

Oasis LDS-IG User Manual
OASIS
H.Z.02290025
A product recommended by State Administration of Grain for popularization
One of the first batches of products having passed a nationwide survey by State
Administration of Grain
ISO9001: 2000 certified
LDS-IG
Computerized Moisture Meter
User’s Manual
Quick, accurate, convenient
AC/DC power supply compatible
High-brightness backlight LCD, clear and energy-saving
Multipoint calibration, error correction
Low power consumption, automatic shutdown
Automatic weighing and temperature compensation
Volume-weight conversion display
Shanghai QingPu Oasis Inspection Technologies Co., Ltd.
Thank you for buying and using our product. In order to maximize the effect of this product, please
read this User’s Manual carefully and keep safely.
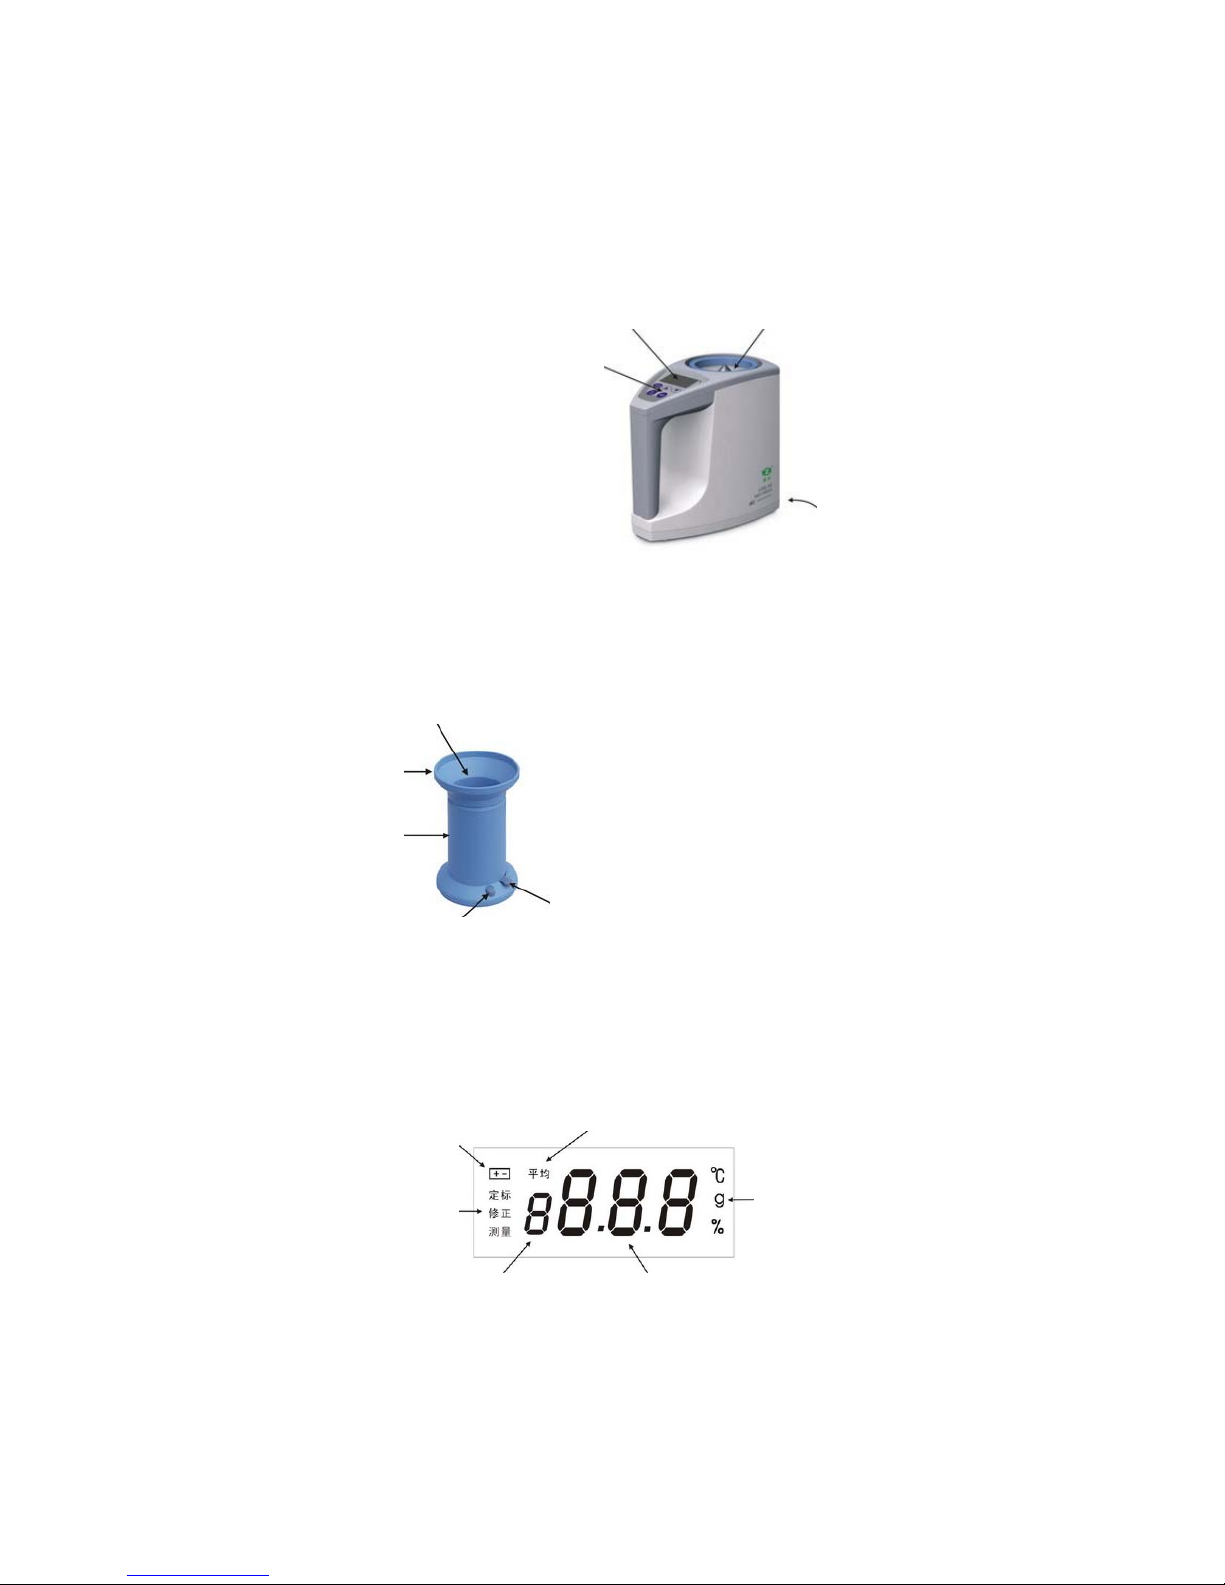
I. Structure Diagram
LCD panel Measuring sensor
Operation panel
AC power socket
Communication
interface
Lower edge of blanking cylinder
the place for sample to be placed
during measurement
Funnel
Sample container
Switch for discharge
gate
Discharge gate
Schematic drawing of LCD panel
display when the dry
battery is under voltage
Indicate that the value is the
average of the measure
Indicate different working
statuses of the moisture
meter
Indicate the corresponding
unit of measurement result
Indicate the measurement times Indicate measurement
result
II. Preparations before Use
1. Take out protective foam blocks filled around the measurement sensor of the moisture meter ( “the
meter” for short), and meanwhile confirm that the sensor is free of any substance, otherwise the meter
will not work properly;
2. Open the cover of battery compartment at the bottom of the meter, load in four 5# alkaline (1.5V)
dry batteries (rechargeable batteries must not be used) according to polarity indication, or plug into AC
power source (200V±10%, 50Hz) with AC adapter which is provided together with the meter;
3. Put the meter on a wind-free and shake-proof horizontal platform and make the funnel closely
attached to sample container.
4. Get ready the sample to de tested: conduct preliminary sample screening, get rid of impurities, and
put the sample in the meter for as long as possible to achieve temperature balance;
5. Check the list to identify category code: for ease of operation, the calibration parameters for
representative categories have been preset during shipment of the meter. During application, all you
need to do is check the “category-code list” attached to this User’s Manual and chooses the
corresponding category code for moisture measurement.
Note: when the meter is used for trade settlement and safe storage which needs higher precision, we
strongly recommend that you adopt standard sample of the category to be measured and conduct
calibration and error correction of the meter so as to ensure measuring precision and safeguard your
interest.
III. Moisture Measurement
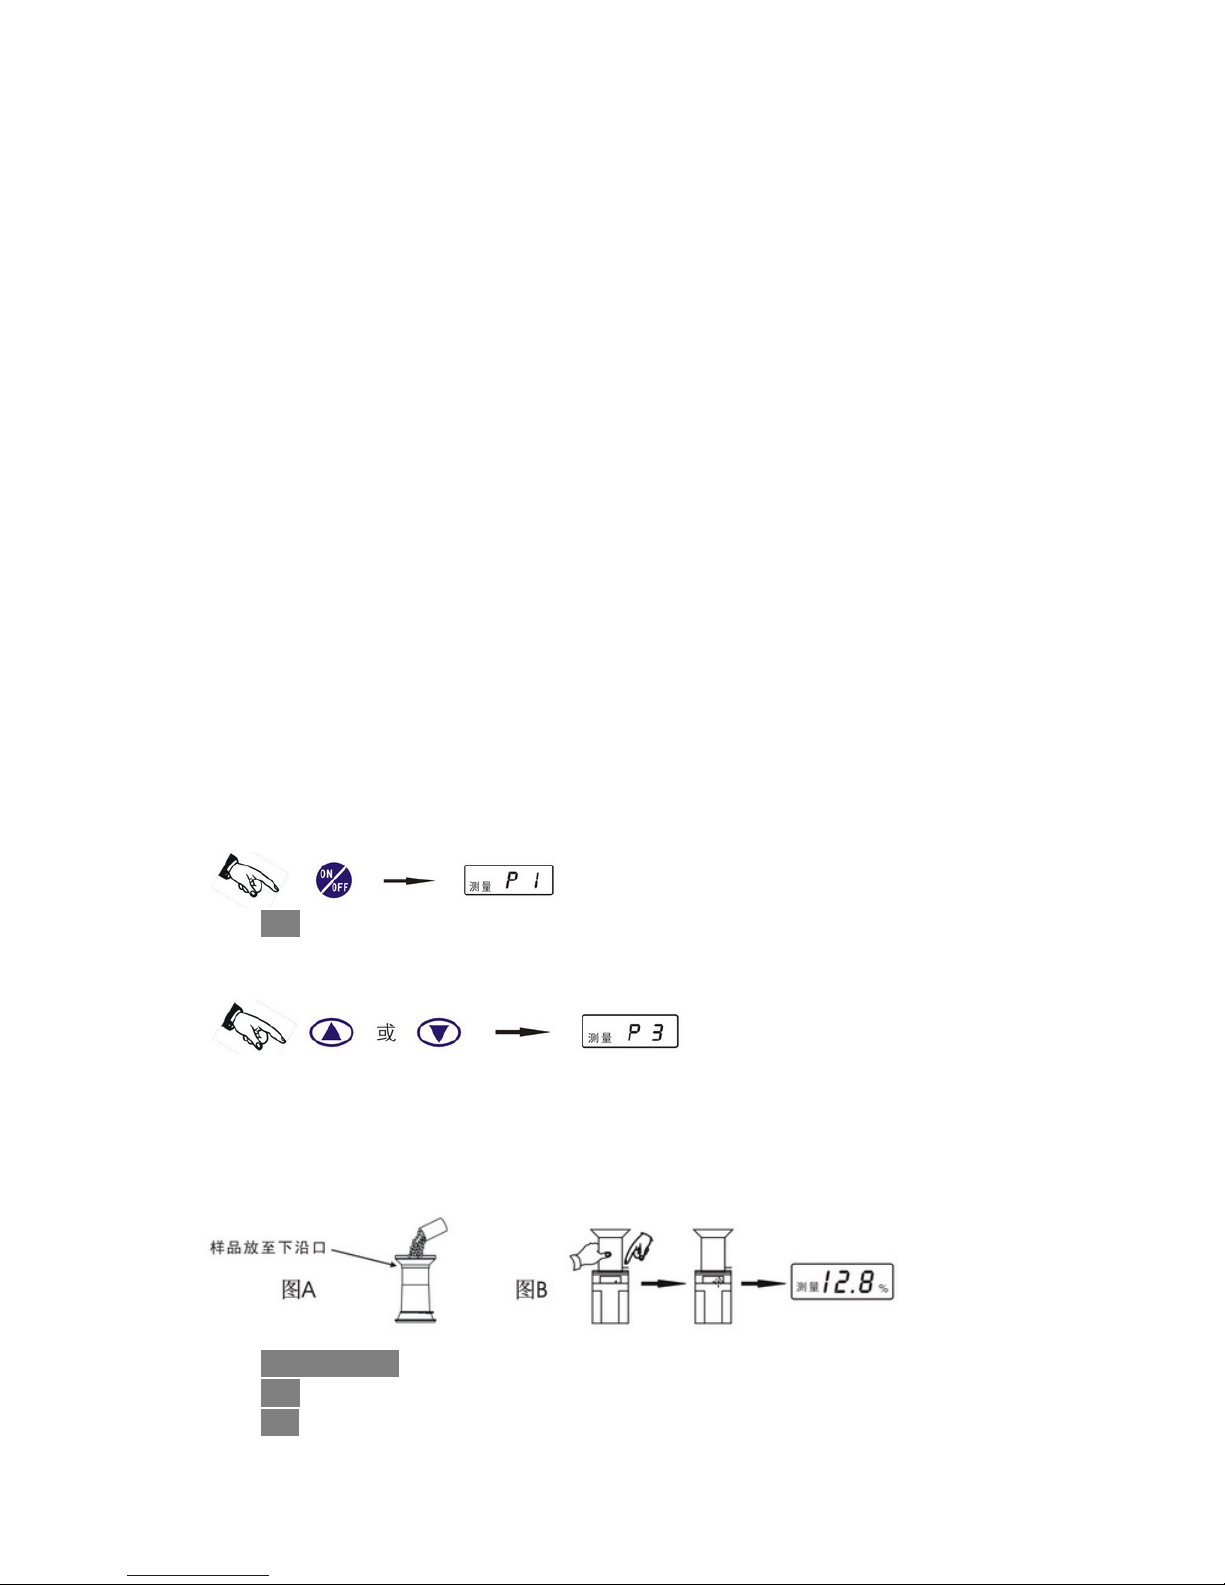
1. Press down the power switch and the meter starts self-check. If no abnormality is found, the category
code will be displayed;
Note 测量:measure
2. Press the “ ” or “ ” key to choose the code of category to be measured (refer to the attached list △▽
for details);
3. Put the sample into the blanking cylinder to the lower edge of funnel for later use (see Figure A);
4. Make the blanking cylinder closely attached to the meter’s sensor, support the blanking cylinder with
one hand and press gently the switch for discharge gate (shown in Figure B) to make the sample fully
and evenly fall into the measuring sensor. Without pressing any key, the meter will automatically start
the measurement and the moisture value will be displayed after the decimal point flickers several times;
Note 样品放至下沿口:Put the sample to the lower edge
图 A:Figure A
图 B:Figure B
 Loading...