

Page 1
DISTRIBUTED BY:
00702-39
OPERATING INSTRUCTIONS
OAKTON WD-35606-00, -05
CON 5 and TDS 5
Acorn Series Meters
Printed in the U.S.A. 8/98
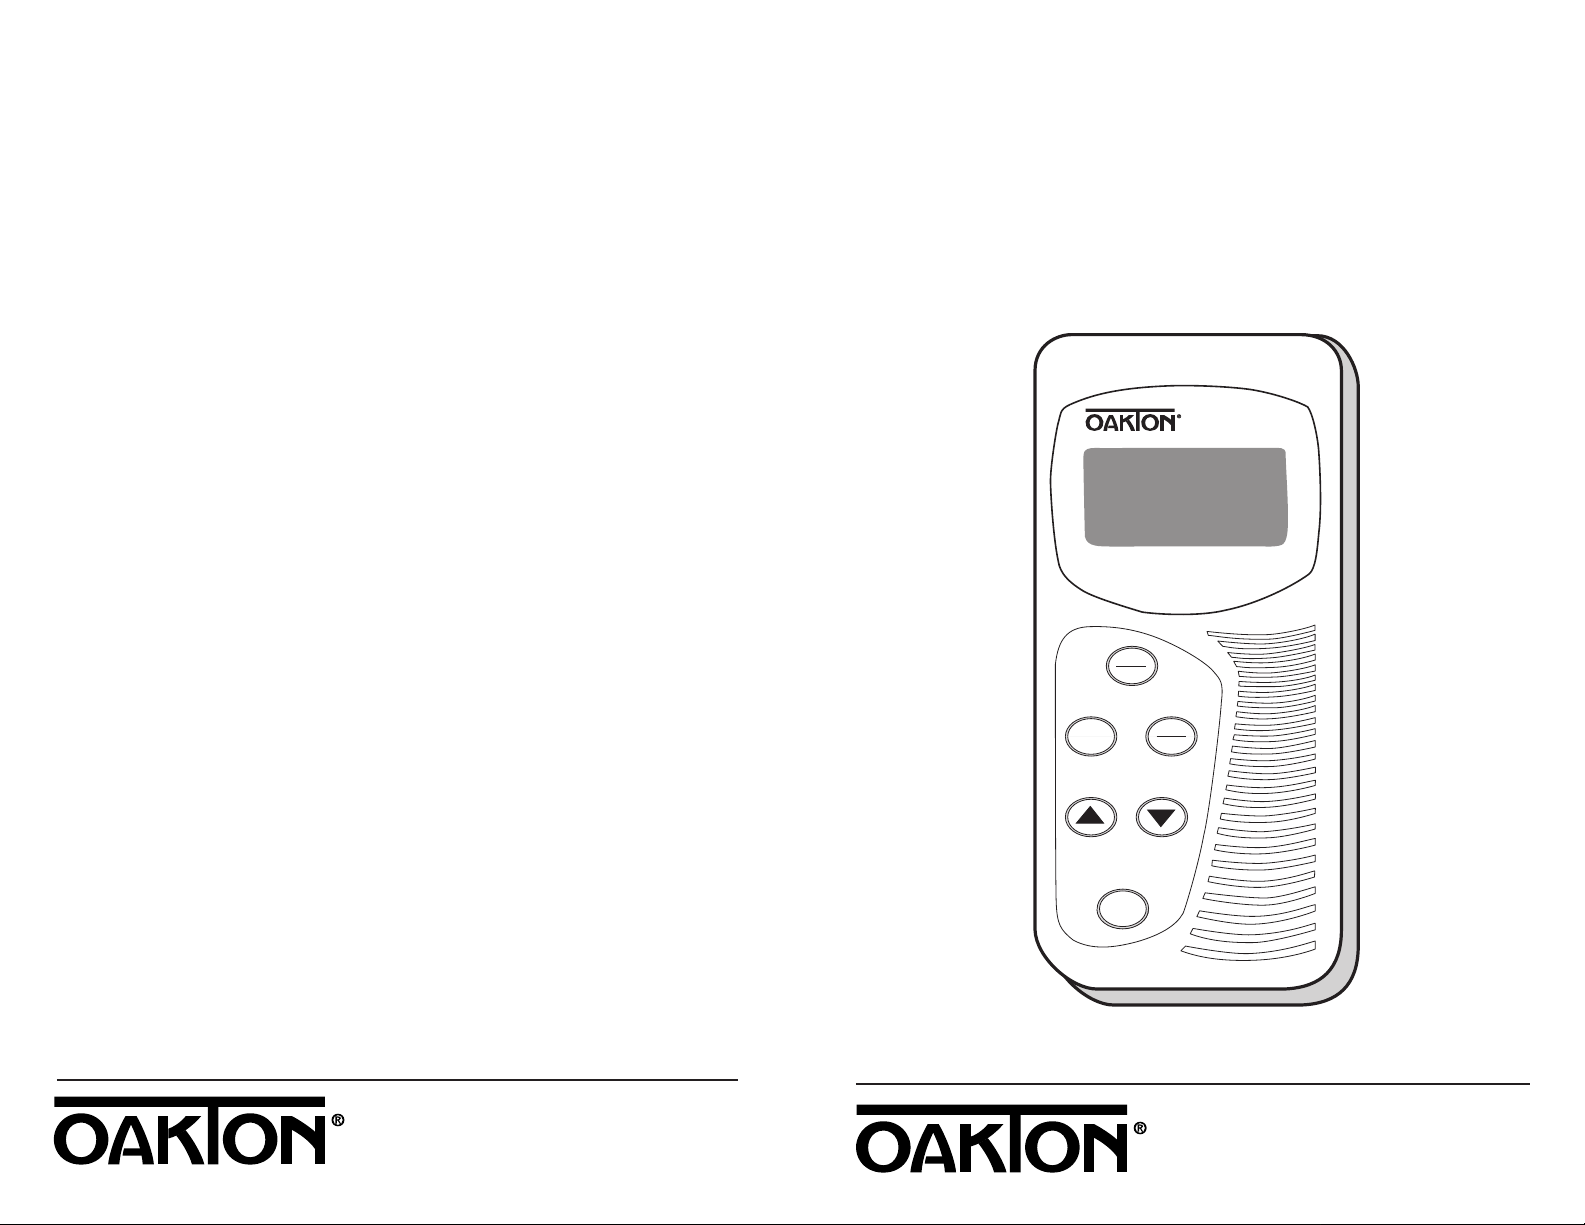
CON 5
Acorn series
Conductivity/°C Meter
ON
OFF
CAL
HOLD
ENTER
MODE
Page 2

32
Table of Contents
1. Introduction...........................................................................................4
2. Display and Keypad Functions...............................................................5
3. Preparation .........................................................................................6-7
3.1 Inserting the batteries ..................................................................................................................6
3.2 Connecting the electrode and temperature probe..................................................................6
3.3 Switching the Meter on...............................................................................................................7
3.4 Setting the Conductivity-to-TDS conversion factor (Acorn TDS5 only).............................7
4. Calibration........................................................................................8-10
4.1 Conductivity/TDS Calibration...............................................................................................8-9
4.3 Temperature Calibration...........................................................................................................10
5. Measurement.......................................................................................11
5.1 Taking Measurements................................................................................................................11
5.2 HOLD feature .............................................................................................................................11
6. Probe Care and Maintenance..............................................................12
7. Error Messages .....................................................................................13
8. Troubleshooting...................................................................................14
9. Specifications.......................................................................................15
10. Accessories......................................................................................16-17
11. Warranty..............................................................................................18
12. Return of Items ...................................................................................18
Page 3
54
1. Introduction
Thank you for purchasing an OAKTON®Acorn Meter. These meters are economical,
microprocessor-based meters that deliver ±2% full scale accuracy.
Some of the features of these meters are:
• Large LCD for clear and easy reading
• CON 5 series meters allow measurement in Conductivity and Temperature (°C)
• TDS 5 series meters allow measurement in TDS and Temperature (°C)
This instruction manual is organized for easy reference. For basic functions of this
meter, read sections 2 through 5. These sections include basic instructions that will
get you up and running quickly. The remaining sections of this manual (6 through
12) deal with probe maintenance, error messages and troubleshooting. This part of
the manual also includes the Specifications, Accessories, Warranty and Return of
Items section.
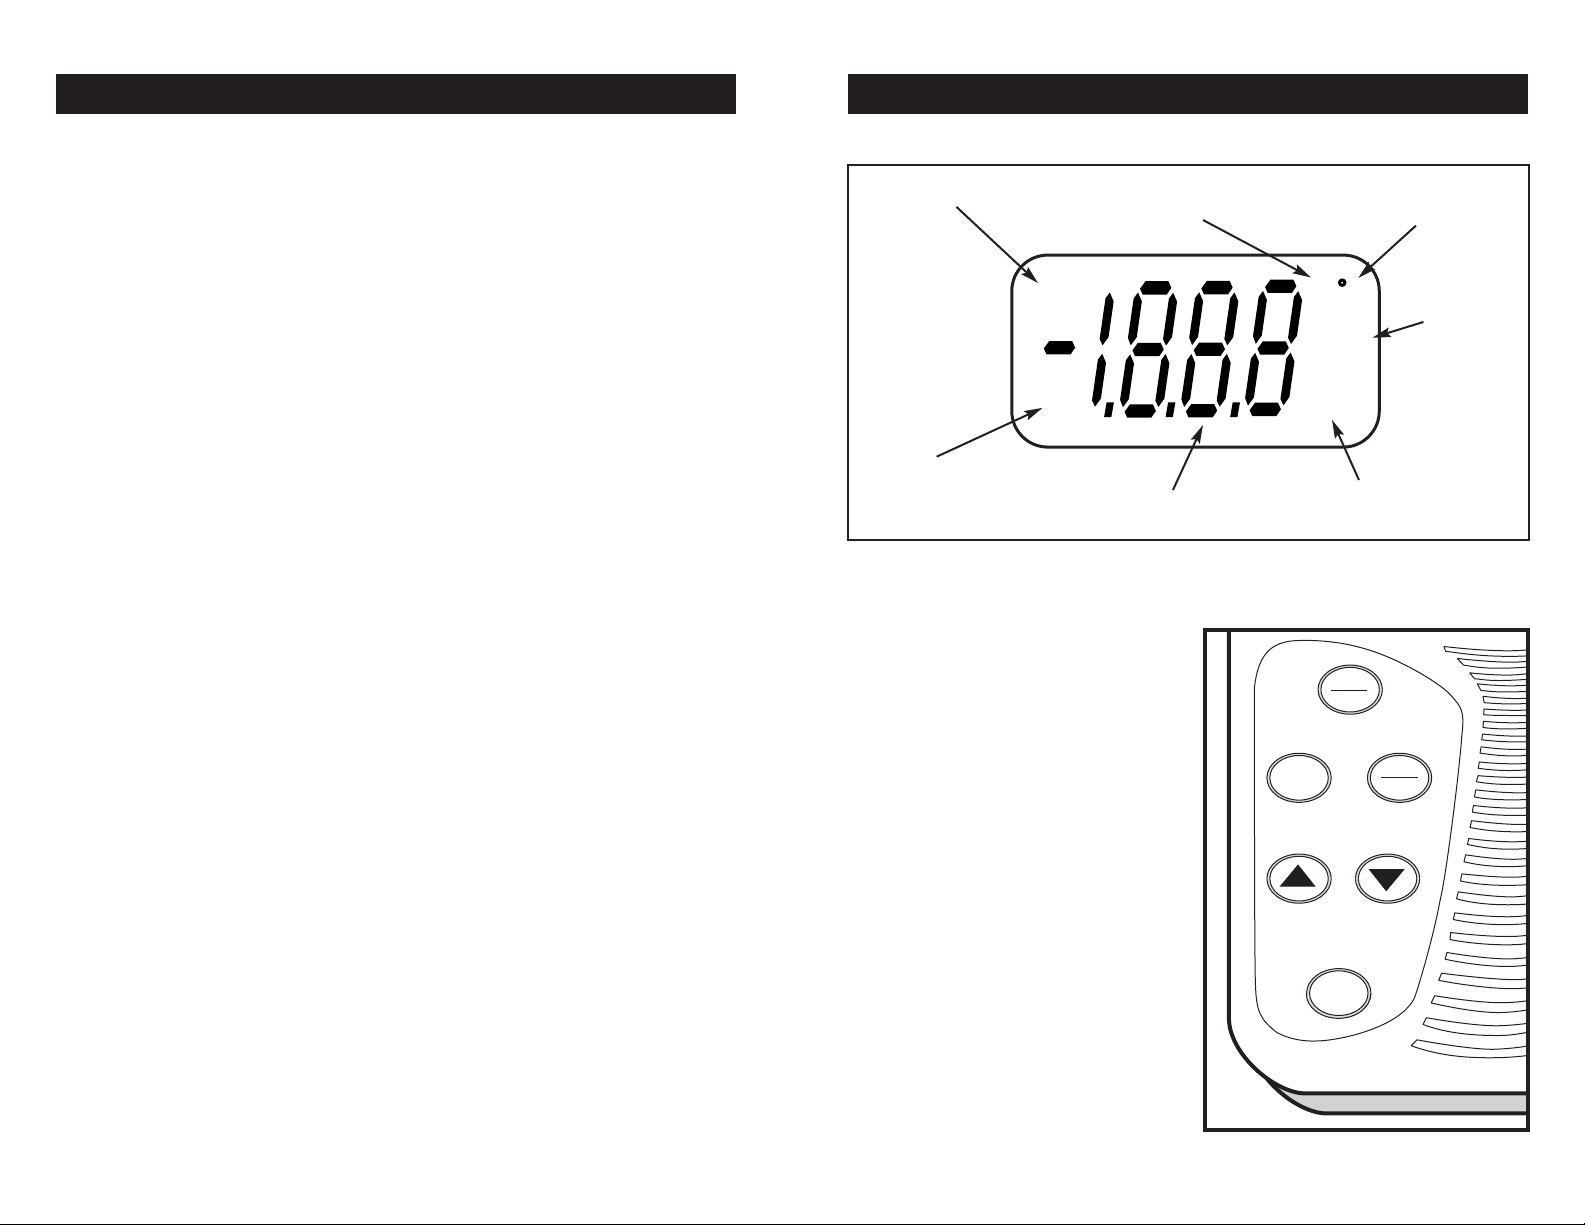
2. Display and Keypad Functions
The Acorn has a large custom LCD with the following indicators:
µ
m
S
t
HO
LO
C
pp m
indicates
operation mode
Degree C
annunciator
µS, mS
annuciators for
Conductivity
readings
ppm, ppt annuciators
for TDS readings
Reading
indicates
HOLD
function is
activated
indicates
low
battery
condition
The Acorn has six keys on its splashproof keypad. These keys are ON/OFF,
HOLD/ENTER, CAL , ▲ (UP), ▼ (DOWN) and MODE.
ON/OFF: Powers meter on and shuts
unit off. Meter directly enters
measurement mode when you
turn it on.
CAL: Allows calibration of the meter
for Conductivity/ TDS and
Temperature
HOLD/ENTER: Freezes the measured
reading.; confirm calibration value
or option selected.
▲ (UP) / ▼ (DOWN): Scrolls up or
down to the values you want for
calibration.
MODE: Selects the parameter of
measurement: Conductivity/ TDS
or temperature.
ON
OFF
CAL
HOLD
ENTER
MODE
Page 4

3. Preparation
Inserting the batteries
The battery compartment is found at the
back of the instrument. To open the
battery compartment, push the lid up
See figure
Note the polarity of battery before insert-
ing the batteries into position. After
replacement, place the cover back into
its position and press down until it
locks tight.
A "LO" annunciator in the LCD alerts
you when battery power is running
low. Replace batteries with a fresh set as
soon as possible.
Connecting the Conductivity/TDS
and Temperature Probe
The Acorn CON 5 and TDS 5 come with a combination Conductivity/TDS and
temperature probe. This probe has two connectors: a BNC connector for the
Conductivity/TDS element, and a phono jack connector for the temperature
element. To connect the Acorn meter to your probe, align the post of the meter’s
BNC connector with the slots on the probe’s BNC connector, push together and
twist the electrode
connector 1/2 turn
until it clicks into place.
Insert the phono jack
connection into the
socket on the meter.
To remove, simply rotate
the BNC connector
counter-clockwise until
it unlocks, and slide the
connector off the socket.
The phono jack connection can be removed
with a simple pull.
76
3.1
A
A
BNC and phono jack connections at top of Acorn meter
3.2
Switching the meter on
Press the ON/OFF key to power up your meter. All the LCD segments display
for a few seconds as the meter goes through a self-diagnostic test. The LCD then
switches into Conductivity/TDS measurement mode. Wet the probe for 10 minutes
before calibrating or taking readings in order to saturate the probe surface and
minimize drift.
If the temperature probe is not connected, the temperature reading (°C) defaults
to 25°C.
Setting the Conductivity-to-TDS conversion factor
(Acorn TDS 5 only)
The Acorn TDS 5 is set to a default conversion factor of 0.67. This should give good
results for most applications (including natural waters and other applications that
calibrate to 442 standard solutions). You can adjust the factor for different salts,
chemicals, or nutrient solutions using the following procedure.
1. Turn meter on.
2. Press Hold/Enter key. The “HO” indicator will
appear in the upper left corner and the reading
will freeze.
3. Press CAL key. Display will show “F.67”
indicating the current factor.
See figure
If the factor has been changed from the factory
default, a number other than F.67 will appear.
4. Adjust factor using ▲ / ▼ keys.
5. Press Hold/Enter to confirm.
3.3
3.4
A
A
Page 5

98
4. Calibration
Conductivity /TDS calibration
This instrument is capable of up to three-point calibration to ensure accuracy across
the entire range of the meter. You need only one calibration for measurement of the
entire range of the meter. If a range is not calibrated, the meter automatically detects
the closest range calibrated and uses the calibration information. However, only
the ranges that have been calibrated have maximum accuracy. Calibrate to all
ranges to ensure highest accuracy throughout all measurement ranges.
When to calibrate
If you are measuring in solutions with conductivity lower than 100 µS or TDS lower
than 50 ppm, calibrate the meter at least once a week to get specified ±2% full scale
accuracy. If you are measuring in the mid ranges and you wash the probe in deionized water and store it dry, calibrate the meter once a month. If you take measurements at extreme temperatures, calibrate at least once a week
Use only the supplied conductivity/TDS probe or replacement probe WD-35606-50.
NOTE: Do not reuse solutions after calibration. Contaminants in the solution can
affect the calibration, and the accuracy of the measurements.
Preparing for calibration
Select a conductivity or TDS standard near the sample value you are measuring. If
this is not possible, choose a calibration solution value that is approximately 2/3
the full scale (F.S.) value of the measurement range. For example, in the 200 to 1999
µS range, use a 1413 µS solution for calibration. Note:the Acorns will not accept
calibration values less than 40 µS (20 ppm).
Wet the probe for 10 minutes prior to calibration to saturate the probe and
minimize drift.
It is not necessary to reset the meter before calibration. All new calibrations will
automatically override existing calibration.
Calibrating for Conductivity or TDS
1. Pour approximately 3 cm of the chosen Conductivity / TDS standard into
two separate containers.
2. Gently stir the probe in one of the containers of your standard. This standard
acts as a rinse solution, removing contaminants that offset the calibration.
3. Dip the rinsed probe into the other container
of your standard.
4. Turn meter on. Meter will automatically enter
Conductivity/TDS mode.
5. Tap probe on the bottom of the container to
remove air bubbles. Let the probe stabilize to
the solution temperature.
6. Press the CAL key. The meter will blink with
the factory calibrated value.
See figure
7. Press ▲ (up) or ▼ (down) key until the
displayed value matches your standard
solution.
8. Press enter key to confirm. The meter will exit
calibration, and return to measurement mode.
Repeat for all ranges for maximum accuracy.
4.1
A
B
A
B
Range Resolution Accuracy
0.0 to 199.9 µS* 0.1 µS ±4 µS
Conductivity 200 to 1999 µS 1 µS ±40 µS
2.00 to 19.99 mS 0.01 mS ±0.4 mS
0.0 to 99.9 ppm* 0.1 ppm ±2 ppm
TDS 100 to 999 ppm 1 ppm ±20 ppm
1.00 to 9.99 ppt 0.01 ppt ±0.2 ppt
*Minimum calibration value 40 µS (20 ppm).
m
S
Page 6

1110
Temperature calibration
The built-in temperature sensor included in the probe is factory calibrated. Over
time, the temperature calibration may drift and require recalibration. If you replace
the probe you should calibrate temperature prior to Conductivity/TDS calibration.
1. Connect your probe to the meter.
2. Press the MODE key until "°C" appears in the LCD.
3. Compare displayed value to a NIST certified
thermometer or other thermometer known to
be accurate. For best accuracy, place probe
and thermometer in a constant temperature
bath.
4. Press the CAL key. the LCD shows "CA" and
the reading flashes.
See figures
5. Press the ▲ (up) or ▼ (down) key until
the display shows the correct temperature.
Maximum adjustment if ±5°C from the
factory default.
6. Press ENTER key to confirm calibration. The
LCD displays "CO", and the meter then
reverts to measurement mode.
A
A
B
B
4.2
5. Measurement
Taking Measurements
1. Rinse probe with distilled water to remove any impurities.
2. Turn meter on. Meter will automatically go into Conductivity /TDS measure-
ment mode. Press MODE key to toggle between Conductivity/ TDS and
temperature measurement modes.
3. Dip probe into sample. Make sure the tip of the probe is completely immersed
into the sample. Stir probe gently to create a homogenous sample. Tap probe to
remove air bubbles.
5.1
Hold function
1. Press the HOLD key once. The LCD shows
"HO" to indicate the HOLD function is
activated
See figure
2. Press HOLD key again to deactivate the HOLD
function and return to measurement mode.
A
A
5.2
C
HO
m
S
Page 7

1312
6. Probe care and maintenance
Keep your conductivity probe clean.
For best accuracy, soak a dry probe at least 5 to 10 minutes before use. Rinse the
probe before use, and gently swirl it while you take readings.
Wash the probe with deionized or tap water before storing it.
Never scratch the stainless steel portions with a hard substance.
Do not strike the probe against any hard surface.
Do not soak your probe in your solutions for an extended period of time. Readings
will rise over a continuous period of time if you soak your probe.
Do not immerse the probe in oily solutions. To remove oils, films or oxidation, clean
electrode with alcohol.
Clean the probe by immersing it in an agitated mild detergent bath. Wipe probe
with soft tissue paper. Rinse thoroughly in tap water and then in deionized water.
Recalibrate the meter after cleaning the probe.
7. Error Messages
Error Message
in LCD display Indicates Solution
E 2 Recalibrate instrument
Microproccesor Turn meter off and then on
E 3 error again. Return meter
if necessary.*
Ur Temperature under range (<0°C) Warm solution.
or faulty temperature sensor. Replace temperature sensor.
Or Conductivity over range (>19.99 mS); Cool solution.
Temperature over range (>50°C) Replace temperature sensor.
or faulty temperature sensor.
You will see the Error message in the primary
display (the row of digits that show you your
measurements).
See figure
To eliminate errors, switch off the meter and
switch it on again. If error persists, or the meter
shows incorrect values, return the meter.*
*See page 18 for information on Return of Items
A
A
Page 8

1514
7. Troubleshooting
Problem Cause Solution
LO annunciator Low battery Replace batteries
on LCD with fresh set
Power on but Batteries not in place Insert batteries
no display
Batteries not in Re-insert batteries with
correct polarity (+ and -) correct polarity
Weak batteries Replace batteries
Unstable Probe not deep Place probe deeper in sample
reading enough in sample
Broken probe Replace probe
External “noises” or Remove or switch off
induction caused by interfering motor
by nearby electric motor
Dirty probe Clean probe
Slow response Dirty probe Clean probe
Display locked Electrical discharge Switch meter off and turn on
near meter again. Remove battery and
insert again
Not able to Dirty/oily probe Clean probe (see “Probe
calibrate Care & Maintenance” pg 12)
Calibration standard out of Select standard between 40 µS
acceptable calibration range (20 ppm) and 19.9 mS (9.9 ppt)
8. Specifications
Mode
Conductivity / TDS /
Temperature
CON 5 TDS 5
0.0 to 199.9 µS 0.0 to 99.9 ppm
Range
200 to 1999 µS 100 to 999 ppm 0.0 to
2.00 to 19.99 mS 1.00 to 9.99 ppt 50°C
Auto-ranging Auto-ranging
0.1 µS 0.1 ppm
Resolution 1 µS 1 ppm 0.1°C
0.01 mS 0.01 ppt
Accuracy ±2% of full scale ±0.5°C
Calibration
up to 3 points against
±5.0°C
appropriate calibration solutions
TDS Factor: User adjustable 0.5 to 0.85
Display: Single line LCD
Cell constant: 1
Temperature Compensation: Automatic (ATC), 0.0 to 50.0 °C
Reference temperature: factory set at 25°C
Temperature coefficient: factory set at 2% per C
Inputs: BNC, phono jack
Auto shutoff: after 17 minutes
Hold Function indicator: HO
Error Message display: Err
Low battery indication: LO
Operating temperature: 0 to 50°C
Power: 4 x AAAAlkaline batteries (>60 hours)
Dimensions: Meter only: 5.5" x 2.7" x 1.3" (14 x 7 x 3.5 cm);
Boxed: 9.25" x 6.5" x 3" (23.5 x 16.5 x 7.6 cm)
Weight: Meter only: 0.5 lb (210 g); Boxed: 1 lb (420 g)
Page 9

1716
9. Accessories
WD-35606-00 Additional CON 5 Series Acorn Meter (Conductivity/°C)
with combination Conductivity/ Temperature probe
WD-35606-05 Additional TDS 5 Series Acorn Meter (TDS/°C)
with combination TDS/Temperature probe
Replacement probes and accessories
WD-35606-50 Replacement probe, 4"L x 0.47 OD (100 x 12 mm).
Shpg wt. 0.44 lb/199 g)
WD-35606-80 Protective Rubber Boot, encases meter in sturdy rubber to protect it
from drops and dings. Also features meter stand for convenient benchtop use.
OAKTON calibration solutions (1 pint bottles)
Conductivity solutions have ±1% accuracy at 25°C. Shpg wt 1.1 lb/510 g per bottle.
WD-00653-16 Conductivity 84 µS solution.
TDS values: 40.38 ppm KCl; 38.04 ppm NaCl; 50.50 ppm 442
WD-00653-47 Conductivity 447 µS solution.
TDS values: 225.6 ppm KCl; 215.5 ppm NaCl; 300.0 ppm 442
WD-00653-18 Conductivity 1413 µS solution.
TDS values: 744.7 ppm KCl; 702.1 ppm NaCl; 1000 ppm 442
WD-00653-15 Conductivity 1500 µS solution.
TDS values: 757.1 ppm KCl; 737.1 ppm NaCl; 1050 ppm 442
WD-00653-27 Conductivity 2070 µS solution.
TDS values: 1045 ppm KCl; 1041 ppm NaCl; 1500 ppm 442
WD-00653-20 Conductivity 2764 µS solution.
TDS values: 1382 ppm KCl; 1414.8 ppm NaCl; 2062.7 ppm 442
WD-00653-89 Conductivity 8974 µS solution.
TDS values: 5101 ppm KCl; 4487 ppm NaCl; 7608 ppm 442
WD-00606-10 Conductivity 12,880 µS solution.
TDS values: 7447 ppm KCl; 7230 ppm NaCl; 11,367 ppm 442
WD-00653-50 Conductivity 15,000 µS solution.
TDS values: 8759 ppm KCl; 8532 ppm NaCl; 13,455 ppm 442
OAKTON “Singles” calibration solution pouches 20/box.
Conductivity solutions have ±1% accuracy at 25°C. Shpg wt 1 lb/454 g per box.
WD-35653-00 Deionized rinse water solution pouches
WD-35653-10 Conductivity 447 µS solution.
TDS values: 225.6 ppm KCl, 215.5 ppm NaCl, 300.0 ppm 442.
WD-35653-11 Conductivity 1413 µS solution.
TDS values: 744.7 ppm KCl, 702.1 ppm NaCl, 1000 ppm 442.
WD-35653-12 Conductivity 2764 µS solution.
TDS values: 1382 ppm KCl, 1414.8 ppm NaCl, 2062.7 ppm 442.
WD-35653-13 Conductivity 15,000 µS solution.
TDS values: 8759 ppm KCl, 8532 ppm NaCl, 13,455 ppm 442.
To order OAKTON accessories, contact your OAKTON distributor.
Page 10

1918
15. Warranty
OAKTON warrants this meter to be free from significant deviations in material and
workmanship for a period of one year from date of purchase. OAKTON warrants
this probe to be free from significant deviations in material and workmanship for a
period of six months from date of purchase. If repair or adjustment is necessary and
has not been the result of abuse or misuse within the warrantied time period, please
return—freight prepaid—and correction will be made without charge. OAKTON
alone will determine if the product problem is due to deviations or customer misuse.
Out-of-warranty products will be repaired on a charge basis.
16. Return of items
Authorization must be obtained from your OAKTON distributor before returning
items for any reason. When applying for authorization, please include data regarding
the reason the items are to be returned. For your protection, items must be carefully
packed to prevent damage in shipment and insured against possible damage or loss.
NOTE: We reserve the right to make improvements in design, construction, and
appearance of products without notice.
 Loading...