


Product Overview......................................................................3
Installation Overview...............................................................4
Installation Instructions...........................................................5
How it works.............................................................................7
Operating Instructions............................................................8
Frequently Asked Questions.................................................9
Troubleshooting Guide...........................................................16
Warranty & Parts.....................................................................18
Manufactured by:
o3waterworks, LLC.
207 Byers Creek Road
Suite D
Mooresville, NC 28117
For support, contact:
support@o3waterworks.com
Model: LM001 Mfg. Bat. # 2020-1
2 3
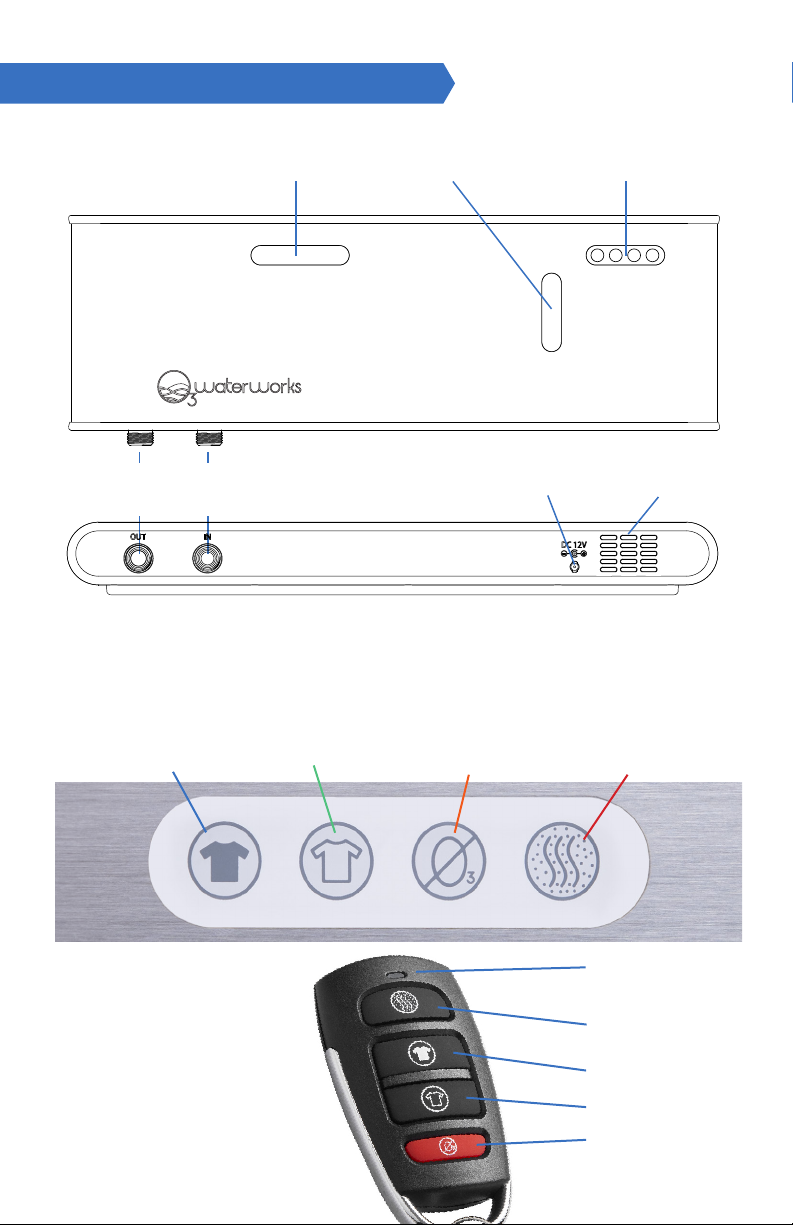
PRODUCT OVERVIEWOVERVIEW
Out
H2O
In
H2O
Normal Mode
(Blue)
Choose for normal
everyday loads.
Ok to mix colors
and whites
Mixer
Window
Boost Mode
(Green)
Choose for
heavily soiled
items and
white loads
Dehumidifer
Window
Power
Plug
NO O3 Mode
(Orange)
Choose to run
washing machine
without enhanced
oxygen
Control
Panel
Cooling
Vents
Dehumidifier
(Red)
Run dehumidifier
cycle when dessicant
balls inside window
are no longer blue
MULTI-FUNCTION
REMOTE CONTROL
Use for convenience
or installations where
the unit needs to be
mounted in a location
that is not easily accessible
Indicator Light
Dehumidifier
activated
Normal Mode
Boost Mode
NO O3 Mode
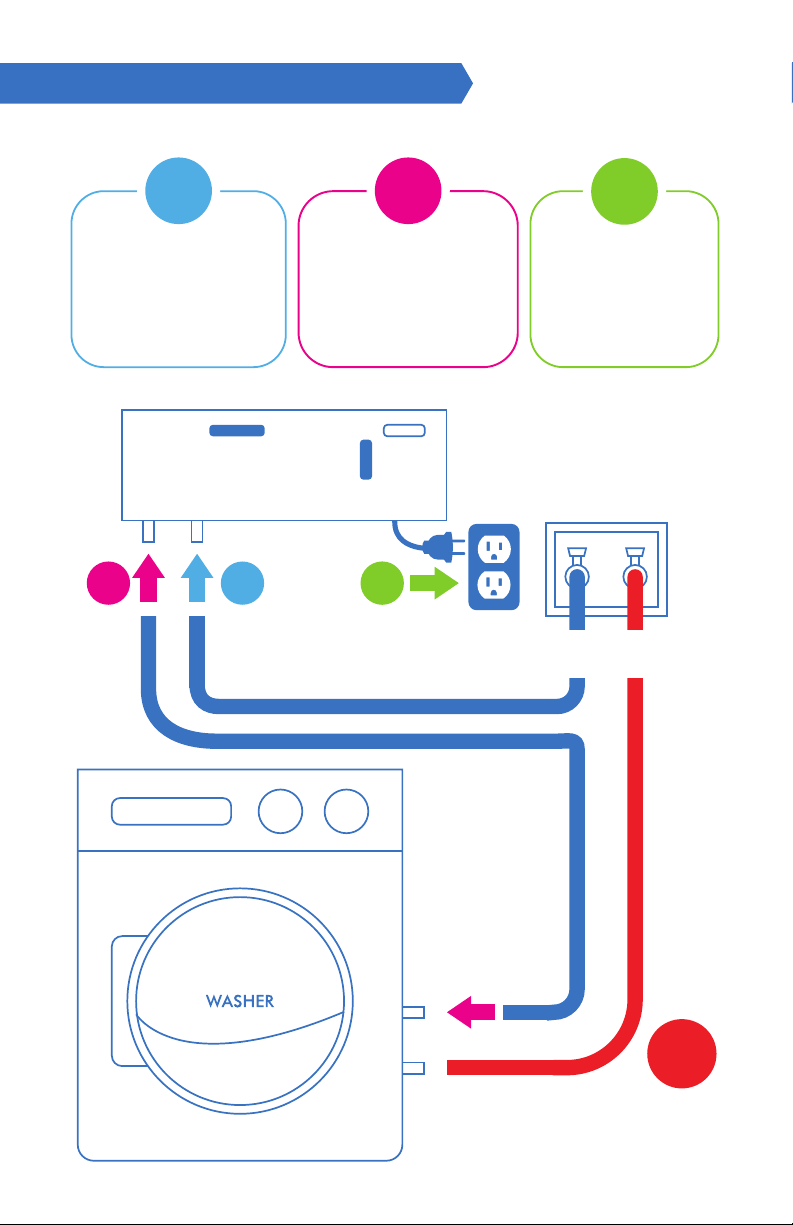
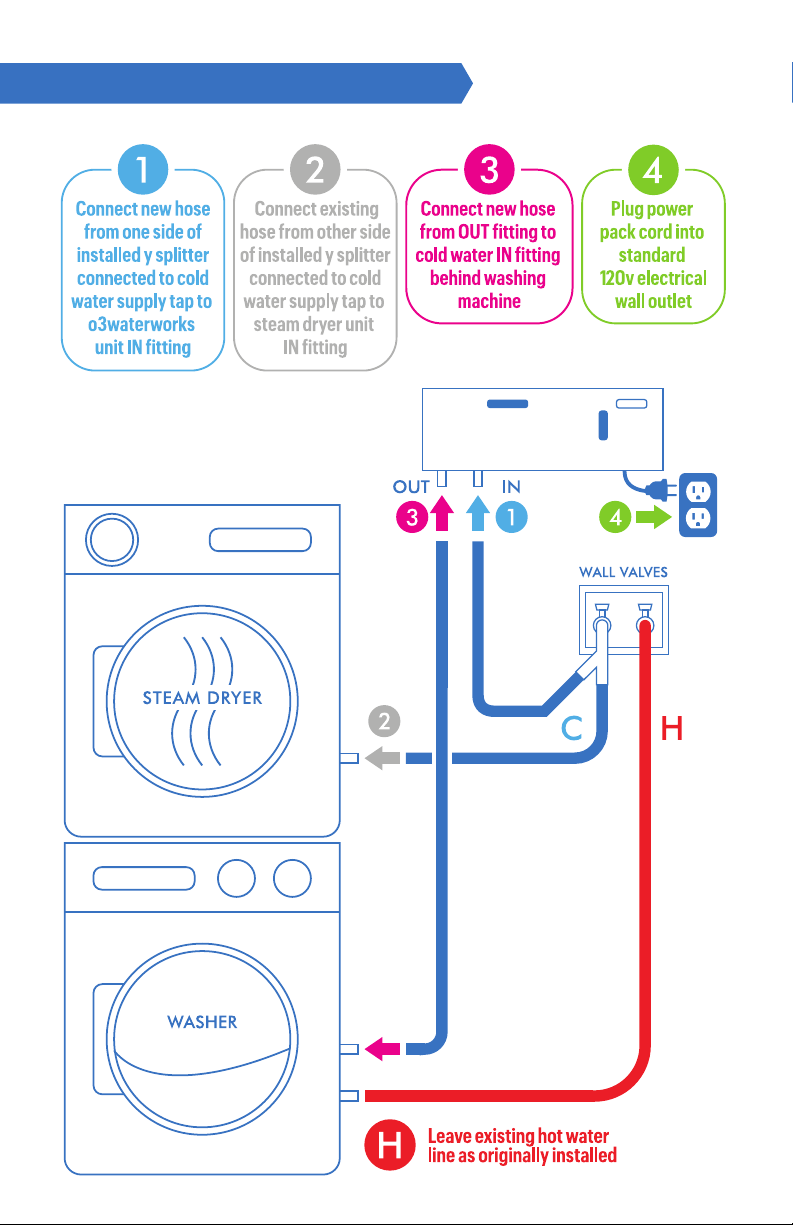
STANDARD INSTALLATION INSTALLATION WITH STEAM DRYER
No plumber or electrician required No plumber or electrician required
1
Connect new hose
from cold water
supply tap to
waterworks
O
3
unit IN fitting
OUT IN
2
1
2
Connect new hose
from OUT fitting to
cold water IN fitting
behind washing
machine
3
3
Plug power
pack cord into
standard
120v electrical
wall outlet
WALL VALVES
C
H
H
Leave existing hot water
line as originally installed
4 5
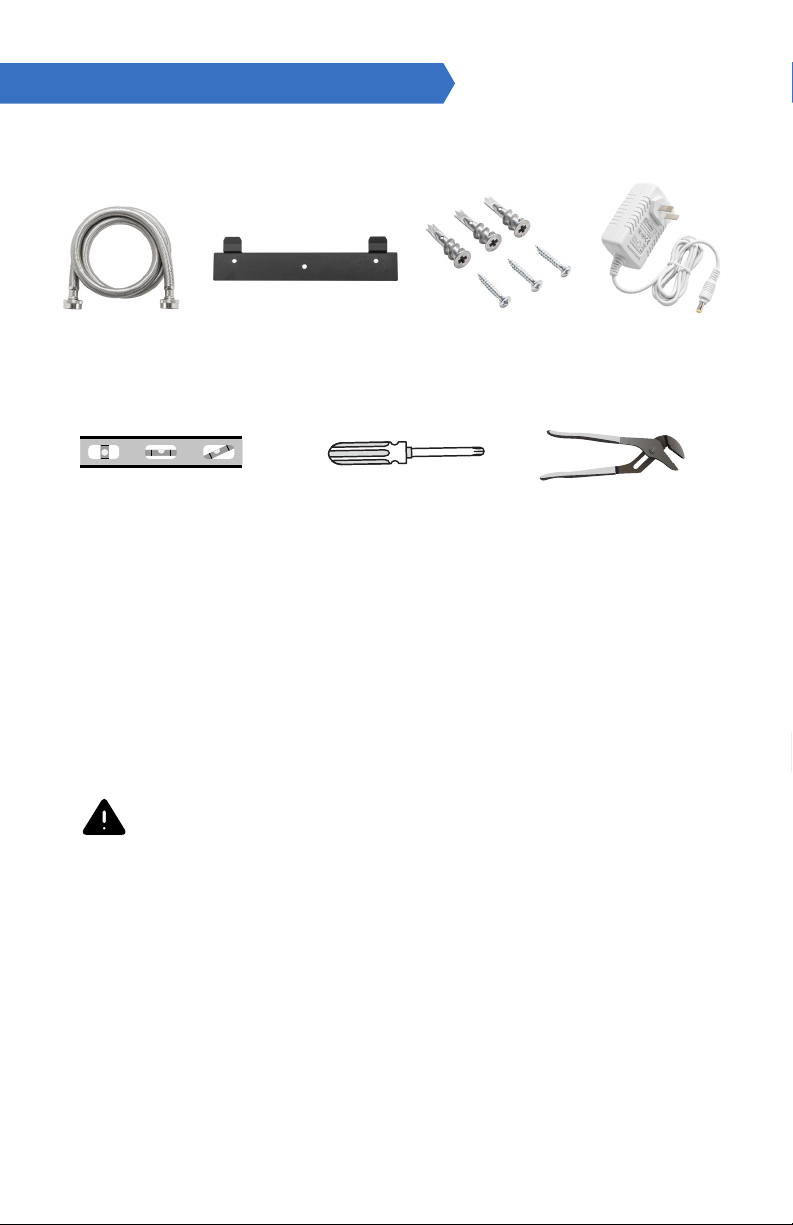
INSTALLATION INSTRUCTIONS
For Drywall Applications
Parts Included:
(estimated install
time 15-20 mins)
Stainless steel
Hose (x2)
Wall Bracket Anchors (x3) 12v DC Power
Adaptor
Tools required:
Spirit Level
Phillips Screwdriver Adjustable Wrench
1. Position the included paper template on the wall, where the
O3waterworks unit will be mounted.
2. Ensure that the paper template is straight using a spirit level.
Use tape to temporarily secure it against the wall.
3. Mark the 3 screw locations on the template for the included
metal Wall Bracket. For drywall installations, use the included
wall anchors, and continue to step 4. If you are mounting to
studs or a masonry wall, you will need to use hardware suitable
for those installation types (not included).
Warning: (Be sure to avoid any plumbing or electrical
lines that may be concealed inside the wall.)
4.
Secure the Wall Mounting Bracket to the wall using the included screws.
5.
Lay the O3waterworks unit face down onto a non-scratch surface.
6. Turn o the water supply valves connected to your washing
machine. Using an adjustable wrench, disconnect the existing
hose from the cold water supply, and from the back of the
washing machine. Connect the supplied stainless steel hose
from the cold water supply to the IN fitting on the bottom of the
O3waterworks
unit.
7. Connect the second included supply hose from the OUT fitting
under the
O3waterworks
unit to the cold water IN fitting on the
washing machine. Do not over-tighten.
6 7
 Loading...