

O2health Help at Hand User Manual

1
User guide
Help at
Hand

32
What’s in this guide?
• Getting started Page 4
A summary Page 6
In more detail Page 8
• Using the website Page 12
• Using your handset Page 21
• Frequently asked questions Page 37
Why O2 Heal th?
We’re using our understanding of mobile
technology to make healthcare more
accessible. By introducing products and
services that make it easier, simpler and
faster to get the care you need. And by
using communication to make sure there’s
someone there when you need them.
We’ve created Help at Hand – a service that
makes caring for, and being cared for, easier.
Welcome to Help at Hand.
With your Help at Hand
handset, help is not more
than a press of a button
away. This is every thing
you need to know to get
set up.
What your Help at Hand handset
can do
• Connect to a 24/7 support centre.
• Call for help if it detects a fall.
• Make calls to four saved numbers
(speed dials).
• Get calls and texts.
• Let your chosen helpers know when
your battery’s low.
Hello.
54
You’ll need these before
you start
• Your Help at Hand handset.
• Your O
2
sim card.
• The charger.
• Internet access.
• Your credit or debit card.
• The IMEI (the product code for your Help
at Hand handset) and phone number.
You’ll find these on the side of the box.
• Details of who’ll use the handset
and service.
• Details of who your chosen helpers are
(at least two, and a maximum of eight).
Next steps
Over the page there’s a summary of the
steps you’ll need to take to get you up and
running. You’ll find more details on each of
the steps in the following pages.
Make sure your handset is on and fully
charged before registering.
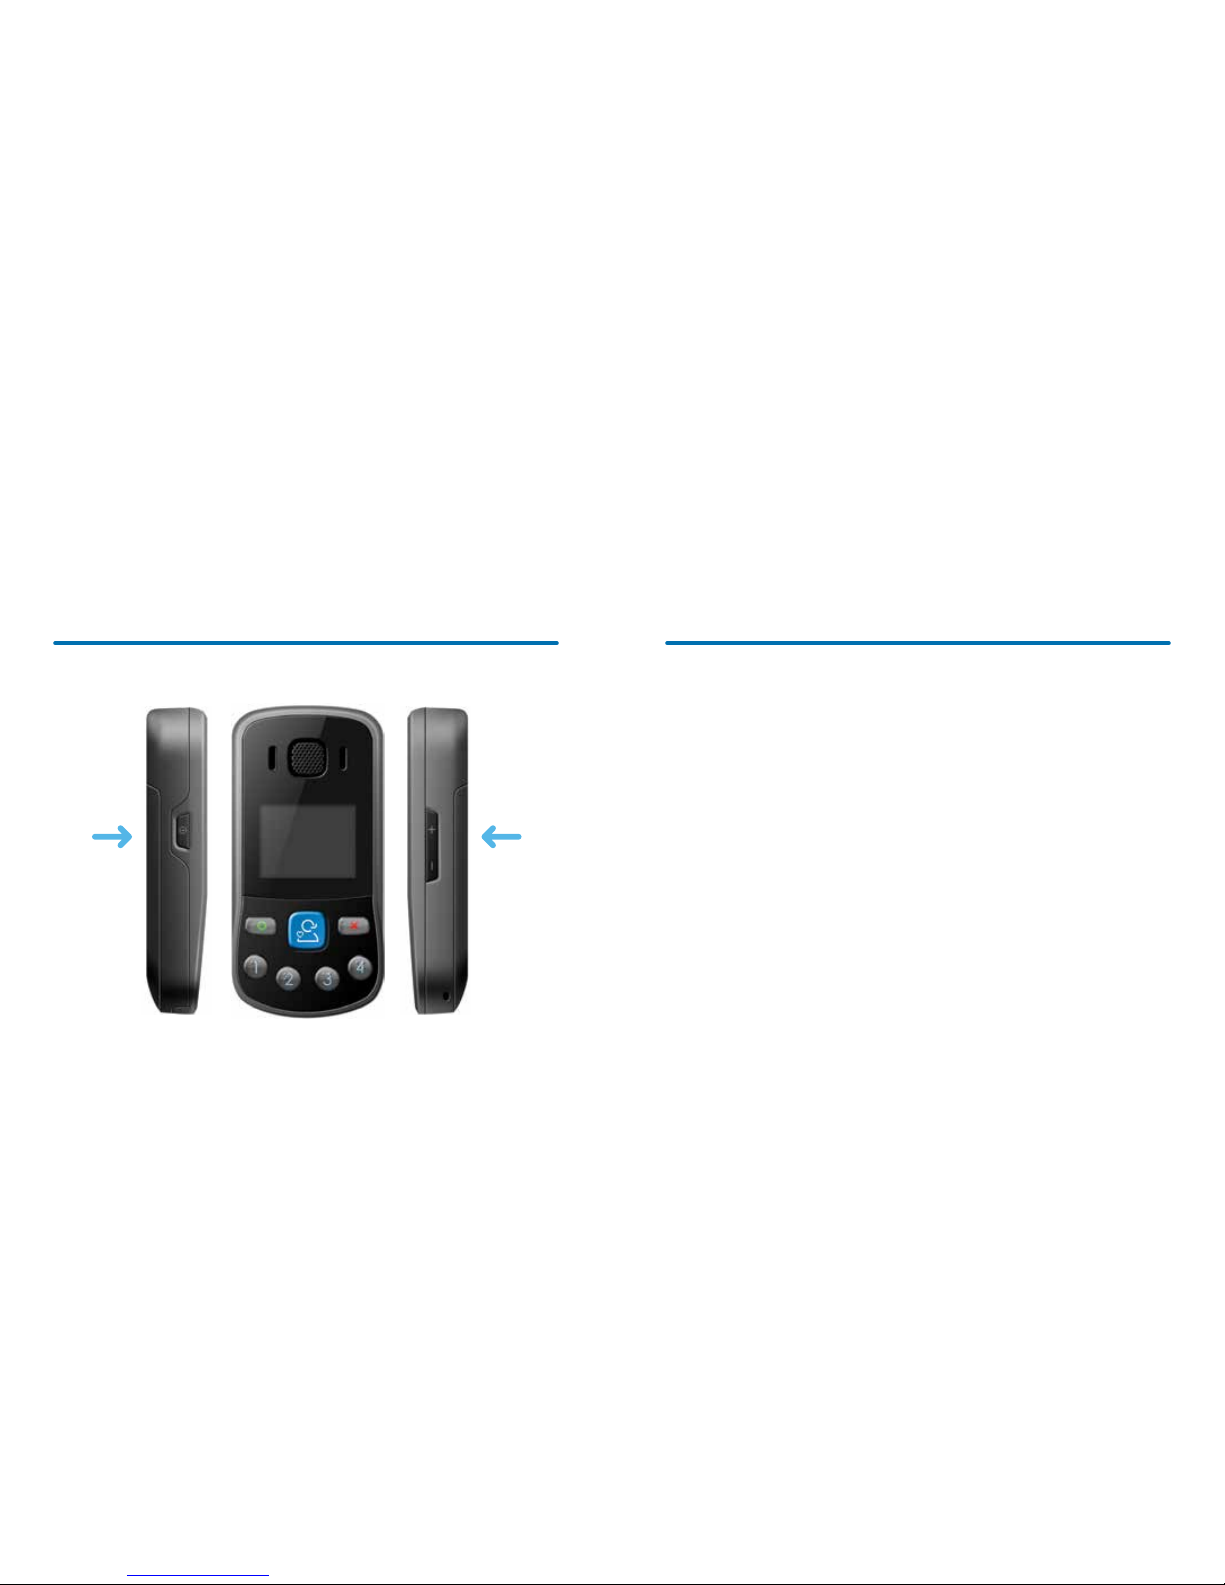
Getting started
Your Help at Hand handset
Turn on the
handset here.
Make sure it’s
on and fully
charged before
registering
Scroll up
and down
with these
buttons

76
a summary
2. Put in the
sim card.
6. Log into your
account (if you’re
not already
registered with
O
2
, you’ll need
to register a new
account).
9. To get an accurate
location for your
handset, go
outside for a few
minutes.
That’s it.
You’re ready to use Help at Hand.
7. Go through the
four stages on the
site (there will be
a guide on each
screen) and pay for
your subscription.
3. Put in the battery
so the gold tabs on
the battery connect
to the gold tabs on
the phone.
And replace back
by sliding up.
4. Charge the
handset with
the charger for
24-hours. And
make sure you get
a GPS signal.
1. Take the back off
the handset by
sliding it down
5. Go to https://
helpathand.
o2.co.uk.
You will need
Internet access
and a credit or
debit card.
8. Make a test call
to our support
team by pressing
the blue support
button in the
middle of the
handset.

98
There are two steps to
setting up. The first is
preparing your handset.
The second is setting
up your account online.
Prepare your handset
Take the back off the handset by sliding it
down, put in the sim card and then put in
the battery so the gold tabs on the battery
connect to the gold tabs on the phone.
Replace the back by sliding up.
Next, you’ll need to fully charge it. The slot
is on the bottom of the handset. You’ll need
to charge it approximately every 24 hours.
in more detail
Once you’ve charged the handset for 24
hours, leave the handset in clear view of the
sky for five or ten minutes. This lets your
handset find a GPS signal.
The GPS icon will stay static when the
handset has a GPS fix. It will flash when
it’s searching for GPS.
When your handset has no GPS (or no
GPS icon is shown) or is searching for GPS
(GPS icon is flashing), the battery life will be
significantly reduced. To avoid this, keep
your device in a place where the GPS icon
stays on screen (like near a window).
Help at Hand uses GPS to send your location
to the support centre. GPS is accurate up to
100 metres, but it is only available outdoors.
It is important to get a recent GPS reading
so that the support centre can accurately
determine your location.
Now you can start setting up your account.
GPS Icon

1110
Set up your account online
Go to https://helpathand.o2.co.uk
If you already have an O2 account
You can log into your account using your
username and password. (If you’ve forgotten
these, we can send you a reminder.)
If you’re not an O
2
customer
You’ll need to register a new account.
Follow the instructions on the screen.
If you’re not already registered with O
2
you’ll
need your handset nearby or a mobile phone
so that we can text you an access code.
Once you’re signed in, we’ll guide you
through the set-up process on the screen.
Paying for months and minutes
You need to be subscribed to get in touch
with our support team using your handset.
You can choose how long you subscribe for
– one month, three months, six months
or a year.
If you want to use your handset to make
calls (on buttons 1-4 on the handset),
you’ll need to buy minutes on top of your
subscription and add phone numbers to use
as speed dials using our website.
On the welcome page there are videos
from our O
2
Gurus about how to use
your handset. A checklist of what you
need to get started. And an O
2
network
coverage checker that shows where your
handset does and doesn’t work. Just in case.
File Edit View History Bookmarks Tools Help
Welcome to O2
https://helpathand.o2.co.uk
1312
Once you’ve set up your account online,
you can use the website to manage all
your settings.
Log in to https://helpathand.o2.co.uk at
any time to:
• Update your information.
• Change how your handset works.
• Find your Help at Hand handset.
• Pay for your service
(or top up your minutes).
Whenever you turn an alert on or off
the handset will tell you. And it will beep
when you change an option on the
website (like the size of your zones).
It will also display pop-up messages.
Using the website
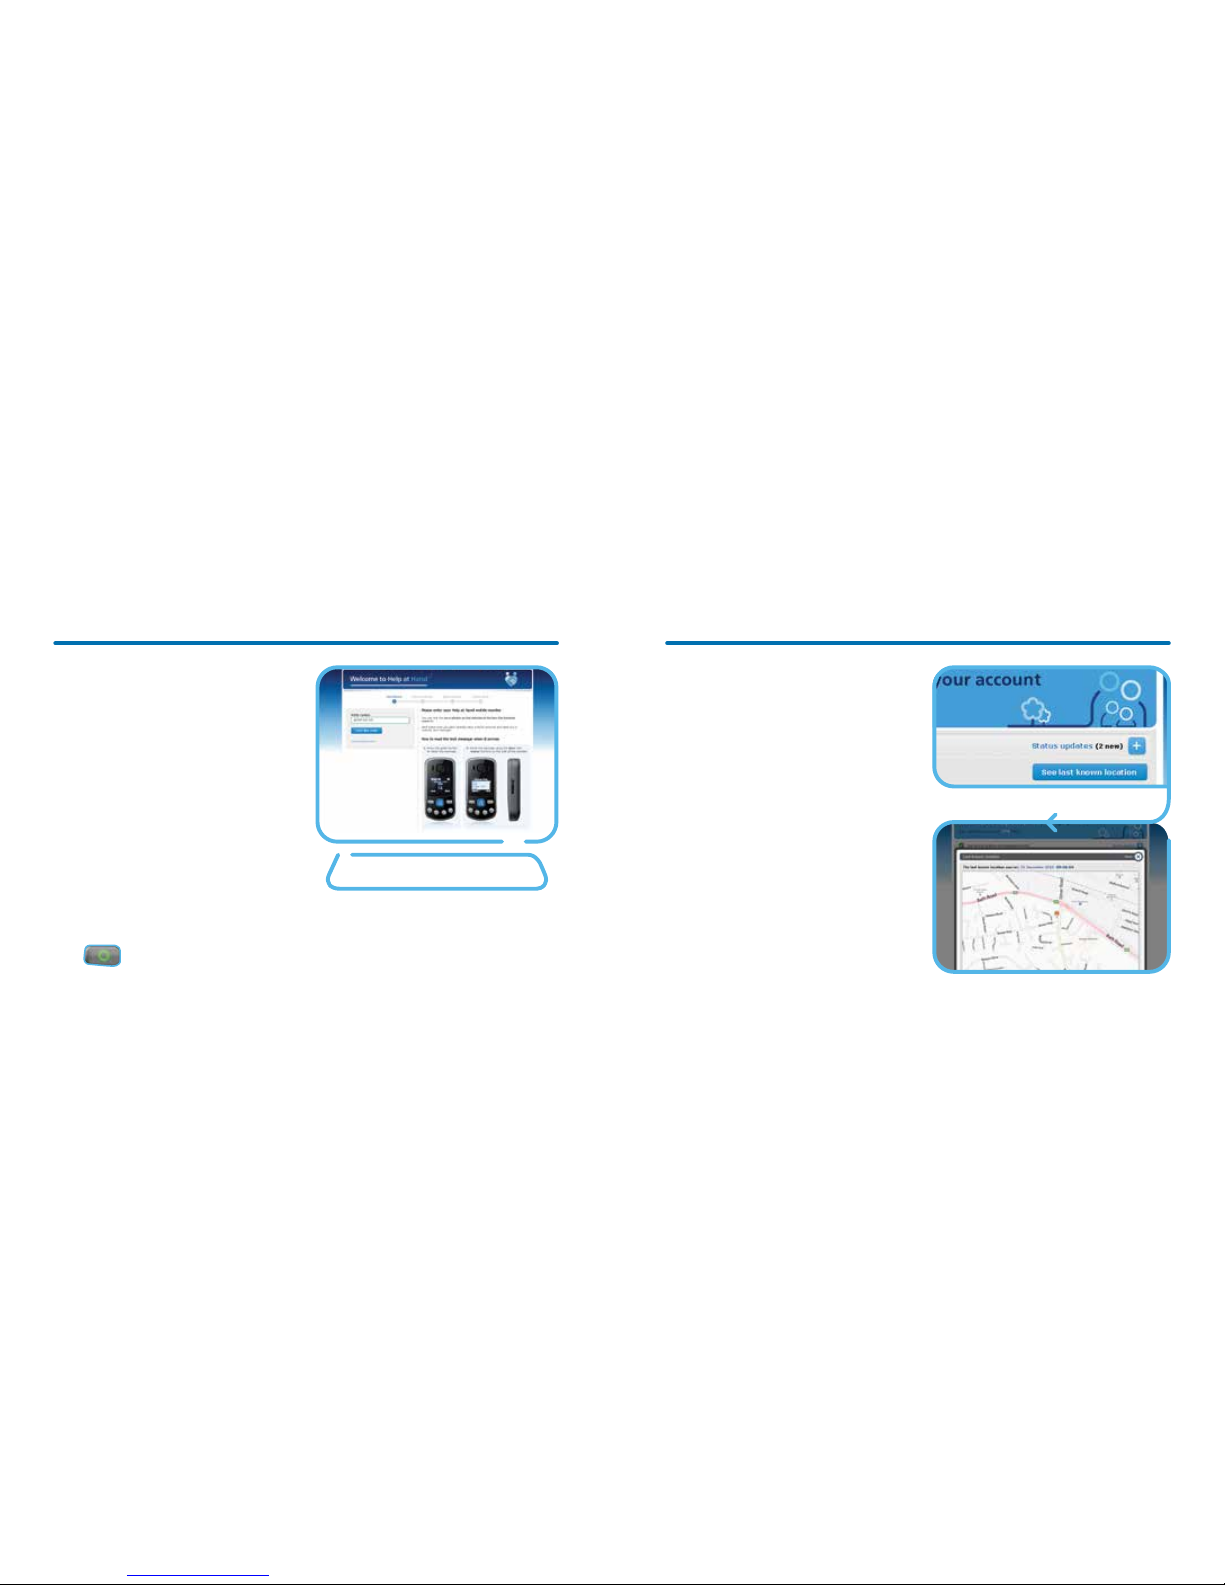
Seeing where your
handset is
Whenever you’re logged into your account
you’ll see a map on the right hand side of
the screen under the heading ‘Last known
location’. This lets you keep track of where
your handset is.
Remember, it is important to get a recent
GPS reading so that the support centre can
accurately determine your location. If you
can’t see a location, take your handset
outside for 5-10 minutes to get a reading.
And if you’ve shared your log-in details
with one of your helpers, they’ll also be
able to check where you are when you’re
carrying your handset.
Click ‘Refresh location’ to make sure you’re
seeing the most up-to-date information.
Press to confirm and get rid of
the pop-up message
 Loading...