

Page 1
1 2
1 2
1 2
o2.co.uk
O2 (UK) Limited, 260 Bath Road, Slough, Berkshire SL1 4DX
Registered in England No. 1743099. Registered Office as above.
© O2 (UK) Limited 2003. Correct at time of going to press (June 2005)
O2 X1b is a trademark of the O2 Group of companies.
O2C2450N KGL 06/05
O2X1b
™
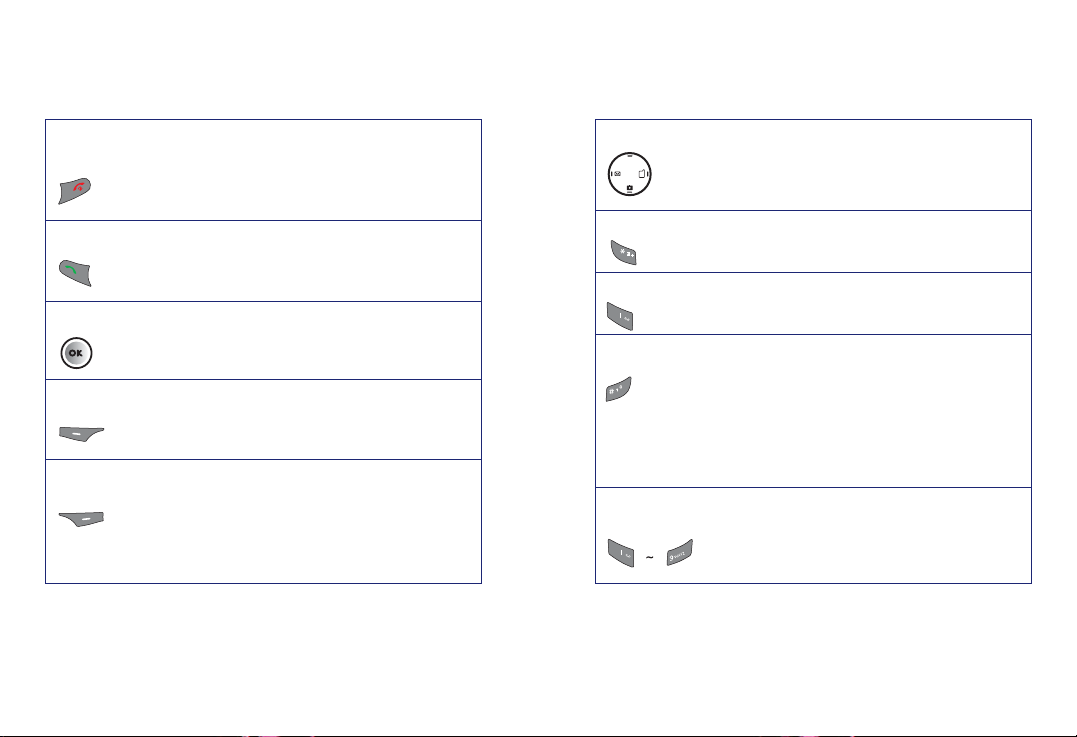
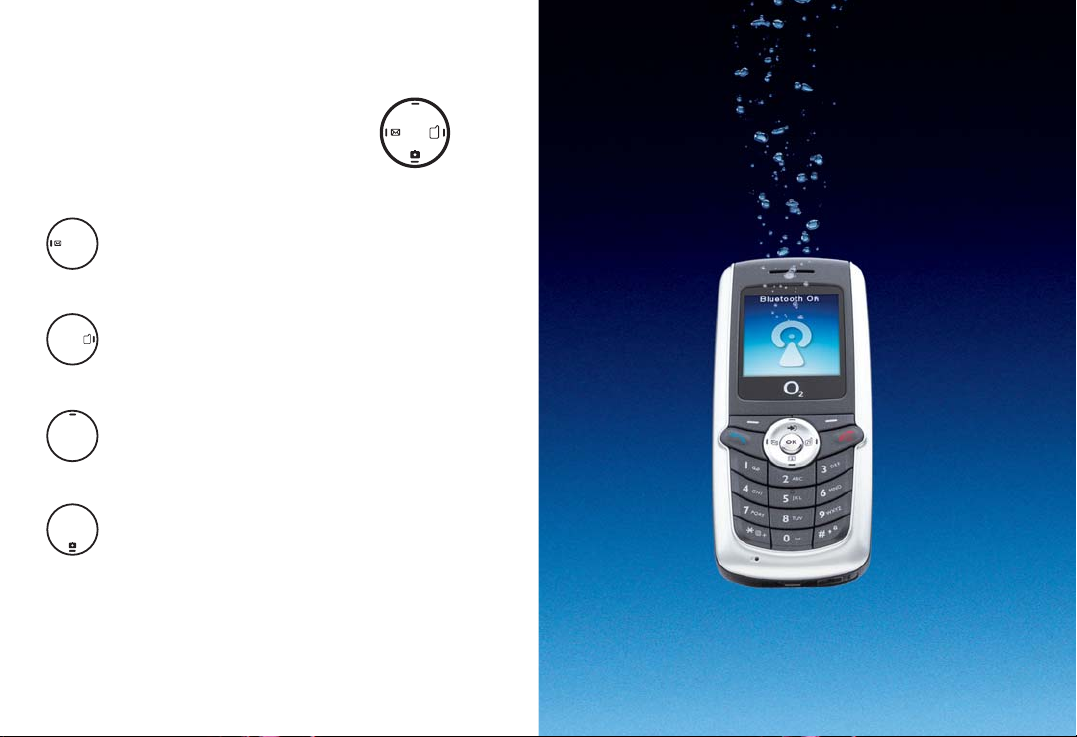
How to use it
Page 2

ii
Setting up
• Insert the SIM into the slot on the back of the O2X1b
handset, connect the battery and slide on the outer cover
• Check these items are securely in place, then press
until the screen turns on. Then enter a PIN if necessary*
• You’re now ready to use the O
2
X1b
Charging the handset
• Insert the lead from the charger to the base of the handset
into the charging socket
• Connect the charger to the correct electrical socket. The
phone will start charging
• When the phone is fully charged disconnect the charger
from the socket and then from the phone
Quick start guide
i
Just a tick
Before you start exploring your new mobile we’d like to say
thanks for choosing an O2X1b. Everything you need to know
to get you started is explained briefly in this first chapter.
The O2X1b has a range of features including an integrated
camera, picture messaging, Bluetooth connectivity, polyphonic
ringtones, a 65,000 colour screen, access to O2Active and all
the other features you’d expect from an O2mobile.
The main thing is that you enjoy discovering everything you
can do.
* The default PIN code is 4321 or 5555. If you enter an incorrect PIN code three
times in succession, your SIM card will lock and you must enter the PUK code to
unlock it. Please contact O2 Customer Service or visit www.o2.co.uk/PUK and follow
the instructions.
Page 3

iv
How to create and send a text message
• Press to enter the text message screen
• You can now start typing your message using the keypad.
The O
2
X1b uses ITAP, a predictive text input. Press to
change between input options
• Once you’ve finished typing your text, press
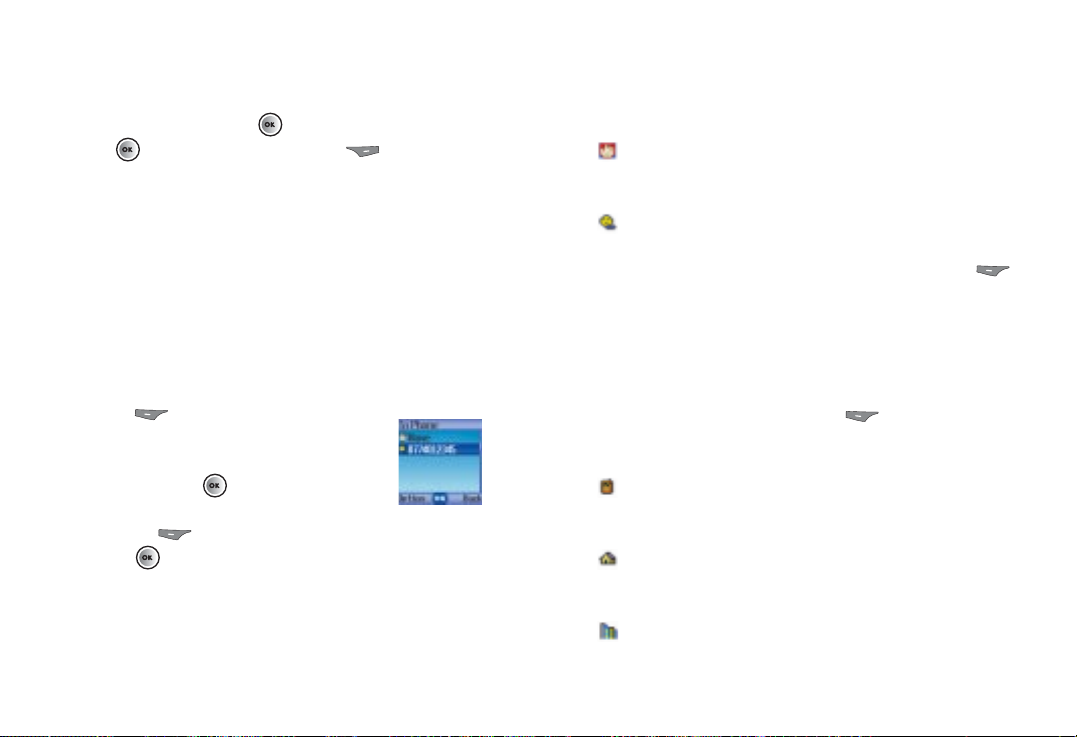
• Type the number of the person that you wish to send the
text to or select their contact number from your
phonebook
• Press and your message will be sent to the recipient
Quick start guide
iii
Basic navigation
Here’s how to navigate when using the O2X1b.
• Use to move up, down, left or right
• Press or to select an item
• Press to go
Back or delete digits entered
• Press to go back to the standby screen
How to make a call
• Type the number of the person you wish to call by using the
numbered keypad or press to select Contacts and
scroll up and down to find the contact
• Press to dial the number. Your O
2
X1b will start to dial
the number
• After you’ve connected, press to end the call
Page 4

vi
Top tips
• You can assign a picture to a caller’s name, so when the
contact calls you their photo appears on screen.
See page 40 for details
• To take a picture of yourself, select
Camera in idle mode,
then turn the handset over. The mirror will then act as a
viewfinder. Once you’re ready to take your picture, press
to capture the image
• You can set a picture as your wallpaper. See page 134
for details
• To access the profiles menu press . For further
information on profiles see page 128
• To lock your keypad, press and hold .
To unlock your keypad, press to select
Unlock and
then press
Quick start guide
v
How to take a picture
• From the idle screen press to enter the
viewfinder mode
• Focus the camera on the picture subject
• Select
Option to amend the Quality and Mode of
your photo
• Once you’re ready, press to take a picture
• Press to select
Save or to select Discard and
return to the viewfinder screen and take another picture
How to access O2Active
• In the standby screen press to access O2Active
• Your O
2
X1b will access O2Active and the O2Active
homepage will load onto your screen
• Scroll through the menu – there’s so much you can do
• When you’ve finished press to disconnect
For further information on O
2
Active see page 84.
Page 5

O2 X1b is a trademark of the O2 Group of companies.
viii
vii
Contents
Welcome xiii
Chapter 1 – Before using your mobile 1
What’s in the box 2
Handset description 4
Main display 6
Icons 8
Function keys 10
Navigation key 12
Chapter 2 – Preparing your mobile for use 15
Plug in your SIM 16
The battery 18
Charging your battery 19
Important battery information 21
Chapter 3 – Basic functions 23
Turning your mobile on and off 24
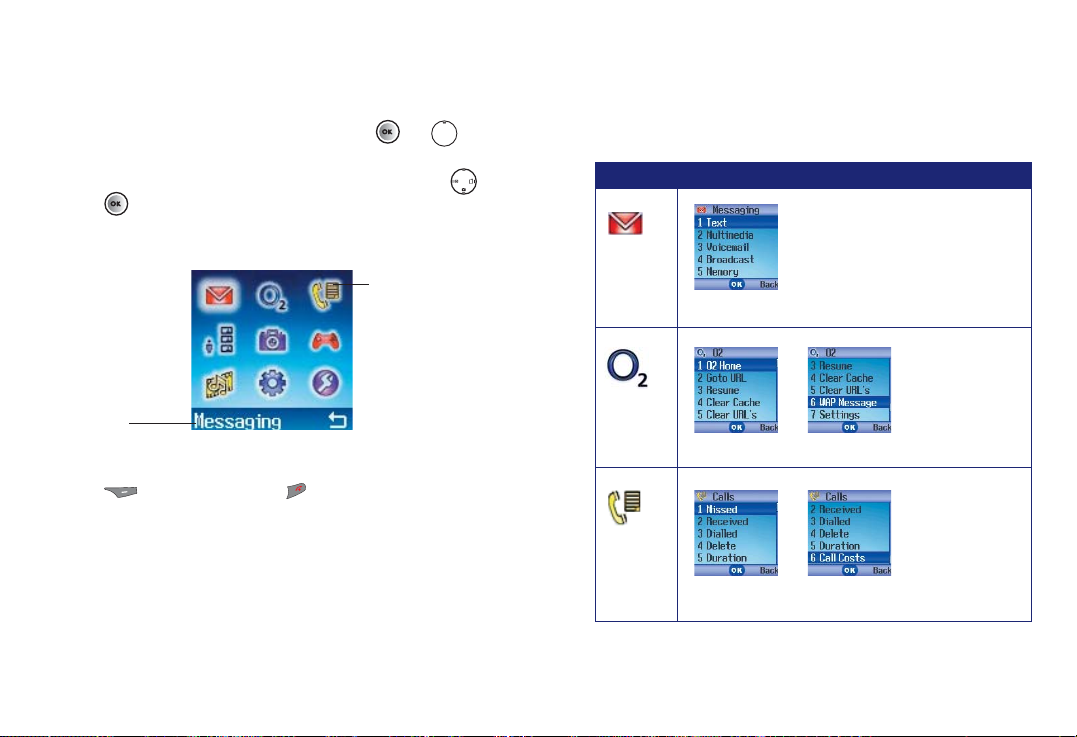
The menu 26
The basics 30
Making a call 30
Ending a call 30
Receiving calls 30
Making an international call 31
Emergency calls 31
Voicemail 901 32
Page 6

x
Text 58
– Write a text message 58
– Read messages 60
– Inbox 62
– Sent items 62
– Drafts 64
– Delete 65
– Settings 65
Multimedia 66
– Create a media message 66
– Read messages 71
– Inbox 73
– Sent items 74
– Drafts 74
– Delete 75
– Settings 75
Camera 76
Camera settings 77
Take a picture 78
Managing your pictures 79
View your pictures 83
ix
Chapter 4 – Main menu 35
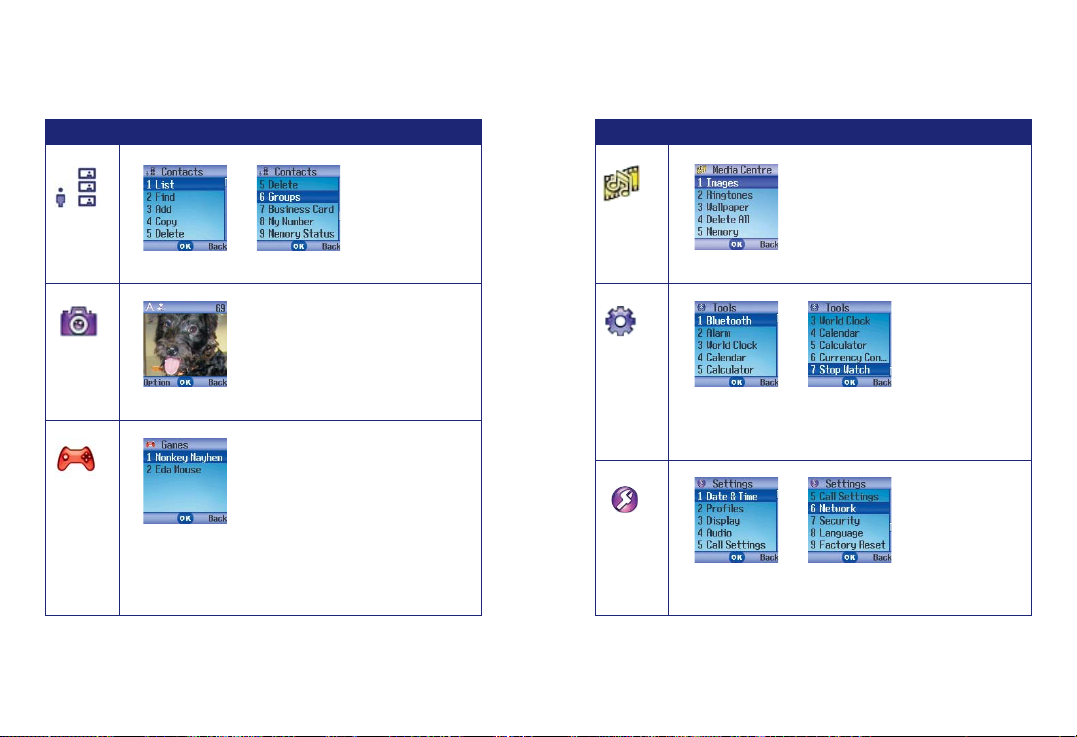
Contacts 36
Adding contacts to your phonebook 36
Finding contacts in your phonebook 41
Copy 42
Delete 42
Groups 43
Business card 44
My number 44
Memory status 44
Calls 45
Missed, dialled and received calls 45
Delete 47
Duration 48
Call cost 49
During a call 51
In-call menu 53
Messaging 56
Text 56
Multimedia 56
Voicemail 56
Broadcast 57
Memory 57
Page 7

xii
Settings 127
Date and time 127
Profiles 128
Display 134
Audio 139
Call settings 140
Network 145
Security 147
Language 153
Factory reset 153
Chapter 5 – Don’t panic 155
In plain English 156
Trouble shooting 159
Vital statistics 163
Chapter 6 – The important safety bit at the back 165
Safety information for mobiles 166
Mobile care 167
Driving safety 171
Electronic devices 172
Other safety guidelines 175
Cautions 177
About this guide 178
xi
Escape into O2Active 84
Do more with O2Active 86
One touch and you’re there 88
Games 100
Monkey Mayhem 100
Eda Mouse 102
Media Centre 103
Images 103
Ringtones 105
Wallpaper 107
Delete all 108
Memory 108
Tools 109
O
2
109
Bluetooth
®
110
Alarm 113
World clock 116
Calendar 117
Calculator 122
Currency converter 123
Stopwatch 126
Page 8

xiv
This guide will help you get the most from your new mobile –
and all the fantastic features of the O2network.
All in all, we’re pretty pleased with the O2X1b. We hope you
feel the same way.
About the user guide
This user guide relates only to the O2X1b.
Please note that a small proportion of the functions available
differ between Pay & Go and Pay Monthly customers.
Welcome
xiii
Welcome
Well here it is, your new O2X1b mobile – you won‘t
be disappointed.
As well as a 65,000 colour screen, your new mobile features
an integrated camera, picture messaging, Bluetooth
connectivity, polyphonic ringtones and is also a tri-band
handset so you can use your O2X1b in the USA and Canada.
You can also access the O2Active™service using the latest
technology. Up-to-the-minute information is at your fingertips
wherever you are and whenever you need it*. Access
O2Active†by pressing and holding and you can enjoy the
following and much more.
• Plan your night out with Time Out
• Download the latest pictures from
the O2Media Messaging gallery
and send them to your friends
• Be the first to hear the latest gossip
from the music and movie worlds
O2 do not suggest in any way that the celebrities featured in this guide are
endorsing O2 products or services.
* Subject to network coverage.
†
Terms and conditions apply. See www.o2.co.uk
Page 9

Before using your mobile
What’s in the box
Handset description
Main display
Icons
Function keys
Navigation key
Chapter 1
1xv3
Page 10
2
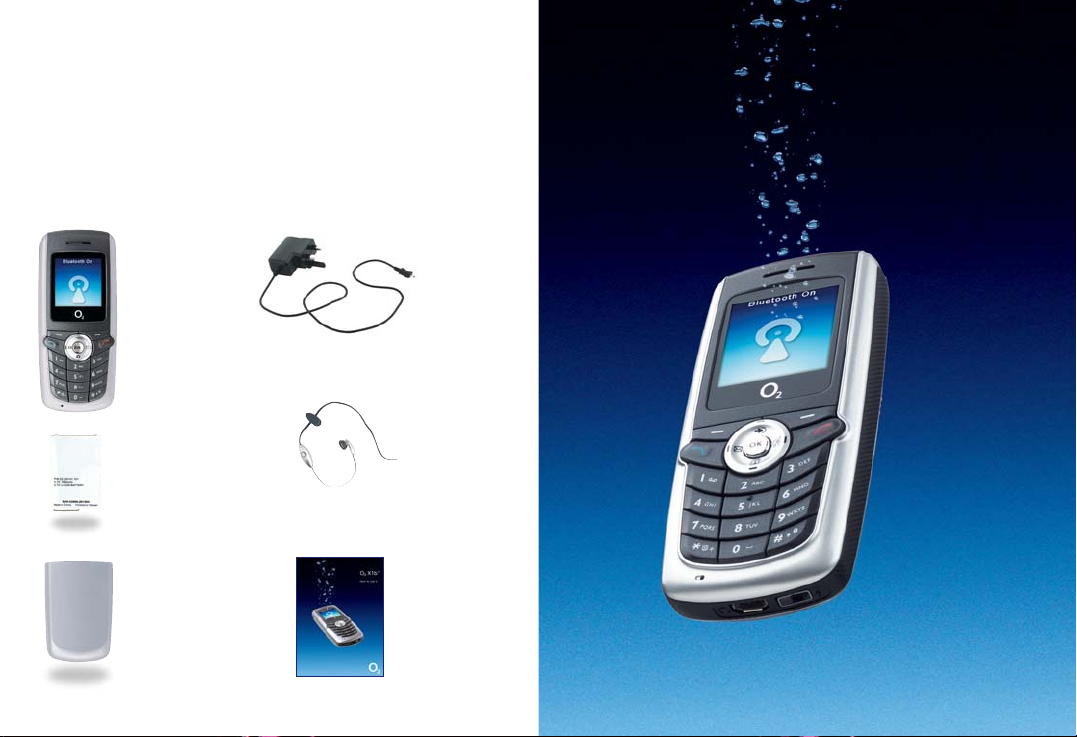
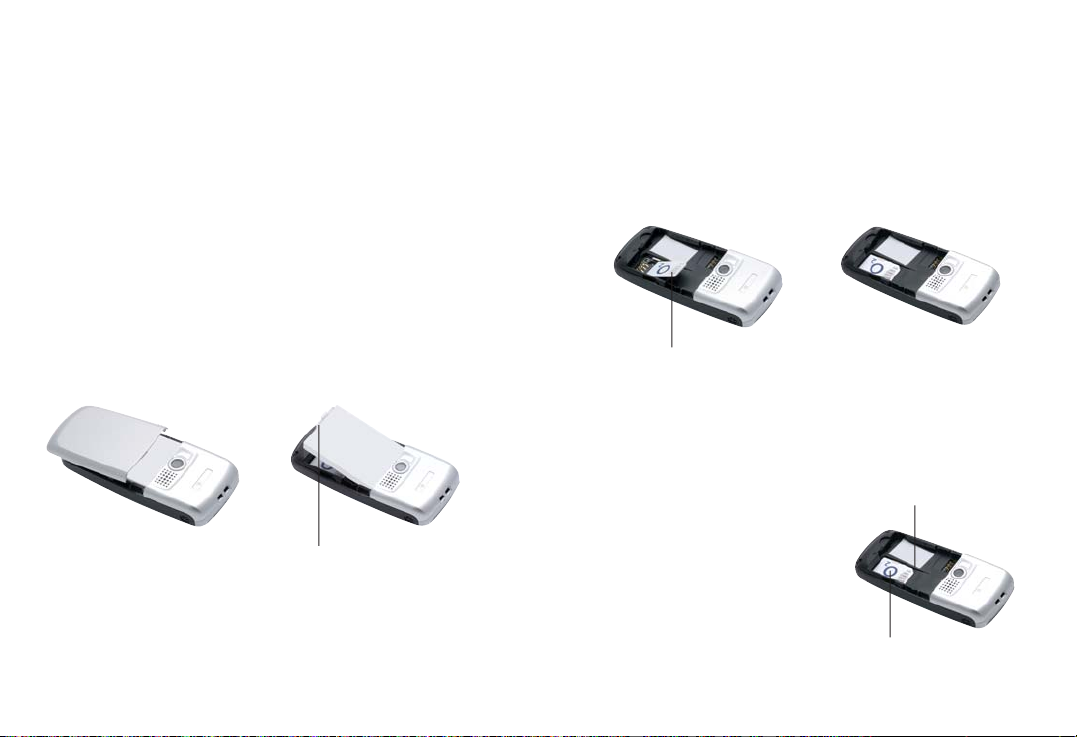
What’s in the box
Thank you for purchasing your O2X1b. Take a look in the box
for the following items. Please check the product contents to
see if you have all the available items as shown.
Your O2X1b
– How to use
it guide
Mobile
phone
Charger
Battery Hands-free
kit
Battery cover
Page 11
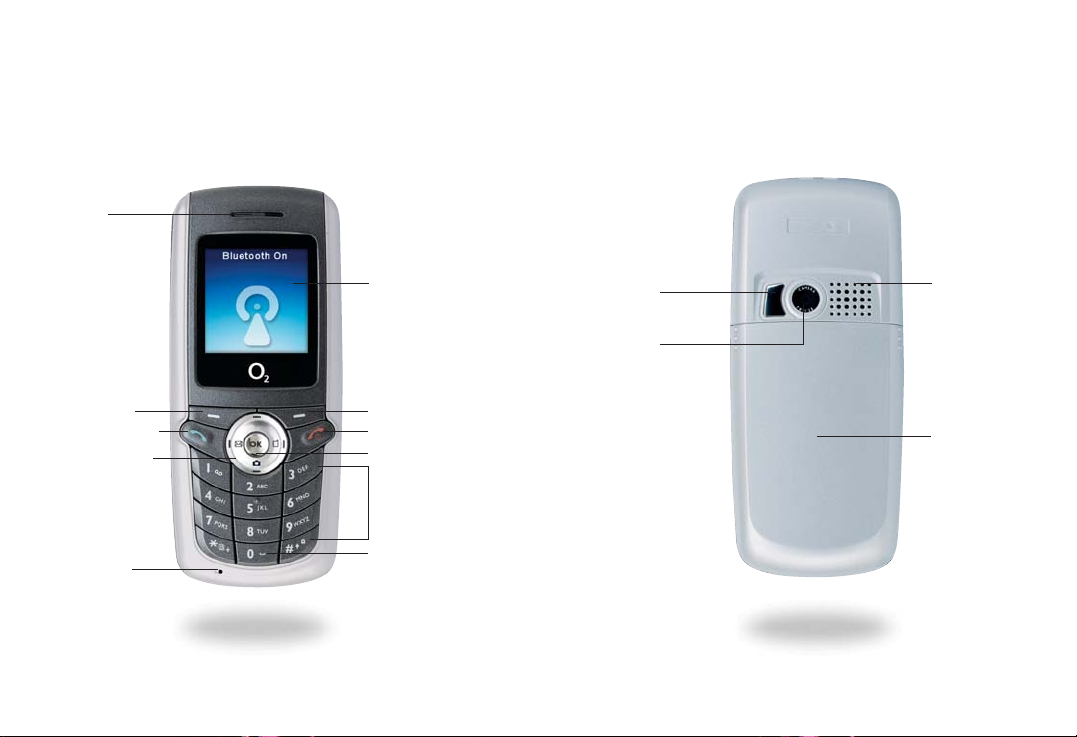
5
Before using your mobile
4
Handset description
Front view
Earpiece
65,000 colour
main display
Back view
Microphone
Left soft key
Dial/Answer key
Navigation key
OK key
Bluetooth on/off
(once paired)
Keypad –
alphanumeric
Right soft key
Power on/off key
Mirror
Speaker
Camera
Battery
Page 12

7
Please note
• To set the time on the display, please refer to page 127
• Photos taken using your mobile’s camera can also be set as
wallpapers. See page 134 for details
• After 30 seconds of inactivity the screen on your O2X1b
changes from displaying O2into ‘Sleep mode’. This means
that it looks almost black. Your mobile has not turned off
but it is in ‘Sleep mode’. By tilting your phone, you can see
the clock displayed. By pressing any key your mobile’s display
will start up again. This is normal operation and designed to
maintain battery life
Before using your mobile
6
Main display
The main display will show icons for network signal strength,
battery power, alarm (if active), the current time and the
current profile in use. The screen can also alert you to
incoming calls, text messages and missed calls.
Current profile
Battery power
Name of operator
Wallpaper
Press to access
your contacts
Date/Time
Press to
access O
Signal
Active
2
Press to enter
the main menu
Page 13
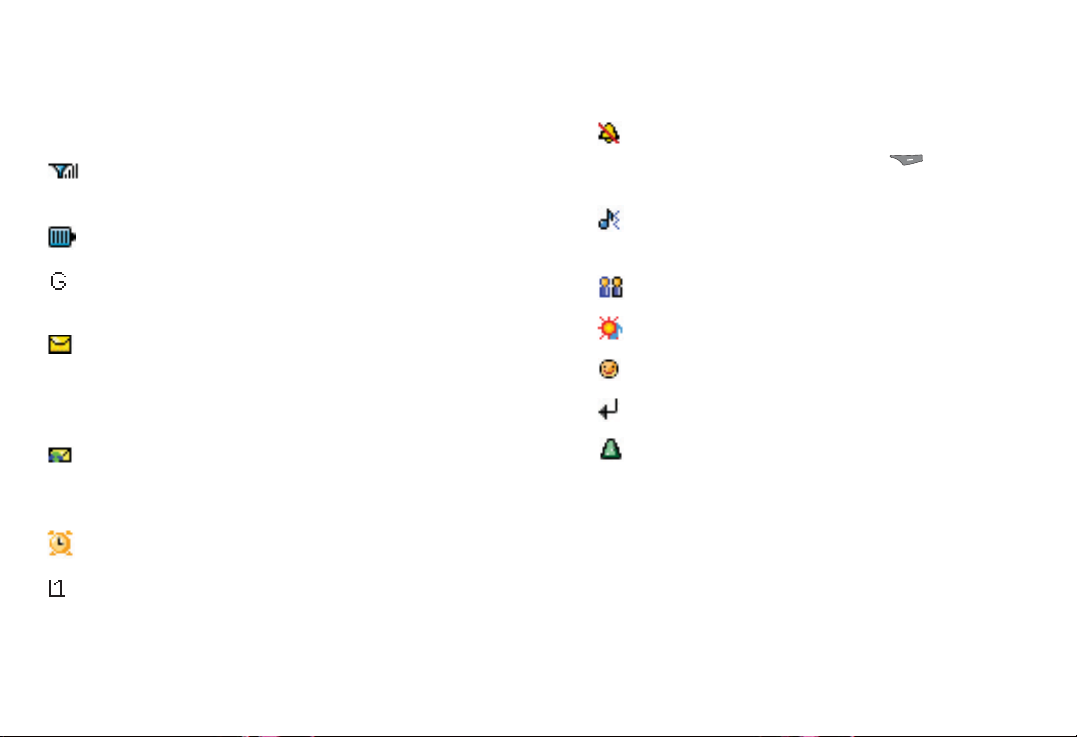
9
Silent Appears when vibration is set as a ringtone. In
the standby screen, press and hold to activate the
Silent profile
Normal Shows the Normal profile is in use. To set a
different profile please refer to page 128
Meeting Shows that the Meeting profile is in use
Outdoors Shows that the Outdoors profile is in use
Personal Shows that the Personal profile is in use
Divert Appears when the call divert function is active
Roaming Indicates roaming has been activated
(It is not your regular network)
Before using your mobile
8
Icons
The icons below appear on your mobile’s display.
Signal strength The number of bars shows
signal strength
Battery Current battery charge level
GPRS network GPRS services have been activated on
your SIM card
Message Shows that a text message or media message
has been received or that there are unread messages. If
the icon appears in red on the main display then your
message memory is full
WAP message You’ve a WAP message (This icon will
only appear when there are no incoming or unread text
and media messages)
Alarm Appears when an alarm is set
Line in use Shows the number of the line currently
in use
Page 14
11
Before using your mobile
10
Function keys
Power on/ • Long press to turn your mobile on/off
off key • Press to reject an incoming call or cancel
a call being dialled
• Press to return to the standby screen
Send/Answer key • Press to dial or answer a call
• Press to access the list of the last
missed/dialled/received calls
OK key • Press to open up the main menu
• Press to select when browsing through
the menu
Left soft key • To access O2Active
• Press to select when browsing through
lower menu levels from standby mode
Right soft key • Press to access your contacts
• Press and hold to turn the silent profile
on or off
• Press to delete entered digits
Navigation key • To browse through the menu
Asterisk key • To insert an asterisk
• Press and hold to select +
Voicemail • Press and hold to access
your voicemail
# key • To insert #
• Press, when creating a message, to
access predictive text (ITAP) or manual
text imput
• Press and hold to activate the phone
keypad lock
Alphanumeric • Press to enter a digit
• Shortcut keys – press and hold to
immediately access a function
Page 15
When in standby mode, the navigation key
can be used to access shortcuts we’ve set up
for you.
Left To create a text message
Right To access your profiles
Up To access the main menu
Down To access the camera function
13
12
Navigation key
Page 16

Chapter 2
Preparing your mobile for use
Plug in your SIM
The battery
Charging your battery
Important battery information
1514
Page 17
17
Preparing your mobile for use
16
To use your mobile, your SIM card needs to be inserted at all
times – this contains important information about your mobile
and network. The message Insert SIM appears when the SIM
card is not installed.
Please take care of your SIM card and don’t keep it near
magnetic and electronic devices as this can interfere with data
storage and network operations.
• Turn your mobile over and slide the cover off
• Release the battery latch and lift the battery off the mobile
Please note
Don’t remove the battery when the mobile is on. This could
mean losing personal settings or data stored either on your
SIM card or in the mobile’s memory.
• Slide the SIM card in under the metal grooves in the SIM
card slot, with the SIM card’s metal contacts facing down
and the cut corner at the top left
Please note
A SIM card can be easily damaged if its metal contacts become
scratched, so take special care when holding or inserting it.
If you wish to remove the SIM
card, you must first press down
the stay, then push the SIM
card out of the slot.
Plug in your SIM
Battery latch
SIM card
SIM card
Stay
➔
➔
Page 18
19
Preparing your mobile for use
18
Power connection
Insert the charger into the slot and plug the charger into the
socket. Please ensure you insert the charger the right side up
and that after insertion the connector is snug to the phone.
An audio tone plays when you have connected the
charger properly.
Before you use your phone for the first time, charge your
battery for at least four hours. Charging the battery fully each
time will help prolong its life – and is much better than
frequent short bursts of charging.
Charging the battery
Installing the battery
Insert the bottom of the battery into the groove at the top of
the mobile. Push down the battery until it locks into place and
then slide the cover back on.
Removing the battery
Slide the cover off. Push the battery latch inwards and then lift
the battery to separate from the mobile.
Please note
The battery must be securely placed in the battery compartment.
If the battery’s not in place your mobile won’t turn on.
The battery
Charger socket
Charger connector
➔
Page 19

21
Preparing your mobile for use
20
• Don’t remove the battery while your mobile is charging
• Don’t overcharge the Li-Ion battery, as this can result in a
reduction in battery performance and life span. The
recommended maximum charge time is 6-8 hours
• Never store a battery near a fire
• Don’t attempt to take the battery apart. Only use the battery
approved by the manufacturer
• Never touch the battery terminals with a metallic object, as
this can lead to short circuiting. Take special care when
carrying a battery in your pocket
• Misuse of the battery can lead to burns from hot
temperatures and even explosion. Never drop or apply any
physical shock to the battery as it may damage it and even
cause fire
• Please keep your battery out of children’s reach and in a dry
and cool area
• Store and charge your battery at room temperature.
Extremes of temperature can prevent full charging and affect
battery life and performance
• Keep the terminals of the battery clean and dry
• When there is risk of lightning, remove the charger’s
plug from the socket to protect the mobile
Important battery information
Charging status
If you charge your mobile
• While it is turned off, the main display shows the
following animation
• While it is turned on, the display shows the icon.
The lines showing the battery power will scroll until the
battery is fully charged
When the battery is out of power, you’ll hear an alert
sound to remind you to recharge it. Eventually, it will turn
off automatically.
Please note
If the battery is very low only the keymat will turn on and
will be lit blue. The screen will not turn on until the battery
is sufficiently charged.
Page 20

Chapter 3
Basic functions
Turning your mobile on and off
The menu
The basics
Voicemail 901
22
23
Page 21
25
Basic functions
24
Turning your mobile off
When the SIM card is installed
• Press and hold until the screen
turns off
Please note
• If the message LOW BATTERY WARNING POWER OFF
is displayed, the mobile will turn itself off. Time to recharge
your battery
• If you remove the battery while your phone’s switched on,
you might lose any unsaved messages and damage your
SIM’s memory
Turning your mobile on and off
Turning your mobile on
When the SIM card is installed
• Press and hold until the screen turns on
• When your mobile is PIN protected, PIN1 Code
is displayed on the screen*
• Enter the 4-digit PIN to unlock the mobile,
then press
• Your default PIN code is 4321 or 5555**
• You’re now ready to go
Please note
If you enter the wrong PIN three times, your phone will lock
and you’ll need a PUK code to unlock it. You can get this from
O2Customer Service or visit www.o2.co.uk/PUK
* If you’re a Pay & Go customer you won’t need to enter a PIN number.
** Please see page 147 for further information on PIN codes.
Page 22
27
Basic functions
26
• When your mobile is in standby mode, press or to
access the main menu
• Scroll through the menu to the function you want using
• Press to select the menu icon highlighted
• Press to go back or press to return to the
standby screen
The menu
The name of the
main menu item
you have
scrolled to
Each icon
represents a
function within
the section
Calls
Messaging
Main menu map
Select To enter
O2 Active
Page 23
29
Basic functions
28
Contacts
Games
Camera
Media
Centre
Tools
Settings
Select To enter Select To enter
Pay & Go customers will see O2as item number 1.
Page 24

31
Basic functions
30
Making an international call
For Pay Monthly customers
• Press and hold until + appears on the screen
• Enter the recipient’s country code, area code and
phone number
• Press
For Pay & Go™customers
See your O2Pay & Go Welcome Pack for details on how to use
your mobile while abroad.
Making emergency calls
• To call emergency services, enter 112 (the international
emergency number) or 999
• Then press
You can make an emergency call even if your mobile is locked
or can’t access the O2network, or there is no SIM card
inserted, so long as you are within range of a network
supported by your mobile.
Making a call
• Ensure that the standby screen is shown on the display
• Enter a phone number and press
• If you make a mistake, you can delete the last
number you entered by pressing
Ending a call
• Press to end a call
Receiving calls
Answering a call
• To answer a call press
To reject a call
• You can reject an incoming call by pressing
The basics
Page 25
33
32
Before you can use Voicemail 901, you need to activate the
service. Details can be found in your O2Welcome Pack.
This service takes messages for you when you can’t take
the call.
To listen to your voicemail message
• In the standby mode, press and hold to dial
your voicemail
• Alternatively, simply dial 901 and press
Voicemail 901
Page 26

Chapter 4
Main menu
Contacts
Calls
Messaging
Camera
O2Active
Games
Media Centre
Tools
Settings
3534
Page 27
37
Contacts
36
Contacts
From the standby menu, press then scroll to Contacts
and press to select. Alternatively, press to access
your contacts.
Adding contacts to your phonebook
You can either use the SIM card or the phone’s memory to
store your numbers.
The phonebook in your mobile’s memory can store up to
500 contacts.
• In the standby screen enter the number you wish to store
and press to select Save
• The screen will show the data fields for a
new contact
• To edit a field press , then enter the
relevant data
• To save press to select Option, then scroll to Save
and press to select
The data fields provided are
Name
The contact’s name
Mobile number
The contact’s default phone number
• To change the category of the phone number, press
to select Option, then select Change Type and select
either Mobile Number, Home Number, Office Number
or Other Number
In addition to the contact fields above you can also add the
data fields listed below by pressing to select Option
at any time and then selecting Add New Field
Mobile number
The contact’s mobile number
Home number
The contact’s home phone number
Office number
The contact’s office phone number
Page 28
39
Contacts
38
Groups
Used to select a caller group for the contact
• Select to edit the field by pressing
• Scroll through the different groups available and press
to confirm
• When there is an incoming call for this contact, the ringtone
assigned to this group will sound and the display will show
the animation/image associated with the group
Please note
To set a ringtone and animation/image for each caller group go
to Contacts – Groups.
Ring ID
To set a ringtone for the contact. When there’s an incoming
call from the contact, your mobile will play this ringtone
• Press , then scroll through the ringtones available and
press
Please note
• The ringtone in this field will replace the one associated with
the contact’s caller group, if any
• The ring ID is only available when you save a contact to your
phone‘s memory
Other number
An alternative number for the contact
Email
Their email address
Home address
Their home address
Office address
Their office address
Company
Their company name
Department
The department in which they work
Position
The position they hold within the company
Note
Used for additional notes
Page 29
41
Contacts
40
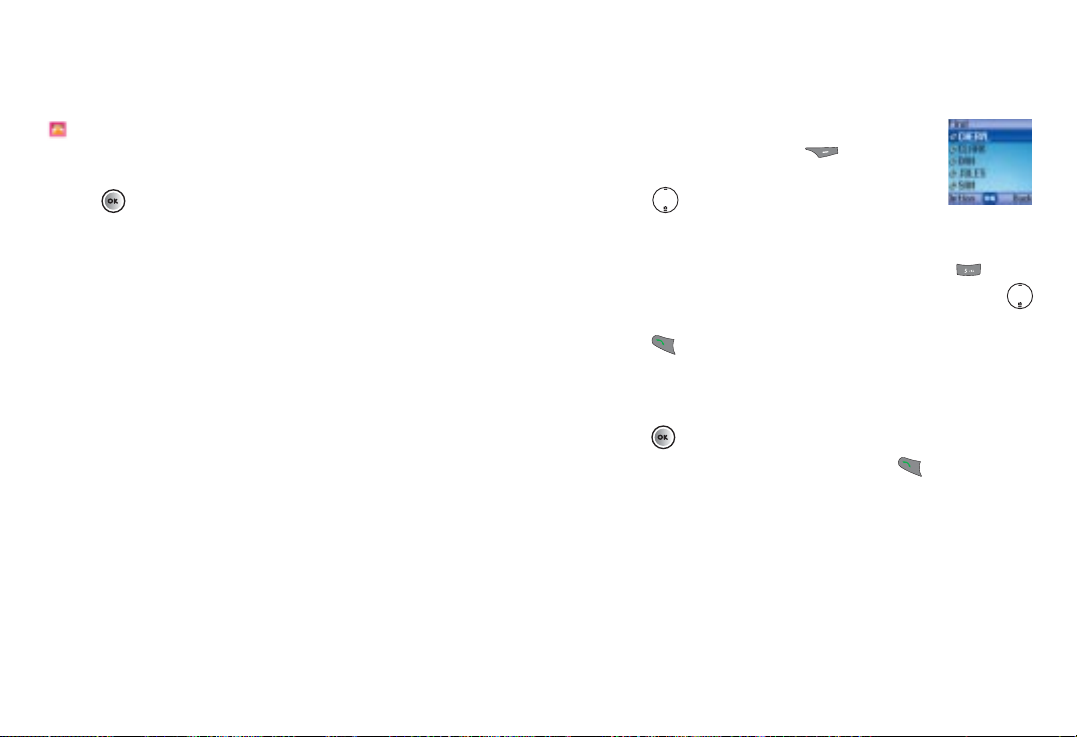
Finding contacts in your phonebook
• In the standby mode, press to select
Contacts
• Press to scroll through your list of contacts
until the one you need is highlighted
• Alternatively, press the key that corresponds to the first letter
of the name you want to locate, so for ‘K’, press twice
and all the contacts beginning with ‘K’ will appear. Press
to scroll to the one you want
• Press to call the first phone number saved under
that contact
If the contact has multiple phone numbers
• Press to show all numbers for that contact
• Scroll to the number you want and press
Image ID
To set the image, photo or wallpaper that will appear on your
mobile’s display when there’s an incoming call from the contact
• Press , then select
New photo To take a new photo of the contact. For further
information on taking photos please refer to the Camera
section on page 76
Images Select an image already stored on your mobile
Wallpaper Select a wallpaper/animation already saved on
your mobile
Please note
• The photo/image/wallpaper set in this field will replace the
image associated with the contact’s caller group
• The image ID is only available when you save a contact to
your phone‘s memory
Page 30
42 43
Contacts
Groups
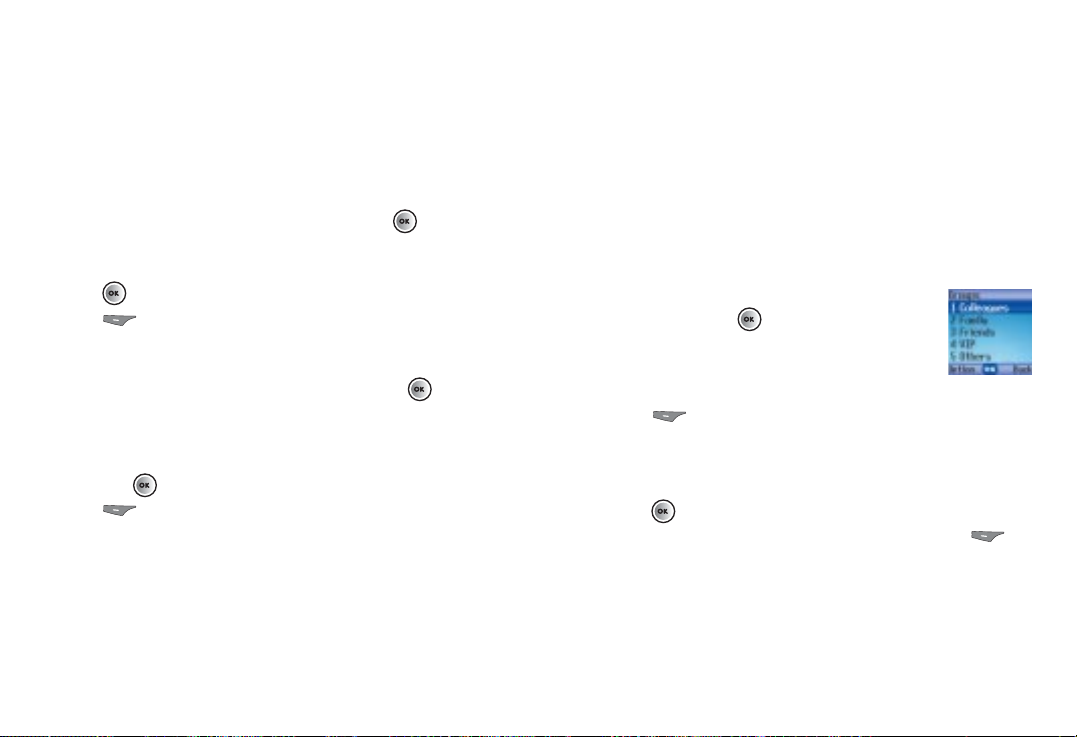
Caller groups can be used to identify a particular group of
contacts, such as, Colleagues, Family, Friends, VIP and
Others. You can associate a ringtone and image with one
group, and when a member of that group calls, your mobile
will use the group’s ringtone and display its image.
• In the Contacts menu, scroll to Groups and
select by pressing
Scroll to one of the groups and then
• Press to select Option. You can then select the
ringtone or image that will identify that caller group. You
can also rename the caller group and view all the associated
details for that group
• Press to view a list of all the names that belong to that
caller group. Scroll to the desired contact and press
to select Option. You can then Edit, Remove or Add
a particular contact from/to that group
Copy
If you’re using the phonebook stored on your phone’s memory,
you can copy it to the SIM card’s phonebook, and vice versa.
• In the Contacts menu, scroll to Copy and press
• Then scroll to a contact to copy to the other phonebook
or scroll to All SIM to Phone or All Phone to SIM and
press
• Press to select Yes and confirm
Delete
• In the Contacts menu, scroll to Delete and press
• If the contacts you wish to delete are saved to your
SIM phonebook scroll to All in SIM or alternatively
All in Phone, otherwise select a particular contact
and press
• Press to confirm deletion
Page 31

44
Business card
Use this option to enter your own business card information.
My number
This allows you to save your SIM card number and name to
your SIM card’s memory.
Memory status
• In the Contacts menu, scroll to Memory status and select
by pressing
You can now view the number of occupied phonebook entries
both on your SIM card and mobile memory as well as the
maximum number of entries that your mobile can store.
Page 32

45
Calls
Calls
• Press then scroll to Calls and press
Missed, dialled and received calls
• Scroll to Missed / Received / Dialled and press . You
can then view all the latest missed, received or dialled calls.
Alternatively, in the standby mode, press to view a list
of these numbers
• Press to scroll to the desired phone number
This icon appears beside missed calls
This icon appears beside dialled calls
This icon appears beside received calls
Please note
• If a phone number has already been stored as a contact
in your phonebook, the display will show the name when
they call
• If the number of the person calling you is not available then
no number will show on the display
Page 33

4746
When the number for a missed, dialled, or received call is
highlighted, you can do the following
• Press to view the time, date and telephone number*
of the call
• Press to redial the number
• Press to select Option and bring up a pop-up menu
Save/Edit If the phone number for the call has not been
stored in the phonebook you’ll be able to create a contact for
this number. If the phone number is already stored as a contact
you will be able to edit the information for this contact
Delete Select to erase the record of the call from the list
Call To call the number or contact listed
* If the telephone number has been withheld, the number will not be displayed.
Send msg Send a text message or media message to the
number or contact listed. For further information on sending
text or media messages see page 56
Delete all Select to delete all call records
Delete
Select to erase all call records.
• In the Calls menu, scroll to Delete and press
to select
• When prompted press to select Yes, or to select
No and return to the Calls menu
Page 34

49
Calls
48
Please note
You must enter your PIN2 code in order to clear call time
records. The PIN2 is the second PIN code. Its main use is to
control restricted services e.g. call time limits and restricted
phone numbers. For further information about PIN2 code,
please refer to page 148.
Call cost
*
Here you can view the cost information for calls.
Last
Shows the costs of your last call, as well as the contact name
or phone number.
All
Shows the total cost for all calls.
Reset
Enables you to reset the call cost to zero. You will need to
enter your PIN2 code to complete.
* Not available to Pay & Go customers.
Duration
View the duration of the calls you have made.
Last
Shows the duration of your last call, as well as the contact
name or phone number.
All
Shows the total time for all calls.
Received
Shows the total time for all received calls.
Dialled
Shows the total time for all dialled calls.
Reset
Allows you to reset all call time records to zero.
Page 35

51
Calls
50
During a call
Adjusting the earpiece volume
• Press and to adjust the call volume
Mute
• Press to select Mute and turn off the microphone. The
person on the other end of the line will not be able to hear
your voice
• To restore the sound, press to select Unmute
Making a second call*
• Enter a phone number, or select one from your contacts.
For further information please refer to the In-call menu
on page 53
• Press to dial
The currently active call will automatically be placed on hold.
However, if there is already an active call and another on hold,
this action will fail.
* Only available on a Pay Monthly calling plan.
Cost limit
Shows the current limit set for total call costs.
Set
Cost limit
Allows you to set a limit for total call costs. If call costs exceed
this limit, your mobile will no longer be able to dial calls. When
this feature is activated, the remaining cost will be displayed in
the information box on the screen each time you end a call. To
set your call cost limit you will need to enter your PIN2 code.
Units
Allows you to enter the unit price and a currency for
calculating call costs. To set the unit price you will need to
enter the PIN2 code.
Page 36

53
Calls
52
In-call menu
• Press during a call to select Option and enter the
In-call menu
• Press to scroll to the desired item, please refer to the
list below
Hold/Unhold/Swap*
Allows you to toggle the call status.
Use headset
Allows you to transfer the call to your Bluetooth headset.
Contacts
Select to enter the contacts menu.
Calls
Select to view the recently dialled, missed or received call
list. You can then press to select Option and enter the
calls menu.
* Only available on a Pay Monthly calling plan.
Call waiting*
If you receive an incoming call while you’re on the phone, a
tone will sound through the earpiece and the display will show
that a second call is waiting.
You can handle the waiting call and currently active call in the
following ways
Answer the waiting call
• Press . The currently active call will automatically be
placed on hold
• If there is already another call on hold, a menu will appear
on the display allowing you to select a call to end and then
answer the waiting call
Reject the waiting call
• Press to select No
* Only available on a Pay Monthly calling plan.
Page 37

55
Calls
54
Conference
This function allows you to set up a conference call.
• Select Conference to place your current caller on Hold
• Dial the next caller by entering their mobile number and
pressing
• You will now have one Active call and one caller on Hold
• To connect the two callers press to select Option then
Conference and select from one of the following
Join
Swap
Transfer
Messaging
Lets you enter the messaging menu. For further information
see page 56.
Calculator
Lets you enter the calculator tool. For further information see
page 122.
Send DTMF
When your mobile is connected to other devices or services,
you can send DTMF (Dual Tone Modulation Frequency) strings.
DTMF strings are keypad tones that can be sent via the
microphone as you dial another number. Your mobile will emit
the tones in order to communicate with answering machines,
pagers, computerised telephone services, and so forth.
• Enter the phone number and then press to send the
DTMF string
End call
Press to end the current call.
Please note
If you have a call on hold you can choose to end all calls, end
the active call or the call on hold or just a single call.
Mute/Unmute
This allows you to activate or cancel the silent mode.
Page 38

56 57
Messaging
Broadcast
Cell Broadcast (CB) has the ability to enable O2to provide
you with information on specific services. Details are available
from O2. When you receive a CB it will display automatically
in the display.
Cell Broadcast is not available to Pay & Go customers. Charges
may apply for customers using CB. For more information
please contact O2Customer Service.
Memory
• Scroll to Memory and press to see how much space is
still available
Messaging
Much more than a phone, your O2X1b is all you need to
communicate.
• In the main menu, scroll to Messaging and select by
pressing
Then select
Text
For information on text messaging go to page 58.
Multimedia
For information on Media Messaging go to page 66.
Voicemail
• Scroll to voicemail and press
Get voicemail Call your voicemail number
Settings Amend your voicemail number
For further information on voicemail go to page 32.
Page 39

58 59
Text
Edit your text message
• After you have finished writing your message you can edit it
by selecting Option and then choosing from the following
Insert Select to insert a template, business card from your
contact list or an appointment from your calendar
Alignment Choose how you want to align the text in your
message. Select either Left, Centre or Right
To send your text message
• Once you’ve edited your message press
• In the To : screen enter the recipient’s mobile number when
prompted or press to select Contacts and select a
contact from your phonebook
• Scroll through the list of contacts and press to select
the desired contacts
• Once you have selected all the contacts you require press
to select Done, then press and select from
the following
Send Select to send your text message
Save to draft Save your message to the Drafts folder so you
can send it at a later time
Discard To delete the text message
With text messaging you can stay in touch anytime, anywhere.
†
• In the main menu, scroll to Messaging and select by
pressing , then select Text
Please note
To enter the text messaging screen directly from the standby
display screen, press
Write a text message
• In the Text menu select New
• Enter your text message using the alphanumeric keys. Your
message can be up to a maximum of 456 characters. One
standard text consists of 160 characters
Please note
• Press 0 to enter a space between words
• Press # to switch between input modes e.g. abc, itap, 123 etc.
• The O2X1b uses ITAP, which is a predictive text input
method. ITAP allows you to type text quickly
• Press * to bring up options to insert characters such as ?, !,
& and @. Using the navigation keys, scroll to the character
you would like to insert and press
†
Subject to network coverage.
Text
Page 40

60 61
Text
• Select
Option by pressing , then select either
Reply To reply to the text message
Call To call the sender
Forward To forward the message
Delete To delete the text message
Save Select to save the content of the message, such as the
sender’s number to your phonebook or ringtone, animation
and calendar attachments
Read messages
When you receive a new message 1 New SMS will appear on
the display with a tone or vibration if selected.
Please note
If the sender is a contact saved in your phonebook their name
will also appear in the message alert rather than the number –
so you know who sent you the message before you open it.
• Press to read the message
Please note
If you’d rather save the text message and read it later, press
to return to the standby screen. The message will be
stored in the inbox and the icon will appear on the
standby screen.
Page 41

62 63
Text
Then you can
• Press to select
Option and then select
Delete Deletes the message
Resend Edit and send the message to its original recipient
Forward Edit and forward the message
Delete All Deletes all the messages in your outbox
• Press to read the message. After reading the message,
press to select Option and then select
Delete Delete the message
Resend Edit and send the message to its original recipient
Forward Edit and forward the message
Inbox
• In the Messaging menu, select Text, then scroll to Inbox
and press
• You are now in the inbox. indicates a read message,
while indicates an unread message
• Select the desired message and press to read
• To return to the main menu press
Sent Items
In the Sent Items you can view all the text messages that
you’ve previously sent.
• In the Messaging menu, select Text, then scroll to Sent
Items and select by pressing
• Scroll to the desired message record
Page 42

64 65
Text
Delete
You can delete messages saved in your Inbox, Sent Items,
Drafts or All.
Settings
Your O2X1b is already set up to send and receive text
messages. If you are unable to send text messages, contact
O2Customer Service.
Drafts
This option allows you to keep message drafts that you
have saved.
• In the Messaging menu, select Text, then scroll to Drafts
and select by pressing
• Scroll to the desired message record
Then you can
• Press to select Option and then select
Delete Deletes the message
Delete All Deletes all messages in the drafts folder
• Press to directly edit the contents of the message
Page 43

66 67
Multimedia
If there are multiple numbers and email addresses
• Press to open up the symbols field along the bottom
of the screen
• Scroll to a comma, semicolon, or space
• To insert into the editing screen and separate the different
numbers and email addresses press
To select a number or email address from your
phonebook
• Press to select Contacts
• Scroll to highlight the name of the desired contact
• Press to mark the number(s) or email address(es)
you want
• You can then repeat the same steps to select other contacts
from your phonebook
• When you have finished press to select Done and
return to the recipient list, displaying all the phone numbers
and email addresses you have chosen
To send your message as a carbon copy or a confidential
carbon copy to others scroll to Cc: or Bcc: and repeat the
instructions above.
Colour Media Messaging means you can do more than tell
people what’s going on – you can show them exactly what’s
happening with pictures, sound and text. Take a photo and
send it as a media message to people showing them exactly
where you are or, if you’re in need of inspiration, you can grab
a full colour picture or image from the O2Gallery – such as
celebrity shots and greeting cards (see O2Active on
page 84) and send it with your own message to people.
• In the main menu, scroll to Messaging and select by
pressing , then select Multimedia
Create a media message
• In the Multimedia menu select New
Select the recipient(s)
You can send your media message to a recipient’s mobile or
email address.
• Scroll to To : and press
To enter a number or email address directly
• Type in the recipient’s phone number or email address
Multimedia
Page 44

68 69
Multimedia
Wallpaper
Attach a saved wallpaper to your media message.
Ringtones
Add a ringtone to your media message.
Template
Your mobile has a list of templates that can be used instead
of entering the text message yourself – just choose from the
list available.
Slide before
Enables you to insert a new page into your media message
before your message’s current content.
Slide after
Insert a new page after your message’s current content.
Enter a subject
• Scroll to Subject: and select by pressing
• Enter the subject for your media message and press
to confirm
Content
• Scroll to Content: and select by pressing
• Enter your message using the alphanumeric keys
For further information on entering text please refer to page 58.
With an attachment
• While writing your message, select Option by
pressing
• Select Insert to enter the following
New photo
Take a new photo using your mobile’s camera and insert it into
the media message you’ve opened. For further information on
using the camera go to page 76.
Photo
Select a photo that you’ve previously saved to your
Images folder.
• Scroll to the file name of the desired photo
• Press to view and press to insert the photo
into your media message
Page 45

70 71
Multimedia
When you have completed all the fields required to send your
media message, scroll to
Send and press to select or
press to select Option from the New screen and choose
from the following
Send Send your media message
Save to draft Save the media message to the Drafts folder
so that you can send at a later time
Preview View your media message before you send it
Discard Delete the media message
Read messages
When you receive a new message 1 New Msg will appear
on the display with a tone or vibration if selected.
Please note
If the sender is a contact saved in your phonebook their name
will also appear in the message alert rather than the number –
so you know who sent you the message before you open it.
• Press to open and play the message’s pages
in sequence
Priority
• Scroll to Priority: and press
• Choose between Low, Normal or High and press
to confirm
Receipts
You can request notification when the recipient receives your
message or when they read it.
• Scroll to Receipts: and press
• Scroll to Both Delivery/Read, Delivery Only, Read Only
or None and press
When you’re writing your media message, press to select
Option at any time to perform the following tasks
Insert To insert another photo, wallpaper or ringtone etc.
Preview Play all the pages you have created in sequence
Remove image Remove an image or photo from the currently
displayed page
Remove text Deletes all of the text from the current page
Slide duration Allows you to set the length of time that
each page is displayed on the screen when playing your
media message
Page 46

72 73
Multimedia
Forward Edit the content and then forward to someone else
Details View the date and time of when the media message
was sent
Save Save the sender’s phone number to your phonebook, or
save a number that was displayed in the message’s content.
You can also select the contents of a media message and save
to your mobile’s memory, such as an image, photo or ringtone
Save all Save all the objects attached to the message
If you wish to read the message later press to return to
the standby screen. The message will be stored in the inbox
and the icon will appear in the standby screen.
Inbox
• In the Messaging menu, select Multimedia, then
scroll to Inbox and select by pressing
• You are now in the inbox. indicates a read message,
while indicates an unread message
• Select the desired message and press to read
• To return to the main menu press
While playing you can perform the following tasks
• Press to select Pause. When the message has stopped,
you can press to select Play and resume playing the
message starting with the currently displayed page.
Alternatively, press to scroll to the page you want to
view and then press to select Play and resume playing
the message starting with that page
• Press to select Stop
When your mobile finishes playing the entire message, you can
do the following
• From the message’s last page press to replay the last
page. If you want to replay the other pages, you must return
to the first page using and then press to start
• Press to select Option, then select
Reply Reply to the media message
Delete Delete the media message
Call Call the sender of the media message, or dial a phone
number in the contents of the message. Scroll to the desired
number and press to dial
Page 47

74 75
Multimedia
Delete
You can delete messages saved in your Inbox, Sent Items,
Drafts or All.
Settings
Your O2X1b is already set up to send and receive media
messages. If you’re unable to send media messages, then
please contact O2Customer Service.
Sent Items
In the Sent Items you can view all the media messages that you
have previously sent.
• In the Messaging menu, select Multimedia, then scroll to
Sent Items and select by pressing
• Scroll to the desired message record
• Press to read the message
Drafts
This option allows you to preserve message drafts that you
have saved.
• In the Messaging menu, select Multimedia, then scroll
to Drafts and select by pressing
• Scroll to the desired message record
Then you can
• Press to select Option and then select
Delete Delete the message
Delete All Delete all messages in the drafts folder
• Press to directly edit the contents of the message
Page 48

77
Camera
76
Take photos using your mobile’s integrated camera, and then
set it as your wallpaper for your display’s standby screen, or
send to others in a media message.
• In the standby screen, press to select Camera and enter
directly into the preview mode
Alternatively, in the main menu, scroll to Camera and
press to select.
• You can now view your subject through
the viewfinder
• By pressing again a title bar will appear at
the top of your screen. From here
you can see the following
Number of images The amount of image space you still
have available
Mode Indicates the mode you are currently in. For more
info see page 77
Quality Indicates the resolution of your photo from 1 to 3
stars. For more info see page 77
Camera
Camera settings
Before you take your picture you can amend the camera settings.
• Press to select Option
• In the camera setting screen select
Quality
Select to set the desired resolution quality for your photograph.
Select from High, Medium or Low.
Mode
Amend the mode to suit the light conditions of your environment
in which you are taking the picture. Your camera will then adjust
automatically in order for you to take the best quality pictures.
Select between Automatic, Indoor, Outdoor and Night.
Images
View the images you have saved.
Memory
View the amount of memory remaining for storing photos.
Page 49

79
Camera
78
Managing your pictures
• After you’ve saved your photo you‘ll be presented with
the Store Options screen. From here you can choose from
the following
Send Send this photo to someone as a media message. You
can also send a media message by entering Messaging –
Multimedia. For further information on Media Messaging go
to page 66
Delete Delete the image
Images Shows the image, the size of your image file and the
date it was captured on
Rename Give your photo a new file name
Save to contacts Save a photo to one of your contact’s
details. Once completed, when the contact calls you their
photo will appear on the screen
• Scroll to and select Save to Contacts by pressing
• To attach this image to an existing contact scroll to Existing
Contacts and press to select
• Scroll through your list of contacts and press to attach
the image to the highlighted contact
Take a picture
• When your object is in focus, press
to take a picture
Please note
To take a picture of yourself, turn your mobile over and use the
mirror as the viewfinder.
Your photo will then show up on the main display.
• Press to select Save. Your photo will be saved to
Media Centre – Images
• If you are not happy with your photo, press to
select Discard
Please note
• When taking photos, don’t block or touch the camera lens
• Always photograph your object with the source of light
behind you
• Do not shake your mobile when taking photos
• Be sure that the lens is perfectly clean before taking photos.
Use a soft cloth to wipe the lens if it’s not clean
Page 50

81
Camera
80
When completing the contact’s details above, choose Option
from the To Phone screen at anytime and select
Save To save the amended details
Add new field You can add an additional field such as
different telephone numbers, email, home and office address,
company name, department and position
Mobile number Enter the contact’s mobile phone number
Home number Enter the contact’s home phone number
Office number Enter the contact’s office phone number
Other number Enter another number you would like to
save to that contact
Email Enter the contact’s email address
Home address Enter the contact’s home address
• If the contact’s details are not already stored in your mobile,
scroll to New Contact in the Image ID screen and select by
pressing
• You can then complete the following details
Name Select by pressing and then enter the
contact’s name
Other Number To enter their contact number scroll
to Other Number and press to select and then enter
the details
Please note
You can also assign the number to a mobile, office or
home number.
• Scroll to Other Number and then press to select
Option, then select Change Type
• Scroll to either Mobile Number, Home Number, Office
Number or Other Number and select by pressing
• You can then enter the relevant details by following the
instructions in Other number above
Page 51

83
Camera
82
Set as wallpaper
Designates this photo as the wallpaper for the display’s standby
screen. You can also do this by going to Settings – Display –
Wallpaper. For further information on Wallpaper please refer
to page 134.
Details
View the photo’s name, date, resolution and file size.
View your pictures
Pictures that you have previously taken will be saved to
Media Centre – Images. For further information on viewing
your images and the Media Centre go to page 103.
Office address Enter details of the contact’s office
Company Enter the company name
Department Enter details of the department where the
contact works
Position Enter the contact’s position within the company
Note Enter additional details regarding the contact
Groups Assign the contact to a particular group, such as
Colleagues, Family or Friends etc. For further
information on Groups please refer to page 39
Ring ID Select the ringtone that will be played when this
particular contact calls
Delete field Delete a particular field that is not required for
this contact.
Page 52

85
O2Active
84
Escape into O2Active
TM
watch travel find chat shop play listen
Page 53

• Book your next weekend escape with lastminute.com
or ebookers
• Check out the latest films and buy Odeon and Vue
cinema tickets
• Plan your night out with Ents 24, ticketmaster or TimeOut’s
restaurant and bar guide
• Find essential info like train times, taxi numbers,
maps or even the National Lottery results
• Enter competitions and win fantastic prizes every week
87
O2Active
Do more with O2Active
• Bring your mobile to life with full colour pictures
• Get the latest news, sports updates and
celebrity gossip
• Download the latest ringtones and wallpapers
• See who’s topping the charts or making the news
in the music world
86
Page 54

Messaging
Text and Media Alerts
Whatever’s important to you, whether it’s footie scores, the
latest showbiz gossip or the top news story, you can keep bang
up-to-date with O2Text and Media Alerts. You can subscribe
and unsubscribe to alerts in a few easy clicks.
Photocards
Do more than just take a picture. With O2’s
new Photocards service, simply take a photo
with your camera phone and send it as a
picture message to 61234. We’ll then transform
your photo and message into a postcard and
deliver it to any postal address in the UK for
just £1.50, plus the cost of a picture message.
Email
Send and receive emails straight from your mobile. If you don’t
have an email account,
you can easily set one up direct from your mobile with O2 or
BT Yahoo.
89
O2Active
Accessing O2Active* is simple as your O2X1bTMmobile phone
is already set up.
• From the standby screen press to access
O2Active
Your O2X1b will access O2Active and the O2Active icons
homepage will load onto your screen.
• Alternatively, to access O2Active select O2 from the
main menu. You will then be taken to the WAP
service screen
• Then select O2
To close the browser
• Whilst online press and hold
What’s New
Head here for all the latest additions to O2Active, including
games sales and exclusive weekly competitions.
* Terms and conditions apply to O2 Active. GPRS charges apply to all O2 Active
services. Please visit www.o2.co.uk for details. O2 Active is a trademark of O2
Group of companies. Services are handset and network dependent.
One touch and you’re there
88
Page 55

Downloads
Ringtones
Get your favourite tune as a polyphonic
ringtone. You can select from the top ringtones
or simply search by artist or song. Ringtones
cost from £1.50.*
Picture Zone
Personalise your phone with a massive choice
including pictures from FHM, Maxim, Artists
& Bands and the hottest Celebs & Babes.
Wallpapers cost up to £2.50.*
Music sites
The best music sites on O2Active. Ministry of Sound, Dance
Zone, Top 10, the songs and tones recommended by the labels
and everything you need to know about your favourite artists
and bands.
* Standard WAP browsing charges also apply. Terms and conditions apply.
See o2.co.uk/terms
91
O2Active
Chat
Chat with your mates or meet new people, whenever and
wherever†, with O2chat. You can chat 1-to-1 or take your pick
of one of our dedicated chat rooms like the music forum
where you can chat about upcoming gigs or your favourite
artists. You can even post a picture if you can’t decide what to
wear on a night out, with MMS chat! Whether you choose to
use wap, text or MMS chat, you can chat safely and
anonymously, and all of O2’s public forums are moderated
every minute of every day.
Blogging
Meet new people with Blogging. Imagine a world where
everyone has their own newspaper... welcome to the world of
blogs. We’ve teamed up with the folk at 20six.co.uk to bring
their blogs to O2Active so you can chat in a virtual
environment. You can do so safely and anonymously as all O2’s
public forums are monitored 24 hours a day.
† Subject to network coverage.
90
Page 56

The Lab
Find new picture quizzes, polls and other weird and wonderful
things here every week.
Gossip
You’ll hear it here first. And if you can’t get enough celebrity
scandal, sign up for daily alerts with every juicy detail.
Horoscopes
Discover what the stars have to say about your career, finances
and love life from Russell Grant and TimeOut.
Bollywood
Get the best of Bollywood direct to your mobile, including the
top 10 charts, interviews, intrigue and glamour.
Cartoons
Download the latest Garfield or Dilbert cartoon, then send it on.
93
O2Active
Entertainment
Films
Buy Odeon and Vue tickets and get the latest film reviews,
releases and wallpapers.
Magazines
Get your favourite mag on O2Active, from
NME and Glamour to men’s mag’s FHM
and Maxim.
Gigs and Time Out
Make the most of your night in or out – from
music gigs to comedy clubs and from theatre
to TV listings. With the TimeOut guide, you’ll
find the best bars, restaurants and clubs to
match your taste.
92
Download charges and standard WAP browsing charges
apply. Terms and conditions apply. See o2.co.uk/terms
Page 57

News
Breaking News
Direct from the BBC, get coverage of world
events, business, entertainment, weather
and sport – as it happens.
Weather
Be prepared for whatever happens with
local and international weather forecasts.
Sport
What’s hot
If you can’t be at the match, let the match come to you. As
well as sports such as Cricket, Football, Rugby and Formula 1,
you can find out the latest news in the world of Extreme
sports such as Skiing, Snowboarding and Skateboarding.
Live Headlines & News
Keep in touch with the latest results as and when they
happen plus catch all the day’s sports news and reviews with
full-colour pictures.
Betting
Feeling flush? Then place a bet with Bet2Go on O2Active.
We’ve got all the leading bookmakers.
Alerts & Downloads
As well as the latest news and results, you can also get sport
wallpapers, ringtones and alerts sent to your phone.
95
O2Active
94
Page 58

Gigs & Events
If it’s live and it’s happening near you, you’ll
know about it. You can even get Ministry
of Sound club listings on your mobile.
Shazam
If you hear a track and want to know the
name of it, Shazam can text it to you.
O2Extras
Free & Exclusive club for O2customers with loads of new
offers, competitions and prizes every month, including
• Free polyphonic ringtone* when you join
• Free game* when you join
• Calendar-related, topical content
• Top 50 ringtones from just £1.50* each
* Standard WAP browsing charges apply. See o2.co.uk/extras for more details.
97
O2Active
Music
Ringtones
If you’re into music then get into O2Active. You can download
your favourite tune as a polyphonic ringtone.
Artists & Bands
Find out all you need to know about your favourite artists and
check out their latest albums, lyrics and biographies. You can
also add their pictures to your mobile.
News & Gossip
Get the stories and pictures behind the songs and find out
which artists are making the news.
Charts
Look up the latest weekly singles and album
charts or get them texted to you every week.
96
Page 59

National Lottery
Look up the winning numbers wherever you are.*
Thomson Local Directory
Quickly find the phone numbers you need while you’re
on the move – from cabs and fast food to restaurants
and shops.
lastminute.com
Make holiday plans, gift purchases, dinner
reservations and more using your mobile
with lastminute.com and O2Active.
My WAP
Impress your friends with your own WAP site. It’s so easy
to set up from your mobile. Organising a night out? Update
your WAP site with all the info for your friends to access.
99
O2Active
Info & Travel
Shopping
Shop till you drop, (minus the queues) on O2Active with
CD WOW!, Dixons, Argos, WH Smith, John Lewis and GAME.
It’s just as safe as buying stuff on the Internet.
Train Times
Check train times and get updates wherever you are.*
TimeOut City Guides
Access information on the top ten European
cities, including the best places to stay, eat,
drink and party.
Maps & Routes
Find your way around by car, bike or foot with full-colour route
and walking maps.
ebookers
Buy bargain flights from your mobile.
98
* Subject to network coverage.* Within O2 network coverage.
Page 60

101
Games
• Scroll to
Monkey Mayhem and press
• Press and to scroll to Help, Exit, New Game,
Top Record or Option and press
Keys
To go up
To go down
To go right
To go left
To dig a hole
To enter the game
To exit the game
100
Games
There are two games to play on your O2X1b.
• In the main menu, scroll to Games and select
by pressing
Please note
Your O2X1b does not support downloadable Java games.
Monkey Mayhem
Monkey Mayhem is a platform game. You have to collect fruit
in each level and avoid the monkeys who are out to get you.
The game is divided into five levels. You have three lives during
the game period. A life will be lost whenever you collide with
a monkey. Dig a hole to avoid a monkey. When no lives are left
or the time is up, the game will be over. You should collect all
the fruit or get a key to pass the current level in the specified
time. Once you have collected all of the fruit a key appears.
Collect the key, open the door and escape to the next level.
Good luck!
Page 61

102
Eda Mouse
Eda Mouse is an easy, intellectual game with 8 levels. You have
to make Eda collect 3 fruits which belong to the same type
e.g. apples, then launch them to eliminate the falling fruits
from above before they all come down on Eda.
• Scroll to Eda Mouse and press
• Press and to scroll to New Game, Top Record,
Help, Sound or Exit and press
Keys
To go right
To go left
To launch fruit
To enter the game
To exit the game
Page 62

103
The Media Centre stores all the images, photos, ringtones
and wallpapers you have either taken, downloaded
or received.
• In the main menu, scroll to Media Centre and
select by pressing
Then select
Images
The image library contains all the images and photos you
have saved.
• Scroll to Images and press
When you enter this menu the most recently saved images
will be displayed as thumbnails (small miniature versions of
the photos you have taken), and the top of the screen will
display the file name of the currently highlighted thumbnail.
The size and date of the image will also be displayed on the
right of the thumbnail.
Media Centre
Page 63

105
Media Centre
104
Set as wallpaper
Designates this image as the wallpaper for the display’s
standby screen. You can also do this by going to Settings –
Display – Wallpaper. For further information on Wallpaper
please refer to page 134.
Delete
Delete the image stored.
Delete all
Delete all the images saved in Media Centre – Images.
Details
Select to view the name and size of the image. It will also
detail the date on which the image was saved.
Ringtones
Change the ringtone on your mobile and even
assign a ringtone to one of your contacts so
you’ll know who is calling just by the ringtone.
• Scroll to Ringtones and press
• Scroll through the ringtones available
• Press and scroll through the images previewed
and press to view fully
Managing your images
To manage your images select Option by pressing , and
choose from the following options
Send
Lets you send your image to someone else in a media message.
You can also send a media message by entering Messaging –
Multimedia. For further information on Media Messaging go to
page 66.
Rename
Select to give your image a new file name.
Save to contacts
Assign the image to one of your contacts. When the contact
calls you the assigned image will appear on your display. For
further information on saving an image to one of your contacts
please refer to page 40.
Page 64

107
Media Centre
106
Wallpaper
Change the wallpaper on your mobile’s display. Choose from
the list of preset wallpapers or one you have downloaded or
received in a media message.
• Scroll to Wallpaper and press
• Scroll through the list of wallpapers and press
to view
Managing your wallpapers
• Press to select Option, then select
Set to wallpaper
Scroll through the wallpapers available and select one.
This will then show on your standby screen.
Details
This will give you details of your selected wallpaper.
Managing your ringtones
• Highlight one of the ringtones available and press to
select Option, and choose from one of the following options
Default tone
Select your preferred ringtone and set it as your mobile’s
default ringtone.
Save to contacts
You can assign the ringtone to one of your contacts, just
like images and wallpaper. When your contact calls you the
assigned ringtone will sound. Please refer to page 39 for
more information.
Details
View the name and size of the ringtone file. It will also detail
whether the ringtone is pre-defined – supplied already on
your mobile.
Page 65

108
Delete all
Delete all the images, ringtones and wallpapers you
have saved.
Memory
View the remaining space available on your mobile.
Page 66

109
Tools
Other clever things your mobile can do for you.
• In the main menu scroll to
Tools and select by pressing
O2
• Select O2 if you are on Pay & Go to access a list of useful
numbers and services
Please note
O2 is only available to Pay & Go customers. If you are on a Pay
Monthly calling plan your first menu option within Tools is
Bluetooth (please see page 110).
Tools
Page 67

111
Tools
110
Making calls using Bluetooth
• Dial your number to make a call and press
• To end your call press
Short-cuts to using Bluetooth
• Check your mobile and headset are paired together
(see page 110)
• Make a long press on the 0 key to switch Bluetooth on and
connect to your headset
• To switch Bluetooth off and disconnect from your headset
make a long press on the 0 key
Please note
By pressing the 0 key you will connect to the last Bluetooth
device you were previously connected to. The device name
will be at the top of the devices list.
Bluetooth®*
• Switch on your Bluetooth headset once charged and put it
into Pairing mode (refer to headset info). Pairing mode is
the process where a headset and phone talk to each other
before connecting
• Scroll to Bluetooth and press
• Select Turn o n
• After prompt Search for Bluetooth devices
select Ye s. The O2X1b will find headsets in
pairing mode
• Once you see your headset in the list select it
by pressing and enter the security code
of the headset (refer to headset info)
1. 2. 3.
4.
* The Bluetooth logo appears on the side of O2 X1b using the permission granted
by the Bluetooth SIG reference B02196 UM.
Page 68

113
Tools
112
Tools
Alarm
Set an alarm as a wake-up call or just as a
reminder for things to do.
• Scroll to Alarm and press
• Select the alarm you wish to set and activate
and press
Please note
• You can also rename the alarm. Scroll to the
alarm you wish to rename and press to
select Rename and follow the prompts
• If you activate the alarm feature, when the specified
date and time arrive, your mobile will sound the alarm,
even if it is switched off
Set an alarm
• To turn the alarm on, press , scroll to On
and press to save
Then, use the following steps to complete the alarm settings
Time
Enter the time when an alarm will go off
Battery life
• Bluetooth will affect the battery life of your
mobile when switched on
• Make a long press on the 0 key to switch
Bluetooth off
Bluetooth standard/profiles
• Your O2X1b mobile supports the transfer of
speech over Bluetooth only
Page 69

115
Tools
114
Alarm tone
To set the ringtone for the alarm
• Press to set the alarm tone
• Scroll through the options available and press
• Once complete press to
Save the Alarm settings.
To confirm that the alarm is set will appear in the
standby screen
Please note
When the alarm rings, there are two ways to turn it off
• Press or . Your alarm will not sound until the next
scheduled time
• Press and select Snooze. The alarm will ring again
minutes later
Frequency
Set how often the alarm sounds
• Press to enter
Frequency
• Use to set the alarm mode and press to confirm
Once Alarm will go off only once
Daily Alarm will go off every day at the specified time
Weekday Alarm will go off Monday through Friday. It will not
go off on weekends
Time duration
To set the length of time the alarm will sound
• Press to enter Time Duration
• Scroll through the options available and press
Page 70

117
Tools
116
Calendar
You can use the calendar to set up forthcoming events such
as a meeting, an appointment, or a friend’s birthday.
The calendar will also remind you about events you have
previously scheduled.
• Scroll to Calendar and press
• When you open the calendar, the current date will
be highlighted
Please note
If you have not set the current time and date on your mobile,
go to Settings – Date & Time and set.
World clock
If, during travel, you move between time zones, your mobile
will automatically adjust the time displayed on the screen so
that you always have access to accurate local time.
Please note
If you have not set the current time and date on your mobile,
go to Settings – Date & Time and set.
• Scroll to World Clock and select by pressing
On The time displayed on your mobile will be reset
automatically according to the local network operator’s time
zone prompts
Off Your mobile will display the time you set even if you travel
into other time zones. Your mobile will ignore time zone
prompts issued by the local network operator
Confirm First If you select this option your mobile will ask for
your confirmation before it resets the time
Page 71

119
Tools
118
End date
Enter the date when the event is due to finish
End time
Enter a time for when the event is due to finish
Reminder
You can set a reminder so that the alarm will sound from
five minutes up to one day or not at all, after the
scheduled time originally set for the event
• Press and to scroll through the options available
Repeat
Choose whether the memo will regularly remind you
about the event after the scheduled date. Choose
between None, Daily, Weekly, Monthly or Yearly
• Press and to scroll through the options available
Location
Enter a location for the event
• Press , then enter the location and press to save
To set a memo
• In the calendar screen, press to move
the red box to the date where you wish to
create a memo
• When the desired date is highlighted, press , then select
Option by pressing to enter the calendar menu. Scroll
to Add and press to select and open the memo editor
• In the memo editor screen, scroll to the data field you wish
to edit
You can enter data in the following fields
Subject
Enter a name for the event associated with the memo.
• Press to enter Subject and then enter the name
Start date
Change the memo’s assigned date by pressing the
appropriate number keys
Start time
Enter a time for the event associated with the memo by
using the appropriate number keys
Page 72

121
Tools
120
• Press to select Back, to return to the Calendar menu
then press to select Option and choose from the
following options
Add Add a new memo
Go to today Go direct to today’s date
Delete after Select whether to delete the memo after
1 week, 2 weeks or 1 month. Alternatively, select None to
keep the memo detailed in your calendar
Delete all Delete all existing memos
• Press twice to select Back and return to the Calendar
screen. The dates that already contain memos will now be
marked by a yellow box
Attendees
Enter the names of all who are due to attend the event
• Press , then enter the attendees and press to save
Memo
Record any notes about the event associated with
the memo
• Press , then enter any memos associated with the event
and press to save
• After entering the data in each of the fields, press
to select Save and save the memo to that date
You can then perform the following tasks
• Press to select Option and select whether to Edit or
Delete the highlighted memo or Add a new memo. You
call also select Send vCalendar to send the event details to
someone else in a text message
• Press to view the details of the highlighted memo. Then
press to select Option and choose whether to Edit or
Delete the memo, or Send vCalendar
Page 73

123
Tools
122
Currency converter
• Scroll to Currency Converter and press
Once you enter the currency converter screen, the default
currencies will be displayed.
Step one
• To set the currencies for conversion, select Option and
select either Currency 1 (to set the currency at the
top of the screen) or Currency 2 (to set the currency
at the bottom of the screen), then press to confirm
• After selecting a currency from the list, press
Calculator
Allows you to use your keypad as a calculator.
• Select Calculator by pressing to open the
calculator screen
• Use the keypad to type
in the numbers you wish
to calculate
• Use to perform
the mathematical
operations on the screen
• Press * to enter a decimal point
• Once completed press to select =
Please note
• You can enter numbers up to a maximum of 8 digits
in length
• If you make a mistake press to delete
Entered numbers
and calculation
results appear in
this field
Page 74

125
Tools
124
Step three
• Return to the currency converter screen and select one of
the currencies
• Enter an amount that you wish to convert into the other
currency. The amounts can be up to six digits long
Step four
• Press . The converted amount will appear in the field for
the other currency
Step two
• To set the exchange rate, select Option and then
Rate Setting
• Enter the rate from converting between currency 1 and
currency 2 and press to save
• The conversion calculation result will be displayed at the
bottom of the screen
Please note
• The calculation can provide precision up to two
decimal places
• The exchange rate field can accommodate a maximum
of six digits (including decimal digits)
• Press * to enter a decimal point
Page 75

126
Stop watch
• Scroll to Stop Watch and press
• Press to start the stopwatch
• While the stopwatch is running, you can press
to select Split and save up to 20 elapsed
times (such as in a race). The display will show
the saved times in the lower part of the screen
• Press to halt the stopwatch
• Once the stopwatch has stopped, select Reset by pressing
to zero the stopwatch
Please note
Pressing to select Back while the stopwatch is running
will bring up the Quit? warning message although the
stopwatch will continue to run. Selecting Yes will stop the
stopwatch and No will return to the timer screen.
Page 76

127
Settings
The settings menu is used to set basic parameters for your
mobile such as time and date, profiles, security, network and
call settings.
• In the main menu scroll to
Settings and press
Date and time
You can set the time and date, as well as the format
in which the time and date will be displayed on the
start up screen.
• Select Date & Time by pressing
Date
Scroll to Date and enter the current date which will be
displayed on the standby screen and calendar.
Time
Scroll to Time and enter the current time you wish to display
on the standby screen.
Settings
Page 77

129
Settings
128
Normal
This is the default profile. Once activated the display’s status
bar will show the icon.
Meeting
The options in this profile have been preset to suit a meeting
environment e.g. no audible ringtone or keypad tones. Once
activated the display’s status bar will show .
Silent
The options in this profile have been preset to suit
environments where you need to be discreet with your mobile
e.g. no audible ringtone or keypad tones. Once activated the
display’s status bar will show .
Outdoors
The options in this profile have been preset to suit an outdoor
activity e.g. the highest volume ringtone or activation of both
ringtone and vibrating alerts. Once activated the display’s
status bar will show .
Format
Scroll to Format and decide the format in which the time and
date will appear on the standby screen.
• To amend the format press and
• Once completed press to save
Profiles
Change the settings that determine how your mobile alerts
you to an incoming call, in a few simple clicks.
• Scroll to Profiles and press
• Press and scroll to the profile that best suits the
environment you are in
• Then press to activate
Choose from the following
Page 78

131
Settings
130
Adjust the settings for each of the profiles to suit a particular
environment.
• Scroll to the desired profile and press to select Edit
Then select one of the available options
Vibrate
Scroll through the options available listed below and press
Ring only
Vibrate only
Ring and vibrate
Vibrate then ring
Ringtone
Choose from a selection of ringtones. Scroll to your preferred
ringtone and press .
Please note
You can also download your favourite tunes and save them
as your ringtone from O2Active. Please refer to page 91 for
more information.
Headset
This profile is only active when the headset is attached to your
mobile. Once activated the display’s status bar will show .
Personal
You can use this profile as a group of custom settings, and
rename the profile if desired. Once activated the display’s
status bar will show .
You can also rename this profile so that the name you choose
will appear on the standby screen. Please refer to Rename on
page 133.
Page 79

133
Settings
132
Answer mode
• Use to scroll between the options available and press
. Choose between
Send key Allows incoming calls to be answered only by
pressing
Any key Allows incoming calls to be answered by pressing
any key except , which is used to reject incoming calls
Rename
Allows you to provide a new name for the profile (only
available for the personal profile).
Factory reset
To return all settings to the original factory settings.
Please note
The restore setting requires a password. The default for this
is 1234.
Message tone
Select how your mobile alerts you when you receive
a message.
• Scroll through the options available and press
Calendar tone
Choose a ringtone for the alarms set for events or reminders
in your calendar.
• Scroll through the options available and press
Keypad tone
Determines whether keypad tones are played when keys
are pressed.
• Scroll to On or Off and press to select
Ring volume
• Press to select, then press to adjust
the ringtone volume or mute the ringtone
• Press to confirm
Page 80

135
Settings
134
Wallpaper
• Scroll through the preset wallpapers available and press
to view
• To save the wallpaper currently in view press or press
to select Back and choose another wallpaper
Photo
• Scroll through the photos that you have taken or received
and press to view
• To save the photo as your wallpaper press or press
to select Back and choose another photo
Welcome message
Choose the photo, wallpaper or message that will be displayed
when your mobile is turned on.
• Scroll to Welcome Message and press
Then choose from one of the following options
Display
Adjust your mobile’s display settings including the welcome
animation, wallpaper and more...
• Scroll to Display and press
• Then select the following options
Wallpaper
Your mobile says a lot about you so ensure you choose
the wallpaper for your display carefully. You can choose from
the list available or even select an image that you have taken
with your mobile’s built-in camera, downloaded from O2Active
or received from friends in a media message.
• Scroll to Wallpaper and press
• Select either Wallpaper or Photo to choose between one
of the preset wallpapers or an image that you have saved
You can also download celebrity photos, cartoons and other
graphics from O2Active in a few easy clicks and give your
mobile an individual look. Check out page 91 for more info.
Page 81

137
Settings
136
Text
• Scroll to Text and press to select Edit
• In the Text screen, enter your welcome message and
press
• Then choose the ringtone to accompany your message and
press
Off
Select to cancel all welcome messages.
Banner
Enter the message that will be displayed
permanently on your screen. You can insert your
name so that you can identify your mobile easily.
• Scroll to Banner and press
• Insert your message and press to save
• Then return to the standby screen and view your banner
message on the display
Wallpaper
• Scroll to Wallpaper and press to select Edit. Scroll
through the preset wallpapers available
• Press to view and then press to save
• Then scroll through the ringtones available that will
accompany your wallpaper greeting when you turn your
mobile on. Press
Photo
Select one of the photos you have taken or received as your
welcome greeting as well as a ringtone accompaniment.
• Scroll to Photo and press to select Edit
• Scroll through the photos available and press to view
and then press
• Then scroll through the ringtones available that will
accompany your photo when you turn your mobile on.
Press to select and save
Page 82

139
Settings
138
Audio
This menu allows you to set various sounds that your mobile
uses, such as ringtones, message tones, alarm tones and
calendar tones as well as altering the speech volume and
ring volume.
• Scroll to Audio and press . Then select
from the options available
Ringtone
Message tone
Alarm tone
Calendar tone
Keypad tone
Ring volume
Speech volume
Please note
Some of the options provided in this menu and the Profiles
menu are identical. Please refer to Profiles on page 128.
Contrast
• Scroll to Contrast and press
• Adjust the contrast of the screen’s display
using and press to confirm
Brightness
• Scroll to Brightness and select by
pressing
• Adjust the brightness by pressing
• Press to confirm
Page 83

141
Settings
140
Minute minder
Once this option is activated, your mobile will emit a beep
once every minute during a call.
• Select On or Off and press
Show number
You can decide whether or not to display your phone number
on the recipient's phone when you make a call.
• Scroll through the options listed below and press
On The recipient’s phone will display your phone number
Off Your phone number will not be shown on the
recipient’s phone
Preset Whether your phone number will be displayed on a
recipient’s phone will be determined by the default set by O
2
Please note
If this feature is turned off, you may not be able to make
phone calls in certain countries, such as Singapore and China.
Call settings
• Scroll to Call Settings and press
• Then select from one of the following options
Answer mode
Choose how to answer an incoming call from the list below
and press to confirm.
Send key Allows incoming calls to be answered only by
pressing
Any key Allows incoming calls to be answered by pressing any
key accept , which is used to reject incoming calls
Connect alert
Activating this feature enables your mobile to provide
a ringtone or vibrating alert, or flash the backlighting when the
recipient of a call has answered.
• Scroll to highlight either Ringtone, Vibrate, Flash or Off
and press to confirm
Page 84

143
Settings
142
Intl. except home If activated, your mobile can only be used
to dial local calls and calls to your home country from abroad.
Other international calls will be barred
All incoming Rejects all incoming calls
Incoming when roaming If you are in another country (using
roaming), activating this option will cause your mobile to reject
all incoming calls
Cancel all Cancels all call barring settings. You must enter
your password in order to cancel these settings
Change password To change your password
Call waiting
†
If there is an incoming call when you are in the middle
of another call, the screen will display the number of the
incoming call and call waiting message to alert you.
• Scroll to On or Off and press to confirm
your selection
†
Available to Pay Monthly customers only.
Call divert*
Forward incoming calls to another designated phone number
or your voicemail.
Forward all Forwards all incoming calls. After the Forward all
mode is activated will be displayed on the standby screen
When busy Forwards calls when you are on another call
No reply Forwards calls when you do not answer
Not reachable Diverts calls when your mobile is turned off or
outside network coverage
Cancel all To cancel all call forward settings
Call barring
†
You can lock your mobile to reject incoming calls or bar
outgoing calls, domestic or international. Call barring is a
password protected network service, and details should be
acquired from O2Customer Service.
All outgoing Blocks dialling of any calls from your mobile
Intl. out If activated no international calls can be made from
your mobile
* Pay & Go customers can only divert to Voicemail 901.
Page 85

145
Settings
144
Please note
If the PIN2 code is entered incorrectly three consecutive times,
the PIN2 code will be locked down. You will need the PUK2
code to unlock the PIN2 code. Contact Customer Service to
obtain the PUK2 code.
Network*
Network mode
You can choose whether the network selection mode that your
mobile uses when turned on is automatic or manual.
• Scroll to your preferred choice and press
Automatic When outside the coverage of your regular
network, your mobile will automatically search for usable
networks
Manual When outside the coverage of your regular network,
your mobile will list available networks and allow you
to choose
* Only available whilst abroad with your O2 X1b mobile.
Auto redial
If there is no answer at a number you have dialled,
your mobile will automatically redial.
• Scroll to On or Off and press
Fixed dialling number*
After this feature is activated, your mobile will only be able to
dial numbers on the fixed dial number list. If a number is not on
the list, calls cannot be made to this number.
Before activating the fixed dial number feature
• Select View, then Option and select Add to create a fixed
dial number list
• Enter the PIN2 code, and then add a new number to your
fixed dial number list
After creating the list, you can view, edit and delete numbers
in the list.
• To activate, scroll to On and press
* Available to Pay Monthly customers only.
Page 86

146 147
Settings
Service tone
You can set your service tone to on/off.
On Your Service tone will play when your mobile is switched on
Off Your Service tone has been switched off
Security
Prevent unauthorised use of your mobile by using
a PIN code, phone password and SIM card lock.
Please note
To protect your mobile, the Security menu requires you to
enter a handset code before you can access the menu and set
the options. The default handset code is 1234. To change the
handset code, please refer to the Phone Lock option.
Available list
This will show a list of operators available for you to select.
• Scroll through the options available and press
Band setting
According to your requirements, you can set an appropriate
band in the GSM network system.
• Scroll through the band settings available and press
Connection
Set your mobile to search for a GPRS / GSM network when
it is turned on.
GPRS & GSM When it is turned on, your mobile will search
for available GPRS and GSM networks
GSM only When it is turned on, your mobile will search only
for a GSM network
Page 87

149
Settings
148
Please note
If the PIN code is entered incorrectly three times your mobile
will automatically disable. The screen will display the messages
PIN blocked or Enter PUK (Personal Unblocking Key). Don’t try
to enter your PIN again. Contact O2Customer Service for a
PUK code to unblock your mobile.
Phone lock
Select to activate/deactivate or change your mobile’s startup
password which prevents unauthorised use of your mobile.
Once activated, your mobile will be locked down when turned
on unless this password is entered correctly. If an incorrect
password is entered, your mobile will remain locked down, and
cannot be unlocked even if the SIM card is replaced by another
one. When the mobile is locked, you will only be able to make
emergency calls.
The procedure for setting the phone lock password is the same
as for the PIN1 code and the default password is 1234.
PIN code
A PIN code will prevent unauthorised use of the SIM card.
Unless the correct PIN code is entered when your mobile is
turned on, the SIM card cannot be used, even if it is inserted
in another mobile.
PIN code
Select PIN code to activate/deactivate or change the PIN1 code.
• Select PIN Code and press , then enter your PIN code
and press . The default PIN code is 5555
• To activate/deactivate the PIN1 code, scroll to Set Status
and press . Then scroll to On or Off and press
again to select
• To change your password, scroll to Change Password and
press . Then enter the new code and then confirm the
code when requested
PIN2 code*
Used to change the PIN2 code. The procedure is the same as
for the PIN1 code.
* Available to Pay Monthly customers only.
Page 88

151150
Settings
Screen lock
Once activated, if you don’t perform any tasks for a set period
of time, your mobile will automatically activate the screensaver,
the purpose being to prevent personal information on your
mobile from being viewed by others.
To return to the original screen, after pressing any key, you
must enter the password you set for this feature.
• Scroll to Screen Lock and press to select
• Enter the default screen lock password which has been
preset to 1234 and press
Set status
• To set the screen lock feature, scroll to Set Status
• To turn the screen lock off, scroll to Off and press
• To turn the screen lock on, scroll to On. Before pressing
to save, press to select Edit and select the length
of time your mobile will be active before it locks and
press . Then press again to select On
SIM lock
Use to prevent unauthorised use of your mobile with other SIM
cards. After you activate the SIM lock, only the SIM card present
when the feature was activated will be accepted by the mobile.
Before setting the SIM lock feature, enter the previously set SIM
lock password – the default password is 1234. Your new
password must be between 4 and 8 digits in length.
Please note
Your mobile can recognise up to three different SIM cards. The
first time you enter a new SIM card your mobile will request
the SIM lock password. If entered correctly, the mobile will be
able to recognise the new SIM card and use it normally. The
next time your mobile is turned on with this SIM card inserted,
you will not be asked to enter the SIM lock password again.
Page 89

153152
Settings
Language
You can set the language of your mobile. Select from
the following
Automatic Your mobile will automatically select the language
of the country you are resident it
English Your mobile displays will be in English
Deutsch Your mobile displays will be in German
Factory reset
Restores all of your mobile’s settings to their factory defaults.
152
Change password
• You can leave the password as 1234, however if you
wish to amend, scroll to Change Password and press
• Then enter the new password in the New Code
and Confirmed fields, followed by to save the
new settings
Auto keypad lock
You can set you mobile’s keypad to lock after a certain period
of time. To unlock the keypad you will need to enter the
password. To set the auto keypad lock follow the prompts that
are similar to the screen lock feature.
Page 90

Chapter 5
Don’t panic
In plain English
Trouble shooting
Vital statistics
154 155
Page 91

157156
Don’t panic
Unblocking Key or ‘PUK’ code which you can get from
O
2
Customer Service.
PIN2
PIN2 is a security code that you can obtain by calling O
2
Customer Service.
IMEI
IMEI stands for International Mobile Equipment Identifier and is
a number that’s unique to your mobile. If your mobile is stolen,
the IMEI number will allow us to block it from being used.
WAP
Wireless Application Protocol or WAP allows you to access
information and entertainment services, such as O2Active on
your phone.
In plain English
Roaming
Roaming allows you to move from one base station to another
or from one network to another without affecting the call.
Tri-band
Mobile phones operate on different frequencies in different
countries. A tri-band mobile can switch between three
frequencies e.g. 900 Mhz, 1800 Mhz and 1900 Mhz.
The O2X1b is a tri-band mobile.
SIM card
A SIM is the little gold-plated plastic card that you get from O
2
and which holds the unique data the network needs to identify
your mobile.
PIN*and PUK
Access to use a mobile is most often protected by a code
known as ‘PIN’ – Personal Identification Number. Your SIM
card comes with a default PIN that you can change to any
code you prefer. See page 148 for details. If you forget your
code, or by mistake enter a faulty code three times in a row,
the SIM card will lock. To unlock, you must enter the Personal
* Pay & Go mobiles are not set up with a default PIN code.
Page 92

159158
Don’t panic
Trouble shooting
Why does my mobile not turn on when I press the
key?
The key press has been too short or the mobile has shut down
because the battery power level is too low to make calls.
Recharge the battery fully.
The standby time seems too short. Why is this?
You might have played a lot of games or unintentionally
pressed keys which led to the display lighting up.
My mobile displays ‘Insert SIM’, what does this mean?
You must insert the SIM before you can use the mobile. If it is
already installed, remove and clean the blank area with a dry
cloth, then reinsert.
My mobile displays ‘INVALID SIM’, what does this mean?
The mobile is SIM-locked and will not accept the inserted SIM.
Insert the correct SIM or contact O2Customer Service.
Can’t connect to your Bluetooth headset?
Please ensure that your headset is ON and in ‘pairing mode’.
For further info go to page 110.
GPRS
General Packet Radio System is a service that transmits data to
and from your phone. Charges are based on the amount of
transferred data rather than on airtime.
CSD
A wireless service protocol used for WAP. CSD stands for
Circuit Switched Data. This allows you continuous WAP
connection. You pay for the time spent connected rather than
the amount of data.
URL
Uniform Resource Locator or URL is an address system
used on the Internet. All WAP homepages have a unique
address, allowing browsers to distinguish one from the other.
A WAP URL always starts with the text string: http://wap
followed by the address.
APN
APN stands for Access Point Name.
ISP
ISP stands for Internet Service Provider.
Page 93

161160
Don’t panic
Can I send and receive emails and surf the Mobile
Internet on my mobile?
Yes. Your mobile has WAP capability, which means that you
can access the Mobile Internet from your mobile. For sending
and receiving emails, please contact O2Customer Service.
What is ITAP?
ITAP text input is a predictive text editor that allows you to
type using just one click per letter and saves you time when
writing SMS and text entries.
What type of networks are supported?
Check the technical specifications on pages 145 and 163.
Can I use my mobile inside a car?
Please refer to ’Driving Safety’ on page 171.
How do I clean my mobile if it gets dirty?
See ‘Mobile care’ on page 167.
Can’t re-connect to headset when it is ON once it has
already been working?
Please ensure that the headset is just on and not in
‘pairing mode’.
My mobile displays ‘EMERGENCY ONLY’, what does
this mean?
Your SIM card is not properly installed or configured, or you
are out of network range.
My mobile displays ‘NO NETWORK’, what does
this mean?
You’re outside network range or there is no clear path to
the transmitter. If you’re inside a building, try moving towards
a window.
Some calls are not processed. What is wrong?
A call bar has been set to restrict mobile usage. Check call
barring and cancel as necessary.
Someone else is receiving my calls. What is wrong?
The mobile has been set to forward your calls to another
number. Cancel call forwarding as necessary.
Page 94

163
Don’t panic
162
Vital statistics
Size 102 x 44 x 18mm
Weight 86g
Talktime
• Bluetooth off 3.4 – 5.7
hours
• Bluetooth on 3 – 4.5 hours
Standby time
• Bluetooth off 73 – 161
hours
• Bluetooth on 60 – 115
hours
Display 65k colour screen
(128 x 128 pixels)
Camera CIF camera
Band Tri-band
GPRS Class 10
Bluetooth 1.1 (Voice only)
Accessories
Contact O2Retail for more
accessories.
Personalised features
Personalised profiles
Greeting
Wallpaper
Polyphonic ringtones
Leisure
Access the colour world of
O2Active.
Organising features
Calendar
Alarm
Calculator
World Clock
Currency converter
Stopwatch
My mobile has been lost or stolen. What do I do?
Contact O2Customer Service immediately to bar your mobile
and prevent misuse. If your mobile has been stolen you should
report the incident to the local police.
How do I reset my mobile to factory defaults?
Enter the Settings menu and scroll to Factory reset and
when prompted enter the code.
Page 95

Chapter 6
The important safety bit at the back
Safety information for mobiles
Mobile care
Driving safety
Electronic devices
Other safety guidelines
Cautions
About this guide
164 165
Page 96

167
Safety
166
Mobile care
Never attempt to open the mobile casing. There are no userserviceable parts inside, and you might damage sensitive
electronic circuits and components. Unauthorised disassembly
will void the warranty.
Never leave your mobile in the window of your car or
otherwise expose it to strong sunlight or excessive heat for a
prolonged period of time as this may damage it.
Never handle your mobile with wet hands or expose it to
moisture or liquids of any kind. Continuous changes from a
cold to a warm environment may lead to condensation inside
the mobile, resulting in corrosion and possible damage.
If you pack your mobile in your suitcase during travel, beware
not to damage it. Cramming a suitcase may crack the LCD
display. Remember to switch off your mobile during air travel.
Safety information for mobiles
Read this information
Your O2X1b™ mobile phone has been designed,
manufactured and tested so as not to exceed the limits for
exposure to electromagnetic fields recommended by the
Council of the European Union. These limits are part of
comprehensive guidelines developed by independent scientific
organisations.
European standards provide for the amount of radio frequency
electromagnetic energy absorbed by the body when using
a mobile phone to be measured by reference to the Specific
Absorption Rate (SAR). The SAR limit for the general public
is currently 2 watts per kilogram averaged over 10 grams
of body tissue.
Your O2X1b mobile phone SAR value is 1.09 watts per kilogram.
Page 97

169
Safety
168
• Use only the battery approved by the manufacturer
• Never replace the battery with a non-approved battery
• Never try to open the battery as it contains substances that
might be harmful if swallowed or come into contact with
unprotected skin
• Never short-circuit the battery, as it may overheat
and cause a fire. Keep away from jewellery and other metal
objects
• Never dispose of the battery in a fire. It could explode and
release harmful substances into the environment
• Never dispose of the battery with your regular household
waste. Take it to a hazardous material collection point
• Do not touch the battery terminals
• Caution: Risk of explosion if battery is replaced by an
incorrect type
The charger
• Use only the charger supplied with your mobile
• Never pull the charger cord to release it from the mains –
pull the charger itself
As with all other radio devices, touching the built-in antenna area
during telephone conversation may impair the quality and lead to
shorter standby time due to increased power consumption.
The battery
Your mobile is equipped with a high-performance Li-Ion
battery. Optional battery types may be available, check with
your local retailer. Observe the maintenance guidelines and
your battery should give you a long service life.
• At the beginning of the battery’s life, fully charge and
discharge (let it go flat) three times
• Do not over charge the Li-Ion battery, as this can result in a
reduction in battery performance and life span. The
recommended maximum charge time is 6-8 hours
• Avoid repeated short charging. It is preferable to let the
battery go flat and then recharge it completely
• Avoid charging in strong heat or extreme cold. Ambient
room temperature is preferable. The battery has its optimum
performance in an ambient temperature of
+5 °C to +50 °C
• Don’t store a battery near a fire or heat source
Page 98

171
Safety
170
Driving safety
O2 fully supports the new legislation announced by the
Department for Transport, banning the use of handheld
mobile phones while driving. It is an offence while driving
to hold a mobile or cradle it in your neck, at any point during
the setup, making or taking of a phone call, text message
or any other data related mobile communication. Use of fully
installed car kits are still permitted, as are the use of alternate
hands-free accessories.
In the interest of safety, we would recommend the use of a
cradle while using any form of hands-free accessory. When
driving we recommend that you use voicemail wherever
possible, and that you listen to your messages when you are
not in the car. If you must make a hands-free call when driving
keep it brief.
An airbag inflates with great force. Do not place objects,
including both installed or portable wireless equipment, in
the area over the airbag or in the air bag deployment area.
If in-vehicle wireless equipment is improperly installed and
the air bag inflates, serious injury could result.
WARNING: Failure to follow these instructions may lead
to serious personal injury and possible property damage.
Cleaning and storing
• Your mobile should always be handled with care and
protected from dirt, dust and damp. To avoid scratches,
never place your mobile face down
• If cleaning is necessary, switch the mobile off and wipe
carefully with a soft, slightly damp (not wet) cloth. Use a
cotton swab to clean the camera lens. Allow the mobile to
dry completely before switching it on. Never use solvents for
cleaning
• If you’re not going to use your mobile for some time, fully
charge the battery and store the mobile in a dry place away
from direct sunlight. Your mobile should be switched off
during storage. Recharge every 6 to 12 months
• Never expose your mobile to heat or strong sunlight
• Never expose your mobile to moisture or liquids of
any kind
• Do not paint your mobile or otherwise block the keypad,
microphone or earpiece function, i.e. with stickers
Page 99

173
Safety
172
Electronic devices
Most modern electronic equipment is shielded from RF energy.
However, certain electronic equipment may not be shielded
against the RF signals from your mobile.
Pacemakers
The Health Industry Manufacturers’ Association recommends
that a minimum separation of six (6”) inches be maintained
between a mobile and a pacemaker to avoid potential
interference with the pacemaker. These recommendations are
consistent with the independent research by and
recommendations of Wireless Technology Research.
If you have a pacemaker:
• Always keep your mobile more than six inches from your
pacemaker when it is turned on
• Do not carry your mobile in a breast pocket
• Use the ear opposite the pacemaker to minimise the
potential for interference
• If you have any reason to suspect that interference is taking
place, turn your mobile off immediately
Hearing aids
Some digital mobiles may interfere with some hearing aids. In
the event of such interference, call O2Customer Service to
discuss alternatives.
Other medical devices
If you use any other personal medical device, consult the
manufacturer of your device to determine if they are adequately
shielded from external RF energy. Your physician may be able to
assist you in obtaining this information. Turn your mobile off in
healthcare facilities when any regulations posted in these areas
instruct you to do so. Hospitals or healthcare facilities may be
using equipment that could be sensitive to external RF energy.
Vehicles
RF signals may affect improperly installed or inadequately
shielded electronic systems in motor vehicles. Check with the
manufacturer or its representative regarding your vehicle. You
should also consult the manufacturer of any equipment that
has been added to your vehicle.
Page 100

175
Safety
174
Other safety guidelines
Aircraft
Regulations prohibit using your mobile while in the air. Switch
off your mobile before boarding an aircraft.
Blasting areas
To avoid interfering with blasting operations, turn your mobile
off when in a ‘blasting area’ or in areas posted: ‘Turn off twoway radio.’ Obey all signs and instructions.
Potentially explosive atmospheres
Turn your mobile off when in any area with a potentially
explosive atmosphere and obey all signs and instructions.
Sparks in such areas could cause an explosion or fire resulting
in bodily injury or even death.
Areas with a potentially explosive atmosphere are often, but
not always, clearly marked. They include fuelling areas such as
petrol stations; below deck on boats; fuel or chemical transfer
or storage facilities; vehicles using liquified petroleum gas (such
as propane or butane); areas where the air contains chemicals
or articles, such as grain, dust, or metal powders; and any
other area where you would normally be advised to turn off
your vehicle’s engine.
Posted facilities
Turn your mobile off where posted notices so require.
Magnetic media
Magnetic fields generated by mobile phones may damage data
on magnetic storage media such as credit cards, computer
discs or tapes. Do not place your phone next to such media.
You should never expose your phone to strong magnetic fields
as this may cause temporary malfunction.
 Loading...