

Page 1
Nyx Tracker User Manual
Starscape: speeds up
imaging star trails
Lunar: for imaging the
moon
Stars: the default mode
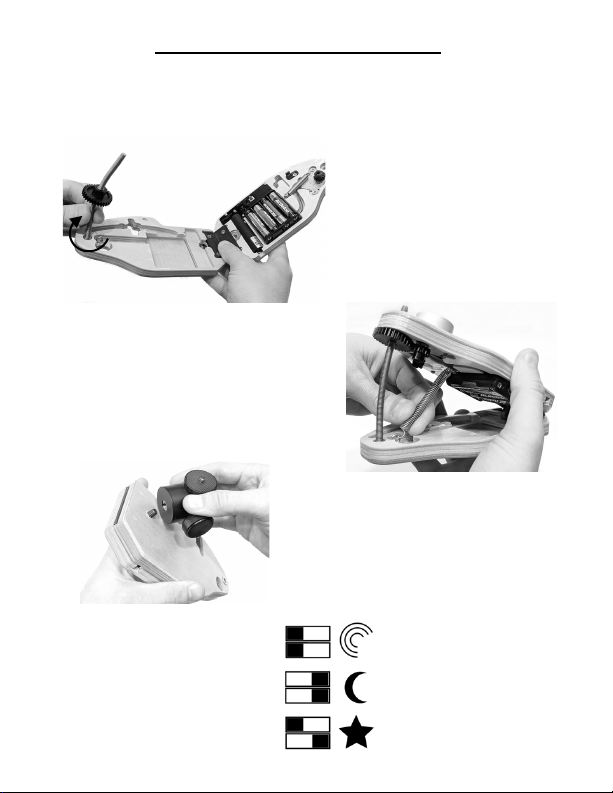
Open your Nyx Tracker like a
book. Insert 4 AAA batteries
and screw the driving rod
into the threaded insert with
the gear hub facing away
from the insert.
Place the hub of the large gear in
the hole next to the small gear.
Make sure it seats well. Attach the
open end of the spring to the
eyebolt.
Screw the ball head onto the
tracker.
Set the N/S hemisphere
toggle to your location
and the speed switches
to your imaging mode.
Congratulations on your Nyx Tracker purchase! In just a few easy
steps you’ll be imaging the night sky.
1
2
3
4
Page 2
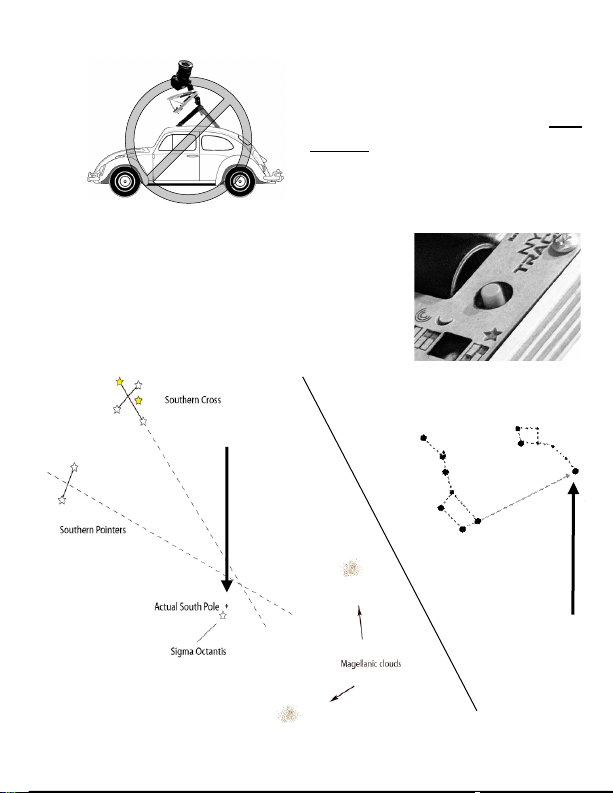
Screw the tracker onto a tripod and
mount your camera to the
ballhead. Place the tripod on firm
ground (not in a building, on a car,
or on a bench).
Activate the laser with the red button
and point it at the celestial pole, near
Sigma Octantis in the southern
hemisphere (left) or Polaris in the
northern hemisphere (right).
Point the camera at the section of the sky you want to image.
Make sure your camera is in focus! A
Bahtinov mask, though not necessary,
helps with this step.
Fine-tune your alignment. Make sure
the laser is aimed at the celestial pole
to within no more than ½ a degree,
roughly half a pinky nail at arm’s
length. The closer the better.
Turn the motor on by pressing the
blue button.
Begin your exposures! Make sure not to disturb the tracker.
• 1600 ISO is a good starting point.
• See the exposure time table on the last page.
• Stop your lens down once or twice for sharper images.
• Shoot in RAW format for best post-processing results.
Postprocess your images. Free stacking software and online
tutorials exist in abundance. Search google or visit an
astrophotography forum such as
reddit.com/r/astrophotography for help!
1°
Southern
Celestial Pole
Northern
Celestial Pole
5
6
7
Page 3
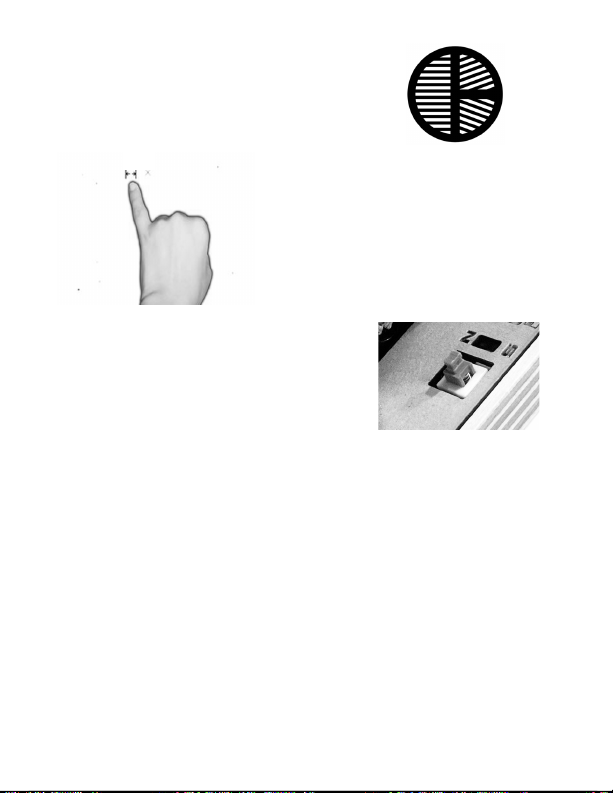
Make sure your camera is in focus! A
Bahtinov mask, though not necessary,
helps with this step.
Fine-tune your alignment. Make sure
the laser is aimed at the celestial pole
to within no more than ½ a degree,
roughly half a pinky nail at arm’s
length. The closer the better.
Turn the motor on by pressing the
blue button.
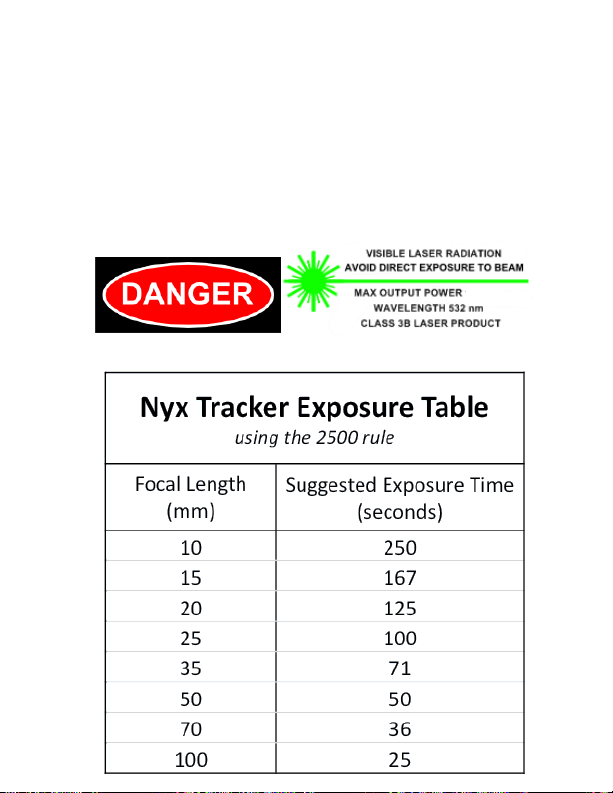
Begin your exposures! Make sure not to disturb the tracker.
• 1600 ISO is a good starting point.
• See the exposure time table on the last page.
• Stop your lens down once or twice for sharper images.
• Shoot in RAW format for best post-processing results.
Postprocess your images. Free stacking software and online
tutorials exist in abundance. Search google or visit an
astrophotography forum such as
reddit.com/r/astrophotography for help!
1°
8
9
10
11
12
Page 4
Check out the video tutorials and tips at
Starscape: speeds up
imaging star trails
Lunar: for imaging the
moon
Stars: the default mode
Open your Nyx Tracker like a
book. Insert 4 AAA batteries
and screw the driving rod
into the threaded insert with
the gear hub facing away
from the insert.
Place the hub of the large gear in
the hole next to the small gear.
Make sure it seats well. Attach the
open end of the spring to the
eyebolt.
Screw the ball head onto the
tracker.
Set the N/S hemisphere
toggle to your location
and the speed switches
to your imaging mode.
5 mW
https://nyxtech.us/pages/tips-tutorials
Enjoy!!
Note: The alignment laser is not designed to operate in
temperatures below freezing. If aligning in very cold weather, keep
the laser warm with a hand warmer!
 Loading...