

Page 1

1
TELCEL
JOIN
User Manual
Page 2

Preface
Please read the following g
u
compliance with the follow
i
Non-compliance may pose da
n
illegal.
The phone is packed with featu
Player, Video Player, Digital C
a
also meets the GSM/GPRS t
international authorities.
We reserves the right to modi
f
content in this manual, i.e. soft
w
that in the actual device. Pleas
e
This guide aims to help you
following icons periodically pres
e
Æ- indicates sequence of proc
e
- presents additional notes
o
- shows further cautionary
2
idelines before using your new pho
n
ng is highly recommended for yo
ger to you and your mobile phone, a
n
res to satisfy your needs such as Phoneb
mera, among others. It is Wi-Fi and Blu
echnical criteria. It is certified by both
y technical specifications without prior n
o
are, images, accessories and more, ma
y
refer to your unit for accuracy.
get started on your new phone. you
w
ent to help you make better use of your d
e
sses
n a topic or alternative options for a feat
u
measures to prevent damage to your mo
b
e. Utmost
ur safety.
d may be
ook, Music
etooth and
local and
tice.Some
vary from
ill find the
vice.
re
ile phone
Page 3
3
1. Getting Started
Switch your Mobile Phone ON / OFF
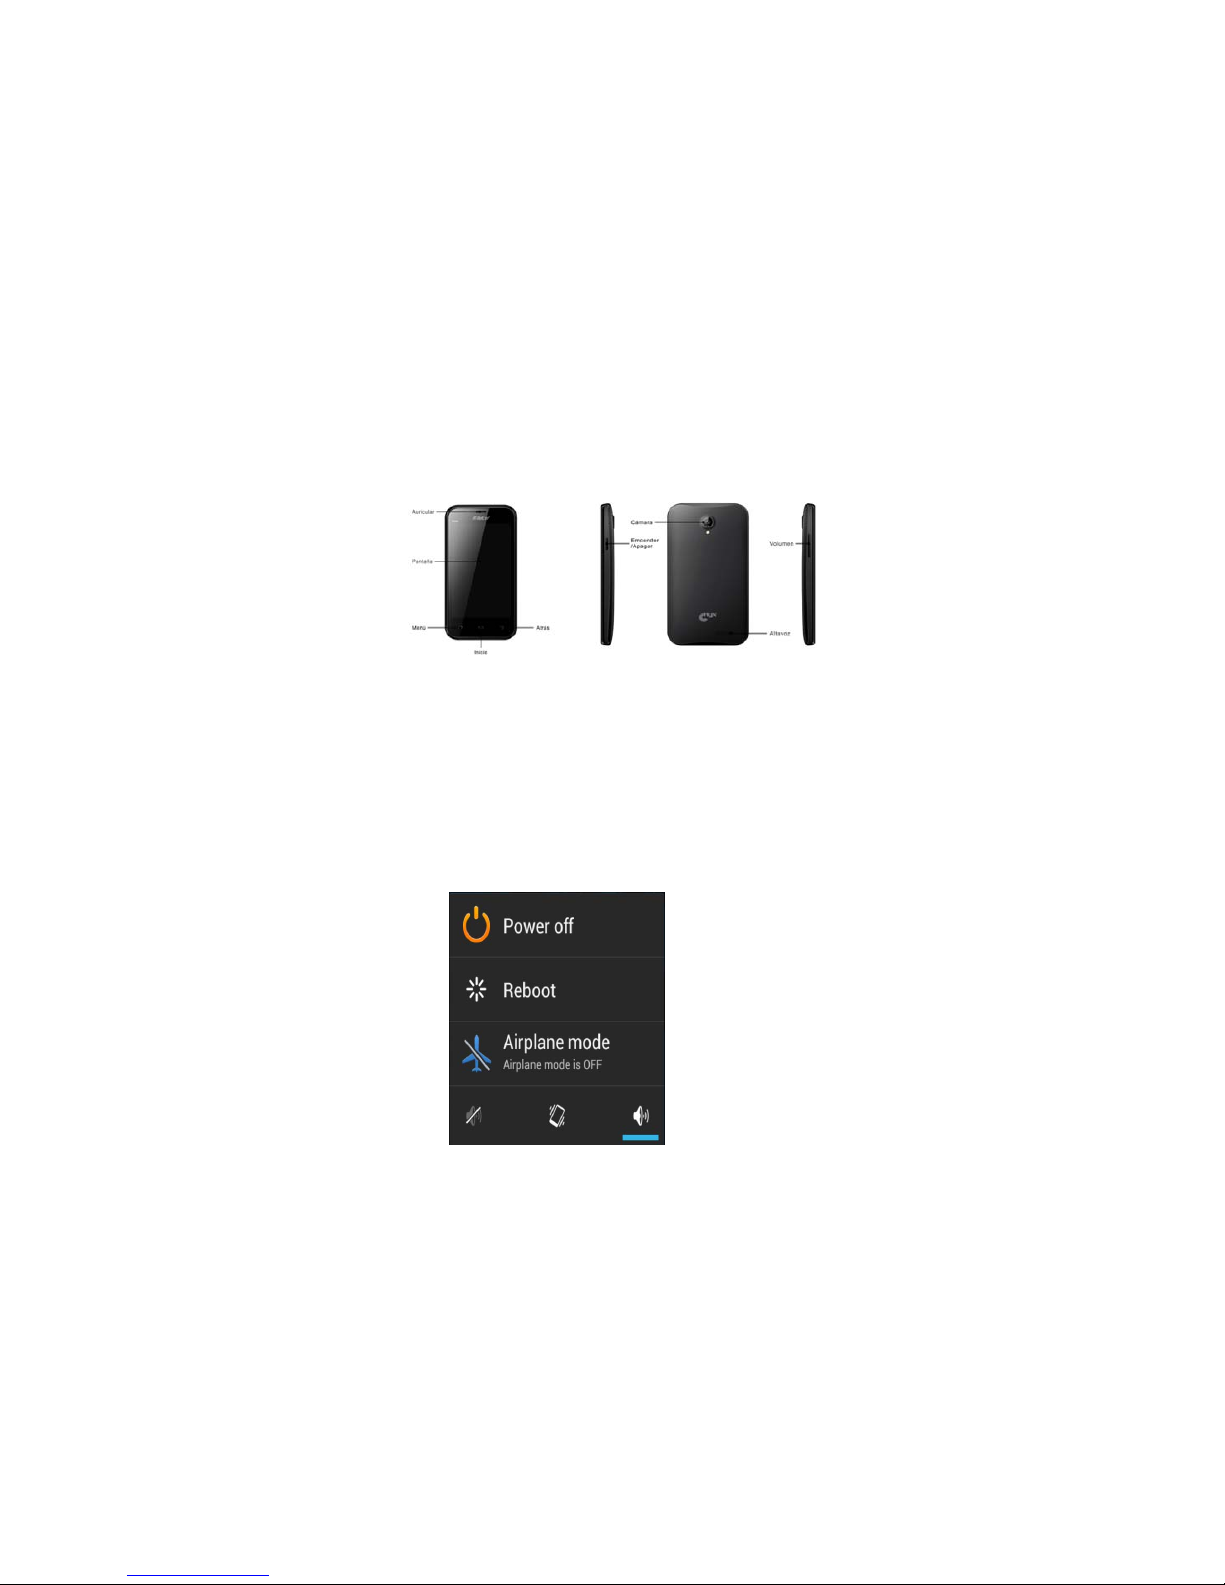
To switch your mobile phone ON, press and hold the Power Key until an animation
appears on the screen. Make sure the battery is charged and inserted properly.
To switch OFF, press and hold the Power Key until a window pops up.
Tap Power Off and the phone will shut down.
Page 4
4
Install / Remove the SIM Card and Battery
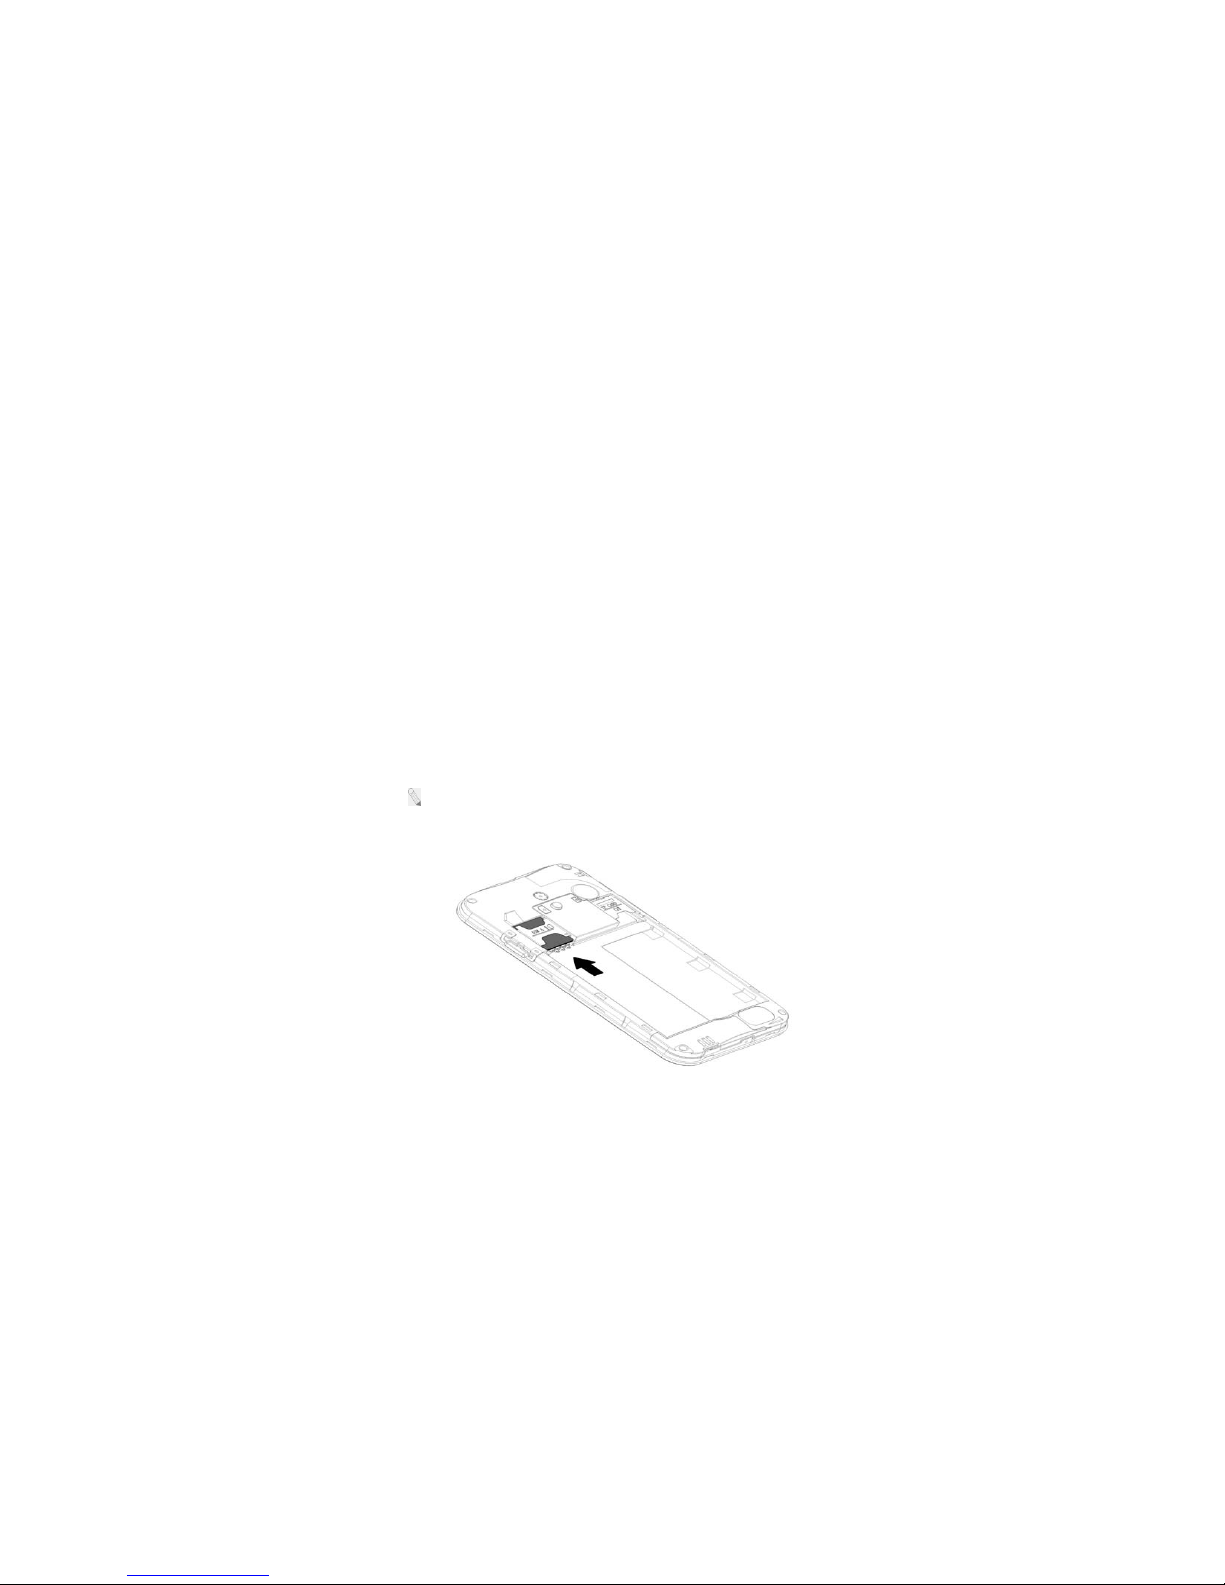
Make sure to switch off the device and disconnect from charger before installing
and removing the SIM card and battery. To install / remove the SIM card and
battery, perform the following:
1. Turn the mobile phone OFF.
2. Snap open the phone’s back cover and pull out the battery.
3. Carefully insert the SIM card into the SIM card slot, making sure
that the card’s gold plate is facing down and in proper alignment
with the phone’s metal contacts.
4. Carefully return the battery into its slot and put the cover back on.
: If the screen displays that the SIM card is locked permanently, please consult
your network operator.
Page 5
5
Install / Remove the Memory Card
The Memory Card is a handy mobile storage device that expands the mobile
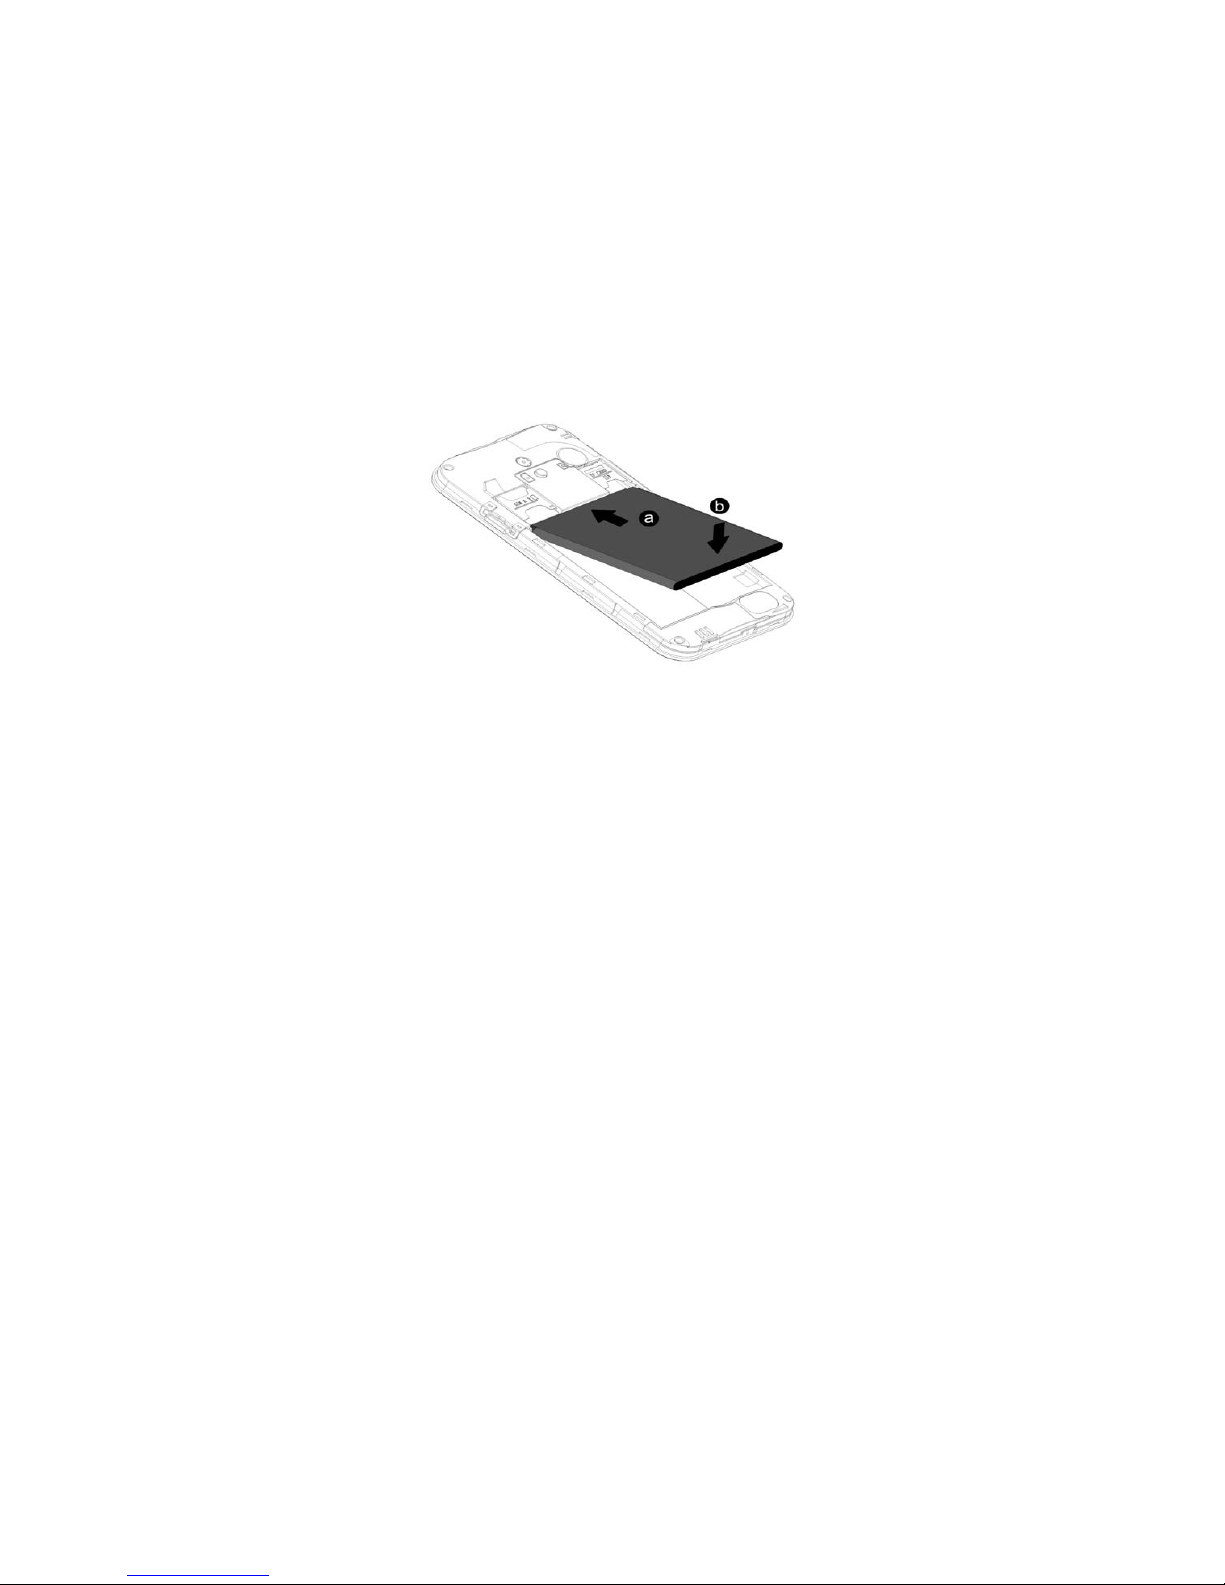
phone’s storage capacity. To install/remove the memory card, perform the
following:
1. Turn the mobile phone OFF.
2. Snap open the phone’s back cover and the SD card lock.
3. Carefully insert the Memory Card into the slot, making sure that the
card’s gold plate is facing down and in proper alignment with the
phone’s metal contacts.
4. Carefully lock the SD card and put the cover back on.
5. To remove, carefully slide the lock and pull the card out of the slot.
Page 6
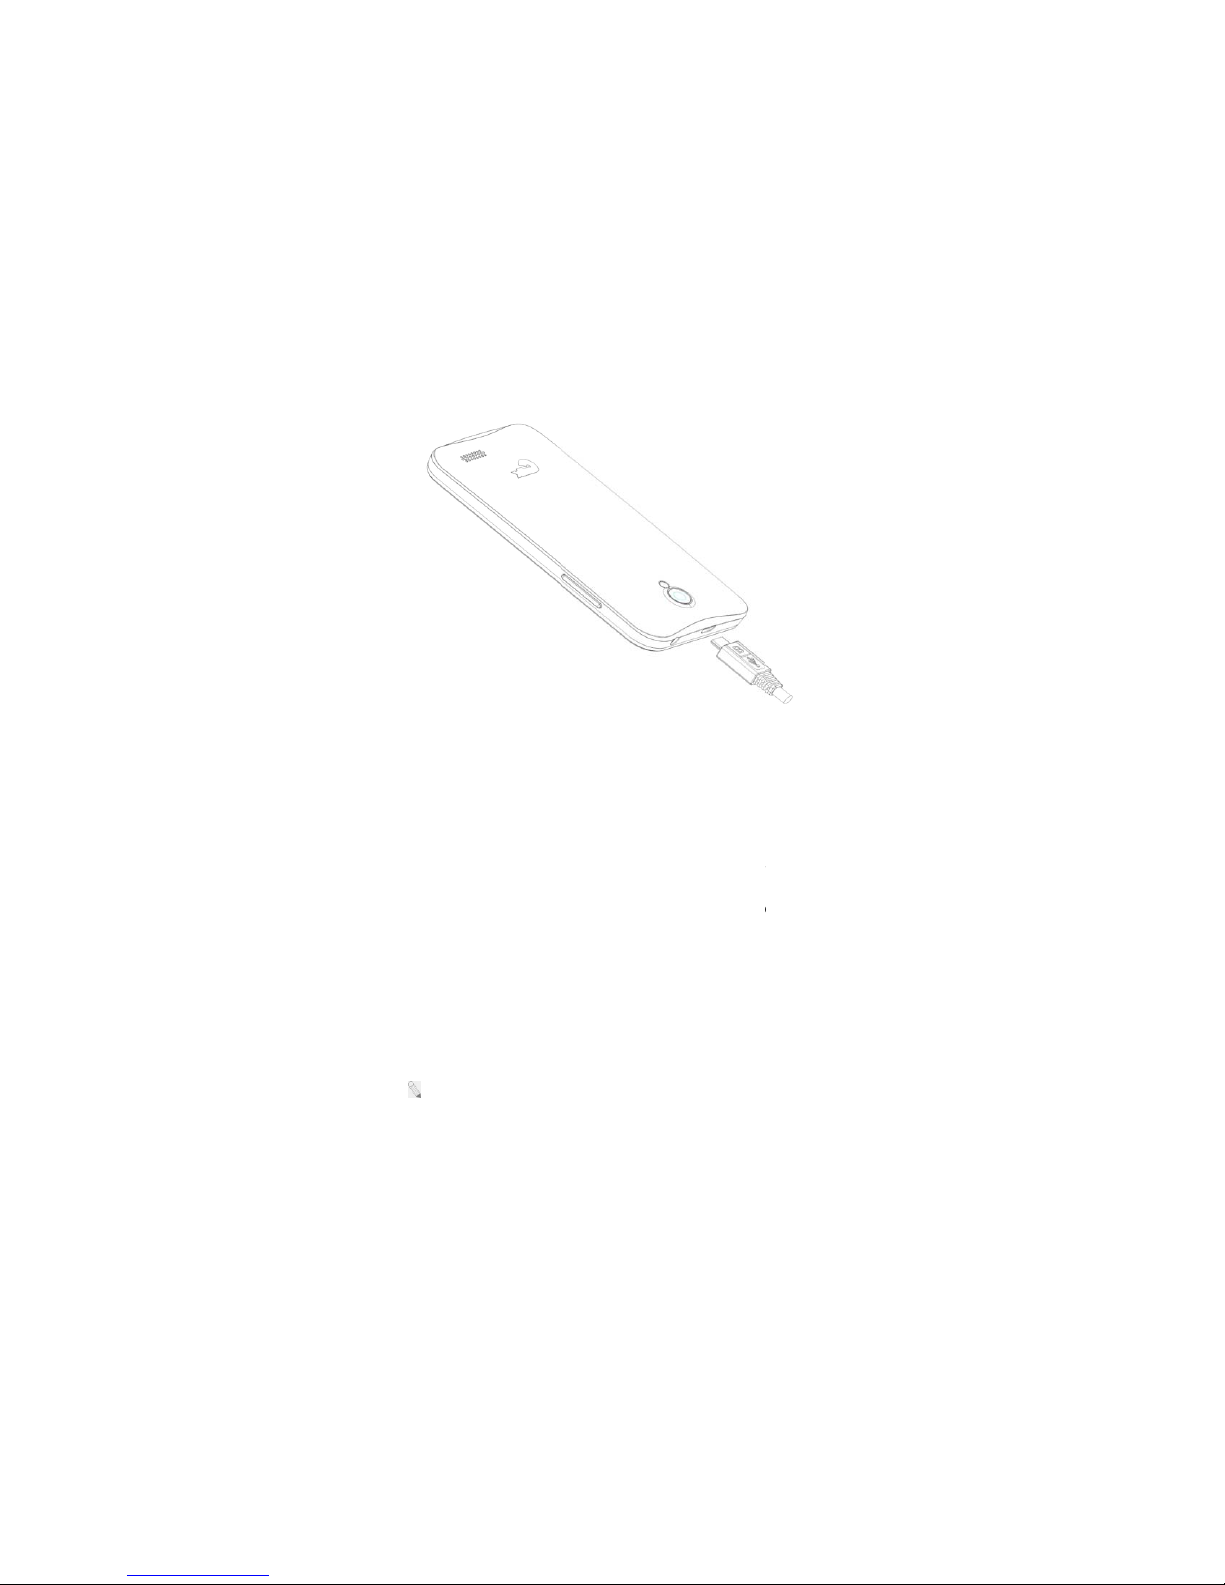
Charge the Battery
1. Plug the charger
2. Connect the s
m
phone’s chargin
g
The battery indicator icon will
complete, i.e. the battery char
g
the charger.
: Do not forget to unplug th
e
: Only use approved charg
e
: You can use the phone wh
charging the handset in its Po
w
screen.
6
into the electrical outlet.
all end of the charger connector into t
slot.
flash until charging is finished. When
c
ing icon stops flashing, disconnect the p
charger from the electrical outlet after ch
a
r and other accessories.
ile charging, but charging time may incre
a
er Off state, a charging indicator will app
e
he mobile
harging is
hone from
rging.
se. When
ar on the
Page 7
Switch to Sleep Mode / Wake
The Sleep Mode suspends yo
u
to prolong battery life. Your d
e
display automatically turns off
a
settings.
Lightly press Power Key to swi
t
Press the Power Key to Wake
U
To configure sleep settings, go
: Switching the Phone to Sle
e
Screen Lock
7
Up
r device to a low power consumption sta
t
vice also goes into Sleep Mode by itsel
f
fter a certain period of time, depending
o
ch to Sleep Mode.
p / activate your screen display.
to Settings Æ Display Æ Sleep Æ choo
s
p Mode is a way to lock your phone.
e in order
when the
n display
e time
Page 8

1.You can lock your screen for
is locked after the display goes
2.Go to Settings Æ Security
Æ
3.Touch the type of lock you w
a
You can choose among these l
Slide provides no protection, b
u
Face Unlock lets you unlock
y
lock option.
Voice Unlock lets you unlock
repeated words for accuracy.
Pattern lets you draw a simple
slightly more secure than Face
PIN requires four or more num
b
Password requires four or mo
r
as long as you create a strong
: A strong password is usua
of alphanumeric characters an
d
Unlock Your Phone
Drag the icon to the right,
8
additional security. After you set a lock,
t
to sleep.
Screen lock.
nt and follow the onscreen instructions.
ock options:
t lets you get to the Home screen quickly
our phone by looking at it. This is the le
a
your phone by voice. It first lets you reco
r
pattern with your finger to unlock the tab
Unlock.
ers. Longer PINs tend to be more secure
e letters or numbers. This is the most se
c
password.
lly eight or more characters long, and is
c
symbols.
depending on your screen lock pattern.
he screen
.
st secure
d a set of
let. This is
.
ure option,
omposed
Page 9

: To set Screen Lock patter
Lock Æ choose from options.
Security Codes
The mobile phone and the SIM
misuse. When prompted to e
n
correct code and then confir
m
settings for these codes, go to
card lock Æ Choose which c
a
OK
Personal Identification Number
Local network service provider
s
including the PIN, PIN2 and
successive times, the SIM card
To unlock the SIM card, you n
e
For further information regardi
service provider.
Basic Troubleshooting for lock
e
-Enter the correct PUK. You wi
l
9
n, go to Menu Æ Settings Æ Security
Æ
card support several passwords in order
ter any of the codes mentioned below, t
y
by tapping the OK key. To access th
Menu [ ] Æ Settings Æ Security Æ
S
rd to lock ÆLock SIM Card Æ enter SI
(PIN)
s furnish each SIM card with a unique s
e
PUK. If the PIN is incorrectly entered
will be locked.
ed to enter the PUK or the Personal Unlo
c
ng PIN, PUK and SIM Lock, contact yo
u
d SIM card:
l then be prompted to enter a new PIN.
Screen
to prevent
pe in the
e phone’s
et up SIM
M PIN Æ
t of codes
for three
king Key.
r network
Page 10

10
-Type in the new PIN Æ OK.
-Re-type the new PIN Æ OK.
PUK
The PUK (Personal Unlocking Key) code is required in order to modify a blocked
PIN. This code usually comes with the SIM card upon purchase. Otherwise,
contact your local service provider.
: If you enter the wrong PUK code for 10 consecutive times, the SIM card will
become invalid.
Page 11

11
2. Overview
Functions of Main Keys
Menu Key – Allows you to change wallpaper/widgets manage apps,
access system settings
Home Key – Returns to the main screen in one touch; Tap and hold the
Home Key to view recently browsed/accessed/used applications
Back Key – makes the screen go back one level
Touch Control
Your phone is receptive to the following finger gestures:
TAP – selects or launches an item or an app i.e. selecting from the menu, entering
characters or text in a field.
TAP & HOLD - activates widgets and offers further options to an application. tap&
hold an item on the screen by touching it and not lifting your finger until an action
occurs.
DRAG - tap & hold an item and then, without lifting your finger, move your finger
on the screen to reposition it on the screen.
Page 12

12
SWIPE OR SLIDE - lets you scroll the screen up, down, left or right. It is also used
when unlocking the screen. Lightly and quickly touch and slide your finger across
the screen without pausing to avoid dragging an item instead.
DOUBLE-TAP - lets you zoom in or out a screen Tap quickly twice on a webpage,
map, or other screen to zoom.
PINCH - lets you zoom in or out a screen by placing two fingers on the screen at
once and pinching them together (to zoom out) or spreading them apart (to zoom
in).
Customize the Home Screen
Change the Wallpaper:
Tap and hold any clear part of the Screen Æ Choose wallpaper from Gallery, Live
Wallpapers and Wallpapers.
Remove Items from Your Home Screen
Tap Home Key to return to the Home Screen.
Tap and hold the item to be removed and drag it towards the [X Remove] icon at
the top of the screen.
Page 13
13
Auto-Rotate Screen
With the Auto-Rotate Screen turned on, you will be able to view items on the
screen vertically or horizontally, depending on how you hold your phone. Please
note that not all screens are covered by the Auto-Rotate Screen feature.
To turn the Auto-Rotate Screen feature on/off, go to Menu Æ Settings Æ Display
Æ Auto-Rotate Screen Æ (uncheck)
You may also drag down the Notifications panel and tap ‘Auto-rotation’ to activate
or deactivate auto-rotate function.
Folders
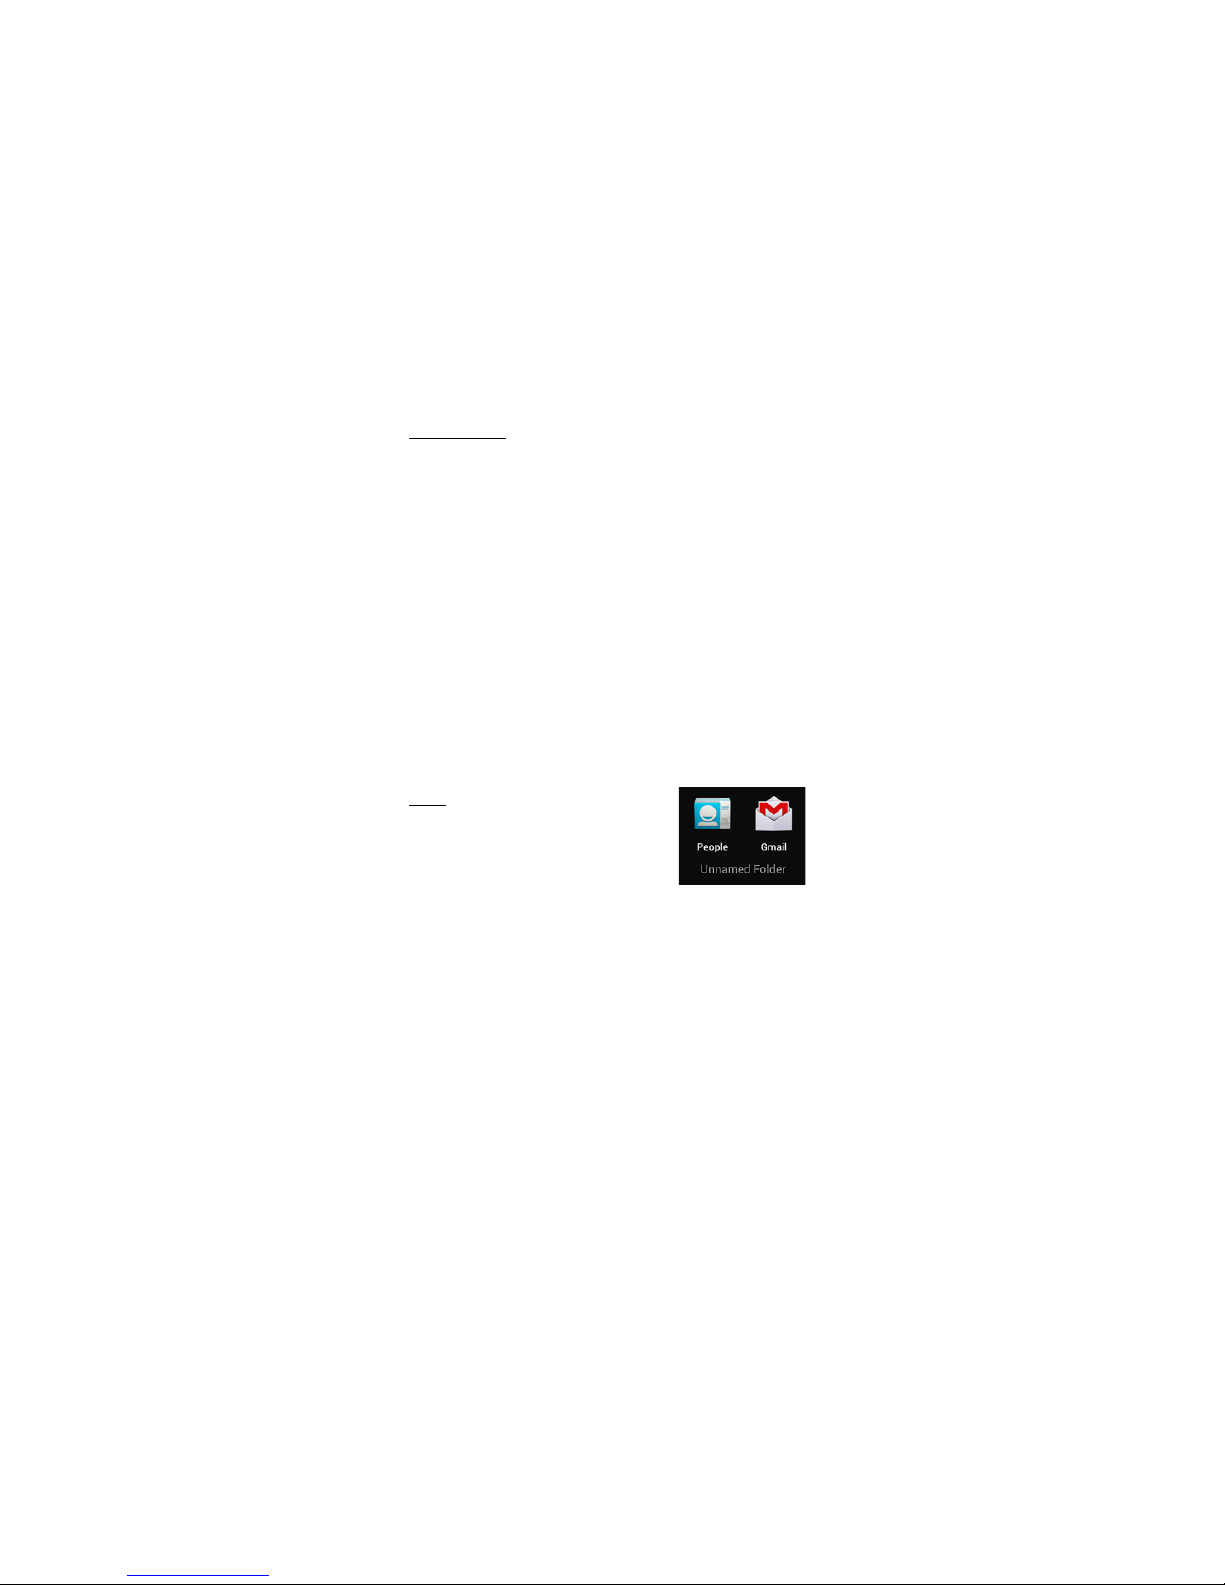
This allows you to organize your applications in
folders on the Home Screen. To make a new
folder on your Home screen, tap and hold and drag apps to the Home Screen, and
stack them on top of another. They will automatically be grouped into a folder.
To name folder on Home screen
1. Touch the folder icon on Home screen to open
2. Touch the folder’s title bar to show the name field.
3. Edit the folder’s name and tap done after renaming.
Page 14
14
To remove applications out of a folder back to the Home Screen
Touch and hold the item in a folder, and then drag it out of the folder.
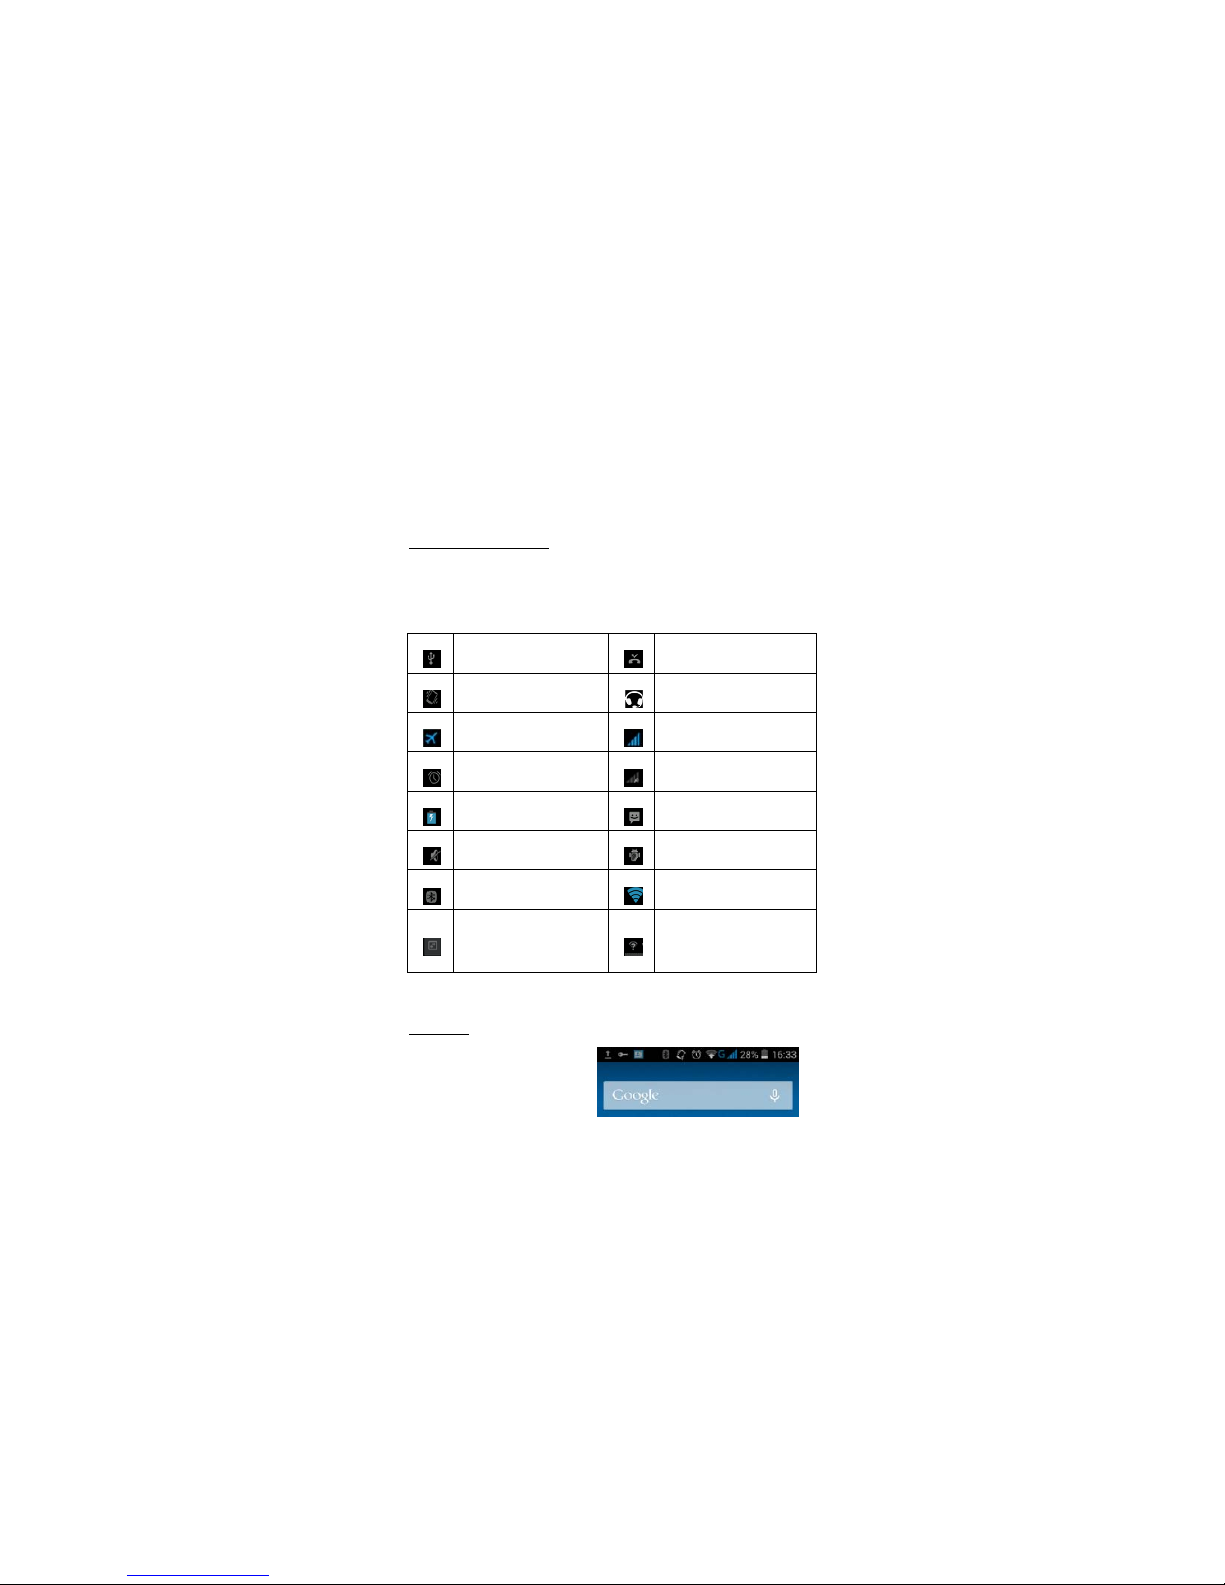
Status and Notification Icons
To view your phone’s notifications, simply swipe the notifications bar downwards.
Below are the possible status icons you will encounter and their meanings:
USB connected
Missed call
Meeting mode
Earphone insert
Airplane mode
Signal strength
Alarm set
Signal searching
Battery charge
New message
Silent mode
USB debugging connected
Bluetooth icon
Wi-Fi network
Data Conn. off
New Wi-Fi network
detected
Notifications
The Notifications panel lets you view
notices, warnings and any new updates in your phone.
1
、
To open the Notifications panel
Page 15

15
Found on the top part of the screen, swipe the notifications panel (also known as
the status bar) downwards.
*Swipe upwards to close.
2
、
To open a running application from the Notifications panel
From the Notifications panel, touch the icon for the running application to open it.
To dismiss notifications, tap
Toolkits
ToolKits quickly start applications such as Bluetooth, WLAN and so on.
• Using two fingers, swipe the Notifications panel downwards.
• Tap a ToolKit to enable or disable.
Magnification Gestures
With this feature turned on, you can zoom in/out by quickly tapping the screen
three times (triple-tapping)
While zoomed in, you can:
Pan
– Drag two or more fingers across the screen
Adjust zoom level
– pinch two or more fingers together or spread them apart.
You can also temporarily magnify what’s under your finger by triple-tapping and
holding. In this magnified state, you can drag your finger to explore different parts
of the screen. Lift your finger to return to previous size.
Page 16

: The triple-tap magnificatio
n
and navigation bar.
To activate, go to SettingsÆ
A
3.Basic Functions
Make and Answer Calls
Make a Call
Option 1: On the Home Scree
n
number Ætap .
Option 2: Tap ÆÆ
e
Option 3: Tap ÆPeople
Æ
: Tap to erase incorr
e
Dial an International Call
For international calls, type (+)
number.
(+) (Country Code) (complete
p
: Tap and hold to typ
e
and the telephone number. Th
e
Dial an Emergency Call
16
gesture works on any screen except th
e
ccessibility Æ Magnification Gestures
Æ
tap Æ choose the Phone tab Æe
n
nter phone number Æ tap.
tap name of selected contact
ct digits.
followed by the country code and then th
e
hone number) then tap
"+" and then type the country code, the
a
n tap the telephone icon to connect.
keyboard
ON.
ter phone
complete
rea code
Page 17
This phone operates using radi
cannot guarantee connection i
n
rely solely on wireless phones
t
call:
1.
Switch your p
h
2. Dial emergen
c
: Some networks may requi
phone before making an em
country. Emergency calls m
a
interference issues.
A
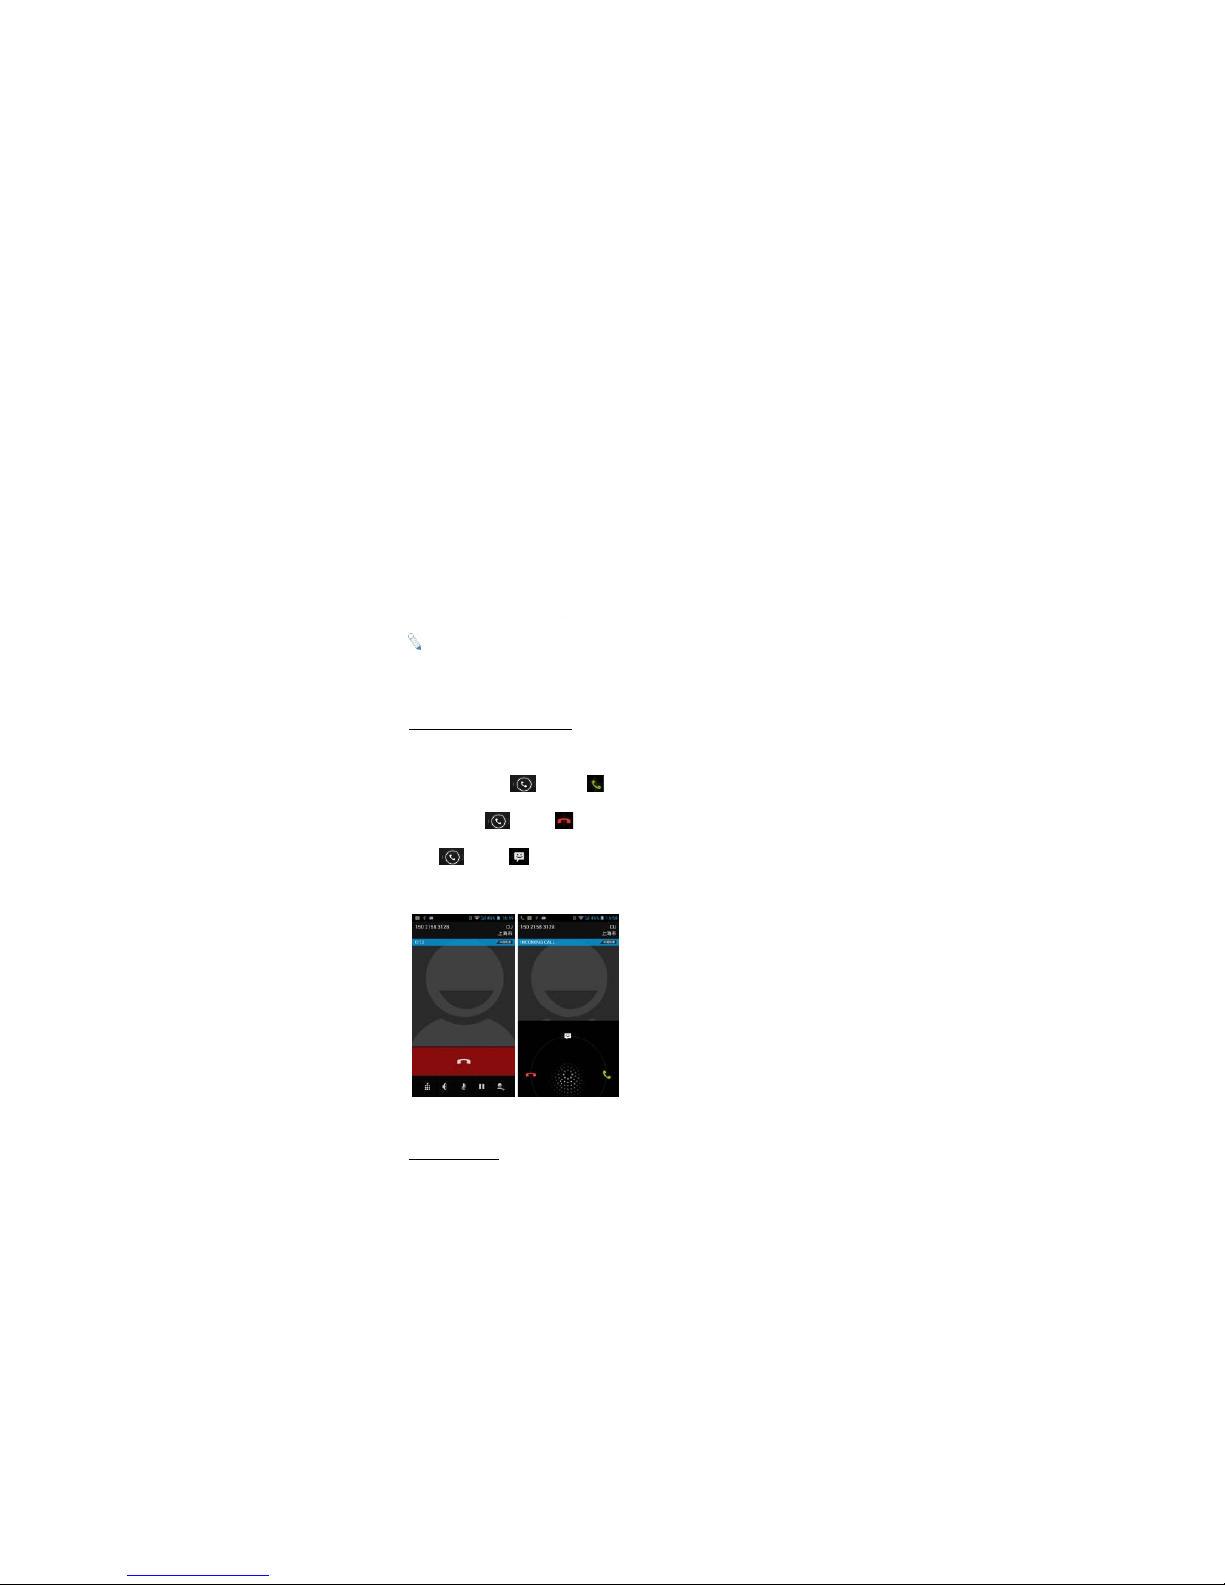
nswer / Reject an Incoming C
When you receive an incoming
To accept call, drag tow
a
To reject, drag towards
Drag towards to se
n
Adjust the Volume
17
o signals, wireless and landline networks,
all locations at all conditions. It is not ad
v
o make emergency calls. To make an em
e
one on.
y number and tap Call.
re that a valid SIM card is properly inse
r
ergency call. Emergency numbers var
y
y not work in all locations due to ne
t
all
call, a notification message appears on t
h
rds
d a message instead.
but
isable to
rgency
ted in the
in every
work and
e screen.
Page 18

During a call, press the Volum
e
Options During a Call
- Launch/Hide Dial Pad
- Turn speakerphone on/o
f
- Mute
- Put a call on hold
- add current call’s details
t
People
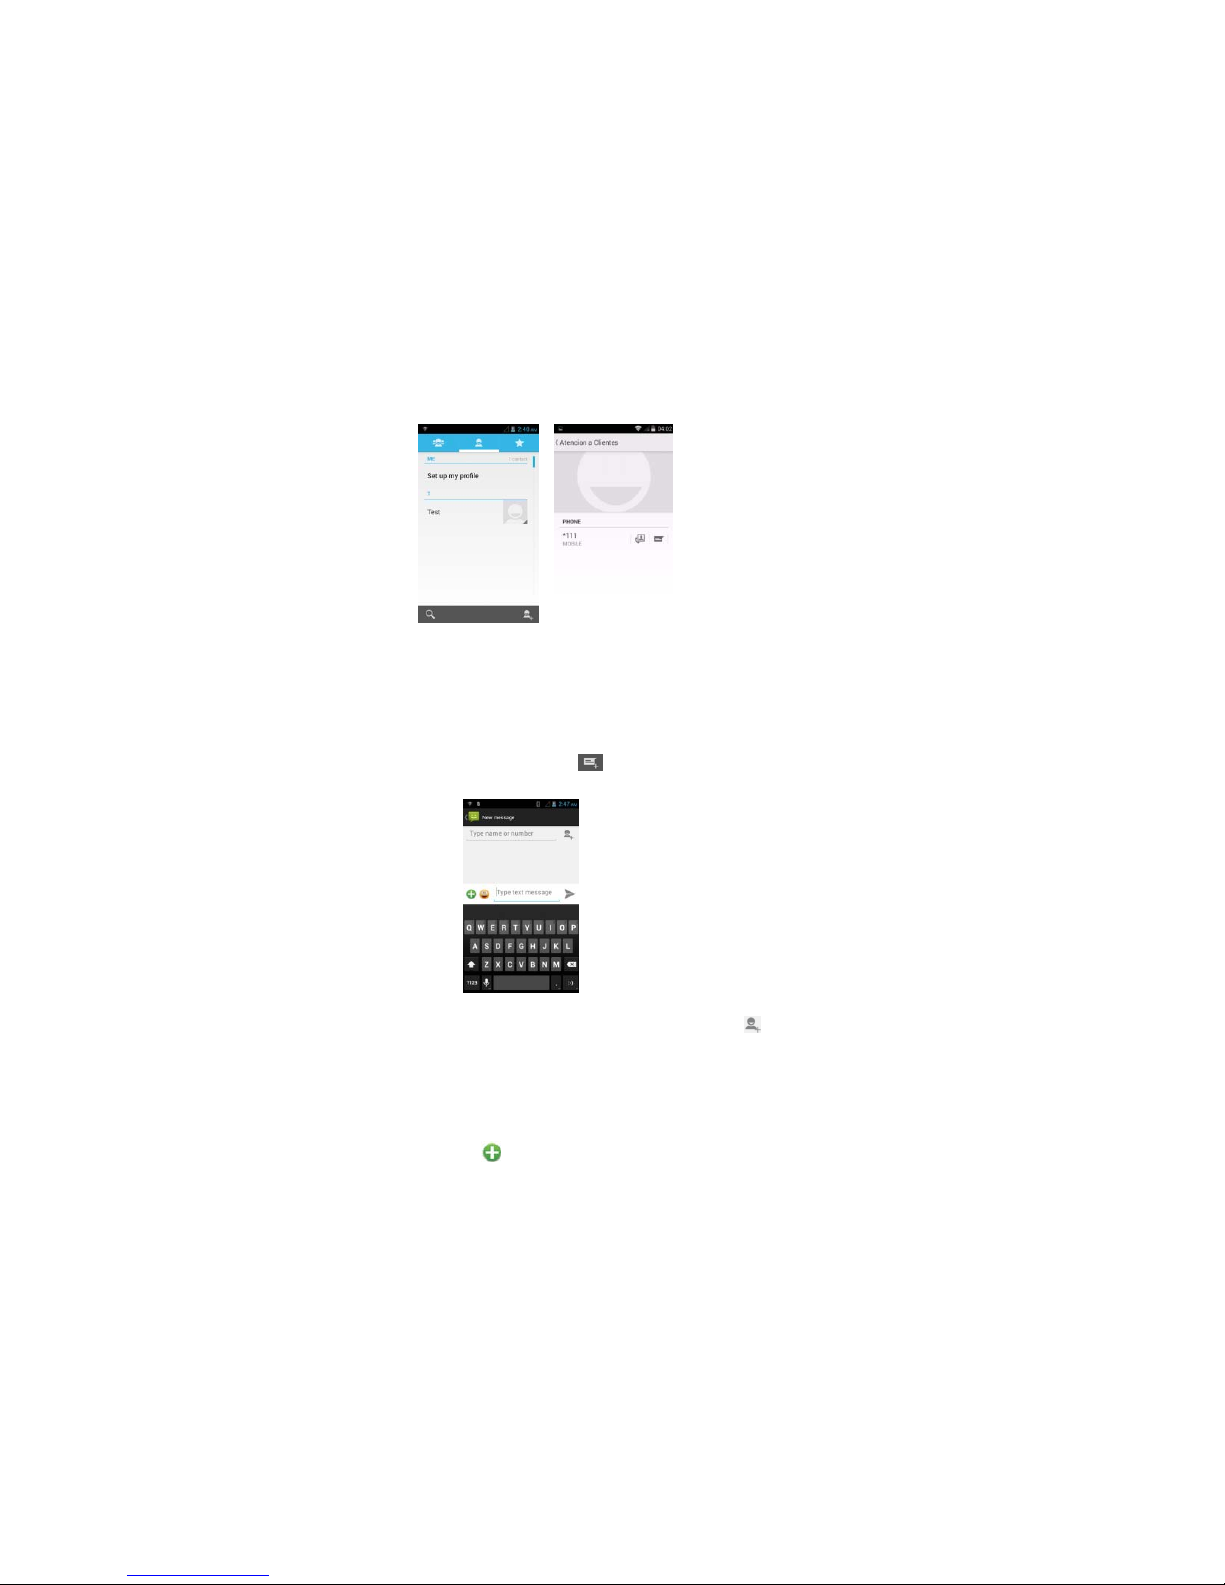
You can add contacts on you
r
your Google account or other
your contacts, go to ÆPe
o
- Create contact. Store th
e
- Search. Type name or n
u
- Groups. Create group
ÆType person’s nameÆDon
e
- Favorites. To add conta
tap on the upper right corn
e
- Send message
18
keys to adjust the volume.
f
o contacts.
phone and synchronize them with the
c
accounts that support contact syncing. T
ple [ ].
contact toÆSIM/phoneÆ tap Done.
mber of contact you wish to find Æ Next.
under account, tap ÆPhoneÆ gro
u
.
cts to Favorites, tap chosen contact from
r of the screen.
ontacts in
o manage
p’s name
list. Then,
Page 19
19
Messaging
To create and send message from home screen, tap
¾ Tap the new message icon at the bottom left part of the screen
¾ In TO field, type the recipient’s phone number OR tap to search
from contacts.
¾ Type message in the Type message field using the on screen keyboard.
¾ Tap to insert smileys, etc.
Page 20

¾ Tap to send.
: To send MMS, add an atta
c
will automatically be sent a
s
attachment, the message is re
v
Message Threads
Instead of inbox, outbox and s
e
into “threads,” where messag
e
into a conversation-like folder.
certain number or a group.
Delete a thread / message
To erase a message tap and h
o
To erase an entire thread, tap
Æ tap
- select all
20
hment to the text message by tapping an
d
an MMS. Likewise, if the user re
m
erted back to being sent as SMS.
nt folders, your phone organizes all your
s exchanged with the same number ar
e
Tap a thread to view all messages you
h
ld a specific message Æ Delete.
and hold a thread Æselect conversation
/
the SMS
oves the
messages
grouped
ad with a
s to erase
Page 21

Connect to the Internet
Connect to a wireless network
t
Swipe down Notifications pa
n
Tap Wi-Fi to display available
n
: If network connection is su
c
Some Wi-Fi networks are secu
r
access. Enter the correct secu
r
Browser
To surf the Internet on your ph
o
Tap the address barÆ type in
d
: To change the homepag
e
Æchoose from options.
Tap to access more func
t
Tap to view all active bro
w
To bookmark a page, tap
Æ
To open new tab, tap +
Capture and View Photo or V
21
o browse Internet.
elÆ
etworks.
cessful, the icon will appear on the
ed and may prompt you to enter a passw
ity password and tap “Connect.”
ne,go to Æ .
esired URL Æ GO
menuÆ Settings Æ General Æ Set
H
ions, such as bookmarks, history and oth
e
sers.
ideo
status bar.
ord before
omepage
rs
Page 22

22
This mobile phone is equipped with a digital camera that lets you take photos and
videos whenever and wherever you like. To capture images, go to Æ .
Capturing an Image
Aim the phone at the subject, and then tap to take a shot.
- view recently captured image
- Switch to front camera
Swipe the panel on the left side of the screen to adjust settings.
- Panorama
Tap for more camera settings
Capturing a Video
On Camera mode, tap
Aim the phone at the subject.
To start/stop recording, select .
- switch to front camera.
- launch settings.
Page 23

23
4. Main Menu
The Main Menu displays all the applications your phone has. You may access the
Main menu by tapping on the Menu icon [ ] from the Home Screen.
Browser
Please see “Browser”.
Calculator
This mobile phone is equipped with a calculator to facilitate simple computations
using the 4 basic functions. Tap on the Calculator’s interface and an
advanced panel will pop up for more complex calculations. Enter the numbers
using on-screen keyboard and choose the desired operation. Tap for
corrections and to get the output.
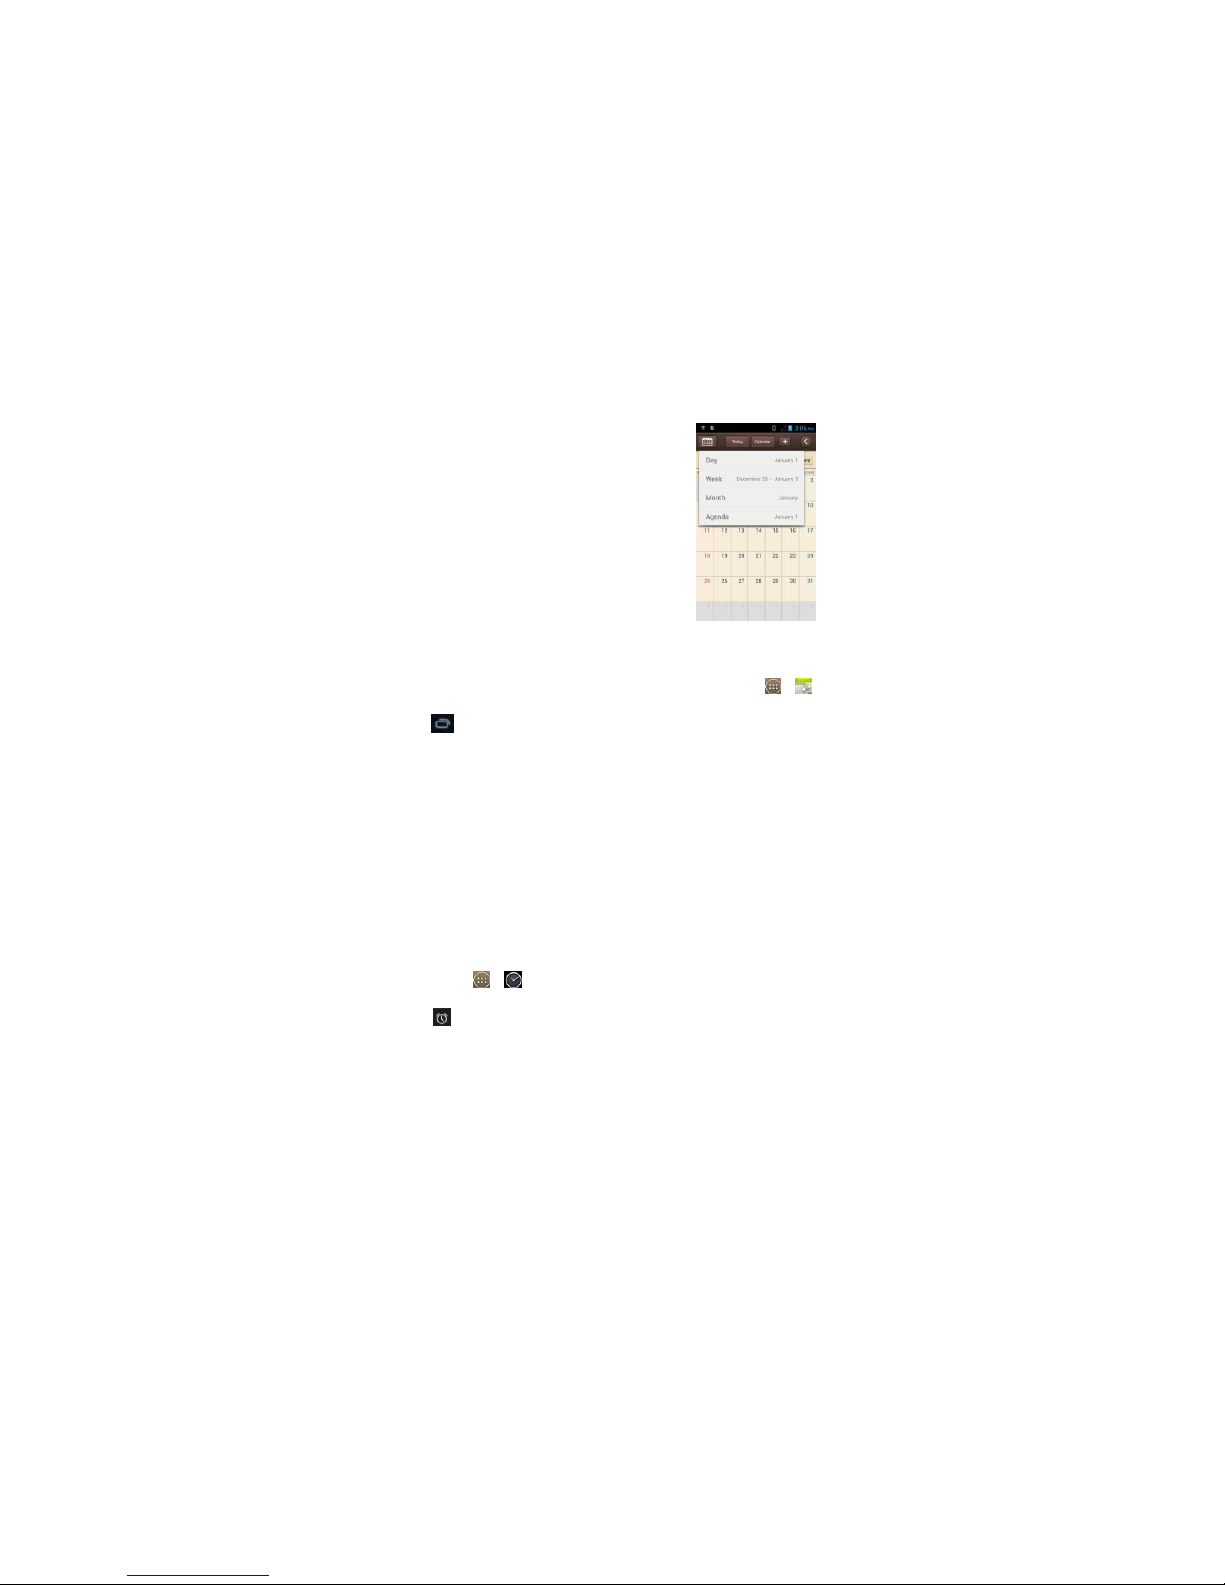
Calendar
Page 24
24
The calendar application shows the current date/month,
and lets you organize your schedule by allowing you to add, edit, delete and view
events. You may also add appointments and notes as reminders. Go to Æ .
Tap for options.
Camera
Please see “Capture and View Photo or Video”
Clock
This function shows the current time and date, and gives you access to the alarm
clock. Go to Æ
Tap to edit alarms.To add new alarm, tap +
Downloads
Page 25
25
This allows you to view a list of downloaded files and apps stored in the internal
storage, and those currently being downloaded. To manage Downloads, go to
Æ .
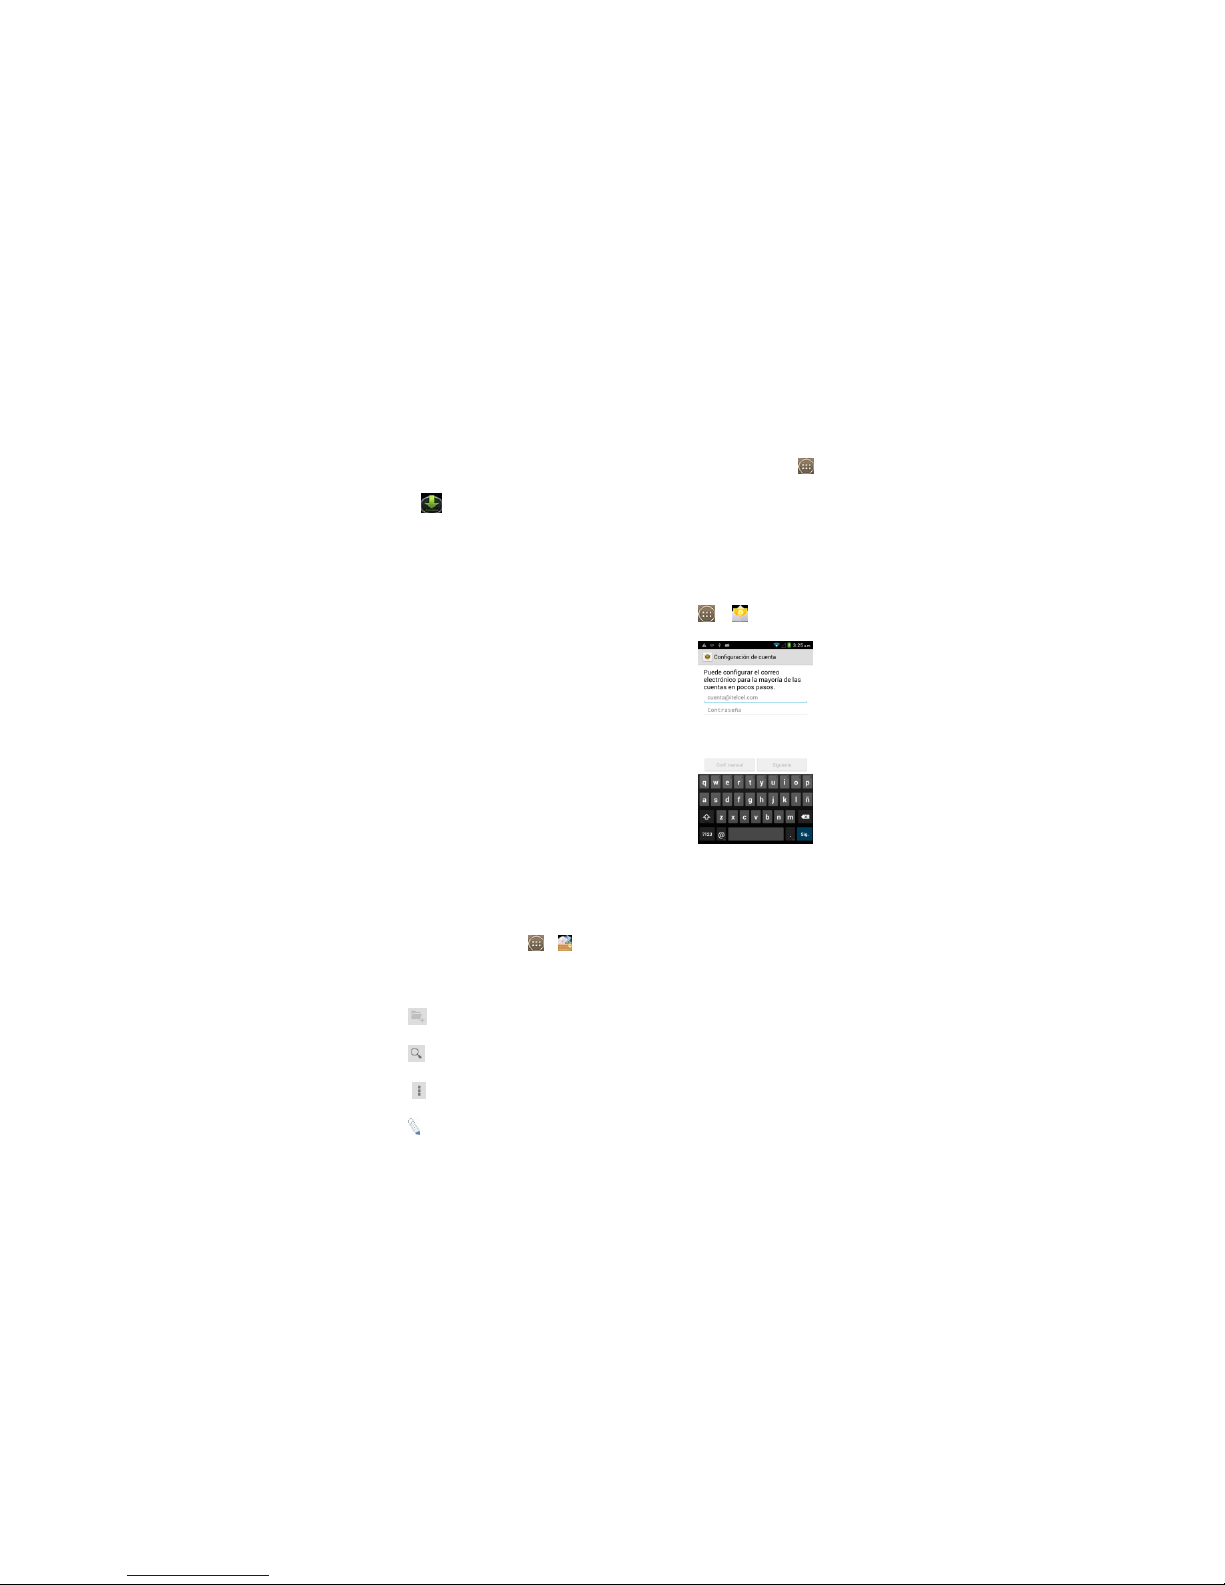
Email
You can send and receive e-mails on your phone. Tap Æ Æ set up an
account by entering an existing email address and
password.
File Manager
The File Manager lets you view, open and manage the data saved in your phone
and Memory card. Go to ÆÆ choose from Phone Storage / SD Card.
- New folder
- Search item
- display options
: You may also press and hold a folder or file for further options.
Page 26
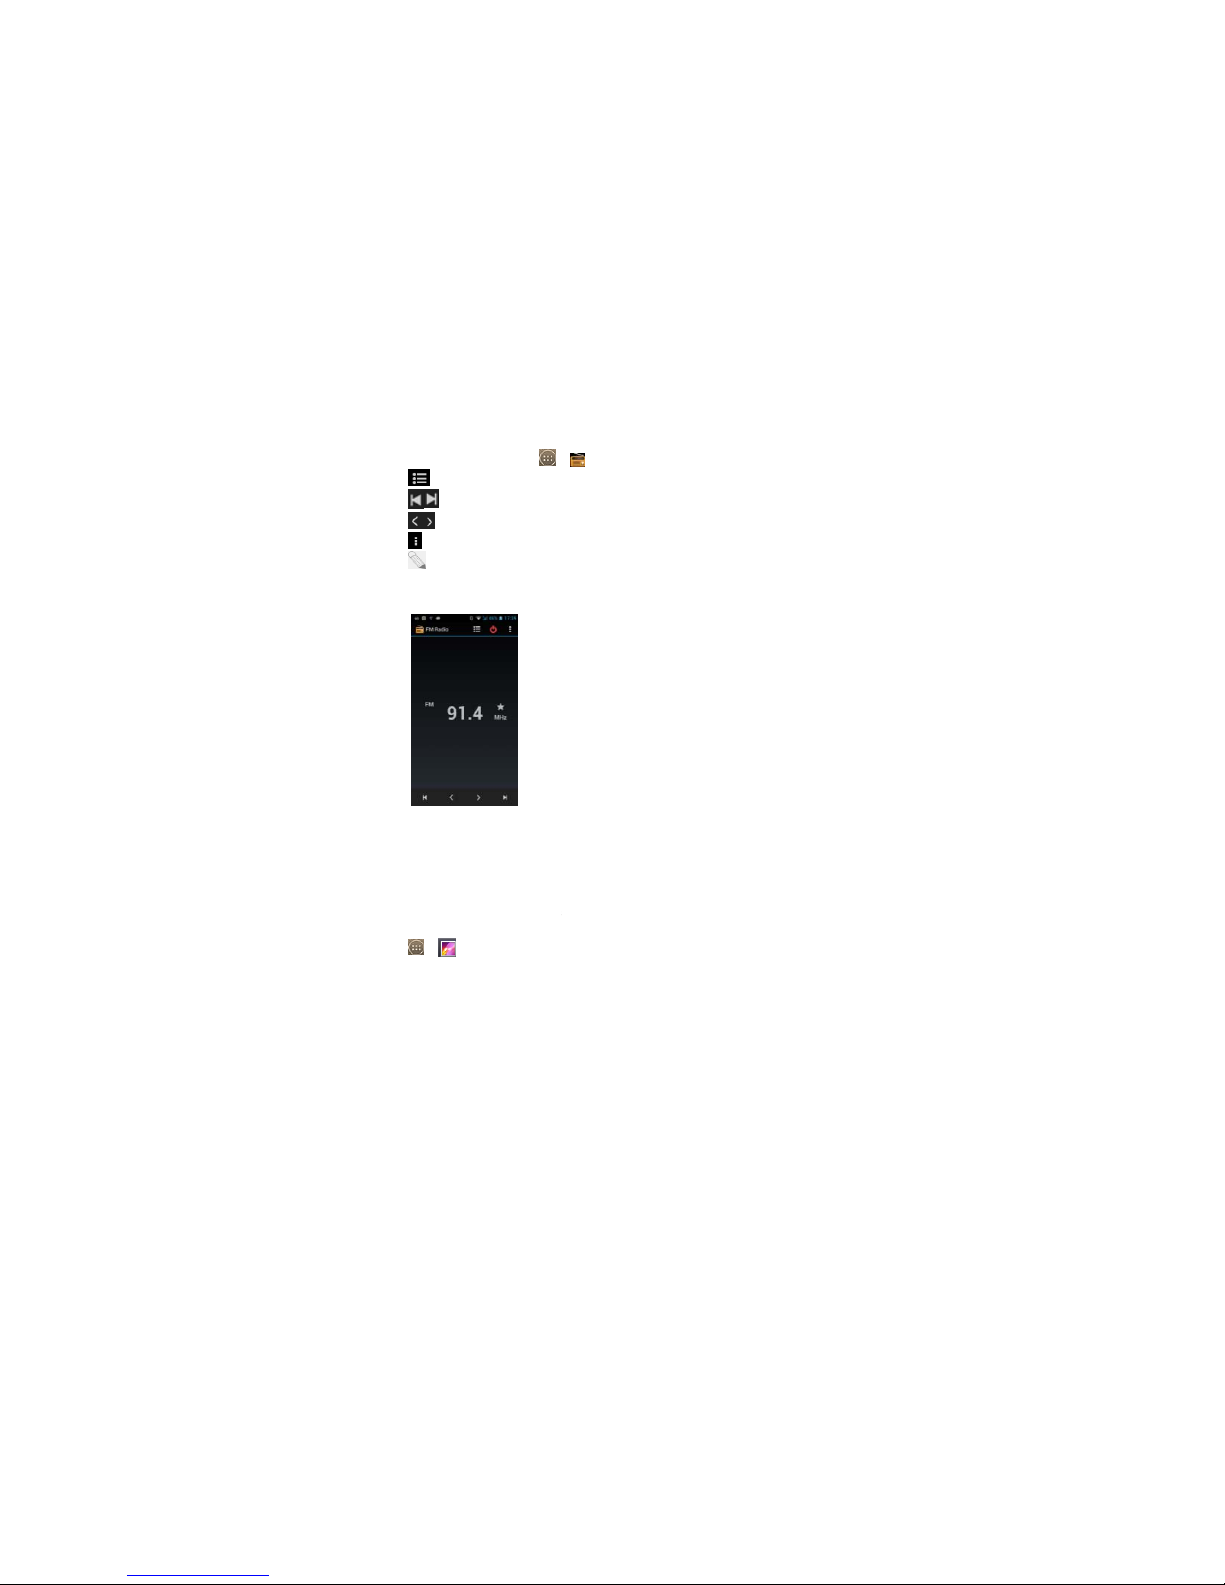
FM Radio
To listen to the radio, go to
Æ
- view channel list on/off
- search the channel lis
t
- Fine tune channel
- Display options: Search,
S: A
headset must be conn
e
adjust volume.
Gallery
To view captured images, re
c
Æ .
Click on a thumbnail to open a
n
Tap and hold an image to sha
r
details.
26
.
peaker, and Record FM
cted for the FM radio to work.Press si
d
orded video clips, and downloaded ima
g
album.
e (via Messaging, Bluetooth, Email), del
e
e keys to
es, go to
te or view
Page 27
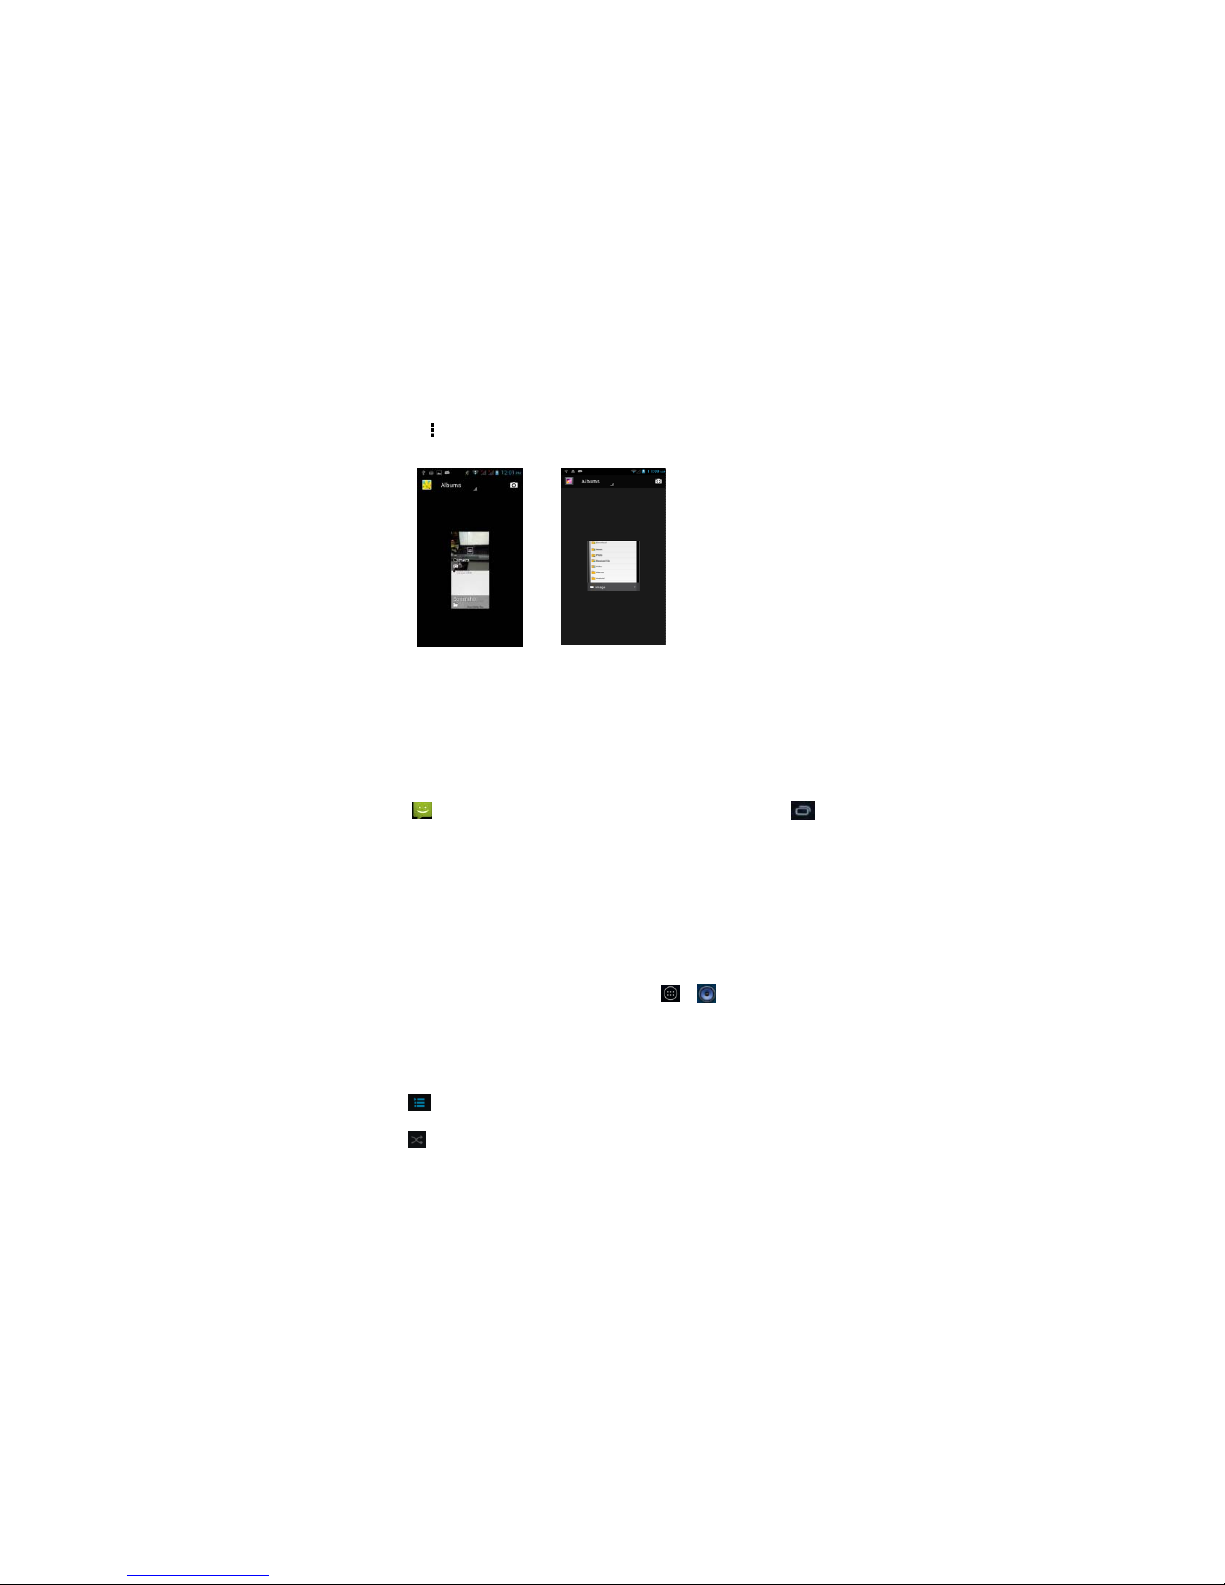
Tap to display other settings.
Messaging
This menu allows you to read,
icon displayed in standby mo
d
from the Home Screen t
o
options. For related informatio
n
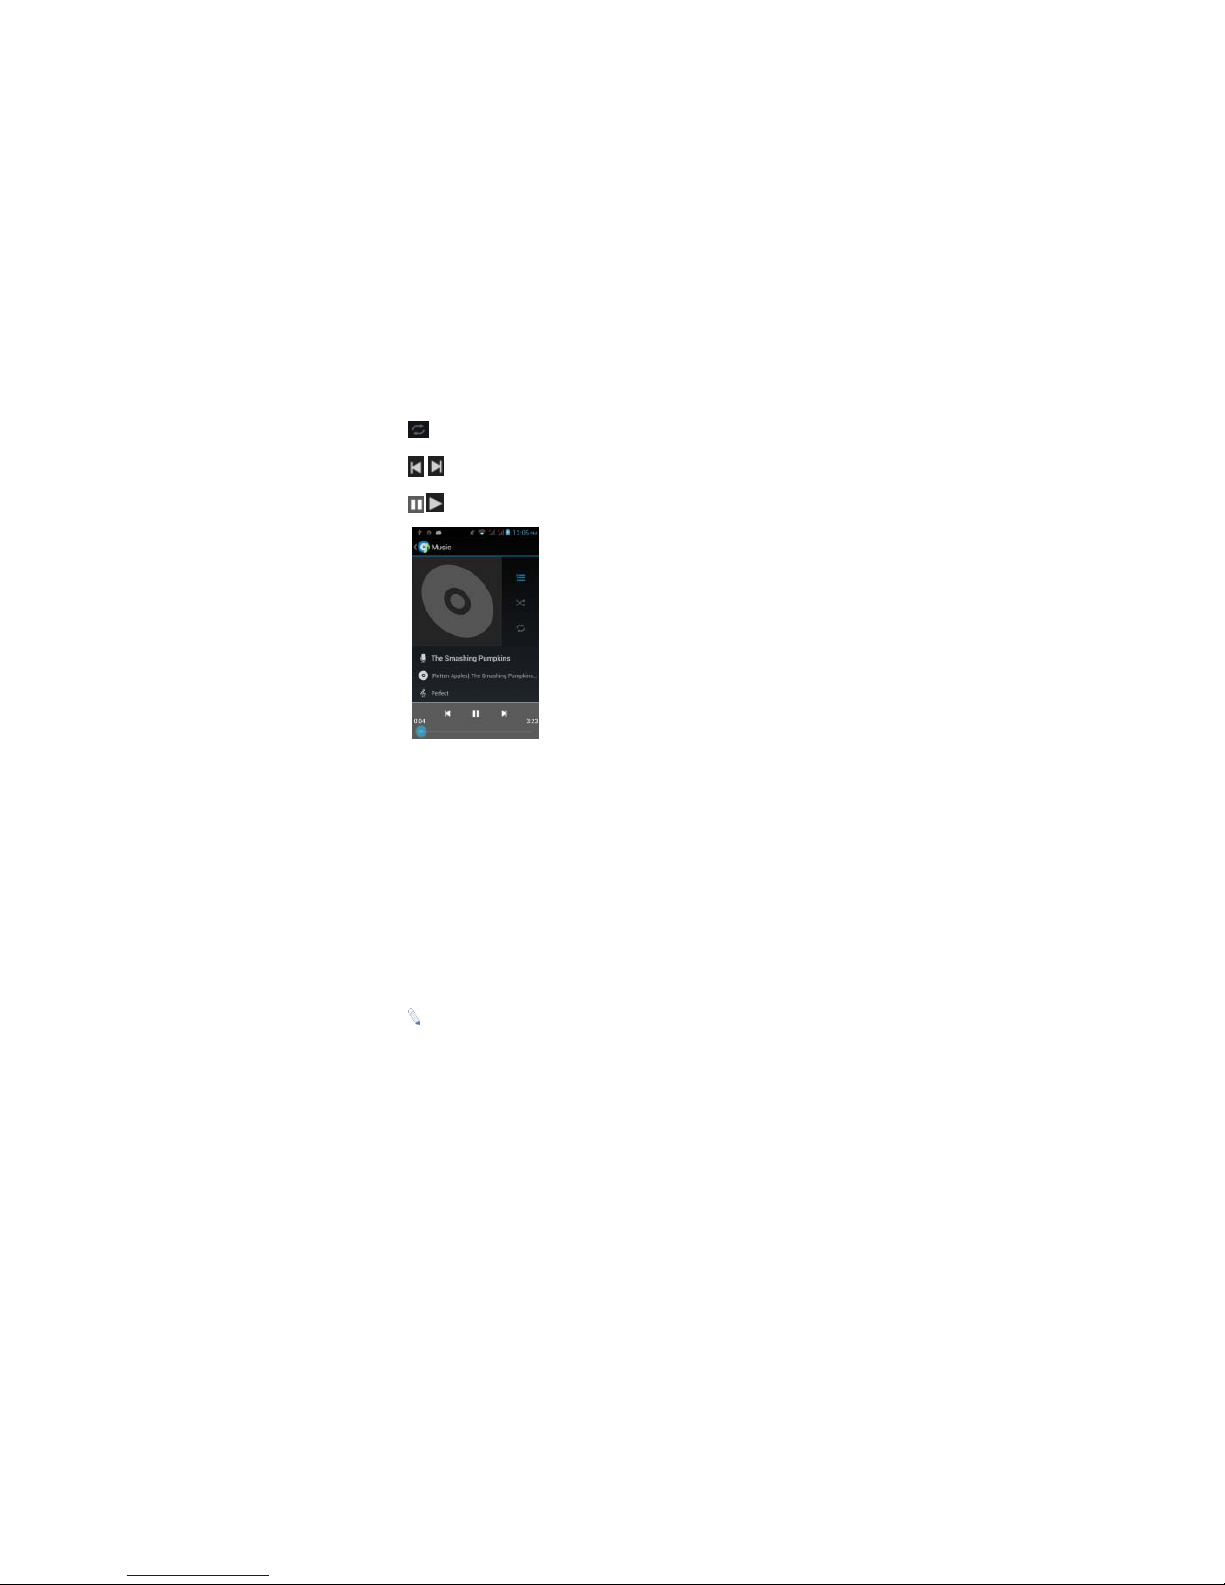
Music
Use the Music to play music a
n
The songs are categorized i
n
playlist, press & hold chosen s
o
- displays playlist
- shuffles tracks
27
compose, send and receive messages.
T
e refers to received and unread mess
a
access. On the Messaging interface,
, refer to “Messaging”.
d audio files. Go to Æ .
to tabs: Artists, Albums and Songs. T
o
ng Æ Add to Playlist.
he screen
ges. Tap
tap
create a
Page 28
28
- repeats playback
/ - plays previous or next track
/ - play/pause song
People
This menu refers to the directory where all the contacts are stored in alphabetical
order. You can view, edit, delete, send messages and perform various other
functions on each contact in your phonebook. The People menu allows you to
store, locate and view your saved contacts. Aside from these, People also allows
you to copy, edit and delete a contact.
: You can also send SMS / MMS or call a contact directly from People, as well
as store several details (e-mail, pictures, phone numbers, etc.) for each contact if
saved in the phone’s memory.
For related information, see ‘Manage Contacts’
Page 29

29
To import contacts from email to phone or the other way around
Go to Æ .
Tap Æ Import/Export.
Select where to import and export ÆNext
Mark contacts to import/export ÆCopy.
Phone
The Phone menu has three tabs. The Dialer, Call Log and Contacts tabs. To
access this, tap on the Home Screen.
The Dial tab directs you to the dial pad where you can make calls. Please refer to
“Make a Call” for related information.The Call Log tab gives you access to your
phone’s call history. To view this, tap the Call Log tab at the top part of the screen,
and your call logs will be listed. Go to .Touch number to call and view call
details.
Æ Received call
Æ Outgoing call
Æ Missed call
Æ send message
Æ view contact details
To clear log, tap Æ Delete Æ select call to be deleted ÆÆ OK
For further settings, tap Æ Settings ÆCall Settings
Page 30

30
This lets you manage you phone’s Voice call such as other Settings(message
templates sent).
Voice Search
This function lets you search for any file you wish to find be it stored in your
phone’s messages, apps, music folder, contacts, or the Web.
Go to Æ Type your search on the search bar and tapÆ.
: Another way to search: On the Home Screen, tap and type query. Tap
Go to start search.
: Please make sure that your phone’s Wi-Fi connection if you wish to search for
something on the Internet.
SIM ToolKit (STK)
The features of your STK are offered by your service provider. If your SIM card
supports the STK feature, you will see the STK menu. You may contact your
network service provider for more information regarding the STK. To access, tap
Æ .
Sound Recorder
Page 31
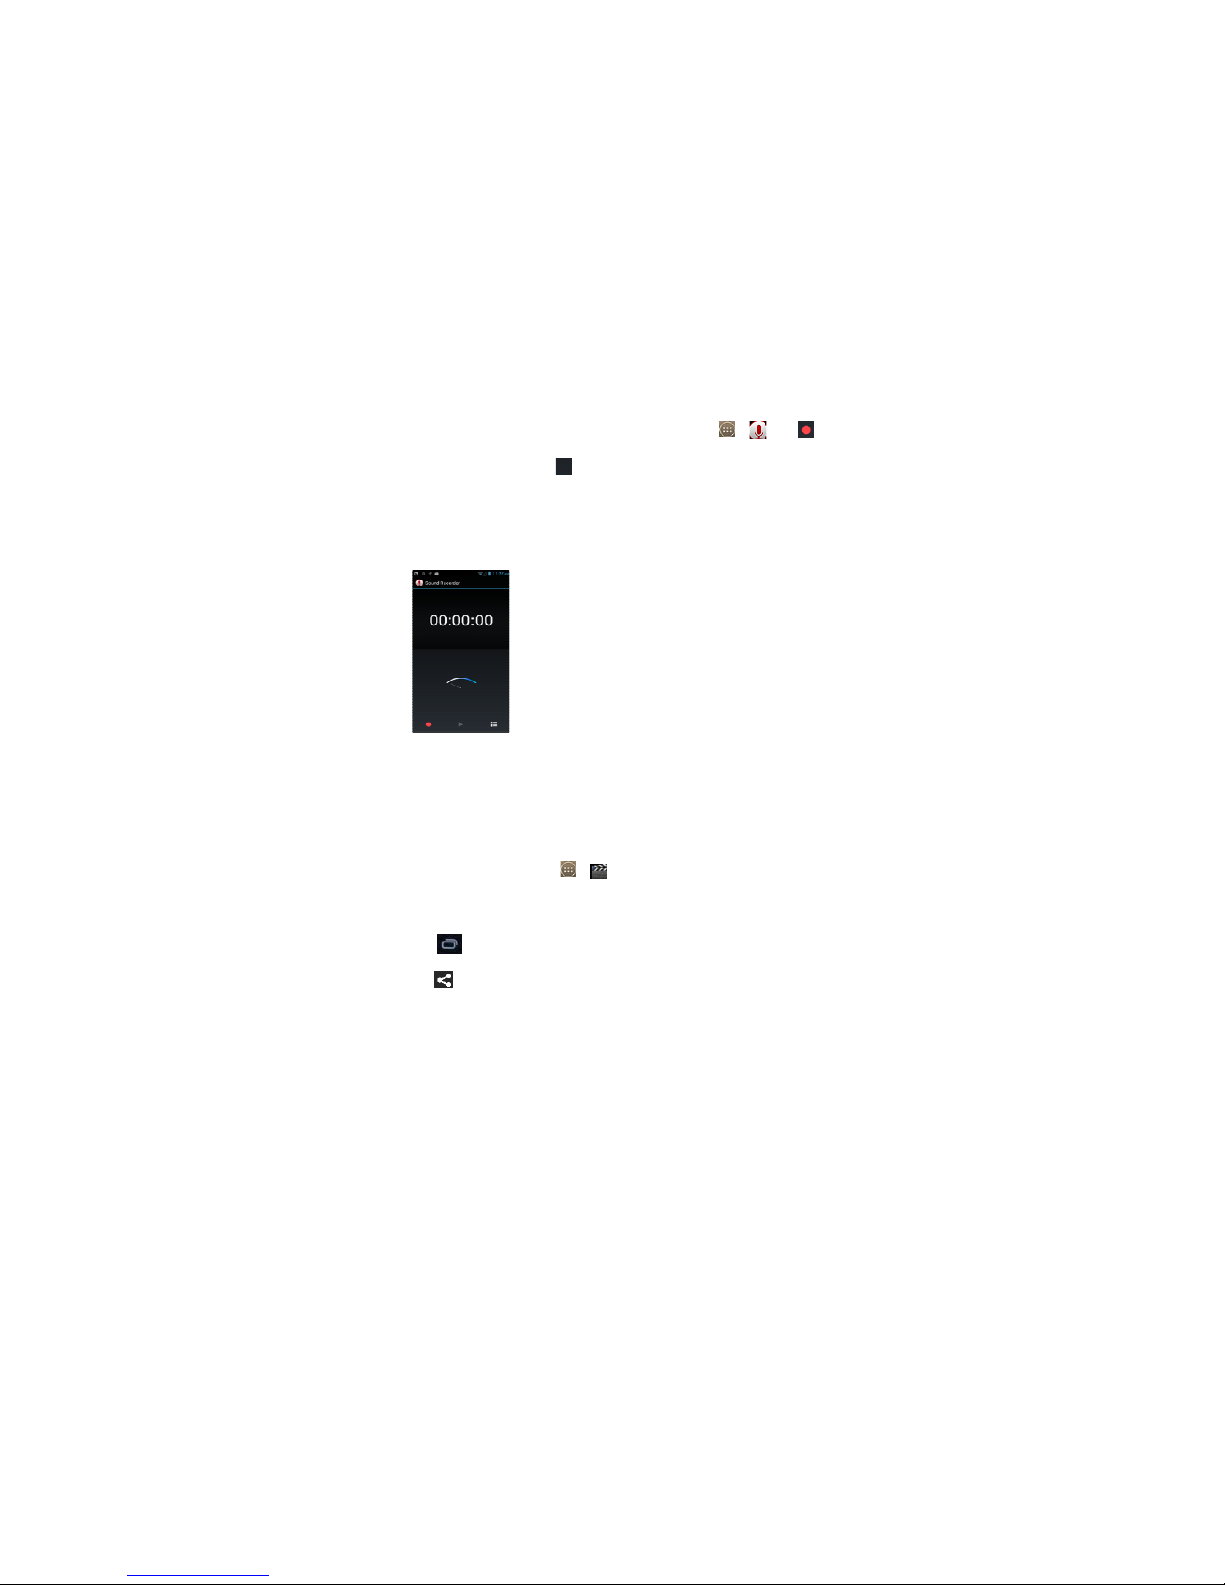
Record sound and other audio
to start recording and press
sound, press ►. After playbac
k
To view the recorded files, tap
Video Player
This displays and lets you vie
Memory Card. To access, tap
To Pause/Play, just tap on the
v
Tap ÆStop to stop play
b
Tap to share on Youtub
e
and Gmail.
5.
Settings
Under Wireless & Networks:
Wi-Fi
31
files on your phone by going to Æ
to stop recording. To play the recentl
y
, you may opt to discard or save the reco
w all video files stored in your phone a
n
ÆÆtap a video to Play.
ideo.
ack.
,Picasa, Messaging, Bluetooth, Goog
l
. Tap
recorded
rded file.
d in your
e+, Email
Page 32

32
This allows you to switch your phone’s Wi-Fi capability ON or OFF.
Check the Wi-Fi network by looking at the icon in the status bar.
Mobile Data
This allows you to switch your SIM card’s capability to transfer data ON or OFF.
Charges may apply.
Bluetooth
Switch the Bluetooth function ON so you may establish wireless connection with
other compatible devices with the Bluetooth technology. The Bluetooth may be
used to send and receive different kinds of files. With the Bluetooth technology you
may establish wireless connection with a compatible PC to enhance
communication.
Bluetooth is a short-range wireless communication technology. Phones or other
devices with Bluetooth capabilities can exchange information wirelessly within a
distance of about 10 meters. The Bluetooth devices must be paired before the
communication is performed.
Tap > Click next to the Bluetooth menu to turn it on,
When Bluetooth is on, the icon will appear in the status bar.
Tap Bluetooth. Your phone will show all visible Bluetooth devices in range.
Page 33

33
Tap the device you want to pair with and operate according to the message
prompt.
When the owner of the device to be paired accepts the connection, the pairing is
completed.
TIPS: Tap your device name to make your phone discoverable if other devices try
to pair with your phone.
Data Usage
This lets you monitor your data usage per month. Switch ON the mobile data
usage function so you can monitor your mobile usage per month. You may also
opt to set a limit on your mobile data usage.
: Your phone’s calculations may differ from the accounting of your mobile
network service provider. It is not advisable to rely solely on the phone’s
calculations.
Airplane Mode
It is also known as the “Flight Mode,” which is advisable when riding aircrafts. This
function, when turned ON, disables all wireless connection to any network.
However, with the airplane mode, you can make use other functions of your device
such as playing music, watching videos and capturing images and videos.
VPN
Page 34

This allows you to set up and
VPN to set up a VPN connecti
o
• Add PPTP VPN: Set up a
protocol.
• Add L2TP VPN: Set up a con
• Add L2TP/IPSec PSK VP
N
key-based Layer 2/IPsec tunne
• Add L2TP/IPSec CRT VPN:
S
Layer 2/IPsec tunneling protoc
o
: You must set a lock scree
set up a lock screen pattern,
Lock Æ choose lock method
Tethering and Portable Hots
p
Tethering is a method for con
n
via an Internet-capable mobile
connection, making it a WLAN
you cannot use your phone’s
W
ÆÆ More Æ Tetherin
g
: For further information, go t
o
Disable the Wi-Fi Hotspot
34
manage Virtual Private Networks (VPNs)
n via the following settings:
connection to a VPN with Point-to-Poin
t
nection to a VPN with Layer 2 tunneling p
: Set up a connection to a VPN with
p
ling protocol.
et up a connection to a VPN with Certifi
c
l.
n pattern before you can use credential s
t
settings, go to ÆÆ Security
Æ
.
ot
ecting a computer or other devices to t
h
phone, such as this one. It will share yo
u
hotspot; however, network charges may
a
-Fi capability when it is working as a hot
s
and Portable Hotspot.
Tethering and Portable Hotspot Æ H
e
. Tap Add
tunneling
rotocol.
re-shared
ate-based
orage. To
Screen
e Internet
r phone’s
pply, and
pot. Go to
lp.
Page 35

35
Tap ÆÆ More ÆTethering & portable hotspot Æ un-tick the
Portable Wi-Fi hotspot check box.
Mobile Networks
The Mobile Networks Settings lets you control the settings of your subscriptions,
and data settings as well. It also lets you enable or disable access over mobile
networks and connect or disconnect to data services when roaming.
Under the Device category:
Audio Profiles
This menu lets you customize your phone’s settings to suit your activities, lifestyle
and environment. The mobile phone is equipped with multiple user profiles that
you can customize tones for incoming calls, messages. The phone is equipped
with four (4) pre-set profile options: General, Silent, Meeting and Outdoor. Tap a
profile to change its settings.
Display
In this sub-menu, you can change the settings for the phone’s Lock screen
notifications,Wallpaper,Brightness,Auto-RotateScreen,Sleep,Daydream,Font
size ,Fonts, Cast screen.
: Please note that there is another way to customize your phone’s appearance
i.e. change the wallpaper. On idle mode, tap and hold any clear part of the Home
Page 36

36
screen and a series of options on changing the wallpaper will appear. To change,
just follow the prompt on the screen.
Storage
View and manage the data storage of your device:
Total Space and Available Space: Lists the amount of space on the phone storage
installed in your device and the amount you have used to store photos, videos,
music, and other files.
Available Space: The amount of internal phone storage used by the operating
system, its components, applications (including those you downloaded), and their
permanent and temporary data.
Battery
This sub-menu displays the status of your battery’s power.
Apps
This sub-menu enables you to manage all the installed, running and saved
applications in the phone memory and SD card.
Personal category:
Location access
Your device supports Global Positioning System. The settings related to the
location, EPO and AGPS can be configured using this sub-menu.
This allows apps to determine your location and use this to speed up process
when searching for places using GPS and improving Google search results.
Page 37

37
Security
This allows you to protect your device from unauthorized users by setting the PIN
code or entering a password before being able to access the phone.
Screen Lock
Please refer to Locking/Unlock your Phone
Disabling Screen Unlock Security
If you have created an unlock pattern, PIN or password, you can disable it.
Tap ÆÆ Security Æ Screen lock.
Draw the screen unlock pattern or enter your PIN/ password you have created if
required.
Tap None.
Encrypt Phone
Note: Encryption takes an hour to accomplish. For more info, tap ÆÆ
Security Æ Encrypt your phone.
Set up SIM Card Lock
This prevents unauthorized individuals from using your SIM card. The SIM Card
lock feature requires user to enter PIN to use phone. To activate ÆÆSet
up SIM card Lock ÆLock SIM Card
Protect Your Phone with a PIN or Password
Page 38

38
Create a PIN or Password
Tap ÆÆ Security Æ Screen lock.
Tap PIN or Password.
Enter desired PIN or Password Æ Continue Æ Re-enter PIN or Password Æ OK
Language & Input
Use the Language & Keyboard settings to select the language for the text on your
device and for configuring the onscreen keyboard. You may also add words to
your personal dictionary.
Backup & Reset
If activated, this sub-menu allows you to back-up your data, WLAN passwords and
other settings to Google servers.
The Factory Data Reset erases all data in your phone’s internal storage including
your accounts, system and app data, downloaded apps.
To access this, go to ÆÆ Backup & Reset ÆDRM reset /Factory Data
Reset ÆReset Phone Æ Erase Everyt h ing.
Add account
Add account Contain Corporate and Email.
Date & Time
Page 39

39
This lets you choose whether to automatically update your phone’s date and time
or otherwise. You may also automatically synchronize your phone’s date and time
according to your time zone.
In this sub-menu, you may also set the date, time, time zone, time and format.
Schedule power on & off
You can set time of boot or shutdown by touching it. You may also select to repeat
it or a certain day during a week.
Accessibility
You can use the Accessibility settings to configure any plug-ins you have installed
on your device. You may enable aor disable the following services on your phone
by marking/unmarking the following options’ checkbox:
• Magnification gestures
• Large text
• Power button ends call
• Auto-rotate screen
• Text-to-speech output
• Touch &hold delay
• Enhance web accessibility
• Quick boot
Developer Options
This lets you view your Development Device ID and enable or disable the debug
Page 40

40
mode when USB is connected. Other options include:
Desktop backup password
– Desktop full backups aren’t currently protected
Stay awake
– the screen will not be put to sleep mode while charging
Protect SD card
–Apps must request permission to read SD card
USB Debugging
– proceeds to debug mode when USB is connected
Power menu bug reports
– Include prtion in power menu for taking a bug report
Allow mock locations
– lets you use a different location regardless of your actual
whereabouts.
Select debug app
– No debug application set
Wait for debugger
– Debugged application waits for debugger to attach before
executing.
Verify apps over USB
– Check apps installed via ADB/ADT for harmful behavior.
Show touches
– shows visual feedback for touches
Pointer location
– lets a screen overlay showing current touch data
Show layout bounds
– Show clip bounds,margins,etc.
Show GPU view updates
– Flash views inside windows when drawn with the GPU
Show hardware layers updates
– Flash hardware layers green when they update
Show GPU overdraw
– From best to worst:blue,green,lightred,red
Show surface updates
– Flash entire window surfaces when they update
Window animation scale
– Animation scale 1x
Transition animation scale
–Animation scale 1x
Page 41

41
Animator duration scale –Animation scale 1x
Disable HW overlays
– Always use GPU for screen compositing
Force GPU rendering
– Fore use of GPU for 2d drawing
Force 4x MSAA
–Enable 4x MSAA in OpenGL ES2.0 apps
Strict mode enabled
– displays home screen when apps do long operations on a
main thread.
Show CPU Usage
– displays screen overlay showing current CPU usage
Profile GPU rendering
– Measure rendering time in adb shell dumpsys gfxinfo.
Enable OpenGL traces
-None
Enable traces
–No traces currently
Don’t keep activities
– destroys every activity as soon as the user leaves it
Background process limit
– lets you set how many processes can run
simultaneous in the background.
Show all ANRs
– shows ‘not responding’ dialog for background apps
: You must go to About phone->Build number, tapping five times in a row, back
to the previous page, the developer options will appear.
About Phone
This allows you to view system information including wireless updates, status, and
your phone’s specifications and legal information.
Page 42
42
Applications for telcel.
SIM Telcel
You can access the TELCEL SIM tool kit via this menu.
Portal Claroideas
You can access the internet webpage via Portal ideas directly.
Telcel
ideas apps is a container that collects famous telcel services.
You can access any telcel services via this apps.
GPS
You can access the GPS Telcelservice via this menu
Claromusica
You can access the TELCEL music service via this menu
Clarojuegos
You can enjoy the TELCEL games via this menu
6. Important Safety Precautions
This mobile phone meets quality standards set by national authorities and
complies with safety requirements on harmless human exposure to radio waves.
Kindly read the following guidelines before using your wireless phone. Utmost
compliance with these precautions is highly recommended for your safety.
Page 43

Non-compliance may pose da
illegal.
General Precautions
•
Use only authorized
a
use of incompatible b
a
overheating, rupture o
r
•
Do not put the battery
,
microwave, as this ma
y
•
Do not use the mobil
Doing such may caus
e
•
Do not store the phon
extensive damage to t
h
•
Keep the phone out of
Do not use your phone
w
moving a vehicle and observ
e
unfortunate incidents.
If you are with a pac
e
centimeters away from the m
e
Consult your physician for mor
e
43
nger to you and your mobile phone, an
ccessories and batteries by the manufa
c
tteries and accessories may cause bat
t
fire. This may also nullify your warranty.
phone and charger in a high-pressure c
o
result in circuit damage or fire.
e phone near flammable and explosive
explosion or fire.
e in areas with high temperature as this
c
e handset.
children’s reach.
hile driving. Keep your hands free when
o
road safety rules and traffic regulation
s
maker, make sure to use your phone
a
dical device as it may interfere with it
s
information.
d may be
turer. The
ery leaks,
ntainer or
materials.
an cause
perating a
to avoid
t least 20
function.
Page 44

44
Phone
• DO turn off your mobile phone inside aircrafts, hospitals and other
locations where its use is restricted. Use of handsets in prohibited areas is
dangerous as it may cause interference in the operation of electrical and
medical equipment.
• DO keep your mobile phone away from moisture. Contact with water or
any liquid may cause the phone to malfunction and overheat.
• DON’T disassemble or remodel your phone as this may cause permanent
and irreparable damage. This may also void your mobile phone’s
warranty.
• DON’T use sharp or pointed objects in pressing you phone’s keys as this
can cause damage.
• DON’T use your handset if you notice any damage (e.g. broken antenna)
as this may cause injury to the user.
Battery
• Each phone is equipped with a rechargeable battery. Use only authorized
batteries and accessories.
• For better performance and longer battery life, initial charging of at least
four (4) hours is recommended when using the mobile phone for the first
time.
Page 45

45
• The optimum performance of a new battery is achieved only after two or
three complete charge and discharge cycles. Overcharging, however, may
affect battery life.
• Do not use a damaged battery or charger. If battery life becomes
noticeably shorter than usual, it is recommended to replace it with a new
one.
• While charging, keep the mobile phone out of children’s reach.
• Store the battery in a cool and dry place away from direct sunlight, dust
and water.
• Avoid exposing batteries to extreme temperature (below -10°C (14°F) or
above 45°C (113°F)).
• Unplug the charger from the electrical outlet when not in use.
• Avoid using the charger in a wet environment. If the charger comes in
contact with water or any form of liquid, immediately unplug it from the
outlet to reduce the risk of overheating, charger malfunction, electric shock
or fire.
• Be careful with the disposal of spent batteries. Avoid throwing them in a
fire, as this may cause explosion. It is recommended to abide by local
environmental laws and guidelines on proper waste disposal.
Page 46

46
• Do not short-circuit the batteries (i.e. when metal objects such as coins,
are directly connected to the metal side of the battery) as this will damage
your phone. It is advisable to handle spare batteries with extra care.
Cleaning and Maintenance
• The handset, battery and charger are not water-resistant and should
always be kept dry. Avoid using them in excessively moist areas.
• Use a soft, dry cloth to clean the handset, battery and charger.
• Do not use alcohol, thinner, benzene or other solvents to clean the
handset.
• Avoid charging the mobile phone through a dirty outlet as this causes poor
electrical contact and results in power lost and charging failure.
7. Troubleshooting
Below is a list of common problems that may occur when using your mobile phone.
Before running to Service Center, you may want to troubleshoot the issues first in
order to save time and energy.
For better performance, it is recommended to always fully charge your battery.
Avoid storing too much data in the phone as this may affect its performance.
1. Phone does not switch on
Page 47

•
Press and hold th
e
•
Check the battery
c
•
Remove and inser
t
2. Phone does not resp
o
•
Press and hold th
e
•
Remove and inser
t
3. The phone switches
o
•
Check if the keypa
•
Check the battery
c
4. The battery won’t ch
a
•
Make sure the bat
t
•
Make sure that the
•
Use only approve
d
•
Double check if t
h
mobile phone or n
o
: The charger can be conne
c
5. Standby time is too s
h
•
Standby time has
local network serv
i
area.
•
In some cases, yo
u
47
end key until image appears on the displ
a
harge level.
the battery, and switch your phone on a
g
nd for several minutes
end key.
the battery, and switch your phone on a
g
ff by itself
d is locked when left unused.
harge level.
rge
ery is not fully drained.
battery is inserted correctly.
batteries and chargers.
e charger connector is properly conne
c
t.
ted only after the battery is inserted.
ort
something to do with the system settin
g
ce provider. Switch your phone off in a w
might need to replace the battery.
y.
ain.
ain.
ted to the
s of your
eak signal
Page 48

48
6. Cannot connect to a network
• Move to an area with better coverage.
• Contact your local network service provider.
• Try to manually select a network.
7. SIM Error
• Make sure that SIM card is properly inserted in its intended spot.
• Make sure that the chip in the SIM card is not damaged or the SIM
card is not scratched.
• Check the coverage of your local network service provider if you
appear to be out of coverage or have weak signal. You may opt to
move near a window.
8. Cannot make calls
• Make sure that the number you dialed is correct and the dial key has
been pressed.
• Use the full national area code.
• When abroad, use country-specific international access codes
9. Cannot receive calls
• Make sure that your phone is connected to a network (Check if the
network is busy or invalid).
• Check the Call Diverts settings.
Page 49

49
• Check the Incoming Call Barring settings.
10. The caller’s number is not displayed
• Contact your local network service provider as the caller might have
withheld his or her number.
11. Entries cannot be made in Phonebook.
• Check if the Phonebook is full. If so, you may have to delete some
records in order to accommodate new ones.
12. The caller cannot leave a voicemail message
• Contact your local network service provider
• Make sure that the voice mail number you have saved is correct.
• If the network is busy, try again after a few minutes.
13. Messages cannot be sent/received
• You may have to delete some old or saved messages, as the
message capacity of the phone is limited.
• Contact your local network service provider and verify your service
center number.
14. PIN is entered incorrectly three times
• Enter the PUK code (PIN Unlock Code). This code usually comes with
the SIM card upon purchase. Otherwise, contact your local service
provider.
Page 50

50
FCC Statement
§ 15.19 Labeling requirements.
This device complies with part 15 of the FCC Rules. Operation is subject to the following
two conditions: (1) This device may not cause harmful interference, and (2) this device
must accept any interference received, including interference that may cause undesired
operation.
§ 15.21 Information to user.
Any Changes or modifications not expressly approved by the party responsible for
compliance could void the user's authority to operate the equipment.
§ 15.105 Information to the user.
Note: This equipment has been tested and found to comply with the limits for a Class B
digital device, pursuant to part 15 of the FCC Rules. These limits are designed to provide
reasonable protection against harmful interference in a residential installation. This
equipment generates uses and can radiate radio frequency energy and, if not installed and
used in accordance with the instructions, may cause harmful interference to radio
communications. However, there is no guarantee that interference will not occur in a
particular installation. If this equipment does cause harmful interference to radio or
television reception, which can be determined by turning the equipment off and on, the
user is encouraged to try to correct the interference by one or more of the following
measures:
-Reorient or relocate the receiving antenna.
-Increase the separation between the equipment and receiver.
-Connect the equipment into an outlet on a circuit different from that to which the receiver
is connected.
-Consult the dealer or an experienced radio/TV technician for help.
Page 51

51
Specific Absorption Rate (SAR) information:
This mobile phone meets the government's requirements for exposure to radio waves. The
guidelines are based on standards that were developed by independent scientific
organizations through periodic and thorough evaluation of scientific studies. The standards
include a substantial safety margin designed to assure the safety of all persons regardless
of age or health.
FCC RF Exposure Information and Statement The SAR limit of USA (FCC) is 1.6 W/kg
averaged over one gram of tissue. Device types:
JOIN(FCCC ID:YPVITALCOMJOIN)
has also been tested against this SAR limit. The highest SAR value reported under this
standard during product certification for use at the ear is 0.515W/kg and when properly
worn on the body is 0.601W/kg. This device was tested for typical body-worn operations
with the back of the handset kept 10mm from the body. To maintain compliance with FCC
RF exposure requirements, use accessories that maintain a 10mm separation distance
between the user's body and the back of the handset. The use of belt clips, holsters and
similar accessories should not contain metallic components in its assembly. The use of
accessories that do not satisfy these requirements may not comply with FCC RF exposure
requirements, and should be avoided.
Body-worn Operation
This device was tested for typical body-worn operations. To comply with RF exposure
requirements, a minimum separation distance of 10mm must be maintained between the
user’s body and the handset, including the antenna. Third-party belt-clips, holsters, and
similar accessories used by this device should not contain any metallic components.
Page 52

52
Body-worn accessories that do not meet these requirements may not comply with RF
exposure requirements and should be avoided. Use only the supplied or an approved
antenna.
 Loading...