

NVX BDA7501 User Manual
750 WATT RMS
MONOBLOCK CLASS D
AMPLIFIER
USER MANUAL
BDA7501

1
NVX AMPLIFIER
THANK YOU FOR CHOOSING NVX
Thank you for choosing the NVX Boost Series Monoblock Amplier!
Your choice of an NVX BDA7501 Amplier indicates a desire for
high quality music reproduction in the automobile. NVX Boost Series
Ampliers bring you over four decades of car audio expertise. So
whether you are a music loving commuter or a serious car audio
competitor, NVX has the product for you!
Visit: nvx.com | Call: 213.444.1689 | 15303 Ventura Blvd. 9th Floor, Sherman Oaks, CA 9140 3
2
MONOBLOCK CLASS D | BDA7501
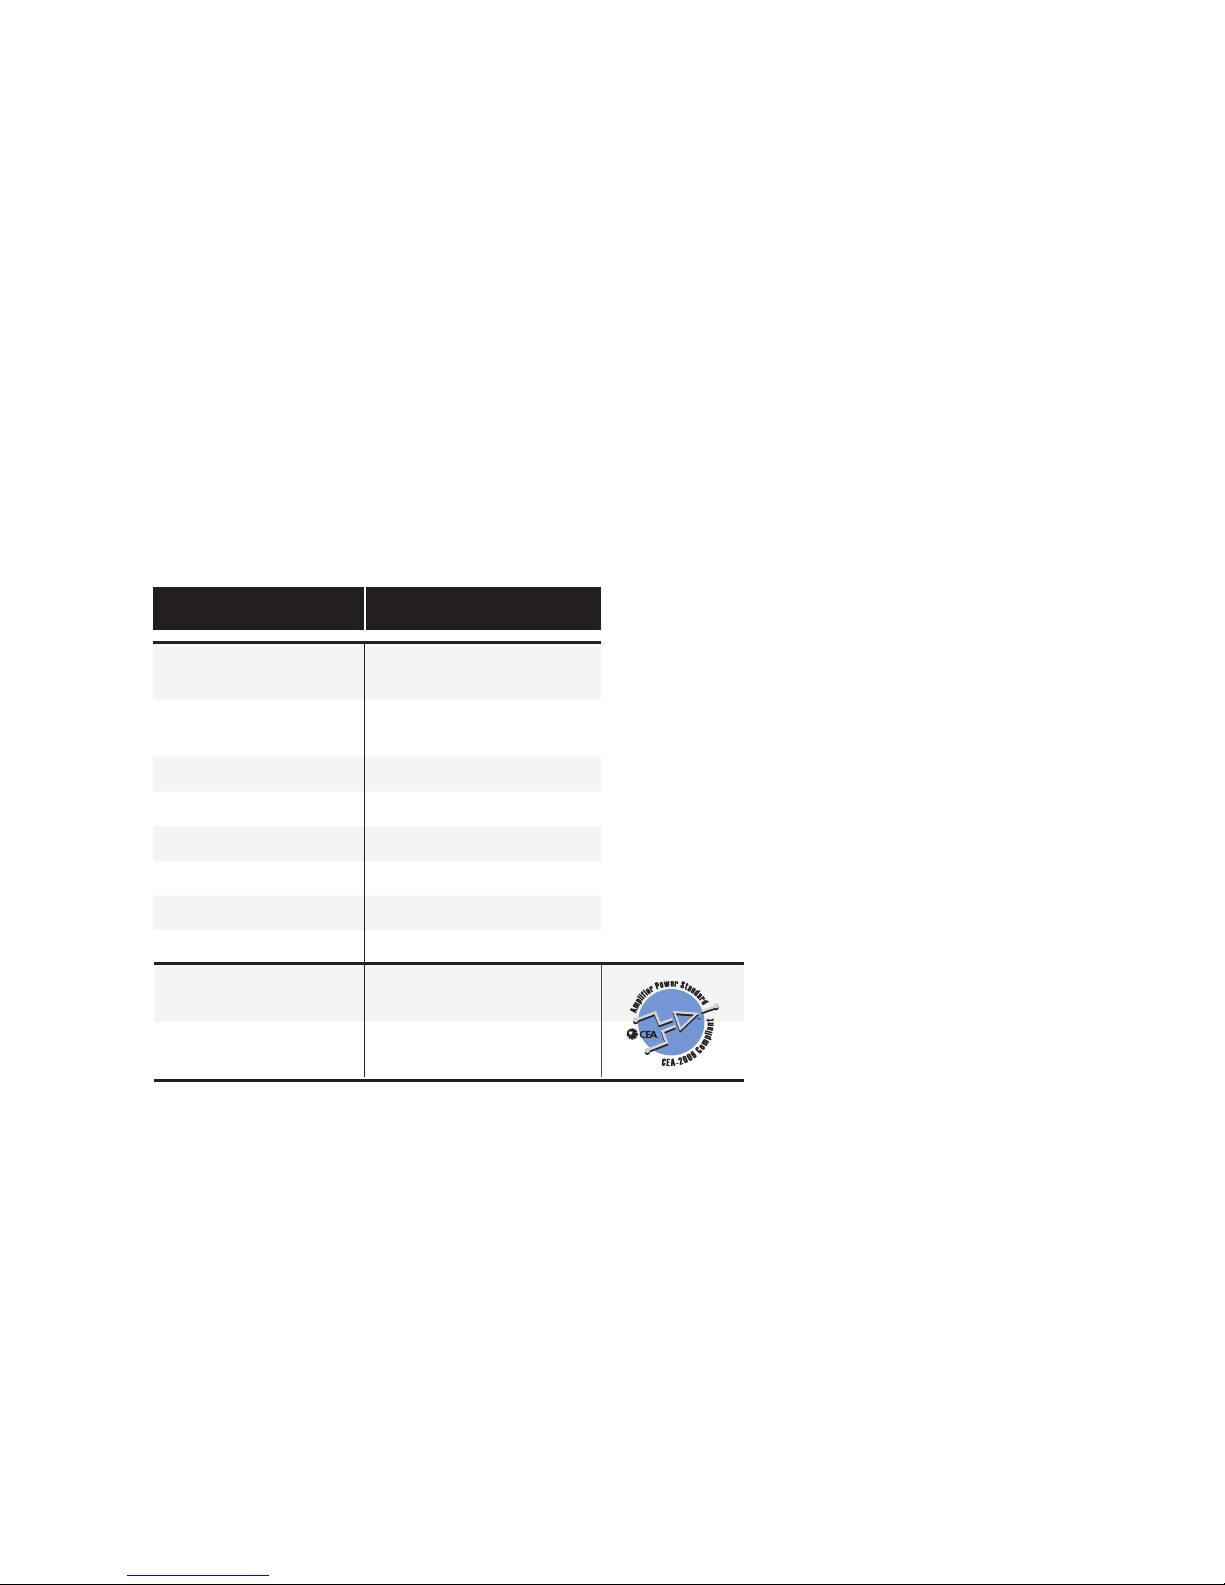
SPECIFICATIONS FEATURES
AMPLIFIER BDA7501
RMS Power Output
@ 14.4
450 Watts x 1 Channel
@ 4 Ohms
750 Watts x 1 Channel
@ 2 Ohms
Frequency Response
50-250 HZ
Input Sensitivity
.25-6.0 V
Signal-to-Noise Ratio
90 dB
Variable Low Pass Filter
50-250 Hz
Subsonic Filter
10- 50 Hz
Bass Boost
0-18 dB
• 12 dB per octave slopes allow you to tailor the sound to
best t the subwoofer and your listening preferences
•
18 dB per octave slope offers steep roll-off above or
below the selected frequency
•
High quality platinum nish connections for solid electrical
connections that resist corrosion
•
Overload, short circuit, thermal, and reverse polarity
circuit protection
RMS Power Output
400 Watts x 1 Channel
@ 4 Ohms & ≤ 1% THD+N
Signal-to-Noise Ratio
88 dBA
1 Watt into 4 Ohms

3
NVX AMPLIFIER
INSTALLATION
LEVEL CONTROL
•
NOT a volume or a power limiting control
• Makes the amp more sensitive to input from the stereo
•
With the gain up the amp will reach full output at a
lower volume
•
Try to run the gain at the lowest setting possible for
your system
LPF CONTROL
• Removes unwanted frequencies from a subwoofer
or amplifier
•
Tweeters can easily be destroyed by bass notes,
subwoofers won’t sound natural if it is playing
midrange notes
•
Requires careful adjustment to ensure that you are left
with no holes in your frequency response range
Professional installation by an authorized NVX dealer is
highly recommended! Otherwise, the performance of your
new amplier may not be satisfactory. In the event that you
decide to do your own installation, please read and follow
this manual carefully. Failure to do so may compromise the
integrity of the amplier, your automobile and potentially
void the product warranty.
Ampliers are generally mounted in the hatch/trunk area
of a car or SUV and under or behind the seat of most
pickup trucks. Select a location that will provide adequate
ventilation for the amplier. Avoid mounting the amplier
with the ns facing down. The ns should be facing up,
either vertically or horizontally. Secure the amplier with
the screws provided.
Before securing the amplier, inspect the mounting
location carefully to ensure that you do not drill into or
damage any electrical, hydraulic, uid, or fuel lines.
Know your total ohm load before you make
any connection
FEATURES CONT.
 Loading...