

Page 1
1
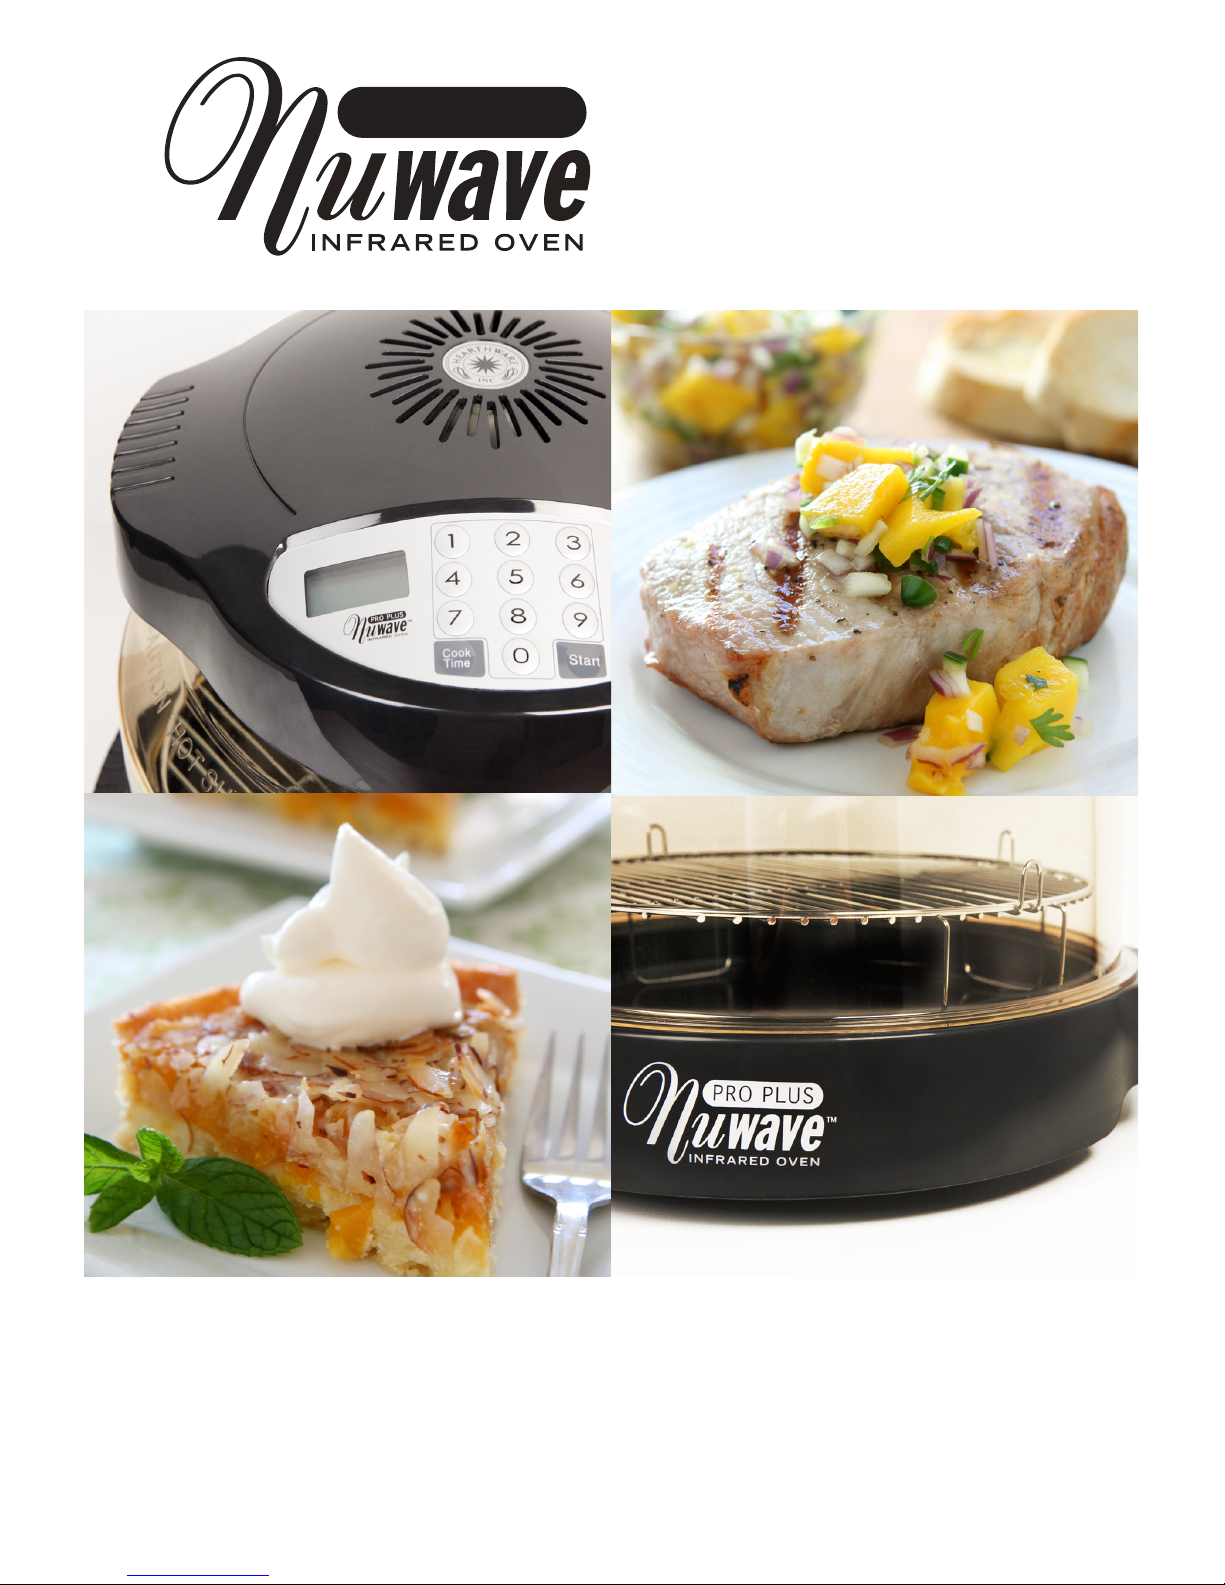
NuWave Oven Pro Plus Manual & Complete Cookbook
PRO PLUS
Page 2

2
IMPORTANT SAFEGUARDS
When using electrical products, especially when children are present,
basic safety precautions should always be followed, including the
following:
READ ALL INSTRUCTIONS BEFORE USING
DANGER – To reduce the risk of electrocution:
Read all instructions, safeguards, and warnings before using the
appliance.
Do not place appliance where it can fall or be pulled into water or other
liquids.
Do not reach for an appliance that has fallen into water. Unplug
immediately!
Do not immerse cord, plug, or power head in water or other liquids.
WARNING – To reduce the risk of burns, electrocution, re or injury:
This appliance should not be used by children. Close supervision is
necessary when this product is used near children.
Use this appliance for its intended purpose as described in this brochure.
Do not use any other accessories or attachments not recommended by the
manufacturer. They may result in re, electrical shock, or personal injury.
Never operate this appliance if it has a damaged cord or plug; not working
properly; has been dropped or damaged; or dropped into water. Return the
appliance to an authorized customer service center for inspection, repair,
or adjustment. Any other servicing should be performed by an authorized
service representative.
Keep the cord away from heated surfaces.
Unplug from outlet when not in use and before cleaning. Allow to cool
before putting on or taking off parts.
Always unplug power cord by pulling on the plug. DO NOT unplug by
pulling on cord.
Never force the plug into an outlet.
Do not use outdoors.
Do not use or operate where aerosol (spray) products are being used or
where oxygen is being administered.
Do not let cord hang over edge of table or counter, or touch hot surfaces.
Do not place on or near a hot gas or electric burner or in a heated oven.
Extreme caution must be used when moving an appliance containing hot
oil or other hot liquids.
Use extreme caution when removing hot liner pan or cooking rack.
To disconnect, press the Pause/Clear button twice before unplugging.
Do not use this appliance for anything other than it is intended.
Check all electrical wiring. Beware of damaged cord or plug.
This appliance is for household use only; it is designed to process
normal household quantities. It is not suitable for continuous or
commercial operation.
Page 3

3
Do not disassemble the product. There are no user serviceable parts.
Do not leave the appliance unattended while in use.
Use the handles when lifting the dome from the base.
Do not touch hot surfaces. Use the handles provided or use oven
mitts.
Stop or pause cooking before removing the dome to check or turn
food. The dome and power head should be placed on the dome
holder.
Always remove the dome away from you so the escaping steam is
channeled away from your face.
If the power cord is damaged, it should be replaced by a special cord
or assembly from the manufacturer or its service agent.
Use caution when disposing of hot grease.
Keep this manual handy for easy future reference.
WARNING
SAVE THESE INSTRUCTIONS
Electrical Information:
The cord length of this appliance was selected to reduce Safety
Hazards that may occur with a long cord. Extension cords are
available and may be used if care is exercised in their use. If an
extension cord is used: (1) the marked electrical rating of the
extension cord should be at least as great as the electrical rating of
the appliance, and (2) the longer cord should be arranged so that
it does not drape over the counter or table top where it could be
accidentally pulled off the counter or table or tripped over.
Certain models of the appliance may have a polarized plug (one blade is wider
than the other). This plug is intended to t into a polarized outlet only one way.
if the plug does not t fully into the outlet, reverse the plug. If it still does not
t properly, contact a qualied electrician. Do not attempt to modify the plug in
any way.
Electric shock hazard. Use with adequate electrical system.
Do not use if cord or plug is damaged.
WARNING: All metal items in the oven, such as the liner pan and
cooking rack, can get very hot during cooking. Please be careful
when removing these items from a hot oven. Always wear oven
mitts or use pot holders. Allow liner pan and cooking rack to cool
completely before cleaning. The dome opening may expand
slightly when hot. In rare instances, the power head could detach
itself from the dome completely, thereby causing hot air to
escape from between the dome and the power head.
Page 4

4
Table of Contents
Introduction ................................................. 6
Parts & Accessories .................................... 7-9
Owner’s Manual .................................... 10-17
RoHS Compliant .......................................... 18
NuWave Supreme Pizza Kit ................ 19-21
Quick & Easy Cooking Guide ................ 22-23
Complete Cookbook (General Tips) ............ 24
Breakfast ................................................ 26
Appetizers ............................................... 30
Poultry .................................................... 58
Vegetables .............................................. 45
Vegetables Continued
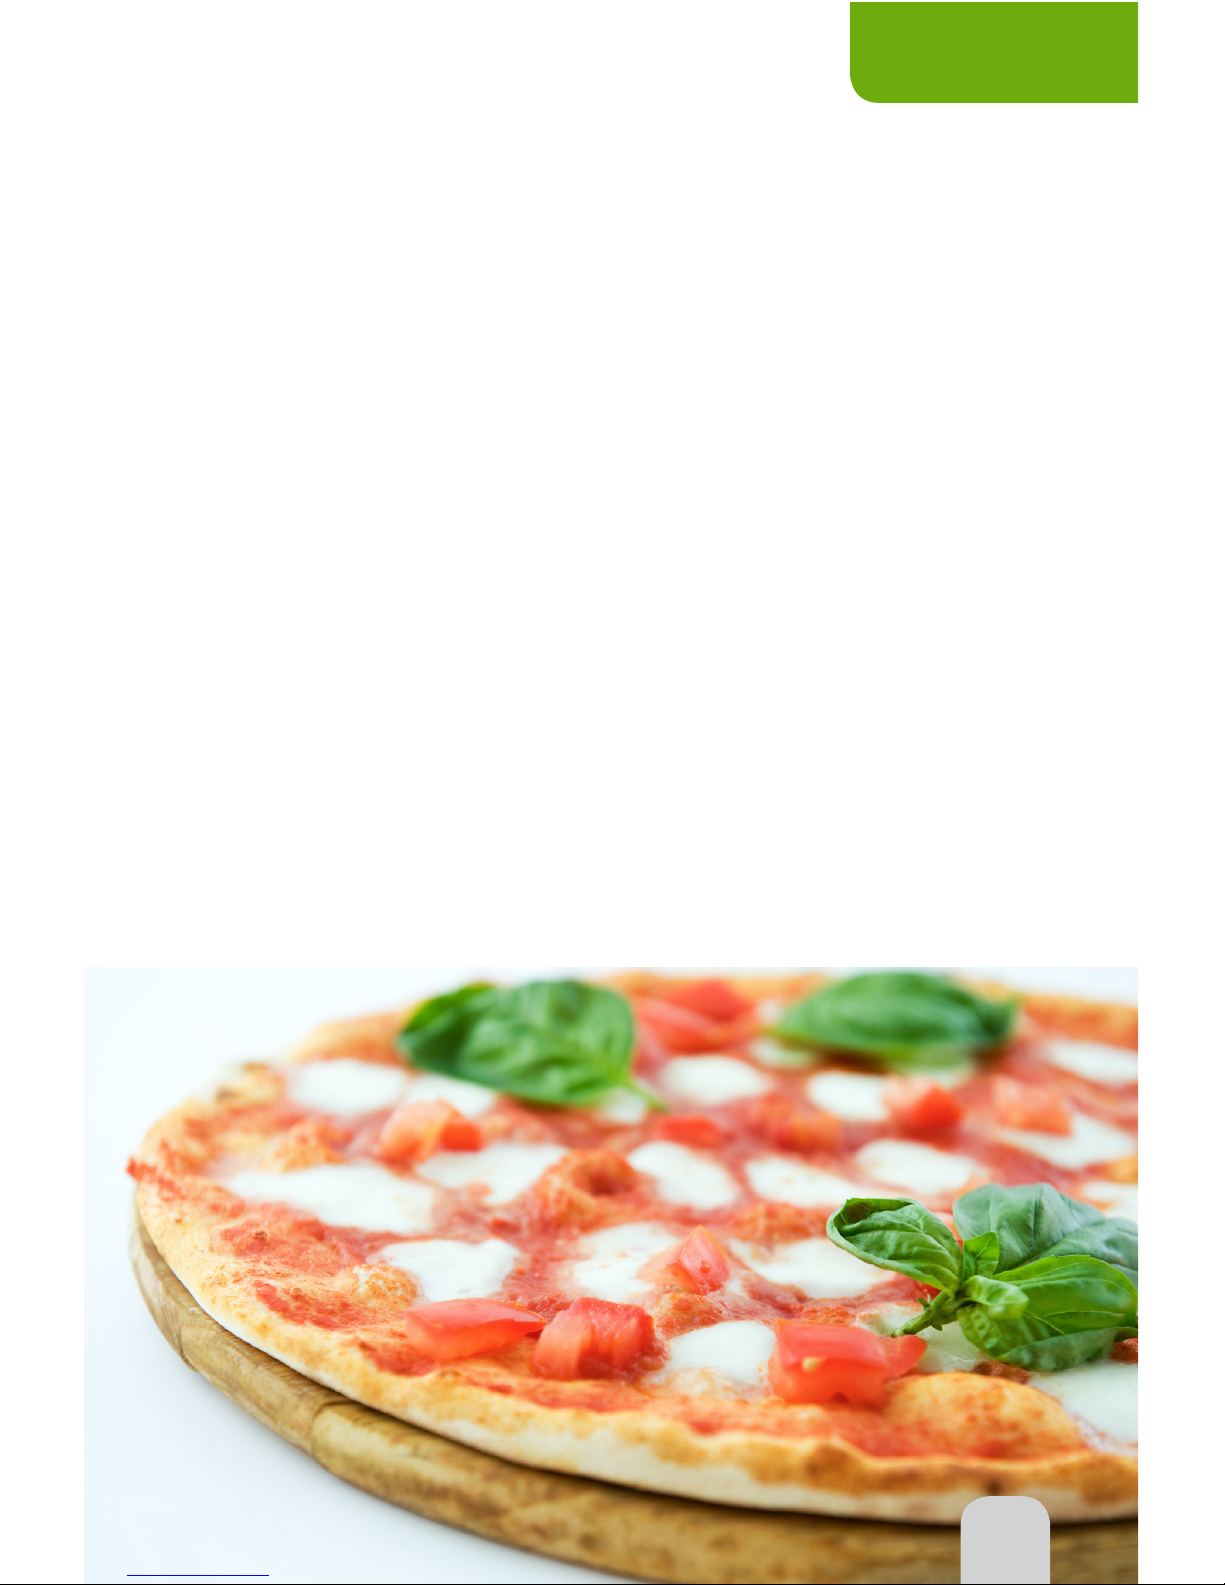
Pizza ........................................................ 41
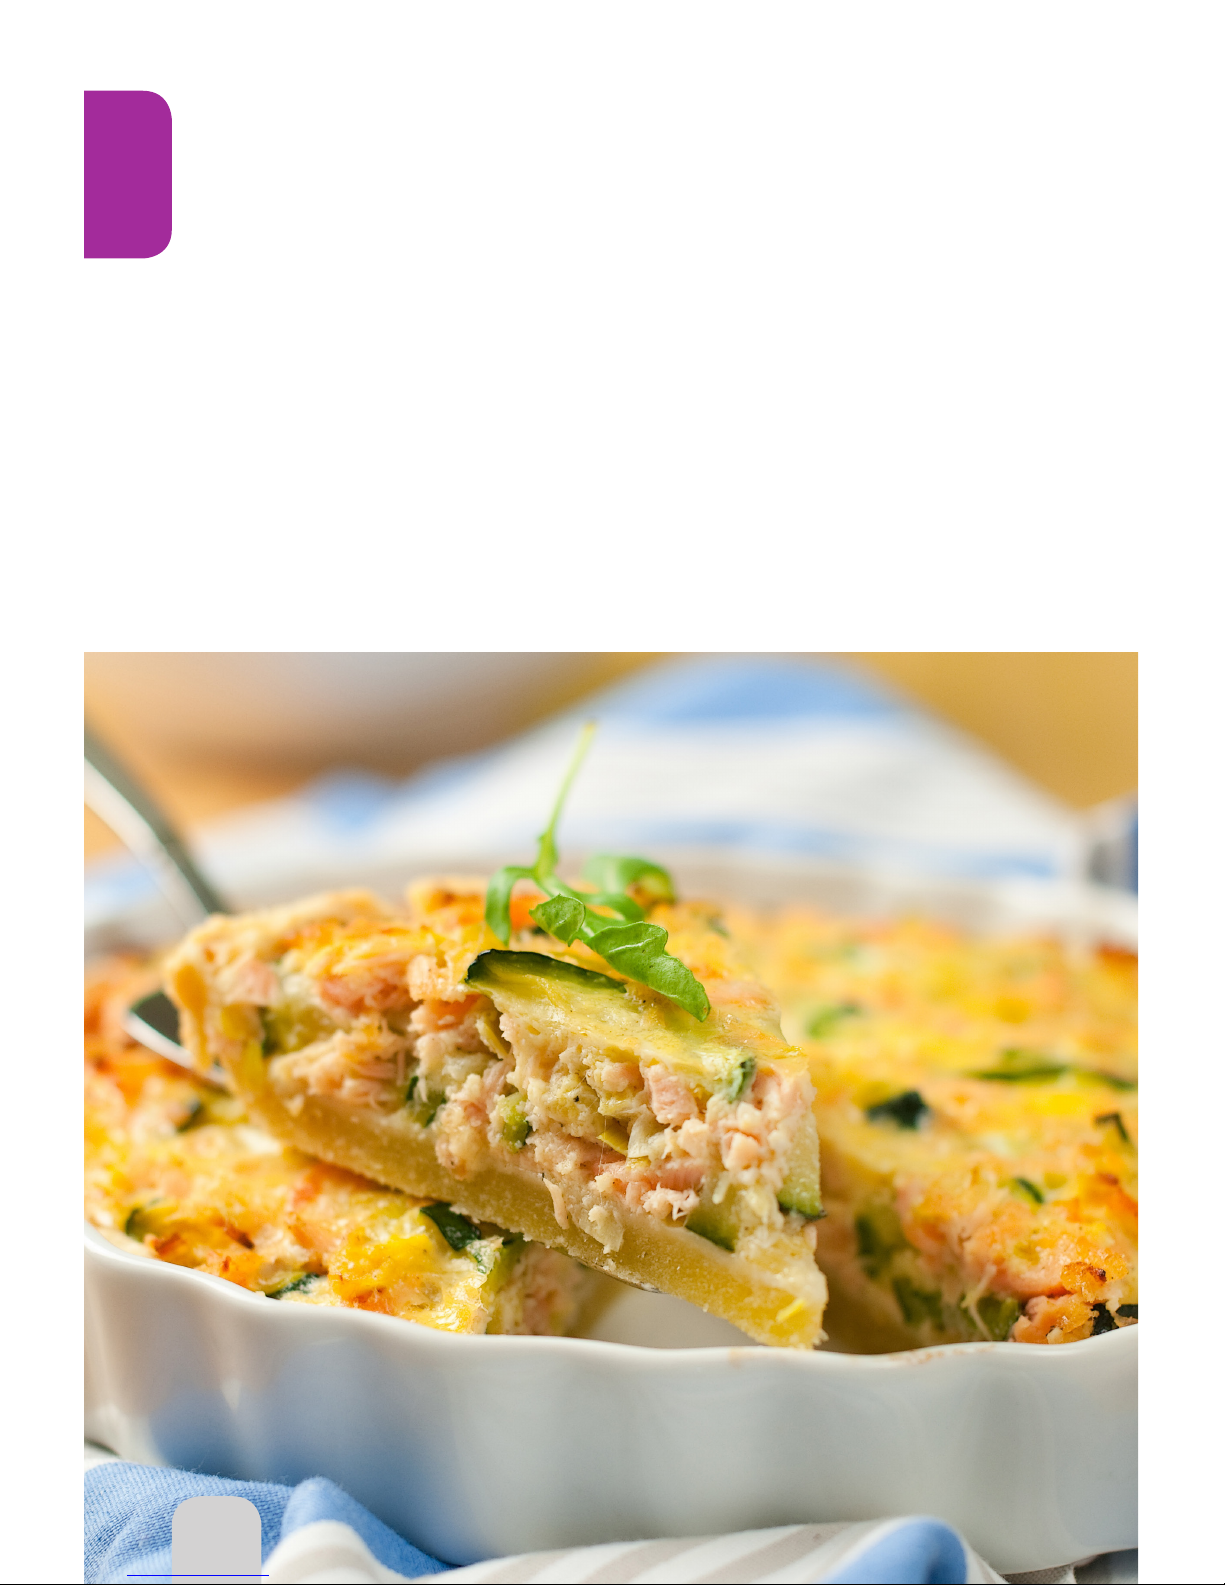
Easy Quiche Pie ................................. 27
Cinnamon Breakfast Twists .............. 27
Oven Omelette .................................... 27
NuWave Mun Sandwich ................. 28
Low-Cal French Toast ......................... 28
Steak & Eggs ..................................... 28
Ham & Cheese Strata ........................ 29
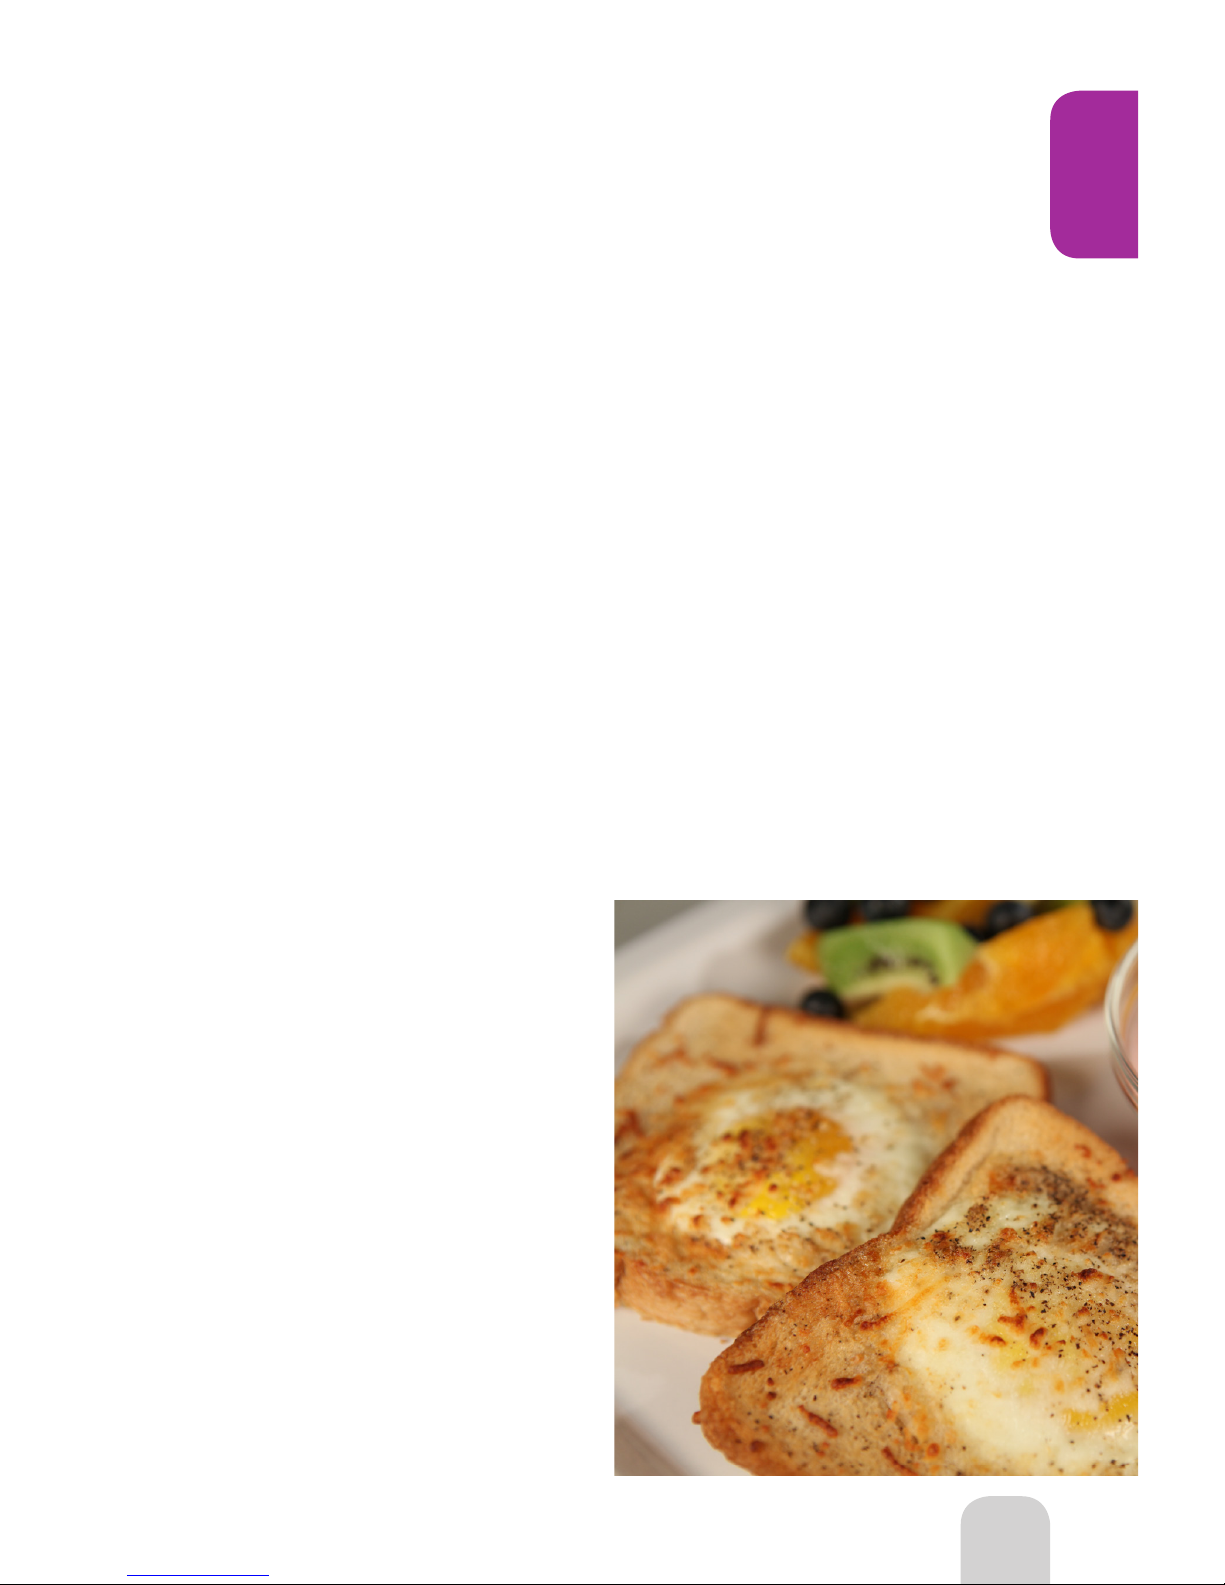
Nest Egg with Manchango ................ 29
Ham & Eggs Scramble ...................... 29
Sweet Party Mix ................................. 31
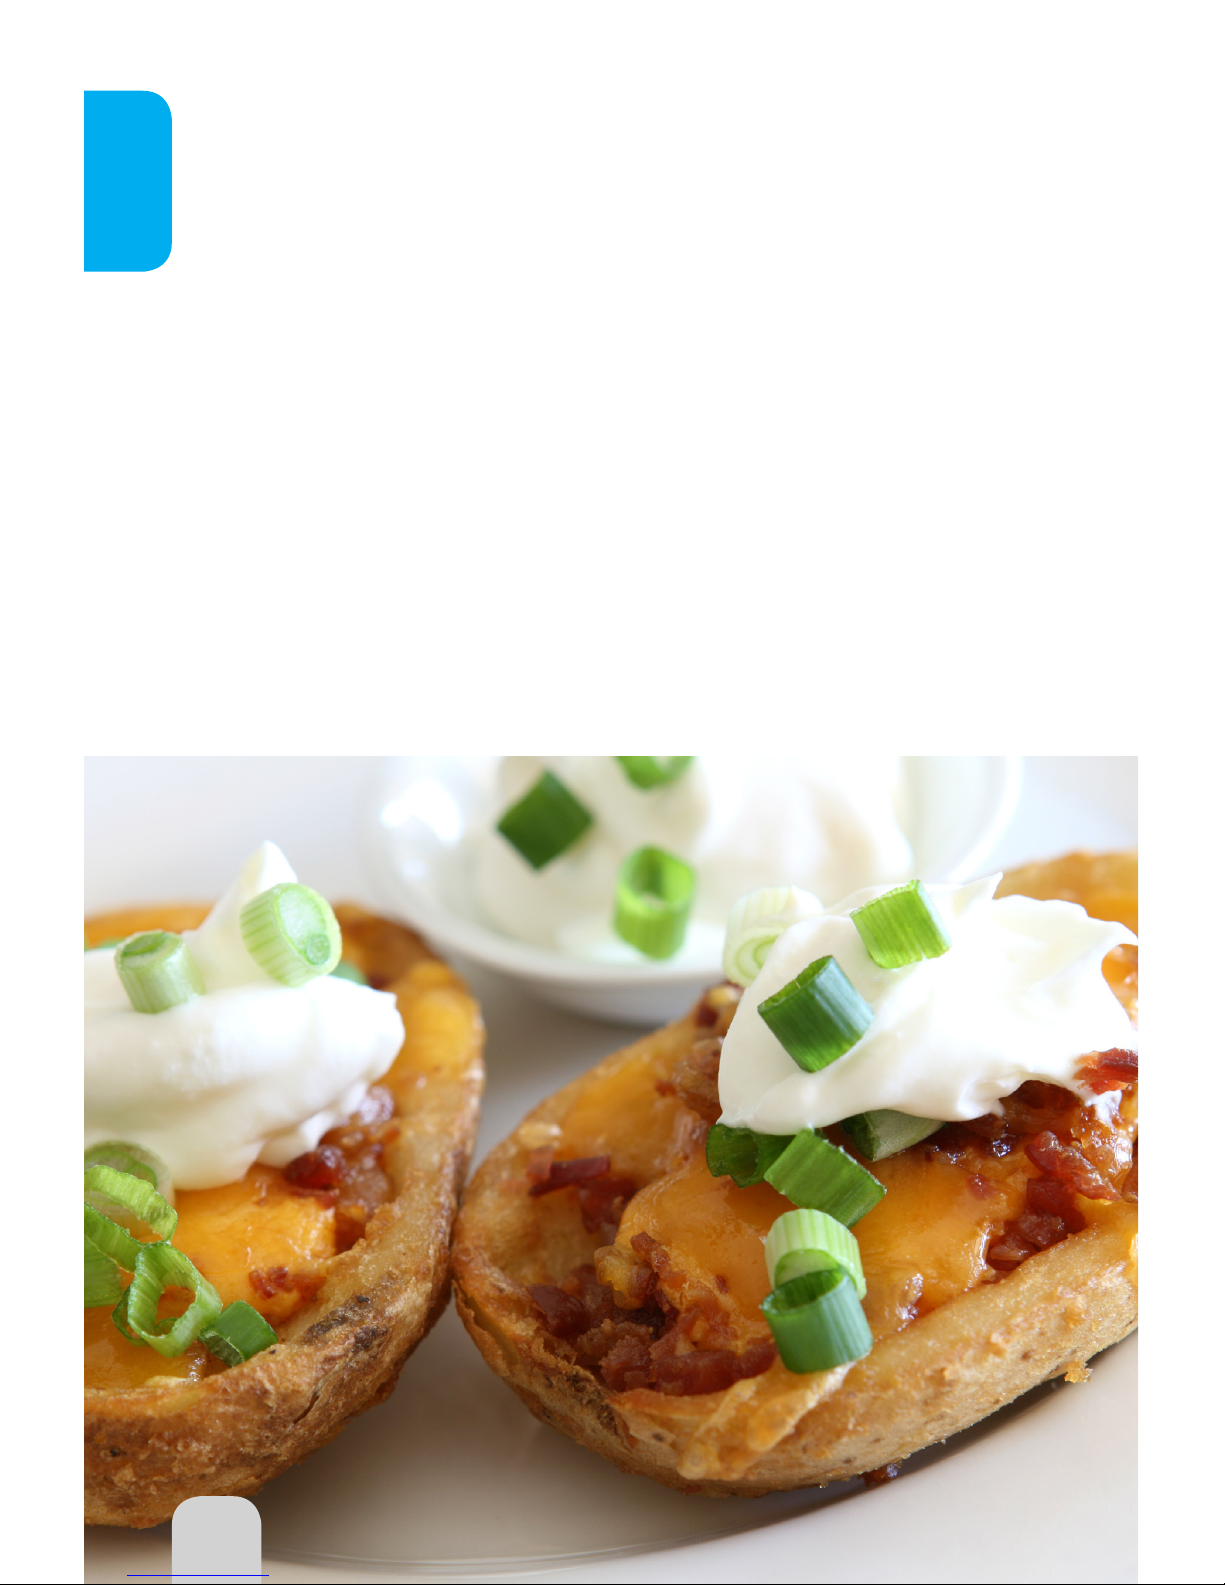
Potato Skins ...................................... 31
Shrimp Rumaki .................................. 31
Sweet & Sour Cocktail Meatballs ....... 32
Skinny Pigs in a Blanket ..................... 32
Grilled Cheese................................... 33
Baked Party Sweet Onion Dip ........... 33
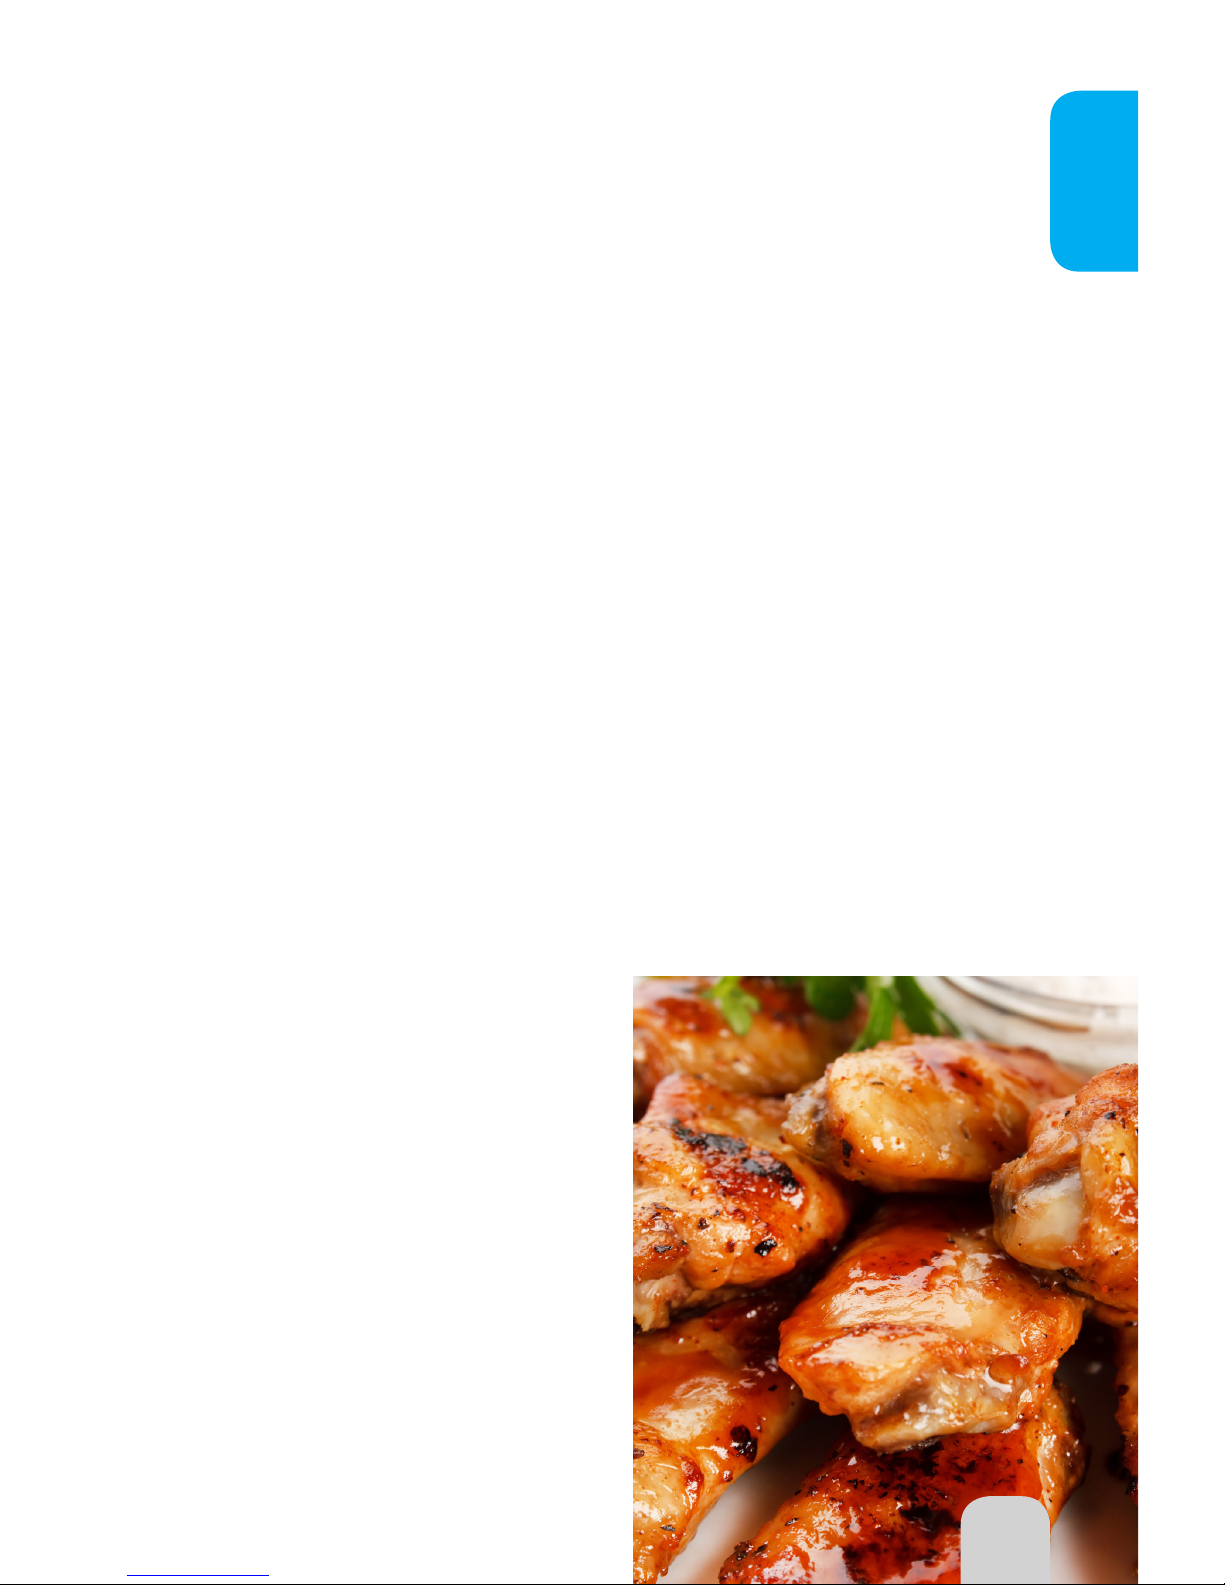
Tangy Mild Wings .............................. 33
Prosciutto-Wrapped Shrimp Sticks .... 34
Savory Lil’ Smokies ............................ 34
Ham & Cheese Pitas .......................... 34
Taco-Flavored Chicken Wings ......... 34
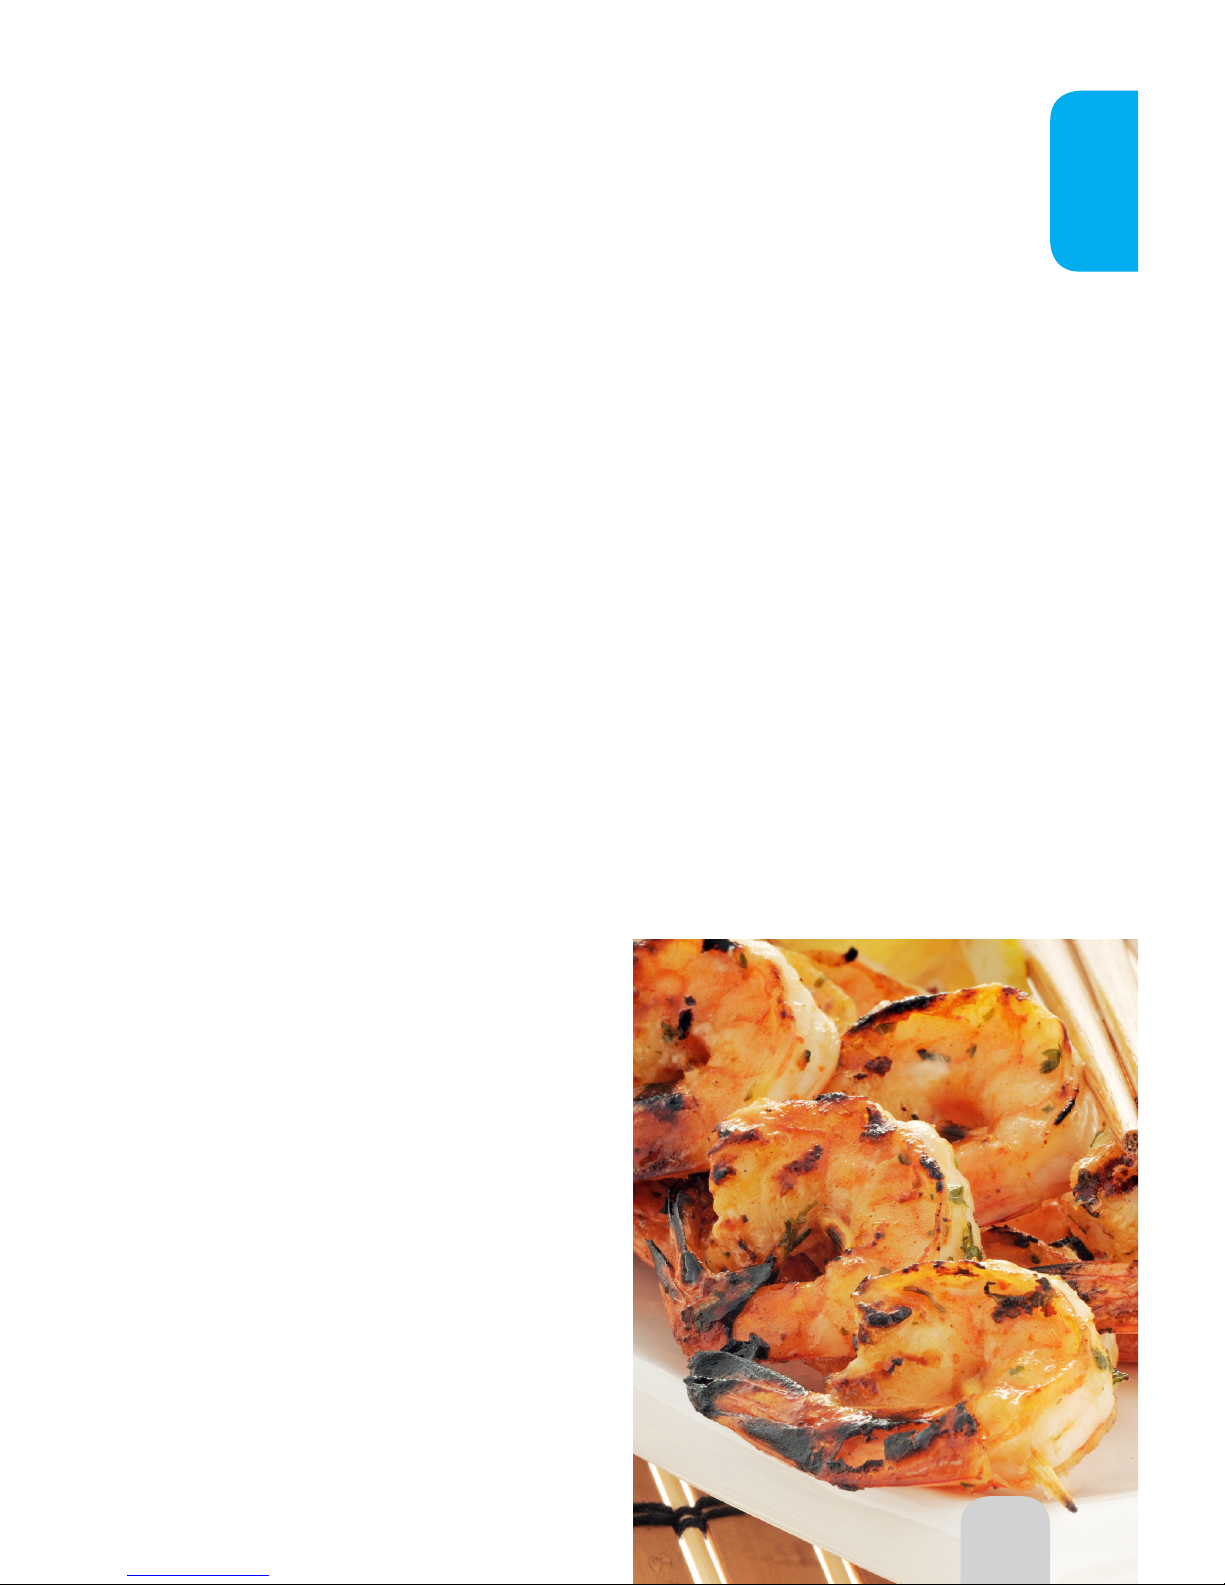
Spicy Grilled Shrimp Skewers ........... 35
Jumbo Lump Crab Cakes ................. 35
Hot Artichoke Dip .............................. 36
Italian Purses ................................... 36
Crab & Parmesan Wontons .............. 37
Chicken Nachos ................................ 37
Spicy Bualo Chicken Sandwiches ... 59
Oven-Fried Chicken ........................ 59
Chicken Tenders with Wasabi Sauce ... 60
Thai Chicken ................................... 60
BBQ Chicken ................................... 60
Chicken with Mushrooms & Peppers . 61
Breaded Chicken Breast .................. 61
Cornish Hens, Artichokes & Potatoes .. 62
Cilantro Garlic Chicken Breast ......... 62
Buttery Chicken Breast .................... 63
Chicken Curry ................................... 63
Caraway Duck with Raspberry Sauce 63
Nutty Breading Chicken Breast ....... 64
Low-Fat Crunchy Filled Chicken ...... 64
Air Fried Honey Ginger Chicken ........ 65
Mexican Elote .................................. 46
Haricots Almondine .......................... 46
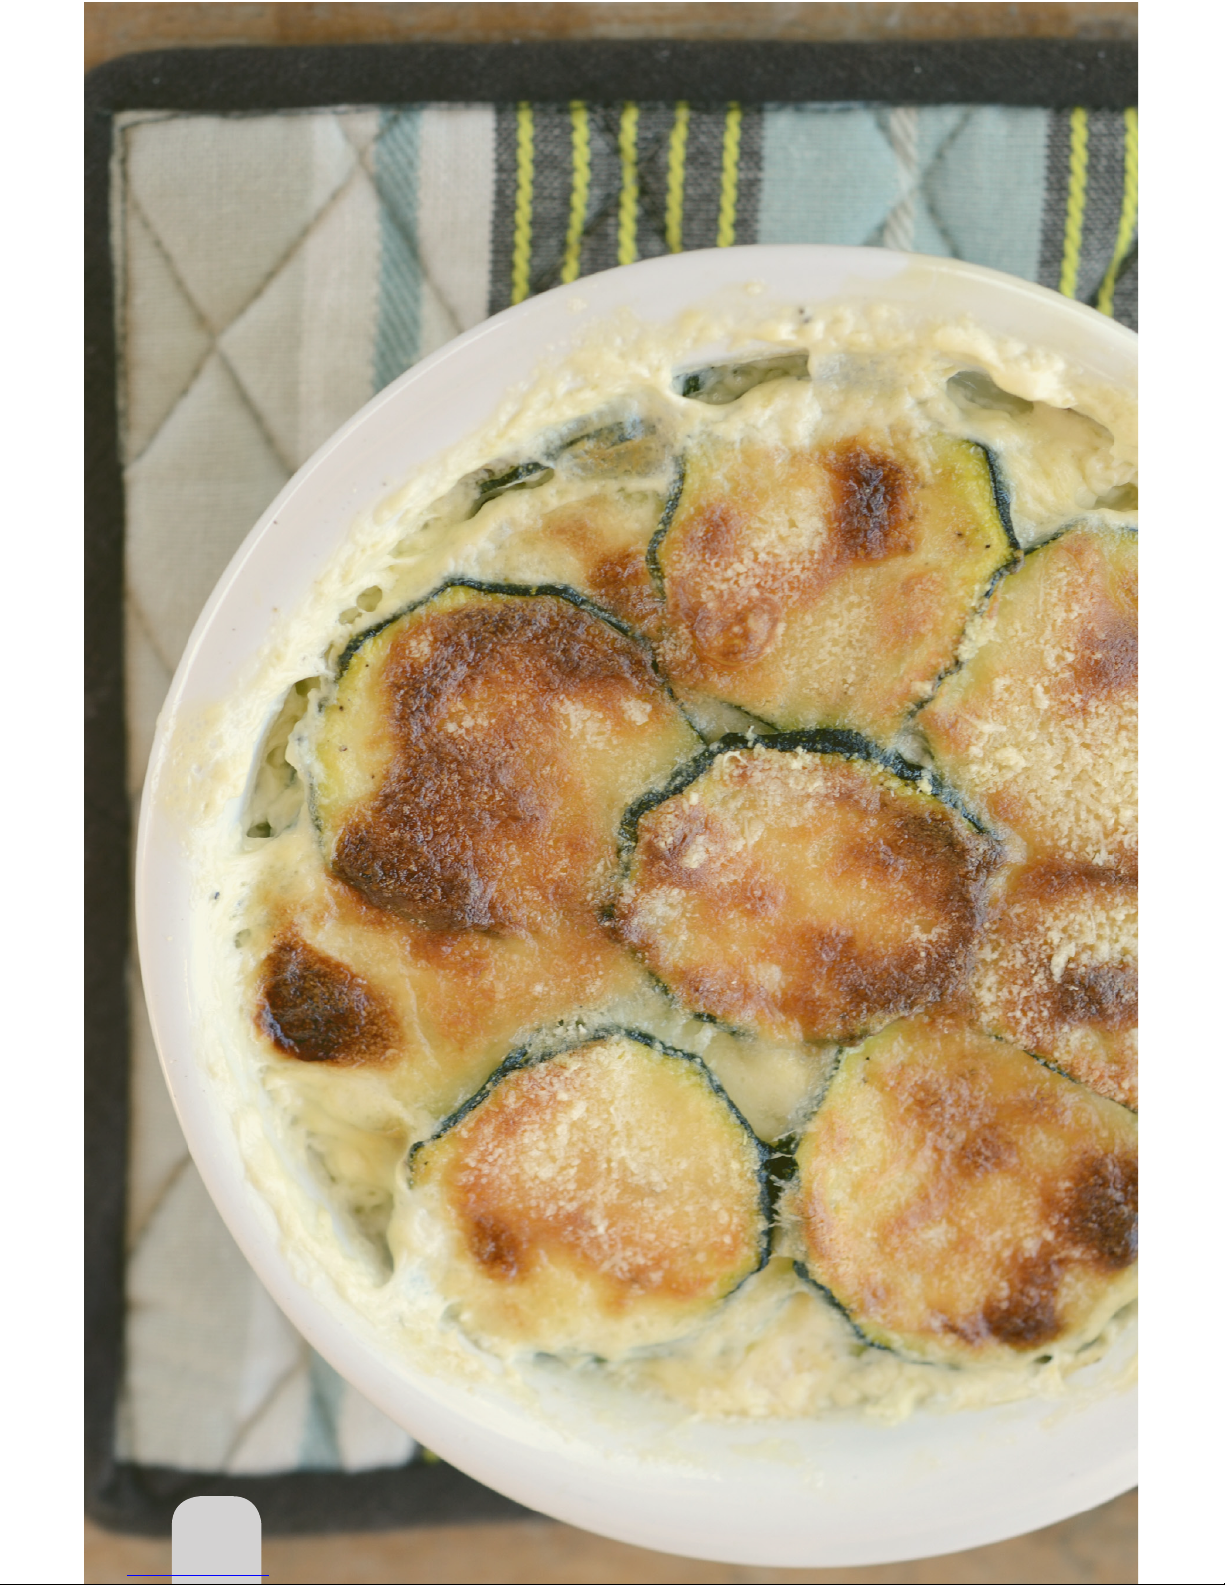
Zucchini & Onions Au Gratin ............. 46
Italian Pizza Burger .......................... 42
Goat Cheese Pizza ............................ 42
Gorgonzola Pizzettas ........................ 42
Mexican Pizza .................................... 42
Pizza Boats ...................................... 43
Calzones ............................................. 43
Mini Spinach Calzones ..................... 44
Pita Pizza ......................................... 44
Beef ......................................................... 66
Glazed Beef Ribs ............................ 67
Honey Citrus Glazed Veal Chops ..... 67
Foolproof Standing Rib Roast .......... 67
London Broil ..................................... 67
Grilled Cheeseburgers ..................... 68
Yankee Pot Roast ............................. 68
Japanese Style Steak ...................... 68
Beef & Andouille Burgers ................. 69
Homestyle Meatloaf ......................... 70
Three-Meat Fajita Dinner ................. 70
Pepper Steak .................................... 71
Corned Beef Brisket ......................... 71
Classic NuWave Pot Roast .............. 71
Beef & Corn Casserole with Noodles .... 72
Baked Reuben Sandwich ................ 72
Japanese Style Steak ...................... 72
Boneless Rump Roast ..................... 73
Dehydration ............................................ 38
Dehydrating Fruit .............................. 38
Dehydrating Vegetables ................... 38
Spiced Pecans .................................. 39
Beef Jerky .......................................... 40
Trail Mix ............................................. 40
Asparagus with Parmesan Crust ...... 47
Sweet Potato Casserole ................... 47
Artichoke Feta Tortilla Wraps ........... 48
Stued Peppers with Tofu ............... 49
Roasted Vegetables Sandwich ....... 49
Roasted Herb Potatoes .................... 50
Cauliower, Chickpeas & Olives ....... 50
Roasted Butternut Squash .............. 50
Roasted Asparagus ......................... 50
Stued Baked Potatoes with Bacon .. 51
Parmesan Basil Tomatoes ............... 51
Double Stued Cheesy Potatoes ...... 52
Ricotta Spinach Rolls ....................... 52
Gratin Dauphinois ............................ 53
Eggplant, Zucchini & Tomato Tian ...... 53
Aparagus, Mushrooms & Potatoes ..... 54
Eggplant Parmesan Casserole ........ 54
Caramelized Onions ......................... 55
Parmesan Fries ................................ 55
Cheese Stued Tomatoes ................. 55
Corn Soué ...................................... 56
Mixed Vegetables Casserole ........... 56
Broiled Zucchini Slices ..................... 57
Balsamic Glazed Carrots ................... 57
Page 5

5
Pork ......................................................... 74
Baked Ham in Cola ........................... 75
Asian Marinated Pork Chops ............ 75
Pork Chops with Mustard Sauce ...... 76
Adobo Cutlets ................................... 76
Thai Pork Tenderloin ........................ 76
Kielbasa Casserole with Rice.............. 77
Avocado BLTs ................................... 77
Italian Sausage with Peppers ........... 78
Hot Dogs .......................................... 78
Chilied Pork Chops ........................... 79
Glazed Spareribs ............................. 79
Seafood ................................................... 80
Tuna Noodle Casserole ..................... 81
Simple Sole ...................................... 81
Shrimp with Lemon .......................... 81
Shellsh Medley ............................... 81
Sweet Chili Scallops ........................ 82
Clams & Sausage ............................. 82
Lemon Salmon with Mango Salsa ..... 83
Grilled Salmon & Fresh Basil ............ 83
Lobster Termidor .............................. 83
Peppered Tuna with Hoisin Sauce ..... 84
Tuna with Fresh Orange Salsa ......... 84
Artichoke Topped Tilapia .................. 85
Bass wtih Fennel .............................. 85
Cheesy Crab Melts ........................... 86
Ancho Chili Crusted Salmon Tacos .... 86
Lamb ....................................................... 87
Herb Stued Lamb Chops ................ 88
Lamb Chops with Feta & Tomatoes ... 88
Lamb with Pesto ............................... 89
Lamb & Ham ..................................... 89
Lamb Kabobs ................................... 89
Curried Lamb .................................... 89
Desserts .................................................. 90
Pumpkin Whoopie Cookies ............ 91
Pound Cake ........................................92
Latin Lace Florentines Cookies ....... 92
Easy Lemon Cookies ....................... 93
Country Road Bar Cookies .............. 93
Bread Pudding with Whiskey Sauce .. 94
Almond Tart ...................................... 95
Angel Food Cake ............................. 95
Golden Ginger Nut Lemon Bars ....... 96
Blueberry Streusel Coee Cake ....... 97
Contendio
Introducción .............................................. 102
Partes & Accessorios ......................... 103-105
Maual Del Usario ................................ 106-113
Normas RoHS ........................................... 114
Equipo Supremo para Pizza ........... 115-117
Tabla de Preparación Rápida y Fácil ..... 118
Recetas .......................................... 120
Huevos con Chorizo .................... 122
Pollo al Romero ............................ 122
Enchiladas de Pechuga de Pavo ...... 122
Pechuga de Pollo a la Mantequilla ... 123
Pollo al Limón .............................. 123
Muslos de Pollo Fritos .................. 123
Camarones a la Cerveza ..............123
Camarones con Limón ................... 123
Cangrejo Fundido .......................... 123
Elote Estilo Mexicano ..................... 124
Papas a la Parmesana ................... 124
Tacos de Salmón ............................ 124
Albóndigas ........................................ 125
Carnitas ............................................. 125
Cerdo en Mole ............................... 125
Cena Mexicana .............................. 125
Helado de Piña Caramelizado ........ 126
Manzana Crujiente .......................... 126
Page 6

6
Congratulations on the purchase of your NuWave Oven Pro Plus! This book contains
detailed instructions and images to help you get started using this revolutionary
product, designed to help individuals and families “Live Well for Less™.” It is also
filled with great recipes and time-saving tips that empower you to prepare delicious
gourmet meals in half the time it would take when using a regular oven.
Cooking is fast and easy with the NuWave Oven Pro Plus from Hearthware®, Inc.
This versatile countertop appliance combines infrared, conduction and convection
heat to save time and energy, while cutting calories and fat from your diet. Cooking in
the NuWave requires neither preheating nor defrosting. Just place frozen food in the
oven and press the buttons to program time and temperature. For added convenience,
the oven utilizes a layered cooking system that enables multiple foods to cook at the
same time without mixing or mingling flavors.
Preparing foods with the NuWave Oven Pro Plus is a healthy choice. No butters or
oils are required when cooking, and its unique design drains two to three times the
amount of fat drippings when compared with a conventional oven. And because
vegetables cook faster, they retain the essential nutrients that would have burned
away with a standard oven.
We invite you to visit www.NuWaveNow.com for more cooking tips and shared
recipes from NuWave Oven chefs all over the world, as well as for information on
parts and accessories for your NuWave. Our mission is to exceed expectations by
developing innovative new products, using the most advanced technology, that allow
consumers to ”Live Well for Less™.”
Welcome to the NuWave of Cooking
We value every NuWave Oven customer. You’ve purchased
your oven because you want to save time, money and energy while
enjoying healthier, great tasting meals. To show our gratitude and lifetime
commitment to you, we have created NuWaveCookingClub.com exclusively
for our customers. This site is hosted by our Executive Chef and will feature
recipes, step-by-step instructional cooking videos and more. You can also
visit www.NuWaveNow.com to see more innovative products developed by
the makers of the NuWave Oven. We hope you enjoy using your NuWave
Oven Pro Plus.
C
O
O
K
I
N
G
C
L
U
B
.
C
O
M
Introduction
Page 7
7
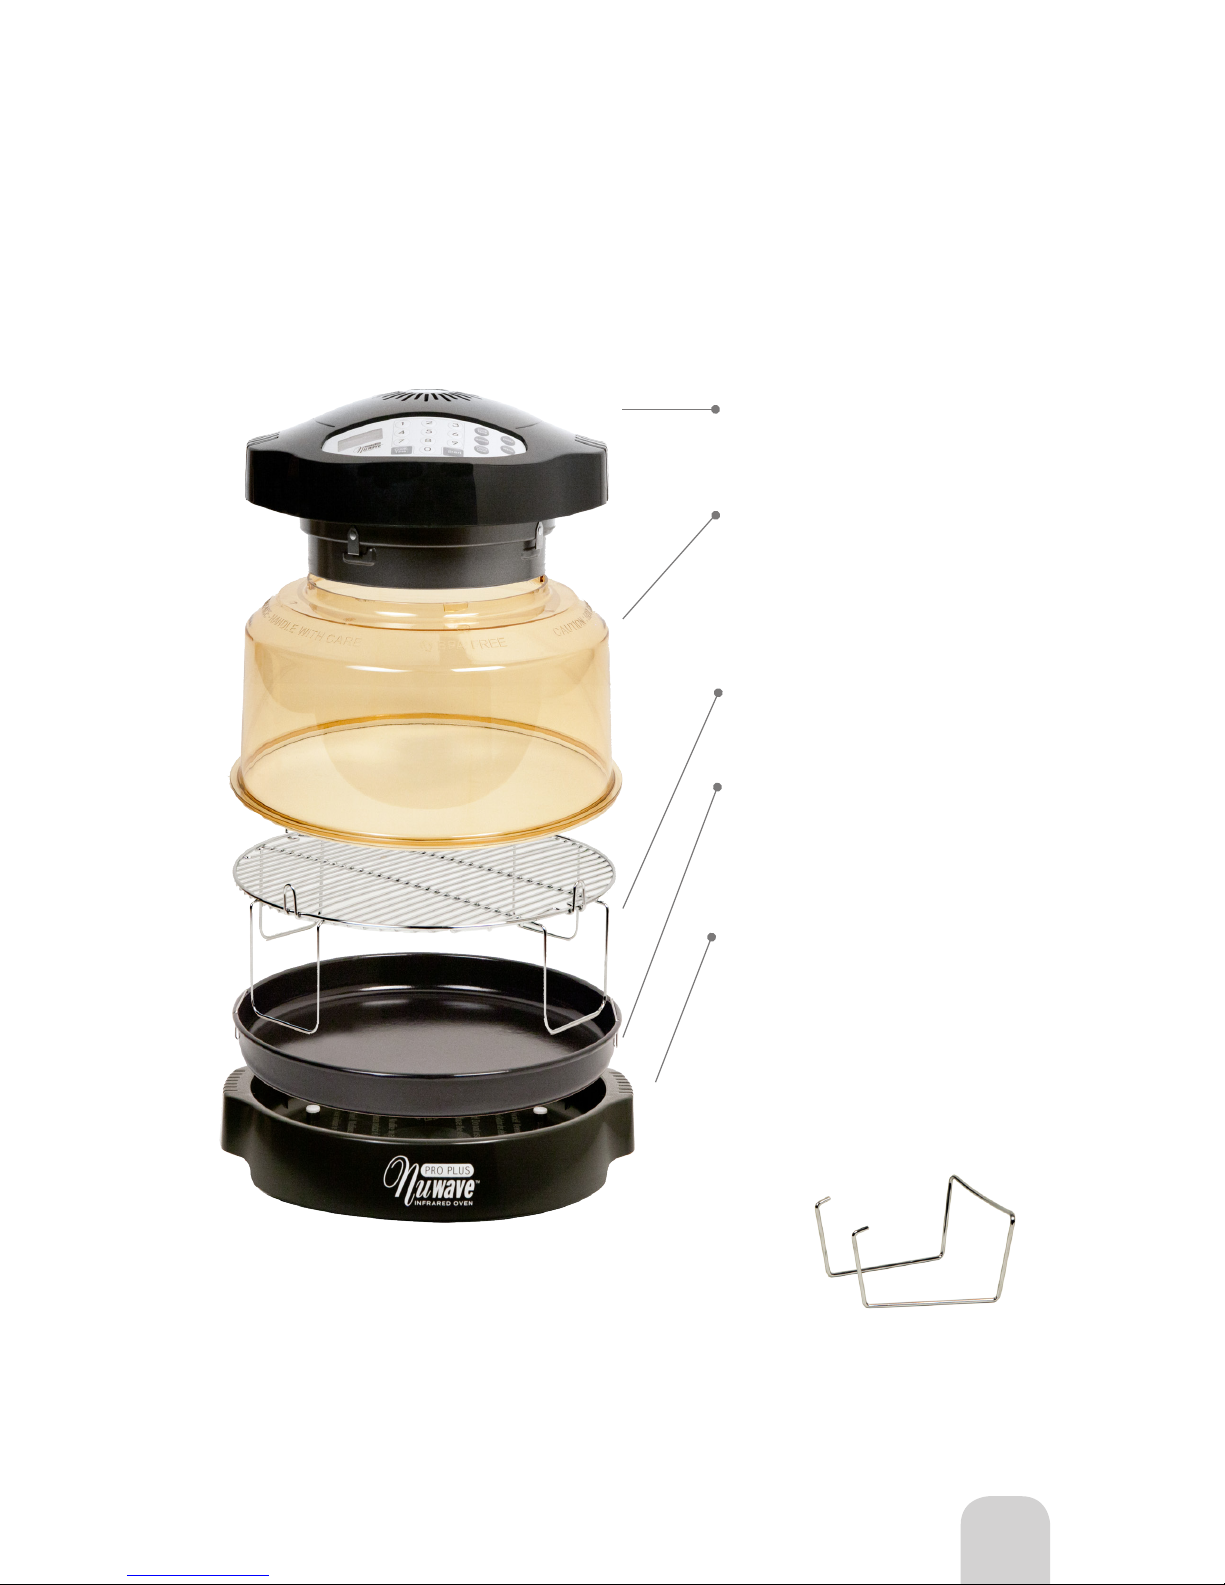
Parts for the NuWave Oven Pro Plus
Power Head - easy-to-use, programmable
digital controls.
Dome - BPA-free, transparent, and
lightweight.
Cooking Rack - reversible to heights of
1-inch or 3-inch.
Base - cool to the touch so it can also be
used as a serving tray.
Dome Holder - uniquely designed to
securely hold your NuWave Pro Plus dome
and power head assembly.
Non-Stick Liner Pan - easy clean, eco-
friendly, non-stick, no PTFE, and no PFOA.
Parts
Page 8
8
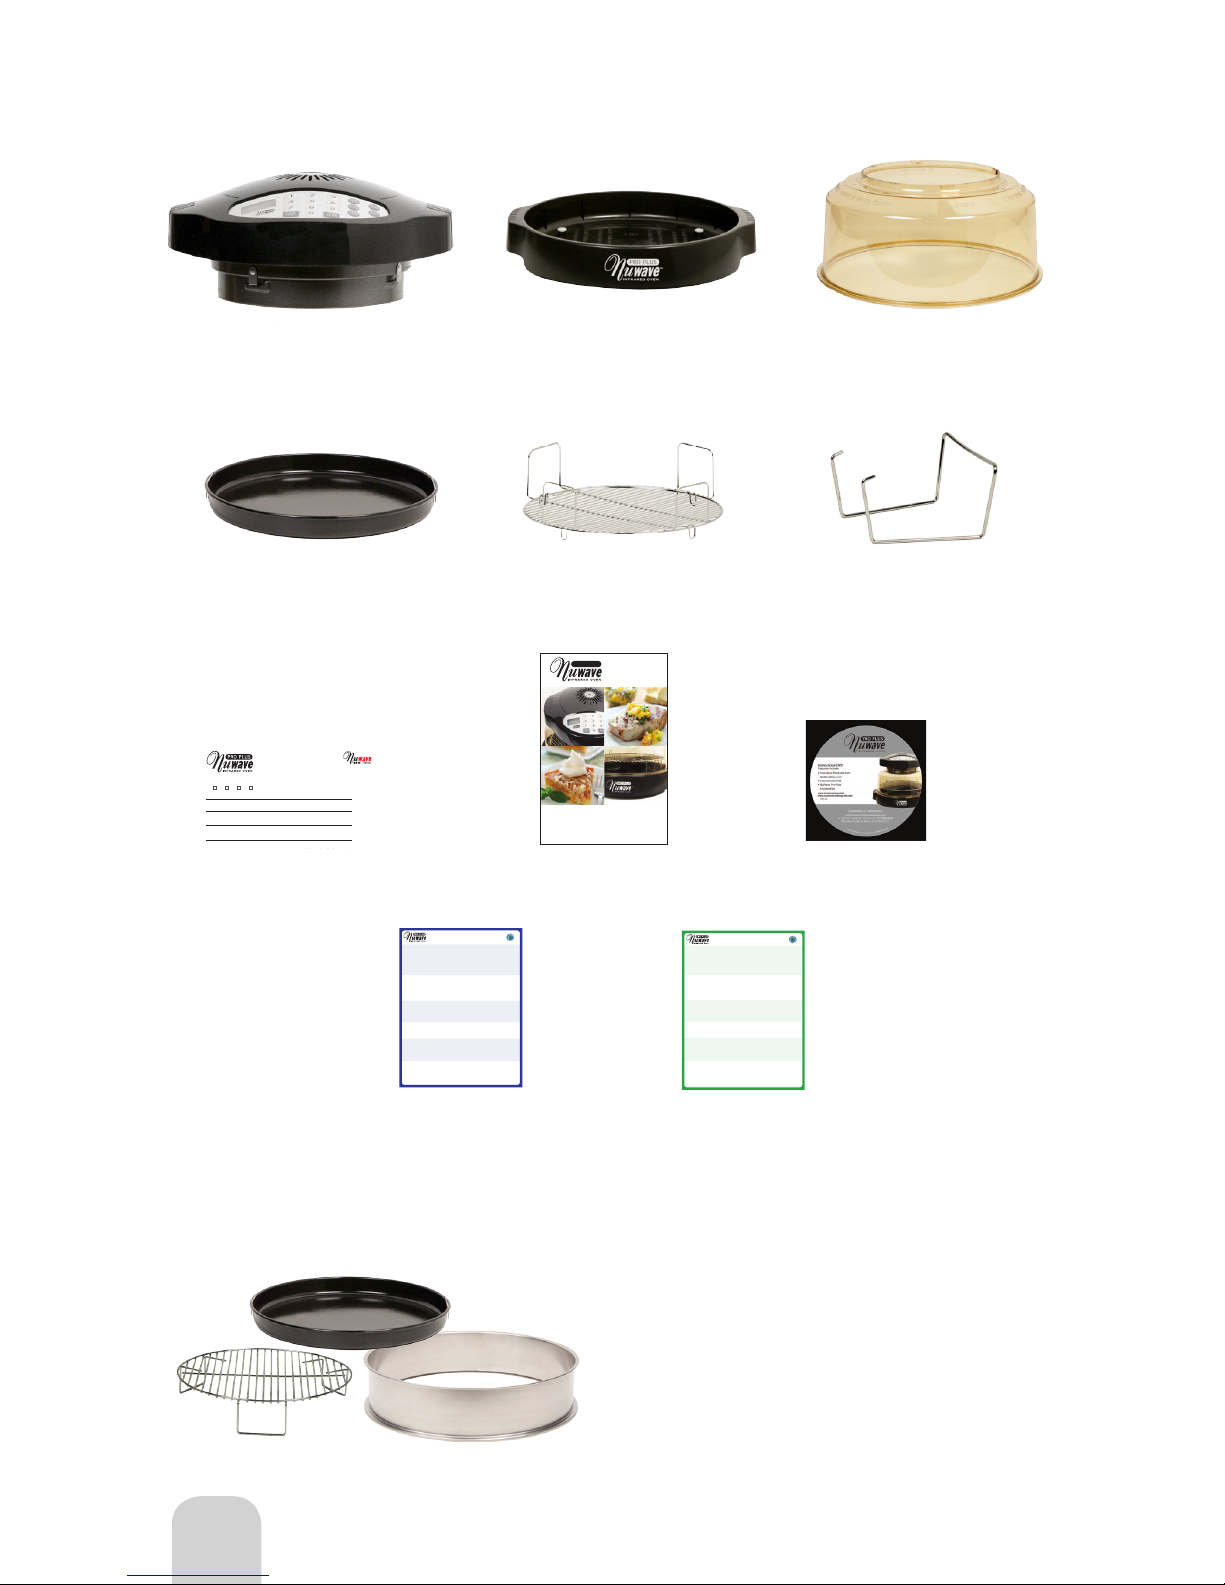
NuWave Oven Pro Plus Parts
Digital Power Head (IRC6) 26001
Black with Silver Accents
Cool to Touch Base (IRC6) 26004 Black with
Silver Accents
1-inch/3-inch Reversible
Cooking Rack 22070
12-inch Non-Stick
Liner Pan 26010
BPA-Free Dome 26007
Dome Holder 22020
English Quick & Easy
Cooking Guide 26014
Spanish Quick & Easy
Cooking Guide 26014
Quick & Easy Cooking Guide
1-inch
3-inch
3-inch
3-inch
3-inch
1-inch
1-inch
3-inch
3-inch
3-inch
3-inch
140+˚
180+˚
140+˚
160+˚
145+˚
145+˚
145+˚
145+˚
145+˚
145+˚
140+˚
140+˚
140+˚
140+˚
140+˚
16-18 min/lb 20-23 min/lb
5-8 min/side
5-6 min/side N/A
8-9 min/side
5-6 min/side
17-19 min/side
8-10 min/side
10-12 min/side
7-9 min/side
22-25 min/side
12-14 min/side
180+˚
140+˚
140+˚
140+˚
140+˚
140+˚
18-22 min/side
18-22 min/side
22-24 min/side
5-6 min/side
3-4 min/side
4-5 min/side
7-9 min/side
4-5 min/side
6-8 min/side
Roasts 3-7 lbs
Ham
[Precooked]
Sausage
Bacon
Italian, Bratwurst, Etc.
Chops
Tenderloins
Spare Ribs
Seafood
Fish, Steaks & Fillets ½ lb
Shrimp & Scallops
Lobster Tails 4 oz
[Small]
3-inch 145+˚ 4-6 min/side 8-13 min/sideCrab Legs
3-inch
1-inch
125-130˚
130-135˚
135-140˚
155+˚
15-17 min/lbs Rare 20-21 min/lbs R are
17-19 min/lbs Med. Rare 21-22 min/lbs Med. Rare
19-20 min/lbs Medium 22-23 min/lbs Medium
21+ min/lbs Well Done 24+ min/lbs Well Done
Beef & Lamb Rack Height
Steaks 2-inch thick
Roasts 2-10 lbs
Internal Temp.
Fresh
Frozen
160+˚
5-7 min/side 8-9 min/side
Burgers ½-inch thick 3-inch
Pork
3-inch
3-inch
1-inch
165+˚
165+˚
165+˚
165+˚
13-14 min/side
11-13 min/side
10-12 min/lb
10-12 min/lb
15-17 min/side
14-15 min/side
14-16 min/lb
14-16 min/lb
10-12 min/lb 14-16 min/lb
Chicken, [Bone-in] Pieces
Chicken, ½-inch Boneless/Skinless
1-inch
1-inch
165+˚ 17-21 min/lb 22-24 min/lb
Chicken, Whole 2-5 lbs
Turkey, Whole 8-10 lbs
3-inch Ring
165+˚
Turkey, Whole 11-16 lbs
Turkey, Breasts 5-7 lbs
Poultry
[Thicker add 2 mins per ½ inch]
Roasted,
Onion, Garlic, Peppers,
Zucchini, and Yellow Squash
Home Fries [½ -inch thick]
Potato, Whole Med. Size
Steamed Broccoli & Cauliower
Squash
, Acorn, Butternut & Spaghetti
3-inch
3-inch
1-inch
1-inch
1-inch
10 min/side
N/A
N/A
N/A
35-40 min
N/A
30-40 min
10-15 min
25-35 min
15-20 min
Vegetables
[Oven-Safe Dish with Glass Lid or Foil]
Chicken Tenders & Nuggets
Frozen Vegetables
Frozen Ready-Made Foods
3-inch
3-inch
3-inch
3-inch
3-inch
6-8 min/side
6-8 min/side
6-8 min/side
6-8 min/side
6-8 min/side
Hot Wings
Onion Rings
Mozzarella Sticks
[In Oven-Safe Dish]
PLEASE READ BOOKLET FOR COMPLETE INSTRUCTIONS.
General Guidelines Only. These are not meant to be recipes. All cooking guidelines may vary.
Copyright ©2014 by NuWave, LLC. All rights reserved. www.NuWaveNow.com
26014-UA-Q01
All cooking times are based on a temperature of 350˚
125-130˚
130-135˚
135-140˚
155+˚
5-6 min/side Rare 10-11 min/side Rare
6-7 min/side Med. Rare 11-12 min/side Med. Rare
7-8 min/side Medium 12-13 min/side Medium
9+ min/side Well Done 14+ min/side Well Done
LEA EL INSTRUCTIVO PARA INSTRUCCIONES COMPLETAS.
Estas son instrucciones únicamente. No utilizar como rectas. Las instrucciones pueden variar.
Copyright ©2014 by NuWave, LLC. All rights reserved. www.NuWaveNow.com
Asada 3-7 lbs
Jamón
Salchicha
Tocino
Salchica Italiana, Bratwurst, Etc.
Chuleta
Lomo
Costilla al gusto
Mariscos
Pescado, Steaks & Fillets 1-pulgada de grueso
Camarones & Vieiras
Cola de Langosta 4 onzas
[Pequeño]
Patas de Cangrejo
Res & Cordero
Hamburguesas de ½-pulgada de grueso
Bistec de 1-pulgada de grueso
Roasts 2-10 lbs
Puerco
Pollo, [Con Hueso] Piezas
Pollo, ½-pulgada Sin Hueso/Sin Piel
Pollo, Completo 2 lbs
Pavo, Completo 8-10 lbs
26014-UA-Q01
Pavo, Completo 11-16 lbs
Pavo, Pechuga 5-7 lbs
Aves
[Si es mas gruesa agregue 2 min. por ½ pulg]
Tabla de Preparación Rápida y Fácil
Chicken Tenders & Nuggets
Vegetales Frisados
Alimentos Congelados ya Preparados
Hot Wings - Alitas de Pollo
Onion Rings
Mozzarella Sticks
[En un Plato para Horno]
Asado,
Cebolla, Ajo, Chile Morron Rojo,
Calabacín, y Calabacín Amarillo
Papas Fritas
Papas,
Entera Mediana
Broccoli y Colior al Vapor
Vegetales
[Un plato apto para horno con tapa de vidrio o lámina]
Calabaza
1-pulg
3-pulg
3-pulg
3-pulg
3-pulg
1-pulg
1-pulg
3-pulg
3-pulg
3-pulg
3-pulg
140+˚
180+˚
140+˚
160+˚
145+˚
145+˚
145+˚
145+˚
145+˚
145+˚
140+˚
140+˚
140+˚
140+˚
16-18 min/lb 20-23 min/lb
5-8 c/lado
5-6 c/lado N/A
8-9 c/lado
5-6 c/lado
17-19 c/lado
8-10 c/lado
10-12 c/lado
7-9 c/lado
22-25 c/lado
12-14 c/lado
180+˚
140+˚
140+˚
140+˚
140+˚
140+˚
18-22 c/lado
18-22 c/lado
22-24 c/lado
5-6 min/lado
3-4 c/lado
4-5 c/lado
7-9 min/lado
4-5 c/lado
6-8 c/lado
3-pulg 145+˚
4-6 c/lado 8-13 c/lado
3-pulg
1-pulg
125-130˚
130-135˚
135-140˚
155+˚
15-17 min/lbs Rare 20-21 min/lbs Rare
17-19 min/lbs Med. Rare 21-22 min/lbs Med. Rare
19-20 min/lbs Medium 22-23 min/lbs Medium
21+ min/lbs Well Done 24+ min/lbs Well Done
Altura de la Parrilla Temp. Interno
Fresca
Congelada
160+˚
5-7 c/lado 8-9 c/lado
3-pulg
3-pulg
3-pulg
1-pulg
165+˚
165+˚
165+˚
165+˚
13-14 c/lado
11-13 c/lado
15-17 c/lado
14-15 c/lado
1-pulg
1-pulg
165+˚
17-21 min/lb 22-24 min/lb
3-pulg Anillo Extendor
165+˚
3-pulg
3-pulg
1-pulg
1-pulg
1-pulg
10 c/lado
N/A
N/A
N/A
35-40 min
N/A
30-40 min
10-15 min
25-35 min
15-20 min
3-pulg
3-pulg
3-pulg
3-pulg
6-8 min/lado
6-8 min/lado
6-8 min/lado
6-8 min/lado
140+˚ 3-pulg
6-8 min/lado
350˚F para todos los alimentos
125-130˚
130-135˚
135-140˚
155+˚
5-6 c/lado Rare 10-11 c/lado Rare
6-7 c/lado Med. Rare 11-12 c/lado Med. Rare
7-8 c/lado Medium 12-13 c/lado Medium
9+ c/lado Well Done 14+ c/lado Well Done
10-12 min/lb
10-12 min/lb
14-16 min/lb
14-16 min/lb
10-12 min/lb 14-16 min/lb
Product Registration Form
Hoja de Registro del Producto
™
®
M.I. First Name - Nombre Last Name - Apellido
Street Address - Dirección
Apt. #
City - Ciudad State - Estado Zip Code - Código Postal
Telephone Number - Número Telefónico E-Mail Address - Correo Electrónico
Want Quick & Easy Registration?
Register online at www.NuWaveNow.com
¿Quieres Registro rápido y fácil?
Regístrese por internet en www.NuWaveNow.com
Enjoy your NuWave Oven for 3 to 4 weeks before returning your registration card.
Disfrute de su NuWave Oven de 3 a 4 semanas antes de regresar a su tarjeta de registro.
1. Mr. Mrs. Ms. Miss
( ) -
NuWave Pro Plus Oven
Accessories
Registration Card 26018
Complete Cookbook
& Manual 26013
Extender Ring Kit 26012
Kit includes:
10-inch Non-Stick Baking Pan 22071
2-inch Cooking Rack 26008
3-inch Stainless Steel Extender Ring 26011
NuWave Oven Pro Plus Manual & Complete Cookbook
PRO PLUS
Instructional
DVD 26015
Parts & Accessories
Page 9
9
To order call our Customer Service Line at: 1.877.689.2838 (M-F 8:00AM-4:30PM CST), or order online at
www.NuWaveNow.com. Please provide the item name and number to ensure that your purchase is processed
accurately.
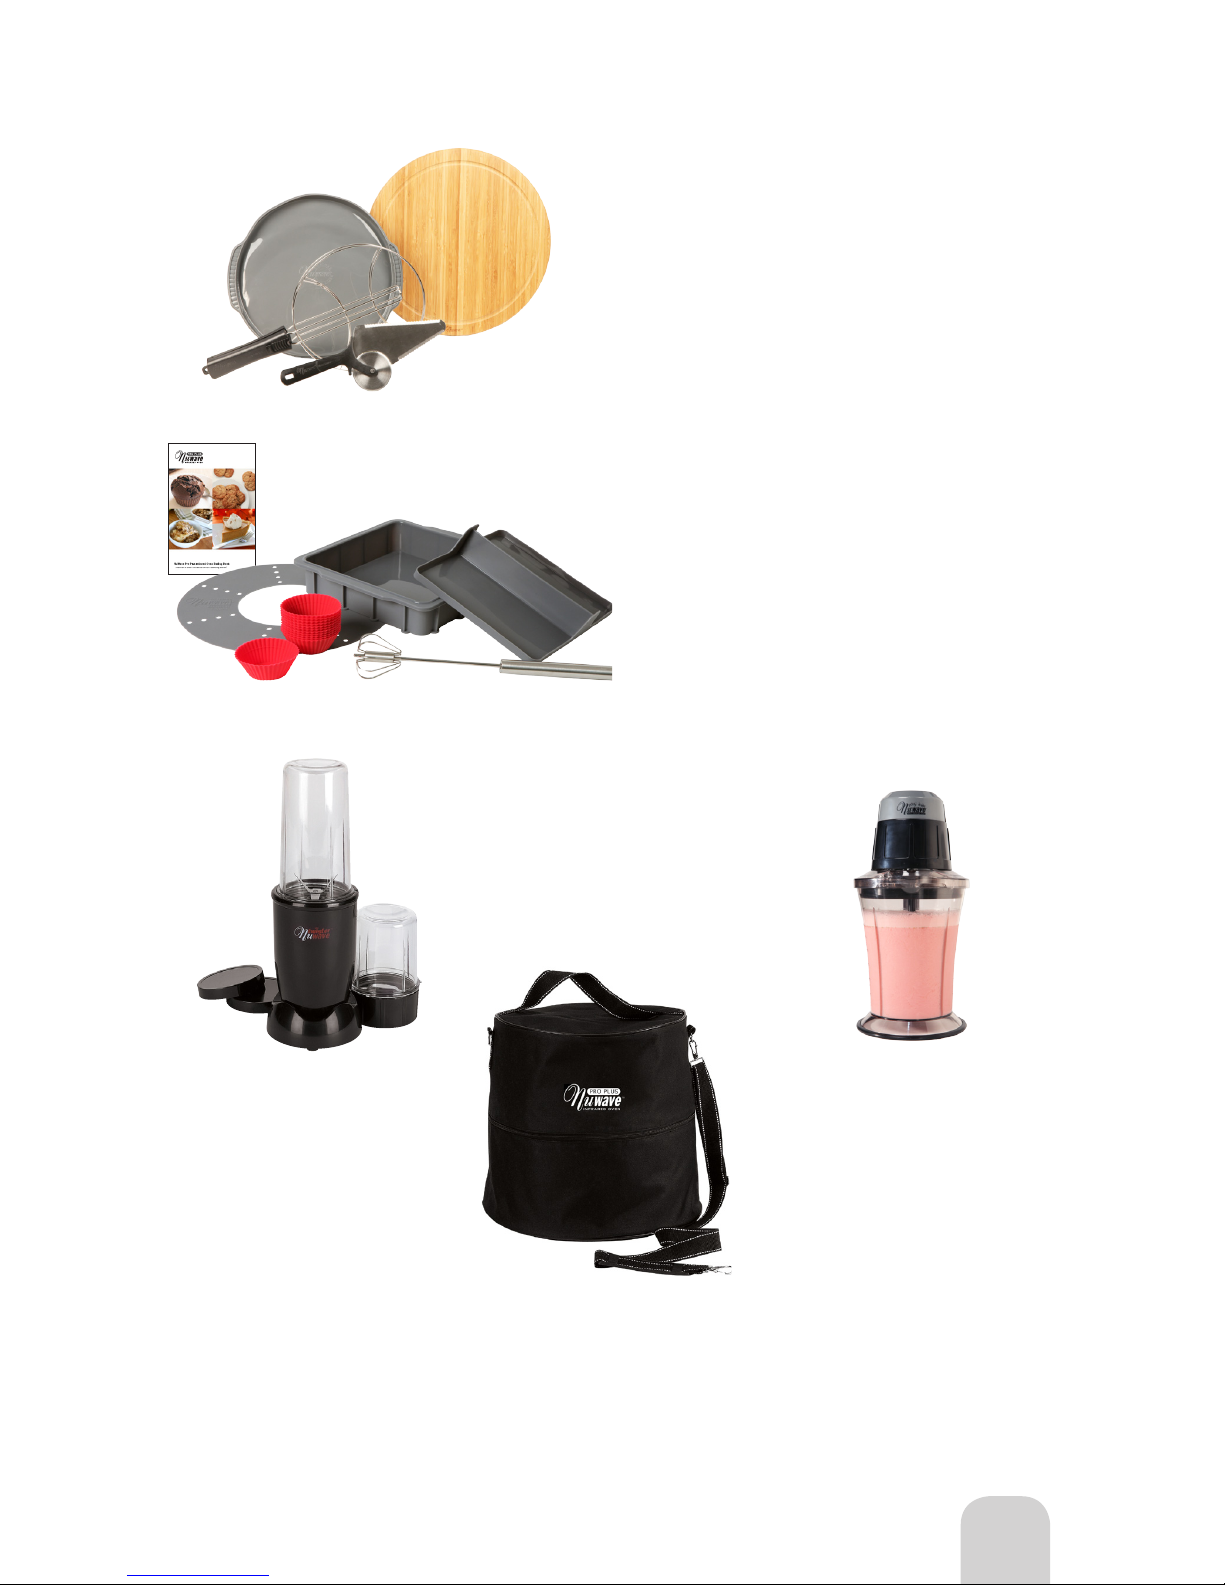
NuWave Pro Plus Oven Accessories
NuWave Supreme Pizza Kit 22104
NuWave Pro Plus Baking Kit 26019
Kit includes:
Stainless Steel Pizza Flipper 22042
Silicone Pizza Liner 22105
Stainless Steel Pizza Server 22106
100% Bamboo Cutting Board 22107
Kit includes:
8x8-inch Silicone Baking Pan 22111
Silicone Baking Divider 22112
Silicone Cupcake Liner (set of 12) 22113
Silicone Baking Ring 22114
Whip-It Whisk 22115
NuWave Pro Plus Baking Book 26020
NuWave Pro Plus Carrying Case 26016
NuWave Party Mixer 22191
NuWave Twister 22091
Parts & Accessories
Page 10
10
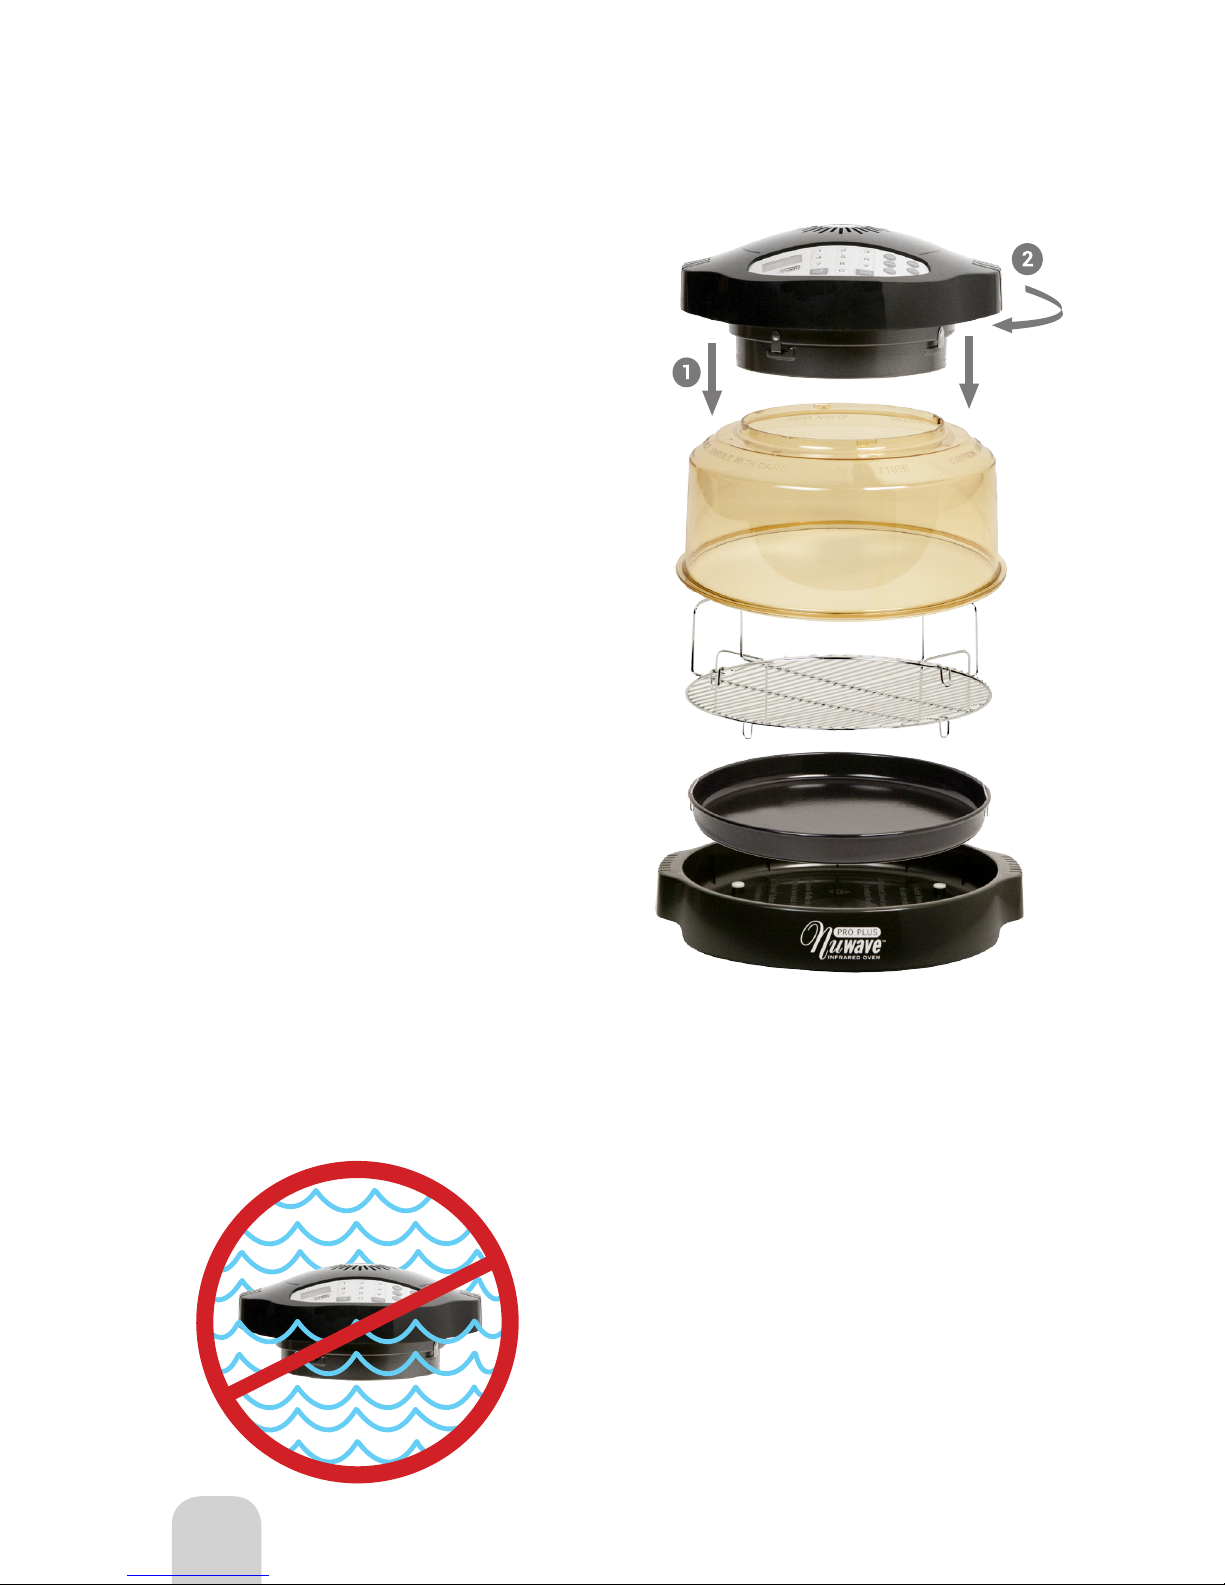
Connecting Power Head to Dome
Assembling the Full NuWave Oven
NuWave Oven Pro Plus
Assembly Guide
Lock
Place Power Head on the rim of the Dome and lock
it into place by rotating the Power Head clockwise
until the locking lugs are engaged.
Place Base Tray on a firm, stable surface.
Place Liner Pan inside Base Tray. When doing so,
make sure the handles are in the dropped down
position. If the handles are not fully dropped, the
Dome may not fit over the base properly.
Place dual level Cooking Rack on the Liner Pan
according to cooking requirements.
Place food on the rack.
Place Dome with Power Head over food, connecting
to the Base Tray. The Dome should fit evenly onto
the base.
Set cook time and temperature according to recipe
requirements.
BEFORE USING:
Prior to the first use of your NuWave Oven, wash Dome,
Liner Pan, Base, and Cooking Rack in warm soapy water or
run through a dishwasher cycle.
IMPORTANT - Do not wash or immerse Power
Head in water or cycle through dishwasher. The outer
surface may be cleaned by wiping carefully with a
damp dishcloth or sponge.
Owner’s Manual
Page 11
11
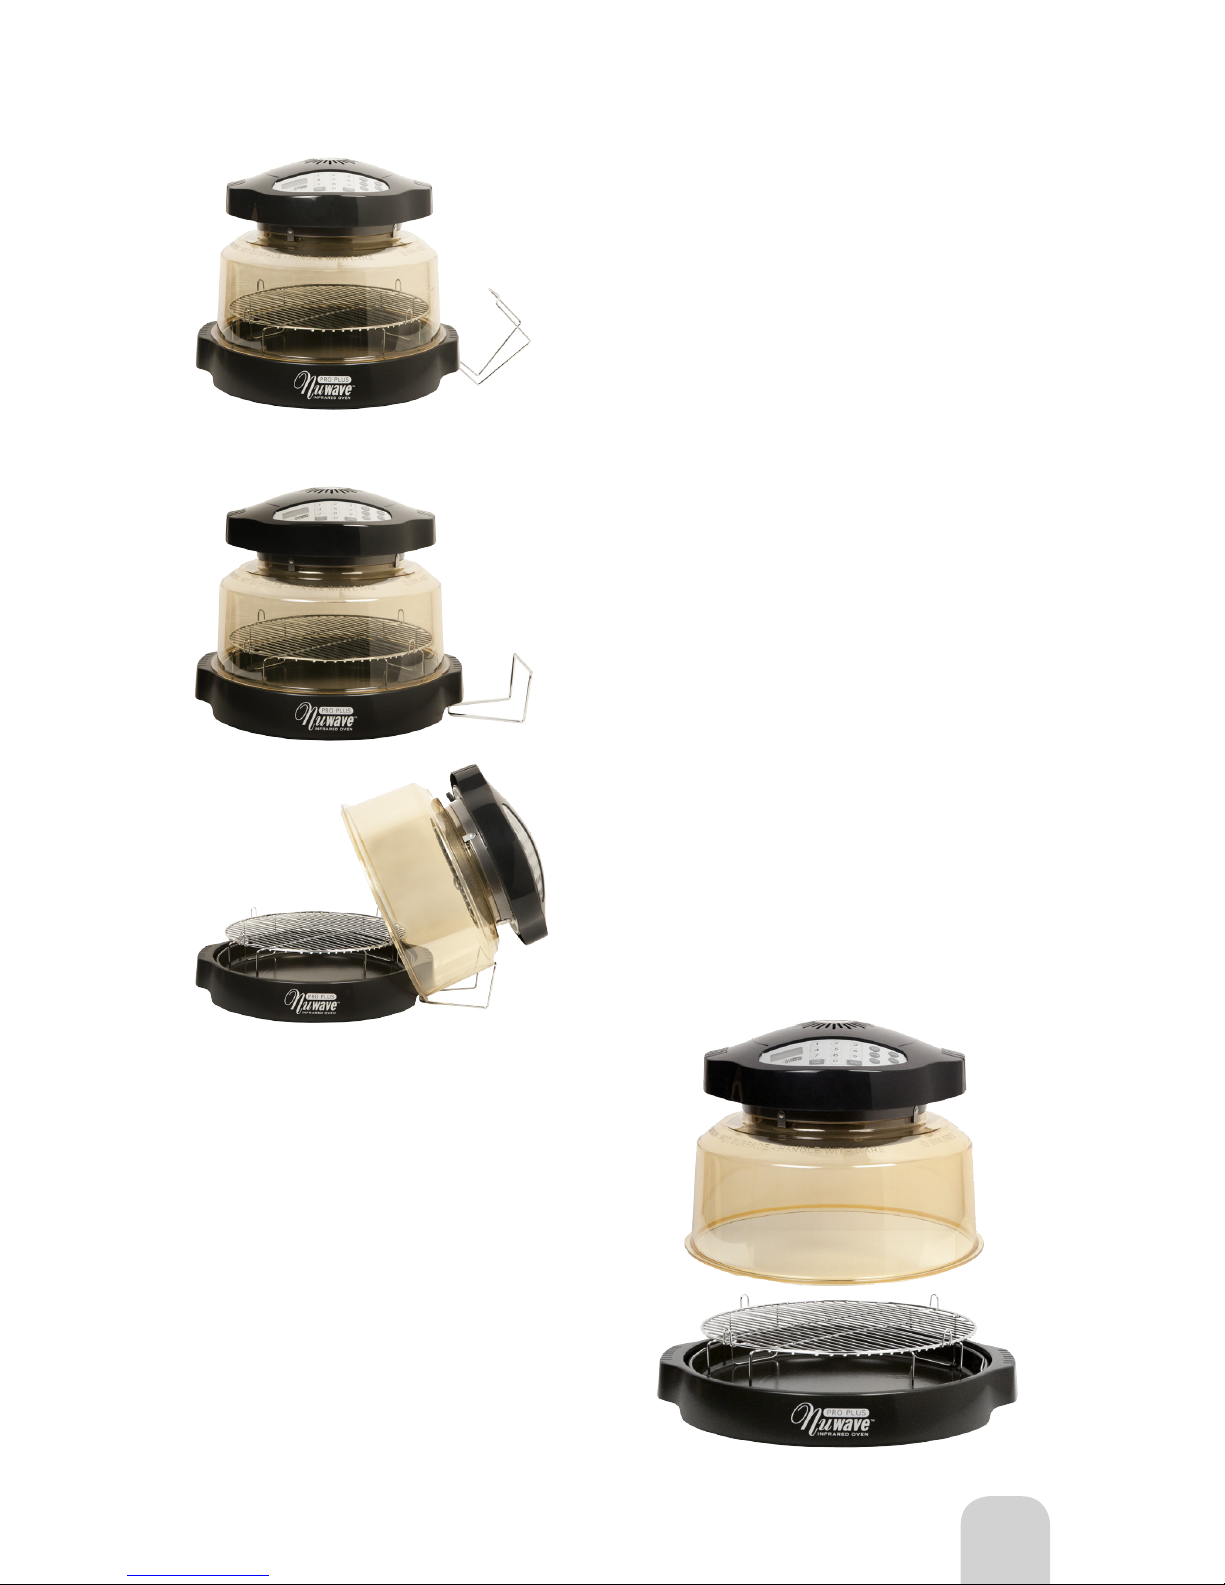
Step 3
Place the assembled Power Head and Dome at a 45°
angle on the holder as shown.
Note: Do not leave Dome in Dome Holder for an
extended period of time.
Only lift Dome by the handles on the Power
Head. Once the Power Head and the Dome are
assembled, the handles will allow you to lift both
together when removing or checking food. When
removing Liner Pan after cooking, be extremely
careful and always use oven mitts.
For best results, follow the time, temperature, and
Cooking Rack height instructions provided in the
cooking chart and recipe book.
No preheating required.
How to Install and Use Dome Holder
Make sure the Power Head is tightly locked onto the Dome. The
whole assembly can be easily lifted and put aside as shown in steps
1, 2 and 3.
Step 1
Place Dome Holder under either side of base
handle.
Step 2
Make sure both feet of the Dome Holder are situated
inside the handle, and the Dome Holder is resting
horizontally on a flat surface.
Cooking Instructions
Owner’s Manual
Page 12
12
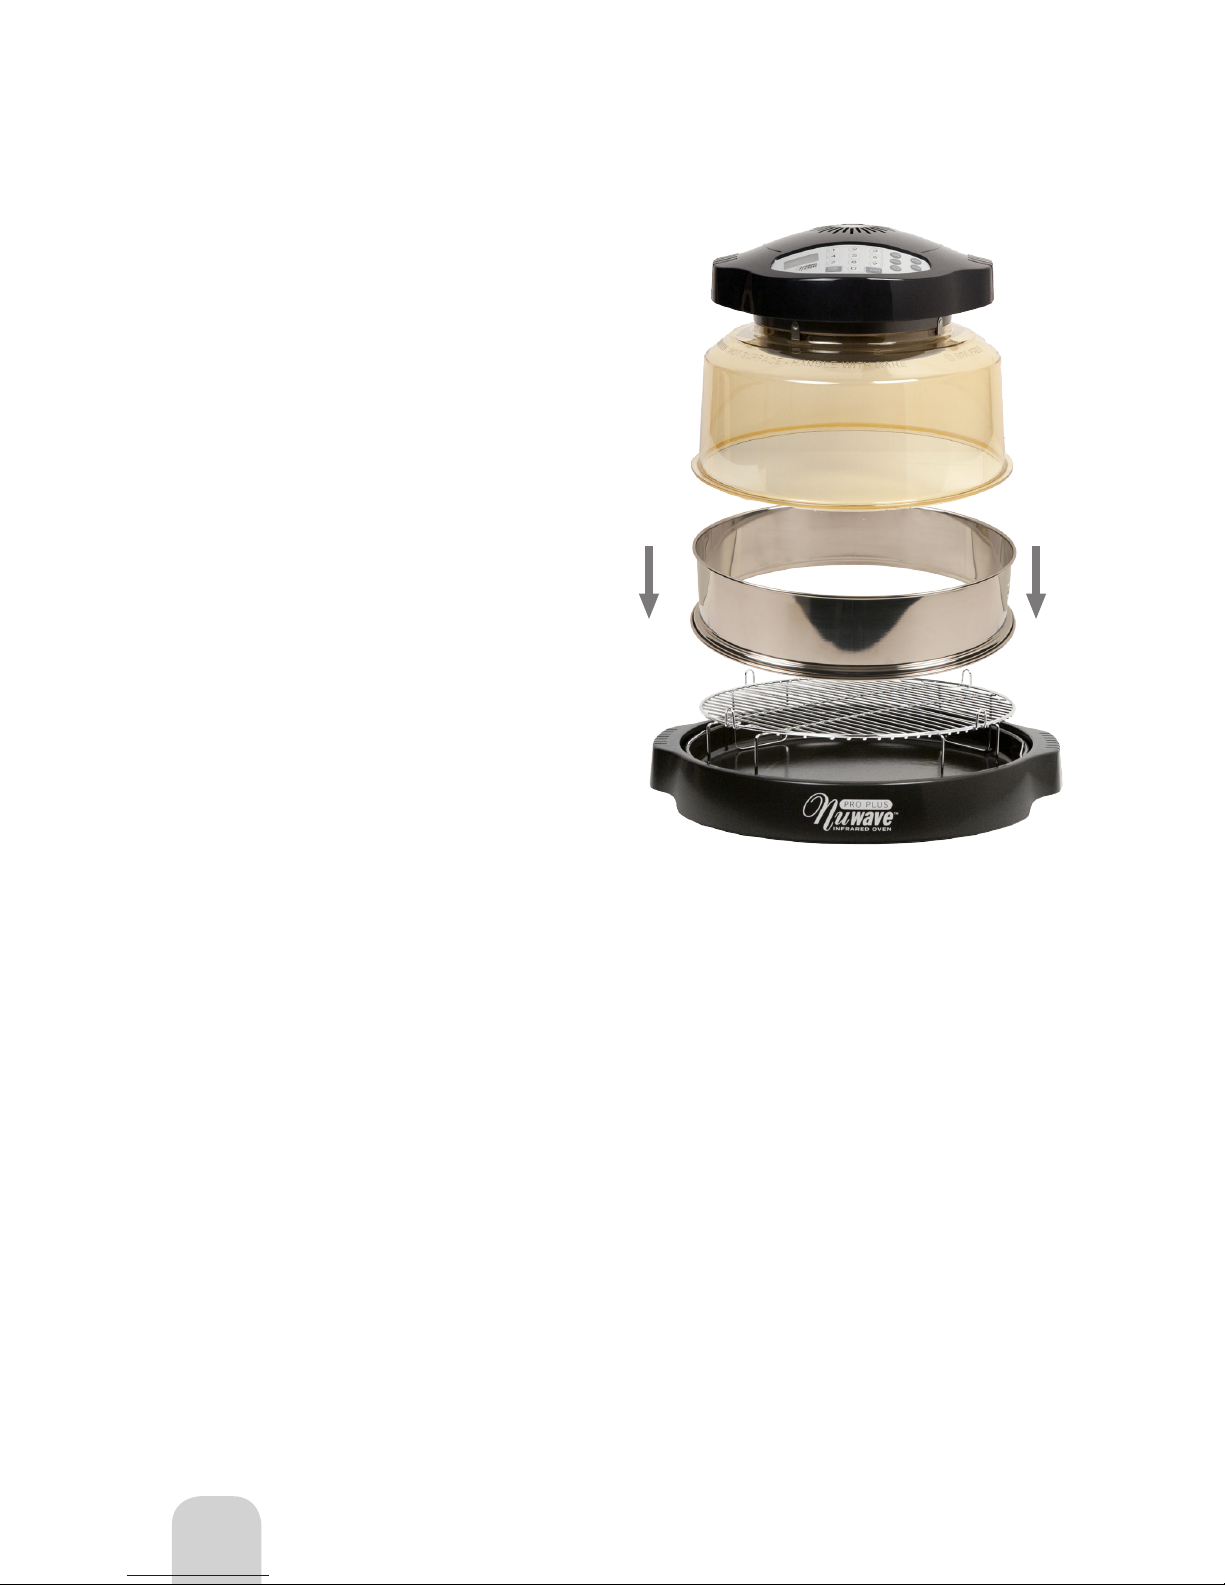
If your NuWave Oven included a 3-inch Extender
Ring, the Ring can be used for multi-level cooking
or for oversized food items that may not fit under
the standard dome. Generally, foods (such as a ham
or turkey) that exceed 10 pounds would require the
use of the Extender Ring for optimal cooking.
• Place foods that require the longest cooking
time on the rack closest to the heating element (ex.
potatoes, carrots), and place soft vegetables on the
lower racks (ex. mushrooms, tomatoes).
• When choosing the multi-level cooking option,
use food combinations that take roughly the
same amount of time to prepare. Examples: pork
or chicken and potato wedges; fish and stewed
tomatoes; or frozen beef with baked potatoes.
• If top layer foods nish cooking earlier, remove
rack(s) from above and continue cooking bottom
foods until done.
Directions
The Extender Ring should be positioned between
the original dome and the base. The addition of
the Extender Ring will expand the NuWave Oven’s
available cooking space by approximately 440 cubic
inches when using the 3-inch Ring. When adding
the Extender Ring to the NuWave Oven, make sure it
fits snugly onto the dome. When the Ring is placed
under the dome incorrectly, the overlapping edges
will not fit together properly. Please use caution
when using the Ring. If improperly used, heat or
steam could escape from the oven which could
cause burns or alter the necessary cooking times of
your foods. The Extender Ring should only be used
as an accessory item with the NuWave Oven. It is
not intended to serve as a replacement for the dome,
base, or any other components of the NuWave Oven.
Models Containing 3-inch Extender Ring
• Use shallow or oven-safe dishes for cooking.
• To warm bread, place it on the bottom rack or
liner pan and cover. To bake bread, place bread on
the top rack.
General Rules
Owner’s Manual
Page 13
13
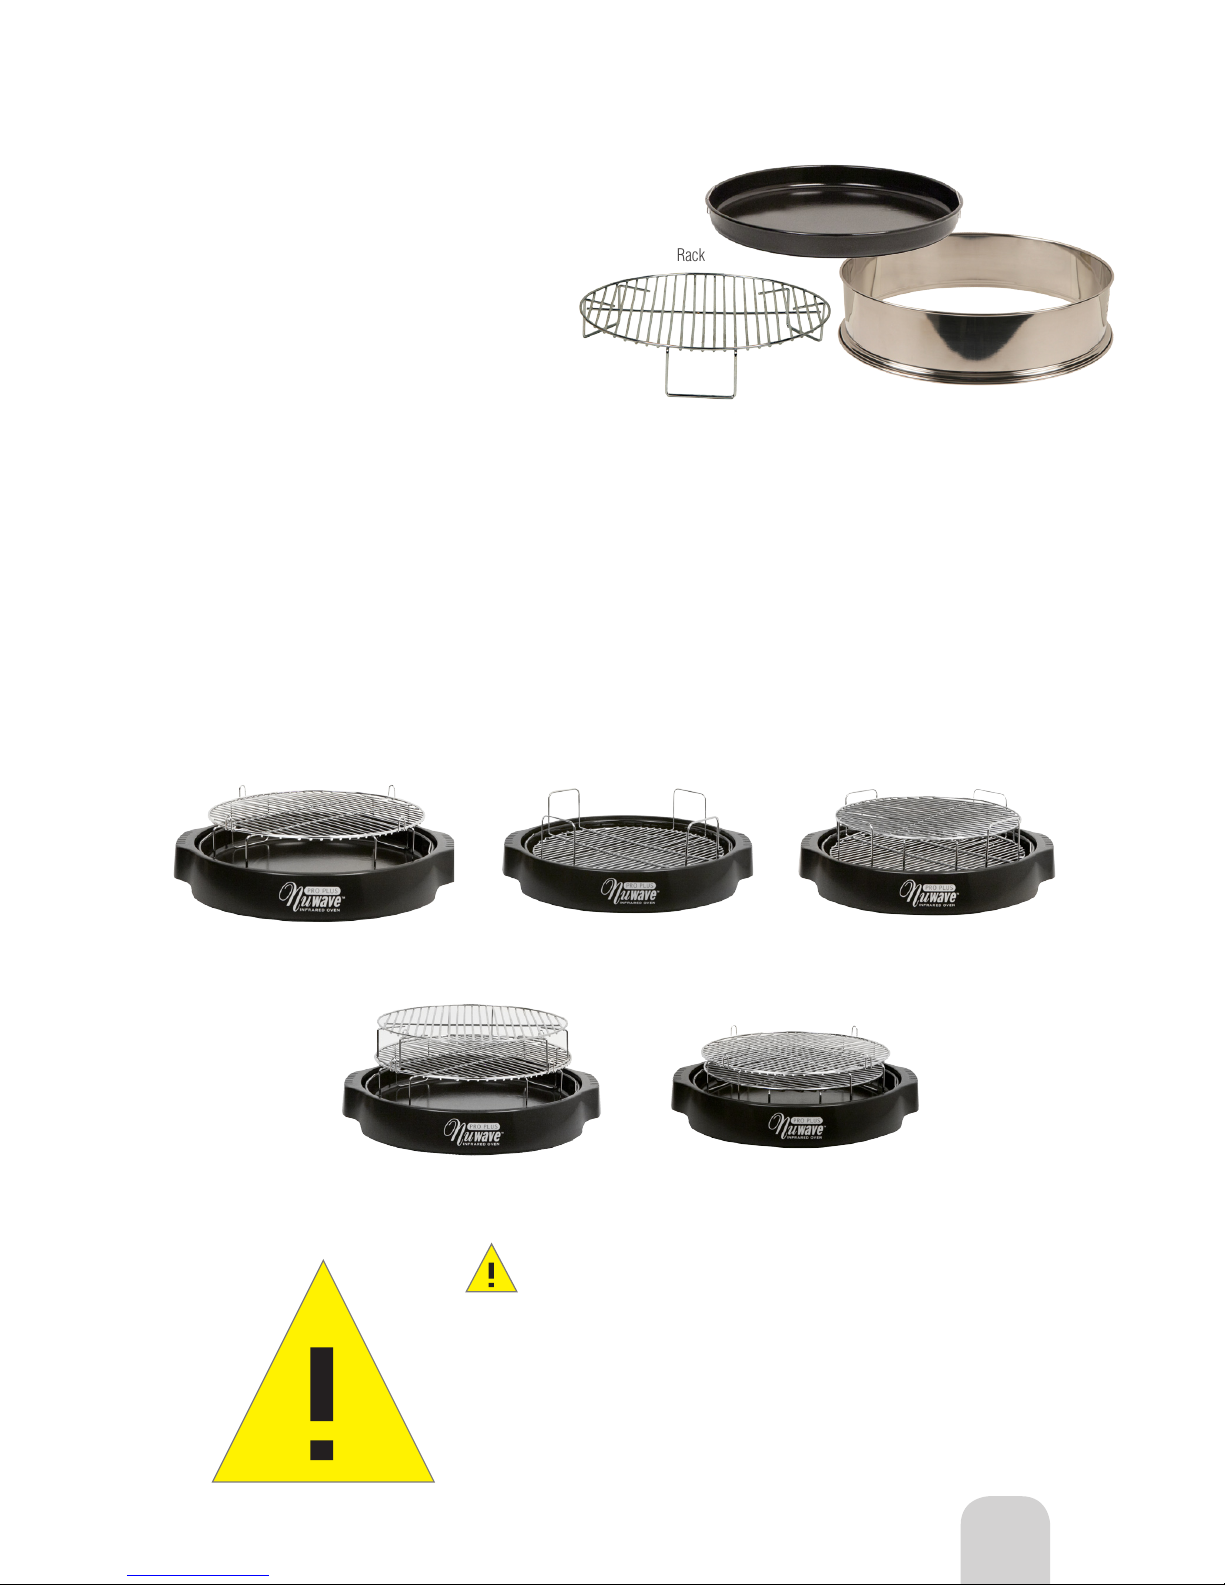
2-inch Rack
The 2-inch Rack for the NuWave Oven Pro Plus can
be used in a variety of ways.
1] It can be the primary rack with or without the
Extender Ring.
2] With the Extender Ring, it can be positioned on
top of or under the 3-inch rack for more multi-level
cooking space.
3] Without the Extender Ring, the 2-inch rack can
also facilitate multi-level cooking by creating a third
cooking surface between the liner pan and the bottom
of the 3-inch rack.
4] You may use two extra 2-inch racks above and
below the 3-inch rack, which is especially useful for
dehydrating.
Care and Use
The Extender Ring is constructed from high-impact
stainless steel. It should not be cleaned with any
harsh abrasive, but it is dishwasher safe.
Models Containing Extender Ring Kit
Do not touch the dome or any surface on the cooking area
during operation. The air inside the dome can reach 350°F
(177°C) which makes the surface very hot and may cause
burns. Do not open the dome or remove the power head
while the NuWave Oven is operating. Turn off the power
before removal.
CAUTION
2-inch Cooking Rack
10-inch Non-Stick Baking Pan
3-inch Stainless Steel Extender Ring
Note: The 2-inch rack is only to be used in the
positions and purposes shown below. Any other
uses may affect cooking time and quality.
3-inch Cooking Rack 1-inch Cooking Rack 2-inch & 1-inch
Cooking Rack
3-inch & 2-inch Cooking
Rack
2-inch & 3-inch Cooking
Rack
Owner’s Manual
Page 14
14
PR O PL US
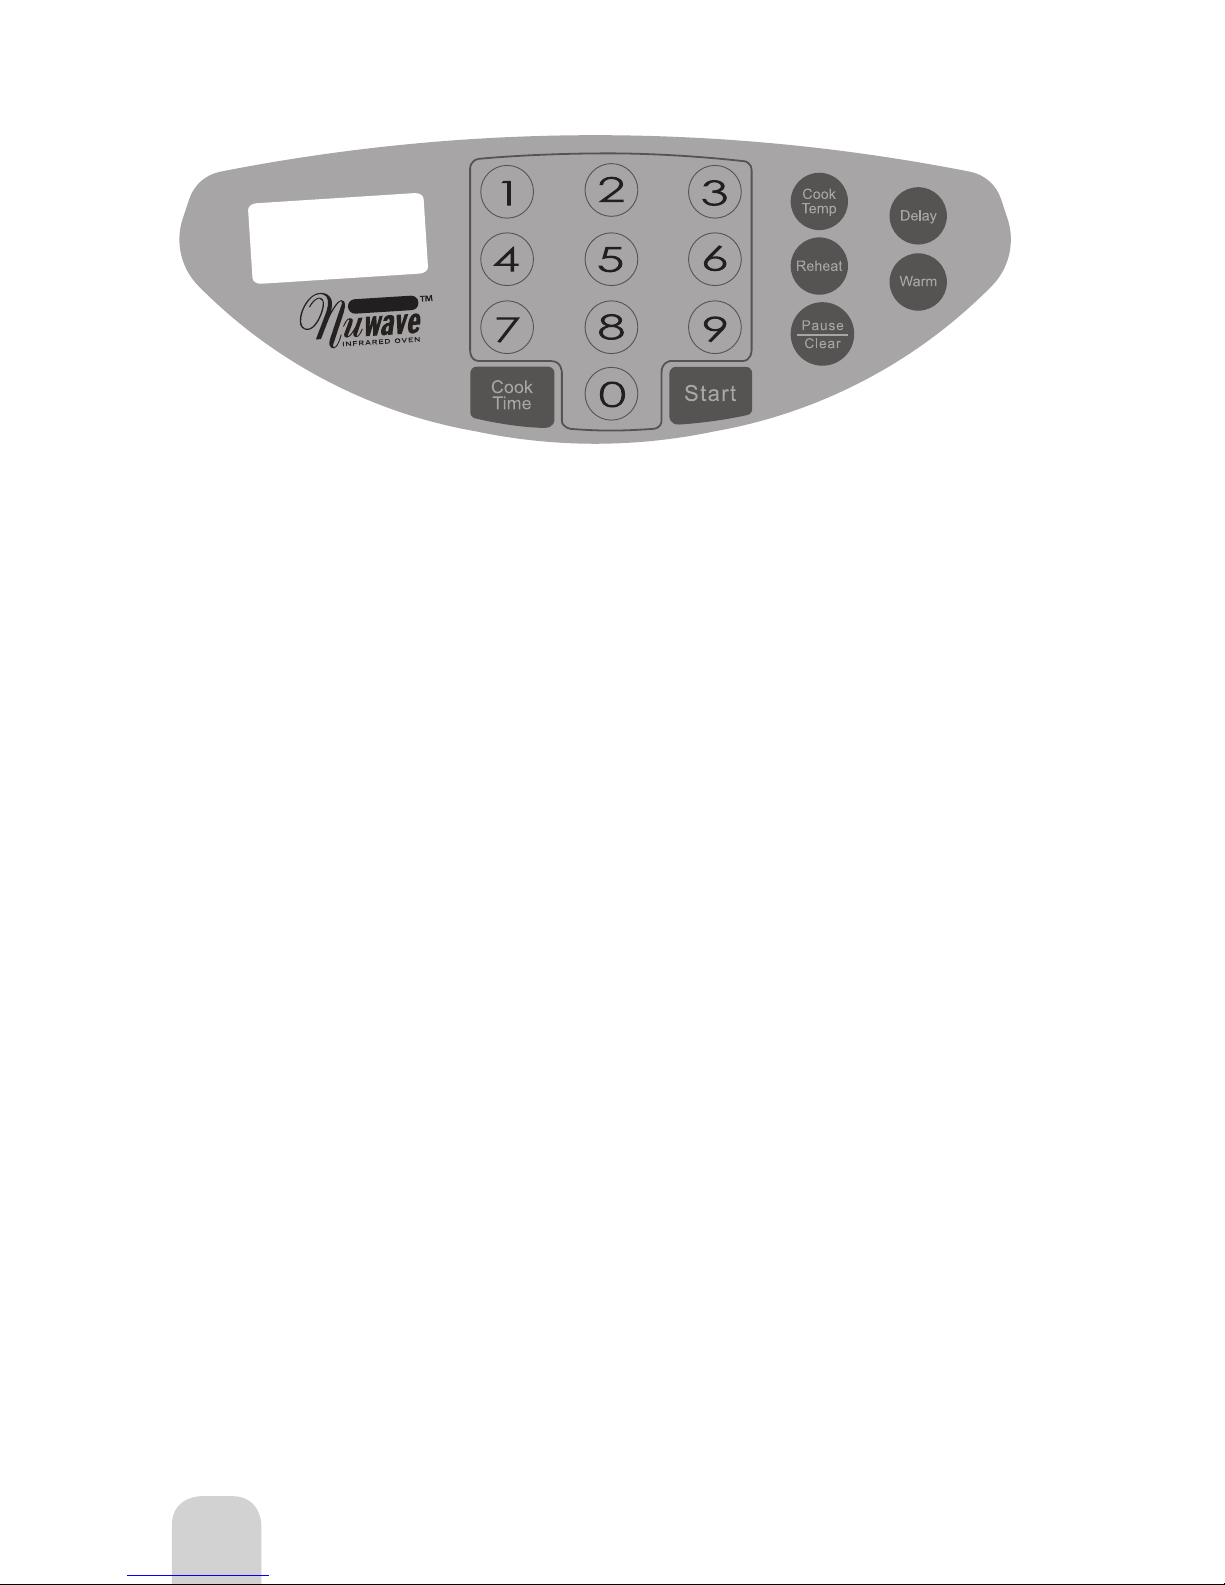
Digital Control Panel on Power Head
Directions for the NuWave Oven Pro Plus
• Make sure the unit is plugged into a properly grounded outlet and that the cord is not touching any
heated objects.
• Be certain that the liner pan has been properly placed within the base.
• Do not place the Pro Plus or any associated parts directly on your stove top, inside a conventional oven
or in contact with any other direct heat source. Damage may result.
• Metal, glass or silicone dishes and pans, and all other oven-safe materials used in a conventional oven,
may be utilized in the NuWave Pro Plus.
General Use Instructions
Control Panel on Power Head
“0” should appear on LCD display when program is clear.
Easy Start
To start cooking, press the Cook Time button, enter time as desired, then press Start. Default is programed at
350ºF. If cooking at any other temperature, Cook Temp button will be needed. See Setting Temperature
for details.
Setting Cook Time
Press the Cook Time Button. The Time indicator will flash in the right corner of the display panel. Enter the
time in hours and minutes by pressing the corresponding numerals. For example, 1 hour and 30 minutes
would be entered by pressing 1,3,0. The display panel will show 1:30. If the required time is in minutes,
you only need to enter 1 or 2 numbers. For example, 5 minutes just push 5; for 46 minutes, push 46. If the
number needs to be corrected, clear the entry by pressing Pause/Clear button twice. Then re-enter the correct
numbers.
Note: Maximum allowed cook time for temperatures 325ºF and above is 2 hours. If cooking time is set more
than that it will automatically revert back to 2 hours. Longer times can be added by simply adding more time
after the initial 2 hours has expired. For temperatures below 325ºF, maximum allowed time is 9 hours and 59
minutes.
Owner’s Manual
Page 15

15
CLEANING AND CARE INSTRUCTIONS
Unplug the unit before cleaning. The dome and all other parts, except the Power Head, are dishwasher safe.
Protect the metal and plastic surfaces; do not use abrasive cleaners or scouring pads. Clean after each use. The
outer surface of the Power Head can be cleaned by wiping with a damp cloth.
Warm Function
After the initial cooking time is complete, you may keep foods warm. When entering warm, it will always be the
last function. The default setting is programmed at 155ºF for 2 hours. Press the Warm button. The Warm and
Time functions on the LCD will blink. 2:00 will be displayed, then press Start. To change the time, press cook
time, enter the desired time and proceed. You may program the oven to keep foods warm for up to 9 hours and
59 minutes. Once the initial cooking cycle is finished, the oven will “beep” twice before switching to the WARM
function.
Delay Function
After setting your temperature and time, you can delay the program before cooking starts. When entering delay, it
will always be the first function. The delay function is only for cook time and delaying start time. Press the Delay
button. The Delay and Time functions on the LCD will blink. Input delay time and press Start. Delay stops blinking
and remains on until time expires. It is possible to delay a program for up to 9 hours and 59 minutes. If the delay
countdown reaches 0, the oven will “beep” to signal the end.
Reheat Function
The default setting is programmed at 350ºF for 4 minutes. This function is perfect for reheating single portion-sized
foods. To activate the reheat function, make sure programming is clear. The LCD display will read 0. Press the
Reheat button. This will activate the default setting. Press Start. Alarm will “beep” 3 times once time has expired.
For example, if you are warming leftover pizza, simply place the slice on the 3-inch rack, press Reheat, then Start.
If you are warming a rice or noodle dish, place a single-serving amount in an oven-safe container (glass, metal,
silicone). For softer rice or noodles, add a sprinkle of water and cover with foil.
Setting Temperature
• Press the Cook Temp button.
• Press desired temperature.
• Temperature can be changed by 1ºF increments.
• Temperature ranges from 100ºF to 350ºF.
Start Cooking
Set appropriate temperature and time, then press Start to begin cooking. The remaining cooking time will appear in
the display panel, and the colon symbol between the hours and minutes will blink. The oven will automatically stop
cooking when the time has expired, and a “beep” will alert you to that fact.
Pause/Clear Cooking
To Pause the oven, press the Pause/Clear button once. The remaining cooking time will stay listed on the display
panel but the colon will not blink.
To STOP or Clear cooking time, press the Pause/Clear button twice. Cooking functions will cease immediately,
remaining time will be fully cleared, and a ‘0” will appear.
Owner’s Manual
Page 16

16
THE MANUFACTURER WARRANTS
The infrared cooking system including power head, dome, cooking rack, liner pan, base, and all electrical
components are to be free from defects and workmanship under normal household use, when operated in
accordance with the Manufacture’s written instructions provided with each unit for one (1) year from date
of purchase. The Manufacturer will provide the necessary parts and labor to repair any part of the infrared
cooking system at NuWave, LLC. Service Department. After the expiration of the warranty, the cost of the labor
and parts will be the responsibility of the owner.
IMPORTANT TIPS:
1. Check the power outlet to ensure proper operation. Do not operate the unit simultaneously with
other major appliances plugged into the same outlet.
2. Check the cooking temperature if the oven is cooking too slowly.
3. The electrical plug must be properly inserted into the outlet.
4. Always turn off and unplug the oven before washing.
5. Moisture may accumulate inside Dome if food is not promptly removed once cooking time has
expired. Steam/moisture buildup can be avoided through prompt removal of cooked foods.
6. Do not rest dome in dome holder for extended period of time, as it could warp. Always replace
dome on base tray promptly after removing food.
IMPORTANT - Do not wash or immerse Power Head in
water or cycle through dishwasher. The outer surface may be
cleaned by wiping carefully with a damp dishcloth or sponge.
Owner’s Manual
THE NUWAVE OVEN PRO PLUS COOKING SYSTEM
To obtain warranty service, contact the service department
at this toll free number: 1-877-689-2838 M-F 8:00AM - 4:30PM CST or
NuWave, LLC.
1755 N. Buttereld Road, Libertyville, IL 60048, U.S.A.
www.NuWaveNow.com
Page 17

17
THE WARRANTY DOES NOT COVER
The non-stick coating (if applicable) on any part of the cooking system. The Limited Warranty is voided if
repairs are made by an unauthorized dealer or the serial number data plate is removed or defaced. Normal
deterioration of finish due to use or exposure is not covered by this Warranty. This Limited Warranty does
not cover failure, damages or inadequate performance due to accident, acts of God (such as lightning),
fluctuations in electric power, alterations, abuse, misuse, misapplications, corrosive type atmospheres,
improper installation, failure to operate in accordance with the Manufacturer’s written instructions, abnormal
use or commercial use.
TO OBTAIN SERVICE
The owner shall have the obligation and responsibility to: Pay for all services and parts not covered by
the warranty; Prepay the freight to and from Service Department for any part or system returned under this
warranty; Carefully package the product using adequate padding material to prevent damage in transit.
The original container is ideal for this purpose. Include in the package the owner’s name, address, daytime
telephone number, a detailed description of the problem, and your “RGA number.” (Call 1-877-689-2838) or
e-mail [email protected] to obtain the RGA (Return Goods Authorization number). Provide
the cooking system model & serial number and proof of date of purchase (a copy of the receipt) when making
claims under this warranty.
MANUFACTURER’S OBLIGATION
The Manufacturer’s obligation under this Limited Warranty is limited to repairing or replacing any part of the
infrared cooking system expressly covered by this Limited Warranty which upon examination is found to
be defective under normal use. The Limited Warranty is applicable only within the continental United States
and only to the original purchaser of the manufacturer’s authorized channels of distribution. THE LIMITED
WARRANTY MAY NOT BE ALTERED, VARIED OR EXTENDED EXCEPT BY A WRITTEN INSTRUMENT
EXECUTED BY THE MANUFACTURER. THE REMEDY OF REPAIR OR REPLACEMENT AS PROVIDED UNDER
THIS LIMITED WARRANTY IS EXCLUSIVE. IN NO EVENT SHALL THE MANUFACTURER BE LIABLE FOR
ANY CONSEQUENTIAL OR INCIDENTAL DAMAGES TO ANY PERSON, WHETHER OR NOT OCCASIONED BY
NEGLIGENCE OF THE MANUFACTURER, INCLUDING WITHOUT LIMITATION, DAMAGES FOR LOSS OF USE,
COSTS OF SUBSTITUTION, PROPERTY DAMAGE, OR OTHER MONEY LOSS.
Some states do not allow the exclusion or limitation of incidental or consequential damages, so the above
limitation exclusions may not apply. This Limited Warranty gives specific legal rights, and there may also be
other rights which vary from state to state. EXCEPT AS OTHERWISE EXPRESSLY PROVIDED ABOVE, THE
MANUFACTURER MAKES NO WARRANTIES EXPRESSED OR IMPLIED ARISING BY LAW OR OTHERWISE,
INCLUDING WITHOUT LIMITATION, THE IMPLIED WARRANTIES OF MERCHANTABILITY AND FITNESS
FOR A PARTICULAR PURPOSE TO ANY OTHER PERSON. READ YOUR OWNER’S MANUAL. IF YOU STILL
HAVE ANY QUESTIONS ABOUT OPERATION OR WARRANTY OF THE PRODUCT, PLEASE CONTACT
HEARTHWARE, INC.
1-877-689-2838.
email: [email protected]
Owner’s Manual
Page 18

18
*RoHS stands for “the Restriction Of the use of certain Hazardous Substances in
electrical and electronic equipment”.
If you want to find out more about the RoHS Directive, please visit
http://en.wikipedia.org/wiki/RoHS
RoHS Restricted Materials
Maximum Concentration
0.1% by weight
0.1% by weight
0.01% by weight
0.1% by weight
0.1% by weight
0.1% by weight
Lead (Pb)
Mercury (Hg)
Cadmium (Cd)
Hexavalent Chromium (Cr-VI)
Polybrominated Biphenyls (PBB)
Polybrominated Diphenyl Ethers (PBDE)
Material & Toxicological Profile
At NuWave, LLC., we have taken a great amount of care in ensuring
that our products are safe and secure for every household. All NuWave
Ovens are built and manufactured in strict compliance with RoHS*
standards. Although US manufacturers are not bound by law to follow
RoHS standards, Hearthware has made a conscious decision to
voluntarily follow this directive to preserve the safety of its consumers
and the quality of our environment.
Owner’s Manual
Page 19
19
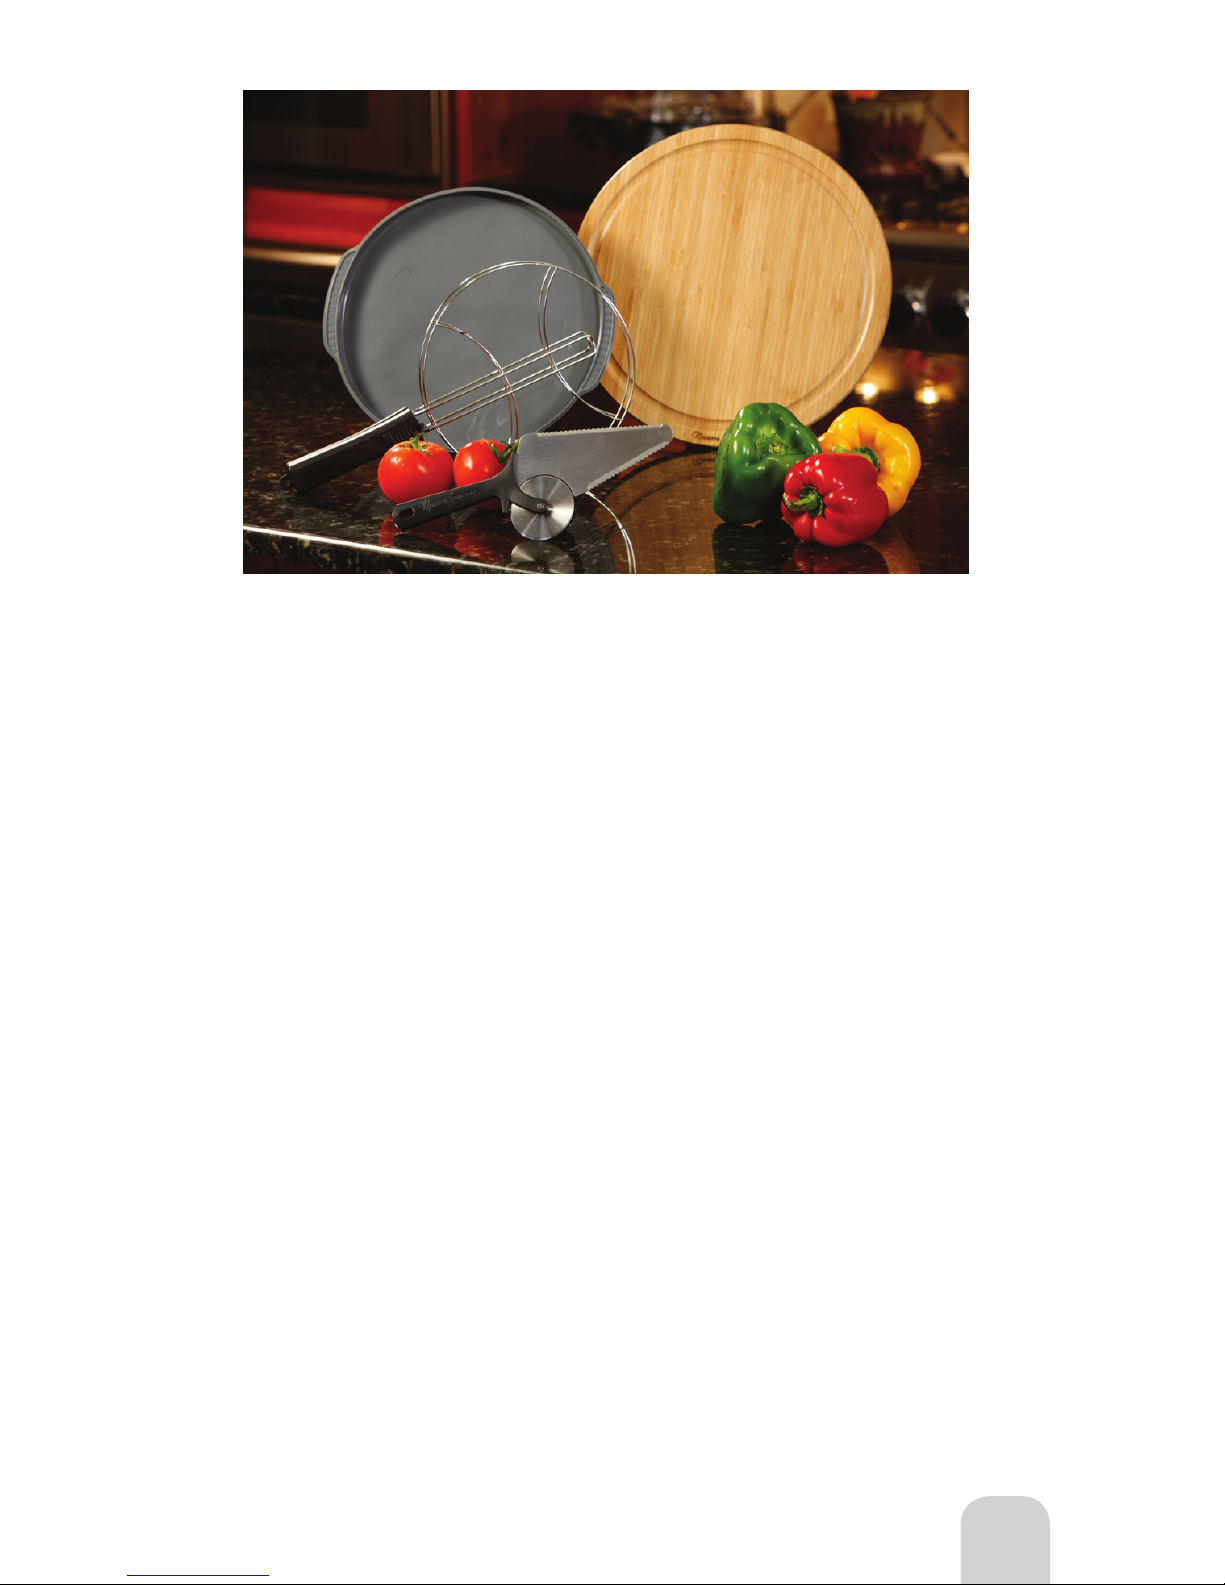
We love baking pizza in the NuWave Oven so much we’ve created these tools so you can bake
the best tasting pizza ever! Achieve hot, fresh, better-than-just-delivered pizza at home...
AS EASY AS 1 - 2 - 3 when you use your NuWave Oven and the Supreme Pizza Kit! Whether
you prefer your pizza thin, regular or deep dish...your NuWave Oven, along with the Supreme
Pizza Kit, will do the trick!
*Your order may contain only some of the above
items. To purchase this product, call Hearthware
Customer Service at 1-877-689-2838 or order
online at www.NuWaveNow.com
The NuWave Supreme Pizza Kit*
The spring-loaded, easy grip handle allows you to
securely clamp the
10-inch stainless steel rings shut,
safely letting you flip your pizzas, calzones,
quesadillas and much more!
Bake your pizza crust first without overcooking
your cheese or favorite toppings. The slick surface
will not stick to cheese, and also attracts unwanted
grease (complies with FDA regulations).
Two great utensils rolled into one! The NuWave
Pizza Server, with multiple stainless steel cutting
surfaces and easy grip handle, will have you slicing
and serving your pizza with ease.
The unique bamboo cutting board will spare
damage to your countertops, save you money
and help protect the environment. This board is
multi-functional with a flat side for cutting pizzas
and breads and a grooved side for cutting fruits,
vegetables and other foods with juices.
The NuWave Stainless Steel Pizza Flipper
The NuWave Silicone Pizza Liner
The NuWave Stainless Steel Pizza Server
The NuWave 100% Bamboo Cutting Board
Frozen, Fresh, Thick or Thin...
Supreme Pizza Kit
Page 20
20
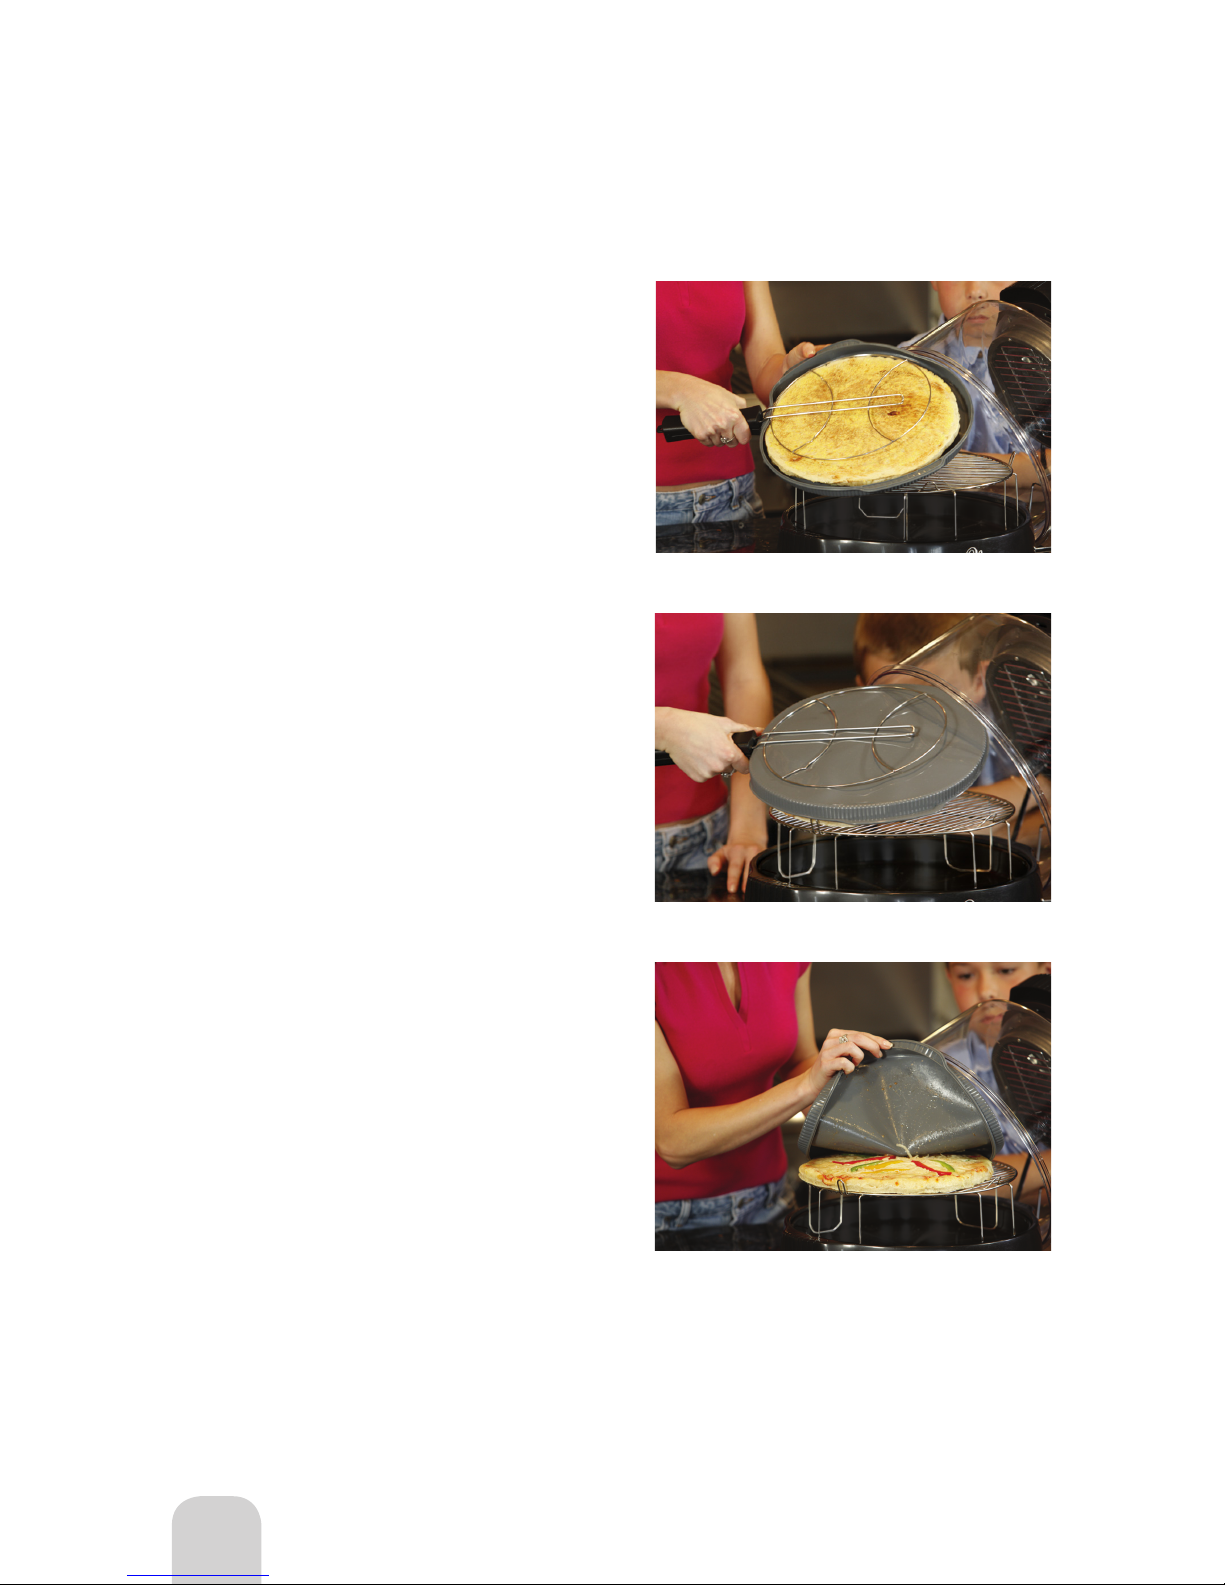
1. Place the Pizza Liner over the top of your pizza.
2. Place pizza upside down on the 3-inch rack. Cook at
350ºF, until crust of pizza is a light brown in color.
How to Use the NuWave Pizza Flipper &
Pizza Liner with your NuWave Oven
Note
Make sure the reversible rack is positioned as the 3-inch rack in the NuWave Oven.
5. While gripping the handle, rotate the pizza and Pizza
Liner completely around and set pizza back on the rack
crust side down. The pizza should now be right side up.
6. Remove the Pizza Liner and cook at 350ºF for 3-5
minutes or until cheese is melted to your preference.
3. When using Pizza Flipper, start with the Pizza
Flipper open and slide under the Pizza Liner and over
the top of the crust.
4. Using the handle, close the Pizza Flipper until pizza
is securely held.
Care & Use
The Pizza Flipper, Pizza Liner, Pizza Server and Bamboo Cutting board should
be washed with mild soap and water. It should not be cleaned with harsh
abrasives. Allow utensils to dry completely before using or storing.
Supreme Pizza Kit
Page 21
21
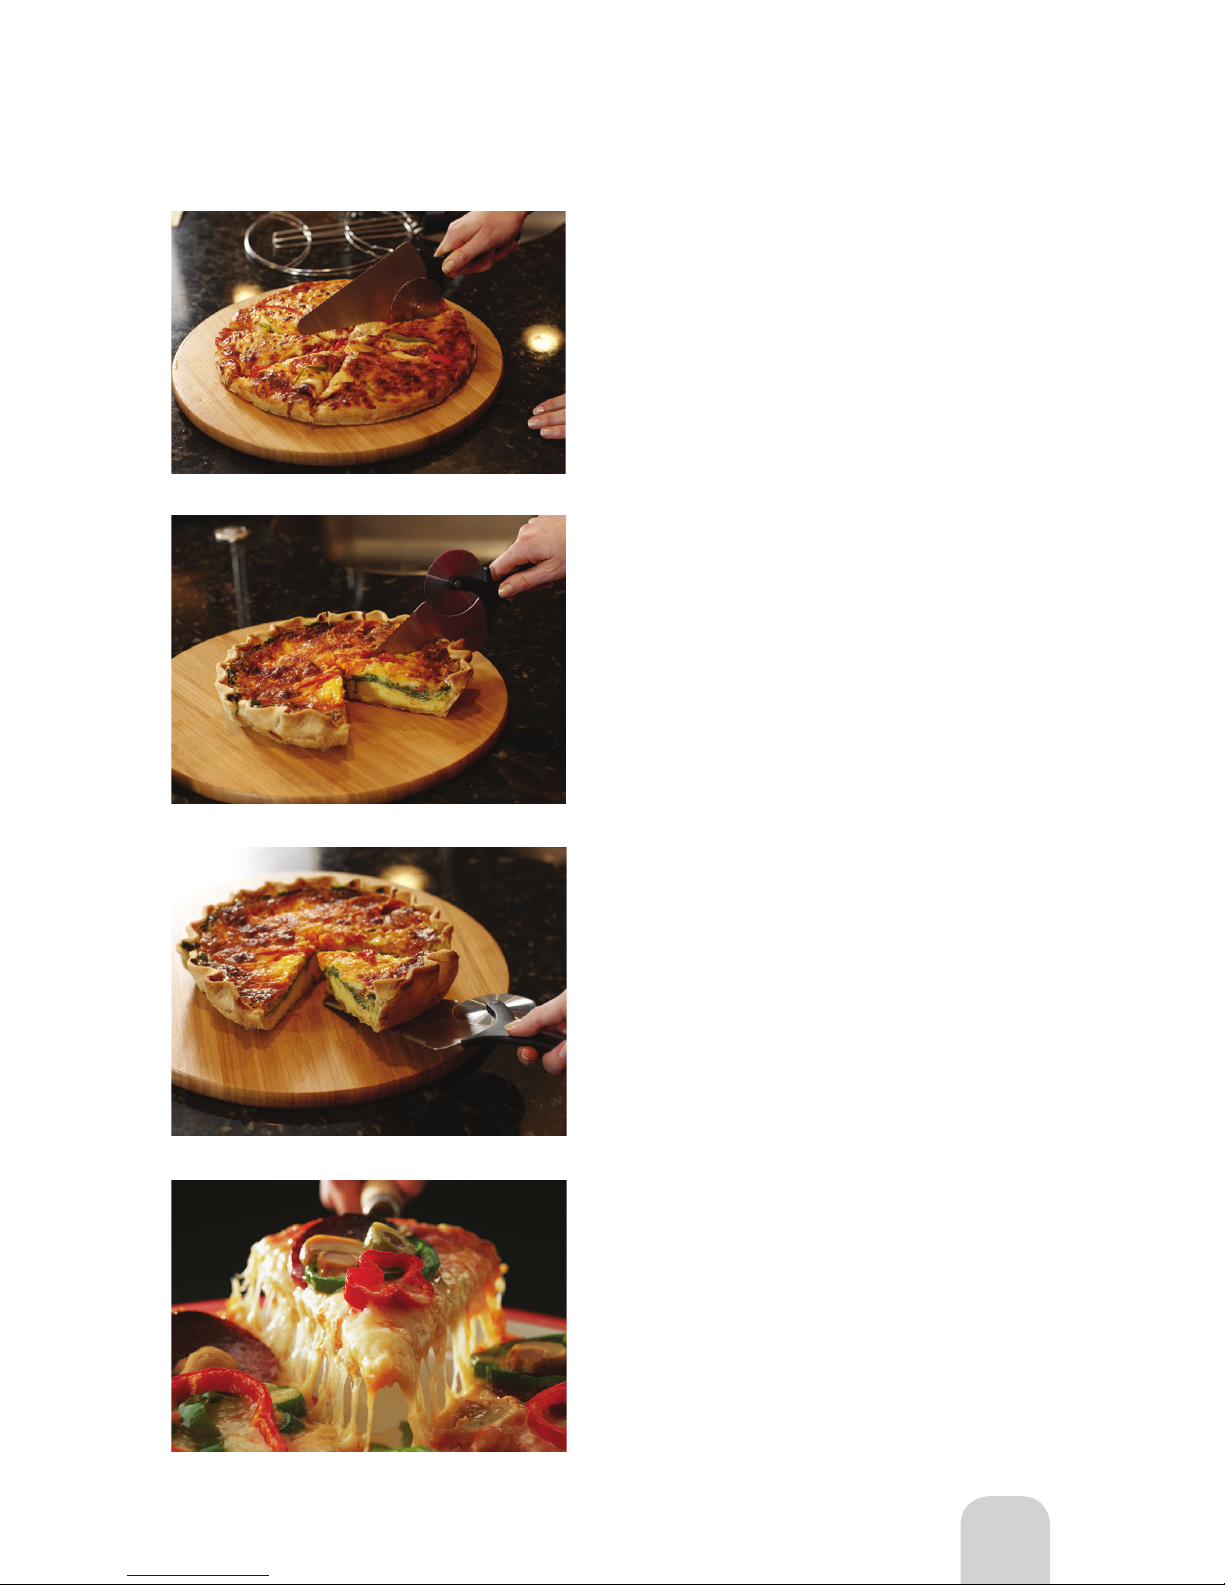
Perfect Pizza Every Time!
Pizza baked in the NuWave Oven is delicious without
exception, so the only thing left to do is ENJOY!
Slicing & Serving with the NuWave
Stainless Steel Pizza Server
CAUTION
The edges of the spatula and pizza cutter are sharp.
Always cut away from your body. Serrated edges are
sharp, and should not be used for support.
Rolling Slicer
Hold handle so the Pizza Server is
on top, permitting you to use the Pizza Cutter.
Serrated Slicer
Both the Pizza Cutter and the Pizza Server
can be used to slice additional foods such as
quesadillas, panini sandwiches, quiche and
much more.
Server
To use the Pizza Server, simply point the edge of the
spatula away from you, and with a scooping motion
lift the pizza or food and place on a serving dish.
Supreme Pizza Kit
Page 22

22
Quick & Easy Cooking Guide
1-inch
3-inch
3-inch
3-inch
3-inch
1-inch
1-inch
3-inch
3-inch
3-inch
3-inch
140+˚
180+˚
140+˚
160+˚
145+˚
145+˚
145+˚
145+˚
145+˚
145+˚
140+˚
140+˚
140+˚
140+˚
140+˚
16-18 min/lb 20-23 min/lb
5-8 min/side
5-6 min/side N/A
8-9 min/side
5-6 min/side
17-19 min/side
8-10 min/side
10-12 min/side
7-9 min/side
22-25 min/side
12-14 min/side
180+˚
140+˚
140+˚
140+˚
140+˚
140+˚
18-22 min/side
18-22 min/side
22-24 min/side
5-6 min/side
3-4 min/side
4-5 min/side
7-9 min/side
4-5 min/side
6-8 min/side
Roasts 3-7 lbs
Ham
[Precooked]
Sausage
Bacon
Italian, Bratwurst, Etc.
Chops
Tenderloins
Spare Ribs
Seafood
Fish
, Steaks & Fillets ½ lb
Shrimp & Scallops
Lobster Tails 4 oz
[Small]
3-inch 145+˚ 4-6 min/side 8-13 min/sideCrab Legs
3-inch
1-inch
125-130˚
130-135˚
135-140˚
155+˚
15-17 min/lbs
Rare
20-21 min/lbs
Rare
17-19 min/lbs
Med. Rare
21-22 min/lbs
Med. Rare
19-20 min/lbs
Medium
22-23 min/lbs
Medium
21+ min/lbs
Well Done
24+ min/lbs
Well Done
Beef & Lamb Rack Height
Steaks 2-inch thick
Roasts 2-10 lbs
Internal Temp.
Fresh
Frozen
160+˚
5-7 min/side 8-9 min/side
Burgers ½-inch thick 3-inch
Pork
3-inch
3-inch
1-inch
165+˚
165+˚
165+˚
165+˚
13-14 min/side
11-13 min/side
10-12 min/lb
10-12 min/lb
15-17 min/side
14-15 min/side
14-16 min/lb
14-16 min/lb
10-12 min/lb 14-16 min/lb
Chicken,
[Bone-in] Pieces
Chicken, ½-inch Boneless/Skinless
1-inch
1-inch
165+˚ 17-21 min/lb 22-24 min/lb
Chicken,
Whole 2-5 lbs
Turkey,
Whole 8-10 lbs
3-inch Ring
165+˚
Turkey,
Whole 11-16 lbs
Turkey,
Breasts 5-7 lbs
Poultry
[Thicker add 2 mins per ½ inch]
Roasted,
Onion, Garlic, Peppers,
Zucchini, and Yellow Squash
Home Fries [½
-inch thick]
Potato,
Whole Med. Size
Steamed Broccoli & Cauliower
Squash
, Acorn, Butternut & Spaghetti
3-inch
3-inch
1-inch
1-inch
1-inch
10 min/side
N/A
N/A
N/A
35-40 min
N/A
30-40 min
10-15 min
25-35 min
15-20 min
Vegetables
[Oven-Safe Dish with Glass Lid or Foil]
Chicken Tenders & Nuggets
Frozen Vegetables
Frozen Ready-Made Foods
3-inch
3-inch
3-inch
3-inch
3-inch
6-8 min/side
6-8 min/side
6-8 min/side
6-8 min/side
6-8 min/side
Hot Wings
Onion Rings
Mozzarella Sticks
[In Oven-Safe Dish]
PLEASE READ BOOKLET FOR COMPLETE INSTRUCTIONS.
General Guidelines Only. These are not meant to be recipes. All cooking guidelines may vary.
Copyright ©2014 by NuWave, LLC. All rights reserved. www.NuWaveNow.com
26014-UA-Q01
All cooking times are based on a temperature of 350˚
125-130˚
130-135˚
135-140˚
155+˚
5-6
min/side Rare
10-11
min/side Rare
6-7
min/side Med. Rare
11-12
min/side Med. Rare
7-8
min/side Medium
12-13
min/side Medium
9+
min/side Well Done
14+
min/side Well Done
English Quick & Easy Cooking Guide
Page 23

23
LEA EL INSTRUCTIVO PARA INSTRUCCIONES COMPLETAS.
Estas son instrucciones únicamente. No utilizar como rectas. Las instrucciones pueden variar.
Copyright ©2014 by NuWave, LLC. All rights reserved. www.NuWaveNow.com
Asada 3-7 lbs
Jamón
Salchicha
Tocino
Salchica Italiana, Bratwurst, Etc.
Chuleta
Lomo
Costilla al gusto
Mariscos
Pescado
, Steaks & Fillets 1-pulgada de grueso
Camarones & Vieiras
Cola de Langosta 4 onzas
[Pequeño]
Patas de Cangrejo
Res & Cordero
Hamburguesas de ½-pulgada de grueso
Bistec de 1-pulgada de grueso
Roasts 2-10 lbs
Puerco
Pollo,
[Con Hueso] Piezas
Pollo, ½-
pulgada Sin Hueso/Sin Piel
Pollo,
Completo 2 lbs
Pavo,
Completo 8-10 lbs
26014-UA-Q01
Pavo,
Completo 11-16 lbs
Pavo,
Pechuga 5-7 lbs
Aves
[Si es mas gruesa agregue 2 min. por ½ pulg]
Tabla de Preparación Rápida y Fácil
Chicken Tenders & Nuggets
Vegetales Frisados
Alimentos Congelados ya Preparados
Hot Wings - Alitas de Pollo
Onion Rings
Mozzarella Sticks
[En un Plato para Horno]
Asado,
Cebolla, Ajo, Chile Morron Rojo,
Calabacín, y Calabacín Amarillo
Papas Fritas
Papas,
Entera Mediana
Broccoli y Colior al Vapor
Vegetales
[Un plato apto para horno con tapa de vidrio o lámina]
Calabaza
1-pulg
3-pulg
3-pulg
3-pulg
3-pulg
1-pulg
1-pulg
3-pulg
3-pulg
3-pulg
3-pulg
140+˚
180+˚
140+˚
160+˚
145+˚
145+˚
145+˚
145+˚
145+˚
145+˚
140+˚
140+˚
140+˚
140+˚
16-18 min/lb 20-23 min/lb
5-8 c/lado
5-6 c/lado N/A
8-9 c/lado
5-6 c/lado
17-19 c/lado
8-10 c/lado
10-12 c/lado
7-9 c/lado
22-25 c/lado
12-14 c/lado
180+˚
140+˚
140+˚
140+˚
140+˚
140+˚
18-22 c/lado
18-22 c/lado
22-24 c/lado
5-6 min/lado
3-4 c/lado
4-5 c/lado
7-9 min/lado
4-5 c/lado
6-8 c/lado
3-pulg 145+˚
4-6 c/lado 8-13 c/lado
3-pulg
1-pulg
125-130˚
130-135˚
135-140˚
155+˚
15-17 min/lbs
Rare
20-21 min/lbs
Rare
17-19 min/lbs
Med. Rare
21-22 min/lbs
Med. Rare
19-20 min/lbs
Medium
22-23 min/lbs
Medium
21+ min/lbs
Well Done
24+ min/lbs
Well Done
Altura de la Parrilla Temp. Interno
Fresca
Congelada
160+˚
5-7 c/lado 8-9 c/lado
3-pulg
3-pulg
3-pulg
1-pulg
165+˚
165+˚
165+˚
165+˚
13-14 c/lado
11-13 c/lado
15-17 c/lado
14-15 c/lado
1-pulg
1-pulg
165+˚
17-21 min/lb 22-24 min/lb
3-pulg Anillo Extendor
165+˚
3-pulg
3-pulg
1-pulg
1-pulg
1-pulg
10 c/lado
N/A
N/A
N/A
35-40 min
N/A
30-40 min
10-15 min
25-35 min
15-20 min
3-pulg
3-pulg
3-pulg
3-pulg
6-8 min/lado
6-8 min/lado
6-8 min/lado
6-8 min/lado
140+˚ 3-pulg
6-8 min/lado
350˚F para todos los alimentos
125-130˚
130-135˚
135-140˚
155+˚
5-6
c/lado Rare
10-11
c/lado Rare
6-7
c/lado Med. Rare
11-12
c/lado Med. Rare
7-8
c/lado Medium
12-13
c/lado Medium
9+
c/lado Well Done
14+
c/lado Well Done
10-12 min/lb
10-12 min/lb
14-16 min/lb
14-16 min/lb
10-12 min/lb 14-16 min/lb
Spanish Quick & Easy Cooking Guide
Page 24
24
THE
NUWAVE OVEN
COMPLETE
COOKBOOK
24
Page 25
25
This recipe book contains valuable
information that will help you start
incorporating the NuWave Oven Pro Plus
into your daily life. We’ve provided easy-toprepare recipes, along with helpful tips at the
beginning of each section that will help you
achieve perfect cooking results every time.
Also visit NuWaveCookingClub.com for other
great tips and instructional videos.
General Tips
Metal containers, aluminum foil or any
oven-safe dish can be used in the NuWave
Oven Pro Plus. The infrared rays will not
penetrate through these materials. Lightweight
aluminum foil works best for lining shallow
dishes and pans. Cover food loosely with
aluminum foil to protect from browning more
than preferred. Keep in mind that heat will still
circulate, but the foil may slow the cooking
time of the food beneath.
Steam buildup can occur when cooking foods
that contain a lot of moisture, like vegetables
or fish. When your cooking cycle is complete,
General Tips
please remember to lift the dome so that steam
is channeled away from your face.
To keep prepared foods crisp, such as egg
rolls, chicken tenders or pizza, remove the
dome immediately after cooking.
Timing is the key to perfection with the
NuWave Oven Pro Plus. Keep in mind that
all cooking guidelines are just that, and may
need to be adjusted depending on the specific
situation.
When cooking larger dishes such as roasts or
other foods with varying thickness, suggested
cooking times may need to be extended. Cook
in 3-minute increments and check after each
interval.
Using a meat thermometer is always essential
for checking the internal temperature of the
meat.
25
Page 26
26
Breakfast
Tips for Breakfast
Bacon: Cook at 350˚F on the 3-inch rack for 5-6 minutes per side.Sprinkle on brown sugar
5 minutes before finished for a sweet taste.
For easy cleanup, place aluminum foil in the liner pan. Once the grease solidifies, discard
the foil.
Egg substitutes can be used in any recipe. 1 egg equals ¼ cup egg substitute.
To warm pre-made muffins, breads or pastries, simply wrap in aluminum foil and place in
the liner pan during the last 2 minutes of cooking time.
Toast bagels, English muffins or bread by placing on the 3-inch rack and cook at 350˚F for
about 3-5 minutes.
26
Page 27

27
Breakfast
Cinnamon Breakfast Twists
Easy Quiche Pie
Serves: 4
1 (11-ounce) package frozen
breadsticks
1 cup sugar
2 teaspoons cinnamon
Directions:
1. Mix sugar and cinnamon in medium
bowl; set aside.
2. Place breadsticks in sugar mixture
one at a time; toss to coat.
Serves: 6
1 cup ham, chopped
4 large mushrooms, medium
chopped
1 cup loosely packed spinach
1 cup Swiss cheese, shredded
½ cup Bisquick
1 cup milk
⅛ teaspoon pepper
2 eggs
Directions:
1. Place ham, mushrooms and
spinach in oven-safe dish,
silicone liner or foil and place on
3-inch rack.
2. Cook at 350°F for 6-8 minutes.
3. While ham mixture is cooking,
mix Bisquick, milk, pepper and
eggs.
4. Pour egg mixture in 8x8-inch
silicone baking pan.
5. Stir cooked ham, mushroom, and
spinach into baking pan.
6. Sprinkle cheese on top.
7. Place pan on 1-inch rack and
bake at 350°F for 18-20 minutes,
or until knife can be inserted and
center comes out clean.
8. Let stand for 5 minutes before
serving.
Oven Omelette
Serves: 4
10 eggs
½ cup milk
6 ounces Cheddar cheese,
shredded
1 cup ham or bacon, finely
chopped
½ cup green pepper, chopped
¼ cup onion, chopped
1 tablespoon parsley
Directions:
1. In medium bowl, beat eggs and
milk until fluffy.
2. Stir in cheese, meat, green
pepper and onion.
3. Pour egg mixture into 8x8-inch
silicone baking pan.
4. Bake on 1-inch rack at 350°F for
12-15 minutes.
5. Let sit inside dome for 1 minute
and then cut into desired sizes
(Do not cut directly in silicone
pan).
Tip: You can add any type of meat
to this dish. Just finely chop it
and drain the grease.
3. Hold breadstick by each end
and twist.
4. Set on 3-inch rack and bake at
350°F for 12 minutes, turning
once.
Tip: If you prefer softer twists, bake
for 9 minutes.
Tip: For different flavors, brush a
beaten egg onto breadsticks
and sprinkle with sesame
seeds, poppy seeds, or grated
cheese.
Tip: Use butter to add more
cinnamon sugar onto
breadsticks.
Page 28

28
Low-Cal French Toast
Serves: 6
½ loaf bread
1 (16-ounce) container egg substitute
1 cup corn flakes, crumbed
Directions:
1. Soak favorite bread in egg
substitute.
2. Coat in corn flake crumbs.
3. Place bread on 3-inch rack and
bake at 350°F for 10-12 minutes.
Tip: Top with low-calorie syrup or
fruit and you can have a crispy,
healthy, and delicious breakfast!
NuWave Muffin Sandwich
Serves: 2
2 large eggs
2 English muffins, split in half
2 slices Canadian bacon
2 slices American cheese
Salt & pepper to taste
Directions:
1. Spray two large custard cups
with oil.
2. Crack one egg into each cup.
3. Gently break yolk.
4. Season with salt & pepper.
5. Place English muffin halves in
liner pan and place eggs on
3-inch rack.
6. Cook at 350°F for 5-6 minutes.
7. When timer goes off, place
Canadian bacon on rack next to
eggs.
8. Place cheese on muffins and
cook for additional 2 minutes.
9. Assemble sandwiches & enjoy!
Tip: Replace Canadian bacon with
frozen breakfast sausage
patties.
Steak & Eggs
Serves: 1
1 (4-ounce) sirloin steak
Seasoned salt to taste
½ tomato, seeds removed
2 tablespoons Parmesan cheese,
grated
1 tablespoon butter
2 large eggs
1 scallion, thinly sliced
Directions:
1. Crack eggs in shallow, oven-safe
dish.
2. Break yolks and place in liner
pan.
3. Cut ¼ tomato from top, and sliver
from bottom, so tomato can stand
upright.
4. Season steak and add cheese to
tomatoes.
5. Place steak and tomatoes on
3-inch rack.
6. Cook at 350°F for 8-9 minutes per
side for medium doneness.
Tip: When cooking from frozen,
place frozen steak on 3-inch
rack and cook at 350°F for
14-15 minutes. Add eggs and
tomato and cook another 10
minutes.
Ham & Cheese Strata
Serves: 6-8
10 bread slices
1½ cups ham, cubed
6 ounces Swiss cheese, shredded
6 ounces Cheddar cheese,
shredded
4 eggs
½ teaspoon salt
1 teaspoon onion powder
Breakfast
Page 29
29
Nest Egg with Manchego
Serves: 1
1 bread slice
1 teaspoon butter or cooking spray
1 egg
3 tablespoons Manchego cheese
Directions:
1. Cut round large enough to fit an egg
from bread.
2. Flatten and press back into hole.
3. Butter both bread sides.
4. Place bread in oven-safe baking
pan on 3-inch rack.
5. Crack egg into hole and top with
black pepper and Manchego
cheese.
6. Bake at 350°F for 10-11 minutes.
7. Serve with sliced bacon and fresh
fruit.
Tip: You can substitute any kind of
cheese.
Tip: Use bottom of a juice glass, can
or round cutters to cut bread.
Ham & Eggs Scramble
Serves: 1
2 large eggs
3 ounces ham, chopped
2 tablespoons parsley, chopped
2 ounces Cheddar cheese,
shredded
Salt & pepper to taste
Directions:
1. Mix all ingredients together in
shallow dish.
2. Place dish on 3-inch rack.
3. Cook at 350°F for 7-9 minutes.
4. Stir and continue to cook for 2
minutes.
Tip: For a spicy kick, add 3 ounces
crumbled chorizo sausage.
Breakfast
1½ cups milk
1 teaspoon dry mustard
¼ teaspoon red bell pepper
1½ cups corn flakes
4 tablespoons butter, melted
Directions:
1. Trim crust from bread and layer
10-inch baking pan, or 8x8-inch
silicone baking pan.
2. Layer ham and cheeses,
alternating layers.
3. Mix eggs, milk and seasonings
together.
4. Pour egg mixture over layers.
5. Let liquid soak into bread for 2
minutes.
6. Mix cornflakes and melted butter;
sprinkle on top.
7. Bake on 1-inch rack at 350°F for
20 minutes to form crust.
8. When strata starts to brown,
cover loosely with foil and finish
cooking for an additional 10 more
minutes.
9. When done, let sit for 1-2 minutes.
Page 30
30
Tips for Appetizers
Prepared foods from your grocer’s freezer section make great, easy snacks for appetizers or
entertaining. These items are prepared to perfection on the 3-inch rack at 350˚F for about
6-10 minutes per side. Some of the most popular choices include:
Hot wings
Corn dogs
Bagel bites
Chicken tenders
Poppers
Potato skins
Egg rolls
Pot stickers
French fries
For the best grilled cheese sandwich, use the 3-inch rack and cook at 350°F for 3-4 minutes
per side. Add some ham or turkey for extra protein!
30
Appetizers
Page 31

31
Stuffed Potato Bites
Serves: 2
2 medium baked potatoes
¼ cup low-fat sour cream
1 packet ranch seasoning
1 cup Cheddar cheese, shredded
Green onions (optional)
Bacon pieces, cooked (optional)
Directions:
1. Bake potatoes on 1-inch rack at
350°F for 35-45 minutes.
2. Let cool for 5-10 minutes.
3. Cut potatoes lengthwise and scoop
out filling from skins.
4. Combine potato filling with sour
cream and seasoning mix.
5. Fill skins with mixture and
sprinkle with cheese.
6. Place skins on 3-inch rack and
bake at 350°F for 6-7 minutes, or
until cheese is melted.
7. Add green onions and bacon.
Sweet Party Mix
Yield: 6 cups
2 cups bite-size corn square cereal
2 cups bite-size rice square cereal
1 cup pretzel knots
½ cup sliced almonds
¼ cup packed brown sugar
1½ tablespoons butter
1½ tablespoons light-colored
corn syrup
¼ teaspoon baking soda
½ cup dried cranberries
Directions:
1. In large bowl, combine corn
cereal, rice cereal, pretzels and
almonds; set aside.
2. In 3-quart sauce pan, combine
brown sugar, butter and corn
syrup.
3. Cook sugar mixture on Medium
(275°F) heat and stir until mixture
boils.
4. Continue boiling at moderate,
steady rate, without stirring, for 3
additional minutes.
5. Remove saucepan from heat and
stir in baking soda.
6. Pour sugar mixture over cereal
mixture; gently stir to coat.
7. Pour cereal mixture into liner pan.
8. Bake at 350°F for 8-9 minutes.
9. Stir and cook for 5 additional
minutes.
10. Lay hot party mix on large
buttered foil.
11. Once cool, break up pieces and
stir in dried fruit.
12. Store in an air-tight container.
Shrimp Rumaki
Serves: 6
6 slices bacon
24 small shrimp or 12 jumbo
shrimp, cut in half
¼ cup sliced water chestnuts
Directions:
1. Cut bacon into 4 equal pieces.
2. Lay each bacon piece onto
shrimp and chestnut slice.
3. Roll and secure with a toothpick.
4. Place shrimp on 3-inch rack and
cook at 350°F for 6-8 minutes
per side.
Tip: Replace shrimp with tofu,
chicken livers or mussels.
Appetizers
Page 32

32
Skinny Pigs in a Blanket
Yield: 16 pigs in blankets
2½ cups reduced-fat all-purpose
baking mix
¾ cup low-fat milk
8 reduced-fat chicken or turkey
hot dogs, cut in half
Directions:
1. Spray liner pan with non-stick
spray.
2. Combine baking mix and milk in
bowl until soft dough forms.
3. Turn onto surface, lightly
sprinkled with baking mix, and
knead.
4. Roll dough into 8x12-inch
rectangle.
5. Cut dough into 8 squares.
6. Cut each square in half to form 2
triangles.
7. Starting from narrow end, wrap
each triangle around hot dog
half.
8. Place in liner pan.
9. Bake at 350°F for 15-17 minutes.
Tip: You can serve with spicy
mustard for added flavor.
Tip: You can make this using
premade crescent dinner rolls.
Sweet & Sour Cocktail Meatballs
Serves: 20
4 slices hearty white sandwich
bread, torn into pieces
½ cup milk
2 large eggs
½ pound ground pork
½ cup fresh parsley, finely chopped
2 garlic cloves, minced
1 teaspoon salt
2 teaspoons pepper
2½ pounds lean ground beef
1 tablespoon vegetable oil
1 onion, minced
1 (28-ounce) can tomato sauce
2½ cups apricot preserves
¼ cup packed dark brown sugar
3 tablespoons Worcestershire
sauce
2 tablespoons Dijon mustard
¼ teaspoon red pepper flakes
Directions:
1. Using fork, mash bread, milk
and egg yolks in large bowl until
smooth.
2. Add pork, parsley, garlic, salt and
pepper; mix until incorporated.
3. Add beef and knead until
combined.
4. Form mixture into 1¼-inch
meatballs (makes about 80).
5. Place meatballs on 3-inch rack
and bake at 350°F for 7-8
minutes per side.
6. While meatballs bake, place
tomato sauce, apricot preserves,
brown sugar, Worcestershire
sauce, mustard and red pepper
flakes in 3-quart sauce pan and
mix well.
7. Heat sauce at 275˚F to achieve
simmer.
8. Let simmer for 15-20 minutes.
9. Place meatballs in sauce to coat,
then place in chafing dish or in
liner pan to serve.
Tip: Unless you have the Extender
Ring Kit, you will need to bake
the meatballs in stages. With
the Extender Ring Kit, both the
1-inch and 2-inch racks to
place the meatballs on each
layer.
Appetizers
Page 33
33
Tangy Mild Wings
Serves: 2-4
2 pounds chicken wings
1 cup ketchup
¼ bead molasses
¼ cup soy sauce
½ teaspoon red pepper flakes
½ teaspoon cayenne pepper
½ teaspoon black pepper
½ teaspoon salt
3 tablespoons Worcestershire
sauce
3 tablespoons white vinegar
Directions:
1. Mix all ingredients except chicken.
2. Add wings to sauce and coat
well. Reserve extra sauce for
dipping.
3. Place chicken on 3-inch rack and
cook on 350°F for 7-9 minutes
per side for fresh or 8-10 minutes
per side for frozen.
4. Serve with carrots, celery and
Ranch or Blue cheese dressing.
Tip: Add more cayenne pepper if
desired.
Grilled Cheese
Serves: 1
2 slices wheat or white bread
1 tablespoon margarine or butter
2 slices American cheese
Directions:
1. Spread butter or margarine on
both sides of bread.
2. Place one piece on 3-inch rack,
buttered side down.
3. Place cheese atop bread and top
with remaining slice, buttered
side up.
4. Grill at 350°F for 3-4 minutes per
side.
Tip: Add your favorite meat such
as ham, salami or turkey.
Baked Party Sweet Onion Dip
Yield: 6 cups
2 large onions, medium diced
2 cups Parmesan cheese, shredded
2 cups low-fat mayonnaise
½ teaspoon black pepper
Directions:
1. Mix all ingredients together in
10-inch baking pan.
2. Smooth ingredients flat and place
on 1-inch rack.
3. Bake at 350°F for 12-14 minutes,
or until the dish turns brown and
bubbly.
4. Serve with your favorite crackers
or bread.
Tip: You can substitute the
ingredients with low fat cheese
and mayonnaise.
Tip: Vidallia onions work the best and
are available year-round.
33
Appetizers
Page 34

34
Savory Lil’ Smokies
Yield: 50 sausages
¾ cup chili sauce
¾ cup grape jelly
4 teaspoons red wine
2 teaspoons dry mustard
1½ teaspoons soy sauce
½ teaspoon ground ginger
½ teaspoon ground cinnamon
½ teaspoon ground nutmeg
1 pound little smoky sausages
Directions:
1. Combine all ingredients, except
sausages, into bowl and mix well
until smooth.
2. Add sausages to sauce; coat well.
3. Pour sauce and sausages into
liner pan.
4. Bake at 350°F for 6-7 minutes per
side.
5. Serve with toothpicks.
Prosciutto-Wrapped
Shrimp Sticks
Yield: 6 skewers
48 medium shrimp, uncooked
¾ pound thinly sliced prosciutto
3 tablespoons olive oil
8 (6-inch) bamboo skewers
Directions:
1. Peel, devein, wash and remove
tails from shrimp.
2. Uncurl shrimp and wrap small
slice prosciutto neatly and snugly
around each to cover.
3. Place shrimp on bamboo
skewers; place skewers on
3-inch rack.
4. Using pastry brush, brush oil to
coat each side.
5. Cook at 350°F for 5-7 minutes per
side.
6. Sprinkle with black pepper.
Ham & Cheese Pitas
Serves: 4
4 (8-inch) pita bread rounds
4 thin slices ham, cut in half
4 slices sharp Cheddar or Swiss
cheese, cut in half
1 red onion, very thinly sliced
2 ripe tomatoes, very thinly sliced
1 tablespoon melted butter
Paprika
Directions:
1. Cut pita rounds across center,
making 8 half circles.
2. Stuff each half with ham, cheese,
onions and tomatoes.
3. Using pastry brush, lightly butter
each piece.
4. Sprinkle with paprika.
5. Place directly on 3-inch rack and
cook at 350°F for 7 minutes per
side, or until cheese has melted.
Taco-Flavored Chicken Wings
Yield: 30 wings
4 pounds chicken wings
1 pack taco seasoning
3 tablespoons extra virgin olive oil
2 tablespoons red wine vinegar
2 teaspoons hot pepper sauce
1 cup guacamole or salsa (optional)
Directions:
1. In large, resealable plastic bag,
combine taco seasoning, oil and
vinegar with hot pepper sauce.
2. Add chicken to sauce.
3. Seal bag and turn over to coat.
4. Let mixture sit in refrigerator for
30 minutes.
5. Place chicken on 3-inch rack and
cook at 350°F for 8-10 minutes
per side.
Tip: Serve with either guacamole
or salsa.
Appetizers
Page 35
35
Jumbo Lump Crab Cakes
Yield: 4 large crab cakes
16 ounces jumbo lump crab meat
⅔ cup fresh or canned white
bread crumbs
2 teaspoons Dijon mustard
2 tablespoons mayonnaise
2 tablespoons chopped chives
2 tablespoons chopped parsley
1 tablespoon lemon juice
½ teaspoon cayenne pepper
1 teaspoon crab seasoning
Salt & pepper for taste
Directions:
1. Mix all ingredients except crab
meat.
2. Gently fold in crab meat, leaving
meat in chunks. Add more bread
crumbs if desired.
3. Form into desired crab cake
sizes.
4. Place on 3-inch rack and cook at
350 °F for 8-9 minutes.
Tip: Place over gourmet greens or
with your favorite sauce.
Spicy Grilled Shrimp Skewers
Serves: 4
1½ pounds extra-large shrimp,
peeled and deveined
4 tablespoons unsalted butter,
melted and divided
¼ teaspoon cayenne pepper
½ teaspoon salt
½ cup hot pepper jelly
1 teaspoon grated zest
2 tablespoons lime juice
4 wooden skewers
Directions:
1. Wash and dry shrimp with paper
towel.
2. Thread shrimp on skewers and
brush with 1 tablespoon melted
butter.
3. Season shrimp with salt and
cayenne pepper.
4. Warm jelly in saucepan over
Medium (275°F) heat until
bubbling.
5. Remove jelly from heat and whisk
in remaining butter, lime zest and
lime juice.
6. Cover sauce and keep warm.
7. Place shrimp on 3-inch rack and
cook at 350°F for 5-6 minutes per
side for fresh or 7-8 minutes per
side for frozen.
Tip: Adding fresh lime juice helps
cut through the spice and
sugar of hot pepper jelly for a
tangy, balanced glaze.
Tip: Soak wooden skewers in oil, to
prevent burning.
35
Appetizers
Page 36
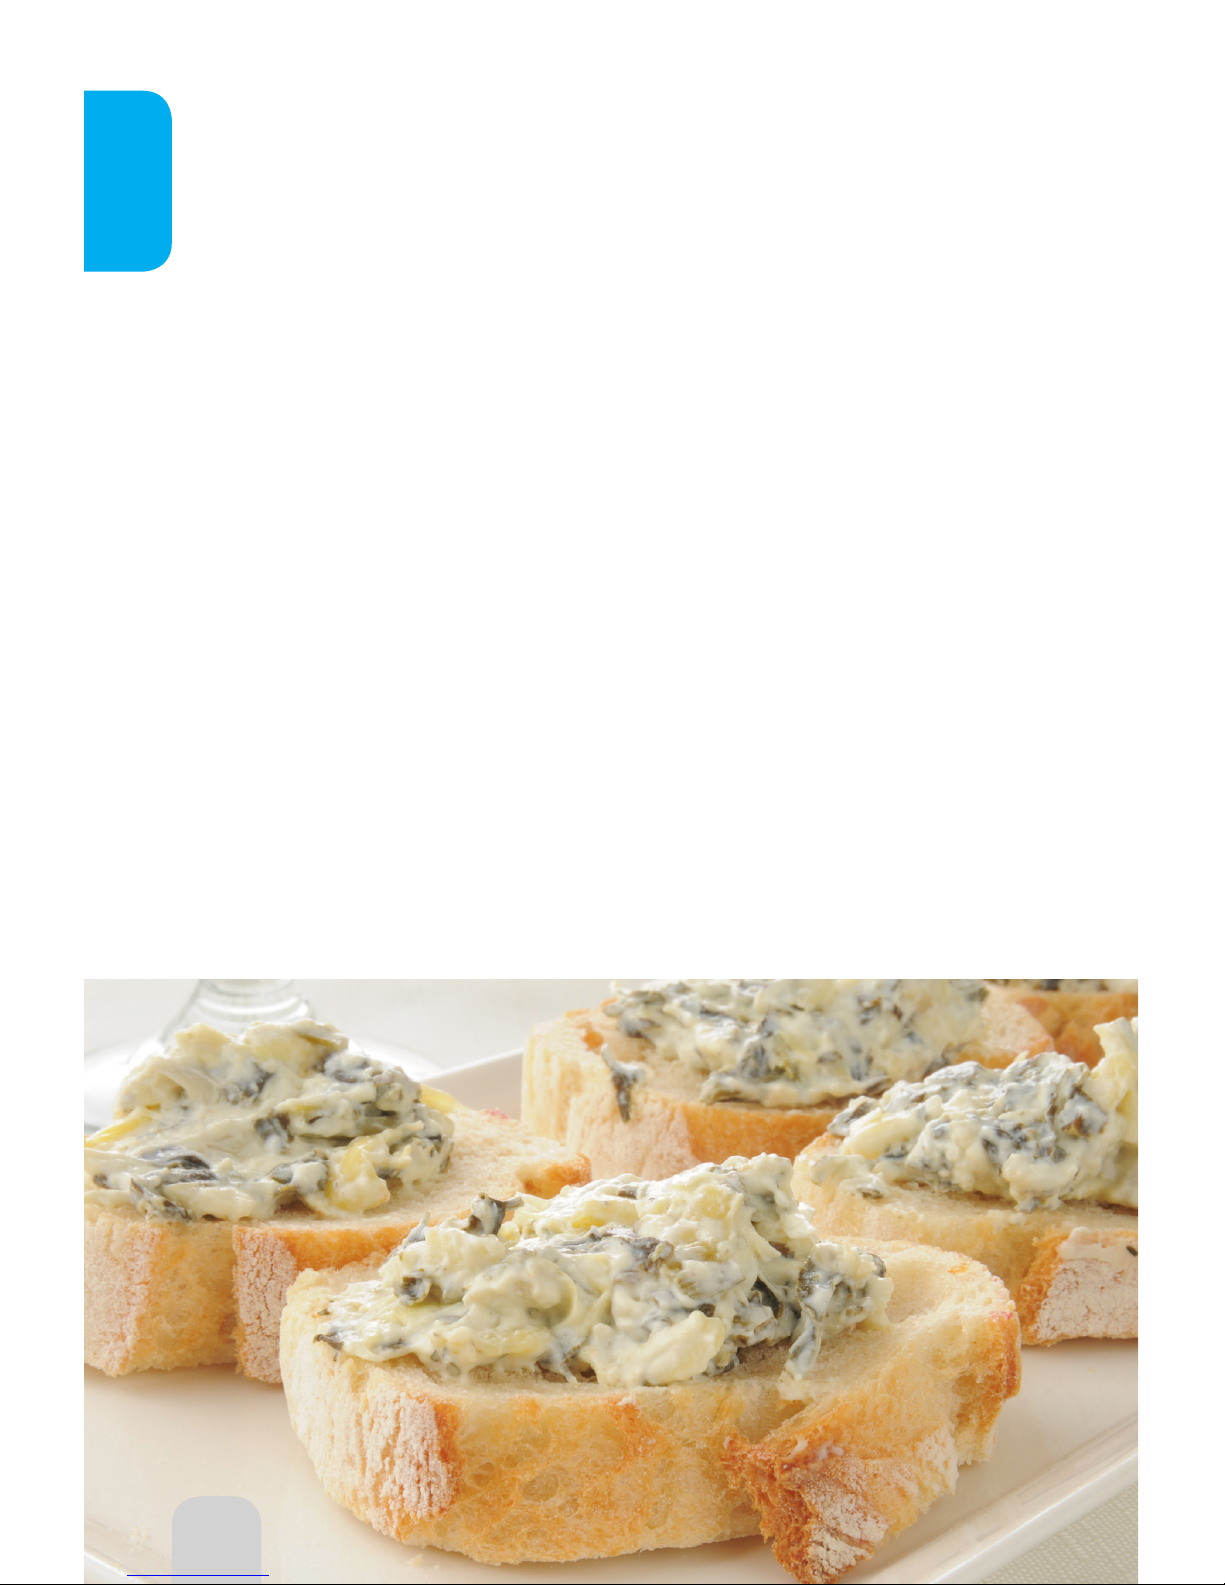
36
Hot Artichoke Dip Italian Purses
Yield: 4 cups
1 cup mayonnaise
¼ cup minced fresh garlic clove
1 (8-ounce) package cream
cheese, softened
1 cup Parmesan cheese, grated
and divided
2 cups Monterey Jack cheese,
shredded
2 (6-ounce) jars artichokes hearts,
drained, divided and chopped
Directions:
1. In medium bowl, mix garlic,
mayonnaise, cream cheese,
¾ cup Parmesan cheese, 1 cup
Monterey Jack cheese and
artichokes.
2. Place in oven-safe dish.
3. Place on 1-inch rack and sprinkle
remaining Parmesan and
Monterey Jack cheese over top.
4. Bake at 350°F for 28-30 minutes,
or until golden brown.
Yield: 16 purses
2 (8-ounce) canned crescent rolls
½ pound Italian sausage or ground
beef, cooked and crumbled
½ cup Mozzarella cheese,
shredded
½ cup onions, sliced
1 tablespoon Italian herb seasoning
1 medium tomato, diced
⅛ teaspoon garlic powder
Directions:
1. Mix meat, cheese, onions, Italian
seasoning, tomato and garlic
powder in a small bowl; set
aside.
2. Separate dough into 8 triangles.
3. Place mixture by spoonful into
each triangle.
4. Take each end of triangle and
overlap top.
5. Pinch edges to seal in mixture.
6. Place 8 crescent roll purses on
liner pan.
7. Bake at 350°F for 16-18 minutes.
8. Repeat for remaining eight purses.
36
Appetizers
Page 37
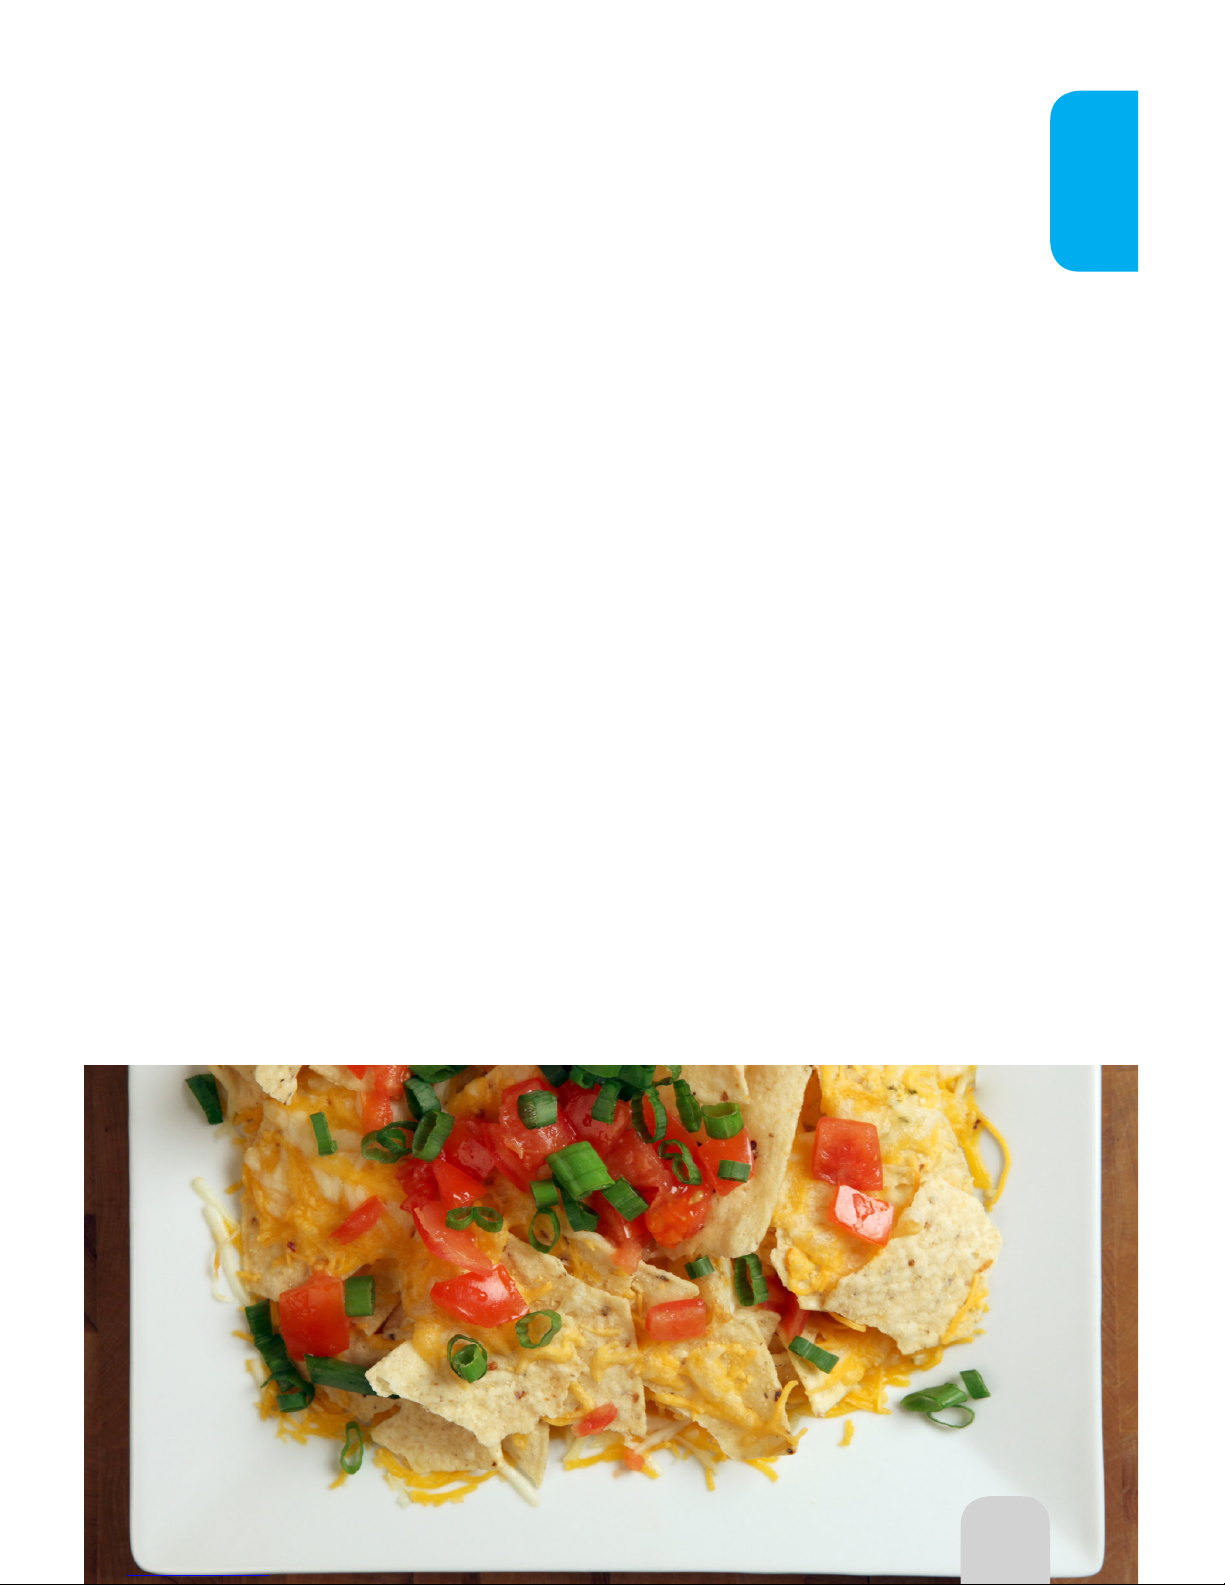
37
Chicken NachosCrab & Parmesan Wontons
Serves: 2
2 chicken breasts, pounded to
1-inch thickness
½ cup red or green peppers,
chopped
½ cup onions, sliced
1 large tomato, chopped
1 (7-ounce) can green chiles,
drained and diced
1 can small black olives, sliced
Directions:
1. Place chicken breast on 3-inch
rack.
2. Cook at 350°F for 10-12 minutes
per side for fresh or 14-16
minutes per side for frozen.
3. Shred chicken.
4. Spray liner pan with non-stick
cooking spray.
5. Place tortilla chips in liner pan
and layer with shredded chicken,
cheese and vegetables.
6. Top with second cheese layer.
7. Cook chips at 350°F for 11-12
minutes or until cheese is melted.
8. Serve with salsa.
Serves: 4
24 wonton wrappers
4 ounces lump crab meat,
pre-cooked
3 tablespoons Vidalia onion, grated
2 tablespoons Parmesan cheese,
grated
2 tablespoons parsley, chopped
¼ teaspoon black pepper
Small bowl warm water
Directions:
1. In bowl, mix crab meat, onion,
Parmesan, parsley and pepper.
2. Lay 3 single wonton wrappers
on dry, clean surface and place
tablespoon crab mixture into
wrapper.
3. Using your nger or pastry brush,
lightly spread water on wonton
edges.
4. Fold into envelope, making sure
points match up.
5. Press together and place on
3-inch rack.
6. Repeat process until all 24 are
done.
7. Cook in batches at 350°F for 6-8
minutes per side.
37
Appetizers
Page 38

38
Dehydration & Nuts
Tips for Dehydration & Nuts
Roasting Nuts:
Use pan on 3-inch rack and cook at 350˚F.
Pecan or almond pieces, 3-4 minutes.
Coconut, unsweetened and shredded, 1-2 minutes.
Whole nuts can be roasted in two layers: For example, start one layer in liner pan for 6
minutes and then place another pan, filled with nuts, on 3-inch rack and continue for
another 5 minutes. This doubles the capacity!
Dehydrating:
Alternate all foods when dehydrating.
Non-stick cooking spray will help avoid sticking. When dehydrating, keep dome open
slightly to let moisture escape. Remove dome promptly once your cycle has completed to
ensure that moisture does not build up.
Adding foods to the 3-inch rack as well can increase amounts made.
You need to alternate racks occasionally for even dehydrating times.
Store all dehydrated foods in air-tight container in cool pantry.
Fruits should be washed (minus bananas) and patted dry.
Rub fresh lemon over apples to avoid browning.
Dehydrating Fruits
Bananas - ¼-inch thick, 150˚F for 4 hours
Pineapple - ¼-inch thick, 120˚F for 8 hours
Apples - ¼-inch thick, 150˚F for 4 hours
Apricots - Pit and halve, 150˚F for 4½ - 5 hours
Strawberries - Cut in half, 150˚F for 2½ - 3 hours
Dehydrating Vegetables
Asparagus - Dehydrate at 120˚F for 4½ hours
Green Beans - Dehydrate at 120˚F for 5½ hours
Mushrooms - Dehydrate at 120˚F for 4 - 5½ hours
Summer squash - Cut ¼-inch slices, dehydrate at 120˚F for 4½ - 5 hours
Tomatoes - Halve and removes seeds, dehydrate at 120˚F for 7½ - 8 hours
Sweet Peppers - Cut into ½-inch long strips, dehydrate at 120˚F for 7 hours
Herbs - Wash and dry. Leave on stems and place on racks. Place herbs on racks and dehydrate at 120˚F
for 1 hour for more delicate herbs like thyme, and cook for 1½ hours for hardier herbs like rosemary.
Place rack over herbs to prevent herbs from flying around.
Page 39
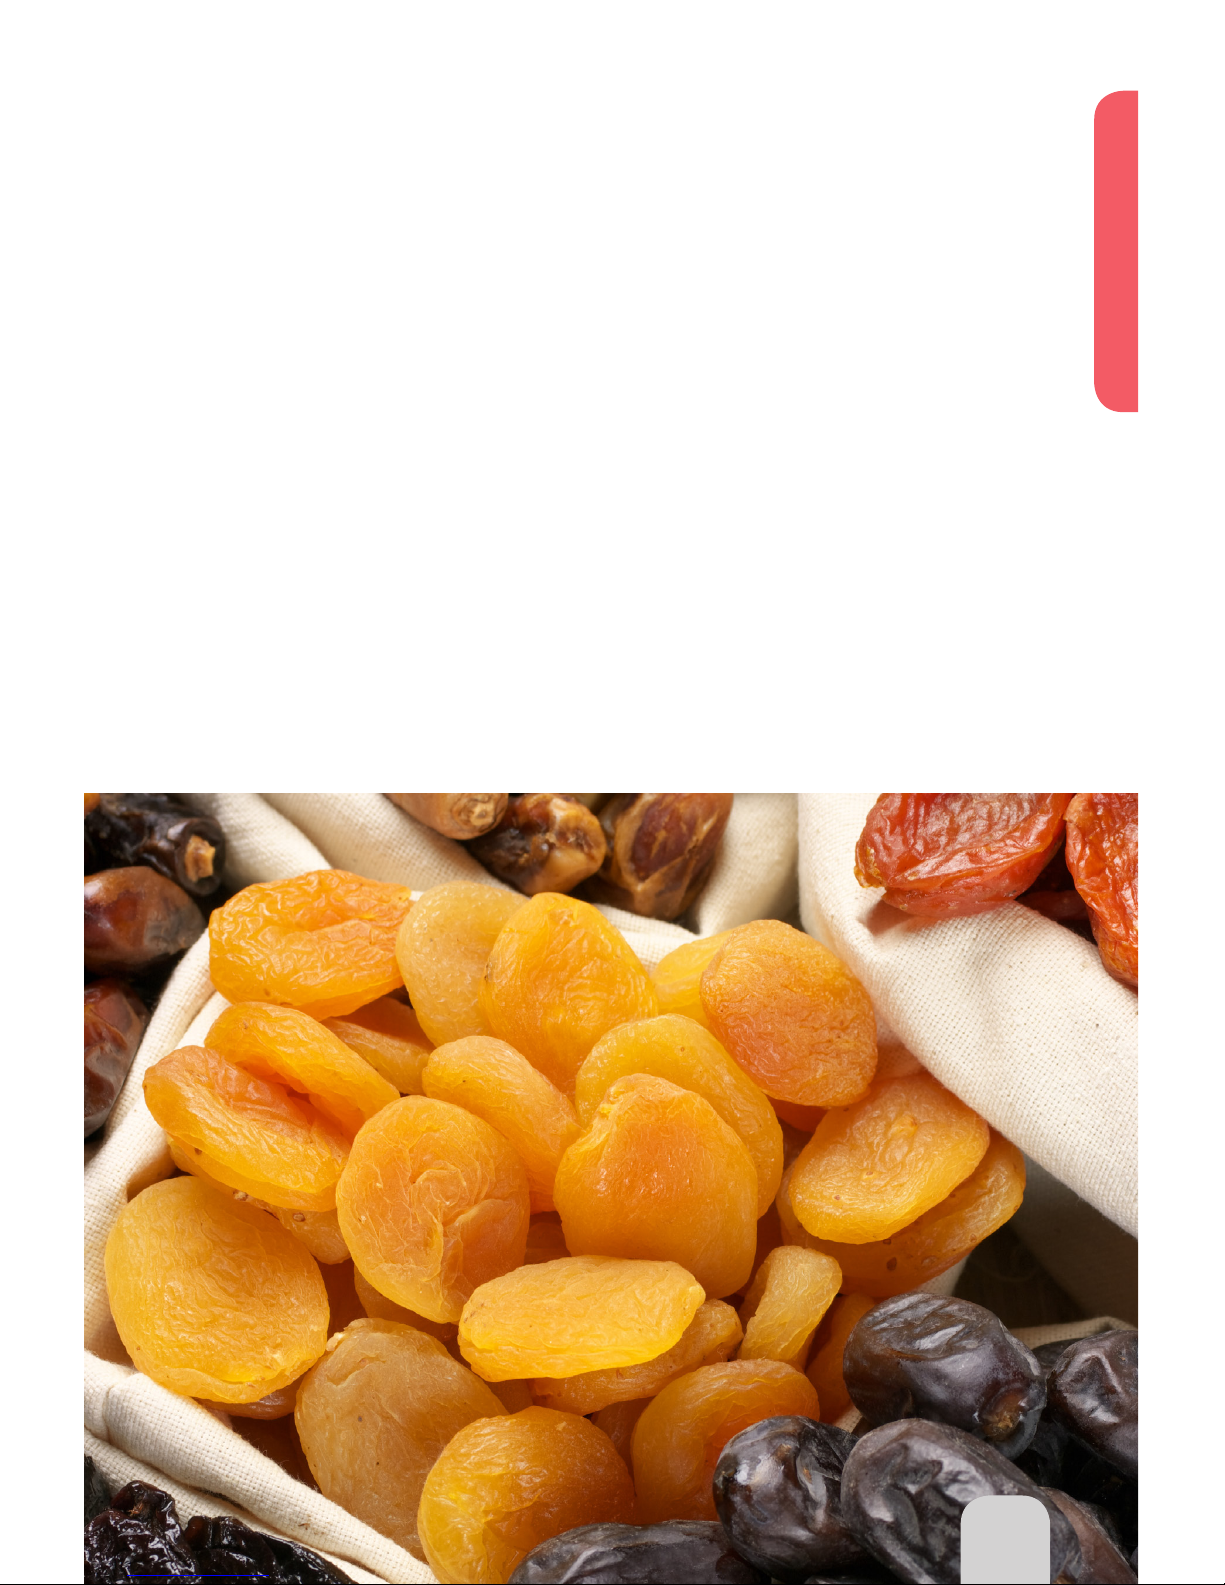
39
Dehydration & Nuts
Spiced Pecans
Yield: 2 cups
1 package taco seasoning mix
5 tablespoons sugar, divided
¼ teaspoon cayenne pepper, divided
2 teaspoons cinnamon
¼ cup orange juice
2 cups pecan halves
Directions:
1. Spray liner pan with oil.
2. In small saucepan, combine
1 tablespoon seasoning mix, 4
tablespoons sugar, ⅛ teaspoon
cayenne pepper and cinnamon;
mix well.
3. Stir in orange juice.
4. Bring to boil over Medium
(275°F) heat.
5. Once boil is reached, remove
pan from heat.
6. Add pecans; stir until pecans are
well coated.
7. Spread pecans evenly in liner pan.
8. Cook at 350°F for 7-8 minutes.
9. Immediately remove dome and
stir pecans.
10. Continue cooking at 350°F for
additional 7-8 minutes.
11. While pecans cook, in small
bowl, combine remaining
seasoning mix, 1 tablespoon
sugar and ⅛ teaspoon
cayenne pepper.
12. Remove pecans from Oven.
13. Place pecans in bowl with
seasoning mixture and toss. If
pecans stick together, gently
break them apart; continue to
toss.
14. Spread pecans out on cooling
rack.
15. Gently shake to remove any
residual seasoning mixture.
16. Store in airtight container.
39
Page 40
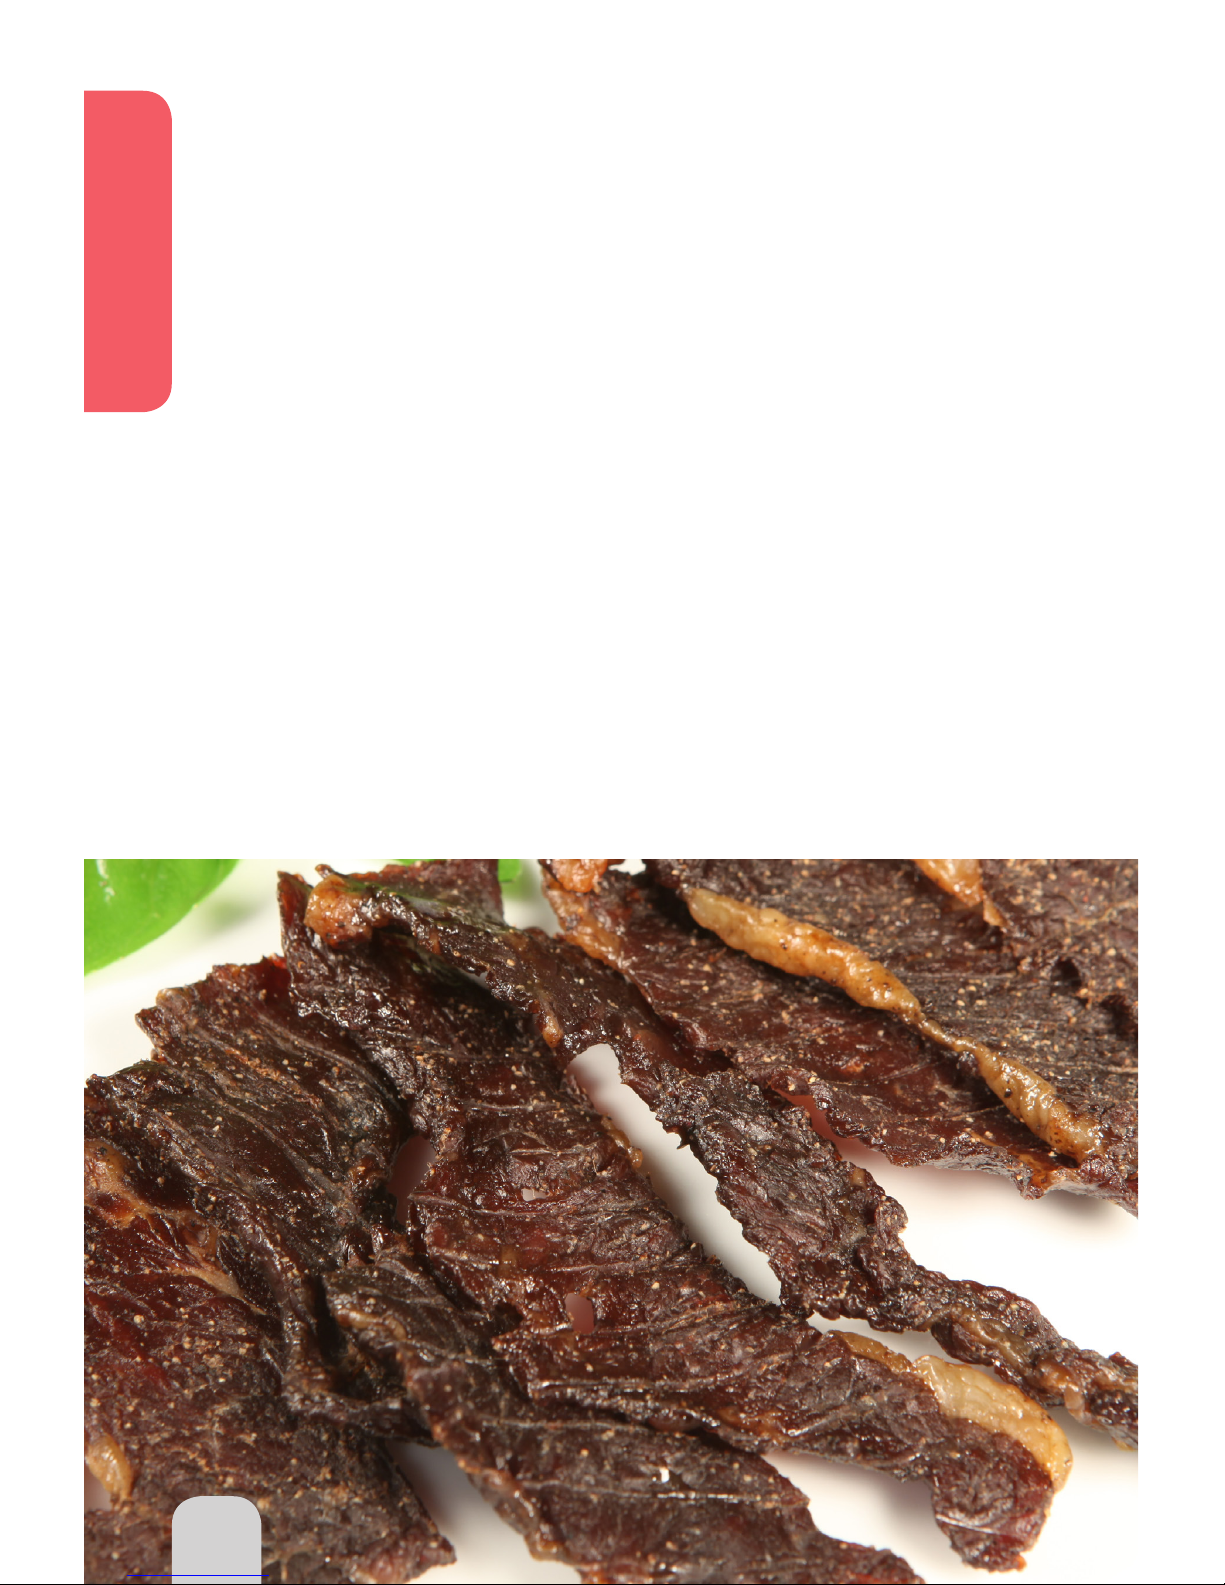
40
Trail Mix
Yield: 11 cups
1 cup dried cranberries
1 cup dried blueberries
1 cup dried pineapple
1 cup dried apple pieces
1 cup peanuts
1 cup cashews
1 cup almonds
1 cup mini marshmallows
1 cup chocolate chips
1 cup peanut butter chips
1 cup white chocolate chips
Directions:
1. Dehydrate berries at 150°F for
2½-3 hours.
2. Dehydrate pineapple at 120°F for
8 hours.
3. Dehydrate apples at 150°F for
4 hours.
4. Mix all ingredients together in
large bowl.
5. To store, place in sandwich bags or
airtight containers.
Beef Jerky
Yield: 1 pound
1 pound lean beef sliced thin (sliced
lengthwise with the grain)
¼ cup soy sauce
3 tablespoons Worcestershire sauce
1 tablespoon garlic powder
3 tablespoons liquid smoke
Cayenne pepper to taste
Directions:
1. Place all ingredients in plastic
bag and marinate overnight.
2. Place beef pieces in liner pan and
3-inch rack, ensuring that no
pieces are touching.
3. Dehydrate at 175°F for about
3 hours.
4. Tent dome during last 5 minutes.
5. Pat jerky with paper towel to
remove excess moisture.
6. Cool, and store.
40
Dehydration & Nuts
Page 41
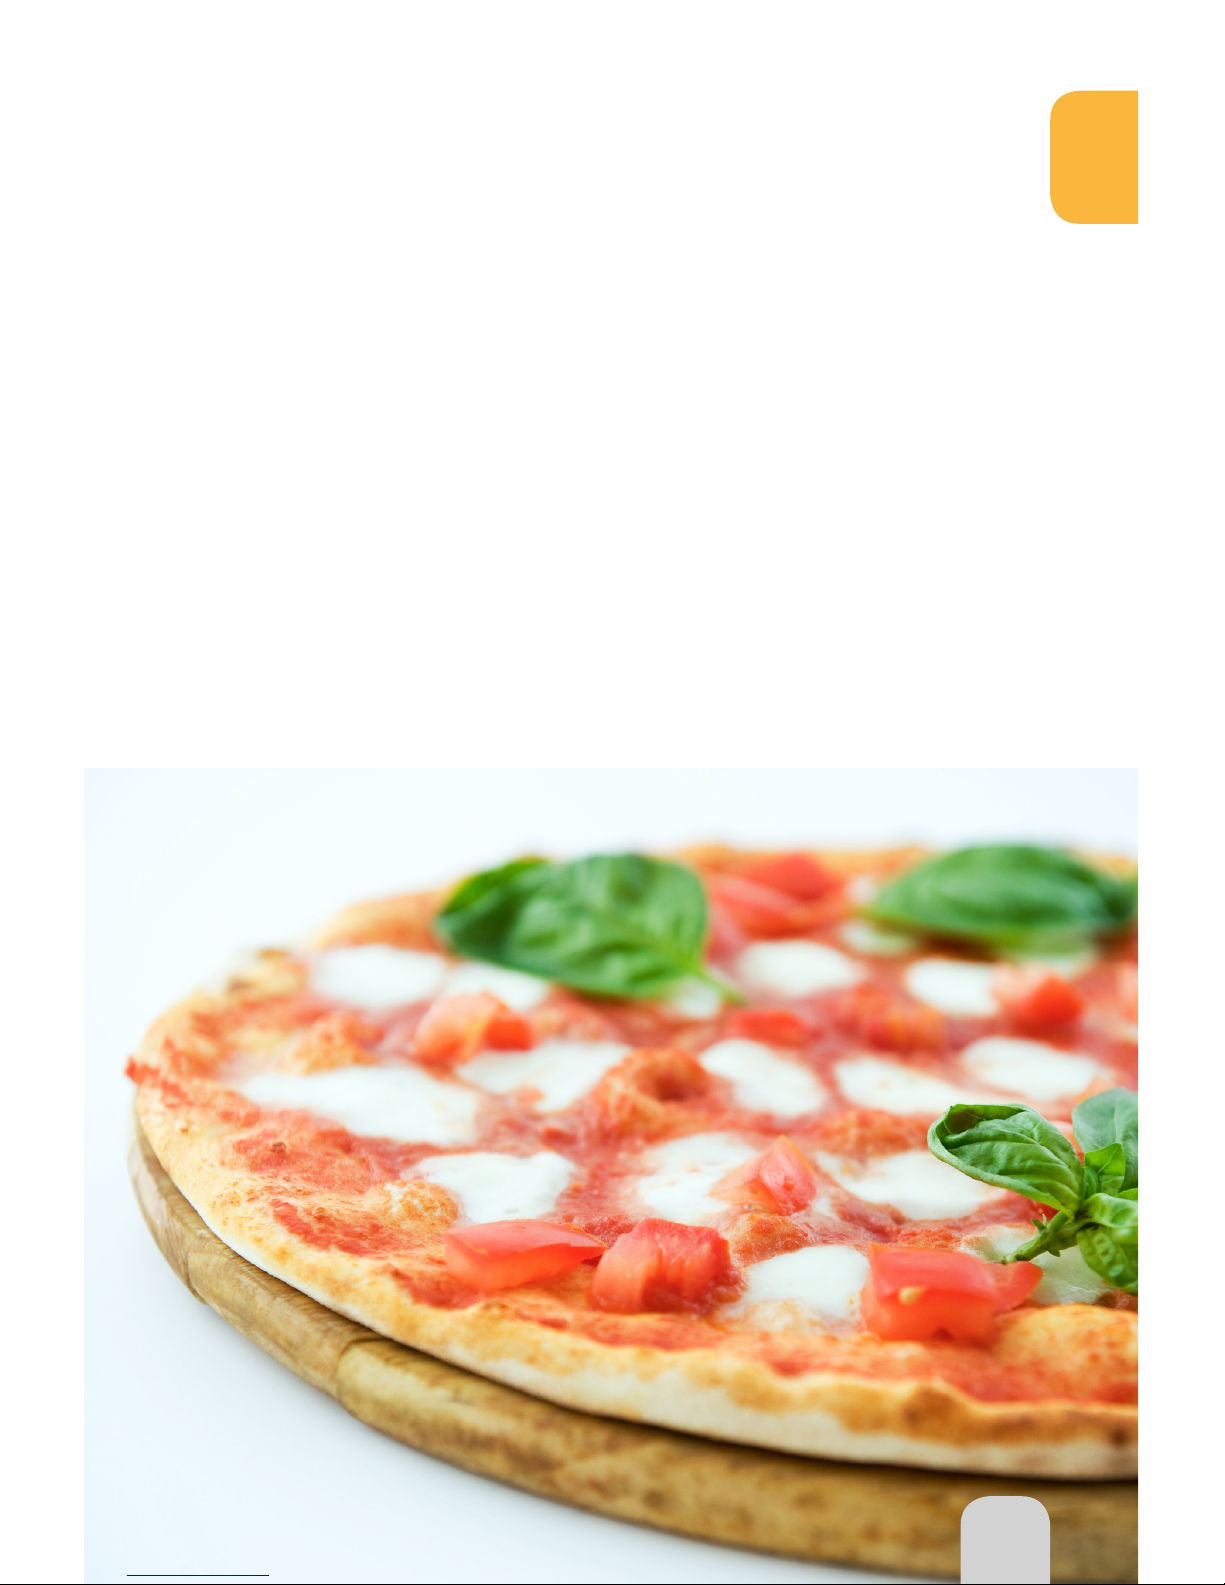
41
Tips for Pizza
To cook a regular crust frozen pizza, place the pizza upside down inside the NuWave
Silicone Pizza Liner and then cook according to directions. You can also use parchment
paper instead of the Silicone Pizza Liner. To finish, flip the pizza so it is cheese side up and
cook for an additional 3-5 minutes, until the cheese melts.
• Thin Crust
Cook on 3-inch rack at 350°F for
18-20 minutes upside down, and right side up
for 3-4 minutes.
• Regular Crust
Cook on 3-inch rack at 350°F for
20-22 minutes upside down, and right side up
for 5-7 minutes.
• Thick Crust
Cook on 3-inch rack at 350°F for
22-26 minutes upside down, and right side
up for 5-7 minutes.
• Deep Dish
Cook on 3-inch rack at 350°F for
30 minutes upside down, and right side up
for 15 minutes.
41
Pizza
Page 42

42
Gorgonzola PizzettasItalian Pizza Burger
Serves: 4
4 (7-inch) flatbreads or pita breads
1½ cups part-skim ricotta cheese
16 grape or cherry tomatoes, halved
¼ cup sliced basil
½ cup Gorgonzola cheese, crumbled
Directions:
1. Place 1 pita on 3-inch rack.
2. Top pita with tomatoes, basil and
cheese.
3. Cook on 350°F for 8-10 minutes.
4. Repeat for remaining pita.
Tip: Get creative and add broiled
shrimp, chicken or other
vegetables.
Serves: 5-6
½ cup pizza sauce, divided
1 egg, beaten
½ cup dry bread crumbs
2 teaspoons onion, dried & minced
½ teaspoon dried oregano
¼ teaspoon salt
⅛ teaspoon pepper
1½ pounds ground beef
3 slices Mozzarella cheese, cut into
half moons
6 Kaiser rolls, cut into half moons
Directions:
1. In bowl, mix egg, breadcrumbs,
onion, oregano, salt, pepper and
ground beef.
2. Form beef mixture into ½-inch
thick patties.
3. Place patties on 3-inch rack and
cook at 350°F for 7-8 minutes.
4. Flip burgers and cook at 350°F
for additional 4 minutes.
5. Add cheese to burgers and cook
for 1 minute.
6. Assemble burgers by placing
each on bottom roll, pizza sauce
on top and top roll.
Goat Cheese Pizza
Serves: 1-2
1 (8 – 10-inch) pizza crust,
pre-baked
3 tablespoons tomato sauce
1 tablespoon basil, freshly chopped
2 ounces goat cheese, crumbled
2 ounces four cheese Italian blend,
crumbled
Directions:
1. Cook crust on 3-inch rack at
350°F for 5 minutes.
2. Spread sauce, cheese and basil
onto crust.
3. Cook at 350°F for 8-10 minutes.
Mexican Pizza
Serves: 1
1 (8-9-inch) flour tortilla
2 tablespoons tomato sauce
½ teaspoon taco seasoning or
Mexican spice blend
⅛ cup fresh scallions, chopped
½ cup shredded Cheddar cheese
Jalapeño peppers to taste
Directions:
1. Place tortilla on 3-inch rack.
2. Mix sauce together with spice
blend and spread onto tortilla.
3. Arrange jalapeños and scallions
over sauce.
4. Top with cheese.
5. Cook at 350°F for 8-10 minutes.
Pizza
Page 43
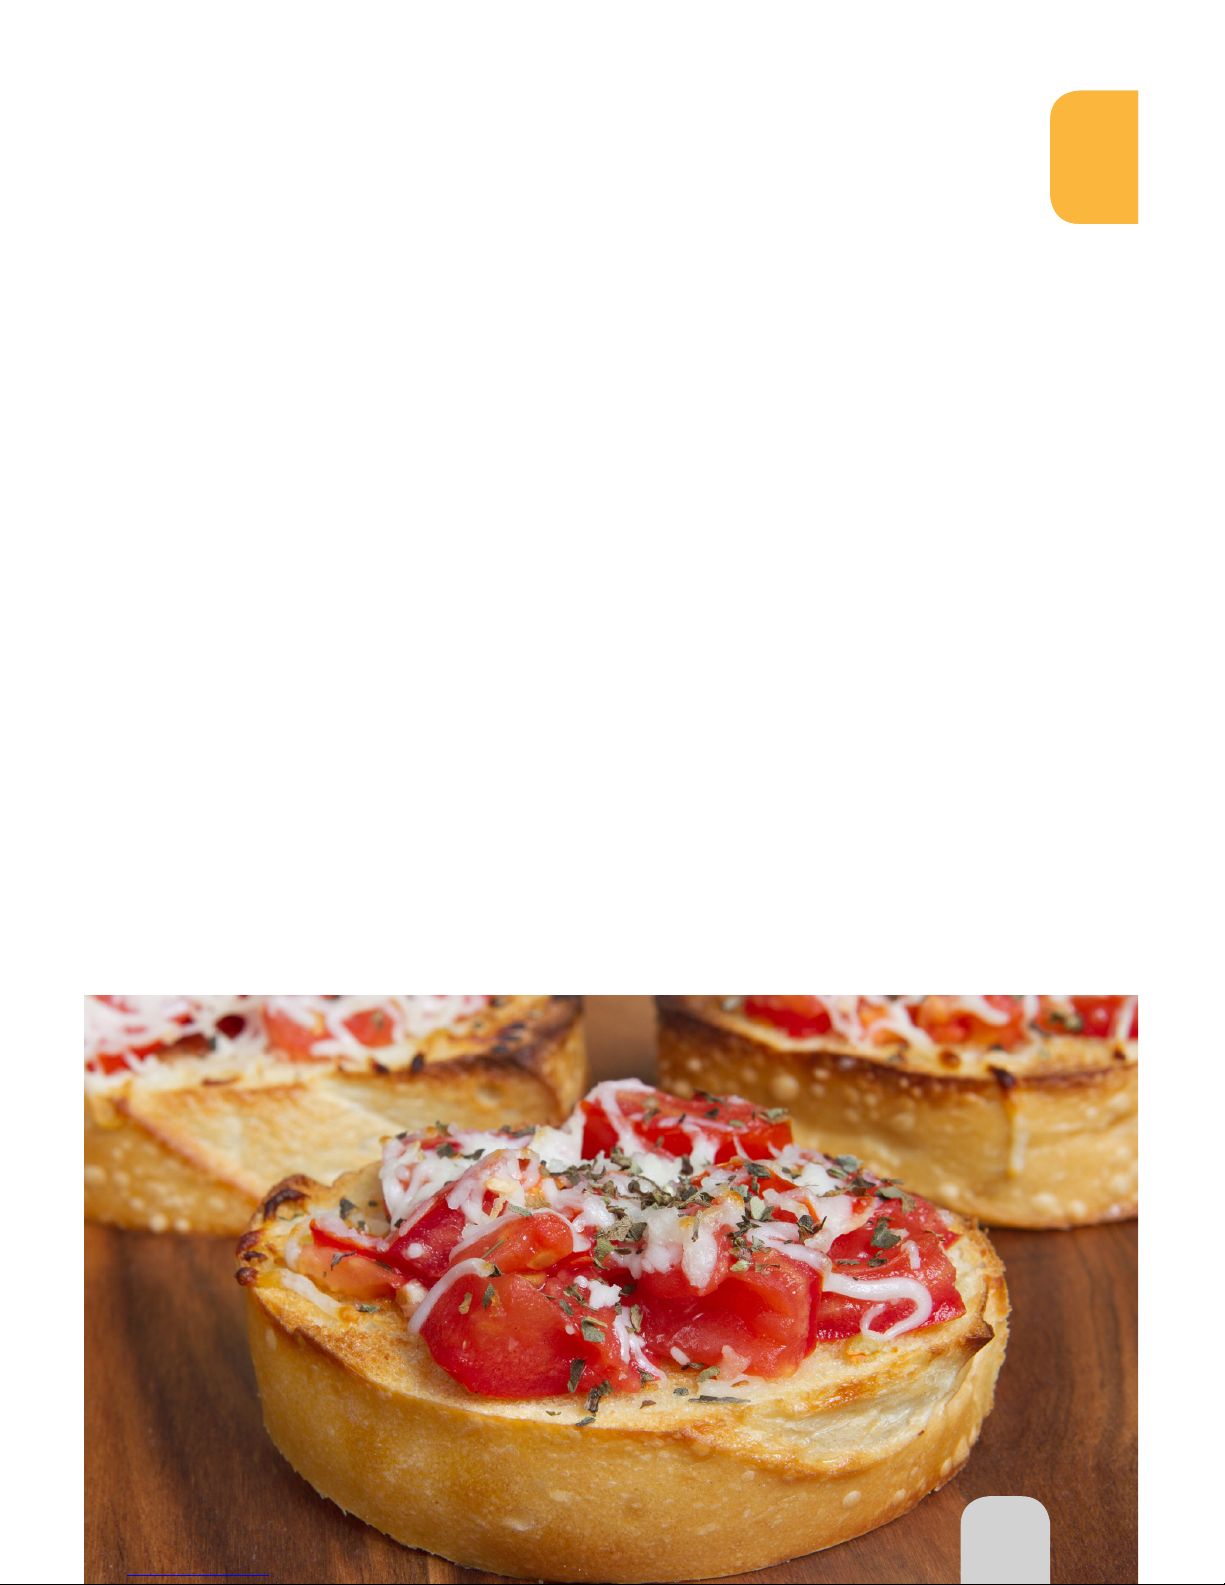
43
Pizza Boats
Serves: 3-4
4 (6-inch long) slices French bread
¾ cup pizza sauce
½ cup Parmesan cheese, grated
4 slices provolone or Mozzarella
cheese
Directions:
1. Spray bread with oil and add
pizza sauce.
2. Place bread on 1-inch rack and
toast at 350°F for 6 minutes.
3. Add cheese and any desired
toppings.
4. Cook at 350°F for 8-10 minutes,
or until cheese is melted and
slightly browned.
Tip: Replace French bread with
English muffins.
Tip: Change up the flavor by adding
sliced pepperoni, mushrooms,
black olives, chopped bell
peppers, etc.
Calzones
Serves: 2
1 tube refrigerated pizza dough
1 cup Mozzarella or Monterey Jack
cheese, shredded
½ cup premade spaghetti sauce
¾ pound cooked Italian sausage or
pepperoni
⅛ cup onions, diced
⅛ cup tomatoes, diced
Directions:
1. Roll dough and cut into 2 (6-inch)
disks.
2. Spray 2 (10-inch) square aluminum
foil sheets with oil and lay dough
onto foil.
3. Place remaining ingredients in equal
amounts onto each disk.
4. Fold over to form half moon shaped
packets.
5. Wrap in foil and place on 1-inch
rack.
6. Cook at 350°F for 10-12 minutes per
side, or until the crust is crispy and
brown.
Tip: If made in advance and frozen,
add 3-4 minutes to cooking time.
43
Pizza
Page 44
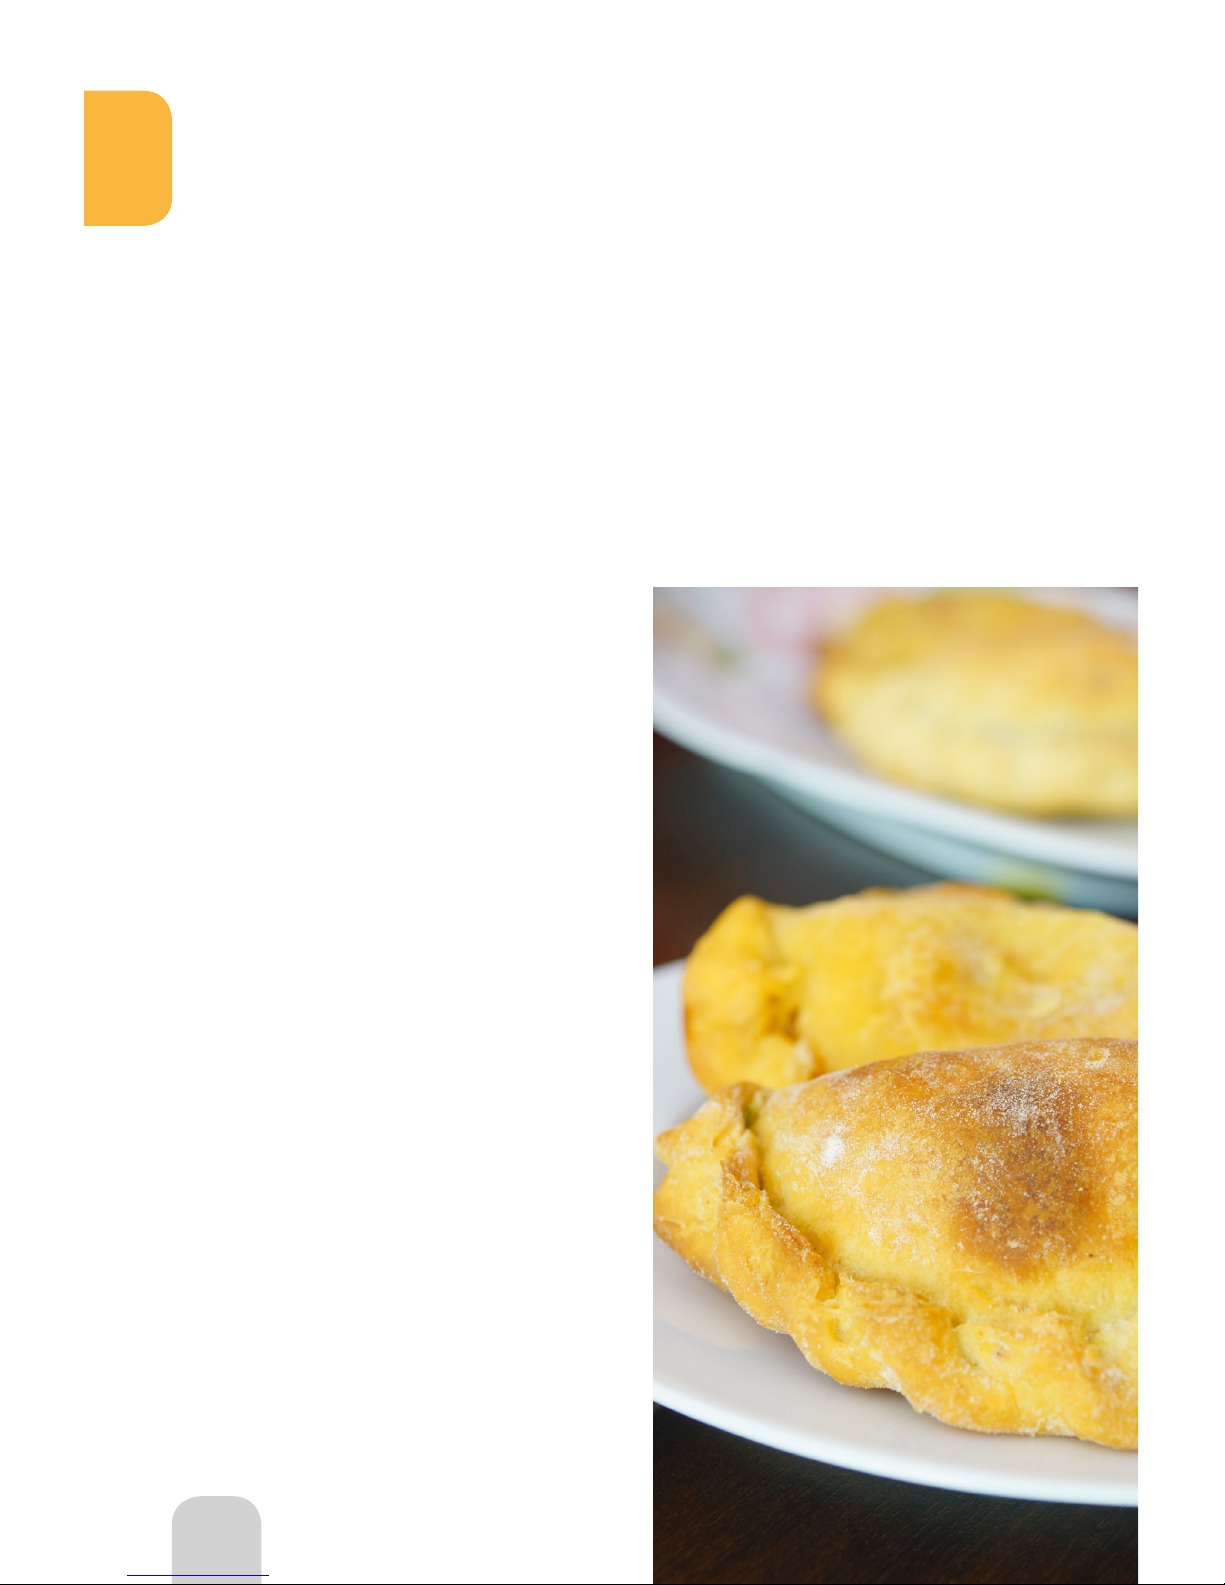
44
Pita Pizza
Serves: 1
1 package (8-9-inch) soft pita bread
2 tablespoons tomato sauce
¼ cup parsley, freshly chopped
6-8 slices pepperoni
½ cup shredded Mozzarella cheese
Directions:
1. Place pita on 3-inch rack and
spread tomato sauce on top.
2. Top with parsley and pepperoni.
3. Sprinkle cheese over pita.
4. Cook at 350°F for 8-10 minutes.
Mini Spinach Calzones
Serves: 12
1 (5-ounce) package frozen spinach,
thawed and well-drained
1 (4-ounce) package reduced-fat
cream cheese, softened
3 tablespoons Parmesan cheese,
grated and divided
2 tablespoons green onion, chopped
¼ teaspoon ground black pepper
1 (13.8-ounce) package refrigerated
pizza dough
1 egg white
1 tablespoon water
Non-stick cooking spray
Directions:
1. Spray 1-inch rack with non-stick
spray.
2. Stir together spinach, cream
cheese, 2 tablespoons Parmesan
cheese, green onion and pepper in
medium bowl; set aside.
3. Unroll pizza dough on lightly oured
surface.
4. Roll dough into 15-inch square.
5. Using pizza cutter or sharp knife,
cut dough into 25 (3-inch) squares.
6. Spoon filling by teaspoonful onto
each square.
7. In small bowl, whisk together egg
white and water.
8. Lift corner of each square and
stretch dough over to opposite
corner, making a triangle.
9. Press edges together with fork tine.
10. Arrange calzones on prepared
1-inch rack.
11. Prick calzones with fork.
12. Brush calzones with egg white
mixture.
13. Cook at 350°F for 12 minutes or
until browned.
Tip: If prepared in advance and frozen,
add 3-4 minutes to cooking time.
Pizza
Page 45
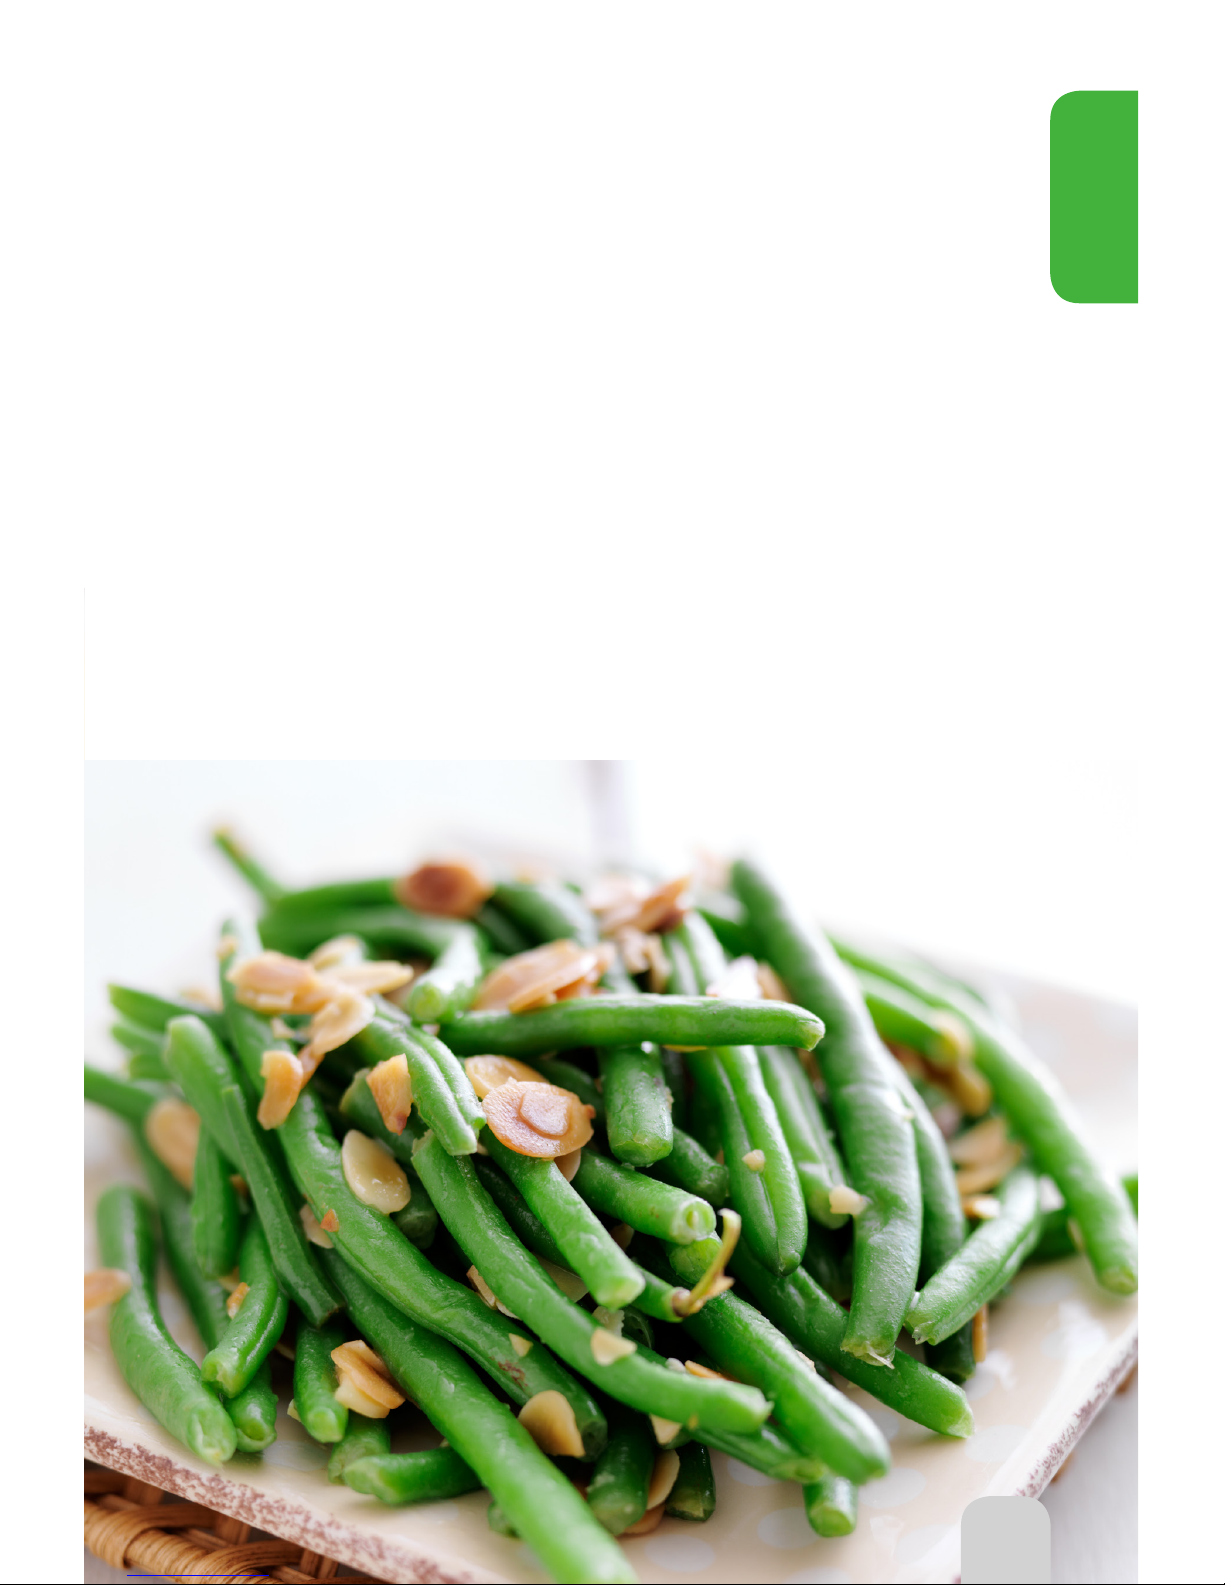
45
Tips for Vegetables
Glass, oven-safe dishes are denser than metal, foil and silicone. Metal and foil also
reflect heat so this will heat faster than glass, which absorbs heat. Silicone will absorb
the heat instead of reflect, however it is thinner than oven-safe glass, so silicone will
decrease the cooking time compared to an oven-safe glass dish.
Keep in mind that cooking times may vary by several minutes depending on the size of
the vegetables.
Always select the freshest produce. Always wash vegetables thoroughly.
Different types of cooking vessels will affect cooking times in different ways. Foods
cooked in denser dishes require longer cooking times. Foods cooked in larger, shallow
dishes require shorter cooking times. Foods cooked in deeper dishes require longer
cooking times.
Vegetables
45
Page 46
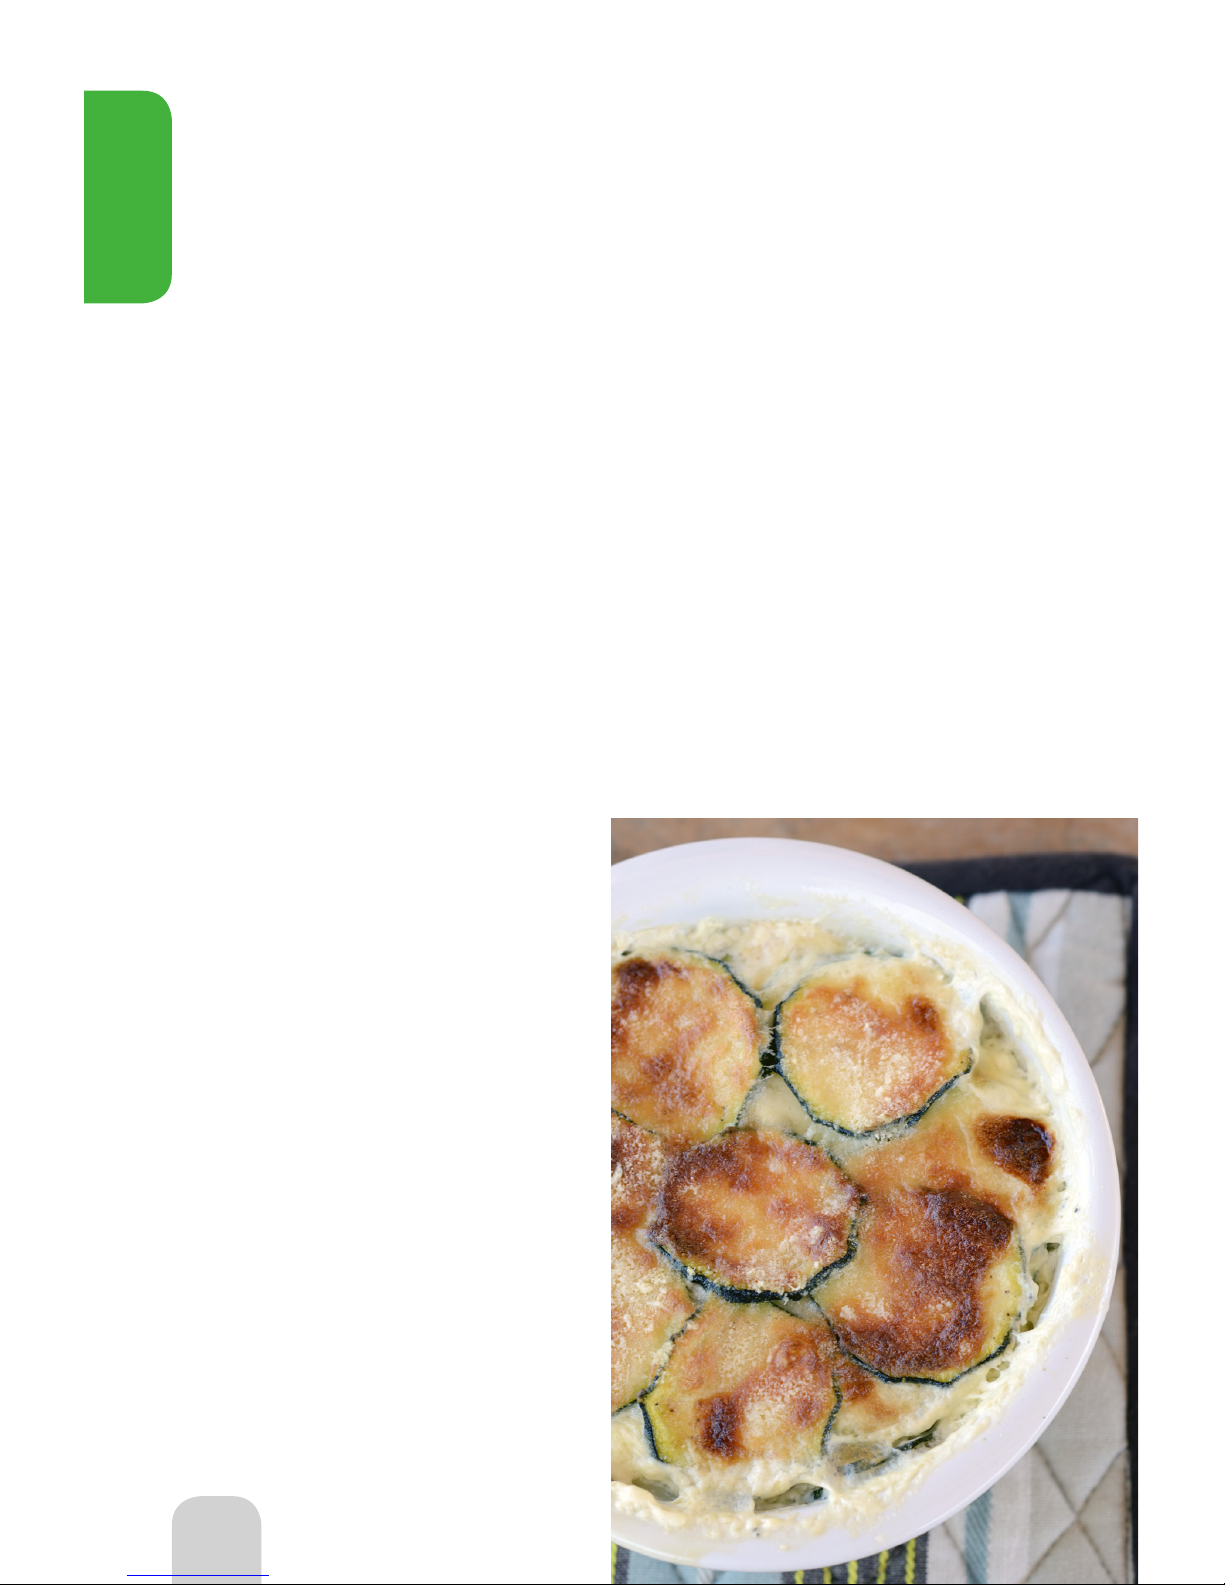
46
Zucchini & Onions Au Gratin
Serves: 2-4
1 large yellow onion, cut into ½-inch
pieces
1 medium zucchini, cut into ½-inch
slices
1 tablespoon olive oil
½ cup Cheddar cheese, shredded
Salt & pepper to taste
Directions:
1. Place onion in liner pan and
drizzle with olive oil.
2. Cook at 350°F for 10-11 minutes,
stirring halfway through cooking
process.
3. Layer zucchini onto onions.
4. Season with salt and pepper.
5. Cook at 350°F for 4-5 minutes.
6. Sprinkle with cheese and cook
at 350°F for additional 2 minutes.
Mexican Elote
Serves: 2-4
4 ears of corn
¼ cup melted butter
¼ cup mayonnaise
½ cup Cotija cheese or Queso
Fresco, grated
Chili powder or paprika to taste
Salt & pepper to taste
4 lime wedges (optional)
Directions:
1. Place corn on 3-inch rack and
roast at 350°F for 7-8 minutes
per side.
2. Remove corn and immediately
pour butter on each ear.
3. Spread mayonnaise on corn.
4. Sprinkle corn with cheese, chili
powder, salt and pepper to taste.
5. Serve with lime wedges.
Haricots Almondine
Serves: 6-8
12 ounces French green beans,
trimmed and rinsed
2 tablespoons olive oil
¼ cup lemon juice
½ cup almonds, sliced
2 tablespoons butter, melted
1 cup crispy fried onion ringlets
Directions:
1. Place green beans in 8x8-inch
oven-safe dish and place
dish on 1-inch rack.
2. Drizzle oil and lemon juice over
beans.
3. Cook at 350°F for 8-10 minutes.
4. Top beans with almonds and
onions.
5. Cook at 350°F for additional 3-4
minutes.
6. Serve immediately.
Vegetables
Page 47
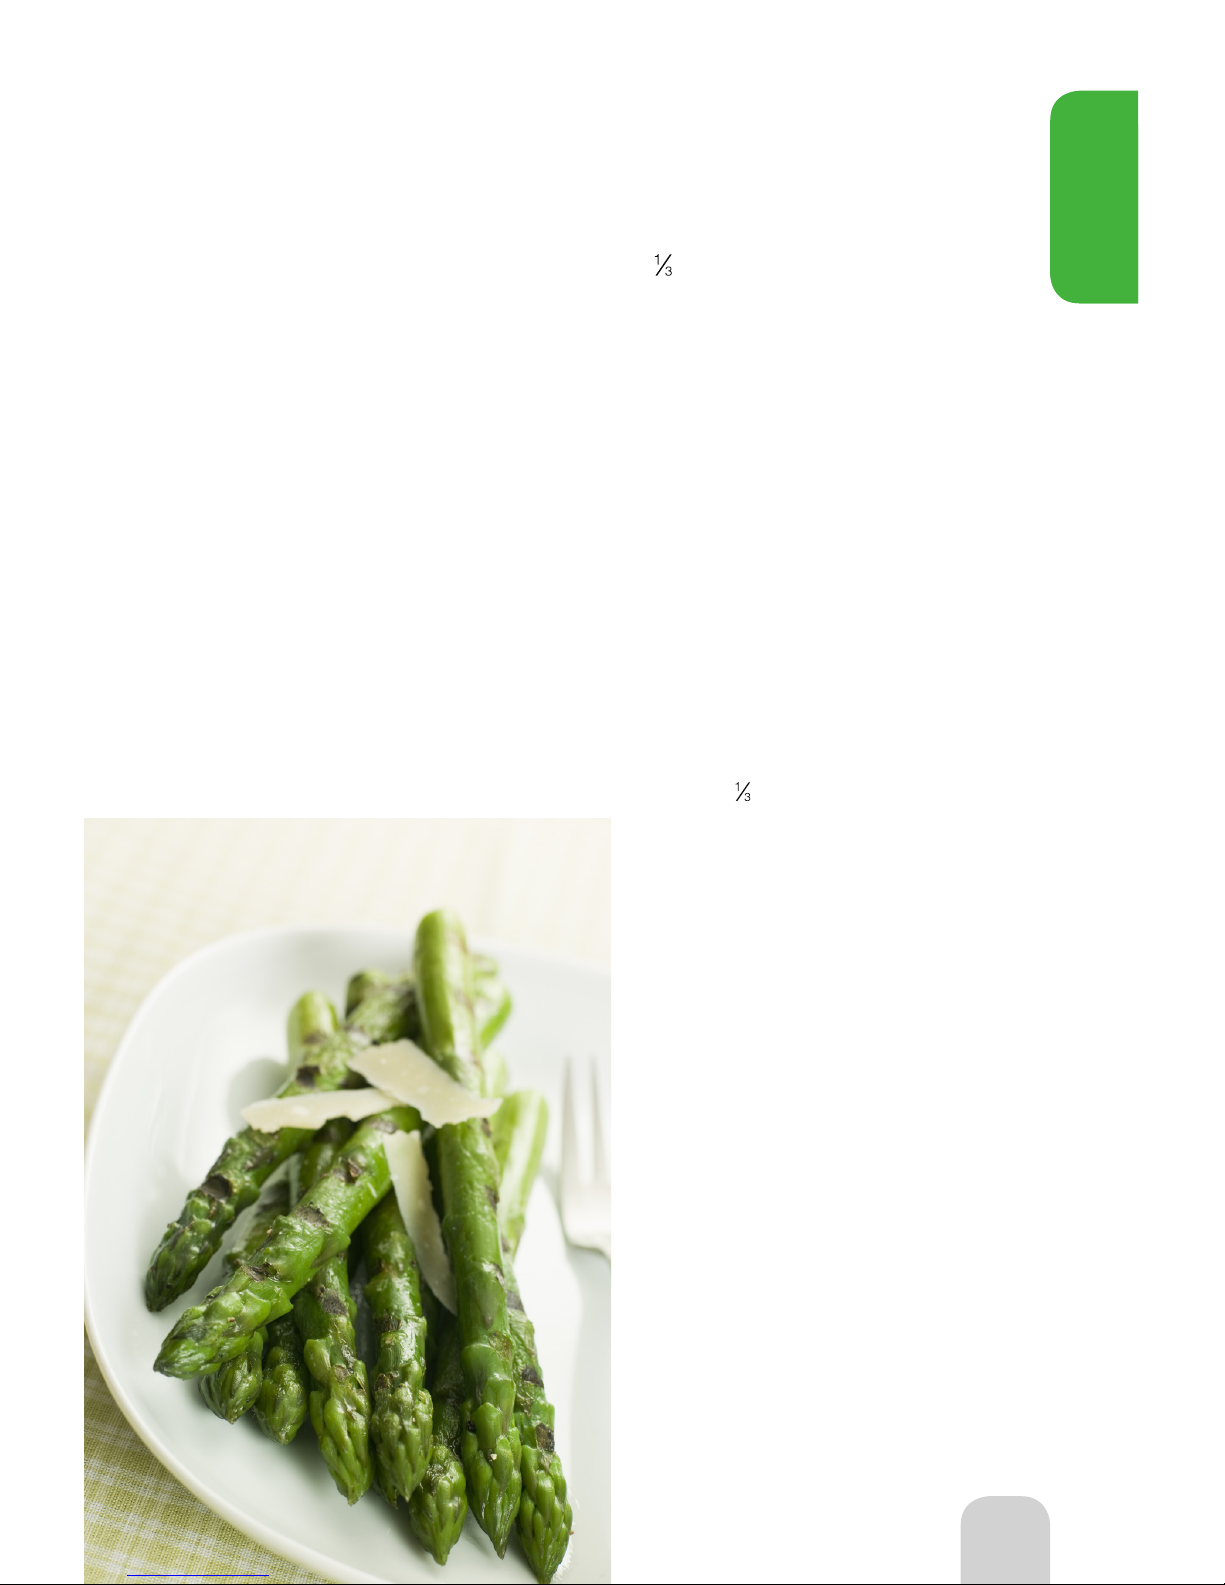
47
Sweet Potato Casserole with
Streusel Topping
Serves: 4-6
4 sweet potatoes
cup and 3 tablespoons butter
½ cup sugar
½ cup brown sugar
2 eggs, slightly beaten
½ teaspoon salt
1 teaspoon vanilla
¼ cup and 1 teaspoon flour
¼ cup pecans, chopped
Directions:
1. Place sweet potatoes on 3-inch
rack and cook at 350°F for 40
minutes.
2. Let sweet potatoes cool for about
15 minutes.
3. Peel sweet potatoes.
4. Place them in medium bowl and
mash.
5. Add cup butter, sugar, eggs,
salt, vanilla and flour; mix well.
6. Place mixture in 1½-quart
casserole dish.
7. Place dish on 1-inch rack and
bake at 350°F for 20-22 minutes.
8. Combine ¼ cup flour, 3
tablespoons butter, brown sugar
and pecans; mix well.
9. Remove dome and stir casserole.
10. Spread streusel topping on
casserole.
11. Continue to bake for additional
12 minutes.
Asparagus with Parmesan Crust
Serves: 6
1 pound asparagus
1 tablespoon extra virgin olive oil
1 ounce Parmesan cheese, shaved
¼ cup balsamic vinegar
Black pepper to taste
Directions:
1. Wash and trim asparagus.
2. Toss asparagus in olive oil and
place on 3-inch rack.
3. Sprinkle cheese on asparagus
and cook at 350°F for 7-8
minutes.
4. Drizzle balsamic vinegar over
asparagus and enjoy.
Tip: Cooking time may vary
depending on the size of the
vegetables.
Vegetables
Vegetables
Page 48

48
Stuffed Peppers with Tofu
Serves: 4
1 cup brown rice
1 (12-ounce) package extra firm tofu,
drained and diced
1¾ cups marinara sauce, divided
Salt & pepper to taste
4 bell peppers, ¼ tops cut off and
seeds removed
2 cups Mozzarella cheese, shredded
and divided
8 (½-inch) slices tomato
Directions:
1. Cook brown rice per package
directions.
2. Arrange peppers in baking dish.
3. Using wooden spoon or spatula,
press ¼ cup rice into each pepper
half.
4. Layer with marinara sauce and 1
cup Mozzarella cheese.
5. Press 3 tablespoons tofu into
pepper halves.
6. Place 1 tomato slice on each
pepper.
7. Top peppers with remaining cheese.
8. Place baking dish on the 1-inch rack.
9. Cover and bake at 350°F for 18
minutes.
10. Uncover and bake at 350°F for 2-3
minutes or until tops are brown.
Tip: If cheese becomes too brown, tent
with foil or parchment paper.
Tip: You can also place remaining
cheese on the last 4 minutes of
baking.
Tip: If you want to add meat to this
dish, simply add ½ pound cooked
and crumbled Italian sausage.
Artichoke Feta Tortilla Wraps
with Chive Sauce
Yield: 24 Rolls
1 (14-ounce) can artichoke hearts,
drained and finely chopped
½ cup cream cheese
3 green onions, thinly chopped
⅓ cup Parmesan or Romano
cheese, grated
¼ cup feta cheese, crumbled
3 tablespoons pre-made pesto
8 (8-inch) whole tortillas
1 (7-ounce) jar sweet red peppers,
drained and cut into strips
1 (8-ounce) carton plain fat-free
yogurt
1 tablespoon chives, roughly
chopped
Directions:
1. Coat 8x8-inch silicone pan with
cooking spray; set aside.
2. In large bowl, stir together
artichoke hearts, cream cheese,
green onions, Parmesan cheese,
feta cheese and pesto.
3. Place 2 tablespoons filling onto
each tortilla.
4. Top with red pepper strips and
roll up.
5. Arrange rolls in prepared baking
dish. If desired, lightly coat rolls
with cooking spray.
6. Place silicone pan on 3-inch rack
cook at 350°F for 10-12 minutes,
or until heated through.
7. While wraps are cooking, mix
yogurt and chives in separate
bowl; set aside.
8. Once cooked, cut each roll
into thirds and arrange on serving
platter.
9. Serve with yogurt and chive
sauce.
Vegetables
Page 49

49
Roasted Vegetables SandwichRoasted Spaghetti Squash
Serves: 4
1 cup plain fat-free Greek-style
yogurt
1½ tablespoons tahini
1 tablespoon fresh lemon juice
½ teaspoon ground cumin
1 teaspoon garlic, minced
½ teaspoon salt, divided
3 tablespoons olive oil
½ teaspoon Spanish smoked
paprika
12 large button mushrooms
2 tomatoes, halved horizontally
1 (1½-pound) eggplant, cut
lengthwise into 8 wedges
1 head of radicchio, quartered
1 medium onion, quartered
¼ teaspoon black pepper
Fresh parsley, chopped (optional)
4 Kaiser Rolls
1. Combine yogurt, tahini, lemon
juice, cumin, garlic and ¼
teaspoon salt in bowl and stir
with whisk; set aside in
refrigerator.
2. Combine oil and paprika in
separate bowl.
3. Brush oil mixture evenly over
mushrooms, tomatoes, eggplant,
radicchio and onion.
4. Grill vegetables at 350˚F on
1-inch rack for 18-20 minutes.
5. Stir vegetables halfway through
cooking process.
6. Place vegetables on platter;
sprinkle with chopped parsley if
desired.
7. Add sauce and serve with Kaiser
rolls or Greek pita bread.
Serves: 4-5
1 spaghetti squash, cut in half
crosswise and seeds removed
2 teaspoons sugar
2 teaspoons salt
Extra-virgin olive oil as needed
Directions:
1. Prepare squash; set aside.
2. Drizzle with olive oil.
3. Evenly divide sugar and salt
between both halves.
4. Bake spaghetti squash on 1-inch
rack at 350°F for 25 minutes.
5. To assemble, use fork to gently
remove stands.
6. Transfer to serving platter.
7. Drizzle with olive oil for garnish.
Tip: Cut ¼-inch thick sliver off end
of the spaghetti squash so it
can stand upright.
Tip: Pour a small amount of olive oil,
about ⅛ teaspoon, in the bulb
of the squash. Using your
finger, spread the oil along the
stem and around the bulb. Pour
off any remaining oil.
Tip: Depending on the size of the
squash, you may have to bake
in batches.
Tip: Hold spaghetti squash warm on
serving platter with foil.
Vegetables
Page 50

50
Roasted Herb Potatoes
Roasted Cauliflower, Chickpeas,
& Olives
Roasted Butternut Squash
Serves: 6
2 pounds small new potatoes
2 tablespoons olive oil
1 tablespoon salt
½ teaspoon black pepper
2 tablespoons fresh rosemary,
coarsely chopped
4 cloves garlic, thinly sliced
Directions:
1. Cut potatoes into 1-inch pieces (if
potatoes are small, leave whole).
2. Place in large bowl and toss with
olive oil, salt, pepper, herbs and
garlic.
3. Place potatoes on 3-inch rack and
cook at 350°F for 20-22 minutes.
4. Pause halfway through cooking
process and turn potatoes.
5. Finish cooking process by hitting
Start button.
Tip: You can use 1 teaspoon of your
favorite dried herb.
Serves: 4-6
5½ cups cauliflower florets
1 cup Spanish green olives, pitted
8 cloves garlic, coarsely chopped
1 (15-ounce) can chickpeas (garbanzo
beans), rinsed and drained
3 tablespoons olive oil
½ teaspoon crushed red pepper
¼ teaspoon salt
3 tablespoons fresh flat leaf parsley
Directions:
1. Toss all ingredients in large bowl
and mix evenly to coat.
2. Place ingredients in liner pan.
3. Roast at 350°F for 20-22 minutes.
Serves: 4-5
1 butternut squash, cut in half lengthwise and
seeds removed
2 teaspoons sugar
2 teaspoons salt
Extra-virgin olive oil as needed
Directions:
1. Prepare squash; set aside.
2. Drizzle with olive oil.
3. Evenly divide sugar and salt
between both halves.
4. Bake butternut squash on 1-inch
rack at 350°F for 35 minutes.
5. To assemble, medium dice cooked
squash.
6. Transfer to serving platter.
7. Drizzle with olive oil for garnish.
Tip: Pour a small amount of oil, about
⅛ teaspoon, in the bulb of the
squash. Using your nger, spread
the oil along the stem and around
the bulb. Pour off any remaining
oil.
Tip: Depending on the size of the
squash, you may have to bake in
batches.
Tip: Hold spaghetti squash warm on
serving platter with foil.
Roasted Asparagus
Serves: 4
1 pound trimmed asparagus
2 tablespoons extra-virgin olive oil
½ teaspoon kosher salt
½ teaspoon black pepper
Directions:
1. Toss trimmed asparagus in olive
oil, salt and pepper.
2. Place asparagus on 3-inch rack.
3. Roast at 350°F for 6-8 minutes.
Vegetables
Page 51
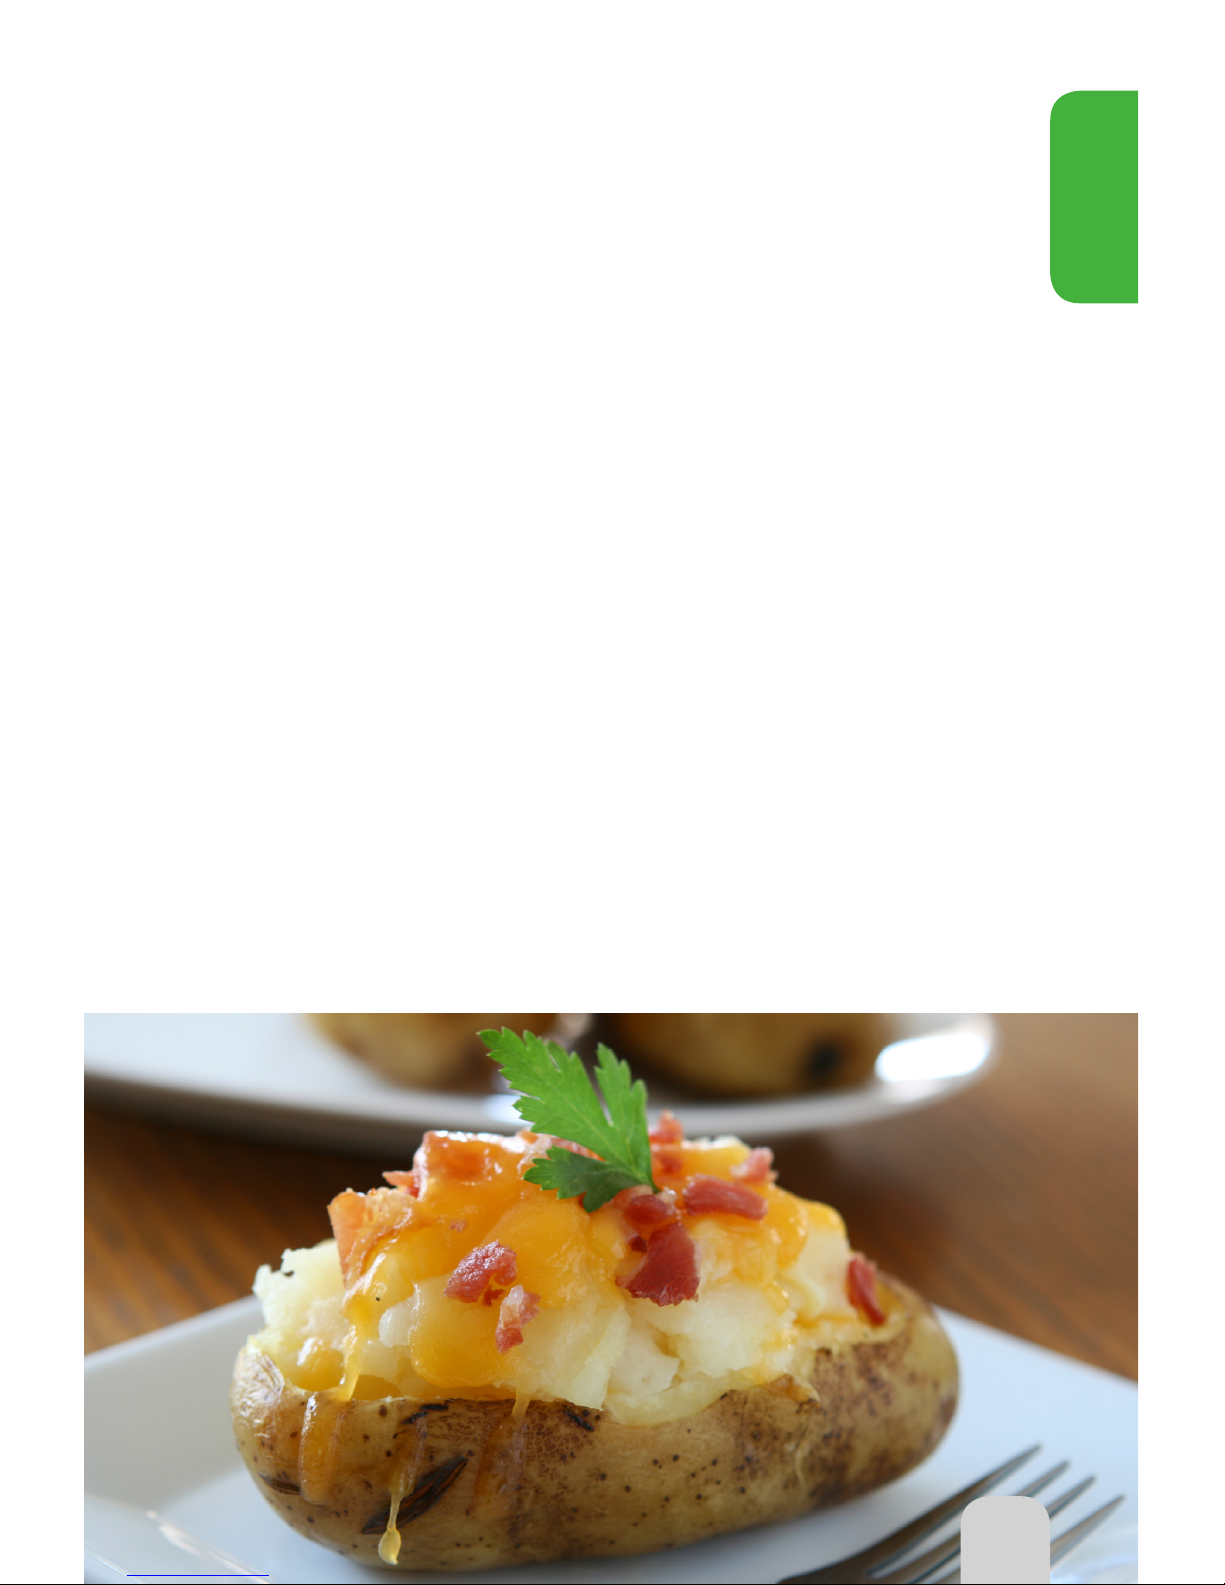
51
Stuffed Baked Potatoes with
Bacon
Serves: 6
6 medium baking potatoes, washed
and dried
1 cup milk, slightly heated
1 cup sharp Cheddar cheese, grated
3 tablespoons butter or margarine
Salt & pepper to taste
2 tablespoons green onions, chopped
6 slices bacon, fried and crumbled
Directions:
1. Punch holes in potatoes with fork.
2. Bake potatoes on 1-inch rack at
350˚F for 35-45 minutes.
3. Remove potatoes from oven and
cool for about 15 minutes, until you
can handle them comfortably.
4. Slice off top of each potato and
scoop out inside.
5. Mash well. Add butter, cheese, salt,
pepper and milk; mix thoroughly.
6. Spoon potato mixture back into
potato skins.
7. Bake on 1-inch rack at 350°F for
6-8 minutes.
8. Garnish with bacon and green
onions.
Tip: Cook bacon on 3-inch rack
at 350°F for 5-6 minutes
per side.
Tip: Larger potatoes will take
longer.
Parmesan Basil Tomatoes
Serves: 4
4 red tomatoes
2 tablespoons Parmesan cheese,
grated
3 tablespoons fresh basil, chopped
2 tablespoons olive oil
Cracked black pepper to taste
Directions:
1. Trim top third from tomatoes just to
remove vine pit.
2. Trim thin slices from bottoms so
tomatoes can stand upright.
3. Mix remaining ingredients together.
4. Divide mixture evenly into tomatoes.
5. Place tomatoes on foil on 3-inch
rack.
6. Cook at 350°F for 8-10 minutes, or
until cheese bubbles and tomatoes
are warm.
51
Vegetables
Page 52

52
Double Stuffed Cheesy Potatoes
Serves: 4
4 russet potatoes, thoroughly
washed
2 tablespoons butter
½ teaspoon salt
⅛ teaspoon pepper
¼ cup sour cream
½ cup Cheddar cheese, shredded
and divided
Directions:
1. Cook potatoes on 3-inch rack at
350°F for 35-45 minutes.
2. Cool potatoes for 15 minutes,
or until you can handle them
comfortably.
3. Cut potatoes in half, lengthwise.
4. Carefully scoop centers into
medium bowl, leaving a durable
shell.
5. Smash scooped potato centers.
6. Add butter, salt, pepper, sour
cream and ¼ cup cheese; stir
with spoon.
7. Fill each potato shell with filling in
equal amounts.
8. Place on 1-inch rack and cook at
350°F for 8-10 minutes.
9. Sprinkle with remaining cheese
and bake at 350°F for additional
1-2 minutes.
Ricotta Spinach Rolls
Serves: 4-6
8 lasagna noodles, cooked and
drained
1 medium onion, finely chopped
2 cloves garlic, minced
1 tablespoon butter
3 cups tomato sauce
1 teaspoon oregano
½ teaspoon thyme leaves
½ teaspoon basil
¼ cup mushrooms, chopped (optional)
1 (10-ounce) package frozen chopped
spinach
1 cup ricotta or cottage cheese
2 tablespoons Parmesan cheese
Dash black pepper
Directions:
1. Prepare noodles as per directions
on package.
2. Sauté onion and garlic in butter until
vegetables are tender.
3. Add tomato sauce, seasonings,
mushrooms and simmer for 7-8
minutes or until it starts to bubble;
set aside.
4. Cook spinach according to package
directions. Drain and squeeze out
excess water.
5. Blend together spinach, cheeses
and pepper.
6. Place spinach mixture evenly at one
end of each noodle.
7. Roll each noodle and place on its
side in lightly greased liner.
8. Cover noodles with prepared sauce.
9. Bake at 350°F for 15-20 minutes or
until heated through.
Vegetables
Page 53

53
Gratin Dauphinois
Eggplant, Zucchini, & Tomato Tian
Serves: 6
6 cups small red potatoes, washed
and thinly sliced
½ cup white onion, finely diced
2 cloves garlic, finely minced
4 tablespoons butter
½ cup Parmesan cheese, shredded
½ cup heavy cream
3 tablespoons fresh parsley,
finely chopped
Salt & pepper to taste
Directions:
1. Wash, slice, and place potatoes in
bowl.
2. Add onion and cheese to potatoes.
3. In 10-inch baking pan, layer potato
mixture so that entire baking pan is
covered.
4. In sauce pan, heat butter, cream,
salt and pepper; pour mixture over
potatoes.
5. Gently shake baking pan to release
any bubbles.
6. Place pan on 1-inch rack and cook
at 350°F for 35-45 minutes.
7. Let pan sit for 2 minutes inside
dome.
Tip: Substitute fresh parsley with 1½
tablespoons dried parsley.
Tip: If necessary, cover the dish with
foil towards the end of the cooking
process to prevent overbrowning.
Tip: Change the flavor by adding
nutmeg and grated Gruyere
cheese.
Serves: 6
½ cup fresh or dry bread crumbs
½ cup Parmesan cheese, grated
2 tablespoons flat leaf parsley
1½ teaspoons fresh oregano,
chopped
2 cloves garlic
1 small Japanese eggplant, cut
diagonally into ¼-inch slices
2 medium zucchinis, cut diagonally
into ¼-inch thick slices
2 large plum tomatoes cut into
¼–inch slices
1½ tablespoons extra-virgin olive oil,
divided
¼ teaspoon kosher salt
¼ teaspoon black pepper
¼ cup vegetable stock or chicken
Directions:
1. In blender, blend bread crumbs,
cheese, garlic and herbs.
2. Layer eggplant, zucchini and
tomatoes in tian.
3. Top with bread crumb mixture.
4. Pour stock over bread topping.
5. Bake at 300°F on 1-inch rack
for 20 minutes.
Tip: Tian is a French word referring
to a shallow cooking vessel. A
glass, ceramic or silicone baking
dish can also work well for this
recipe.
Tip: Try to find eggplant, zucchinis,
and plum tomatoes that all have
the same diameter. This makes it
easy to layer them in an even
circle in the Tian.
Vegetables
Page 54

54
Roasted Asparagus,
Mushrooms & Potatoes
Serves: 2-3
10 stalks asparagus, woody ends
of stalks broken
3 large portabello mushroom caps,
woody stems removed
3 Yukon Gold potatoes, cut in
crosswise in ¼-inch thick rounds
½ cup Parmesan cheese, grated
2 tablespoons fresh rosemary,
roughly chopped
Extra-virgin olive oil as needed
Kosher salt & black pepper
as needed
Directions:
1. Grab asparagus stalk and apply
pressure to bottom. It will
naturally snap where woody part
ends.
2. Grab remaining asparagus and
cut all ends at same length.
3. In large bowl, add asparagus, oil,
salt and black pepper; toss to
coat.
4. Place asparagus on 3-inch rack.
5. Brush off any dirt clinging to
mushrooms.
6. Grasp stem and pull it free from
cap with your thumbs.
7. Place portabello mushrooms on
clean surface.
8. Lightly drizzle mushrooms with
oil, salt and pepper; rub to coat.
9. Fill each cap with 2 tablespoons
cheese.
10. Place caps on 3-inch rack, next
to asparagus.
11. In same bowl, add potatoes, oil,
salt, pepper and rosemary; toss
to coat.
12. Place potatoes on 3-inch rack,
next to asparagus and
mushrooms.
13. Cook at 350°F for 26-28 minutes,
pausing every 8 minutes to
remove cooked vegetables.
14. Remove asparagus after 8
minutes. Remove mushrooms
after 16 minutes. Cook potatoes
for entire 24 minutes.
15. Hold vegetables in warm place,
covered with foil, until all
vegetables have cooked.
Tip: You can clean out the gills of
the mushrooms by scraping it
out using a tip of a spoon.
Tip: Use a small amount of olive oil
because the mushrooms
absorb it.
Tip: You can cut potatoes in any
shape you choose. Keep
in mind cooking times will vary
depending on the cut size you
use. They can be cut in
wedges, halves or quarters.
Eggplant Parmesan Casserole
Serves: 4-6
1 large eggplant, outer skin
removed and thinly sliced
1 tablespoon olive oil
1 cup Parmesan cheese, shredded
2-3 basil leaves, sliced
1½ tablespoons garlic, minced
1 large tomato, thinly sliced
Dash sea salt
1 cup Mozzarella cheese
Directions:
1. Spread olive oil over 9-inch or
10-inch oven-safe baking pan.
2. Using at least 2 layers, layer all
ingredients in order listed above.
3. Place dish on 1-inch rack and
cook at 350°F for 18-22 minutes.
4. Let sit for 5 minutes. Serve in
slices.
Vegetables
Page 55
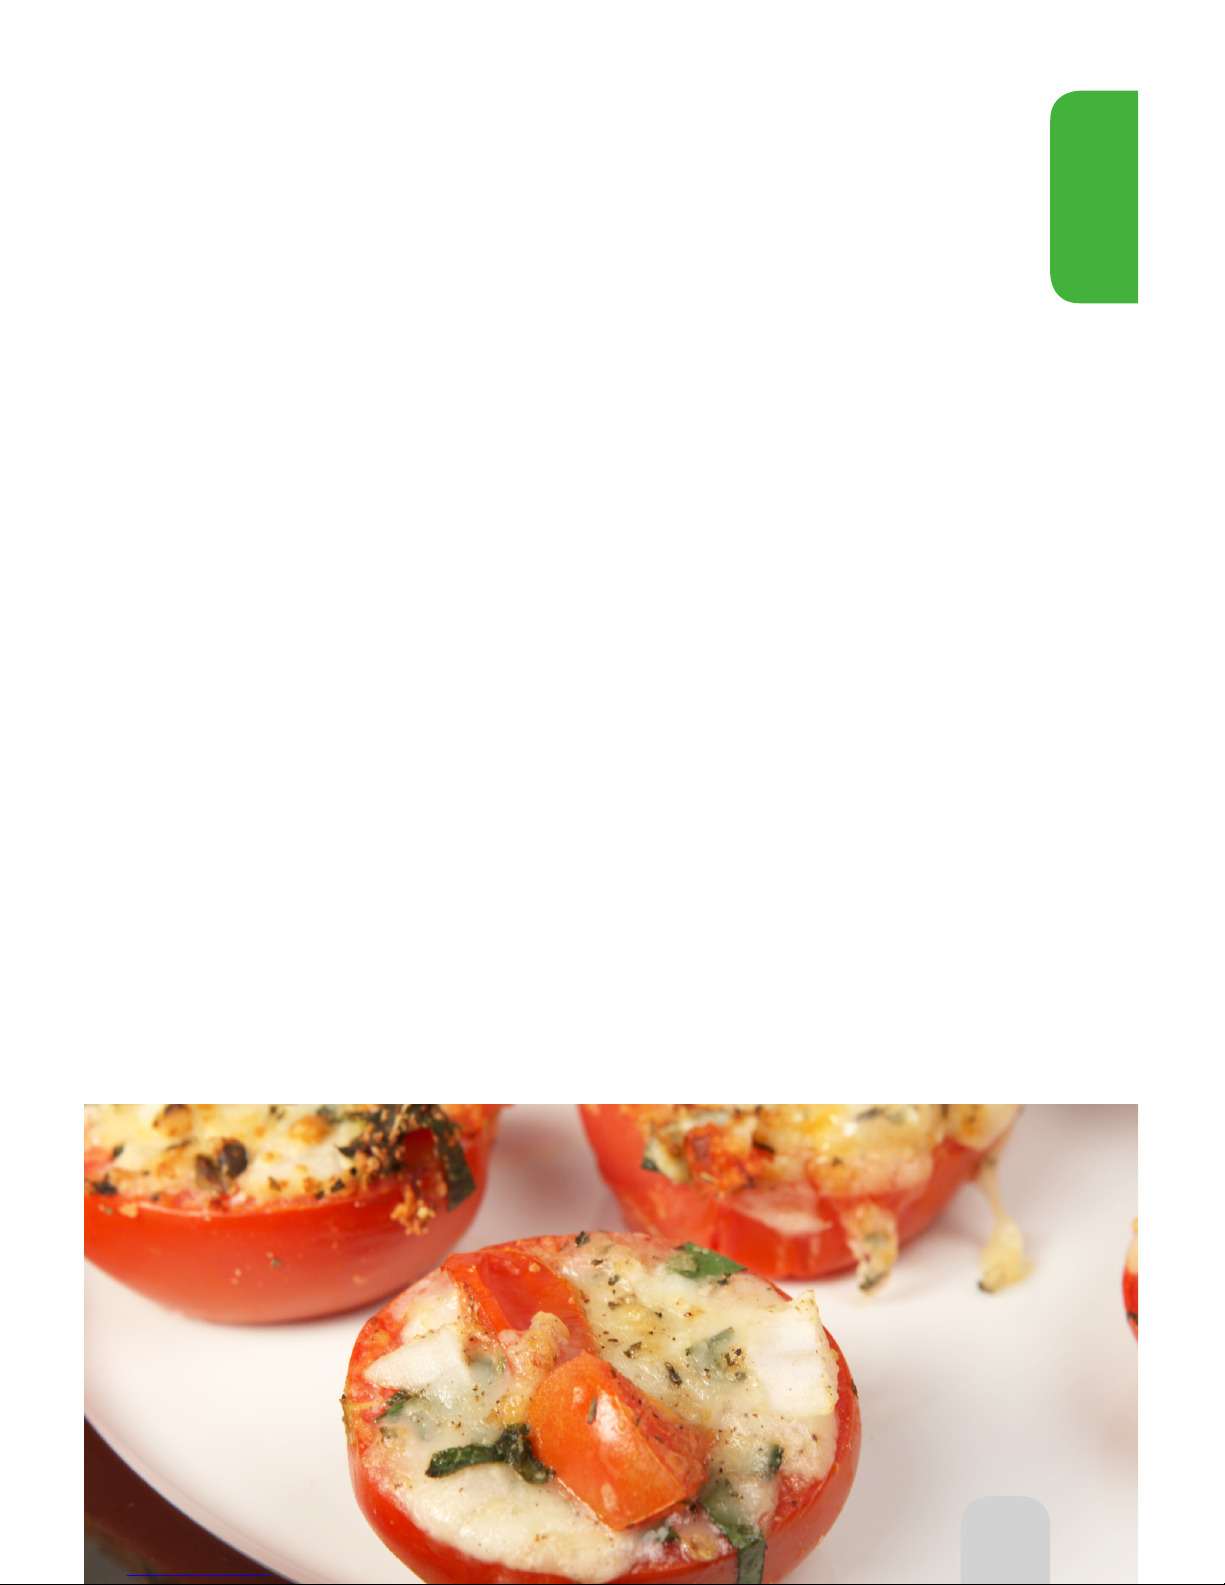
55
Caramelized Onions
Serves: 4
1 (½-pound) Vidalia onion, halved and
cut into slices
2 tablespoons extra virgin olive oil
3 tablespoons garlic cloves, minced
1 teaspoon brown sugar
Directions:
1. Place all ingredients in oven-safe
baking dish.
2. Bake at 350°F on 3-inch rack for
8-10 minutes.
Parmesan Fries
Serves: 2-4
2 large baking potatoes, with ½ inch
removed from each end
½ cup Parmesan cheese, grated
Olive oil to taste
Salt & pepper to taste
Directions:
1. Cut potatoes (rinsed in water then
drained), lengthwise, into
½-inch fries.
2. Toss with olive oil, salt and pepper.
3. Lay fries onto 3-inch rack and cook
at 325°F for 12-14 minutes, flipping
halfway through cooking process.
4. Toss with cheese and serve.
Cheese Stuffed Tomatoes
Serves: 6
3 Roma tomatoes
1 cup Mozzarella cheese
½ cup Parmesan cheese
1 tablespoon fresh thyme
1 tablespoon fresh basil
¼ cup onion, chopped
1 tablespoon garlic, chopped
¼ teaspoon black pepper
Directions:
1. Cut thin slice off bottom of each
tomato.
2. Cut ¾-inch slice off stem of each
tomato.
3. Scoop out pulp, leaving ½-inch
thick shell.
4. Arrange tomatoes right side up in
single layer on 3-inch rack.
5. Mix remaining ingredients.
6. Distribute stuffing evenly and fill
each tomato.
7. Bake at 350°F for 7-8 minutes.
55
Vegetables
Page 56
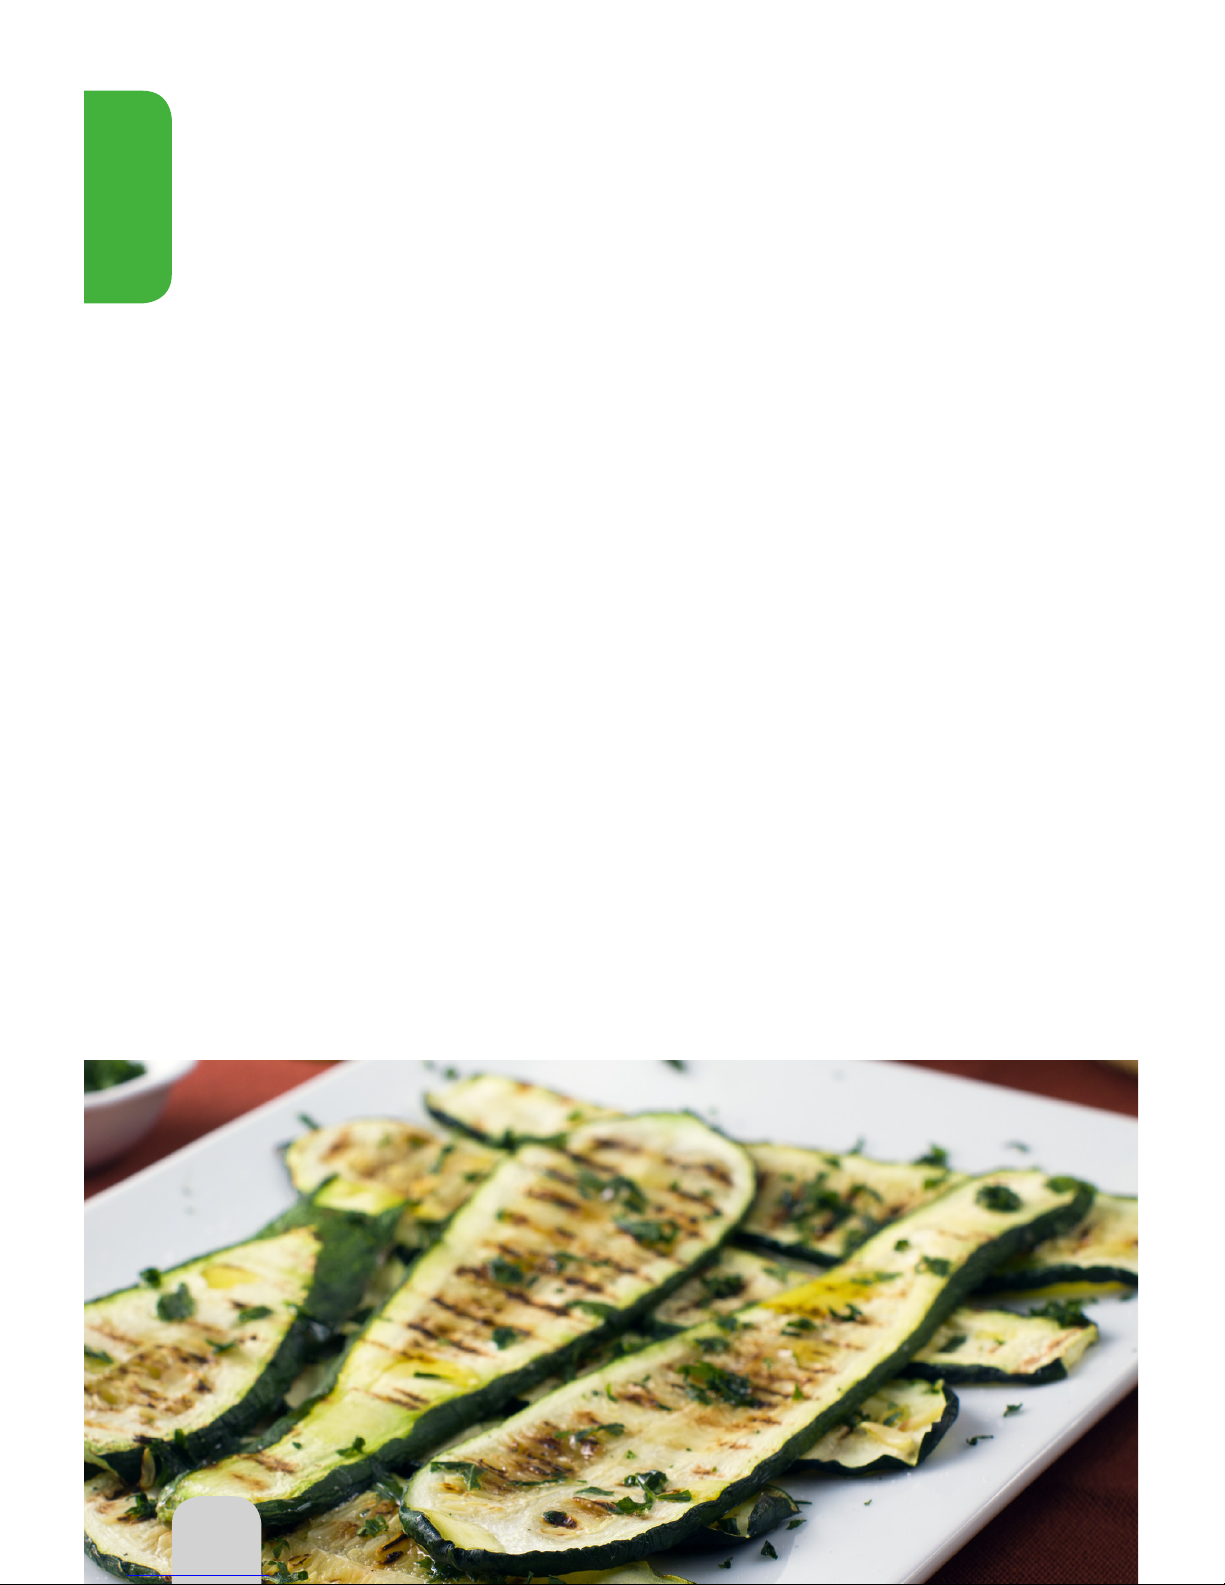
56
Corn Soufflé
Serves: 8
1 package cornbread mix
1 (15-ounce) can regular corn, drained
1 (15-ounce) can cream-style corn,
drained
1½ cups Cheddar cheese, shredded
1 teaspoon salt
4 eggs, beaten
¼ cup sugar
Directions:
1. Mix all ingredients together.
2. Pour into 10-inch baking pan that
has been sprayed with non-stick
spray.
3. Place pan on 1-inch rack.
4. Cook at 350°F for 25-30 minutes.
5. When timer goes off, let soufflé sit
inside dome for 2 minutes.
6. Serve and enjoy.
Tip: If you use a larger pan, you will
need less cooking time.
Tip: If possible, use freshly sliced corn
off of the cob.
Mixed Vegetable Casserole
Serves: 8
1 (15-ounce) can mixed vegetables,
drained
1 (8-ounce) can water chestnuts,
sliced and drained
1 cup sharp Cheddar cheese,
grated
1 cup celery, finely chopped
¾ cup mayonnaise
1 small onion, finely chopped
20 Ritz® crackers, crushed
2 tablespoons melted butter
Directions:
1. In large bowl, mix vegetables,
chestnuts, cheese, celery,
mayonnaise and onion.
2. Transfer mixture to 10-inch
greased baking pan or casserole
pan that will fit into NuWave
Oven.
3. Place pan on 1-inch rack and
cook at 350°F for 15-17 minutes.
4. Combine crackers and butter.
5. 2 minutes before casserole is
done, sprinkle with cracker
mixture.
6. Continue to cook until brown.
7. Let casserole sit inside dome for
1-2 minutes before removing.
56
Vegetables
Page 57
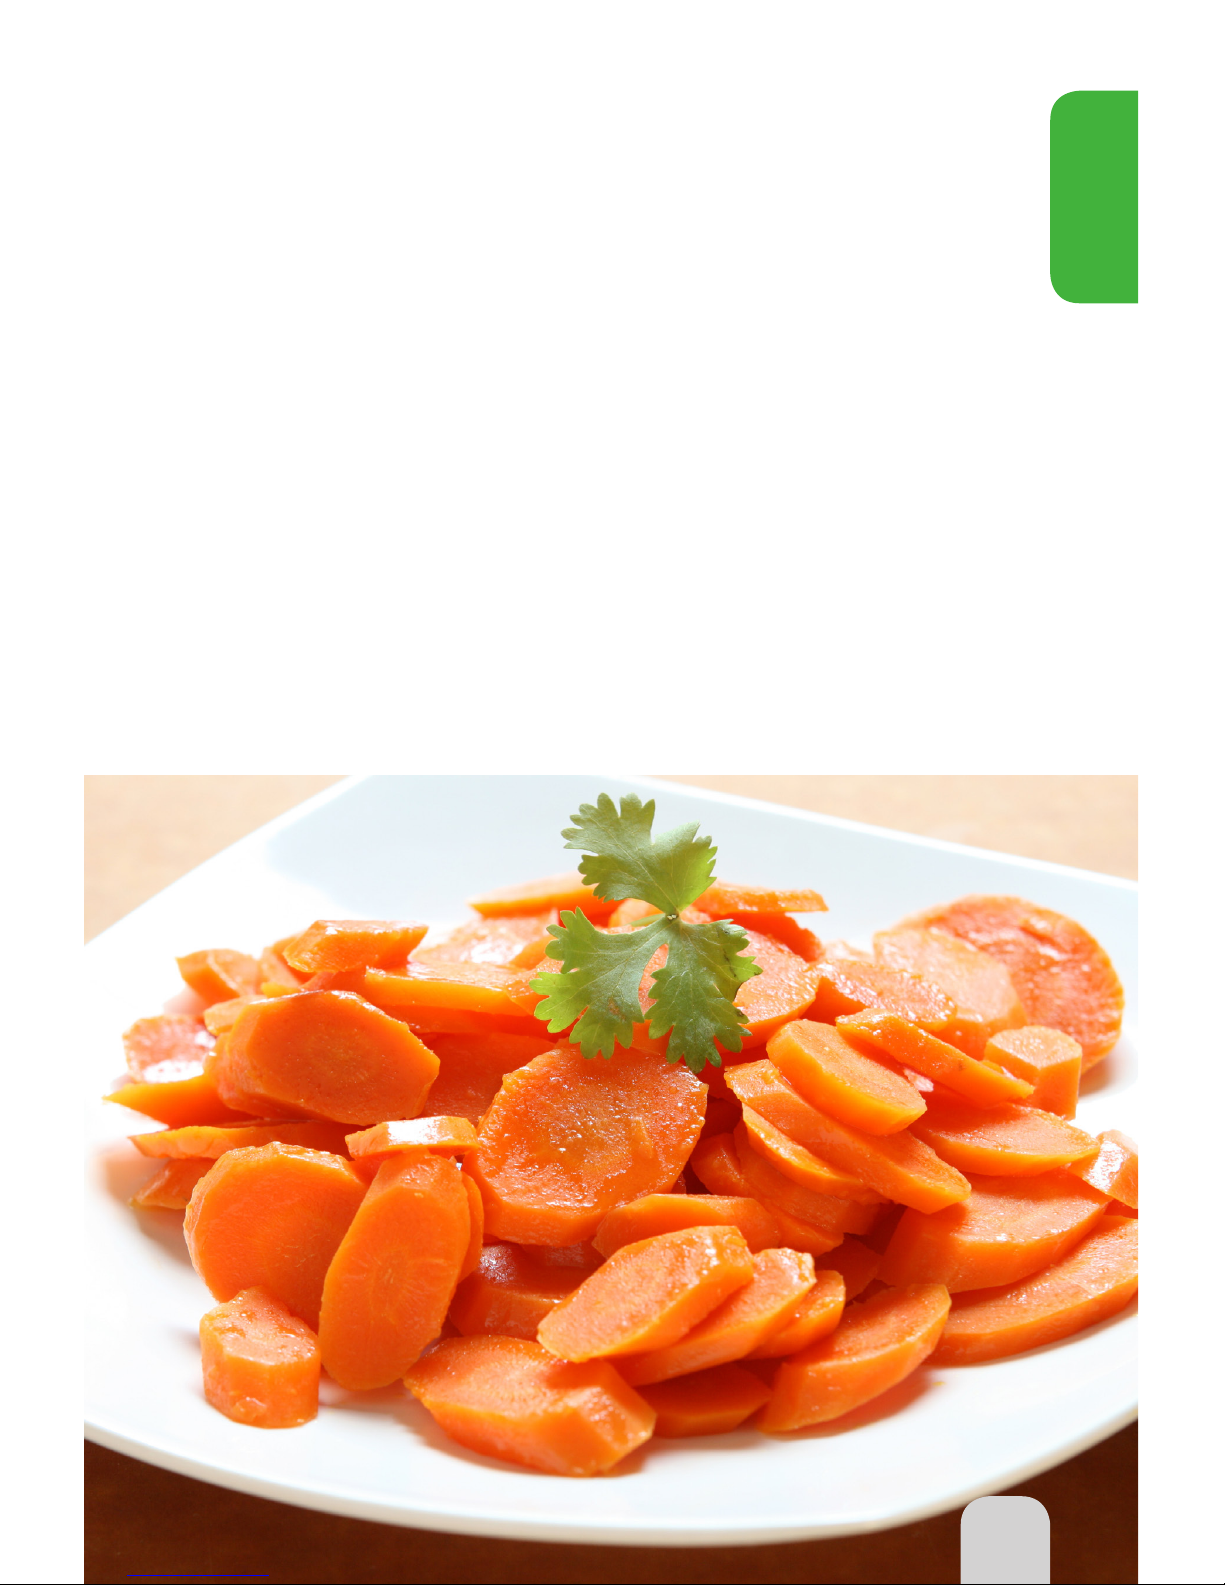
57
Broiled Zucchini Slices Balsamic Glazed Carrots
Serves: 12
2 cloves garlic, minced
2 tablespoons olive oil
1 tablespoon fresh rosemary,
roughly chopped
⅛ teaspoon black pepper
⅛ teaspoon salt
3 zucchinis or yellow squashes, cut
lengthwise into ¼-inch slices
Directions:
1. In 9-inch fry pan, cook garlic in
hot oil over Medium (275°F) heat
for 30 seconds or until fragrant.
2. Stir in rosemary, pepper and salt.
3. Drizzle mixture over zucchini;
toss to coat.
4. Arrange zucchini on 3-inch rack.
5. Cook at 350°F for 8-10 minutes
per side.
Serves: 6
1 pound fresh carrots, washed
and cut into thin round slices
2 tablespoons olive oil
1 teaspoon salt
½ teaspoon black pepper
2 tablespoons balsamic vinegar
1 tablespoon brown sugar
Directions:
1. Place all ingredients in bowl and
add carrots.
2. Season with salt and pepper.
3. Place in oven-safe dish on
1-inch rack.
4. Cook at 350°F for 11-12 minutes.
5. Stir carrots and continue cooking
at 350°F for 2 minutes.
57
Vegetables
Page 58
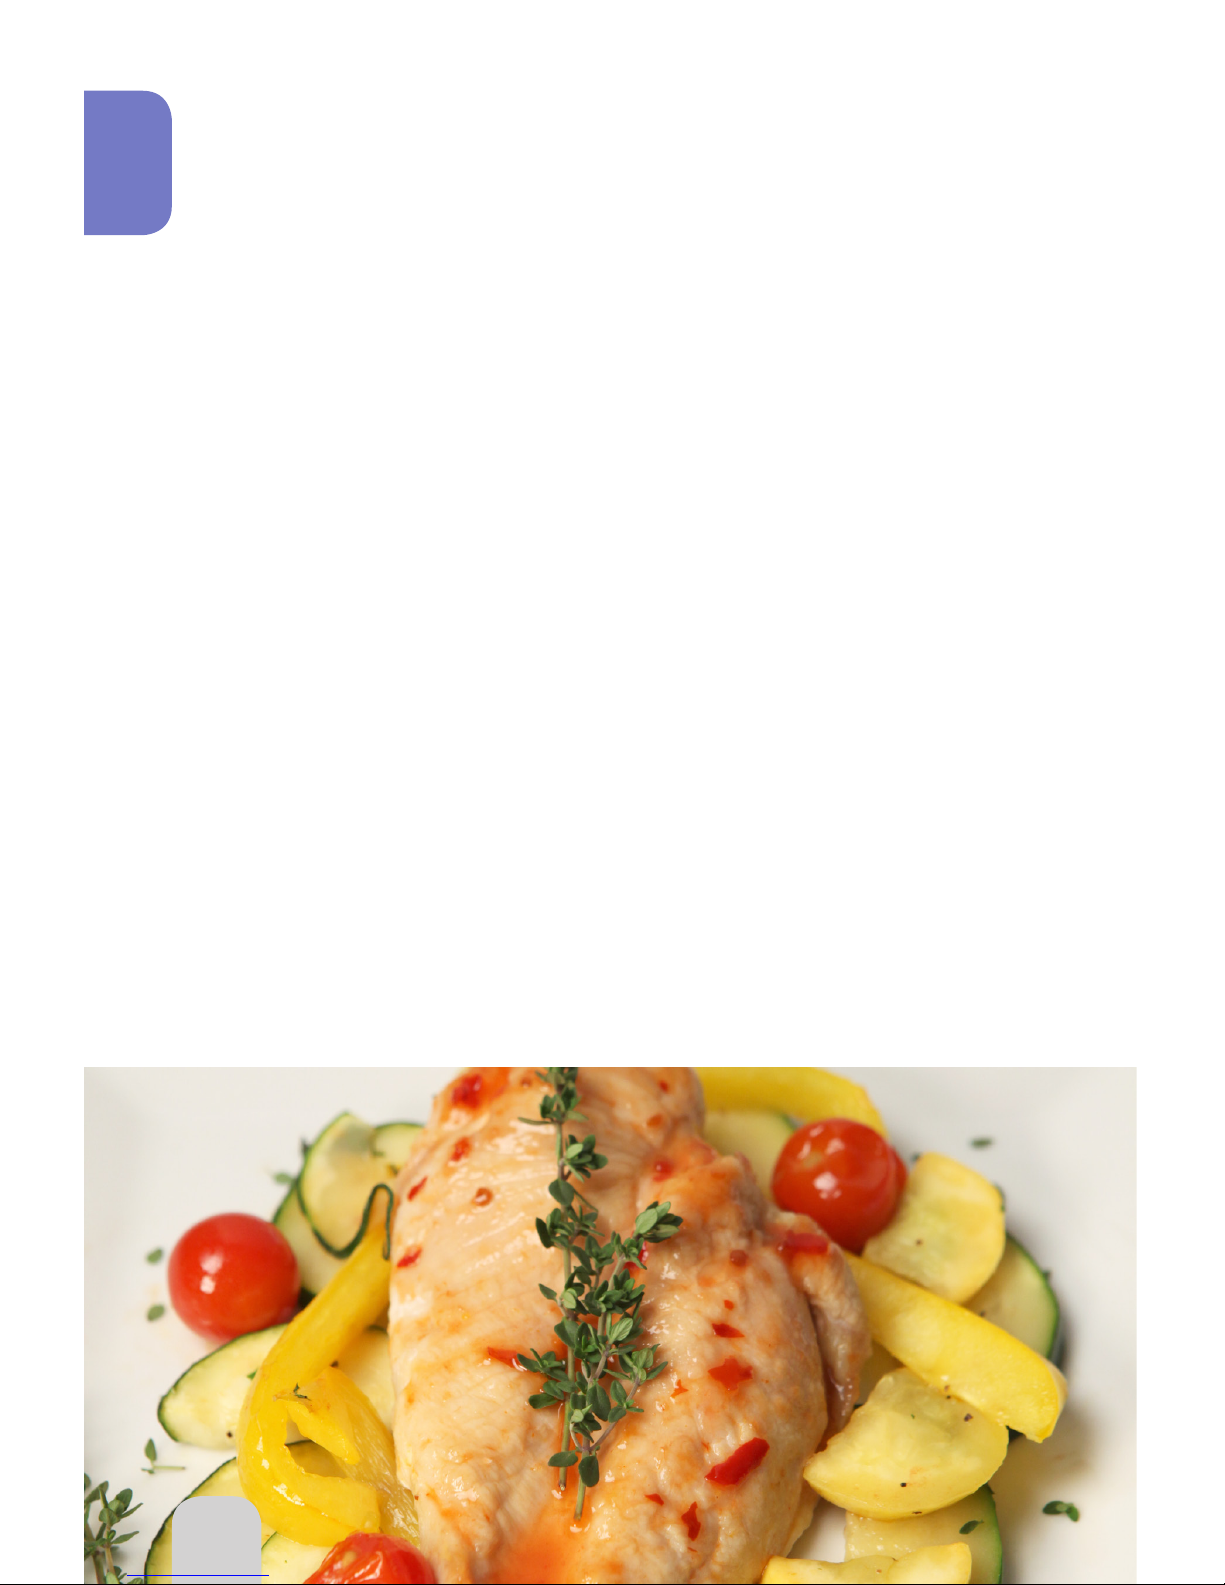
58
Poultry
Tips for Poultry
Poultry should be turned halfway through the cooking process for even browning. When
adding your favorite dry seasonings to frozen poultry, lightly brush with oil or sprinkle cold
water on it beforehand; this will allow seasonings to adhere.
Brush sauces onto fresh poultry so the seasonings bake right in.
To save time and to add extra flavor, marinate poultry in a sealed bag or container and freeze
into separate servings. When ready to prepare, refer to the Quick & Easy Cooking Guide for
appropriate cooking times.
To prevent poultry from browning too fast, place aluminum foil over the top. Be sure to
secure the aluminum foil to the sides of the cooking rack or extend the aluminum foil outside
of the oven. This will prevent the internal fan from blowing the aluminum foil around during
the cooking process.
Turkey Tip: Start cooking the turkey, breast side down, for the first half of the cooking
process. When you flip the turkey breast side up, if there are giblets inside the turkey, they
should be thawed enough for easy removal at this time. During the last 20-30 minutes of the
cooking process, stuff the cavity with your favorite stuffing and resume cooking.
Poultry: When completely cooked, white meat will be white; thigh meat near the bone will
have no pink color, and the juices will run clear.
*Using a meat thermometer is essential for checking the internal temperature of the meat to ensure
that it has been thoroughly cooked to 165˚F.
58
Page 59

59
Poultry
Spicy Buffalo Chicken Sandwiches Oven-Fried Chicken
Serves: 4
3 tablespoons butter, melted
½ cup buffalo-style hot sauce, divided
4 hoagie rolls, split
cup ranch dressing
½ teaspoon Creole seasoning
1½ cups carrots, matchstick cut
1½ cups celery, diagonally sliced
¼ cup onion, finely chopped
12 large deli-fried chicken strips
(1¼ pounds)
1 (4-ounce) package Blue cheese,
crumbled
Directions:
1. Stir together butter and 2 teaspoons
hot sauce.
2. Brush butter mixture onto cut sides
of rolls.
3. Place rolls cut side up in liner pan.
4. Stir together ranch dressing, 2-3
teaspoons hot sauce and Creole
seasoning.
5. Add carrots, celery and onion; toss
to coat.
6. Arrange chicken on bottom halves
of rolls.
7. Drizzle remaining hot sauce onto
rolls.
8. Layer chicken evenly with carrot
mixture and cheese.
9. Top with remaining roll halves.
10. Cook at 300°F for 10-12 minutes
11. Serve with additional hot sauce.
Tip: You can change flavors by adding
shredded Parmesan cheese,
Swiss cheese or Blue cheese
dressing.
Serves: 4
½ cup buttermilk
1 tablespoon Dijon mustard
2 cloves garlic, minced
1 teaspoon hot sauce
2-3½ pounds chicken, fresh, skin
removed and cut into legs, breast,
thighs and wings
½ cup all-purpose flour
1½ teaspoons paprika
1 teaspoon dried thyme
1 teaspoon baking powder
⅛ teaspoon salt (optional)
⅛ teaspoon pepper to taste
Non-stick cooking spray
Directions:
1. Whisk butter, mustard, garlic and
hot sauce in shallow glass dish until
well blended.
2. Add chicken. Mix to make sure meat
is thoroughly coated.
3. Cover and marinate in refrigerator
for at least 30 minutes, or up to 8
hours.
4. Put flour, paprika, thyme, baking
powder, salt and pepper in large
sealable plastic bag.
5. Shaking off excess marinade, place
one or two chicken parts at a time in
bag; shake to coat.
6. Shake off excess flour mixture.
7. Place chicken parts on 1-inch rack
that has been sprayed with cooking
spray.
8. Cook chicken at 350°F for 13-14
minutes per side.
Tip: If you do not have buttermilk,
try mixing 1 teaspoon vinegar for
every 1 quart of the milk that you
already have.
Page 60

60
Thai ChickenChicken Tenders with Wasabi
Dipping Sauce
BBQ Chicken
Serves: 1
1 (4 – 6-ounce) chicken breast, cut
into bite size pieces
2 tablespoons Thai green curry paste
2 tablespoons fresh ginger, grated
2 tablespoons garlic, minced
2 tablespoons olive oil
¼ cup raw coconut, unsweetened
and shredded
Directions:
1. Mix all ingredients in shallow bowl.
2. Place chicken mixture on 3-inch
rack.
3. Cook at 350°F for 11-13 minutes.
4. Stir and serve.
Serves: 4
3 (1-pound) boneless, skinless
chicken breasts, cut crosswise
into ½-inch strips
⅔ cup white flour
1 teaspoon baking soda
½ cup Parmesan cheese
½ teaspoon garlic salt
½ teaspoon paprika
½ teaspoon black pepper
1 egg, slightly beaten
3 tablespoons extra-virgin olive oil
½ cup mayonnaise
2 teaspoons wasabi
Directions:
1. Spray 3-inch rack with non-stick
cooking spray.
2. In 1-gallon food storage plastic
bag, mix flour, baking soda,
cheese, garlic salt and paprika.
3. Dip chicken strips into egg and
place in bag.
4. Seal bag; shake to coat chicken.
5. Place chicken on 3-inch rack.
6. Repeat coating process until all
chicken pieces are coated.
7. Drizzle olive oil over chicken.
8. Cook at 350°F for 12-14 minutes,
turning chicken halfway through
cooking process.
9. Let chicken rest for 1 minute
before serving.
10. Mix mayonnaise and wasabi for
dipping sauce.
Tip: If using thicker chicken, you
will need to add a few more
minutes per side.
Tip: For a spicier dipping sauce,
add more wasabi. You can also
use honey mustard or BBQ
sauce.
Serves: 4
1 whole fryer chicken
(2 breasts, 2 thighs, 2 wings, 2 legs)
1 cup BBQ sauce
2 tablespoons honey mustard
1 tablespoon soy sauce
1 tablespoon Worcestershire sauce
1 clove garlic, minced
Directions:
1. Place chicken pieces on 3-inch
rack.
2. Mix remaining ingredients in bowl
and baste onto chicken.
3. Grill at 350°F for 11-13 minutes
per side.
4. When flipping chicken pieces,
baste on remaining sauce.
Tip: If cooking from frozen, grill for
14-15 minutes per side.
Poultry
Page 61
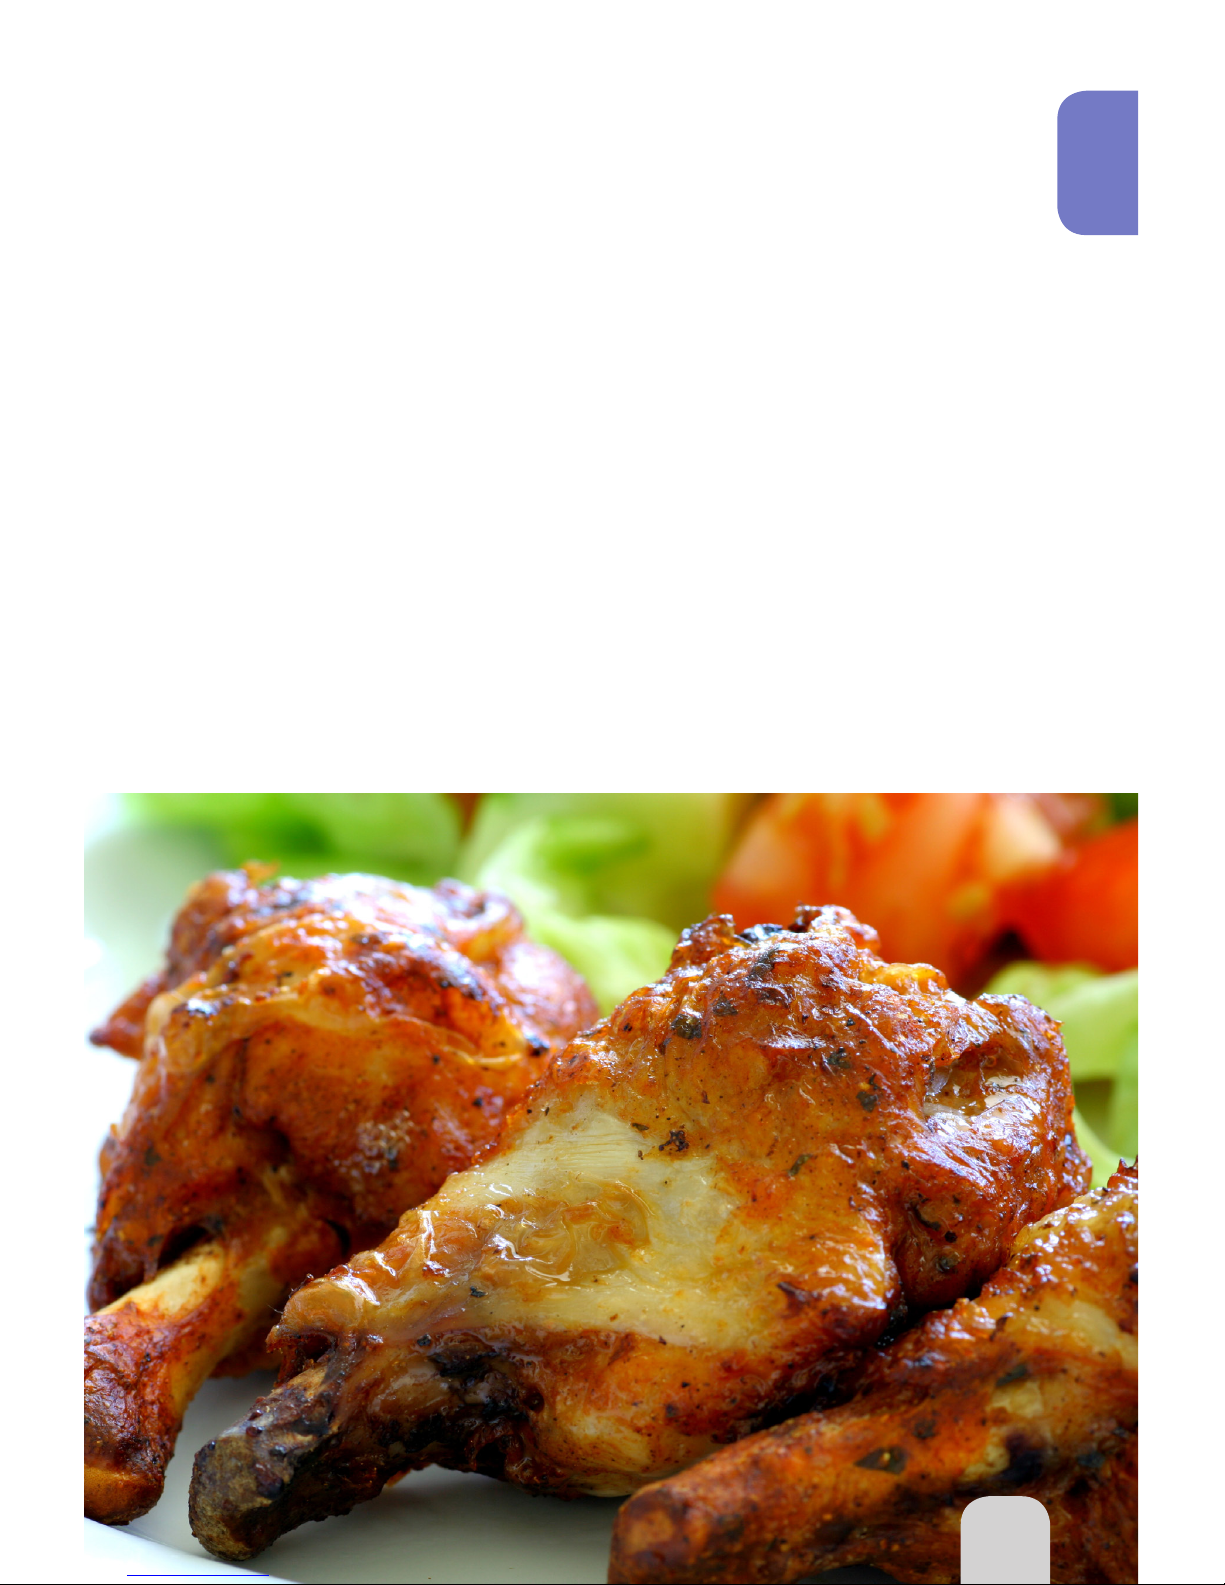
61
Creamy Chicken Breast with
Mushrooms & Peppers
Serves: 1
1 (4 – 6-ounce) chicken breast
2 large mushrooms, sliced
½ bell pepper, cut into 1-inch pieces
½ cup sour cream
Salt & pepper to taste
Directions:
1. Place chicken in oven-safe dish.
2. Add mushrooms and peppers
alongside chicken.
3. Spread sour cream over all
ingredients.
4. Season with salt and pepper.
5. Place dish on 3-inch rack and cook
at 350°F for 11-13 minutes per side.
Tip: If chicken is frozen, cook for
14-15 minutes per side.
Breaded Chicken Breast
Serves: 1
1 cup seasoned bread crumbs
2 tablespoons butter
1 egg, beaten
1 (4 – 6-ounce) boneless chicken
breast
2 tablespoons parsley, chopped
Directions:
1. Place bread crumbs in shallow oval
dish.
2. Dip chicken in egg and roll in bread
crumbs.
3. Place chicken on 3-inch rack.
4. Place butter on chicken and cook at
350°F for 11-13 minutes per side.
5. Sprinkle with parsley and serve.
61
Poultry
Page 62
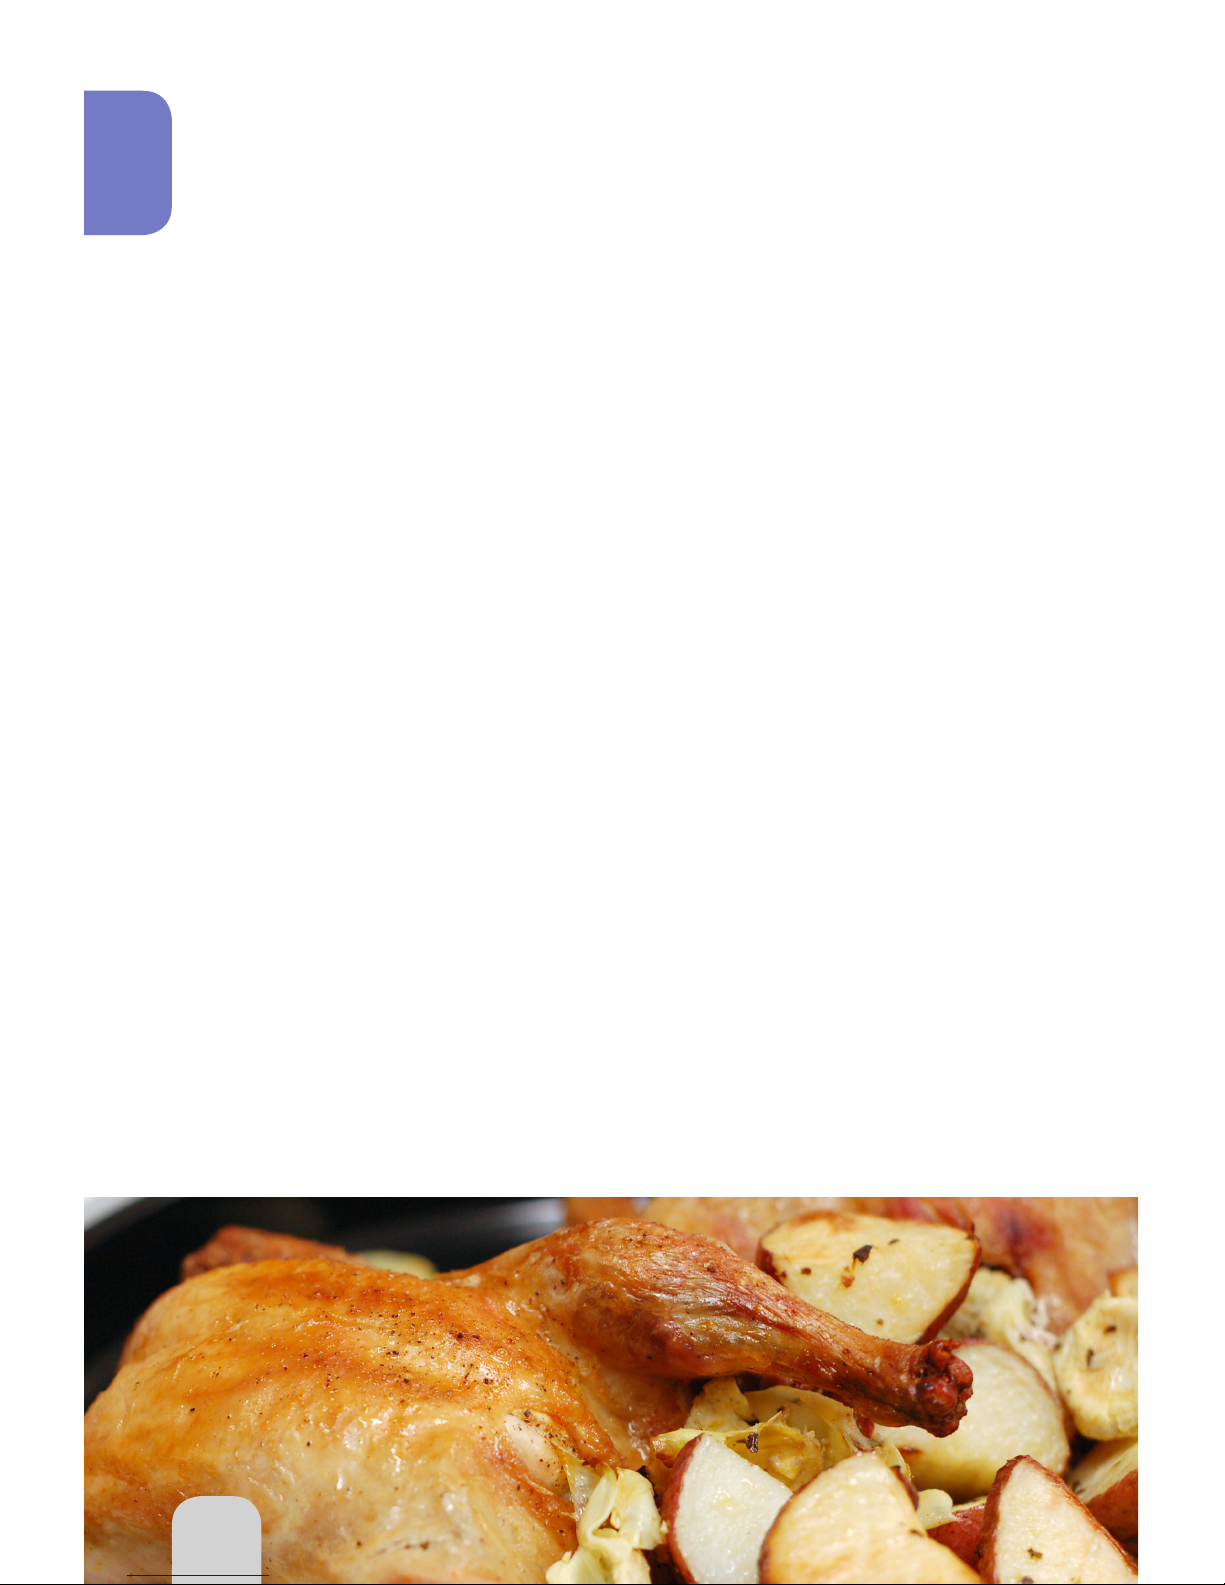
62
Cornish Game Hens with
Artichokes & Potatoes
Serves: 4
2 tablespoons lemon juice
3 cloves garlic
2 tablespoons extra-virgin olive oil
1 teaspoon oregano
1 teaspoon thyme
½ teaspoon kosher salt
¼ teaspoon black pepper
2 cans artichoke hearts, drained
8 ounces small potatoes, quartered
2 (1½-pound) Cornish game
hens, washed and dried with
paper towel
Directions:
1. In large bowl combine lemon juice,
garlic, oil, oregano, thyme, salt and
black pepper.
2. Add artichoke hearts and potatoes;
toss to coat.
3. Using slotted spoon, transfer
artichokes to bowl.
4. With reserved marinade, brush
game hens.
5. Twist wing tips under back.
6. Place hens on 1-inch rack and
spread potatoes and artichokes
around birds.
7. Cook at 350°F for 15-18 minutes
per side (28-32 minutes per side
if frozen).
8. Let hens rest for 5 minutes.
9. Cut hens down middle and serve
with potato and artichokes.
Cilantro Garlic Chicken Breast
Serves: 6
6 (6-ounce) boneless, skinless
chicken breasts
4 cloves garlic, peeled
1 small onion, peeled
1 cup loosely packed fresh cilantro
leaves
1 tablespoon granulated sugar
1 tablespoon soy sauce
1 teaspoon black pepper
¼ cup lemon or lime juice
Directions:
1. Place one chicken breast
between parchment paper sheets
or on plastic wrap.
2. With meat pounder or rolling pin,
flatten chicken to be about
½-inch thick.
3. Place chicken in large plastic
bag. Repeat with remaining
chicken breasts.
4. Using blender, nely chop garlic,
onions and cilantro.
5. Blend in lemon juice, sugar, soy
sauce and pepper.
6. Pour sauce over chicken.
7. Refrigerate for 1-4 hours.
8. Arrange chicken on 3-inch rack.
9. Cook at 350°F for 11-13 minutes
per side.
62
Poultry
Page 63

63
Buttery Chicken Breast
Serves: 1
1 (4 – 6-ounce) boneless chicken
breast
2 tablespoons butter
4 tablespoons parsley, chopped
Salt & pepper to taste
Directions:
1. Place chicken in 8x8-inch silicone
baking pan.
2. Add butter, parsley, salt and
pepper to pan and place on
3-inch rack.
3. Cook at 350°F for 11-13 minutes
per side.
Chicken Curry
Serves: 1
1 (4 – 6-ounce) chicken breast, cut
into bite size pieces
1 scallion, cut into ½-inch pieces
½ green bell pepper, small diced
2 cloves garlic, minced
2 tablespoons fresh ginger, grated
1 tablespoon curry powder or paste
¼ cup sour cream
1 teaspoon coriander leaves,
chopped
Salt & pepper to taste
Directions:
1. Mix chicken, scallion, green
pepper, garlic, ginger, curry, salt
and pepper in small bowl.
2. Place chicken on 3-inch rack and
cook at 350°F for 11-13 minutes.
3. Stir in cream and sprinkle with
coriander and serve.
Caraway Duck with
Raspberry Sauce
Serves: 2-3
1 whole duck (2 legs, 2 thighs, 2
wings, 2 breasts, all cut in half)
1 tablespoon caraway seed, crushed
Salt & pepper to taste
1 pint fresh raspberries
1 tablespoon lime juice
¼ teaspoon ground ginger
Cayenne pepper to taste
Sugar to taste
Directions:
1. Using fork or knife, pierce skin of
each duck piece several times.
2. Season duck on all sides with
caraway.
3. Lay duck on 1-inch rack and cook at
350°F for 30-35 minutes per side,
upside down first.
4. While duck cooks, purée
raspberries in blender.
5. Using exible spatula, push berries
through mesh strainer to remove
seeds.
6. Mix raspberry puree, lime juice,
ginger and cayenne until well
blended.
7. Add sugar as desired.
8. Simmer sauce on Low (100°F),
being careful not to overcook.
9. Serve immediately with duck.
Tip: If you cook the sauce for too long,
it will taste more like jam.
Poultry
Page 64
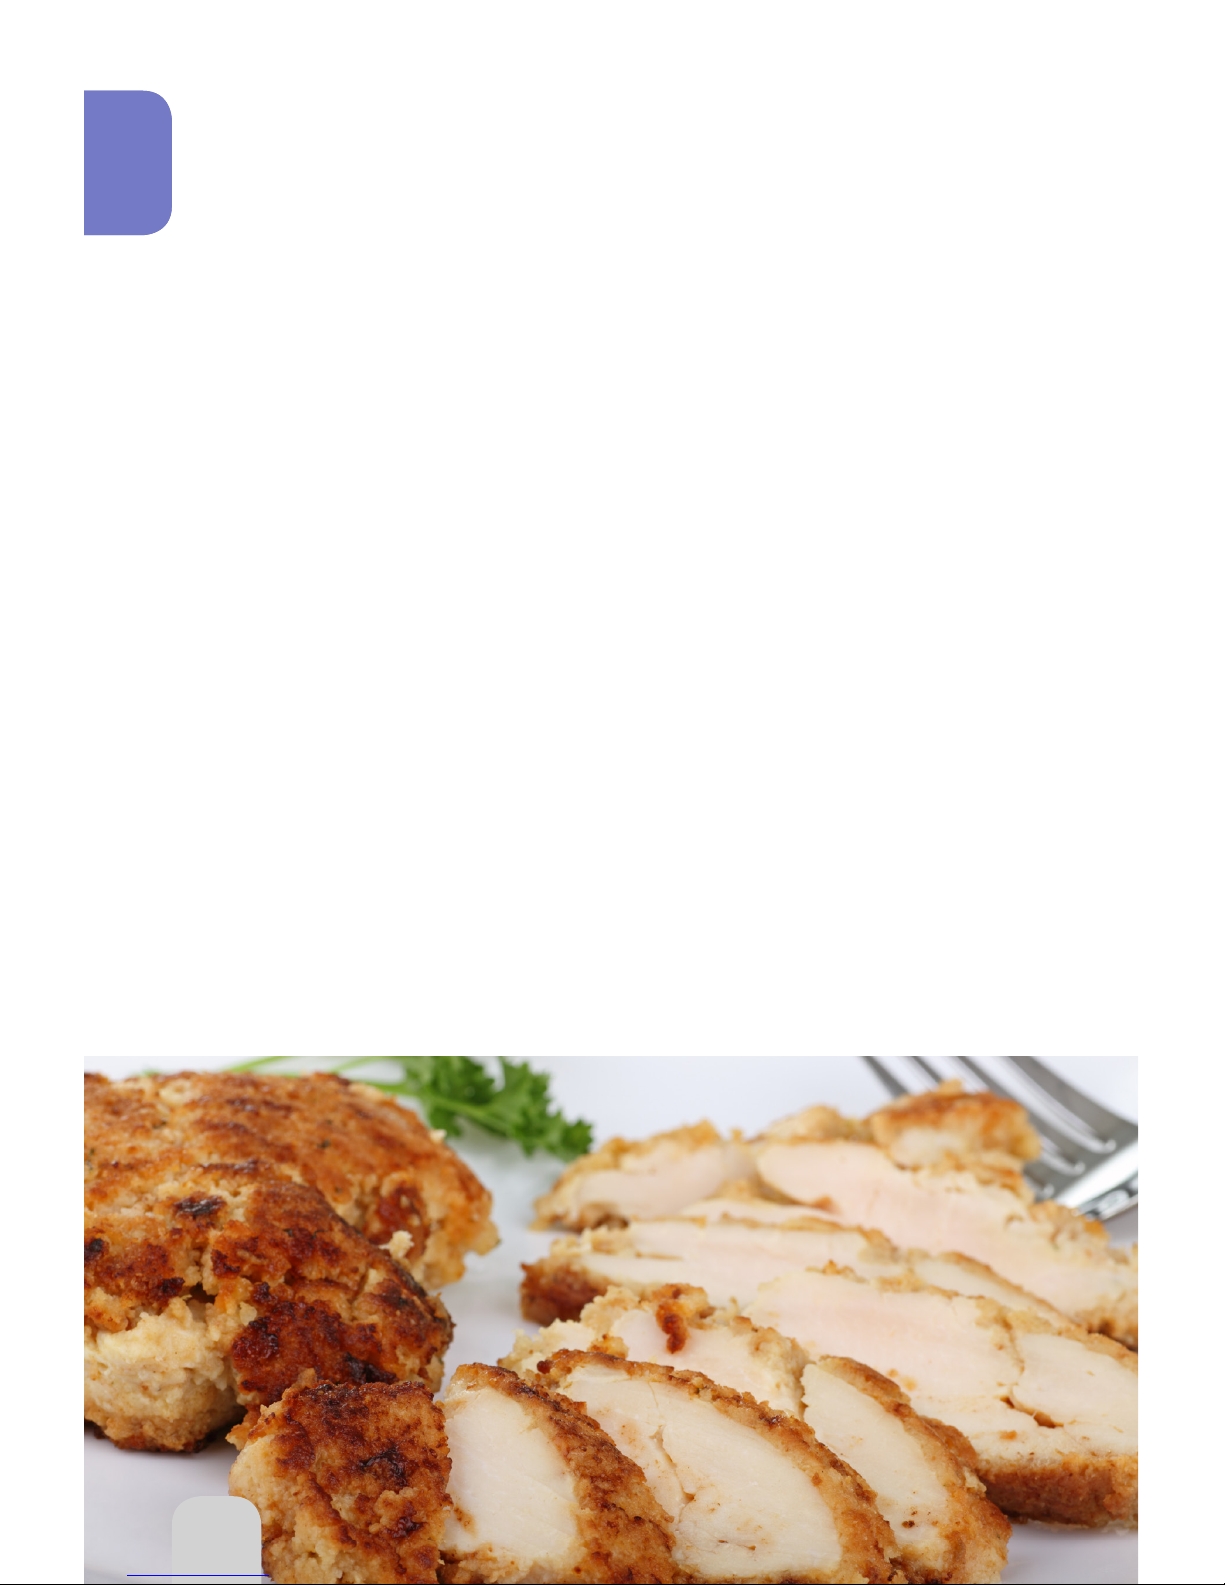
64
Poultry
Nutty Breading Chicken Breast
Serves: 1
1 egg, beaten
½ cup pecans, ground
1 tablespoon wheat germ
1 teaspoon Italian seasoning blend,
dried
1 (4 – 6-ounce) boneless chicken
breast
2 tablespoons parsley, chopped
Salt & pepper to taste
Directions:
1. Mix pecans, wheat germ and
seasonings in shallow oval dish.
2. Dip chicken in egg and roll in nut
mixture.
3. Place chicken on 3-inch rack and
cook at 350°F for 11-13 minutes
per side.
4. Sprinkle with parsley and serve.
Tip: You can substitute real eggs
with ¼ cup egg substitute.
Low-Fat Crunchy Filled Chicken
Serves: 4
4 boneless chicken breasts
3 ounces low-fat Cheddar cheese,
sliced
1 tablespoon Dijon mustard
1 cup corn flakes, crushed
1 teaspoon parsley flakes, dried
½ cup non-fat buttermilk
Directions:
1. Cut deep 2-inch slit into meaty
portion of chicken.
2. Slice cheese into 4 portions and
brush with mustard.
3. Place 1 cheese slice into each slit
and secure with wooden
toothpicks.
4. Combine cereal, seasoning and
parsley.
5. Dip chicken into buttermilk and roll
in cereal mixture.
6. Place chicken in 8x8-inch silicone
baking pan.
7. Place pan on 1-inch rack and cook
at 350°F for 27-29 minutes.
Tip: Save the leftover cornflakes from
the bottom of the cereal box for
this recipe to cut down on waste.
64
Poultry
Page 65
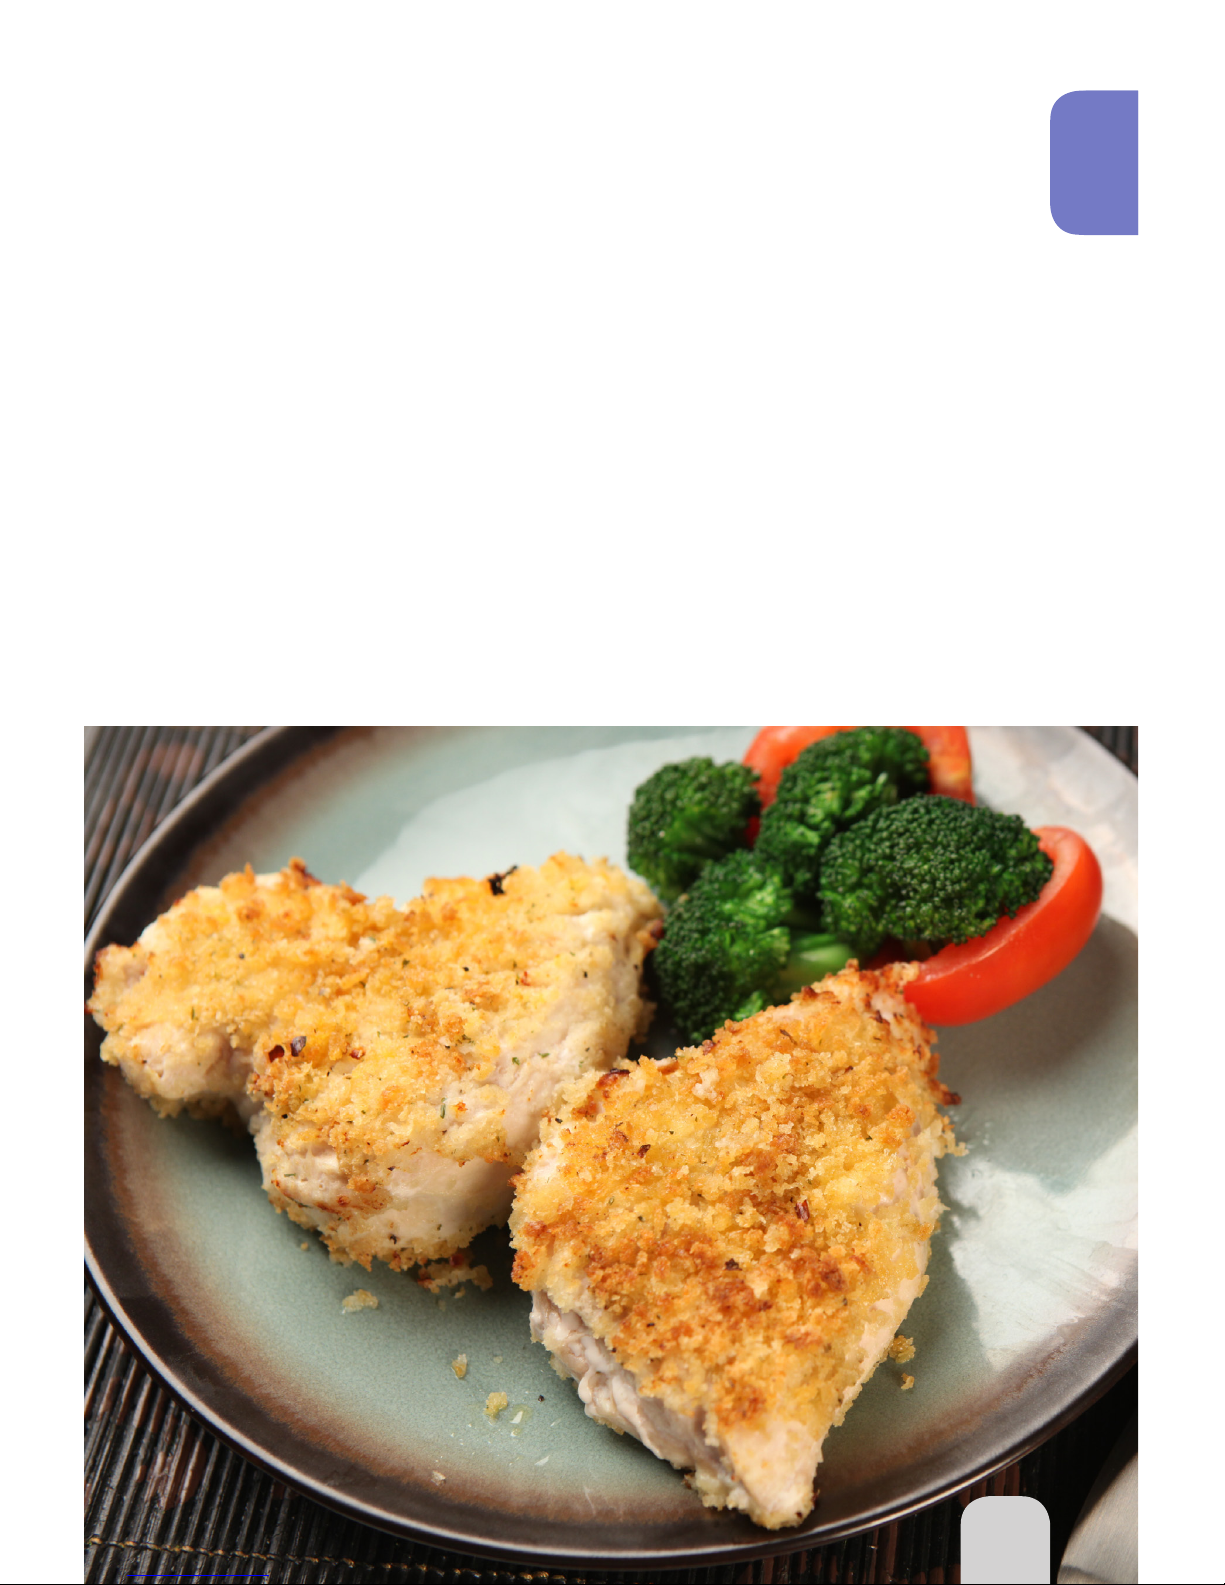
65
Air-Fried Honey Ginger Crusted
Chicken
Serves: 4
4 (4-ounce) boneless, skinless chicken
breasts
1 tablespoon honey
1 tablespoon orange juice
½ teaspoon ground ginger
¼ teaspoon black pepper
Dash red pepper flakes (optional)
¾ cup crushed corn flakes
½ teaspoon dried parsley flakes
Directions:
1. Spray shallow 10-inch baking
pan with non-stick spray.
2. In small bowl, combine honey,
orange juice, ginger, black
pepper and red pepper flakes.
3. Brush mixture over chicken
breasts.
4. Combine corn flakes and parsley
and pat onto chicken.
5. Place chicken in prepared baking
dish and place on 3-inch rack.
6. Cook at 350°F for 11-13 minutes
per side.
Tip: If chicken is frozen, cook for
14-15 minutes per side.
Tip: Chicken is completely cooked
when juices run clear.
Tip: These are approximate times.
Actual time will vary, depending
on the size of the chicken.
65
Poultry
Page 66
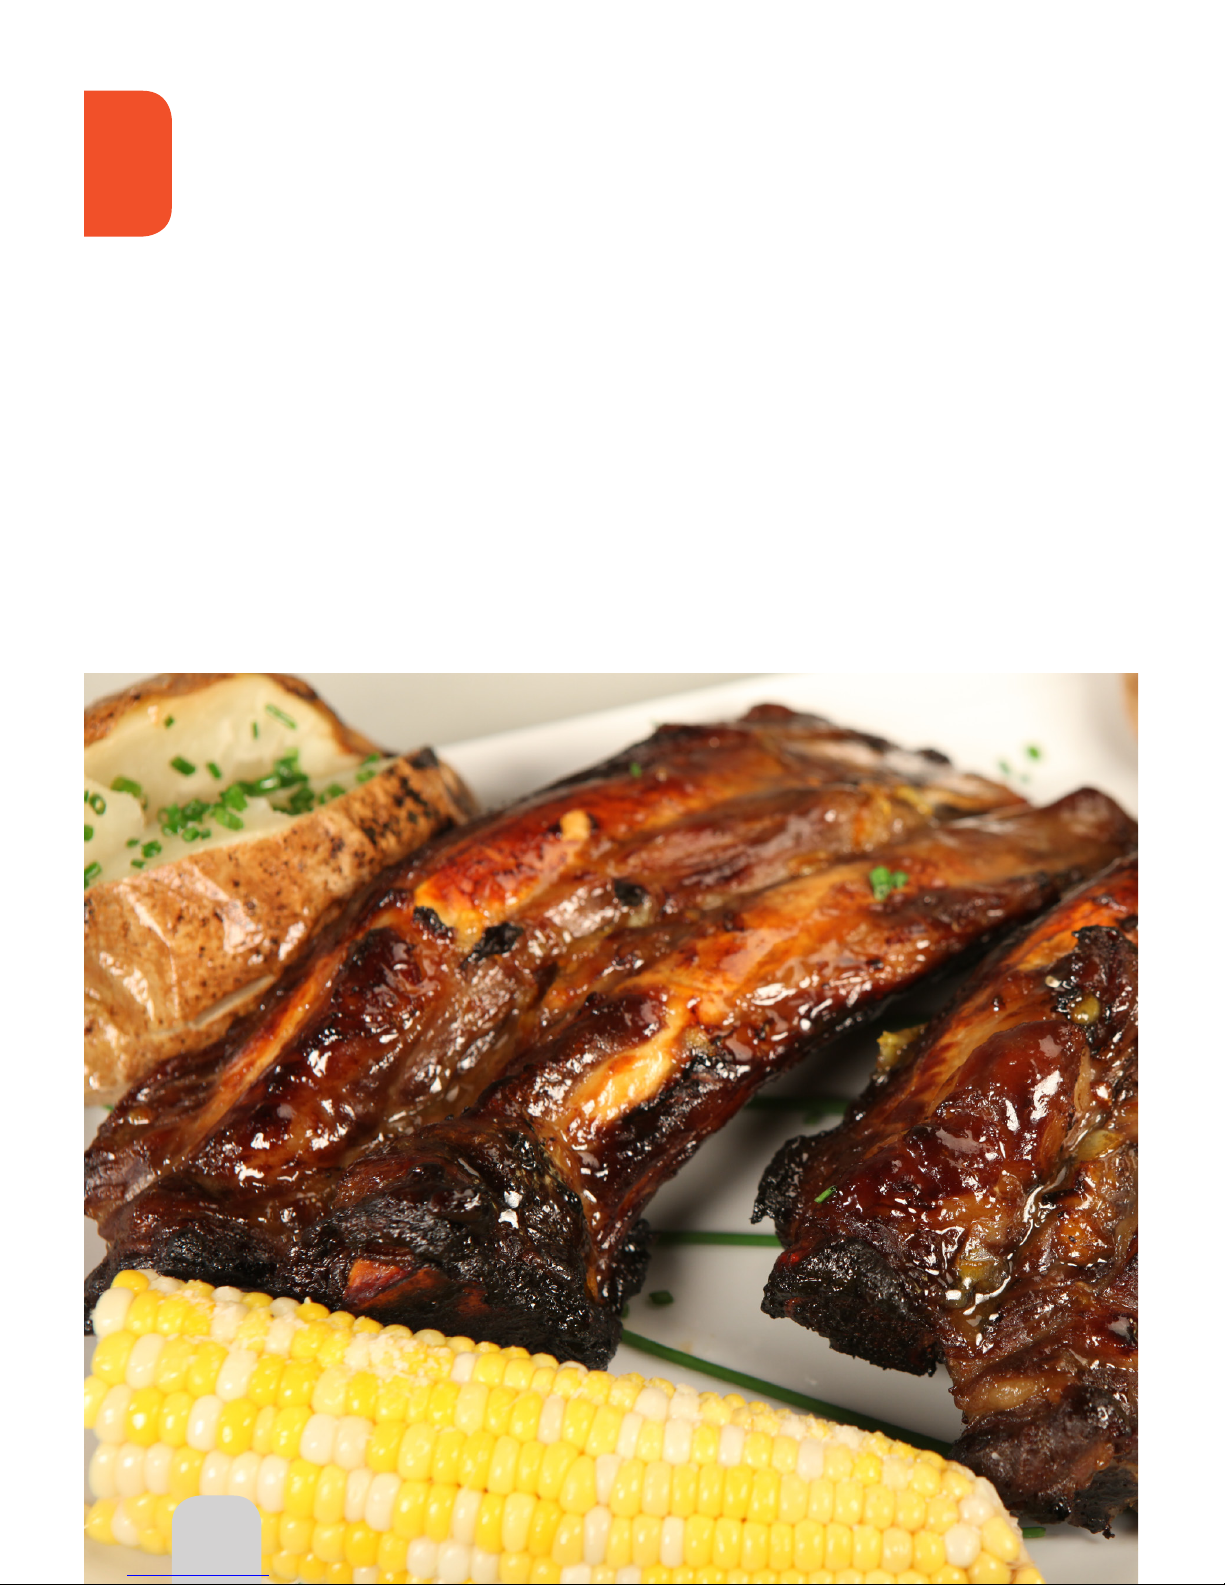
66
Beef
Tips for Beef
Turning beef halfway through cooking time allows for even browning.
To use your favorite dry seasonings on frozen meat, sprinkle cold water on it beforehand; this
will allow seasonings to adhere.
Brush sauces on fresh meats to infuse flavors. Rub with olive oil to achieve maximum
browning.
To save time, marinate in a sealed bag or container and freeze into separate servings.
For appropriate cooking times, refer to the Quick & Easy Cooking Guide.
* Using a meat thermometer is essential for checking the internal temperature of the meat.
66
Page 67

67
Beef
Foolproof Standing Rib RoastGlazed Beef Ribs
Serves: 6-8
1 (5-pound) standing rib roast,
thawed
1 teaspoon onion powder
1 teaspoon kosher salt
1 teaspoon black pepper
Directions:
1. Rub roast with seasonings.
2. Place on 1-inch rack with rib side
down.
3. Cook at 350°F for 15-17 minutes per
pound for rare doneness.
4. Flip roast halfway through cooking
process.
5. Let stand for 10 minutes before
slicing.
Tip: For medium-rare doneness,
cook for 17-19 minutes per pound.
Tip: For medium doneness, cook for
20-22 minutes per pound.
Tip: For well-done roast, cook for 27
minutes, or more, per pound.
Serves: 2
1 rack beef ribs, cut in half
Salt & pepper to taste
½ cup orange marmalade
2 teaspoons Dijon mustard
1 teaspoon lemon juice
1 tablespoon Worcestershire sauce
Directions:
1. Mix marmalade, mustard, lemon
juice and Worcestershire sauce
together in bowl.
2. Baste ribs with sauce.
3. Place ribs on 1-inch rack and
cook at 350°F for 20-25 minutes
per side.
4. Let meat rest under dome for 5
minutes.
Tip: Bottled BBQ sauce may be
substituted for glaze.
Tip: Melt marmalade by keeping it
at room temperature for 30
minutes.
London Broil
Serves: 1
1 (6-ounce) sirloin steak sliced, cut
into ½-inch strips
2 large white mushrooms, sliced
1 tablespoon Worcestershire sauce
1 tablespoon butter
Salt & pepper to taste
Directions:
1. Place all ingredients in shallow
oven-safe dish.
2. Cook on 1-inch rack at 325°F for
15 minutes.
Honey Citrus Glazed Veal Chops
Serves: 4
3 tablespoons fresh lime juice
2 tablespoons fresh ginger root, grated
½ teaspoon lime zest
4 (8-ounce) veal rib chops,
cut 1-inch thick
Directions:
1. Stir together lime juice, honey,
ginger and lime zest in small bowl.
2. Place veal chops in glass dish.
3. Brush lime mixture onto veal.
4. Refrigerate for 1 hour, covered.
5. Place veal on the 3-inch rack, cook
at 350°F for 12-15 minutes per side
for fresh or 15-20 minutes for frozen.
Page 68

68
Yankee Pot Roast
Serves: 4-6
2½-3 pounds chuck or shoulder
roast
3 large potatoes, cleaned and
peeled into quarters
4 large carrots, cut on bias
1 large onion, cut in wedges
2-3 sprigs rosemary
1 teaspoon black pepper
½ cup red wine
1 teaspoon pepper
1 teaspoon salt
1 oven roasting bag
Directions:
1. Place all vegetables in oven bag.
2. Place meat on vegetables and
season with wine, salt, pepper
and rosemary.
3. Close bag with provided tie and
make small slit on top.
4. With slit facing up, roast on
1-inch rack at 275°F for 4 hours.
5. Remove bag and place on tray.
6. Cut open to serve.
Japanese Style Steak
Serves: 1
1 (4 – 6-ounce) sirloin steak
¼ cup miso paste
2 tablespoons sake or dry white
wine
2 tablespoons pickled ginger slices
Directions:
1. Mix miso and sake and spread
over steak.
2. Let steak marinate for 1 hour in
shallow dish.
3. Cook on 3-inch rack at 350°F
for 6-7 minutes per side to
achieve medium-rare.
4. Serve with ginger slices.
Tip: You can get miso paste at your
local international supermarket.
Grilled Cheeseburgers
Serves: 4
1 pound lean ground beef
1 tablespoon Worcestershire sauce
1 egg
½ cup dry bread crumbs
½ package dry onion soup mix
4 hamburger buns
4 slices American cheese
Directions:
1. Place ground beef in large mixing
bowl.
2. Add Worcestershire sauce, egg,
bread crumbs and onion soup
mix.
3. Mix together with hands. Be
careful not to over mix, as this will
result in tough burgers.
4. Divide meat mixture into four
equal amounts.
5. Form beef into round patties
approximately ¼-inch thick.
6. Place hamburger patties on
3-inch rack and cook at 350°F
for 5-7 minutes per side for fresh
patties or 10-11 minutes per side
for frozen patties.
7. Place one cheese slice on
each hamburger and cook
for one additional minute to melt
cheese.
8. Remove cheeseburgers and
place on buns.
9. Add desired condiments.
Tip: You may substitute ground
turkey for ground beef.
Tip: If burgers are thicker than
¼-inch, add 2 minute
increments to cooking time until
desired tenderness is achieved.
Beef
Page 69
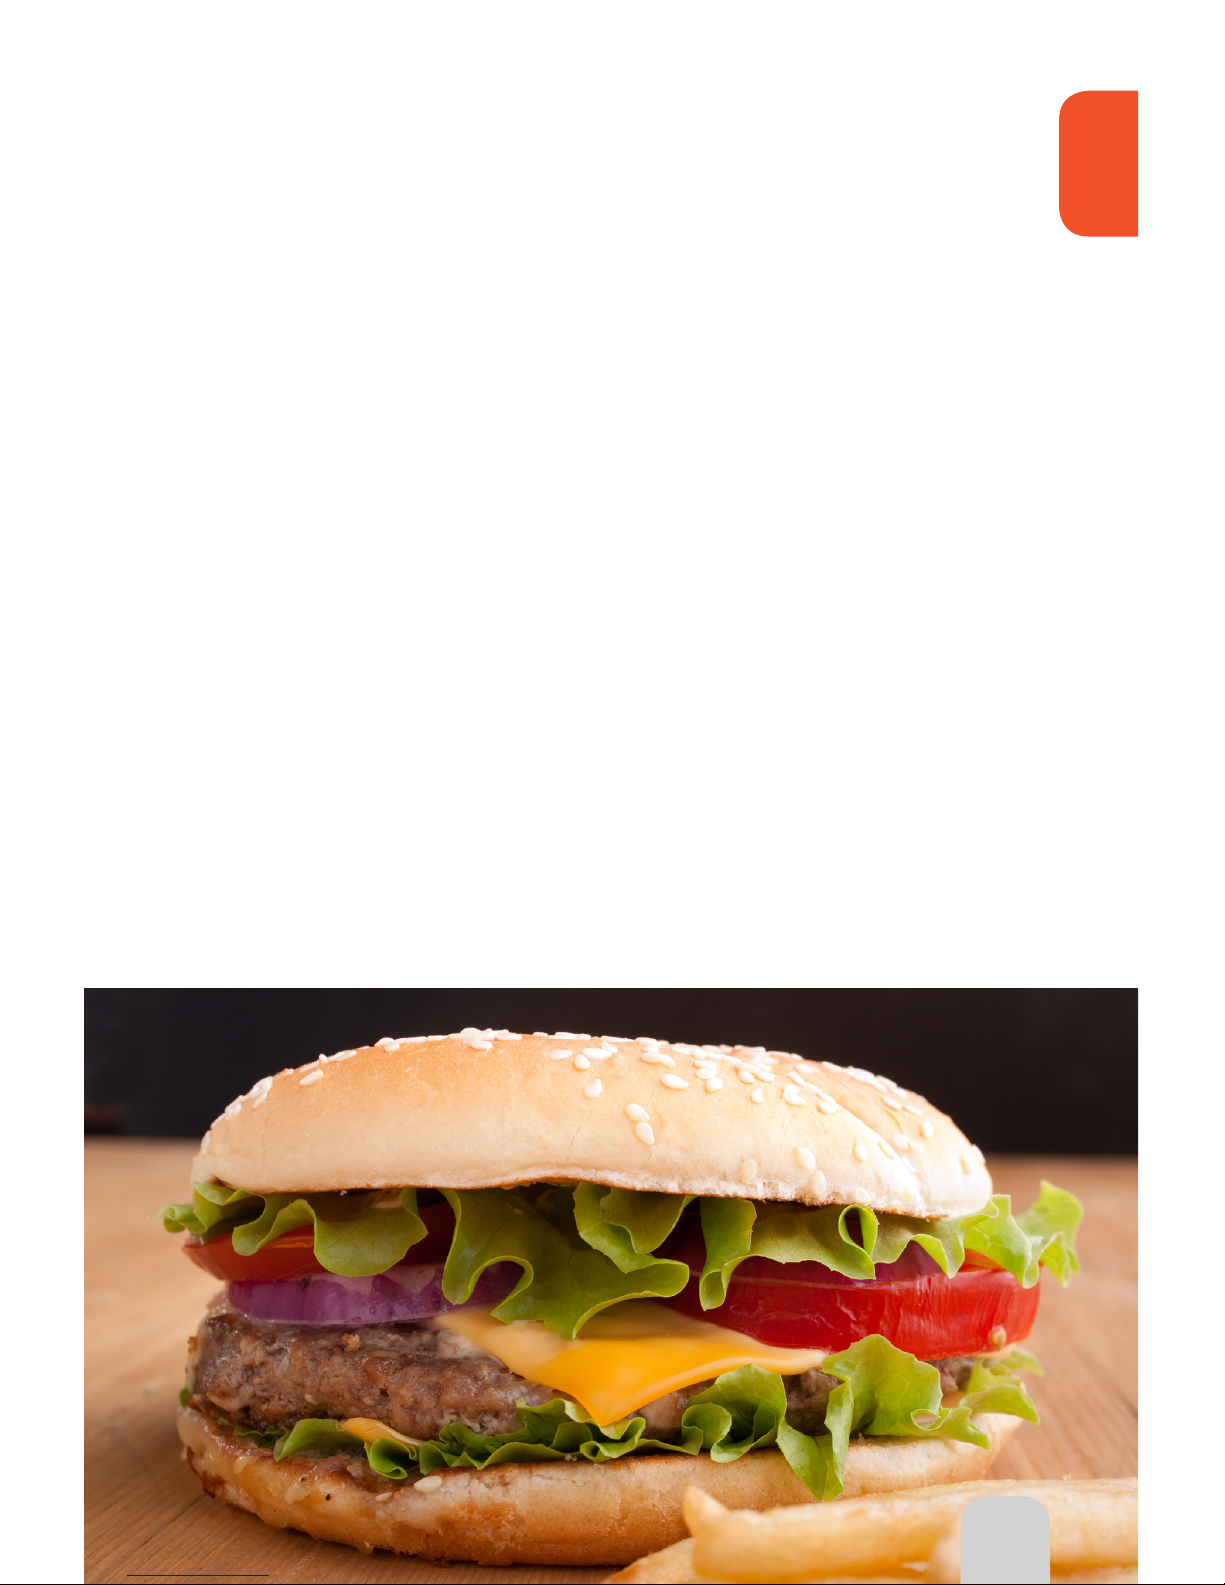
69
Beef & Andouille Burgers
with Caramelized Onions
& Spicy Mayonnaise
Serves: 6
½ pound Andouille sausage, cut
into ¼-inch cubes
½ pound ground 20% fat beef
chuck or ground beef
¾ cup pecans, toasted and
chopped
1 teaspoon salt
¼ teaspoon black pepper
½ pound sweet onion
3 tablespoons extra virgin olive oil,
divided
3 tablespoons garlic cloves, minced
1 teaspoon brown sugar
¾ cup mayonnaise
1 tablespoon fresh lemon juice
1 teaspoon Cajun or Creole
seasoning blend
¼ teaspoon hot pepper sauce
Directions:
1. Mix sausage, beef, pecans, salt
and black pepper together and
shape into 6 (½-inch thick) patties.
2. Store burgers in refrigerator while
preparing remaining ingredients.
3. Place sweet onion, 2 tablespoons
olive oil, garlic and brown sugar
in liner pan.
4. Cook onion mixture at 350°F for
10-11 minutes.
5. Remove and keep warm.
6. Place burgers on 3-inch rack and
cook at 350°F for 5-7 minutes per
side.
7. While burgers are cooking, mix
together mayonnaise, lemon
juice, Creole seasoning, hot
pepper sauce and 1 tablespoon
olive oil and place in refrigerator.
8. Place burgers on bun, add
caramelized onions and top with
spicy mayonnaise.
Tip: Your local butcher should carry
Andouille sausage. They
should also be able to cut it to
the specific size.
Tip: You can make these burgers
ahead of time and freeze them.
Just add 2-3 minutes to the
cooking time.
69
Beef
Page 70
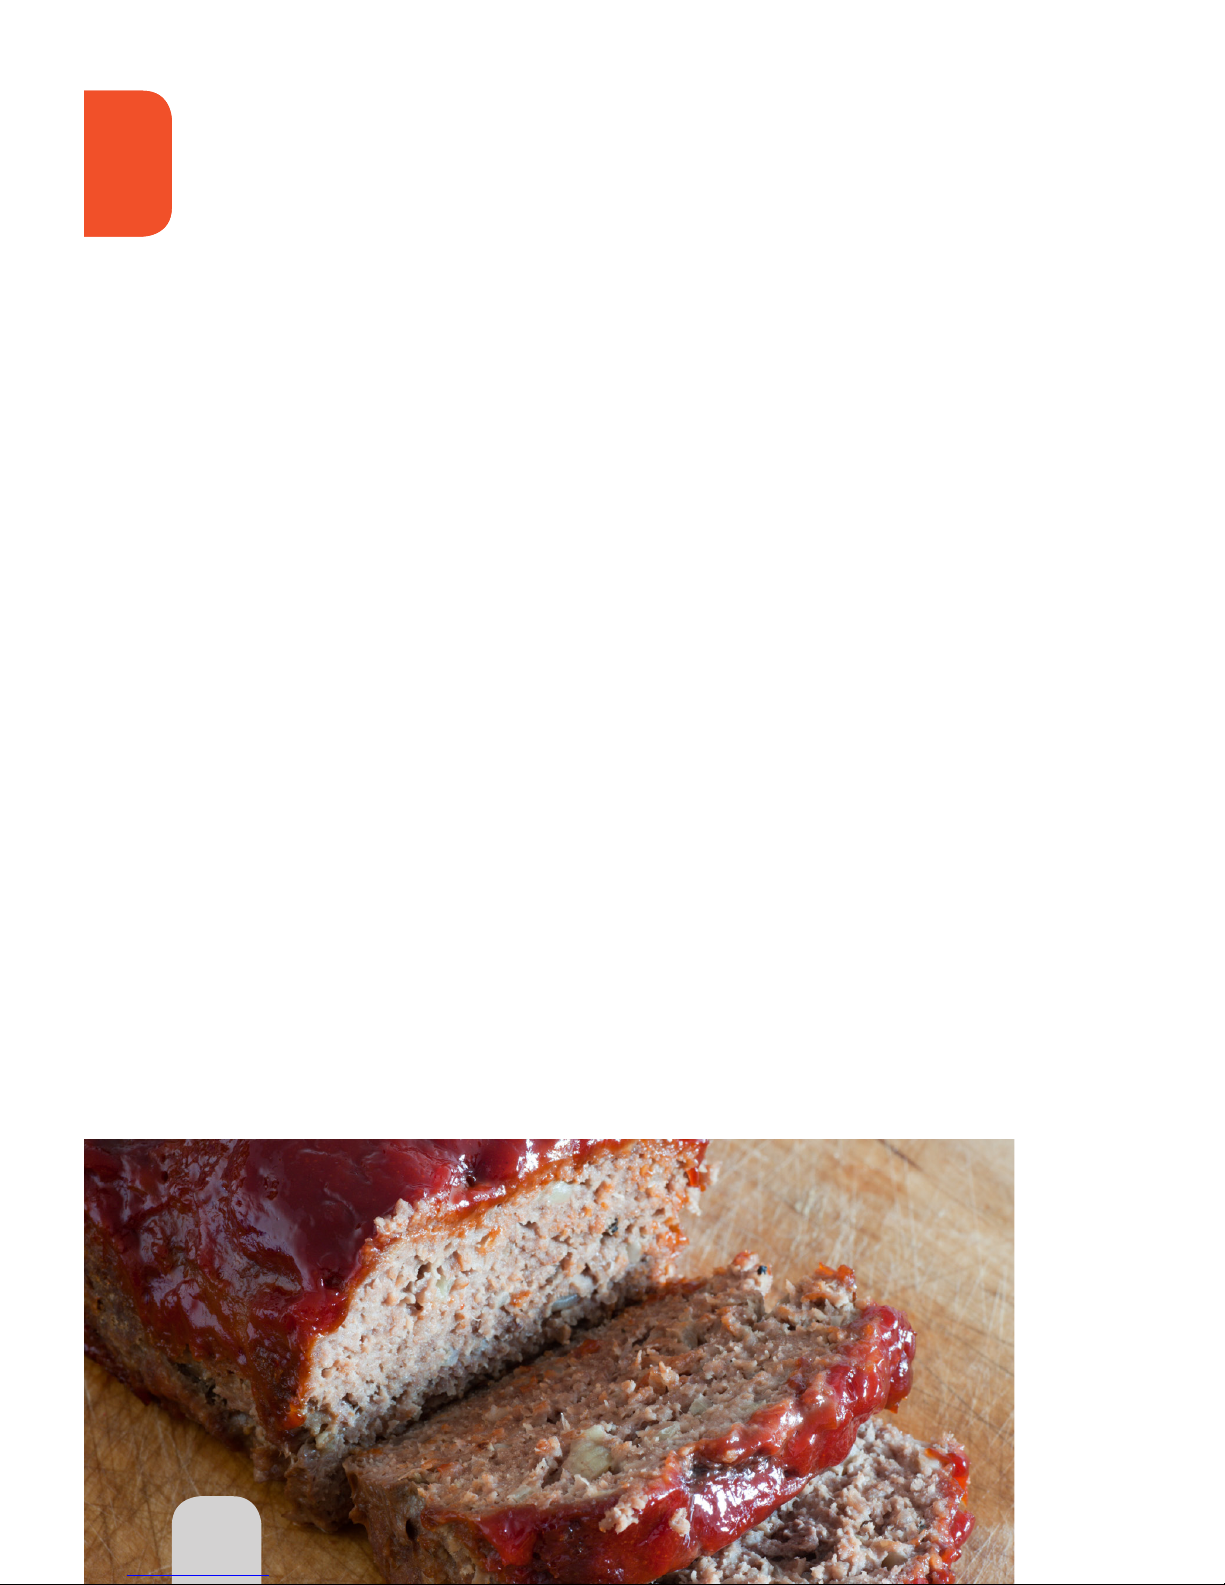
70
Beef
Homestyle Meatloaf
Serves: 8
1 tablespoon olive oil
1 medium onion, chopped
3 garlic cloves, finely chopped
1½ pounds lean ground beef
1 large egg
½ cup dry bread crumbs
1 tablespoon Worcestershire sauce
1 tablespoon dried Italian
seasonings
½ cup ketchup or chili sauce
1 tablespoon Dijon mustard
Directions:
1. In small skillet, heat oil over
Medium-High (375°F) heat.
2. Add onion and garlic to skillet.
3. Cook for 3 minutes, or until onion
softens.
4. In large bowl, combine beef,
egg, bread crumbs,
Worcestershire sauce and Italian
seasoning. Mix well.
5. Pack mixture into 4x8-inch loaf
pan.
6. In separate small bowl, combine
ketchup and mustard.
7. Spread topping over loaf.
8. Place loaf on 1-inch rack and
cook at 350°F for 45-50 minutes.
Tip: If the meat starts to brown too
quickly, loosely cover with foil.
Classic NuWave Pot Roast
Serves: 4-6
2½ pounds chuck or shoulder roast
1 tablespoon olive oil
Fajita seasoning mix
2 potatoes, peeled and cut into
quarters
1 cup small carrots
1 large yellow onion, peeled and
cut into quarters
Directions:
1. Brush roast with olive oil and add
fajita seasoning.
2. Cook at 300°F for 1 hour.
3. Brush remaining vegetables with
oil and sprinkle fajita seasoning
mix.
4. Turn roast and add vegetables
around edges.
5. Cook at 325°F for 45 minutes or
until vegetables are done.
6. Allow roast to sit for 5-10 minutes.
Beef
70
Page 71

71
Three-Meat Fajita Dinner
Serves: 2
10 ounces meat (flank steak,
chicken or pork)
1 large Spanish onion
1 green pepper
1 red pepper
1 yellow pepper
1 package taco or fajita seasoning
mix
1 (8-ounce) package shredded
Mexican or Cheddar cheese
1 package ready-made tortillas
1 (8-ounce) ready-made salsa mix
Salt & pepper for taste
Directions:
1. Cut all vegetables and meats into
3 x ¼-inch strips.
2. Sprinkle seasoning mix onto
meats.
3. On 3-inch rack, place vegetables
around outside and meats on
inside.
4. Cook pork and chicken at 350˚F
for 10-15 minutes per side. Cook
flank steak at 350˚F for 6-7
minutes per side for medium
doneness.
5. Remove dome and flip
vegetables and meats.
6. Wrap tortillas in aluminum foil and
place in liner pan.
7. Replace dome; cook at 350°F for
another 10-12 minutes until
meats are done.
8. Carefully open foil and place
meats and vegetables on
warmed tortillas.
9. Top with cheese and salsa.
10. Roll up tortillas and enjoy.
Beef
Corned Beef Brisket
Pepper Steak
Serves: 4-6
1 (3½ – 4-pound) corned beef brisket
6 small red potatoes, cut in half
1 head cabbage, cut in wedges
1 cup water
1 bouillon cube
1 oven roasting bag
Directions:
1. Rinse meat and place corned beef
fatty side up in cooking bag.
2. Add seasoning packet, water,
bouillon cube and potatoes.
3. Secure bag with twist tie.
4. Lay bag on 1-inch rack.
5. Cook at 325°F for 1 hour.
6. Carefully turn bag over and cook at
350°F for additional 30 minutes or
until meat is tender.
Tip: Making slits in the cooking bag
will result in juices escaping.
Gather the open end of the bag
and leave a thumb-size hole and
tie with string.
Tip: Serve with potatoes, cabbage
and rye bread for that St. Patrick’s
Day touch!
Tip: Add ⅛ teaspoon cloves and 10
peppercorns if it is not included in
the seasoning pack.
Serves: 4-6
1-2 pounds sirloin steak
Salt for taste
½ cup peppercorns, crushed
Directions:
1. Salt steak and press
peppercorns into both sides.
2. Lay steak on 3-inch rack and
cook at 350°F for 8-10 minutes
per side for medium doneness.
71
Beef
Page 72
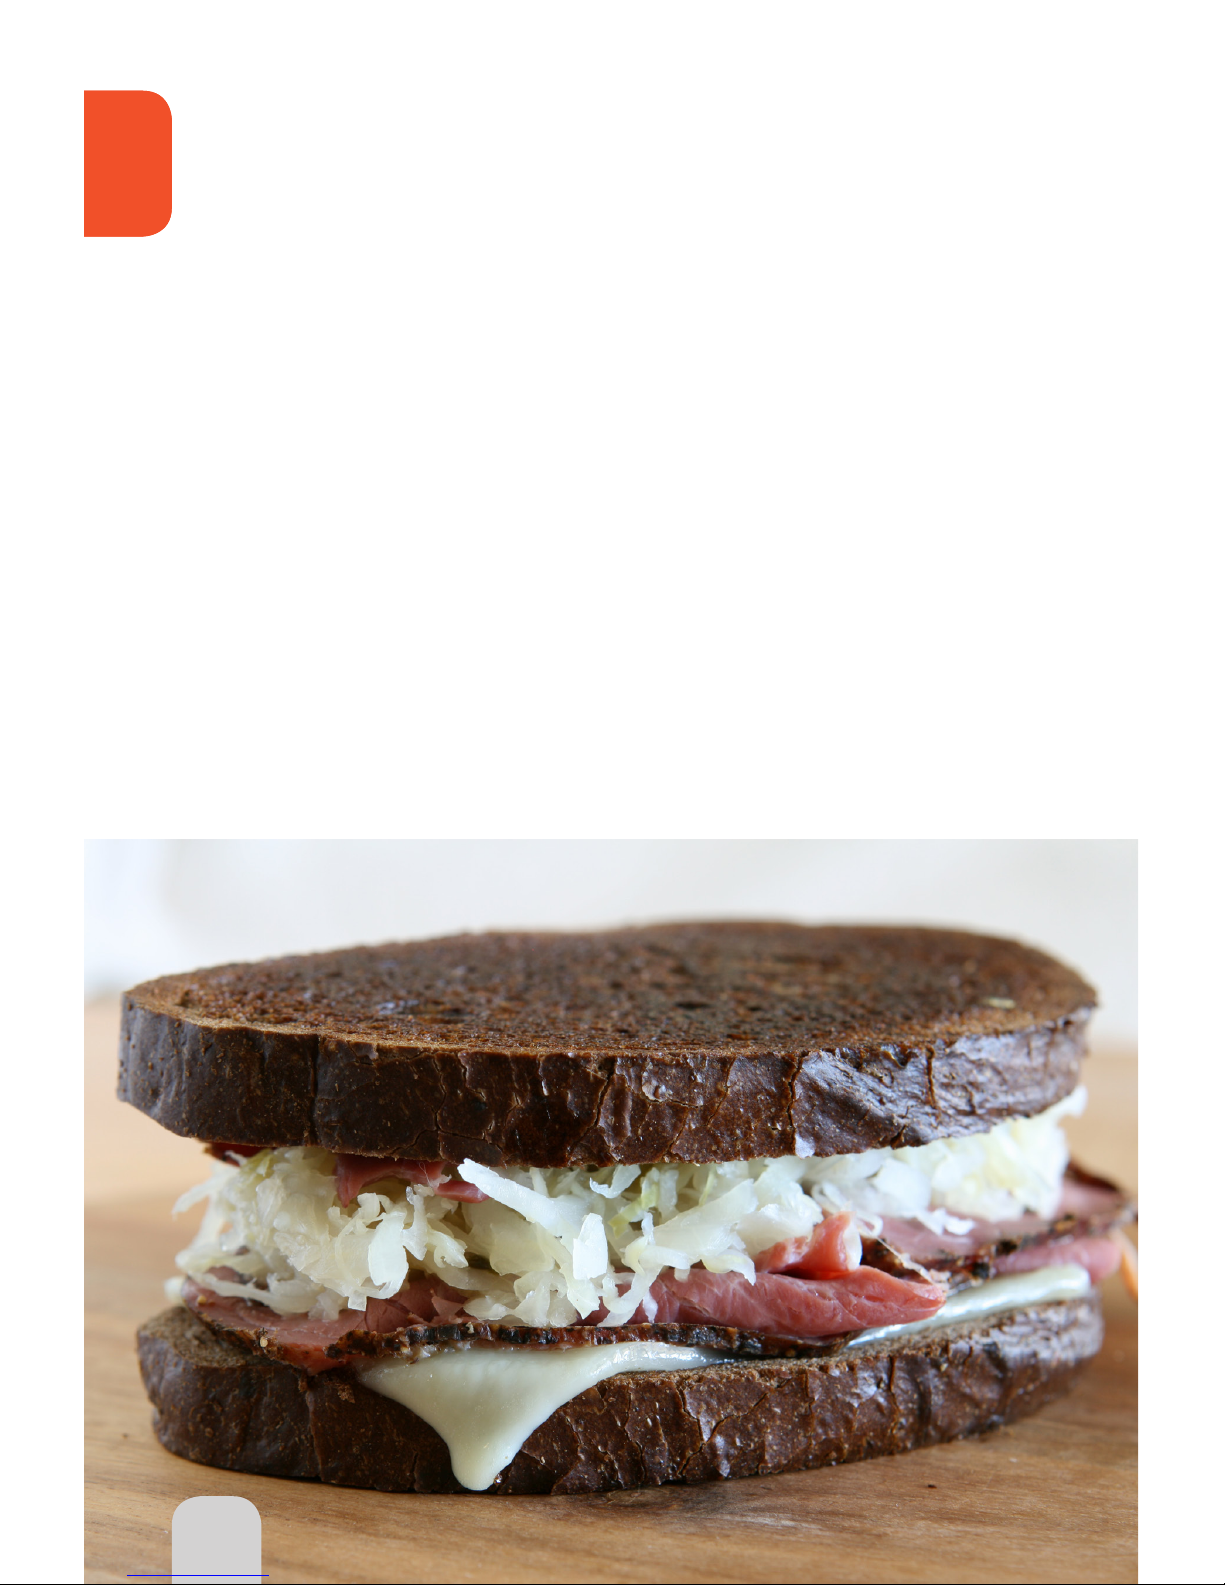
72
Beef
Baked Reuben Sandwich
Serves: 1
2-4 tablespoons butter, softened
2 slices rye bread
2 ounces corned beef, thinly sliced
¼ cup sauerkraut, squeezed dry
1 slice Swiss or Gruyere cheese
1 tablespoon Thousand Island
dressing
Directions:
1. Lightly butter each slice of bread
on one side.
2. Place corned beef, sauerkraut
and cheese on unbuttered bread
slice side.
3. Spread dressing onto corned
beef.
4. Top with second bread slice,
buttered side up.
5. Cook at 350°F for 7-9 minutes per
side.
Beef & Corn Casserole
with Noodles
Serves: 4
1 (12-ounce package)
macaroni noodles
1 pound ground beef
½ cup onions, small diced
1 (11-ounce) can tomato soup
1 (8-ounce) can tomato sauce
1 (15-ounce) can cream-style corn
1 (11-ounce) can corn niblets, drained
Directions:
1. Cook noodles according to package
directions. Drain and rinse.
2. Brown beef and onions until onions
are cooked through.
3. Add soup, tomato sauce and corn
to beef mixture.
4. Mix noodles with beef and sauce
mixture.
5. Pour into liner pan.
6. Bake at 350°F for 20-25 minutes.
72
Beef
Page 73
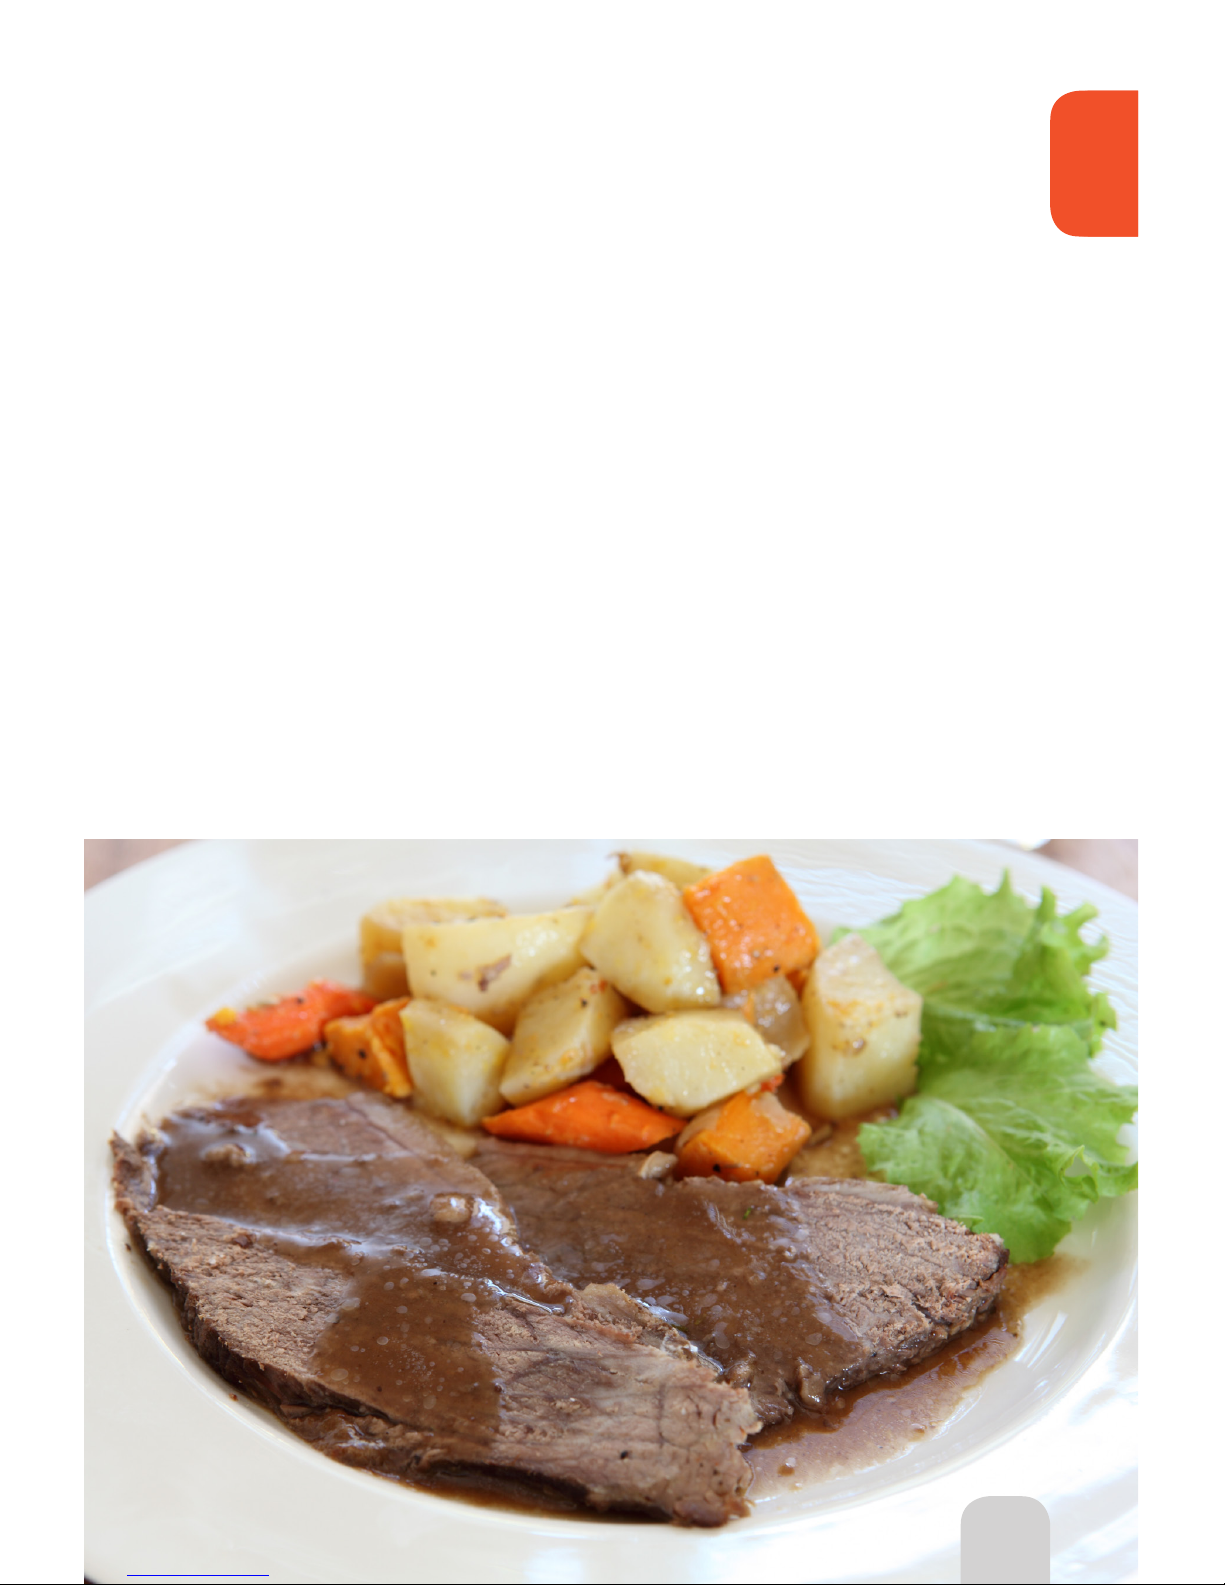
73
Beef
Boneless Rump Roast
Serves: 4-6
4 – 5-pound boneless rump roast
4-6 cloves whole garlic
1 teaspoon fresh cracked
peppercorns
1 large onion cut in slices
4 large russet potatoes, quartered
3 carrots peeled, cut into sticks
½ cup beef broth
½ cup dry red wine (optional)
Directions:
1. Make small slits in roast and
place garlic in slits (a little portion
will show).
2. Season roast with fresh cracked
peppercorns.
3. Place sliced onions on 1-inch
rack.
4. Place roast, garlic side down, on
onions.
5. Roast at 350°F for 15 minutes per
pound to achieve medium-rare;
18 minutes per pound for
medium and 22 minutes per
pound for well-done.
6. Flip roast halfway through
cooking process.
7. Place carrots and potatoes
around roast and pour red wine
and beef broth over roast and
potatoes.
8. Continue to roast remaining
half to achieve desired level of
tenderness.
9. Pause the machine and turn
carrots and potatoes (optional).
10. Let meat rest for 10 minutes
before slicing.
73
Beef
Page 74

74
Pork
Tips for Pork
For even browning, turn pork halfway through cooking process.
To use your favorite dry seasonings on frozen meat, sprinkle cold water on it beforehand;
this will allow seasonings to adhere.
Brush sauces onto fresh meats to infuse flavors.
To save time, and to add extra flavor, marinate pork in a sealed bag or container and freeze
into separate servings. For appropriate cooking times, refer to the Quick & Easy Cooking
Guide.
Place aluminum foil or parchment paper loosely over the pork to prevent overbrowning. Be
sure to secure foil to sides of rack or extend it outside the oven to prevent the NuWave Pro
Plus Infrared Oven’s internal fan from blowing the foil around during the cooking process.
To Cook a Ham
The NuWave Pro Plus Infrared Oven can cook up to an 8-pound boneless ham, or a
14-pound ham if using the NuWave® Extender Ring.
Place ham on the 1-inch rack. Add glaze during the last 10 minutes. If the ham is over
browning, place aluminum foil or parchment paper over the top. Cook at 300°F for 12-14
minutes per pound.
• Using a meat thermometer is essential for checking the internal temperature of the meat
to ensure that it has been thoroughly cooked.
Today’s pork is very lean and should not be overcooked. To check accurate doneness, use
a digital cooking thermometer. The National Pork Board follows the guidance of the U.S.
Department of Agriculture, which recommends cooking roasts, tenderloins and chops to an
internal temperature of 145°F, followed by a three-minute rest time, resulting in a flavorful,
tender and juicy eating experience. Ground pork, like all ground meat, should be cooked to
160°F. Pre-cooked ham can be reheated to 140°F or enjoyed cold.
Page 75
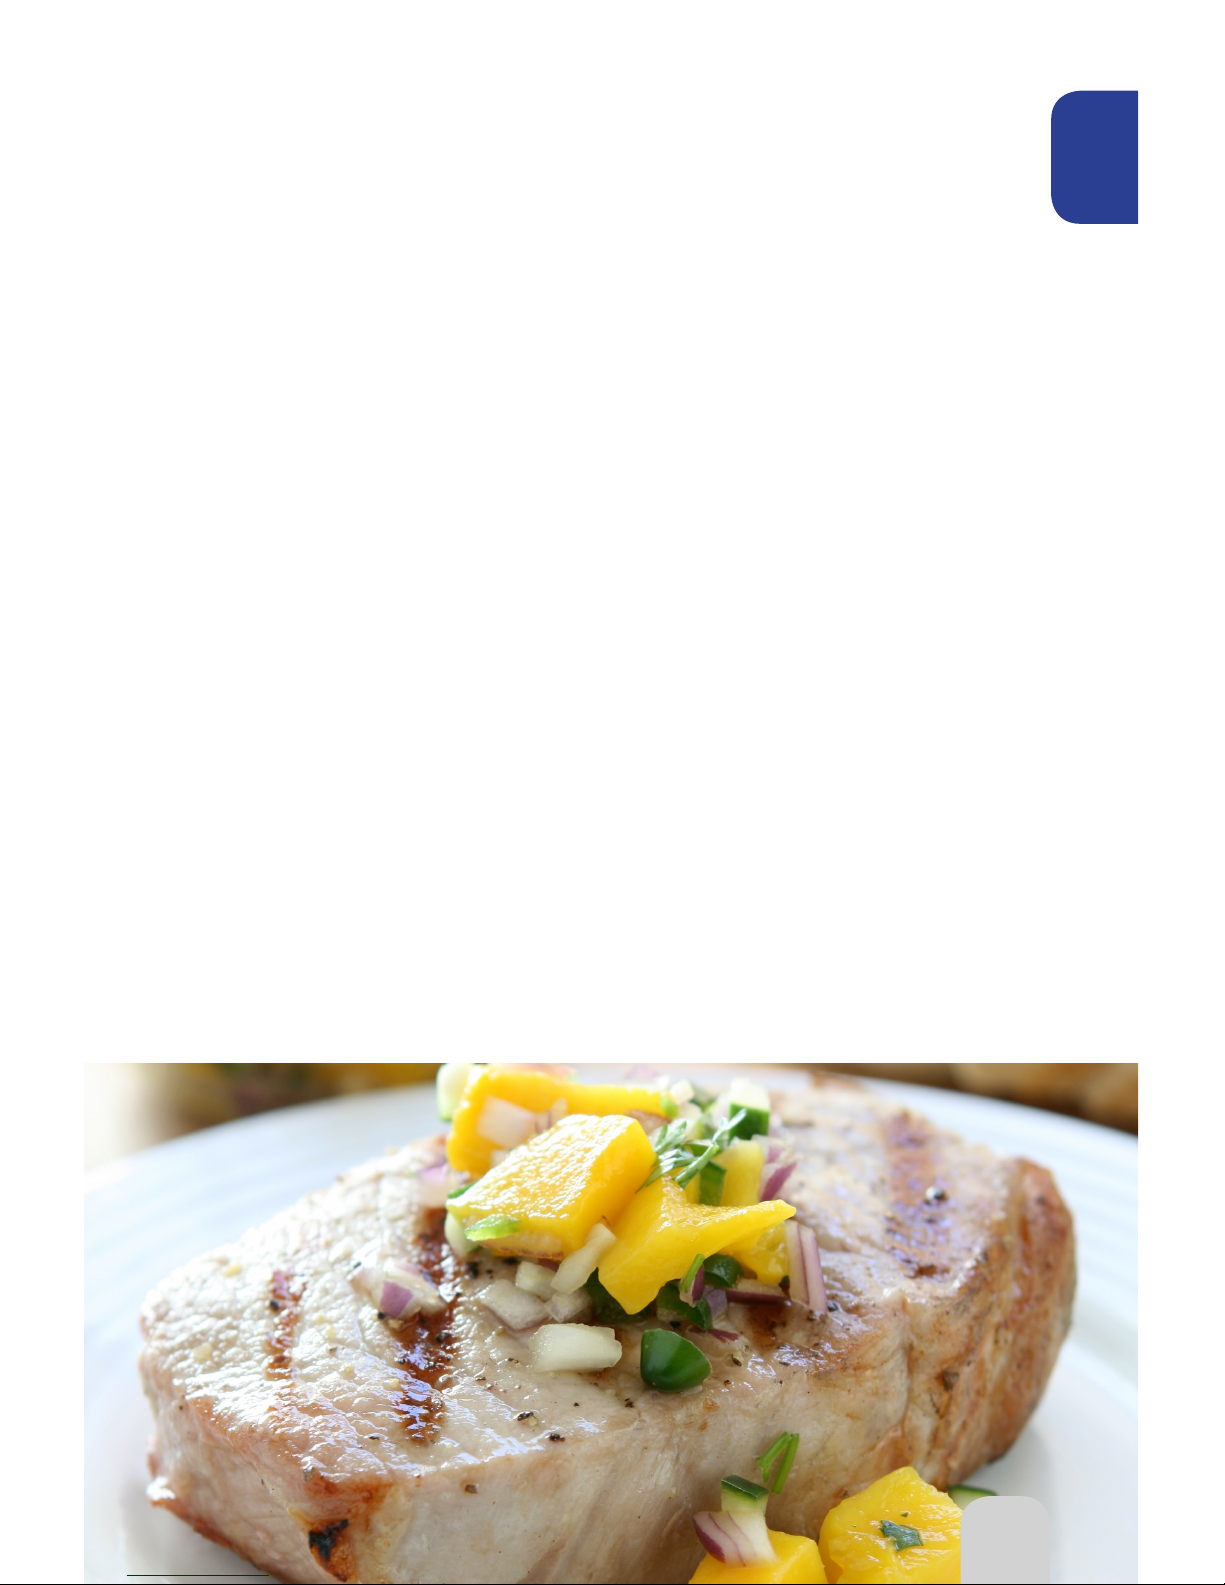
75
Asian Marinated Pork Chops with
Pineapple Relish
Baked Ham in Cola
Serves: 4
4 (1 – 1½-inch thick) pork chops
1 teaspoon ground ginger
¼ teaspoon black pepper
¼ cup soy sauce
¼ cup extra virgin olive oil
3 cloves garlic, chopped
1 tablespoon brown sugar
1 cup fresh or canned pineapple
¼ cup red onion, sliced
3 tablespoons flat leaf parsley,
chopped
Salt & pepper to taste
Directions:
1. Mix ginger, black pepper, soy
sauce, oil, garlic and brown sugar
in freezer-safe bag.
2. Place pork in marinade.
3. Let pork marinate in freezer or
refrigerator for 2 hours.
4. Place pork on 3-inch rack and cook
at 350°F for 8-10 minutes per side.
5. While pork cooks, mix pineapple,
onion, parsley, salt and pepper
together to make pineapple relish.
6. When pork is finished, top with
pineapple relish.
Serves: 25
1 (10-pound) bone-in ham
1 can cola
1 cup brown sugar
Directions:
1. Place ham on 1-inch rack, fat
side down.
2. Add half can cola to cover ham.
3. Cook at 300°F for 12-14 minutes
per pound.
4. Pat sugar on ham and add
remaining cola, pouring slowly.
5. Bake for additional 15 minutes.
6. Let ham rest inside dome for 5
minutes.
Tip: For frozen ham, cook for 18-20
minutes per pound.
Tip: With the Extender Ring, you
can make up to a 14-pound
ham.
Tip: If you like your ham breaded,
add 2 teaspoons dry mustard,
1 teaspoon fresh ground
pepper and 1½ cups plain
breadcrumbs along with sugar
and remaining cola. The
cooking times will not change
when adding extra ingredients.
75
Pork
Page 76
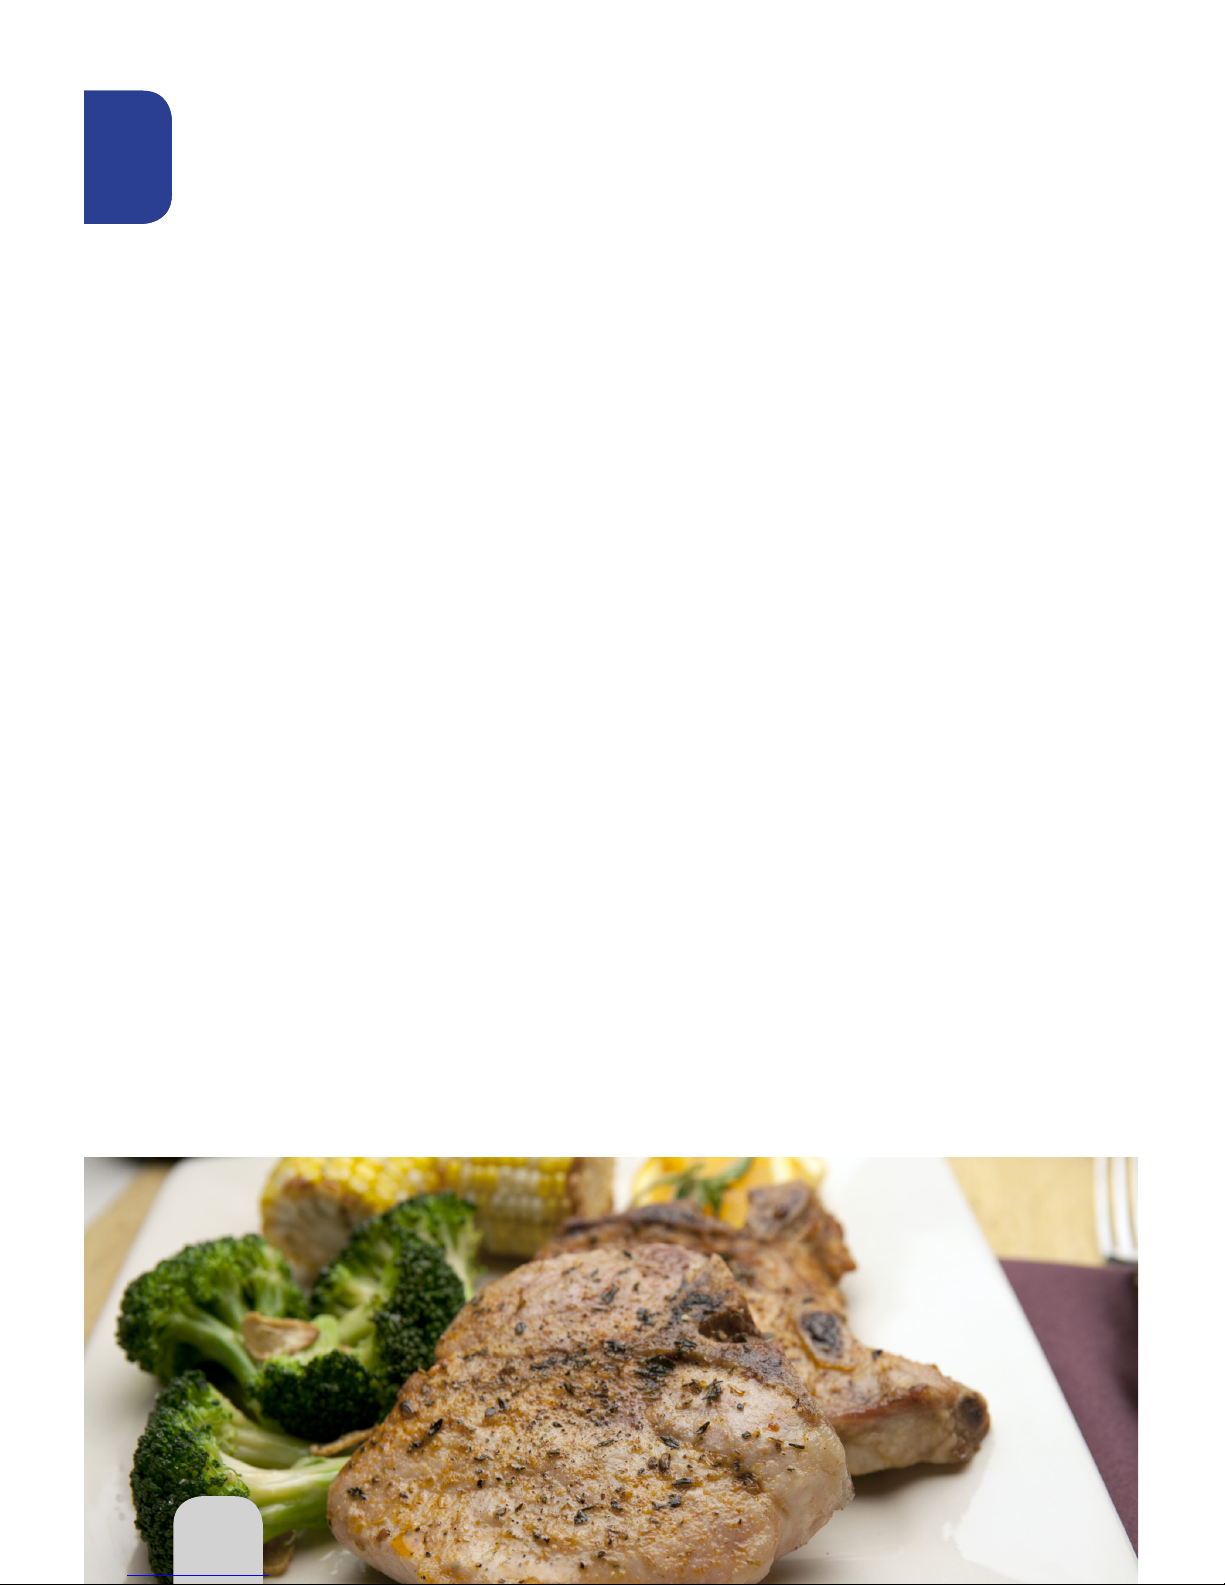
76
Pork
Thai Pork TenderloinPork Chops with Mustard Sauce
Serves: 6
2 (12-ounce) pork tenderloins
2 cloves garlic, minced
1 tablespoon ginger root, chopped
2 tablespoons fresh cilantro, chopped
3 tablespoons hoisin sauce
2 tablespoons lime or lemon juice
1 tablespoon soy sauce
1 tablespoon sesame oil
2 tablespoons sweet Asian
chili sauce
Directions:
1. In small bowl, combine all
ingredients except for pork.
2. Arrange tenderloins in single layer
in dish just large enough to hold
them.
3. Pour sauce over meat, turning to
coat.
4. Cover and refrigerate for 1-4 hours.
5. Place tenderloins on 3-inch rack
and cook at 350°F for 12-14
minutes per side if fresh or 18-22
minutes per side if frozen.
6. Let meat rest for 5 minutes before
cutting. Slice meat diagonally.
Tip: You can substitute 1 teaspoon
dried ginger root for fresh.
Tip: For a less spicy version, use 1
tablespoon Asian chili sauce.
Serves: 1
1 (4 – 6-ounce) pork chop
2 tablespoons butter
1 tablespoon prepared mustard
1 tablespoon cream
½ teaspoon dried tarragon
Salt & pepper to taste
Directions:
1. Mix butter, mustard, cream,
tarragon, salt and pepper;
spread mixture over pork.
2. Place chop in oven-safe dish and
place dish on 3-inch rack.
3. Cook at 350°F for 10-12 minutes
per side, or until juices run clear.
Adobo Cutlets
Serves: 1
1 (4-6 ounce) pork cutlet
1 tablespoon white vinegar
Adobo seasoning
Chopped radishes
Directions:
1. Place cutlet in oven-safe dish and
season with adobo and vinegar.
2. Place dish on 3-inch rack and cook
at 350°F for 12-14 minutes, or until
juices run clear.
3. Sprinkle with radishes and serve.
76
Pork
Page 77
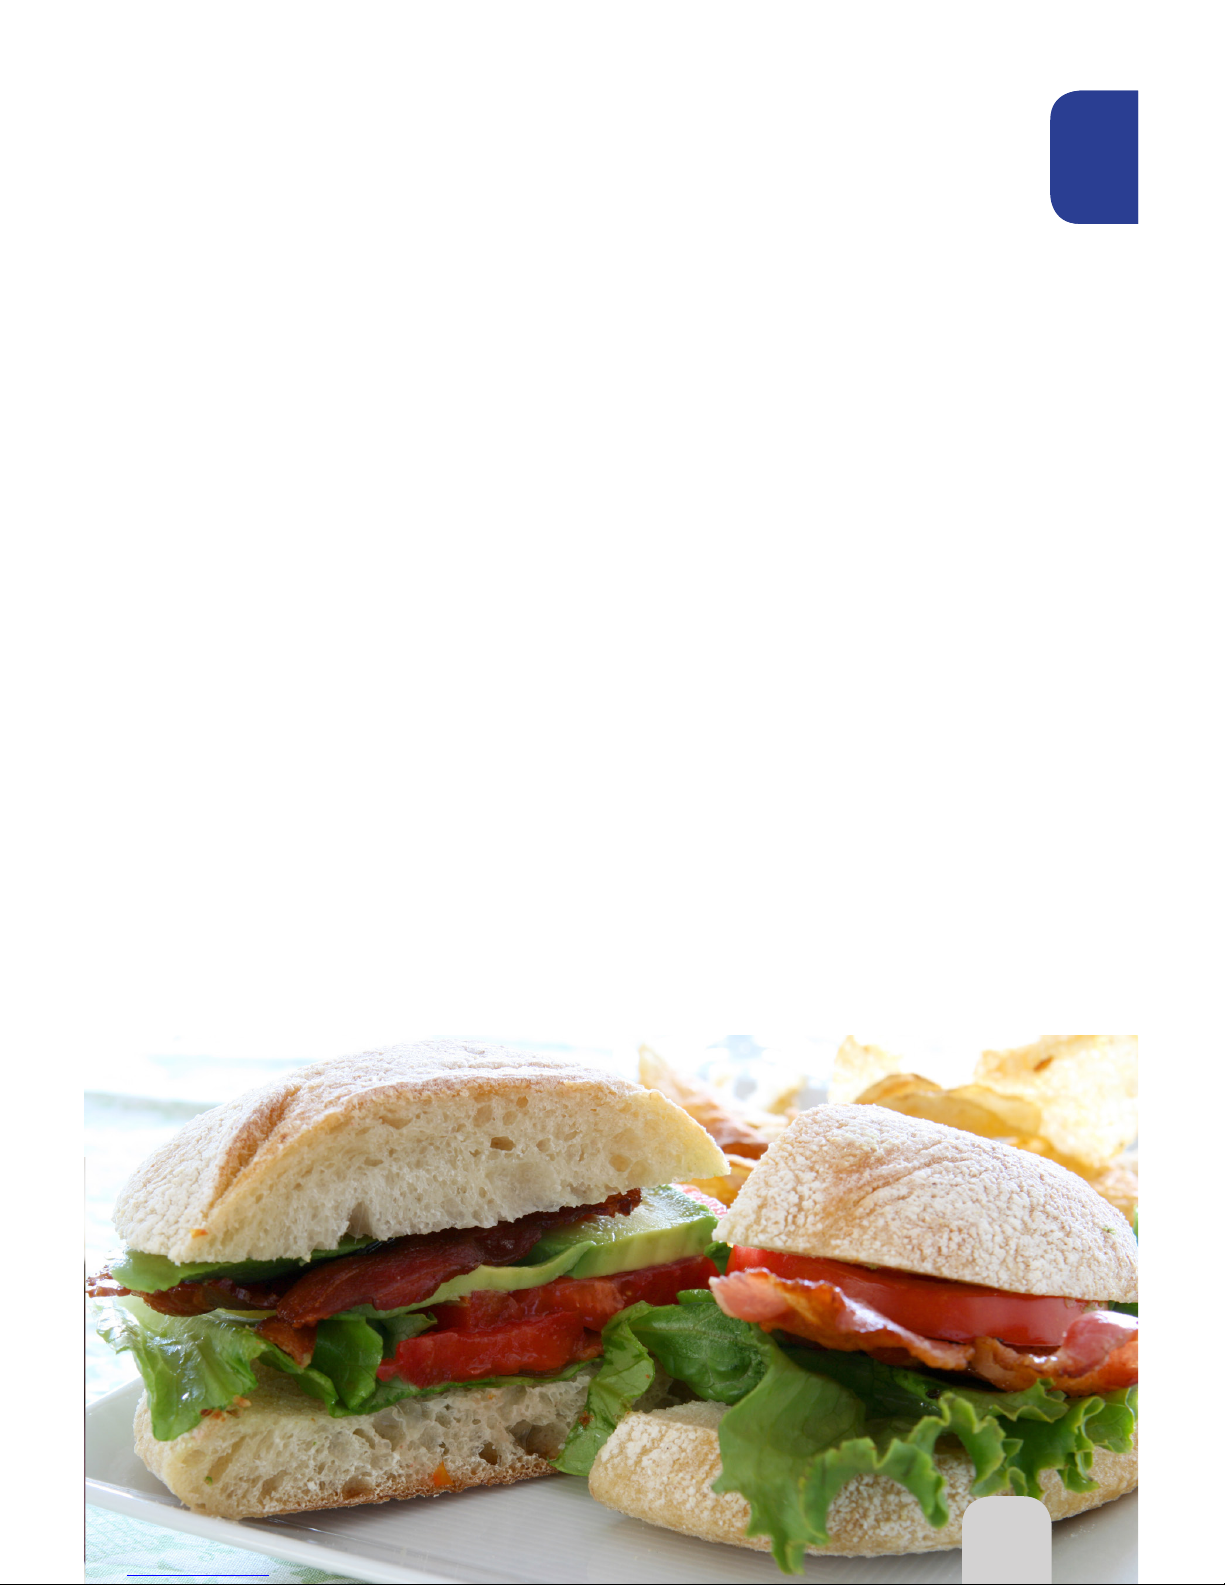
77
Pork
Kielbasa Casserole with
Rice & Vegetables
Avocado BLTs
Serves: 4-6
1 (10½-ounce) can condensed cream
of celery soup, undiluted
¾ cups water
1 tablespoon butter or margarine
1½ cups instant rice
1 pound sausage, sliced into ½-inch
pieces
1 (10-ounce) package frozen peas,
thawed
1 (10-ounce) package frozen corn,
thawed
1 cup Cheddar cheese, shredded
Directions:
1. In 3-quart saucepan, combine soup,
water and butter.
2. Bring to boil on Medium-High
(375°F), mixing until smooth.
3. Stir rice into soup mixture; cover
and let stand for 5 minutes.
4. Stir in sausage, peas and corn.
5. Place mixture in oven-safe dish and
place in liner pan.
6. Cook at 350°F for 20-22 minutes.
7. Top with cheese and cook for
additional 1-2 minutes, or until
cheese melts.
Serves: 4
½ pound bacon slices
1 whole baguette, cut into 4 equal
pieces and split open
4 tablespoons extra-virgin olive oil
1 garlic clove, crushed
1 cup salad greens
4 plum tomatoes, cut lengthwise
2 avocados, halved, pitted
and thinly sliced
Salt & pepper to taste
Directions:
1. Cook bacon on 3-inch rack at 350°F
for 10 minutes.
2. Brush bread crust with olive oil and
rub garlic inside bread.
3. Lay bread, crust side up, onto
3-inch rack at 350˚F and grill for
3-4 minutes.
4. Remove bread and build sandwich
with greens, tomatoes and
avocados.
5. Season with salt and pepper.
77
Pork
Page 78
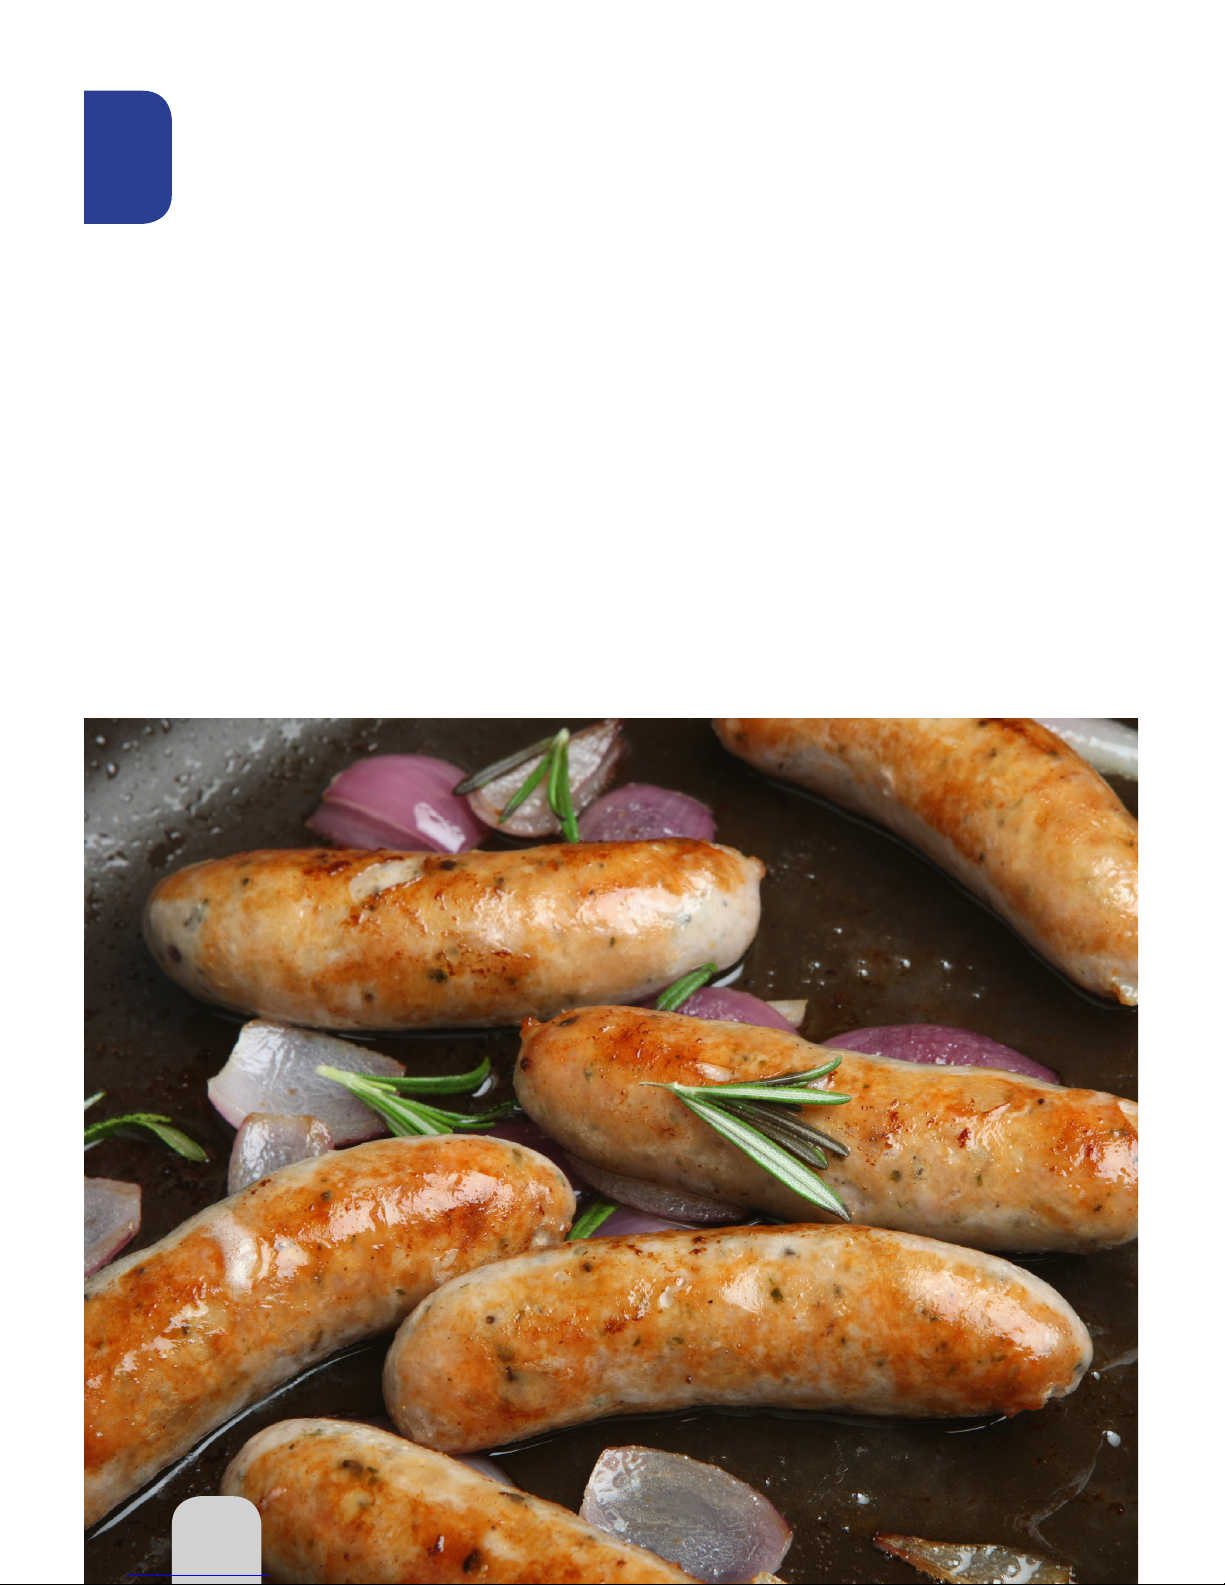
78
Hot DogsItalian Sausage with Peppers
Serves: 4
4 Hot dogs
4 Hot dog buns
Directions:
1. Place hot dogs on 3-inch rack and
cook at 350°F for 6 minutes per
side.
2. Place hot dog in hot dog bun and
add desired condiments.
Tip: If hot dogs are frozen, cook for
10 minutes per side.
Serves: 1
4 ounces Italian sausage
1 red bell pepper, stem and seeds
removed and sliced
3 scallions, cut into 1-inch crosscut
slices
2 cloves garlic, minced
1 tablespoon olive oil
Directions:
1. Place all ingredients in shallow
oven-safe dish and set on 3-inch
rack.
2. Cook at 350°F for 5-8 minutes per
side.
Tip: If sausage is frozen, cook for
8-10 minutes per side.
78
Pork
Page 79
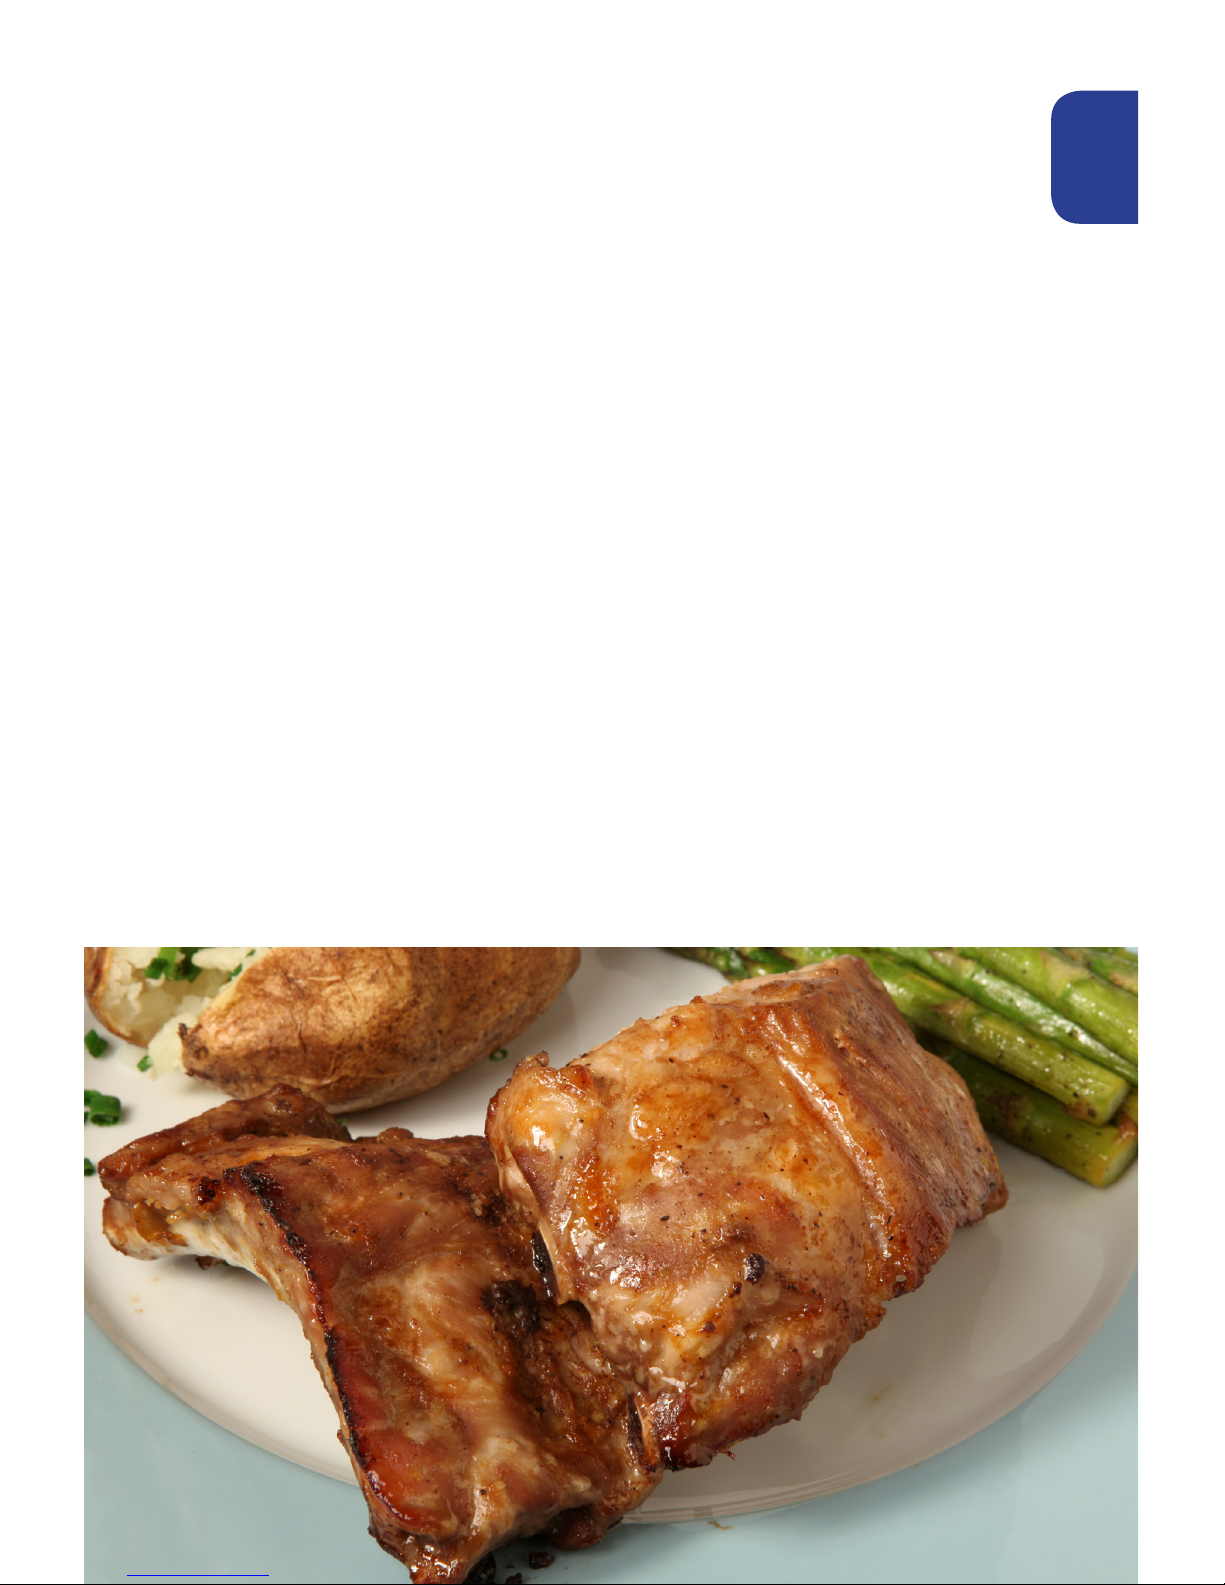
79
Glazed SpareribsChilied Pork Chops
Serves: 4
1 rack pork spareribs
1 cup orange marmalade, melted
2 teaspoons Dijon mustard
1 teaspoon lemon juice
1 tablespoon Worcestershire sauce
Salt & pepper to taste
Directions:
1. Melt marmalade by keeping it at
room temperature for 30 minutes.
2. Add mustard, lemon juice and
Worcestershire sauce to
marmalade.
3. Baste ribs and place on 3-inch rack.
4. Cook at 350°F for 18-22 minutes
per side.
5. Let meat sit inside dome for 5
minutes.
6. Season with salt and pepper.
Tip: For frozen ribs, cook for 22-24
minutes per side.
Serves: 4
4 (1-inch) loin pork chops
6 tablespoons extra virgin olive oil
2 cloves garlic, minced
1 teaspoon oregano
1 teaspoon cumin
1½ teaspoons salt
2 tablespoons chili powder
2 tablespoons green chilies
2 tablespoons fresh cilantro
Directions:
1. Place oil, herbs and seasonings
into bowl and mix.
2. Place pork chops in mixture for 1
hour or overnight.
3. Place chops on 3-inch rack and
cook at 350°F for 10-12 minutes
per side.
4. Let meat rest for 5 minutes before
cutting.
Tip: Cook for 14-16 minutes per side
if frozen.
79
Pork
Page 80
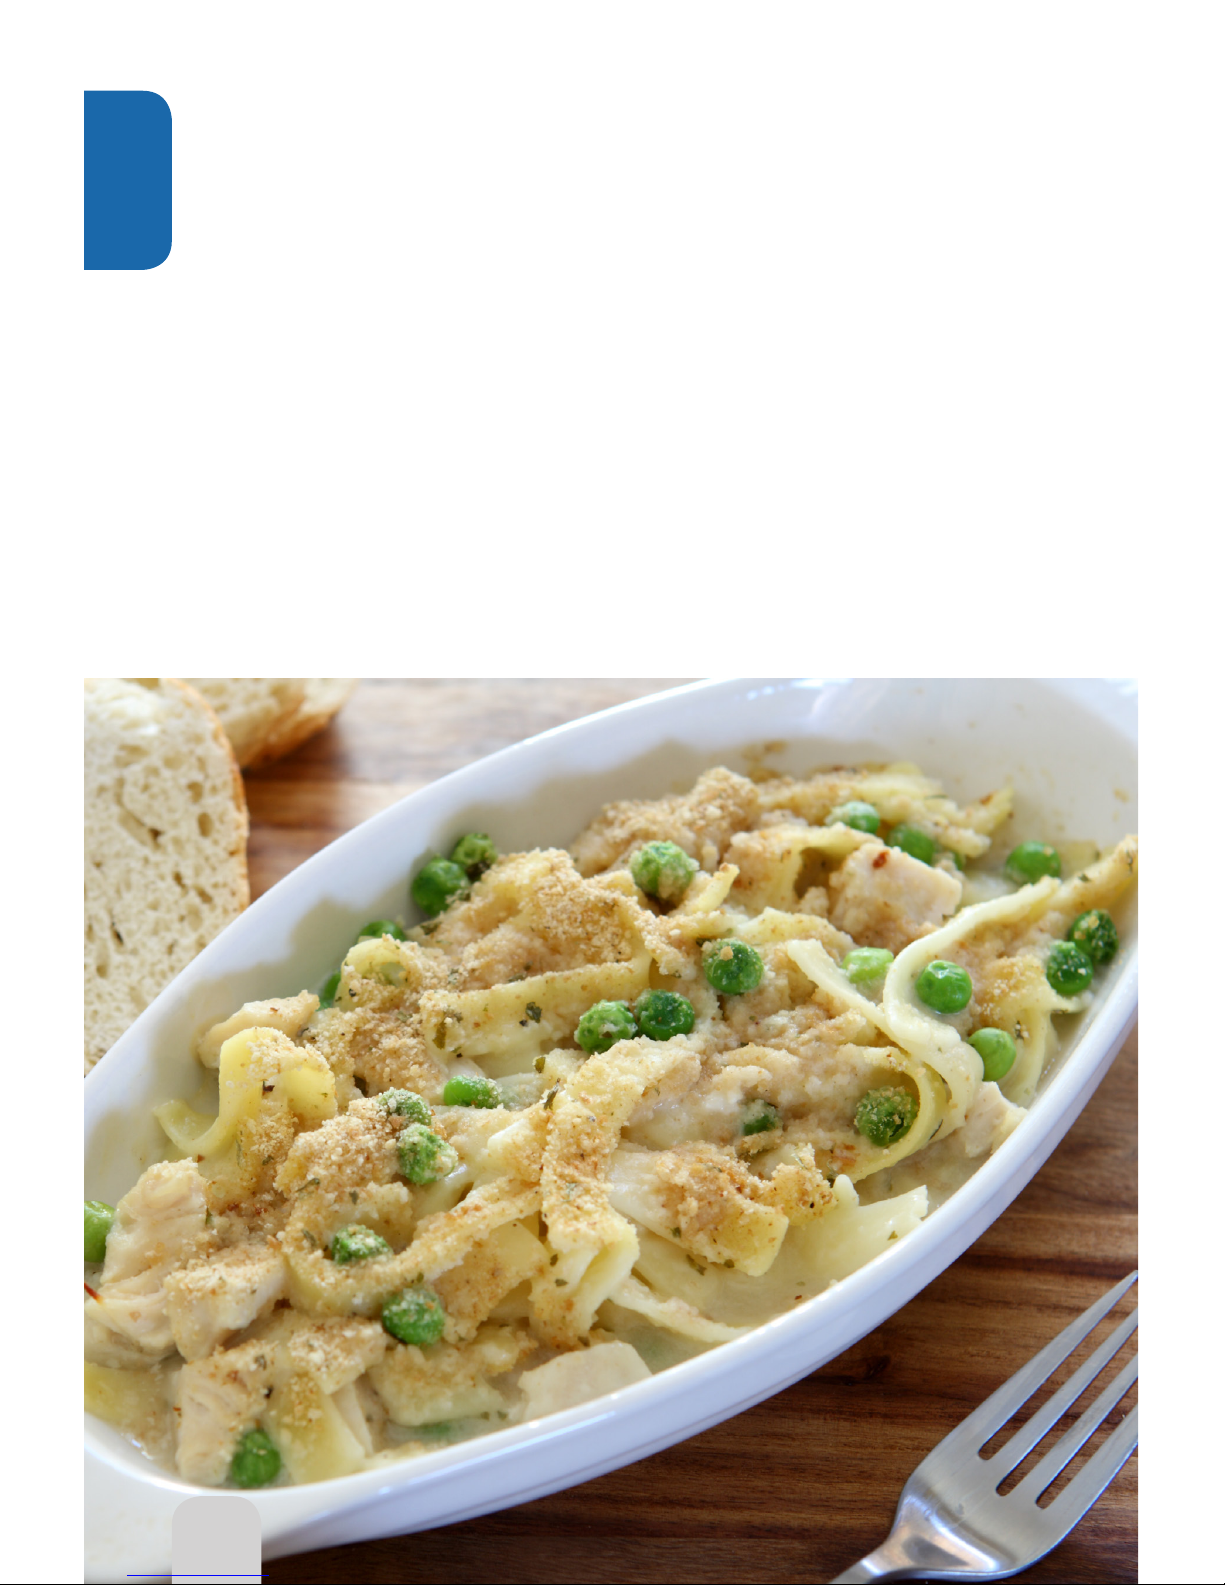
80
Seafood
Tips for Seafood
Place fish fillets presentation side down, flipping halfway through cooking time.
To use your favorite dry seasonings on frozen fish, sprinkle cold water on it beforehand; this
will allow seasonings to adhere.
Brush sauces on fresh fish to infuse flavors.
To steam fish, place aluminum foil or parchment paper over the top. Be sure to secure the foil
to the sides of the rack or extend it outside the oven to prevent the NuWave Pro Plus Infrared
Oven’s internal fan from moving foil around during the cooking process.
Roll lemon on countertop to loosen juices and render the most juice from your lemon.
80
Page 81

81
Shrimp with Lemon
Shellfish Medley
Serves: 2
12 large shrimp, peeled and
deveined
1 tablespoon lemon juice
2 tablespoons olive oil
1 teaspoon lemon pepper
Directions:
1. Place all ingredients in shallow
oven-safe dish.
2. Set dish on 3-inch rack.
3. Cook at 350°F for 6-8 minutes,
stirring halfway through cooking
process.
Serves: 2
4 littleneck clams
4 large shrimp
4 mussels
2 squids, cleaned and cut into
1-inch rings
2 cloves garlic, minced
2 tablespoons olive oil
¼ cup clam juice
1 tablespoon hot sauce
Dash parsley, minced
Directions:
1. Scrub clams and mussels.
2. Mix all ingredients in oven-safe
dish and place on 3-inch rack.
3. Cook at 350°F for 12-14 minutes,
or until clams and mussels open.
Tip: Pause halfway through cooking
process and shake seafood in
baking dish. This will help open
the clams and mussels.
Tip: If clams and mussels have not
opened, do not eat.
Tuna Noodle Casserole
Serve: 4-6
2 (5-ounce) cans tuna, drained
2 cups egg noodles, cooked
1 (10½-ounce) can cream of
mushroom soup
½ cup water
1 cup frozen peas or green beans,
thawed
½ cup sour cream
1 cup Cheddar cheese, shredded
and divided
¼ cup bread crumbs
Directions:
1. Cook noodles according to
directions; drain.
2. In medium bowl, add tuna, soup,
sour cream, peas or green
beans, ¾ cup cheese and
noodles.
3. Place tuna mixture in 10-inch
baking pan.
4. Cook on 1-inch rack at 350°F for
20-22 minutes.
5. Once cooking time is complete,
place remaining ¼ cup cheese
and bread crumbs on top.
6. Cook for another 2 minutes.
7. Let casserole cool for 5-10
minutes.
Tip: Substitute oven-fried onions for
bread crumbs.
Simple Sole
Serves: 1
1 (5-ounce) filet of sole
1 tablespoon lemon juice
2 tablespoons butter
Salt & pepper to taste
Directions:
1. Place all ingredients in oven-safe dish.
2. Place dish on 3-inch rack.
3. Cook at 350°F for 7-9 minutes.
Seafood
Page 82
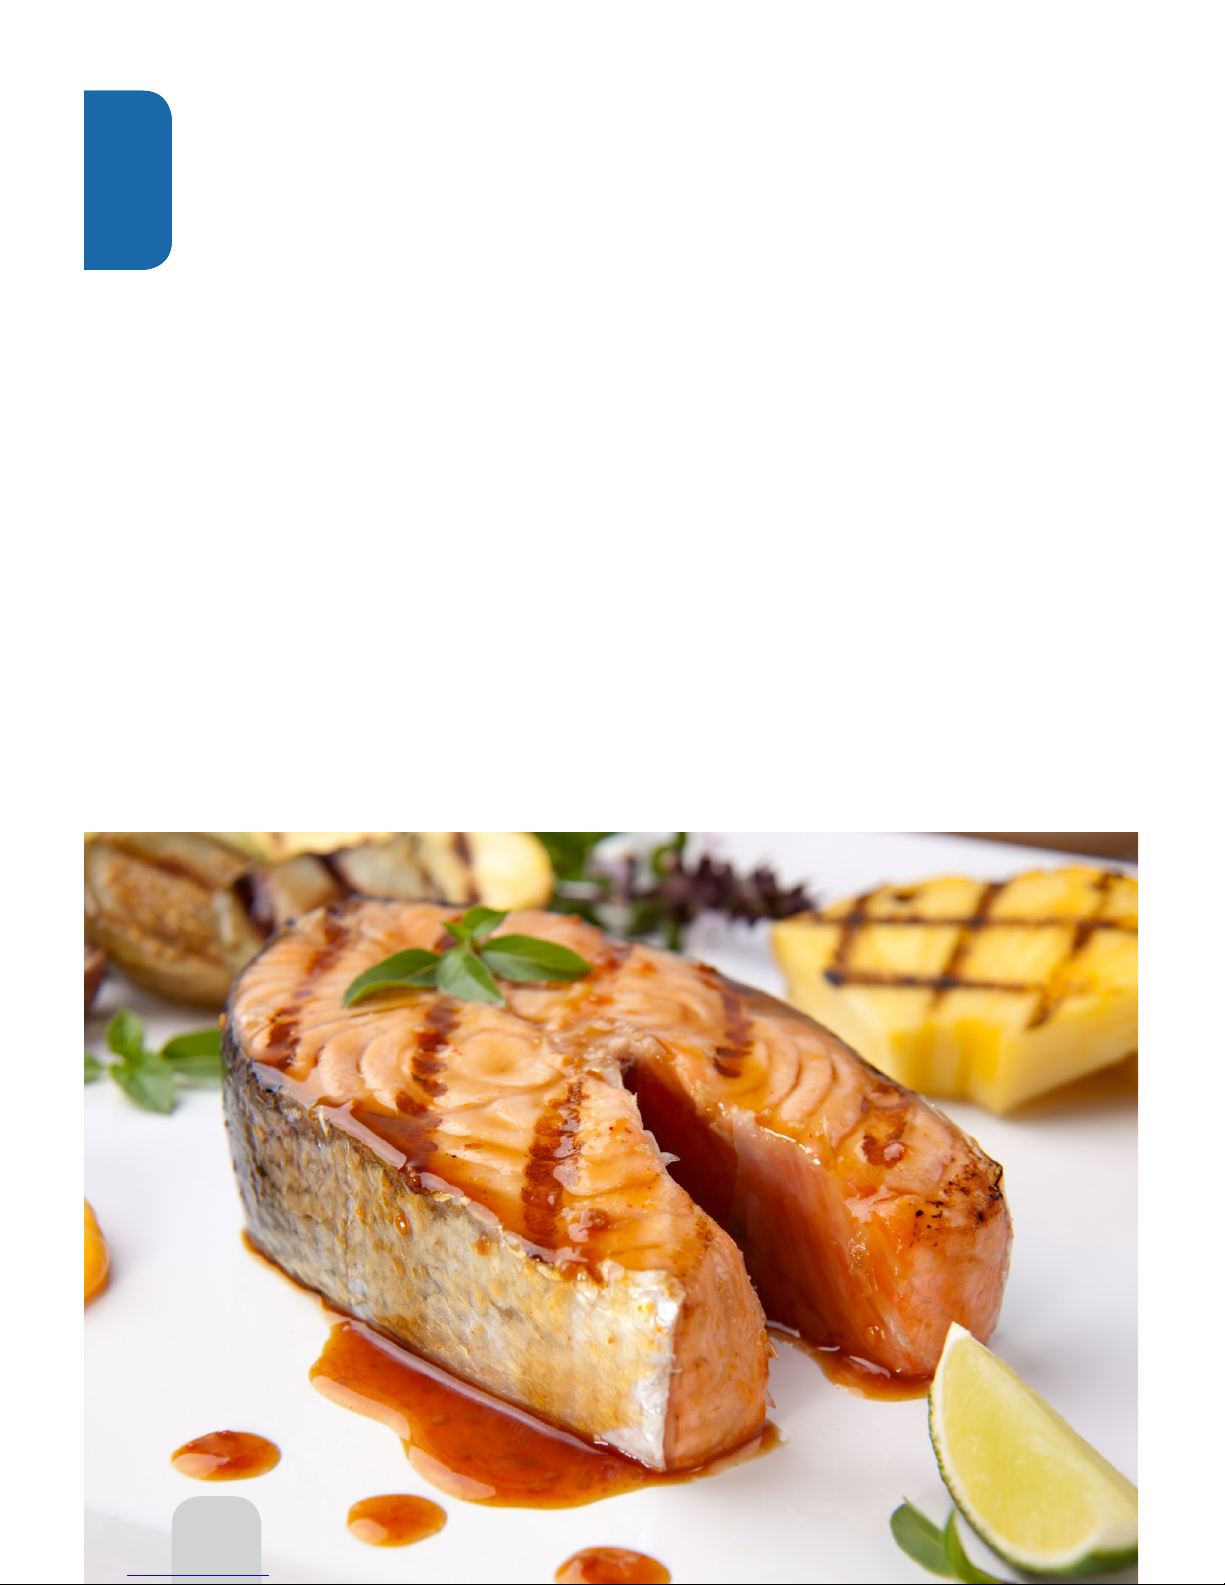
82
Sweet Chili Scallops
Serves: 4
16-18 ounces sea scallops
⅛ cup olive oil
1 tablespoon soy sauce
1 tablespoon sweet chili powder
1 tablespoon ground cumin
Directions:
1. Rinse scallops and drain on
paper towel.
2. Mix together olive oil, soy sauce,
chili powder and cumin.
3. Just prior to cooking, toss
scallops in marinade.
4. Place scallops on 3-inch rack.
5. Cook at 350°F for 3-4 minutes per
side.
Tip: If scallops are frozen, cook at
350°F for 4-5 minutes per side.
Seafood
Clams & Sausage
Serves: 1
1 sausage, crumbled
8 littleneck clams, cleaned
1 clove garlic, minced
Chopped cilantro to taste
Lemon slices as needed
Hot sauce to taste
Directions:
1. Mix clams with sausage, garlic,
cilantro and hot sauce.
2. Place lemon slices in shallow
bowl; set aside.
3. Place clams in liner pan and
cook at 350°F for 10-12 minutes,
or until clams open and sausage
is cooked.
4. Serve with lemon slices.
Tip: If you can’t find littleneck clams,
substitute 1 (8-ounce) can
whole clams.
82
Seafood
Page 83

83
Lobster Thermidor
Serves: 1
1 (4-6 ounce) lobster tail, shell
removed and cut into 1-inch
pieces
2 tablespoons butter
2 tablespoons heavy cream
2 tablespoons shallot, minced
½ teaspoon dry mustard
Chopped parsley
Directions:
1. Mix all ingredients in oven-safe
dish.
2. Place dish on 3-inch rack.
3. Cook at 350°F for 10-11 minutes.
Seafood
Grilled Salmon & Fresh BasilLemon Salmon with
Mango Salsa
Serves: 4
3 tablespoons lemon juice
¼ cup fresh basil leaves, minced
1 tablespoon olive oil
1 tablespoon soy sauce
1 teaspoon Worcestershire sauce
1 garlic clove, minced
¼ teaspoon black pepper
4 (6-ounce) pounds salmon filets
Directions:
1. Combine lemon juice, basil,
olive oil, soy sauce,
Worcestershire sauce, garlic and
pepper in resealable plastic bag;
mix well.
2. Add salmon to marinade and
seal bag.
3. Marinate in refrigerator for 30-60
minutes.
4. Remove salmon from bag;
discard excess marinade.
5. Place salmon on 3-inch rack.
6. Cook at 350°F for 5-6 minutes.
Serves: 4
Salmon Ingredients:
4 (6-ounce) salmon fillets
2 tablespoons lemon juice
1 tablespoon olive oil
1 tablespoon grated lemon zest
2 teaspoon Dijon mustard
½ teaspoon black pepper
Salsa Ingredients:
1 ripe mango, peeled and diced
2 green onions, finely chopped
¼ cup red bell pepper, chopped
2 tablespoons fresh cilantro,
chopped
2 tablespoons lime juice
Directions:
1. In small bowl, whisk together
lemon juice, olive oil, lemon zest,
mustard and pepper.
2. Place fish in baking dish and
pour marinade over fish.
3. Marinate and refrigerate for 20
minutes.
4. While fish is marinating, mix all
salsa ingredients together in
small bowl; refrigerate until ready
to serve.
5. Place salmon on 3-inch rack and
cook at 350°F for 5-6 minutes per
side.
6. Pour mango salsa over salmon
and serve.
Tip: For frozen salmon, cook for 7-9
minutes per side.
Tip: For well-done salmon, add 2
minutes to cooking time.
Seafood
Page 84

84
Seafood
Peppered Tuna with
Hoisin Sauce
Serves: 4
Tuna Ingredients:
4 (5–6-ounce) tuna steaks,
½-inch thick
1 teaspoon peppercorns, crushed
2 tablespoons soy sauce
3 tablespoons sesame oil
1 tablespoon lemon juice
Sauce Ingredients:
2 tablespoons soy sauce
2 tablespoons Hoisin Sauce
1 tablespoon honey or molasses
1 clove garlic, minced
2 tablespoons fresh lime juice
½ teaspoon fresh ginger, grated
½ teaspoon chili paste
2 tablespoons peanut oil or
sesame oil
Directions:
1. Mix all tuna ingredients and
spread over tuna.
2. Place tuna pieces on 3-inch rack.
3. Cook at 350°F for 5-6 minutes per
side.
4. In small bowl, mix all sauce
ingredients.
5. Place sauce in small dipping
bowl and serve with tuna.
Tip: For thicker tuna, cook for 6-7
minutes per side.
Tip: Serve on top of Wonton crisps
with sliced tuna and sauce.
Tuna with Fresh Orange Salsa
Serves: 4
4 (5–6-ounce) tuna steaks,
½-inch thick
½ teaspoon ground cumin
1 tablespoon olive oil
½ teaspoon salt
¼ teaspoon black pepper
Salsa Ingredients:
1 teaspoon orange peel, finely
shredded
4 medium oranges, peeled,
sectioned, and coarsely chopped
1 large tomato, seeded and
chopped
¼ cup fresh cilantro, snipped
2 tablespoons green onion,
chopped
2 tablespoons walnuts,
chopped and toasted
1 tablespoon lime juice
¼ teaspoon salt
¼ teaspoon black pepper
Directions:
1. In small bowl, combine cumin,
salt and pepper.
2. Brush fish with olive oil and
sprinkle with cumin mixture.
3. Place fish on 3-inch rack and
cook at 350°F for 5-6 minutes
per side.
4. While fish cooks, mix all salsa
ingredients in medium bowl.
5. Spoon salsa over fish, and serve.
Tip: For frozen tuna, cook for 7-9
minutes per side.
Tip: Fish should break apart with
a fork easily when tested for
doneness.
Seafood
Page 85
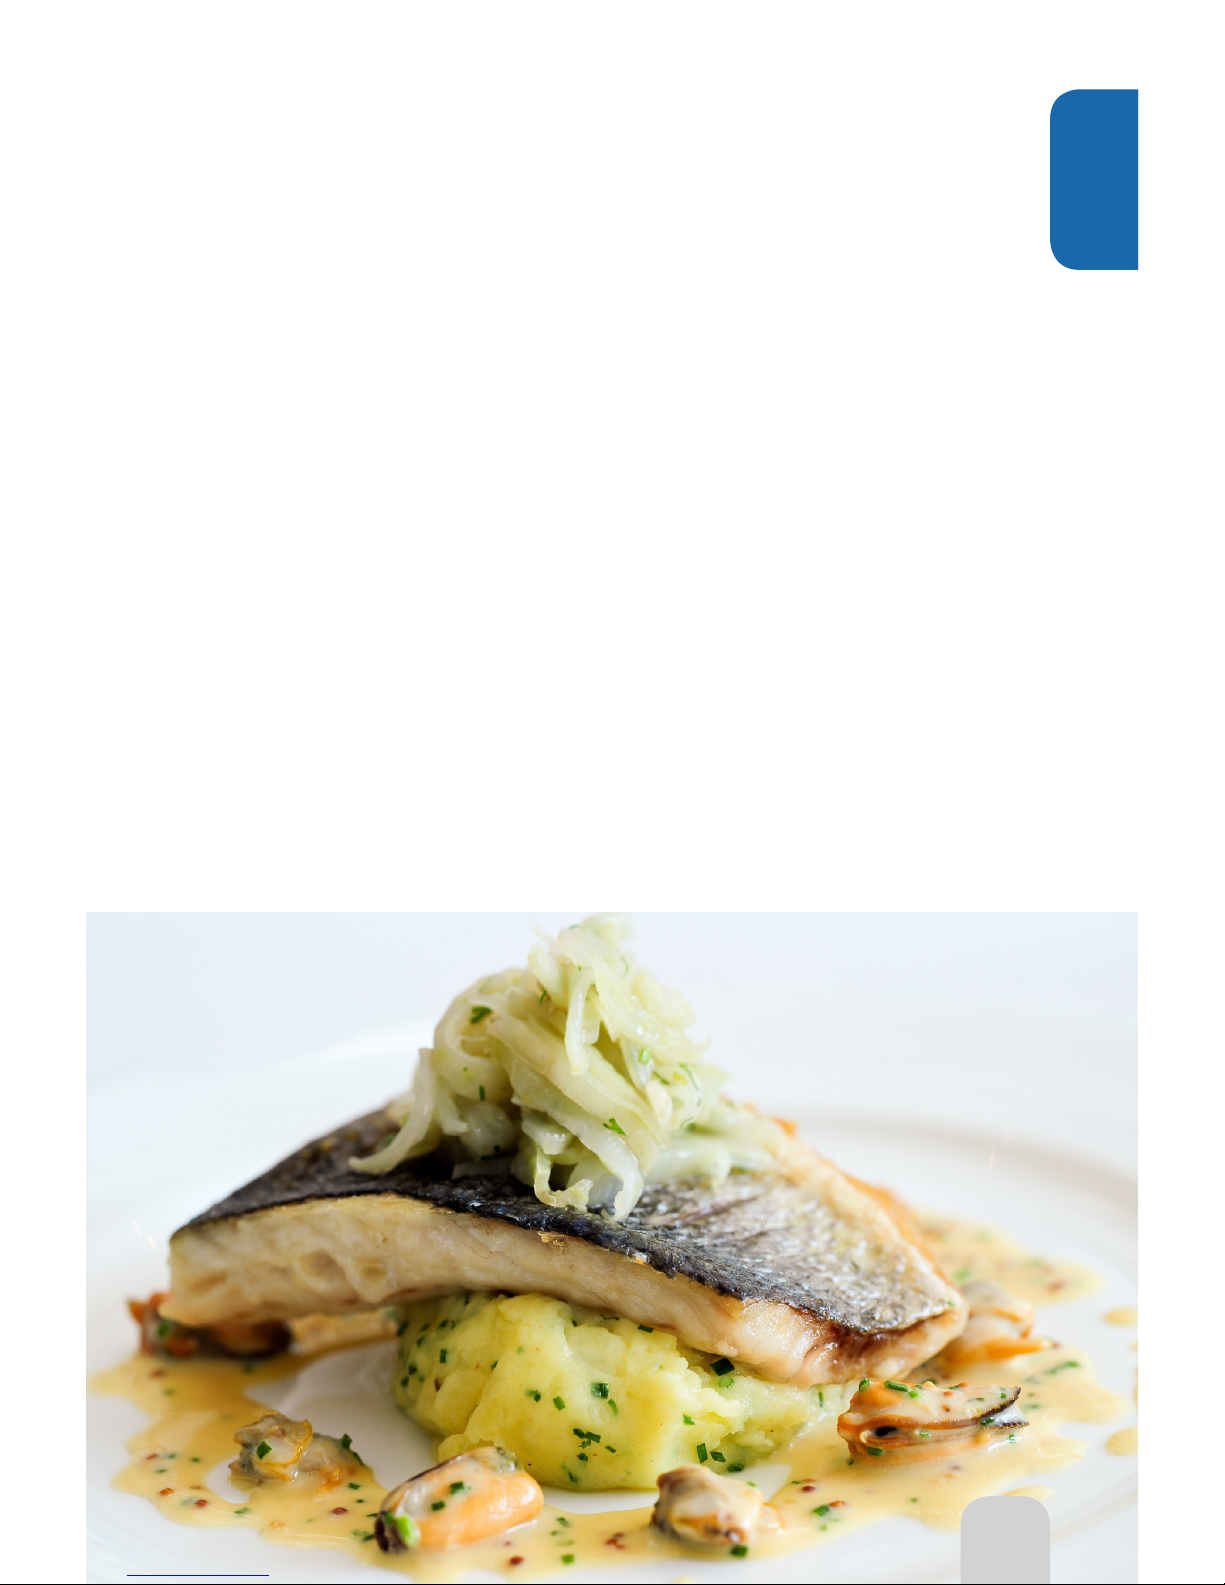
85
Seafood
Bass with FennelArtichoke Topped Tilapia
Serves: 1
6 ounces stripped or black bass,
1-inch thick
1 teaspoon fennel seeds, crushed
1 tablespoon olive oil
1 tablespoon lemon juice
Salt & pepper to taste
Directions:
1. Mix fennel, olive oil, lemon juice,
salt and pepper.
2. Place bass on 3-inch rack and
spread fennel mixture onto fish.
3. Cook at 350°F for 8-10 minutes
per side in an oven-safe dish.
Tip: Bones can be removed with
needle nose pliers.
Tip: Filets can be cooked with or
without the skin. If skin-on,
make two shallow slices in the
skin to reduce shrinkage while
fish is cooking.
Serves: 4
4 (6 – 8-ounce) tilapia filets
2 tablespoons olive oil
1 tablespoon Italian herb seasoning
1 teaspoon soy sauce
1 cup prepared artichoke antipasto
from jar, drained
½ cup grated Parmesan cheese
Directions:
1. Mix together olive oil, Italian
herb seasoning and soy sauce;
set aside.
2. Mix together artichoke and
cheese; set aside.
3. Place filets on silicone pizza liner.
4. Brush each filet on exposed side
with olive oil mixture.
5. Spread artichoke mixture in even
layer over each filet.
6. Place filets on 3-inch rack cook at
350°F for 10-12 minutes.
Tip: If cooking from frozen, cook at
350°F for 13-15 minutes.
85
Seafood
Page 86
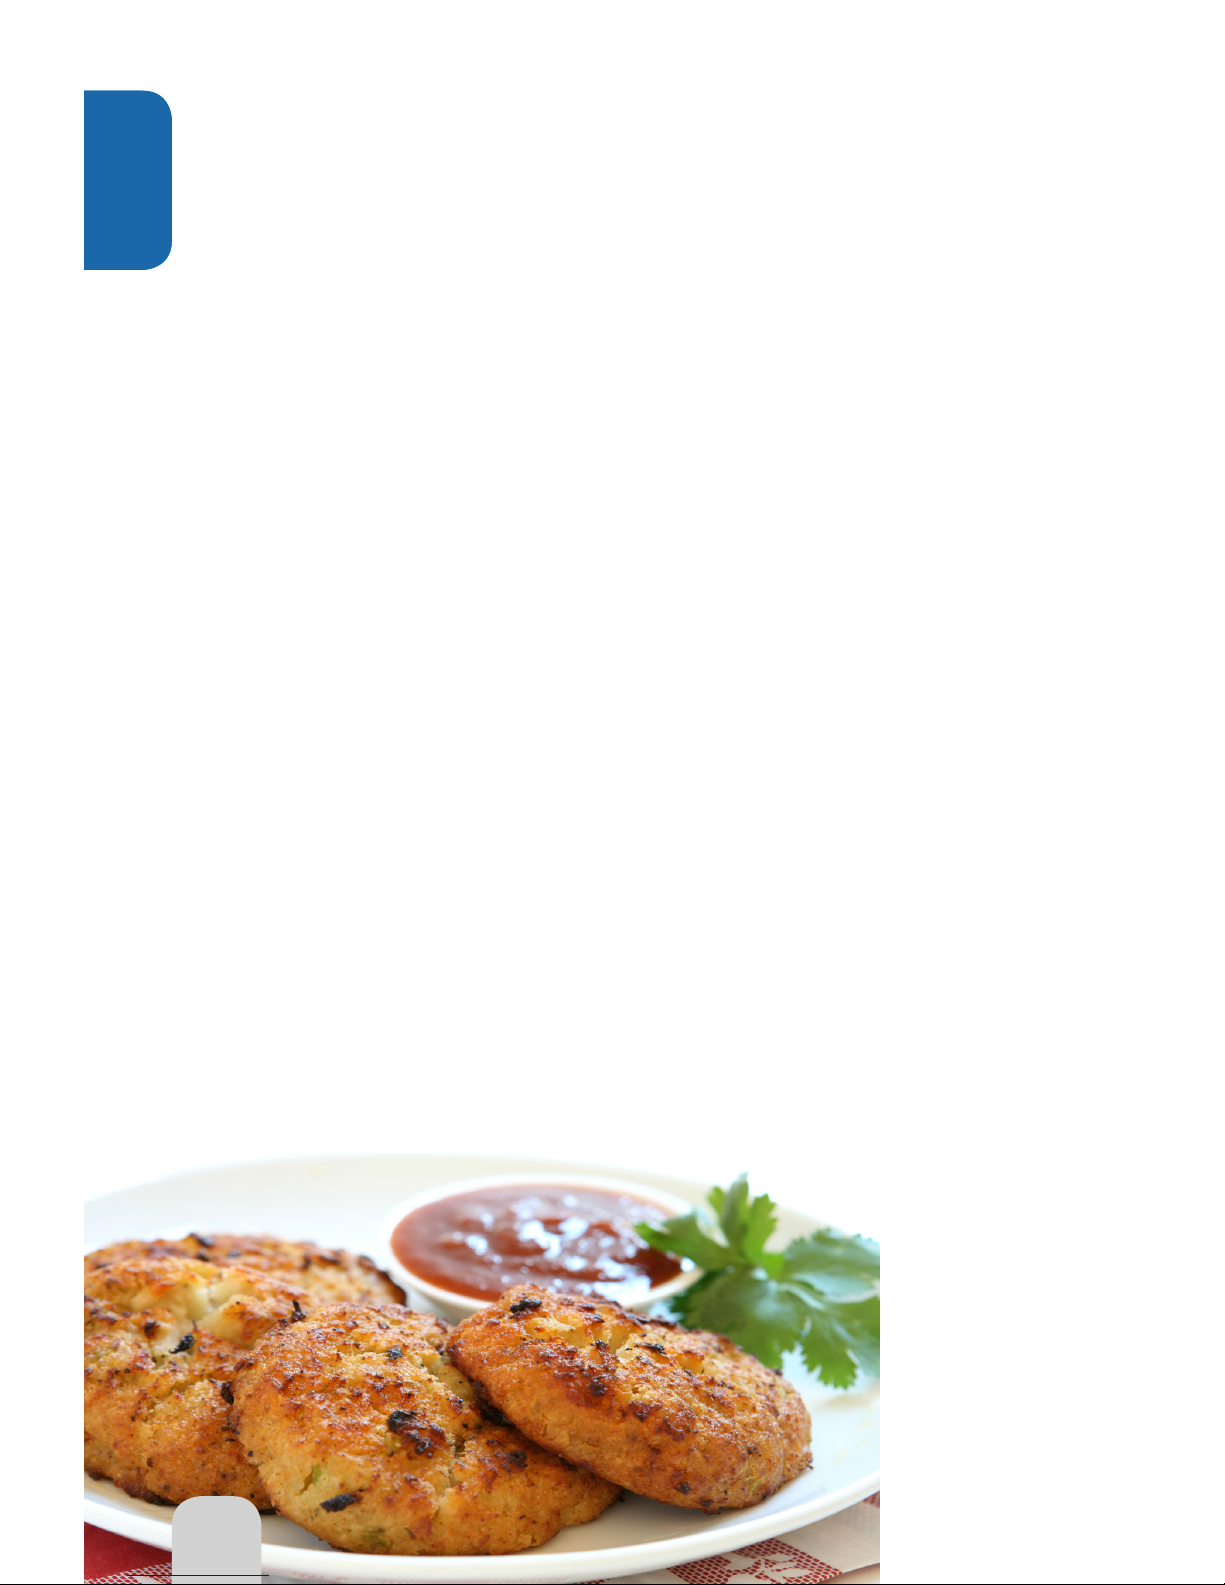
86
Ancho Chili Crusted Salmon Tacos
Serves: 4
4 (6-ounce) salmon filets
1 tablespoon canola oil
1 teaspoon ground ancho chili
powder
1 tablespoon cumin
2 tablespoons brown sugar
1 teaspoon soy sauce
6 ounces cabbage, shredded
½ cup jalapeño ranch dressing
8-12 corn tortillas
Directions:
1. Place salmon on parchment
paper on 3-inch rack.
2. Brush salmon with oil on both
sides.
3. Cook at 350°F for 5-6 minutes.
4. Meanwhile, stir together chili
powder, cumin and brown sugar.
5. After 5 minutes, flip salmon and
drizzle with soy sauce.
6. Sprinkle brown sugar mixture
onto salmon.
7. Cook at 350°F for 5-6 minutes, or
to desired tenderness.
8. While salmon cooks, toss
together cabbage and dressing.
9. Wrap tortillas in foil and warm
in liner pan for last 5 minutes of
cooking process.
10. Serve salmon with warm tortillas
and cabbage salad.
Cheesy Crab Melts
Serves: 6
7 ounces jumbo lump crab meat
½ cup Cheddar or Asiago
cheese, shredded
¼ cup celery, finely chopped
¼ cup red bell pepper, finely
chopped
¼ cup green onion, finely chopped
¼ cup mayonnaise
1 teaspoon Russian-style mustard
or Dijon mustard
½ teaspoon salt
¼ teaspoon black pepper
3 English muffins, cut in half
Directions:
1. Pick through crab to ensure there
are no shells.
2. Squeeze out any extra liquid from
crab meat.
3. Combine all ingredients except
English muffins; gently fold
mixture together.
4. Pre-toast English muffins on
3-inch rack.
5. Spread crab mixture evenly over
muffins.
6. Bake at 350°F for 6-8 minutes per
side, or until cheese is bubbly.
Tip: Substitute crab meat with
7 ounces tuna.
86
Seafood
Seafood
Page 87
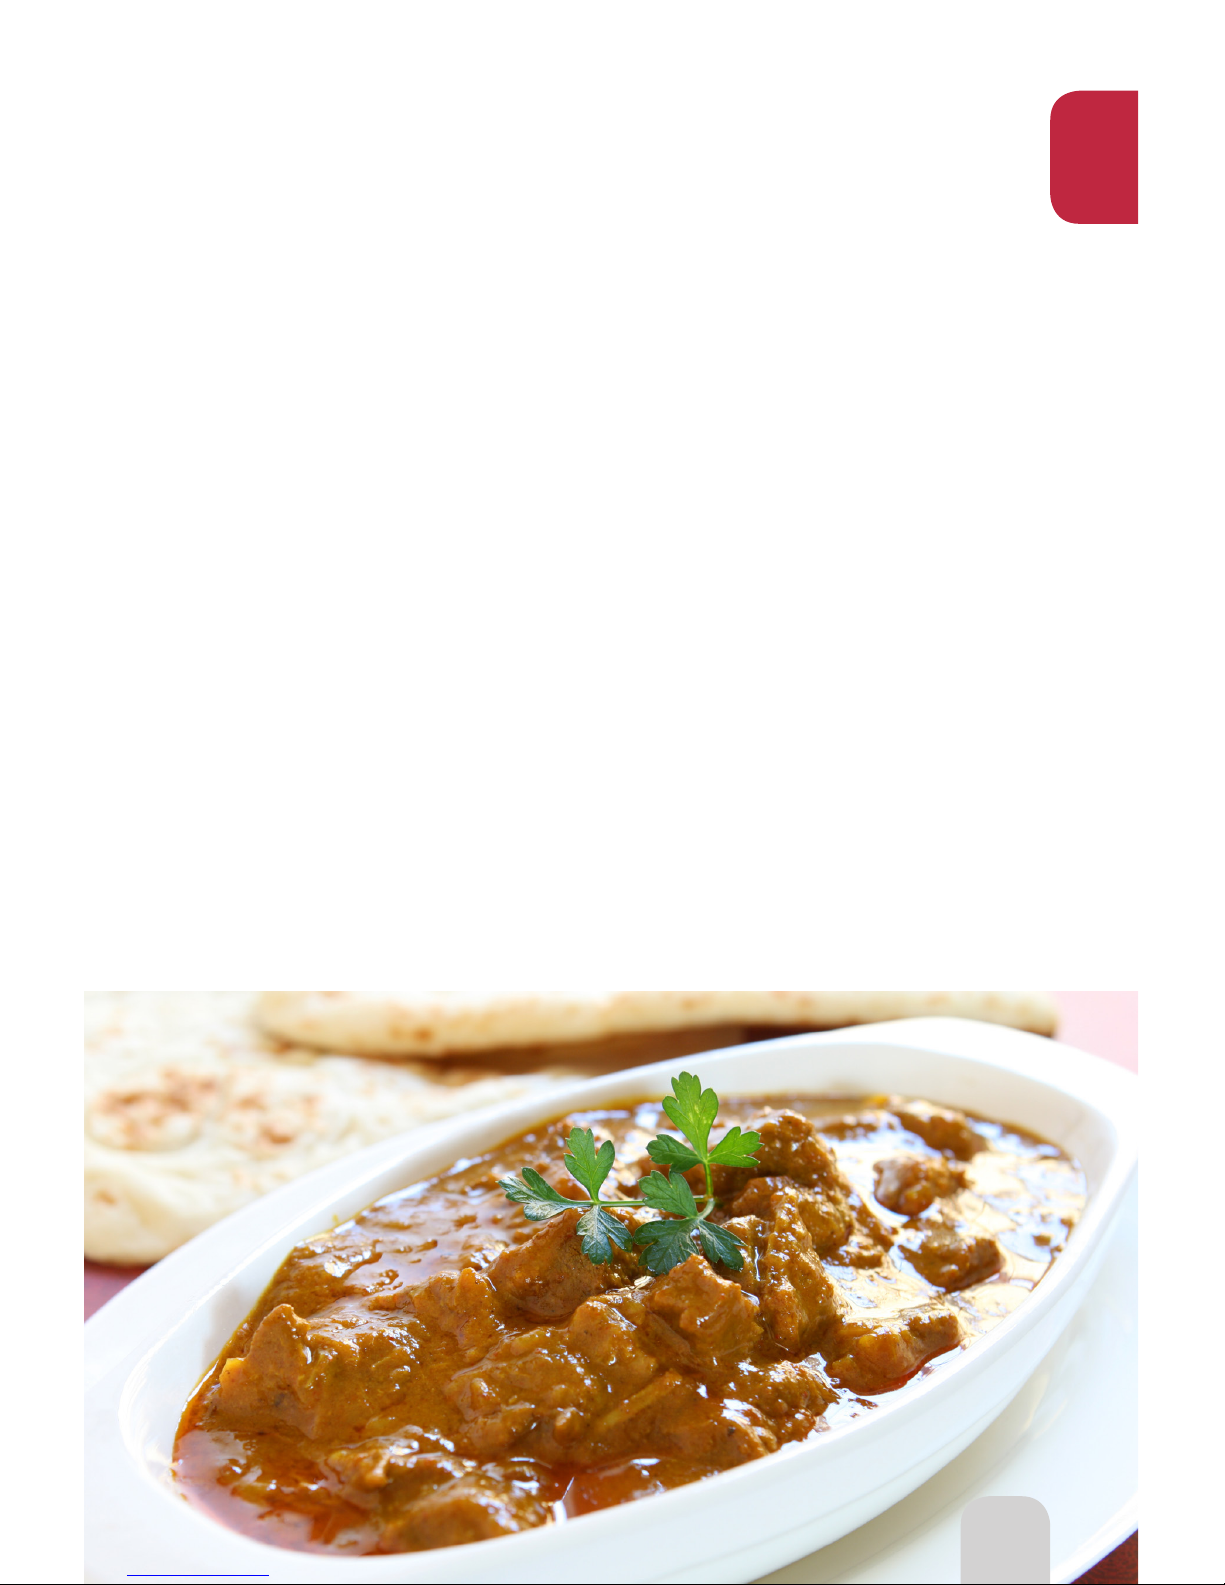
87
Tips for Lamb
To use your favorite dry seasonings on frozen meat, sprinkle cold water on it or lightly
brush oil on beforehand; this will allow seasonings to adhere. Brush sauces on fresh
meats to infuse flavors. To save time, marinate in a sealed bag or container and freeze
into separate servings. When ready to use, refer to the cooking guide.
Soak lamb in 1 cup milk, to tone down gaminess.
Use a meat thermometer to ensure lamb is properly cooked.
Roasting Recommendations
(Temperatures listed below are based on internal temperatures)
Lamb Cuts 135º-145ºF (63ºC)
Lamb Roasts 145º-150ºF (66ºC)
(Boneless)
Rare 120º-140ºF (60ºC)
Medium-Rare 140º-150ºF (66ºC)
Medium-Well 150º-160ºF (71ºC)
* Using a meat thermometer is essential for checking the internal temperature of the meat.
Lamb
87
Page 88
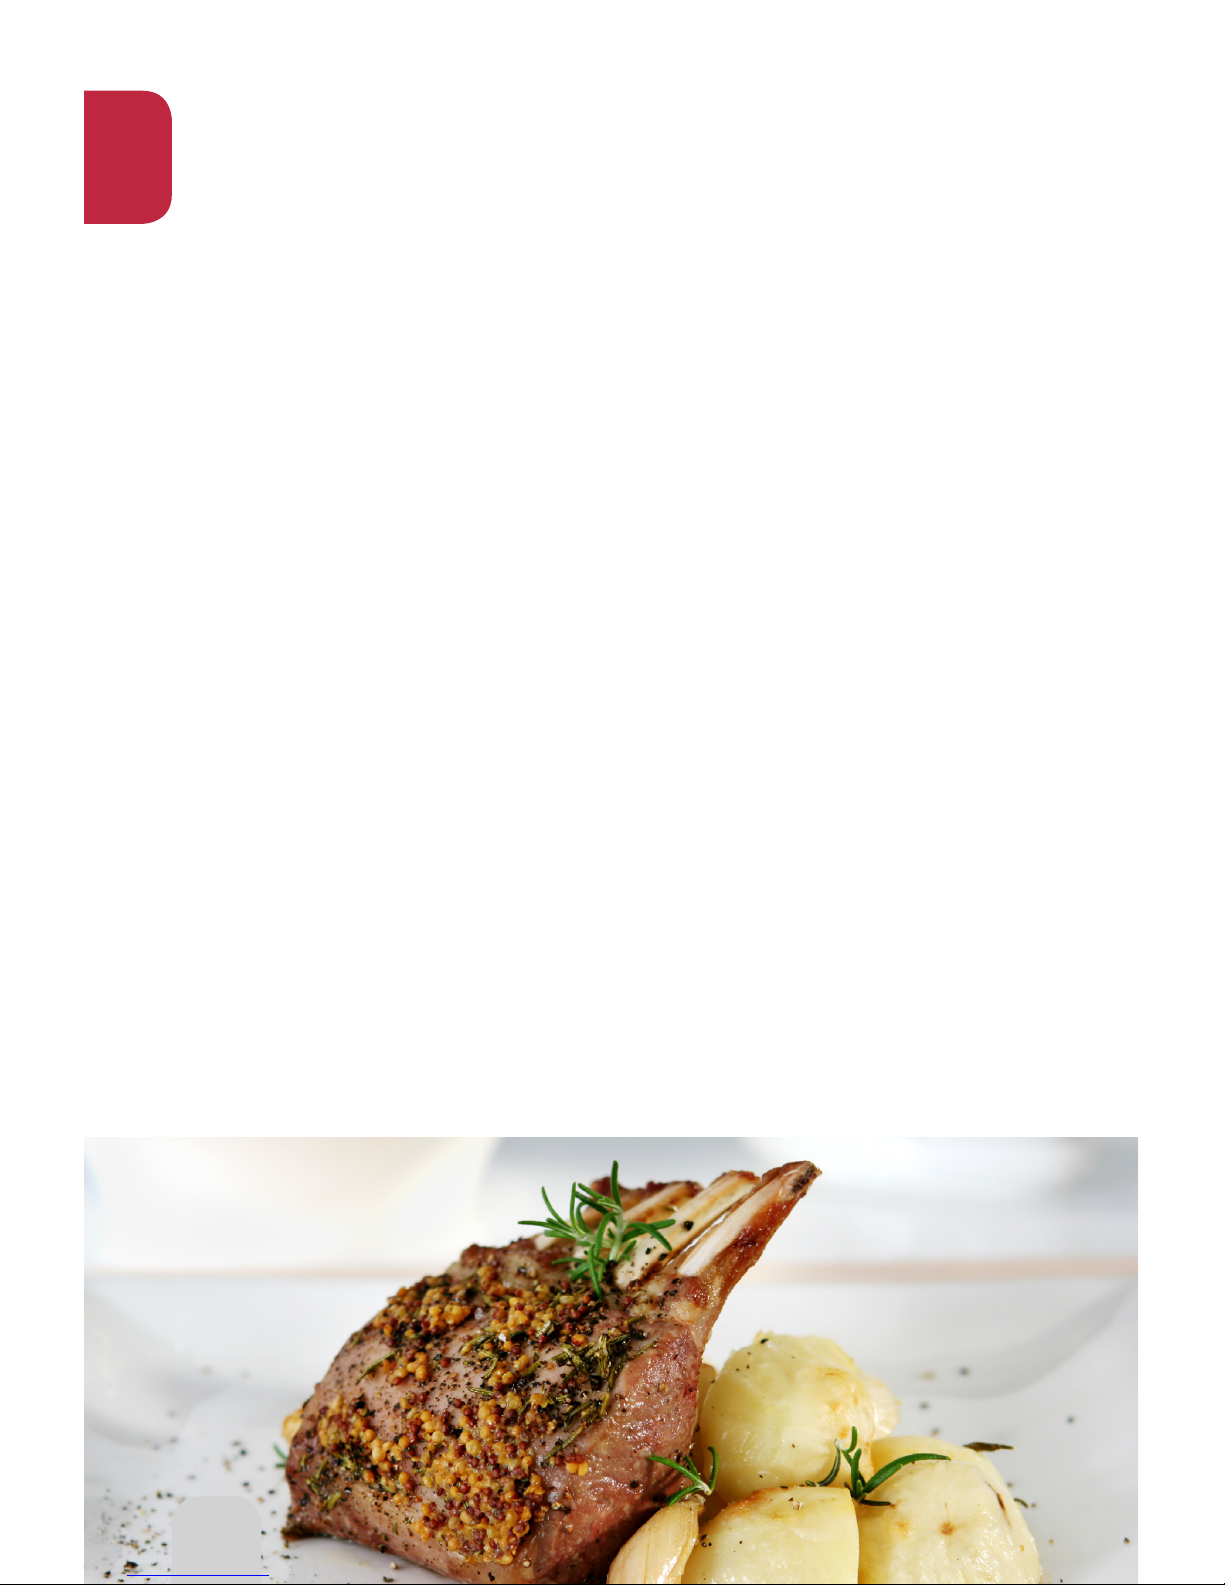
88
Herb Stuffed Lamb Chops
Yield: 6 lamb chops
6 (2-inch) lamb chops
1 stick soft, unsalted butter
3 cloves garlic, minced
1 tablespoon fresh parsley, chopped
1 tablespoon fresh tarragon,
chopped
1 large shallot, chopped
¼ teaspoon ground black pepper
1 teaspoon salt
Directions:
1. Mix garlic, herbs, shallots, salt
and pepper with butter.
2. Place butter mixture inside
lamb pockets.
3. Secure with toothpicks.
4. Place lamb chops on 3-inch rack.
5. Cook at 350°F for 8-10 minutes
per side for medium-rare
doneness.
Tip: You can use 1½ teaspoons dry
tarragon instead of fresh.
Tip: Have your butcher cut a 2-inch
pocket into side of lamb. You
can also cut pocket yourself.
Lay meat down and cut a
¾-inch pocket through the side.
Lamb Chops with
Feta & Tomatoes
Serves: 4
2 tablespoons olive oil
1 clove garlic
1 tablespoon lemon juice
4 (1-inch) lamb chops
4 ounces feta cheese, crumbled
¼ cup chopped ripe tomatoes
4-6 kalamata olives, pitted
1 tablespoon parsley, chopped
Salt & pepper to taste
Directions:
1. In shallow dish, mix olive oil,
garlic and lemon juice.
2. Add lamb chops, turning to coat
all sides.
3. Place in refrigerator for 15
minutes.
4. In small bowl, mix feta, tomatoes,
olives and parsley; set aside.
5. Place lamb chops directly on
3-inch rack and sprinkle with salt
and pepper.
6. Cook at 350°F for 8-10 minutes,
flipping halfway through cooking
process.
7. When chops are done, spoon
feta mixture in equal portions
onto each chop.
8. Cook at 350°F for 1-3 minutes, or
until cheese melts.
88
Lamb
Page 89

89
Curried Lamb
Serves: 1
6 ounces leg of lamb, cut into
1-inch cubes
½ green pepper, thickly sliced
2 cloves garlic, minced
2 tablespoons fresh ginger, grated
2 tablespoons curry paste
1 tablespoon lemon juice
4 tablespoons sour cream
Directions:
1. Mix lamb, pepper, garlic, ginger
and curry paste in oven-safe dish.
2. Place dish on 1-inch rack and cook
at 350°F for 10-12 minutes.
3. Stir and cook for another 8 minutes.
4. Stir in juice and sour cream and
serve.
Lamb KabobLamb with Pesto
Serves: 4
2 pounds leg of lamb, trimmed
and cut into 2-inch cubes
1 large green bell pepper, cored
and cut into 8 equal pieces
1 red onion, quartered
8 large white mushrooms
4 Roma tomatoes, cut in half
and seeded
Barbeque sauce
Directions:
1. Divide ingredients into four
servings and slide onto metal or
bamboo skewers, alternating meat
and vegetables.
2. Place kabobs on 3-inch rack and
brush with sauce or seasoning.
3. Cook at 350°F for 10-12 minutes.
4. Flip kabobs and brush other side
with sauce or seasoning.
5. Cook for additional 7-8 minutes.
Serves: 1
1 (6-ounce) sirloin chop
½ cup packed fresh basil leaves
1 tablespoon toasted pine nuts
2 cloves garlic
½ cup olive oil
Salt to taste
Directions:
1. Place basil, nuts and garlic
in blender.
2. Slowly pour in oil until it forms
into thick paste.
3. Add salt and blend until sauce
reaches desired thickness.
4. Place steak on 3-inch rack and
cover with half pesto sauce.
5. Cook at 350°F for 4 minutes.
6. Flip steak and add remaining
sauce.
7. Cook for additional 4 minutes.
Tip: Add more oil if sauce is
too thick.
Lamb & Ham
Serves: 1
6 ounces leg of lamb, cut into
1-inch cubes
2 ounces smoked ham, diced
½ green pepper, cored and chopped
1 clove garlic, minced
2 tablespoons olive oil
Salt & pepper to taste
Directions:
1. Mix everything in oven-safe dish
and place on 3-inch rack.
2. Cook at 350°F for 8-10 minutes.
3. Stir and cook for additional 8-10
minutes.
Lamb
Page 90

90
Tips for Dessert
Many recipes in this section call for the use of the Silicone Baking Ring, 8x8-inch Silicone
Baking Pan, and Silicone Cupcake Liners, all of which can be found in the NuWave Baking Kit.
If you’d like to purchase the NuWave Baking Kit and take your baking to the next level, visit www.
NuWaveNow.com.
When converting your own recipe to NuWave Pro Plus Oven methods, it is recommended to use
the Extender Ring, 1-inch rack and bake at 300˚F the first time. You can always adjust from there.
The use of glass and ceramic pans will increase the required cooking time. Recipes in this book
have been tested in silicone and metal pans.
For multi-layer baking, use the Silicone Baking Ring. Recipe temperatures will typically need to
be set at 250˚F rather than 300˚F. Remember to adjust accordingly when using your own recipes.
Because the NuWave retains the moisture in baked goods, your recipe will stay fresh longer than
recipes made in conventional ovens when stored properly.
For converting recipes requiring a 9x13-inch pan, you can usually substitute two pans using our
8x8-inch square silicone baking pan, with divider in place, slicing into finger size bars.
For cakes, cookies, muffins and more, adding the Extender Ring will control even browning.
Depending on recipe directions, place cookies around perimeter of the liner pan (avoid placing
cookies directly under Power Head).
For bottom crust pies, bake crust alone at 350˚F for 15-20 minutes. Add pie filling and cook
remaining time as directed.
If a recipe calls for a glaze, spread it on during the last 5 minutes to prevent overcooking.
Always check for doneness with a toothpick or fork. If additional time is needed only use 3-5
minutes increments.
The Silicone Baking Ring can be used for any foods you want to prevent from sticking to the rack.
Recipes that call for baking in our NuWave Silicone 8x8-inch Pan will require more time if you
are using a smaller pan. Check for doneness with toothpick and 3-5 minutes at a time until
desired doneness is reached.
Desserts
Page 91

91
Pumpkin Whoopie Cookies
Yields: 24 cookies
1 cup vegetable oil
2 cups packed light brown sugar
2 large eggs
1 cup pumpkin puree, canned
or fresh
1 tablespoon pumpkin pie spice
1 teaspoon pure vanilla extract
1 teaspoon baking powder
1 teaspoon baking soda
1 teaspoon salt
3 cups all-purpose flour
Directions:
1. Spray liner pan with non-stick
cooking spray.
2. In large bowl, mix together
vegetable oil and brown sugar
until smooth.
3. Add in eggs until blended. Add in
pumpkin puree, pumpkin pie
spice, vanilla, baking powder,
baking soda and salt. Whip until
light and fluffy.
4. Gently fold in flour with rubber
spatula. Be careful not to
over mix.
5. Using small cookie scoop, drop
pieces on liner pan about 2
inches apart.
6. Place Extender Ring on
base.
7. Bake at 350˚F for 12-14
minutes, or until cookies spring
back when lightly touched.
8. Cool completely before filling.
Cream Cheese Filling Ingredients:
1 (8-ounce package) cream
cheese, softened
1 cup butter, softened
4½ cups powdered sugar
2 teaspoons pure vanilla extract
Cream Cheese Filling Directions:
1. In large bowl of electric mixer,
cream butter and cream cheese
on medium speed, scraping
sides of bowl.
2. Mix on low speed and add
powdered sugar and vanilla, then
beat until light and fluffy.
3. Spread flat side of the cookies
with cookies filling. Top with
another pumpkin cookie,
pressing down very lightly
to seal.
Tip: If you don’t have pumpkin
pie spice on hand, mix:
1½ teaspoon cinnamon
1 teaspoon nutmeg
1 teaspoon ginger
½ teaspoon allspice
Store in single layers and
keep refrigerated.
91
Desserts
Page 92

92
Latin Lace
Florentine Cookies
Yield: 48 Cookies
¾ cup quick-cooking oats
¾ cup all-purpose flour
¾ cup granulated sugar
1 teaspoon ground cinnamon
¾ teaspoon chili powder
½ teaspoon baking soda
½ teaspoon salt
1½ cups sliced almonds
10 tablespoons (1 ¼ sticks)
unsalted butter, melted
¼ cup half-and-half cream or
whole milk
¼ cup light corn syrup
1 teaspoon pure vanilla extract
4 ounces fine-quality bittersweet
chocolate, chopped (look
for bittersweet chocolate with a
minimum of 60% cocoa solids)
Directions:
1. In large bowl, whisk together
oats, flour, sugar, cinnamon,
chili powder, baking soda and
salt.
2. Stir in almonds; set aside.
3. In separate bowl, combine
butter, half-and-half (or milk),
corn syrup and vanilla extract.
4. Add wet ingredients to dry
ingredients a little at a time until
combined.
5. Place heaping teaspoons of
batter onto liner pan 3 inches
apart.
6. Bake at 300˚F for 14 minutes or
until crisp around the edges.
7. Transfer cookies to cooling rack.
8. Place wax paper below rack to
catch chocolate drizzle.
9. While cookies are cooling, melt
chocolate in metal bowl set
over pan of simmering water.
10. Drizzle chocolate in zigzag
pattern over tops of cooled
cookies.
Pound Cake
Yield: 1 Cake
3 cups all-purpose flour
½ teaspoon baking powder
½ teaspoon salt
1 cup (2 sticks) unsalted butter,
softened
3 cups sugar
2 teaspoons pure vanilla extract
6 large eggs
1 cup heavy cream
Directions:
1. Sift together flour, baking powder
and salt; set aside.
2. Cream butter and sugar together
until fluffy on medium-high speed.
3. Mix in vanilla extract and add
eggs one at a time, beating well
after each addition.
4. Gradually add flour mixture
to butter mixture alternating with
heavy cream.
5. Pour batter into silicone bundt
pan.
6. Place Extender Ring on base.
7. Place bundt pan on 1-inch rack.
8. Bake at 300˚F for 30 minutes.
9. Reduce temperature to 275˚F
and bake for 45 minutes without
opening the NuWave.
10. Check for doneness with a
knife. If more time is needed, do
not add more than 5 minutes at
a time.
11. Remove from NuWave; let cool
in pan for 15 minutes.
12. Invert cake onto cake plate.
Tip: Replace vanilla extract with
almond or lemon extract to
change it up.
Desserts
Page 93

93
Country Road Bar Cookies
Easy Lemon Cookies
Serves: 12
2 cups graham cracker crumbs
⅓ cup melted butter
¼ cup granulated sugar
½ cup chopped macadamia nuts
½ cup white chocolate chips
½ cup sweetened flaked coconut
1 (14-oz.) can sweetened
condensed milk
Directions:
1. Combine first 3 ingredients in
medium bowl.
2. Press mixture onto bottom of
8x8-inch silicone baking pan.
3. Place 3-inch Extender Ring on
base tray. Place pan on 1-inch
rack.
4. Bake at 300˚F for 15 minutes.
5. Remove from oven.
6. Sprinkle macadamia nuts, white
chocolate morsels and coconut
over hot crust.
7. Pour condensed milk evenly
over top.
8. Bake additional 20-25 minutes,
or until lightly browned and
edges are bubbly.
9. Let cool for 1 hour on wire rack.
Slice each loaf into finger size
bars.
Tip: Place silicone divider in
8x8-inch pan and slice into
finger size bars. If macadamia
nuts are not available, try butter
toffee peanuts.
Yield: 36 Cookies
1 package (18¼ ounces) lemon
cake mix
1 egg
½ cup butter (softened)
1 tablespoon lemon juice
Grated zest from 1 lemon
Powdered sugar for decoration
Directions:
1. Pour cake mix into large bowl.
2. Mix in egg, butter, lemon juice
and lemon zest until well
blended.
3. Refrigerate dough for at least 15
minutes, or overnight if desired.
4. Roll heaping teaspoons of dough
into balls and roll in powdered
sugar.
5. Place cookie dough around
perimeter of liner pan, with
pieces about 1 inch apart.
6. Bake at 300˚F for 10 minutes.
7. Once cookies have cooled
completely, dust with powdered
sugar one more time.
For multi-level baking:
1. Place Extender Ring on NuWave
Oven base.
2. Place cookies in liner pan as
directed above.
3. Place 1-inch rack over cookies in
liner pan.
4. Place Silicone Baking Ring on
cooking rack.
5. Arrange cookies on Silicone
Baking Ring.
6. Bake at 300˚F for 15 minutes.
Tip: Do not place cookies directly
under heating element.
Desserts
Page 94
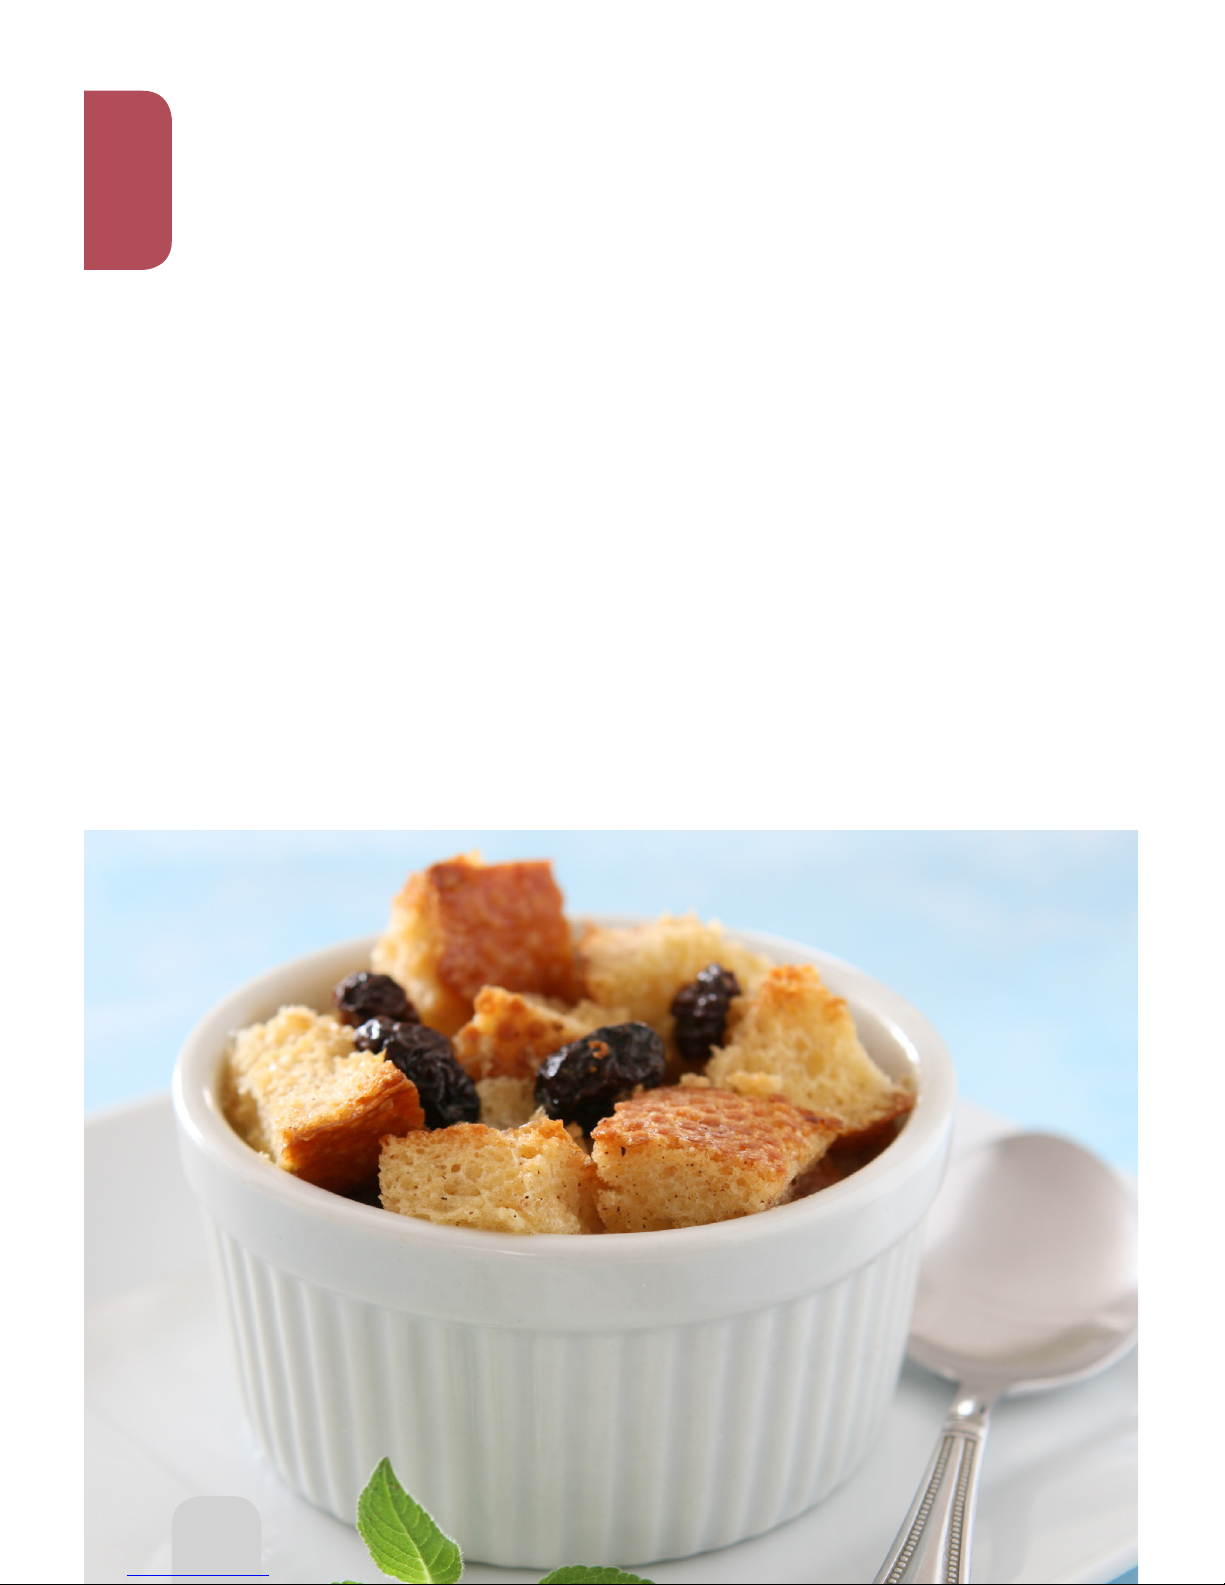
94
Bread Pudding with
Whiskey Sauce
Serves: 6
10 slices day old white bread
4 tablespoons white sugar
3½ cups milk
4 eggs, separated
1 tablespoon vanilla
½ teaspoon salt
2 sticks butter
1 cup raisins
Whiskey Sauce Ingredients:
½ cup sugar
¼ cup water
¼ cup butter
1 shot glass Whiskey
Directions:
1. Break bread into oven-safe
casserole dish, no bigger than
1½ quarts.
2. Soften bread with small amount
of milk.
3. Beat sugar and egg yolks.
4. Add milk and stir well.
5. Add vanilla and salt.
6. Pour milk mixture over bread.
Fold in raisins.
7. Cut butter into chunks and
fold in.
8. Place pan on 1-inch rack and
bake at 350˚F for 30 minutes.
9. Check by sticking knife in center;
if it comes out clean, it’s done.
Whiskey Sauce Directions:
1. Mix all ingredients and heat
until dissolved.
2. Remove from heat and add a
spoonful of Whiskey Sauce to
each pudding serving.
94
Desserts
Page 95

95
Almond Tart
Serves: 8
10-12 ounces ginger snaps,
broken into pieces
1 stick unsalted butter, cut into
cubes
12 ounces chopped almonds
4 eggs
¾ cup light corn syrup
¼ cup honey
½ cup sugar
1 tablespoon rum
1 teaspoon pure vanilla extract
dash of salt
Directions:
1. Process cookie pieces and
butter pieces together in food
processor, fitted with steel blade,
until crumbs begin to soften
together.
2. Press into 9-inch tart pan, along
sides and bottom.
3. Sprinkle almonds evenly over
bottom of crust.
4. In medium bowl, beat together
eggs, corn syrup and honey
until pale in color.
5. Mix in sugar, rum, vanilla and
salt.
6. Pour mixture over almonds and
place pan on 1-inch rack.
7. Bake at 350˚F for 5 minutes.
8. Tent tart with foil, continue baking
for 30 minutes.
9. Remove foil tent, continue to
bake at 350˚F for additional
15 minutes.
Angel Food Cake (Box)
Serves: 10-12
1 cake mix box (prepared)
1 metal tube pan
Water
Directions:
1. Prepare mix as directed on
package.
2. Pour batter into ungreased pan.
3. Cut through batter with sharp
knife to remove large air bubbles.
4. Place Extender Ring on
base tray.
5. Place tube pan on 1-inch rack.
6. Bake at 300˚F for 20 minutes.
7. Lower temperature to 250˚F
and bake for additional
20 minutes.
8. Remove pan from oven and hang
upside down on top of wine
bottle until completely cool.
9. Loosen cake from tube and
sides of pan using a knife or
spatula with up-and-down
strokes.
10. Gently remove cake.
Desserts
Page 96
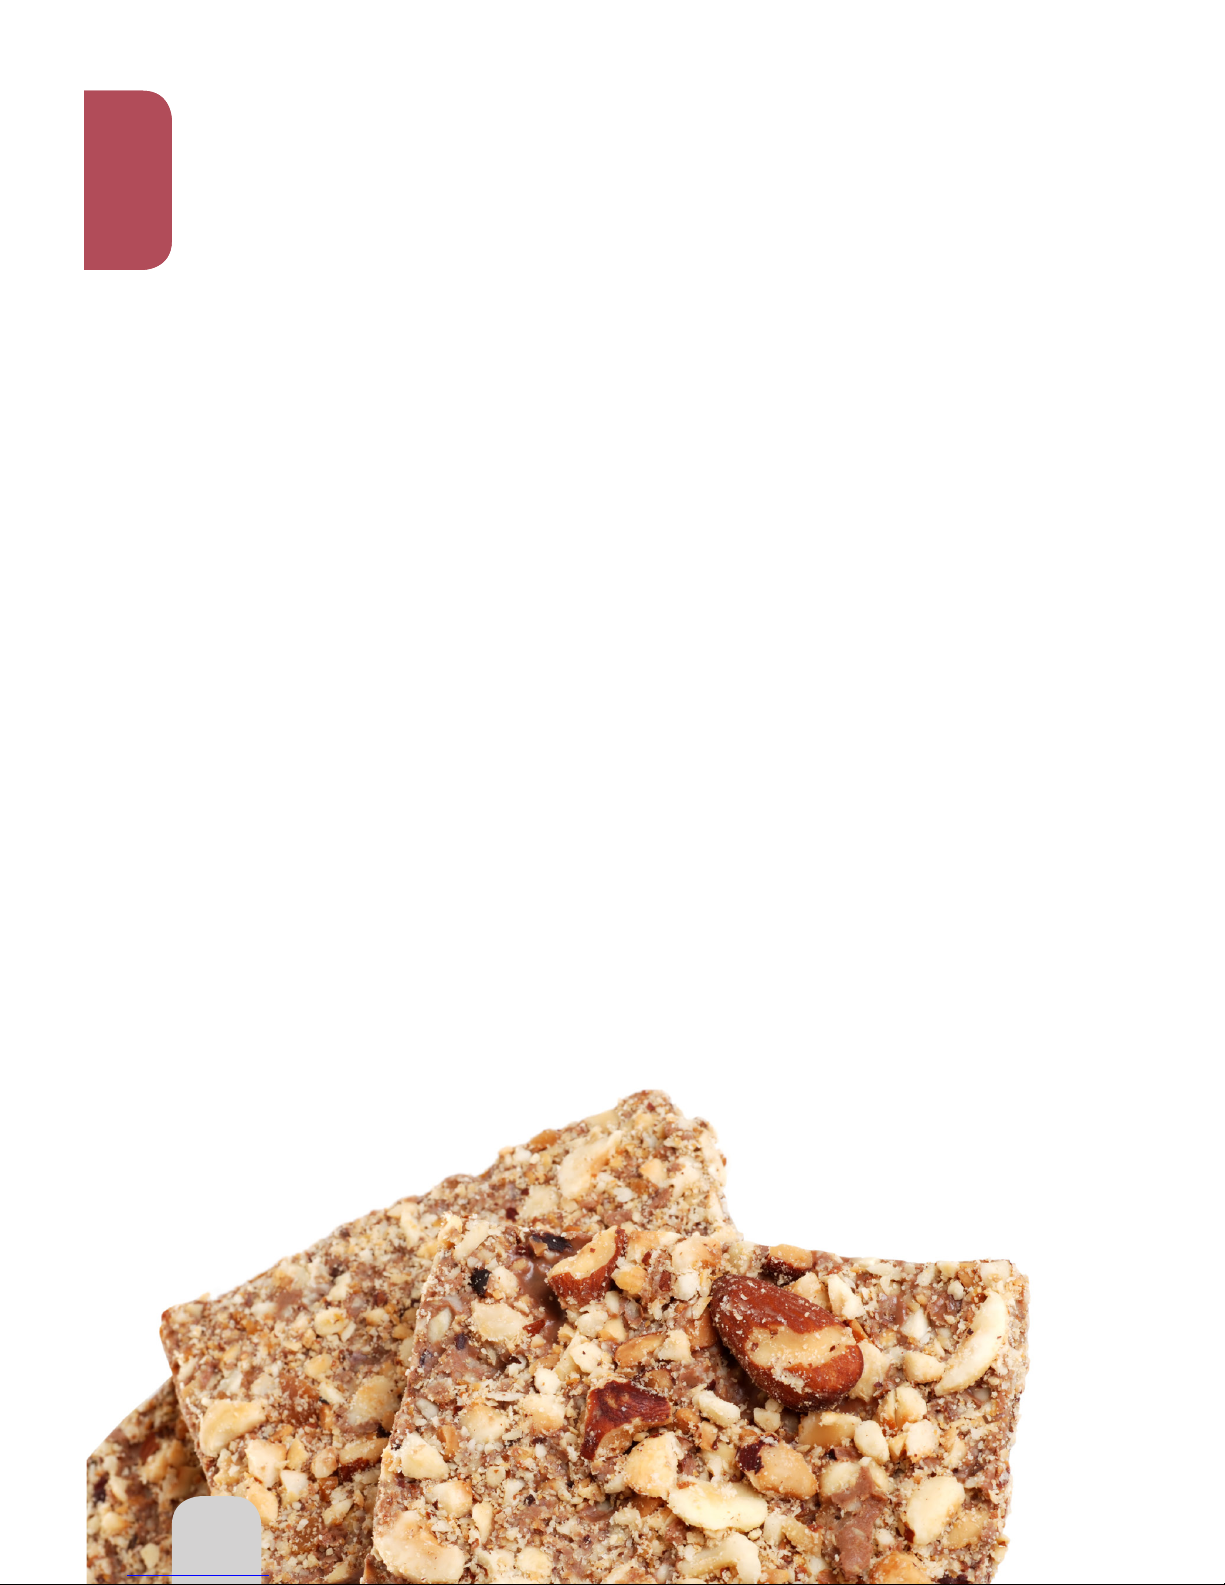
96
Golden Ginger Nut Lemon Bars
Serves: 8-10
2 cups all-purpose flour
½ cup powdered sugar
½ teaspoon baking soda
¼ teaspoon salt
¾ cup cold butter
½ cup golden raisins
1½ cups white chocolate chips
1 cup coarsely ground almonds,
divided
3 tablespoons finely chopped
crystallized ginger
10 ounces lemon curd
Lemon Curd Ingredients:
½ cup fresh lemon juice
1 tablespoon grated lemon zest
½ cup sugar
2 eggs
½ cup unsalted butter, cubed
Lemon Curd Directions:
1. In 2-quart saucepan, combine
lemon juice, lemon zest, sugar,
eggs and butter.
2. Cook over medium-low heat until
thick enough to hold marks from
whisk and first bubble appears
on surface.
Ginger Bar Directions:
1. Prepare lemon curd and set
aside.
2. Combine flour, sugar, baking
soda and salt in a large bowl; cut
in butter with a pastry blender
until crumbly.
3. Toss in half the almonds.
4. Reserve 1 cup flour mixture.
5. Press remaining flour mixture
onto bottom of 8x8-inch silicone
baking pan and press evenly.
6. Place Extender Ring on base.
7. Place pan on 1-inch rack.
8. Bake at 350˚F for 15-18 minutes
or until lightly browned.
9. Remove from oven.
10. Spread lemon curd over crust,
leaving ¼-inch border.
11. Mix raisins, almonds and ginger
with reserved flour mixture and
sprinkle evenly over the top.
12. Bake additional 12-15 minutes,
or until lightly browned.
13. Open dome and remove
promptly when time is
completed.
14. Allow to cool slightly and cut
into squares.
Tip: Make lemon curd ahead of time
and store up to one week.
96
Desserts
Page 97
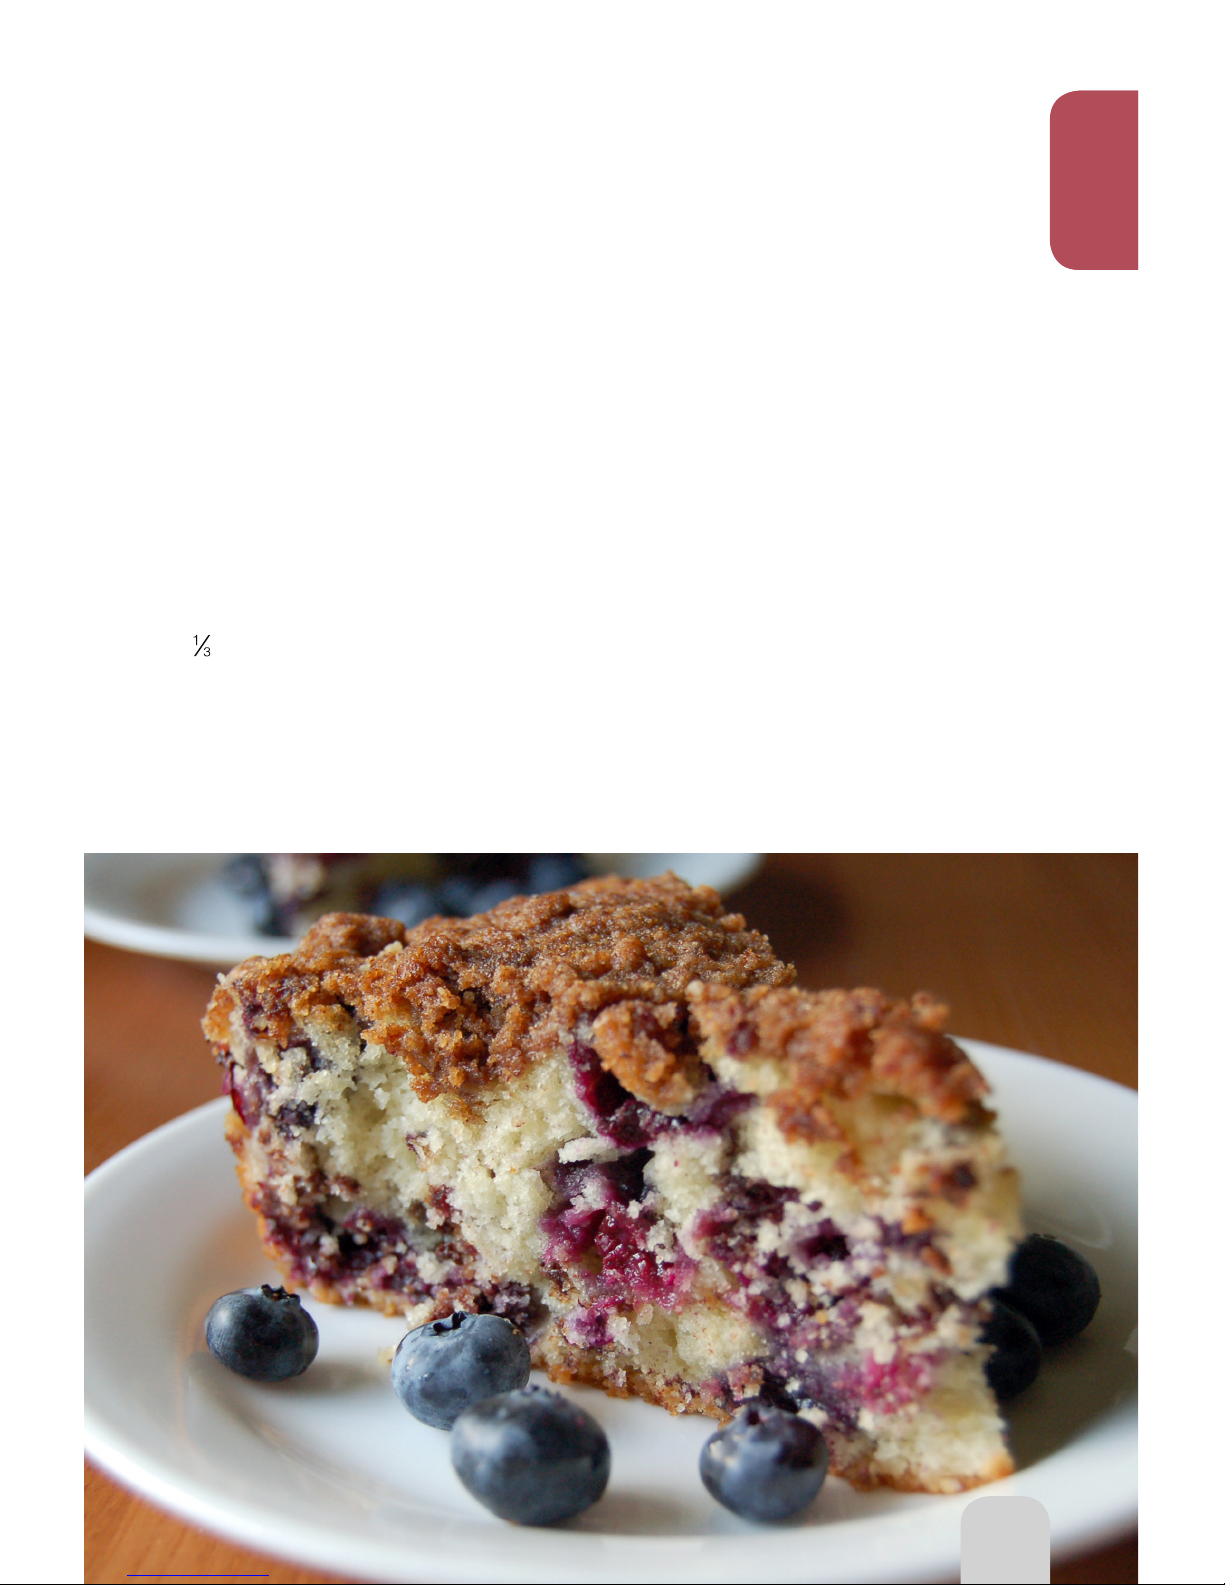
97
Blueberry Streusel
Coffee Cake
Serves: 8-10
Cake Ingredients:
2 cups and 3 tablespoons
all-purpose flour
¾ cup sugar
2 teaspoons baking powder
¼ teaspoon salt
1 egg
½ cup milk
½ cup butter, softened
1 cup fresh or frozen blueberries
1 cup chopped pecans
Streusel Topping Ingredients:
½ cup sugar
cup all-purpose flour
¼ cup cold butter
Streusel Directions:
1. Combine sugar and flour in bowl.
2. Cut in butter until crumbly; set
aside.
Cake Directions:
1. In large mixing bowl, combine
the flour, sugar, baking powder
and salt.
2. Add egg, milk and butter.
3. Beat mixture well.
4. Fold in blueberries and pecans.
5. Spread into greased 9-inch
spring form baking pan.
6. Sprinkle streusel topping over
batter.
7. Place Extender Ring on NuWave
Oven base.
8. Place 1-inch rack in base tray.
9. Place baking pan on 1-inch rack.
10. Bake at 300˚F for 30 minutes.
11. Cool for 15 minutes and serve
warm.
97
Desserts
Page 98
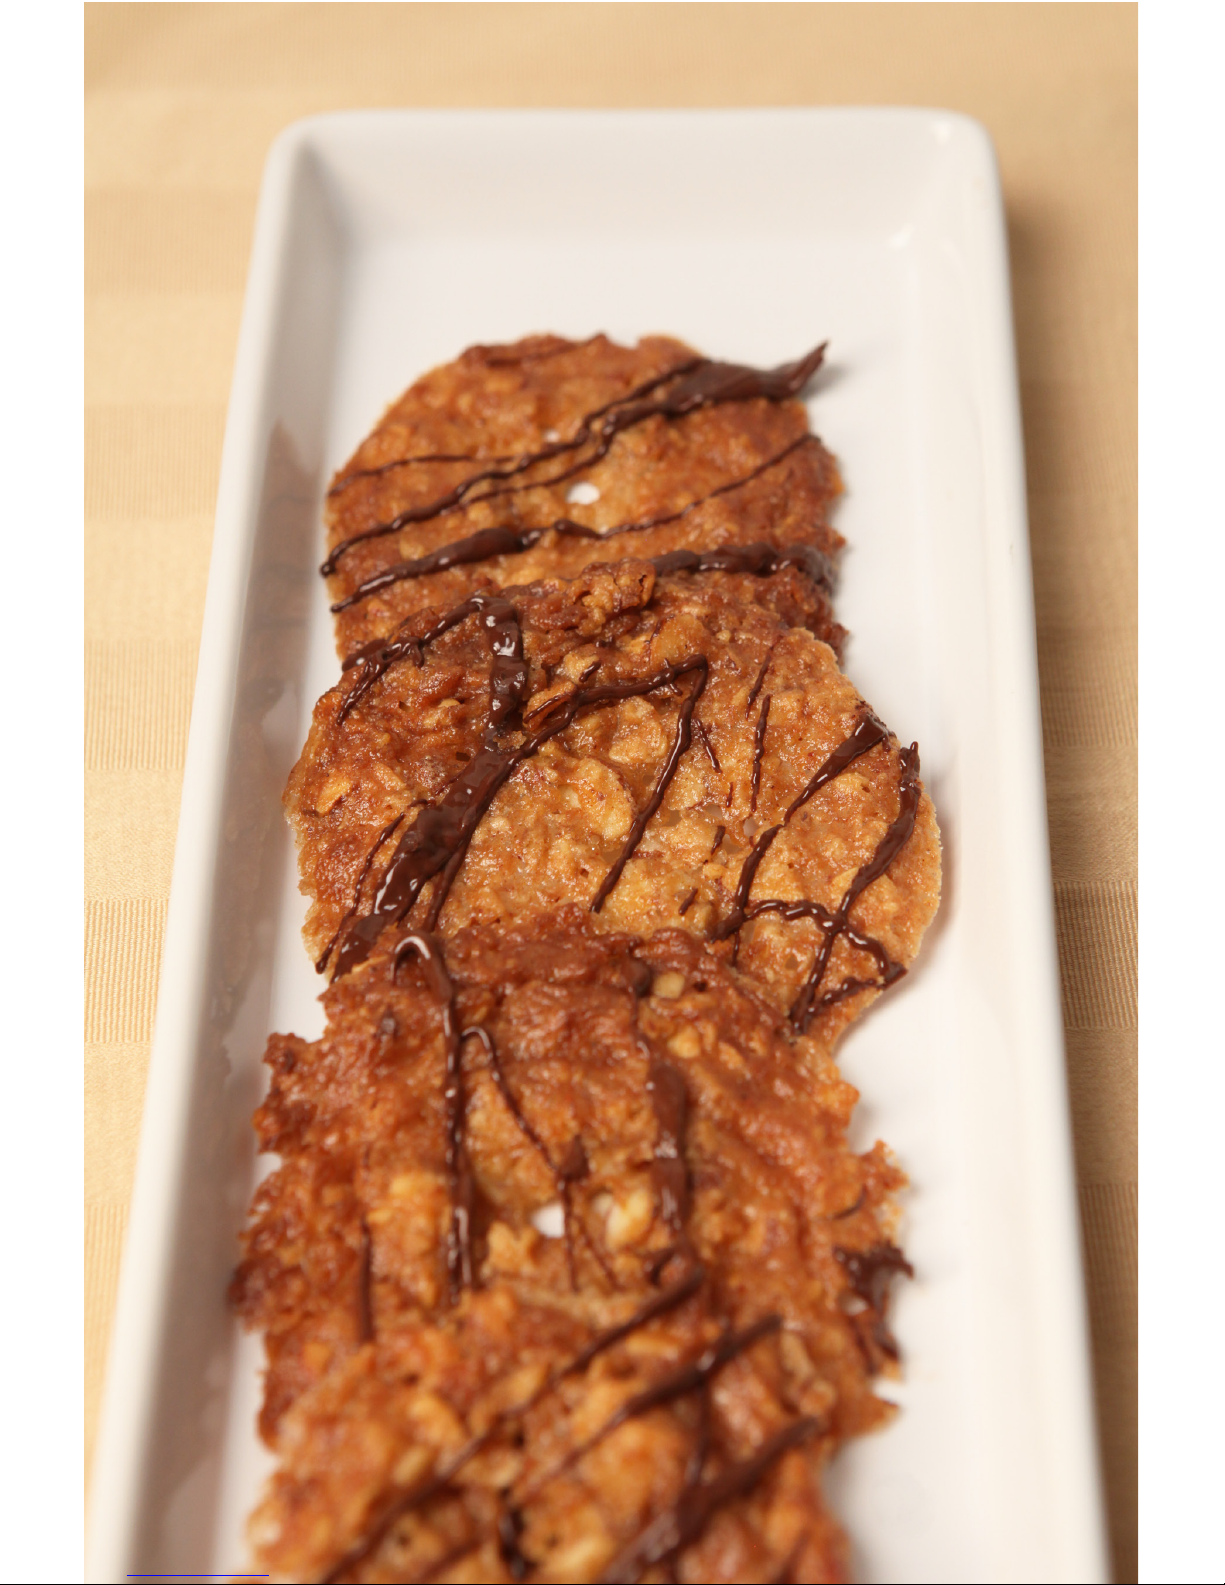
98
Page 99
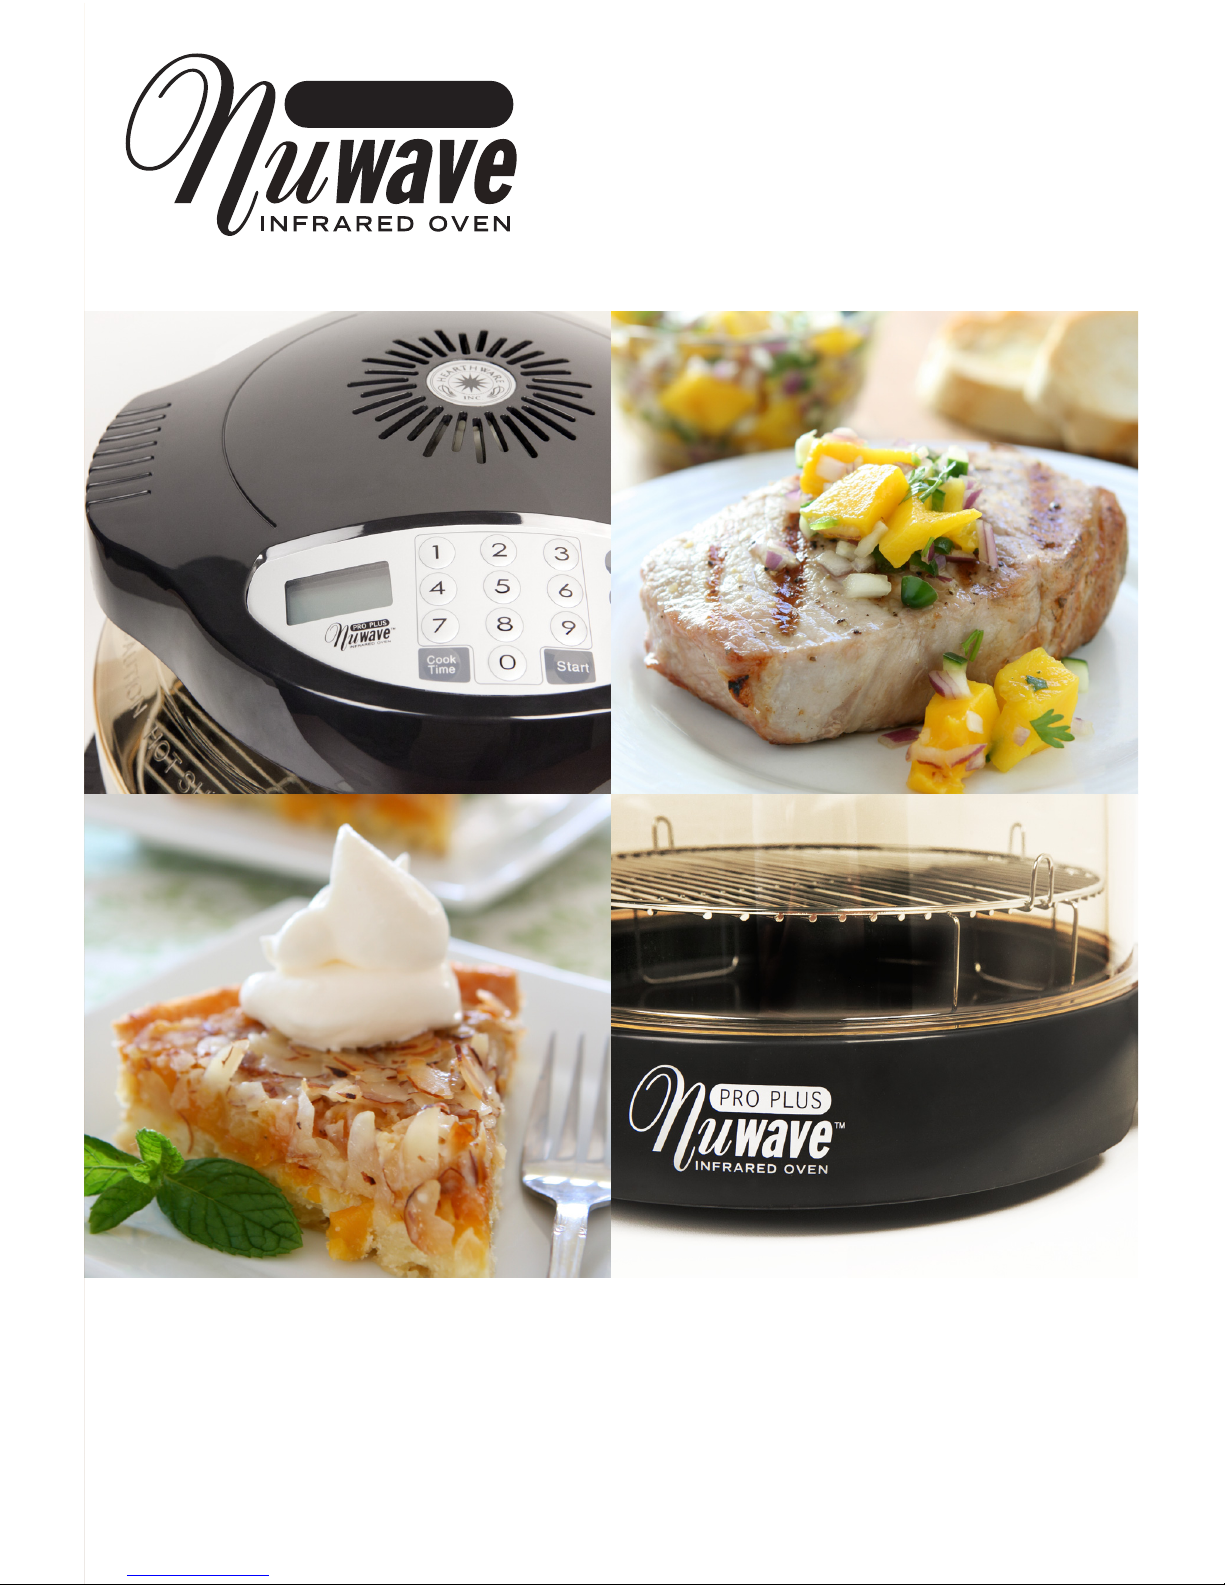
99
Horno Infrarrojo de The NuWave Pro Plus
Libro de recetas & Manual Completos
PRO PLUS
Page 100

100
IMPORTANTES MEDIDAS DE SEGURIDAD
Cuando utilice productos eléctricos, especialmente cuando haya
niños presentes, se deben tomar precauciones básicas, incluyendo
las siguientes:
LEA TODAS LAS INSTRUCCIONES ANTES DE USARSE
PELIGRO – Para reducir el riesgo de electrocución:
• Lea todas las instrucciones, medidas de seguridad y advertencias antes
de utilizar el electrodoméstico.
• No coloque el aparato donde se pueda caer o sumergir en agua u otros
líquidos.
• No trate de sacarlo si se ha sumergido en agua. ¡Desconéctelo
inmediatamente!
• No sumerja el cable, la clavija o la fuente de potencia en agua u otros
líquidos.
ADVERTENCIA – Para reducir el riesgo de quemaduras, electrocución,
fuego o lesiones:
• Este electrodoméstico no deberá ser utilizado por niños. Tenga más cuidado cuando
utilice el producto cerca de niños.
• Utilice este electrodoméstico para su propósito planeado como se describe en su
folleto.
• No utilice cualquier otro accesorio o aditamento no recomendado por el fabricante.
Podrían ocasionar fuego, descarga eléctrica o lesiones personales.
• Nunca opere este electrodoméstico si tiene el cable o la clavija dañados, si no
funciona adecuadamente, si ha sido dañado o si se ha sumergido en agua. En
cualquiera de estos casos, devuelva el electrodoméstico a un centro de servicio al
cliente autorizado para su revisión, reparación o ajuste. Cualquier otro servicio deberá
ser realizado por un representante de servicio autorizado.
• Mantenga el cable alejado de supercies calientes.
• Desconecte del contacto cuando ya no esté en uso y hágalo antes de limpiarlo.
Déjelo enfriar antes de abrirlo o desarmarlo.
• Siempre desconecte el aparato jalando la clavija. NO lo desconecte jalando el cable.
• Nunca force la clavija en un enchufe.
• No lo utilice al aire libre.
• No lo utilice donde se estén usando productos aerosoles, así como en lugares donde
el oxígeno sea reducido.
• No deje el cable colgando en la orilla de una mesa o una barra, o tocando supercies
calientes.
• No colocar sobre o cerca de un calentador de gas o eléctrico o dentro de un horno
caliente.
• Extreme precauciones cuando mueva el electrodoméstico si contiene aceite u otros
líquidos calientes.
• Tome especial precaución cuando saque la cacerola o la rejilla calientes.
• Para desconectar el aparato presione el botón Pause/Clear dos veces antes de
hacerlo.
• No utilice este electrodoméstico para otro uso que no sea para el que está diseñado.
• Revise todo el cableado. Tenga cuidado con cables o clavijas dañados.
• Este electrodoméstico es para uso doméstico únicamente; está diseñado para
procesar cantidades normales de una casa. No es conveniente para un uso continuo u
operación comercial.
 Loading...