

Page 1
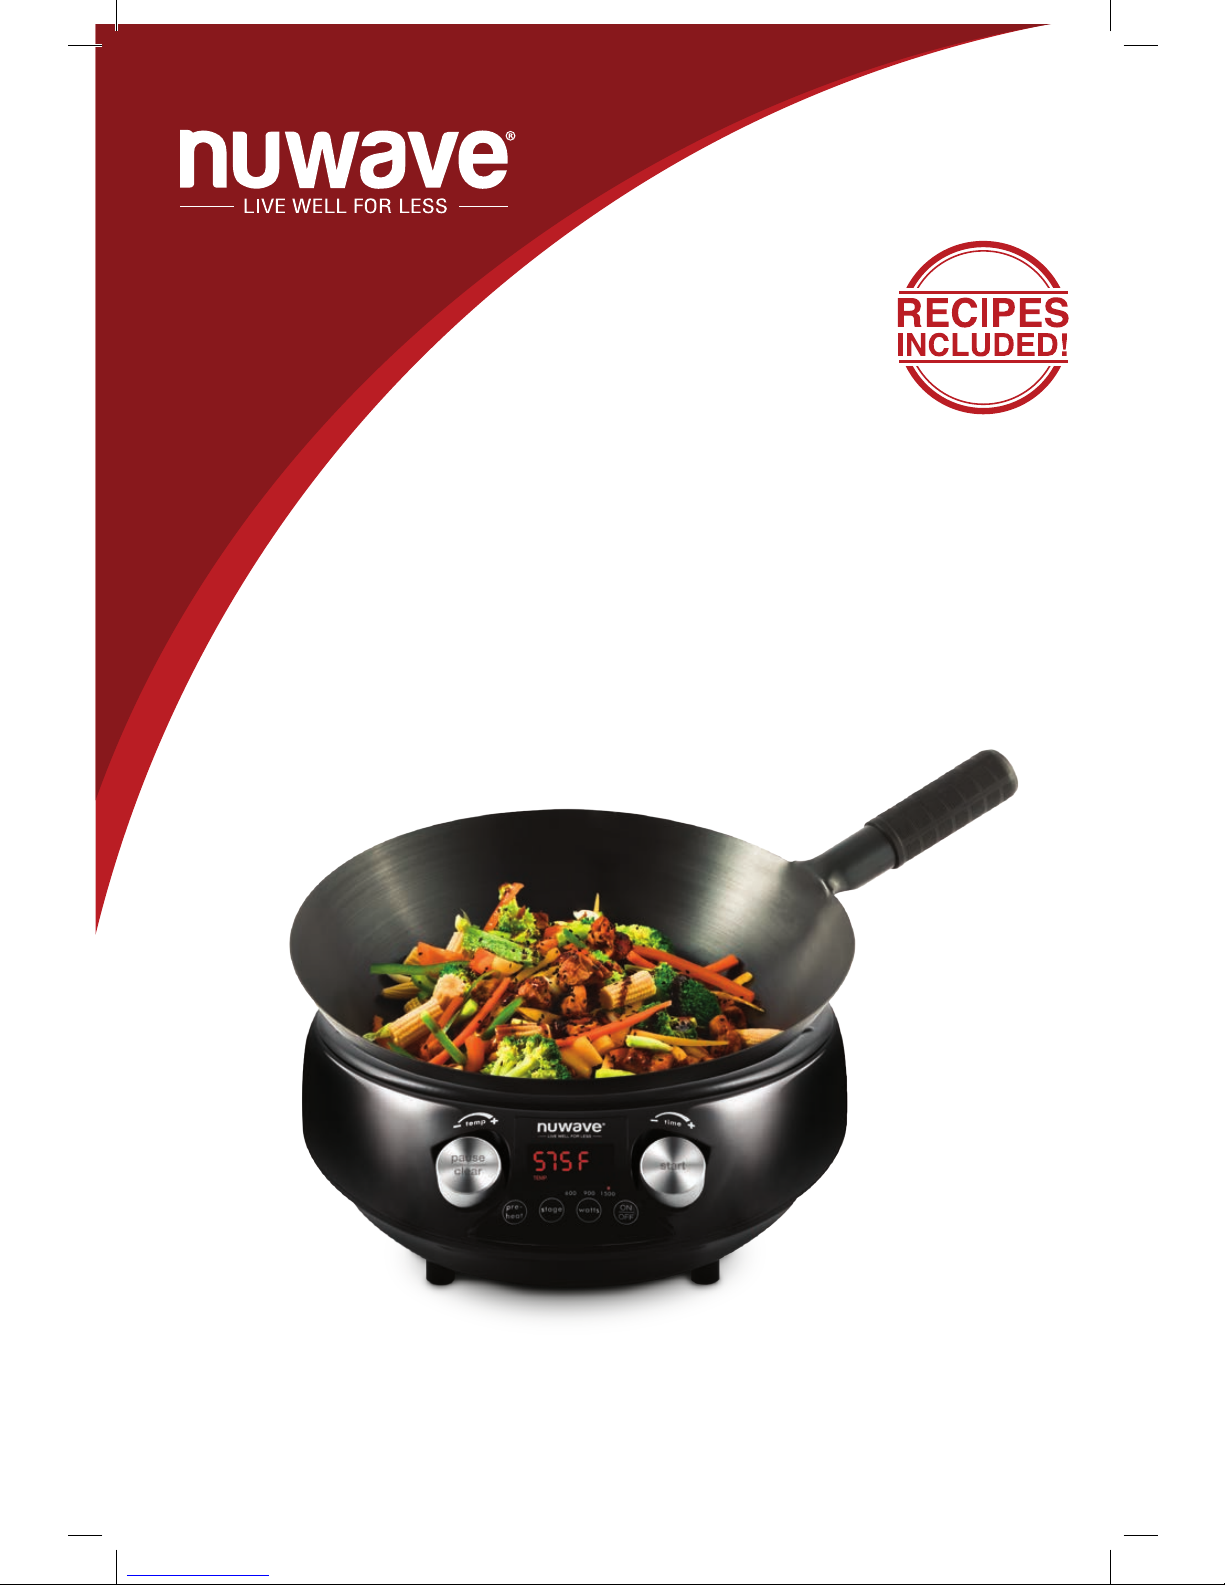
NuWave
Precision Induction Wok
™
Owner’s Manual & Complete Recipe Book
Page 2
NuWave
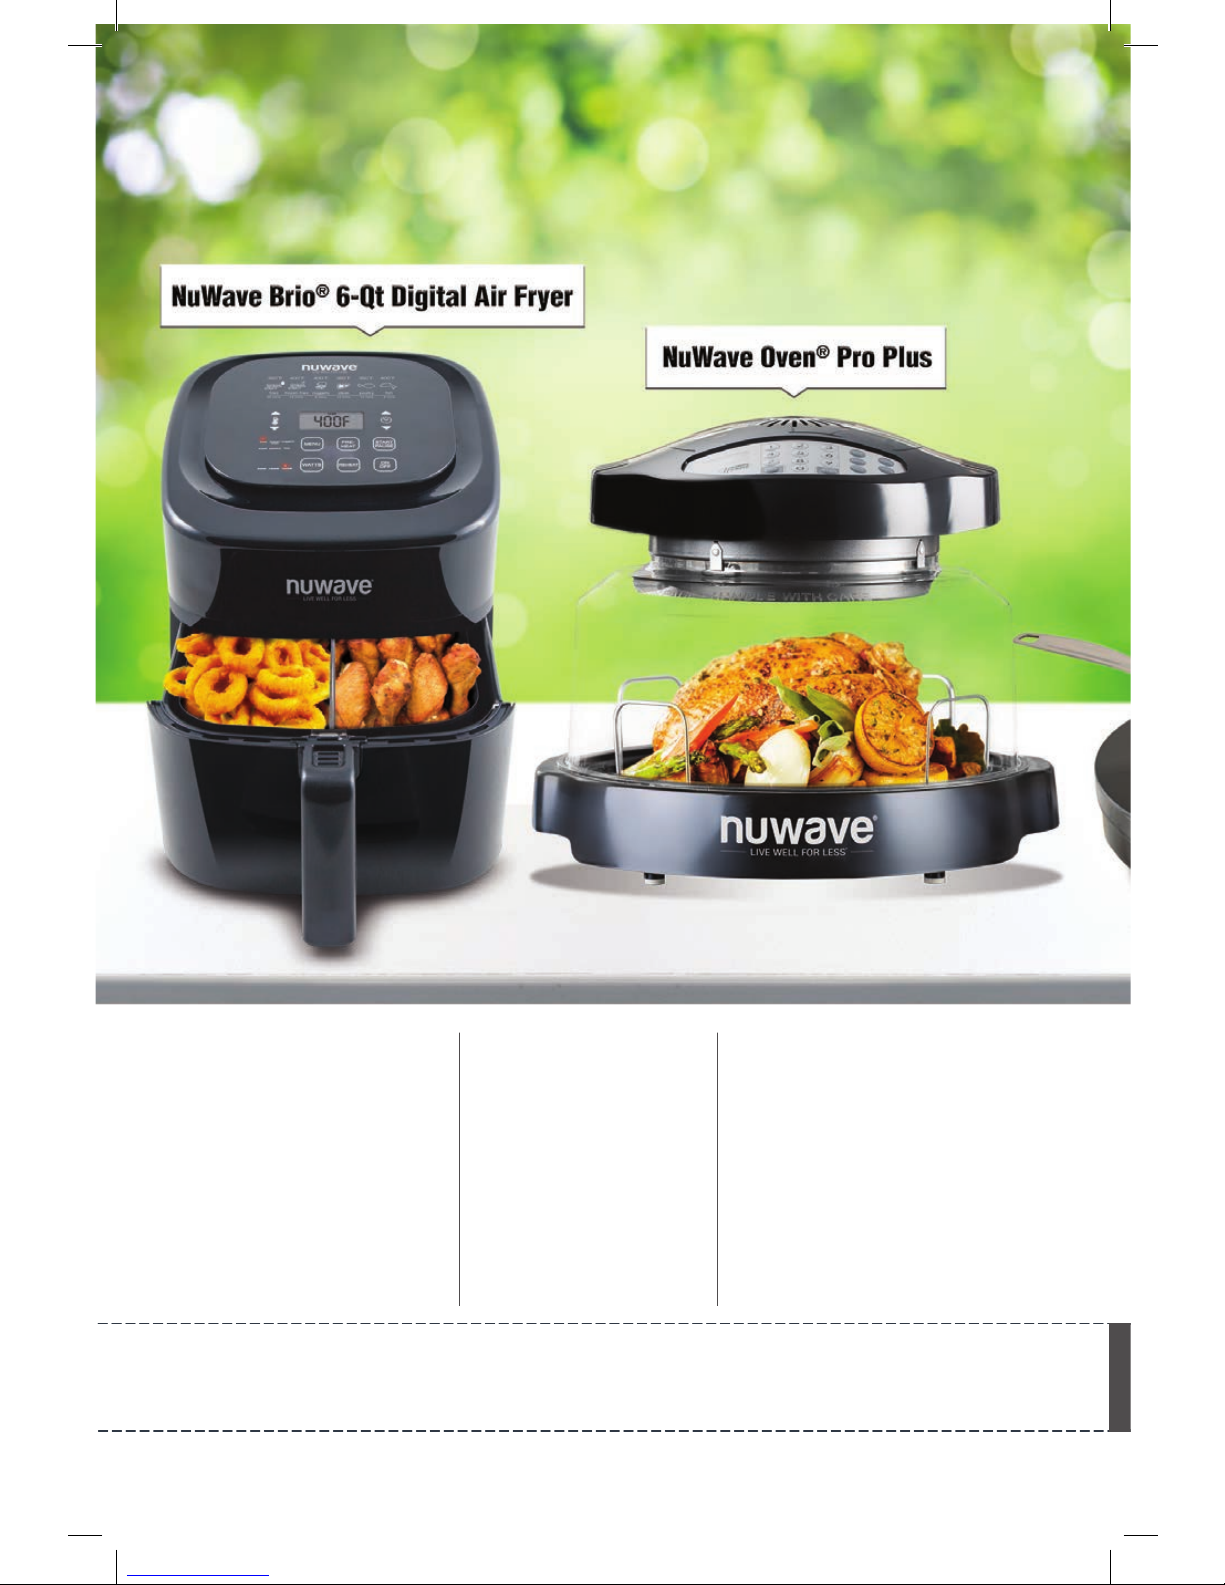
Oven® Pro Plus
Super-heated air cooks
your food to crispy,
tender perfection.
The digital touch screen
gives you precise
temperature control.
Cook healthier
meals faster and
more efficiently
with Triple Combo
Cooking Power.
NuWave PIC
®
(Precision Induction
Cooktop)
Cook faster, safer,
and more efficiently
than you ever could
on your gas or
electric stovetop.
For more about our innovative products, visit:
www.nuwavenow.com
NuWave Brio® 6-Qt
Digital Air Fryer
Page 3
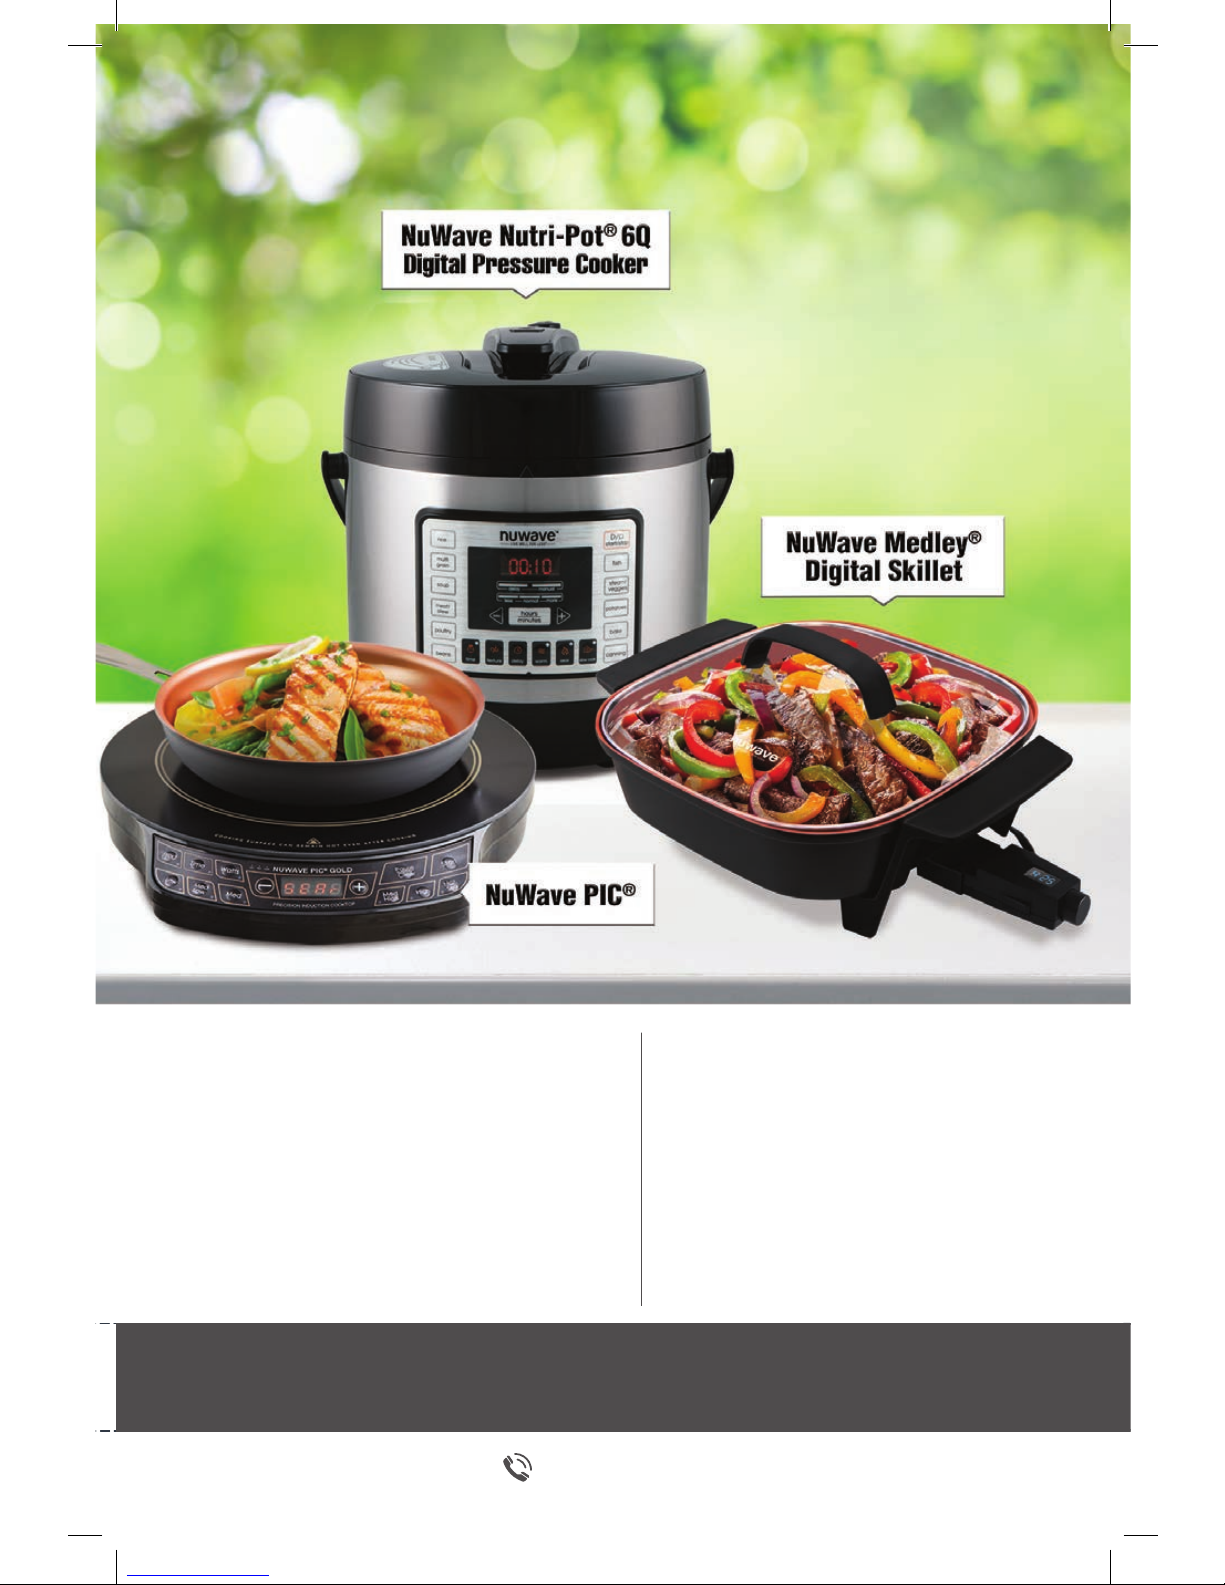
Easily cook rice, poultry, vegetables
and more all with the press of a
button! The Nutri-Pot’s safety release
valve and hinged lid make for
convenient and safe operation.
Coated with Duralon® Healthy
Ceramic Non-Stick coating for
easy cleanup. Includes a premium,
vented, tempered glass lid.
1-877-689-2838
www.nuwavenow.com
NuWave Medley
®
12”x12” Digital Skillet
NuWave Nutri-Pot® 6Q
Digital Pressure Cooker
Page 4
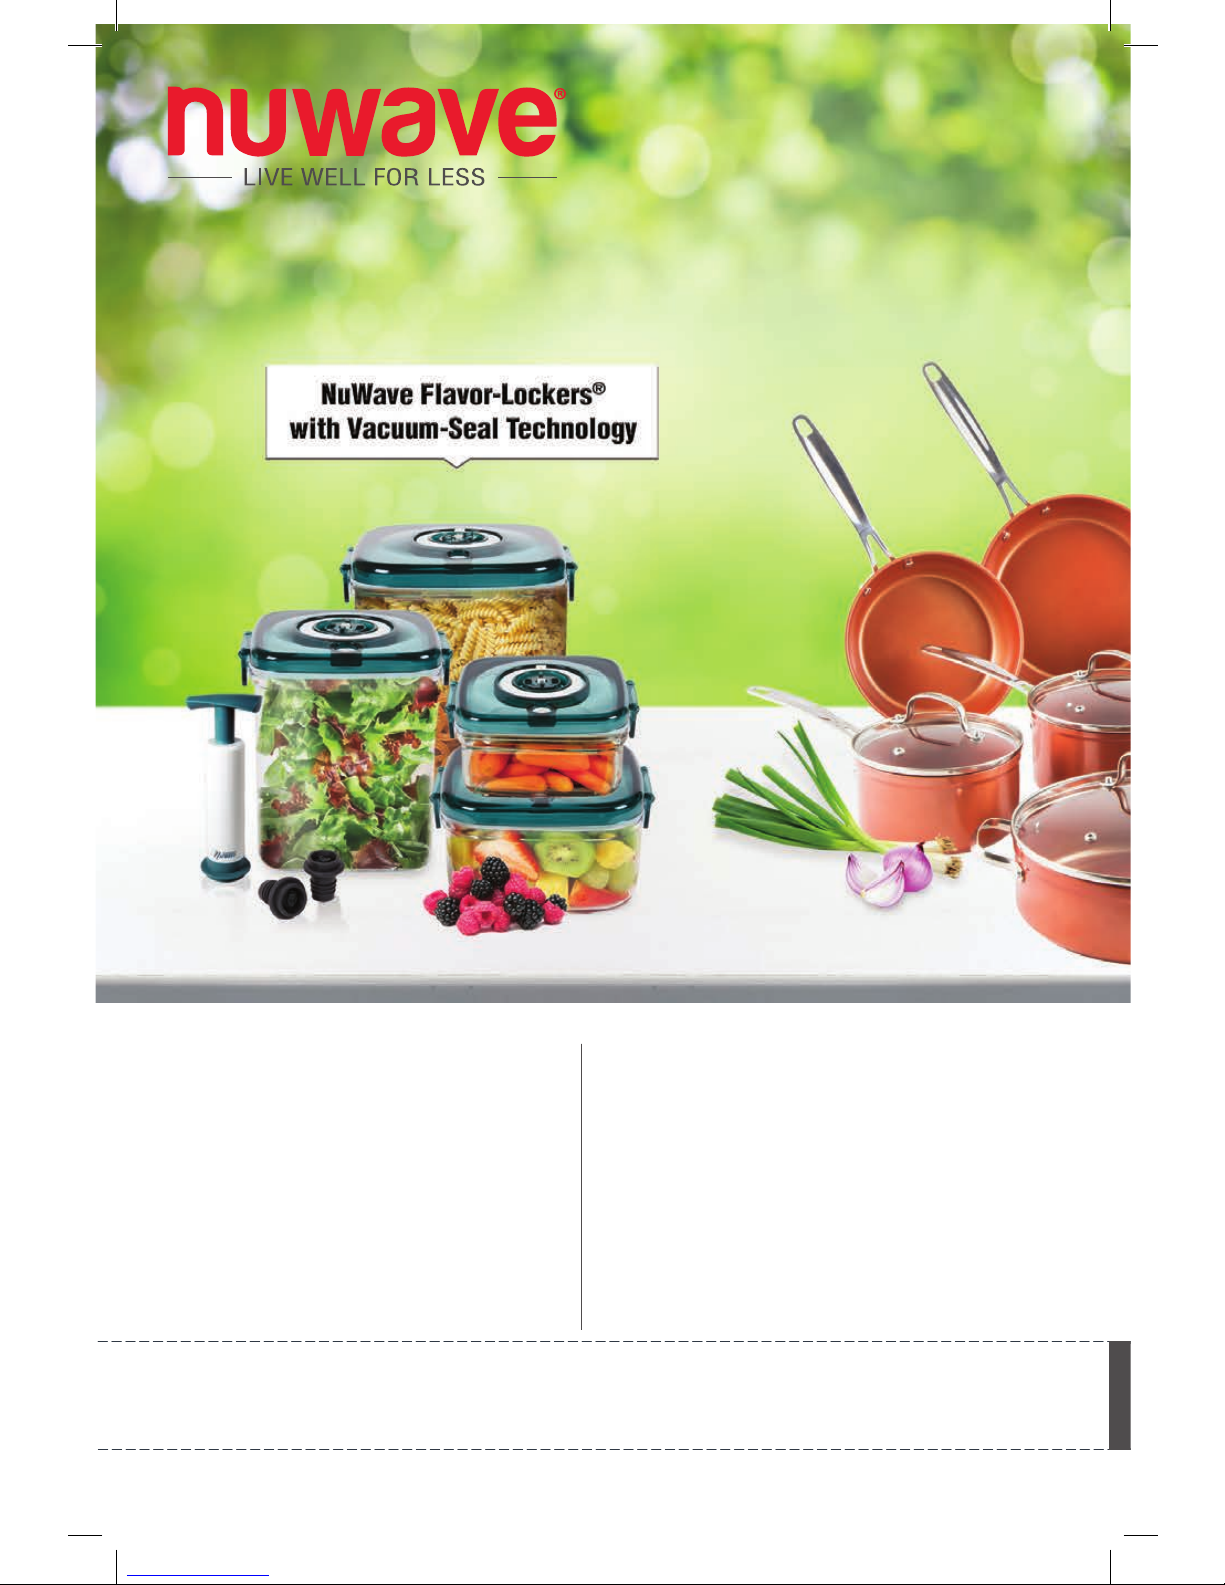
NuWave Flavor-Lockers
®
with Vacuum-Seal Technology
Keep food fresh for up to 21 days!
Slow the growth of mold by removing
trapped oxygen with a few easy pumps.
NuWave Duralon® Healthy
Ceramic Non-Stick
Cookware
Coated with Duralon Healthy
Ceramic Non-Stick coating for
easy cleanup, this versatile
cookware is perfect for use in
ovens or on gas, electric, and
even induction cooktops.
For more about our innovative products, visit:
www.nuwavenow.com
Page 5
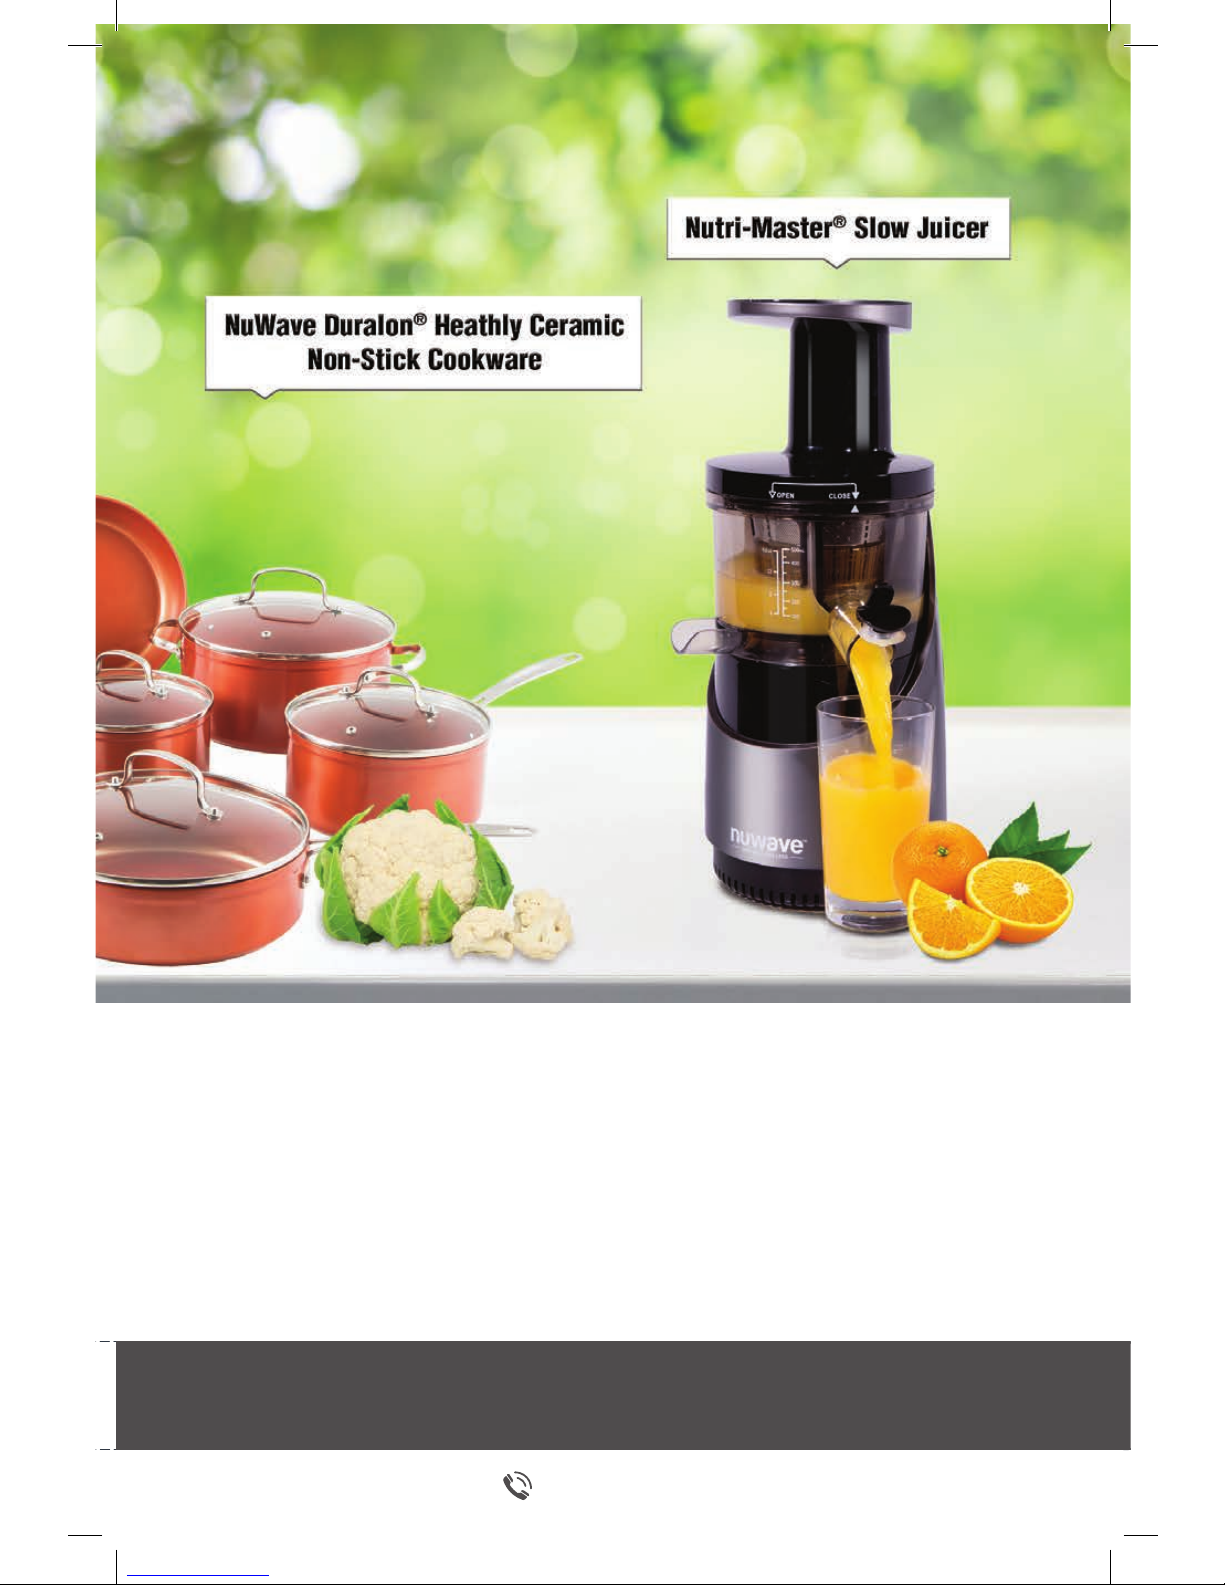
NuWave Nutri-Master® Slow Juicer
The Nutri-Master, with a low 48 RPM, is both
incredibly quiet and powerful enough to extract
juice from nuts and hard vegetables.
1-877-689-2838
www.nuwavenow.com
Page 6

6
Owner’s Manual
TABLE OF CONTENTS
Welcome to NuWave Precision
Induction Cooking ........................... 7
What is Induction Cooking? ........... 7
OWNER’S MANUAL
Parts Descriptions .......................... 8
Important Safeguards ...............9-11
Care & Maintenance - Induction
Wok Base................................12-13
Care & Maintenance - Wok .......... 13
Operating Instructions ............. 14-15
Control Panel ..........................16-17
Troubleshooting Guide ............ 18-19
Limited Warranty ........................... 20
Recipes
Beef Chop Suey ........................... 22
Beef Chow Mein........................... 23
Crab Rangoon.............................. 24
Egg Drop Soup ............................ 25
Egg Foo Yung
(Cantonese Style) ........................ 26
Fried Rice with Shrimp, Ham, and
Shiitake Mushrooms .................... 27
Fried Wontons.............................. 28
General Tso’s Chicken................. 29
Kung Pao Chicken ....................... 30
Orange Chicken ........................... 31
Pot Stickers .................................. 32
Sesame Chicken .......................... 33
Shrimp Fried Rice ........................ 34
Spring Rolls with Pork
and Shrimp................................... 35
Stir-Fried Beef with Broccoli
and Oyster Sauce ........................ 37
Stir-Fried Vegetables ................... 38
Sweet and Sour
Chicken Tempura......................... 39
Sweet and Sour Shrimp ............... 40
Vegetable Egg Rolls .................... 41
Wonton Soup ............................... 43
Spanish...........................................44
Page 7

7
Owner’s Manual
What is Induction Cooking?
Congratulations on purchasing your NuWave Precision Induction Wok™.
This manual contains detailed instructions and images to help you get
started. It is also lled with great recipes and time-saving tips to help you
prepare delicious gourmet meals in a fraction of the time it would take
when using a regular stovetop. Cooking is fast and easy with the Precision
Induction Wok from NuWave, LLC. This versatile countertop appliance
uses induction technology to save time, energy, and money. The NuWave
Precision Induction Wok is efcient, safe, fast, and easy to clean. And
because you can program times and temperatures from warm to sear, you
can make almost any kind of food without the risk of under or overcooking.
The NuWave Precision Induction Wok is comprised of a series of induction coils
based on magnetic principles. These coils generate magnetic elds that produce
an immediate warming reaction in steel and iron-based pots and pans. Heat is
generated directly in the wok, limiting additional heat that radiates around the
surface like traditional gas or electric ranges, making the Precision Induction
Wok much more energy efcient.
Induction cooking is the most eco-friendly way to prepare meals because the
method releases no toxins into the environment. Induction cooking emits no
ame, so less residual heat is produced in your kitchen.
Additional Benets:
• Energy Conservation: The magnetic eld, generated by the copper coils,
causes invisible molecules in the Wok to begin vibrating rapidly, creating
heat, so the Wok itself heats the food.
• Safety: The NuWave Precision Induction Wok’s design uses no red hot
coils or open ames, essentially eliminating the risk of re. Automatic
shut-off feature enhances the Induction Wok Base’s safety. Simply
Touch and Go!
• Fast Cooking: Heating is immediate and temperature is precise with the
NuWave Precision Induction Wok. Features 6 different temperature settings
that are adjustable in 5-degree increments. There’s no guessing!
• Lightweight & Portable: Because the NuWave Precision Induction
Wok Base weighs only 6.9 pounds, you can take the NuWave Precision
Induction Wok anywhere you go. Use it indoors or outdoors anywhere with
a standard U.S. electrical outlet.
• Easy to Clean: Spills won’t burn and stick to the Induction Wok Base
surface. Just wipe and go!
Welcome to NuWave®
Precision Induction Cooking
Page 8
8
Owner’s Manual
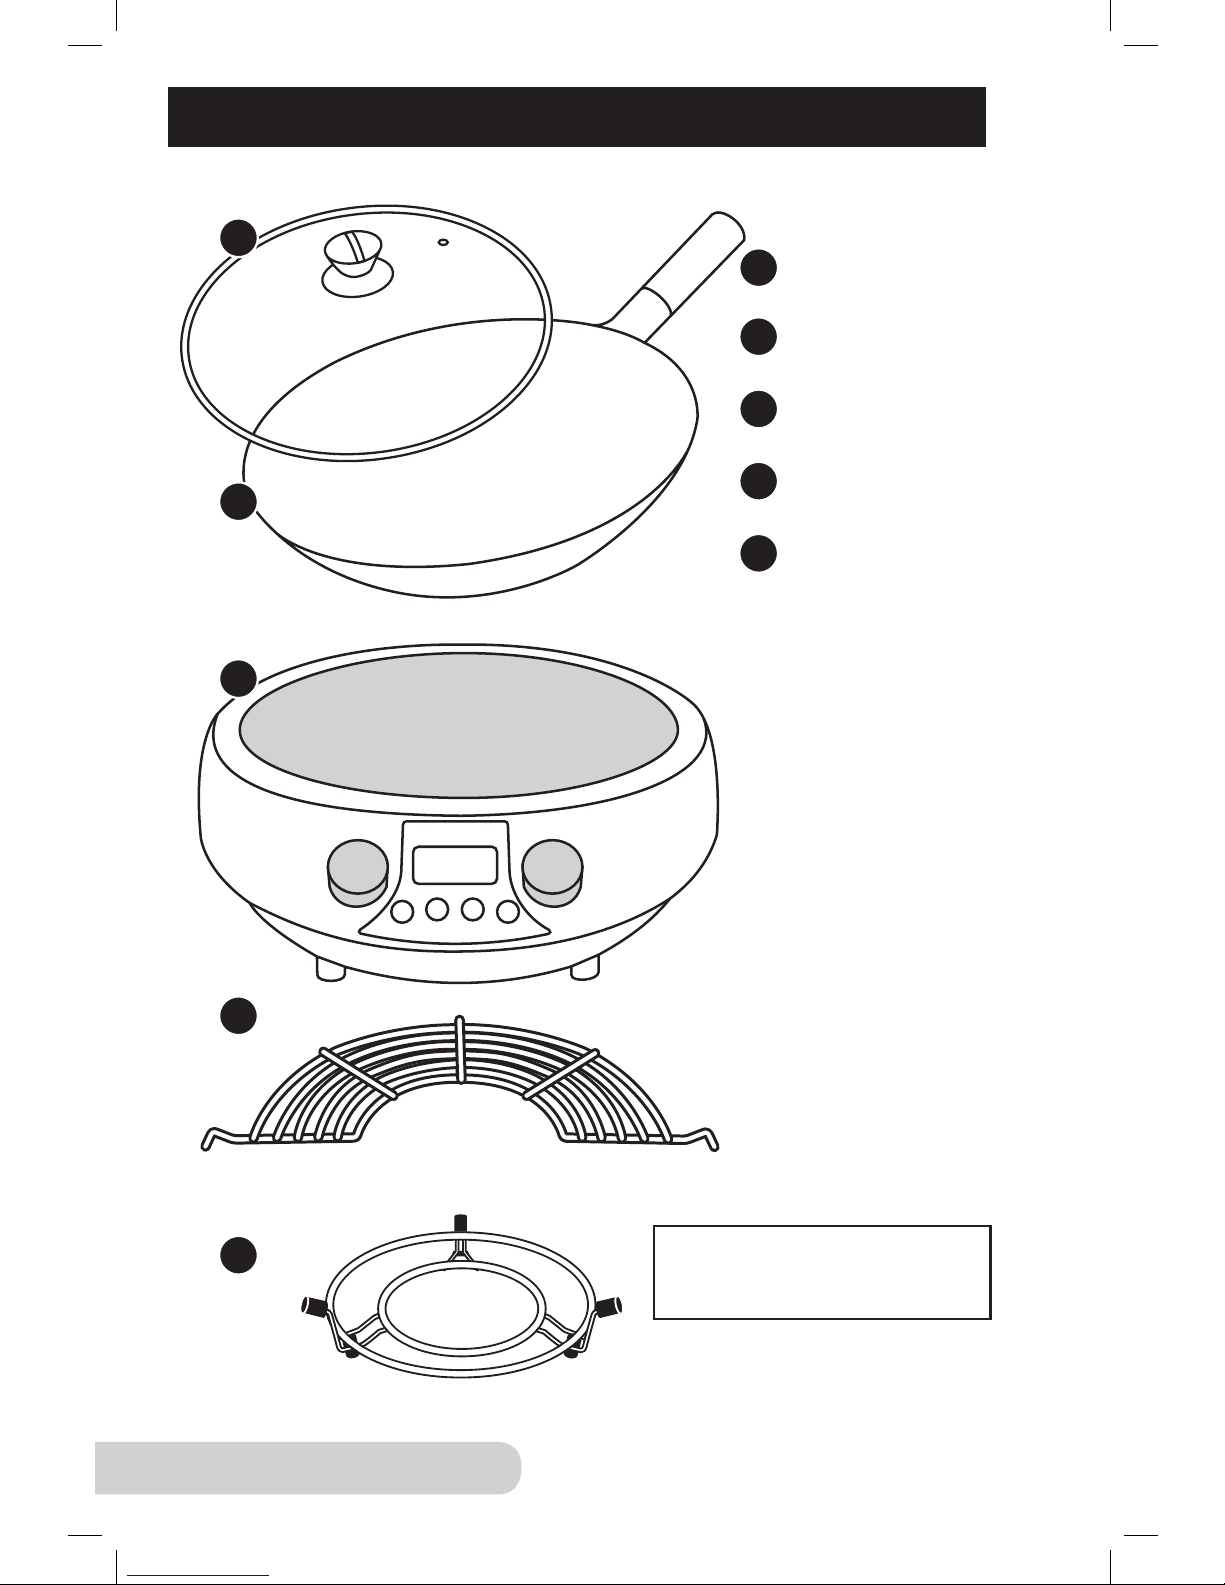
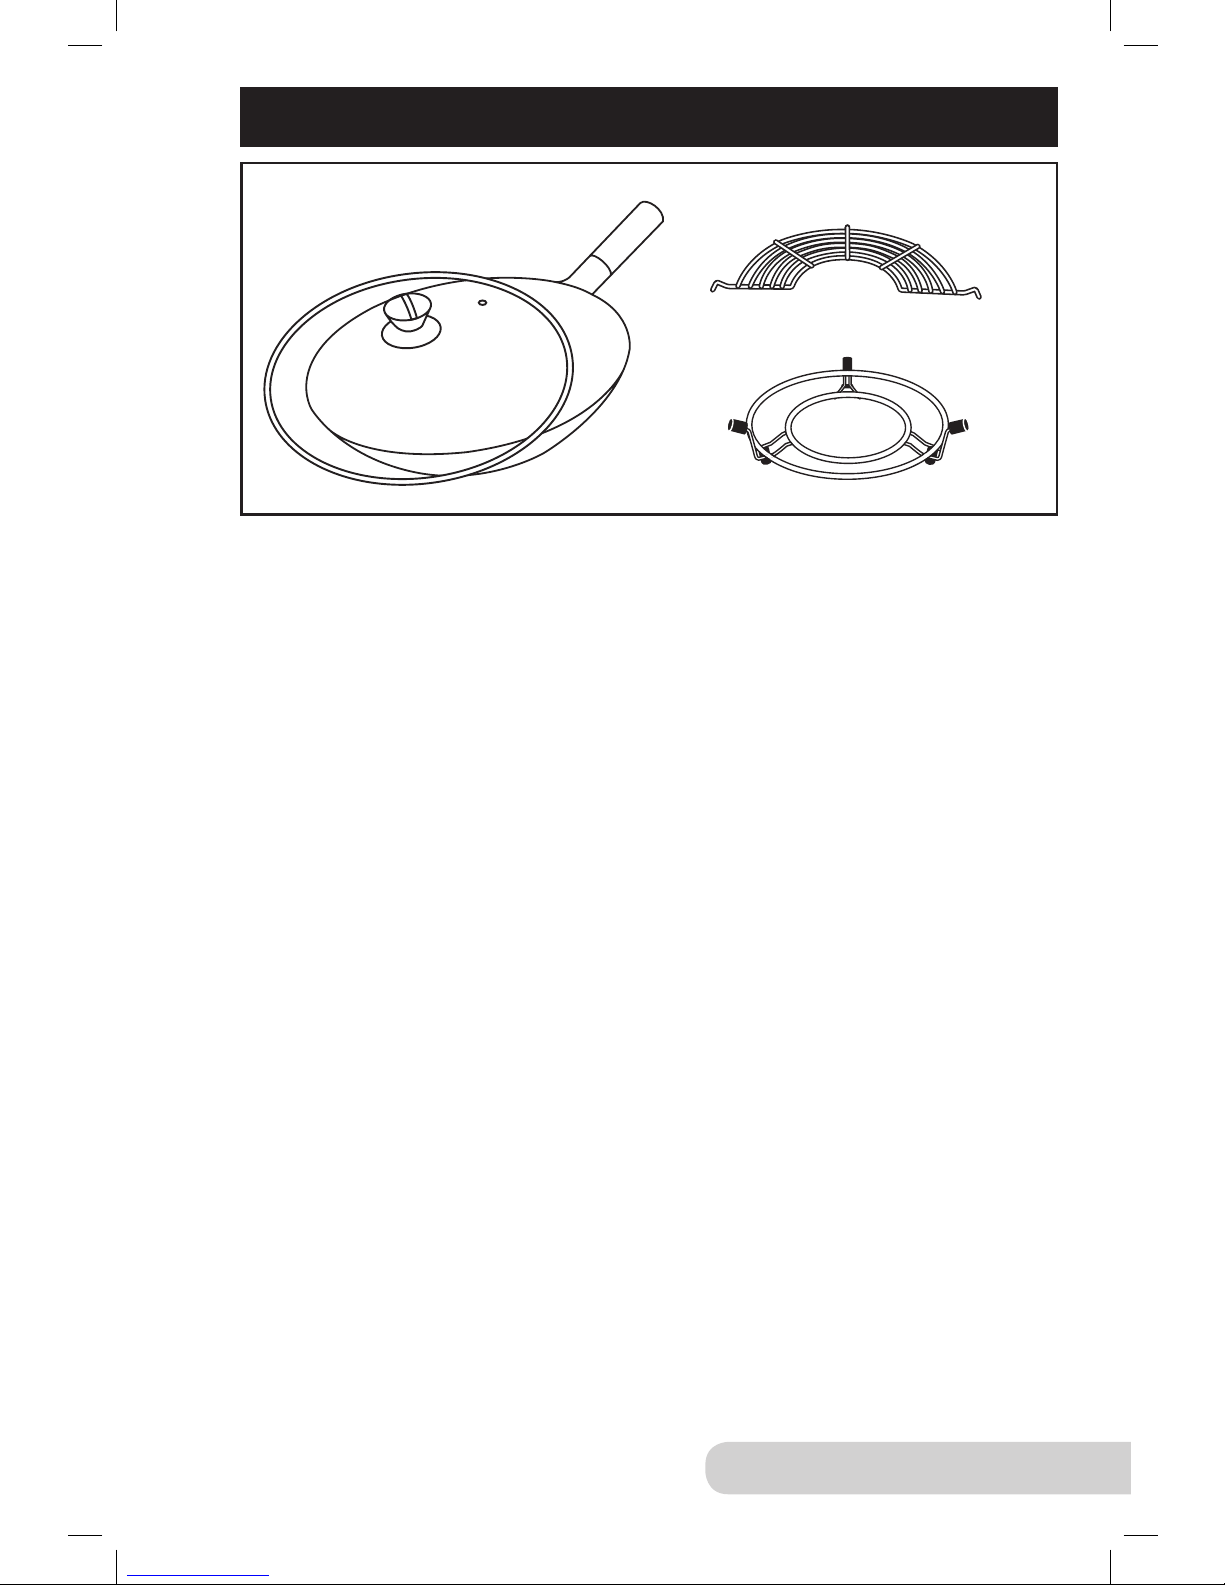
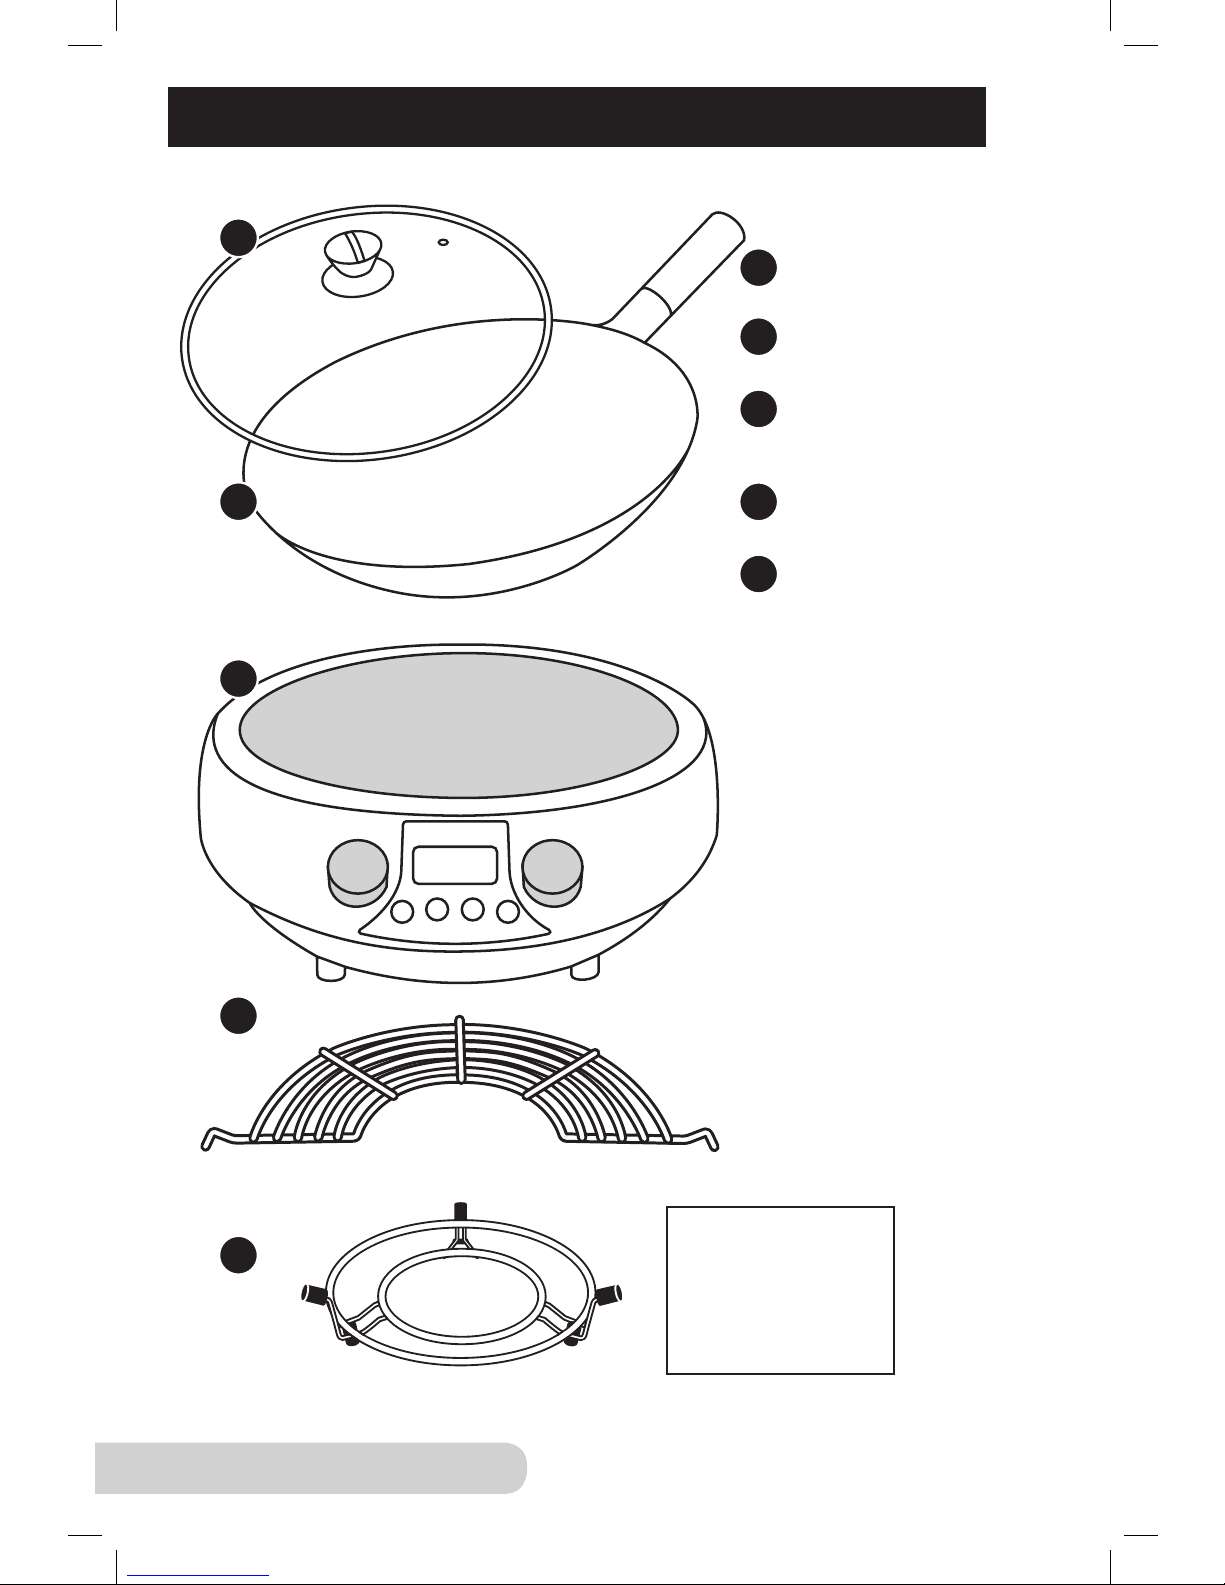
PARTS DESCRIPTION
2
1
3
4
After cooking on the Induction
Wok Base, the Wok Stand can be
used as a serving tray.
Wok Lid
Part #: 31752
Wok
Part #: 31751
Induction Wok Base
Part #: 30801
Deep Frying Rack
Part #: 31754
Wok Stand
Part #: 31753
5
2
1
3
4
5
Page 9

9
Owner’s Manual
IMPORTANT SAFEGUARDS
READ ALL INSTRUCTIONS
Do not use outdoors When using electrical appliances, basic safety
precautions should always be followed, including the following:
DANGER – To reduce the risk of electrocution:
1. Do not use outdoors.
2. Read all instructions, safeguards, and warnings before using
the appliance.
3. Do not place appliance where it can fall or be pulled into water or
other liquids.
4. Do not reach for an appliance that has fallen into water. Unplug
immediately. Do not immerse cord, plug, or any portion of appliance
in water or other liquids.
WARNING – For individuals with pacemakers:
1. This appliance emits an electromagnetic eld that is strongest within
2 feet of the cooking surface.
2. Scientic tests have proven inconclusive as to whether the electrical
eld will disrupt the function of a pacemaker. Please consult your doctor
or medical professional for guidance before use.
WARNING – To reduce the risk of burns, electrocution, re, or injury:
1. This appliance is not meant for continuous use.
2. This appliance includes a heating function. Surfaces may develop high
temperatures. Do not touch hot surfaces. Induction Wok Base may retain
residual heat after Wok has been removed. The use of pot holders or
alternative safety measures is highly recommended.
3. This appliance should not be used by children. Close supervision is
necessary when this product is used near children.
4. Do not place on any gas or electric burner or in a heated oven.
5. Do not place metallic objects such as knives, forks, spoons, or lids on
the Induction Wok Base as they may become hot.
6. This appliance is not intended for commercial use.
7. Use this appliance for its intended purpose as described in this
manual. Do not use any other accessories or attachments not
recommended by the manufacturer. They may result in re, electrical
shock, or personal injury. It is recommended to only use supplied
Wok with the Precision Induction Base.
8. Never operate this appliance if it has a damaged cord or plug, is not
working properly, has been dropped or damaged, or dropped in water.
Contact Customer Service at 1-877-689-2838 or [email protected].
9. Do not operate a broken Induction Wok Base. If Induction Wok Base
should break, cleaning solutions and spillovers may penetrate the
appliance and create a risk of electric shock.
10. Keep cord away from heated surfaces. Do not let the cord hang over
Page 10

10
Owner’s Manual
IMPORTANT SAFEGUARDS (CONTINUED)
the edge of the table or counter. Never force the plug into an outlet.
Always unplug power cord by pulling on the plug. Turn the unit off before
removing the plug from the wall.
11. Do not operate where aerosol (spray) products are being used or where
oxygen is being administered.
12. This appliance should never be set up around unattended children or
those unaware of its presence. The appliance should be situated on at,
stable surfaces, away from water sources such as pools, spas, sprinklers,
hoses, etc.
13. Do not move the appliance while hot.
14. This appliance is for household use only; it is designed to process
normal household quantities. It is not suitable for continuous or
commercial operation.
15. Do not disassemble the product. There are no user serviceable parts.
16. Do not leave the appliance unattended while in use.
17. This appliance is not intended for operation by means of an external timer
or separate remote-control system.
18. Clean Induction Wok Base with caution. Cleaning a hot surface with
wet applications can cause steam and some cleaners can produce
dangerous fumes. Unplug from outlet before cleaning.
19. Use caution when disposing of hot grease.
20. Keep this manual handy for future reference.
Page 11
11
Owner’s Manual
Correct Disposal of This Product
This marking indicates that this product should not be disposed of with
other household wastes throughout the EU. To prevent possible harm to the
environment or human health from uncontrolled waste disposal, recycle it
responsibly to promote the sustainable reuse of material resources. To return
your used device, please use return and collection systems or contact the
retailer where the product was purchased. They can handle environmentallysafe recycling.
IMPORTANT – FCC Information:
Warning: Changes or modications to this unit not expressly approved
by the party responsible for compliance could void the user’s authority
to operate the equipment.
Note: The device complies with part 18 of the FCC Rules.
Electrical Information
1. The short cord length of this appliance was selected to reduce safety
hazards that may occur with a long cord.
2. An extension cord may be used with this appliance if:
a) The marked electrical rating of the extension cord is rated at least as
great as the electrical rating of the appliance.
b) The longer is arranged so that it does not drape over the countertop or
tabletop where it could be accidentally pulled off or tripped over.
3. Certain models of this appliance may have a polarized plug (one blade is
wider than the other). This plug is intended to t into a polarized outlet only
one way. If the plug does not t fully into the outlet:
a) Reverse the plug.
b) Contact a qualied electrician (if reversing plug does not work).
DO NOT ATTEMPT TO MODIFY PLUG IN ANY WAY.
IMPORTANT SAFEGUARDS (CONTINUED)
WARNING
Electric shock hazard. Use with adequate electrical system.
Do not use if cord or plug is damaged.
WARNING: All items on the Induction Wok can get very hot during
cooking. Please be careful when removing these items from the
unit. Always wear oven mitts or use pot holders. Induction Wok may
retain residual heat after Wok has been removed. Allow everything
to cool completely before cleaning.
1-877-689-2838 or [email protected]
SAVE THESE INSTRUCTIONS
Page 12
12
Owner’s Manual
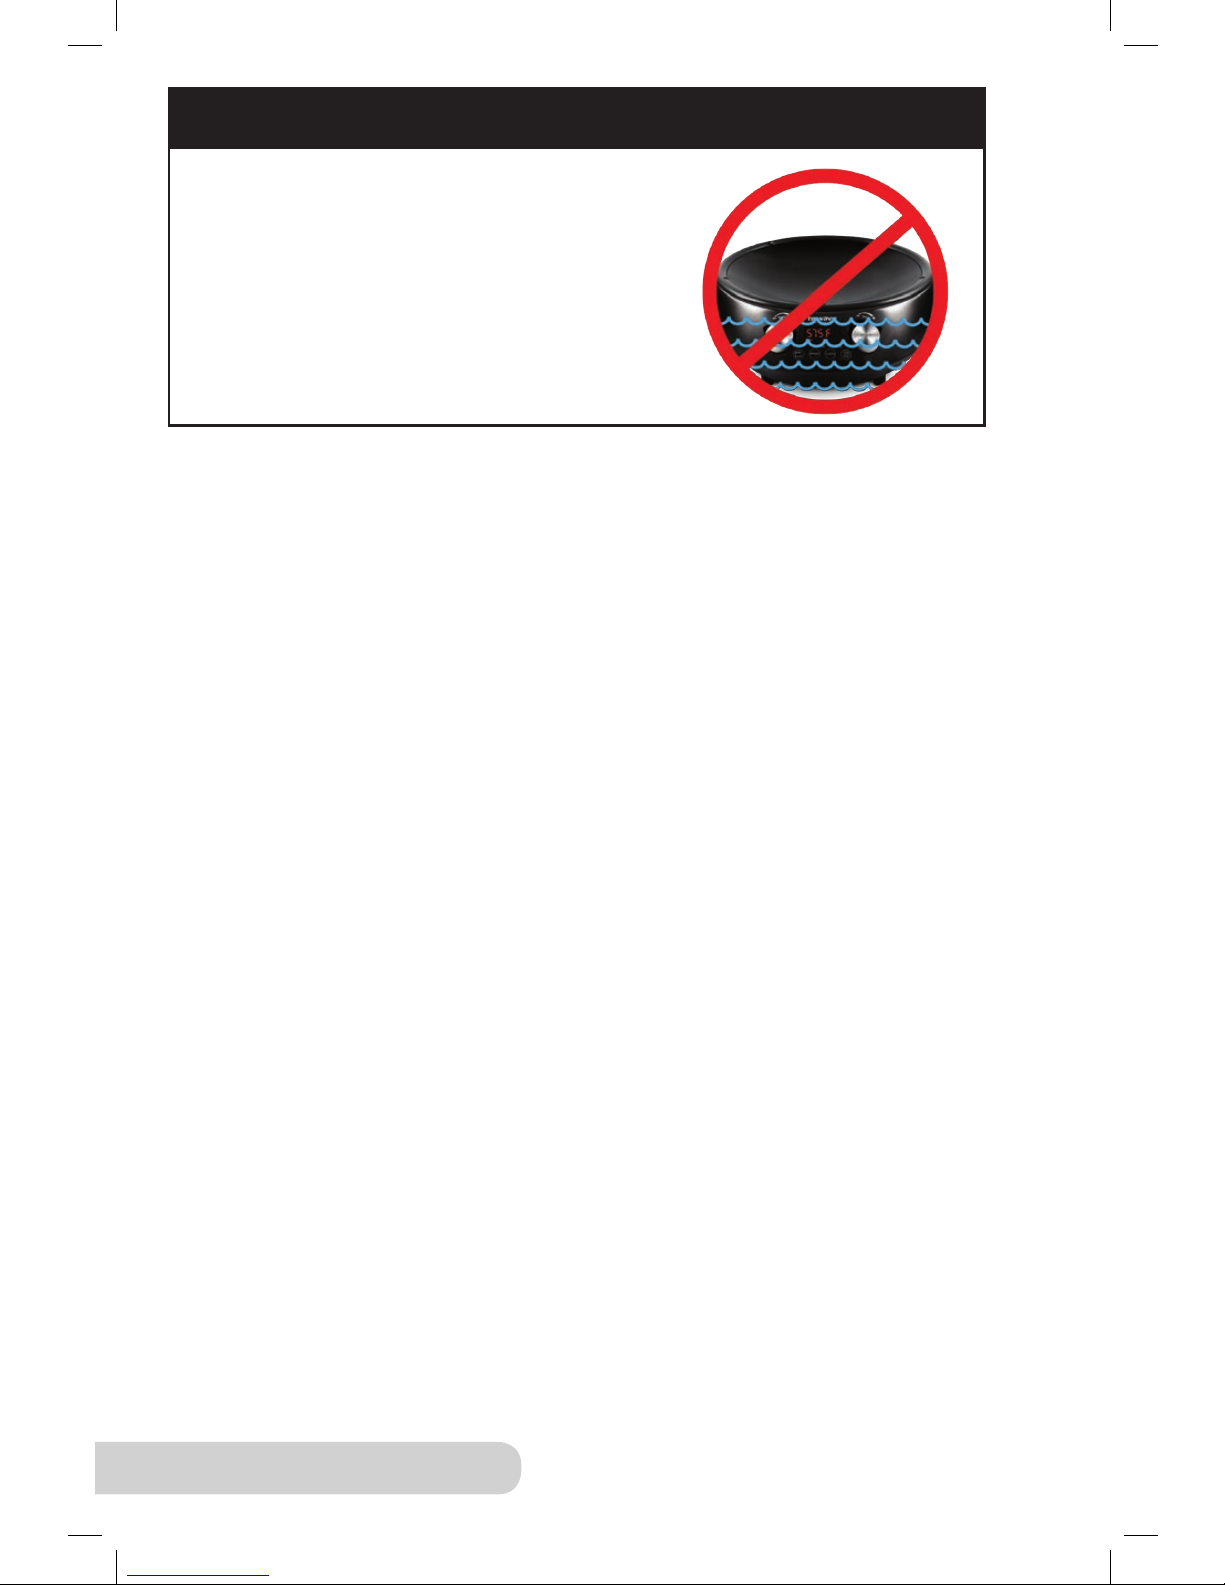
CARE & MAINTENANCE - INDUCTION WOK BASE
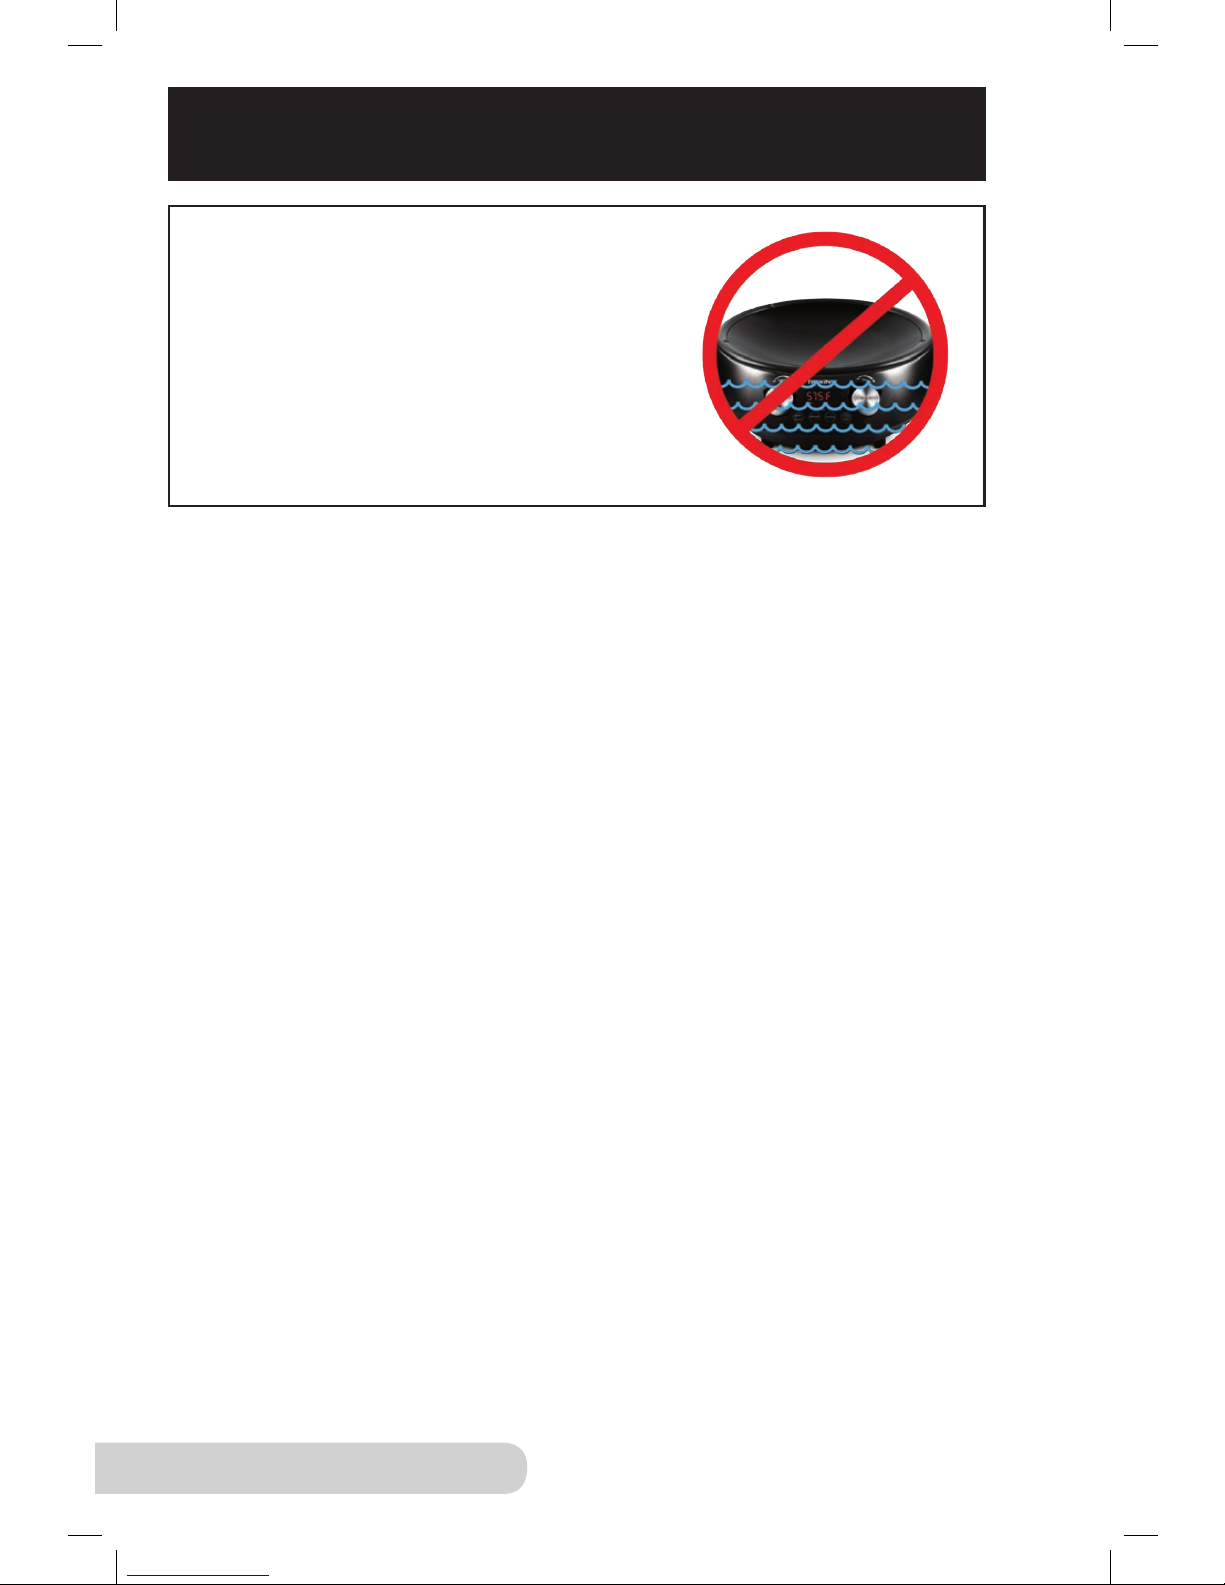
Before use, wipe surface with a damp
dishcloth or sponge, and dry thoroughly.
IMPORTANT - Do not immerse unit in water
or attempt to cycle through dishwasher.
Make sure unit has cooled completely
prior to cleaning. The outer surface may be
cleaned by wiping carefully with a damp
dishcloth or sponge.
AFTER USE:
• Clean after each use.
• Unplug the unit before cleaning.
• Make sure unit has cooled completely prior to cleaning.
• The outer surface may be cleaned by wiping carefully with a damp
dishcloth or sponge.
• Remove the power plug prior to cleaning the NuWave Precision Induction
Wok
™
. Do not use caustic cleaning agents. Water should not penetrate the
interior of the Induction Wok Base.
• Never immerse the NuWave Precision Induction Wok, its cables, or plug in
water or other liquids.
• Wipe the glass surface with a damp cloth or use a mild, non-abrasive soap
solution. Make sure the unit has cooled completely before cleaning.
• Wipe casing and operating panel with a soft cloth dampened with water
or a mild detergent.
• Do not use oil-based cleansing products as their use may damage plastic
parts or the casing/operating panel.
• Do not use ammable, acidic, or alkaline materials or substances near the
NuWave Precision Induction Wok, as this may reduce the service life of
the Induction Wok Base or pose a re risk when the Induction Wok Base
is in use.
• In order to keep your NuWave Precision Induction Wok looking like new,
take measures to ensure that the bottom of Wok does not scrape the
unit’s glass surface, although a scratched surface will not impair the use
of the Induction Wok Base.
• Make sure to properly clean the unit before storing it in a cool, dry place.
Important Tips:
1. Check power outlets to ensure proper operation. Do not use in an outlet
where other major appliances are engaged. Check settings if the unit is
cooking too slowly.
2. The electrical plug must be properly plugged into the outlet.
3. Always turn off and unplug the unit before wiping.
Page 13
13
Owner’s Manual
CARE & MAINTENANCE - WOK
Wok
Wok Stand
Note: Before seasoning the wok, it is recommended to clean the wok before rst
use. The Wok, Lid, Deep Frying Rack, and Wok Stand are dishwasher safe.
Seasoning/Care and Use
1. Make sure the Wok has been thoroughly dried.
2. Heat the Wok and rub 2 tablespoons of peanut oil in surface with a dry
cloth or a thick wad of paper towels so new layer of oil coats the surface.
(Caution: Surface Will Be Hot!)
• Leave a window open and use a fan to remove any smoke. The
surface smoking is natural during this process.
3. Allow the pan to cool to room temperature. Repeat the steps two to three
more times, rubbing a small amount of oil in the pan each time.
Cleaning the Wok:
1. After Wok has been used to cook, simply wipe Wok clean with a paper
towel or a dry rag.
• If the Wok is very dirty and requires a more thorough cleaning, wipe the
Wok using clean oil or a bamboo brush (eucalyptus has antibacterial
properties) to scratch off any encrustations. Simply run water into Wok
and scrub away until residue is gone.
2. Dry the Wok thoroughly after cleaning.
3. When all residue has been removed from the Wok, repeat the
seasoning process.
If a more thorough cleaning is needed:
1. Heat the Wok.
2. Add 2 tablespoons of peanut oil and add several tablespoons
of kosher salt.
Deep Frying Rack
Lid
Page 14

14
Owner’s Manual
General Operating Instructions:
• Place the Induction Wok Base on a stable, level, non-metallic surface.
• Never use the Induction Wok Base on a ammable surface (e.g., tablecloth,
carpet, etc.).
• Do not block the ventilation slots of the Induction Wok Base. This may
cause the unit to overheat. Maintain a minimum distance of 3-5 inches
from walls and other objects, appliances, etc.
• Do not place devices or objects that are sensitive to magnetic elds
on top of or next to the NuWave Precision Induction Wok™ (e.g., credit
cards, cellphones, radios, TVs, video recorders, etc.).
• Do not use the Precision Induction Wok in the proximity of open res,
heaters, or other heat sources.
• Do not place on stovetop.
• Ensure that the power cable is not damaged or compressed beneath the
Induction Wok Base.
• The power cable must not come into contact with sharp edges and/or
hot surfaces.
• Prior to connecting the Precision Induction Wok, conrm that the voltage
needs indicated in this manual correspond to the voltage supply in your
home. A wrong connection may lead to the unit’s damage and possible
injury to persons.
• In the event that damage to the unit is observed, immediately
disconnect the Precision Induction Wok from the power supply.
OPERATING INSTRUCTIONS
3. Give Wok a hard scrub with a folded paper towel. (Caution: Surface Will
be Hot!)
4. Cool the Wok.
5. Rinse under running water and dry thoroughly.
• Afterward, a light rub of peanut oil can be applied to Wok once again.
Note: The “conventional” ideas of cleanliness and hygiene with cookware are
somewhat counterproductive when dealing with a genuine wok—the residues
that remain on the Wok’s surface after dry-wiping it after use will, over time,
form a layer that will serve to enhance the taste of your stir-fried foods.
CARE & MAINTENANCE - WOK (CONTINUED)
Page 15
15
Owner’s Manual
CONTROL PANEL
On/Off Function:
1. Press “ON/OFF” once to turn on. “0” will be displayed.
2. Press “ON/OFF” again to turn the unit off.
Watts Function:
1. The default wattage is set to 1500. Press “watts” repeatedly to switch to
600, 900, and back to 1500 watts.
• When you turn unit off and on again, the previous watts selected will
remain in the Wok until changed.
F/C Function:
1. Press “stage” and “watts” simultaneously until you see “F” or “C” ashing.
2. Press “stage” to switch from “F” to “C” and vise versa.
3. Press “on/off” to complete the selection.
Pause/Clear Function:
1. Press “pause/clear” once to pause the unit.
• The temperature selected will be displayed and “F” will be ashing.
• If have selected “TIME” and you press “pause”, “TIME” will not
be ashing.
• To resume cooking, press “start”.
2. Press “pause/clear” again to clear any program out.
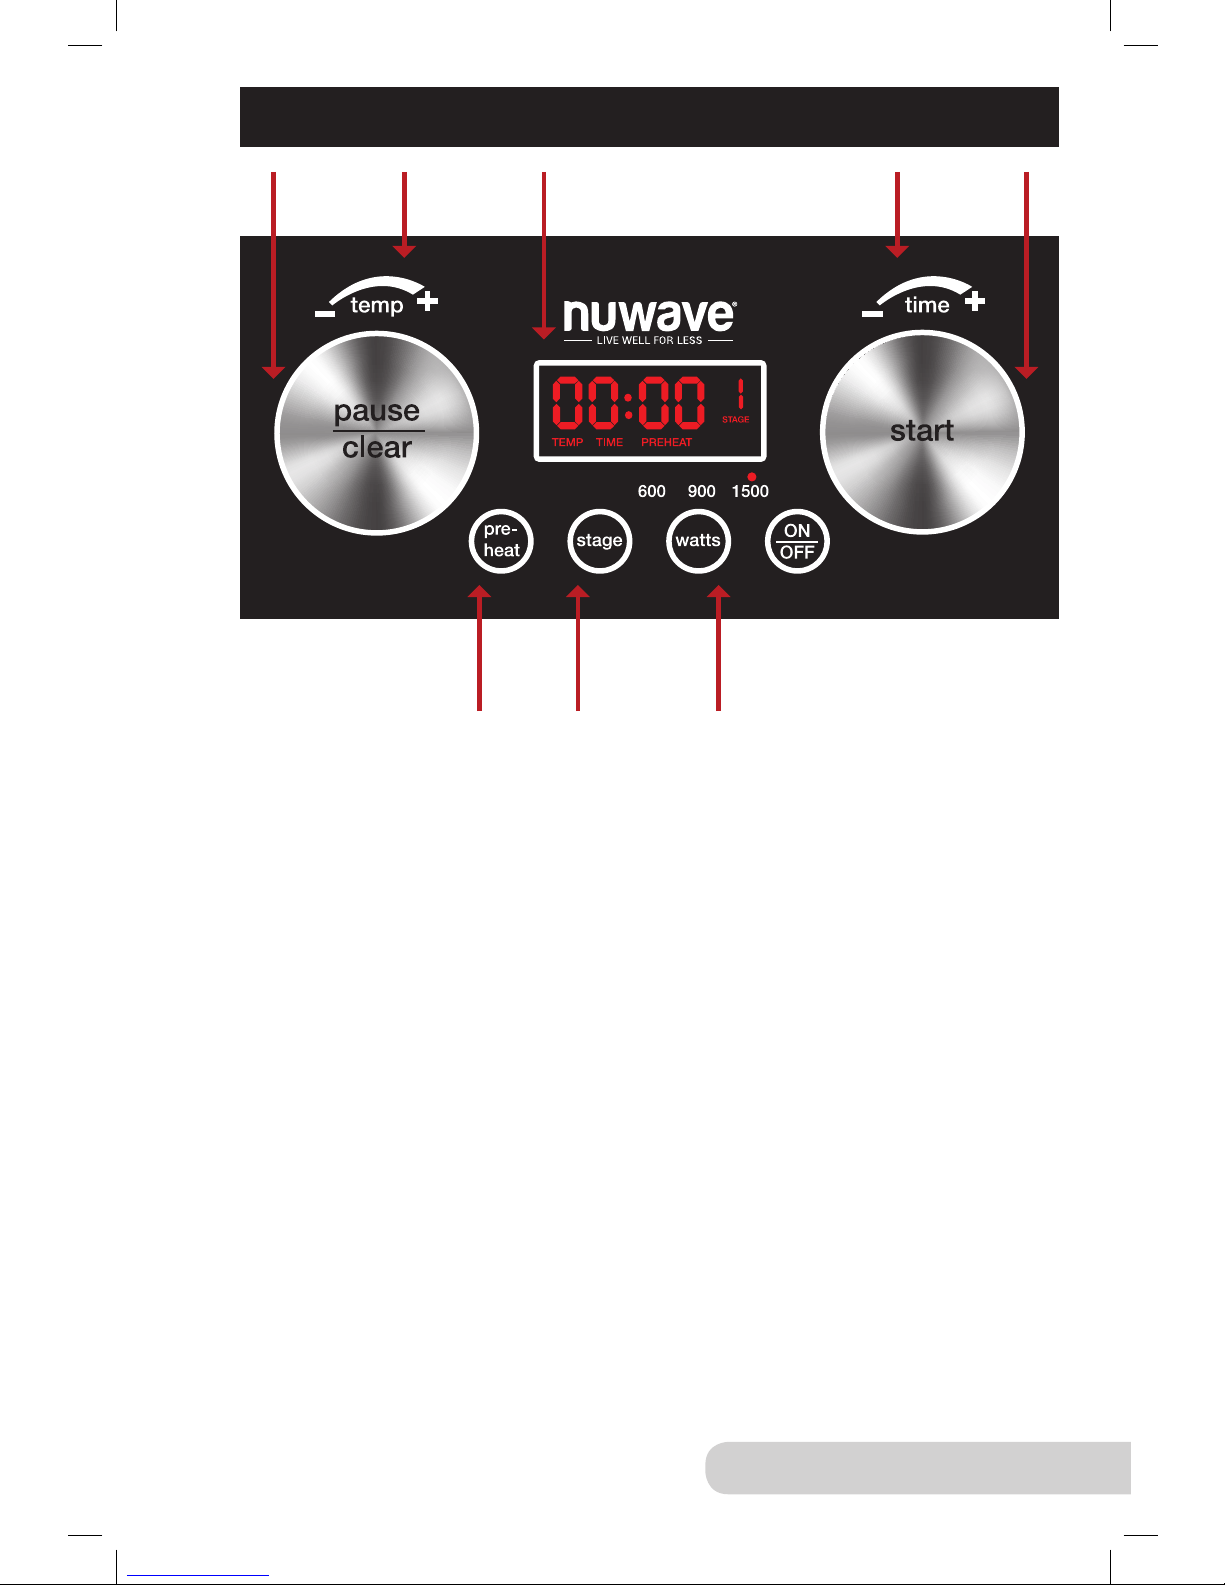
Press to
quickly clear
& pause
Turn to
adjust
temperatures
Digital LED
displays times
& temperatures
Turn to
adjust times
Press
to start
Quickly
heat to
desired
temperature
10 Stages lets
you adjust
temperatures
and times.
3 different
watts.
Page 16

16
Owner’s Manual
CONTROL PANEL (CONTINUED)
Quick Start:
1. After you turn the unit on, press “start” on the dial. “375F” and “TEMP”
will be displayed and the countdown will begin.
• The Wok is defaulted to 375F for 20 minutes.
Temperature Function:
Simply turn the dial to decrease or increase temperature.
• Located on the left dial.
• Temperature range 100-575F in 5-degree increments.
Time Function:
Simply turn the dial to decrease or increase time.
• Located on the right dial.
• Time range is from 1 minute to 9 hours and 59 minutes (Time is in Hours
and Minutes).
Stage Function:
1. Press “stage”. “STAGE” will be ashing and “1”, “TIME”, and “00:00” will
be displayed.
2. Set time and adjust temperature, if needed.
3. Press “stage” again. “STAGE” will be ashing and “2”, and “TIME”, and
“00:00” will be displayed.
4. Set time and adjust temperature, if needed.
5. Repeat steps, if necessary.
• You can create up to 10 stages. Stage 10 will display as “0”.
6. Press “start”.
Preheat Function:
1. Press “preheat”. “PREHEAT” and “375F” will be displayed.
2. Adjust time and adjust temperature, if needed.
• Preheat program has a default of 375F for 20 minutes.
3. Press “start”. Selected temperature and “F” will be ashing.
4. Once the temperature you selected has been reached, “selected
temperature” and “ready” will be displayed indicating the Wok will hold
that temperature for 5 minutes or until you press “start”.
5. Once you press “start”, the countdown you selected will begin with the
programmed temperature.
• If you press “pause” when the unit is preheating, “5” will be ashing,
indicating the Wok will hold the program for 5 minutes or until you
press “start”.
Page 17
17
Owner’s Manual
TROUBLESHOOTING GUIDE
• When any of the above error messages displays on the LED, the unit will
“beep” at least once.
• The fan will run up to a maximum of 60 seconds after pressing “pause/
clear” once. Continue cooking by pressing “start” within 45 minutes.
• The unit will turn off after 45 minutes if no buttons (such as “start”) are
pressed. When the unit shuts off, it will clear all previous cooking history.
• After pressing “pause/clear” twice or cooking has stopped, the fan will
run up to a maximum of 60 seconds until the unit cools. At that point, the
NuWave Precision Induction Wok will turn off.
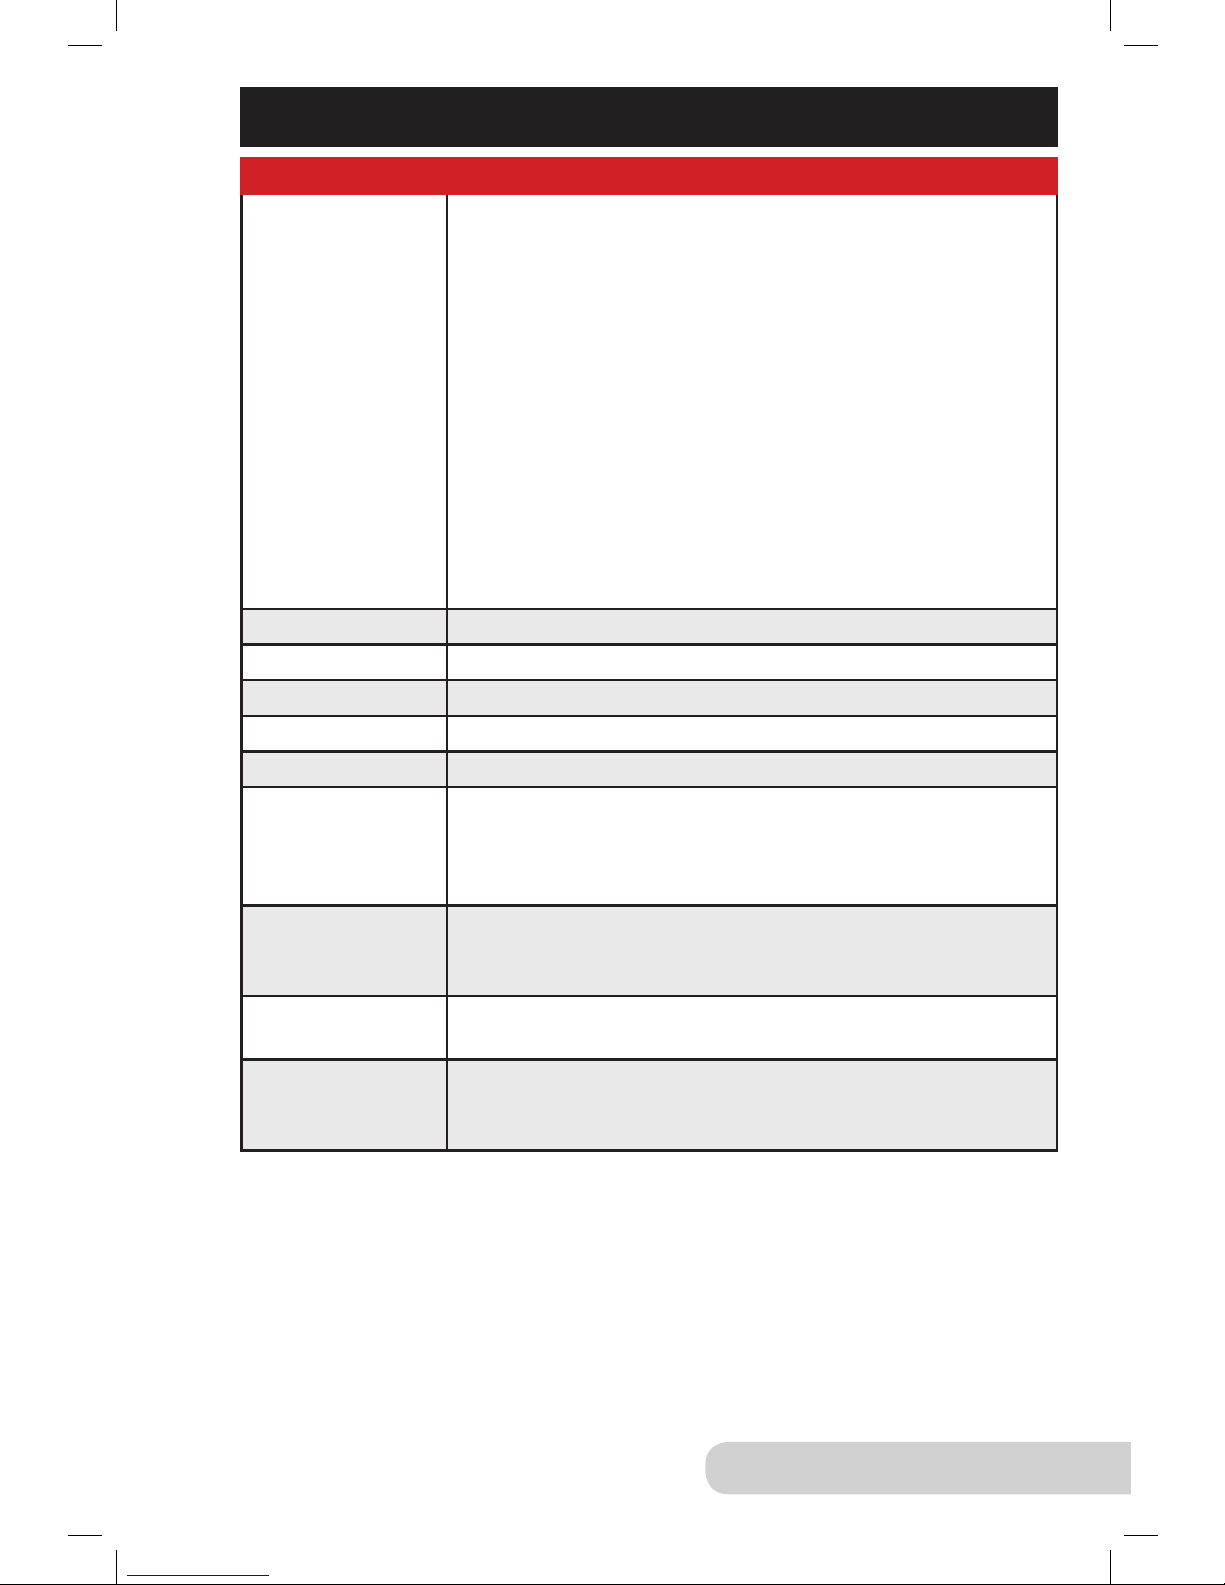
Error Message Solution
E1
E2 The unit is malfunctioning. Contact customer service.
E3 The unit’s voltage is too low. Minimum = 85 volts
E4 The unit’s voltage is too high. Maximum = 144 volts
E5 The unit is malfunctioning. Contact Customer Service.
E6 The unit is malfunctioning. Contact Customer Service.
E7
Overheating or air ventilation is obstructed. If internal
temperature exceeds 230˚F, operation will cease and a
“beep” noise will be produced. Press “pause/clear” twice.
Wait for the unit to cool.
E8
Overheating or if unit exceeds a temperature 20˚F
higher than sear, the appliance will turn off. Contact
Customer Service.
E9
The unit is malfunctioning. Contact Customer Service at
1-877-689-2838 or [email protected].
FULL
In programming mode, when the total entered time
reaches the appliance’s limit of 99:59, no additional
stages can be inputted.
An E1 reading typically means that your NuWave
Precision Induction Wok
™
does not detect Wok on its
surface. This can occur for one of two reasons:
1. The induction coils contained within the
NuWave Precision Induction Wok will only
work when they are in direct contact with a
piece of Wok. To maintain your appliance’s
effectiveness, always ensure that it rests on a
at surface and that contact is consistent with
your Wok.
2. An E1 message may also occur if your Wok is
not induction-ready.
It is recommended to only use supplied
Wok with the Precision Induction Base.
Page 18
18
Owner’s Manual
TROUBLESHOOTING GUIDE (CONTINUED)
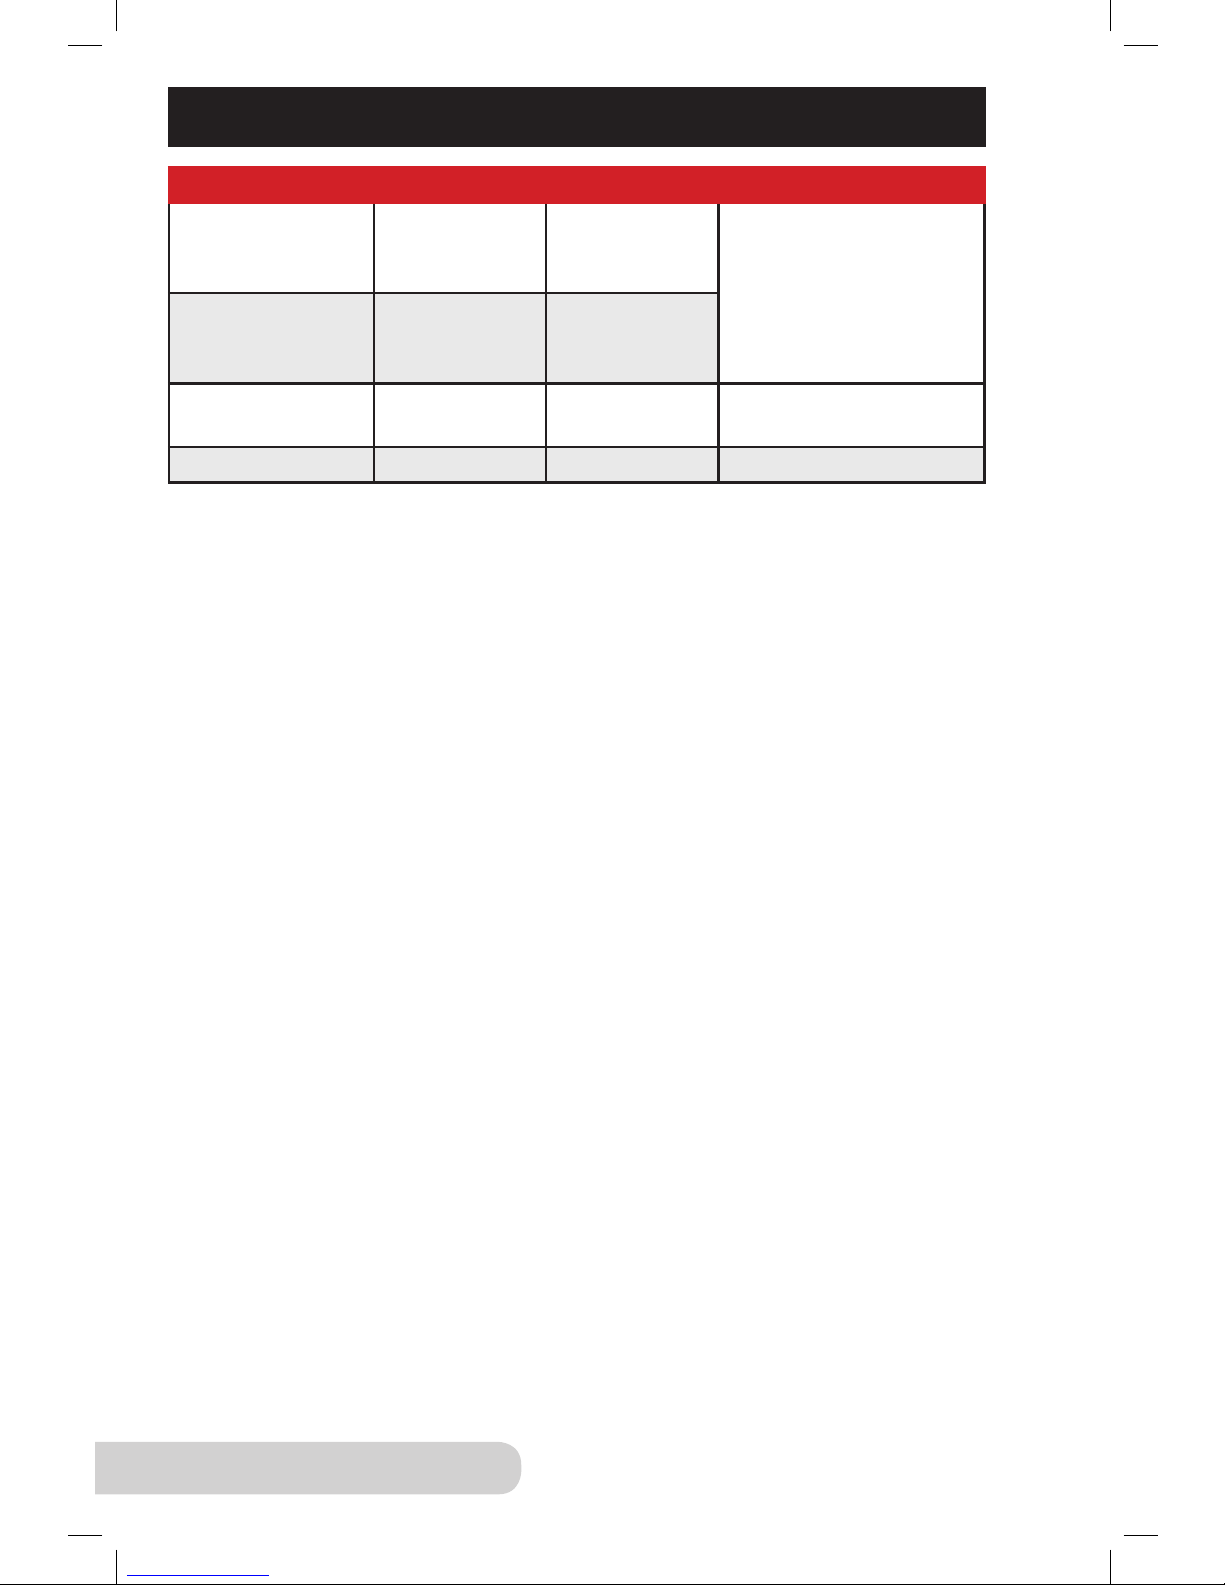
When the Wok is off of the NuWave Precision Induction Wok
Initial Single beep
“F” or “C”
or “Sear” or
“:” Flashing
After returning the
Wok to the surface of
the NuWave Precision
Induction Wok, it
will automatically
resume cooking.
<10 seconds None
“F” or “C”
or “Sear” or
“:” Flashing
11-70 seconds Yes E1
Resume cooking by
pressing “start”.
After 70 seconds None 0 Cooking stops.
Page 19

19
Owner’s Manual
LIMITED WARRANTY
The NuWave Precision Induction Wok
THE MANUFACTURER WARRANTS
The NuWave Precision Induction Wok™, including the Wok Stand, the Deep
Frying Rack, and the Lid are to be free from manufacturer defects. All
electrical components are warrantied for 1 year from the date of purchase,
under normal household use, and when operated in accordance with the
Manufacturer’s written instructions.
The Manufacturer will provide the necessary parts and labor to repair any
part of the NuWave Precision Induction Wok at NuWave, LLC Service
Department. After the expiration of the warranty, the cost of the labor and
parts will be the responsibility of the owner.
THE WARRANTY DOES NOT COVER
The Limited Warranty is voided if repairs are made by an unauthorized dealer
and/or the serial number data plate is removed and/or defaced. Normal
deterioration of nish due to use or exposure is not covered by this Warranty.
This Limited Warranty does not cover failure, damages or inadequate
performance due to accident, acts of God (such as lightning), uctuations in
electric power, alterations, abuse, misuse, misapplications, corrosive-type
atmospheres, improper installation, failure to operate in accordance with the
Manufacturer’s written instructions, abnormal use or commercial use. NuWave,
LLC reserves the right to void the Limited Warranty, where allowable by law, for
products purchased from an unauthorized dealer.
TO OBTAIN SERVICE
The owner shall have the obligation and responsibility to: Pay for all services
and parts not covered by the warranty; Prepay the freight to and from Service
Department for any part or system returned under this warranty; Carefully
package the product using adequate padding material to prevent damage
in transit. The original container is ideal for this purpose. Include in the
package the owner’s name, address, day time telephone number, a detailed
description of the problem, and your “RGA number.” Call 1-877-689-2838
or email [email protected] to obtain the RGA number (Return Goods
Authorization number). Provide the cooking system model & serial number and
proof of date of purchase (a copy of the receipt) when making claims under
this warranty.
Page 20

20
Owner’s Manual
MANUFACTURER’S OBLIGATION
The Manufacturer’s obligation under this Limited Warranty is limited, to the
extent allowable by law, to repairing or replacing any part covered by this
Limited Warranty which upon examination is found to be defective under
normal use. The Limited Warranty is applicable only within the continental
United States and only to the original purchaser of the manufacturer’s
authorized channels of distribution. THE LIMITED WARRANTY MA Y NOT BE
ALTERED, VARIED OR EXTENDED EXCEPT BY A WRITTEN INSTRUMENT
EXECUTED BY THE MANUFACTURER. THE REMEDY OF REPAIR OR
REPLACEMENT AS PROVIDED UNDER THIS LIMITED WARRANTY IS
EXCLUSIVE. IN NO EVENT SHALL THE MANUFACTURER BE LIABLE
FOR ANY CONSEQUENTIAL OR INCIDENTAL DAMAGES TO ANY
PERSON, WHETHER OR NOT OCCASIONED BY NEGLIGENCE OF THE
MANUFACTURER, INCLUDING WITHOUT LIMITATION, DAMAGES FOR
LOSS OF USE, COSTS OF SUBSTITUTION, PROPERTY DAMAGE, OR
OTHER MONEY LOSS.
Some states do not allow the exclusion or limitation of incidental or consequential
damages, so the above limitation exclusions may not apply. This Limited Warranty
gives specic legal rights, and there may also be other rights which vary from
state to state. EXCEPT AS OTHERWISE EXPRESSLY PROVIDED ABOVE,
THE MANUFACTURER MAKES NO WARRANTIES EXPRESSED OR IMPLIED
ARISING BY LAW OR OTHERWISE, INCLUDING WITHOUT LIMITATION,
THE IMPLIED WARRANTIES OF MERCHANTABILITY AND FITNESS FOR A
PARTICULAR PURPOSE TO ANY OTHER PERSON. READ YOUR OWNER’S
MANUAL. IF YOU STILL HAVE ANY QUESTIONS ABOUT OPERATION OR
WARRANTY OF THE PRODUCT, PLEASE CONTACT NUWAVE, LLC.
READ YOUR OWNER’S MANUAL:
If you still have any questions about operation or warranty of the product, please
contact NuWave, LLC at: 1-877-689-2838 or email [email protected].
LIMITED WARRANTY (CONTINUED)
Page 21
21
Recipes
Recipes
Page 22
22
Recipes
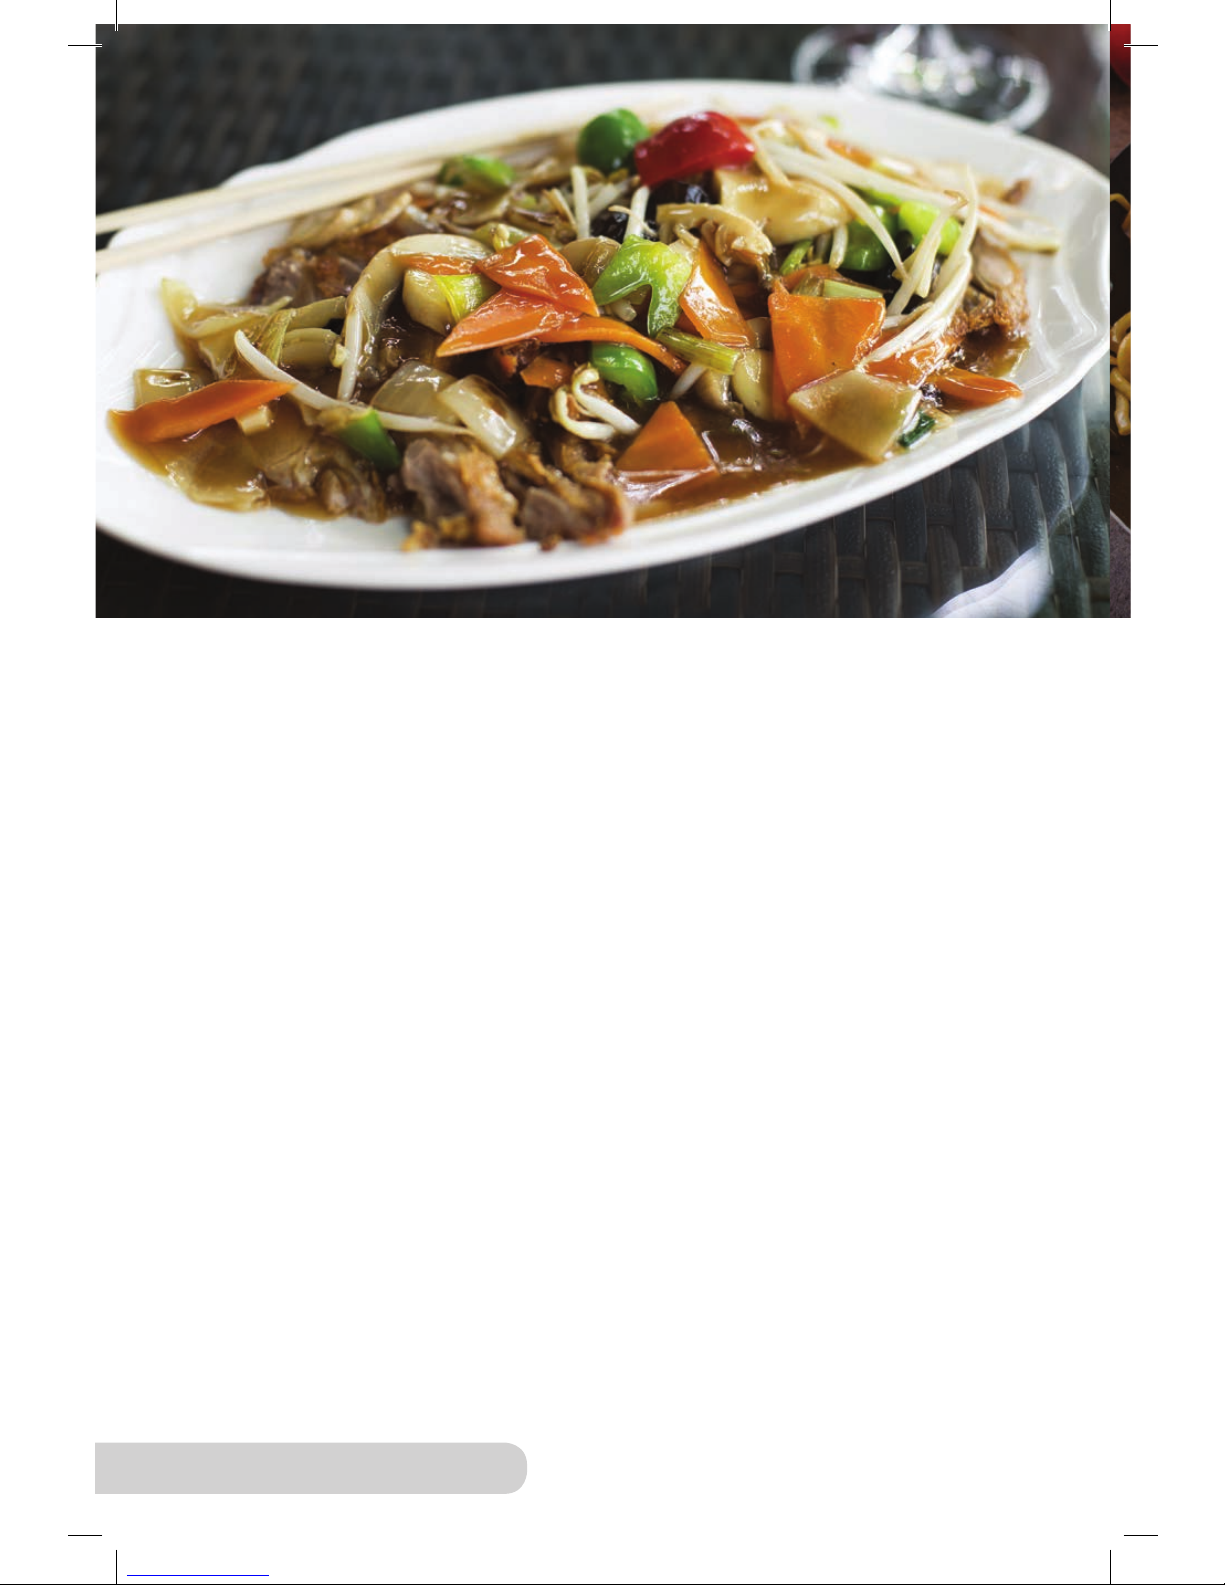
Beef Chop Suey Serves: 4-6
Ingredients:
½ pound beef (round or chuck),
cut into thin slices
2 teaspoons peanut oil
2 teaspoons soy sauce
1 teaspoon sugar
1 teaspoon sea salt
4 teaspoons cornstarch
2 onions, chopped
2 carrots, chopped
¼ pound mushrooms, sliced
7 ounces bean sprouts
3 slices ginger, crushed
½ cabbage, chopped
1 teaspoon sugar
4 cloves garlic, crushed
2 cups cooked rice
Directions:
1. In a bowl, mix oil, soy sauce, sugar, sea salt, cornstarch, and fresh
ground pepper.
2. Add beef to mixture and marinate in refrigerator.
3. Heat Wok to 425˚F and add peanut oil. Add onions and carrots and sauté.
4. Add mushrooms, sprouts, ginger, and cabbage, and stir-fry. Add sugar
and sea salt.
5. Remove vegetables from Wok; set aside.
6. Add more oil to Wok and add garlic and sauté.
7. Add marinated beef and sauté for 4 minutes until cornstarch is no longer
visible and beef is cooked.
8. Serve chop suey over cooked rice.
Page 23
23
Owner’s Manual
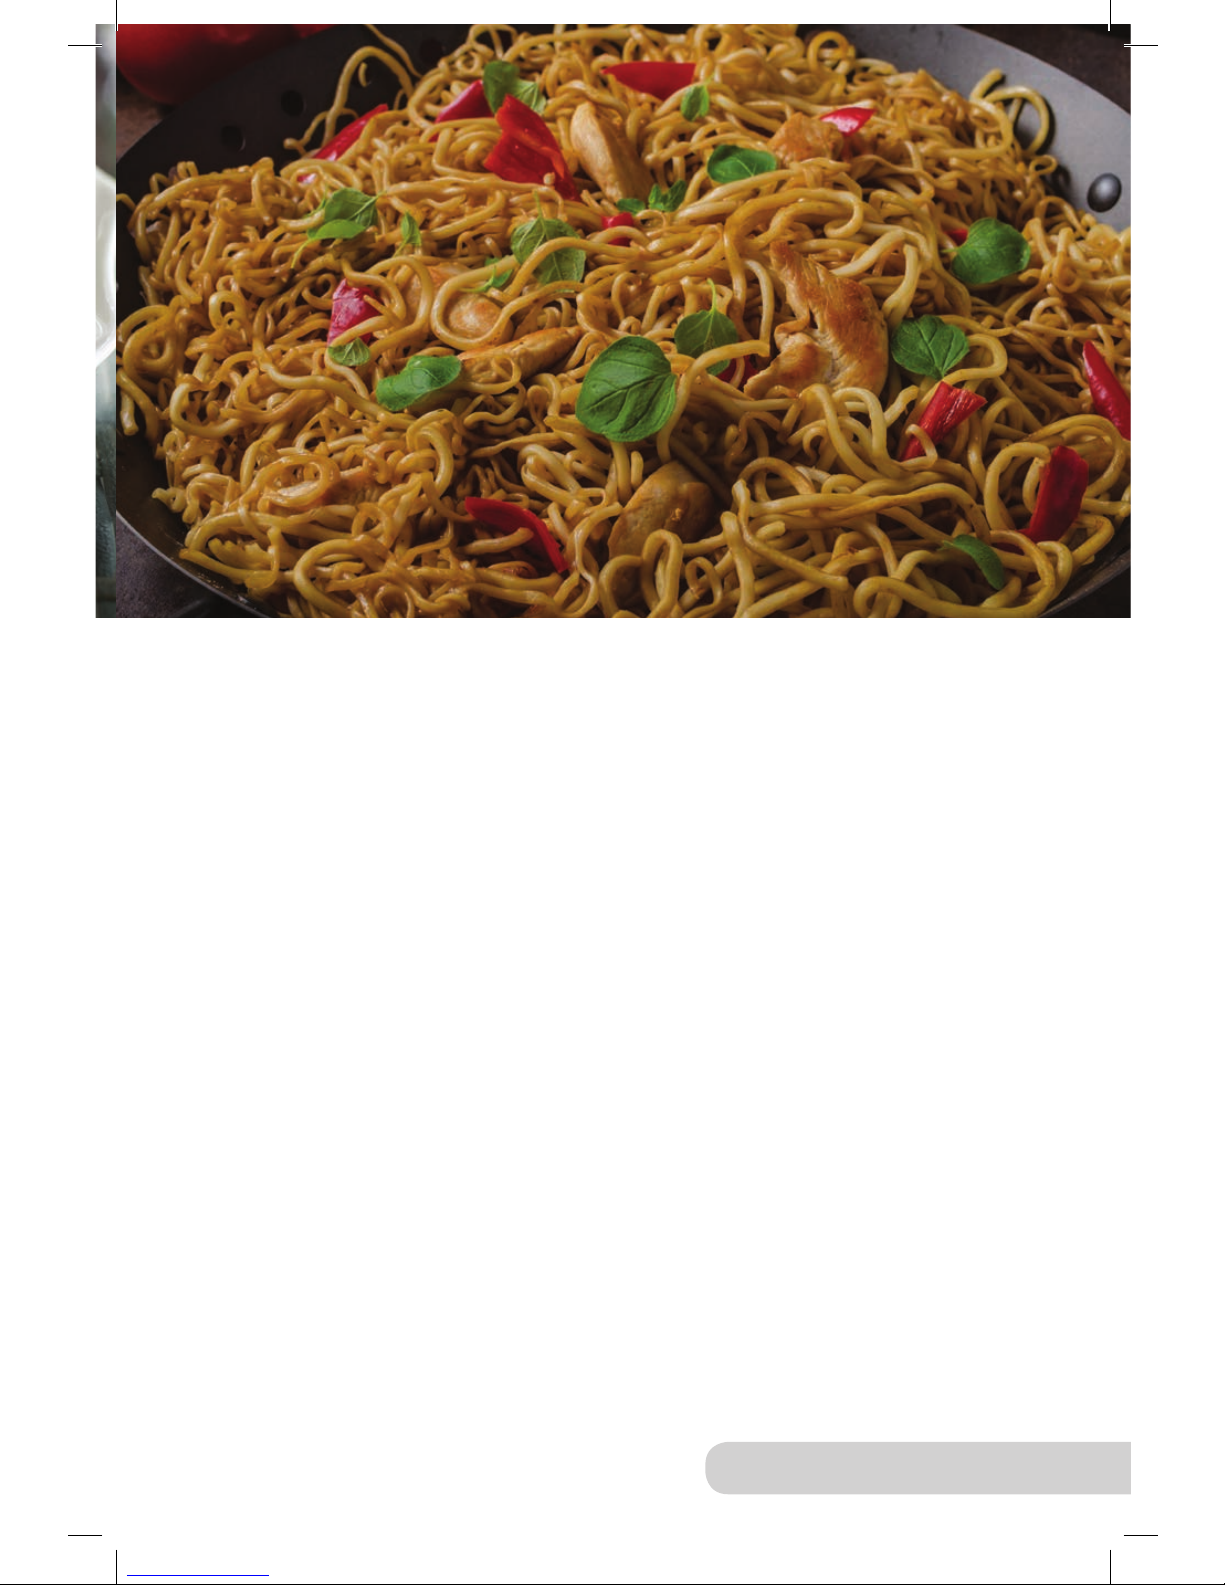
Beef Chow Mein Serves: 4-6
Ingredients:
Beef (round), sliced
1 tablespoon peanut oil
1 package chow mein noodles
1 package frozen vegetables
2 cups beef stock
¼ teaspoon garlic, minced
2 tablespoons soy sauce
Directions:
1. Heat up Wok to 425˚F and add peanut oil.
2. Place sliced beef into Wok and sauté for about 4 minutes.
3. Remove meat from Wok and put in a bowl with soy sauce
and garlic. Combine.
4. Return beef to Wok. Add beef stock, chow mein noodles,
and frozen vegetables.
5. Cook until vegetables are crisp and noodles are done.
6. Remove from heat. Serve immediately.
Page 24
24
Owner’s Manual
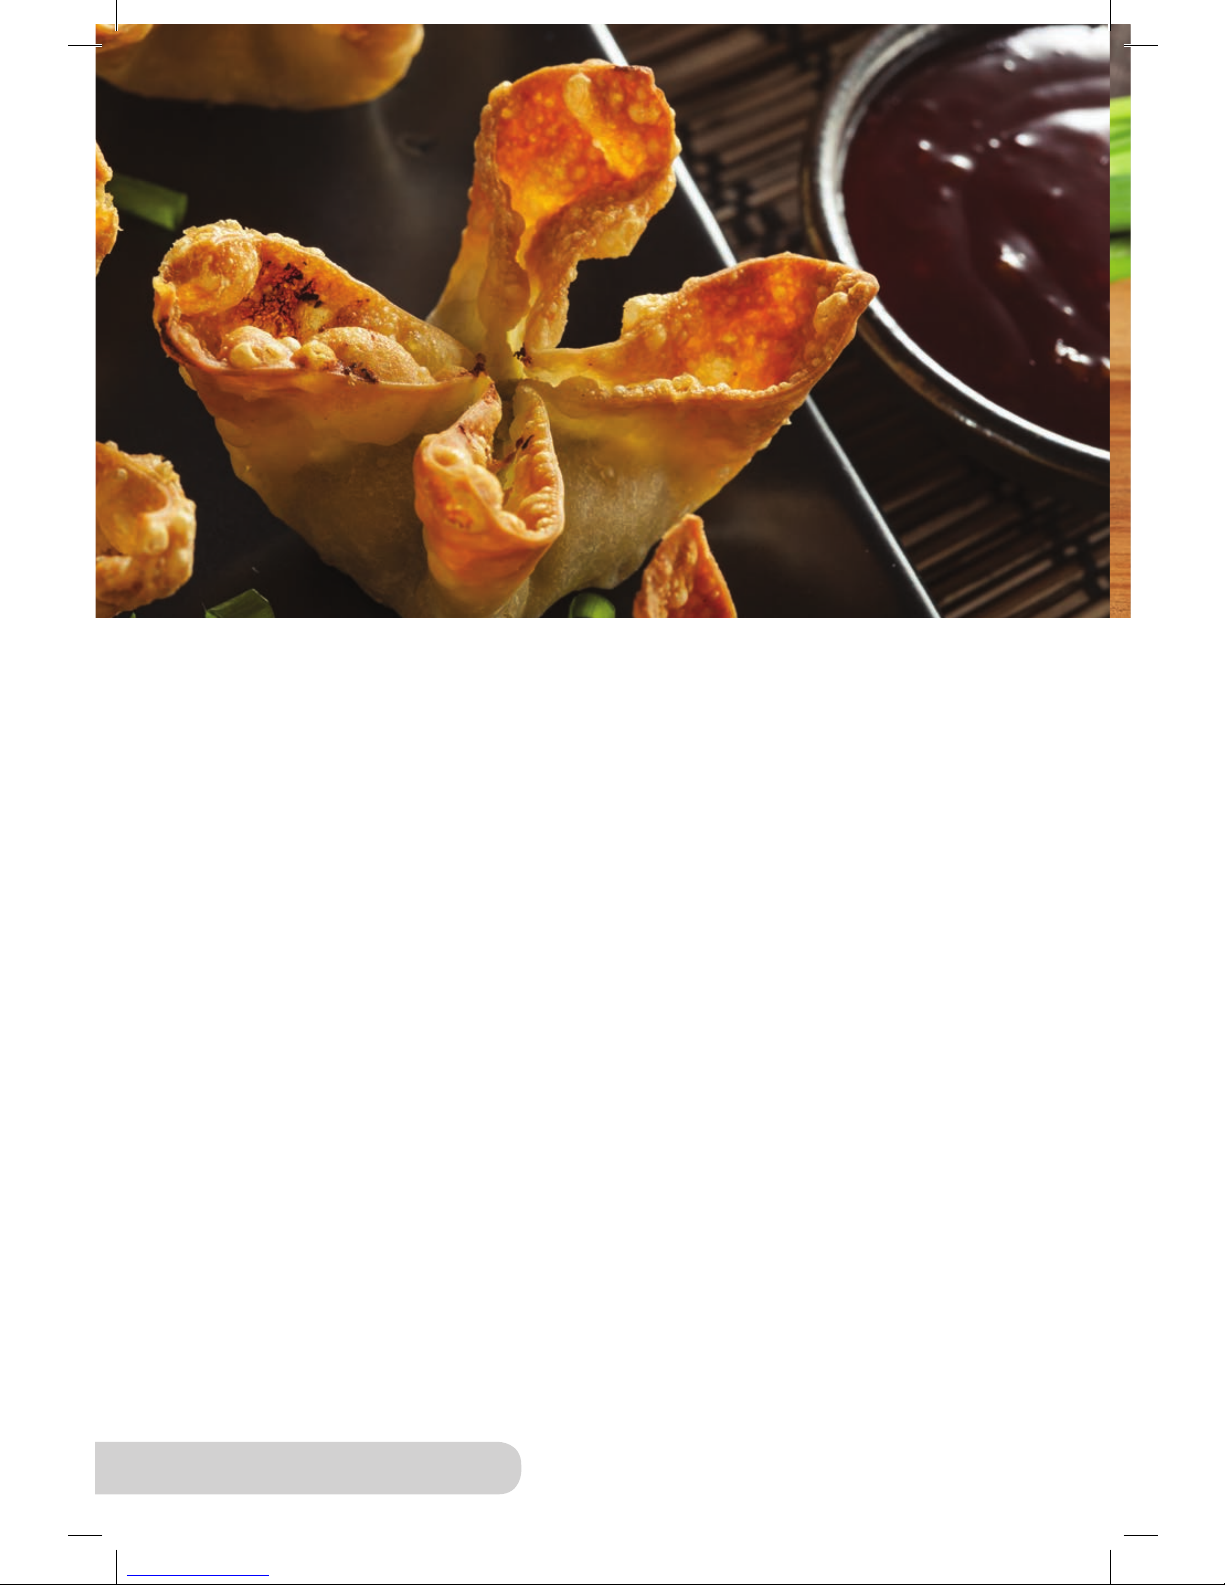
Crab Rangoon Serves: 8
Ingredients:
6 ounces lump crabmeat
6 ounces cream cheese, softened
3 green onions, thinly sliced
1 egg, beaten
Peanut oil, enough for deep-frying in Wok
1 package wonton skins (wrappers)
Directions:
1. In a bowl, add crabmeat, cream cheese, and green onions. Mix well.
2. Fill each wonton skin (wrapper) with ½ teaspoon of lling for each wonton.
3. Seal edges of wrapper with beaten egg.
4. Fold over and squeeze out any air of wonton.
5. Heat Wok to 375˚F and add peanut oil (pour in enough for deep-frying
in Wok).
6. Place in wontons. Deep-fry until they are golden brown and crispy.
7. Remove and allow excess oil to drip off. Drain on paper towel.
Page 25
25
Owner’s Manual
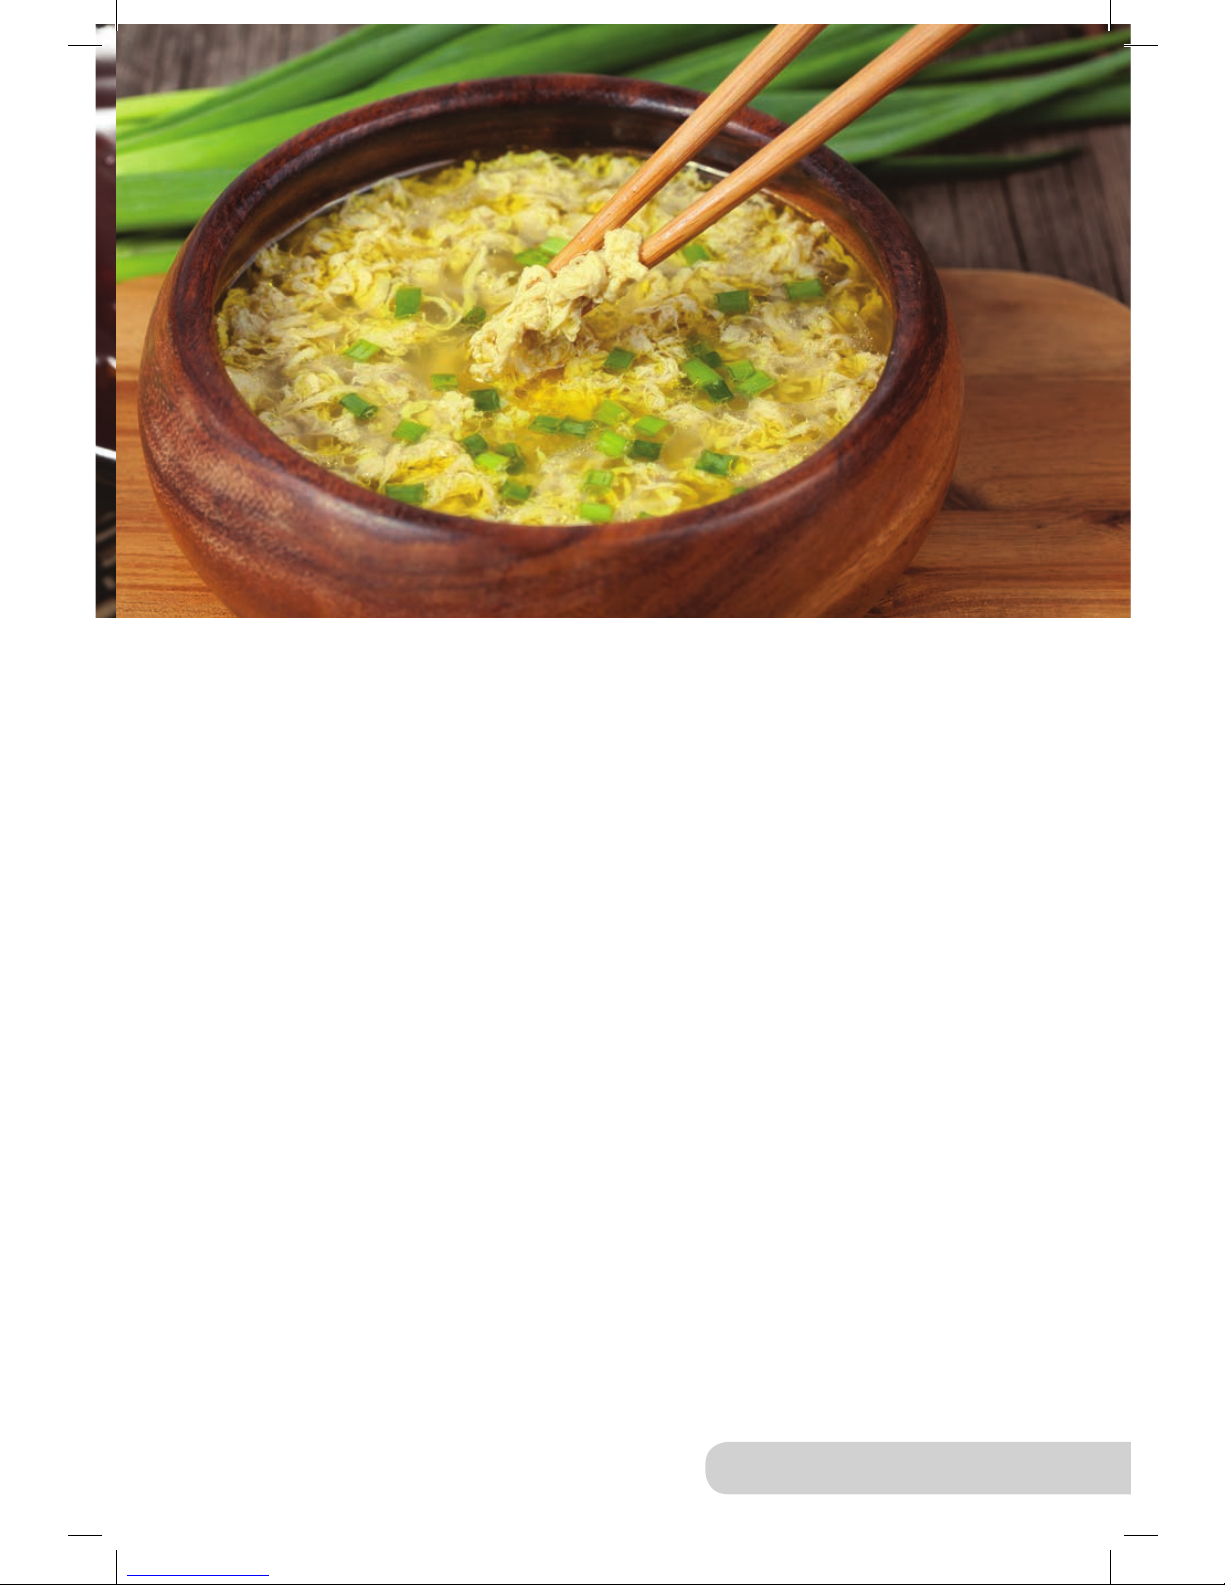
Egg Drop Soup Serves: 4
Ingredients:
2 large eggs, lightly beaten
6 cups chicken broth
1 teaspoon sugar
½ teaspoon fresh grated ginger
¼ teaspoon ground white pepper
½ teaspoon sea salt
1 green onion, sliced thin
1 tablespoon cornstarch
3 tablespoons cold water
1 teaspoon rice wine
Directions:
1. Heat up the Wok, add chicken broth, and bring up to a boil.
2. Add rice wine and ginger, reduce to a simmer, and add sugar and ground
white pepper.
3. Slowly add cornstarch mixture to the broth.
4. Pour lightly beaten eggs into stock and stir. Garnish with green onions.
Page 26
26
Owner’s Manual
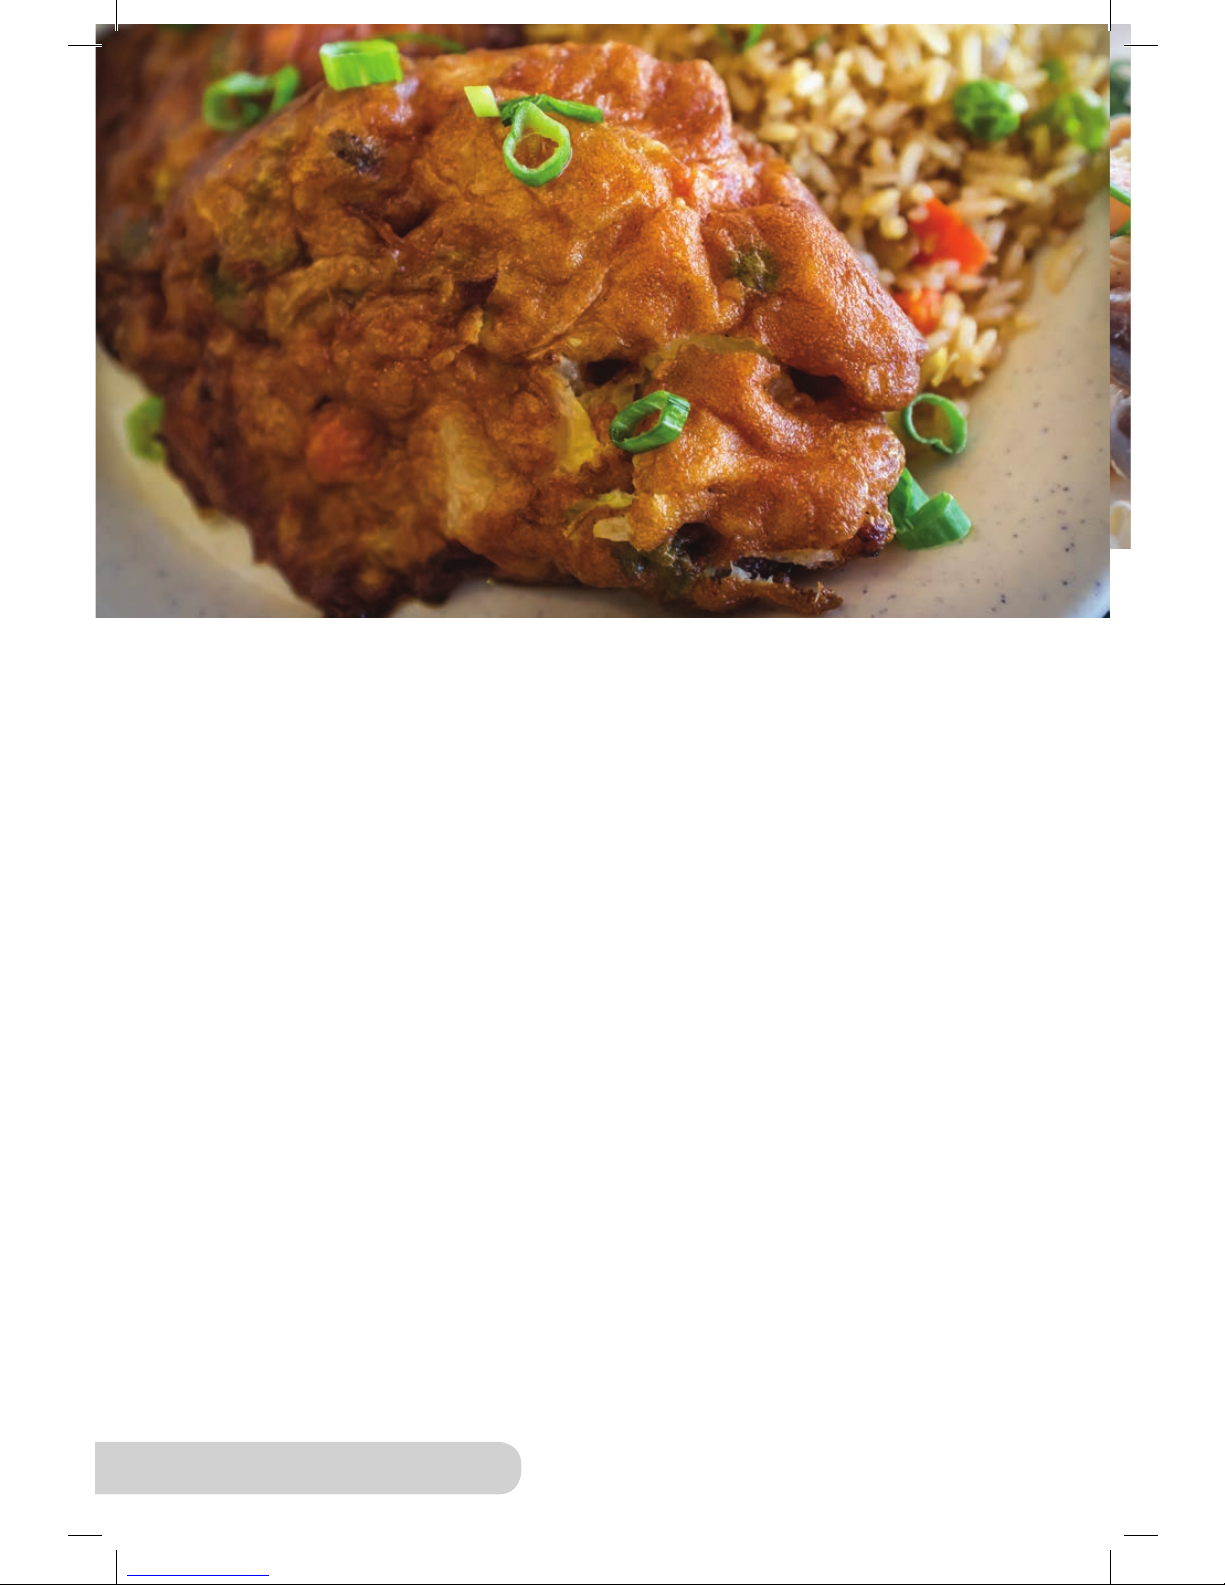
Egg Foo Yung (Cantonese Style) Serves: 4
Ingredients:
3 large eggs, lightly beaten
6 Chinese mushrooms, sliced
2 ounces fresh spinach
½ teaspoon sugar
1 cup bean sprouts
½ cup chopped water
chestnuts, drained
2 ounces cooked pork, chicken,
or shrimp
1 teaspoon rice wine
1 teaspoon sea salt
½ teaspoon freshly
ground black pepper
3 tablespoons peanut oil
2 tablespoon cilantro, freshly chopped
Directions:
1. Pour beaten eggs into a bowl. Add sea salt and add fresh ground black
pepper; set aside.
2. Heat Wok and add all the vegetables. Cook for 1 minute.
3. Add pork (or chicken or shrimp) and cook until golden brown and
cooked through.
4. Add mushrooms, spinach, bean sprouts, and chestnuts.
5. Once cooked, pour eggs from bowl into Wok and cook, ipping
occasionally, for 2 minutes.
6. Remove and cut into desired sizes.
7. Drizzle with rice wine and garnish with cilantro sprigs.
Page 27
27
Owner’s Manual
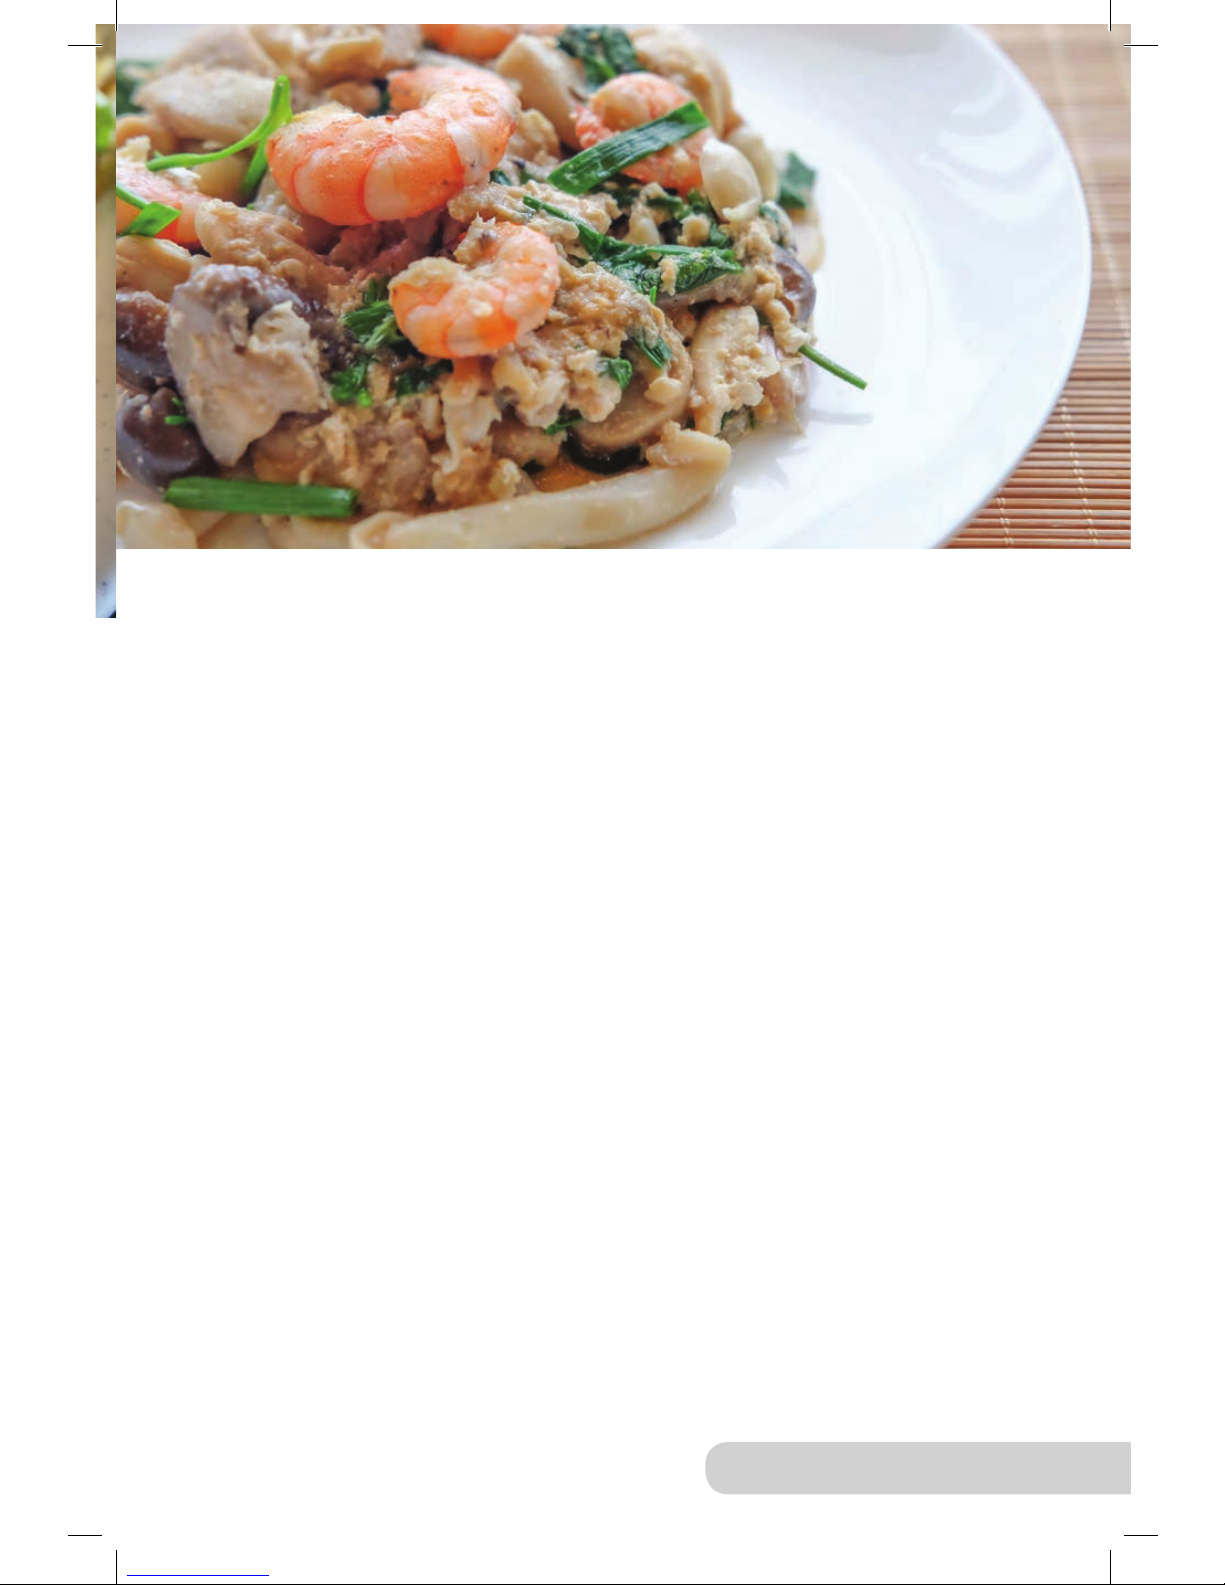
Fried Rice with Shrimp, Ham, and Shiitake Mushrooms
Serves: 4-6
Ingredients:
½ounce dried shiitake mushrooms
¼ cup oyster sauce
1 tablespoon soy sauce
3½ teaspoons peanut oil
2 large eggs, lightly beaten
8 ounces small shrimp,
peeled, deveined
5 cups sticky rice, cooked according to
directions
1 cup baby peas
8 ounces smoked deli ham, cut into
½-inch pieces
2 garlic cloves, minced
5 scallions, thinly sliced
Directions:
1. Rehydrate the shiitake mushrooms in steaming water for about 5 minutes.
2. Remove stems and slice caps into ¼-inch-thick pieces; set aside.
3. In a bowl, combine oyster sauce and soy sauce; set aside.
4. Heat Wok to 275˚F. Add 1½ teaspoons of the peanut oil. Add eggs and
cook for 20 seconds. Stir-fry an additional 30 seconds to break eggs into
small pieces.
5. Transfer to a bowl; set aside.
6. Add 1½ teaspoons of the peanut oil to Wok and and add shrimp,
stirring constantly until they are opaque and cooked through,
approximately 30 seconds.
7. Transfer to the bowl with egg pieces; set aside.
8. Heat remaining peanut oil in Wok, adding peas, ham, and mushrooms. Cook
1 minute, stirring constantly.
9. Add rice and oyster sauce mixture and cook, stirring constantly to break up
rice clumps, about 3 minutes.
10. Add scallions, eggs, and shrimp. Cook until heated through, about 1 minute.
Page 28
28
Owner’s Manual
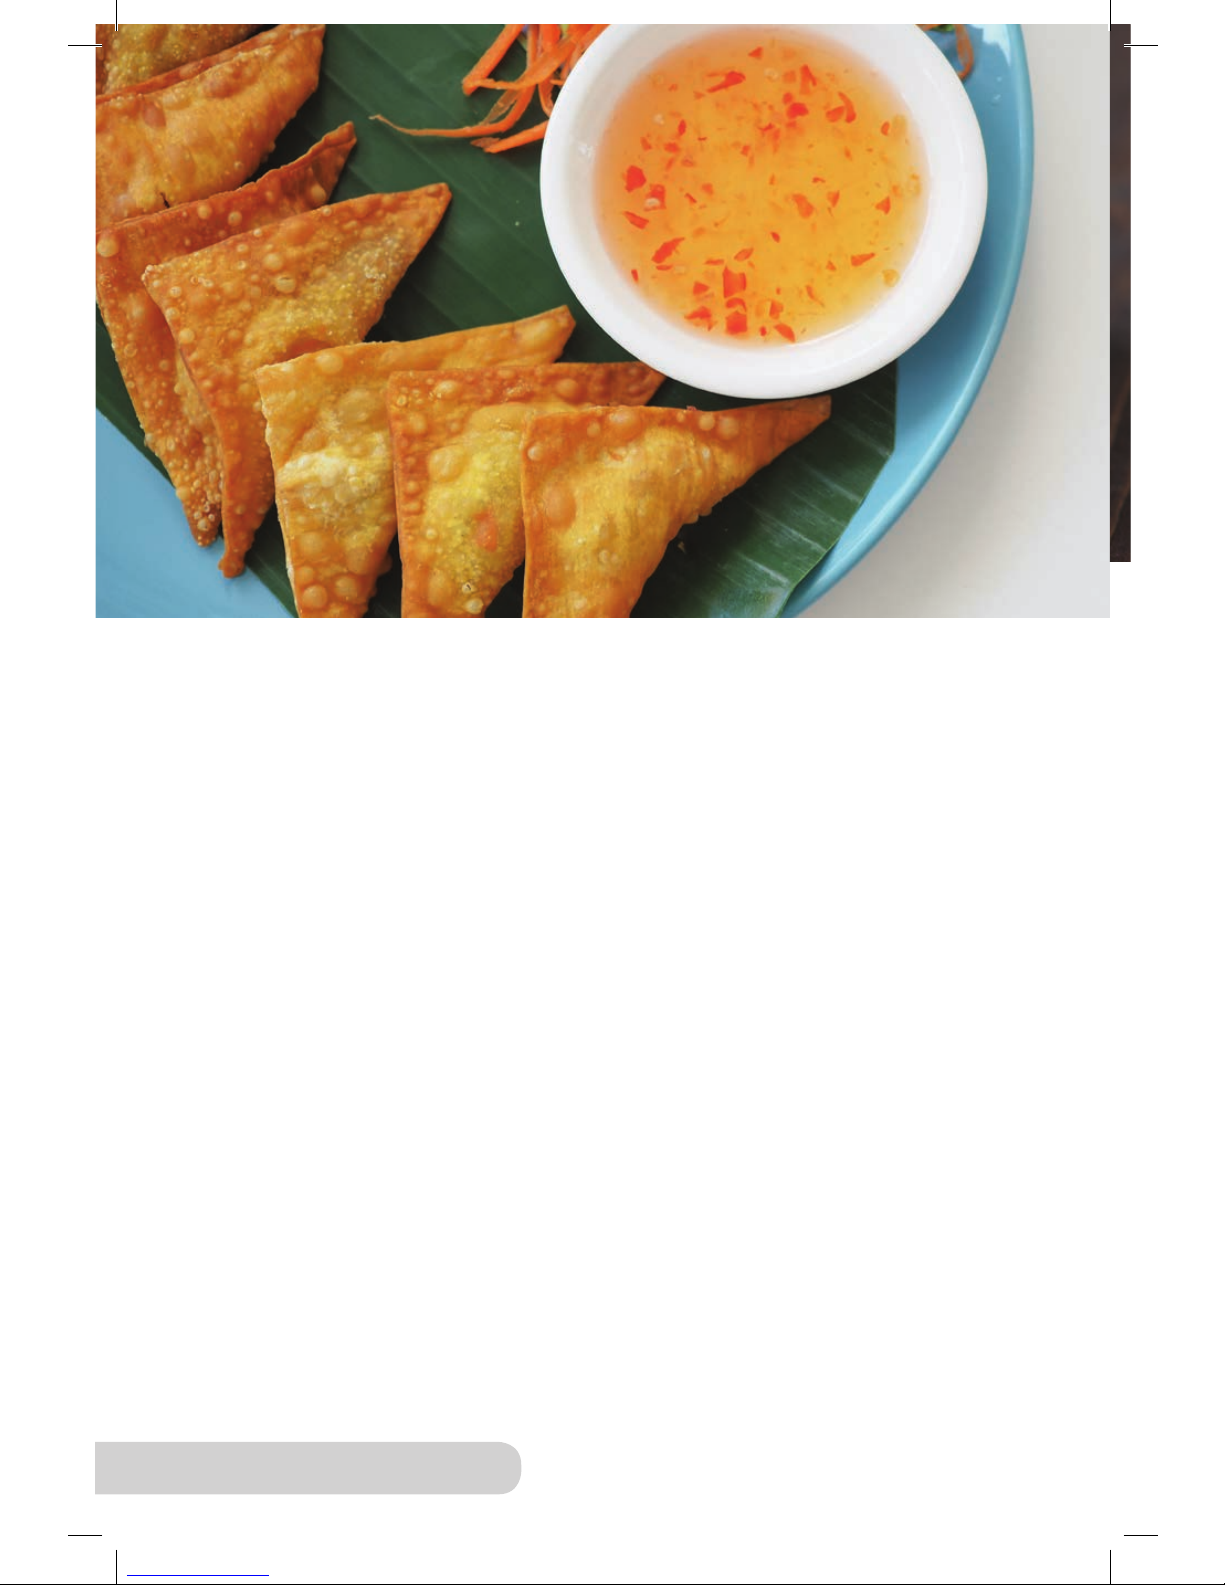
Fried Wontons Serves: 6
Ingredients:
1 pound ground pork
2 carrots, finely chopped
5 scallions, finely chopped
1 tablespoon soy sauce
1 tablespoon sesame oil
1 tablespoon fresh ginger, minced
2 cloves of garlic, minced
40 to 50 wonton wrappers
Peanut oil (for deep-frying)
Directions:
1. In a bowl, mix pork, garlic, ginger, sesame oil, soy sauce, scallions,
and carrots.
2. Take one wonton wrapper and place about 1 tablespoon of pork lling
on top.
3. Wet the edges of the wonton wrapper with some water and fold the edges
over to make a triangle. Press down on edges with ngers to seal.
4. Repeat to make several.
5. Heat Wok to 365˚F and add enough peanut oil to deep-fry, about 1½
inches deep.
6. Deep-fry 5 to 6 wontons at a time until golden brown.
7. Drain cooked wontons on a rack or plate lined with paper towel.
Tip: Serve wontons with chili sauce or a sweet and sour sauce.
Page 29
29
Owner’s Manual
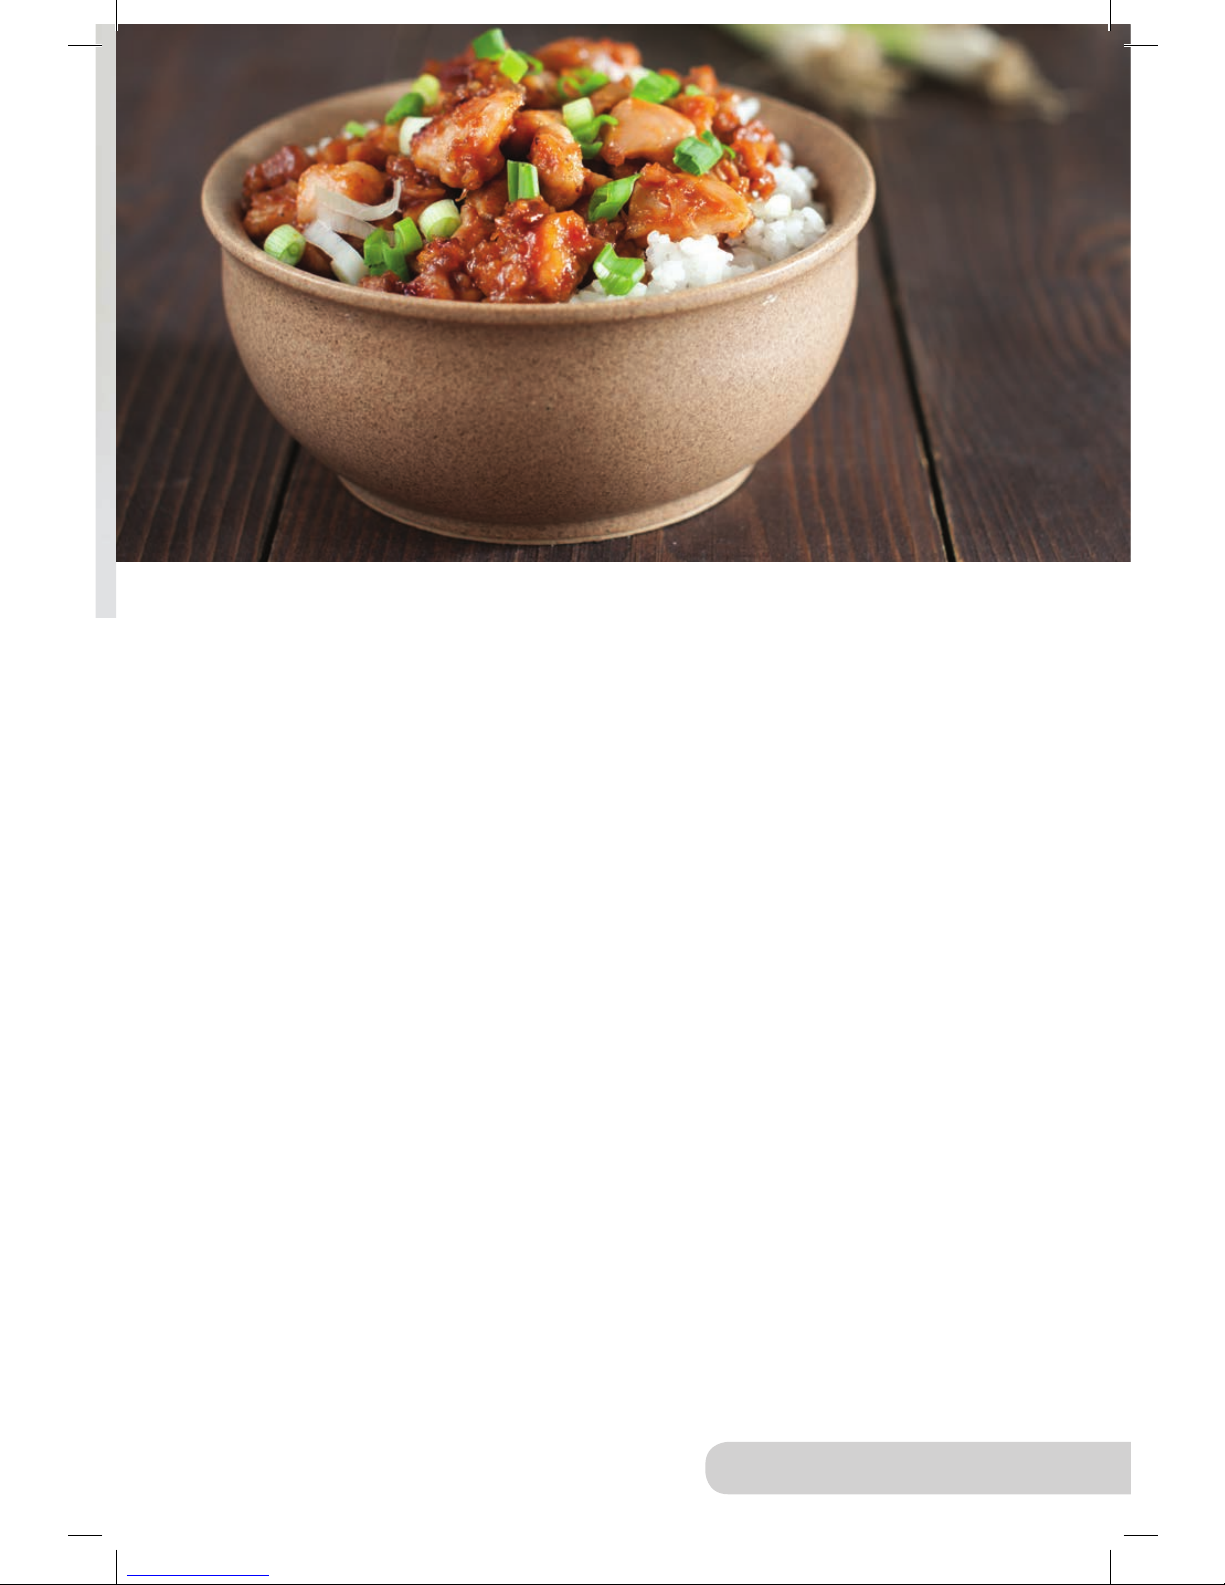
General Tso’s Chicken Serves: 4
Ingredients:
2 pounds chicken meat, boneless,
skinless, cut into 1-inch pieces
2 tablespoons peanut oil
2 cloves of garlic, minced
2 teaspoons fresh ginger, minced
4 scallions, chopped
1 teaspoon sesame seeds
3 tablespoons soy sauce
1 tablespoon rice vinegar
1½ tablespoons honey
1 tablespoon sugar
2 teaspoons chili sauce
¾ cup chicken broth
5 teaspoons cornstarch, divided
Sea salt
Freshly ground black pepper
Directions:
1. In a small bowl, whisk together soy sauce, rice vinegar, honey, sugar, chili
sauce, chicken broth, and 2 teaspoons of the cornstarch; set aside.
2. In a medium bowl, add the remaining 3 teaspoons of cornstarch.
3. Add sea salt and fresh ground pepper to the medium bowl.
4. Add the chicken and coat on all sides.
5. Over high heat (425˚F), add peanut oil, and swirl to coat the Wok.
6. Add the chicken, cooking until there is a brown crust on all sides. Cook in
batches, if necessary, to avoid chicken sticking to the bottom of the Wok.
7. After the brown crust develops, take chicken out of Wok; set aside.
8. Turn heat down to medium (275˚F), and add garlic, ginger, and scallions and
stir-fry for 20 seconds.
9. Pour sauce into the Wok and bring to a simmer.
10. Return the chicken to Wok and toss to combine with sauce. Stir-fry the
chicken for another 1 to 2 minutes or until cooked.
11. Garnish chicken with sesame seeds and serve with rice.
Page 30
30
Owner’s Manual
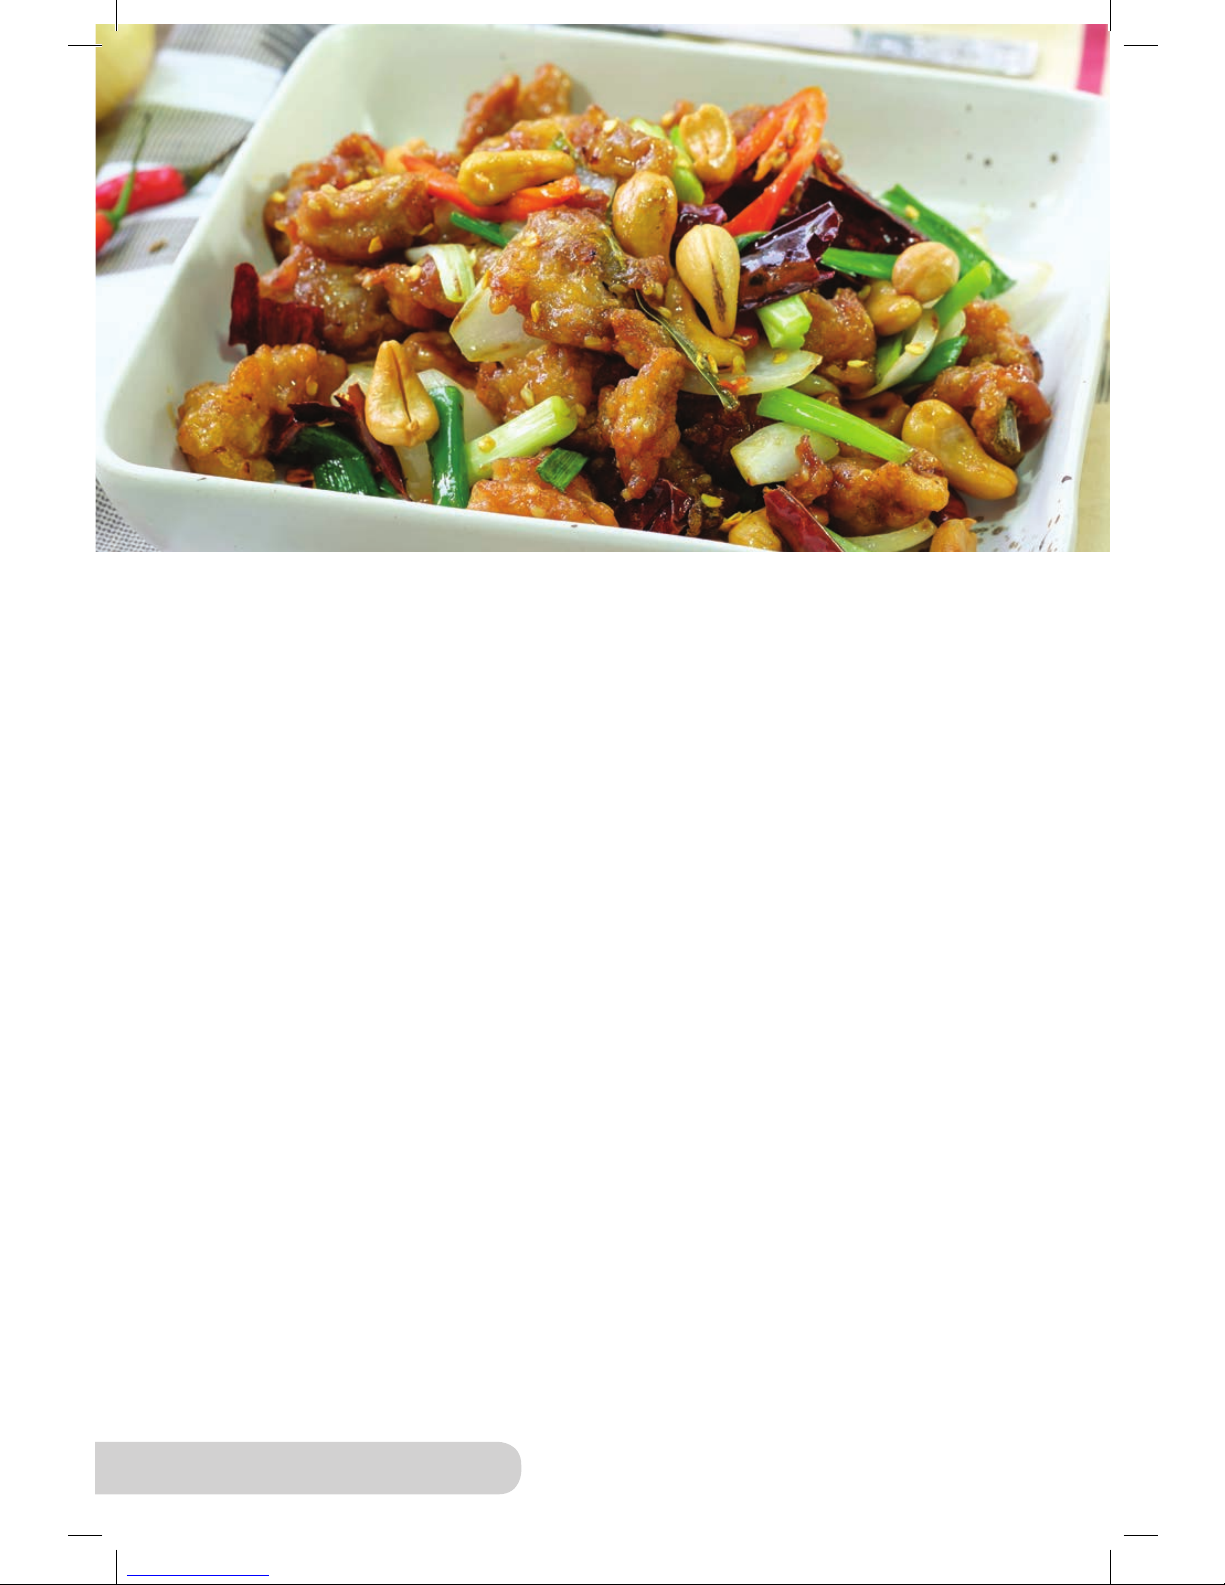
Kung Pao Chicken Serves: 4
Ingredients:
1 pound boneless, skinless chicken
thighs, diced into small pieces
1 tablespoon balsamic vinegar
2 teaspoons hoisin sauce
1 teaspoon sesame oil
½ teaspoon ground peppercorns or
chili flakes
2 tablespoons peanut oil
8 to 10 Chinese chilies, dry, whole
3 scallions, chopped
2 cloves of garlic, minced
½ cup unsalted roasted peanuts
1 tablespoon soy sauce, and 1
teaspoon soy sauce, (divided)
2 teaspoons rice wine
3 teaspoons cornstarch (divided)
Directions:
1. In a medium bowl, mix 1 tablespoon of the soy sauce, rice wine, and 2
teaspoons of the cornstarch.
2. Add chicken thighs and stir to coat. Let chicken sit for 10 minutes.
3. In another bowl, mix balsamic vinegar, remaining 1 teaspoon of soy sauce,
hoisin sauce, sesame oil, remaining 1 teaspoon of cornstarch, and ground
peppercorns; set aside.
4. Heat the Wok to 425˚F. A drop of water should sizzle on contact. Add the
peanut oil and coat the Wok.
5. Add red chilies and stir-fry for 20 seconds.
6. Add chicken and stir-fry until light brown, about 3 minutes.
7. Add scallions and garlic and stir-fry for 1 minute.
8. Pour the sauce mixture in, toss and coat the chicken, and then remove
from heat. Serve.
Page 31

31
Owner’s Manual
Orange Chicken Serves: 4
Ingredients:
2 pounds chicken breasts, cut into
1-inch cubes
2 large eggs, beaten
½ cup cornstarch, plus 1 tablespoon
cornstarch, divided
2 tablespoons water
¼ cup all-purpose flour
2 cloves of garlic minced
½ teaspoon ginger, minced
½ teaspoon red chili flakes
⅔ cup fresh squeezed orange juice
2 tablespoons soy sauce
1 tablespoon rice wine vinegar
1 tablespoon sweet chili sauce
1 tablespoon brown sugar
2 green onions, chopped
Steamed white rice
Oil (enough for deep-frying in Wok),
plus 1 tablespoon
Directions:
1. Place beaten eggs in a bowl. In a second bowl, mix dry ingredients: ½ cup
of the cornstarch, our, sea salt, and fresh ground black pepper.
2. Coat chicken pieces in egg then toss into cornstarch mixture. Shake off
excess our.
3. In the Wok, bring up to 375˚F. Add enough oil to deep-fry chicken pieces.
4. Deep-fry chicken (in a couple of batches) until golden and crispy, about 4
to 5 minutes. Drain on paper towels; set aside.
5. In a small bowl, mix 1 tablespoon of the cornstarch with 2 tablespoons of
water; set aside.
6. When cooled, clean out Wok. Reheat, bringing up to 375˚F.
7. Add 1 tablespoon oil and add garlic, ginger, and chili akes. Cook until
fragrant, about 2 minutes.
8. Whisk in orange juice, soy sauce, rice wine vinegar, chili sauce, and brown
sugar and mix. Bring up to a boil.
9. Once boiling, slowly whisk in cornstarch mixture to the sauce to thicken.
Bring heat down on sauce to 175˚F and simmer for about 5 minutes.
Once sauce gets a syrupy consistency, turn heat off.
10. Return chicken to Wok and toss with sauce to coat.
11. Plate and garnish with green onions. Serve over steamed white rice.
Page 32
32
Owner’s Manual
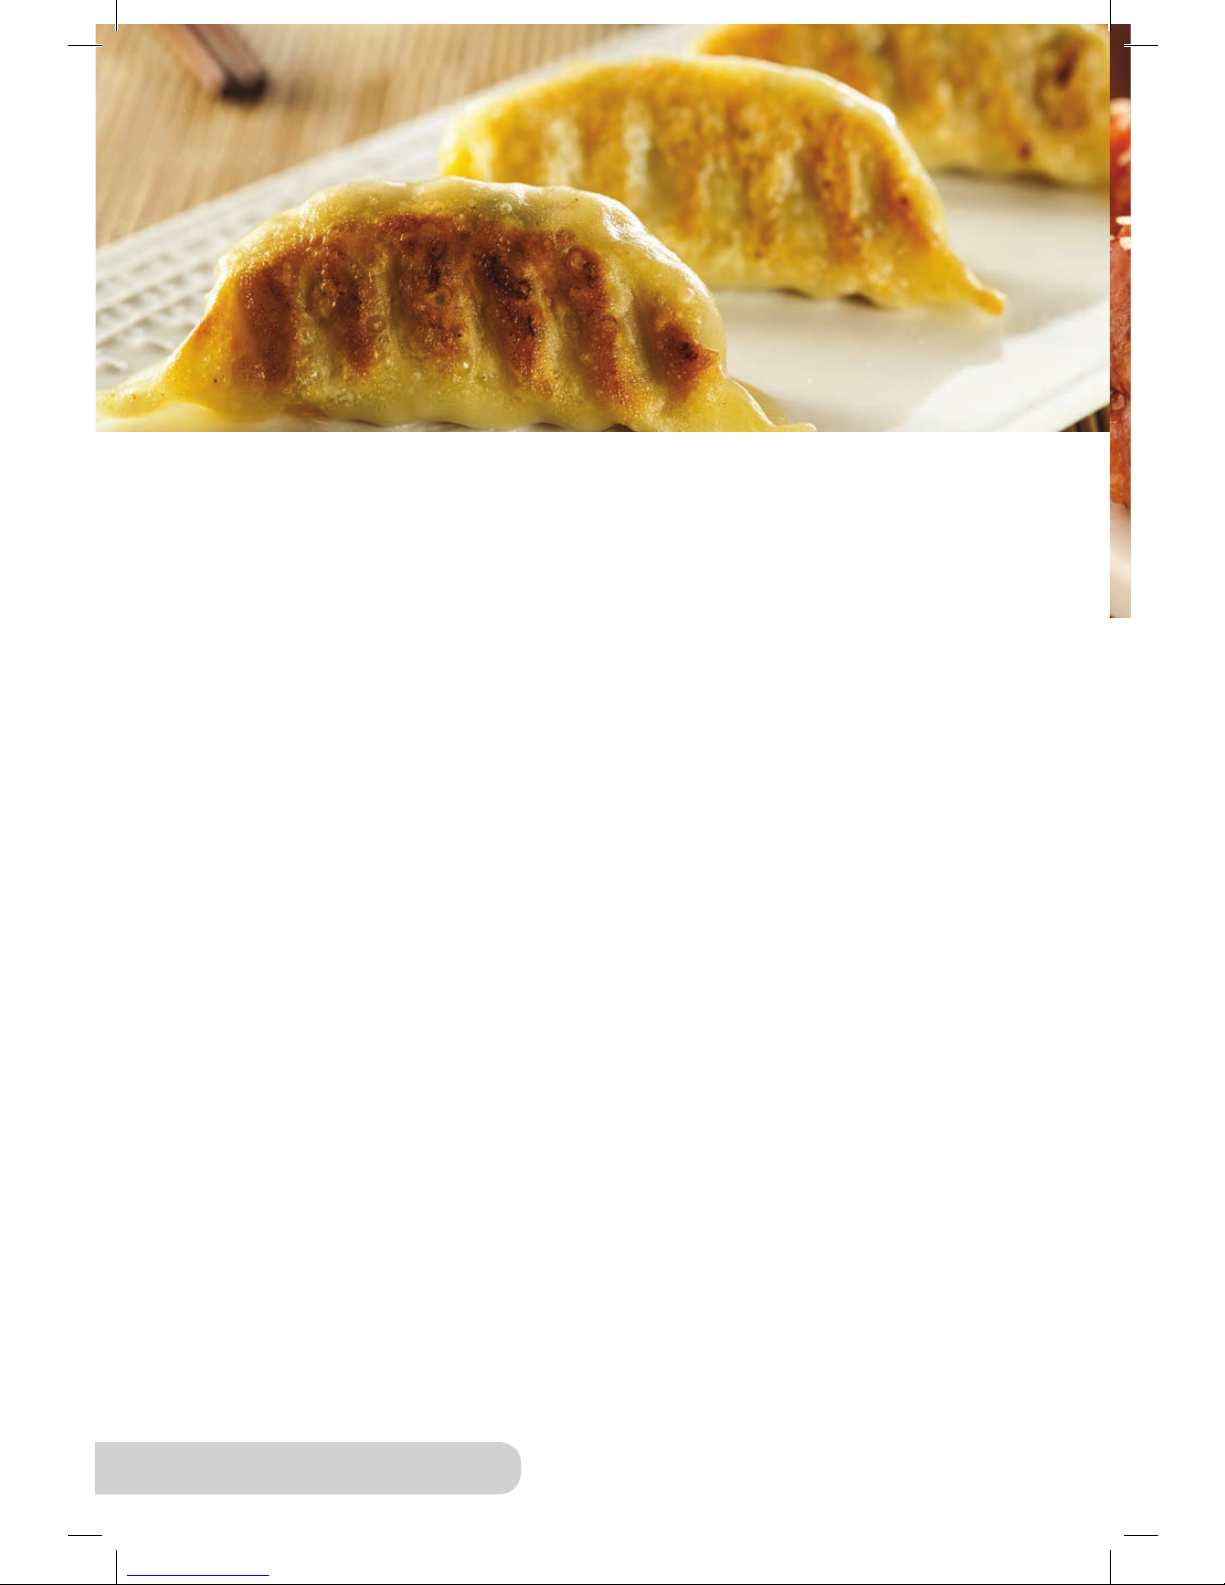
Pot Stickers Serves: 6
Ingredients:
½ pound ground pork
¼ cup scallions, finely chopped
¼ teaspoon cayenne pepper
1 teaspoon light brown sugar
1⅓ cup chicken broth
2 tablespoons red pepper,
finely chopped
2 teaspoons ketchup
2 teaspoons Worcestershire sauce
1 teaspoon yellow mustard
3 to 4 tablespoons vegetable oil,
for frying
Non-stick cooking spray
Sea salt and freshly ground
black pepper
Directions:
1. In a bowl, mix ground pork, scallions, red pepper, egg, ketchup, yellow
mustard, Worcestershire, light brown sugar, cayenne, sea salt, and fresh
ground black pepper.
2. Keep wonton wrappers in the package and place a damp cloth on top, as
they will dry up quickly.
3. Take 1 wonton wrapper and lightly brush water on the edges.
4. Place ½ teaspoon of pork mixture in center of the wrapper and shape
as desired.
5. Lightly spray non-stick vegetable spray on a tray or baking sheet and place
dumplings on.
6. Covered the dumplings with a damp cloth.
7. Heat up the Wok to 400˚F and brush with vegetable oil.
8. Add 8 to 10 pot stickers at a time and cook for 2 minutes.
9. Add chicken broth, turn heat down to 100˚F, and then cook for another
2 minutes.
10. Remove wontons and place on a platter.
11. Clean the Wok and repeat process until all pot stickers are cooked.
Tip: To keep the cooked pot stickers warm, preheat your regular oven in a low
setting at 220˚F and keep them in oven.
Page 33
33
Owner’s Manual
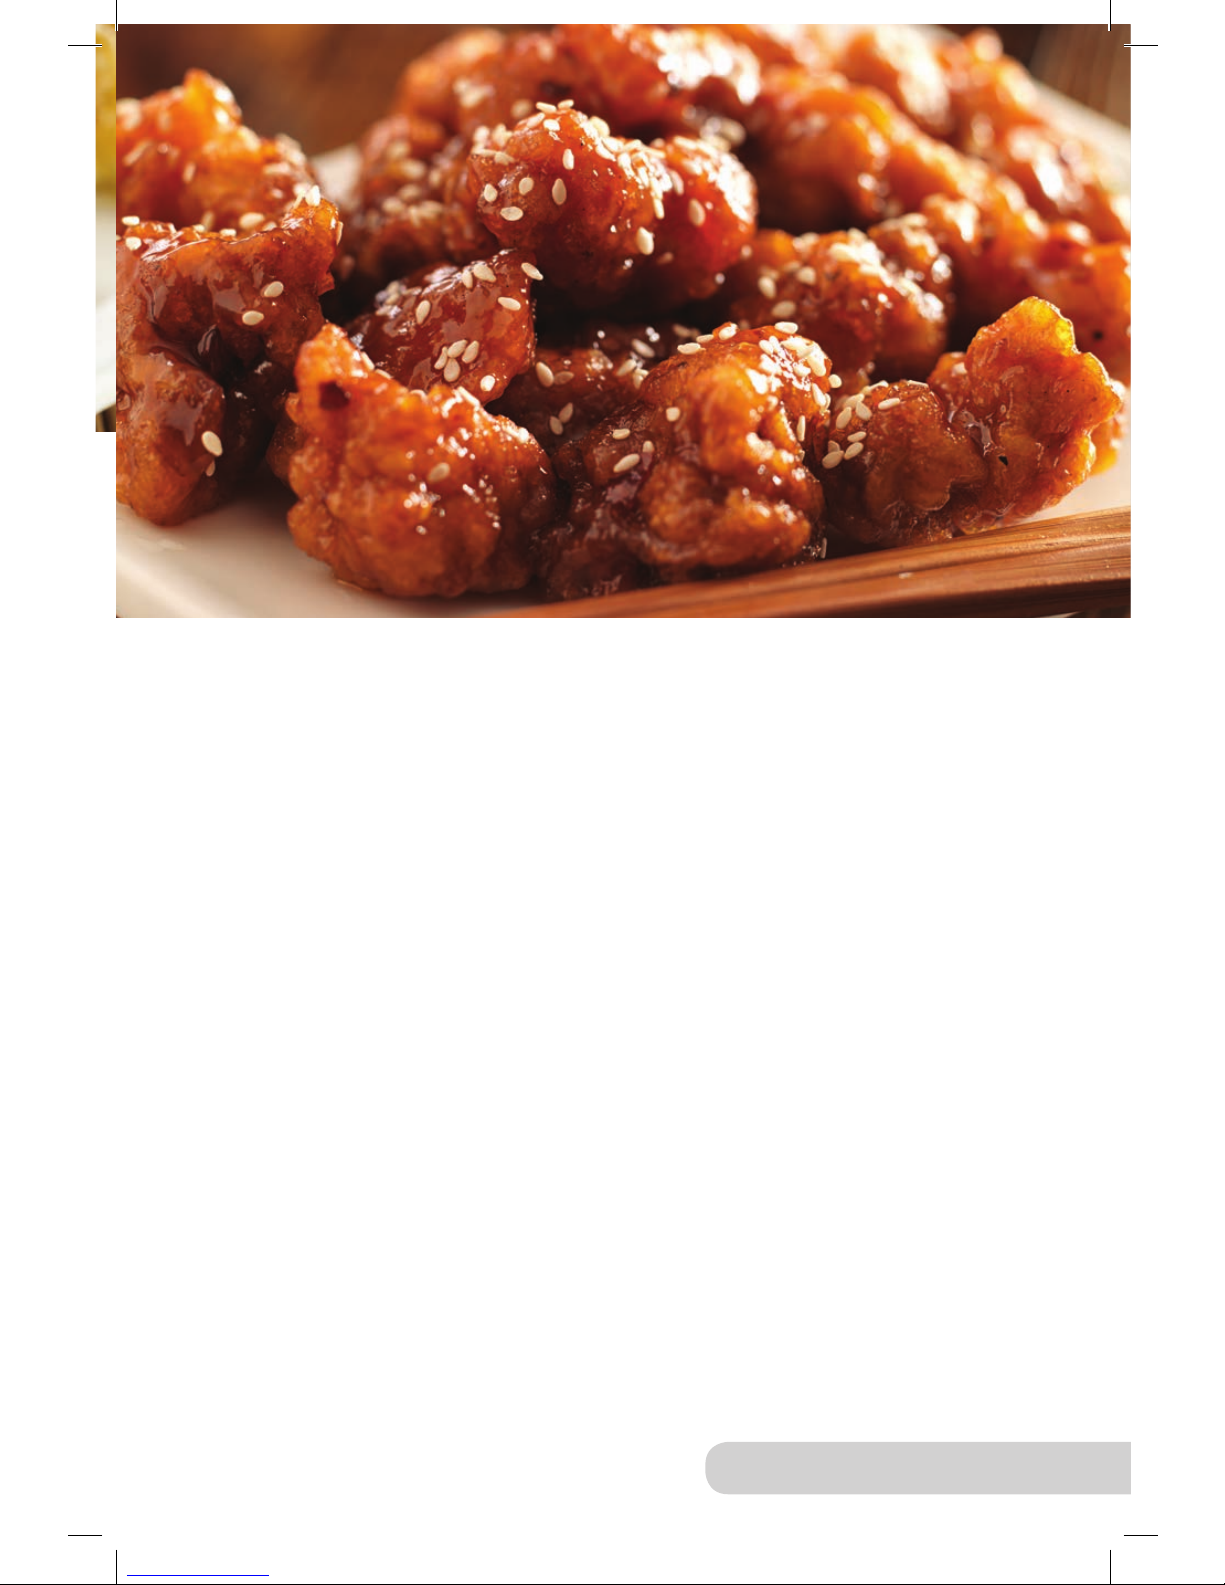
Sesame Chicken Serves: 4
Ingredients:
1 pound boneless chicken thighs,
fat trimmed off, meat cut into
bite-sized pieces
1½ teaspoons peanut oil
2 tablespoons sesame seeds
1 scallion, finely sliced
2 tablespoons soy sauce
2 teaspoons sesame oil
1 tablespoon sugar
1 tablespoon honey
2 tablespoons rice vinegar
1 tablespoon fresh ginger, grated
1 clove of garlic, minced
1 egg, beaten
3 tablespoons cornstarch
Sea salt and freshly ground black
pepper
Directions:
1. In a bowl, mix soy sauce, sesame oil, sugar, honey, rice vinegar, and
garlic; set aside.
2. In a big bowl, mix beaten egg with cornstarch and season with sea salt
and fresh ground pepper. Let it rest for 10 minutes.
3. Add chicken to mixture, tossing to coat all the pieces.
4. Bring Wok up to 425˚F. Once hot, add oil and swirl to coat the Wok.
5. Add chicken and stir-fry for 5 to 6 minutes or until golden brown.
6. Add the sauce to Wok, toss with chicken, and continue to stir-fry for 2
minutes or until sauce thickens. Remove from heat.
7. Garnish with sesame seeds and scallions. Serve.
Page 34
34
Owner’s Manual
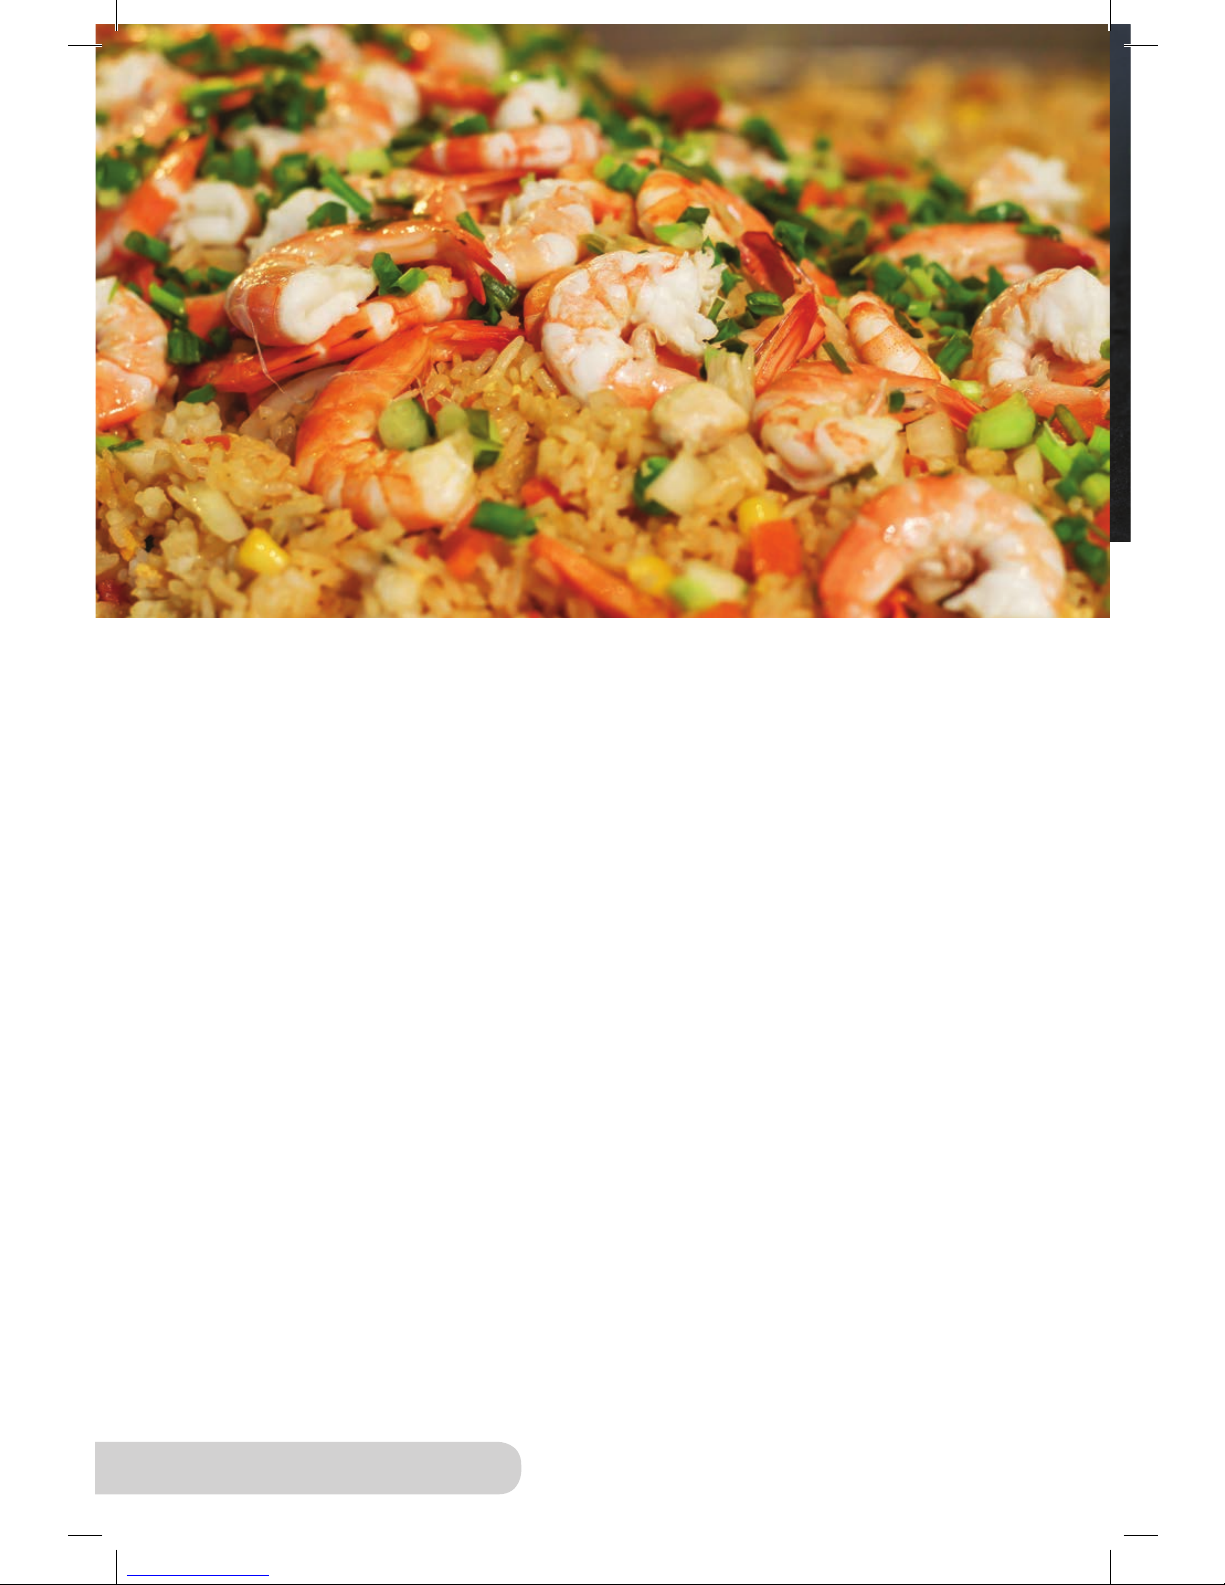
Shrimp and Fried Rice Serves: 4-6
Ingredients:
2 tablespoons peanut oil
12 large shrimp, cleaned,
shelled and deveined
1 teaspoon Shaoxing rice wine
2 eggs, beaten
2 scallions, chopped
1 tablespoon sesame oil
4 leaves green cabbage,
finely shredded
4 cups cooked jasmine or long-grain rice
1 tablespoon soy sauce (and
additional amount to taste)
Seal salt
Freshly ground black pepper
Directions:
1. Heat Wok to 425˚F. A drop of water should sizzle on contact. Add peanut
oil and swirl to coat.
2. Add shrimp and rice wine and stir-fry for 1-2 minutes or until shrimp just
turns pink.
3. Transfer shrimp to a plate; set aside.
4. Add eggs, scallions, and sesame oil to Wok and stir-fry for 1 minute.
5. Add cabbage in and stir-fry for an additional 1-2 minutes.
6. Turn heat down to 375˚F and add rice. Toss, mixing everything together.
7. Add shrimp back to Wok and mix. Cook for an additional 1-2 minutes until
shrimp are all opaque.
8. Turn off heat and add the soy sauce, stirring in to incorporate. Season with
sea salt and fresh ground pepper to taste.
Page 35
35
Owner’s Manual
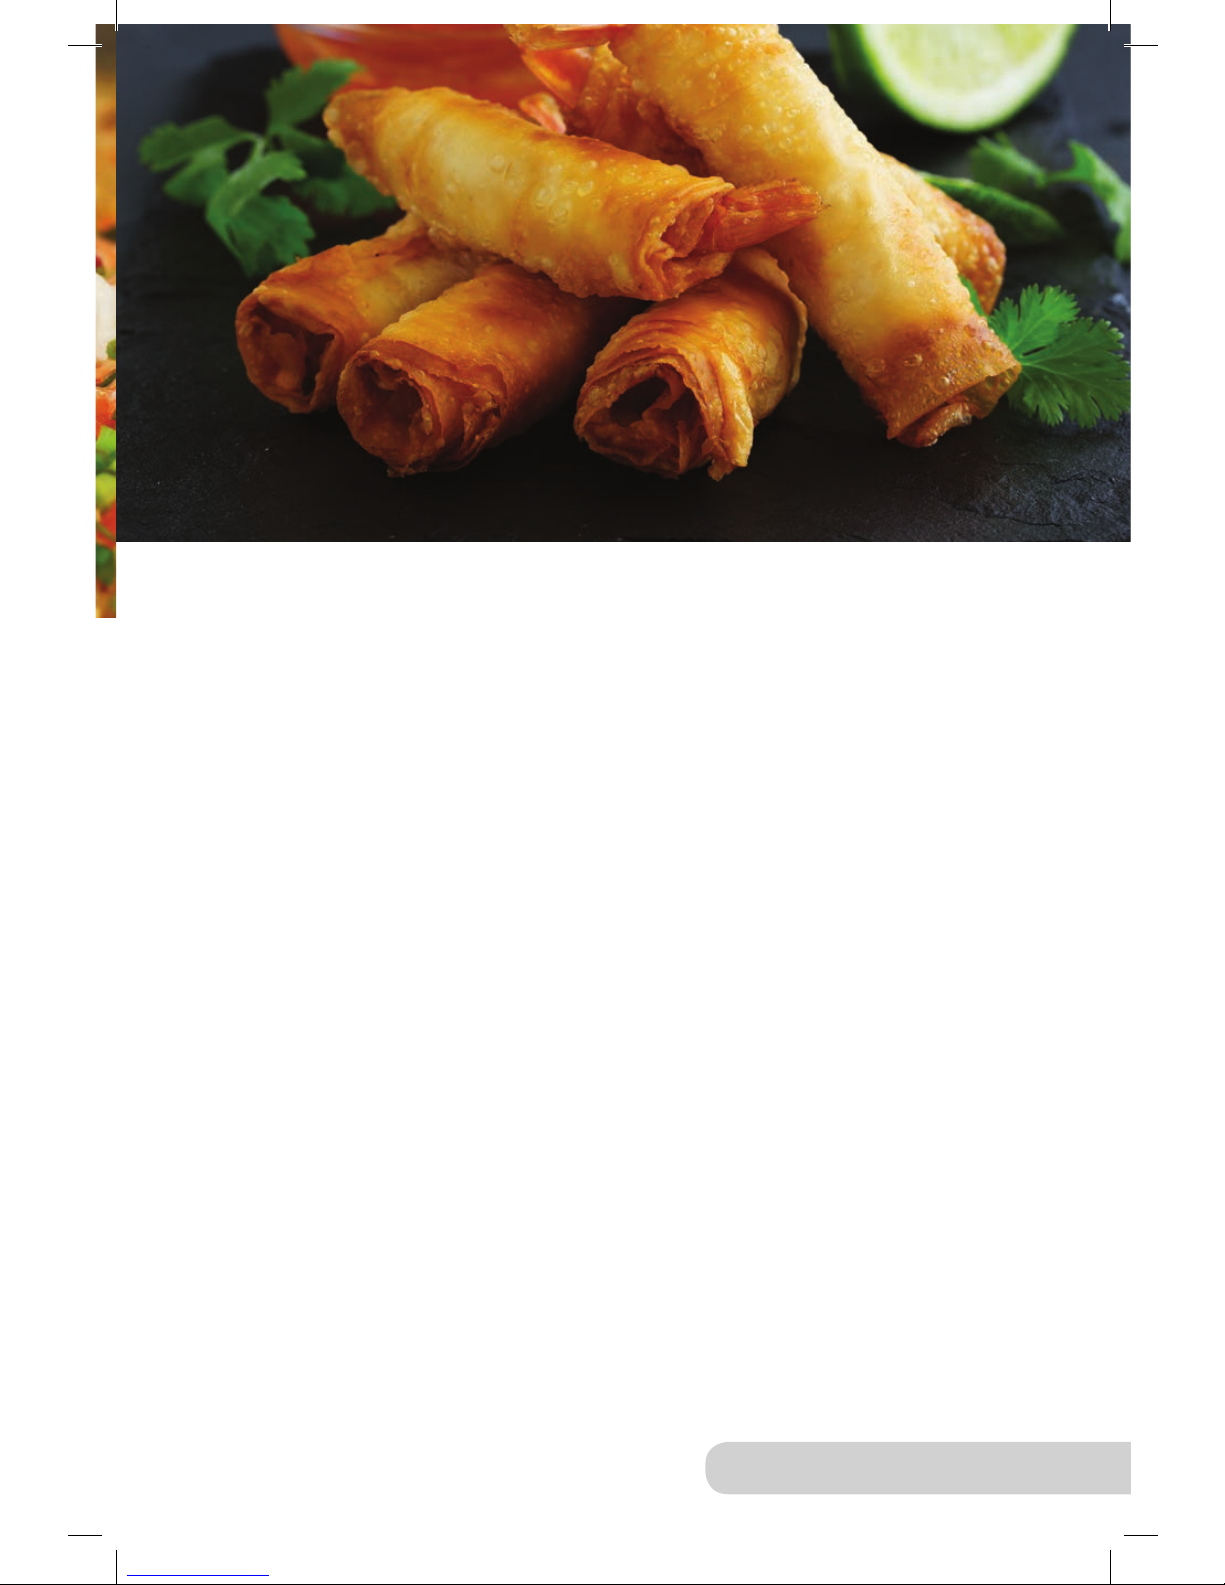
Spring Rolls with Pork and Shrimp Serves: 6
Ingredients:
12 spring roll wrappers
2 tablespoons flour (with water for
paste to seal spring rolls)
6 Chinese mushrooms, dried,
soaked for 30 minutes, drained,
and chopped
8 ounces ground pork
8 ounces shrimp, cooked, chopped
½ teaspoon cornstarch, mixed with 1
teaspoon soy sauce
3 ounces grated carrot
3 ounces bean sprouts
3 ounces chestnuts, sliced
6 spring onions, finely chopped
½ teaspoon sesame oil
4 cups peanut oil, plus 1 tablespoon
for initial heating of Wok
Directions:
1. Heat Wok to 275˚F and add the 1 tablespoon of peanut oil.
2. Add ground pork and stir-fry for 2-3 minutes. Add shrimp, cornstarch paste,
and carrot.
3. Increase heat to 375˚F and add bean sprouts and spring onions.
Toss for 1 minute, and then incorporate the dry mushrooms.
4. Take off the heat and add sesame oil.
5. Cool the lling mixture down quickly on a sheet tray.
6. Once lling has cooled, take a wrapper and place it on a clean work
surface or cutting board. Spoon the lling in the center of the wrapper
and fold the corner of the wrapper nearest to you over the lling.
7. Smear a little of the our paste on the free sides, turn the sides to the
middle, and then roll it up.
8. Repeat with the remaining wrappers and pork lling.
9. Return Wok to heat and bring temperature down to 350°F. Add the 4 cups
of peanut oil.
10. Once oil is hot, carefully drop 4 spring rolls in and cook until they are golden
and crisp. Cook remaining spring rolls. Drain on paper towels. Serve.
Page 36
36
Owner’s Manual
Page 37

37
Owner’s Manual
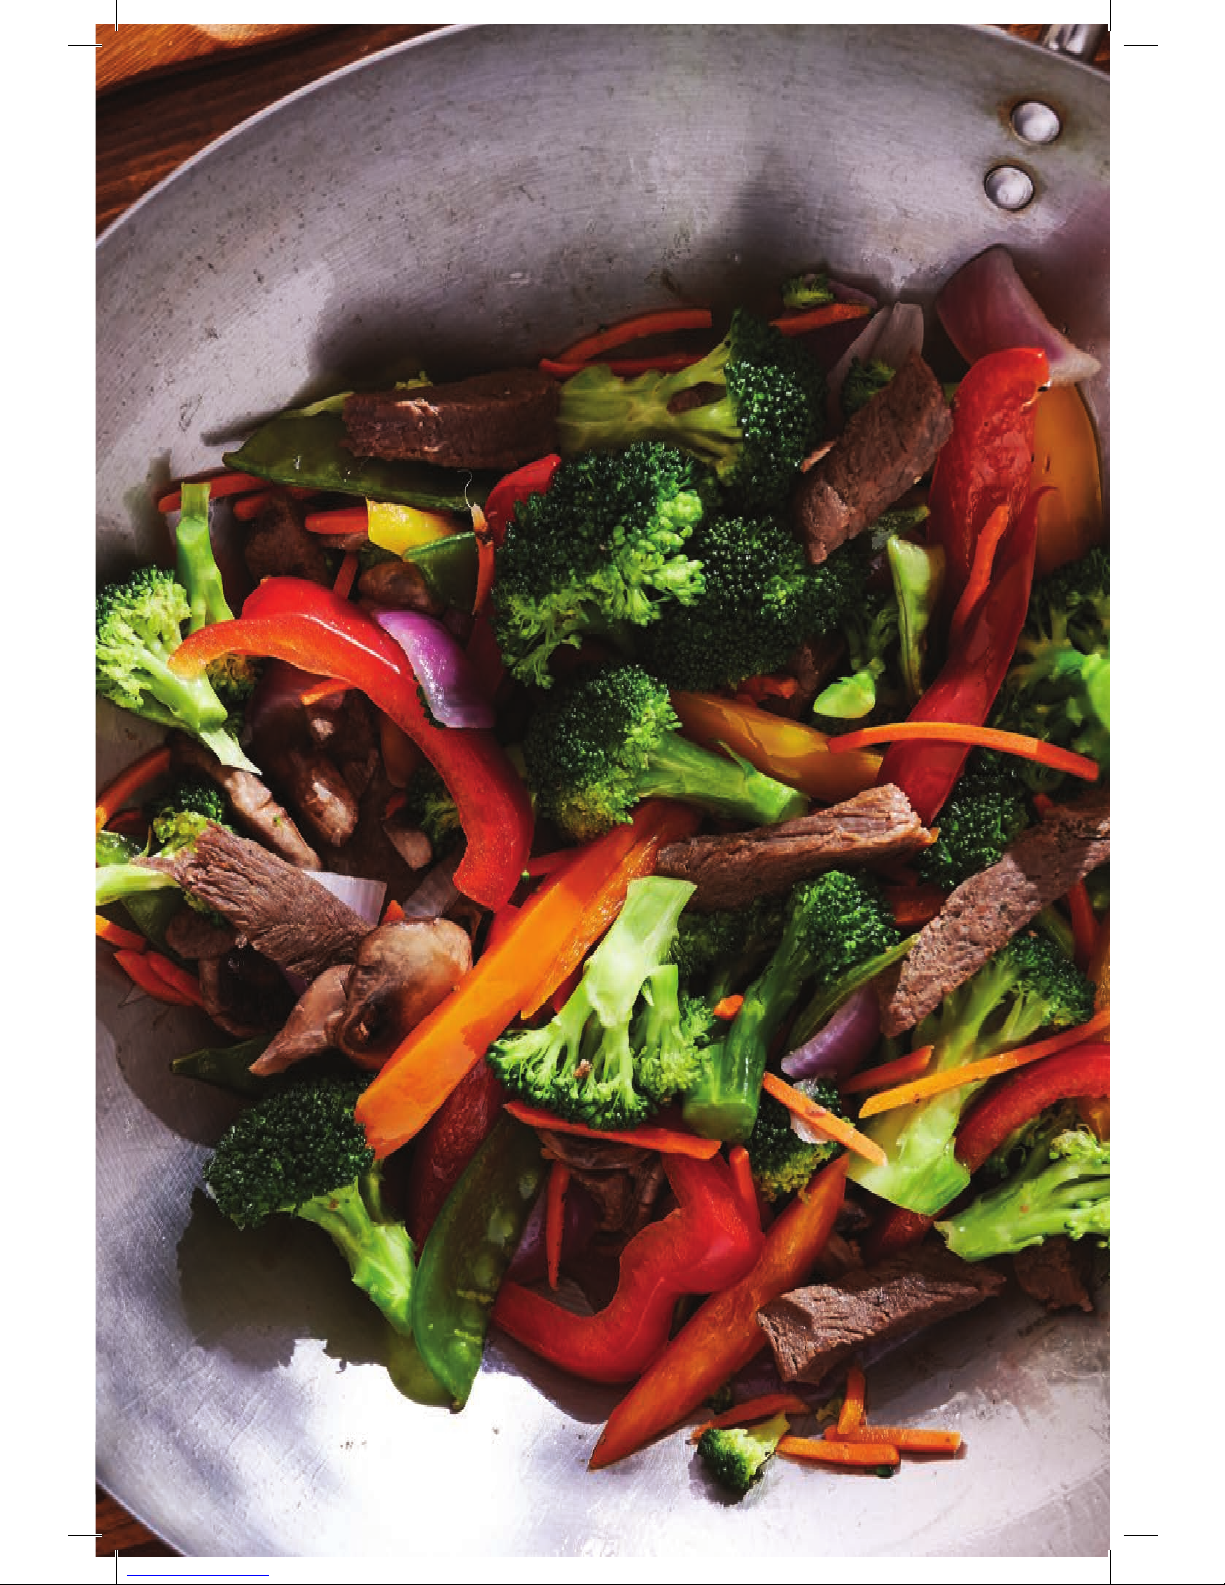
Stir-Fried Beef with Broccoli and Oyster Sauce Serves: 4-6
Ingredients:
Sauce:
5 tablespoons oyster sauce
2 tablespoons chicken broth
1 tablespoon dry sherry
1 tablespoon packed light brown sugar
1 teaspoon toasted sesame oil
1 teaspoon cornstarch
Stir-fry:
1 pound flank steak, trimmed, sliced into
2-inch-long strips, each ⅛ inch thick
3 tablespoons soy sauce
6 cloves garlic, minced
2 tablespoons vegetable oil, plus extra
4½ teaspoons oil, divided
1¼ pounds broccoli florets, cut into
1-inch pieces, stalks peeled, sliced on
the bias, and 1/8 inch thick
⅓ cups water
1 small red bell pepper, stemmed,
seeds removed, cut into ¼-inch pieces
3 scallions, sliced thin and on the bias
Directions:
1. For the sauce, whisk all sauce ingredients together in a small bowl;
set aside.
2. Combine beef and soy sauce in a medium bowl and let sit for at least 10
minutes or up to an hour, stirring once.
3. Combine garlic, ginger, and 1½ teaspoons oil in Wok, Heat Wok to 425˚F,
until it’s just smoking.
4. Add half of the beef in a single layer, breaking up clumps. Cook without
stirring for 1 minute.
5. Stir and continue to cook until browned, about 30 more seconds.
Transfer beef to bowl and repeat with an additional 1½ teaspoons oil
and remaining beef.
6. Add 2 tablespoons vegetable oil to empty Wok and heat Wok to 425˚F,
until it’s just smoking. Add broccoli and cook for 30 seconds.
7. Add water, cover, and reduce heat to 275˚F. Cook until broccoli is tender-
crisp, about 2 minutes. Do not overcook broccoli. Transfer to paper towellined plate.
8. Add remaining vegetable oil to Wok. Bring heat up to 425˚F, until it’s just
smoking. Add bell pepper and cook, stirring frequently, for about 1½ minutes.
9. Push bell pepper up the sides of the Wok. Add garlic mixture to center and
cook for 15-20 seconds, mashing mixture in Wok. Stir garlic mixture into
bell pepper.
10. Return beef and broccoli to Wok and toss to combine.
11. Whisk sauce to recombine and add to the Wok and cook. Stir constantly
until sauce thickens and is evenly distributed, about 30 seconds.
12. Transfer to platter and sprinkle with scallions.
Page 38
38
Owner’s Manual
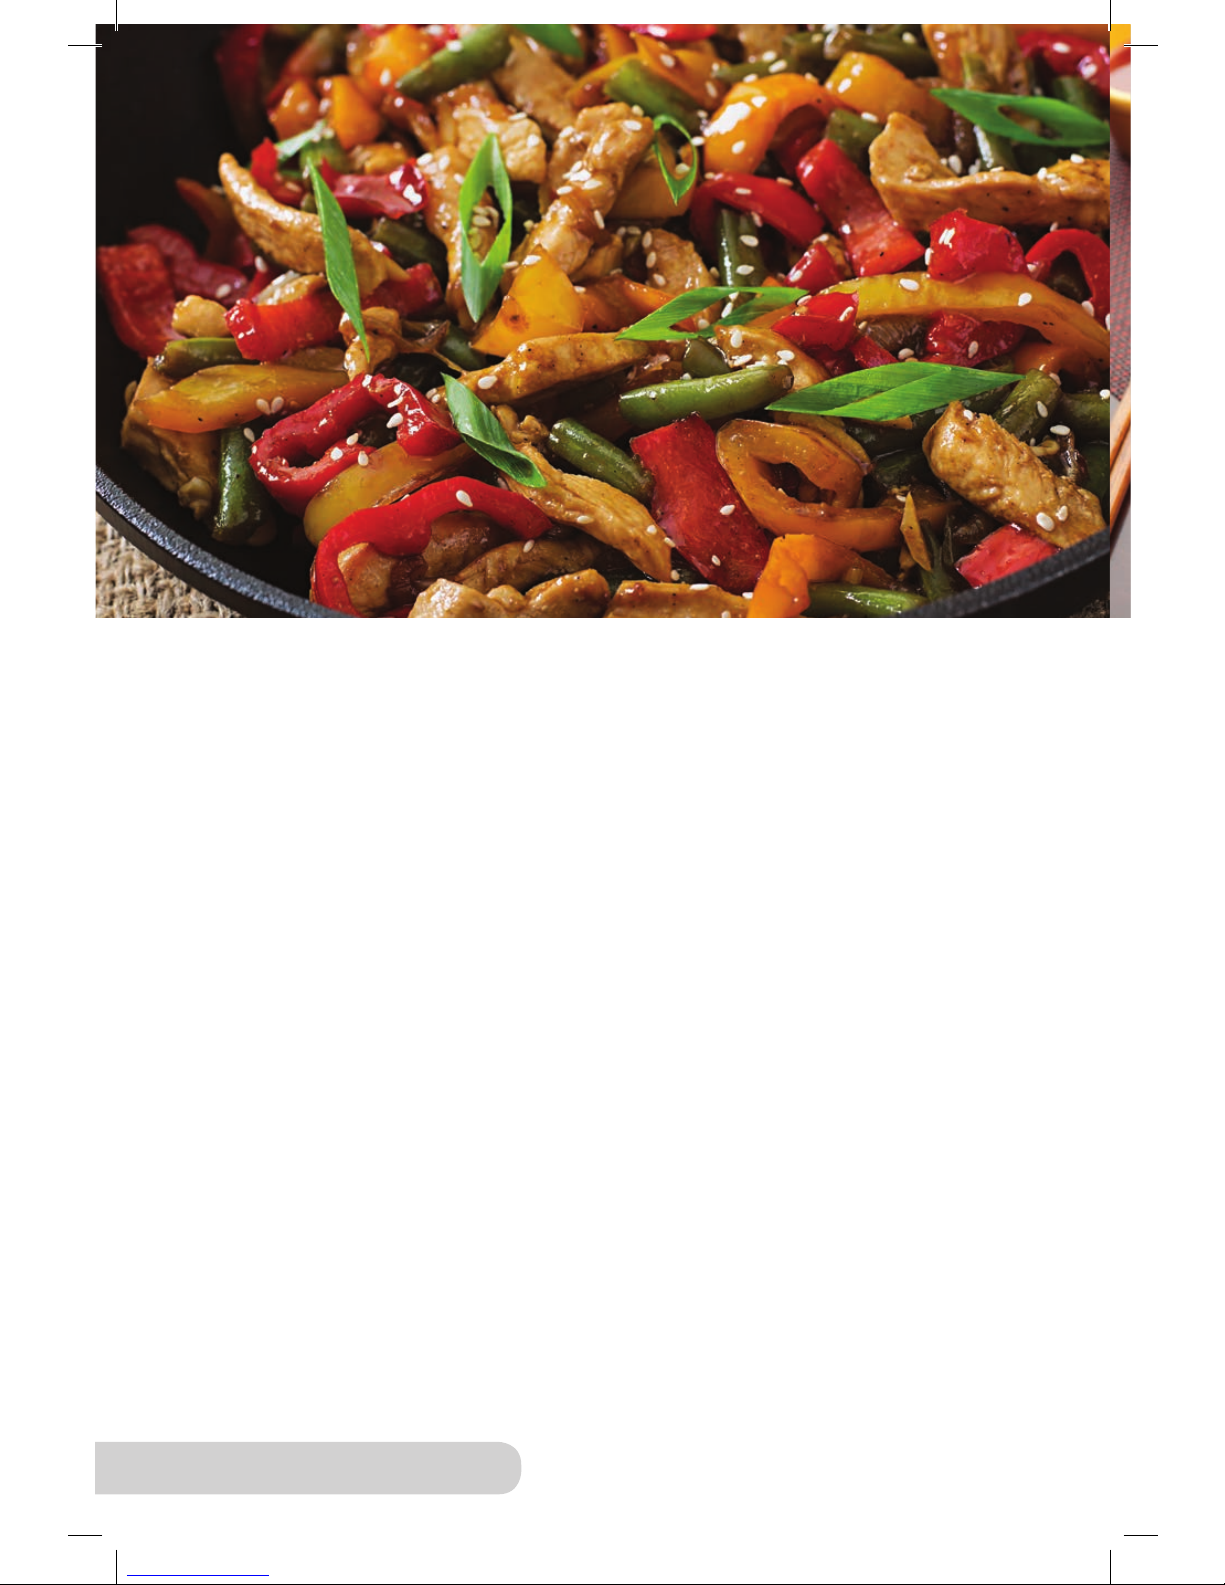
Stir-Fried Vegetables Serves: 4
Ingredients:
1 cup snow peas
8 dried black Chinese mushrooms,
soaked in hot water, stems removed,
caps sliced or left whole
¾ cup canned bamboo shoots
½ tablespoon grated ginger
2 tablespoons rice wine
½ teaspoons oyster sauce
½ teaspoon sesame oil
½ teaspoon soy sauce
Sea salt
Freshly ground black pepper
½ teaspoon sugar
2 tablespoons peanut oil
Extra vegetables of your choice
(optional)
Directions:
1. Heat Wok to 525˚F and add peanut oil.
2. Once hot, add snow peas and cook 30 seconds, adding sea salt
and sugar.
3. Add mushrooms and bamboo shoots.
4. Add in extra vegetables (optional). Add ginger, rice wine, oyster sauce,
sesame oil, soy sauce, and fresh ground black pepper.
5. Serve with white rice.
Tip: Add 1 cup of the mushroom liquid (from when they were soaked),
if needed.
Page 39
39
Owner’s Manual
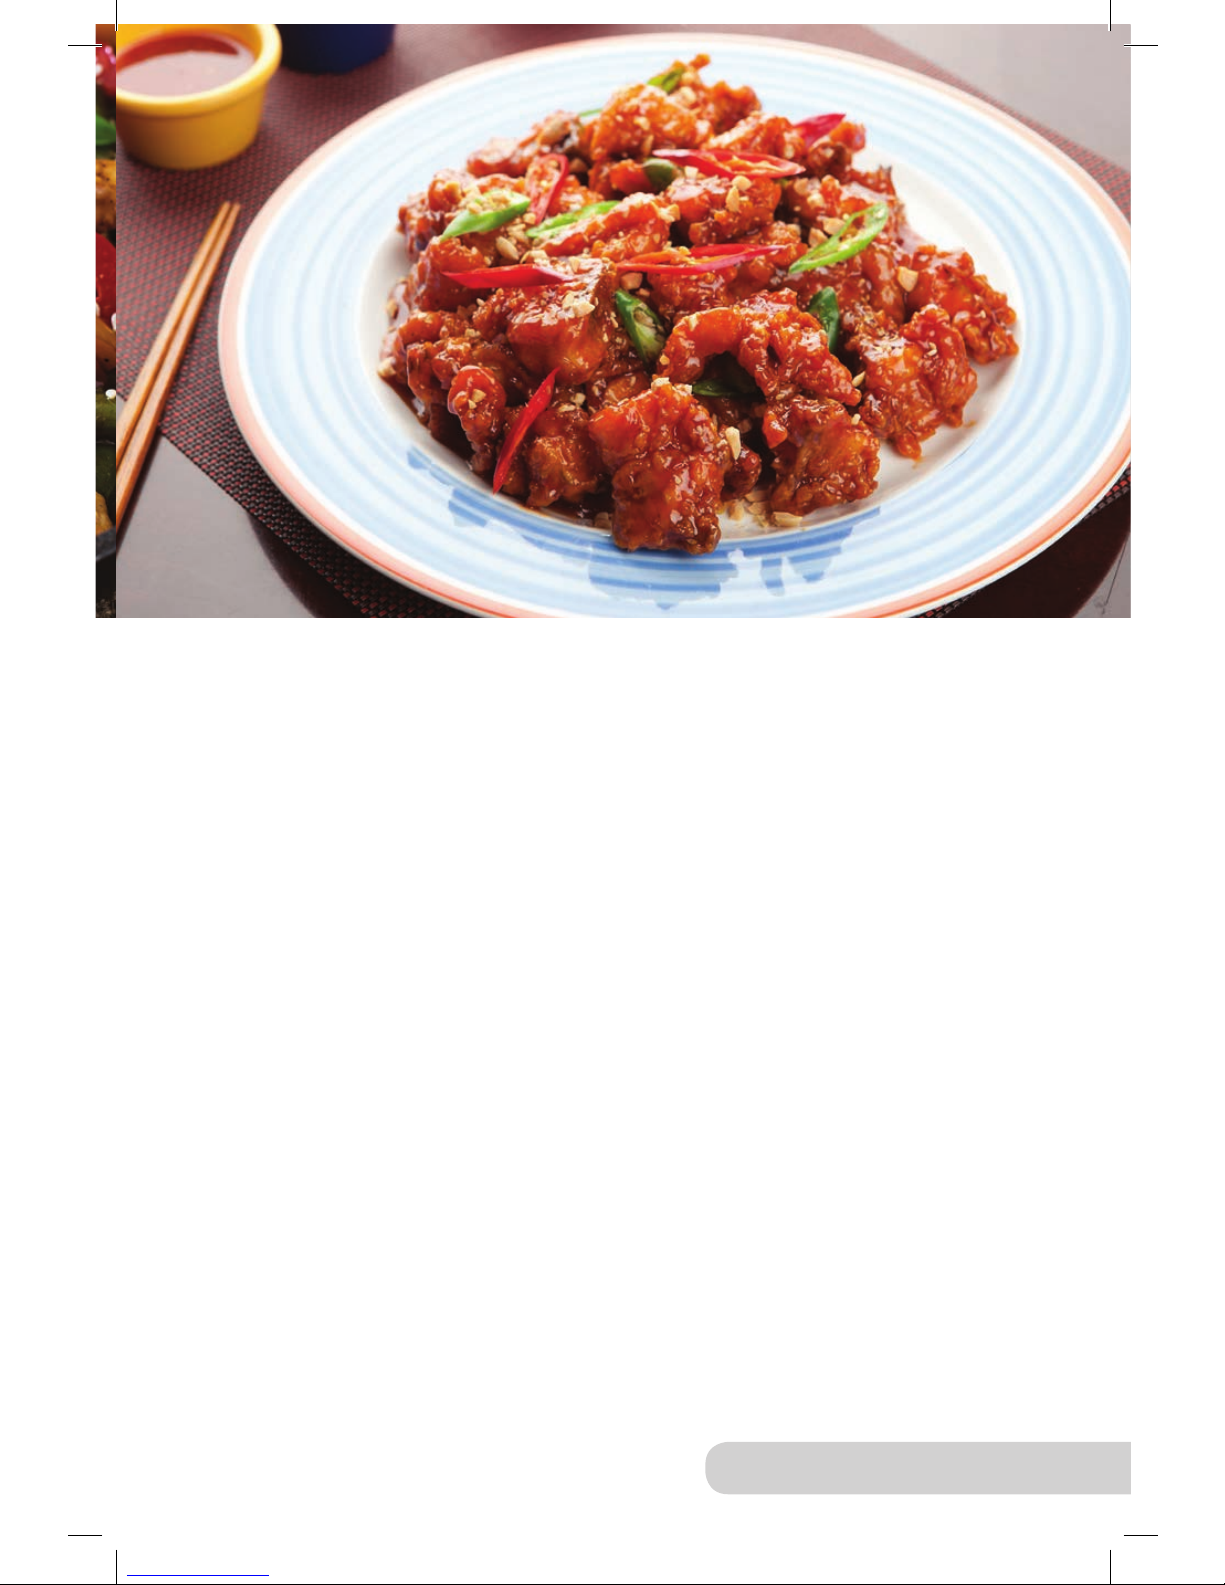
Sweet and Sour Chicken Tempura Serves: 4
Ingredients:
2 8-ounce chicken breasts, diced into
2-inch pieces
4 cups peanut oil
Batter:
¼ cup self-rising flour
¼ cup cornstarch
¼ teaspoon sea salt
¼ teaspoon sugar
½ cup cold water
Sweet and Sour Sauce
(makes 2½ cups):
1 cup sugar
3 tablespoons ketchup
½ cup water
½ cup rice vinegar
Directions:
1. For the batter, place water in a bowl then add all the dry ingredients.
Mix well.
2. For the sweet and sour sauce, place all the ingredients in a saucepan
and bring up to a boil. Let sauce cool.
3. Heat Wok to 350˚F and add 4 cups peanut oil.
4. Coat the chicken in the batter and place each piece separately in the oil.
Cook for 4 to 5 minutes.
5. Remove the chicken and drain on paper towel. Repeat until all are cooked.
6. Pour sweet and sour sauce into Wok. Return cooked chicken to Wok and
toss to coat well. Serve.
Page 40
40
Owner’s Manual
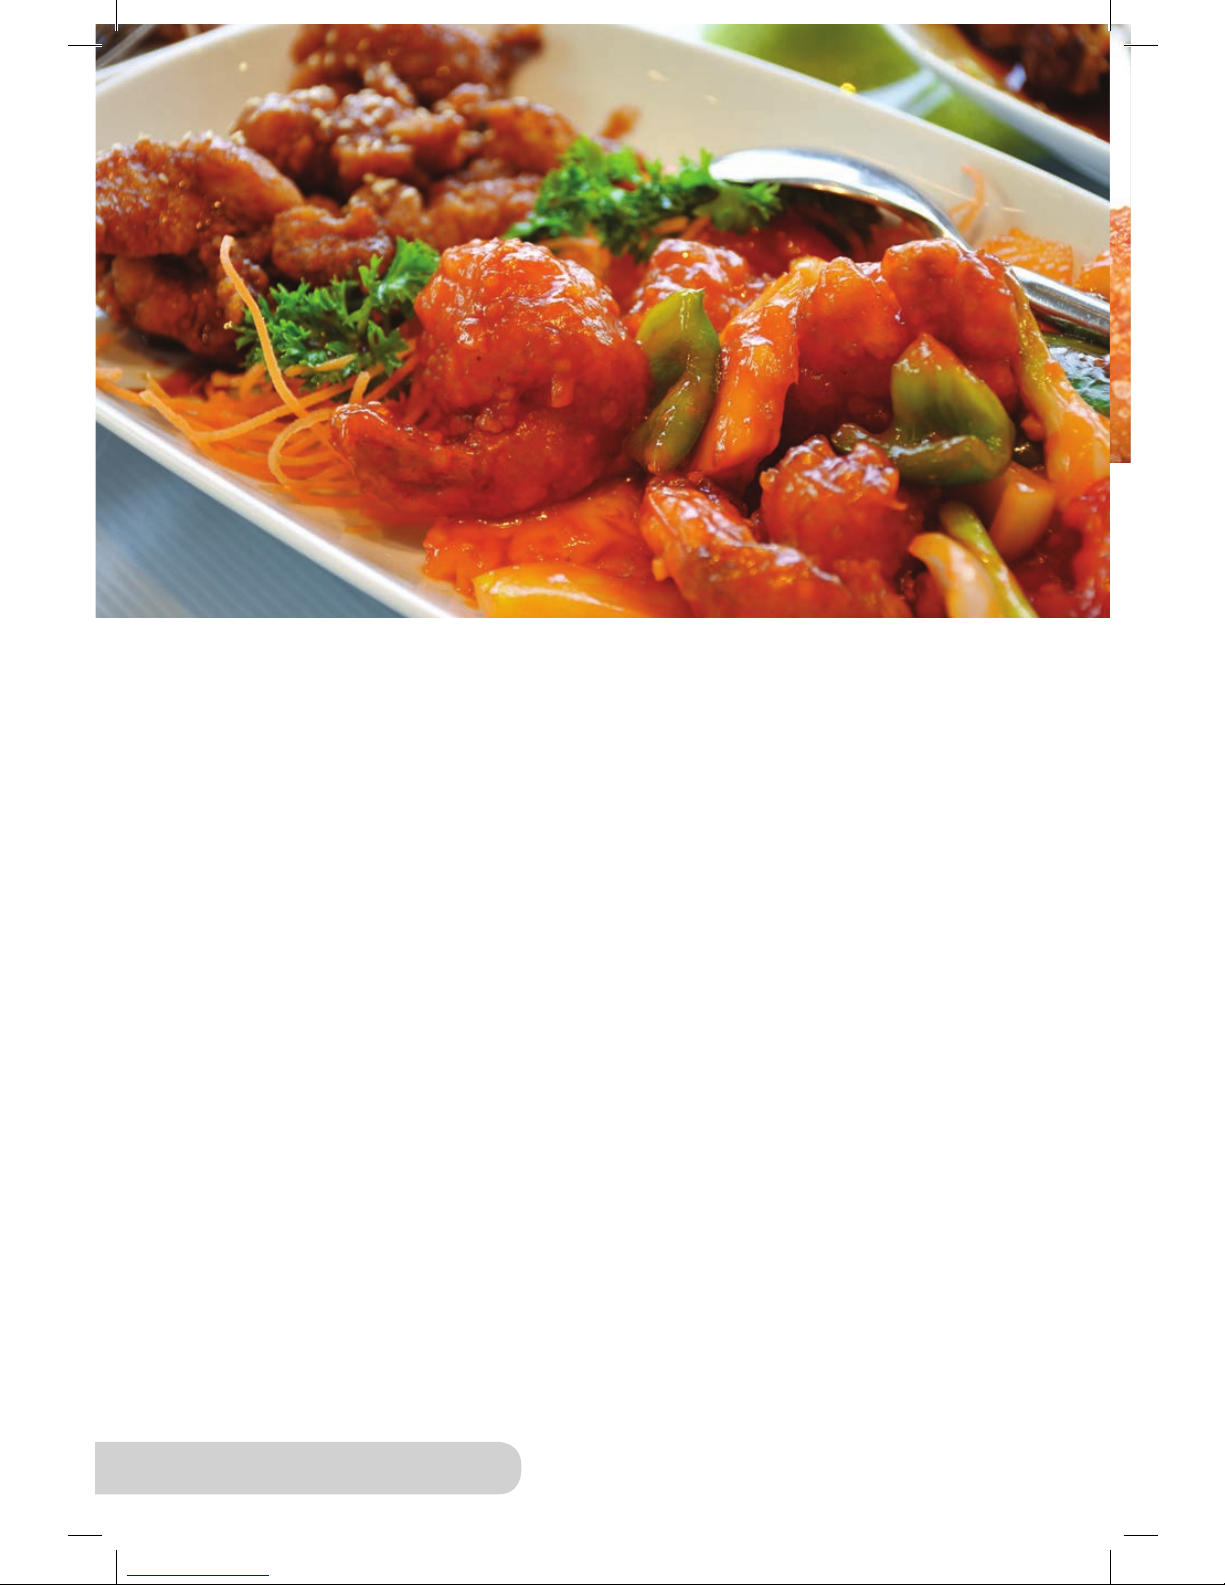
Sweet and Sour Shrimp Serves: 4-6
Ingredients:
11 ounces cooked jumbo shrimp
(tiger prawns)
1 small head romaine lettuce
For sauce:
1 tablespoon vegetable oil
1 tablespoon scallions, green parts
only, finely chopped
2 teaspoons fresh ginger root,
finely chopped
2 tablespoons light soy sauce
2 tablespoons soft light brown sugar
3 tablespoons rice vinegar
1 tablespoon Shaoxing rice wine
½ cup chicken or vegetable stock
1 tablespoon cornstarch paste
Sesame oil (a few drops)
Directions:
1. Separate lettuce leaves and arrange them on a platter.
2. Peel cooked shrimp and dry with paper towel; set aside.
3. For the sauce, heat Wok to 375˚F. Add scallions and ginger. Toss to mix.
4. Add soy sauce, sugar, rice vinegar, rice wine, and stock. Bring up to a boil.
5. Add shrimp to the sauce and toss to coat. Cook the shrimp through.
6. Thicken the sauce with cornstarch paste, stirring until smooth.
7. Remove from heat, place on lettuce, and drizzle with sesame oil.
Page 41
41
Owner’s Manual
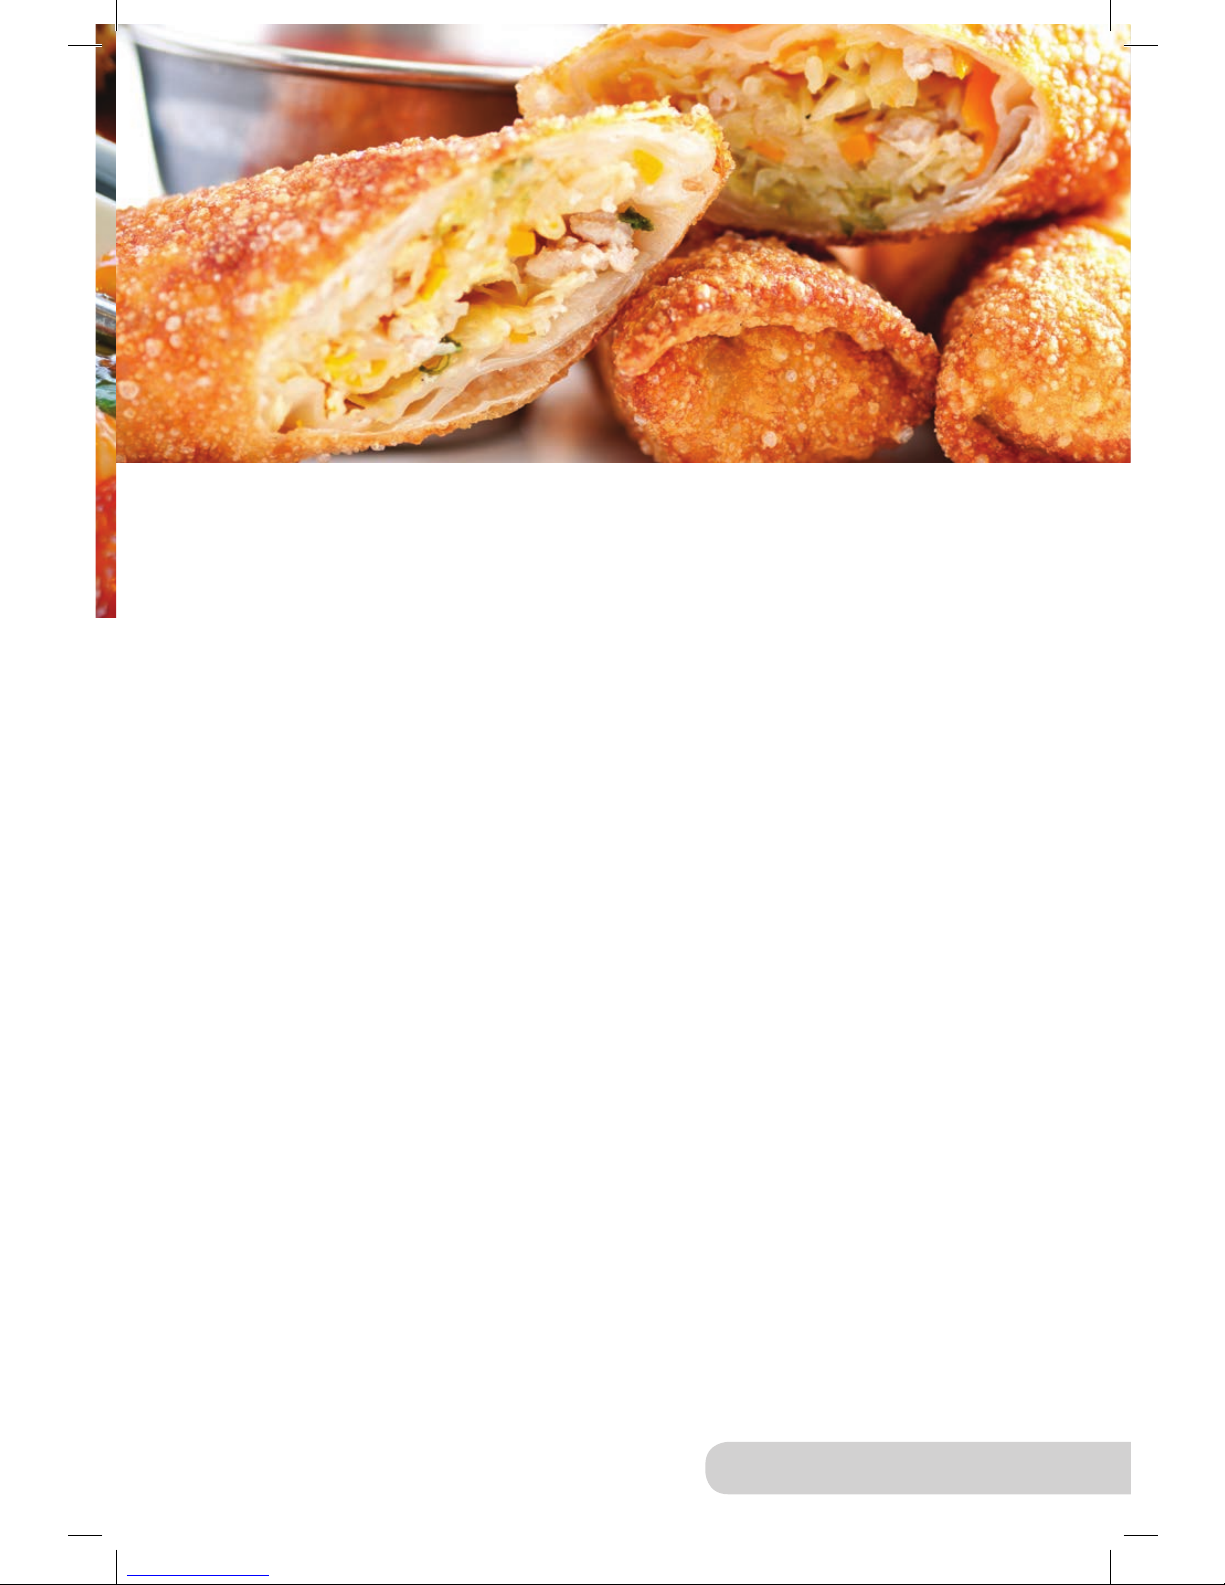
Vegetable Egg Rolls Serves: 4
Ingredients:
2 tablespoons peanut oil, plus extra 1
tablespoon, divided
2 cloves garlic, minced
1 tablespoon ginger, minced
½ sweet onion, sliced thin
1 celery stalk, sliced thin
2 carrots, cut into matchsticks
½ small cabbage head, shredded
2 tablespoons rice vinegar
2 teaspoons soy sauce
1 teaspoon sugar
40-50 egg roll wrappers
Directions:
1. Heat Wok to 375˚F and add the 2 tablespoons of peanut oil.
2. Add garlic and ginger and cook for 30 seconds. Add onion, celery, and
carrots and stir-fry for 2 minutes.
3. Add cabbage, rice vinegar, soy sauce, and sugar, and continue to stir-fry
for an additional 2 minutes.
4. Remove vegetables and place on a sheet tray to cool down. Turn heat off.
5. Take one egg roll wrapper and place on a clean surface. The point nearest
to you should be directly facing you.
6. Spread 1 tablespoon of the lling, making a horizontal line across.
7. Roll the point of the wrapper closest to you over the lling. Fold in the two
side corners.
8. Dampen the remaining open point with water. Finish rolling the egg roll
away from you.
9. Heat Wok to 375˚F and add the extra 1 tablespoon of peanut oil.
10. Place 2 egg rolls in Wok, seam-side down. Fry for about 5 to 8 minutes,
turning them constantly to ensure even cooking. Fry the egg rolls in 2
separate batches.
11. When cooked, drain on paper towels.
Tip: Serve with a plum sauce or a sweet and sour sauce.
Page 42
42
Owner’s Manual
Page 43

43
Owner’s Manual
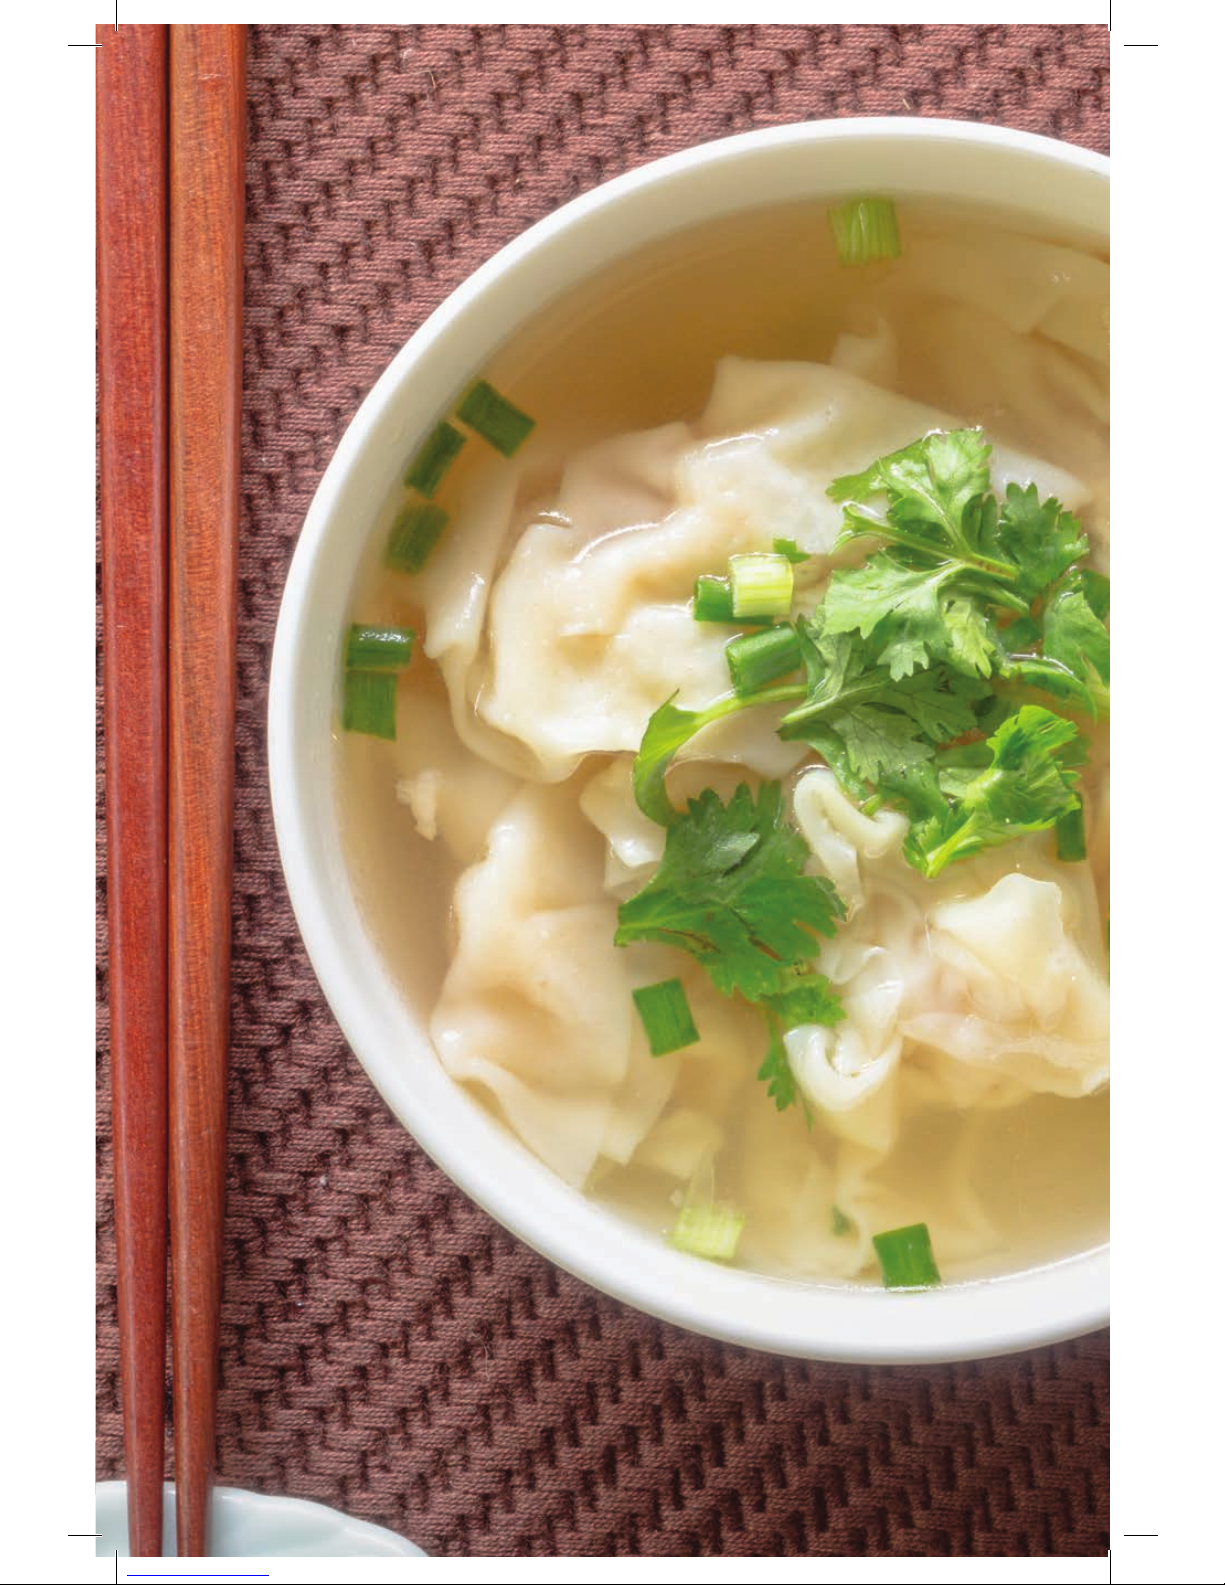
Wonton Soup Serves: 6
Ingredients:
Soup:
8 cups chicken broth
1 small carrot, shredded
1 onion, diced small
2 garlic cloves, minced
1 1-inch piece of ginger, minced
3 scallions, finely minced
4 ounces ground pork
Wonton Mixture:
25 pieces wontons
6 ounces ground pork
2 scallions, minced
1 onion, finely chopped
⅛ teaspoon freshly ground
black pepper
1 clove garlic, minced
1 tablespoon soy sauce
1 teaspoon sesame oil
1 egg white, lightly beaten
Directions:
1. For the mixture lling, in a bowl, mix ground pork, onion, ginger, scallions,
soy sauce, and fresh ground black pepper.
2. Wrap with plastic and place in freezer for 10 minutes.
3. Line a sheet pan with parchment paper.
4. Place one wonton skin on a clean working surface with one point of the
wrapper facing toward you.
5. Place 1 teaspoon of the mixture lling in the middle of the wonton wrapper.
6. Brush the edges of wonton skin with water and fold into a triangle. Press
down to seal, and then brush the corners with water and fold over the ends
with your nger and press to seal. Place each wonton on the sheet pan.
7. Cover wontons with a damp paper towel. Repeat until all wontons are
done. Refrigerate for 3 hours.
8. Remove, and then cover with plastic before cooking.
9. Heat the Wok to 425˚F and add oil.
10. Once oil is hot, add ground pork, onions, garlic, and ginger to Wok.
Cook for 4 to 5 minutes. Do not allow pork to brown, but cook completely.
11. Add the chicken broth, bring broth up to a boil, and then lower heat to
175˚F and simmer for 30 minutes. Strain the soup, if you wish.
12. Place wontons in Wok and broth. Bring heat up 425˚F. Cook wontons
for 4 to 6 minutes or until all are cooked through.
13. Serve soup on the side with the wontons or use the soup “as is” and add
cooked (boiled separately) wontons and carrots before pouring into bowls.
Garnish with scallions.
Page 44
Manual del Usuario
NuWave
Wok de Precisión e Inducción
Page 45

45
Manual e Instrucciones
Bienvenido a la Cocina de Precisión e
Inducción NuWave
®
Felicidades por la compra del Wok de Precisión e Inducción NuWave. Este
manual contiene instrucciones detalladas e imágenes para ayudarle a
comenzar. También está lleno de grandes recetas y consejos para ahorrar
tiempo, los cuales le ayudarán a preparar deliciosas comidas gourmet en una
fracción de tiempo que tomaría hacerlo al utilizar una estufa convencional.
Cocinar es rápido y fácil con el Wok de Precisión e Inducción de Nu-Wave, LLC.
Este versátil electrodoméstico de barra utiliza tecnología de inducción para
ahorrar tiempo, energía y dinero. El Wok de Precisión e Inducción NuWave es
eciente, seguro, rápido y fácil de limpiar. Y, debido a que puede programar
tiempos y temperaturas desde tibio hasta abrasador, usted puede preparar casi
cualquier tipo de comida sin el riesgo de cocinarlo de más o de menos.
¿Qué es la Cocción por Inducción?
El Wok de Precisión e Inducción NuWave se compone de una serie de bobinas
de inducción basadas en principios magnéticos. Estas bobinas generan campos
magnéticos que producen una reacción inmediata de calentamiento en ollas y
sartenes de acero y hierro. El calor se genera directamente en el wok, limitando
el calor adicional que se irradia alrededor de la supercie como sucede en
las estufas tradicionales de gas o eléctricas, haciendo el Wok de Precisión e
Inducción mucho más eciente energéticamente.
La cocción por inducción es la forma más ecológica de preparar las comidas
porque el método no libera toxinas en el medio ambiente. La cocción por inducción
no emite llama, por lo que se produce menos calor residual en su cocina.
Benecios adicionales:
Conservación de la Energía: El campo magnético, generado por las bobinas
de cobre, hace que las moléculas invisibles en el Wok comiencen a vibrar
rápidamente creando así calor, por lo que el Wok calienta la comida por sí mismo.
Seguridad: El diseño del Wok de Precisión e Inducción NuWave no utiliza
ninguna bobina roja caliente o llamas abiertas, eliminando esencialmente el
riesgo de incendio. La función de Apagado Automático realza la seguridad de la
Base del Wok de Inducción. ¡Solamente tóquelo y adelante!
Cocción Rápida: Se calienta inmediatamente y la temperatura es precisa
en el Wok de Precisión e Inducción NuWave. Cuenta con 6 ajustes de
temperatura diferentes que pueden cambiarse en incrementos de 5 grados.
¡No tendrá que calcular!
Ligero y portátil: Debido a que el Wok de Precisión e Inducción NuWave pesa
sólo 6.9 libras, se puede llevar a donde sea. Úselo en interiores o al aire libre,
en cualquier lugar donde haya un contacto eléctrico estándar (E.U.A.).
Fácil de limpiar: Los derrames no se quemarán o pegarán en la supercie de
la Base del Wok de Inducción. ¡Sólo límpielo y listo!
Page 46
46
Manual e Instrucciones
DESCRIPCIÓN DE PIEZAS
Después de cocinar
en la Base de Wok
de Inducción, la
Plataforma del Wok
se puede usar como
bandeja de servir.
2
1
3
4
Tapa del Wok
Parte: 31752
Wok
Parte: 31751
Base del Wok
de Inducción
Parte: 30801
Estante de Freír
Part #: 31754
Plataforma
Part #: 31753
5
2
1
3
4
5
Page 47

47
Manual e Instrucciones
MEDIDAS DE SEGURIDAD IMPORTANTES
LEA TODAS LAS INSTRUCCIONES
Cuando utilicen electrodomésticos, siempre se deben seguir
precauciones básicas de seguridad, incluyendo las siguientes:
PELIGRO - Para reducir el riesgo de electrocución:
1. No lo use al aire libre.
2. Lea todas las instrucciones, medidas de seguridad y advertencias antes
de usar el aparato.
3. No coloque el electrodoméstico donde pueda caerse o ser jalado hacia
agua u otros líquidos.
4. No trate de sacar un aparato que ha caído al agua. Desenchúfelo
inmediatamente. No sumerja el cable, el enchufe o cualquier parte del
aparato en agua u otros líquidos.
ADVERTENCIA - Para personas con marcapasos:
1. Este aparato emite un campo electromagnético que es más fuerte dentro
de 2 pies de la supercie de cocción.
2. Las pruebas cientícas han demostrado ser poco concluyentes en
cuanto a si el campo eléctrico interrumpirá la función de un marcapasos.
Por favor, consulte a su médico o profesional médico antes de usarlo.
ADVERTENCIA – Para reducir el riesgo de quemaduras, electrocución,
incendio y lesiones:
1. Este aparato no está diseñado para uso continuo.
2. Este aparato incluye una función de calentamiento. Las supercies
pueden alcanzar temperaturas altas. No toque las supercies calientes.
La Base del Wok de Inducción puede conservar calor residual después
de retirar el recipiente. El uso de agarradores u otras medidas de
seguridad alternativas son altamente recomendables.
3. Este electrodoméstico no deberá ser utilizado por niños. Tenga aún más
cuidado cuando utilice el producto cerca de niños.
4. No lo coloque sobre ninguna parrilla de gas o eléctrica, o dentro de un
horno caliente.
5. No coloque sobre la Base del Wok de Inducción objetos
metálicos como cuchillos, tenedores, cucharas o tapas,
ya que se pueden calentar.
6. Este aparato no está diseñado para uso comercial.
7. Utilice este electrodoméstico para el propósito para el que está
diseñado como se describe en este manual. No utilice otros
accesorios o aditamentos no recomendados por el fabricante, ya que
ello podría provocar un incendio, una descarga eléctrica o lesiones
personales. Se recomienda utilizar únicamente el Wok incluido en
la Base de Precisión e Inducción.
Page 48

48
Manual e Instrucciones
8. Nunca utilice este electrodoméstico si tiene el cable o la clavija dañados,
si no funciona adecuadamente, si se cayó o ha sido dañado, o si se ha
sumergido en agua. Contacte a Servicio al Cliente al 1-877-689-2838 o
escriba a [email protected]
9. No utilice un aparato roto. En caso de una ruptura, los limpiadores
o derrames pueden penetrar el aparato creando el riesgo de una
descarga eléctrica.
10. Mantenga el cable lejos de supercies calientes. No deje el cable colgando
de las orillas de mesas o barras. Nunca forcé la clavija en un contacto.
Siempre desconecte jalando la clavija. Apague el aparato antes de
desconectarlo del contacto.
11. No lo utilice donde se estén usando productos aerosoles, así como en
lugares donde el oxígeno sea reducido.
12. Utilice un juicio apropiado y cuidado cuando utilice el aparato al aire libre
o espacios públicos. Este aparato nunca deberá ser puesto donde haya
niños sin cuidar o alguien que no sepa de su presencia. Debe ser colocado
en una supercie plana y estable, lejos de fuentes de agua como albercas,
spas, rociadores, mangueras, etc.
13. No mueva el aparato mientras esté caliente.
14. Este electrodoméstico es para uso doméstico únicamente; está diseñado
para procesar cantidades normales de una casa. No es conveniente para
un uso continuo u operación comercial.
15. No desarme el producto. Las partes no sirven por sí solas.
16. No deje el electrodoméstico desatendido si está en uso.
17. Este aparato no está diseñado para utilizarse por medio de un reloj externo.
18. Limpie el aparato con precaución. Al limpiar una supercie caliente con
aplicaciones húmedas se puede provocar vapor y algunos limpiadores
pueden producir humo peligroso. Desconecte del contacto antes de limpiar.
19. Tome precaución cuando deseche el aceite caliente.
20. Mantenga este manual a la mano para una referencia en el futuro.
MEDIDAS DE SEGURIDAD IMPORTANTES
Información Eléctrica
1. La longitud del cordón corto de este electrodoméstico se seleccionó
para reducir los riesgos de seguridad que pueden presentarse con un
cable largo.
2. Se puede usar un cable de extensión con este electrodoméstico si:
a) La clasicación eléctrica marcada del cable de extensión se clasica al
menos tan bien como la clasicación eléctrica del dispositivo.
b) La más larga está dispuesta para que no caiga sobre la encimera o
sobre la mesa donde podría ser extraída o tropezada accidentalmente.
Page 49
49
Manual e Instrucciones
MEDIDAS DE SEGURIDAD IMPORTANTES
Forma correcta para desechar este producto
Esta marca indica que este producto no debe desecharse con otros residuos
domésticos dentro de E.U.A. Para evitar posibles daños al medio ambiente
o a la salud humana por el desecho incontrolado de residuos, recíclelos
responsablemente para promover la reutilización sostenible de los recursos
materiales. Para devolver el dispositivo usado, utilice sistemas de devolución
y recolección o póngase en contacto con el distribuidor donde adquirió el
producto. Se puede manejar reciclaje ambientalmente seguro.
ADVERTENCIA
Peligro de descarga eléctrica. Utilizar con el sistema eléctrico
adecuado. No lo utilice si el cable o el enchufe están dañados.
ADVERTENCIA: Todos los artículos del Wok de Inducción pueden
calentarse mucho al cocinar. Tenga cuidado al quitarlos de la
unidad. Siempre use guantes de horno o utilice sujetadores.
El Wok de Inducción puede retener calor residual después de
retirarlo. Deje que todo se enfríe completamente antes de limpiarlo.
1-877-689-2838 o [email protected]
GUARDA ESTAS INSTRUCCIONES
IMPORTANTE - Información de la FCC:
Advertencia: Los cambios o modicaciones a esta unidad que no sean
aprobados explícitamente por la parte responsable podrían invalidar la autoridad
del usuario para operar el equipo.
Nota: El equipo cumple con la parte 18 del Reglamento FCC.
3. Ciertos modelos de este aparato pueden tener un enchufe polarizado
(una cuchilla es más ancha que la otra). Este enchufe está diseñado
para encajar en un tomacorriente polarizado de una sola manera. Si el
enchufe no entra completamente en el tomacorriente:
a) Invierta el enchufe.
b) Póngase en contacto con un electricista calicado (si el enchufe de
reversa no funciona). NO INTENTE MODIFICAR EL ENCHUFE DE
NINGUNA MANERA.
Page 50
50
Manual e Instrucciones
CUIDADO Y MANTENIMIENTO - BASE DEL WOK
DE INDUCCIÓN
Antes de usarlo, limpie la supercie con un
trapo húmedo o una esponja, y seque bien.
IMPORTANTE: no sumerja la unidad en
agua ni intente girar por el lavavajillas.
Asegúrese de que la unidad se haya
enfriado por completo antes de limpiarla.
La supercie exterior se puede limpiar
limpiando cuidadosamente con un paño
húmedo o una esponja.
DESPUÉS DE USARLO:
• Limpie después de cada uso.
• Desconecte la unidad antes de limpiarla.
• Asegúrese de que la unidad se haya enfriado completamente antes
de limpiarla.
• La supercie externa se puede limpiar con un paño húmedo o una esponja.
• Retire el cable de alimentación antes de limpiar el Wok de Precisión e
Inducción NuWave. No utilice agentes de limpieza cáusticos. El agua no debe
penetrar en el interior de la Base de Wok de Inducción.
• Nunca sumerja el Wok de Precisión e Inducción NuWave, sus cables o el
enchufe en agua u otros líquidos.
• Limpie la supercie de vidrio con un paño húmedo o use una solución
jabonosa suave y no abrasiva. Asegúrese de que la unidad se haya enfriado
por completo antes de limpiarla.
• Limpie la cubierta y el panel de operación con un paño suave humedecido
con agua o un detergente suave.
• No utilice productos de limpieza a base de aceite, ya que su uso puede dañar
las partes plásticas o la cubierta/panel de operación.
Page 51

51
Manual e Instrucciones
• No utilice materiales inamables, ácidos o alcalinos cerca del Wok de Precisión
e Inducción NuWave, ya que esto puede reducir la vida útil de la Base del Wok
de Inducción o crear un riesgo de incendio cuando la Base está en uso.
• Con el n de mantener su Wok de Precisión e Inducción NuWave como
nuevo, tome medidas para asegurarse de que la parte inferior del Wok no
raspe la supercie de vidrio de la unidad. Aunque una supercie rayada no
pone en peligro el uso de la Base del Wok de Inducción.
• Asegúrese de limpiar adecuadamente la unidad antes de guardarla en un
lugar fresco y seco.
Consejos Importantes:
1. Revise las tomas de corriente para asegurar un funcionamiento correcto.
No lo utilice en un tomacorriente donde se encuentren otros aparatos
importantes. Compruebe los ajustes si la unidad está cocinando
demasiado lento.
2. El enchufe eléctrico debe estar conectado correctamente a la toma
de corriente.
3. Siempre apague y desenchufe la unidad antes de limpiarla.
CUIDADO Y MANTENIMIENTO - BASE DEL WOK
DE INDUCCIÓN (CONTINUACIÓN)
Page 52
52
Manual e Instrucciones
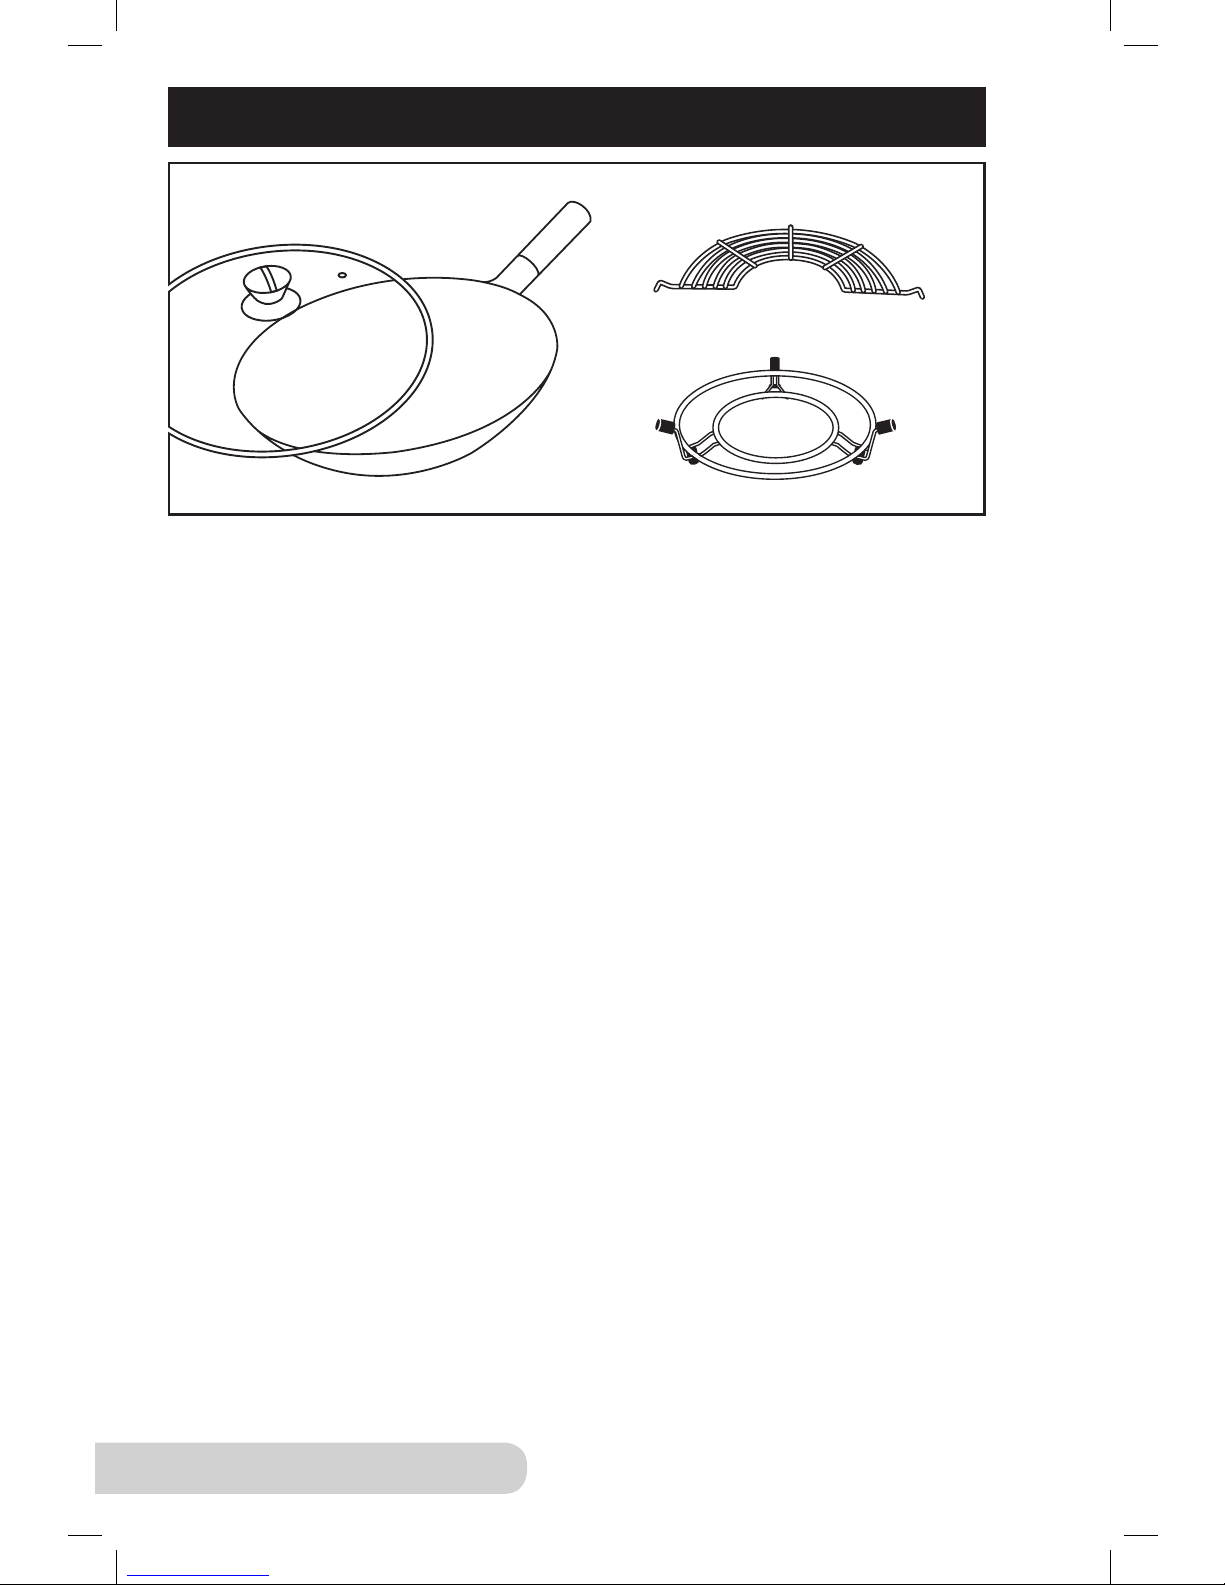
CUIDADO Y MANTENIMIENTO - WOK
Wok
Plataforma
Nota: Antes de curar el Wok; se recomienda limpiar el Wok antes del primer uso.
El Wok, Tapa del Wok, Estante de Freír y la Olataforma son aptos para el lavado
de platos.
Curación/Cuidado y Uso
1. Asegúrese de que el Wok se ha secado completamente.
2. Caliente el Wok y frote 2 cucharadas de aceite de cacahuete en la
supercie con un paño seco o un conjunto grueso de toallas de papel
para que la nueva capa de aceite recubre la supercie. (Precaución: la
supercie estará caliente).
• Deje una ventana abierta y utilice un ventilador para quitar cualquier
humo. El humo de la supercie es natural durante este proceso.
3. Deje que la sartén se enfríe a temperatura ambiente. Repita los pasos
de dos a tres veces más, frotando una pequeña cantidad de aceite en la
sartén cada vez.
Limpieza del Wok:
1. Después de que el Wok se ha utilizado para cocinar, simplemente
límpielo con una toalla de papel o un trapo seco.
• Si el wok está muy sucio y requiere una limpieza más profunda,
limpie el wok usando aceite limpio o un cepillo de bambú (el
eucalipto tiene propiedades antibacterianas) para rascar cualquier
incrustación. Solamente deje que corra agua en el wok y frote hasta
que el residuo desaparezca.
2. Seque el wok bien después de la limpieza.
3. Cuando todos los residuos hayan sido retirados del Wok, repita el
proceso de curación.
Estante de Freír
Tapa
Page 53

53
Manual e Instrucciones
Instrucciones de uso generales:
• Coloque la Base del Wok de Inducción sobre una supercie estable no metálica.
• Nunca utilice la Base del Wok de Inducción sobre una supercie inamable
(por ejemplo, un mantel, una alfombra, etc.).
• No bloquee las ranuras de ventilación de la Base del Wok de Inducción. Esto
podría hacer que la unidad se sobrecaliente. Mantenga una distancia mínima
de 3-5 pulgadas a las paredes y otros objetos, electrodomésticos, etc.
• No coloque dispositivos u objetos que son sensibles a los campos
magnéticos encima o al lado del Wok de Precisión e Inducción NuWave
(por ejemplo, tarjetas de crédito, teléfonos celulares, radios, televisores,
grabadoras de vídeo, etc.).
• No use el Wok de Precisión e Inducción cerca de amas abiertas,
calentadores u otras fuentes de calor.
• No lo coloque sobre la estufa.
• Asegúrese de que el cable de alimentación no esté dañado o presionado
debajo de la Base del Wok de Inducción.
• El cable de alimentación no debe entrar en contacto con bordes alados y/o
supercies calientes.
• Antes de conectar el Wok de Precisión e Inducción, conrme que las
necesidades de voltaje indicadas en este manual corresponden a la
alimentación de tensión de su hogar. Una conexión incorrecta puede
provocar daños a la unidad y posibles lesiones a personas.
• En el caso de que se observen daños en la unidad, desconecte
inmediatamente el Wok de Precisión e Inducción de la fuente
de alimentación.
INSTRUCCIONES DE FUNCIONAMIENTO
Si se necesita una limpieza más profunda:
1. Caliente el Wok.
2. Agregue 2 cucharadas de aceite de cacahuete y agregue varias
cucharadas de sal kosher.
3. De una tallada fuerte al wok con una toalla de papel doblada.
(Precaución: ¡La supercie estará caliente!)
4. Enfríe el Wok.
5. Enjuague con agua corriente y seque completamente.
• Posteriormente, se puede aplicar al wok una ligera frotación de
aceite de cacahuete una vez más.
Nota: Las ideas “convencionales” de limpieza e higiene con los utensilios de
cocina son algo contraproducentes cuando se trata de un wok auténtico – los
restos que se quedan en la supercie del wok, después de secarlo luego de
su uso, forman una capa que con el tiempo servirá para mejorar el sabor de
sus alimentos.
CUIDADO Y MANTENIMIENTO - WOK (CONTINUACIÓN)
Page 54
54
Manual e Instrucciones
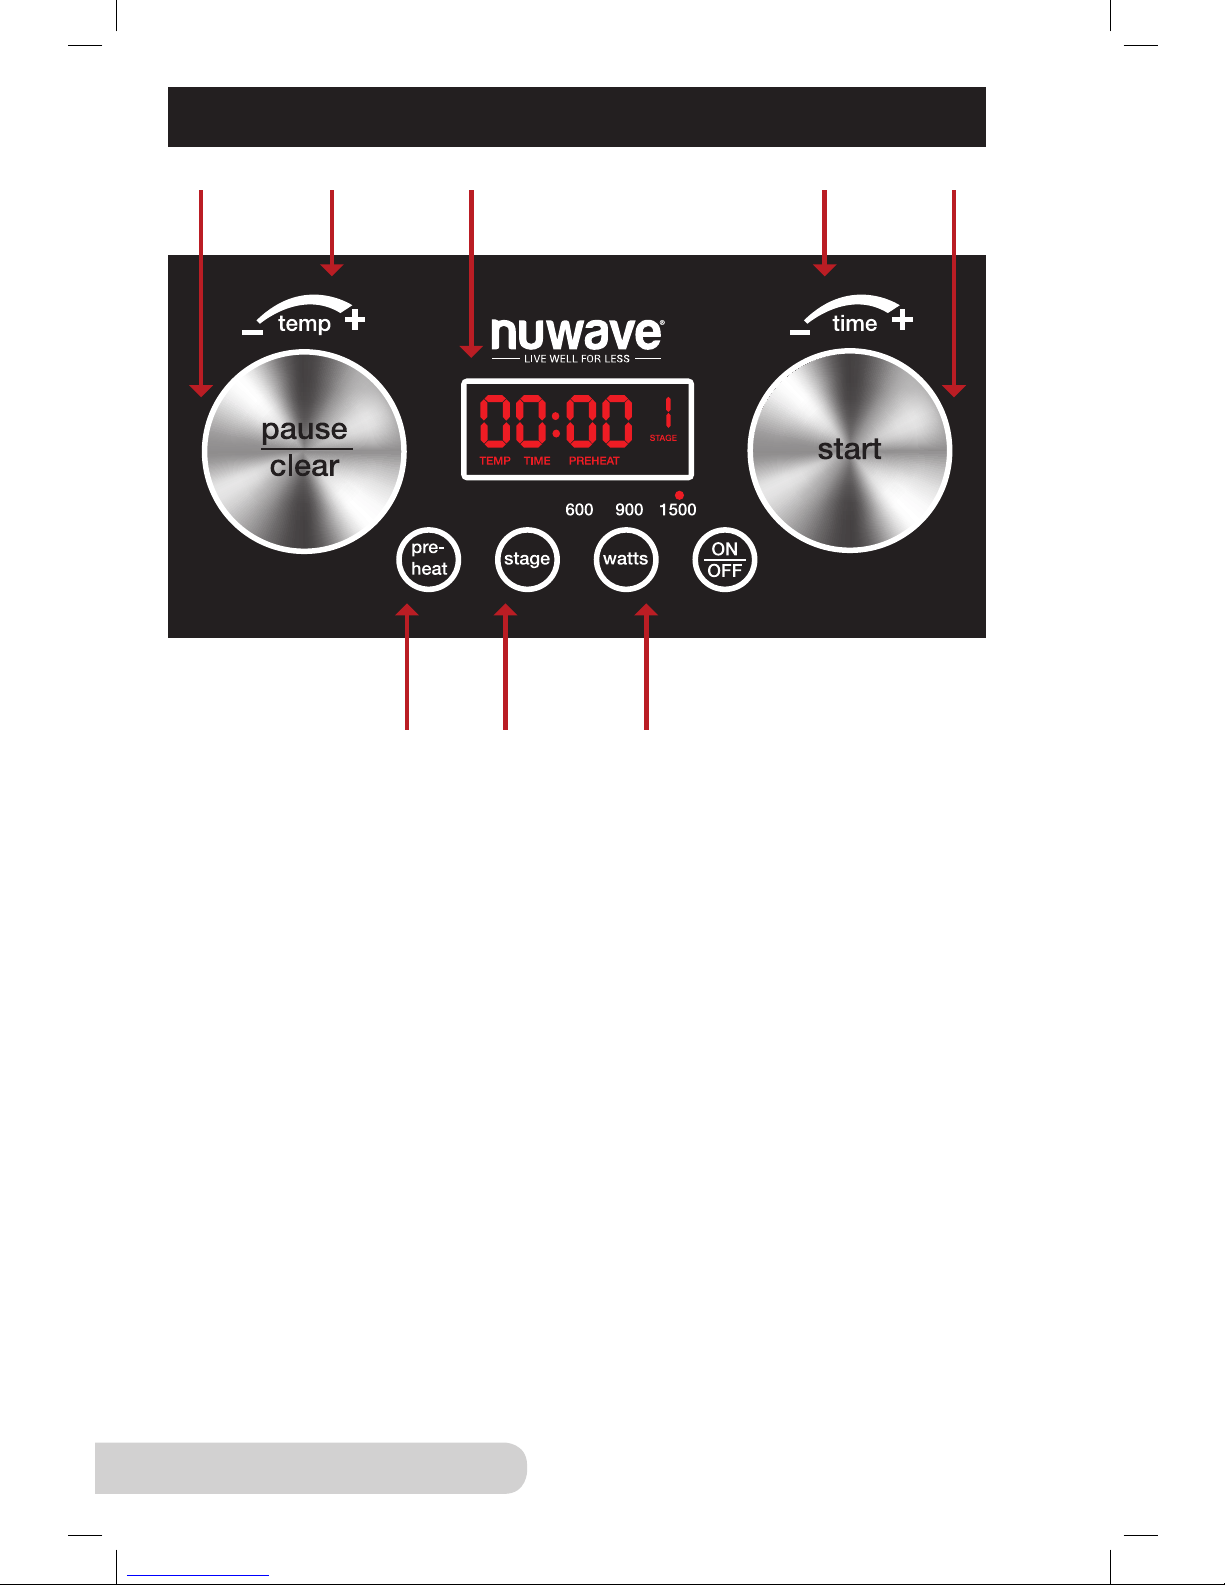
PANEL DE CONTROL
Función Encendido / Apagado:
1. Pulse “ON/OFF” una vez para encenderlo. Se visualizará “0”.
2. Presione “ON/OFF” nuevamente para apagar la unidad.
Función de Watts:
1. La potencia en watts predeterminada se establece en 1500. Presione
“watts” repetidamente para cambiar a 600, 900 o volver a 1500 watts.
• Cuando apague y vuelva a encender la unidad, los watts anteriores
seleccionados permanecerán en el Wok hasta que sean cambiados.
Función F/C:
1. Presione “stage” y “watts” simultáneamente hasta que vea “F” o “C”
parpadeando.
2. Presione “stage” para cambiar de “F” a “C” y viceversa
3. Pulse “on/off” para completar la selección.
Función Pausa/Borrar:
1. Presione “pause/clear” una vez para pausar la unidad.
• Se visualizará la temperatura seleccionada y “F” parpadeará.
• Si ha seleccionado “Time” y presiona “pause”, “TIME” no parpadeará.
• Para reanudar la cocción, presione “start”.
2. Presione “pause/clear” nuevamente para borrar cualquier programa.
Presione
para borrar
y detener
rápidamente
Gire para
ajustar las
temperaturas
LED digital
muestra tiempos y
temperaturas
Turno para
ajustar tiempos
Presiona
para
comenzar
Caliente
rápidamente a
la temperatura
deseada.
10 etapas
le permite
ajustar las
temperaturas
y los tiempos.
3 vatios diferentes.
Page 55

55
Manual e Instrucciones
PANEL DE CONTROL (CONTINUACIÓN)
Inicio Rápido:
1. Después de encender la unidad, presione “start” en la perilla. “375F” y
“TEMP” se mostrarán y comenzará la cuenta regresiva.
• El Wok está predeterminado a 375F por 20 minutos.
Función de Temperatura:
Simplemente gire la perilla para disminuir o aumentar la temperatura.
• Ubicada en la perilla derecha.
• El intervalo de tiempo es de 1 minuto a 9 horas y 59 minutos (el tiempo es
en horas y minutos).
Función de Tiempo:
Simplemente gire la perilla para disminuir o aumentar el tiempo.
• Ubicada en la perilla derecha.
• El intervalo de tiempo es de 1 minuto a 9 horas y 59 minutos (el tiempo es
en horas y minutos).
Función de Cocción por Etapas:
1. Presione “stage”. “STAGE” parpadeará y aparecerán “1”,
“TIME” y “00:00”.
2. Ajuste el tiempo y la temperatura si es necesario.
3. Presione “stage” otra vez. “STAGE” parpadeará y aparecerán “2”,
“TIME” y “00:00”.
4. Ajuste el tiempo y la temperatura si es necesario.
5. Repita los pasos si es necesario.
• Puede crear hasta 10 etapas. La etapa 10 se mostrará como “0”.
6. Presione “start”.
Función de Precalentamiento:
1. Presione “preheat”. “PREHEAT” y “375F” se visualizarán.
2. Ajuste el tiempo y la temperatura si es necesario.
• El programa de precalentamiento está predeterminado a 375F
por 20 minutos.
3. Presione “start”. La temperatura seleccionada y “F” parpadearán.
4. Una vez que se haya alcanzado la temperatura seleccionada, se visualizará
“selected temperature” y “ready”, indicando que el Wok mantendrá esa
temperatura durante 5 minutos o hasta que se presione “start”.
5. Una vez que se presione “start”, comenzará la cuenta regresiva que
usted seleccionó con la temperatura programada.
• Si presiona “pause” cuando la unidad está precalentando, “5”
parpadeará, indicando que el Wok mantendrá el programa durante 5
minutos o hasta que se presione “start”.
Page 56

56
Manual e Instrucciones
GUÍA DE SOLUCIÓN DE PROBLEMAS
Mensaje de error Solución
E1
E2
La unidad no funciona correctamente. Contacte a Servicio
al Cliente.
E3 El voltaje de la unidad es demasiado bajo. Mínimo = 85 voltios.
E4 El voltaje de la unidad es demasiado alto. Máximo = 144 voltios.
E5
La unidad no funciona correctamente. Contacte a Servicio
al Cliente.
E6
La unidad no funciona correctamente. Contacte a Servicio
al Cliente.
E7
Sobrecalentamiento o la ventilación de aire está obstruida.
Si la temperatura interna supera los 230˚F, el funcionamiento
cesará y se producirá un “pitido”. Presione “pause/clear” dos
veces. Espere a que la unidad se enfríe.
E8
Sobrecalentamiento o si la unidad excede una temperatura
de 20°F más alta que la temperatura máxima, el aparato se
apagará. Contacte a Servicio al Cliente.
E9
La unidad no funciona correctamente. Contacte a Servicio al
Cliente al 1-877-689-2838 o escriba a [email protected].
FULL
En el modo de programación, cuando el tiempo total ingresado
alcance el límite del aparato que es de 99:59, no se podrán
introducir etapas adicionales.
Un E1 normalmente signica que el Wok de Precisión e
Inducción NuWave no detecta el Wok en su supercie. Esto
puede ocurrir por una de las dos siguientes razones:
1. Las bobinas de inducción contenidas dentro
del Wok de Precisión e Inducción NuWave sólo
funcionarán cuando están en contacto directo con
una pieza de Wok. Para mantener la ecacia de su
electrodoméstico, asegúrese siempre de que quede
sobre una supercie plana y que el contacto sea
compatible con su Wok.
2. Un mensaje E1 también puede ocurrir si su Wok no
es para inducción.
Se recomienda utilizar sólo el Wok incluido con la Base
de Precisión e Inducción.
Page 57
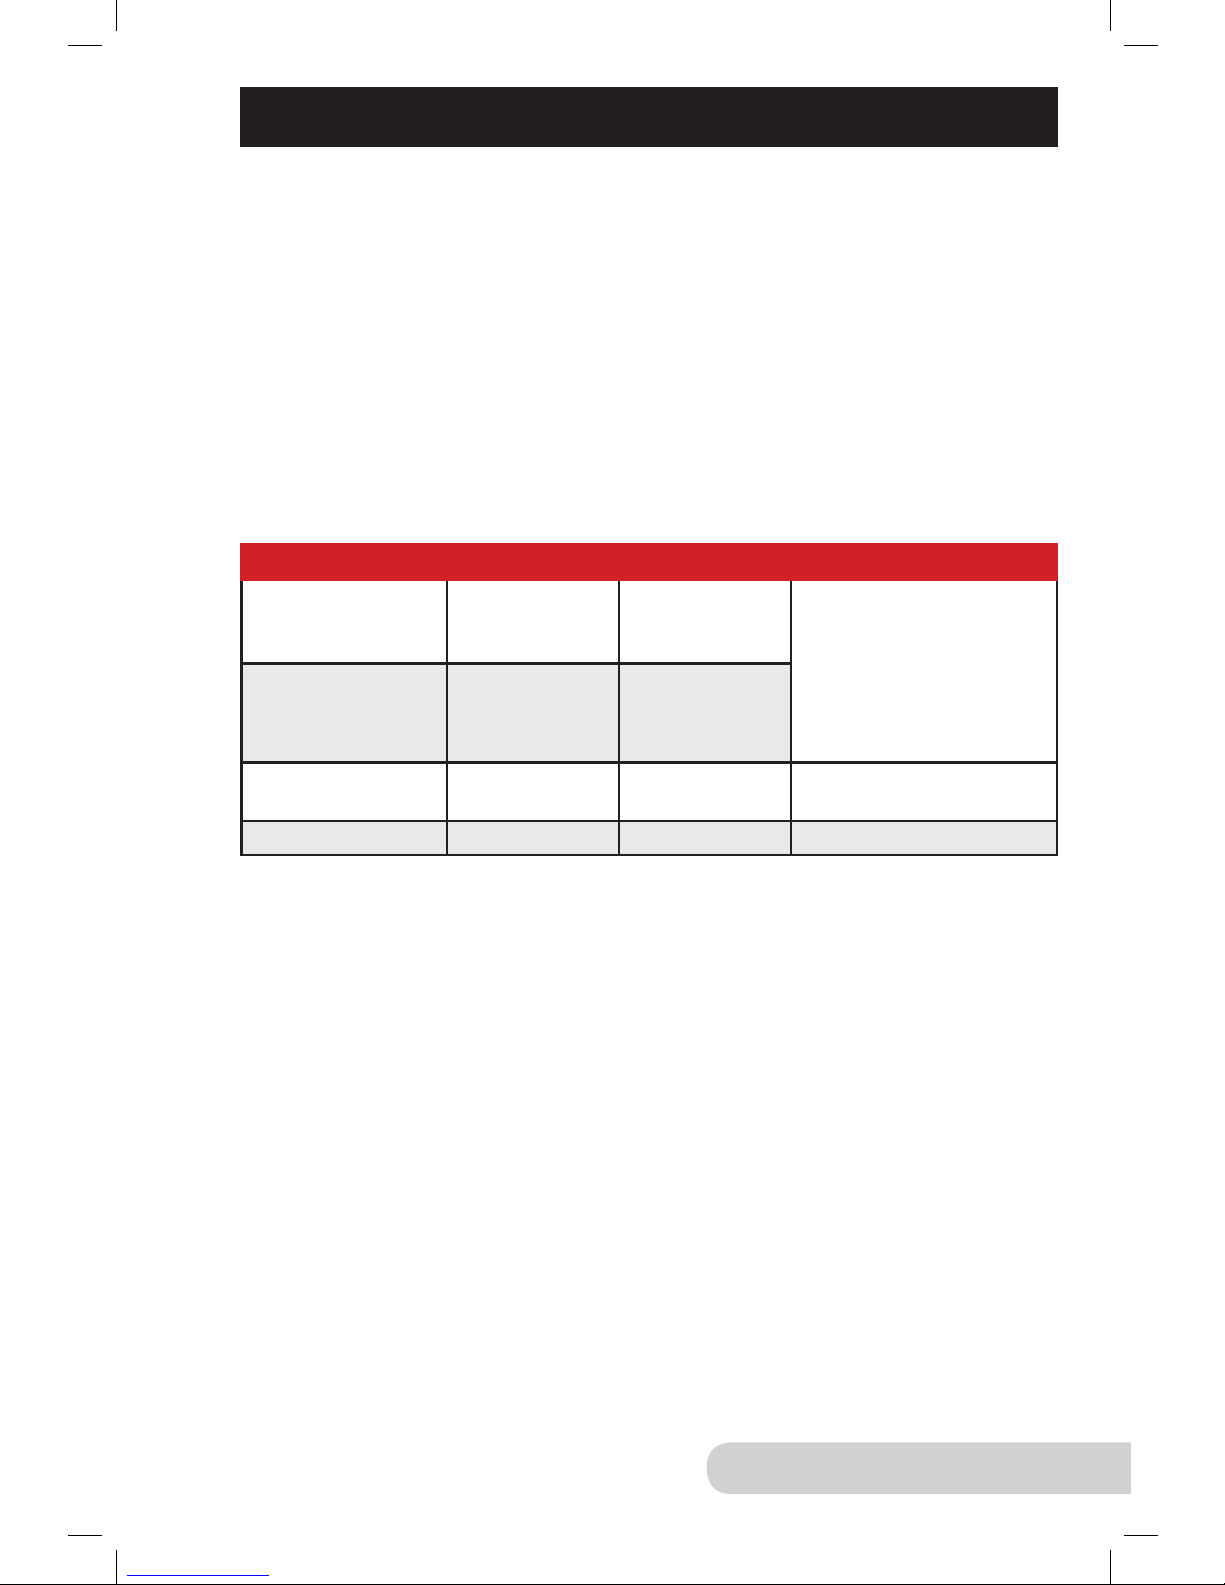
57
Manual e Instrucciones
GUÍA DE SOLUCIÓN DE PROBLEMAS (CONTINUACIÓN)
Cuando el Wok está fuera del Wok de Precisión e Inducción NuWave
Inicial Un solo pitido
“F” o “C” o
“Sear” o “:”
parpadeando
Después de devolver
el Wok a la supercie
del Wok de Precisión
e Inducción NuWave,
se reanudará
automáticamente
la cocción.
<10 segundos Ninguno
“F” o “C” o
“Sear” o “:”
parpadeando
11-70 segundos Si E1
Reanude la cocción
presionando “start”.
After 70 segundos Ninguno 0 La cocción se detiene.
• Si aparece alguno de los mensajes de error anteriores en el LED, la unidad
emitirá un “pitido” al menos una vez.
• El ventilador funcionará hasta un máximo de 60 segundos después de
presionar “pause/clear” una vez. Continúe cocinando presionando “start”
dentro de los siguientes 45 minutos.
• La unidad se apagará después de 45 minutos si no se presiona ningún
botón (como “start”). Cuando la unidad se apague, borrará todo el historial
de cocción previo.
• Después de presionar “pause/clear” dos veces o la cocción se haya
detenido, el ventilador funcionará hasta un máximo de 60 segundos hasta
que la unidad se enfríe. En ese momento el Wok de Precisión e Inducción
NuWave se apagará.
Page 58

58
Manual e Instrucciones
El Wok de Precisión e Inducción NuWave
EL FABRICANTE GARANTIZA
El Wok de Precisión e Inducción NuWave, incluyendo la Plataforma del Wok,
el Estante de Freír, y la Tapa están libres de defectos de fabricación. Todos
los componentes eléctricos están garantizados por 1 año a partir de la fecha
de compra, bajo un uso doméstico normal y siempre que se hayan manejado
de acuerdo a las instrucciones por escrito del Fabricante. El Fabricante
proporcionará las partes necesarias y mano de obra para reparar cualquier
parte del Wok de Precisión e Inducción NuWave en el Departamento de
Servicio de NuWave, LLC. Una vez vencida la garantía, el costo de mano de
obra y las partes será responsabilidad del propietario.
LA GARANTÍA NO CUBRE
La Garantía Limitada se invalida si la reparación es hecha por un distribuidor
no autorizado o si la placa del número de serie es retirada o maltratada. El
deterioro normal del acabado, por uso o exposición, no está cubierto por esta
Garantía. Esta Garantía Limitada tampoco cubre fallas, daños o desempeño
inadecuado por accidentes, desastres naturales (tales como relámpagos),
uctuaciones en la energía eléctrica, alteraciones, abuso, mal uso, ambientes
corrosivos, instalación inadecuada, o falla en la operación de acuerdo con las
instrucciones escritas por el Fabricante, uso no normal o comercial. NuWave,
LLC se reserva el derecho de invalidar la Garantía Limitada, donde lo permita la
ley, a los productos que hayan sido comprados a distribuidores no autorizados.
PARA OBTENER EL SERVICIO
El propietario tendrá la obligación y responsabilidad de: Pagar por todos
los servicios y partes no cubiertas por la garantía; pagar por adelantado el
envío hacia y desde el Departamento de Servicio para cualquier pieza o
sistema devuelto bajo esta garantía; Empacar cuidadosamente el producto
utilizando el material de relleno adecuado para prevenir cualquier daño
durante el tránsito. El empaque original es ideal para este propósito. Incluya
en el empaque el nombre del propietario, dirección, teléfono durante el
día, una descripción detallada del problema y su “número RGA”. Llame
al 1-877-689-2838 o escriba a [email protected] para obtener el
RGA (Número de Autorización de Devolución del Producto). Proporcione
el modelo del producto, el número de serie y comprobante de la fecha de
compra (una copia del recibo) cuando reclame su garantía.
GARANTÍA LIMITADA
Page 59

59
Manual e Instrucciones
OBLIGACIONES DEL FABRICANTE
La obligación del Fabricante bajo esta Garantía Limitada está limitada, hasta
lo permitido por ley, a reparar o reemplazar cualquier parte cubierta por esta
Garantía Limitada cuya revisión muestre que el defecto es por uso normal.
La Garantía Limitada aplica únicamente en los Estados Unidos y sólo para el
comprador original en los canales de distribución autorizados por el fabricante.
LA GARANTÍA LIMITADA NO PUEDE SER ALTERADA, CAMBIADA O
EXTENDIDA EXCEPTO POR UN INSTRUMENTO POR ESCRITO REALIZADO
POR EL FABRICANTE. LA SOLUCIÓN DE REPARACIÓN O REEMPLAZO
INCLUIDA EN ESTA GARANTÍA ES EXCLUSIVA. EN NINGÚN CASO EL
FABRICANTE SERÁ RESPONSABLE DE NINGÚN DAÑO RELEVANTE
O FORTUITO A ALGUNA PERSONA, SEA O NO OCASIONADO POR LA
NEGLIGENCIA DEL FABRICANTE, INCLUYENDO, SIN LÍMITE, DAÑOS POR
PÉRDIDA POR USO, COSTOS POR REEMPLAZO, DAÑO A LA PROPIEDAD,
U OTRAS PÉRDIDAS MONETARIAS.
Algunos estados no permiten la exclusión o limitación de daños relevantes
o fortuitos, así que la exclusión mencionada podría no aplicar. Esta Garantía
Limitada proporciona derechos legales especícos y podría haber otros derechos
que varíen entre estado y estado. EXCEPTO POR LO QUE YA SE EXPRESÓ
DE FORMA DIFERENTE, EL FABRICANTE NO GARANTIZA EXPRESA O
IMPLÍCITAMENTE POR LEY U OTRAS, INCLUYENDO SIN LIMITACIONES,
LAS GARANTÍAS IMPLÍCITAS DE COMERCIALIZACIÓN Y EJERCICIO
PARA UN PROPÓSITO PARTICULAR A CUALQUIER OTRA PERSONA.
LEA EL MANUAL DEL USUARIO. SI TUVIERA ALGUNA DUDA SOBRE EL
FUNCIONAMIENTO O LA GARANTÍA DEL PRODUCTO, CONTACTE A
NUWAVE, LLC.
EA SU MANUAL DEL USUARIO: Si tuviera alguna duda sobre el
funcionamiento o la garantía del producto, contacte a NuWave, LLC al:
1-877-689-2838 o escriba a [email protected].
GARANTÍA LIMITADA (CONTINUACIÓN)
Page 60
www.nuwavenow.com
FOR HOUSEHOLD USE ONLY
Item No. BM 30801
Rev. 08-AA
12-21-17
Model: 30801, 120V, 60Hz, 1500 Watts
For patent information please go to: www.nuwavenow.com/legal/patent
Designed & Developed in USA by:
NuWave, LLC
1795 N. Buttereld Road
Libertyville, IL 60048, U.S.A.
Customer Service:
1-877-689-2838 • [email protected]
Made in China
©2018 NuWave, LLC • All Rights Reserved.
 Loading...