

Page 1
• 1
NuWave™ PIC Gold Manual & Complete Cookbook
Owner’s Manual, Recipes & Tips
PRECISION INDUCTION COOKTOP GOLD
™
Page 2

2 • NuWave™ PIC Gold Complete Cookbook
• 3
Table of Contents
Introduction, Parts & Accessories 4-5
Important Safeguards 6-7
Owner’s Manual 8-12
Troubleshooting 13-14
Cooking Tips 15
Breakfast
16
Scrambled Eggs 17
Omelette 17
Homemade Yogurt 18
Breakfast Potatoes 18
Fried Eggs 19
Homemade Pancakes 19
Vegetables
20
Green Beans Almondine 21
Grilled Japanese Eggplant with
Feta & Sun-dried Tomatoes
22
Stir-Fried Tofu & Vegetables 22
Broccoli & Carrot Stir-Fry 23
Artichokes with Butter Sauce 23
Beef
24
Grilled Sirloin with Mushrooms
& Red Peppers
25
Bistro Beef & Mushrooms 25
Hometown Chili 26
Spiced Beef with Dumplings 26
Pork & Chicken
27
Pan-fried Pork Chops 28
Pork Marsala 28
Sweet & Sour Pork with
Pineapple
29
Black-Eyed Peas with Andouille 29
Chicken & Mushrooms 30
Herb Chicken 30
Fried Chicken PIC Style 31
Seafood
32
Seafood Paella 33
Ginger Shrimp 33
Steamed Mussels in Tomato &
Wine
34
Jumbo Louisiana Shrimp with
Andouille & Grits
34
Battered Fried Shrimp 35
Fried Catsh 35
Pasta, Grains & Rice
36
How to Cook Pasta 37
Basic Pasta Dough 37
Roasted Red Pepper Sauce
over Torellini
38
Mushroom Stroganoff 38
Fettuccine Alfredo 39
Beans with Pesto Bulgur 39
Vegetables Fried Rice
40
Rice Pilaf 40
Spanish Rice 41
Popcorn Rice with Pecans 41
Stocks, Soups & Sauces
42
Vegetable Stock 43
Chicken Stock 43
Beef Stock 44
Vegetable Beef Soup 44
Creamy Cheddar Soup 45
French Onion Soup 45
Shrimp & Tofu Soup 46
Chunky White Bean
Tomato Soup
46
Hollandaise Sauce 47
Roux 47
Marinara Sauce 48
Cheese Sauce 48
Quick Brown Sauce 49
Basic White Sauce 49
Mushroom Duxelle 50
Mustard Marinade 50
Fondues
51
Chocolate Fondue 52
Cheddar Cheese Fondue 52
S’Mores Fondue 52
Cheddar Chipotle Fondue 52
Brie & Sun-dried Tomato
Fondue
53
Shabu-Shabu 53
Chicken Fondue 54
Beef Fondue 54
Desserts
55
Simple Fudge 56
Classic Cherries Jubilee 56
Peanut Brittle 57
Chocolate Caramel Turtles 57
Bananas Foster 57
Pears in White Wine
Caramel Sauce
58
Candy Suckers 58
Panna Cotta with Amber
Crystals
59
Old Fashioned Hard Candy 59
Contenido
60
Introducción 61
Partes & Accessorios 62
Manual Del Usario 63-71
Recetas
72
Caldo de Pollo 73
Huevos Revueltos 73
Caldo de Res 74
Papas Para el Desayuno 74
Cerda Agridulce con Piña 75
Camarones Capeados 75
Chili Tradicional 76
Paella de Mariscos 76
Masa Básica para Pasta 77
Arroz Español 77
Arroz Frito con Verduras 78
Fetuchini Alfredo 78
Table des Matières
79
Manual D’Utilisation 79-90
Page 3

4 • NuWave™ PIC Gold Complete Cookbook
• 5
What is Induction Cooking?
Welcome to NuWave™
Precision Induction Cooking
Congratulations on purchasing your NuWave™ PIC Gold. This book contains
detailed instructions and images to help you get started using your Cooktop.
It is also lled with great recipes and time-saving tips to help you prepare
delicious gourmet meals in a fraction of the time it would take when using a
regular stovetop. Cooking is fast and easy with the Precision Induction Cooktop
Gold from NuWave, LLC. This versatile countertop appliance uses induction
technology to save time, energy and money. The NuWave™ Precision Induction
Cooktop is efcient, safe, fast and easy to clean. And because you can program
times and temperatures from warm to sear, you can make almost any kind of
food without the risk of under or overcooking.
The NuWave™ PIC Gold is comprised of a series of induction coils (based
on magnetic principles). These coils generate magnetic elds that produce a
warming reaction in steel and iron-based pots and pans. In this way, heat is
generated in the cookware and not on the cooktop surface, which is much more
energy-efcient than traditional gas or electric ranges. Induction cooking is the
most eco-friendly way to prepare meals because the method releases no toxins
into the environment. Induction cooking emits no ame, so less residual heat
is produced in your kitchen. The NuWave™ Precision Induction Cooktop Gold
remains cool to the touch where the magnetic surface is not activated.
NuWave™ Precision Induction Cooktop Gold
Products and Accessories:
NuWave™ Precision Induction Cooktop:
(30201) NuWave™ PIC Gold
(32141) Complete Cookbook / Manual
(32144) Instructional DVD
(32145) Fact Sheet
NuWave™ Ultimate Cookware Set:
(32003) 3.5-quart Stainless Steel Pot
(32004) 3.5-quart Pot Lid
(32005) Stainless Steel Steamer
NuWave™ Cast Iron:
(32023) Cast Iron Grill
(32022) Oil Drip Tray
(32056) Cast Iron Grill Manual
To order parts and accessories, call customer service at:
1-855-742-2665, Monday-Friday, 8:00 AM – 4:30 PM CST.
You may also order online at: www.NuWaveNow.com.
Please provide the correct item name and number to ensure that your order is processed accurately.
(31201) NuWave™ Precision Pressure Cooker
(32061) Nuwave™ Precision Pressure Cooker Manual
Lid (Optional):
Lid (Optional):
Lid (Optional):
Hard-Anodized Aluminum Pans:
9-inch
10.5-inch
12-inch
9-inch
10.5-inch
12-inch
(32109)
(32110)
(32114)
Copper
Copper
Copper
Copper
Gold
Gold
Gold
(32119)
(32120)
(32124)
(32309)
(32310)
(32311)
(32012)
(32004)
(32014)
Stainless Steel Stock Pots & Saucepans:
Everyday Pan: Stainless Steel Grill Pan:
Lid (Optional):
1.5-quart
2.0-quart
3.0-quart
5.5-quart
9.0-quart
10-piece Set
12-inch 11-inch
1.5-quart
2.0-quart
3.0-quart
5.5-quart
9.0-quart
(32031)
(32032)
(32033)
(32039)
(32034)
(31250)
(32018) (32024)
(32036)
(32037)
(32038)
(32040)
(32004)
Stainless Steel Pans:
Stainless Steel Plus Pans:
9-inch
10.5-inch
12-inch
9-inch
10.5-inch
11.5-inch
9-inch
10.5-inch
12-inch
9-inch
10.5-inch
11.5-inch
(32015)
(32016)
(32017)
(32009)
(32010)
(32011)
(32331)
(32332)
(32333)
(32339)
(32334)
(31350)
(32012)
(32004)
(32014)
(32012)
(32004)
(32013)
NuWave™ Duralon™2 Ceramic Non-Stick Cookware:
NuWave™ Precision Pressure Cooker:
(31113) Cast Iron Griddle
(32060) Cast Iron Griddle Manual
(32100) NuWave™ Duralon™2 Ceramic Non-Stick Cookware Manual
(32157) Quick Start Guide
(32158) Registration Card
(31111) Custom-Made Carrying Case
(32007) Fondue Insert
(32008) Set of 8 Fondue Forks
(32055) Ultimate Cookware Set Manual
Additional Benets:
• Energy Conservation: Now you can live well for less with the NuWave™
Precision Induction Cooktop Gold. The NuWave™ PIC Gold uses induction
technology. The secret is an internal series of copper coils. These coils
generate a magnetic eld within your metal pots and pans. The magnetic
eld causes invisible molecules in the cookware to begin vibrating rapidly,
creating heat, so the cookware itself heats the food. The NuWave™ PIC
Gold is one of the most energy-efcient cooktops available today, which
means that cooking with the PIC Gold will translate into savings on your
monthly utility bills.
• Safety: The NuWave™ PIC Gold’s design requires no coils or open ame,
eliminating the risk of re. Automatic shut-off features enhance the cooktop’s
safety. Simply touch and go! Users can also take the ice cube challenge!
Induction technology warms the pan, but the surface remains cool to the
touch.
• Fast Cooking: Heating is immediate and temperature is precise with the
NuWave™ PIC Gold. Features 6 different temperature settings that are
adjustable in 10-degree increments. There’s no guessing!
• Lightweight & Portable: Because it weighs only 5.4 pounds, you can take the
NuWave™ PIC Gold anywhere you go! Use it indoors or out - anywhere with
a standard U.S. electrical outlet.
• Easy to Clean: Spills won’t burn and stick to the cooktop surface. Just wipe
and go!
Page 4
6 • NuWave™ PIC Gold Complete Cookbook
• 7
pools, spas, sprinklers, hoses, etc.
12. Do not move the appliance while hot.
13. This appliance is for household use only; it is designed to process normal
household quantities. It is not suitable for continuous or commercial
operation.
14. Do not disassemble the product. There are no user serviceable parts.
15. Do not leave the appliance unattended while in use.
16. This appliance is not intended for operation by means of an external timer or
separate remote-control system.
17. Clean cooktop with caution. Cleaning a hot surface with wet applications can
cause steam and some cleaners can produce dangerous fumes. Unplug from
outlet before cleaning.
18. Use caution when disposing of hot grease.
19. Keep this manual handy for future reference.
Electrical Information
• The cord length of this appliance was selected to reduce Safety Hazards that
may occur with a long cord. Extension cords are available and may be used
if care is exercised in their use. If an extension cord is used: (1) the marked
electrical rating of the extension cord should be at least as great as the
electrical rating of the appliance, and (2) the longer cord should be arranged
so that it does not drape over the counter or table top where it could be
accidentally pulled off the counter or table or tripped over.
• Certain models of the appliance may have a polarized plug (one blade is
wider than the other). This plug is intended to t into a polarized outlet only
one way. If the plug does not t fully into the outlet, reverse the plug. If it still
does not t properly, contact a qualied electrician. Do not attempt to modify
the plug in any way.
SAVE THESE INSTRUCTIONS
IMPORTANT – FCC Information:
Warning: Changes or modications to this unit not expressly approved by the
party responsible for compliance could void the user’s authority to operate the
equipment.
Note: The device complies with part 18 of the FCC Rules.
Correct Disposal of This Product
This marking indicates that this product should not be disposed of with other
household wastes throughout the EU. To prevent possible harm to the environment
or human health from uncontrolled waste disposal, recycle it responsibly to promote
the sustainable reuse of material resources. To return your used device, please
use return and collection systems or contact the retailer where the product was
purchased. They can handle environmentally safe recycling.
WARNING
WARNING: All items on the cooktop can get very hot during
cooking. Please be careful when removing these items from
the unit. Always wear oven mitts or use pot holders. Cooktop
may retain residual heat after cookware has been removed.
Allow everything to cool completely before cleaning.
Electric shock hazard. Use with adequate electrical system.
Do not use if cord or plug is damaged.
IMPORTANT SAFEGUARDS
When using electrical appliances, basic safety precautions should always be followed
including the following:
WARNING – For individuals with pacemakers:
1. This appliance emits an electromagnetic eld that is strongest within two feet
of the cooking surface.
2. Scientic tests have proven inconclusive as to whether the electrical eld
will disrupt the function of a pacemaker. Please consult your doctor or medical
professional for guidance before use.
WARNING – To reduce the risk of burns, electrocution, re, or injury:
1. This appliance includes a heating function. Surfaces may develop high
temperatures. Do not touch hot surfaces. Cooktop may retain residual heat
after cookware has been removed. The use of pot holders or alternative safety
measures is highly recommended.
2. This appliance should not be used by children. Close supervision is necessary
when this product is used near children.
3. Do not place on any gas or electric burner or in a heated oven.
4. Do not place metallic objects such as knives, forks, spoons, or lids on the
cooktop as they may become hot.
5. This appliance is not intended for commercial use.
6. Use this appliance for its intended purpose as described in this manual.
Do not use any other accessories or attachments not recommended by the
manufacturer. They may result in re, electrical shock, or personal injury.
7. Never operate this appliance if it has a damaged cord or plug, is not working
properly, has been dropped or damaged, or dropped in water. Contact
customer service for inspection, repair, or adjustment.
8. Do not operate broken cooktop. If cooktop should break, cleaning solutions
and spillovers may penetrate the appliance and create a risk of electric shock.
9. Keep cord away from heated surfaces. Do not let the cord hang over the
edge of the table or counter. Never force the plug into an outlet. Always
unplug power cord by pulling on the plug. Turn the unit off before removing
the plug from the wall.
10. Do not operate where aerosol (spray) products are being used or where
oxygen is being administered.
11. Use proper judgment and caution while using cooktop in outdoor
environments and public areas. This appliance should never be set up
around unattended children or those unaware of its presence. The appliance
should be situated on at, stable surfaces, away from water sources such as
READ ALL INSTRUCTIONS
BEFORE USING
DANGER – To reduce the risk of electrocution:
1. Read all instructions, safeguards and warnings before using the appliance.
2. Do not place appliance where it can fall or be pulled into water or other liquids.
3. Do not reach for an appliance that has fallen into water. Unplug immediately.
4. Do not immerse cord, plug, or any portion of appliance in water or other
liquids.
Page 5
8 • NuWave™ PIC Gold Complete Cookbook
• 9
NuWave™ Precision Induction Cooking
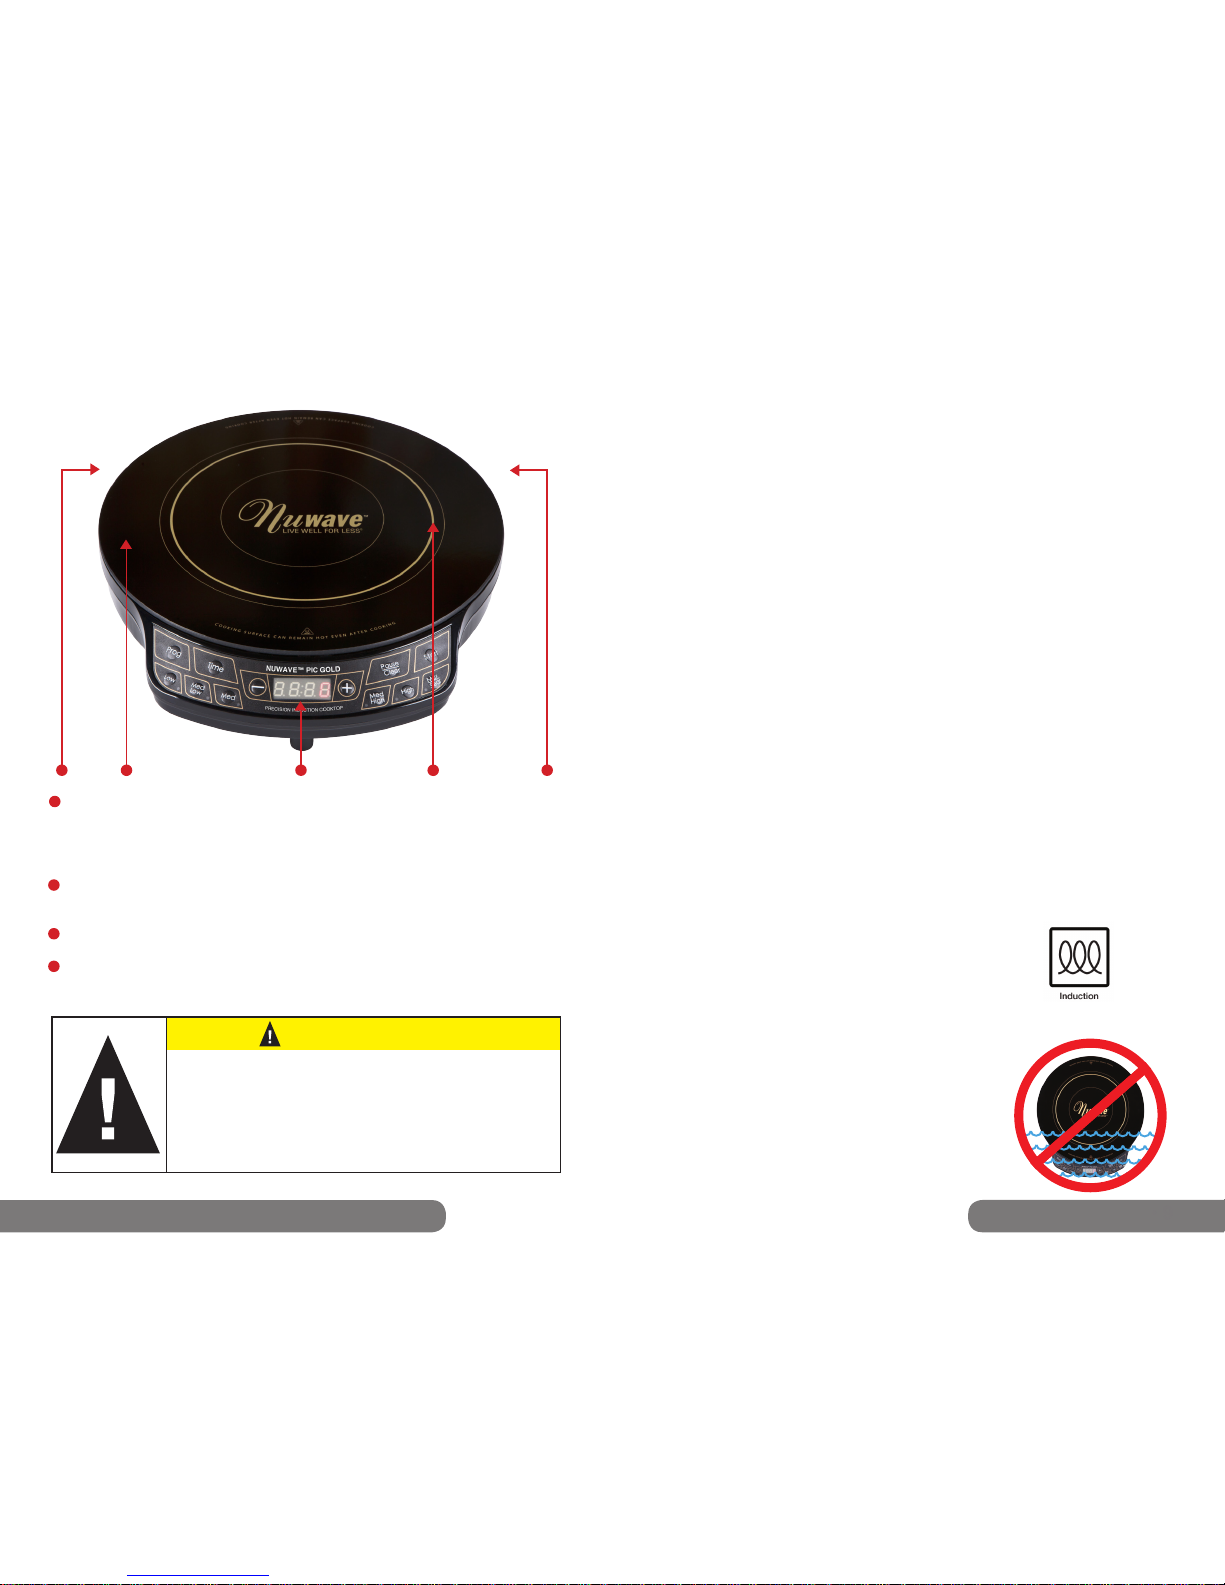
Ventilation: Air vents are located on the back of the product to allow any heat
generated by the heating element to escape. This design feature prevents heat
transfer to the cooking surface and ensures efcient performance of the NuWave™
PIC Gold.
Surface: The NuWave™ PIC Gold’s heat-resistant glass surface stays cool to the
touch and cleans easily with the simple wipe of a damp cloth.
Control Panel with LED Display: Clearly lit, easy-to-read control panel.
Heat Source: Electro-magnetic coils located below the glass surface transfer
generated heat directly to induction-ready cookware.
1
1
2
3
4
4
3 1
2
CAUTION
While the NuWave™ PIC Gold is in operation, do not touch
the appliance’s surface as it may become very hot, leading
to the risk of burns. Cooktop may retain residual heat after
cookware has been removed.
Do not remove pots and pans during cooking process. Push
“Pause/Clear” button to turn off power before removal.
Induction Cooktop-Compatible Cookware:
ATTENTION:
The heating surface is located inside the larger gold ring. You may use pans
measuring up to the total width of the NuWave™ PIC Gold, which measures 12.3
inches, however in these situations, heat will transfer more slowly to the outer
edges. Do not use pans larger than 12.3 inches.
Examples of compatible cookware:
• All NuWave™ Cookware • NuWave™ Duralon™2 Ceramic Non-Stick Fry Pans
• Cast iron • Enameled iron and steel • Stainless steel with magnetic base
Non-induction-compatible cookware:
• Copper • Glass • Aluminum • Pottery type vessels
How do I check my cookware for induction compatibility?
Three simple ways to check if your existing pots and pans, or future cookware
purchases, are compatible with the NuWave™ PIC Gold:
1. A magnet is typically a great indicator. If it sticks to the bottom of a piece of
cookware, this typically means the pot or pan is induction-ready. However be
cautioned that there are instances when a cooking vessel’s magnetic properties
may not be strong enough for the pot to work efciently with the NuWave™ PIC
Gold.
2. Place a small amount of water in a particular pot or pan.
If induction compatible, water will begin to boil.
3. An induction-ready symbol may be printed on the
bottom of the cookware.
IMPORTANT - Do not immerse unit in water or
attempt to cycle through dishwasher. The outer
surface may be cleaned by wiping carefully with
a damp dishcloth or sponge. Make sure unit has
cooled completely prior to cleaning.
As induction technology is based on magnetic principles, compatible cookware
must have a ferrous (iron-based, magnetic) bottom. Some types of cookware
are made of naturally magnetic metals (such as pure iron), while others are
rendered magnetic by “sandwiching” a thin layer of a ferrous metal within the
base. This layer will be acted upon by the magnetic eld of the induction cooktop
to distribute heat. Tri-ply, high-quality stainless steel and cast iron cookware will
work with induction cooktops. Copper, glass and aluminum cookware will not
work unless they have a sandwiched magnetic base. Pots that function optimally
with the NuWave™ PIC Gold tend to be medium to heavy gauge.
BEFORE USE:
Wipe surface with a cloth soaked in warm,
soapy water.
Cleaning & Care for Your NuWave™ PIC Gold:
Owner’s Manual
• 9
Page 6
10 • NuWave™ PIC Gold Complete Cookbook
• 11
Owner’s Manual
General Operating Instructions:
General Cleaning Instructions:
• Unplug the unit before cleaning.
• Clean after each use.
• Make sure unit has cooled completely prior to cleaning.
• The outer surface may be cleaned by wiping carefully with a damp dishcloth or
sponge.
• Remove the power plug prior to cleaning the NuWave™ PIC Gold. Do not use caustic
cleaning agents and water should not penetrate the interior of the induction
cooktop.
• Never immerse the NuWave™ PIC Gold, its cables or plug in water or other liquids.
• Wipe the glass surface with a damp cloth or use a mild, non-abrasive soap
solution. Make sure the unit has cooled completely before cleaning.
• Wipe casing and operating panel with a soft cloth dampened with water or a
mild detergent.
• Do not use oil-based cleansing products as their use may damage plastic parts
or the casing/operating panel.
• Do not use ammable, acidic or alkaline materials or substances near the NuWave™
PIC Gold, as this may reduce the service life of the induction cooktop or pose a re
risk when the induction cooktop is in use.
• In order to keep your NuWave™ PIC Gold looking like new, take measures to ensure
that the bottom of cookware does not scrape the unit’s glass surface, although a
scratched surface will not impair the use of the induction cooktop.
• Make sure to properly clean the unit before storing it in a cool, dry place.
• Place the cooktop on a stable, level, non-metallic surface.
• Never use the cooktop on a ammable surface (e.g. table cloth, carpet, etc.).
• Do not block the ventilation slots of the induction cooktop. This may cause the unit
to overheat. Maintain a minimum distance of 3-5 inches from walls and other
objects, appliances, etc.
• Do not place devices or objects that are sensitive to magnetic elds on top of or next
to the NuWave™ PIC Gold (e.g. credit cards, cell phones, radios, TVs, video
recorders, etc.).
• Do not use the induction cooktop in the proximity of open res, heaters or other heat
sources.
• Ensure that the power cable is not damaged or compressed beneath the induction
cooktop.
• The power cable must not come into contact with sharp edges and/or hot surfaces.
• Prior to connecting the NuWave™ PIC Gold, conrm that the voltage needs
indicated in this manual correspond to the voltage supply in your home. A wrong
connection may lead to the unit’s damage and possible injury to persons.
• The cooktop’s surface is designed from temperature-resistant glass. In the event
that damage to the unit is observed, even a small crack on the glass surface,
immediately disconnect the NuWave™ PIC Gold from the power supply.
IMPORTANT TIPS:
1. Check power outlets to ensure proper operation. Do not use in an outlet
where other major appliances are engaged. Check settings if the unit is
cooking too slowly.
2. The electrical plug must be properly plugged into the outlet.
3. Always turn off and unplug the unit before wiping.
• 11
Directions for the Display Panel
Easy Start:
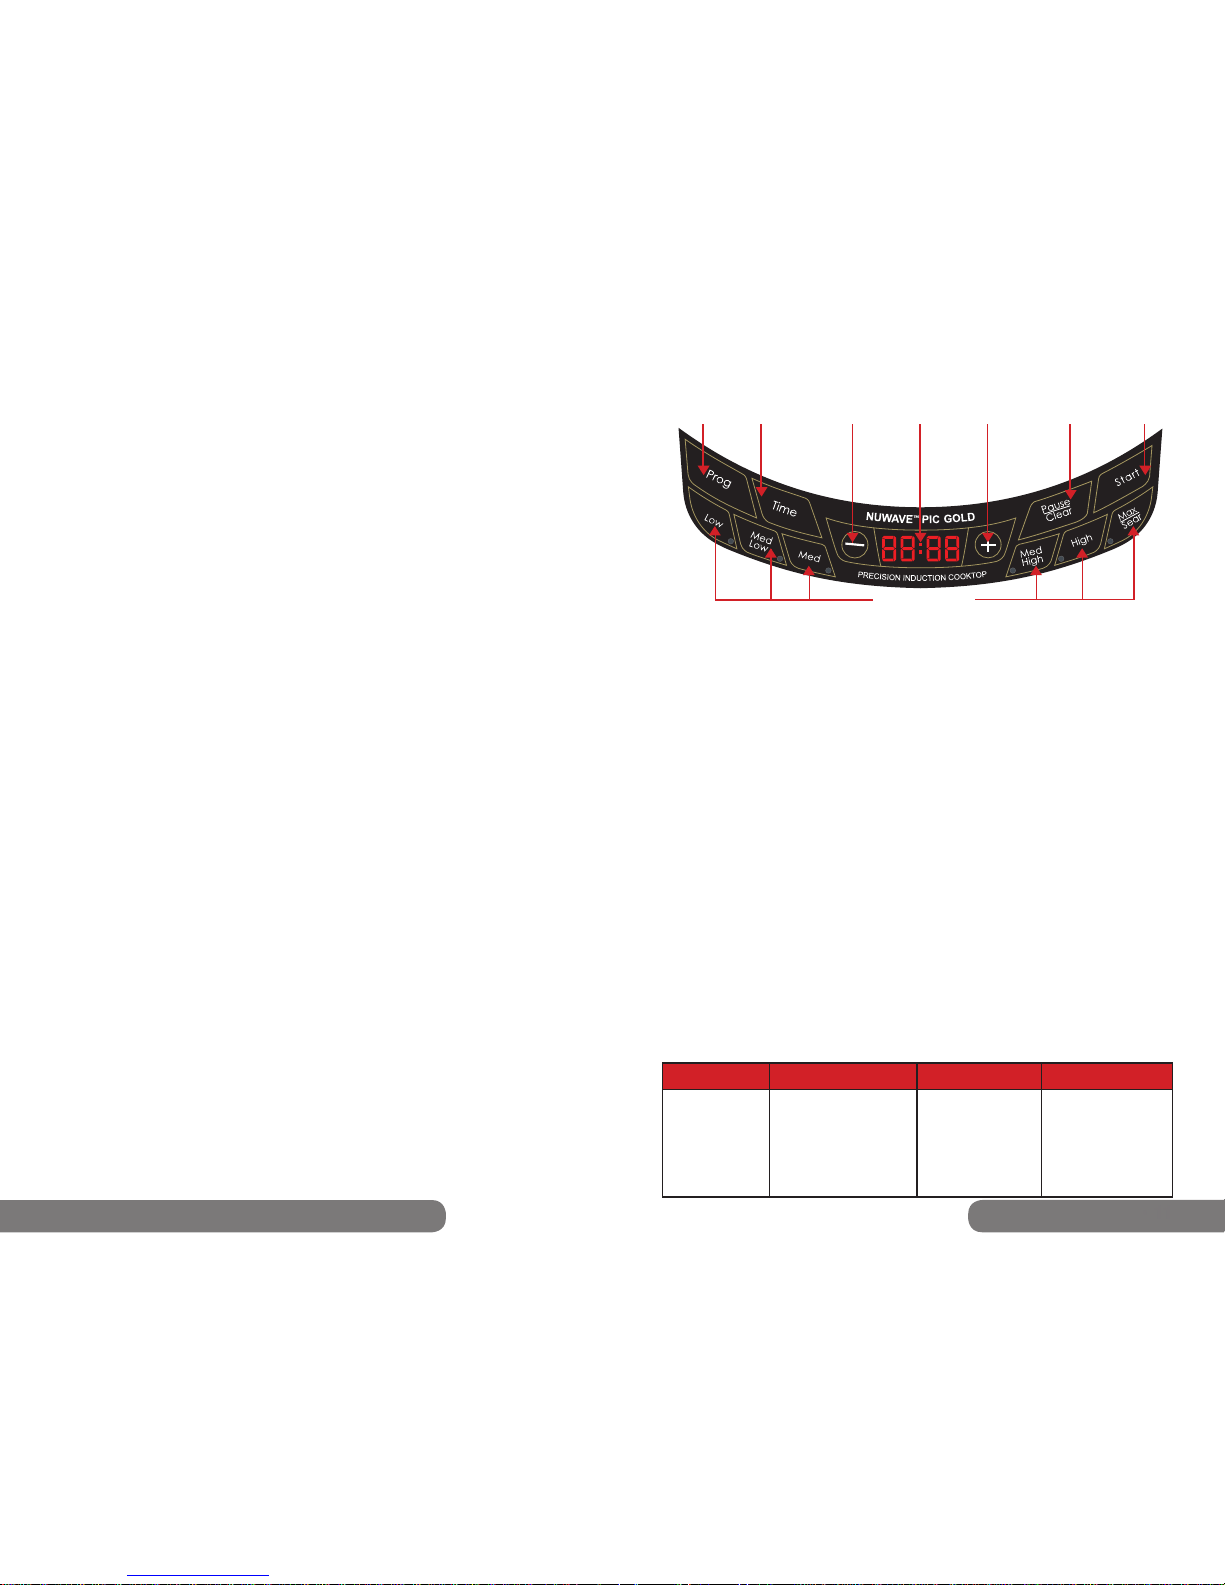
The NuWave™ PIC Gold is preset to cook on High (425°F) for 1 hour. To begin cooking, press
“Start” button, after placing an induction-ready pot on the surface. If cooking at a power level
other than “High,” press “Low,” “Max/Sear” or press the “-” or “+” buttons to increase or decrease
temperature in 10°F increments. See the Panel Display Chart on the bottom of this page for
more details.
Control Panel:
“0” should appear when program is clear or power is on.
To Start Cooking:
There are several ways to begin cooking with your NuWave™ PIC Gold:
• Press “Start.” Default temperature is 425°F and 1 hour cooking.
• Set temperature and press “Start.” Default is 1 hour cooking.
• Set cooking time and press “Start.” Default temperature is 425°F.
• Set temperature and time, then press “Start.”
The NuWave™ PIC Gold will automatically stop cooking once time has expired and a “beep”
sound will alert users. The display will always show current temperature during the cooking
cycle. To display time lapse, press “Time” and a countdown will appear, marking the duration
before the cycle or stage is complete.
Setting Temperature:
This appliance is preset to cook on High (425°F). To reset, press temperature key “Low” - “Max/
Sear,” then press “Start.” The temperature range will appear on the display panel. To raise or
lower the temperature in 10°F increments, press the “+” or “-” buttons until desired temperature
is displayed. Refer to chart below for preset temperatures. The minimum is 100°F while the
maximum temperature reaches 575°F.
NOTE: Display temperature represents temperature of 1.5L of oil in the NuWave™ 3.5-quart
Stainless Steel Pot. Thermometer location for test at the origin (middle) of the NuWave™
3.5-quart Stainless Steel Pot and an equidistant length between the pot base and top of the oil.
The NuWave™ PIC Gold’s LED screen is defaulted to display cooking temperature in
Fahrenheit(F). To switch the display to Celsius(C), press the “Prog” button, followed by “-”. Press
“-” again to convert to Celsius. To return to Fahrenheit, press “-” once more. To close out of the
F/C conversion option, press the “Pause/Clear” button until a “0” appears on the unit’s screen.
Program
Time
Decrease
LED
Display
Low-Max/Sear
Increase
Pause/Clear
Start
100°F (38°C)
175°F (79°C)
275°F (135°C)
375°F (191°C)
425°F (218°C)
575°F (302°C)
Press Button Range Temperature Examples
Low
Med Low
Med
Med High
High
Max/Sear
Warm
Simmer
Steam
Stir/Deep Fry
Boil/Saute
Sear
100F / 38C
175F / 79C
275F / 135C
375F / 191C
425F / 218C
SEAR
Panel Display
Page 7
12 • NuWave™ PIC Gold Complete Cookbook
• 13
• 13
Troubleshooting
Delay Function:
The purpose of this function is to allow for set programs to start at a later time.
To delay a program, press “Prog,” then press the “Time” button. A “0” will ash in the
lower right corner of the display panel. Press the “+” button until the desired amount
of time you wish to delay the program start is reached (for more information, review
SETTING TIME on the top of this page). Then press “Prog” again to set cooking
program. The amount of time selected for delay is included in the programmed
stages. To continue to the next stage, press “Low” to “Max /Sear” to set the cooking
temperature. Continue with step #2 from the “PROGRAMMING FUNCTION”
instructions. Once ready for the countdown to begin, press “Start.” When delay
countdown reaches “0,” the NuWave™ PIC Gold will beep twice to signal the end. At
this point, the cooking time will start and the temperature will be displayed.
Programming Function (Stage Cooking):
• Press the “Prog” button.
• “Pro” will appear in the display panel.
1. Input the desired set temperature, ranging from “Low” to “Max/Sear.” If you
need to increase or decrease the temperature, press the “-” or “+” buttons.
2. Press the “Time” button. 00:00 will appear on the display, then press the “-” or
“+” buttons until you reach the desired time. See above section “SETTING
TIME” for detailed information on how to enter minutes and hours.
•To add additional stages, repeat steps 1 and 2 and then press “Start” to begin your
program. You may program up to 10 stages (delay is considered a stage).
•If you need to change any part of the program, press the “Pause/Clear” button twice
to start over.
Example: In order to boil for 5 minutes before reducing to simmer for 20 minutes,
press “Prog,” then press the “Max/Sear” button. Press the “Time” button once, then
press “+” until you reach 5. Press “Low” next, then press “Time” twice, then “+” until
you reach 20. Finally, press “Start.”
NOTE: Maximum programmable cook time is 99 hours and 60 minutes.
Pause /Clear Function:
To interrupt cooking time, press the “Pause/Clear” button once. This will pause the
NuWave™ PIC at whatever might be the current stage. The temperature will remain
listed in the display panel, but the “F” will be blinking. To resume, press “Start.”
To CLEAR the cooking mode or display while the NuWave™ PIC Gold is in operation,
press the “Pause/Clear” button twice. The screen will be fully cleared, a “0” will
appear and the unit will turn off.
Setting Cooking Time:
Press the “Time” button. A “0” will ash in the far right corner of the display panel.
Press the “+” button until you reach the desired amount of time. Examples: To
program 5 minutes press “Time” once, then press “+” until you see 00:05 on the
display. Then press “Start.” For 20 minutes, press “Time” twice, then press the “+”
button until you see 00:20, then press “Start.” For 2 hours and 30 minutes, press
“Time” twice before pressing “+” until you reach 3, then press “Time” again. Press “+”
until you reach 2 (the display will show 02:30), then press “Start.”
• The blinking “0” indicates the digit you can adjust. The maximum time is
99 hours and 60 minutes.
• The display shows hours and minutes, but not seconds.
Troubleshooting
Solution
Error
Message
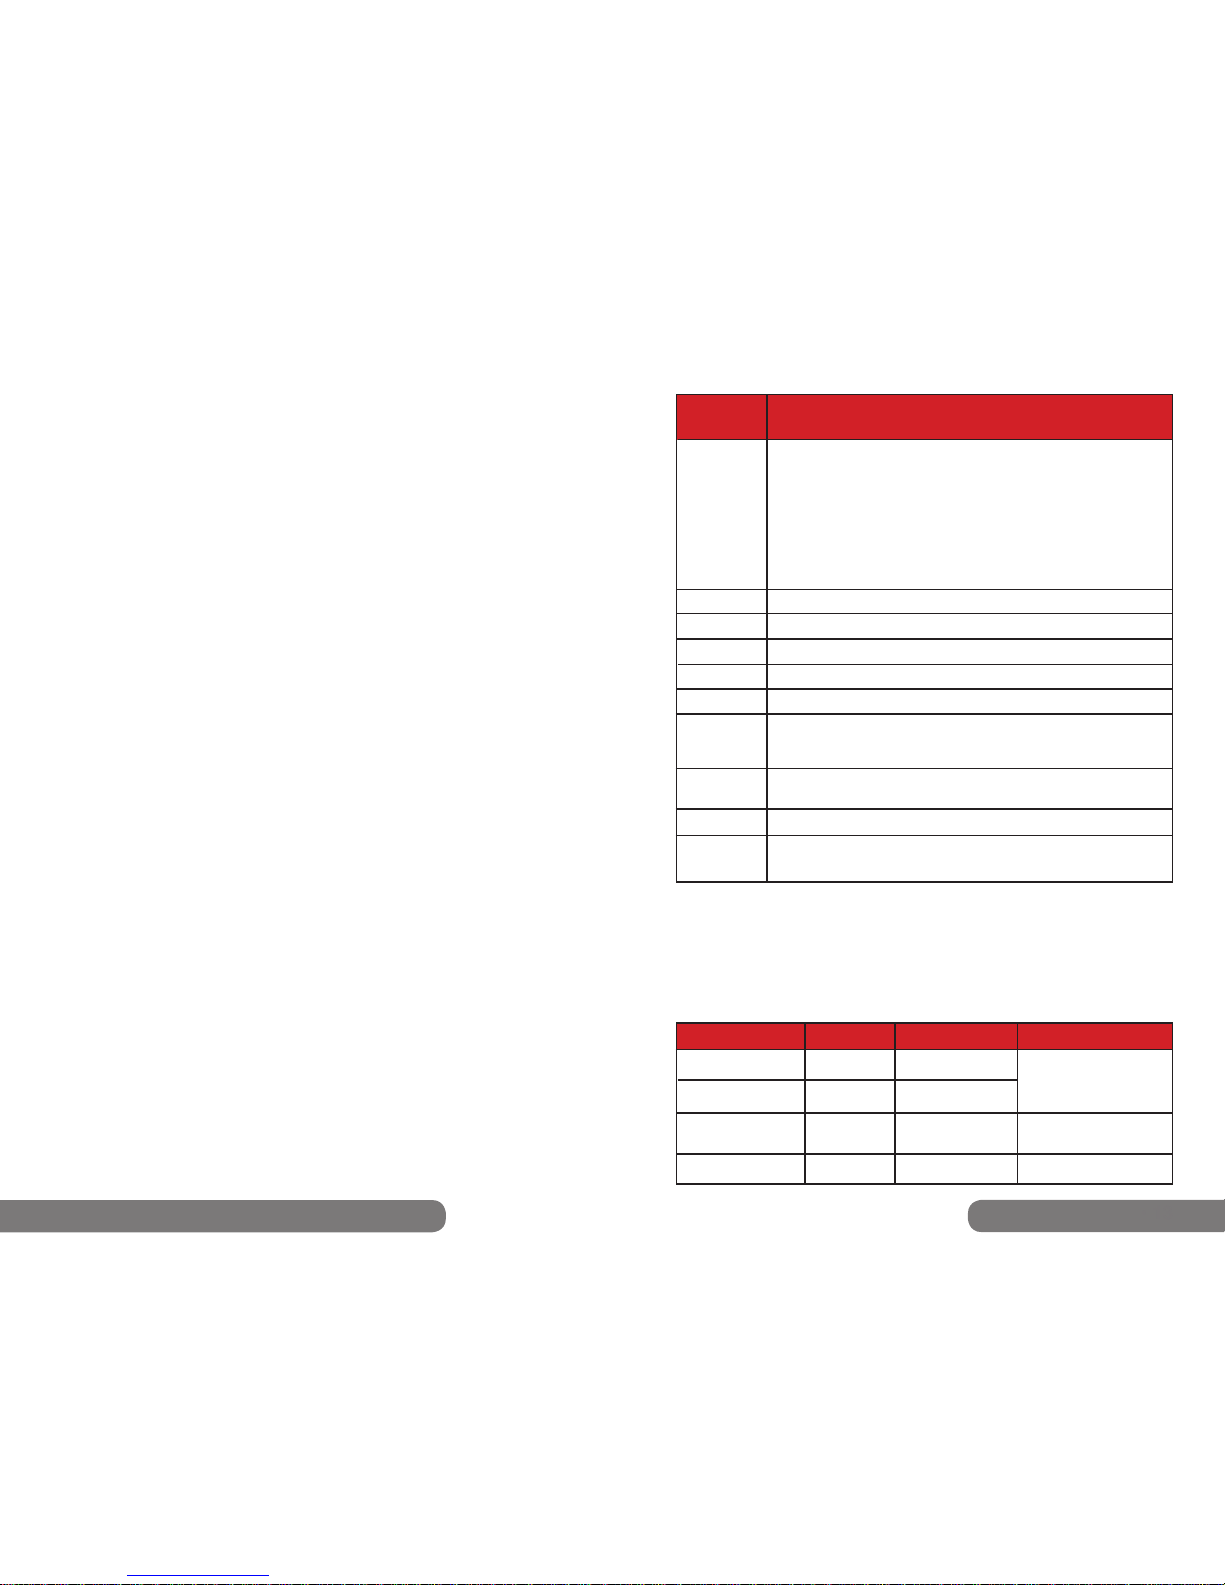
E2
E3
E4
E5
E6
E7
E8
E9
FULL
E1
The unit is malfunctioning. Contact customer service.
The unit is malfunctioning. Contact customer service.
The unit is malfunctioning. Contact customer service.
An E1 reading typically means that your NuWave™ PIC Gold
does not detect cookware on its surface. This can occur for one of
two reasons.
1. Have you placed a pot or pan on the unit? The induction coils
contained within the NuWave™ PIC Gold will only work when
they are in direct contact with a piece of cookware. To maintain
your appliance’s effectiveness, always ensure that it rests on a at
surface and that contact is consistent with your cookware.
2. An E1 message may also occur if your chosen cookware is not
induction-ready.
The units voltage is too low. Minimum = 85 volts
The units voltage is too high. Maximum = 144 volts
Overheating, or air ventilation is obstructed. If internal temperature
exceeds 230˚F, operation will cease and a “beep” noise will be
produced. Press “Pause/Clear” twice. Wait for the unit to cool.
In programming mode, when the total entered time reaches the
appliance’s limit of 99:60, no additional stages can be inputted.
Overheating, if unit exceeds a temperature 20ºF higher than sear,
the appliance will turn off. Contact customer service.
The units is malfunctioning. Contact customer service.
• When any of the above error messages display on the LED, the unit will “beep” at
least once.
• The fan will run up to a maximum of 60 seconds after pressing the “Pause/Clear
button once. Continue cooking by pressing the “Start” button within 45 minutes.
• The unit will turn off after 45 minutes if no buttons (such as “Start”) are pressed.
When the unit shuts off, it will clear all previous cooking history.
• After pressing the “Pause/Clear” button twice or cooking has stopped, the fan will run up
to a maximum of 60 seconds until the unit cools. At that point the NuWave™ PIC Gold
will turn off.
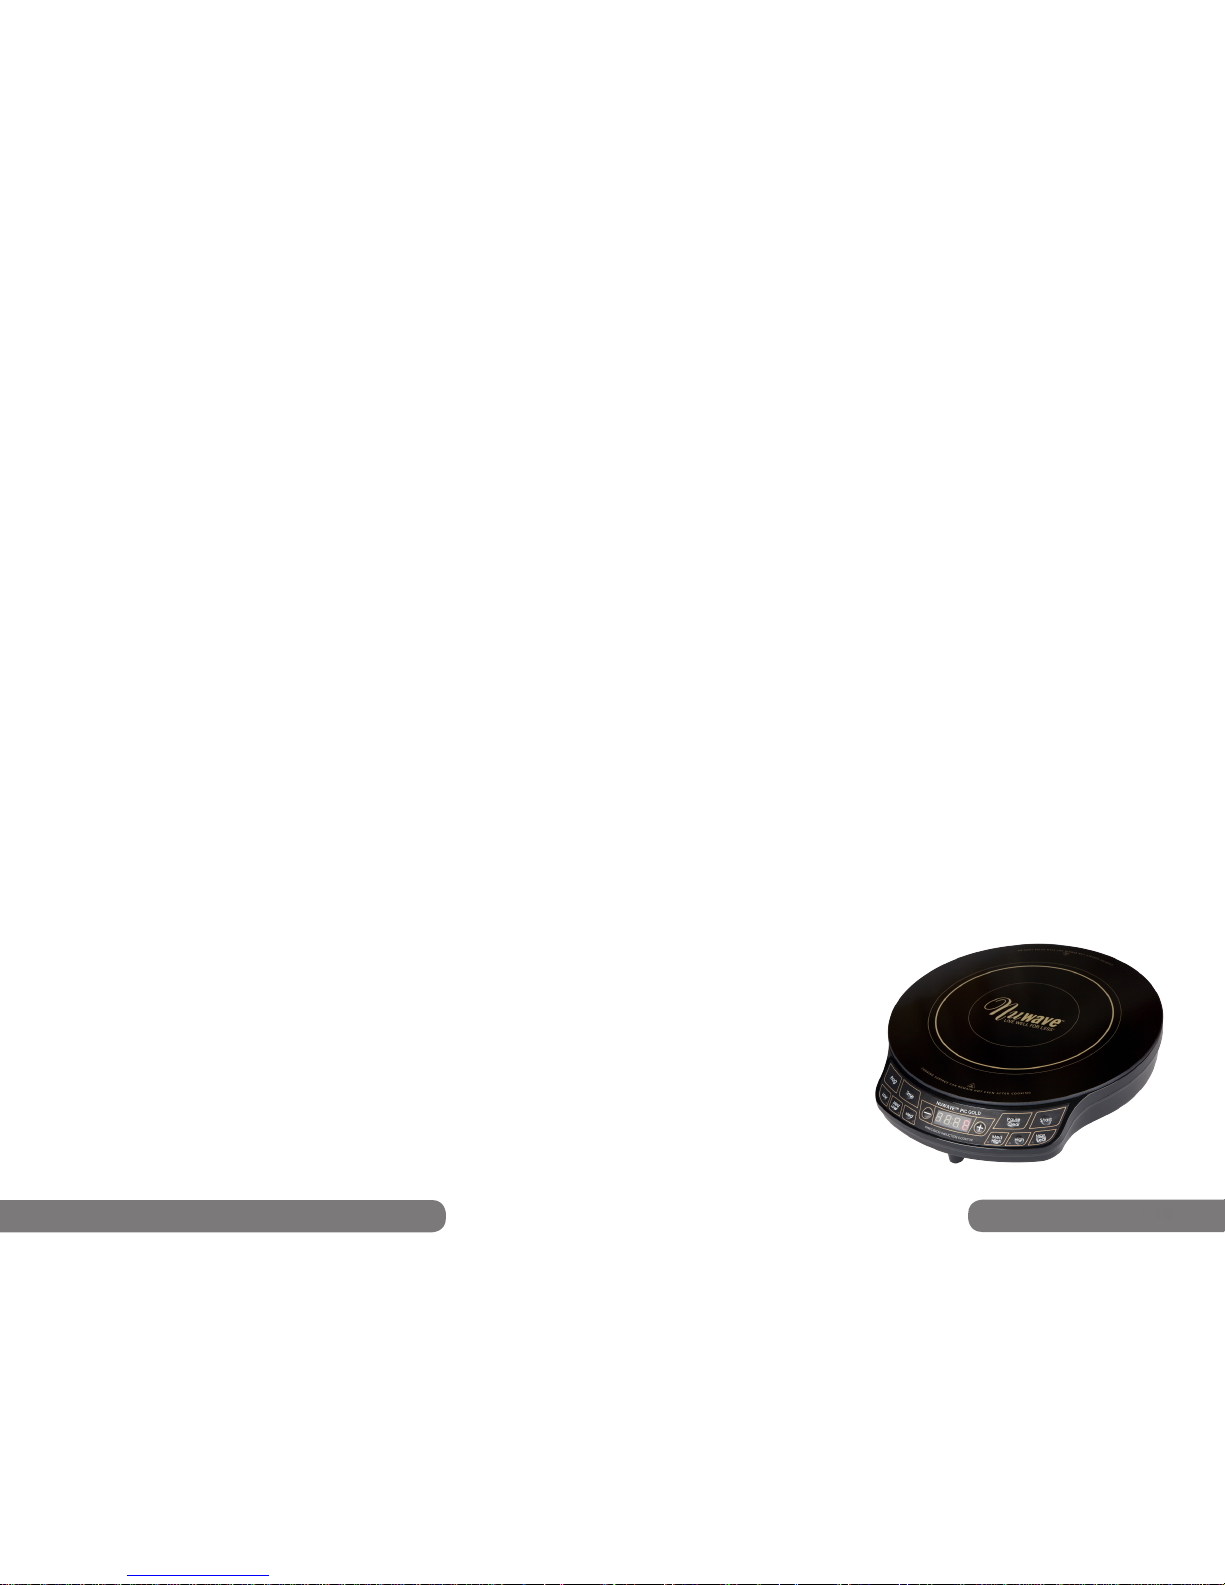
Beep sound Display Reference
Initial
< 10 seconds
11- 70 seconds
After 70 seconds
Single beep
None
Yes
None
“F” or “C” or “Sear”
or “:” Flashing
“F” or “C” or “Sear”
or “:” Flashing
E1
0
After returning the pot,
NuWave™ PIC Gold will
automatically resume
cooking.
Resume cooking by
pressing “Start” button.
Cooking stops.
After removing
cookware
Page 8
14 • NuWave™ PIC Gold Complete Cookbook
• 15• 15
Cooking Tips
THE MANUFACTURER WARRANTS: The induction cooktop and all electrical
components to be free from defects and workmanship under normal household use, when
operated in accordance with the Manufacturer’s written instructions provided with each
unit for one (1) year from date of purchase. The Manufacturer will provide the necessary
parts and labor to repair any part of the induction cooking system at NuWave, LLC Service
Department. After the expiration of the warranty, the cost of the labor and parts will be the
responsibility of the owner.
THE WARRANTY DOES NOT COVER: Any coating (if applicable) on any part of the
cooking system. The Limited Warranty is voided if repairs are made by an unauthorized
dealer or the serial number data plate is removed or defaced. Normal deterioration of
nish due to use or exposure is not covered by this Warranty. This Limited Warranty does
not cover failure, damages or inadequate performance due to accident, acts of God (such
as lightning), uctuations in electric power, alterations, abuse, misuse, misapplications,
corrosive type atmospheres, improper installation, failure to operate in accordance with
the Manufacturer’s written instructions, abnormal use or commercial use.
TO OBTAIN SERVICE: The owner shall have the obligation and responsibility to: pay
for all services and parts not covered by the warranty; prepay the freight to and from
Service Department for any part or system returned under this warranty; carefully package
the product using adequate padding material to prevent damage in transit. The original
container is ideal for this purpose. Include in the package: owner’s name, address,
daytime telephone number, a detailed description of the problem, and your RETURN
GOODS AUTHORIZATION NUMBER (RGA number):
Call 1-855-742-2665 or e-mail [email protected] to obtain the RGA number. Provide
the cooking system model & serial number and proof of date of purchase
(a copy of the receipt) when making claims under this warranty.
MANUFACTURER’S OBLIGATION:
The Manufacturer’s obligation under this Limited Warranty is limited to repairing or
replacing any part of the induction cooktop expressly covered by this Limited
Warranty which upon examination is found to be defective under normal use. The
Limited Warranty is applicable only within the continental United States and only to the
original purchaser of manufacturer’s authorized channels of distribution.
The Limited Warranty may not be altered, varied or extended except by written instrument
executed by the manufacturer. The remedy of repair or replacement as provided under
this limited warranty is exclusive. In no event shall the manufacturer be liable for any
consequential or incidental damages to any person, whether or not occasioned by
negligence of the manufacturer, including without limitation, damages for loss of use,
costs of substitution, property damage, or other money loss. Some states do not allow
the exclusion or limitation of incidental or consequential damages, so the above limitation
exclusions may not apply. This Limited Warranty gives specic legal rights, and there may
also be other rights which vary from state to state. Except as otherwise expressly provided
above, the manufacturer makes no warranties expressed or implied arising by law or
otherwise, including without limitation, the implied warranties of merchantability and tness
for a particular purpose to any other person.
READ YOUR OWNER’S MANUAL: If you still have any questions about operation or
warranty of the product, please contact NuWave, LLC at
1-855-742-2665 or e-mail [email protected].
Cooking Tips
This recipe book contains valuable information designed to assist
in the incorporation of the NuWave™ PIC Gold into daily life.
We’ve provided easy-to-prepare recipes along with helpful tips at
the beginning of each section for perfect results everytime.
Here are a few general suggestions to help you start cooking:
• Place a garbage bowl next to your cutting board for discarding
food scraps.
• Flexible cutting boards are very convenient. Just chop and lift
- no mess, no spills.
• Glass measuring cups are optimal for liquids while plastic
measuring cups work well for dried ingredients.
• After you have juiced lemons, put them in the garbage
disposal to freshen the surrounding air.
• Pay close attention to butter as it’s melting. Butter melts when
its internal temperature reaches a range between 82.4°F and
96.8°F. This means it melts fast, so be prepared to remove it
from the stove quickly.
• Some of the enclosed recipes suggest prepping and/or
cooking items in the NuWave® Oven. Contact customer
service for more information or to place an order.
Delicious Details!
1 square of baker’s chocolate = 1 ounce
4 pecks = 1 bushel
8 tablespoons = 1/2 cup
1 pound of chopped nuts = 2 cups
1/2 cup of butter = 1 stick
2 cups granulated sugar = 1 pound
2 cups butter = 1 pound
16 uid ounce = 1 pint
1 cup = 1/2 pint
Page 9
16 • NuWave™ PIC Gold Complete Cookbook
• 17
• Add a teaspoon of water for each egg and whip for ufer results. Heat pan
on high for 1 minute to ensure fast cooking.
• Cool down boiled eggs by placing them in a bowl of ice cubes while running
eggs under water. This will help peel eggs with ease.
•
• If, while cracking, a small egg shell fragment gets into the mix, take a larger
piece of the shell and place it into the egg mixture. The larger shell will serve
as a magnet, drawing the small fragment towards it.
• To prevent cheese from adhering to grater, spray utensil with non-stick
cooking spray.
• Spilled egg on NuWave™ PIC surface? Wipe clean, in seconds with hot
soapy water.
Breakfast
Tips for Eggs
When storing your eggs, keep refrigerated, as they can lose more freshness
in one day at room temperature than they can in one week in the fridge. Eggs
should be kept in their original cartons in order to keep their moisture and avoid
getting odors from other foods. Keep them on the fridge shelf, not in the door to
avoid frequent temperature uctuations.
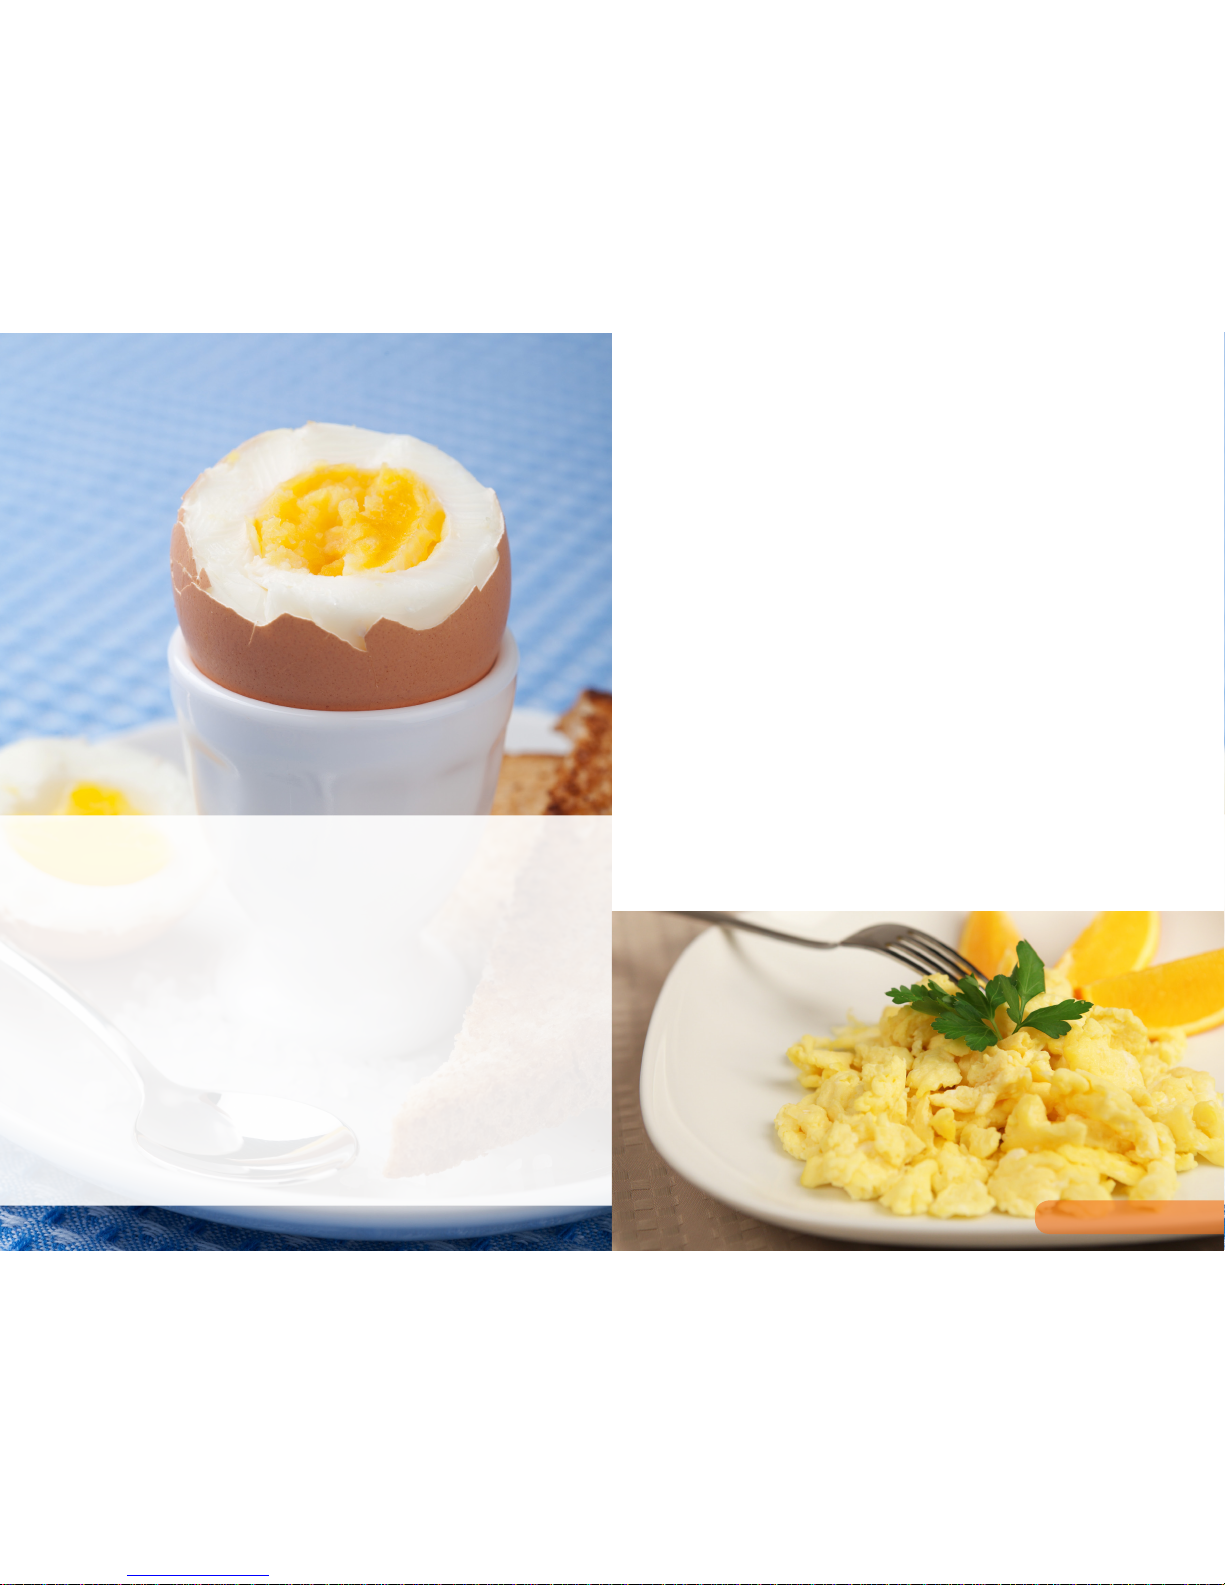
Scrambled Eggs
Serves: 1
2 eggs
2 tablespoons milk
Salt and pepper to taste
1/4 teaspoon black pepper
1 tablespoon butter or
non-stick cooking spray
Directions:
1. In medium bowl, combine eggs, milk,
salt and black pepper.
2. Heat 9-inch fry pan on Medium-High
(375˚F). Add butter and cook until
butter starts to melt .
3. Pour egg mixture into fry pan.
4. Cook eggs on Medium-High (375°F),
without stirring, until mixture begins
to set on bottom and around edges.
5. Using spatula or wooden spoon, lift
and fold partially cooked egg mixture
so that uncooked portion ows
underneath.
6. Cook for 2-3 additional minutes until
eggs are cooked through and still
glossy.
Omelette
Serves: 1-2
2-3 eggs
1 tablespoon cold water
Salt and pepper to taste
1 tablespoon butter
Directions:
1. Whisk eggs in bowl with salt, pepper
and cold water.
2. Heat 9-inch fry pan at 350°F.
3. Add butter and cook until butter starts
to melt.
3. Swirl with rubber spatula and cook
eggs until almost set.
4. Occasionally tilt pan and lift and fold
partially cooked egg mixture so that
uncooked portion ows underneath.
5. Using spatula fold the omelette in half
or thirds.
6. Flip over onto plate to serve.
Tip: Sprinkle the omelette with shredded
cheese, ham, bacon and
vegetables.
• Make sure vegetables are small for
even cooking.
Breakfast • 17
Page 10
18 • NuWave™ PIC Gold Complete Cookbook
• 19
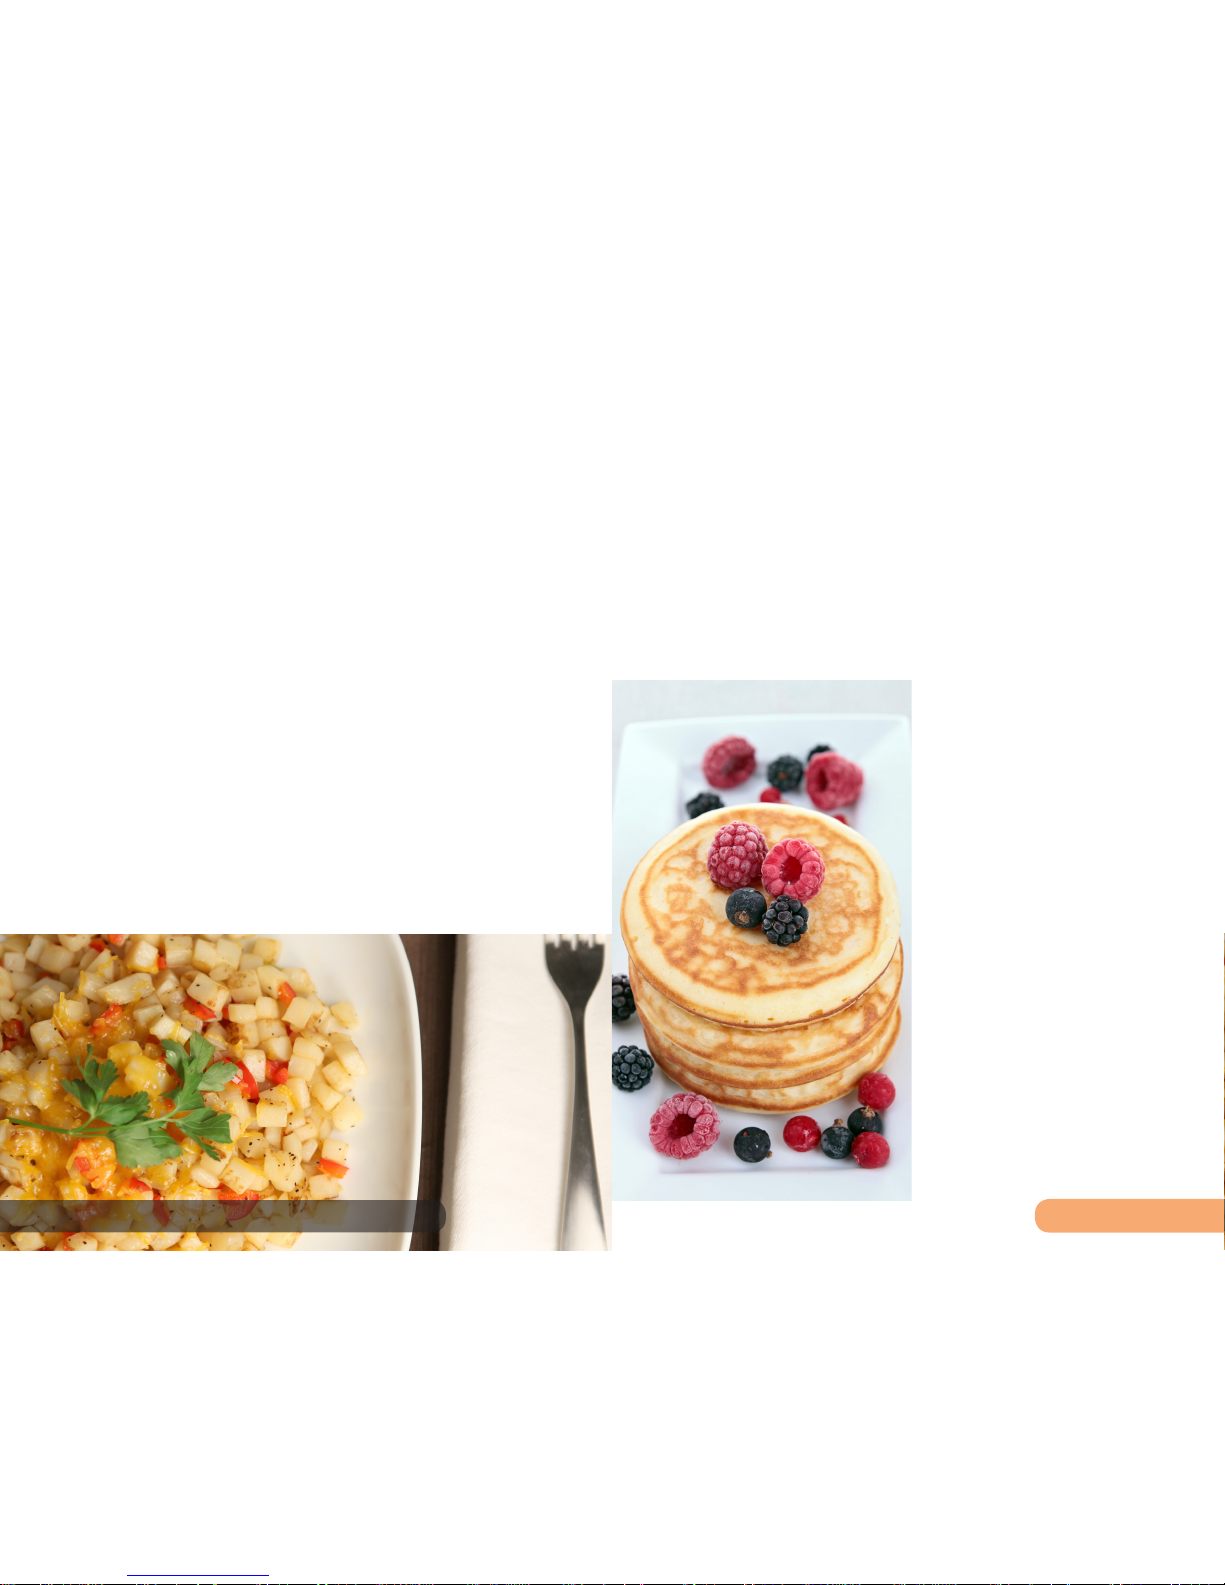
Breakfast Potatoes
Serves: 4
2 cups coarsely chopped tiny new
potatoes or round red potatoes
½ cup chopped onion
½ cup chopped green or red bell
pepper
2 tablespoons olive oil
½ teaspoons salt
½ teaspoon pepper
½ cup shredded cheddar cheese
(optional)
Directions:
1. In medium sauce pan, add potatoes
and enough water to cover.
2. Season with salt to taste and heat at
350°F until water boils.
3. Once water boils, cook potatoes for
an additional 5-6 minutes.
4. Drain potatoes to remove any
excess water.
5. In large nonstick skillet, heat olive oil
over Medium (275°F).
6. Add potatoes, onions, and bell
peppers to skillet.
7. Cook for 20-25 minutes until tender,
stirring occasionally.
8. Season with salt and pepper and
sprinkle with cheese before serving.
Homemade Yogurt
Yield: 1 quart or 8 Yogurt Jars
1 quart whole milk
1 packet (5 grams) yogurt starter
(powdered culture)
Directions
1. Pour milk into medium pot.
2. Press High (425°F) to bring milk up
to 180°F (or until milk starts to boil)
then let milk cool down to 108-112°F.
3. Dissolve powdered culture into milk,
mix well.
4. Pour mixture into yogurt jars.
5. Place yogurt jars in pot then ll pot
with water to ensure water covers at
least ¼ of the jars throughout
cooking process.
6. Press Low (100°F) and then press
“+” until display shows 130°F to
heat water (this allows milk to
maintain 110°F inside yogurt jars).
7. Continue heating for 4-4½ hours
or until yogurt has reached desired
rmness.
8. Refrigerate to stop incubation.
9. Fruit and nuts can be added to
yogurt before serving.
Tip: For the best results, use
Jump-Start yogurt starter.
Breakfast • 19
Homemade Pancakes
Serves: 4
1½ cups self-rising our
1 teaspoon baking powder
2 tablespoons white sugar
2 eggs, lightly beaten
1 cup milk
2 ounces butter
Pinch salt
Maple syrup
Butter
Directions:
1. Sift our, baking powder, and salt
into bowl.
2. Make a well in center of bowl.
3. Mix eggs, milk, and melted butter in
small bowl.
4. Pour egg mixture into well all at
once, whisking to form smooth
batter.
5. Cover the bowl and let sit for 10
minutes.
6. Lightly brush frying pan with canola
oil and heat on Medium-High
(375°F).
7. Pour ¼ cup batter into pan. Swirl
gently to form pancake.
8. Cook until bubbles form or bottom
gets golden brown and ends begin
to dry.
9. Flip pancake and cook other side for
30 seconds.
10. Transfer to plate and repeat with
remaining batter.
11. Serve with butter and maple syrup.
Tip: Use buttermilk in place of regular
milk for buttermilk pancakes.
• Add ½ cup shredded potatoes for
potato pancakes.
Fried Eggs
Serves: 1
1 teaspoon butter or
non-stick spray
2 eggs
Directions:
1. In large skillet, melt oil or butter on
Medium-High (375°F).
2. Break eggs into skillet.
3. When whites are set, the egg is
sunny side up. For over-easy eggs,
ip and cook an additional 15-20
seconds.
18 • NuWave™ PIC Gold Complete Cookbook
Page 11
20 • NuWave™ PIC Gold Complete Cookbook
• 21
• Cook dense vegetables rst
(carrots, broccoli, celery, etc.), then
softer vegetables (peppers, onions,
garlic, etc.) last.
• Store purchased vegetables in
the same manner in which you
bought them from the grocery. For
example, potatoes should never be
stored in the refrigerator.
• Do not cook with or eat potatoes
that have roots growing from
them. This usually means they
are past their prime and could be
detrimental to your health.
Vegetables
• Save vegetable scraps such as
carrot peels, celery stalks and
onions as ingredients for soup and
stew stock. Freeze until needed.
• Steaming vegetables is a great
way to retain their nutrients. It
helps preserves color and ensures
the intake of maximum vitamins.
To steam, place water in a pot and
bring it to boil. Insert steam basket
in pot, situated above water line.
Place vegetables in basket and
cook until they reach al dente (rm
to the bite) consistency.
Tips for Vegetables
Perfectly Cooked Vegetables
in the Induction Steam Basket
Guidelines below are for al dente (rm to the bite). Place water in 3.5-quart
All-Purpose Pot. Bring 2 cups water to boil while covered on Max/Sear. Cut
temperature to medium-high (375°F) once rolling boil has developed. Uncover
and add Stainless Steel Steamer Basket. Place vegetables in basket. Cook
vegetables for listed time, or add 2-4 minutes for softer vegetables.
Asparagus 3-5 minutes
Broccoli 4-5 minutes for orets
6 minutes for stalks
Cauliower 4-5 minutes
Zucchini 3 minutes Cut into ½ inch pieces
Red, Yellow & Green Peppers 3 minutes Cut into ½ inch strips
Carrots 5-6 minutes Cut in ½ inch slices
Cabbage 10-12 minutes Cut into 6 wedges
Parsnips 5-6 minutes Cut into ½ inch pieces
Collard Greens & Spinach 2-3 minutes Chopped
Kohlrabi 6-7 minutes Peel & cut into ½ inch slices
Sugar Snap Peas 3-4 minutes
Pea 2-3 minutes
Leeks 3-4 minutes Cut into ½ inch slices
Turnips 8-9 minutes Peel & cut into ½ inch slices
Summer Squash 15 minutes Cut in half & remove seeds
Vegetables Time Special Preparations
Green Beans Almondine
Serves: 4
8 ounces green beans
2 tablespoons slivered almonds
2 tablespoons butter
1 tablespoon lemon juice
Ice water bath
Directions:
1. Wash and trim green beans to
desired length.
2. Blanch green beans in boiling salted
water for 3-4 minutes or until still
crisp, but not raw.
3. Drain beans and place in ice water
bath to stop cooking process; set
aside.
4. In large saucepan, cook and stir
almonds in melted butter on Medium
(275°F) until almonds turn golden,
while not letting butter brown.
5. Remove blanched beans from ice
bath and add to almonds.
6. Continue to cook until green beans
reach desired temperature.
7. Remove from heat and add lemon
juice.
Vegetables
• 21
Page 12
22 • NuWave™ PIC Gold Complete Cookbook
• 23
Vegetables
• 23
Grilled Japanese Eggplant
with Feta & Sun-dried
Tomatoes
Serves: 4
4 Japanese eggplants, stemmed and
halved lengthwise
1 tablespoon salt
¼ cup oil-packed sun-dried tomatoes,
chopped and drained
3 tablespoons fresh lemon juice
3 tablespoons olive oil, divided
2 tablespoons olive oil for grilling
1 clove minced garlic
1 tablespoon fresh-chopped
Italian parsley
½ cup crumbled feta cheese
Directions:
1. Place eggplant halves in large
colander and toss with salt.
2. Let eggplant stand for 30 minutes
then pat dry.
3. Meanwhile, stir tomatoes, lemon
juice, 1 tablespoon oil, garlic and
parsley in medium bowl.
4. Stir in feta cheese and season with
fresh ground pepper.
5. Prepare Cast Iron Grill by placing on
NuWave™ PIC and heats on Max/
Sear until grill starts to smoke.
6. Turn NuWave™ PIC down to
Medium-High (375°F).
7. Brush eggplant with oil and place on
grill.
8. Grill eggplant for 3 minutes per side,
until tender.
9. Place eggplant on platter and serve
with prepared feta topping.
Tip: Use a mandolin to cut the eggplant
evenly into 1-inch strips
Stir-Fried Tofu & Vegetables
Serves: 4
½ cup natural peanut butter
¾ cup hot water
¼ cup cider vinegar
4 tablespoons soy sauce
2 tablespoons molasses
½ teaspoon crushed red pepper akes
4 teaspoons canola oil
1 pound rm tofu, cut into small pieces
2 tablespoons garlic, minced
2 teaspoons gingerroot, divided
1-1½ pounds broccoli
1 cup red onion
1 red pepper, cut in strips
1 yellow pepper, cut in strips
1 cup peanuts, unsalted
Directions:
1. In bowl, mix peanut butter, hot water,
vinegar, soy sauce, molasses and red
pepper akes until smooth; set aside.
2. Add 2 tablespoons oil to wok or large
skillet and heat on High (425°F).
3. Add tofu and stir on High (425°F)
for 5 minutes or until edges started to
brown.
4. Transfer tofu to bowl using slotted
spoon; set aside.
5. If wok is dry, add 2 teaspoons oil.
6. Stir-fry garlic and ginger for 30
seconds, stirring constantly.
7. Add broccoli and stir-fry for 2
minutes.
8. Add peppers, peanuts and sauce.
9. Cook for 3-5 minutes on High
(425°F).
10. Serve over rice.
Broccoli & Carrot Stir-Fry
Serves: 4
¼ cup vegetables broth or
chicken stock
1 tablespoon balsamic vinegar
1 teaspoon cornstarch
1 tablespoon cooking oil
1 teaspoon grated fresh ginger
1½ cups carrots, thinly sliced
2 cups broccoli orets
1 teaspoon grated fresh garlic
Directions:
1. To make sauce, stir together broth,
vinegar, and cornstarch in small
bowl; set aside.
2. Pour oil into wok or frying pan and
heat on Max/Sear.
3. Add ginger to pan and stir-fry for 15
seconds while constantly moving
pan.
4. Add carrots and stir-fry for 1 minute.
5. Add broccoli and garlic and stir-fry
for 3-4 minutes.
6. Add prepared sauce and cook until
thick and bubbly, stirring constantly.
7. Serve with your favorite meat or over
rice.
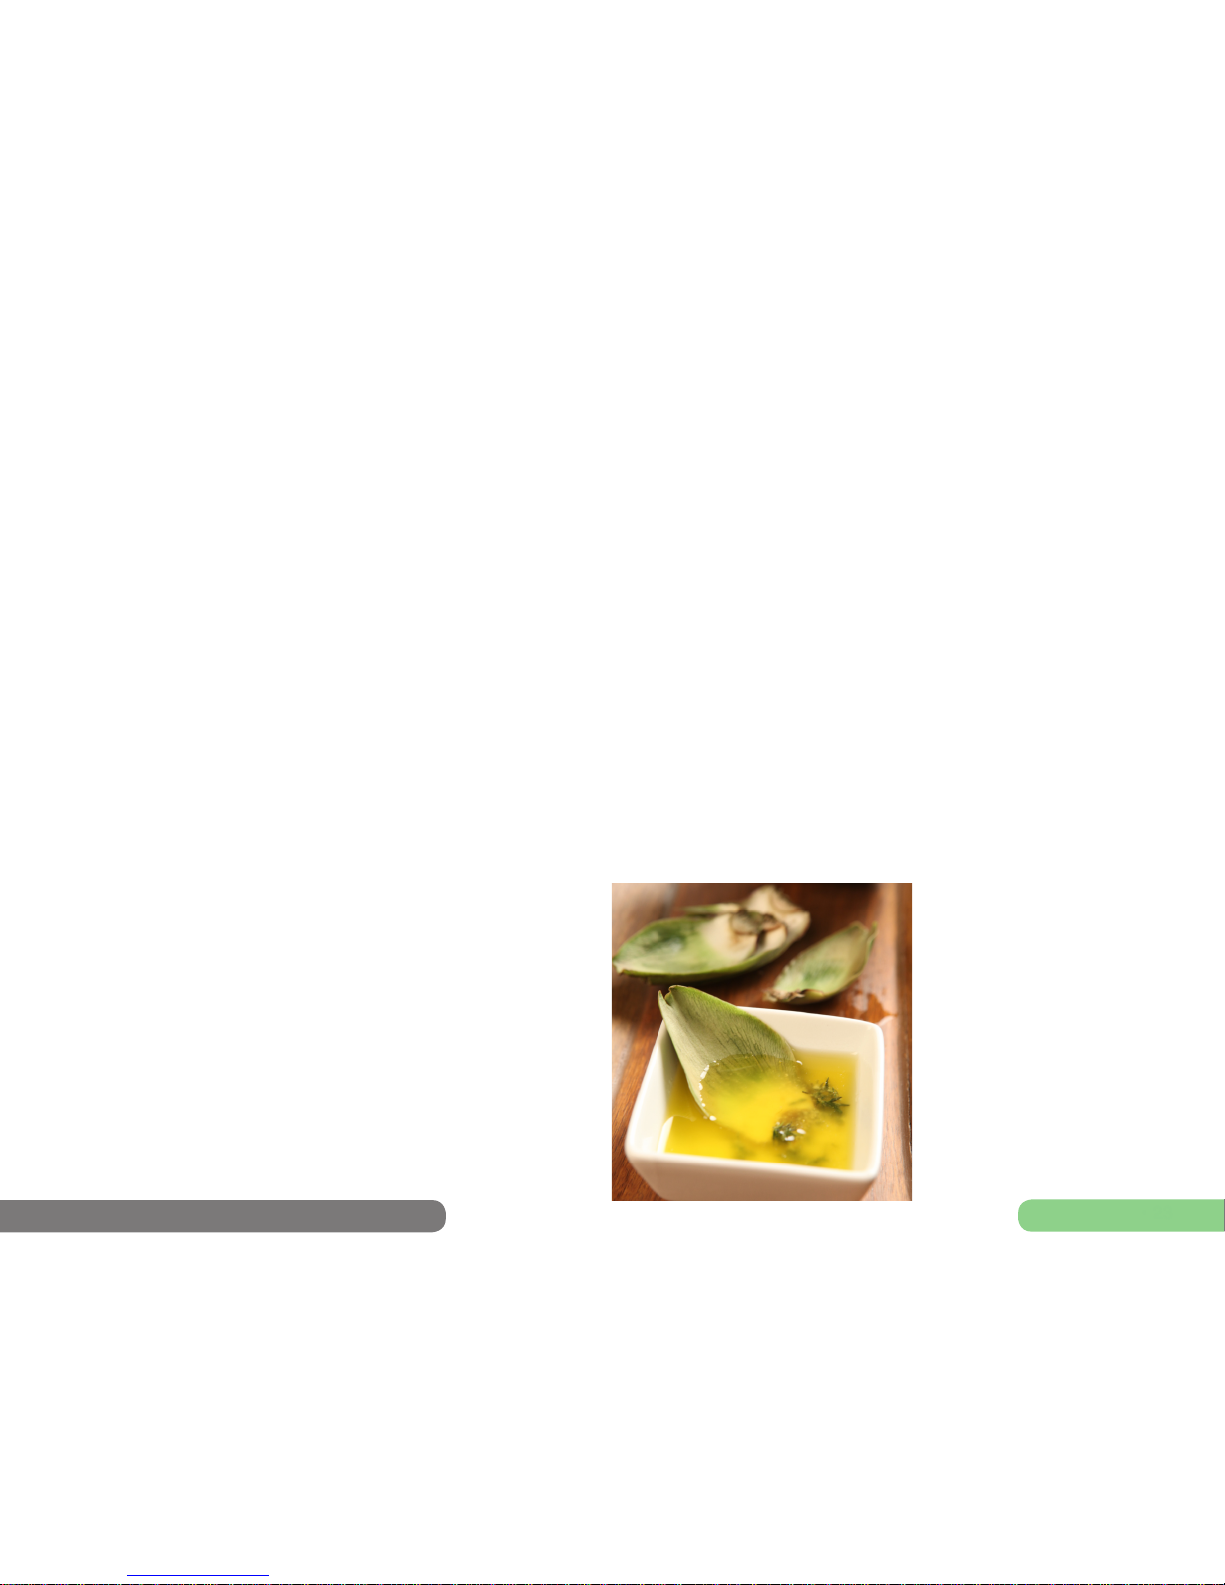
Artichokes with Butter
Sauce
Serves: 2
2 (10-ounce) artichokes
1 full lemon plus 1 tablespoon, juiced
and separated
¼ cup butter
1 teaspoon herbs (dill, tarragon, or
oregano)
Directions:
1. Wash artichokes, trim stems and
remove loose outer leaves.
2. Cut off 1 inch from top and snip off
sharp leaf tips.
3. Brush cut leaves with lemon juice.
4. In large sauce pan or stock pot, bring
large amount of water, enough to
cover artichokes, to boil on Max/
Sear.
5. Add salt and artichokes to boiling
water.
6. Reduce heat to Medium (275°F).
7. Simmer covered artichokes for 20-25
minutes or until leaves pull out
easily.
8. Drain artichokes upside down on
paper towels.
9. Melt butter on Medium-Low (175°F)
and stir in herbs and 1 tablespoon
lemon juice.
10. Transfer butter sauce to bowl and
dip artichokes leaves in butter.
Page 13
24 • NuWave™ PIC Gold Complete Cookbook
• 25
• Internal meat temperature*
according to taste preferences:
Rare: 120°F-125°F
Medium-rare: 130°F-135°F
Medium: 140°F-145°F
Medium-well: 150˚F-155˚F
Well-done: 160°F-170°F
• Meat should be thawed in the
refrigerator.
• Cut meat across the grain. If you’re
not sure how to do this, consult
your butcher.
• Inexpensive cuts of meat may be
marinated to promote tenderness.
Beef
• When it comes to searing meat, the
cut is not ready to be ipped if it is
sticking to pan.
• Let all meats (chicken, beef, lamb,
pork, etc.) sit for 3-5 minutes after
cooking time is complete, but
before cutting.
• 1 pound of raw ground beef equals
2 cups of cooked meat.
* A meat thermometer is essential for
checking internal temperature.
Tips for Beef
Bistro Beef & Mushrooms
Serves: 4
4 beef sirloin steaks, cut ½-inch thick
1 tablespoon Dijon mustard or course
grain brown mustard
¼ cup dry red wine or sherry
1 tablespoon Worcestershire sauce
½ cup beef broth
2 tablespoons butter
2 tablespoon all-purpose our
2 (4-ounce) packages sliced button,
shitake or Portobello mushrooms
2 teaspoons fresh thyme
½ teaspoons salt
½ teaspoon pepper
Directions:
1. Trim fat from steaks. Spread mustard
evenly over both sides.
2. In large skillet or grill pan, sear steak
on both sides for 3-4 minutes on
Max/Sear for medium-rare.
3. In 2-quart sauce pan, heat red wine
and Worcestershire on Medium
(275°F) heat for 3 minutes or until au
sec.
4. Add broth and butter to sauce.
5. Once butter has melted, in small
increments, pour in our and stir with
silicone spatula until sauce thickens.
6. Cook for 1 minute or until our taste
has been removed.
7. Add mushrooms, thyme, salt and
pepper and cook for 2 minutes to
incorporate avors.
8. Slice beef in ½-inch slices on bias
and add to mushroom sauce
9. Simmer for 5 minutes.
10. Serve with egg noodles or rice.
Tip: Au sec is a French culinary term
meaning nearly dry. The liquid has
been reduced until nearly gone.
You may cut temperature down
to Medium-Low (175°F) heat to
slow down the speed of the liquid
reducing.
Grilled Sirloin with
Mushrooms & Red Peppers
Serves: 4
4 (6 – 7-ounce) sirloin steaks
1 tablespoon olive oil
1 medium red bell pepper, cut
into strips
6 ounces sliced button mushrooms
1 small onion, thinly sliced
½ teaspoon salt
½ teaspoon pepper
Directions:
1. Add olive oil to Cast Iron Grill and
heat on Max/Sear for 20 seconds or
until it smokes.
2. Brush vegetables with olive oil and
place on grill.
3. Grill vegetables for 2-3 minutes,
moving them to grill edge to keep
warm.
4. Season steak with black pepper and
add to grill.
5. Sear on each side for 4-5 minutes
for medium-rare, 6-7 minutes for
medium or 8-10 minutes for well done.
6. Serve steaks over grilled vegetables.
Tip: Create crosshatch marks by
rotating steaks 90° halfway through
cooking process on each side.
• 25
Beef
Page 14
26 • NuWave™ PIC Gold Complete Cookbook
• 27
Hometown Chili
Serves: 6-8
2 pounds ground beef
1 cup chopped yellow onion
1 cup chopped celery
2 tablespoons chopped garlic
2 cans light red kidney beans
4 (15-ounce) whole tomatoes
3 tablespoons chili seasoning
2 cups cold water
3 tablespoons fresh parsley, minced
½ teaspoon black pepper
½ teaspoon salt
1 cup grated cheese (optional)
½ cup chopped green onions (optional)
1 cup crackers (optional)
Directions:
1. In large stock pot, cook ground beef
and 1 tablespoon chili seasoning on
Medium High (375°F).
2. Drain any fat and add the meat back
to large stock pot
3. Add onions, celery, and garlic. Sauté
with ground beef for about 2 minutes
until onions are translucent, stirring
every 30 seconds.
4. Add kidney beans, tomatoes,
remaining chili seasoning, water,
parsley, salt and pepper.
5. Turn NuWave™ PIC to High (425°F)
and bring to boil.
6. Turn NuWave™ PIC down to
Medium-Low (175°F) and let simmer
for 45 minutes.
7. Serve with cheese, chopped onions,
and crackers.
Tip: If you don’t have fresh parsley,
substitute 1 tablespoon dry parsley.
Spiced Beef with Dumplings
Serves: 4-6
1 (3-pound) boneless chuck roast
2 tablespoons olive oil
1 (16-ounce) can tomatoes
1¾ cup water, divided
¼ cup red wine
2 tablespoons beef bouillon
Salt to taste
2 cloves garlic, minced
1 (8-count) package refrigerated
biscuits
1 tablespoon minced parsley
2 tablespoons cornstarch
Directions:
1. Trim excess fat from roast.
2. Heat oil in medium stock pot on
Medium (275°F).
3. Brown roast on all sides.
4. Add tomatoes, 1½ cups water, red
wine, boullion, salt and garlic to
medium stock pot.
5. Cook on Medium-Low (175°F) for
2-2½ hours or until tender.
6. Place biscuits on roast and sprinkle
with parsley.
7. Cover and steam dumplings for
on Medium-Low (175°F) 15 minutes,
shaking pot occasionally.
8. Remove meat and dumplings and
place on platter.
9. Degrease cooking liquid.
10. Bring cooking liquid and remaining
water up to boil on Medium-High
(375°F).
11. Gradually add cornstarch by
continually stirring it into cooking
liquid.
12. Continue to stir until gravy is thick.
Pork & Chicken
Tips for Pork & Chicken
• Poultry is ready to serve once the
internal temperature* reaches
165-170°F, or when juices run clear.
• Pork is ready to eat when the
internal temperature* approaches
145-155°F, or once juices run clear.
• To cut raw meat more easily, it may
help to thoroughly chill it rst.
• 1 pound of raw chicken equals 2
cups of cooked meat.
• When it comes to searing meat, the
cut is not ready to be ipped if it is
sticking to pan.
• When adding raw meat to hot oil,
wear a hot pad or glove and/or
use tongs to prevent burns.
• Let all meats (chicken, beef, lamb,
pork, etc.) sit for 3-5 minutes after
cooking time is complete before
cutting.
• Meat should be thawed in the
refrigerator.
* A meat thermometer is essential for
checking internal temperature.
Page 15

28 • NuWave™ PIC Gold Complete Cookbook
• 29
Pork Marsala
Serves: 4
1 pound pork tenderloin, well trimmed
1 teaspoon olive oil
1 tablespoon minced garlic
1 teaspoon tomato paste
½ cup dry Marsala
½ cup red wine
12 ounces button mushrooms
Salt and Pepper to taste
1 tablespoon chopped fresh parsley
Directions:
1. Cut pork diagonally into cutlets
¼-inch thick or pound cutlets to
thickness of ¼-inch.
2. Heat fry pan on High (425°F) for
about 1 minute and add cutlets.
3. Sear on sides, sealing in juices
and brown for about 1 minute and 30
seconds per side.
4. Remove cutlets from pan.
5. Heat oil on Medium (275°F) heat and
add the garlic and sauté for 1 minute.
6. In separate container, combine
tomato paste Marsala and red wine.
Add mixture to pan.
7. Add mushrooms. Turn down to
Medium-Low (175°F) heat and
simmer for 3-5 minutes.
8. Return reserved cutlets to pan, and
heat them through on Medium-Low
(175°F) heat.
9. Before serving, sprinkle with parsley.
Pan-fried Pork Chops
Serves: 4
4 bone-in or center cut pork chops,
about ¾-inch thick
1 cup all-purpose our
1 teaspoon garlic powder
½ teaspoon paprika
½ teaspoon salt
½ teaspoon pepper
½ teaspoon cayenne (optional)
3 slices bacon, chopped
½ cup vegetable oil or olive oil
Directions:
1. In 10-inch fry pan, cook bacon on
Medium-High (375°F) for 6 minutes
or until fat renders and bacon is
crisp.
2. While bacon cooks, mix all spices
with our.
3. Pat pork chops dry with paper towel.
4. Cut 2 slits at the ends to keep the
chop from curling when cooked.
5. Season both sides with our and
spice mixture and shake off any
excess.
6. Using slotted spoon, transfer bacon
to paper towel and reserve for later
use.
7. Add olive oil to bacon render and
heat on Medium-High (375°F) for 2
minutes.
8. Cook chops for 5-7 minutes per side
until well browned and the internal
temperature has reached 145°F.
Tip: Boneless chicken cutlets or breasts
can be used in place of pork chops.
• 29
Pork & Chicken
Sweet & Sour Pork with
Pineapple
Serves: 4
6 tablespoon unsalted butter, divided
2 pounds celery root, peeled and cut
into 1-inch cubes
2 cups water
1 tablespoon salt, divided
¼ cup milk
2 teaspoons garlic, minced
1 pound baby bok choy, trimmed and
sliced crosswise
1½ pounds boneless pork loin, trimmed
and cut into cubes
1 (10-ounce) can fresh pineapple
chunks
1/3 cup honey
2 tablespoons sherry vinegar
White pepper to taste
Directions:
1. Melt 2 tablespoons butter in 3-quart
sauce pan on Medium-High (375°F).
2. Add celery root and cook for 5
minutes, stirring to coat with butter.
3. Add water and ½ teaspoon salt.
Bring to boil.
4. Reduce heat to a simmer on
Medium–Low (175°F), let simmer for
30 minutes or until tender.
5. Strain, reserving ¼ cup cooking
liquid.
6. Puree in food processor with
reserved cooking liquid, milk and 1
tablespoon butter.
7. Return to pan to keep warm.
8. Heat 3 tablespoons butter on High
(425°F).
9. Sauté garlic for 1 minute until tender,
stirring constantly.
10. Add bok choy and ½ teaspoon salt
and cook on Medium-High (375°F)
for 4-5 minutes, stirring until just
tender. Set aside and keep warm.
11. In same fry pan, add 1 tablespoon
butter.
12. Cook pork on Medium-High (375°F)
heat until brown and cooked
through.
13. Remove pork with slotted spoon
and add to bok choy.
14. In same fry pan, add pineapple with
juice, honey, vinegar and remaining
salt and cook on Medium-High
(375°F).
15. Bring to a boiling.
16. Add pork and bok choy into sauce.
17. Serve with celery root puree along
side.
Black-Eyed Peas with
Andouille
Serves: 6
½ pound Andouille sausage, cut into
¼-inch thick slices
½ cup onion, diced
½ green bell pepper, diced
½ red bell pepper, diced
3 cups black-eyed peas, cooked
1 cup chicken stock or water
½ teaspoon kosher salt
½ teaspoon black pepper
Directions:
1. Heat large skillet on Medium-High
(375°F).
2. Add sausage and cook for 5 minutes,
or until browned on both sides.
3. Transfer sausage to bowl and set
aside.
4. In same skillet, add onion and bell
peppers and cook for 5 minutes, or
until wilted.
5. Add peas, chicken stock, sausage,
salt and pepper and cook for 5 minutes.
Page 16

30 • NuWave™ PIC Gold Complete Cookbook
• 31
• 31
Pork & Chicken
Herb Chicken
Serves: 4
4 (6-ounce) boneless, skinless
chicken breasts
¼ cup our
¼ teaspoon salt
¼ teaspoon pepper
1 tablespoon fresh thyme
1 tablespoon fresh chopped rosemary
1 tablespoon fresh chopped oregano
2-3 cloves garlic, peeled and nely
chopped
½ cup white wine
¾ cup chicken stock or broth
¼ cup fresh chopped Italian parsley or
chervil
Directions:
1. Heat fry pan on Medium-High
(375°F).
2. Dredge chicken in our, which has
been seasoned with salt and pepper;
shake off the excess our.
3. Add chicken to fry pan and brown on
both sides for color; set aside.
4. Add herbs, garlic and wine to fry pan.
5. Bring cooking liquid to simmer on
Medium-High (375°F).
6. When cooking liquid is brought back
up to temperature, add chicken to fry
pan.
7. Add chicken stock and bring back to
simmer on Medium-Low (175°F).
8. Cover and cook chicken for
about 10-12 minutes or until internal
temperature reaches 165°F.
9. Before serving dish, sprinkle with
fresh parsley or chervil.
Tip: If you don’t have fresh thyme,
rosemary or oregano, you can
substitute with 1 teaspoon dried
thyme, rosemary or oregano.
Chicken & Mushrooms
Serves: 6
6 (6-ounce) boneless, skinless
chicken breasts
½ cup our
½ teaspoon salt
½ teaspoon black pepper
1 tablespoon olive oil
3-4 cloves garlic, peeled and
roughly chopped
1 pound mushrooms, cut into slices
¼ cup balsamic vinegar
1 cup chicken broth/stock
¼ teaspoon thyme
Directions:
1. In large heavy skillet, heat the oil on
Medium-High (375°F).
2. Dredge chicken pieces in our,
mixed with salt and pepper, shaking
off excess our.
3. Add chicken to skillet and cook for 3
minutes on each side or until brown.
4. Add garlic, turn chicken pieces over
and scatter mushrooms over
chicken.
5. Cook ingredients for about 3
minutes, shaking skillet to distribute
mushrooms.
6. Add vinegar, broth, and thyme.
7. Cover skillet and cook chicken
on Medium-Low (175°F) for 10-12
minutes, turning chicken once as it
cooks, until the center is fully
cooked.
8. Remove chicken and place on
platter; keep warm.
9. Cook mushrooms for additional 4-5
minutes on Medium-High (375°F) to
thicken sauce.
10. Pour sauce over chicken and serve
with rice.
Fried Chicken PIC Style
Serves: 1-2
1½ pounds bone-in chicken pieces
(breasts, thighs, and drumsticks)
2/3 cup all-purpose our
3 teaspoons poultry seasoning or
paprika
3 teaspoons dried basil or marjoram
1 teaspoon garlic powder
1 teaspoon onion powder
1 teaspoon salt
1 teaspoon black or white pepper
7 cups canola or vegetable oil
Directions:
1. Combine our and all spices in
4-quart plastic container. Shake to
evenly mix ingredients.
2. Add canola or vegetable oil to
3.5-quart pot.
3. Heat over Medium-High (375°F) for
12-15 minutes, until oil reaches
350˚F.
4. Add chicken pieces to seasoned
our, shaking plastic container each
time to coat.
5. Cook chicken 10-12 minutes per side.
6. Cook chicken until internal
temperature reaches 165-170˚F.
Tip: Be careful not to overcrowd pan.
If necessary, cook in two or three
batches.
• This recipe can be altered to fry 4
pounds of chicken. To do so,
double the dry seasoning and
increase our to 3 cups.
• Ideal oil temperature for chicken is
350˚F and should be checked with
a digital thermometer.
Page 17
32 • NuWave™ PIC Gold Complete Cookbook
• 33
Seafood
Tips for Seafood
• Always smell seafood prior to
purchase to ensure freshness.
• When buying whole sh, make
sure eyes are clear. Cloudy eyes
typically signify older sh.
• Rinse seafood prior to cooking.
• Thaw in refrigerator on lowest
shelf. If there is a spill, other foods
won’t be contaminated.
• Peeling shrimp? Use fresh lemon
juice to remove lingering smell from
hands.
• The perfect temperature for melting
butter is 100°F (Low).
Cooked Seafood Guidelines
Whole Fish
Flesh should be opaque
and ready to ake.
Shrimp
Flesh is opaque and
shell turns from red to pink.
Scallops
Flesh turns opaque
Lobster Tails
Flesh turns opaque and
outside shell turns red.
Seafood Paella
Serves: 6-8
2 teaspoons butter
1 cup onion, diced
Salt and black pepper to taste
1 cup long-grain rice
1 small green pepper, seeded and
nely chopped
1 small red pepper, seeded and nely
chopped
1 tablespoon garlic, minced
½ teaspoon saffron threads, crumbled
2 ½ cups sh stock or base
1 (6 – 8-ounce) lobster tail, removed
from shell and chopped into large
pieces
½ pound king crab legs, shelled,
chopped into large pieces
12 ounces Tilapia llets, cut into large
pieces
4 ounces sea scallops, raw
4 ounces large shrimp, raw, pealed
and deveined
4 ounces mussels, pre-cooked
4 ounces clams, pre-cooked
4 ounces squid, pre-cooked and
pre-chopped
4 ounces octopus, pre-cooked and
pre-chopped
Directions:
1. In 3.5-quart stock pot, melt butter on
Medium (275°F) for about 20
seconds.
2. Sauté onion in butter on Medium
(275°F) for 2 minutes or until onion
has softened.
3. Season with salt and pepper to taste.
4. Add rice and cook by stirring
occasionally for 30 seconds.
5. Add bell peppers, garlic, saffron and
2 cups broth.
6. Bring mixture to boil on Medium-High
(375°F) covered.
7. Once boiling, lower heat to Medium
(275°F) and let simmer for 10-15
minutes.
8. Add seafood mix.
9. Cook for 15-20 more minutes
uncovered, or until most liquid has
been absorbed and rice is tender.
Tip: Do not brown rice.
Tip: You can use any type of bell
pepper.
Ginger Shrimp
Serves: 4
1½ pounds shrimp, peeled
and deveined
1 tablespoon olive oil, divided
2 tablespoons grated fresh ginger
1 cup chopped green onions
1½ cups chicken stock
2 tablespoons cold water
1 tablespoon cornstarch
Directions
1. Heat 1½ teaspoons oil in large
nonstick sauté pan on High (375°F).
2. Sauté shrimp on High (375°F) for 4
minutes or until they turn pink.
3. Remove shrimp and set aside.
4. Heat remaining oil on Medium-Low
(175°F).
5. Add ginger and onions, and sauté
until the onions are tender.
6. Add chicken stock and bring to a boil
on Max/Sear.
7. Mix together cold water and
cornstarch and stir mixture into
sauté pan.
8. Return shrimp to skillet and bring
everything to temperature on
Medium-High (375°F).
9. Serve over rice.
• 33
Seafood
Page 18

34 • NuWave™ PIC Gold Complete Cookbook
• 35• 35
Seafood
Jumbo Louisiana Shrimp
with Andouille & Grits
Serves: 6
30 jumbo raw shrimp, peeled
and deveined
2 tablespoons extra virgin olive oil
1 tablespoon Creole spice
½ teaspoon salt
6 tablespoons Andouille sausage,
small diced
1 tablespoon shallot, minced
1 tablespoon garlic, minced
2 tablespoons paquillo peppers,
small diced
1 tablespoon chopped thyme
4 cups shrimp stock or vegetable stock
2 tablespoons butter
1 teaspoon fresh lemon juice
2 cups tomatoes, diced
1 cup uncooked grits
Directions:
1. Cook grits according to package
directions.
2. Add olive oil to large sauté pan and
heat on Medium (275°F).
3. Season shrimp with Creole spice
and salt.
4. Sauté shrimp in pan until they turn
pink.
5. Remove shrimp and set aside.
6. Add Andouille, shallot, garlic, paquillo
peppers and thyme to pan.
7. Sauté for 2 minutes, or until shallots
become soft.
8. Add stock to pan and bring to
simmer.
9. Add butter, shrimp, lemon juice and
tomatoes and cook for additional 2-4
minutes.
10. Serve over grits.
Steamed Mussels in
Tomato & Wine
Serves: 4
2 pounds mussels
2 cups white wine
1 (14½-ounce) can Italian-style
chopped tomatoes
½ stick butter, cut into quarters
4 cloves garlic, roughly chopped
¼ cup fresh basil leaves, loosely
packed and roughly chopped
2 shallots, roughly chopped
Directions:
1. Rinse and scrub mussels in cold
water.
2. Fill large pot 1-inch deep with water
and add mussels.
3. Bring covered pot to boil on High
(425°F) for 5-7 minutes, or until
shells open.
4. Drain half cooking liquid and reserve
remaining liquid in pot with mussels.
5. Discard any mussels that did not
open.
6. Add remaining ingredients and
cook on Medium-Low (175°F) for 15
minutes.
7. Serve mussels in large bowl with hot
crusty bread and salad.
Tip: It is not necessary to remove the
entire beard of the mussel, as they
add avor to the cooking stock.
Tip: You can sporadically shake the
pot back and forth to help the
mussels cook.
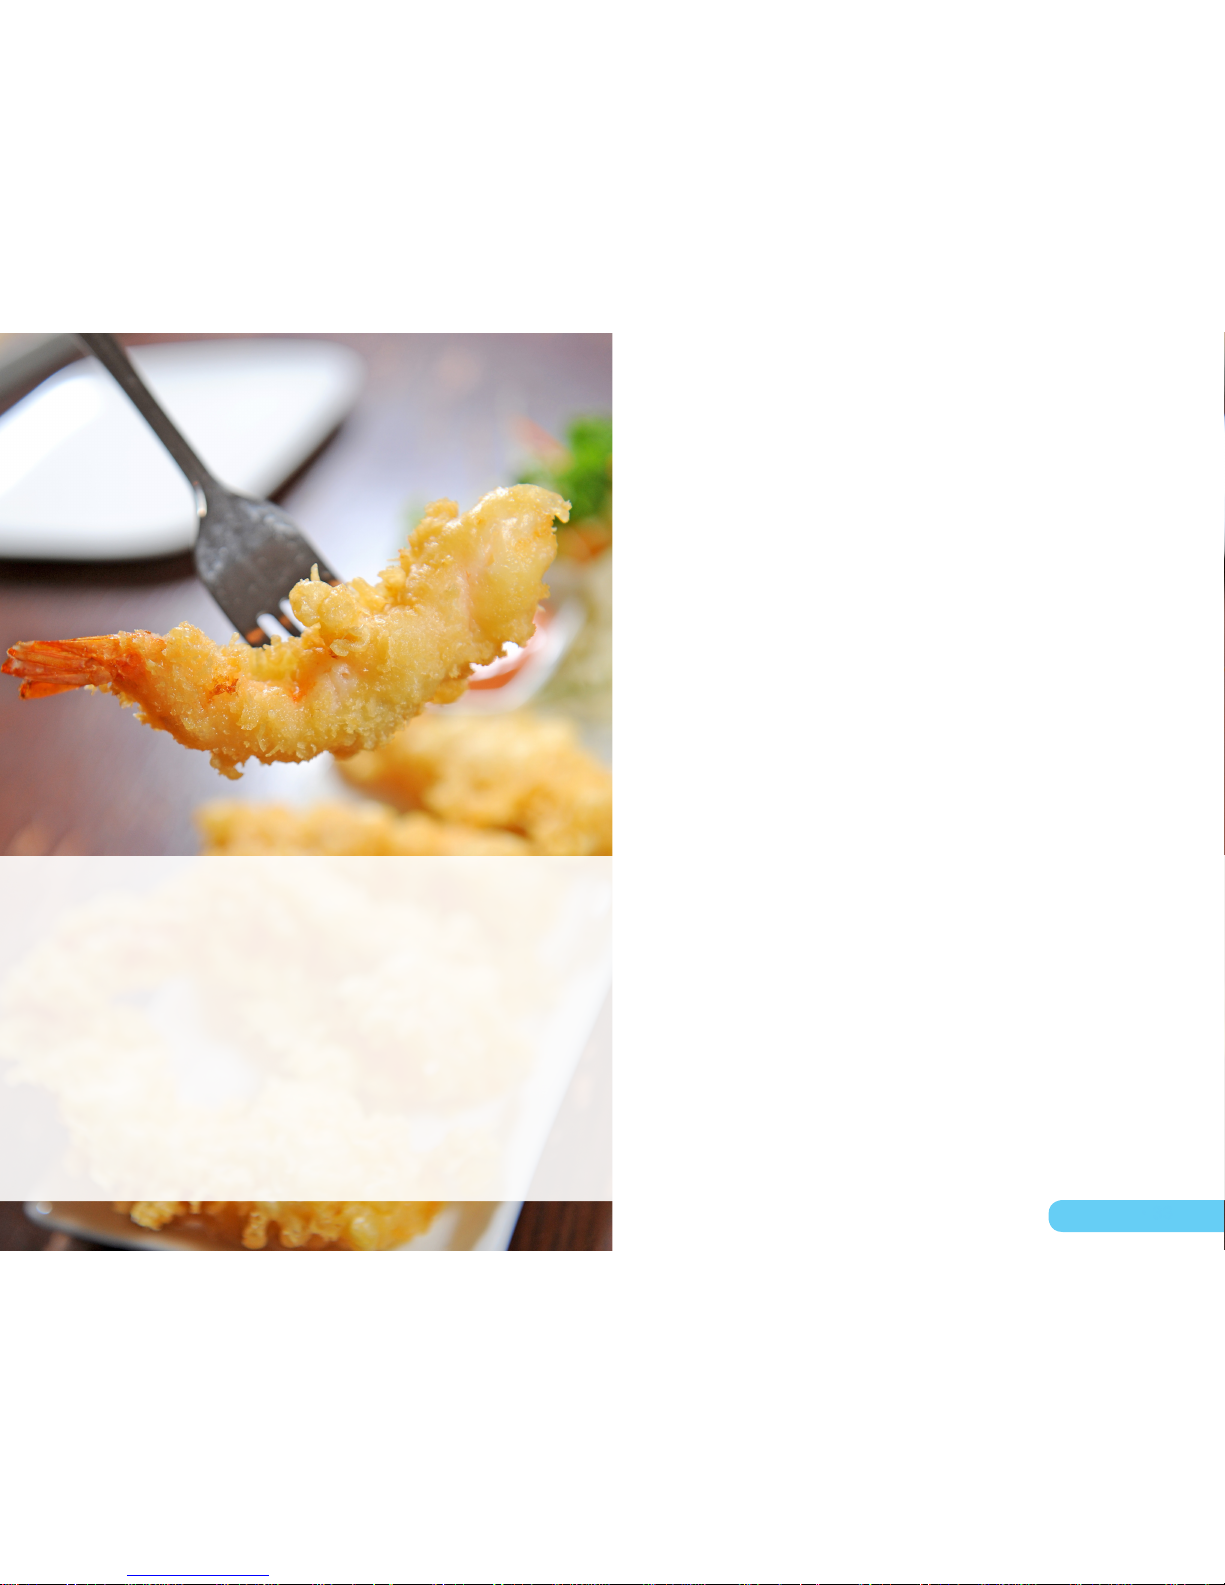
Battered Fried Shrimp
Serves: 4-6
2 pounds uncooked shrimp, peeled and
deveined, tails left on
1 cup all-purpose our
½ teaspoon sugar
½ teaspoon salt
1 cup ice water
1 egg
1 large bottle vegetable oil, portioned
into 6 cups and 2 tablespoons
Directions:
1. Heat oil in a large heavy pot at 350°F.
2. In large bowl, mix our, sugar and
salt.
3. Add ice water, egg and 2
tablespoons oil to our mixture to
make batter.
4. Dry shrimp thoroughly.
5. Holding shrimp by tails with tongs,
dip them into batter one at a time.
6. Carefully place shrimp in pot and
fry for about 2 minutes or until
golden brown.
7. Transfer to paper towel to drain,
keeping shrimp warm location.
8. Continue to cook remaining shrimp.
9. Serve immediately.
Tip: Test you oil by using a toothpick.
Drop the toothpick in the oil; if it
fries, then the oil is hot enough.
• Use a digital thermometer to check
the oil temperature and adjust
accordingly.
Fried Catsh
Serves: 4
8 (4-ounce) catsh lets
½ cup buttermilk
1/3 cup all-purpose our
1/3 cup cornmeal
1 teaspoon black pepper
1 teaspoon salt
3 cups canola oil or olive oil
Directions:
1. Place catsh in medium, shallow
bowl.
2. Pour buttermilk over sh and let sit
for 15-20 minutes.
3. Meanwhile, in another medium bowl,
add all dry ingredients and stir
together.
4. Dip sh into cornmeal mixture to coat
completely; place in single layer on
plate, ensuring that they do not
overlap.
5. Heat oil at 350°F.
6. Place catsh in oil, being careful not
to overcrowd, and cook for 5-6
minutes or until catsh turns golden
brown.
7. Transfer to paper towel to drain and
continue to cook remaining catsh.
Tip: If you don’t have buttermilk, mix
together regular milk and 1
tablespoon vinegar.
• Fry only 2-3 pieces at a time, so as
to not overcrowd the pot.
Page 19
36 • NuWave™ PIC Gold Complete Cookbook
• 37
Pasta, Grains
& Rice
Tips for Pasta, Grains & Rice
• Under dry conditions, rice can be
stored for up to 1 year at room
temperature.
• Rinsing rice removes some of the
starch, giving it a uffy and less
sticky consistency.
• If you forget to presoak beans,
place them in 3 cups water for
every 1 cup of beans, then bring to
a boil on Max/Sear for 2 minutes.
Remove from heat, cover and soak
beans for 1 hour.
• Fresh pasta cooks more quickly
than dry pasta.
• Some pasta, such as lasagna,
manicotti and cannelloni, can be
used without being precooked.
These are called no-bake pasta.
• Not sure which type of pasta will
complement the dish? As a rule of
thumb, small pastas, such as orzo,
are ideal for clear or hearty soups.
Curved, twisted or tube-shaped
pastas, such as penne, are perfect
for tomato sauces. Ridged pastas,
such as rigatoni, are best used
with meat sauces. Smooth pastas,
such as fettuccine, complement
cream sauces.
• Bow Ties 2 - 3 minutes
• Fettuccine 1½ - 2 minutes
• Lasagna 2 - 3 minutes
• Linguine 1½ - 2 minutes
• Spaghetti 1½ - 2 minutes
• Ravioli 6 - 8 minutes
• Tortellini 8 - 10 minutes
Basic Pasta Dough
Yield: 1 pound
2 cup all-purpose our, divided
½ teaspoon salt
2 egg yolks, beaten
1 egg, beaten
1/3 cup water
1 teaspoon olive oil
Directions:
1. In large bowl, stir together 1¾ cups
of our and salt.
2. Make well in center of our mixture.
3. In separate bowl, beat egg yolks,
egg, water and oil.
4. Pour egg mixture into bowl with our,
stirring to incorporate.
5. On clean surface, sprinkle remaining
our and remove dough from bowl.
6. Knead dough for 8-10 minutes, until
smooth and elastic.
7. Cover and let dough rest for 30
minutes.
8. Flour working surface and divide
dough into 4 equal portions.
9. Roll each portion into round shape
and cut into your favorite pasta
shape.
10. Let stand uncovered for 20
minutes.
11. Boil water on Max/Sear and cook
according to guide,”How to Cook
Pasta”.
Tip: 1 pound of uncooked pasta serves
6-8 people
How to Cook Pasta
Fill large saucepan or kettle, with 3
quarts of water for every 4-8 ounces
of pasta. Bring to a boil on “Sear.”
You may add 1 teaspoon salt and
1 tablespoon olive or cooking oil to
prevent pasta from sticking (optional).
Add pasta a little at a time so water
continues boiling. Reduce heat to
Medium-High (375°) and continue
boiling uncovered, stirring occasionally
according to the specications below,
or until pasta is al dente (rm). Drain
in colander. When cooking dry pasta,
check package directions because they
tend to vary by brand. When preparing
pasta salad, cool noodles with cold
water then add a small amount of oil to
prevent from sticking.
To store noodles, spread on wire
cooling rack; let noodles dry overnight
or until completely dry. Place in an
airtight container and refrigerate for
up to 3 days or freeze up to 2 months.
The time needed to dry pasta will vary,
depending on size and shape of pasta.
Cooking Times
for Homemade Pasta
Pasta, Grains & Rice
• 37
Page 20

38 • NuWave™ PIC Gold Complete Cookbook
• 39
Pasta, Grains & Rice
• 39
Mushroom Stroganoff
Serves: 4
8 ounces wide egg noodles
2 tablespoons butter
2 medium onions, cut into ¼-inch slices
4½ cups mushrooms, sliced
1 clove garlic, minced
2 tablespoons all-purpose our
1 vegetable bouillon cube, crumbled
¾ cup water
1 (8-ounce) carton sour cream
Salt & pepper to taste
1 tablespoon fresh chives (optional)
Directions:
1. In sauce pot, heat water for pasta
2. Meanwhile, in large sauté pan, melt
butter on Medium-High (375°F).
3. Sauté onion for 3-4 minutes until
tender, stirring occasionally.
4. Stir in mushrooms and garlic.
5. Cook for 5 minutes, or until
vegetables are tender, stirring
occasionally.
6. Add our to mushrooms; continue to
cook to remove raw taste.
7. Deglaze with bouillon and water
8. Bring to simmer and lower
temperature to Medium-Low (175°F);
cook for 10 minutes.
9. Cook egg noodles according to
package directions.
10. Add sour cream and season with
salt and pepper.
11. Continue cooking for 2-3 minutes to
incorporate avors.
12. Pour sauce over pasta and sprinkle
with chives.
Roasted Red Pepper Sauce
over Tortellini
Serves: 6
2 (9-ounce) packages cheese or
meat tortellini
4 red peppers, roasted
2 tablespoons butter
1 cup onion, small diced
4 cloves garlic, minced
1 tablespoon fresh thyme
1 tablespoon fresh oregano
2 teaspoons sugar
Directions:
1. In saucepan, cook tortellini according
to package directions.
2. Meanwhile, using food processor,
process red peppers until smooth;
set aside.
3. In medium saucepan, heat butter
until melted.
4. Sauté onion and garlic until fragrant
and tender.
5. Add pureed pepper, thyme, oregano,
and sugar.
6. Cook and stir until heated through.
7. Pour sauce over tortellini; toss and
coat.
Tip: If you don’t have freshly roasted
red peppers, substitute with 2 jars
of roasted red peppers.
• If you don’t have fresh thyme,
substitute with 1 teaspoon dried.
If you don’t have fresh oregano,
substitute with ½ teaspoon dried.
Beans with Pesto Bulgur
Serves: 6
¾ cup dry cranberry beans, lima beans
or pinto beans
2 tablespoons olive oil
6 cups water, divided
1 cup vegetable stock
¾ cup bulgur wheat
¾ cup red pepper, chopped
¼ cup green onion, thinly sliced
1/3 cup refrigerated pesto sauce
Directions:
1. Pour bean onto clean counter to
sort. Remove any stones, debris and
old beans.
2. Rinse beans.
3. Soak beans in 3 cups water and let
soak for 6-8 hours or overnight.
4. In large sauce pan, combine soaked
beans, oil and 3 cups water.
5. Bring to boil on Max/Sear.
6. Reduce heat to Medium- Low
(175°F) and let simmer.
7. Drain and rinse beans; set aside and
keep warm.
8. In same large sauce pan, bring stock
to boil on Max/Sear.
9. Incorporate bulgur into cooking liquid
by stirring.
10. Cover and cook on Medium-low
(175°F) for 15 minutes.
11. Add red pepper, green onions and
pesto and cook for 5 minutes.
12. Pour out any excess water.
13. Add beans and bring back to
temperature on Medium (275°F)
until majority of water has been
absorbed and heated through.
Tip: Cook beans for 1-1½ hours.
• If you are short on time, use 1
(15-ounce) can pinto beans, rinsed
and drained instead of dry beans.
Fettuccine Alfredo
Serves: 4
12 ounces dried fettuccine
¾ cup heavy whipping cream
½ cup butter
¾ cup grated Parmesan cheese
Salt & pepper to taste
Pinch nutmeg
Directions:
1. Cook fettuccine according to
package directions.
2. Meanwhile, in separate sauce pan,
bring butter and cream to simmer on
Medium (275°F) for 3 minutes,
stirring sporadically.
3. Drain and return fettuccine to
saucepan.
4. Remove sauce from heat.
5. Add warm sauce, cheese, salt,
pepper and nutmeg to fettuccine;
coat well.
6. Serve immediately.
Page 21

40 • NuWave™ PIC Gold Complete Cookbook
• 41
• 41
Pasta, Grains & Rice
Vegetable Fried Rice
Serves: 4
1 teaspoon toasted sesame oil
or cooking oil
1 egg, beaten
1 tablespoon vegetable oil
½ pound fresh asparagus spears,
cut into 1-inch pieces
¼ cup fresh mushrooms, sliced
¼ cup celery, cut on bias
2 tablespoons green onion, thinly
sliced
2 cloves garlic, minced
3 tablespoons reduced-sodium soy
sauce
2 tablespoons white wine or water
2 cups precooked brown rice, chilled
Dash red pepper
Directions:
1. In large skillet or wok, heat 1
teaspoon sesame oil on Medium
(275°F).
2. Add egg and cook for 1 minute or
until egg is set.
3. Remove and transfer egg to bowl;
keep warm.
4. In same wok, heat vegetable oil on
High (425°F).
5. Stir-fry asparagus, mushrooms,
celery and garlic for about 3 minutes,
stirring constantly.
6. Stir in soy sauce, wine and red
pepper.
7. Add cooked rice and cook for about
2 minutes, stirring constantly.
8. Stir in eggs.
Rice Pilaf
Serves: 4
1 tablespoon olive oil
½ cup onion, nely chopped
½ cup fresh mushrooms, thinly sliced
¼ cup celery, nely diced
1 garlic clove, minced
¾ cup long grain rice, un-cooked
and parboiled
1 ½ teaspoons instant chicken or
vegetable bouillon
¼ teaspoon black pepper
1½ cups water
Directions:
1. In 3.5-quart All-Purpose Pot, heat
olive oil on High (425°F) for 45
seconds or until warm.
2. Sauté onion, mushrooms, celery and
garlic for 2-3 minutes.
3. Carefully stir in rice, bouillon, pepper
and water.
4. Bring rice to boil and reduce heat to
Medium (275°F).
5. Cover and simmer for 12-14 minutes
or until rice is tender and liquid is
absorbed.
Tip: Use the Stainless Steel Steamer
Basket to steam your favorite
vegetables while preparing rice,
saving you time!
Spanish Rice
Serves: 6-8
¾ cup long-grain rice, uncooked
1 tablespoon olive oil
½ cup onion, nely chopped
½ cup green pepper, chopped
1 clove garlic, minced
1 teaspoon chili powder
1 (28-ounce) can diced tomatoes,
un-drained
1 (4 ounce) can diced green chili
peppers, drained
1 cup water
¼ teaspoon salt
1/8 teaspoon black pepper
1 tablespoon bottled hot pepper sauce
(optional)
½ cup shredded Cheddar cheese
(optional)
Directions:
1. In large skillet with lid, heat oil on
Medium-High (375°F).
2. Sauté onion, green pepper and garlic
for 2-3 minutes.
3. Add chili powder and cook for 1
minute.
4. Stir in tomatoes, rice, chili peppers,
water, salt, black pepper and hot
sauce.
5. Bring to boil.
6. Reduce heat to Medium-Low (175°F)
and let simmer, covered, for 20
minutes or until the rice is tender and
most liquid has been absorbed.
Popcorn Rice with Pecans
Serves: 6
1 tablespoon unsalted butter
1 teaspoon garlic, minced
1 cup popcorn rice
2½ cups water
½ teaspoon salt
1 cup pecans, chopped
Directions:
1. In medium saucepan, melt butter on
Medium-Low (175°F).
2. Add garlic and cook for 1 minute,
stirring occasionally.
3. Add rice and cook for 1 minute,
stirring constantly.
4. Add water and salt; bring to boil on
High (425°F).
5. Reduce heat to Medium-Low (175°F)
and cook, covered, for 18 minutes
until tender.
6. Let stand for 5 minutes and stir in
pecans.
Tip: You can buy popcorn rice at
specialty stores. If you can’t nd
popcorn rice, you can use basmati
as a substitute.
Page 22
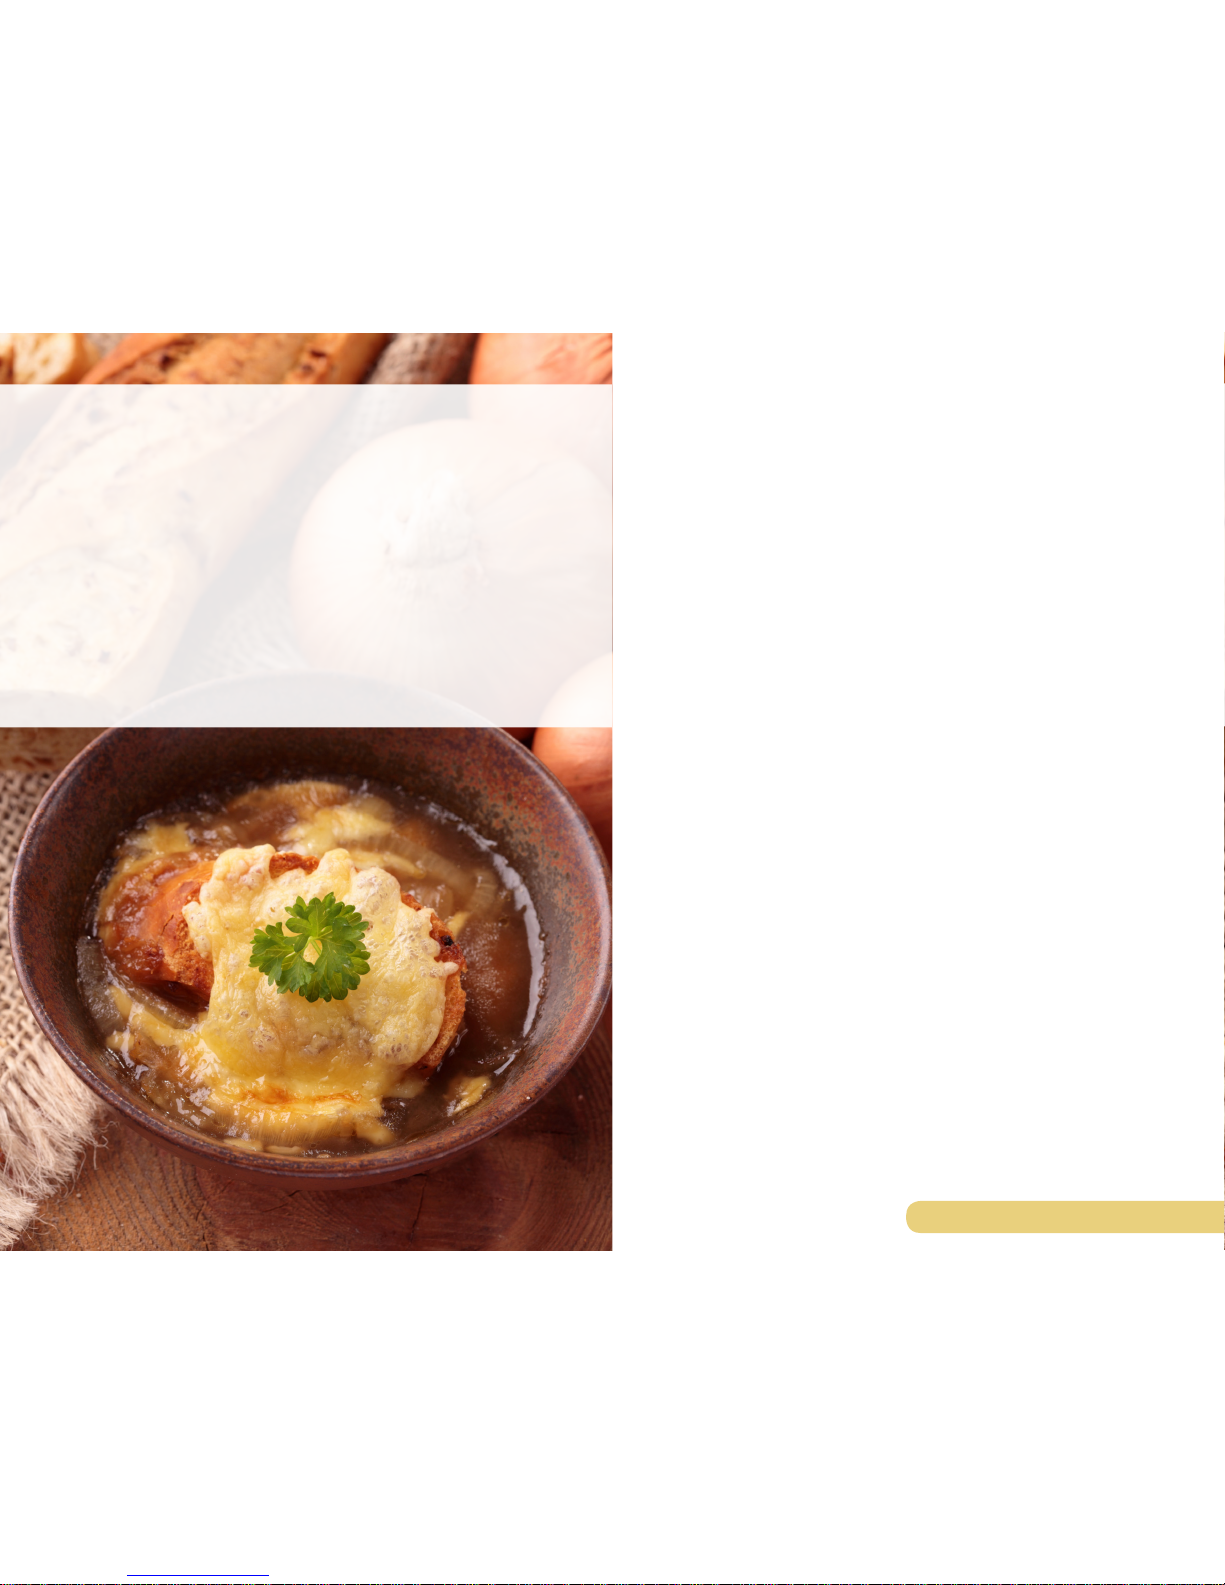
42 • NuWave™ PIC Gold Complete Cookbook
• 43
Stocks, Soups
& Sauces
Tips for Stocks, Soups & Sauces
• When preparing stocks, make
double batches and freeze for later
use.
• Freeze small amounts of prepared
stock in ice cube trays for quick
and easy seasonings.
• Over salted stocks, soups or
sauces? Add 1 teaspoon sugar
for every 2 liters of liquid. You
may also peel a white potato and
cut into chunks before adding to
liquid. Allow potato to cook for 10
minutes.
• Stocks should be brought to a boil
only once.
• Cloudy chicken stock? Add a froth
of three egg whites to hot soup and
let it form a raft. Skim raft for clear
soup.
• To remove fat, place soup or stock
in refrigerator. Fat will rise to the
top for easy extraction.
• Save vegetable scraps such as
carrot peels, celery stalks and
onions as ingredients for soup and
stew stock. Freeze until needed.
Chicken Stock
Yield: ½ gallon
3 pounds chicken bones
3 carrots, washed and cut into large
pieces
2 stalks celery with leaves, washed and
cut into large pieces
1 large onion, washed and cut into
large pieces
½ gallon and 1 cup water
½ teaspoon black peppercorns
4 sprigs celery
2 bay leaves
1 cheesecloth
1 twine
Directions:
1. Place washed chicken bones,
vegetables and water in large stock
pot.
2. In cheesecloth, place peppercorns
and herbs and tie with twine.
3. Tie cheesecloth to handle of stock
pot and let bouquet garni cook with
bones and vegetables.
4. Bring stock to boil on Max/Sear.
5. Turn NuWave™ PIC to Medium-Low
(175°F) and simmer for 2½ hours.
6. Strain stock through cheesecloth
and colander.
7. Cool in refrigerator. Once it solidies,
remove any remaining fat from top.)
Tip: Stock stays good for 3 days in
refrigerator or 6 months in freezer.
Tip: Bouquet garni is a French cooking
term, meaning a bunch of herbs
tied together in a bundle for
avoring a dish as it cooks.
Vegetable Stock
Yield: 7 cups
4 medium yellow onions, unpeeled
4 medium carrots
3 medium potatoes
2 medium parsnips, turnips or
rutabagas, cut
1 small head cabbage
8 cups water
½ teaspoon whole peppercorns
4 stems fresh parsley
4 bay leaves
½ teaspoon basil,
½ teaspoon marjoram
½ teaspoon rosemary
2 pieces cheesecloth
1 piece twine
Directions:
1. Wash all the vegetables and cut off
root and stem ends.
2. Cut all vegetables in one large,
rough chop.
3. Place vegetables in a large stock pot
and add water
4. Place peppercorns and herbs in
cheesecloth and tie into bundle to
make bouquet garni.
5. Tie bouquet garni to stock pot handle
for easy removal.
6. Bring to boil on Max/Sear.
7. Turn down to Medium- Low (175°F)
and let simmer for 1 hour.
8. Strain through colander, lined with
cheesecloth.
9. Store in refrigerator for 3 days or
freezer for up to 6 months.
Tip: Bouquet garni is a French cooking
term, meaning a bunch of herbs
tied together in a bundle for
avoring a dish as it cooks.
• Freeze stock in ice cube trays.
Once frozen, place in a heavy
freezer bag to store.
• 43
Stocks, Soups & Sauces
Page 23

44 • NuWave™ PIC Gold Complete Cookbook
• 45
• 45
Stocks, Soups & Sauces
Vegetable Beef Soup
Serves: 8
1½ pounds boneless beef chuck roast,
cubed
1 tablespoon olive oil
4 cups water
3 (10 ounce) can beef broth stock
1 teaspoon dried oregano, crushed
½ teaspoon dried marjoram, crushed
¼ teaspoon black pepper
2 bay leaves
2 cups tomatoes, chopped and peeled
1 (10-ounce) package frozen whole
kernel corn
1½ cups medium potatoes, peeled and
medium diced
1 cup frozen green beans
1 cup sliced carrots
1 cup sliced celery
½ cup onion, medium diced
Directions:
1. In large pot, heat oil on High (425°F).
2. In batches, brown meat on all sides,
making sure not to overcrowd pot.
Once browned, set aside and keep
warm.
3. Return meat to pot and stir in water,
beef stock, oregano, marjoram,
pepper and bay leaves.
4. Bring to boil on High (425°F).
5. Reduce heat to Medium-Low (175°F)
and let simmer for 1 hour, covered.
6. Discard bay leaves and skim fat if
necessary.
7. Stir in tomatoes, corn, potatoes,
green beans, carrots, celery, and
onion.
8. Return to boil on High (425°F).
9. Reduce heat to Medium (275°F)
and let simmer for 20 minutes, or
until vegetables are tender.
Beef Stock
Yield: 1 gallon
4 pounds meaty beef bones
1 cup tomato paste
3 carrots, washed and cut into large
pieces
2 stalks celery with leaves, washed
and cut into large pieces
1 large onion, washed and cut into
large pieces
1 gallon and 1½ cups cold water,
divided
10 whole peppercorns
8 sprigs fresh parsley
4 bay leaves
2 pieces cheesecloth
1 piece twine
Directions:
1. Place bones in large shallow
roasting pan.
2. Bake bones at 450°F for 30 minutes,
or until well browned and charred,
turning once.
3. Cover bone with tomato paste and
cook for additional 15 minutes, or until
paste chars.
4. Transfer bones to a large stock pot.
5. Add vegetables to roasting pan and
cook at 450°F for 15 minutes.
6. Transfer vegetables to stock pot.
7. Add ½ cup water to roasting pan and
scrape all brown bits off.
8. Pour liquid into the stock pot and add
remaining water.
9. In cheesecloth, place peppercorns
and herbs and tie with twine.
10. Tie cheesecloth to handle of stock
pot and let bouquet garni cook with
bones and vegetables.
11. Bring stock to boil on Max/Sear.
12. Turn NuWave™ PIC down to
Medium-Low (175°F) and let stock
simmer for 3½ hours covered.
13. Strain stock through strainer that
has been covered with cheesecloth.
14. Cool in refrigerator. Once it
solidies, remove any remaining fat
from top.
French Onion Soup
Serves: 4
2 tablespoons butter or margarine
2 cups yellow onion, thinly sliced
2 tablespoons our
4 cups beef stock or broth
¼ cup dry sherry
1 teaspoon Worcestershire sauce
½ teaspoon black pepper
6 slices French bread, toasted
1 cup shredded Swiss, Gruyere, or
Jarlsberg cheese
Directions:
1. In large saucepan, melt butter on
Medium (275°F).
2. Add onions and cook, covered, for
20 minutes or until onions are tender
and caramelized, stirring sparsely.
3. Dust onions with our and stir.
4. Bring temperature down to Medium Low (175°F) and heat for 6 minutes
to remove raw our taste.
5. Stir in broth, sherry, Worcestershire
sauce and pepper and bring to boil
6. Increase heat to Medium (275°F)
and let simmer for 10 minutes,
uncovered.
7. Meanwhile add cheese to bread and
broil for 1-2 minutes, or until the
cheese melts.
8. Serve onion soup with bread round
on top.
Tip: Instead of using a broiler, you can
toast bread using the NuWave®
Oven Pro or Elite. For the Pro,
cook on the 4-inch rack on Power
Level HI for 4 minutes per side. For
the Elite, cook on the 3-inch rack
on Power Level HI for 2 minutes
per side.
Creamy Cheddar Soup
Serves: 4
1 small onion, chopped
2 large pimentos, chopped
3 tablespoons butter
3 tablespoons all-purpose our
1½ cups chicken stock
1½ cups half-and–half
¾ cup grated sharp Cheddar cheese
Salt and pepper to taste
Dash cayenne pepper (optional)
Directions:
1. In saucepan, melt butter on Medium High (375°F).
2. Sauté onion and pimentos for 5-7
minutes.
3. Turn NuWave™ PIC down to
Medium (275°F) and add stock and
half and half.
4. Once heated, gradually add our and
cook for 2 minutes, or until raw our
taste has been removed.
5. Bring temperature down to Medium Low (175°F).
6. Add cheese and stir until melted.
7. Add salt, black pepper and cayenne
pepper to taste.
Page 24

46 • NuWave™ PIC Gold Complete Cookbook
• 47
• 47Stocks, Soups & Sauces
Chunky White Bean-Tomato
Soup
Serves: 4
4 slices bacon, cut into 1-inch pieces
1 medium onion, chopped
3 cups reduced-sodium chicken broth
2 (15-ounce) cans navy or great
Northern beans, drained and rinsed
1 (15- ounce) can diced tomatoes
½ teaspoon dried thyme
½ teaspoon cumin
1 teaspoon salt
½ teaspoon black pepper
Directions:
1. Heat large pot on Medium-High
(375°F) until hot.
2. Add bacon and cook for 5 minutes
or until it begins to brown, stirring
frequently.
3. Add onion and cook for 5 minutes or
until tender, stirring occasionally.
4. Remove any excess pan drippings.
5. Stir in remaining ingredients.
6. Turn NuWave™ PIC up to High
(425°F) and bring to boil.
7. Reduce to Medium-Low (175°F)
and simmer for 5-10 minutes to
blend avors.
8. With potato masher, mash beans
about 15 times to slightly thicken
soup.
Shrimp & Tofu Soup
Serves: 4
8 ounces raw shrimp, cleaned, peeled
and deveined
3½ cups shrimp or chicken stock
6 ounces mushrooms
¼ cup rice vinegar or white vinegar
½ tablespoon soy sauce
1 teaspoon sugar
1 teaspoon fresh ginger
½ teaspoon black pepper
8 ounces rm tofu, drained and cut into
bite-size pieces
1 tablespoons cornstarch
1 tablespoon cold water
½ cup frozen peas
½ cup shredded carrot
2 tablespoons green onion, thinly sliced
Directions
1. Thaw shrimp if frozen; set aside.
2. In large saucepan, combine chicken
broth, mushrooms, vinegar, soy
sauce, sugar, ginger, and pepper.
3. Bring to boil on High (425°F).
4. Once boil starts, reduce heat to
Medium-Low (175°F) and simmer for
2 minutes, covered.
5. Stir in shrimp and tofu.
6. Return mixture to boil on High
(425°F).
7. Once boil starts, reduce heat to
Medium-Low (175°F) and let simmer
for 3 minutes, or until shrimp turns
pink.
8. In separate container, stir together
cornstarch and cold water to make
slurry.
9. Stir slurry into soup and cook until
slightly thick.
10. Stir in peas, carrots and green
onions and cook for 2 minutes,
or until heat thoroughly.
Tip: Slurry is a cold liquid mixed with
cornstarch until smooth and glossy.
Roux
Yield: 3-4 tablespoons
3 tablespoons unsalted butter
3 tablespoons our
Directions:
1. In 3.5-quart all-purpose pot, melt
butter on Medium (275°F).
2. Add our in stages and mix with
wooden spoon.
3. Continue stirring until it forms a
slurry or clumps.
4. Cook roux for about 5 minutes to
remove starch and nutty aroma.
Tip: If you want a medium colored roux,
cook for 7-8 minutes. For a dark
roux, cook for 10-12 minutes.
• To make a sauce, add 1 cup
of warm milk or stock and whisk
until smooth. If too thick, add small
amounts of liquid.
• To make a cheese sauce, add
1 cup of grated cheese and 1
cup of warm milk or stock. Stir until
smooth.
Hollandaise Sauce
Yield: 1 cup
4 egg yolks
½ cup butter
½ teaspoons salt
½ teaspoon hot sauce
1 tablespoon Worcestershire sauce
Directions:
1. In 1.5-quart sauce pan, melt butter
at 220°F; set aside.
2. Blend egg yolks in 1.5-quart all
purpose stainless steel pot on Low
(100°F).
3. Whisk egg yolks rapidly. Be careful
not to let eggs get too hot, or else
they will begin to scramble.
4. Slowly drizzle in melted butter
and continue to whisk until sauce is
thickened and has doubled in
volume.
5. Remove sauce from heat and add
remaining ingredients.
6. Stir well until sauce cools a bit.
Tip: If the sauce curdles, beat in a little
heavy cream.
• If sauce gets too thick, whisk
with a few drops of warm water
before serving.
Page 25
48 • NuWave™ PIC Gold Complete Cookbook
• 49
• 49Stocks, Soups & Sauces
Marinara Sauce
Yield: 3 quarts
4 tablespoons olive oil
1 medium onion, diced
1 green pepper, diced
2 tablespoons garlic, minced
3 tablespoons fresh basil
1 tablespoon dried thyme
1 tablespoon dried oregano
2 (28-ounce) cans diced tomatoes
2 (29-ounce) cans tomato sauce
2 tablespoons sugar
1 teaspoon salt
½ teaspoon pepper
Directions:
1. Heat oil in large, heavy pot on
Medium (275°F).
2. Add onions, bell pepper and garlic
and cook until onion is translucent,
stirring occasionally.
3. Add herbs and continue to stir for 30
seconds, allowing oils to release.
4. Add diced tomatoes, tomato sauce,
sugar, salt and pepper.
5. Turn NuWave™ PIC up to Medium High (375°F) and bring to boil.
6. Reduce NuWave™ PIC to Medium Low (175°F) and let simmer for 30
minutes, stirring occasionally.
Tip: You can brown Italian sausage or
ground beef and add to sauce for a
great meat sauce.
Cheese Sauce
Yield: 1 ½ cups
3 tablespoons butter
3 tablespoons our
1 cup milk
½ teaspoon white pepper (optional)
½ teaspoon dry mustard (optional)
1 cup shredded cheese
Directions:
1. Melt butter in 3-quart saucepan on
Low (100°F).
2. Add our and stir with spatula to
make roux.
3. Change temperature to Medium Low (175°F) and cook our for about
5 minutes, or until starchy taste is
gone.
4. Stir in liquid until mixture thickens.
5. Add white pepper and mustard;
blend well.
6. Remove from heat and add cheese,
stirring until melted.
Tip: Exchange the milk for a cup of
chicken stock. It will pair better with
chicken dishes.
Basic White Sauce
Yield: 1 cup
3 tablespoons butter
3 tablespoons all-purpose our
1 cup milk
¼ teaspoon salt
¼ teaspoon white pepper
Directions:
1. Melt butter in 3-quart sauce pan on
Medium-Low (175°F).
2. Stir in our to make roux.
3. Cook on Medium-Low (175°F) for
5 minutes, stirring constantly. Do not
allow roux to brown.
4. In separate 2-quart sauce pan, heat
milk to boiling point on Medium-High
(375°F).
5. Stir milk into roux gradually, beating
briskly until sauce is thick and
smooth.
6. Simmer for 4 minutes, stirring
occasionally.
7. Season with salt and pepper.
Tip: Keep sauce warm before serving
by holding NuWave™ PIC on Low
(100°F).
Quick Brown Sauce
Yield: 1½ cups
3 tablespoon butter
3 tablespoons our
1½ cups beef stock or beef bouillon
½ teaspoon thyme
1 teaspoon fresh parsley
Salt and pepper to taste
Directions:
1. Melt butter in a heavy saucepan on
Medium-Low (175°F).
2. Increase temperature to Medium
(275°F) and gradually add our to
incorporate.
3. Reduce heat to Medium-Low (175°F)
and simmer for several minutes to
remove raw our taste.
4. In separate saucepan, heat beef
stock.
5. Gradually add beef stock to roux,
continuing to stir until sauce
thickens.
6. Add herbs, and simmer for 2-3
minutes.
7. Check sauce for seasoning and add
salt and pepper if needed.
Page 26
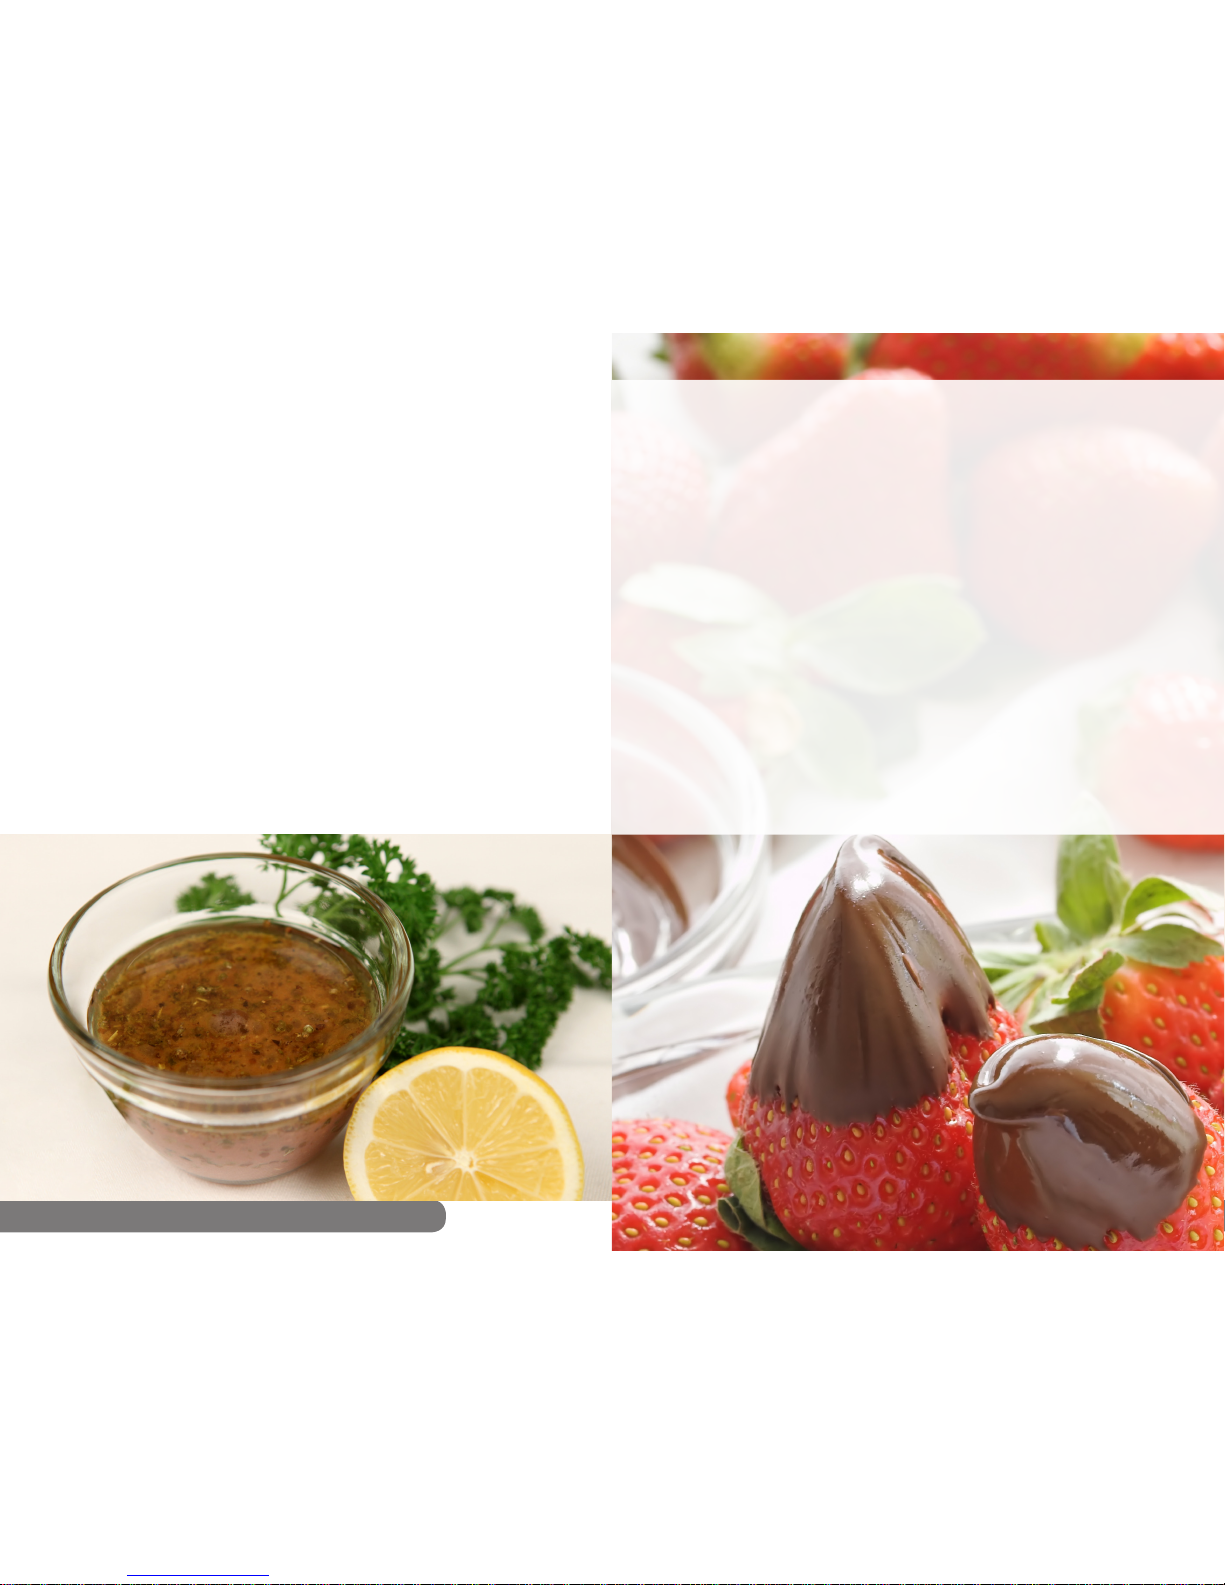
50 • NuWave™ PIC Gold Complete Cookbook
• 51
Mushroom Duxelle
Serves: 4
8 ounces sliced mushrooms
1 tablespoon olive oil
1 medium onion, sliced
2 cloves garlic, minced
¼ cup chopped Italian parsley
1 cup white wine
Salt and pepper to taste
Directions:
1. In sauté pan, heat the olive oil on
Medium-High (375°F).
2. Add the onions and sauté for 2
minutes.
3. Add mushrooms, garlic and parsley;
stir for 2 minutes, or until mushrooms
soften.
4. Add wine and cook until wine is
au sec or cooked into vegetables.
5. Season with salt and pepper.
Tip: This dish pairs perfectly with steak,
chicken and rice.
Mustard Marinade
Serves: 6-8
¼ cup olive oil
¼ cup white wine vinegar
1-2 garlic cloves, grated
1 teaspoon dried oregano, sage or
parsley
2 tablespoons Dijon mustard
Directions:
1. Combine all ingredients in medium
sauce pan.
2. Bring pan to slow boil on Medium High (375°F).
3. Turn NuWave™ PIC down to
Medium-Low (175°F) and let simmer
for 10 minutes, stirring occasionally.
4. Let marinade cool completely.
5. Pour over meat and refrigerate for 2
hours or over night.
• By setting the cooktop to “Low,”
you can keep prepared fondue
warm without the risk of scorching
or burning.
• Prepare all fondue food dippers
before melting fondue sauce.
• Remove cheese from refrigerator
and let it warm to room
temperature before melting on the
NuWave™ PIC. This also lessens
the amount of time the cheese will
be exposed to heat.
• Cheese is optimally melted on
Medium/Low (175°F), but can differ
depending on the type of cheese.
• The temperature at which
chocolate melts ranges between
110˚F -120°F. Once chocolate has
melted, reduce heat to 110°F to
Fondues
hold at the perfect temperature for
fondue dipping.
• If chocolate should become
separated, add warm heavy
whipping cream or 1 teaspoon
melted butter per 4 ounces of
chocolate, then stir to reintegrate.
• Water or any cold liquid should
never come into contact with
chocolate. It may harden and
become grainy.
• When using a double boiler, make
sure no steam or condensation
seeps into chocolate.
• Get creative when coming up with
ideas for dipping. Fruit, cakes,
fresh coconut, mini cream puffs,
mini donuts, and vanilla wafers are
all delicious, and there are many
more possibilities out there!
Tips for Fondues
Page 27

52 • NuWave™ PIC Gold Complete Cookbook
• 53• 53
Fondues
Chocolate Fondue
Serves: 4-6
12 ounces milk, semi-sweet
or sweet cooking chocolate
½ cup half-and-half
¼ teaspoon cinnamon
1 tablespoon vegetable oil
4 cups of assorted dippers
Directions:
1. Heat chocolate and half-and-half
in heavy saucepan on medium low (175°F), stirring constantly, until
chocolate is melted and smooth.
2. Set NuWave™ PIC to low (100°F)
and push “+” button twice.
3. Hold fondue at 120°F and add
cinnamon.
4. If the chocolate becomes too thick,
use vegetable oil to thin it out.
Cheddar Chipotle Fondue
Yield: 2-3 cups
2 cups shredded sharp Cheddar cheese
½ cup dry white wine
½ cup whipping cream
2 tablespoons Dijon mustard
1 tablespoon chipotle peppers in
adobo sauce, pureed
Directions:
1. Mix all ingredients in medium, heavy
bottom saucepan.
2. Cook on Medium–Low (175°F),
stirring constantly.
3. Serve in fondue pot over Low
(100°F) heat.
4. Serve with bread, meat or vegetables.
S’Mores Fondue
Yield: 4 cups
1½ cups milk
1 (12-ounce) bag semisweet
chocolate chips
1½ cups marshmallow crème
1 cup graham cracker crumbs
3 red apples, sliced
3 green apples, sliced
Directions:
1. Heat milk in saucepan on medium low (175°F) until just simmering.
2. Remove milk from heat.
3. Add chocolate chips and let stand
for 1 minute; stir until melted.
4. Whisk in marshmallow crème.
5. Pour mixture into fondue pot and
return to NuWave™ PIC on Low
(100°F) to keep warm.
6. Place graham cracker crumbs in
serving bowl.
7. Dip apple slices into warm chocolate
mixture then dip apples in graham
cracker crumbs.
Cheddar Cheese Fondue
Yield: 2 cups
¾ cup chicken broth (or ¾ cup water)
2 tablespoons Dijon mustard
1 tablespoon cornstarch
2 cups shredded Cheddar cheese
Directions:
1. In heavy saucepan, bring broth to
boil on High (425°F).
2. Once broth is boiling, reduce heat to
Medium (275°F).
3. In separate bowl, mix mustard and
cornstarch thoroughly.
4. Add mustard, cornstarch and cheese
to hot broth; stir with wire whisk until
well blended.
5. Cook for 10 minutes, or until cheese
is completely melted and mixture is
well blended, stirring constantly.
6. Pour cheese into fondue pot and
place on Low (100°F).
7. Serve with bell peppers, cauliower
orets, apple chunks, pretzels and
broccoli.
Shabu-Shabu
Serves: 4-6
6 cups vegetable stock
5 green onions, thinly sliced
1 tablespoon grated ginger
2 cloves garlic, crushed
1 whole red chili pepper, seeded and
thinly sliced
4 tablespoons soy sauce
6 cups assorted vegetables, cleaned
and cut
Salt and pepper to taste
Directions
1. In large pot, warm the vegetable
stock over Medium (275°F) heat.
2. Add chopped green onions, ginger,
garlic, and chili pepper, and bring to
boil on High (425°F).
3. Reduce heat to Medium-Low (175°F)
and let simmer for 30 minutes.
4. Arrange vegetables on plate and
keep refrigerated until fondue stock
is ready.
5. Strain and transfer stock to fondue
pot and keep on Medium-Low
(175°F) heat.
6. Dip vegetables using fork or skewer.
7. Serve with your favorite dip.
Tip: Shiitake mushrooms, green
onions, rm tofu, tomato wedges,
leafy dark green lettuce are ideal
vegetables to dip.
Tip: Change up the recipe by adding
beef, chicken, pork, lamb and
seafood.
Brie & Sun-dried Tomato
Fondue
Serves: 4
3 tablespoons dry packed sun-dried
tomatoes
8 ounces Brie cheese, trimmed of rind
and cubed
1 tablespoon cornstarch
1 tablespoon butter
1 shallot, minced
½ cup dry white wine
1 tablespoon granulated sugar
Directions:
1. Soak sun-dried tomatoes in boiling
water and cover for 10 minutes.
2. Drain tomatoes and pat dry.
3. Chop tomatoes into small pieces;
set aside.
4. In bowl, toss cubed Brie with
cornstarch until well coated;
set aside.
5. In large saucepan, melt butter over
Medium (275°F).
6. Add shallots and sauté until
softened.
7. Add wine and heat until just
simmering.
8. Reduce heat to Medium-Low
(175°F).
9. Add Brie mixture by handfuls to
saucepan, stirring constantly until
cheese is melted.
10. Stir in sun-dried tomatoes and
sugar; mix well.
11. Transfer to fondue pot and serve
immediately.
Page 28
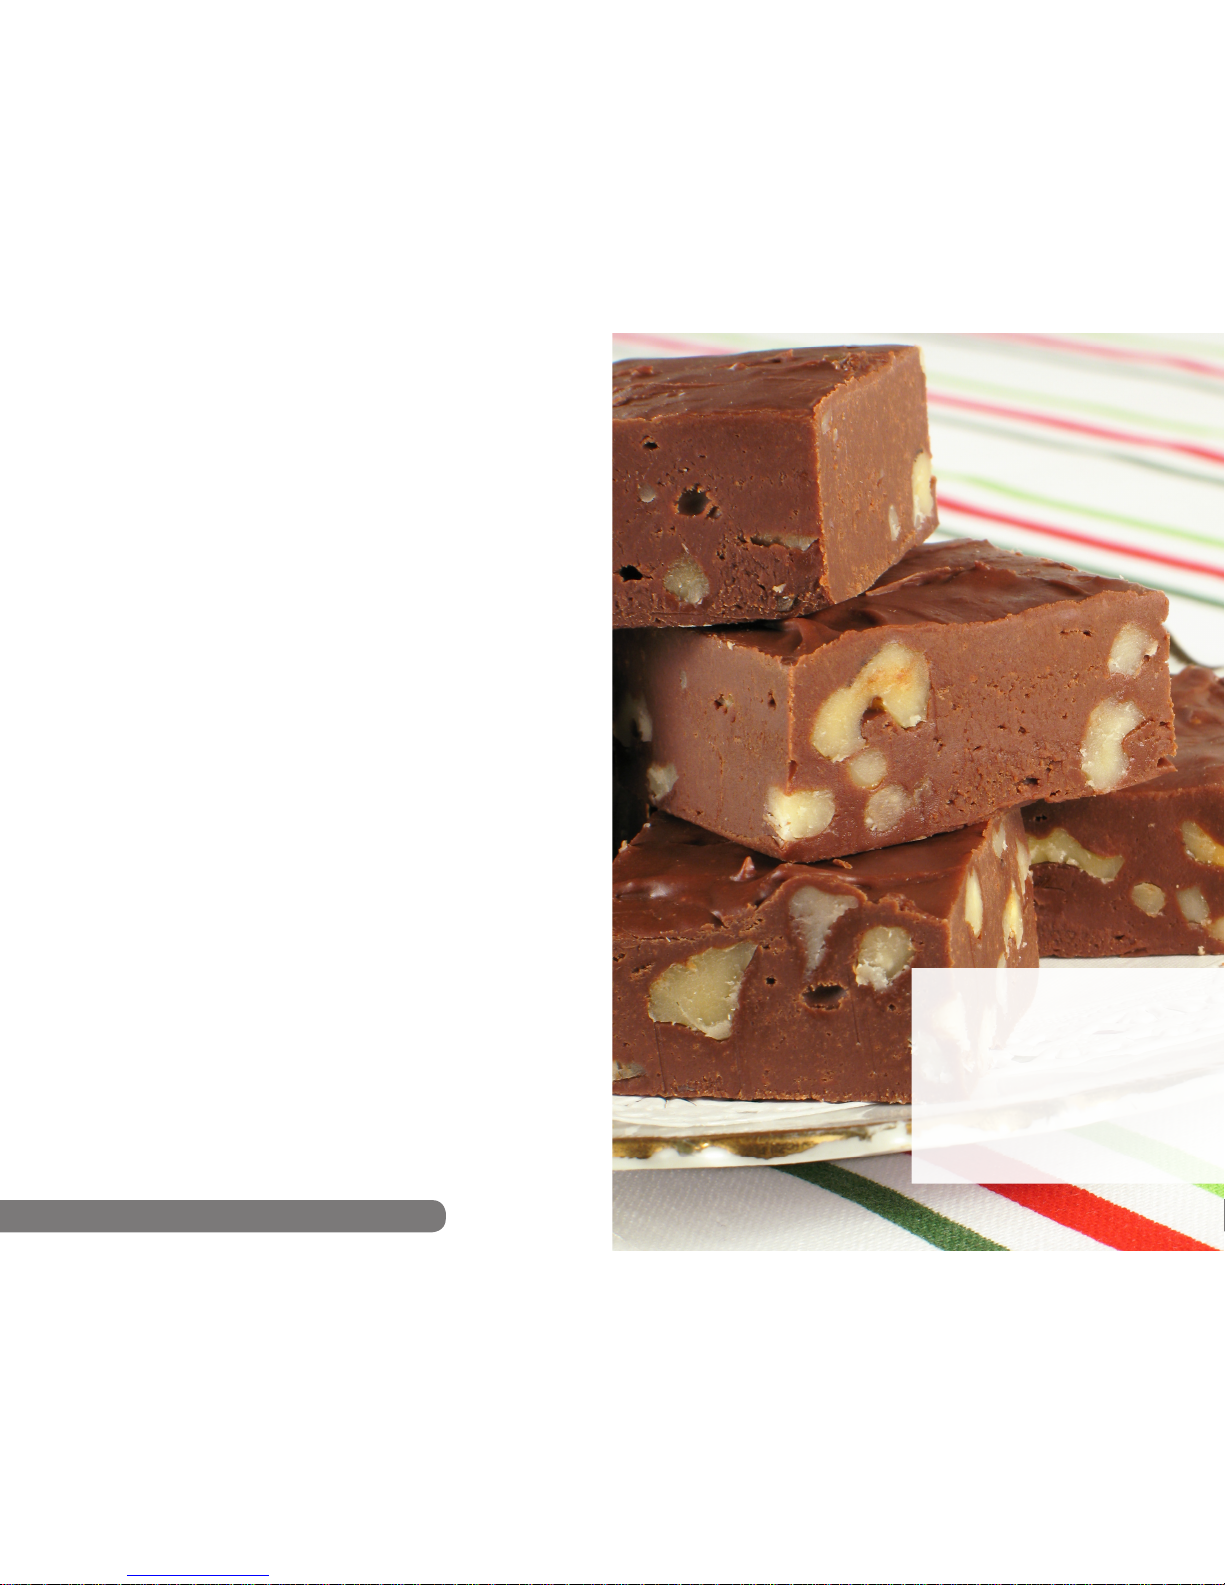
54 • NuWave™ PIC Gold Complete Cookbook
• 55
Chicken Fondue
Serves: 8
¼ cup Italian dressing
1 medium onion, small diced
2 cans chicken broth
½ cup apple juice
2 tablespoons corn starch
2 pounds boneless skinless chicken
breasts, cut into thin strips
3 cups assorted vegetables
1 cup mayonnaise
1 small garlic clove, nely chopped
1 tablespoon lemon juice
1 tablespoon Italian dressing mix
Directions:
1. Heat ¼ cup Italian dressing in
fondue pot over Medium-High
(375°F) heat.
2. Add onions and cook until crisp and
tender, stirring occasionally.
3. Add broth, apple juice, and
cornstarch; stir until well blended.
4. Bring mixture to boil over High
(425°F).
5. Turn heat down to Medium-High
(375°F).
6. Using long-handled fork or skewer,
dip chicken and vegetables, in
batches, into boiling broth mixture.
7. Cook chicken for 3 minutes and cook
vegetables for 1-2 minutes.
8. Mix mayonnaise, garlic, lemon juice
and Italian dressing mix to make
sauce.
9. Remove chicken and vegetables
from pot and dip in sauce.
Beef Fondue
Serves: 6-8
3 pounds boneless beef sirloin or
tenderloin
Cooking oil (canola, olive oil, or
vegetable)
½ pint low fat sour cream
½ cup low fat mayonnaise
¼ cup prepared mustard
1 tablespoon fresh horseradish
1 tablespoon nely chopped onion
Directions:
1. Trim any fat from meat and cut into
bite-size cubes.
2. Keep beef refrigerated until 20
minutes before cooking.
3. Fill fondue pot halfway with cooking
oil.
4. Heat oil to 375°F over Medium-High
heat.
5. While oil is heating, mix sour cream,
mayonnaise, mustard, horseradish
and onion to make sauce.
6. Place meat on spears or skewers
and place in hot oil for 1-3 minutes,
depending on desired doneness.
7. Dip beef into prepared sauce.
Desserts
Tips for Desserts
• Water should never come into contact
with chocolate. It may harden and
become grainy.
• Need buttermilk? Add 1 tablespoon of
white vinegar to 8 ounces of milk and stir.
• 1 square of baker’s chocolate = 1 ounce.
Page 29

56 • NuWave™ PIC Gold Complete Cookbook
• 57• 57
Desserts
Simple Fudge
Yield: 2 pounds
1½ cups sugar
1 (5-ounce) can evaporated milk
½ cup butter
2 cups small marshmallows
1 cup semi-sweet chocolate pieces
½ cup walnuts (optional)
½ teaspoon vanilla
Directions:
1. Line 8x8x2-inch baking pan with foil,
extending foil over edges.
2. Butter foil; set pan aside.
3. Butter sides of 2-quart heavy
saucepan.
4. In saucepan, combine sugar,
evaporated milk, and butter.
5. Cook and stir on Medium-High
(375°F) for 10 minutes until mixture
boils.
6. Reduce heat to Medium (275°F) and
cook for additional 6 minutes, stirring
constantly.
7. Remove saucepan from heat.
8. Add marshmallows and chocolate;
melt until mixture is combined.
9. Beat by hand for 1 minute.
10. Spread fudge evenly in prepared
pan.
11. Cover and chill for 2-3 hours or until
rm.
12. When fudge is rm, use foil to lift
fudge from pan.
13. Cut into squares.
14. Store tightly covered in refrigerator
for up to 1 month.
Classic Cherries Jubilee
Serves: 6
½ cup white sugar
2 tablespoons cornstarch
¼ cup water
¼ cup orange juice
1 pound Bing or other dark, sweet
cherries, rinsed and pitted (you may
substitute frozen, pitted cherries)
½ teaspoon nely grated orange zest
½ teaspoon vanilla extract
¼ cup brandy
3 cups vanilla ice cream
Directions:
1. Whisk sugar and cornstarch in a
wide saucepan.
2. Stir in water and orange juice,
bringing to boil on Medium (275°F),
whisking until thickened.
3. Stir in cherries and orange zest,
returning to boil before reducing
heat.
4. Simmer for 10 minutes.
5. While cherries are cooking, spoon
ice cream into serving bowls.
6. Remove cherries from heat and stir
in cherry extract.
7. Pour in brandy and ignite with a long
lighter.
8. Gently shake pan until blue ame
has extinguished itself.
9. Spoon cherries atop ice cream.
Peanut Brittle
Yield: 2 pounds
2 cups raw peanuts
1 ½ cups sugar
2/3 cup Karo syrup, light
2 teaspoons baking soda
1 teaspoon vanilla
Directions:
1. Place NuWave™ Silicone Pizza
Liner on baking sheet pan or use
buttered 9x13-inch baking dish;
set aside.
2. In 10.5-inch fry pan, cook peanuts,
syrup, and sugar on Medium (275°F)
until candy thermometer reaches
296°F (147°C).
3. Remove from heat.
4. Stir in baking soda and vanilla.
5. Spread evenly in prepared pan to
cool.
6. Once cool, break into desired pieces.
Chocolate Caramel Turtles
Yield: 35 turtles
1 (16-ounce) package caramels
2 tablespoons water
¾ pound pecan halves
1 (6-ounce) package semi-sweet
chocolate chips
Directions:
1. Melt caramels and water in heavy
bottom saucepan on Medium-Low
(275°F), stirring until melted.
2. Arrange pecans in 36 groups 2
inches apart on greased cookie
sheet or parchment paper.
3. Drop melted caramel by teaspoon
onto nuts and let cool.
4. Melt chocolate chips and drizzle
enough over nuts to coat caramel.
5. Let cool for 30 minutes.
6. Transfer to air-tight container and
store in refrigerator for up to 1 month.
Bananas Foster
Serves: 6
6 rm, ripe bananas, peeled and sliced
in half lengthwise
6 scoops vanilla ice cream
1 stick butter
¾ cup brown sugar
¾ cup rum
Dash cinnamon
Directions
1. In large fry pan, melt brown
sugar and butter on Medium (275°F).
2. Add bananas and roll in brown sugar
and butter mixture.
3. Sprinkle bananas with cinnamon
and sauté for about 2 minutes or
until tender.
4. Add rum, wait a few seconds, then
ambé.
5. Baste bananas until ame dies.
6. Remove from heat.
7. Place two slices over ice cream and
spoon sauce on top.
8. Serve immediately.
Tip: Peanuts will start to pop when
ready.
Page 30
58 • NuWave™ PIC Gold Complete Cookbook
• 59• 59
Desserts
Candy Suckers
Yield: 18 suckers
18 sucker sticks
¼ stick butter
½ ounce light corn syrup
¾ ounce sugar
Few drops food coloring
Candy Decoration (optional)
Directions:
1. Lightly butter baking sheet and
arrange lollipop sticks on baking
sheet.
2. Combine butter, corn syrup, and
sugar in heavy 1-quart saucepan.
3. Bring to boil on Medium-High
(375°F), stirring occasionally.
4. Reduce heat to Medium (275°F) and
continue cooking, stirring frequently
until mixture reaches 270°F internal
temperature.
5. Stir in food coloring.
6. Drop mixture by tablespoonfuls over
each lollipop stick at ends.
7. If desired, while lollipops are hot,
press on candy decorations.
8. To decorate when cooled, crush
candy decoration undersides with
corn syrup and press onto lollipops.
9. Cool lollipops thoroughly before
removing from baking sheet.
Pears in White Wine
Caramel Sauce
Serves: 4
2 pounds ripe pears
2 cups dry white wine
1 cup white sugar
Directions:
1. Peel pears and cut them lengthwise
into 8 wedges.
2. Using small knife, remove pear
seeds.
3. Place pears in large shallow serving
dish and pour wine over pears.
4. Let marinate for 30 minutes at room
temperature.
5. Place sugar in large heavy non-stick
skillet on Medium (275°F), stirring
often.
6. Cook for 15 minutes until sugar
melts into completely into caramel
sauce.
7. Pour caramel sauce over pears to
cover completely.
8. Cover and refrigerate for at least 3
hours.
9. Using slotted spoon, place pears
onto platter. Reserve liquid.
10. Place marinating liquid in small
saucepan and reduce same sauce
on Medium-High (375°F) to ¾ cup.
11. Drizzle warm sauce over pears and
serve.
Panna Cotta with Amber
Crystals
Serves: 4
1¾ cups heavy cream
7½ tablespoons sugar, divided
3 tablespoons cold water
1½ teaspoons powdered gelatin
Directions:
1. Place cream and 3½ tablespoons
sugar in medium saucepan.
2. Cook mixture on Medium-Low
(175°F) for 3-4 minutes or until sugar
is completely dissolved.
3. Place cold water in cup and sprinkle
gelatin over water; let sit for 1
minute.
4. Add dissolved gelatin to warm cream
mixture and beat well.
5. Cook on Medium-Low (175°F) for 2
minutes, stirring constantly.
6. Divide mixture evenly into 4 or
5-ounce ramekins.
7. Refrigerate for 2 hours.
8. To make crystals, place 4
tablespoons sugar in small non-stick
skillet.
9. Cook on Medium-High (375°F) until
sugar dissolves into smooth
caramel-colored liquid. Stir with
wooden spoon to prevent lumps.
10. Place 2 layers wax paper on at
surface.
11. Using long-handled spoon, drizzle
hot caramel on wax paper in thin
lines.
12. Once caramel hardens, place
another wax paper piece on top
and, using rolling pin, crush into
crystals.
13. Sprinkle crystals over Panna Cotta.
Old Fashioned Hard Candy
Yield: 1½ pounds
2 cups white sugar
1 cup water
¾ cup light corn syrup
½ teaspoon peppermint extract
1 drop red food coloring (optional)
1/8 cup confectioners’ sugar
Directions:
1. In heavy 2-quart saucepan, combine
sugar, water and corn syrup.
2. Cook until sugar dissolves, stirring
constantly.
3. Then, cook without stirring at 300°F
for several minutes. If sugar crystals
form on sides of pan, wipe them off
with damp brush.
4. Remove from heat and add oil
avoring and enough food coloring
to color; stir only to mix.
5. Pour into 2 well-buttered 9-inch
pans.
6. Set one pan over sauce pan
containing hot water.
7. As soon as other pan is cool enough
to handle, cut it with scissors into
1-inch strips, then snip strips into
pieces.
8. Drop the pieces onto buttered baking
sheet.
9. Toss in small amount of powdered
sugar to keep from sticking together.
10. Repeat with the second pan of
candy.
Page 31
60 • NuWave™ PIC Gold Complete Cookbook
• 61
NuWave
™
PIC Gold Manual Del Usario
PRECISION INDUCTION COOKTOP GOLD
™
¿Qué es la Cocina por Inducción?
Bienvenido a la Cocina del
NuWave™ Precision Induction
Felicidades por la compra de su NuWave™ PIC Gold. Este libro contiene
instrucciones detalladas e imágenes que le ayudarán a empezar a utilizar su
Cooktop. También está lleno de grandiosas recetas y consejos para ahorrar tiempo,
los cuales le ayudarán a preparar deliciosas comidas gourmet en fracciones
de tiempo de lo que le tomaría utilizando una estufa regular. Cocinar es rápido
y fácil con el Precision Induction Cooktop Gold de NuWave, LLC. Este versátil
electrodoméstico de barra utiliza la tecnología de inducción para ahorrar tiempo,
energía y dinero. El NuWave™ Precision Induction Cooktop es eciente, seguro,
rápido y fácil de limpiar. Y, ya que puede programar los tiempos y las temperaturas
desde tibio hasta abrasador, usted preparará casi cualquier platillo sin el riesgo de
cocinarlo de más o de menos.
El NuWave™ PIC Gold está compuesto por una serie de bobinas de inducción
(basada en principios magnéticos). Estas bobinas generan campos magnéticos
que inducen una reacción cálida en las cacerolas y sartenes de acero o base de
erro. De esta manera el calor es generado en los utensilios y no en la supercie
del cooktop, lo cual es mucho más eciente en energía que las estufas tradicionales
de gas o eléctricas. La cocina por inducción es la forma más ecológica de preparar
alimentos porque este método no libera toxinas en el ambiente. La inducción no
emite ama alguna, así que se produce menos calor residual en su cocina. El
NuWave™ Precision Induction Cooktop permanece frío al tocarlo donde la supercie
magnética no es activada.
Benecios Adicionales:
• Conservación de Energía: Ahora usted puede vivir bien por menos con el
NuWave™ Precision Induction Cooktop Gold. El NuWave™ PIC Gold utiliza
tecnología de inducción. El secreto está en una serie interna de bobinas de
cobre. Estas bobinas generan un campo magnético dentro de sus cacerolas
y sartenes. El campo magnético produce moléculas invisibles que comienzan
a vibrar rápidamente, creando así el calor para que los recipientes por sí
solos calienten los alimentos. El NuWave™ PIC Gold es uno de los cooktops
más ecientes en energía que se encuentran disponibles hoy en día, lo que
signica que cocinar con él resultará en ahorros en sus recibos mensuales de
electricidad.
• Seguridad: El diseño del NuWave™ PIC Gold no requiere de bobinas o amas
abiertas, eliminando así el riesgo de incendio. Sus características de apagado
automático aumentan la seguridad del aparato. Solamente prográmelo y
olvídese de él. Los usuarios también pueden hacer el reto del cubo de hielo. La
tecnología de inducción calienta el sartén, pero la supercie del NuWave™ PIC
permanece fría al tocarla.
• Cocine Rápido: Calienta inmediatamente y la temperatura es precisa en el
NuWave™ PIC Gold. Cuenta con 6 ajustes de temperatura diferentes que se
regulan en incrementos de 10°. ¡No tendrá que adivinar!
• Ligero y Portátil: Porque pesa sólo 5.4 libras, usted puede llevar el NuWave™
PIC Gold a donde sea que vaya. Utilícelo en interiores o exteriores- en cualquier
lugar donde haya un contacto eléctrico estándar (E.U.A.)
• Fácil de Limpiar: Los derrames no se quemaran y pegarán en la supercie del
cooktop. ¡Sólo límpielo y listo!
Manual Del Usario
• 61
Page 32

62 • NuWave™ PIC Gold Complete Cookbook
• 63
Para ordenar partes y accesorios llame a nuestro número de servicio al cliente al
1-855-742-2665 de Lunes a Viernes de 8:00 AM a 4:30 PM CST.
Usted también puede ordenar en línea en: www.NuWaveNow.com.
Por favor proporcione el nombre correcto del artículo y el número de unidades para asegurarse de
que su compra sea procesada correctamente.
NuWave™ Precision Induction Cooktop Gold
Productos y Accesorios
IMPORTANTES MEDIDAS DE
SEGURIDAD
Manual Del Usario
• 63
(31201) NuWave™ Precision Olla Express
(32061) Manual de la NuWave™ Precision Olla Express
Juego de Sartenes para Freir NuWave™ Duralon™2 de Cerámica Antiadherente:
NuWave™ Precision Olla Express:
Cuando utilice aparatos eléctricos siempre se deben tomar precauciones básicas de
seguridad, incluyendo las siguientes:
LEA TODAS LAS INSTRUCCIONES
ANTES DE USARSE
PELIGRO – Para reducir el riesgo de electrocución:
1. Lea todas las instrucciones, medidas de seguridad y advertencias antes de
utilizar el electrodoméstico.
2. No coloque el aparato donde se pueda caer o sumergir en agua u otros líquidos.
3. No trate de sacarlo si se ha sumergido en agua. Desconéctelo inmediatamente.
4. No sumerja el cable, la clavija o la fuente de potencia en agua u otros líquidos.
ADVERTENCIA – Para personas con marcapasos:
1. Este aparato emite un campo electromagnético que es muy fuerte dentro de dos
pies de la supercie del mismo.
2. Pruebas cientícas han comprobado una indenición de si el campo eléctrico
afectará la función de un marcapasos. Por favor consulte a su médico antes de
usarse.
ADVERTENCIA – Para reducir el riesgo de quemaduras, electrocución,
incendio y lesiones:
1. Este aparato incluye una función de calentamiento. Las supercies pueden
alcanzar temperaturas altas. No toque las supercies calientes. El aparato
puede conservar calor residual después de retirar el recipiente. El uso de
agarradores u otras medidas de seguridad son altamente recomendables.
2. Este electrodoméstico no deberá ser utilizado por niños. Tenga más cuidado
cuando utilice el producto cerca de niños.
3. No lo coloque sobre o cerca de parrillas de gas o eléctricas, o dentro de un
horno caliente.
4. No coloque en la supercie objetos metálicos como cuchillos, tenedores,
cucharas o tapas ya que se pueden calentar.
5. Este aparato no está diseñado para uso comercial.
6. Utilice este electrodoméstico para el propósito para el que está diseñado
como se describe en este manual. No utilice otros accesorios o aditamentos
no recomendados por el fabricante, ya que ello podría provocar un incendio, una
descarga eléctrica o lesiones personales.
7. Nunca utilice este electrodoméstico si tiene el cable o la clavija dañados, si no
funciona adecuadamente, si se cayó o ha sido dañado, o si se ha sumergido en
agua. Contacte a servicio al cliente para su revisión, reparación o ajuste.
8. No utilice un aparato roto. En caso de una ruptura, los limpiadores o derrames
pueden penetrar el aparato creando el riesgo de una descarga eléctrica.
9. Mantenga el cable lejos de supercies calientes. No deje el cable colgando
de las orillas de mesas o barras. Nunca forcé la clavija en un contacto. Siempre
desconecte jalando la clavija. Apague el aparato antes de desconectarlo del
contacto.
10. No lo utilice donde se estén usando productos aerosoles, así como en lugares
donde el oxígeno sea reducido.
11. Utilice un juicio apropiado y cuidado cuando utilice el aparato al aire libre
o espacios públicos. Este aparato nunca deberá ser puesto donde haya
niños sin cuidar o alguien que no sepa de su presencia. Debe ser colocado
en una supercie plana y estable, lejos de fuentes de agua como albercas,
NuWave™ Precision Induction Cooktop:
(30201) NuWave™ PIC Gold
(32141) Manual / Recetario
(32144) DVD Instructivo
(32145) Ficha Técnica
NuWave™ Último en Sets de Utensilios:
(32003) Olla de Acero Inoxidable de 3.5-quart
(32004) Tapa para Olla de 3.5-quart
(32005) Vaporera de Acero Inoxidable
Parrilla de Hierro Fundido NuWave™:
(32023) Parrilla de Hierro Fundido
(32022) Charola para Escurrir la Grasa
(32056) Manual de la Parrilla de Hierro Fundido
Tapas de Vidrio (Opcional):
Tapas de Vidrio (Opcional):
Tapas de Vidrio (Opcional):
Sartén de Aluminio Anodizado Duro:
9-inch
10.5-inch
12-inch
9-inch
10.5-inch
12-inch
(32109)
(32110)
(32114)
Copper
Copper
Copper
Copper
Gold
Gold
Gold
(32119)
(32120)
(32124)
(32309)
(32310)
(32311)
(32012)
(32004)
(32014)
Ollas & Cacerolas:
Everyday Sartén: Cacerola de la Parrilla de Acero Inoxidable:
Tapas de Vidrio (Opcional):
1.5-quart
2.0-quart
3.0-quart
5.5-quart
9.0-quart
10-piece Set
12-inch 11-inch
1.5-quart
2.0-quart
3.0-quart
5.5-quart
9.0-quart
(32031)
(32032)
(32033)
(32039)
(32034)
(31250)
(32018) (32024)
(32036)
(32037)
(32038)
(32040)
(32004)
Sartén para Freir de Acero Inoxidable:
Plus Sartén para Freir de Acero Inoxidable:
9-inch
10.5-inch
12-inch
9-inch
10.5-inch
11.5-inch
9-inch
10.5-inch
12-inch
9-inch
10.5-inch
11.5-inch
(32015)
(32016)
(32017)
(32009)
(32010)
(32011)
(32331)
(32332)
(32333)
(32339)
(32334)
(31350)
(32012)
(32004)
(32014)
(32012)
(32004)
(32013)
(31113) Plancha de Hierro Fundido
(32060) Manual de la Plancha de Hierro Fundido
(32100) Manual de NuWave™ Duralon™2 de Ceramica Antiadherente
(32157) Guía Rápida
(32158) Tarjeta de Registro
(31111) Estuche Portátil a la Medida
(32007) Inserto para Fondue
(32008) Juego de 8 Tenedores para Fondue
(32055) Manual de lo Último en Sets de Utensilios
Page 33
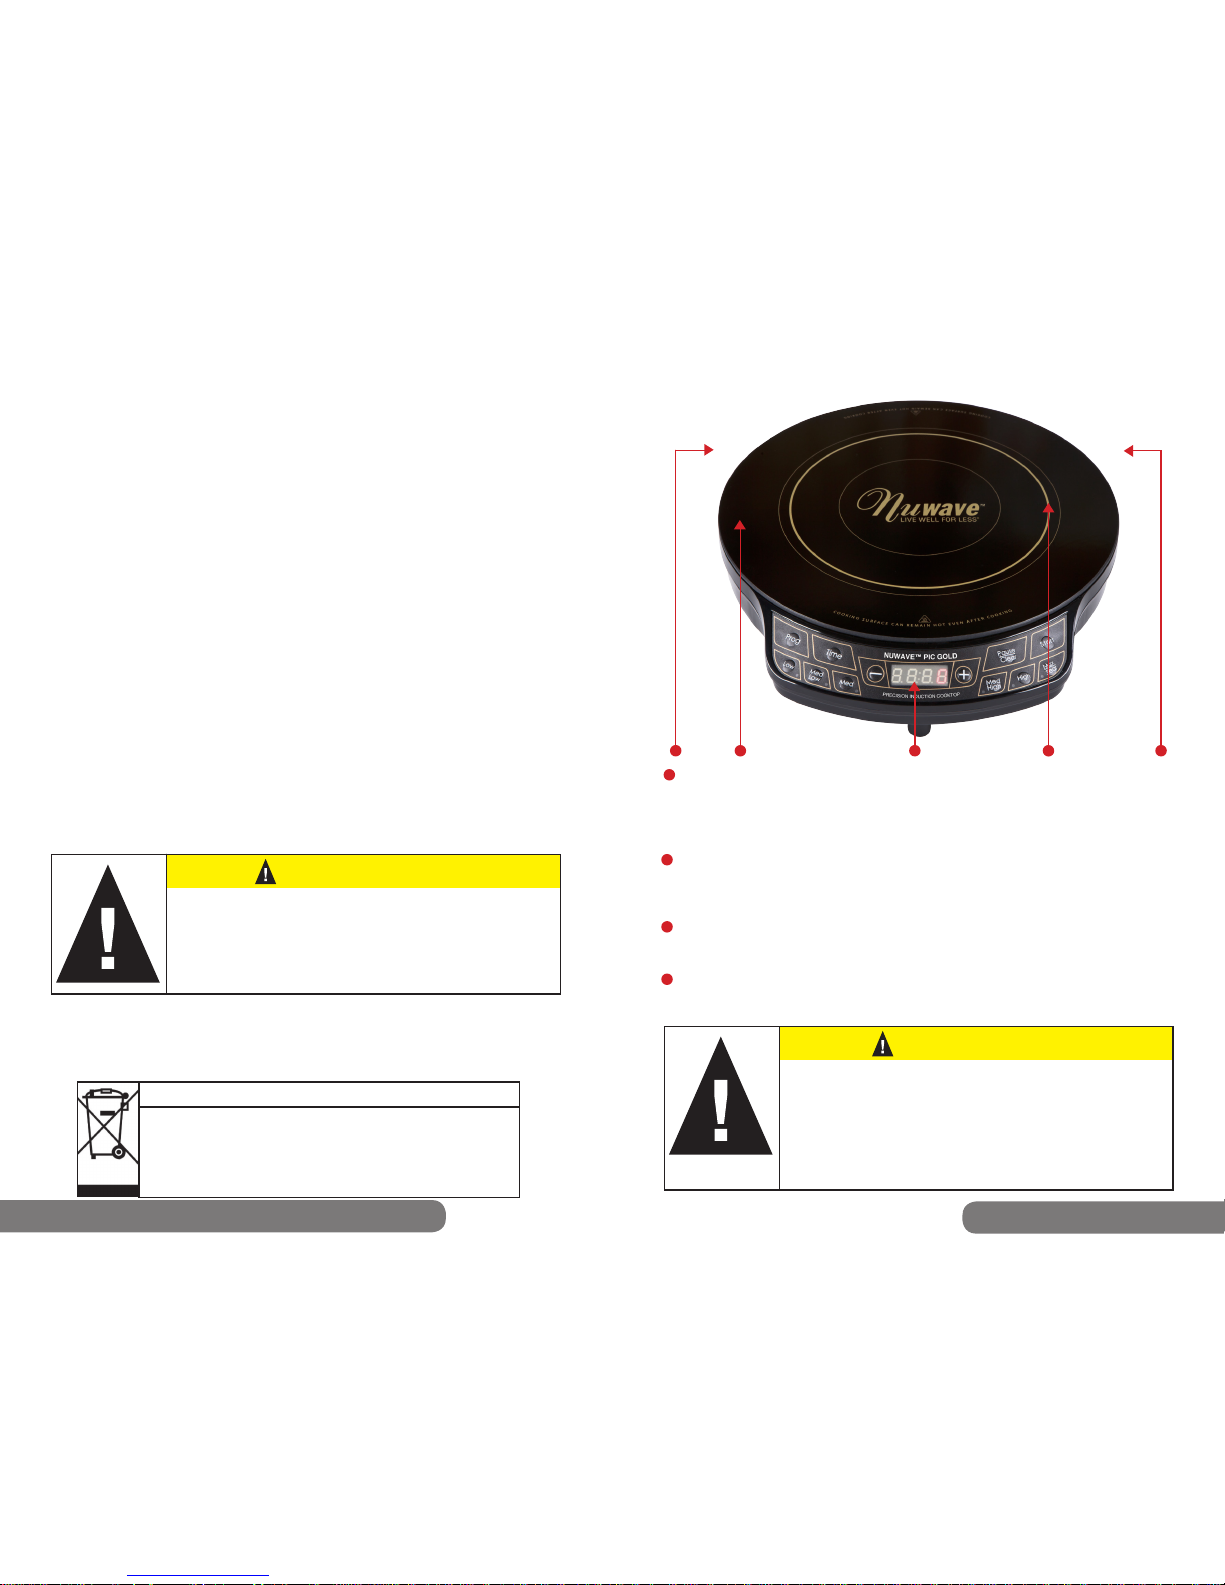
64 • NuWave™ PIC Gold Complete Cookbook
• 65
ADVERTENCIA
IMPORTANT – Información de la FCC:
Advertencia: Los cambios y modicaciones a esta unidad que no sean aprobados
explícitamente por la parte responsable podrían invalidar la autoridad del usuario para
operar el equipo.
Nota: El equipo cumple con la parte 18 del Reglamento FCC.
ADVERTENCIA: TTodos los productos en el aparato se pueden calentar
mucho durante el uso. Por favor tenga cuidado cuando retire esos artículos
de la unidad. Siempre utilice guantes para hornear o agarraderas. El
aparato puede conservar calor residual después de retirar el recipiente.
Permita que todo se enfríe completamente antes de limpiar.
Riesgo de descarga eléctrica. Úsese con un sistema eléctrico
adecuado. No se use si el cable o la clavija están dañados.
Desecho Correcto del Producto
Esta marca indica que este producto no debe desecharse junto con otros residuos
domésticos en los EUA. Para prevenir posibles daños al medio ambiente o la salud
por parte de residuos descontrolados, recíclelo responsablemente para fomentar
la reutilización sustentable de recursos materiales. Para devolver su aparato usado
por favor utilice sistemas de recolección y devolución o contacte al detallista donde
el producto fue comprado. Ellos pueden encargarse del reciclado seguro para el
medio ambiente.
Cocinando con el NuWave™ Precision Induction
Ventilación: Los respiraderos están localizados en la parte trasera del producto
para permitir escapar el calor generado por cualquier elemento caliente. Esta
característica del diseño impide que el calor se transera a la supercie para
cocinar, asegurando un desempeño eciente del NuWave™ PIC Gold.
Supercie: La supercie de vidrio resistente al calor del NuWave™ PIC Gold
se mantiene fría al tacto y se limpia fácilmente con un simple trapo o paño
húmedo.
Panel de Control con Display LED: Panel de control claro, luminoso y fácil de
leer.
Supercie Caliente: Las bobinas electro magnéticas localizadas debajo de la
supercie de vidrio transeren el calor generado directamente al utensilio de
inducción.
1
2
3
4
PRECAUCIÓN
Mientras el NuWave™ PIC Gold esté funcionando no toque
la supercie del aparato ya que puede calentarse mucho y
haber riesgo de quemaduras. El cooktop puede conservar
calor residual después de retirar los utensilios.
No quite las cacerolas o sartenes durante el proceso de
cocinado. Oprima el botón “Pause/Clear” para apagar antes
de retirarlos.
1
4
3 1
2
Manual Del Usario
• 65
spas, rociadores, mangueras, etc.
12. No mueva el aparato mientras esté caliente.
13 Este electrodoméstico es para uso doméstico únicamente; está diseñado
para procesar cantidades normales de una casa. No es conveniente para un
uso continuo u operación comercial.
14. No desarme el producto. Las partes no sirven por sí solas.
15. No deje el electrodoméstico desatendido si está en uso.
16. Este aparato no está diseñado para utilizarse por medio de un contador
externo o un sistema de control remoto por separado.
17. Limpie el aparato con precaución. Al limpiar una supercie caliente con
aplicaciones húmedas se puede provocar vapor y algunos limpiadores
pueden producir humo peligroso. Desconecte del contacto antes de limpiar.
18. Tome precaución cuando deseche el aceite caliente.
19. Mantenga este manual a la mano para una referencia en el futuro.
Información Eléctrica
• El largo del cable de este electrodoméstico fue seleccionado para reducir
los Riesgos de Seguridad que puedan ocurrir con un cable largo. Existen
cables de extensión disponibles, los cuales pueden ser utilizados si esto se
hace con cuidado. Si un cable de extensión es utilizado: (1) la clasicación
eléctrica marcada deberá ser al menos tan grande como la del aparato y (2)
el cable más largo deberá ser arreglado para que no se doble sobre la mesa
o barra donde podría ser accidentalmente jalado o tropezarse.
• Ciertos modelos de electrodomésticos pueden tener una clavija polarizada
(una cuchilla es más gruesa que la otra). Esta clavija está diseñada para ser
usada en una entrada polarizada de una sola forma. Si la clavija no entra
completamente en el contacto, voltéela. Si aún así no cabe apropiadamente,
contacte a un electricista calicado. No intente modicar la clavija de
ninguna manera.
GUARDE ESTAS INSTRUCCIONES
Page 34

66 • NuWave™ PIC Gold Complete Cookbook
• 67Manual Del Usario
• 67
Recipientes Compatibles con el Induction Cooktop:
ATENCIÓN:
La supercie térmica está localizada dentro del anillo oro mayor. Puede usar
recipientes que midan hasta el ancho total del NuWave™ PIC Gold, el cual es de
12.3 pulgadas; sin embargo, en estos casos el calor traspasará más lentamente
a las orillas. No utilice recipientes que midan más de 12.3 pulgadas.
Ejemplos de recipientes compatibles:
• Todos los recipientes NuWave™ • Hierro fundido
• Sartenes para Freir NuWave™ Duralon™2 de Cerámica Antiadherente
• Hierro y acero esmaltados • Acero inoxidable con base magnética
Recipientes no compatibles con la inducción:
• Cobre • Vidrio • Aluminio • Recipientes tipo cerámica
¿Cómo puedo comprobar la compatibilidad de mis recipientes con la inducción?
Existen tres sencillas formas de comprobar si sus cacerolas y sartenes actuales,
o sus futuras compras, son compatibles con el NuWave™ PIC Gold:
1. Un imán es por lo general un gran indicador. Si se adhiere a la parte de
abajo de un recipiente signica que la cacerola o sartén es para inducción.
Sin embargo, tenga en cuenta que existen casos en los que las propiedades
magnéticas de un recipiente pueden no ser sucientemente fuertes para que
funcione ecientemente con el NuWave™ PIC Gold.
2. Coloque una pequeña cantidad de agua en una cacerola o un sartén. Si son
compatibles con la inducción el agua comenzará a hervir.
3. Un símbolo de compatibilidad con inducción puede estar impreso en la parte
de abajo del recipiente.
IMPORTANTE - No sumerja la unidad en agua o
utilice el lavavajillas. La supercie exterior puede
ser limpiada con cuidado con un trapo húmedo o
una esponja. Asegúrese de que la unidad se haya
enfriado completamente antes de limpiarla.
Ya que la tecnología de inducción está basada en principios magnéticos, los recipientes
compatibles deben tener un fondo ferroso (base de erro, magnético). Algunos tipos de
recipientes están hechos de metales magnéticos naturales (como erro puro), mientras
otros están diseñados para ser magnéticos al “hacer sándwich” una delgada capa de un
metal ferroso entre la base. Esta capa actuará sobre el campo magnético del induction
cooktop para distribuir el calor. Los utensilios de triple acero inoxidable de alta calidad y
hierro fundido funcionan en los induction cooktops. Recipientes de cobre, vidrio y aluminio
no funcionarán a menos de que tengan una base magnética de sándwich. Las cacerolas
que funcionan de forma óptima en el NuWave™ PIC Gold tienden a ser de un calibre
mediano a pesado.
ANTES DE USARSE:
Limpie la supercie con un trapo
que haya sido humedecido en agua jabonosa tibia.
Instrucciones de Limpieza y Cuidado para su NuWave™ PIC Gold:
Instrucciones Generales de Operación:
Instrucciones Generales de Limpieza:
Desconecte la unidad antes de limpiarla.
• Limpie después de cada uso.
• Asegúrese de que la unidad se haya enfriado completamente antes de limpiarla.
• La supercie exterior puede ser limpiada con cuidado con un trapo húmedo o esponja.
• Quite el cable de conexión antes de limpiar el NuWave™ PIC Gold. No utilice ningún
agente limpiador cáustico y asegúrese de que el agua no penetre al interior del
induction cooktop.
• Nunca sumerja el NuWave™ PIC Gold, sus cables o la clavija en agua u otros
líquidos.
• Limpie la supercie de vidrio con un trapo húmedo o detergente ligero sin soluciones
jabonosas abrasivas. Asegúrese de que la unidad se haya enfriado completamente
antes de limpiarla.
• Limpie la cubierta y el panel de operación con un trapo suave y humedecido con agua
o detergente ligero.
• No utilice ningún producto limpiador con base de aceite para evitar dañar las partes
plásticas o la cubierta/panel de operación.
• No utilice ningún material o sustancia inamable, ácida o alcalina cerca del NuWave™
PIC Gold, ya que puede reducir su tiempo de vida y representa un riesgo de incendio
cuando el induction cooktop está siendo utilizado.
• Con el n de mantener su NuWave™ PIC Gold luciendo como nuevo, asegúrese de
que la parte de abajo de sus recipientes no rayen el vidrio de la supercie del aparato,
aunque una supercie rayada no afectará el funcionamiento del induction cooktop.
• Asegúrese de limpiar correctamente la unidad antes de guardarla en un lugar seco y
fresco.
• Coloque el cooktop en una supercie estable, nivelada y no metálica.
• Nunca utilice el cooktop en una supercie inamable (por ejemplo un mantel, alfombra,
etc.)
• No bloquee las ranuras de ventilación del induction cooktop. De esa forma se
sobrecalentaría el cooktop. Manténgalo a una distancia mínima de 3-5 pulgadas de
paredes, otros objetos o electrodomésticos, etc.
• No coloque aparatos u objetos que sean sensibles a los campos magnéticos sobre o junto
al PIC Gold (p.e., tarjetas de crédito, teléfonos celulares, radios, TVs, grabadoras de video,
etc.).
• No coloque el induction cooktop junto a fuegos abiertos, calentadores u otras fuentes de
calor.
• Asegúrese de que el cable de corriente no esté dañado o quede presionado debajo del
induction cooktop.
• El cable de corriente no debe estar en contacto con orillas losas y/o supercies calientes.
• Antes de conectar el NuWave™ PIC Gold, conrme que el voltaje indicado en este
manual corresponde al voltaje suministrado en su casa. Una conexión errónea podría dañar
el aparato y posiblemente lesionar a alguien.
• La supercie del cooktop está hecha de vidrio resistente a la temperatura. En caso de
observar un daño en la unidad, aún sea una pequeña grieta en la supercie de vidrio,
desconecte inmediatamente el NuWave™ PIC Gold del suministro de energía.
CONSEJOS IMPORTANTES:
1. Revise el contacto de energía para un funcionamiento apropiado. No opere la unidad
con otros electrodomésticos grandes en el mismo contacto de energía. Revise el nivel de
potencia si la unidad cocina demasiado lento.
2. Revise que la clavija esté correctamente conectada en el contacto.
3. Siempre apague y desconecte la unidad antes de limpiarla.
Page 35
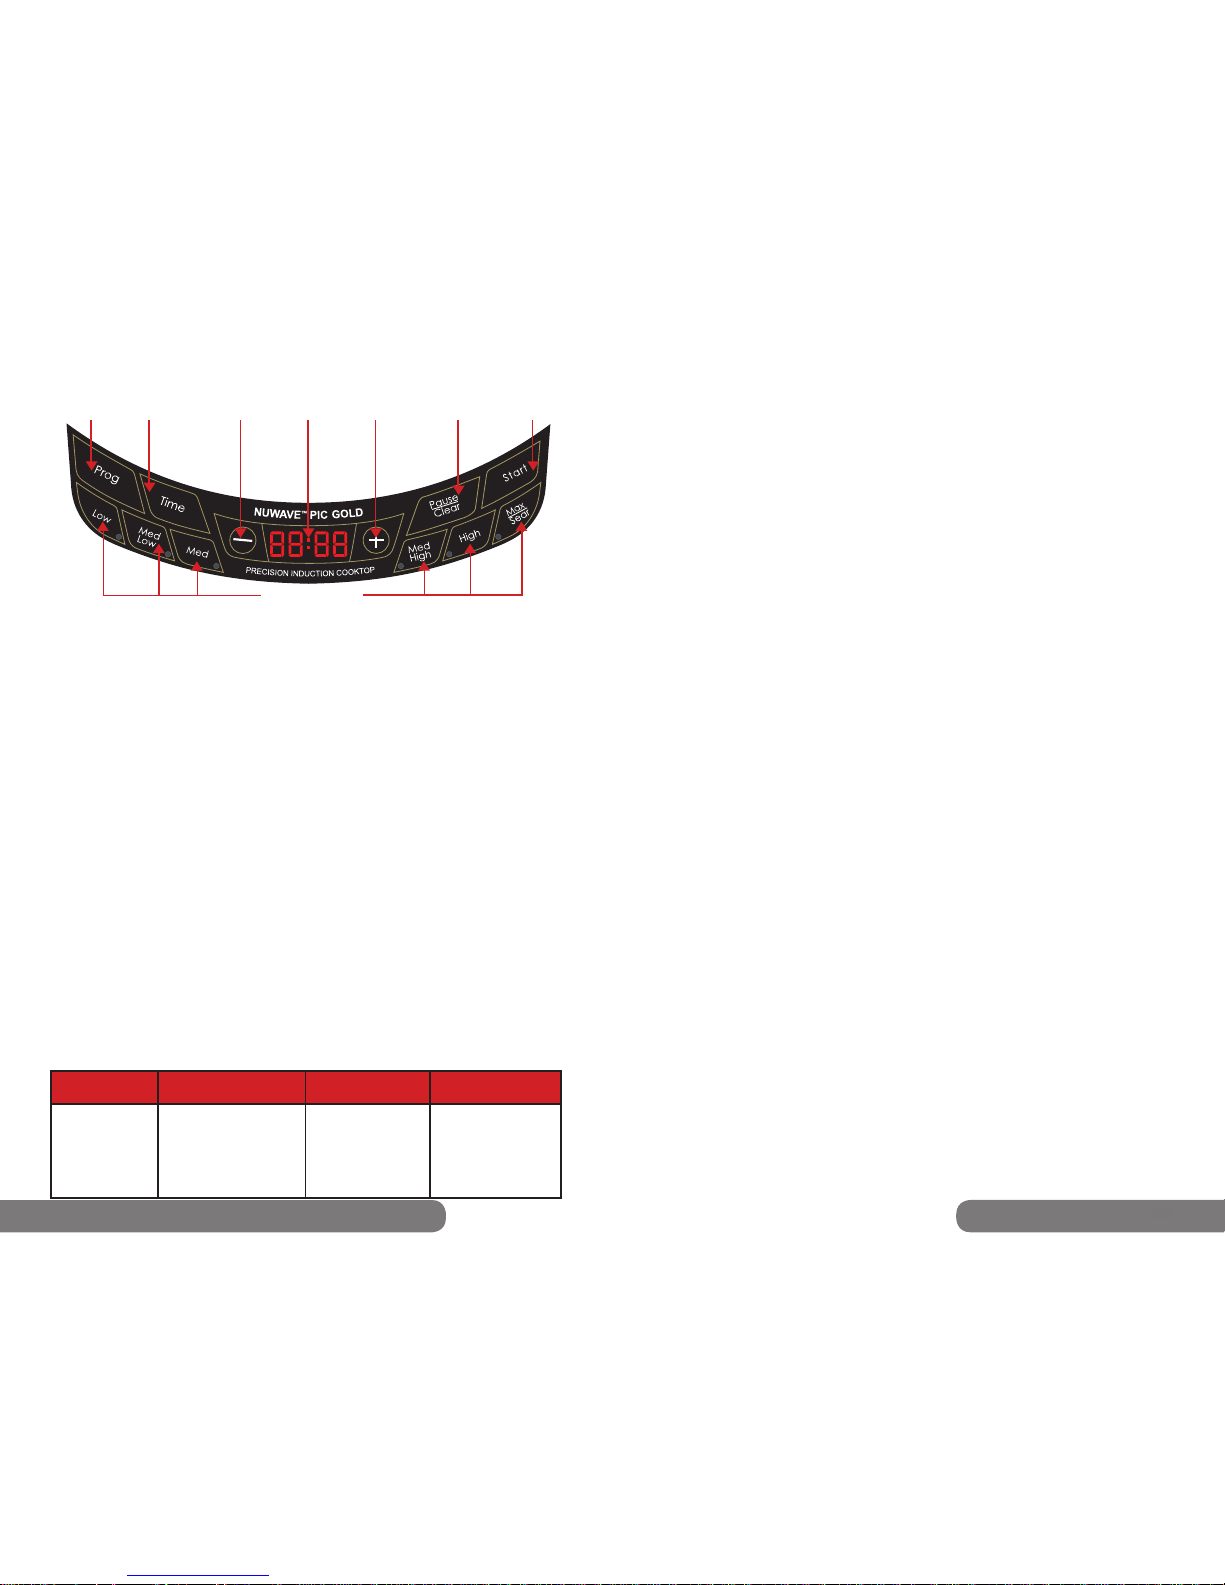
68 • NuWave™ PIC Gold Complete Cookbook
• 69• 69Manual Del Usario
Instrucciones para el Panel del Display
Botón a
Presionar
Rango de
Temperatura
Ejemplos
Low
Med Low
Med
Med High
High
Max/Sear
Tibio
Fuego Lento
Baño María
Mezclar/Freir
Hervir/Saltear
Dorar
Display
Program
Time
Decrease
LED
Display
Low-Max/Sear
Increase
Pause/Clear
Start
Comienzo Rápido:
El NuWave™ PIC Gold está pre-programado para cocinar a temperatura alta (425°F) por 1 hora. Para
empezar a cocinar presione el botón de “Start” después de colocar un recipiente para inducción en
la supercie. Si desea cocinar a cualquier otro nivel de potencia que no sea Alto necesitará presionar
“Low” o “Max/Sear” u oprimir los botones “-” ó “+” para aumentar o disminuir la temperatura en rangos
de 10°F. Vea la Tabla del Panel del Display en la parte inferior de esta página para más detalles.
Panel de Control:
“0” deberá aparecer cuando el programa sea borrado o cuando se encienda.
Para Empezar a Cocinar:
Hay varias maneras de comenzar a cocinar con su NuWave™ PIC Gold:
• Presione “Start” con una temperatura preprogramada de 425°F y una hora como tiempo.
• Programe la temperatura y presione “Start”. El tiempo estándar es de 1 hora.
• Programe el tiempo y presione “Start”. La temperatura estándar es de 425°F.
• Programe la temperatura y el tiempo, luego presione “Start”.
EL NuWave™ PIC Gold dejará de cocinar automáticamente una vez que el tiempo haya concluido
y avisará a los usuarios por medio de un sonido. El display siempre mostrará la temperatura actual
durante el ciclo de cocción. Para mostrar el tiempo faltante, presione “Time” y un contador regresivo
aparecerá, marcando la duración antes del ciclo o si la etapa es completada.
Programando la Temperatura:
Este electrodoméstico está pre-programado para cocinar a temperatura alta (425°F). Para reiniciarlo
presione la función deseada desde “Low” hasta “Max/Sear” y oprima “Start”. El rango de temperatura
se mostrará en el panel del display. Para subir o bajar la temperatura en incrementos de 10°F presione
los botones “+” ó “-” hasta que la temperatura deseada se muestre. Utilice como referencia la tabla de
abajo para establecer las temperaturas. La mínima es de 100ºF mientras que la temperatura máxima
alcanza 575ºF.
NOTA: La temperatura mostrada representa la temperatura de 1.5 L de aceite en el recipiente de
NuWave™ Olla de Acero Inoxidable de 3.5-quart. La posición del termómetro para prueba es al
inicio (en medio) del recipiente de NuWave™ Olla de Acero Inoxidable de 3.5-quart y una distancia
equidistante entre la base del recipiente y la parte de arriba del aceite.
La Pantalla está programada paran mostrar la temperatura en Farenheit (F). Para cambiarla a
Centígrados (C) presione el botón “Prog” seguido de “-” . Presione “-” nuevamente para convertir a
Centígrados. Para regresar a Farenheit presione “-” una vez más. Para cerrar la opción de conversion
de temperature presione el botón “Pause/Clear” hasta que aparezca un “0” en la pantalla.
100F/ 38C
175F / 79C
275F / 135C
375F / 191C
425F / 218C
SEAR
100°F (38°C)
175°F (79°C)
275°F (135°C)
375°F (191°C)
425°F (218°C)
575°F (302°C)
Programando el Tiempo:
Presione el botón de “Time”. Un “0” parpadeará en la esquina inferior derecha del panel
de display. Presione el botón “+” hasta encontrar el tiempo deseado. Por ejemplo, para 5
minutos presione “Time” una vez, luego presione “+” hasta ver 00:05 luego “Start”. Para
20 minutos, presione “Time” dos veces luego presione “+” hasta ver 00:20 luego presione
“Start”. Para 2 horas y 30 minutos, presione “Time” dos veces luego presione “+” hasta
encontrar 3, luego presione “Time” otra vez. Presione “+” hasta encontrar 2 (el display
mostrará 02:30), luego presione “Start”.
• El “0” parpadeando indica el dígito que se puede ajustar. El tiempo máximo es 99
horas y 60 minutos.
• El display muestra horas y minutos, pero no segundos.
Función de Pausa/Borrar:
Para interrumpir el tiempo de cocinado, presione el botón “Pause/Clear” una vez. Esto
pospondrá el NuWave™ PIC Gold en el punto donde se encuentre. La temperatura
permanecerá mostrándose en el panel de display, pero una “F” parpadeará. Para
reanudar presione “Start”. Para BORRAR el modo de cocinado o el display mientras el
NuWave™ PIC Gold está funcionando, presione el botón “Pause/Clear” dos veces. La
pantalla se borrará completamente, aparecerá un “0” y la unidad se apagará.
Función de Programación (Fase de Cocinado):
• Presione el botón “Prog”.
• “Pro” aparecerá en el panel de display.
1. Ingrese la temperatura deseada desde “Low” hasta “Max/Sear”. Si necesita aumentar o
disminuir la temperatura presione los botones de “-” o “+”.
2. Presione el botón de “Time” y 00:00 aparecerá en el display, presione los botones de “-”
o “+” hasta encontrar el tiempo deseado. Vea la sección de arriba “PROGRAMANDO EL
TIEMPO” para información detallada de cómo ingresar los minutos y las horas.
• Para añadir diferentes etapas, repita los pasos 1 y 2 y luego presione “Start” para
comenzar su programa. Usted podrá programar hasta 10 fases (Demora es considerada
una fase).
• Si necesita cambiar cualquier parte del programa presione el botón “Pause / Clear” dos
veces y empiece de nuevo.
Ejemplo: Para hervir por 5 minutos baje a fuego lento (simmer) por 20 minutos, presione
“Prog”, luego presione el botón “Max/Sear”. Presione el botón de“Time” una vez, luego
presione ”+” hasta llegar a 5. Presione “Low”, luego presione “Time” dos veces y “+” hasta
llegar a 20, luego presione “Start”
NOTA: El tiempo máximo para programar es de 99 horas con 60 minutos.
Función de Demora:
El propósito de esta función es permitirle establecer programas que comiencen más
tarde. Para demorar un programa presione “Prog”, luego presione el botón “Time”.
Un “0” se mostrará en la esquina inferior derecha del panel de display. Presione el
botón “+” hasta encontrar el tiempo deseado en demorar (para más información revise
Programando el Tiempo en la parte de arriba de esta página). Luego presione “Prog” otra
vez para establecer el programa de cocinado. El tiempo seleccionado para la demora es
incluido en las fases programadas. Para continuar a la siguiente fase presione de “Low” a
“Max/Sear” para establecer la temperatura. Continúe con el paso #2 de las instrucciones
de “Función de Programación”. Una vez que esté listo para empezar la cuenta regresiva
presione “Start”. Cuando la cuenta regresiva de demora llega a 0, el NuWave™ PIC Gold
suena dos veces para avisar el n. En este momento el tiempo de cocinado comenzará y
la temperatura será mostrada en el display.
Page 36
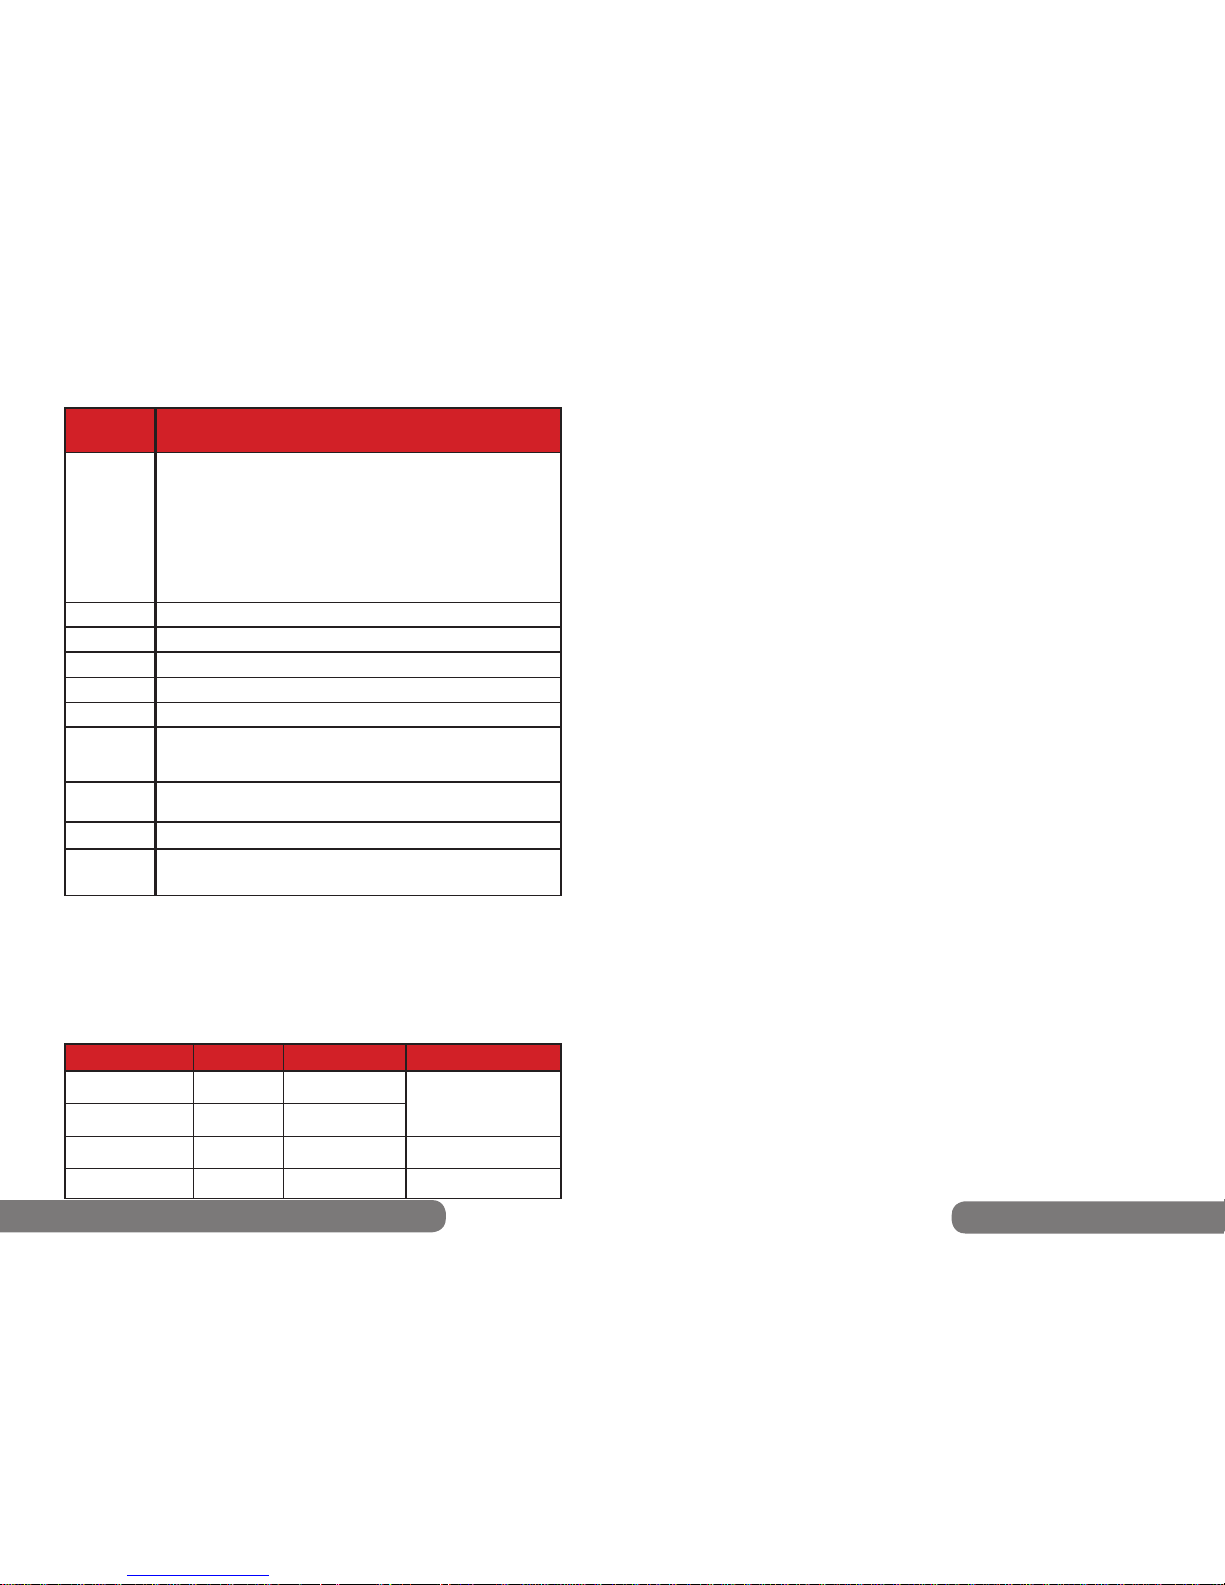
70 • NuWave™ PIC Gold Complete Cookbook
• 71
• 71Manual Del Usario
Solución de Problemas
Solución
Mensaje
de Error
Sonido Pantalla Referencia
Inicial
< 10 segundos
11- 70 segundos
Después de 70
segundos
Uno solo
Ninguno
Sí
Ninguno
“F” o “C” o “Sear” o
“:” Intermitente
“F” o “C” o “Sear” o
“:” Intermitente
E1
0
Al colocar nuevamente el
recipiente, el NuWave™
PIC Gold reanudará el
cocinar.
Reanude presionando
“Start”
El tiempo de cocinado ha
concluido
Solución
Mensaje
de Error
E2
E3
E4
E5
E6
E7
E8
E9
FULL
E1
Mal funcionamiento de la unidad. Contacte a servicio al cliente.
Mal funcionamiento de la unidad. Contacte a servicio al cliente.
Mal funcionamiento de la unidad. Contacte a servicio al cliente.
Un E1 por lo regular signica que el NuWave™ PIC Gold no detecta
algún recipiente en su supercie. Esto puede ocurrir por una de dos
razones:
1. ¿Colocó una cacerola o sartén en la unidad? Las bobinas de
inducción que contiene el NuWave™ PIC Gold trabajarán sólo
cuando estén en contacto directo con un recipiente. Para mantener
la efectividad del aparato, siempre asegúrese de que esté sobre una
supercie plana y que el contacto con el recipiente sea consistente.
2. Un mensaje de E1 también puede aparecer si su recipiente elegido
no es para inducción.
El voltaje de la unidad es demasiado bajo. El mínimo es 85 volts.
El voltaje de la unidad es demasiado alto. El máximo es 144 volts.
Sobrecalentamiento o ductos de ventilación obstruidos. Si la temperatura
interna excede 230°F, cualquier operación se detendrá y se producirá un
sonido. Presione “Pause/Clear” dos veces. Espere a que la unidad se enfríe.
En el modo de programación si el tiempo seleccionado excede el límite
del aparato, que es de 99:59, entonces no se podrán programar más
fases.
Sobrecalentamiento. Si el aparato excede una temperatura de 20°F arriba de
la de Dorar, éste se apagará automáticamente. Contacte a servicio al cliente.
Mal funcionamiento de la unidad. Contacte a servicio al cliente.
• Cuando cualquiera de los mensajes de error anteriores aparezcan en el LED, la unidad
sonará al menos una vez.
• El ventilador trabajará por 60 segundos adicionales después de presionar el botón “Pause/
Clear” una vez. Para continuar cocinando presione el botón “Start” dentro de los siguientes
45 minutos.
• La unidad se apagará después de 45 minutos si ningún botón (como “Start”) es presionado.
Cuando el aparato se apague se borrará toda la historia de cocinado previa.
• Después de presionar el botón “Pause/Clear” dos veces, el ventilador trabajará por 60
segundos adicionales hasta que la unidad se enfríe. En ese momento el NuWave™ PIC
Gold se apagará.
Después de retirar el
recipiente
EL FABRICANTE GARANTIZA: Que el induction cooktop y todos sus componentes
eléctricos estarán libres de defectos y mano de obra bajo un uso doméstico normal
siempre y cuando sea manejado de acuerdo a las instrucciones escritas proporcionadas
por el Fabricante en cada unidad por un (1) año a partir de la fecha de compra. El
Fabricante proporcionará las partes necesarias y mano de obra para reparar cualquier
parte del sistema de cocción por inducción en el Departamento de Servicio de NuWave,
LLC. Después de la expiración de la garantía, el costo de la mano de obra y las partes
será responsabilidad del propietario.
LA GARANTÍA NO CUBRE: Ninguna cubierta (si aplica) ni ninguna parte del sistema
de cocinado. La Garantía Limitada se invalida si se realiza alguna reparación por un
representante no autorizado o si la placa de número de serie es retirada o dañada.
El deterioro normal del acabado debido al uso o la exposición no es cubierto por esta
Garantía. Esta Garantía Limitada no cubre fallas, daños o desempeños inadecuados
ocasionados por algún accidente, catástrofe natural (como un rayo), uctuaciones en la
corriente de energía, alteraciones, abusos, mal empleo o aplicación, ambientes de tipo
corrosivo, instalación incorrecta, falla al operarlo de acuerdo a las instrucciones escritas
del Fabricante, o uso anormal o comercial.
PARA OBTENER SERVICIO: El propietario tendrá la obligación y responsabilidad de:
pagar por todos los servicios y partes que no estén cubiertas por la garantía; pre-pagar el
envío hacia y desde el Departamento de Servicio para cualquier parte o sistema devuelto
bajo esta garantía; empacar cuidadosamente el producto utilizando material de relleno
adecuado para prevenir algún daño durante el tránsito. El empaque original es ideal
para este propósito. Contenido del Paquete: nombre del propietario, dirección, número
de teléfono durante el día, una descripción detallada del problema y su Número de
Autorización de Devolución de Producto (Número RGA):
Llame al 1-855-742-2665 o envíe un correo a [email protected] para obtener su
número RGA. Proporcione el modelo del sistema de cocinado y el número de serie
así como una prueba de la fecha de compra (una copia del recibo) cuando solicite la
aplicación de esta garantía.
OBLIGACIÓN DEL FABRICANTE: La obligación del Fabricante bajo esta Garantía
Limitada se limita a reparar o cambiar cualquier parte del induction cooktop expresamente
cubierta por esta Garantía Limitada, la cual, previa inspección sea detectada como
defecto por uso normal. La Garantía Limitada es aplicada sólo dentro de USA continental
y únicamente para el comprador original en los canales de distribución autorizados por el
fabricante. La Garantía Limitada no puede ser alterada, variada o extendida excepto por
un instrumento escrito y suscrito por el fabricante. La forma de reparación o sustitución
proporcionada bajo esta garantía limitada es exclusiva. En ningún caso el fabricante será
responsable por algún daño incidental o consecuente a alguna persona, ocasionado o
no por la negligencia del fabricante, incluyendo, sin limitación, daños por merma de uso,
costos de sustitución, daños a la propiedad, u otras pérdidas de dinero.
Algunos estados no permiten la exclusión o limitación de daños incidentales o
consecuentes, así que las exclusiones limitantes mencionadas pueden no aplicar. Esta
Garantía Limitada otorga derechos legales especícos y podría haber otros derechos que
varíen de estado a estado. Excepto por lo estipulado anteriormente, el fabricante no hace
garantías expresas o implícitas surgidas de la ley u otros, incluyendo sin limitación, las
garantías implícitas de comercialización y aptitud para un propósito particular a cualquier
otra persona.
LEA SU MANUAL DEL USUARIO: Si usted tiene aún cualquier pregunta sobre el manejo
o garantía del producto, contacte a NuWave, LLC al 1-855-742-2665 o envíe un correo a
[email protected]
Page 37
72 • NuWave™ PIC Gold Complete Cookbook
• 73
Consejos para la Cocina
Este recetario contiene información valiosa diseñada para ayudarle a incorporar
el NuWave™ Precision Induction Cooktop Gold a su vida diaria. Hemos
proporcionado recetas fáciles de preparar así como consejos útiles al inicio de
cada sección para resultados perfectos siempre.
Aquí están algunas sugerencias generales para ayudarle a comenzar a cocinar:
• Coloque un tazón para residuos junto a su tabla de cortar para los desechos
de comida.
• Las tablas de cortar exibles son muy prácticas. Sólo corte y retire- sin
ensuciar ni derramar.
• Las tazas para medir de vidrio son óptimas para líquidos mientras que la de
plástico funcionan bien para ingredientes secos.
• Después de exprimir limones, póngalos en el triturador para refrescar el aire
del ambiente.
• Ponga especial atención a la mantequilla ya que se derrite. La mantequilla
se derrite cuando su temperatura interna alcanza un rango entre 82.4°F y
96.8°F. Esto signica que se derrite pronto, así que esté listo para quitarla de
la estufa rápidamente.
• Algunas de las recetas incluidas sugieren preparar y/o cocinar en el
NuWave® Oven. Contacte a nuestro Servicio al Cliente para mayor
información o para colocar un pedido.
¡Detalles Deliciosos!
1 cuadro de chocolate para hornear = 1 onza
4 pecks= 1 bushel
8 cucharadas= ½ taza
1 libra de nueces picadas= 2 tazas
½ taza de mantequilla= 1 barra
2 tazas de azúcar granulada= 1 libra
2 tazas de mantequilla= 1 libra
16 onzas líquidas= 1 pinta
1 taza= ½ pinta
Huevos Revueltos
Porciones:4
8 huevos
1/3 taza de leche, crema light,
o mitad y mitad
½ cucharadita de sal
¼ cucharadita de pimienta negra
1 cucharada de mantequilla o
aceite antiadherente en aerosol
En un tazón mediano mezcle todos
los ingredientes excepto la
mantequilla. Mezcle en una batidora
el eltrica o mesclelos manualmente.
En un sartén grande derrita la
mantequilla a fuego alto (425º) y
luego vierta la mezcla de huevo.
Cocine a esa temperatura sin mover
hasta que la mezcla se comience a
cocer por la parte de abajo y en las
orillas.
Con una espátula o cuchara de
madera levante y doble a la mitad la
mezcla de tal manera que la parte
cruda se vaya al interior. Cocine por 2
ó 3 minutos hasta que el huevo esté
bien cocido pero aún brilloso.
Caldo de Pollo
Rinde ½ galón
3 libras de pollo con hueso (no
pellejos)
3 tallos de apio con hojas, en
trozos
2 zanahorias en trozos
1 cebolla grande con cáscara en
trozos
½ cucharadita de pimientas
negras enteras
4 ramitas de perejil
2 hojas de laurel
½ galón de agua más una taza
1 papel ltro
1 cordón
Coloque los huesos de pollo lavados
en una caldera grande. Agregue las
verduras y el agua. Haga el bouquet
(papel ltro amarrado con las
pimientas y las hierbas adentro), lo
amarra al asa de la olla para sacarlo
más fácilmente.
Cocine el caldo a fuego alto hasta
que hierva (SEAr) al inicio de la
cocción. Baje el fuego (175º) y déjelo
cocer a fuego lento hasta completar
2½ horas.
Cuélelo en papel ltro y escurridor.
Déjelo enfriar en el refrigerador y
retire la grasa si lo desea. No
agregue sal al caldo, eso se hará
cuando prepare una salsa o sopa.
Consejos: Sólo hierva el caldo una
vez, esto previene que quede turbio.
Refrigere hasta por 3 días o congele
hasta por 6 meses.
• 73Recetas
Page 38

74 • NuWave™ PIC Gold Complete Cookbook
• 75
• 75Recetas
Caldo de Res
Rinde ½ galón
4 libras de carne de res con
hueso (corte de pierna de res)
½ taza de agua
3 zanahorias en trozos
2 tallos de apio con hojas, en
trozos
10 pimientas enteras
8 ramitas de perejil fresco
4 hojas de laurel
1 galón de agua fría más una
taza
1 papel ltro
1 cordón
Coloque la carne en una cacerola
grande para horno. Hornee a 450º
por 45 minutos o hasta que estén
bien dorada, volteándo la carne una
vez. Coloque luego los huesos en
una olla grande. Vierta la ½ taza de
agua en la cacerola en que horneo
los huesos y raspe todos los restos
del dorado. Agregue la mezcla de
agua a la caldera. Añada las verduras
y agua.
En el papel ltro coloque las
pimientas y las hierbas y amarre con
el cordón. Sujételo al asa de la olla y
deje que las hierbas se cocinen junto
con los huesos y las verduras. Cocine
a fuego alto hasta que hierva (SEAr)
y luego baje a fuego lento y termine
de cocinar hasta completar 3½ horas.
Si el caldo hierve durante el fuego
lento baje más la llama (100º).
Cuele el caldo en un colador cubierto
con papel ltro.
Enfríe en el refrigerador y quite la
capa de grasa formada si así lo
desea.
Papas Para el Desayuno
Porciones:4
2 tazas de papas cambray
frescas o papas rojas, en trozos
½ taza de cebolla picada
½ taza de pimiento verde o rojo
picado
2 cucharadas de aceite de olivo
½ taza de queso cheddar
rayado (opcional)
½ cucharadita de sal
½ cucharadita de pimienta
En un sartén grande antiadherente
cocine las papas, la cebolla y el
pimiento con el aceite de olivo a
fuego medio (275º) tapado por 20-25
minutos moviendo ocasionalmente
hasta que se suavicen. Sazone con
sal y pimienta y añada el queso
encima para servir.
Consejo: Usted puede reemplazar las
papas frescas por 1½ taza de hash
browns congeladas o refrigeradas.
El caldo se mantiene en buenas
condiciones por 3 días en el
refrigerador o por 6 meses en el
congelador.
Consejos:
Congélelo en charolas de cubos de
hielo y saque uno cuando desee dar
un poco de sabor extra a sus
verduras o salsas.
Camarones Capeados
Porciones: 4-6
1 taza de harina sin preparar
½ cucharadita de azúcar
½ cucharadita de sal
1 taza de agua helada
2 cucharadas de manteca derreti
da o aceite de olivo
2 libras de camarones sin cocinar,
pelados y desvenados, con cola
1 botella grande de aceite vegetal
para freir
En un tazón grande revuelva la harina
con el azúcar y la sal. Bata con agua
helada, huevo y 2 cucharadas de
aceite. Seque los camarones
perfectamente.
Caliente el aceite para freír en una
olla grande y pesada hasta que
marque usando el botón medio/alto
(375º), toma 2½ minutos para
calentarse. Tomando los camarones
de la cola, sumérjalos en la mezcla
que batió. Con cuidado colóquelos en
la olla y fríalos hasta que se doren.
No los cocine de más; el truco es 2
minutos. Escúrralos en toallas de
papel y sírvalos de inmediato.
Cerdo Agridulce con Piña
Porciones: 4
6 onzas de mantequilla sin sal,
dividida
3 libras de tallo de apio, pelado y
cortado en pedacitos de 1
pulgada
2 tazas de agua
1 cucharada de sal, dividida
¼ taza de leche
2 cucharaditas de ajo picado
1 libra (4) de col china pequeña,
limpias y rebanadas
11/2 libras de lomo de cerdo sin
hueso, limpio y cortado en cubos
10 onzas de piña en trozos
1/3 taza de miel
2 cucharadas de vinagre de jerez
Pimienta blanca al gusto
Derrita 2 cucharadas de mantequilla en
una cacerola mediana a temperatura
media-alta (375º). Agregue el tallo de
apio y cocine por 5 minutos moviéndolo
para cubrirlo con la mantequilla. Añada
agua y 1½ cucharadita de sal y déjelo
hervir. Baje el fuego (175º) y tápelo
por 30 minutos o hasta que estén
suaves. Cuele y guarde ¼ de taza del
líquido. Hágalo puré en el procesador
de alimentos con el líquido que
guardó, la leche y una cucharada de
mantequilla. Regréselo a la cacerola
y manténgalo caliente. En un sartén
grande caliente 3 cucharadas de aceite
de olivo a fuego alto (425º) y salteé el
ajo hasta que se suavice moviéndolo
por un minuto, agregue la col china y
½ cucharadita de sal; cocine a fuego
medio (375º) moviendo hasta que se
suavice, de 4 a 5 minutos. Manténgalo
caliente. En otro sartén grande
agregue 1 cucharadita de aceite de
olivo y cocine la carne de cerdo a
fuego medio (375º) hasta que se dore y
esté cocida. Sáquela con una cuchara
calada y añádala a la col china. En
el sartén de la carne agregue la piña
con su jugo, la miel, el vinagre y la sal
restante y a fuego medio (375º) déjelo
hervir. Agregue el cerdo y la col china
a la misma salsa. Sirva con el puré de
tallo de apio.
Page 39

76 • NuWave™ PIC Gold Complete Cookbook
• 77
• 77Recetas
Chili Tradicional
2 libras de carne de res molida
(sirloin)
1 taza de cebolla amarilla picada
1 taza de apio picado
2 cucharadas de ajo picado
2 latas de frijoles rojos ligeros
4 (15 onzas) de tomate entero con
jugo
2 tazas de agua fría
3 cucharadas de sazonador para
chilli McCormick
3 cucharadas de perejil fresco
picado o 1 cucharada del seco
½ cucharadita de pimienta negra
½ cuharadita de sal
1 taza de queso rayado (opcional)
½ taza de cebollitas cambray
picadas (opcional)
1 taza de galletas saladas
En una caldera grande a fuego alto
(SEAr) dore la carne molida con una
cucharada del sazonador para chili.
Escurra toda la grasa. Agregue la
cebolla, el apio y el ajo y saltéelos
junto con la carne molida a
temperatura media (375º) hasta que la
cebolla esté transparente, moviendo
cada 30 segundos. Esto llevará
alrededor de 2 minutos. Agregue las
dos latas de frijoles rojos, los tomates,
el sazonador para chili, el agua, el
apio, sal y pimienta. Suba la
temperatura a fuego alto (425º) y
espere a que hierva, luego baje la
ama y cocine a fuego lento por 45
minutos. Sirva con queso, cebolla
picada y galletas saladas.
Paella de Mariscos
Porciones: 6-8
2 cucharaditas de mantequilla
1 taza de cebolla picada
Sal y pimienta negra al gusto
1 taza de arroz de grano grande
1 pimiento verde pequeño, sin semilla y
picado namente
1 pimiento rojo pequeño, sin semilla y
picado namente
1 cucharada de ajo picado
½ cucharadita de hilos de azafrán
desmoronados
2 ½ tazas de caldo o fondo de pescado
1 (6 – 8-onzas) cola de langosta sin
concha, partida en trozos grandes
½ libra de patas de cangrejo King Crab,
desconchadas y partidas en trozos grandes
12 onzas de letes de Tilapia cortados en
trozos grandes
4 onzas de vieira cruda
4 onzas de camarones grandes crudos,
pelados y desvenados
4 onzas de mejillones precocidos
4 onzas de almejas precocidas
4 onzas de calamar precocido y prepicado
4 onzas de pulpo precocido y prepicado
Modo de preparación:
1. Derrita la mantequilla en una cacerola de
3.5 cuartos a temperatura media (275°F)
por 30 segundos.
2. Salteé la cebolla en la mantequilla a la
misma temperatura por 2 minutos o hasta
que la cebolla se haya suavizado.
3. Sazone con sal y pimienta al gusto.
4. Agregue el arroz y cocine moviéndolo
ocasionalmente cada 30 segundos.
5. Agregue los pimientos, el ajo, el azafrán
y las 2 tazas de caldo.
6. Ponga esta mezcla a hervir en MediumHigh (375°F) tapándola.
7. Una vez que hierva, baje la temperatura
a 275° y déjela a fuego lento por 10-15
minutos.
8. Agregue la mezcla de mariscos.
9. Cocine por otros 15-20 minutos sin tapar
o hasta que la mayoría del líquido se haya
absorbido y el arroz esté blando.
Arroz Español
Porciones: 6-8
½ taza de cebolla namente
picada
½ taza de pimiento verde picado
(dulce)
1 diente de ajo picado
1 cucharada de aceite de olivo
1 cucharadita de chili en polvo
1 28 onzas de tomates enlatados
cortados y sin escurrir
¾ taza de arroz de grano grande
sin cocinar
1 4 onzas lata de chiles verdes
en cubos sin escurrir
1 cucharada de salsa picante de
botella (opcional)
½ taza de queso cheddar rayado
(opcional)
En un sartén grande cocine la cebolla
con el pimiento y el ajo a fuego alto
(425º) por 2-3 minutos. Agregue el
chili en polvo y cocine por un minuto
más. Revuelva con los tomates
enlatados, arroz, chiles, y la salsa
picante, 1 taza de agua, ¼
cucharadita de sal y 1/8 cucharadita de
pimienta negra. Deje hervir y luego
reduzca la ama y cocine a fuego
lento, tapándolo, por alrededor de 20
minutos o hasta que el arroz esté
tierno y la mayoría del líquido se haya
absorbido.
Consejos:
Cambie el chili en polvo por algún
curry y cúrcuma y obtendrá un gran
arroz estilo Hindú.
Masa Básica para Pasta
Rinde 1 Libra
2 tazas de harina sin preparar
½ cucharadita de sal
2 yemas de huevo batidas
1 huevo batido
1/3 taza de agua
1 cucharadita de aceite de olivo
En un tazón grande mezcle 1¾ taza
de la harina y la sal. Haga un hueco
en el centro de la mezcla de harina.
En un tazón pequeño revuelva las
yemas de huevo y el huevo completo,
el agua y el aceite. Agregue la mezcla
de huevo a la mezcla de harina;
mezcle bien.
Espolvoree la supercie para amasar
con el ¼ de taza de harina restante.
Ponga la masa sobre la supercie.
Amase la masa hasta que quede
suave y elástica (De 8 a 10 minutos).
Cúbrala y déjela reposar por 10
minutos.
Divida la masa en 4 porciones
iguales. En una supercie ligeramente
harinada extienda cada porción de
masa en un área de 12x9 pulgadas
hasta que quede aproximadamente
1/16 de pulgada. Déjela reposar sin
cubrir por 20 minutos. Espolvoree
ligeramente la masa con harina.
Suavemente enrolle la masa en
espiral; corte tiras de ¼ de pulgada
de ancho. Mueva las hebras para
separarlas; córtelas en largos de 2 a
3 pulgadas.
Hierva agua a fuego alto (425º) y
cocine de acuerdo a la guía.
Para guardar los deos cortados,
espárzalos en una rejilla para
enfriarlos. Déjelos enfriar toda la
noche o hasta que se sequen por
completo. Colóquelos en un
recipiente al vacío y refrigérelos hasta
por tres días o congélelos hasta por 8
meses.
Consejos: Usted no necesita una
máquina para pasta. Enrolle la masa
al grosor deseado y luego corte a
mano.
Page 40
78 • NuWave™ PIC Gold Complete Cookbook
• 79
Arroz Frito con Verduras
Porciones: 4
1 cucharadita de aceite de
ajonjolí tostado o aceite para
cocinar
1 huevo batido
½ libra de espárragos frescos
cortados en pedazos de
1 pulgada
¼ taza de champiñones frescos
rebanados
¼ taza de apio cortado en
diagonal (1 ramo)
2 cucharadas de cebolla verde
rebanada namente
2 dientes de ajo picados
1 cucharada de aceite de olivo
3 cucharadas de salsa de soya
baja en sodio
2 cucharadas de vino blanco o
agua
Un poquito de pimiento rojo
2 tazas de arroz cocido frío
En un sartén o wok grande caliente 1
cucharada del aceite de ajonjolí a
temperatura media (275º). Agregue el
huevo levantando e inclinando el
sartén o wok hasta formar una capa
delgada en el fondo del recipiente (tal
vez el huevo no alcance a cubrir todo
el recipiente).
Cocine por 1 minuto o hasta que el
huevo se cuaje, voltee el recipiente
sobre una charola para hornear y
corte en tiras delgadas y cortas.
Póngalo a un lado.
En el mismo recipiente caliente el
aceite restante a fuego alto (425º) y
saltee los espárragos con los
champiñones, el apio y el ajo por 3
minutos, moviendo las verduras todo
el tiempo. Revuelva con la salsa de
soya, el vino y el pimiento rojo.
Agregue el arroz cocido. Cocine y
mueva por alrededor de 2 minutos.
Fetuchini Alfredo
Porciones: 4
½ taza de crema entera para batir
1 cucharada de mantequilla
6 onzas de fetuchini seco
¾ taza de queso Parmesano
rayado
½ cucharadita de pimienta negra
Es muy importante que deje la crema
y la mantequilla a temperatura
ambiente por 30 minutos. Mientras
tanto, cueza el fetuchini siguiendo las
instrucciones del empaque. Escúrralo
y regréselo a la cacerola.
En otra cacerola a fuego lento (175º)
cocine la mantequilla y la crema
(hasta que aparezcan pequeñas
burbujas alrededor de la cacerola), no
deje que se sobre caliente o la salsa
se cortará. Mueva la salsa de crema
constantemente por 2 minutos.
Agregue la salsa caliente, el queso
parmesano y la pimienta negra al
Fetuchini cubriéndolo bien. Sirva de
inmediato.
Añada y revuelva también el huevo.
Consejos: Asegúrese de que el arroz
cocido esté totalmente frío antes de
comenzar para que los granos de
arroz no se peguen mientras saltea.
Agregue el arroz cocido. Cocine y
mueva por alrededor de 2 minutos.
Añada y revuelva también el huevo.
Consejos: Asegúrese de que el arroz
cocido esté totalmente frío antes de
comenzar para que los granos de
arroz no se peguen mientras saltea.
NuWave
™
PIC Gold Manuel D’Utilisation
PRECISION INDUCTION COOKTOP GOLD
™
Page 41

80 • NuWave™ PIC Gold Complete Cookbook
• 81
Qu’est-ce que la Cuisson à Induction?
Bienvenue à la Cuisson à Induction de Précision de NuWave™
Félicitations pour l’achat de votre NuWave™ PIC Gold. Ce livre contient des
instructions et des images détaillées pour vous aider à commencer à utiliser votre
Table de Cuisson. Il est également inclu d’excellentes recettes et des conseils pour
gagner du temps pour vous aider à préparer de délicieux repas gastronomiques
en une fraction de temps qu’il faudrait lors de l’utilisation d’une cuisinière ordinaire.
La cuisine est facile et rapide avec la Table de Cuisson à Induction de Précision de
NuWave, LLC. Cet appareil de comptoir polyvalent utilise la technologie de l’induction
pour économiser du temps, de l’ énergie et de l’argent. La Table de Cuisson à
Induction de Précision NuWave™ est efcace, sûre, rapide et facile à nettoyer. Et
comme vous pouvez programmer les temps et les températures pour chauffer et
griller, vous pouvez faire n’importe quel type de plat sans risque de cuisson trop
prolongée ou insufsante.
La Table de Cuisson à Induction de Précision (PIC) NuWave™ est constituée d’une série
de bobines d’induction (sur la base de principes magnétiques). Ces bobines génèrent
des champs magnétiques qui produisent une réaction de réchauffement dans des
pots et des casseroles en acier et à base de fer. De cette façon,la chaleur est générée
dans l’ustensile de cuisson et non sur sa surface, ce qui est beaucoup plus efcace
énergétiquement que les cuisinières à gaz ou électriques traditionnelles. La cuisson par
induction est la manière la plus écologique pour préparer les repas car cette méthode ne
libère pas de toxines dans l’environnement. La cuisson à induction ne dégage aucune
amme, donc moins de chaleur résiduelle est produite dans votre cuisine. La Table
de Cuisson à Induction de Précision NuWave™ reste froid au toucher, où la surface
magnétique n’est pas activée.
Avantages supplémentaires:
• Conservation de l’énergie: Maintenant vous pouvez vivre bien pour moins cher avec
le NuWave™ Precision Cuisson à Induction Gold. Le NuWave™ PIC Gold utilise la
technologie d’induction. Le secret est une série interne de bobines de cuivre. Ces
bobines génèrent un champ magnétique dans vos pots et casseroles métalliques.
Le champ magnétique provoque molécules invisibles dans les ustensiles de cuisine
pour commencer vibrant rapidement, créant de la chaleur, de sorte que la batterie
de cuisine se réchauffe la nourriture. Le NuWave™ PIC Gold est l’une des tables de
cuisson les plus éconergétiques disponibles aujourd’hui, ce qui signie que la cuisson
avec le PIC Gold se traduira par des économies sur vos factures mensuelles de
services publics.
• Sécurité: La conception de la NuWave™ PIC Gold ne requiert pas de bobines ou de
ammes nues, ce qui élimine le risque d’incendie. Les fonctions
d’arrêt automatique améliorent la sécurité de la table de cuisson. Il suft de la régler
et oublier! Les utilisateurs peuvent également relever le dé
de ce cube de glace ! La technologie à induction chauffe la casserole, mais la surface
de NuWave™ PIC reste froid au toucher.
• Cuisine rapide: Le chauffage est immédiat et la température est précise
avec la NuWave™ PIC Gold. Elle dispose de 6 différents réglages de température qui
sont réglables par incréments de 10 degrés. Vous ne
perdez plus de temps à deviner!
• Léger et Portable: Parce qu’elle ne pèse que 5.4 livres, vous pouvez
prendre la NuWave™ PIC Gold partout où vous allez ! Utilisez-la à
l’intérieur ou à l’extérieur - n’importe où tant qu’il y a une prise électrique
de norme américaine.
• Facile à nettoyer: Les renversements ne brûlent pas et ne collent pas à la surface de
cuisson. Il suft de l’essuyer et allez!
Produits et Accessoires de la Table de Cuisson
à Induction de Précision NuWave™ Gold:
Pour commander des pièces et des accessoirs, appelez le service à la clientèle au:
1-855-742-2665, du Lundi au Vendredi, 8:00 AM – 4:30 PM CST.
Vous pouvez également commander en ligne à l’adresse: www.NuWaveNow.com.
Veuillez fournir le correct nom et numéro de l’article pour vous assurer que votre commande est
traitée avec précision.
• 81
Manual D’Utilisation
(31201) NuWave™ Precision Cuisinière Pression
(32061) Manuel de NuWave™ Precision Cuisinière Pression
NuWave™ Precision Cuisinière Pression:
NuWave™ Duralon™2 Céramique Ustensiles Antiadhésifs:
Table de Cuisson à Induction de Précision NuWave™:
(30201) NuWave™ PIC Gold
(32141) Manuel / Livre de Recettes Complet
(32144) DVD d’instruction
(32145) Fiche
Batterie de Cusine Ultime de NuWave™:
(32003) Chaudon en Acier Inoxydable 3.5-quart
(32004) Couvercle de Chaudron 3.5-quart
(32005) Cuiseur à Vapeur en Acier Inoxydable
Grille en Fonte de NuWave™:
(32023) Grille en Fonte
(32022) Bac Collecteur d’Huile
(32056) Manuel de Grille en Fonte
Couvercles (Option):
Couvercles (Option):
Couvercles (Option):
Anodisé dur casserole en aluminium à frire:
9-inch
10.5-inch
12-inch
9-inch
10.5-inch
12-inch
(32109)
(32110)
(32114)
Copper
Copper
Copper
Copper
Gold
Gold
Gold
(32119)
(32120)
(32124)
(32309)
(32310)
(32311)
(32012)
(32004)
(32014)
Acier Inoxydable Marmites & Casseroles:
Everyday de Poêle à Frire: Poêle à Griller de Acier Inoxydable:
Couvercles (Option):
1.5-quart
2.0-quart
3.0-quart
5.5-quart
9.0-quart
10-piece Set
12-inch 11-inch
1.5-quart
2.0-quart
3.0-quart
5.5-quart
9.0-quart
(32031)
(32032)
(32033)
(32039)
(32034)
(31250)
(32018) (32024)
(32036)
(32037)
(32038)
(32040)
(32004)
Acier Inoxydable Poêle à Frire:
Acier Inoxydable Poêle à Frire Plus:
9-inch
10.5-inch
12-inch
9-inch
10.5-inch
11.5-inch
9-inch
10.5-inch
12-inch
9-inch
10.5-inch
11.5-inch
(32015)
(32016)
(32017)
(32009)
(32010)
(32011)
(32331)
(32332)
(32333)
(32339)
(32334)
(31350)
(32012)
(32004)
(32014)
(32012)
(32004)
(32013)
(31113) Plaque de Cuisson en Fonte
(32060) Manuel de Plaque de Cuisson
en Fonte
(32100) Manual de NuWave™ Duralon™2 de Ceramica Antiadherente
(32157) Guide de Démarrage Rapide
(32158) Carte d’Inscription
(31111) Mallette de transport sur mesure
(32007) Fondue Insert
(32008) Ensemble de 8 Fourchettes à Fondue
(32055) Manuel de Batterie de Cuisine Ultime
Page 42
82 • NuWave™ PIC Gold Complete Cookbook
• 83• 83
Manual D’Utilisation
ATTENTION
IMPORTANT – Information FCC:
Avertissement: Tout changement ou modication apportés à cet appareil non
expressément approuvés par la partie responsable peut annuler l’autorité de
l’utilisateur à utiliser l’équipement.
Note: Cet appareil est conforme à la section 18 des dispositions de la FCC.
AVERTISSEMENT: l’ensemble des éléments de la table de cuisson
peuvent devenir très chauds lors de la cuisson. Veuillez prendre toutes les
précautions nécessaires lorsque vous retirez ces éléments de l’appareil.
Veillez à porter en permanence des gants de cuisine ou des maniques. La
table de cuisson peut garder une chaleur résiduelle même après que les
récipients ont été retirés du feu. Laissez tous les éléments refroidir avant de
nettoyer.
Danger d’électrocution. Utiliser avec un système électrique adéquat. Ne pas
utiliser si le cordon ou la prise sont endommagés.
Comment éliminer ce produit
Ce marquage indique que ce produit doit être séparé des autres déchets ménagers
dans l’ensemble de l’UE. L’élimination incontrôlée des déchets pouvant nuire à
l’environnement ou à la santé humaine, recyclez ce produit de manière responsable
an de promouvoir la réutilisation durable des ressources matérielles. Pour
retourner votre matériel usagé, veuillez utiliser les systèmes de retour et de collecte
ou contactez le détaillant chez qui le produit a été acheté, qui pourra procéder au
recyclage du produit en toute sécurité.
MISES EN GARDE IMPORTANTES
Lors de l’usage d’appareils électriques, il convient de suivre scrupuleusement certaines
mesures de sécurité essentielles, incluant les précautions suivantes :
LISEZ TOUTES LES INSTRUCTIONS
AVANT UTILISATION
CONSERVEZ CES INSTRUCTIONS
DANGER – Para réduire le risque d’électrocution:
1. Lisez l’ensemble des instructions, des mises en garde et des avertissements
avant d’utiliser l’appareil.
2. Ne placez pas l’appareil dans un endroit où il pourrait tomber ou entrer en
contact avec de l’eau ou tout autre liquide.
3. Ne récupérez pas un appareil qui est tombé dans l’eau. Commencez par le
débrancher immédiatement.
4. Ne plongez pas le cordon électrique, la prise ou toute autre partie de l’appareil
dans l’eau ou dans tout autre liquide.
Information électrique
• La longueur du cordon de cet appareil a été sélectionnée pour réduire les risques de
dangers que pourrait représenter un cordon plus long. Des cordons de rallonges sont
disponibles et peuvent être utilisés avec précaution. Si une rallonge est utilisée: (1)
la puissance électrique gurant sur la rallonge doit être au moins aussi forte que la
puissance électrique de l’appareil, et (2) la rallonge doit être positionnée de telle sorte
qu’elle ne passe pas au-dessus du comptoir ou de la table pour éviter qu’on ne tire
dessus ou qu’on ne trébuche dessus accidentellement.
• Certains modèles peuvent avoir une che polarisée (une lame est plus large que
l’autre). Cette che ne peut être insérée que dans un sens dans une prise polarisée. Si
la che ne s’insère pas entièrement dans la prise, retournez la che. Si elle ne s’insère
toujours pas correctement, contactez un électricien qualié. Ne tentez pas de modier la
prise de quelque façon que ce soit.
AVERTISSEMENT – A l’attention des individus porteurs d’un pacemaker:
1. Cet appareil émet un champ électromagnétique qui est plus puissant dans
l’espace de 600 m situé au-dessus de la surface de cuisson.
2. Les tests scientiques visant à déterminer si le champ électrique entravait le
fonctionnement d’un pacemaker se sont avérés peu concluants. Veuillez
consulter votre médecin ou un professionnel de santé être conseillé avant
l’utilisation.
AVERTISSEMENT – Pour réduire le risque brûlure, d’électrocution,
d’incendie ou de blessure:
1. Cet appareil est doté d’une fonction de chauffage. Ses surfaces peuvent
chauffer à des températures élevées. Ne pas toucher les surfaces chaudes.
La table de cuisson peut garder une chaleur résiduelle même après que les
récipients ont été retirés du feu. L’usage de maniques ou de mesures de
sécurité alternatives est fortement recommandé.
2. Cet appareil ne doit pas être utilisé par les enfants. Une surveillance étroite est
nécessaire lorsque ce produit est utilisé en présence d’enfants.
3. Ne pas placer sur un brûleur au gaz ou électrique ni dans un four chauffé.
4. Ne pas placer d’objets métalliques tels que couteaux, fourchettes, petites
cuillères ou couvercles sur la table de cuisson où ils sont susceptibles de
chauffer.
5. Cet appareil n’est pas destiné à un usage commercial.
6. Utiliser cet appareil uniquement pour l’usage auquel il est destiné,
conformément à ce qui est indiqué dans ce manuel. An d’éviter tout risque
d’incendie, de choc électrique ou de blessure grave, aucun accessoire ou
équipement autre que ceux qui sont conseillés par le fabricant ne doit être
utilisé.
7. Ne jamais utiliser cet appareil si son cordon électrique ou sa prise sont
endommagés, s’il ne fonctionne pas bien, s’il a subi un choc ou est
endommagé, ou s’il est tombé dans l’eau. Veuillez contacter le service
clientèle pour toute vérication, réparation ou réglage.
8. Ne pas faire fonctionner une table de cuisson cassée. Si la table de cuisson
est cassée, les produits d’entretiens et les débordements peuvent s’inltrer
dans l’appareil et provoquer un risque de choc électrique.
9. Maintenir le cordon électrique à distance des surfaces chaudes. Ne pas laisser
le cordon pendre au-dessus du coin de la table ou du comptoir. Ne jamais
forcer pour introduire la che dans la prise. Toujours débrancher le cordon
d’alimentation en tirant sur la prise. Eteindre l’appareil avant de débrancher la
prise du mur.
10. Ne pas faire fonctionner dans des lieux où des produits aérosols (sprays) sont
utilisés ou dans des lieux où l’oxygène est administré.
11. Faire preuve de prudence et de bon sens lorsque la table de cuisson est
utilisée dans des environnements extérieurs et des espaces publics. Cet
appareil ne doit jamais être laissé sans surveillance en présence d’enfants ou
de personnes non averties de sa présence. L’appareil doit être posé sur des
surfaces planes et stables, à distance de sources d’eau telles que les piscines,
les spas, les arroseurs automatiques, les tuyaux d’arrosage etc.
12. Ne pas déplacer l’appareil lorsqu’il est chaud.
13. Cet appareil est exclusivement à usage domestique; il est conçu pour un usage
classique d’un ménage. Il n’est pas destiné à un usage en continu ou un usage
commercial.
14. Ne pas démonter le produit. Aucune pièce interne ne peut être réparée par
l’utilisateur.
15. Ne pas laisser l’appareil sans surveillance lorsqu’il est en marche.
16. Cet appareil n’est pas conçu pour fonctionner avec un minuteur extérieur ou un
système de télécommande distinct.
17. Nettoyer la table de cuisson avec précaution. Nettoyer une surface chaude
avec des linges humides peut provoquer de la fumée et certains produits
peuvent générer des fumées dangereuses. Débrancher avant le nettoyage.
18. Procéder avec précaution pour éliminer les graisses chaudes.
19. Garder ce manuel à portée de main pour référence future.
Page 43
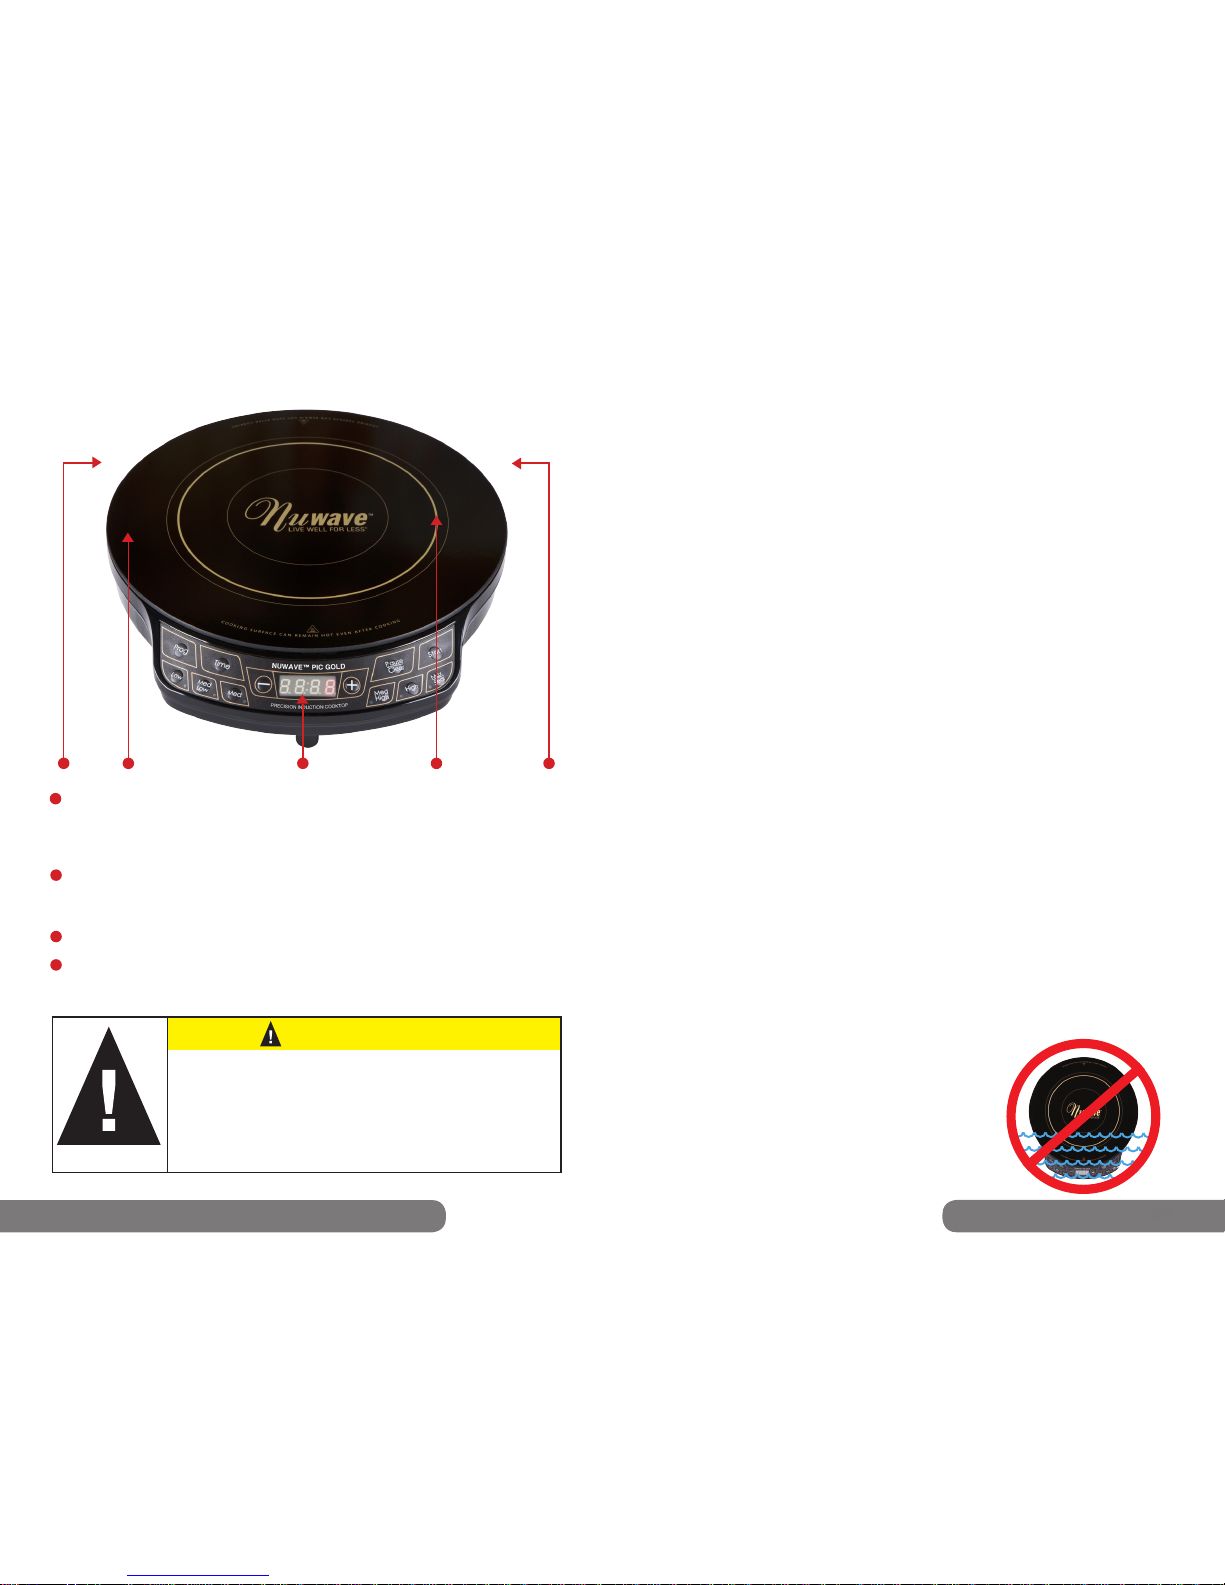
84 • NuWave™ PIC Gold Complete Cookbook
• 85
Cuisson par Induction de Précision NuWave™
Ventilation: Les évents d’aération se trouvent à l’arrière du produit pour permettre à
toute la chaleur dégagée par l’élément chauffant de s’échapper. Cette caractéristique
de conception empêche le transfert de chaleur à la surface de cuisson et assure une
performance efcace de la NuWave™ PIC Gold.
Surface: La surface en verre résistant à la chaleur de la NuWave™ PIC Gold reste froid
au toucher et facile à nettoyer avec un simple coup de chiffon humide.
3 Panneau de Commande avec
Afchage LED: Panneau de commande bien éclairé, facile à lire.
Source de Chaleur: Les bobines électromagnétiques sont situées sous la surface du
verre transfèrent la chaleur dégagée directement une batterie de cuisine pour cuisson
par induction.
1
2
3
4
ATTENTION
Alors que la NuWave™ PIC Gold est en marche, ne touchez pas la
surface de l’appareil car elle peut devenir très chaude, entraînant
risque de brûlures. La Table de cuisson peut conserver la chaleur
résiduelle après que l’ustensile de cuisson a été supprimé.
Ne pas enlever les casseroles et les poêles pendant le processu
de cuisson. Appuyez sur le bouton “Pause/Clear” pour couper le
courant avant de les enlever.
• 85
Manual D’Utilisation
1
4
3 1
2
Batterie de Cuisine Compatible avec Table de Cuisson à Induction:
ATTENTION:
La surface chauffante est situé à l’intérieur de la grande bague or. Vous pouvez
utiliser des casseroles à la mesure de la largeur totale de la NuWave™ PIC Gold, qui
mesure 12.3 pouces, mais dans ces situations, la chaleur transfère plus lantement
vers les bords extérieurs. N’utilisez pas de casseroles de plus de 12.3 pouces.
Exemples de casseroles compatibles:
• Toutes les Batteries de cuission de NuWave™ • En Fonte
• En acier et fonte émaillée • En acier inoxydable avec base magnétique
• NuWave™ Duralon™2 Céramique Antiadhésive Poêle à Frire
Batterie de cuisine compatible non induction:
• En Cuivre • En verre • En Aluminium • Vases en Poterie
Comment puis-je vérier la compatibilité de l’induction de ma batterie de
cuissie ?
Trois façon simples de vérier si vos casseroles et poêles existantes ou de futurs
achats d’ustensiles, sont compatibles avec la NuWave™ PIC Gold:
1. Un aimant est généralement un excellent indicateur. S’il colle au fond d’une pièce
d’ustensiles de cuisine, cela signie généralement que la casserole ou la poêle est
compatible avec l’induction. Cependant, soyez informés du fait qu’il y a des cas où
les propriétés magnétiques d’un récipient de cuisson peuvent ne pas être assez
fortes pour la casserole de fonctionner efcacement avec la NuWave™ PIC Gold.
2. Placez une petite quantité d’eau dans une casserole ou une poêle particulière. Si
l’induction est compatible, l’eau commence à bouillir.
3. Un symbole prête à induction peut être imprimé sur le fond de la batterie de
cuisine.
IMPORTANT – Ne pas tremper l’appareil dans l’eau
ou ne pas essayer de le passer au lave-vaisselle.
La surface extérieure peut être nettoyée en
l’essuyant soigneusement avec un chiffon humide
ou une éponge. Assurez-vous que l’appareil soit
complètement refroidi avant de le nettoyer.
Comme la technologie d’induction est basée sur des principles magnétiques, les
ustensiles compatibles doivent avoir un fond en matériau ferreur (à base de fer,
magnétique). Certains types de batteries de cuisine sont faits en métaux naturellement
magnétiques (tel que le fer pur), tandis que d’autres sont rendus magnétiques en prenant
en “sandwich” d’une mince couche d’un métal ferreux à l’intérieur de la base. Cette
couche sera exécutée par le champ magnétique de la table de cuisson à induction pour
répartir la chaleur. L’acier inoxydable de haute qualité, tri-plis et la batterie de cuisine en
fonte de fer travailleront de concert avec les tables de cuisson à induction. L’ustensile
en cuivre, en verre et en aluminium ne fonctionne pas à moins d’avoir d’une base
magnétique en sandwich. Les casseroles qui fonctionnent de façon optimale avec la
NuWave™ PIC Gold ont tendance à avoir une épaisseur moyenne et forte.
AVANT L’UTILISATION:
Essuyer la surface avec un chiffon imbibé d’eau
chaude savonneuse.
Nettoyage & Entretien pour Votre NuWave™ PIC Gold:
Page 44
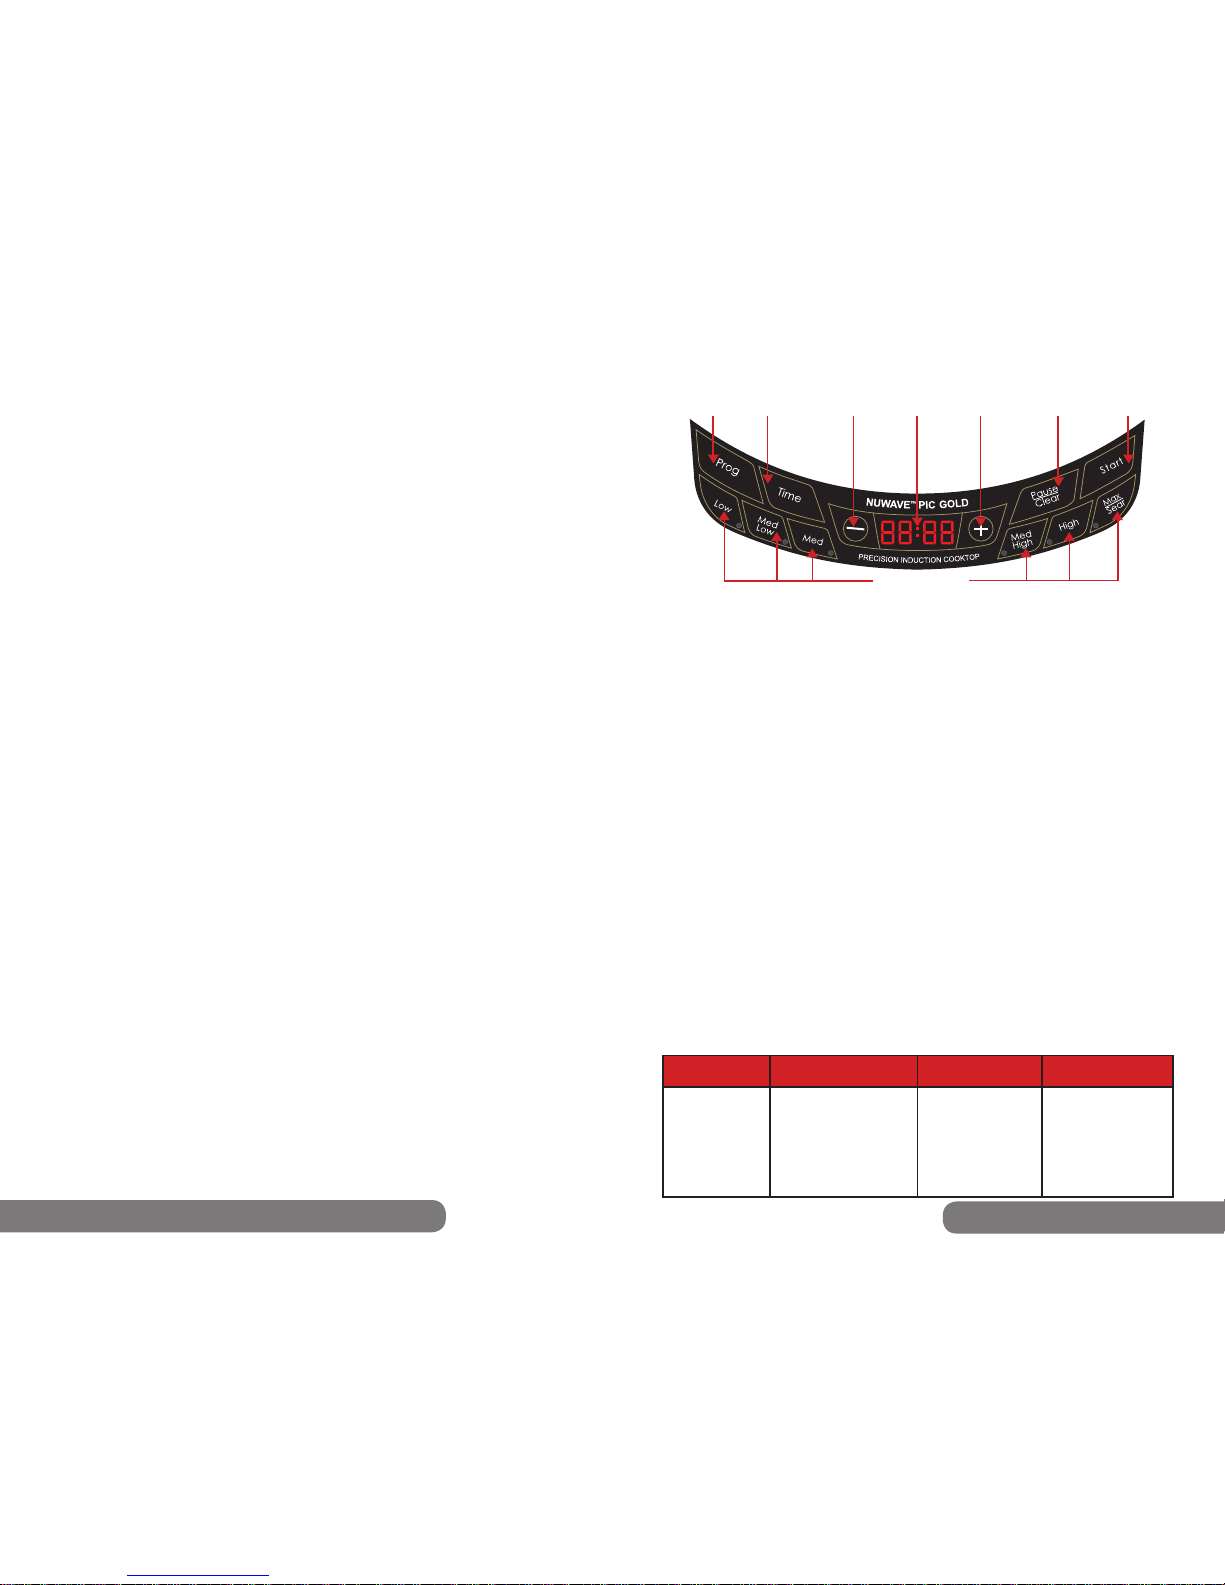
86 • NuWave™ PIC Gold Complete Cookbook
• 87
Instructions Générales d’Exploitation
Instructions Générales de Nettoyage:
• Débrancher l’appareil avant le nettoyage.
• Nettoyer l’appareil après chaque utilisation.
• Laisser refroidir complètement l’appareil avant de le nettoyer.
• La surface extérieure peut être nettoyée en essuyant soigneusement avec un chiffon
humide ou une éponge.
• Retirer la prise d’alimentation avant de nettoyer la NuWave™ PIC Gold. Ne pas utiliser
de produit de nettoyage corrosifs et l’eau ne doit pas pénétrer à l’intérieur de la table de
cuisson à induction.
• Ne jamais plonger la NuWave™ PIC Gold, ses câbles ou prises électrique dans l’eau ou
autres liquides.
• Essuyer la surface du verre avec un chiffon humide ou utiliser une solution de savon doux,
non abrasif. Laisser refroidir complètement l’appareil avant de le nettoyer.
• Essuyer le boîtier ou le panneau de commande avec un chiffon doux imbibé d’eau ou d’un
détergent doux.
• Ne pas utiliser de produits nettoyants à base d’huile car leur utilisation pourrait
endommager les pièces en plastique ou le boîtier/panneau de commande.
• Ne pas utiliser de matériaux inammables, acides ou alcalins ou des substances à
proximité de la NuWave™ PIC Gold, car cela peut réduire la durée de vie de la table de
cuisson à induction ou présenter un risque d’incendie lorsque la table de cuisson à induction
est en cours d’utilisation.
• An de préserver l’aspect neuf de votre NuWave™ PIC Gold, prenez des mesures pour
veiller à ce que le fond de la table de cuisson ne frotte pas la surface du verre de l’appareil,
même si une surface rayée ne nuira pas à l’utilisation de la table de cuisson à induction.
• Veillez à bien nettoyer l’appareil avant de le ranger dans un endroit frais et sec.
• Placer la table de cuisson sur une surface stable, plane, non métallique.
• Ne jamais utiliser la table de cuisson sur une surface inammable (par exemple, linge de
table, tapis, etc.).
• Ne pas couvrir les fentes de ventilation de la table de cuisson à induction. Cela peut
entraîner une surchauffe. Maintenir une distance minimum de 3-5 pouces des murs et
d’autres objets, appareils, etc.
• Ne pas placer d’appareils ou d’objets sensibles aux champs magnétiques sur ou à
proximité de la NuWave™ PIC Gold (ex. cartes de crédit, téléphones portables, radios, TVs,
caméras vidéo, etc.).
• Ne pas utiliser la table de cuisson à induction à proximité de feux ouverts, des radiateurs
ou d’autres sources de chaleur.
• Assurez-vous que le câble d’alimentation n’est pas endommagé ou comprimé sous la table
de cuisson à induction.
• Le câble d’alimentation ne doit pas entrer en contact avec des bords tranchants et/ou des
surfaces chaudes.
• Avant de brancher la NuWave™ PIC Gold, veuillez conrmer que les besoins de tension
indiqués dans ce manuel correspondent à la tension d’alimentation dans votre maison.
Un mauvais branchement peut conduire à des dommages de l’appareil et d’éventuelles
blessures à des personnes.
• La surface de la table de cuisson est conçue à partir de verre résistant à la température. En
cas de dommages à l’appareil, même une petite ssure sur la surface du verre, débranchez
immédiatement la NuWave™ PIC Gold de la source d’énergie.
CONSEILS IMPORTANTS:
1. Vérier les prises de courant pour assurer un fonctionnement correct. Ne pas
brancher dans une prise où sont engagés les principaux appareils ménagers.
Vérier les paramètres si l’appareil fait cuire trop lentement.
2. La prise de courant doit être correctement branchée dans une prise.
3. Toujours éteindre ou débrancher l’appareil avant le l’essuyer.
• 87
Manual D’Utilisation
Instructions pour le Panneau d’Afchage
Démarrage facile:
La NuWave™ PIC Gold est préprogrammée pour faire cuire à haute température (425°F) pendant 1
heur. Pour commencer la cuisson, appuyez sur le bouton “Start”, après avoir placé une casserole prête
à induction sur la surface. Si vous cuisez à un niveau de puissance autre que “Haut”, appuyez sur
“Bas”, “Max/Griller” ou la touche “-” ou “+” pour augmenter ou diminuer la température par tranche de
10°F. Voir le Tableau d’Afchage de Panneau au bas de cette page pour plus de détails.
Panneau de Commande:
“0” doit s’afcher lorsque le programme est clair ou quand l’appareil est opérationel.
Pour commencer la cuisson:
Il ya plusieurs façons de commencer la cuisson avec votre NuWave™ PIC Gold:
• Appuyez sur “Start”. Température par défaut est de 425°F et 1 heure de cuisson.
• Régler la température et appuyez sur “Start”. Par défaut est la cuisson 1 heure.
• Réglez le temps de cuisson et appuyez sur “Start”. Température par défaut est de 425°F.
• Réglez la température et l’heure, puis appuyez sur “Start”.
Le NuWave™ PIC Gold s’arrête automatiquement une fois la cuisson de temps a expiré et un son
“bip” sera alerter les utilisateurs. L’écran afche toujours la température au cours du dernier cycle de
cuisson. Pour afcher laps de temps, appuyez sur “Time” et un compte à rebours apparaît, marquant
la durée avant le cycle ou le stade est complet.
Réglage de la Température:
Cet appareil est réglé pour cuire à température élevée (High) (425°F). Pour réinitialiser, appuyez sur la
touche de température “Basse” (Low) – “Max/Griller” (Max/Sear), puis appuyez sur “Start”. Le champ
de température s’afche sur le panneau d’afchage. Pour relever ou abaisser la température par
tranche de 10°F, appuyez sur les boutons “+” ou “-” jusqu’à ce que la température désirée s’afche.
Veuillez consulter le Tableau ci-dessous pour les températures préréglées. La température minimale
est de 100°F, alors que la maximale atteint 575°F.
NOTE: Afchage de la température représente la température de 1.5L d’huile dans le NuWave™
3.5-quart Acier Inoxydable Poêle à Frire Pot. Lieu de thermomètre pour le test à l’origine (milieu) de la
NuWave™ 3.5-quart Acier Inoxydable Poêle à Frire Pot et une longueur égale distance entre le fond
de pot et la partie supérieure de l’huile.
Écran LED du commandant de bord est par défaut pour afcher la température de cuisson en degrés
Fahrenheit (F). Pour changer l’afchage en degrés Celsius (C), appuyez sur la touche “PROG”,
suivi par “-”. Appuyez sur “-” à nouveau pour convertir en degrés Celsius. Pour revenir à Fahrenheit,
appuyez sur “-” une fois de plus. Pour clore l’option de conversion F/C, appuyez sur la touche “Pause/
Clear” jusqu’à ce que le chiffre “0” apparaît sur l’écran de l’appareil.
Exemples
Low
Med Low
Med
Med High
High
Max/Sear
Réchauffer
Mijoter
Etuver
Rissoler/Frire
Faire bouillir
Griller
Program
Time
Decrease
LED
Display
Low-Max/Sear
Increase
Pause/Clear
Start
Appuyer sur
le Bouton
Plage de température
Afchage de
Panneau
100F/ 38C
175F / 79C
275F / 135C
375F / 191C
425F / 218C
SEAR
100°F (38°C)
175°F (79°C)
275°F (135°C)
375°F (191°C)
425°F (218°C)
575°F (302°C)
Page 45
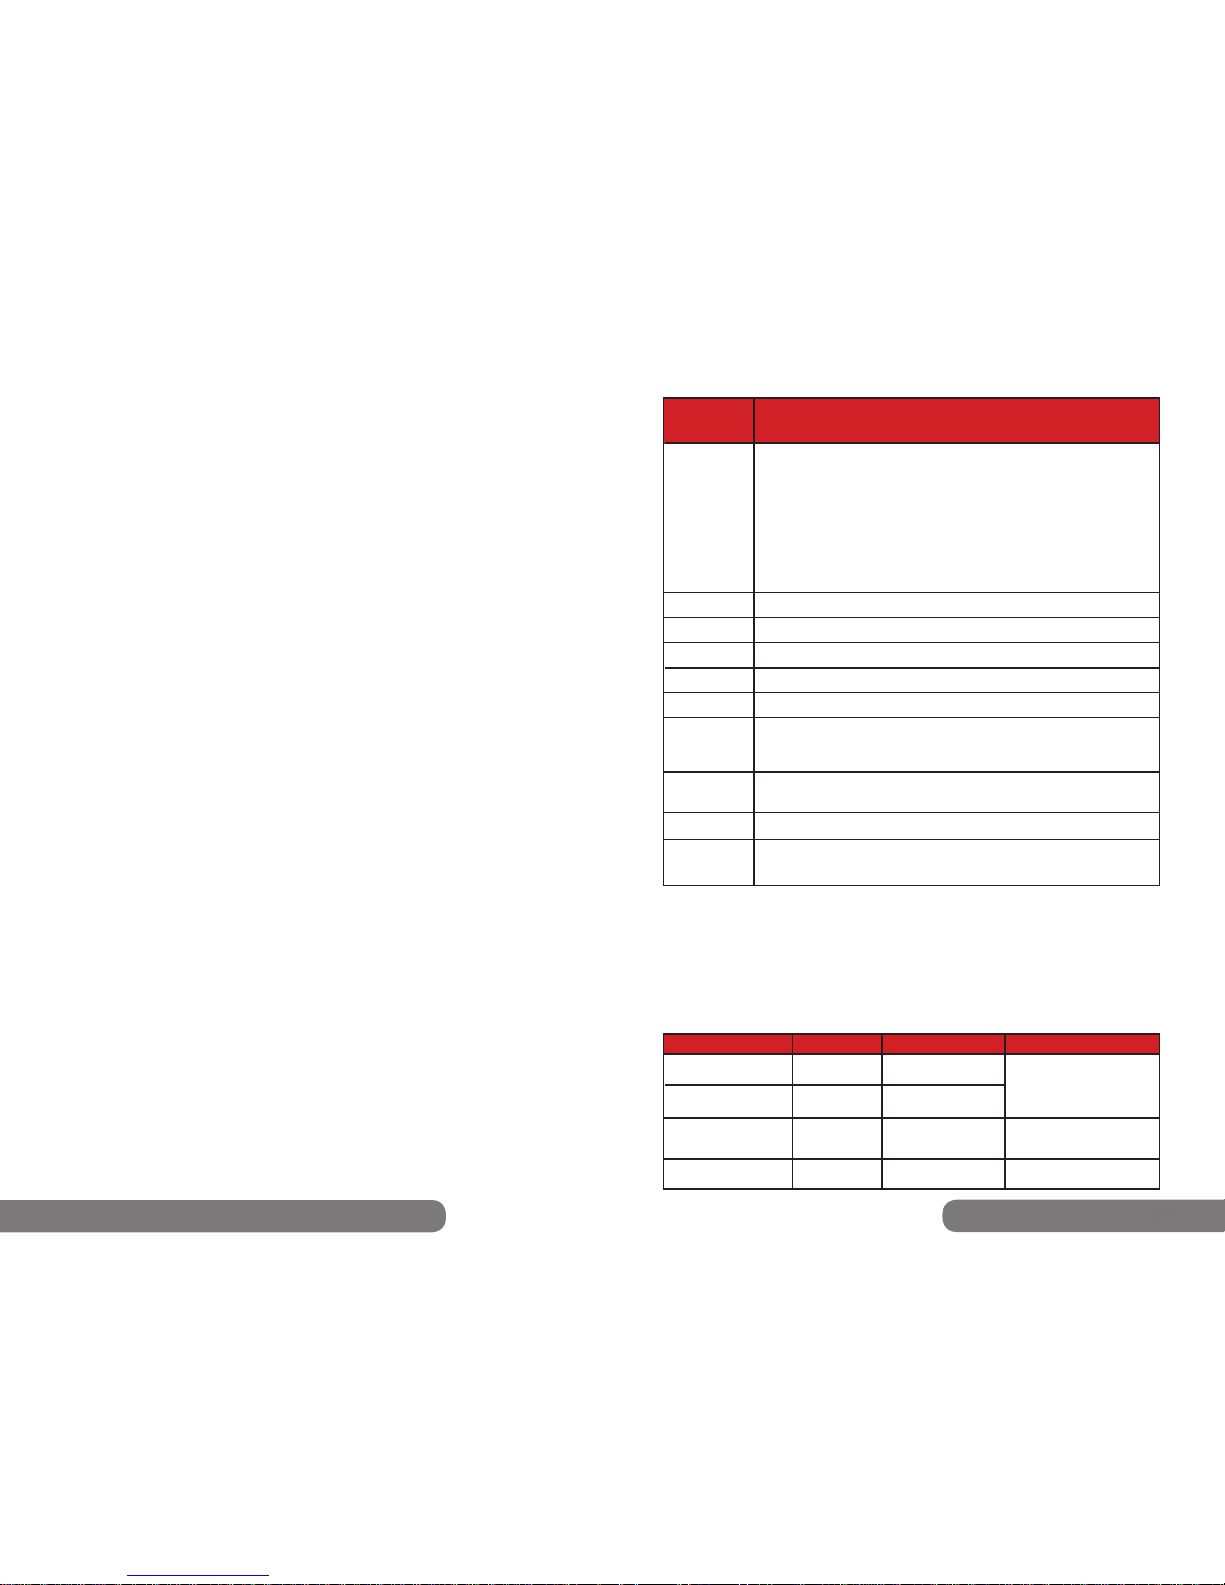
88 • NuWave™ PIC Gold Complete Cookbook
• 89
Fonction de Retardement:
Le but de cette fonction consiste à permettre à des programmes de commencer à une
date ultérieure. Pour retarder un programme, appuyer sur appuyer “Prog,” puis appuyer
sur le bouton “Time”. Un “0” clignotera dans le coin inférieur droit du panneau d’afchage.
Appuyer sur le bouton “+” jusqu’à ce que la quantité de temps que vous souhaitez retarder
pour la démarrage de l’appareil soit atteint (pour plus d’informations, revoir RÉGLAGE DU
CHRONOMETRE (SETTING TIME) sur le haut de cette page). Ensuite, appuyer de nouveau
sur “Prog” pour régler le programme de cuisson. La quantité de temps de retard sélectionné
est inclus dans les étapes programmées. Pour passer à l’étape suivante, appuyer sur
“Low” à “Max /Sear” pour régler la température de cuisson. Passez à l’étape # 2 avec les
instructions de “PROGRAMMATION DES FONCTIONS” (“PROGRAMMING FUNCTION”).
Une fois prête pour le compte à rebours à commencer, appuyer sur “Start.” Lorsque le
compte à rebours de retard atteint “0,” la NuWave™ PIC Gold émet deux bips pour signaler
la n du retardement. A ce stade, le temps de cuisson commencera et la température sera
afchée.
Fonction de Programmation (Cuisson par étapes):
• Appuyer sur le bouton “Prog”.
• “Pro” s’afche dans le panneau d’afchage.
1. Entrer la température désirée, allant de “Baisse” (“Low”) à “Max/Griller” (“Max/Sear”).
Si vous avez besoin d’augmenter ou de diminuer la température, appuyer sur les boutons
“-” ou “+”.
2. Appuyer sur le bouton “Time”. 00:00 s’afche à l’écran, puis appuyer sur les boutons
“-” ou “+” buttons jusqu’à attendre l’heure souhaitée. Voir la section “REGLAGE DU
CHRONOMETRE” (“SETTING TIME”) ci-dessus pour les informations détaillées sur la
méthode d’entrer les minutes et les heures.
•Pour ajouter des étapes supplémentaires, répéter les étapes 1 et 2, puis appuyer sur
“Start” pour commencer votre programme. Vous pouvez programmer jusqu’à 10 étapes (le
retardement est considéré comme une étape).
•Si vous avez besoin de changer n’importe quelle partie du programme, appuyer sur le
bouton “Pause/Clear” deux fois pour recommencer.
Exemple: Pour faire bouillir pendant 5 minutes avant de réduire à feux doux pendant
20 minutes, appuyer sur “Prog,” puis appuyer sur le bouton “Max/Sear”. Appuyer sur le
bouton “Time” une fois, puis appuyer sur “+” jusqu’à atteindre 5. Ensuite, appuyer sur
“Low”, puis appuyer sur “Time” deux fois, puis “+” jusqu’à ce que vous atteigniez 20. Enn,
appuyer sur “Start.” (Démarrer)
REMARQUE: Le temps de cuisson programmable maximale est de 99 heures et 60
minutes.
Fonctions de Pause/Annuler:
Pour interrompre le temps de cuisson, appuyer sur la touche “Pause/Clear” une fois. Cela
va mettre la NuWave™ PIC Gold en pause à une étape donnée. La température restera
inscrite dans le panneau d’afchage, mais le “F” clignotera. Pour reprendre, appuyer sur
“Démarrer” (“Start”). Pour EFFACER (CLEAR) le mode de cuisson ou l’afchage alors
que la CIP est en marche, appuyer deux fois sur la touche “Pause/Clear”. L’écran sera
entièrement effacé, un “0” s’afchera et l’appareil s’éteindra.
Réglage du chronomètre:
Appuyer sur le bouton “TIME”. Un “0” clignotera dans le coin droit de l’écran. Appuyer sur
le bouton “+” jusqu’à atteindre la durée désirée. Exemples: Pour programmer 5 minutes,
appuyer sur “Time” une seule fois, puis appuyer sur “+” jusqu’à ce que 00:05 s’afche sur
l’écran. Ensuite, appuyer sur “Start.” Pour 20 minutes, appuyer sur “Time” à deux reprises,
puis appuyer sur le bouton “+” jusqu’à ce que 00:20 s’afche, ensuite, appuyez sur “Start.”
Pour 2 heures 30 minutes, appuyer sur “Time” à deux reprises, ensuite appuyer sur “+”
jusqu’à atteindre 3, puis appuyer sur “Time” à nouveau. Appuyer sur “+” jusqu’à atteindre
2 (l’écran afchera 02:30), puis appuyer sur “Start.”
• Le clignotement “0” indique le chiffre que vous pouvez régler. La durée maximale
est de 99 heures et 60 minutes.
• L’écran afche les heures et les minutes, mais pas les secondes.
• 89
Manual D’Utilisation
Dépannage
Après avoir sorti pot Bip sonore Display Référence
Initiale
< 10 secondes
11-70 secondes
Après 70 secondes
Bip
Aucun
Oui
Aucun
“F” ou “C” ou “Sear”
ou “:” clignotant
“F” ou “C” ou “Sear”
or “:” clignotant
E1
0
Après le retour du
pot, NuWave™
PIC Gold reprendra
automatiquement cuisine.
Reprendre la cuisson
par le bouton “Start” en
appuyant sur.
La cuisson terminée.
Solution
Message
d’erreur
E2
E3
E4
E5
E6
E7
E8
E9
FULL
E1
L’appareil est défectueux. Contactez le service de clientèle.
L’appareil est défectueux. Contactez le service de clientèle.
L’appareil est défectueux. Contactez le service de clientèle.
Une lecture E1 signie généralement que votre NuWave™ PIC Gold ne
détecte aucun ustensile de cuisson sur sa surface. Cela peut se produire pour
une des deux raisons.
1. Avez-vous placé une casserole ou une poêle sur l’appareil? Les bobines
d’induction contenues dans la NuWave™ PIC Gold ne fonctionnent que quand
elles sont en contact direct avec un morceau de l’ustensile de cuisine. Pour
maintenir l’efcacité de votre appareil, veillez à ce qu’il repose sur une surface
plane et que le contact est compatible avec votre ustensile de cuisine.
2. Un message E1 peut également se produire si votre batterie de cuisine
choisie n’est pas prête à induction.
La tension des appareils est trop faible. Minimum = 85 volts
La tension des appareils est trop élevée.Maximum = 144 volts
La surchauffe ou la ventilation d’air est obstruée. Si la température interne est
supérieure à 230˚F, le fonctionnement cessera et un “bip” sonore sera émis.
Appuyez deux fois sur “Pause/Clear”. Attendez que l’appareil refroidisse.
En mode de programmation, si la durée totale d’entrée atteint la limite de
l’appareil de 99:59, aucune étape supplémentaire ne peut être entrée.
La surchauffe, si la température de l’appareil est supérieure à 20ºF plus
élevée pour griller, l’appareil s’éteint. Contactez le service de clientèle.
L’appareil est défectueux. Contactez le service de clientèle.
• Lorsque l’un des messages d’erreur ci-dessus s’afche sur l’écran LED, l’appareil émet un
“bip” au moins une fois.
• Le ventilateur peut fonctionner jusqu’à 60 secondes supplémentaires après avoir appuyé
sur le bouton “Pause/Clear” une fois. Poursuivre la cuisson en appuyant sur le bouton
“Start” dans les 45 minutes.
• L’appareil s’éteint après 45 minutes si aucun bouton (tel que “Start”) n’est appuyé. Lorsque
l’appareil s’arrête, il effacera tous les antécédents de cuisson.
• Après avoir appuyé sur le bouton “Pause/Clear” deux fois, le ventilateur peut fonctionner
jusqu’à 60 secondes jusqu’à ce que l’appareil refroidisse. A ce stade, la NuWave™ PIC
Gold s’éteint.
Page 46

90 • NuWave™ PIC Gold Complete Cookbook
• 91
LES GARANTIES DE FABRICANT: La tabe de cuisson à induction et tous les
composants électriques doivent être exempts de tout défaut et de fabrication sous réserve
de conditions normales d’usage résidentiel, lorsqu’elle est utilisée conformément aux
instructions écrites du Fabricant, fournies avec chaque unité pour un (1) an à compter
de la date d’achat. Le Fabricant fournira les pièces nécessaires et la main-d’œuvre pour
réparer toute pièce du système de cuisson à induction au Service Technique de NuWave,
LLC. Après l’expiration de la garantie, le coût de la main-d’œuvre et des pièces seront la
responsabilité du propriétaire.
LA GARANTIE NE COUVRE PAS: Tout revêtement (le cas échéant) sur toute partie du
système de cuisson. La Garantie Limitée est annulée si les réparations sont effectuées
par un revendeur non autorisé ou le numéro de série sur la plaque signalétique est
enlevé ou déguré. La détérioration normale de la nition due à l’utilisation ou l’exposition
n’est pas couverte par cette Garantie. Cette Garantie Limitée ne couvre pas les défauts,
les dommages ou la performance insufsante à cause d’accident, de force majeure
(telle que la foudre), les uctuations du courant électrique, les altérations, les abus, une
mauvaise utilisation, de mauvaises applications, les atmosphères de type corrosif, une
installation incorrecte, le défaut de fonctionnement conformément aux instructions écrites,
à l’utilisation anormale et à l’utilisation commerciale du Fabricant.
POUR OBTENIR LE SERVICE: Le propriétaire a l’obligation et la responsabilité de: payer
pour tous les services et les pièces qui ne sont pas couverts par la garantie; de prépayer
les frais de transport au et du Service Technique pour toute parite ou tout système
retourné par cette garantie; d’emballer soigneusement le produit à l’aide de matériaux
de protection pour empêcher que l’appareil ne soit endommagé pendant le transit.
L’emballage d’origine est idéal à cette n. Inclure dans le paquet: le nom du propriétaire,
l’adresse, le numéro de téléphone de jour, une description détaillée du problème et, votre
NUMÉRO D’AUTORISATION DE RETOUR DE MARCHANDISES (numéro ARM):
Appelez 1-855-742-2665 ou par e-mail [email protected] pour obtenir le numéro
ARM. Fournir le modèle & le numéro de série du système de cuisson et la preuve de
la date d’achat (une copie de la fature) an de pouvoir vous prévaloir de la présente
Garantie.
OBLIGATION DU FABRICANT:
L’obligation du Fabricant en vertu de cette Garantie Limitée est limitée à la réparation ou
au remplacement de toute pièce de la table de cuisson à induction expressément couverte
par cette Garantie Limitée qui, après examen, s’avère défectueuse dans des conditions
normales d’utilisation. La Garantie Limitée n’est applicable que dans la zone continentale
des Etats-Unis ou seulement à l’acheteur d’origine ou aux canaux autorisés du fabricant
de la distribution. La Garantie Limitée ne peut être modiée, variée ni prolongée, sauf par
acte écrit signé par le fabricant. Le recours de réparation ou de remplacement prévus en
vertu de cette Garantie limitée est exclusif. Dans aucun cas, le fabricant ne peut être tenu
responsable de tout dommage consécutif ou indirect à toute personne, qu’il soit ou non
attribuable à la négligence du fabricant, y compris sans s’y limiter, les dommages pour
perte d’usage, les coûts de substitution, des dommages matériels ou toute autre perte
d’argent. Certains États ne permettent pas l’exclusion ou la limitation des dommages
indirects ou consécutifs, les exclusions de limitation ci-dessus peuvent ne pas s’appliquer.
Cette Garantie Limitée donne des droits légaux spéciques et, il peut y avoir d’autres
droits qui varient d’un état à l’autre. Sauf pour ce qui est expressément prévu ci-dessus,
le fabricant n’accorde aucune garantie expresse ou implicite découlant de la loi ou
autrement, y compris et sans limitation, toutes les garanties de commercialisation et de
compatibilité à une n particulière, à toute autre personne.
LIRE LE MANUEL DU PROPRIÉTAIRE: Si vous avez encore des questions sur le
fonctionnement ou la garantie du produit, veuillez contacter NuWave, LLC à
1-855-742-2665 ou par courriel [email protected].
Page 47

92 • NuWave™ PIC Gold Complete Cookbook
Thank you for your purchase! We value every NuWave™ customer. You’ve
made the decision to buy the NuWave™ Precision Induction Cooktop Gold
because you want to save time, money and energy while enjoying great
tasting meals cooked to perfection.
Our mission is to exceed customers’ expectations by providing innovative
new products using the most advanced technology available today.
To show our gratitude and lifetime commitment to you, we have created
www.precisioncookingclub.com exclusively for our customers. This site
is hosted by our culinary team and will feature recipes, step-by-step
instructional cooking videos, live chat and more.
You can also visit www.NuWaveNow.com to learn more about the
revolutionary products developed by the makers of the NuWave® Oven Pro,
NuWave® Oven Elite and NuWave® Mini Oven, NuWave™ Twister Blender
and NuWave™ Party Mixer, and NuWave™ Flavor-Lockers® Vacuum-Seal
Storage Containers.
32141 QA-M05
FOR HOUSEHOLD USE ONLY
Designed and Developed in U.S.A. by:
NuWave, LLC
1755 N. Buttereld Rd.
Libertyville, IL 60048, U.S.A.
Customer Service Hours:
Monday-Friday: 8:00 AM - 4:30 PM (CST)
1-855-742-2665 (1-855-PICCOOK)
www.NuWaveNow.com
Model 30201: 120V, 60Hz, 1500 Watts
US Patents Pending.
© 2014 NuWave, LLC All Rights Reserved
™
®
 Loading...