

Page 1
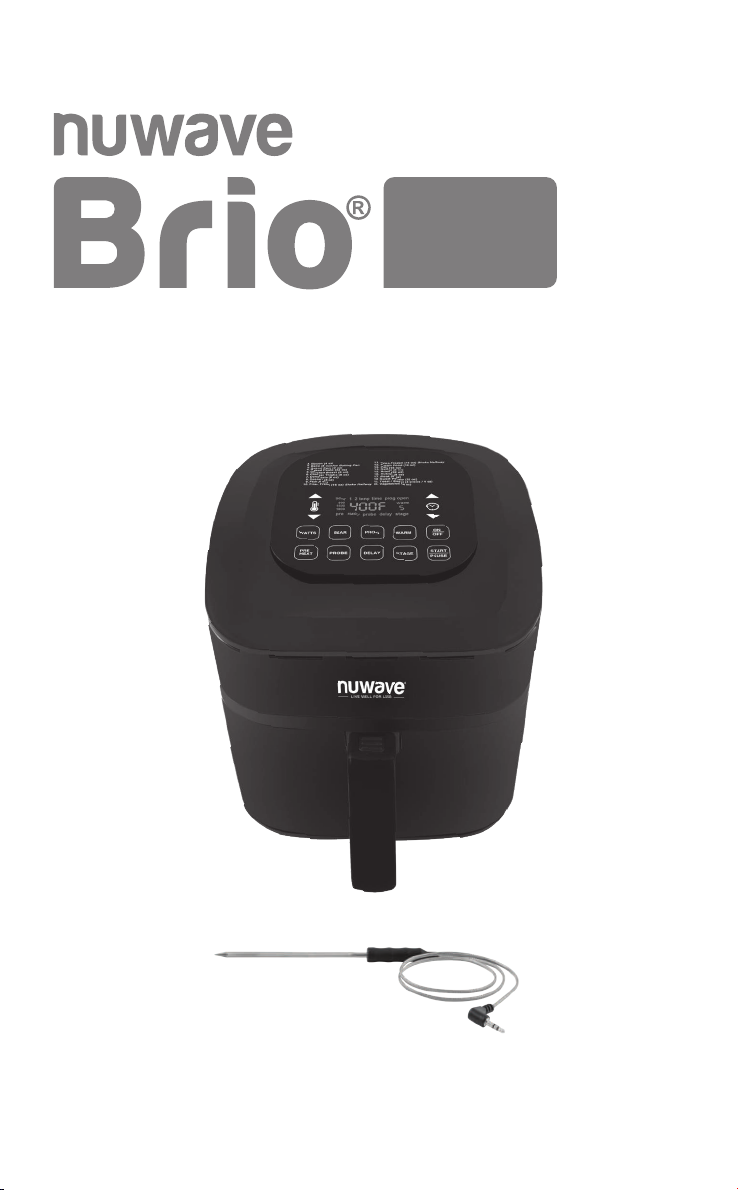
Digital Air Fryer
with Temperature Probe
OWNER’S MANUAL
& COMPLETE
RECIPE BOOK
6Q
nuwavenow.com
Page 2
REGISTER
NOW!
As a special thank-you for registering your NuWave unit,
you’ll automatically receive an additional 6 months added to your limited manufacturer’s warranty!*
All you have to do is follow these simple steps.
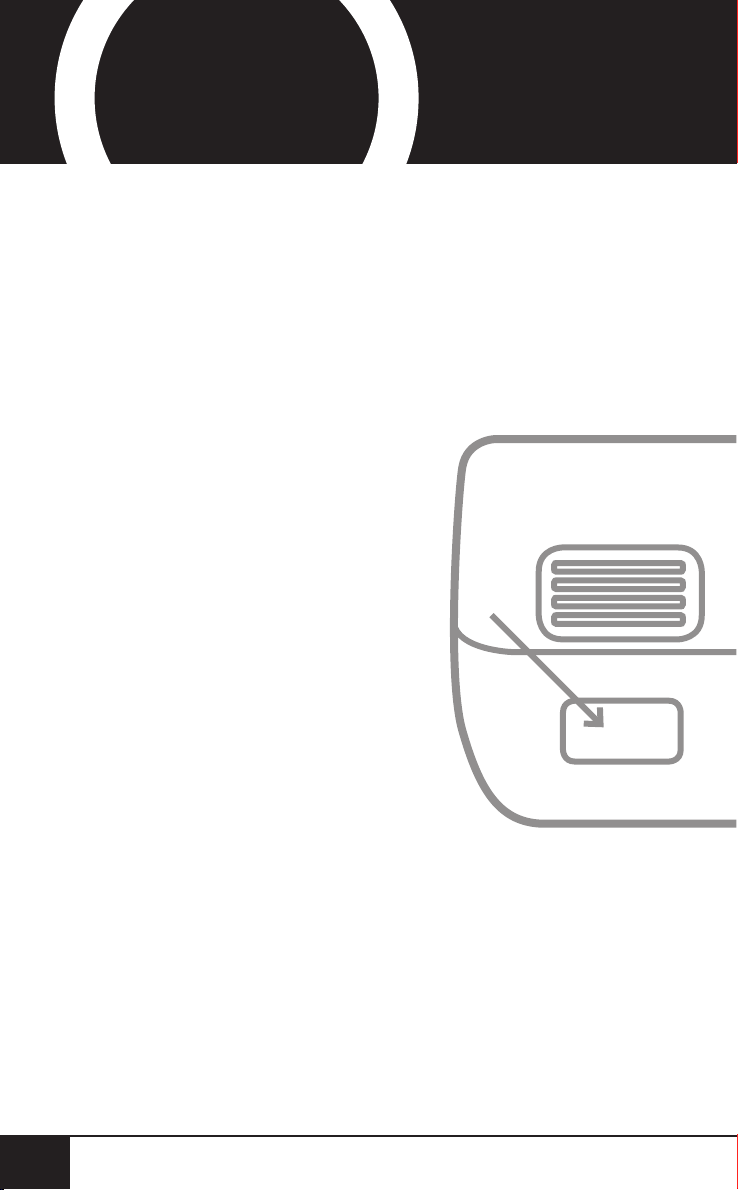
Using your smartphone or
1
2
smart device, scan the QR code
located on the unit label on the
back of the unit.
You will be directed to NuWave’s
product registration page with
your unit’s unique serial number
automatically entered in the
appropriate eld.
NOTE: If you do not have a
web-enabled smart device,
simply visit nuwavenow.com/QR
and manually enter in your unit’s
serial number.
2
2
3
4
Fill out the remaining information
and complete the optional survey.
Once you submit your
information, you will receive
a conrmation email containing
your extended warranty details.
*Register your product within 1 year of date of purchase for a free
6-month extension of your limited warranty.
Page 3
for an additional
months
6
DOWNLOAD THE QR CODE
APP TO YOUR MOBILE DEVICE
Open your mobile app store
1
(App Store, Google Play).
warranty!
2
3
Search for "QR code readers."
QR code readers
Simply download the QR code reader to your phone,
open it, scan the code and you are ready to go.
NOTE: You may need to open your downloaded QR
code reader each time you want to scan a QR code.
nuwavenow.com
nuwavenow.com
3
3
Page 4
OUR PRODUCTS
OUR PRODUCTS
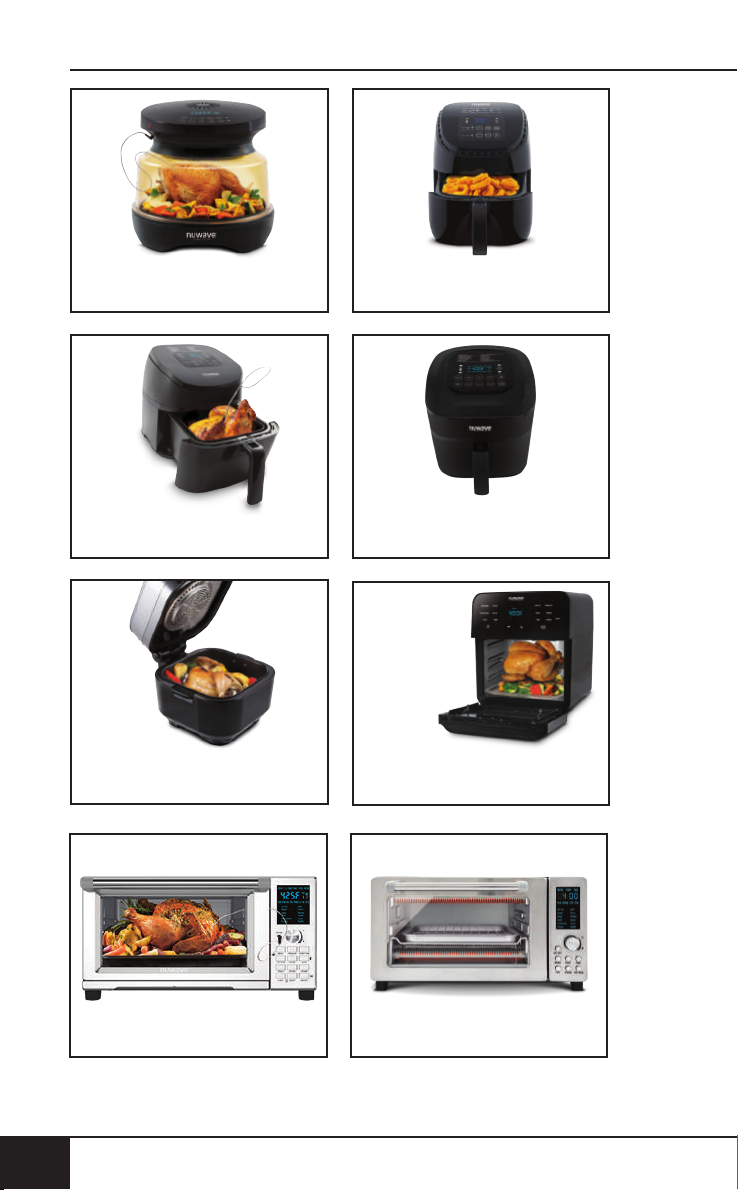
Primo® Combo Grill Oven
Model #: 20701
®
4.5Q Air Fryer
Brio
Model #: 36102
Brio® 10Q Air Fryer
Model #: 37101
Brio® 3Q Air Fryer
Model #: 36011
Brio® 6Q Air Fryer
Model #: 37005
®
Brio
14Q
The Ultimate Air Fryer Oven
Model #: 38001
Bravo
Model #: 20801
4
™
XL Smart Oven
our products
Bravo™ Toaster Oven
Model #: 20831
Page 5
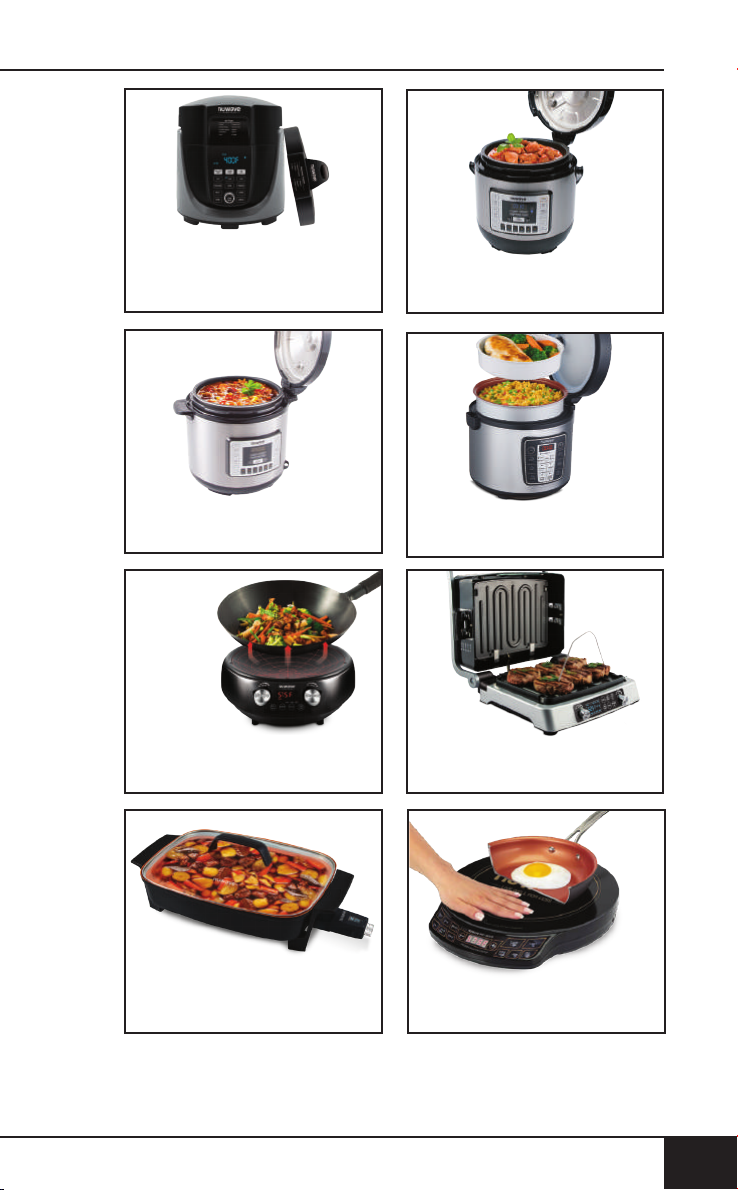
™
Duet
Pressure Cooker
& Air Fryer Combo
Model #: 33801
Nutri-Pot
®
6Q Digital Pressure Cooker
Model #: 33101
Nutri-Pot
®
8Q Digital Pressure Cooker
Model #: 33201
Mosaic
™
Precision Induction Wok
Model #: 30801
Olio™ Rice & Multi-Cooker
Model #: 33701
Jubilee
™
Smokeless Grill
Model #: 35001
Medley
®
Digital Skillet
Model #: 31825
PIC Gold (Induction Cooktop)
Model #: 30242
nuwavenow.com
5
Page 6
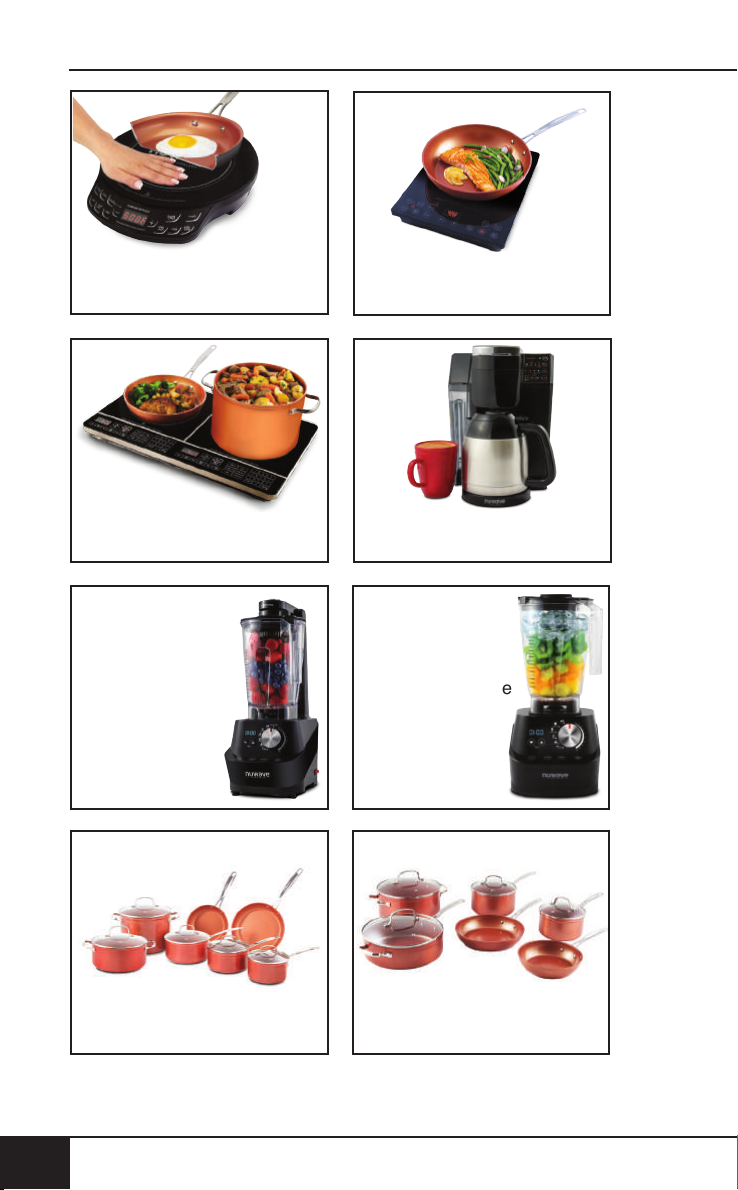
OUR PRODUCTS
PIC Flex (Induction Cooktop)
Model #: 30532
PIC Double (Induction Cooktop)
Model #: 30602
Moxie® Vacuum
High-Performance
Blender
Model #: 28101
PIC Pro Chef (Induction Cooktop)
Model #: 30701
BruHub® 3-in-1 Coffee Maker
Model #: 45011
®
Pro
Moxie
High-Performance
Blender
Model #: 28202
6
12-Piece
®
Duralon
Non-Stick Cookware
Model #: 31424
our products
10-Piece
Duralon
®
Non-Stick Cookware
Model #: 31422
Page 7
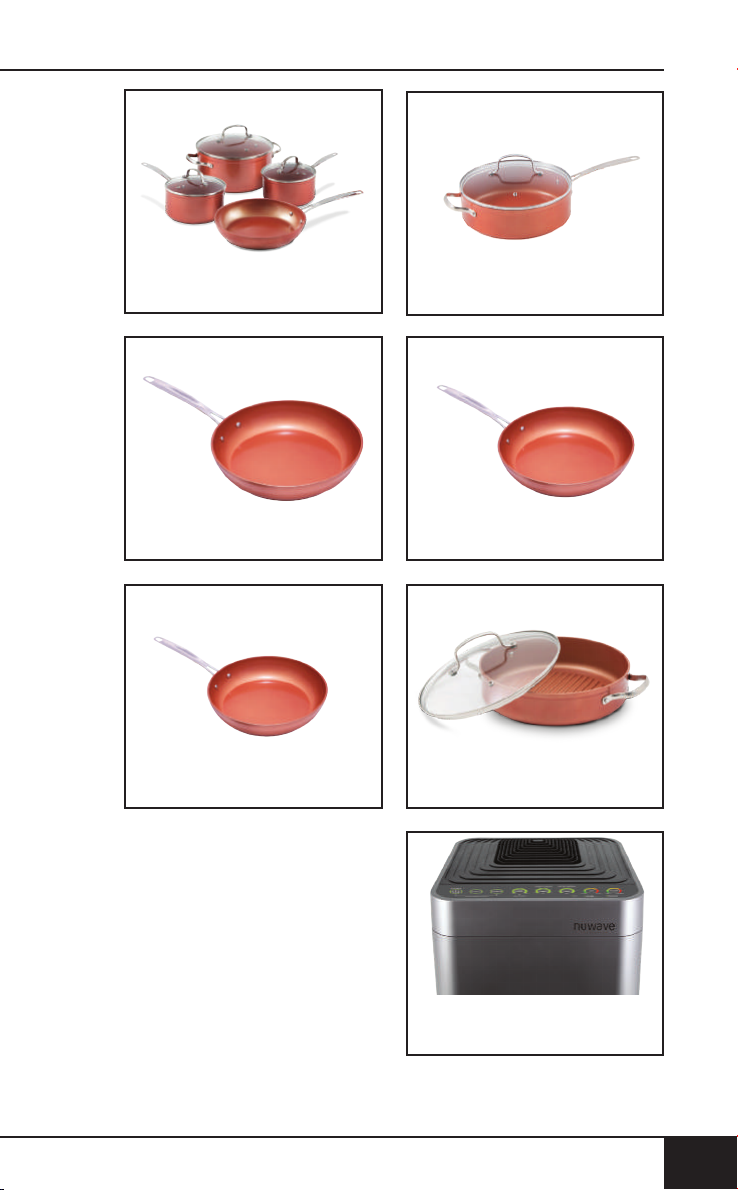
7-Piece
10.5-inch
Duralon® Non-Stick Cookware
Model #: 31420
11-inch
Duralon
®
Non-Stick Fry Pan
Model #: 32708
8-inch
Duralon® Non-Stick Fry Pan
Model #: 32706
Duralon
®
Non-Stick Everyday
Model #: 31434
9.5-inch
®
Duralon
Non-Stick Fry Pan
Model #: 32707
3-Quart
Duralon® Non-Stick Grill Pan
Model #: 31438
OxyPure™ Air Purier
Model #: 47001
nuwavenow.com
7
Page 8

TABLE OF CONTENTS
OWNER’S MANUAL
Important Safeguards .................................................10-13
Parts & Accessories ....................................................14-15
Assembly Guide ..........................................................16-17
Instructions..................................................................18-32
Recipes
Air-Fried Spinach Ravioli with Pesto Sauce.....................34
Air-Fried Shrimp with Cocktail Sauce ..............................35
Bacon-Wrapped Scallops ................................................36
BBQ Chicharrons .............................................................37
BBQ Wings with Pink Peppercorns..................................38
Blue Bacon-Stuffed Mushrooms ......................................39
Cajun Roasted Potatoes ..................................................40
Cajun Salmon with Mustard Greens ................................41
Char Siu ...........................................................................42
Chicago-Style Hot Dogs...................................................43
Chicken Cordon Bleu .......................................................44
Chicken Fajita Egg Rolls ..................................................45
Chicken Parmesan with Marinara ....................................46
Chili-Coffee-Rubbed NY Strip Steak ................................47
Crab Rangoon..................................................................48
Crispy Beef ......................................................................49
Crispy Pork Chops with Roasted Broccoli Crowns ..........50
Croque Monsieur .............................................................51
Devils on Horseback ........................................................52
Filet Mignon .....................................................................53
Fish and Chips with Homemade Tartar Sauce .................54
8
8
table of contents
Page 9

Five-Spice Duck Breast ...................................................55
Fried Pickles ....................................................................56
Homemade Chicken Tenders with Honey Mustard .......... 57
Honey-Butter Pork Tenderloin ..........................................58
Italian Sausage with Rigatoni Pasta ................................59
Jumbo Lump Crab Cakes ................................................60
Korean Wings ..................................................................61
Mongolian Beef ................................................................62
Mozzarella Sticks .............................................................63
Polish Kielbasa with Peppers and Onions .......................64
Reuben Sandwich ............................................................65
Scotch Eggs .....................................................................66
Sesame Beef ...................................................................67
Southern Fried Chicken Thighs .......................................68
Spiced Avocado Fries with Creole Sauce ........................69
Spicy Rumaki ...................................................................70
Stuffed Peppers ...............................................................71
Sweet and Sour Chicken .................................................72
Yakitori .............................................................................73
Cleaning & Maintenance ...................................................74
ENGLISH
Troubleshoot Guide ......................................................75-77
Limited Warranty ..........................................................78-79
Spanish........................................................................80-113
100 Presets & Notes .................................................114-123
nuwavenow.com
nuwavenow.com
9
9
Page 10

IMPORTANT SAFEGUARDS
HOUSEHOLD USE ONLY • READ ALL INSTRUCTIONS BEFORE USE
WARNING: When using the Brio, basic safety
precautions should always be followed:
1. Do not touch hot surfaces. Use handles or knobs.
2. To protect against electrical shock, do not immerse cord,
plugs, or the Brio in water or other liquids.
3. Do not operate the Brio with a damaged cord or plug or
after the appliance malfunctions or has been damaged in
any manner. Return appliance to the nearest authorized
service facility for examination, repair, or adjustment.
4. Close supervision is necessary when any appliance
is used near children. This appliance is not intended
for use by persons (including children) with reduced
physical, sensory or mental capabilities, or lack of
experience and knowledge, unless they have been
given supervision or instruction concerning use of the
appliance by a person responsible for their safety.
5. The use of other accessories that are not intended to be
used with the Brio is not recommended. Doing so may
damage the Brio and can cause accidents.
6. NOT INTENDED FOR OUTDOOR USE. FOR HOUSEHOLD USE ONLY.
7. Do not let cord hang over edge of table or counter or
touch hot surfaces.
8. Do not place the Brio on or near a hot gas, electric
burner, or in a heated oven.
9. Extreme caution must be used when moving the Brio
containing hot oil or other hot liquids.
10. To disconnect, turn the Brio “OFF”, then remove plug
from the wall outlet.
11. During air-frying, hot steam is released from the air
outlet vent. Keep hands and face at a distance from
the steam and from the air outlet vent. Also, be careful
of hot steam and air when removing Trays, Racks, or
Rotisserie Cage and Skewer.
12. Never put the Brio against the wall or other appliances.
There should be at least 3 inches of free space for the
back side, left/right sides, and the upper side of the Brio.
13. Do not place anything on top of the Brio.
10
10
important safeguards
Page 11

14. Unplug the Brio from outlet when not in use and before
cleaning. Allow the Brio to cool before cleaning, putting
on or taking off parts.
15. Keep manual handy for future reference.
ADDITIONAL SAFEGUARDS
SEE INSTRUCTIONS BEFORE USE
Electrical Information
A short power-supply cord (or detachable powersupply cord) is provided to reduce the risk resulting
from becoming entangled in or tripping over a
longer cord. Longer detachable power-supply cords
or extension cords are available and may be used if
care is exercised in their use. If a longer detachable
power-supply cord or extension cord is used:
1. The marked electrical rating of the extension cord
should be at least as great as the electrical rating of
the appliance.
2. The longer cord should be arranged so that it will
not drape over the countertop or tabletop where it
could be pulled on or tripped over unintentionally.
The Brio should be operated on a separate
electrical outlet from other operating appliances due
to wattage limitations. The appliance has a polarized
plug (one blade is wider than the other). To reduce
the risk of electric shock, this plug is intended to fit
into a polarized outlet only one way. If the plug does
not fit fully into the outlet, reverse the plug. If it still
does not fit, contact a qualified electrician. Do not
attempt to modify the plug in any way.
3. If the appliance is of the grounded type, the cord set or
extension cord should be a grounding-type 3-wire cord.
ENGLISH
nuwavenow.com
nuwavenow.com
11
11
Page 12
IMPORTANT SAFEGUARDS
HOUSEHOLD USE ONLY • READ ALL INSTRUCTIONS BEFORE USE
SAVE THESE INSTRUCTIONS
Read and understand the entire manual before using
the Brio.
DO NOT USE THE UNIT FOR OTHER THAN
INTENDED USE.
Note: Put the Brio on a surface that is horizontal, even, and
stable. This appliance is intended for normal household use.
It is not intended to be used in environments such as kitchen
staffs of shops, ofces, farms, or other work environments.
Nor is it intended to be used by clients in hotels, motels, bed
and breakfasts, and non-residential environments.
NOTICE: THE FAILURE TO FOLLOW ANY OF THE
IMPORTANT SAFEGUARDS, ADDITIONAL SAFEGUARDS,
OR THE INSTRUCTIONS FOR SAFE USE IS A MISUSE
OF YOUR BRIO THAT CAN VOID YOUR WARRANTY AND
CREATE THE RISK OF SERIOUS INJURY.
WARNING
In case of other problems,
immediately unplug and contact
Customer Service Department.
1-877-689-2838 • [email protected]
1. Do not place the Brio close to ammable materials,
heating units, or wet environments.
2. Height of ingredients placed in the Fry Pan Basket should
comply with the directions listed under “Instructions.”
3. Do not put any other cooking pans in the Fry Pan
Basket. Do not replace any parts with other containers.
4. It is normal for some smoke to escape the Brio when
heating for the rst time.
5. If a lot of smoke is escaping from the air vent during
operation, unplug the Brio immediately and contact
Customer Service.*
6. Extreme caution must be exercised when operating the
Brio or any other appliance.
12
12
important safeguards
Page 13
7. Do not move the Brio while in operation. Only after the
Brio has completely cooled should moving be attempted.
Always wait for the Air Fryer to cool down prior to
handling it.
8. Children should be supervised to ensure that they do not
play with the appliance.
9. Never use a towel or other material or object to block the
air vents.
10. If any trouble arises during operation, any service
MUST be done by NuWave LLC or authorized by the
manufacturer for repairs.
11. The Brio is not intended to be operated by means of an
external timer or separate remote-control system.
12. Do not disassemble the Brio or replace any parts without
prior written consent from the manufacturer.
13. Do not use metal utensils with the coated Fry Pan Basket
or Fry Pan Basket Net as this can damage the surface.
14. Make sure the Brio is always clean prior to cooking.
*Customer Service Department:
1-877-689-2838 • [email protected]
ENGLISH
CAUTION
• Always put the ingredients to be fried in the Fry
Pan Basket to prevent direct contact with the
heating components.
• Do not cover the air inlet and outlet openings
while the appliance is operating.
• Do not pour oil into the Base Tray or Fry Pan
Basket, as this may create a re hazard.
• Never touch the insides of the appliance while
it is operating.
nuwavenow.com
nuwavenow.com
13
13
Page 14
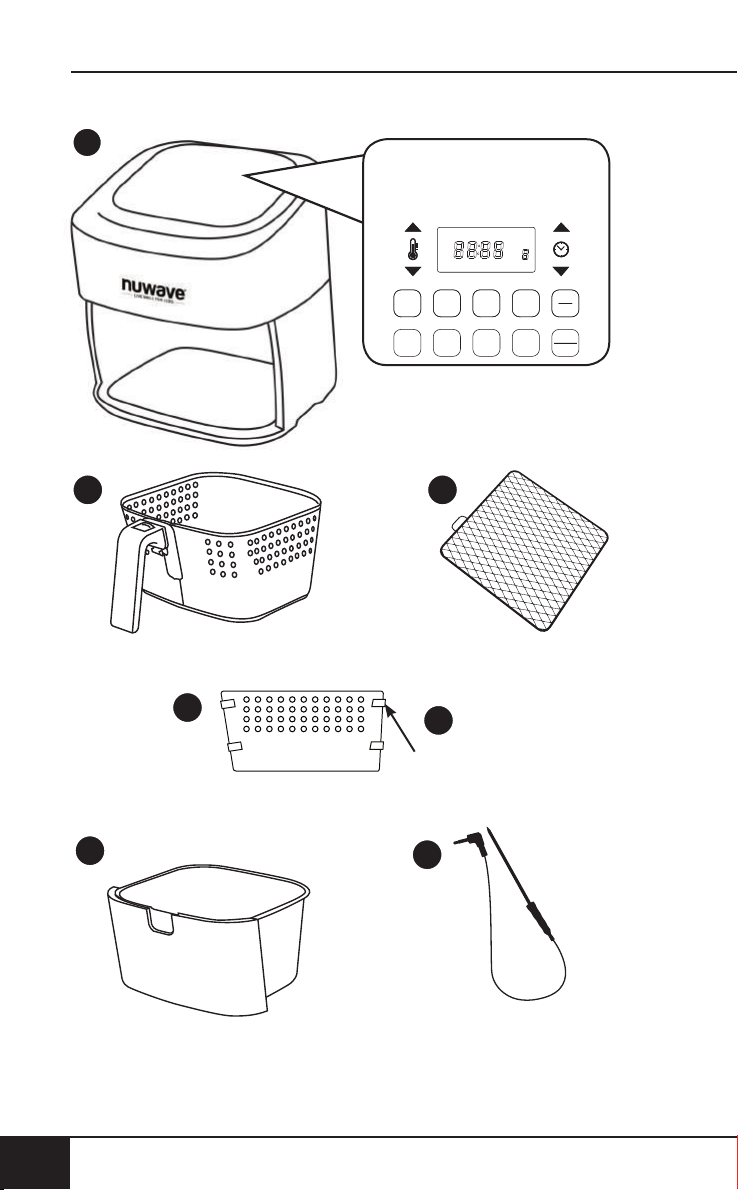
PARTS & ACCESSORIES
START
PAUSE
WATTS
STAGEDELAY
PROG WARM
sear 1 2
1800
1500
900
pre ready probe delay stage
temp time prog open
warm
PROBE
SEAR
1. Bacon (4 oz)
2. Bake (8 oz) Use Baking Pan
3. Baked Eggs (2 oz)
4. Baked Potato (32 oz)
5. Chicken Breast (8 oz)
6. Chicken Thighs (8 oz)
7. Dehydrate (8 oz)
8. Dessert (8 oz)
9. Fish (6 oz)
10. Fries, Fresh (16 oz) Shake Halfway
11. Fries, Frozen (16 oz) Shake Halfway
12. Frozen Food (16 oz)
13. Pork (16 oz)
14. Reheat (8 oz)
15. Roast (32 oz)
16. Shrimp (8 oz)
17. Steak (8 oz)
18. Sweet Potato (32 oz)
19. Toast / Bagel (4 slices / 4 oz)
20. Vegetables (8 oz)
PRE
HEAT
ON
OFF
1
2
5
14
14
parts & accessories
4a
3
4b
Silicone Tabs
6
Page 15
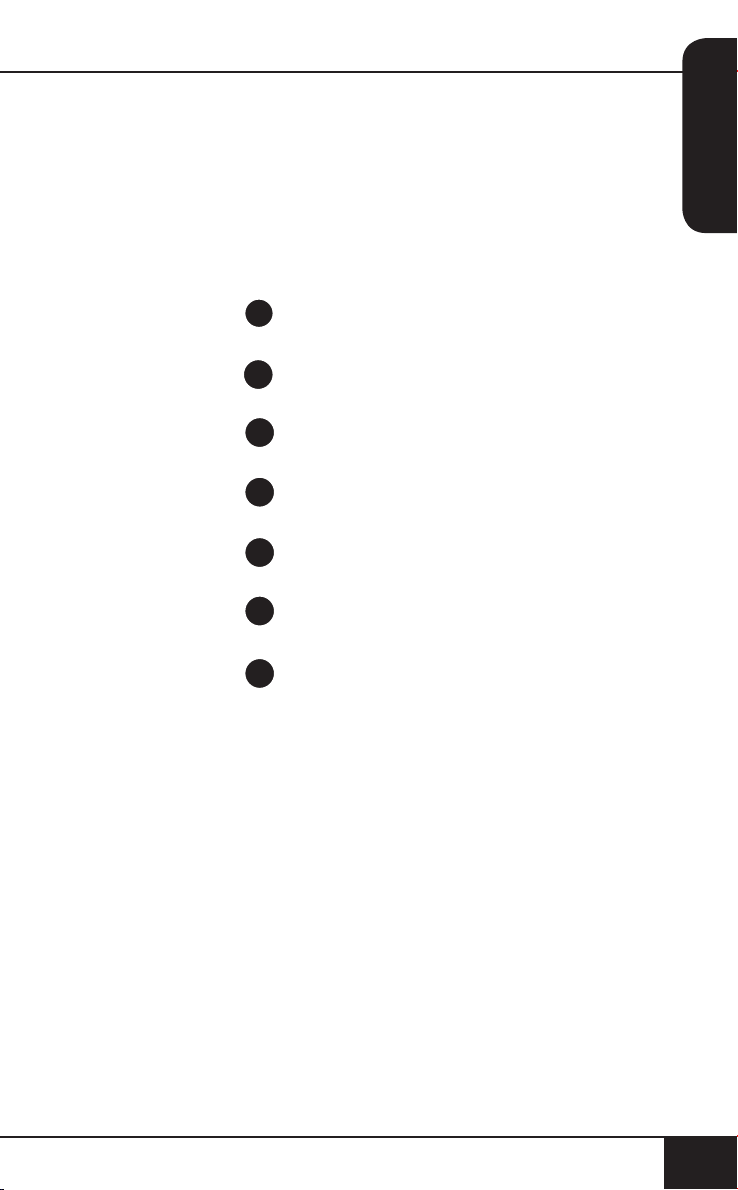
Air Fryer Power Base
1
Part #: 37210
Fry Pan Basket
2
Part #: 37202
Fry Pan Basket Net
3
Part #: 37204
Fry Pan Divider
4a
Part #: 37205
4 Silicone Tabs
4b
Part #: 37207
Base Tray
5
Part #: 37201
Probe
6
Part #: 36261
ENGLISH
nuwavenow.com
nuwavenow.com
15
15
Page 16
ASSEMBLY GUIDE
Assembling the Brio
CAUTION: DO NOT use the Brio without the Base Tray
and Fry Pan Basket with Net. DO NOT touch the insides of
the Base Tray, Fry Pan Basket, and Net immediately after
cooking. Parts will be hot. ONLY hold the Base Tray and Fry
Pan Basket by the handle.
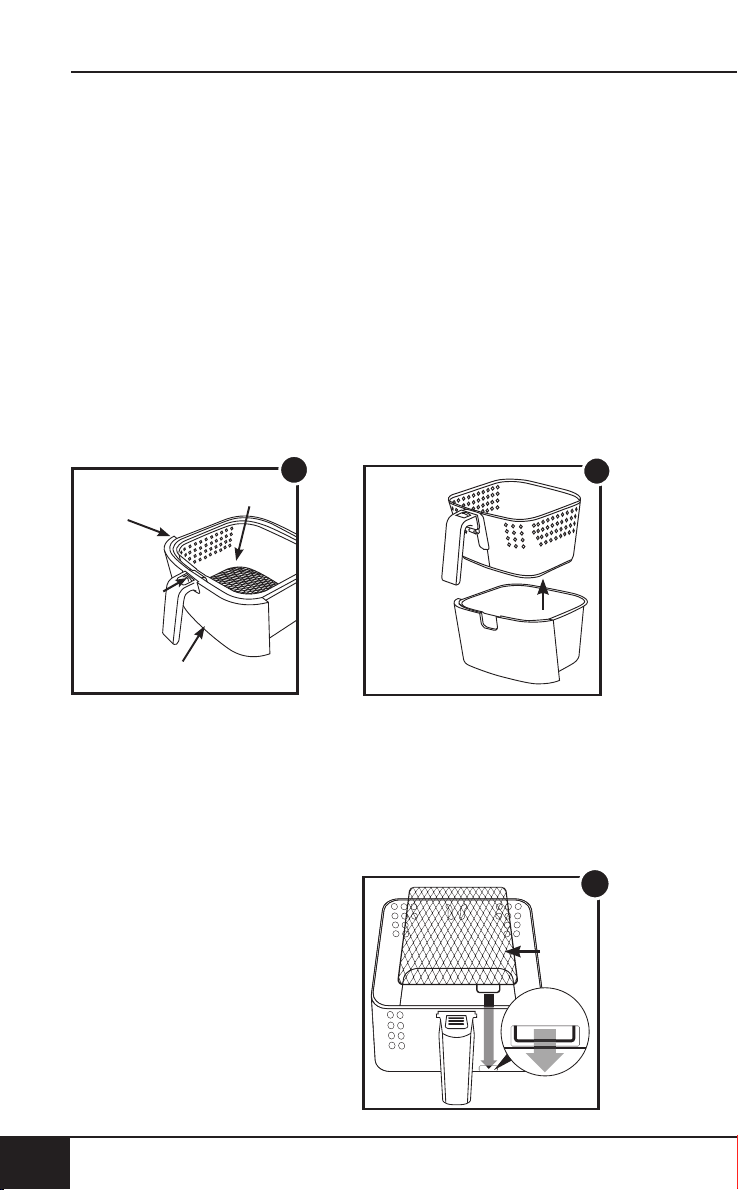
Removing Base Tray with Fry Pan Basket
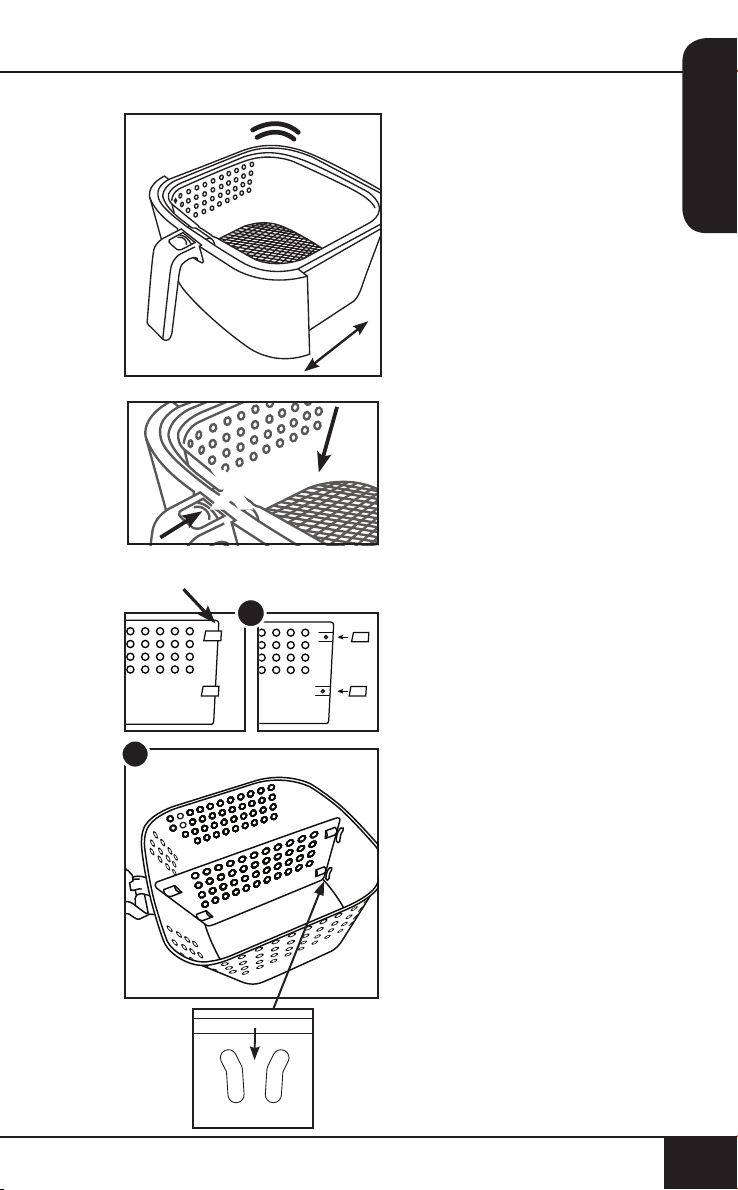
1. Using the handle, pull and slide out the Base Tray and
Fry Pan Basket with Net. (See Fig. 1.)
2. To remove Fry Pan Basket from Base Tray, while holding
the handle, push demounting button forward and lift
up Fry Pan Basket from Base Tray. (See Fig. 2.) When
cooking, this will reduce extra weight from Base Tray
and make it easier to pour or shake smaller foods.
2
Fry Pan
Basket
Demounting
Button
Base Tray
Basket Net
1
Fry Pan
Basket
Base Tray
Removing the Fry Pan Basket Net:
1. After removing Fry Pan Basket from Base Tray, turn Fry
Pan Basket upside down.
2. Using oven mitts, press the underneath of the Fry Pan
Basket Net down until it is released from Fry Pan Basket.
Net and its tab will be released from Fry Pan Basket.
Assembling the Fry Pan
3
Basket Net
1. Place Tab of Fry Pan
Basket Net into slot of Fry
Pan Basket. (See Fig. 3.)
2. Press other end of Fry Pan
Basket
Net
Tab
Basket Net down until Net
snaps into place and is at
inside Fry Pan Basket.
16
16
assembly guide
Page 17
For Best Results
X
Silicone Tabs
Shaking Food
Some foods require shaking
halfway through cooking. To
properly shake the food, hold
the handle, remove the Base
Tray with Fry Pan Basket from
the appliance, and shake.
Once the food has been
adequately shaken, slide
the Base Tray with Fry Pan
Basket back into the Brio.
Note: For best results, when
cooking, do not ll more than
4
⁄ 5 full.
DO NOT PUSH THE
DEMOUNTING
BUTTON FORWARD
WHILE SHAKING.
ENGLISH
1
2
Using the Fry Pan Divider:
Fig.1.
Make sure all 4 Silicone Tabs
are placed on the divider tabs.
Fig. 2.
Looking down at the Fry Pan
Basket, slide the Divider down
the center of the Basket.
Make sure the Divider is
between both the groves and
screws of the Basket.
To remove Divider, simply
slide the Divider straight up.
(Caution: Divider will be hot
from cooking. Use oven mitts.)
Silicone Tabs can be
removed from the Divider
before cleaning. (Caution:
Silicone Tabs may be hot.)
nuwavenow.com
nuwavenow.com
17
17
Page 18

INSTRUCTIONS
Function Buttons
ON/OFF: The ON/OFF button turns the unit on and off and
stops all cooking functions.
START/PAUSE: When the START/PAUSE button is pressed,
the unit begins or pauses cooking. The START/PAUSE
button is also used to mute and unmute the Brio’s beeping
sounds for a quiet operation if desired.
[↑] & [↓] Buttons: Use the arrow buttons to adjust
temperatures and times.
WATTS: The unit comes with three (3) wattage adjustments
(900, 1500 & 1800). Press the WATTS button to change the
running wattage the unit will use. When the unit is turned off
and/or unplugged, the unit will run at the wattage previously
used when plugged in and turned on.
DELAY: Use the DELAY button to delay cooking for up to
24-hours. Use the [↑] and [↓] buttons to adjust the delay time.
To cancel delay at any time, simply press the DELAY button.
STAGE: Use the STAGE button set to up to ve (5) different
cooking parameters. Cooking temperatures and times can
be adjusted for each stage of cooking using the TEMP &
TIME buttons and the [↑] and [↓] buttons.
PREHEAT: Use the PREHEAT button to preheat the unit
before cooking. Use the [↑] and [↓] buttons to adjust the
temperature before or during preheat. To cancel the preheat
function press the PREHEAT button anytime.
SEAR: The SEAR button is used to cook at high temperature
for a short amount of time. Use the SEAR button to “sear”
foods directly before and/or after the regular cooking cycle.
Use the [↑] and [↓] buttons to adjust the temperature and
time (up to 5-minutes) before or during the searing cycle.
WARM: Use the WARM button to keep your food warm after
cooking or when you simply want to keep something warm
for an extended amount of time. Use the [↑] and [↓] buttons
to adjust the warming temperature and warming time. Press
the WARM button to cancel the warm cycle.
PROGRAM: The unit comes with 100 pre-programed
cooking recipes along with an additional 100 memory slots to
add your own unique recipes the way you like them cooked.
Use the PROGRAM button to recall and save
programmed recipes.
18
18
instructions
Page 19

PROBE: Use the PROBE button to set the Digital
Temperature Probe’s target temperature as-well-as to view
the foods internal temperature during cooking. Use the [↑]
and [↓] buttons to adjust the Digital Temperature Probe
target temperature.
Order of Cooking Sequence:
1. Delay
2. Preheat
3. Sear 1
4. Stage 1~5 / Program / Probe
5. Sear 2
6. Warm
FUNCTION USES
Plug the power cord into an electrical outlet. Press the ON/
OFF button to turn the unit on. The LED display will show
360F and TEMP.
ON/OFF
1. Press the ON/OFF button to turn the unit on and off.
Once turned on the LED display will show the default
cooking temperature (360F) and the word temp.
2. The temperature can be adjusted up or down by
using the [↑] and [↓] buttons above and below the
temperature icon.
3. The default cooking time is 15-minutes. To adjust the
cooking time, press the [↑] and [↓] buttons above and
below the time icon.
4. Press the START/PAUSE button to begin cooking.
Note: Before setting any other cooking function, set the
regular stage 1 cooking temperature and time. Stage
cooking is explained in the STAGE section of these
Operating Instructions.
START/PAUSE
1. Press the START/PAUSE button to begin cooking. The
“:” will ash indicating the unit is now cooking.
2. To pause cooking, press the START/PAUSE button or
simply remove the Fry Pan Basket with Base Tray. The
“:” will no longer ash indicating the unit is now paused
and the LED display will show open.
ENGLISH
nuwavenow.com
nuwavenow.com
19
19
Page 20

INSTRUCTIONS
3. To un-pause and go back to cooking, slide the Fry Pan
Basket with Base Tray back into the Brio or press the
START/PAUSE button again.
4. Once the unit nishes cooking, the LED display will show
End with three (3) beep sounds.
5. The START/PAUSE button is also used to mute and
unmute the beep sounds. To mute the beep sounds,
press and hold the START/PAUSE button for two
seconds. The Brio will remain mute until it is unmuted by
again pressing and holding the START/PAUSE button
for two seconds.
DELAY
1. Adjust the cooking temperature and time after turning on
the Brio with the ON/OFF button, then press the DELAY
button to add a delay before cooking.
2. When the DELAY button is pressed, the LED display will
show 01:00 (default delay time), delay, and time.
3. Use the [↑] and [↓] buttons above and below the time
icon to adjust the delay time up or down. Delay time can
be adjusted up to 24-hours (24:00).
4. During the delay cycle, the “:” will ash indicating the
delay time has started counting down.
5. The delay time can be increased or decreased using
the [↑] and [↓] buttons above and below the time icon
anytime during the delay cycle.
6. To stop the delay cycle at any time, simply press the
DELAY button. The unit will end the delay cycle and
move directly into the next cooking function.
7. After the delay time has elapsed, the unit will
automatically move into the next cooking function.
8. Once the unit nishes cooking, the LED display will show
End with three (3) beep sounds.
TEMP
1. To set a different cooking temperature, press the [↑] and
[↓] buttons above and below the temperature icon. The
control panel will display 360F and temp.
• The temperature will adjust in 5-degree increments
between 60°F and 400°F.
2. To quickly adjust the temperature, hold down the arrows
until desired cooking temperature is reached.
20
20
instructions
Page 21

Note: Cooking temperature can be adjusted at any time
before or during the cooking process. Once the display
is switched to temperature display, it will remain in the
temperature display.
TIME
1. To set a different cooking time, press the [↑] and [↓]
buttons above and below the time icon. The control
panel will display 00:15 and time.
• The time will adjust in 1-minute increments.
2. To quickly adjust the time, hold down the arrows until
desired cooking time is reached.
• The maximum selectable cooking time differs
depending on the selected cooking temperature.
• 60°F - 200°F, maximum cooking time is 99 days, 99
hours (99.99).
• 205°F - 275°F, maximum cooking time is 99 hours, 99
minutes (99:99).
• 280°F - 345°F, maximum cooking time is 10 hours
(10:00).
• 350°F - 400°F, maximum cooking time is 1 hour
(01:00).
Note: Cooking time can be adjusted at any time before or
during the cooking process.
PREHEAT
The unit will preheat to the temperature of the next
cooking cycle. For example, if Sear 1 is set to 400F, the
unit will preheat to 400F. If Sear 1 is not used, the unit
will preheat to the set cooking temperature.
1. Press the ON/OFF button and adjust your cooking
temperature and time for stage 1 cooking.
2. Press the PREHEAT button to engage the preheat function.
• The LED display will show set cooking temperature,
pre, and temp.
• The unit will ALWAYS preheat to the cooking
temperature of the next cooking cycle.
3. Press the START/PAUSE button to begin preheating.
ENGLISH
nuwavenow.com
nuwavenow.com
21
21
Page 22

INSTRUCTIONS
• The unit will begin preheating to the set temperature.
• The LED display will show set cooking/preheat
temperature (ashing), pre, and temp.
• During preheat the cooking temperature can be
adjusted by using the [↑] and [↓] buttons above and
below the temperature icon.
• The cooking time can be adjusted also by pressing the
[↑] and [↓] buttons above and below the time icon.
4. When the unit reaches the preheat temperature the
unit will move into a ve (5) minute hold. The unit will
maintain the preheat temperature during this ve (5)
minute hold.
• During the ve (5) minute hold the LED display will
show 5 (ashing), ready, and time and will beep one
(1) time.
• If no action is taken with in the ve (5) minute hold, the
unit will automatically go into standby mode.
5. Place your food into the unit, slide the Fry Pan Basked
with Base Tray back int the Brio. The unit will begin
cooking at the set temperature and time.
6. The preheat cycle can be canceled anytime by pressing
the PREHEAT button. The unit will end the preheat cycle
and automatically go into the next cooking cycle.
7. When the unit is nished cooking the LED display will
show End and beep three (3) times.
STAGE
Stage cooking is used to cook food at different
temperatures and times throughout the cooking
process. Up to ve (5) stages of cooking can be set
up. Delay, Preheat, Sear 1, Sear 2, and Warm are NOT
considered stages in the cooking process. Stage
1 cooking is the default (360F for 15-minutes). The
temperature and time can be adjusted.
1. Press the ON/OFF button. The LED display will show
360F and temp. This is Stage 1. Adjust the cooking
temperature and time using the [↑] and [↓] buttons.
2. To add additional stages, press the STAGE button one
(1) time. The LED display will show 360F, temp, stage,
and 2 (above stage). This is Stage 2 cooking.
22
22
instructions
Page 23

3. Adjust Stage 2 cooking temperature and time by using
the [↑] and [↓] buttons.
4. To set additional stage cooking settings, repeat steps
2 and 3. The number above stage will change as you
continue to press the STAGE button and set temperature
and time. After Stage 5, if the STAGE button is pressed
again it will go back to Stage 1. The LED display will
show Stage 1 set cooking temperature, temp, stage, and
1 (above stage).
5. If you only want two (2) stages of cooking, leave the time
at 00:00 for stages 3~5 and those stages will be skipped.
6. Press the START/PAUSE button to begin cooking. The
unit will cook with the set parameters.
7. During cooking, press the STAGE button to see and
adjust upcoming cooking stages.
8. When the unit is nished cooking the LED display will
show End and beep three (3) times.
9. The STAGE button is also used to scroll through the
cooking function that have been set for a particular
recipe. Press the STAGE button, either before or during
cooking, to see and edit each function of the cooking
cycle as desired. This is explained later in this Manual.
Note:
• The LED display will only indicate the stage cooking
number when two (2) or more stages are used. The LED
display will not show stage number if only one (1) stage
of cooking is used.
• Stage 1 default: 360F, 00:15
• Stage 2~5 default: 360F, 00:00
• If no time is set for stages 2~5, those stages will be
skipped in the cooking cycle.
ENGLISH
nuwavenow.com
nuwavenow.com
23
23
Page 24

INSTRUCTIONS
SEAR
Sear 1 will ALWAYS be directly before regular stage
cooking and Sear 2 will ALWAYS be directly after regular
stage cooking.
Sear 1
Default sear 1 temperature is 400F and default sear 1
time is ve (5) minutes (00:05).
1. Press the ON/OFF button and adjust your cooking
temperature and time for stage cooking.
2. Press the SEAR button one (1) time. This will engage
the sear 1 function.
3. The LED display will show 400F, sear, 1 (ashing),
and temp.
• Sear 1 searing temperature can be adjusted by
using the [↑] and [↓] buttons above and below the
temperature icon. 400F is the maximum searing
temperature.
• Sear 1 searing time can be adjusted by using the [↑]
and [↓] buttons above and below the time icon up to
ve (5) minutes (00:05).
4. Press the START/PAUSE button to begin cooking. The
LED display will show sear 1 (ashing), time, and the set
sear time (00:05 default) with the “:” ashing.
5. Once the Sear 1 cycle is complete the unit will
automatically go into stage (regular) cooking.
6. When the unit is nished cooking the LED display will
show End and beep three (3) times.
Sear 1 & 2
Sear 1 & 2 is used to sear before and after regular
stage cooking.
1. Press the ON/OFF button and adjust your cooking
temperature and time for stage cooking.
2. If you want to set a different temperature and/or time for
Sear 1, press the SEAR button one time and adjust the
sear 1 temperature and time.
3. Press the SEAR button again. The LED display will show
400F, sear, 1, 2 (ashing), and temp.
4. Adjust the Sear 2 temperature and time if desired.
24
24
instructions
Page 25

5. Press the START/PAUSE button to begin cooking. The
LED display will show sear 1 (ashing), 2, time, and the
set sear 1 time with the “:” ashing.
6. Once the Sear 1 cycle is complete the unit will beep
one (1) time and automatically go into regular stage
cooking. The LED display will show sear 2 , time, and
the set regular stage cooking time (00:15 default) with
the “:” ashing.
7. Once the stage cooking cycle is complete the unit will
beep one (1) time and automatically go into sear 2
cooking. The LED display will show sear 2 (ashing), time,
and the set sear time (00:05 default) with the “:” ashing.
8. When the unit is nished cooking the LED display will
show End and beep three (3) times.
Sear 2
Default sear 2 temperature is 400F and default sear 2
time is ve (5) minutes (00:05).
1. Press the ON/OFF button and adjust your cooking
temperature and time for stage 1 cooking.
2. Press the SEAR button three (3) times. This will engage
the sear 2 function.
3. The LED display will show 400F, sear, 2 (ashing),
and temp.
• Sear 2 searing temperature can be adjusted by using
the [↑] and [↓] buttons above and below the temperature
icon. 400F is the maximum searing temperature.
• Adjust the sear 2 time by using the [↑] and [↓]
buttons above and below the time icon up to ve (5)
minutes (00:05).
4. Press the START/PAUSE button to begin cooking.
5. Once the stage cooking cycle is complete the unit will
beep one (1) time and automatically go into sear 2
cooking. The LED display will show sear 2 (ashing),
time, and the set sear time (00:05 default) with the “:”
ashing.
6. When the unit is nished cooking the LED display will
show End and beep three (3) times.
ENGLISH
nuwavenow.com
nuwavenow.com
25
25
Page 26

INSTRUCTIONS
WARM
1. Press the WARM button to engage the warm function
and keep your food warm after cooking until you’re ready
to serve.
2. The LED display will show 145F, temp and warm.
3. Use the [↑] and [↓] buttons above and below the
temperature icon to adjust the warm temperature.
4. Press the [↑] and [↓] buttons above and below the time
icon to adjust the warm time. The LED display will show
01:00 (default), time and warm.
5. Use the [↑] and [↓] buttons above and below the time
icon to adjust the warm time.
6. Press the START/PAUSE button to start cooking. The
unit will go through the regular stage cooking cycle then
will go into warm at the temperature set as well as the
set time.
Using Warm as an Independent Function
1. Warm can be used as an independent function. Press
and hold the WARM button for two (2) seconds.
2. The unit will automatically begin the warming function
and the LED display will show 01:00, time and warm.
3. Warm temperature and time can be adjusted at this time
by using the [↑] and [↓] buttons.
4. When the warming time runs out, the LED display will
show End and will beep three (3) times.
Notes:
• Warm temperature can only be adjusted up to 200F.
• Warm can be used with the program options as well.
Simply choose the program number and press the
WARM button and adjust warm temperature and time.
• To cancel the warm function at any time simply press
the WARM button. Warm will no longer be lit in the
LED display.
26
26
instructions
Page 27

PROGRAM
The PROGRAM button represents Memory Entry
(the storage of frequently used cooking sequences)
and Memory Recall (retrieval of cooking sequences).
Program slots number 1~100 are designated for preset
programs. Slots 101~200 are for your own unique
programs. The unit comes with 100 pre-programed
cooking recipes along with an additional 100 memory
slots to add your own unique recipes the way you like
them cooked.
Memory Recall
Press the PROGRAM button. The LED display will show
prog and 1.
1. Use the [↑] and [↓] buttons to choose the desired
program number to recall. Either set of [↑] and [↓]
buttons (temperature icon or time icon) to scroll through
the program numbers.
2. Once the program number is chosen, press the
START/PAUSE button to begin cooking. You can make
temperature and time adjustments if desired.
3. The unit will cook at the programmed settings.
Program Your Own Recipe Before Cooking
1. Set your cooking parameters using DELAY, PREHEAT,
SEAR 1, STAGE (1~5), SEAR 2 and/or WARM.
2. Press the PROGRAM button. The LED display will show
prog and 101.
3. Use the [↑] and [↓] buttons to choose the desired
program number to save the program to (101~200).
4. Press the PROGRAM button again to store and save the
program to your chosen program number. The program
is now stored and available for future recall.
5. Press the START/PAUSE button to begin cooking
the program.
Program Your Own Recipe During Cooking
1. Set your cooking parameters using DELAY, PREHEAT,
SEAR 1, STAGE (1~5), SEAR 2 and/or WARM.
2. Press the START/PAUSE button to begin cooking.
3. During cooking, press the PROGRAM button. The LED
display will show prog and 101.
ENGLISH
nuwavenow.com
nuwavenow.com
27
27
Page 28

INSTRUCTIONS
4. Use the [↑] and [↓] buttons to choose the desired
program number to save the program to (101~200).
5. Press the PROGRAM button again to store and save the
program to your chosen program number. The program
is now stored and available for future recall.
6. The unit will continue to cook the recipe programmed.
Program Your Own Recipe After cooking
1. Set your cooking parameters using DELAY, PREHEAT,
SEAR 1, STAGE (1~5), SEAR 2 and/or WARM.
2. Press the START/PAUSE button to begin cooking.
3. When the cooking process is nished, and the LED
display shows End, press the PROGRAM button. The
LED display will show prog and 101.
4. Use the [↑] and [↓] buttons to choose the desired
program number to save the program to (101~200).
5. Press the PROGRAM button again to store and save the
program to your chosen program number. The program
is now stored and available for future recall.
View Current Program During Cooking
You can view the currently cooking program number while
the program is running.
1. During cooking, press and hold the PROGRAM button.
2. The LED display will show the currently running program.
3. Release the PROGRAM button to see the previous
screen on the LED display.
View Program Cooking Functions
You can view all cooking functions associated with a
program before or during the cooking process.
1. View Before cooking
• Press the PROGRAM button and nd the program
number to review using the [↑] and [↓] buttons.
• Once the program number shows in the LED display,
press the STAGE button to review each phase of
cooking.
Example:
• Use the [↑] and [↓] buttons until you reach the program
number, as an example we will use #114.
28
28
instructions
Page 29

• Press the STAGE button, the LED display will show sear
1, Set sear 1 time, and time.
• Press the STAGE button again, the LED display will
show stage 1, det stage 1 time, and time.
• Press the STAGE button a third time, the LED display
will show stage 2, Set sear 2 time, and time.
• Press the STAGE button a forth time, the LED display
will show warm, set warm time, and time.
• And for this example, press the STAGE button fth time,
the LED display will show the rst function in this cooking
cycle which was sear 1, set sear 1 time, and time.
• Adjustments to temperature and time can be made for
each function as you view them.
2. During cooking
• Press the STAGE button to review each phase of cooking.
• Continue to press the STAGE button to scroll through
all programmed functions for that program number.
See example above.
• Adjustments to temperature and time can be made for
each function at this time.
• If a cooking function has already occurred in the
cooking process, that function is no longer available
for adjustments in cooking temperature or time.
Editing a Program
You can edit the programs you create before or during
the cooking process and save any changes.
1. Edit Before Cooking
• Press the PROGRAM button and nd the program
number to edit using the [↑] and [↓] buttons.
• Once the program number shows in the LED display,
press the STAGE button until the function you would
like to edit shows in the LED display.
• Using the [↑] and [↓] buttons, make the edits to
temperature and time as desired.
• Once all edits are made, press the PROGRAM button.
The LED display will show prog and 101.
• Use the [↑] and [↓] buttons to nd the program number
to save your edits to.
ENGLISH
nuwavenow.com
nuwavenow.com
29
29
Page 30

INSTRUCTIONS
• Press the PROGRAM button again to save and store
the edits.
2. Edit During Cooking
• During cooking, press the STAGE button until the
function you would like to edit shows in the LED display.
• Use the [↑] and [↓] buttons to adjust the cooking
temperature and time.
• If there are more cooking functions that you would like
to edit, press the STAGE button until you reach the
function you would like to edit and make the changes.
• The unit will continue the cooking process with the
edits that you have made.
Note: Functions that have already ended in the cooking
cycle cannot be edited.
• When cooking has finished, the unit will beep three
(3) times and the LED display will show End followed
by SAVE.
Note: Save indicates there has been a change in the
program settings during cooking.
3. If you have already saved the changes to a program
number during cooking, there is nothing more you need to
do. The edited program is available for further recall.
4. If you have not saved the changes to a program number
by the time cooking nishes, the Brio will remind you that
changes have been made by displaying SAVE, and allow
you to save the changes at this point.
• Press the PROGRAM button. The LED display will
show prog and 101.
• Use the [↑] and [↓] buttons to nd the program number
to save your edits to.
• Press the PROGRAM button again to save and store
the edits.
Note: If you save any recipe to an already lled memory slot,
the new recipe will override the previous recipe. Any edits to
a preset program (1~100) can only be saved and stored into
program numbers 101~200. You cannot save an adjusted
preset program to its original preset program number.
30
30
instructions
Page 31

PROBE
Use the Digital Temperature Probe to accurately cook to
your preferred internal temperature. To use the probe,
connect the probe to the unit.
1. Set your cooking functions and stages as desired.
2. Press the PROBE button. The LED display with show
current probe temperature, temp, and probe.
3. Press and hold the PROBE button for 2 seconds.
The LED display will show probe, 160F (target probe
temperature default), and temp.
4. Use the [↑] and [↓] buttons above and below the
temperature icon to set the target probe temperature
(the internal temperature you want the food to reach
during cooking), up to 210F.
5. Insert the pointed end of the probe into the food to be
cooked and place food in the unit.
6. Press the START/PAUSE button to begin cooking. The
LED display will show the current probe temperature,
temp, and probe.
• To see the current cooking temperature, press the [↑]
or [↓] button above or below the temperature icon. This
will show you current cooking temperature.
• To go back and see the current probe temperature,
press the PROBE button.
• To see the target probe temperature, press and hold
the PROBE button for two (2) seconds. You can adjust
the target probe temperature by using the [↑] and [↓]
buttons above and below the temperature icon.
7. The unit will cook until the current probe temperature
reaches the set target probe temperature. For example,
if you want to cook your chicken to 170F, set the target
probe temperature to 170F.
8. Once the target probe temperature is reached, cooking
will stop, and the LED display will show End.
ENGLISH
nuwavenow.com
nuwavenow.com
31
31
Page 32
INSTRUCTIONS
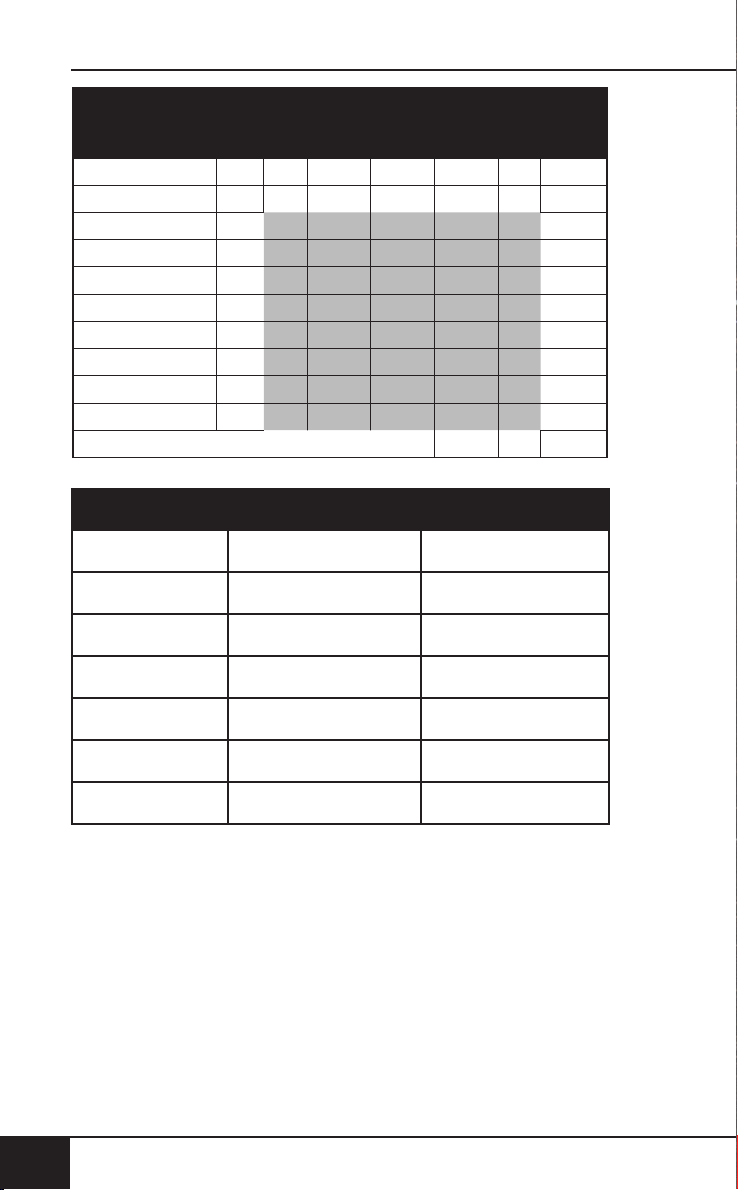
Probe Temp Guide
Temp.°FRare°FMedium
Rare °F
Chicken Breast 360 165 5 - 8
Steak 1" thick 350 125 135 145 150 160 3 - 8
Burgers ¼ lb 350 5 - 7
Pork Chops ¾" thick 360 5 - 7
Fish Fillets ½" thick 350 2 - 3
Fish Steaks 1" thick 350 5 - 7
Shrimp 350 3 - 4
Sausage 360 4 - 5
Vegetables (firm) 360 4 - 8
Vegetables (soft) 350 2 - 5
NOTE: Times may vary depending on cooking preference.
Measurement Chart
Teaspoon = t Fahrenheit = °F Minute = min
Tablespoon = T Celsius = °C Second = sec
Medium°FMedium
Well °F
Well°FTime
Minutes
Cup = c Fluid Ounces = oz Inch = in.
Ounce = oz Liter = L Dozen = doz
Pound = lb(s) Milliliter = ml Hour = hr
Quart = qt Package = pkg. Gram = g
Pint = pt Gallon = gal
32
32
instructions
Page 33
Recipes
ENGLISH
nuwavenow.com
nuwavenow.com
33
33
Page 34

Air-Fried Spinach Ravioli
with Pesto Sauce (Serves 4)
Time and Temp:
Prep: 15 minutes
Cook: 9 minutes
Temp: 350°F
Ingredients:
2 c bread crumbs, Italian
¼ c Parmesan cheese
1 t olive oil
1 c buttermilk
24 spinach ravioli, fresh
For Pesto Sauce:
1 c basil, fresh
3 cloves garlic
3 T pine nuts, roasted
⅓ c Parmesan cheese, grated
Sea salt
Freshly ground black pepper
⅓ c extra-virgin olive oil
Directions:
1. In a bowl, combine bread crumbs, Parmesan cheese,
and olive oil; set aside.
2. Place the buttermilk in a shallow bowl and set up
a breading station with the buttermilk and bread
crumbs.Dip ravioli in buttermilk and then cover with
breadcrumbs; set aside.
3. Place some parchment paper in the bottom of the Fry
Pan Basket and arrange the ravioli. Do not overcrowd.
4. Set the air fryer to 350°F and cook for 9 minutes.
5. While ravioli are cooking, add basil, garlic, pine nuts,
Parmesan cheese, salt, and black pepper to a blender or
food processor. Pulse a couple of times and then leave
food processor running and add olive oil in a steady slow
stream until emulsied.
6. Serve spinach ravioli hot with pesto sauce.
3434
recipes
Page 35

Air-Fried Shrimp with Cocktail Sauce
(Serves 4)
Time and Temp:
Prep: 10 minutes
Cook: 5-7 minutes
Temp: 400°F
Ingredients:
1 lb raw shrimp (30-40 count), peeled, deveined, tails left of
1 t garlic powder
½ t black pepper
1 t sea salt
2 c panko bread crumbs
2 eggs, lightly beaten
1 c all-purpose flour
Cooking spray
Lemon slices (for serving)
For Cocktail Sauce:
1 c ketchup
2 T horseradish
1 T lemon juice
½ t Worcestershire sauce
¼ t sea salt
⅛ t freshly ground black pepper
ENGLISH
Directions:
1. In a small bowl, mix together ketchup, horseradish,
lemon juice, Worcestershire sauce, sea salt, and fresh
ground black pepper. Refrigerate until ready to be used.
2. Rinse shrimp well and pat dry. Put in a large bowl and
season with sea salt, fresh ground black pepper, and
garlic powder. Toss to season shrimp; set aside.
3. Use 3 shallow dishes: in dish #1 place in our, dish #2
put eggs, lightly beaten, and dish #3 bread crumbs.
4. Flour the shrimp rst, follow by dipping in egg, and then
bread with Panko. Repeat until all shrimp are breaded.
5. Cook shrimp in batches. Preheat Brio at 350°F for 5 minutes.
6. Once preheated, arrange shrimp in one single layer in
Basket and spray top with cooking spray. Set Brio at
350°F for 5 to 7 minutes and cook until golden brown.
7. Serve with cocktail sauce and lemon slices.
nuwavenow.com
nuwavenow.com
35
35
Page 36
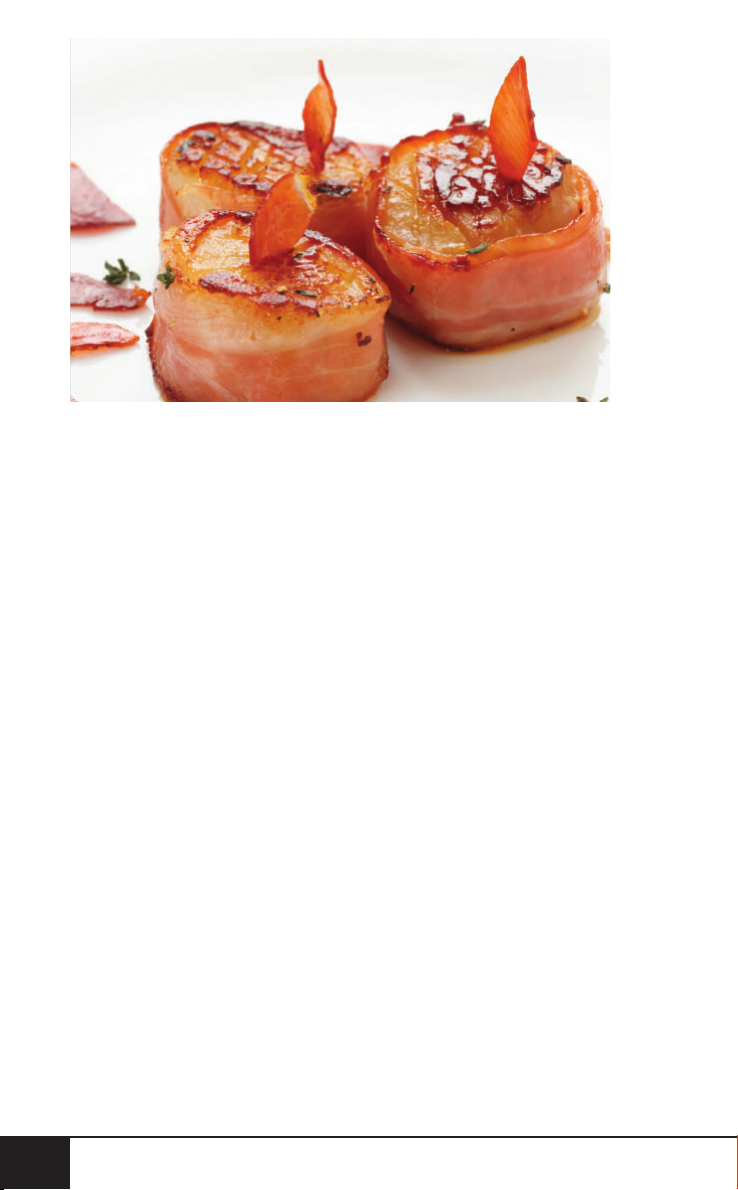
Bacon-Wrapped Scallops (Serves 4)
Time and Temp:
Prep: 8 minutes
Cook: 5-6 minutes
Temp: 400°F
Ingredients:
20 raw sea scallops
5 slices bacon
1 t paprika
Oil spray
20 toothpicks
Directions:
1. Drain and rinse scallops. Place on paper towels to soak
up moisture.
2. Wrap each scallop with a piece of bacon, and then use
toothpicks to hold bacon in place. Season the scallops.
3. Place scallops in single layer into the Basket.
4. Air-fry at 400°F for 5-6 minutes, ipping halfway through.
5. Carefully remove from fryer. Gently remove toothpicks,
then place on serving dish.
3636
recipes
Page 37

BBQ Chicharrons (Serves 2)
Time and Temp:
Prep: 3 minutes
Cook: 3 minutes
Temp: 400°F
Ingredients:
½ c pork rind pellets
Cooking spray
BBQ Seasoning:
2 T sea salt
2 T sugar
2 T smoked paprika
1½ T black pepper, ground
1 t onion powder
1 t garlic powder
1 t celery seeds
¼ t cayenne pepper
ENGLISH
Directions:
1. For seasoning, place all ingredients in a mixing bowl.
Combine completely.
2. Place pork rind pellets into the Basket and set to 400°F.
Cook until pellets puff up to 3-4 times their normal size,
about 3 minutes.
3. Remove chicharrons from fryer basket and season with
barbeque seasoning.
nuwavenow.com
nuwavenow.com
37
37
Page 38
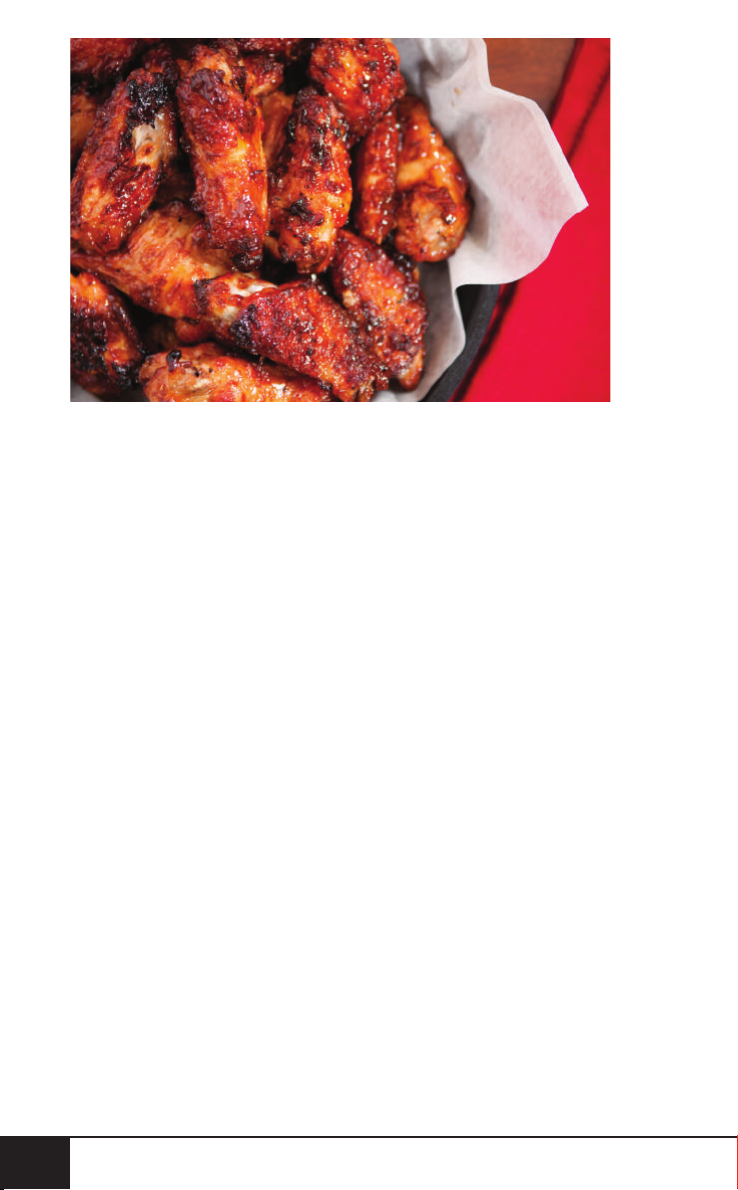
BBQ Wings with Pink Peppercorns
(Serves 2)
Time and Temp:
Prep: 5 minutes
Cook: 20 minutes
Temp: 400°F
Ingredients:
1 lb chicken wings
1 t canola oil
¼ t fresh black pepper
For Sauce:
½ c barbecue sauce
1 T green onion, thinly sliced
1 T pink peppercorns, slightly crushed
Directions:
1. In a large mixing bowl, add wings, oil, and pepper. Toss
to coat wings.
2. Place wings in Basket and set to 400°F for 20 minutes.
3. While the wings are cooking, in another mixing bowl,
add barbecue sauce, green onions, and peppercorns.
To crush peppercorns, place in the palm of hand. Using
ngers, crush each slightly. They will break apart easily.
4. Once the wings are cooked, toss in the sauce to coat.
5. Serve with favorite dipping sauce or enjoy them on their own.
3838
recipes
Page 39
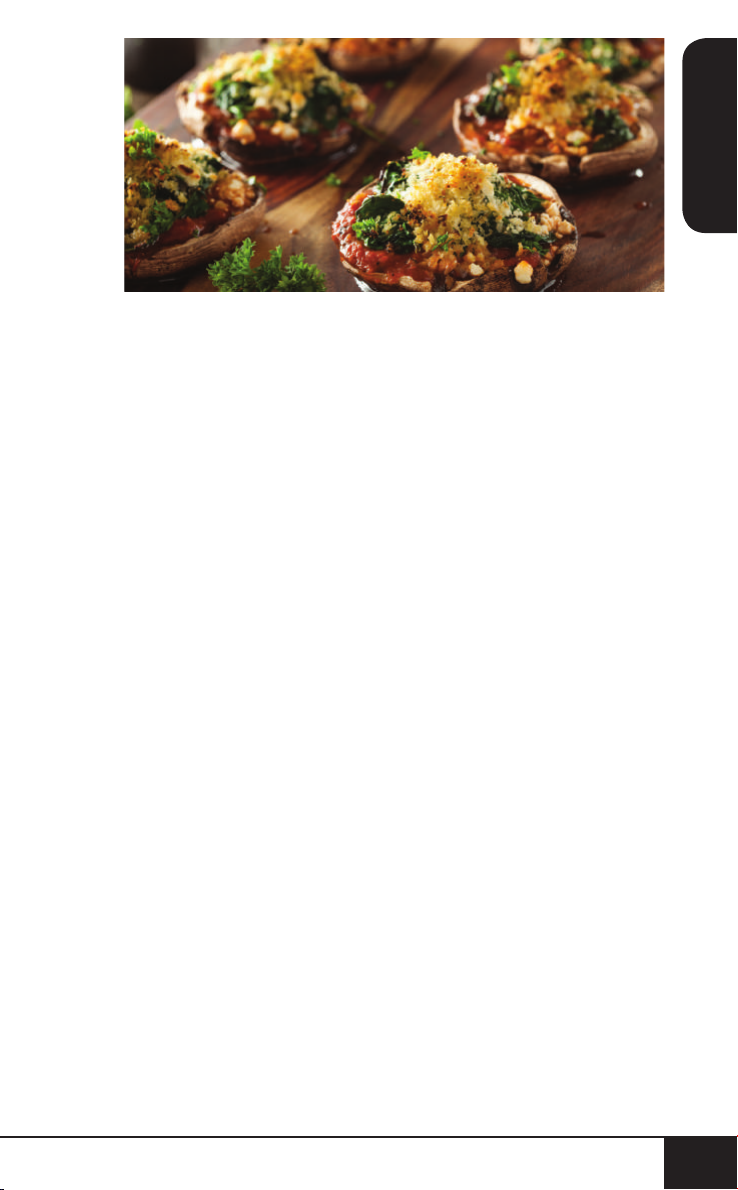
Blue Cheese Bacon-Stuffed Mushrooms
(Serves 2)
Time and Temp:
Prep: 10 minutes
Cook: 15 minutes
Temp: 350°F
Ingredients:
6 large mushrooms
3 strips bacon
2 T butter
¼ c white onions, small dice
2 cloves garlic, minced
½ c blue cheese, crumbled
½ c cream cheese, large dice
⅓ c bread crumbs
ENGLISH
Directions:
1. Clean and remove stems from mushrooms. Mince the
stems and put in a bowl; set aside.
2. Cook bacon in a skillet until crispy. Transfer bacon to
paper towels, leaving bacon fat in the skillet. Add butter,
mushroom stems, onions and garlic.
Cook until onions caramelize.
3. In a food processor, add the bacon, blue cheese, cream
cheese, the mixture from the skillet, and bread crumbs.
Pulse in food processor a couple times until everything is
incorporated. Do not blend.
4. Fill mushroom caps with the cheese mixture and place
them in Basket.
5. Set to 350°F for 15 minutes. Cook until bubbling and
tops are light brown. Serve hot.
nuwavenow.com
nuwavenow.com
39
39
Page 40
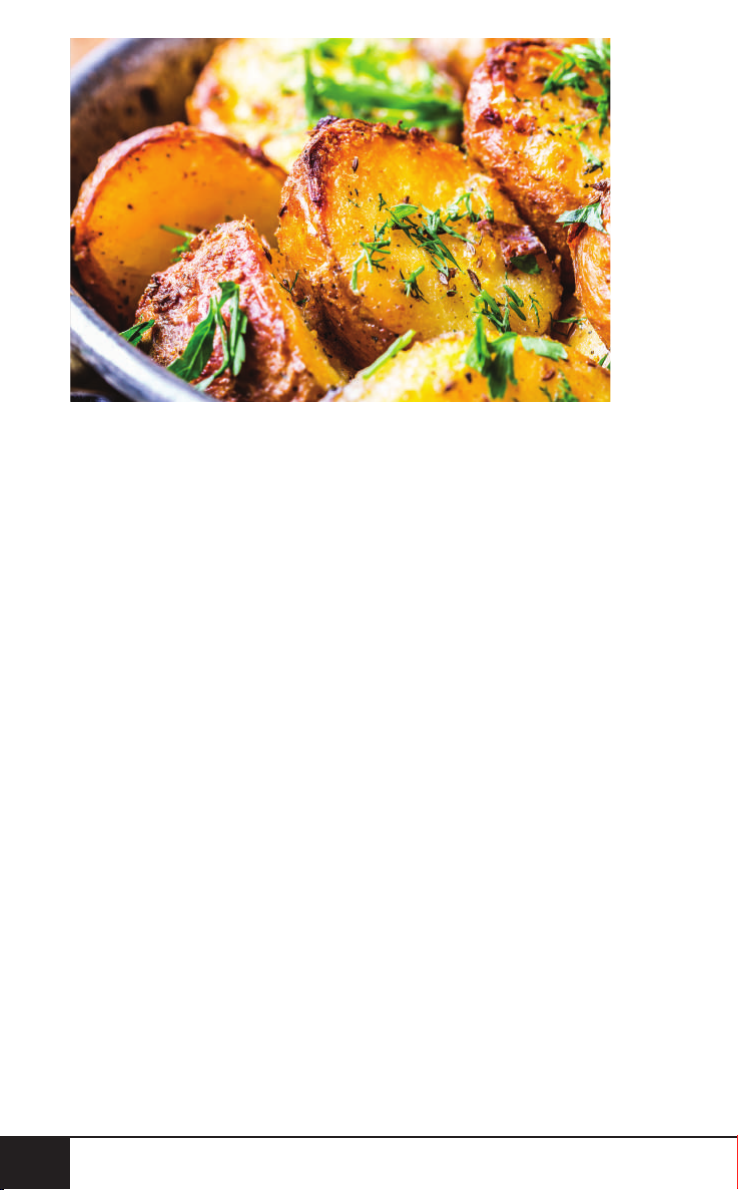
Cajun-Roasted Potatoes (Serves 4)
Time and Temp:
Prep: 10 minutes
Cook: 25 minutes
Temp: 375°F
Ingredients:
4 russet potatoes
2 T extra-virgin olive oil
1 T Cajun spice
Sea salt
Freshly ground black pepper
Directions:
1. Scrub potatoes and cut into wedges. Place in a bowl and
toss with olive oil until completely covered.
2. Arrange potatoes in the Basket.
3. Cook at 375°F for 15 minutes, ipping halfway. Continue
cooking for an additional 10 minutes or until fully cooked.
When done knife inserted in center will slide out easily.
4. Once done, place potatoes in a bowl and toss with Cajun
spice, sea salt, and fresh ground black pepper. Serve
hot with dipping sauce of choice.
4040
recipes
Page 41

Cajun Salmon with Mustard Greens
(Serves 2)
Time and Temp:
Prep: 3 minutes
Cook: 3 minutes
Temp: 360°F
Ingredients:
2 (8-oz) salmon fillets
1 T olive oil
¼ t smoked paprika
½ t seafood seasoning
¼ t cayenne pepper
Cooking spray
For Mustard Greens:
1 lb mustard greens, washed, torn into large pieces
3 cloves garlic, minced
2 T olive oil
½ c white onions, thinly sliced
3 T chicken or vegetable stock
¼ t sea salt
¼ t fresh ground black pepper
¼ t dark sesame oil
ENGLISH
Directions:
1. In a small bowl, mix together olive oil, paprika, seafood
seasoning, and cayenne pepper. Rub on salmon.
Let it marinate for a couple hours.
2. Meanwhile, in a skillet heat oil and add the onions.
Cook until soft. Add garlic.
3. When caramelized, add mustard greens and season
with sea salt, fresh ground black pepper, stock, and
dark sesame oil. Mix everything together and cook until
mustard greens have softened.
4. Preheat Brio at 360°F for 5 minutes.
5. When preheated, arrange salmon in Basket. Spray
cooking oil on top. Set Brio to 360°F for 8 minutes.
6. When done, remove sh. Plate with mustard greens.
nuwavenow.com
nuwavenow.com
41
41
Page 42

Char Siu (Serves 6)
Time and Temp:
Prep: 12 minutes
Cook: 400°F 10 minutes, 320°F 10 minutes
Total Cook: 20 minutes
Temp: 400°F 10 minutes, 320°F 10 minutes
Ingredients:
4 lbs pork belly, skin removed
4 T char siu sauce
Sesame seeds
Homemade Char Siu Sauce:
2 T Shaoxing cooking wine
2 T oyster sauce
⅓ c sugar
⅓ c hoisin sauce
1½ T honey
½ t 5-spice powder
Directions:
1. Combine wine, oyster sauce, sugar, hoisin sauce, honey,
and 5-spice powder in a saucepan over medium heat.
Bring up to a boil. Lower to a simmer and allow the
sauce to thicken slightly, about 10 minutes.
2. Cut belly into 4 equal pieces and rinse. Pat dry with
paper towels.
3. Add the belly pieces and 4T of homemade char siu
sauce to a resealable plastic bag. Marinate at least 24
hours in fridge.
4. About 1 to 1½ hours before cooking, remove pork belly
pieces from marinade. Reserve the marinade.
5. Place the pork belly pieces into Fry Pan Basket. Set to
400°F for 10 minutes.
6. At the end of 10 minutes, baste pork belly with the
remaining marinade and return to the fryer at 320°F for
an additional 10 minutes. Once cooked, remove pork
belly and set aside to rest.
7. While pork belly is resting, add 3T char siu sauce with 5T
water to a small saucepan and bring to a boil.
8. Slice pork belly and drizzle shar siu over the top of sliced
pork belly then top with sesame seeds.
4242
recipes
Page 43
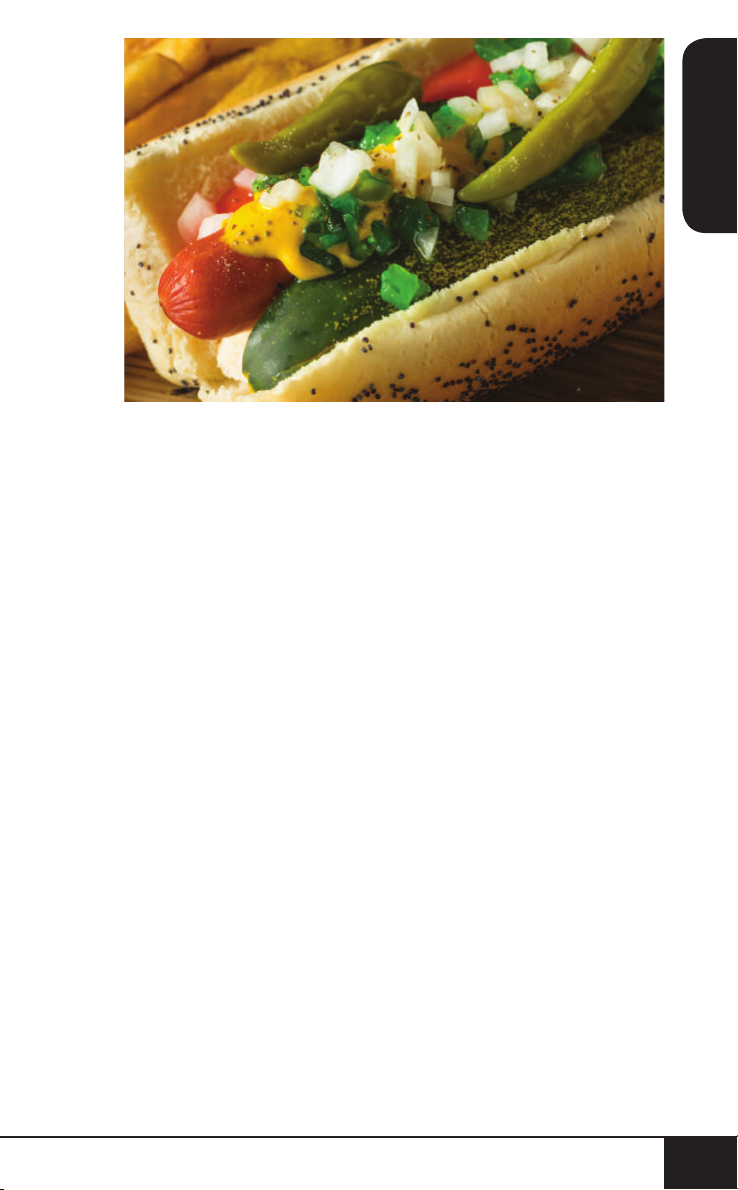
Chicago-Style Hot Dogs (Serves 4)
Time and Temp:
Prep: 5 minutes
Cook: 5 minutes
Temp: 400°F
Ingredients:
8 beef hot dogs
8 poppy seed hot dog buns
½ c yellow mustard
½ c neon-green relish
½ c yellow onions, diced
8 pickle spears
16 sport peppers
16 tomato wedges
1 T celery salt
ENGLISH
Directions:
1. Preheat at 400°F for 5 minutes.
2. Once preheated, place hot dogs in the Basket and cook
at 400°F for 5 minutes. Remove.
3. Place the hot dogs in buns and top with the trimmings.
nuwavenow.com
nuwavenow.com
43
43
Page 44

Chicken Cordon Bleu (Serves 2)
Time and Temp:
Prep: 10 minutes
Cook: 10-12 minutes
Temp: 375°F
Ingredients:
2 chicken breasts, boneless
1 slice ham
1 slice Swiss cheese
2 garlic cloves, minced, divided
1 egg, beaten
½ c breadcrumbs
1 T tarragon, dried
1 T thyme, dried
1 t parsley, finely chopped
Sea salt and black pepper
Directions:
1. Place chicken breasts at on cutting board. With a sharp
knife, slice each chicken breast from the side, cutting
about ¾ the way through the chicken breast. Open up
the chicken, exposing the insides of the breast.
2. Season all sides of the chicken with salt and pepper.
Divide minced garlic between the 2 breasts and place in
center of chicken. Lay ½ slice ham in the middle of each
breast and top with ½ slice of Swiss cheese. Close up
the chicken.
3. In a large bowl, combine the bread crumbs, thyme,
tarragon, and parsley.
4. Place in chicken. Cover the chicken in bread crumbs,
and then coat it in the beaten egg in another bowl. Place
chicken back into bread crumbs.
5. Place chicken into the Basket of the air fryer set temp
375°F. Insert Probe into the largest of the breasts. Set
Probe to 165°F. Shut basket and cook.
6. Once the internal temperature has reached 165°F. the
unit will turn off.
4444
recipes
Page 45

Chicken Fajita Egg Rolls (Serves 6)
Time and Temp:
Prep: 15 minutes
Cook: 10 minutes
Temp: 400°F
Ingredients:
12 egg roll wrappers
1 red bell pepper, small dice
1 pkg. fajita seasoning
8 oz black beans, rinsed, drained
2 oz diced green chilies
½ c chicken, cooked, shredded
½ c pepper jack cheese, shredded
½ c cheddar cheese, shredded
Sea salt and fresh ground black pepper
Cooking spray
1 egg each (to seal egg roll)
ENGLISH
Directions:
1. In a large mixing bowl, combine bell pepper, fajita
seasoning, black beans, green chilies, chicken, add salt
and fresh ground black pepper, and both cheeses.
2. On a at surface, lay out each egg roll wrapper and brush
with egg to aide in sealing the egg roll, evenly divide the
fajita mix to the bottom ⅓ of each wrapper.
3. Leave some space around edges of each wrapper. Fold
the sides of the wrapper toward the middle over the lling
4. then roll the wrap into an egg roll shape.
5. Lay egg rolls in Basket seam-side down and spray lightly
with cooking spray.
6. Set to 400°F for 10 minutes and cook until the egg rolls
are crispy and golden brown. Serve with salsa or a dip.
nuwavenow.com
nuwavenow.com
45
45
Page 46

Chicken Parmesan with Marinara (Serves 4)
Time and Temp:
Prep: 15 minutes
Cook: 9 minutes
Temp: 350°F
Ingredients:
1lb chicken breasts, boneless, skinless, sliced horizontally
(makes 4 pieces)
1 c panko bread crumbs
¾ c marinara sauce
½ c mozzarella cheese, shredded
½ c Parmesan cheese, grated
⅛ c egg whites
2 t Italian seasoning
Sea salt and pepper
Cooking spray
Directions:
1. Spray inside of Fry Pan Basket with cooking spray.
2. Place each halved chicken breast between 2 sheets
of plastic wrap and pound down to atten to ⅛-inch thick.
3. In a shallow dish, combine bread crumbs, mozzarella
cheese, Parmesan cheese, Italian seasoning, salt, and
black pepper.
4. Place egg whites in another bowl. Dip the chicken into
the egg whites then dredge through the bread crumbs,
completely covering the chicken in both egg whites and
bread crumbs.
5. Set to 400°F and place chicken breasts in Basket. Insert
Probe into largest chicken piece. Set Probe to 165°F.
Spray tops of chicken with cooking spray and cook until
internal temperature reaches 165°F and the Brio
turns off.
6. Once cooked through, slide Basket out and ladle
marinara sauce over chicken. Top with additional
mozzarella cheese. Slide back in and cook an additional
3 minutes or until cheese is melted.
7. Serve over a bed of pasta with garlic bread.
4646
recipes
Page 47
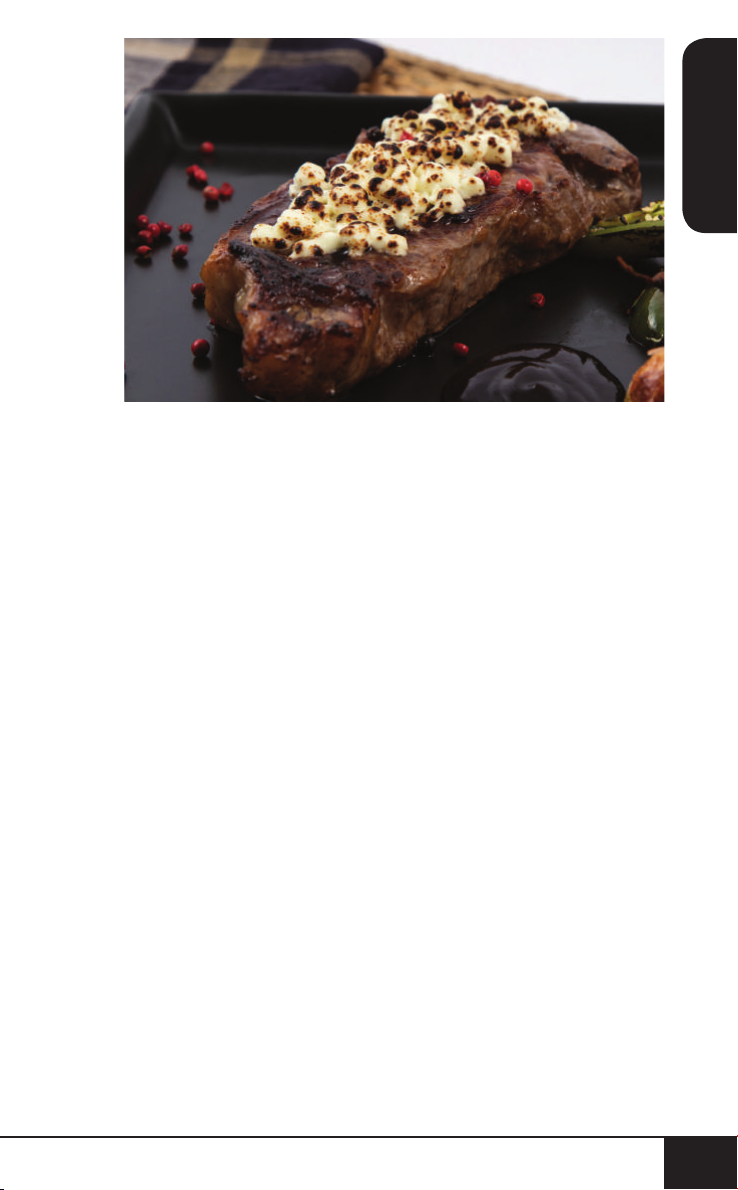
Chili-Coffee-Rubbed NY Strip Steak
(Serves 2)
Time and Temp:
Prep: 3 minutes
Cook: 5-7 minutes
Temp: 400°F
Ingredients:
2 (7-oz) NY strip steaks
¼ c espresso coffee powder
¼ c ancho chile powder
¼ c brown sugar, packed
2 T smoked paprika
2 T sea salt
1 T ground cumin
ENGLISH
Directions:
1. Preheat the unit to 400°F.
2. While preheating, in a small bowl, mix together
espresso coffee powder, ancho chile powder, brown
sugar, seal salt, and smoked paprika. Sprinkle mixture
on both sides of steaks.
3. Set Brio at 400°F and cook steaks for 5 to 7 minutes, for
medium doneness.
Note: May have extra rub depending on how much is put
on steaks.
nuwavenow.com
nuwavenow.com
47
47
Page 48
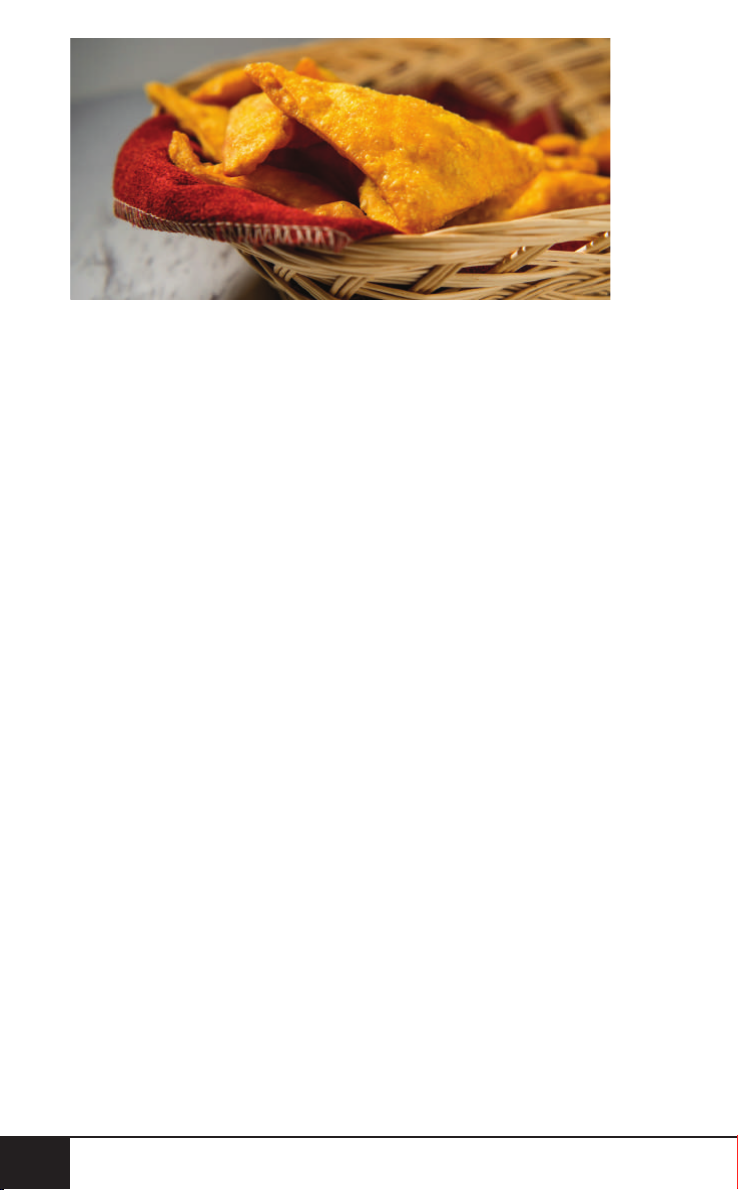
Crab Rangoon (Serves 4)
Time and Temp:
Prep: 15 minutes
Cook: 9 minutes
Temp: 350°F
Ingredients:
8 oz cream cheese
½ c crab meat, drained, and crumbled
2 green onions, thinly sliced
2 t garlic, minced
2 t Worcestershire sauce
½ t soy sauce
1 (12-oz) pkg. wonton wrappers
1 egg each (to seal wonton)
*Sweet and sour dipping sauce (for serving)
Directions:
1. In a bowl, combine cream cheese, crab meat, green
onions, garlic, Worcestershire sauce, and soy sauce.
Mix well.
2. Take one wonton skin and brush with egg to aide in
sealing the wonton in the center.
3. Moisten the edges of the wonton wrapper with water.
Fold in a triangle and press to seal, removing air from
inside. Take the left and right unsealed sides, turning
them up, and place against existing seal on top. Press
along edges to close the areas where the lling could be
exposed. Repeat until all are done.
4. Place Crab Rangoon in the Basket. Set to 400°F and
cook for 15 minutes or until golden brown. Serve hot with
sweet and sour sauce.
4848
recipes
Page 49
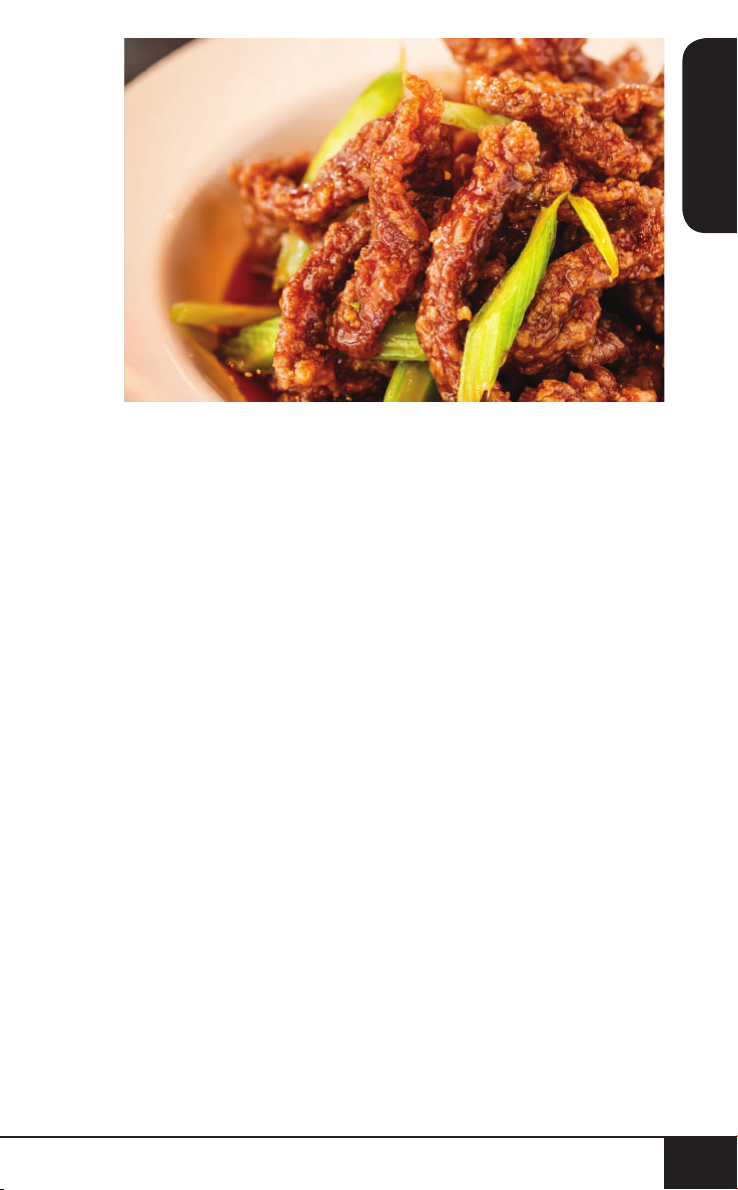
Crispy Beef (Serves 4)
Time and Temp:
Prep: 6 minutes
Cook: 6-8 minutes
Temp: 360°F
Ingredients:
1 lb beef sirloin tip, cut into 1-inch strips
1 (16-oz) jar cheese pasta sauce
1½ c soft bread crumbs
2 T olive oil
½ t marjoram
ENGLISH
Directions:
1. In a shallow dish, mix together the bread crumbs, olive
oil, and marjoram; set aside.
2. Pour cheese pasta sauce into a bowl and add sirloin tip
meat. Toss until all cubed meat is coated.
3. Toss meat in bread crumb mixture to coat thoroughly.
Arrange in Basket, cooking in batches, if necessary.
Insert Probe into largest piece.
4. Set the Brio at 360°F. Cook for 6 to 8 minutes and the
outsides are crisp and brown. Serve hot.
nuwavenow.com
nuwavenow.com
49
49
Page 50

Crispy Pork Chops with Roasted
Broccoli Crowns (Serves 6)
Time and Temp:
Prep: 15 minutes
Cook: 33 minutes
Temp: 400°F
Ingredients:
6 pork chops, boneless
2 eggs, beaten
½ c panko bread crumbs
⅓ c corn flakes, crushed
1¼ t paprika
½ t onion powder
½ t garlic powder
¼ t chili powder
⅛ t black pepper, ground
plus ½t extra
Directions:
1. For the broccoli, in a large pot, add 6qt water and bring
up to a boil. Blanch broccoli in water for 3 minutes and
remove. Drain well. Place broccoli in a large bowl and
add oil, salt, and pepper. Toss to coat broccoli.
2. Add broccoli to Fry Pan Basket. Set the air fryer to 400°F
for 15 minutes. Cook, shaking Basket halfway through to
ensure even cooking.
3. Once done, add lemon zest and Parmesan cheese and
place onto large plate or bowl and cover with foil; set aside.
4. Lightly spray the Air Fry Basket with cooking spray and
preheat to 400°F.
5. Season the pork chops with ½t sea salt.
6. In a bowl, combine, bread crumbs, corn akes, paprika,
onion powder, garlic powder, chili powder, black pepper,
¾t salt, and Parmesan cheese.
7. Dip the pork chops in bowl with beaten eggs. Dip into
bread crumb mixture to coat.
8. Place pork chops in the Basket and set to 12 minutes.
Cook in batches so as not to overcrowd. Apply cooking
spray to top of pork chops.
9. After 6 minutes of cooking, ip pork chops and reapply
cooking spray to the chops. Once all chops are cooked,
place on a plate and serve with broccoli crowns.
2 T Parmesan cheese,
grated
½ t sea salt plus ¾t extra
Cooking spray
2-3 lbs broccoli crowns
2 T extra-virgin olive oil
2 t lemon zest
1 t sea salt
¼ c Parmesan cheese,
grated
5050
recipes
Page 51

Croque Monsieur (Serves 4)
Time and Temp:
Prep: 13 minutes
Cook: 10 minutes
Temp: 400°F
Ingredients:
Sandwich:
8 slices hardy sourdough bread
6 oz Gruyère cheese, grated
¼ c Parmesan cheese, grated
5 oz ham, thinly sliced
Bechamel Sauce:
1½ c milk
¼ c flour
¼ c butter
¼ t Dijon mustard
Dash nutmeg, ground
Sea salt and black pepper
Directions:
For Bechamel:
1. In a saucepan, melt butter over medium heat and add
our, whisking constantly.
2. After 3-4 minutes, gradually whisk in milk and keep
stirring until sauce thickens and becomes smooth.
3. Remove from heat and add mustard and nutmeg. Adjust
seasoning with salt and pepper.
ENGLISH
Sandwich Assembly:
1. Evenly spread bechamel over one side of each slice of
bread. Place 4 slices bechamel side up in the Fry
Pan Basket. Remove Fry Pan Basket beforehand.
2. Add ham, Gruyère, and Parmesan cheese on top. Place
remaining 4 slices of bread on top with the bechamel
facing up. Top bread with remaining Gruyère and
Parmesan cheeses.
3. Place Basket into the air fryer and set to 400°F for 5
minutes. Cook sandwiches until cheese is melted and
golden brown on top.
nuwavenow.com
nuwavenow.com
51
51
Page 52
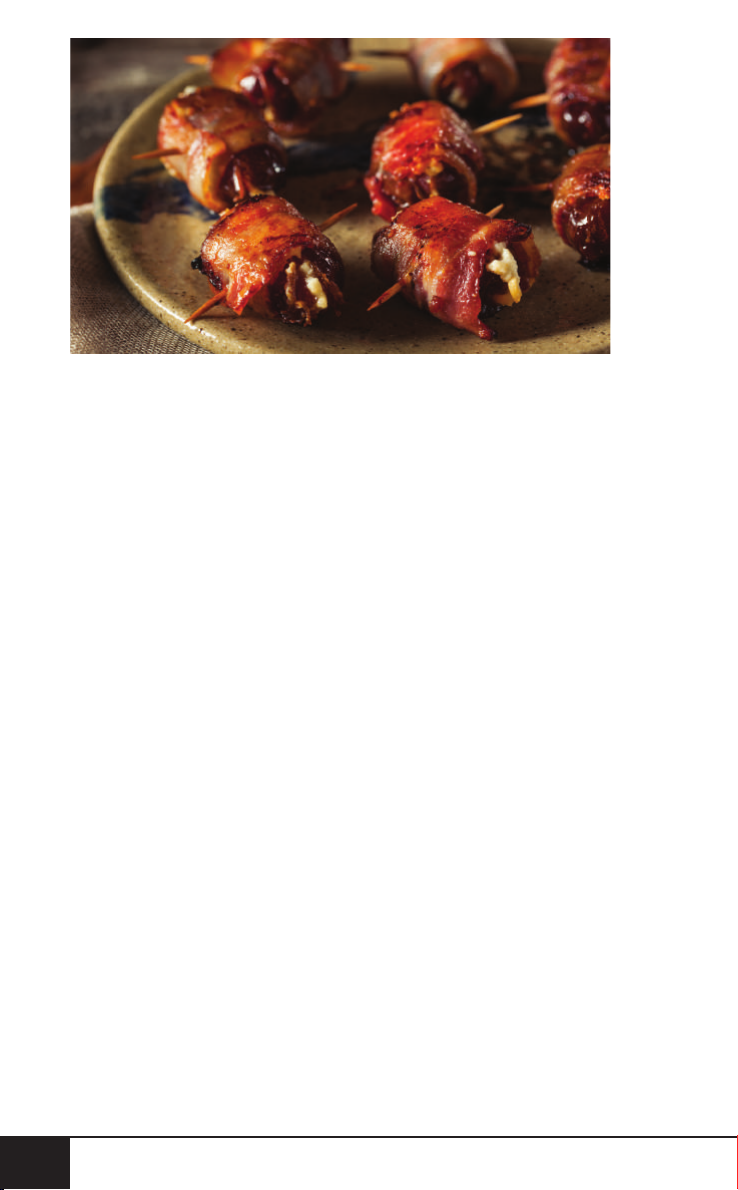
Devils on Horseback (Serves 10)
Time and Temp:
Prep: 13 minutes
Cook: 10 minutes
Temp: 400°F
Ingredients:
40 dates, pitted, left whole
½ c blue cheese, crumbled
20 slices bacon, each cut in half
Chives, thinly sliced (for garnish)
Hoisin sauce, for dipping (optional)
Directions:
1. Preheat the air fryer to 400°F.
2. Split dates in half lengthwise and open the date. Add 1t
of blue cheese to the middle of each date and close the
date around the cheese.
3. Lay a piece of bacon out on a at surface and place the
date at one end of the bacon. Roll up the date, wrapping
the bacon around the date. Periodically stretch the
bacon slightly to ensure a tight wrap around the date.
Repeat for each date.
4. Place dates in the air fryer basket, seam-side down, cooking
in batches, if necessary. Set the fryer to 10 minutes.
5. When done, remove the basket. The bacon should be
brown and crispy and the cheese should be melting and
slightly oozing from each date.
6. Plate the dates with Hoisin sauce or sauce of choice.
Garnish with chives and enjoy.
5252
recipes
Page 53
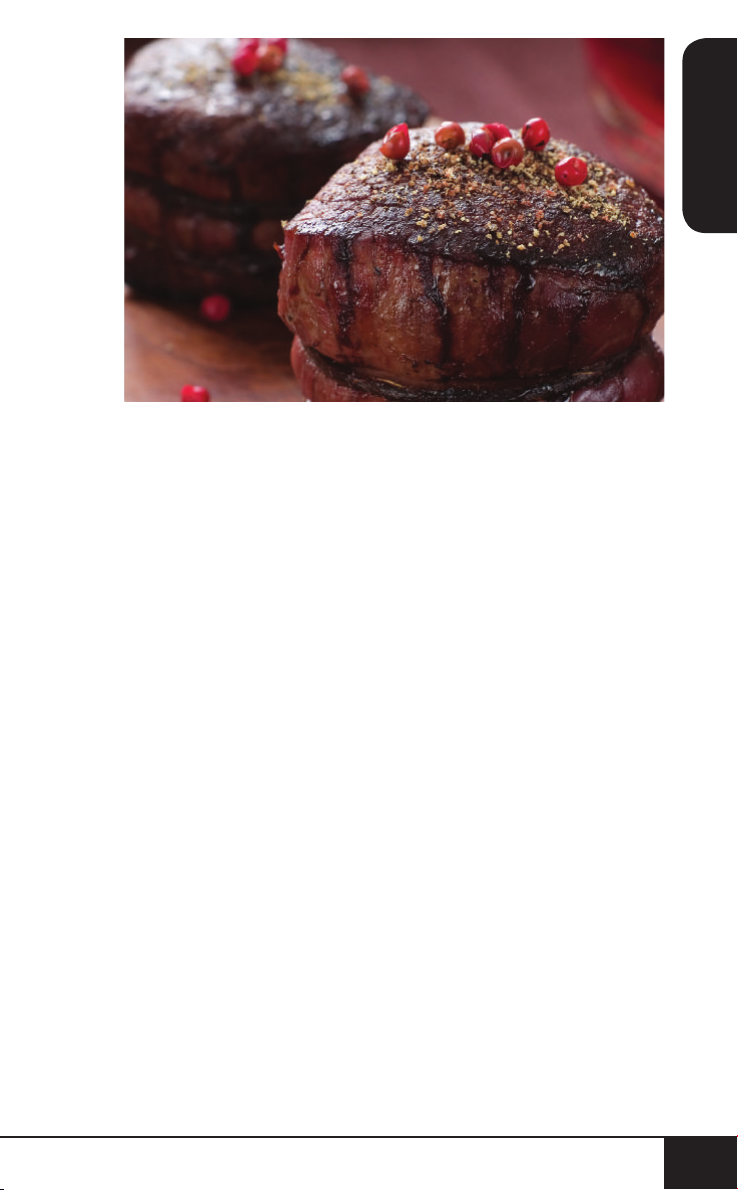
Filet Mignon (Serves 2)
Time and Temp:
Prep: 15 minutes
Cook: 9 minutes
Temp: 350°F
Ingredients:
2 filet mignon steaks
2 slices thick bacon
Olive oil
Sea salt
Freshly ground black pepper
Toothpicks
ENGLISH
Directions:
1. Preheat Brio at 400°F for 15 minutes.
2. Wrap the bacon around the lets mignons. Secure the
bacon with a toothpick.
3. Rub olive oil on the lets and season with sea salt and
fresh ground black pepper.
4. In a heated skillet, sear lets on both sides. Once seared
and once Brio is preheated, place lets in the Basket of
the Brio. Insert Probe into one steak. Set Probe to 125°F.
5. Cook until internal temperature reaches 125°F for
medium-rare. The Brio will turn off.
6. When done, remove steaks and let rest 5 to 10 minutes.
nuwavenow.com
nuwavenow.com
53
53
Page 54

Fish and Chips with Homemade Tartar
Sauce (Serves 4)
Time and Temp:
Prep: 10 minutes
Cook: 15 minutes
Temp: 360°F
Ingredients:
2 catfish fillets
¼ c tortilla chips (optional) or
premade fries
4 slices of wholemeal bread
¼ c Parmesan cheese
¼ t onion powder
¼ t garlic powder
¼ t sea salt
¼ t freshly ground
black pepper
1 egg
2 T milk
Directions:
1. Cut sh llets in half (for pieces total). Season with lemon
juice, sea salt, and fresh ground black pepper; set aside.
2. In a food processor, add bread, tortilla chips, Parmesan
cheese, onion powder, garlic powder, sea salt, fresh
ground black pepper, and lemon zest. Pulse until a bread
crumb consistency is reached. Place in a shallow dish.
3. In another shallow dish, add egg and milk and beat
lightly; set aside.
4. Take a piece of sh and wet with egg mixture and then
coat with breadcrumb mixture. Set aside.
5. Preheat at 360°F for 5 minutes.
6. Place breaded sh in Basket. When done, sh will be
light brown.
7. While cooking, in a small bowl, mix together mayonnaise,
pickles, red onions, white wine vinegar, capers, grain
mustard, sea salt, and fresh ground black pepper. Put in
the refrigerator to chill.
8. Serve sh warm with chips or tortilla chips (optional) and
homemade Tartar sauce.
For Tartar Sauce:
½ c mayonnaise
2 T pickles or cornichons,
finely minced
2 T red onions, finely minced
1 T white wine vinegar
1 T capers
1 t grain mustard
Sea salt
Freshly ground black pepper
5454
recipes
Page 55

Five-Spice Duck Breast (Serves 2)
Time and Temp:
Prep: 10 minutes
Cook: 12-14 minutes
Temp: 400°F
Ingredients:
2 duck breasts, boneless, skin on
6 T soy sauce
1 T Chinese five-spice
1 T mirin
1 T honey
Sea salt and black pepper
Directions:
1. Place duck breasts on a cutting board and score the
duck skin, making 3-4 diagonal cuts through skin. Do not
cut into the meat.
2. Place duck into a resealable plastic bag and add soy
sauce, ve-spice, mirin, honey, salt, and pepper. Mix
everything together to coat duck breasts. Place in
refrigerator to marinate for 24 hours.
3. Set the air fryer to preheat at 400°F.
4. When preheated, add ½c water to bottom of the Basket.
Place in duck breasts skin-side up into the Basket. Insert
Probe into one of the breasts. Set Probe to 165°F. Set
the cooking time to 30 minutes.
5. When preheated, add ½ c water to bottom of the Basket.
Place in duck breasts skin-side up into the Basket. Insert
Probe into one of the breasts. Set Probe to 125°F. for
medium rare. Cook for 8 minutes ip duck breast and
cook to internal temperature has reached 125°F. Let rest
for 10 minutes before serving.
ENGLISH
nuwavenow.com
nuwavenow.com
55
55
Page 56
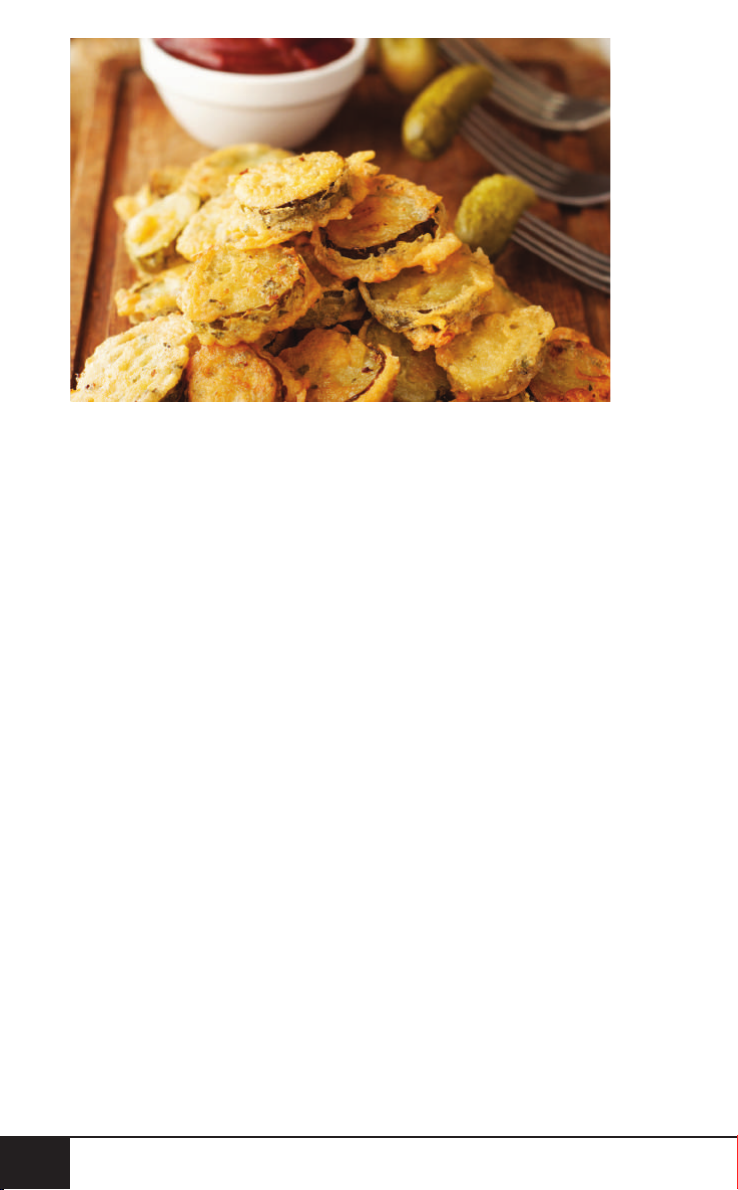
Fried Pickles (Serves 4)
Time and Temp:
Prep: 10 minutes
Cook: 10 minutes
Temp: 400°F
Ingredients:
1 (32-oz) jar pickles, whole
1 c panko bread crumbs
2 eggs, beaten
⅓ c Parmesan cheese, grated
¼ t dill, dried
Sea salt
Directions:
1. Slice pickles on a bias, ¼-inch thick, and place slices on
paper towels to dry.
2. In a shallow bowl, combine bread crumbs, Parmesan,
and dill.
3. Dip one pickle slice in egg then coat with the bread
crumbs. Repeat until all pickle slices are breaded.
4. Arrange breaded pickle slices in Air Fry Basket.
Do not overcrowd.
5. Cook at 400°F for 10 minutes. Shake the basket halfway
through cooking. Serve hot.
5656
recipes
Page 57
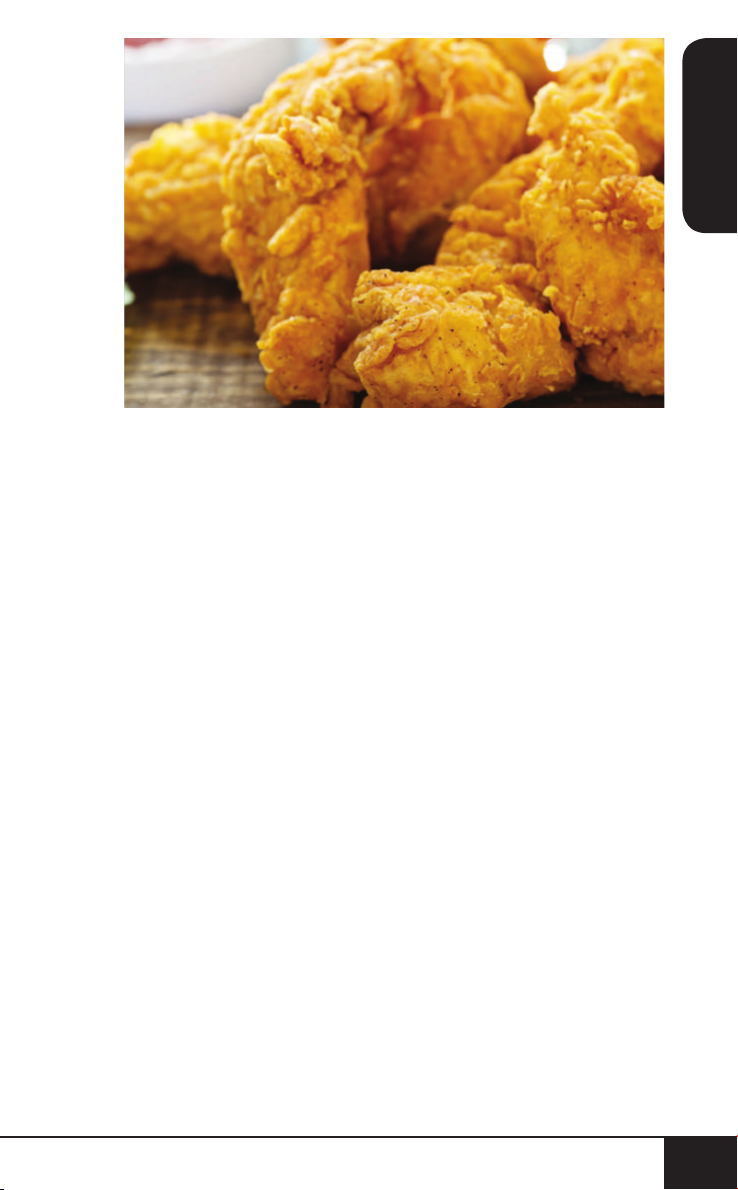
Homemade Chicken Tenders
with Honey Mustard (Serves 2)
Time and Temp:
Prep: 10 minutes
Cook: 12-14 minutes
Temp: 375°F
ENGLISH
Ingredients:
8 chicken tenders
2 eggs, beaten
1 c bread crumbs
½ T dried rosemary
½ T thyme, dry
1 t sea salt
½ t freshly ground black
pepper
Directions:
1. In a mixing bowl, add bread crumbs, rosemary, and
thyme and combine.
2. Preheat to 375°F. Season tenders generously with salt
and pepper. Dip and coat tenders in egg then coat with
the bread crumbs.
3. Place chicken in the Basket. Set to cook for 12 to 14
minutes checking internal temperature of 165°F.
4. While the chicken is cooking, combine mustard, honey,
white vinegar, and pepper in a small mixing bowl. Serve
on side as a dipping sauce for the chicken tenders.
Honey Mustard:
1 T Dijon mustard
1 T honey
1 T white vinegar
1 t cracked black pepper
nuwavenow.com
nuwavenow.com
57
57
Page 58
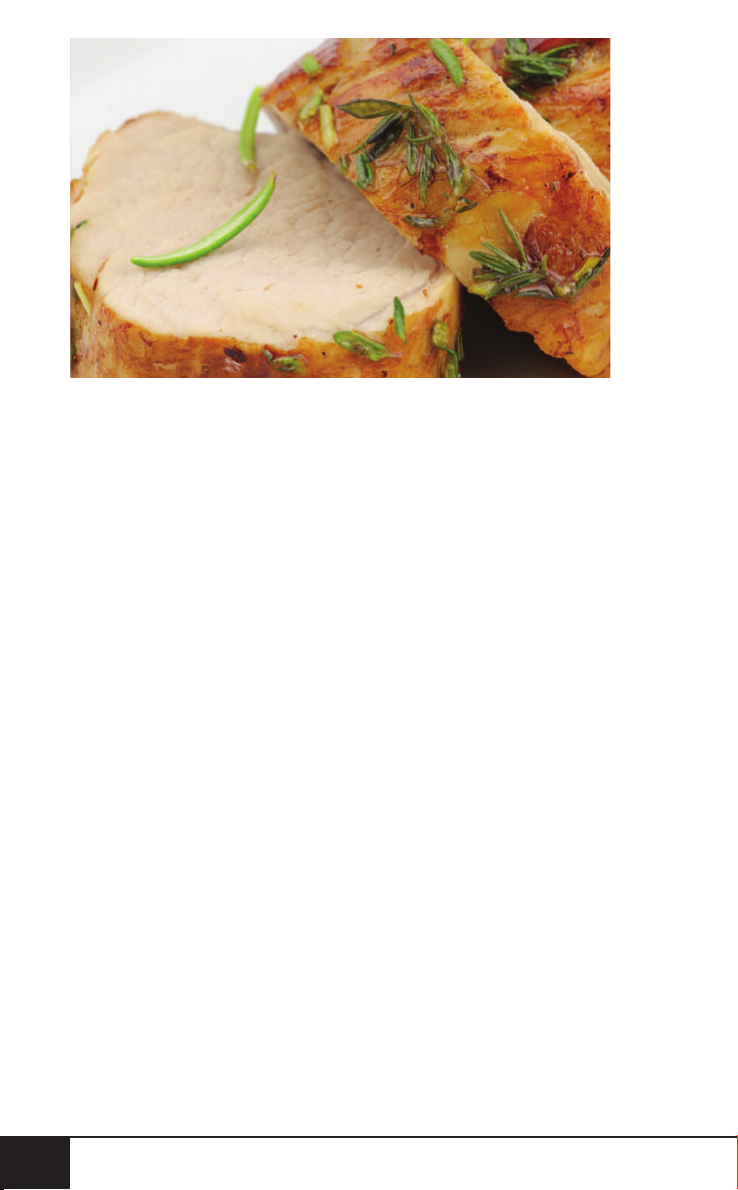
Honey-Butter Pork Tenderloin (Serves 6)
Time and Temp:
Prep: 5 minutes
Cook: 12-15 minutes
Temp: 360°F
Ingredients:
1 (1½-lb) pork tenderloin, trimmed
¾ c water
4 t butter
2 t honey
½ t Cajun seasoning
½ t black pepper, ground
Directions:
1. In a skillet, over medium heat, melt butter and honey.
2. Rub Cajun seasoning and black pepper on pork
tenderloin. Add pork to the honey butter. Brown
tenderloin in skillet on all sides.
3. Place tenderloin in the Fry Pan Basket and set the
fryer to 360°F for 12 minutes. Cook time may be longer
depending on size and thickness of tenderloin.
4. Once cooked, remove tenderloin to a serving dish and
cover with aluminum foil.
5. Pour the juices remaining in Basket from cooked
tenderloin into a saucepan. Add water and heat over
medium heat. Slightly reduce liquid for about 5 minutes.
6. Slice tenderloin and serve with a drizzle of the sauce
from the saucepan.
5858
recipes
Page 59
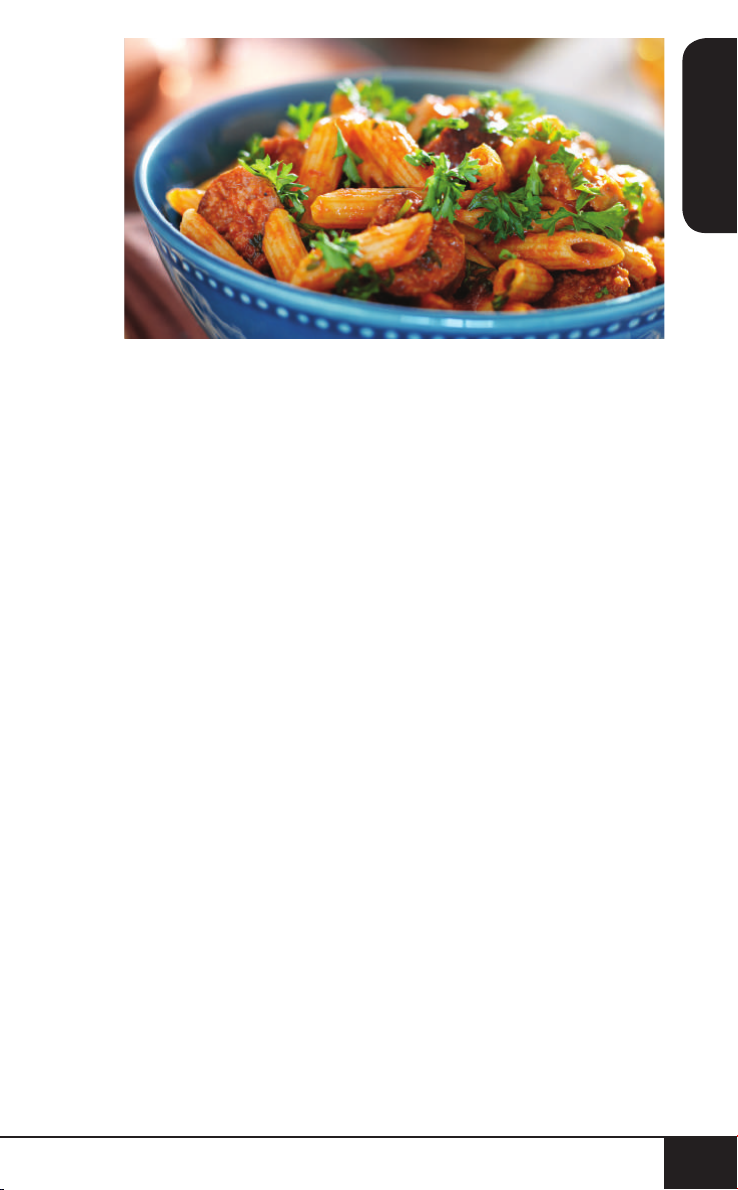
Italian Sausage with Rigatoni Pasta
(Serves 2)
Time and Temp:
Prep: 10 minutes
Cook: 13-14 minutes
Temp: 400°F
Ingredients:
1 lb rigatoni pasta
1 lb Italian sausage, cooked and crumbled
2 basil leaves, chiffonade
1 bell pepper, sliced into strips
1 c grape tomatoes, each halved
1½ T sea salt
¼ c fontina cheese, grated
¼ c mozzarella cheese, shredded
1 c marinara sauce
Cooking spray
ENGLISH
Directions:
1. Cook pasta according to package. Strain pasta and
place in a bowl. Add sausage, bell pepper, tomato,
fontina cheese, half mozzarella cheese, sea salt, and
marinara sauce. Stir together.
2. In a baking dish that will t into the air fryer, coat dish
with cooking spray and add pasta mixture.
3. Set to 400°F for 10 minutes. After 10 minutes, add
remaining mozzarella cheese to the top.
4. Adjust and increase the temperature to 400°F. Cook for
an additional 3-4 minutes until cheese is melted. Top
with fresh basil.
nuwavenow.com
nuwavenow.com
59
59
Page 60
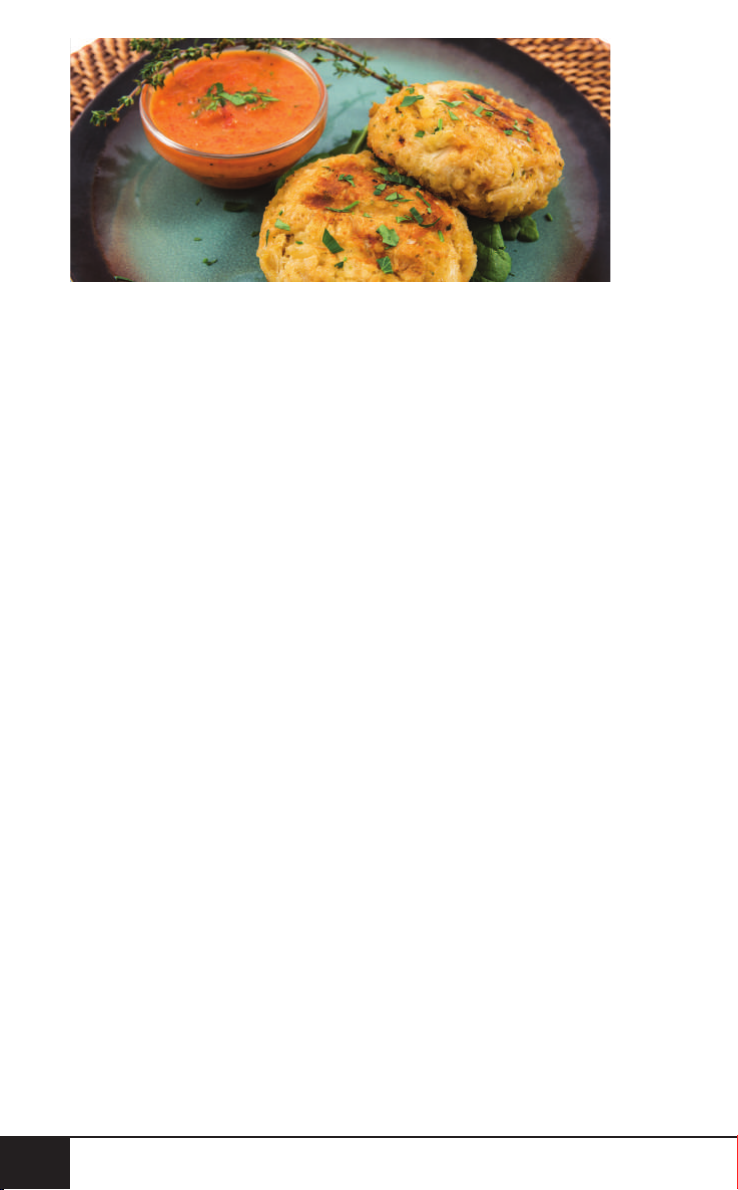
Jumbo Lump Crab Cakes (Serves 4)
Time and Temp:
Prep: 15 minutes
Cook: 10 minutes
Temp: 360°F
Ingredients:
2 c cooked crab meat
1 T all-purpose flour
½ c mayonnaise
3 green onions, finely
chopped
1 yellow onion, medium,
finely chopped
½ c roasted pepper, finely
chopped
Directions:
1. In a large bowl, add crab meat, our, mayonnaise,
onions, green onions, roasted pepper, egg, ½c bread
crumbs, garlic powder, sea salt, and fresh ground black
pepper. Combine all ingredients. Do not overwork
mixture. Divide crab mixture into 16 equal portions and
form crab cakes.
2. In a shallow dish, add 1c of bread crumbs. Pat each crab
cake into the bread crumbs. Place each crab cake on a
tray or plate and put in freezer for 1 hour. (This will make
them easier to handle.)
3. Preheat at 360°F.
4. Once preheated, place in Fry Pan Basket. Set at 360°F
for 10 minutes. Cook until golden brown. Serve hot with
dipping sauce of choice.
1 egg
½ c panko bread crumbs
plus 1c extra
½ t garlic powder
½ t sea salt
½ t freshly ground
black pepper
6060
recipes
Page 61
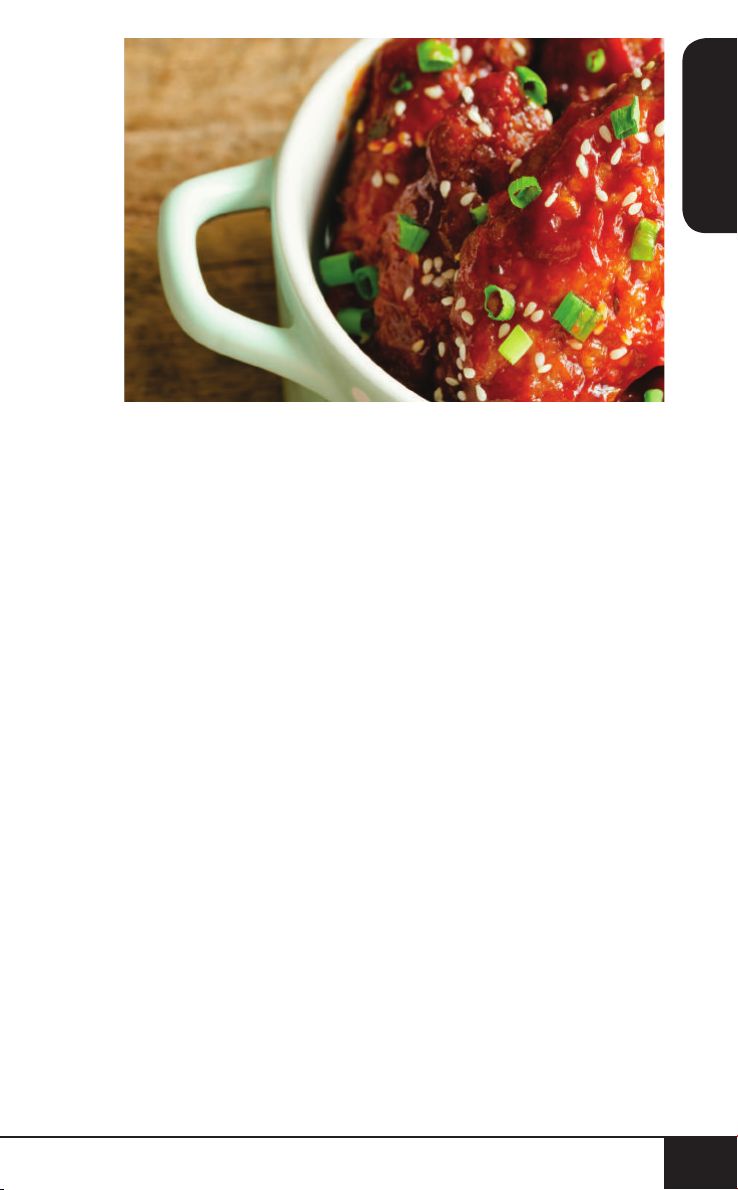
Korean Wings (Serves 2)
Time and Temp:
Prep: 10 minutes
Cook: 20 minutes
Temp: 400°F
Ingredients:
1 lb chicken wings
1 t canola oil
¼ t freshly ground black pepper
For Sauce:
1½ T sambal
1 T Sriracha
1 T black bean paste
ENGLISH
Directions:
1. In a large mixing bowl, add wings, oil, and pepper. Toss
to coat wings.
2. Place wings in Fry Pan Basket and set to 400°F
for 20 minutes.
3. While wings are cooking, in another mixing bowl, add
sambal, Sriracha, and black bean paste. Mix well.
4. When wings are cooked, remove. Toss wings in sauce to
coat. Serve with favorite dipping sauce.
nuwavenow.com
nuwavenow.com
61
61
Page 62
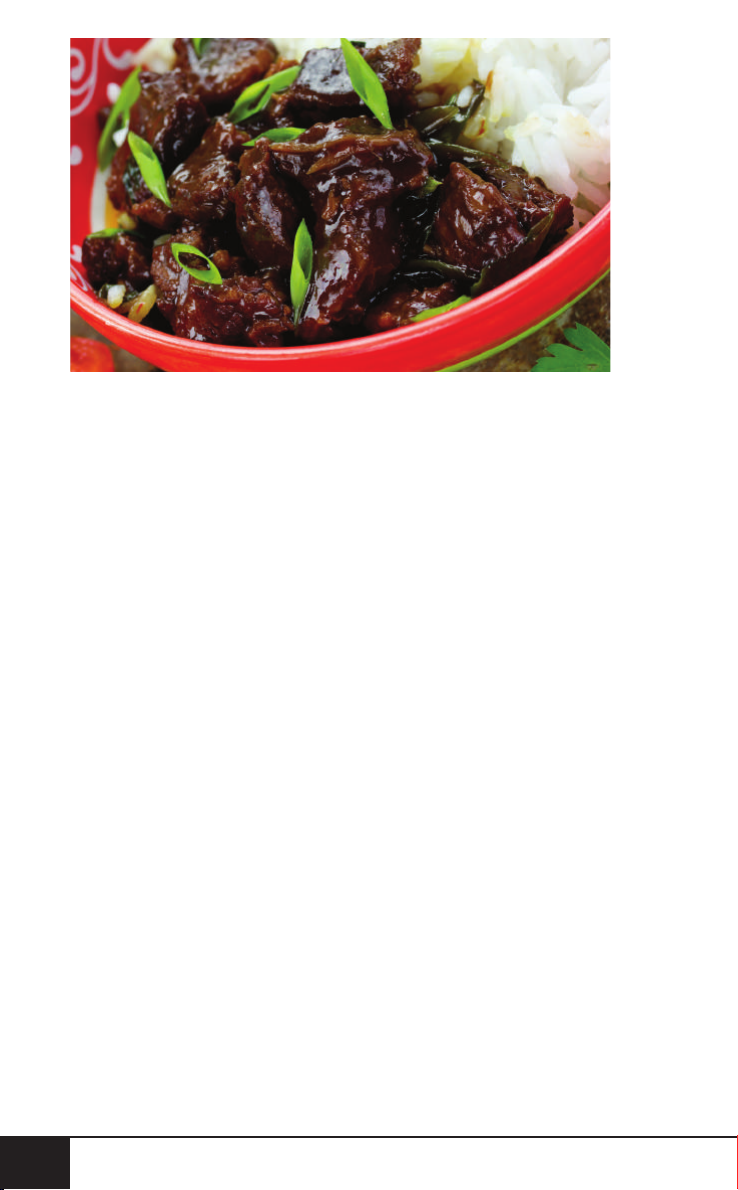
Mongolian Beef (Serves 4)
Time and Temp:
Prep: 10 minutes
Cook: 10 minutes
Temp: 400°F
Ingredients:
2 lbs beef tenderloin beef chuck, cut into strips
¼ c cornstarch
2 T cooking oil
1 T fresh ginger, minced
1 T garlic, minced
½ c rice vinegar
½ c soy sauce
½ c water
1 t hoisin sauce
½ c brown sugar
1 t red pepper flakes
½ c green onion, chopped into 1-inch pieces
Directions:
1. In a plastic zip bag, add cornstarch and beef. Coat evenly.
2. Add the remaining ingredients: ginger, garlic, rice
vinegar, soy sauce, water, hoisin sauce, brown sugar,
and red pepper akes. Marinate for at least 2 hrs.
3. Place beef strips in the Basket. Do not overlap. Set Brio
to 400°F and cook for 10 minutes.
4. Once cooked, place beef on a plate and top with
green onions.
6262
recipes
Page 63

Mozzarella Sticks (Serves 4)
Time and Temp:
Prep: 15 minutes
Cook: 12 minutes
Temp: 400°F
Ingredients:
1 lb mozzarella cheese, whole brick
2 eggs
3 T nonfat milk
1 c plain bread crumbs
1 T basil, fresh, minced
1 T oregano, fresh, minced
1 T parsley, minced
¼ c all-purpose flour
1 t garlic powder
1 t onion powder
½ t cayenne pepper
½ t paprika, smoked
¼ t black pepper, fresh, cracked
Sea salt
Marinara sauce (for serving)
ENGLISH
Directions:
1. Slice cheese into 3-by-½-inch sticks.
2. In a bowl, add eggs and milk. Whisk together.
3. In shallow dish, add bread crumbs, basil, oregano,
and parsley. In a third bowl, place our, garlic powder,
onion powder, cayenne pepper, paprika, sea salt and
black pepper.
4. Assembly line should be our-egg-breadcrumbs. Bread
each piece of cheese in this order.
5. Place breaded cheese sticks on a tray. Freeze for up to 2
hours or until solid.
6. Place small batches in the Basket. Do not overcrowd.
7. Set air fryer to 400°F and cook for 12 minutes. Serve hot
with marinara sauce.
nuwavenow.com
nuwavenow.com
63
63
Page 64
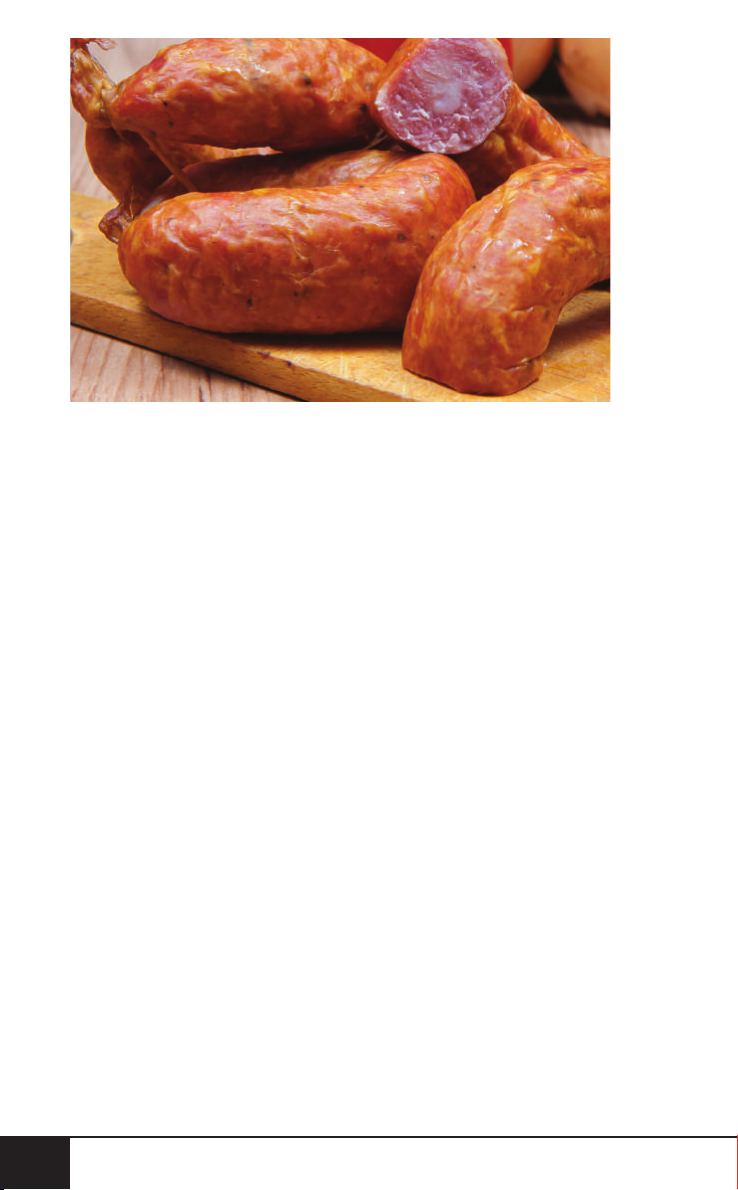
Polish Kielbasa with Peppers
and Onions (Serves 6)
Time and Temp:
Prep: 5 minutes
Cook: 10 minutes
Temp: 400°F
Ingredients:
1 red bell pepper, sliced into strips
1 green bell pepper, sliced into strips
1 red onion, sliced into strips
2 lbs Polish kielbasa, cut into coins
Sea salt and freshly ground black pepper
Cooking spray
Directions:
1. Remove Fry Pan Basket from unit. Spray Basket with
cooking spray. Add kielbasa, peppers, and onions.
2. Add salt, pepper, and top with cooking spray. Toss to
coat sausage and veggies. Slide back into unit.
3. Set air fryer to 400°F for 10 minutes. Shake basket a
couple times halfway through cooking to separate and
move sausage and veggies around.
4. Serve with rice or as a side dish.
6464
recipes
Page 65
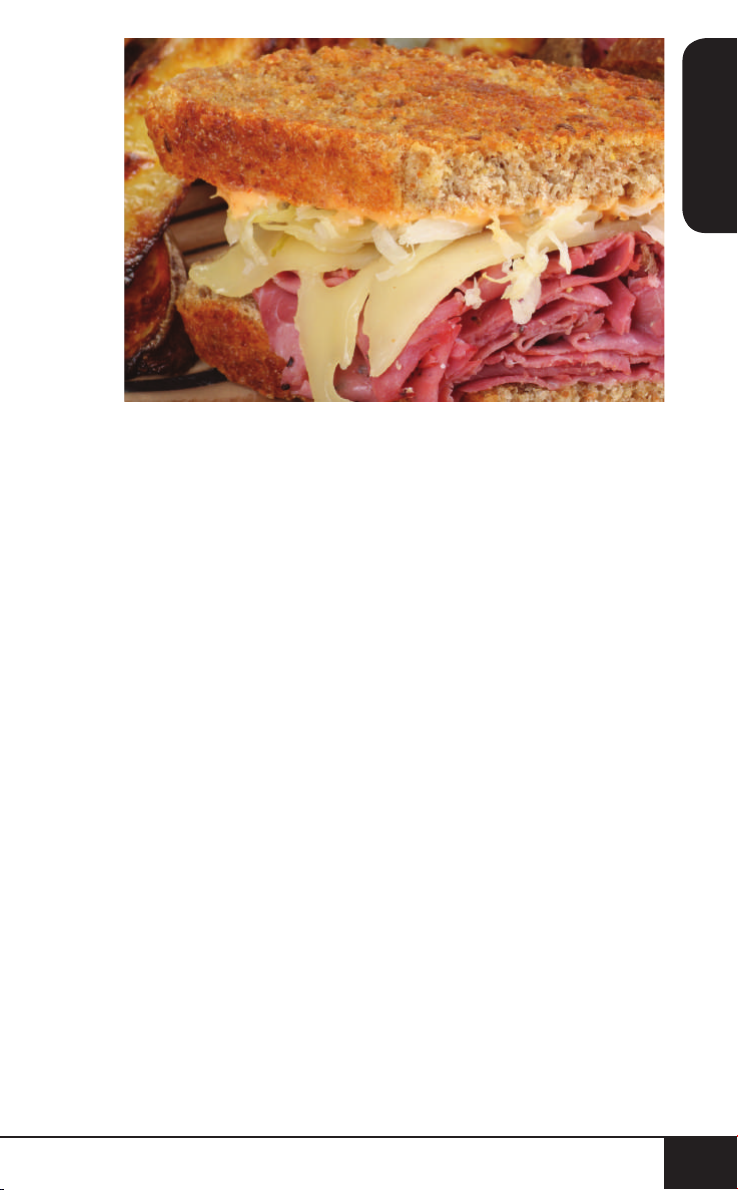
Reuben Sandwich (Serves 2)
Time and Temp:
Prep: 5 minutes
Cook: 8 minutes
Temp: 400°F
Ingredients:
4 slices rye bread
10 slices corned beef
3 T of sauerkraut (with caraway seeds)
4 T Thousand Island dressing
4 slices of Swiss cheese
Butter-flavored cooking spray
ENGLISH
Directions:
1. Spray the outer sides of each slice of rye bread.
2. Arrange the corned beef on 2 of the slices of rye bread.
Evenly spread sauerkraut on top of the corned beef and
drizzle on Thousand Island dressing.
3. Top the sauerkraut and dressing with Swiss cheese. Top
with other rye bread.
4. Carefully place sandwiches in the Basket.
5. Set Brio at 400°F for 4 minutes ip sandwiches over cook
for an additional 4 minutes.
nuwavenow.com
nuwavenow.com
65
65
Page 66
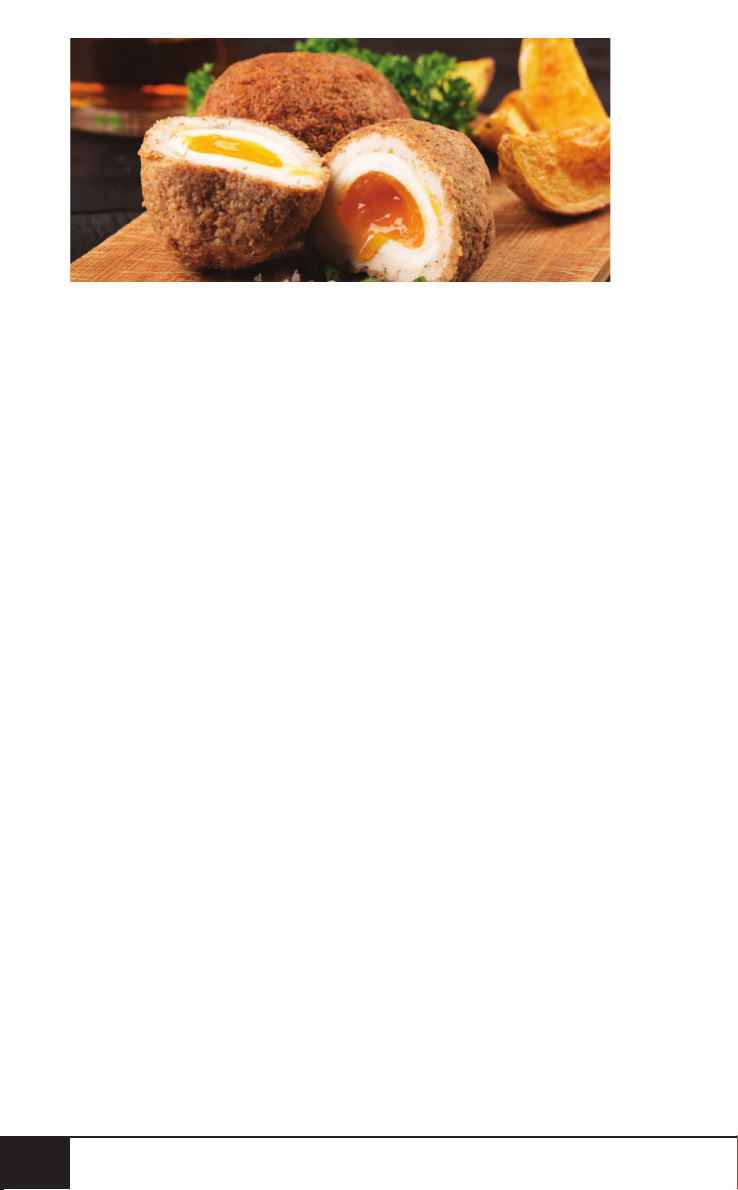
Scotch Eggs (Serves 6)
Time and Temp:
Prep: 5 minutes
Cook: 10 minutes
Temp: 360°F
Ingredients:
6 hard-boiled eggs, peeled
3 eggs, raw, divided
1½ c bread crumbs, divided
1½ lbs pork sausage
½ c flour
Cooking spray
Directions:
1. In a large mixing bowl, combine 1 raw egg, ½c bread
crumbs, and pork sausage.
2. In a shallow bowl, beat the remaining eggs. In another
shallow bowl, add our; set aside.
3. Divide sausage mixture into six equal portions. Flatten
each portion down into an oval-shaped piece.
4. Roll each hard-boiled egg in our then place egg in the
middle of the oval sausage patty. Wrap the sausage
around the egg so that it completely encloses the egg.
5. Once wrapped, once again roll the encircled egg in our,
dip into the beaten eggs, and then roll once again in the
bread crumbs. Repeat for each egg.
6. Place breaded eggs in the Fry Pan Basket in a single
layer and apply cooking spray.
7. Set to 360°F for 10 minutes. After 5 minutes of cooking,
turn each egg over and spray again with cooking spray.
Cook for an additional 5 minutes or until sausage is
cooked and the coating is brown.
6666
recipes
Page 67
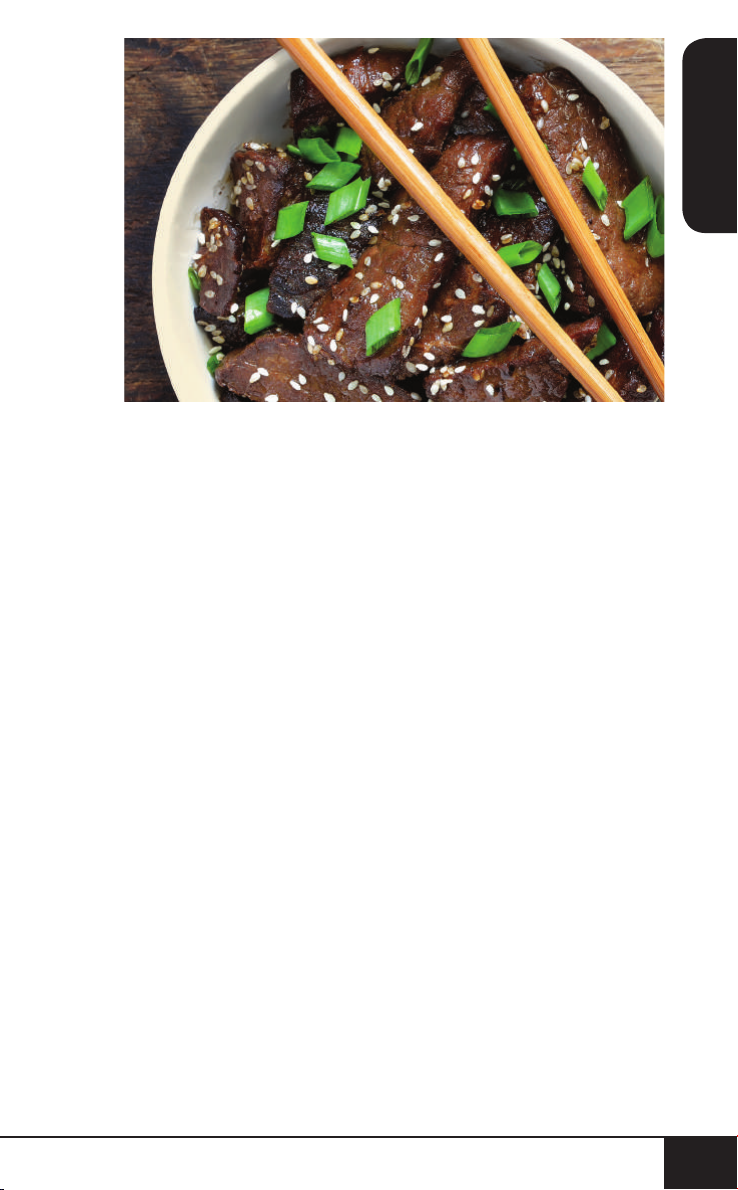
Sesame Beef (Serves 4)
Time and Temp:
Prep: 10 minutes
Cook: 5-7 minutes
Temp: 400°F
Ingredients:
1 lb beef strips, any cut of choice
¼ c soy sauce
¼ c ketchup
2 T honey
2 t sesame seed oil
1 T sesame seeds
2 t cornstarch
ENGLISH
Directions:
1. In a plastic zip bag, add beef strips, soy sauce,
ketchup, honey, sesame seed oil, sesame seeds, and
cornstarch. Mix all together and marinate overnight in
the refrigerator.
2. When ready to cook, preheat at 400°F for 15 minutes.
3. Once preheated, remove the strips of meat from
marinade. Arrange in the Basket.
4. Cook sesame beef at 400°F for 5 to 7 minutes.
5. While cooking, pour remaining marinade from bag into a
saucepan. Bring up to a boil until it thickens.
6. When done, serve sesame beef with marinate on the
side for dipping.
nuwavenow.com
nuwavenow.com
67
67
Page 68

Southern Fried Chicken Thighs (Serves 6)
Time and Temp:
Prep: 15 minutes
Cook: 9 minutes
Temp: 350°F
Ingredients:
6-8 chicken thighs, bone-in
2 c flour
1 c buttermilk
1 T garlic powder
1 T black pepper
1 T paprika
1 t sea salt
1 t onion powder
1 t cumin
½ t cayenne pepper
½ t oregano, dried
½ t thyme, dried
Directions:
1. In a resealable plastic bag, place in chicken thighs and
buttermilk. Seal the bag. Place in refrigerator for at least
2-3 hours.
2. Remove chicken from the bag and reserve the
buttermilk; set aside.
3. Combine our and all spices in a large bowl. Dredge
chicken piece in seasoned our. Dip back into the
buttermilk and dredge once again through the seasoned
our. Repeat for each piece.
4. Place chicken in Basket. Insert Probe into largest piece.
Set Probe to 165°F. After 15 minutes ip chicken and
cook until internal temperature reaches 165°F. the Brio
will turn off.
5. Serve with corn on the cob and enjoy.
6. After 15 minutes of cooking, check Probe to see if
internal temperature of 165°F has been reached.
7. Serve with corn on the cob and enjoy.
6868
recipes
Page 69

Spiced Avocado Fries with Creole Sauce
(Serves 2)
Time and Temp:
Prep: 5 minutes
Cook: 12 minutes
Temp: 400°F
Ingredients:
2 avocados
4 T ground coriander
3 limes, juice and zest
2 c oats
1 T dried or fresh basil
2 T taco seasoning
Sea salt
Freshly ground black pepper
For Dipping Sauce:
½ c mayonnaise
1 T brown mustard
2 t Cajun seasoning
1 t lemon juice
Directions:
1. Cut avocados in half and remove skin and pit (seed) for
each. Slice avocado into wedges.
2. Squeeze lime juice over avocado and season with sea
salt, fresh ground black pepper, and coriander.
3. In a food processor, add lemon zest, oats, basil, and
seasoning. Pulse until bread crumb consistency is
reached. Put mixture into a shallow dish.
4. Take avocado slices and bread them with the oat
mixture. Arrange slices in Basket. Do not overlap.
5. Set to 400°F for 6 minutes. Flip the avocado slices and set
to cook for an additional 6 minutes.
6. In a small bowl, add mayonnaise, brown mustard, Cajun
seasoning, and lemon juice. Mix well and pour into a
dipping sauce container.
7. Before serving, squeeze remaining lemon juice on top of
Creole Sauce and serve on side with avocado.
ENGLISH
nuwavenow.com
nuwavenow.com
69
69
Page 70

Spicy Rumaki (Serves 8)
Time and Temp:
Prep: 10 minutes
Cook: 14-16 minutes
Temp: 400°F
Ingredients:
½ lb chicken livers, cleaned and rinsed, cut into ½-inch
cubes
1 lb bacon slices, each cut into thirds
1 (5-oz) can whole water chestnuts, quartered
1 jalapeño pepper, thinly sliced
2 cloves garlic, minced
2 t fresh ginger, minced
4 T maple syrup
3 T soy sauce
2 T red pepper flakes
Sweet chili sauce for dipping (optional)
Directions:
1. Place chicken livers in a plastic resealable bag along
with soy sauce, ginger, and garlic. Marinate for 2 hours.
2. Remove livers from marinade; set aside. Lay the bacon
slices on a at surface. Brush one side of bacon with
maple syrup. Sprinkle some red pepper akes over bacon
then place a piece of liver at one end of the bacon. Top
with piece of water chestnut and slice of jalapeño.
3. Wrap the bacon around the liver, chestnut, jalapeño
stack by rolling it up. Slightly stretch the bacon to ensure
a tight wrap. Continue this until all liver is used.
4. Place rumaki seam-side down in Basket. Brush with
more maple syrup. Set to 400°F.
5. Cook for 6 minutes ip and cook 6 to 7 minutes to an
internal temperature of 165°F. Checking with a hand
held thermometer.
6. Once bacon has cooked to desired crispiness, remove
rumaki and serve with a sweet chili sauce (optional).
7070
recipes
Page 71
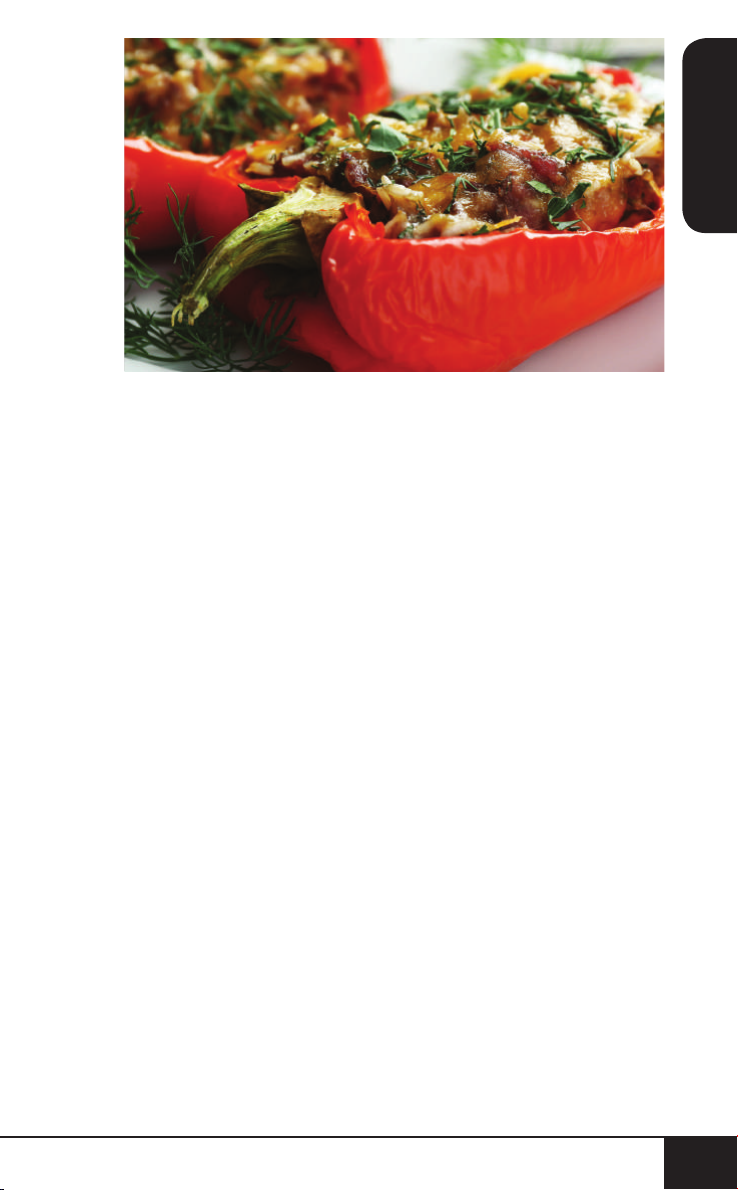
Stuffed Peppers (Serves 4)
Time and Temp:
Prep: 15 minutes
Cook: 20 minutes
Temp: 400°F
ENGLISH
Ingredients:
4 red bell peppers
1 lb ground beef
1 white onion, minced
3 cloves of garlic, minced
1 c tomato sauce, divided
1 t sea salt
1 t fresh ground
black pepper
2 t Worcestershire sauce
2 c cheddar cheese,
shredded, divided
2 t olive oil
Directions:
1. Cut off upper parts of bell peppers and remove stems
and seeds. In a pot of boiling water, place peppers in
and cook for 3 minutes. Take out; set aside.
2. Preheat at 400°F.
3. In a skillet, heat oil and add onions and garlic. Season
with sea salt and fresh ground black pepper. When
done, turn off heat, remove, and allow to cool.
4. In a large bowl, add ground beef, ½c tomato sauce,
Worcestershire sauce, 1c cheddar cheese, sea salt,
fresh ground black pepper, and cooled onion mixture.
5. Fill up peppers with beef lling and top with remaining
tomato sauce and shredded cheese.
6. Arrange peppers in Basket and set at 400°F for 20 minutes.
Serve hot with white rice.
nuwavenow.com
nuwavenow.com
71
71
Page 72

Sweet and Sour Chicken (Serves 4)
Time and Temp:
Prep: 10 minutes
Cook: 15-17 minutes
Temp: 360°F
Ingredients:
4 chicken breasts, boneless, skinless, large dice
2 cloves garlic, minced
1 red onion, large dice
1 red pepper, seeded, large dice
1 green pepper, seeded, large dice
1 c sugar
½ c apple cider vinegar
4 T ketchup
2 T cornstarch
1 T extra-virgin olive oil
1 T soy sauce
1 t red pepper flakes
Sea salt and pepper to taste
Directions:
1. In a large mixing bowl, add garlic, onions, and bell
peppers. Add oil and mix well to coat veggies. Place
vegetables in Basket and set to 360°F.
2. Halfway through cooking, pull out Basket and shake contents.
3. In the same large mixing bowl, combine sugar, vinegar,
ketchup, cornstarch, soy sauce, red pepper akes, and
black pepper. Mix well; set aside.
4. Once vegetables have cooked for 7 minutes, add
chicken to Basket. Cook for 10 min. Until chicken
reaches Probe internal temperature of 160°F.
5. Once chicken reaches 165°F internal temperature
checked with an hand held thermometer around 7 to
9 minutes. Add chicken to an casserole dish and pour
sauce over chicken and vegetables. Stir to coat. Cook for
an additional 5 minutes to thicken the sauce. Remove and
serve with rice.
7272
recipes
Page 73
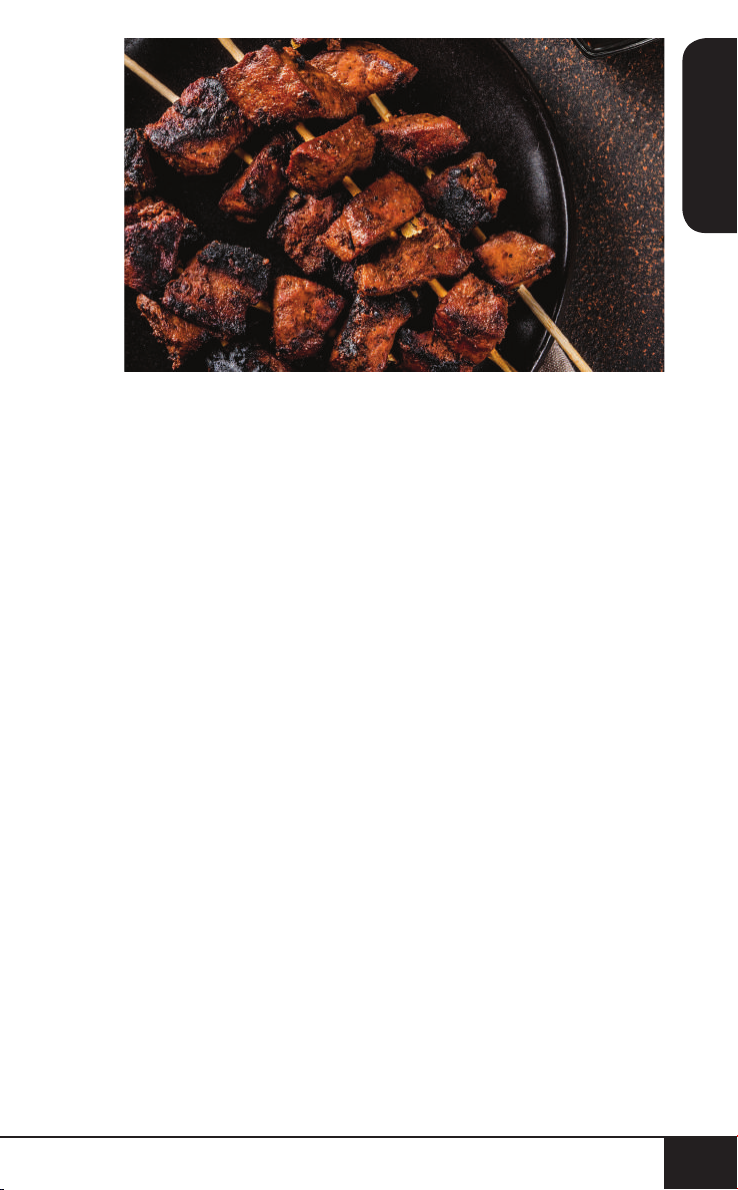
Yakitori (Serves 6)
Ingredients:
⅓C rice wine
½C sugar
2T ginger, minced
2t garlic, minced
⅓C soy sauce
2 lbs chicken, cut into strips
Directions:
1. Combine rice wine, soy sauce, sugar, ginger, garlic,
and soy sauce into a saucepan. Bring up to a boil
until thickened.
2. In a separate bowl, place in chicken and pour marinade
over it.
3. Chill for 2-3 hours.
4. Place marinated chicken onto skewers. Place into the
basket of the fryer.
5. Set the fryer to 400°F.
6. Cook for 10 minutes and baste with marinade halfway
through cooking.
7. Serve with your choice of rice or sauce.
ENGLISH
nuwavenow.com
nuwavenow.com
73
73
Page 74
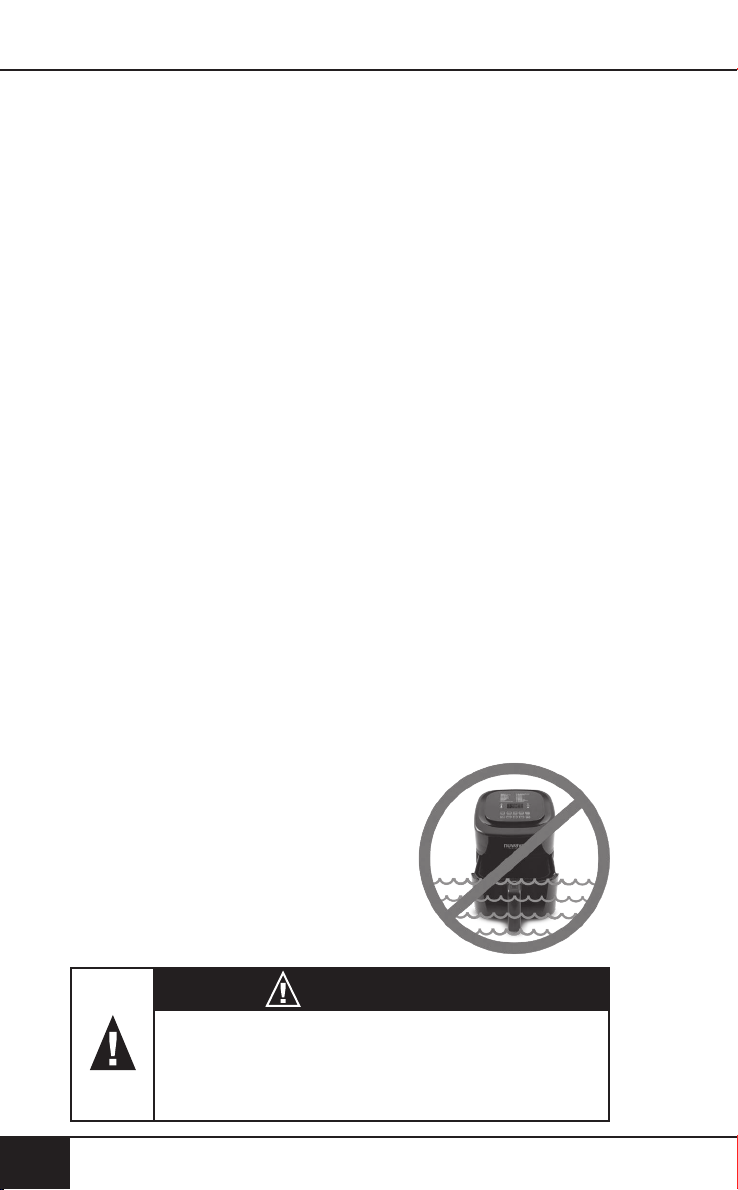
CLEANING & MAINTENANCE
CLEANING & MAINTENANCE
Cleaning
Clean the Brio after every use or in between a number of
large batches. The Fry Pan Basket and the Base Tray have
a non-stick coating with a stainless steel Basket Net. Do not
use metal utensils or harsh abrasives when cleaning as this
can damage the coating.
1. Unplug the appliance and make sure it cools completely.
2. Use a damp cloth to wipe the outside of the appliance.
3. Clean the Fry Pan Basket and inside components with a
nonabrasive sponge, hot water, and mild detergent.
Note: Remove the Base Tray and Fry Pan Basket and place
on a heat-resistant surface to help cool the appliance quicker.
Note: If using the dishwasher for the Base Tray, Fry Pan
Basket, and Fry Pan Basket Net, it is recommended to use
top rack only.
Tip: If there is residual food in the Base Tray and Fry Pan
Basket, add some hot water and let it soak separately for
about 10 minutes for easier cleaning. Then, use a soft
cleaning brush to remove any lingering food.
Note: To clean Probe, wipe end with a damp cloth or paper towel.
Storage:
1. Unplug the Brio and let it cool down completely.
2. Make sure that all the parts are clean and dry.
3. Push the power cord into the storing capsule. Afx the
cord by inserting it into the cord-afxing opening in the
back of the unit.
IMPORTANT - Do not immerse unit
in water or attempt to cycle through
dishwasher. The outer surface may
be cleaned by wiping carefully with
a damp dishcloth or sponge.
Make sure unit has cooled
completely prior to cleaning.
74
74
WARNING
In case of other problems, immediately unplug
and contact Customer Service Department.
1-877-689-2838 • [email protected]
cleaning & maintenance
Page 75

TROUBLESHOOT GUIDE
The Brio is not turning on or working.
1. The Brio is not plugged in.
2. Did not press “ON/OFF” button.
3. Base Tray with Fry Pan Basket is not in the Brio.
4. Insert the plug into an appropriate grounded power
socket. Press “ON/OFF” button after settings are
selected. Place the Base Tray with Fry Pan Basket
into the Brio.
The ingredients fried in the Fry Pan Basket are not
completely cooked.
1. Too many ingredients were used. The cooking
temperature is too low.
2. The cooking time is too short.
3. Remove some ingredients from the Fry Pan Basket;
smaller batches air-fry more evenly. Cook at a higher
temperature. Set the Brio to air-fry for a longer time.
The food is fried unevenly.
1. Certain types of ingredients need to be shaken
halfway through the cooking time.
2. Ingredients that are on the top need to be shaken
halfway through the cooking time.
Fried snacks are not crispy when they come out
of the Brio.
1. You used a type of snack meant to be prepared in a
traditional deep fryer.
2. Use snacks designed to be baked in a traditional oven,
or lightly brush some olive oil onto the snacks before
placing into Brio for a crispier result.
Cannot slide the Fry Pan Basket into
the appliance properly.
1. The Fry Pan Basket is overlled. The Fry Pan Basket is
not placed in the Base Tray correctly.
2. Do not ll the Fry Pan Basket more than 4/5 full. Push
the Fry Pan Basket down into the Base Tray until you
hear a click.
ENGLISH
nuwavenow.com
nuwavenow.com
75
75
Page 76

TROUBLESHOOT GUIDE
White smoke is coming out of the product.
1. You are frying greasy foods. The Fry Pan Basket and
Fry Pan Basket Net or Base Tray contains greasy
residue from previous uses.
2. When preparing greasy ingredients in the air fryer,
large amounts of oil can smoke and inltrate Fry Pan
Basket. The oil will produce white smoke and the Fry
Pan Basket or Base Tray might become hotter than
usual. This will not affect the nal cooking result. White
smoke is caused by grease heating up in the Fry Pan
Basket. Make sure you clean Fry Pan Basket and Fry
Pan Basket Net and Base Tray properly after use.
French fries are fried unevenly in the Brio.
1. You did not soak the potato sticks properly before airfrying them.
2. You did not use the right potato type or they were not fresh.
3. Soak potato sticks in a bowl of water for at least 30
minutes, remove them, and dry with paper towels.
Use fresh potatoes and make sure they stay rm
during air-frying.
French fries are not crispy when they come out
of the Brio.
1. The crispiness of the fries depends on the amount of oil
and water in the fries.
2. Make sure you dry the potato sticks properly before
adding oil. Cut the potato sticks smaller and dry
them for a crispier result. Add slightly more oil on
potatoes before placing in Brio for a crispier result.
If the unit needs to be replaced or returned to the
manufacturer, please contact Customer Service Department
at: 1-877-689-2838 or [email protected].
7676
troubleshoot guide
Page 77
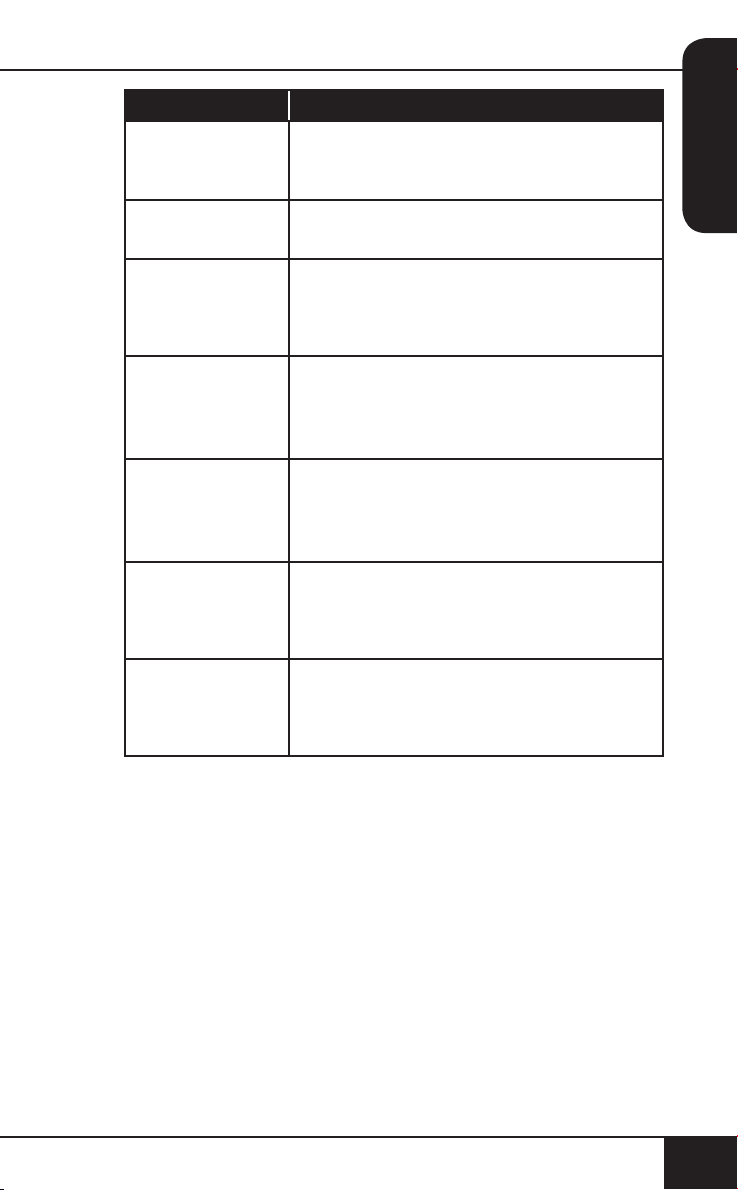
Error Message: Solution(s):
Probe not connected to the unit. Plug
Prb1
the Brio into the appropriate
power socket.
Prb2
The Probe target internal temperature is
set higher than set cooking temperature.
Probe short Circuit.
Prb3
Contact Customer Service Department
at 1-877-689-2838 or help@
nuwavenow.com.
Probe sensor not detecting temperature
Prb4
increase. Ensure the Probe is inserted
into the food and the food is in oven
during cooking.
NTC Temperature Sensor overheated.
Err1
Turn unit off to cool. If the Brio is not
working after it cools down, contact
Customer Service.
NTC Temperature Sensor short circuit.
Err1
Contact Customer Service Department
at 1-877-689-2838 or
[email protected].
NTC Temperature Sensor is open.
Err2
Contact Customer Service Department
at 1-877-689-2838 or
[email protected].
ENGLISH
nuwavenow.com
nuwavenow.com
77
77
Page 78

LIMITED WARRANTY
LIMITED WARRANTY
The NuWave Brio® 6Q Digital Air Fryer with Probe
The NuWave Brio® 6Q Digital Air Fryer with Probe
THE MANUFACTURER WARRANTS
THE MANUFACTURER WARRANTS
The Brio, including the Base Tray, Fry Pan Divider, Fry Pan
The Brio, including the Base Tray, Fry Pan Divider, Fry Pan
Basket, Fry Pan Basket Net, and Probe, are to be free from
Basket, Fry Pan Basket Net, and Probe, are to be free from
manufacturer defects.
manufacturer defects.
All electrical components are warrantied for 1 year from the date
All electrical components are warrantied for 1 year from the date
of purchase, under normal household use, and when operated
of purchase, under normal household use, and when operated
in accordance with the Manufacturer’s written instructions. The
in accordance with the Manufacturer’s written instructions. The
Manufacturer will provide the necessary parts and labor to repair
Manufacturer will provide the necessary parts and labor to repair
any part of the Brio at NuWave LLC Service Department. After the
any part of the Brio at NuWave LLC Service Department. After the
expiration of the warranty, the cost of the labor and parts will be the
expiration of the warranty, the cost of the labor and parts will be the
responsibility of the owner.
responsibility of the owner.
THE WARRANTY DOES NOT COVER
THE WARRANTY DOES NOT COVER
The Limited Warranty is voided if repairs are made by an
The Limited Warranty is voided if repairs are made by an
unauthorized dealer or the serial number data plate is removed
unauthorized dealer or the serial number data plate is removed
or defaced. Normal deterioration of nish due to use or exposure
or defaced. Normal deterioration of nish due to use or exposure
is not covered by this Warranty. This Limited Warranty does
is not covered by this Warranty. This Limited Warranty does
not cover failure, damages or inadequate performance due to
not cover failure, damages or inadequate performance due to
accident, acts of God (such as lightning), uctuations in electric
accident, acts of God (such as lightning), uctuations in electric
power, alterations, abuse, misuse, misapplications, corrosive-type
power, alterations, abuse, misuse, misapplications, corrosive-type
atmospheres, improper installation, failure to operate in accordance
atmospheres, improper installation, failure to operate in accordance
with the Manufacturer’s written instructions, abnormal use or
with the Manufacturer’s written instructions, abnormal use or
commercial use. NuWave LLC reserves the right to void the Limited
commercial use. NuWave LLC reserves the right to void the Limited
Warranty, where allowable by law, for products purchased from an
Warranty, where allowable by law, for products purchased from an
unauthorized dealer.
unauthorized dealer.
TO OBTAIN SERVICE
TO OBTAIN SERVICE
The owner shall have the obligation and responsibility to: pay for all
The owner shall have the obligation and responsibility to: pay for all
services and parts not covered by the warranty; prepay the freight to
services and parts not covered by the warranty; prepay the freight to
and from Service Department for any part or system returned under
and from Service Department for any part or system returned under
this warranty; and carefully package the product using adequate
this warranty; and carefully package the product using adequate
padding material to prevent damage in transit. The original container
padding material to prevent damage in transit. The original container
is ideal for this purpose. Include in the package the owner’s name,
is ideal for this purpose. Include in the package the owner’s name,
address, daytime telephone number, a detailed description of the
address, daytime telephone number, a detailed description of the
problem, and your “RGA number.” Call 1-877-689-2838 or email
problem, and your “RGA number.” Call 1-877-689-2838 or email
[email protected] to obtain the RGA number (Return Goods
[email protected] to obtain the RGA number (Return Goods
Authorization number). Provide the cooking system model & serial
Authorization number). Provide the cooking system model & serial
number and proof of date of purchase (a copy of the receipt) when
number and proof of date of purchase (a copy of the receipt) when
making claims under this warranty.
making claims under this warranty.
7878
limited warranty
Page 79

LIMITED WARRANTY
MANUFACTURER’S OBLIGATION
MANUFACTURER’S OBLIGATION
The Manufacturer’s obligation under this Limited Warranty is
The Manufacturer’s obligation under this Limited Warranty is
limited, to the extent allowable by law, to repairing or replacing
limited, to the extent allowable by law, to repairing or replacing
any part covered by this Limited Warranty which upon examination
any part covered by this Limited Warranty which upon examination
is found to be defective under normal use. The Limited Warranty
is found to be defective under normal use. The Limited Warranty
is applicable only within the continental United States and
is applicable only within the continental United States and
only to the original purchaser of the manufacturer’s authorized
only to the original purchaser of the manufacturer’s authorized
channels of distribution. THE LIMITED WARRANTY MAY NOT BE
channels of distribution. THE LIMITED WARRANTY MAY NOT BE
ALTERED, VARIED OR EXTENDED EXCEPT BY A WRITTEN
ALTERED, VARIED OR EXTENDED EXCEPT BY A WRITTEN
INSTRUMENT EXECUTED BY THE MANUFACTURER. THE
INSTRUMENT EXECUTED BY THE MANUFACTURER. THE
REMEDY OF REPAIR OR REPLACEMENT AS PROVIDED
REMEDY OF REPAIR OR REPLACEMENT AS PROVIDED
UNDER THIS LIMITED WARRANTY IS EXCLUSIVE. IN NO
UNDER THIS LIMITED WARRANTY IS EXCLUSIVE. IN NO
EVENT SHALL THE MANUFACTURER BE LIABLE FOR ANY
EVENT SHALL THE MANUFACTURER BE LIABLE FOR ANY
CONSEQUENTIAL OR INCIDENTAL DAMAGES TO ANY
CONSEQUENTIAL OR INCIDENTAL DAMAGES TO ANY
PERSON, WHETHER OR NOT OCCASIONED BY NEGLIGENCE
PERSON, WHETHER OR NOT OCCASIONED BY NEGLIGENCE
OF THE MANUFACTURER, INCLUDING WITHOUT LIMITATION,
OF THE MANUFACTURER, INCLUDING WITHOUT LIMITATION,
DAMAGES FOR LOSS OF USE, COSTS OF SUBSTITUTION,
DAMAGES FOR LOSS OF USE, COSTS OF SUBSTITUTION,
PROPERTY DAMAGE, OR OTHER MONEY LOSS.
PROPERTY DAMAGE, OR OTHER MONEY LOSS.
Some states do not allow the exclusion or limitation of incidental
Some states do not allow the exclusion or limitation of incidental
or consequential damages, so the above limitation exclusions
or consequential damages, so the above limitation exclusions
may not apply. This Limited Warranty gives specic legal rights,
may not apply. This Limited Warranty gives specic legal rights,
and there may also be other rights which vary from state to state.
and there may also be other rights which vary from state to state.
EXCEPT AS OTHERWISE EXPRESSLY PROVIDED ABOVE,
EXCEPT AS OTHERWISE EXPRESSLY PROVIDED ABOVE,
THE MANUFACTURER MAKES NO WARRANTIES EXPRESSED
THE MANUFACTURER MAKES NO WARRANTIES EXPRESSED
OR IMPLIED ARISING BY LAW OR OTHERWISE, INCLUDING
OR IMPLIED ARISING BY LAW OR OTHERWISE, INCLUDING
WITHOUT LIMITATION, THE IMPLIED WARRANTIES OF
WITHOUT LIMITATION, THE IMPLIED WARRANTIES OF
MERCHANTABILITY AND FITNESS FOR A PARTICULAR
MERCHANTABILITY AND FITNESS FOR A PARTICULAR
PURPOSE TO ANY OTHER PERSON. READ YOUR OWNER’S
PURPOSE TO ANY OTHER PERSON. READ YOUR OWNER’S
MANUAL. IF YOU STILL HAVE ANY QUESTIONS ABOUT
MANUAL. IF YOU STILL HAVE ANY QUESTIONS ABOUT
OPERATION OR WARRANTY OF THE PRODUCT, PLEASE
OPERATION OR WARRANTY OF THE PRODUCT, PLEASE
CONTACT NUWAVE LLC.
CONTACT NUWAVE LLC.
READ YOUR OWNER’S MANUAL
READ YOUR OWNER’S MANUAL
If you still have any questions about operation or warranty of the
If you still have any questions about operation or warranty of the
product, please contact NuWave LLC at: 1-877-689-2838 or
product, please contact NuWave LLC at: 1-877-689-2838 or
email [email protected].
email [email protected].
ENGLISH
nuwavenow.com
nuwavenow.com
79
79
Page 80
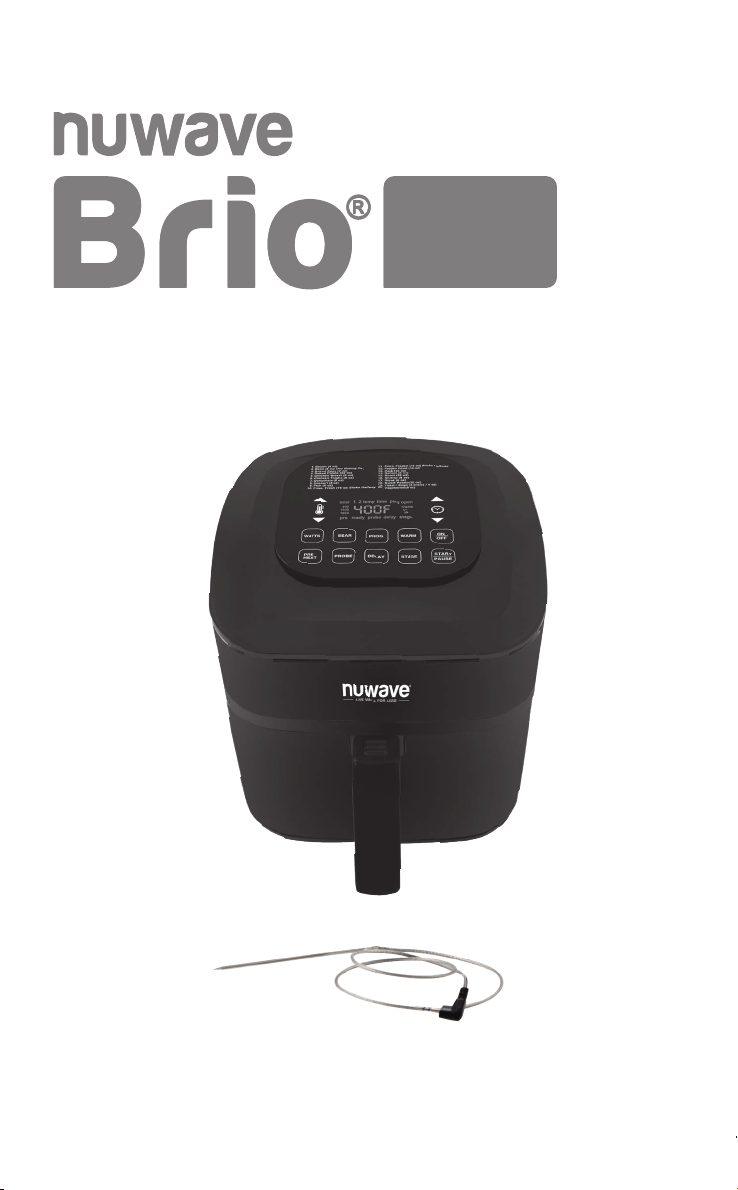
MANUAL DEL
PROPIETARIO
6Q
6Q
Freidora de Aire Digital
con Sensor Digital Integrado
nuwavenow.comnuwavenow.com
Page 81
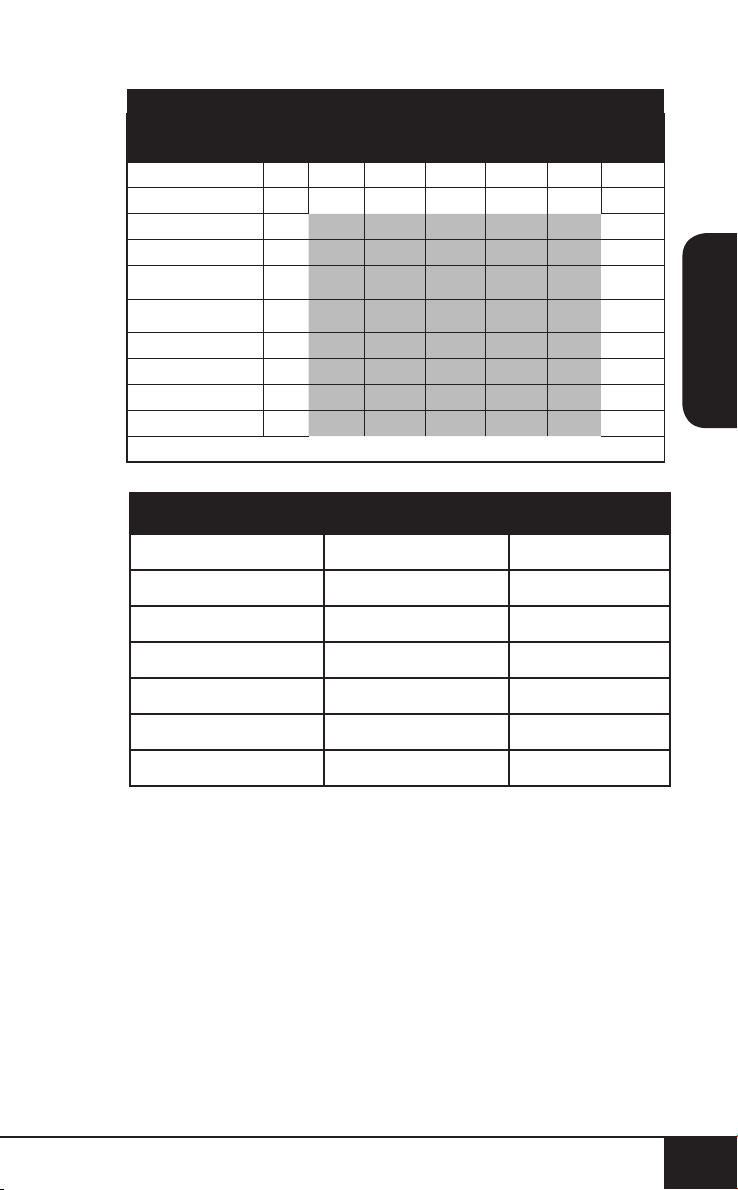
Temp. Del Sensor
Poco
Temp.
Cocido
°F
Pechuga de pollo 360 165 5 - 8
Bistec 1”de grosor 350 125 135 145 150 160 3 - 8
Hamburguesas ¼ lb 350 5 - 7
Pork Chops ¾" thick 360 5 - 7
Chuletas de Cerdo de
¾” de grosor
Filetes de Pescado
de ½”de grosor
Camarón 350 3 - 4
Salchicha 360 4 - 5
Verduras (firmes) 360 4 - 8
Verduras (suaves) 350 2 - 5
NOTA: Los tiempos pueden variar dependiendo de la preferencia de cocción.
350 2 - 3
350 5 - 7
Al
Término°FCocido
Punto
°F
Rare °F
Well °F
Bien
Cocido
°F
Tiempo
Minutos
Tabla de medidas
Cucharadita = t Farenheit = °F Minuto = min
Cucharada = T Centígrados = °C Segundo= sec
Taza = c Onzas uidas = oz Pulgada = in.
Onza = oz Litro = L Docena = doz
SPANISH
Libra = lb(s) Mililitro = ml Hora = hr
Cuarto de galón = qt Paquete = pkg. Gramo = g
Pinta = pt Galón = gal
nuwavenow.com
nuwavenow.com
81
81
Page 82
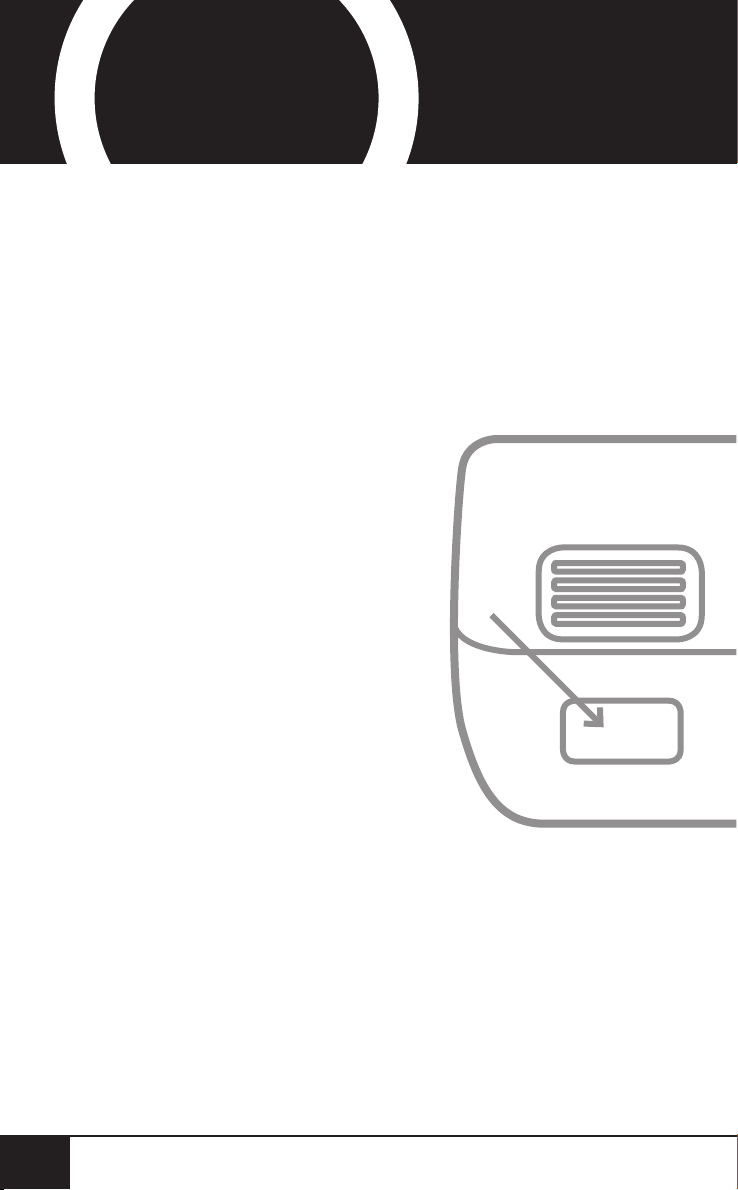
¡REGÍSTRESE
¡REGÍSTRESE
AHORA!
AHORA!
Como agradecimiento especial por registrar su producto,
¡recibirá automáticamente 6 meses adicionales a su
garantía limitada del fabricante!*
Todo lo que tiene que hacer es seguir estos
simples pasos.
Usando su teléfono inteligente o
1
2
dispositivo inteligente, escanee
el código QR ubicado en la
etiqueta de su producto en la
parte posterior de la unidad.
Se le dirigirá a la página de
registro del producto NuWave
con el número de serie único
de su producto que se ingresa
automáticamente en el campo
correspondiente.
NOTA: Si no tiene un dispositivo
inteligente habilitado para
la web, simplemente visite
nuwavenow.com/QR e ingrese
manualmente el número de
serie de su producto.
82
82
3
4
Complete la información restante
y complete la encuesta opcional.
Una vez que envíe su
información, recibirá un correo
electrónico de conrmación
con los detalles de la garantía
extendida.
* Registre su producto dentro de 1 año a partir de la fecha
de compra para una extensión gratuita de 6 meses de
garantía limitada.
Page 83
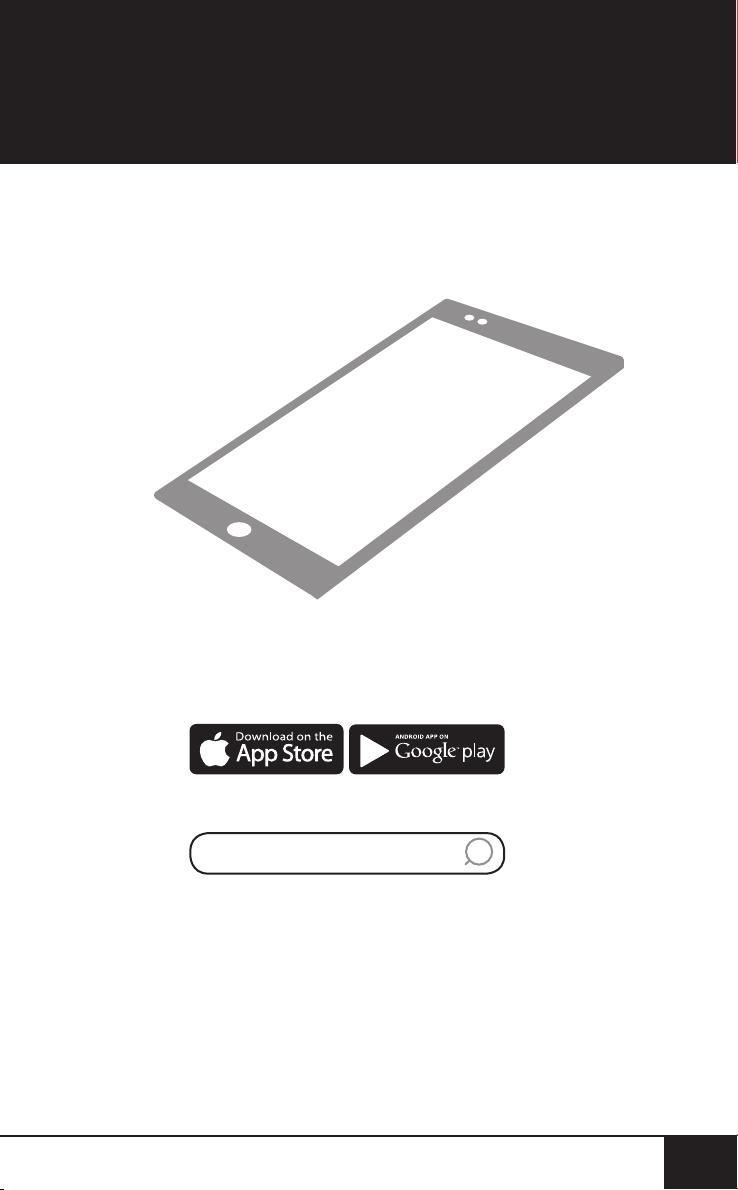
!para una garantía
!para una garantía
adicional de
meses
6
DESCARGUE LA APLICACIÓN QR
CODE EN SU DISPOSITIVO MÓVIL
1
6
Abra su tienda de aplicaciones móviles (App Store,
Google Play).
adicional de
meses
2
3
Busque “lectores de códigos QR.”
lectores de códigos QR
Simplemente descargue el lector de códigos QR a
su teléfono, ábralo y escanee el código, ya está listo
para comenzar.
NOTA: Es posible que deba abrir el lector de código
QR descargado cada vez que desee escanear un
código QR.
nuwavenow.com
nuwavenow.com
83
83
Page 84

MEDIDAS DE SEGURIDAD IMPORTANTES
USO DOMÉSTICO SOLAMENTE • LEA TODAS LAS INSTRUCCIONES
ANTES DE USAR
Al usar unidades eléctricas, siempre se deben seguir las
precauciones básicas de seguridad, incluidas
las siguientes:
1. No toque las supercies calientes. Utilice mangos o perillas.
2. Para protegerse contra descargas eléctricas, no sumerja
el cable, los enchufes ni la Brio en agua u otros líquidos.
3. No opere ningún aparato con un cable o enchufe
dañado o después de que el aparato funcione mal
o haya sido dañado de alguna manera. Devuelva el
aparato al centro de servicio autorizado más cercano
para que lo examinen, reparen o ajusten.
4. Es necesaria una estrecha supervisión cuando
se utiliza cualquier aparato cerca de niños. Este
dispositivo no está diseñado para ser utilizado por
personas (incluidos niños) con capacidades físicas,
sensoriales o mentales reducidas, o con falta de
experiencia y conocimiento, a menos que sean
supervisados o instruidos sobre el uso del dispositivo
por una persona responsable de su seguridad.
5. El uso de otros accesorios que no estén destinados a ser
utilizados con la Brio no es recomendable. Hacerlo puede
dañar la Brio y causar accidentes.
6. NO APTO PARA USO EN EXTERIORES. PARA USO
DOMÉSTICO SOLAMENTE.
7. No deje que el cable cuelgue del borde de la mesa o
mostrador ni que toque supercies calientes.
8. No lo coloque sobre ni cerca de un quemador caliente,
de gas o eléctrico, ni en un horno caliente.
9. Se debe tener mucho cuidado al mover la Brio si
contiene aceite caliente u otros líquidos calientes.
10. Para desconectarla, apague la Brio, luego retire el
enchufe del contacto de pared.
11. Durante la fritura al aire, se libera vapor caliente de la
salida de aire. Mantenga las manos y la cara alejadas del
vapor y de la salida de aire. Además, tenga cuidado con el
vapor caliente y el aire cuando retire la cacerola.
12. Nunca ponga la Brio contra la pared u otros aparatos.
Debe haber al menos 3 pulgadas de espacio libre para
el lado posterior, los lados izquierdo/derecho y el lado
superior de la Brio. No coloque nada encima de la Brio.
8484
medidas de seguridad importantes
Page 85

13. Desenchufe la Brio del contacto cuando no esté en uso y
antes de limpiarla. Permita que la Brio se enfríe antes de
limpiar, poner o quitar partes.
14. La Brio no está diseñada para ser operada por medio
de un temporizador externo o un sistema de control
remoto separado.
15. Mantenga el manual a la mano para futuras referencias.
MEDIDAS DE SEGURIDAD ADICIONALES
VEA LAS INSTRUCCIONES ANTES DE USAR
Se proporciona un cable de suministro de energía corto
(o cable de suministro de energía desmontable) para
reducir el riesgo resultante de enredarse o tropezar
con un cable más largo. Los cables de alimentación
desmontables más largos o los cables de extensión
están disponibles y se pueden usar si se tiene cuidado al
hacerlo. Si se usa un cable de alimentación desmontable
más largo o un cable de extensión:
1. La calificación eléctrica marcada del cable de
extensión debe ser al menos tan grande como la
calificación eléctrica del aparato.
2. El cable más largo debe estar dispuesto de modo que
no se cuelgue sobre la encimera o sobre una mesa
donde se pueda tirar o tropezar involuntariamente. La
Brio debe operarse en una toma eléctrica separada
de otros aparatos operativos debido a limitaciones
del voltaje. El aparato tiene un enchufe polarizado
(una cuchilla es más ancha que la otra). Para reducir
el riesgo de descarga eléctrica, este enchufe está
diseñado para encajar en una toma de corriente
polarizada de una sola manera. Si el enchufe no
encaja completamente en el tomacorriente, invierta el
enchufe. Si aún así no encaja, comuníquese con un
electricista calificado. No intente modificar el enchufe
de ninguna manera.
3. Si el aparato es del tipo con conexión a tierra, el juego
de cables o el cable de extensión debe ser un cable de
3 hilos con conexión a tierra.
SPANISH
nuwavenow.com
nuwavenow.com
85
85
Page 86
MEDIDAS DE SEGURIDAD IMPORTANTES
USO DOMÉSTICO SOLAMENTE • LEA TODAS LAS INSTRUCCIONES
ANTES DE USAR
GUARDE ESTAS INSTRUCCIONES
Lea y comprenda todo el manual antes de usar la Brio.
NO UTILICE LA UNIDAD PARA OTRO USO
QUE NO SEA EL PREVISTO.
Nota: Coloque la Brio en una supercie que sea horizontal,
uniforme y estable. Este aparato está diseñado para uso
doméstico normal. No está diseñado para usarse en entornos
como de personal de cocina de tiendas, ocinas, granjas
u otros entornos de trabajo. Tampoco está destinado a ser
utilizado por clientes en hoteles, moteles, bed and breakfast y
entornos no residenciales.
AVISO: EL FALLO DE SEGUIR CUALQUIERA DE
LAS MEDIDAS DE SEGURIDAD IMPORTANTES,
ADICIONALES O LAS INSTRUCCIONES PARA UN USO
SEGURO ES UN ABUSO DE SU BRIO QUE PUEDE
ANULAR SU GARANTÍA Y CREAR EL RIESGO DE
LESIONES GRAVES.
ADVERTENCIA
En caso de otros problemas, desenchúfela
inmediatamente y comuníquese con el
Departamento de Servicio al Cliente.
1-877-689-2838 • [email protected]
1. No coloque la Brio cerca de materiales inamables,
unidades de calefacción, o ambientes húmedos.
2. La altura de los ingredientes colocados en la canastilla
debe cumplir con las instrucciones enumeradas en
las "Instrucciones".
3. No coloque ningún otro recipiente en la cacerola. No
reemplace ninguna parte con otros contenedores.
4. Es normal que algo de humo escape de la Brio cuando
se calienta por primera vez.
5. Si sale mucho humo del respiradero de aire durante
el funcionamiento, desenchufe la Brio de inmediato y
comuníquese con Servicio al Cliente.*
8686
medidas de seguridad importantes
Page 87
6. No mueva la Brio mientras esté en funcionamiento. Sólo
después de que la Brio se haya enfriado completamente
debe intentarse moverla. Siempre espere a que la
freidora de aire se enfríe antes de manipularla.
7. Los niños deben ser supervisados para asegurarse de
que no jueguen con el aparato.
8. Nunca use una toalla u otro material u objeto para
bloquear las salidas de aire.
9. Si surge algún problema durante la operación, cualquier
servicio DEBE ser realizado por NuWave LLC o
autorizado por el fabricante para reparaciones.
10. El aparato no está diseñado para ser operado por medio
de un temporizador externo o un sistema de control
remoto separado.
11. No desarme la Brio ni reemplace ninguna pieza sin el
consentimiento previo por escrito del fabricante.
12. No utilice utensilios de metal en la cacerola recubierta o
en la canastilla, ya que esto puede dañar la supercie.
13. Asegúrese de que la Brio esté siempre limpia antes
de cocinar.
*Departamento de Servicio al Cliente:
1-877-689-2838 • [email protected]
SPANISH
PRECAUCIÓN
• Siempre coloque los alimentos a cocinar
en la canastilla para evitar que entren en
contacto con los componentes de calor.
• No tape las ventilaciones mientras
esté funcionando.
• No vierta aceite en la cacerola o en la
canastilla, ya que podría generarse un riesgo
de incendio.
• Nunca toque el interior del aparato mientras
esté funcionando.
nuwavenow.com
nuwavenow.com
87
87
Page 88
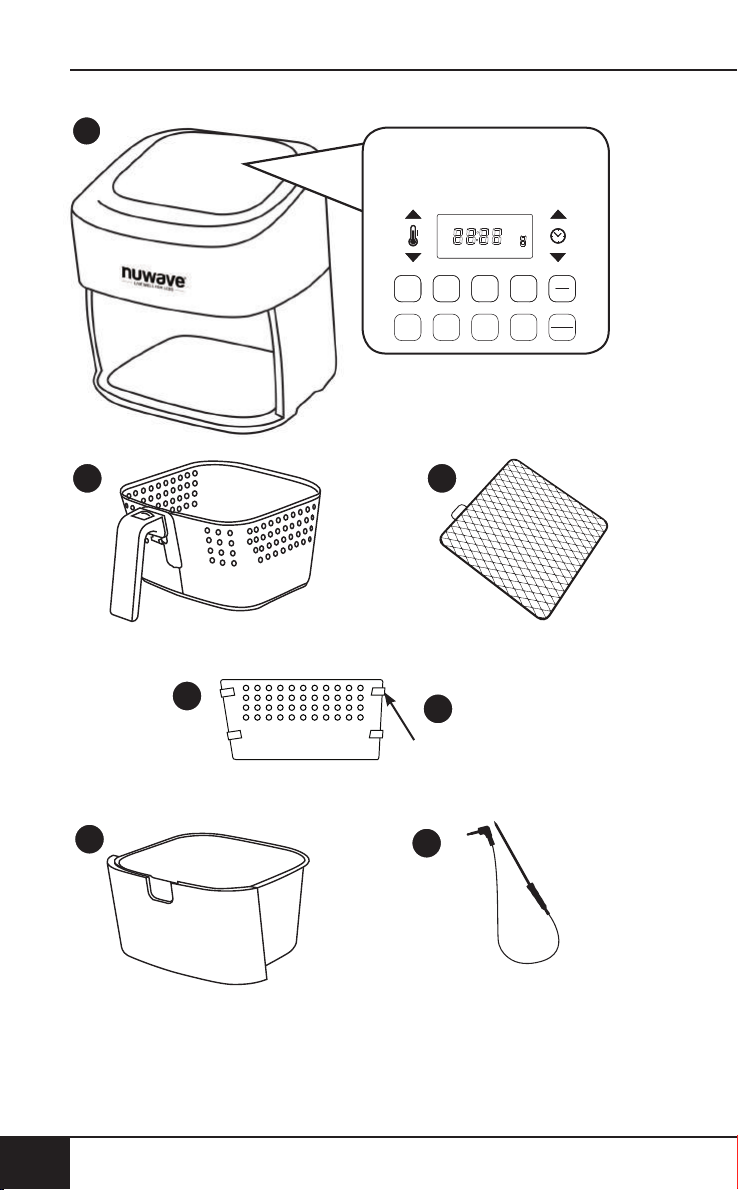
PARTES Y ACCESORIOS
START
PAUSE
WATTS
STAGEDELAY
PROG WARM
sear 1 2
1800
1500
900
pre ready probe delay stage
temp time prog open
warm
PROBE
SEAR
1. Bacon (4 oz)
2. Bake (8 oz) Use Baking Pan
3. Baked Eggs (2 oz)
4. Baked Potato (32 oz)
5. Chicken Breast (8 oz)
6. Chicken Thighs (8 oz)
7. Dehydrate (8 oz)
8. Dessert (8 oz)
9. Fish (6 oz)
10. Fries, Fresh (16 oz) Shake Halfway
11. Fries, Frozen (16 oz) Shake Halfway
12. Frozen Food (16 oz)
13. Pork (16 oz)
14. Reheat (8 oz)
15. Roast (32 oz)
16. Shrimp (8 oz)
17. Steak (8 oz)
18. Sweet Potato (32 oz)
19. Toast / Bagel (4 slices / 4 oz)
20. Vegetables (8 oz)
PRE
HEAT
ON
OFF
PARTES Y ACCESORIOS
1
2
5
8888
4a
partes y accesorios
3
4b
Pestañas de Silicón
6
Page 89

Base de Potencia de
1
la Freidora de Aire
Parte #: 37210
Canastilla
2
Parte #: 37202
Malla de la Canastilla
3
Parte #: 37204
Divisor de la
4a
Canastilla
Parte #: 37205
4 Pestañas de Silicón
4b
Parte #: 37207
Bandeja de la Base
5
Parte #: 37201
Sensor
6
Parte #: 36261
SPANISH
nuwavenow.com
nuwavenow.com
89
89
Page 90
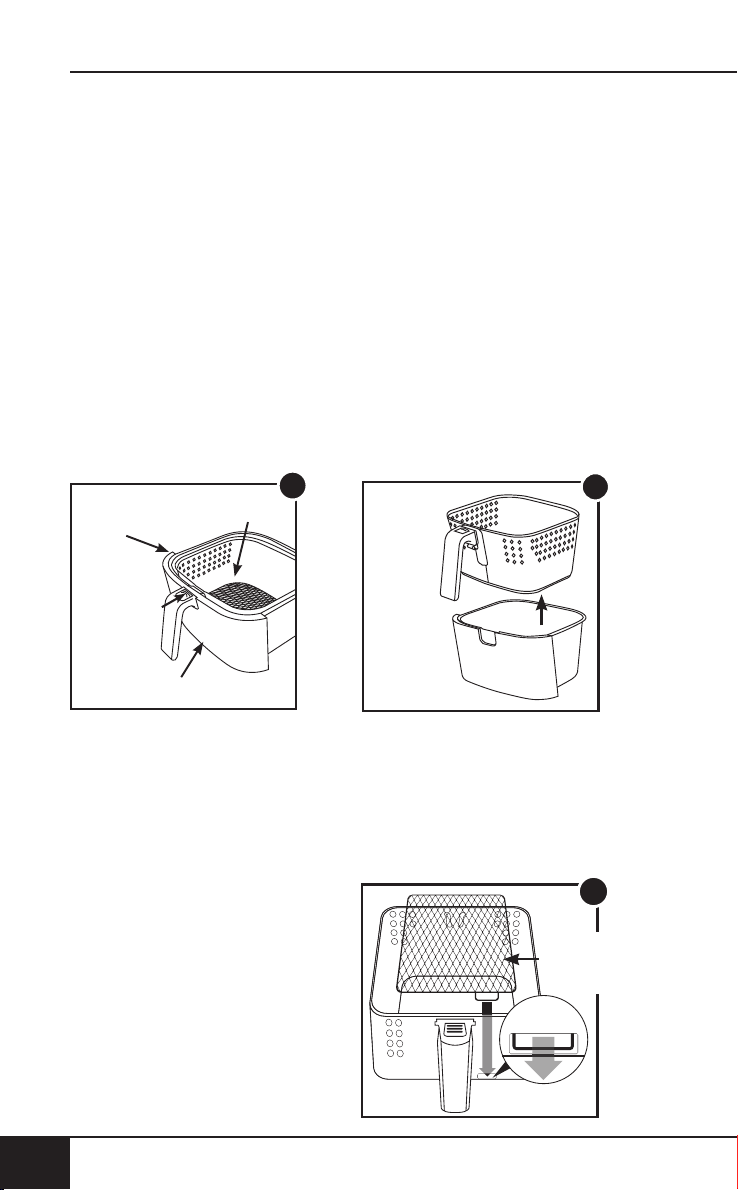
GUÍA DE MONTAJE
GUÍA DE MONTAJE
Montaje de la Brio
PRECAUCIÓN: NO utilice la Brio sin la Bandeja de la Base
o la Cesta con la Malla. NO toque el interior de la Bandeja
de la Base, la Cesta ni la Malla inmediatamente después de
cocinar. Las partes estarán calientes. Solamente sostenga
la Bandeja de la Base y la Cesta por el mango.
Retirar la Bandeja de la Base y la Cesta para Freír
1. Utilizando el mango, jale y deslice hacia afuera la
Bandeja de la Base y la Cesta con la Malla. (Vea Fig. 1.)
2. Para quitar la Cesta para Freír de la Bandeja de la Base,
mientras sostiene por el mango, presione el botón de
desmontaje hacia adelante y levante la Cesta para Freír
de la Bandeja de la Base. (Vea Fig. 2.) Al cocinar, esto
reducirá el peso extra de la Bandeja de la Base y hará
más fácil verter o agitar alimentos más pequeños.
2
Cesta
para Freír
Botón de
Desmontaje
Malla de la Cesta
Bandeja de la Base
1
Freidora
de Aire
Cesta para
Freír
Retirar la Malla de la Cesta para Freír:
1. Después de retirar la Cesta para Freír de la Bandeja de
la Base, voltee la Cesta boca abajo.
2. Utilizando guantes para horno, presione la parte de
abajo de la Malla de la Cesta hasta que salga de ella.
Montaje de la Malla de la Cesta
para Freír
1. Coloque la lengüeta de
la Malla en la ranura de
la Cesta para Freír (Vea
Fig. 3.)
2. Presione el otro extremo
de la Malla de la Cesta
hasta que entre en su
lugar y quede de forma
plana dentro de la Cesta.
9090
guía de montaje
3
Lengüeta
de la Malla
de la Cesta
Lengüeta
Page 91
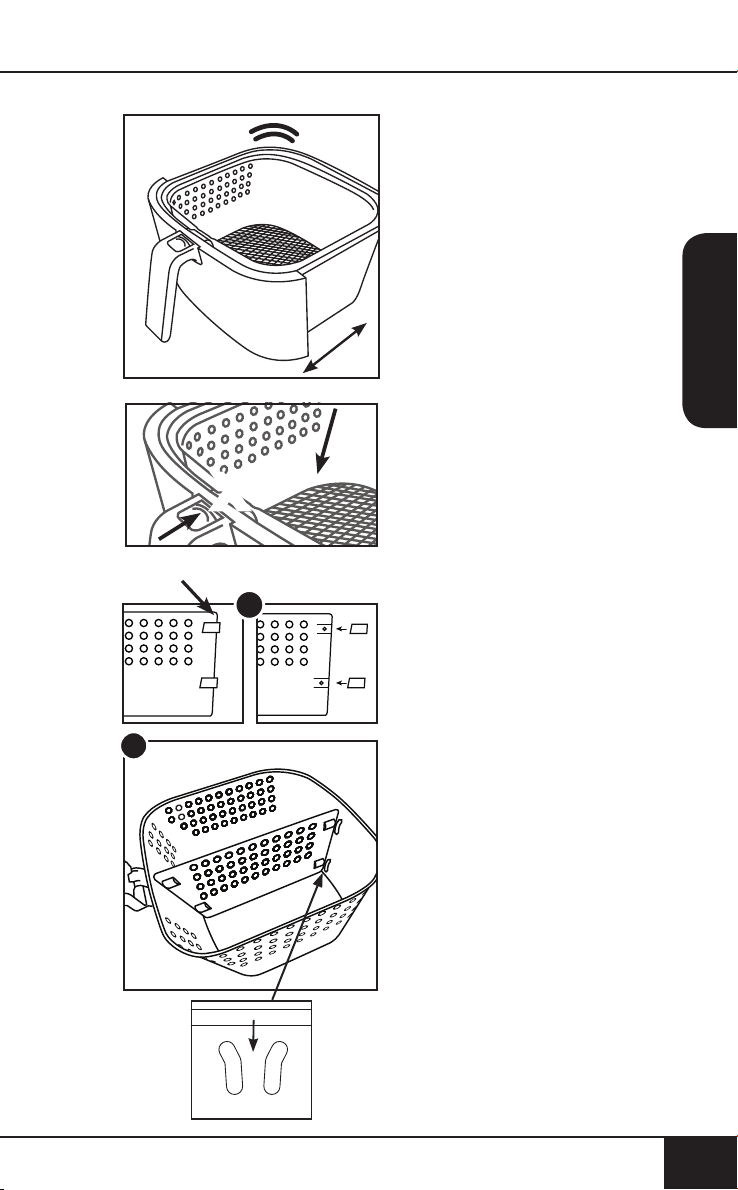
X
Pestañas de Silicón
Mover los Alimentos
Algunos alimentos requieren
agitarse a la mitad de
la cocción. Para agitar
adecuadamente los alimentos,
sostenga el asa, retire la
Bandeja de la Base con la
cesta de sartén del aparato
y agite. Una vez que la
comida se haya agitado
adecuadamente, deslice la
bandeja de la base con la
canastilla de nuevo en la Brio.
Nota: Para mejores resultados
al cocinar, no llene a más de 4 ⁄ 5 .
NO PRESIONE EL BOTÓN
DE DESMONTAJE
MIENTRAS AGITA.
SPANISH
1
2
Usando el divisor de la
Canastilla
Figura 1.
Asegúrese de que las 4 pestañas
de silicón estén colocadas en las
pestañas divisorias.
Figura 2.
Mirando hacia abajo en la
canastilla, deslice el divisor hacia
abajo en el centro de la canastilla.
Asegúrese de que el divisor se
encuentre entre los dos aros y los
tornillos de la cesta. Para quitar
el divisor, simplemente deslice el
divisor hacia arriba. (Precaución:
el divisor estará caliente al cocinar.
Use guantes para horno).
Las pestañas de silicón se pueden
quitar del divisor antes de limpiar.
(Precaución: las pestañas de
silicona pueden estar calientes.)
nuwavenow.com
nuwavenow.com
91
91
Page 92

INSTRUCCIONESINSTRUCCIONES
Botones de Función
ON/OFF: El botón ON/OFF enciende y apaga la unidad y
detiene todas las funciones de cocción.
START/PAUSE: Cuando se presiona el botón START/
PAUSE, la unidad inicia o hace una pausa en la cocción.
El botón START/PAUSE también se usa para silenciar y
activar el sonido de los pitidos del Brio para una operación
silenciosa, si así lo desea.
Botones [↑] y [↓]: Use los botones de echa para ajustar las
temperaturas y los tiempos.
WATTS: La unidad viene con tres (3) ajustes de vataje (900,
1500 y 1800). Presione el botón WATTS para cambiar la
potencia en funcionamiento que utilizará la unidad. Cuando
la unidad se apague y/o desenchufe, la unidad funcionará
con el vataje que se usó anteriormente al volverla a enchufar
y encender.
DELAY: Use el botón DELAY para retrasar la cocción hasta
por 24 horas. Use los botones [↑] y [↓] para ajustar el tiempo
de retardo. Para cancelar la demora en cualquier momento,
sólo tiene que pulsar el botón DELAY.
STAGE: Use el botón STAGE congurado para hasta cinco (5)
parámetros de cocción diferentes. Las temperaturas y tiempos
de cocción se pueden ajustar para cada etapa de cocción
usando los botones TEMP y TIME y los botones [↑] y [↓].
PREHEAT: Use el botón PREHEAT para precalentar la
unidad antes de cocinar. Use los botones [↑] y [↓] para
ajustar la temperatura antes o durante el precalentamiento.
Para cancelar la función de precalentamiento, presione el
botón PREHEAT en cualquier momento.
SEAR: El botón SEAR se utiliza para cocinar a alta
temperatura durante un corto período de tiempo. Use el
botón SEAR para "sellar" los alimentos directamente antes
y/o después del ciclo de cocción regular. Use los botones
[↑] y [↓] para ajustar la temperatura y tiempo (hasta 5
minutos) antes o durante el ciclo de sellado.
WARM: Utilice el botón caliente para mantener su comida
caliente después de cocinar o cuando simplemente
quiera mantener algo caliente durante un gran periodo de
tiempo. Utilice los botones [↑] y [↓] para ajustar el tiempo
y temperatura para mantener caliente. Presione el botón
WARM para cancelar el ciclo de mantener caliente.
9292
instrucciones
Page 93

PROGRAM: La unidad viene con 100 recetas de cocina
preprogramadas junto con 100 ranuras de memoria
adicionales para agregar sus propias recetas únicas a su
gusto. Use el botón PROGRAM para encontrar o guardar
recetas programadas.
PROBE: Use el botón PROBE para congurar la
temperatura objetivo de la sonda digital de temperatura,
así como para ver la temperatura interna de los alimentos
durante la cocción. Use los botones [↑] y [↓] para ajustar la
temperatura objetivo de la sonda digital de temperatura.
Orden de Secuencia de Cocción:
1. Delay
2. Preheat
3. Sear 1
4. Stage 1~5 / Program / Probe
5. Sear 2
6. Warm
USOS DE LAS FUNCIONES
Enchufe el cable de alimentación a una toma de corriente.
Presione el botón ON/OFF para encender la unidad. La
pantalla LED mostrará 360F y TEMP.
ON/OFF
1. Presione el botón ON/OFF para encender y apagar la
unidad. Una vez encendida, la pantalla LED mostrará
la temperatura de cocción predeterminada (360F) y la
palabra temp.
2. La temperatura se puede ajustar hacia arriba o hacia
abajo usando los botones [↑] y [↓] arriba y debajo del
ícono de temperatura.
3. El tiempo de cocción predeterminado es de 15 minutos.
Para ajustar el tiempo de cocción, pulse los botones [↑]
y [↓] encima y debajo del icono de tiempo.
4. Presione el botón de START/PAUSE para comenzar
a cocinar.
Nota: Antes de congurar cualquier otra función de cocción,
congure la temperatura y el tiempo de cocción de la etapa
1 normal. La cocción por etapas se explica en la sección
ETAPAS de estas Instrucciones de Funcionamiento.
SPANISH
nuwavenow.com
nuwavenow.com
93
93
Page 94

INSTRUCCIONES
START/PAUSE
1. Presione el botón de START/PAUSE para comenzar a
cocinar. ":" parpadeará indicando que la unidad
está cocinando.
2. Para hacer una pausa en la cocción, presione el botón
de START/PAUSE o simplemente retire la cesta con la
bandeja de la base. ":" ya no parpadeará, lo que indica
que la unidad está ahora en pausa y la pantalla LED se
mostrará abierta.
3. Para quitar la pausa y volver a cocinar, deslice la cesta
con la bandeja de base de nuevo en el Brio o presione
el botón START/PAUSE.
4. Una vez que la unidad termine de cocinar, la pantalla
LED mostrará End con tres (3) pitidos.
5. El botón START/PAUSE también se usa para silenciar y
activar el sonido de los pitidos. Para silenciar los pitidos,
mantenga presionado el botón START/PAUSE durante
dos segundos. El Brio permanecerá en silencio hasta
que se desactive, presionando nuevamente el botón de
START/PAUSE durante dos segundos.
DELAY
1. Ajuste la temperatura de cocción y el tiempo después de
encender el Brio con el botón ON/OFF. Luego, pulse el
botón DELAY para añadir una demora antes de cocinar.
2. Cuando se presiona el botón DELAY, la pantalla LED
mostrará 01:00 (tiempo de retraso predeterminado),
delay y time.
3. Use los botones [↑] y [↓] encima y debajo del icono de
tiempo para ajustar el tiempo de retardo hacia arriba o
hacia abajo. El tiempo de retardo se puede ajustar hasta
24 horas (24:00).
4. Durante el ciclo de demora, parpadeará “:” indicando
que el tiempo de retardo ha comenzado la cuenta
regresiva.
5. El tiempo de demora se puede aumentar o disminuir
usando los botones [↑] y [↓] arriba y debajo del ícono de
tiempo en cualquier momento durante el ciclo de demora.
9494
instrucciones
Page 95

6. Para detener el ciclo de demora en cualquier momento,
simplemente presione el botón DELAY. La unidad
nalizará el ciclo de demora y pasará directamente a la
siguiente función de cocción.
7. Una vez transcurrido el tiempo de demora, la unidad
pasará automáticamente a la siguiente función de cocción.
8. Una vez que la unidad termine de cocinar, la pantalla
LED mostrará End con tres (3) pitidos.
TEMP
1. To set a different cooking temperature, press the [↑] and
[↓] buttons above and below the temperature icon. The
control panel will display 360F and temp.
• The temperature will adjust in 5-degree increments
between 60°F and 400°F.
2. Para ajustar rápidamente la temperatura, mantenga
presionadas las echas hasta alcanzar la temperatura
de cocción deseada.
Nota: La temperatura de cocción se puede ajustar en
cualquier momento antes o durante el proceso de cocción.
Una vez que la pantalla cambia a la pantalla de temperatura,
permanecerá en la pantalla de temperatura.
TIME
1. Para establecer un tiempo de cocción diferente, pulse
la tecla [↑] y [↓] encima y debajo del icono de tiempo. El
panel de control mostrará 00:15 y time.
• The time will adjust in 1-minute increments.
2. Para ajustar rápidamente el tiempo, mantenga
presionadas las echas hasta que se alcance el tiempo
de cocción deseado.
• El tiempo máximo de cocción seleccionable varía
según la temperatura de cocción seleccionada.
• 60° F - 200° F, el tiempo máximo de cocción es de
99 días, 99 horas (99.99).205°F - 275°F, maximum
cooking time is 99 hours, 99 minutes (99:99).
SPANISH
nuwavenow.com
nuwavenow.com
95
95
Page 96

INSTRUCCIONES
• 205° F - 275° F, el tiempo máximo de cocción es de 99
horas, 99 minutos (99:99).
• 280° F - 345° F, el tiempo máximo de cocción es de 10
horas (10:00).
• 350° F - 400° F, el tiempo máximo de cocción es de 1
hora (01:00).
Nota: El tiempo de cocción se puede ajustar en cualquier
momento antes o durante el proceso de cocción.
PREHEAT
La unidad precalentará a la temperatura del próximo ciclo
de cocción. Por ejemplo, si Sear 1 se establece en 400F, la
unidad precalentará a 400F. Si no se usa Sear 1, la unidad
precalentará a la temperatura de cocción establecida.
1. Presione el botón ON/OFF y ajuste la temperatura y el
tiempo de cocción para la etapa 1 de cocción.
2. Presione el botón PREHEAT para activar la función de
precalentamiento.
• La pantalla LED mostrará cooking temperature, pre,
y temp.
• La unidad SIEMPRE precalentará a la temperatura de
cocción del siguiente ciclo de cocción.
3. Presione el botón START/PAUSE para comenzar el
precalentamiento.
• La unidad comenzará a precalentar a la temperatura
establecida.
• La pantalla LED mostrará set cooking/preheat
temperature (parpadeando), pre y temp.
• Durante el precalentamiento, la temperatura de
cocción se puede ajustar utilizando los botones [↑] y
[↓] encima y debajo del icono de temperatura.
• El tiempo de cocción también se puede ajustar
presionando los botones [↑] y [↓] arriba y debajo del
ícono de tiempo.
4. Cuando la unidad alcance la temperatura de
precalentamiento, entrará en una retención de cinco
(5) minutos. La unidad mantendrá la temperatura de
precalentamiento durante esta retención de cinco
(5) minutos.
• Durante esos cinco (5) minutos la pantalla LED mostrará
5 (intermitente), ready y time y sonará una (1) vez.
96
96
instrucciones
Page 97

• Si no se realiza ninguna acción en los cinco (5)
minutos de espera, la unidad pasará automáticamente
al modo de espera.
5. Coloque su comida en la unidad, deslice la canastilla
con la bandeja de la base hacia atrás en el Brio. La
unidad comenzará a cocinar a la temperatura y el
tiempo establecidos.
6. El ciclo de precalentamiento se puede cancelar en
cualquier momento presionando el botón PREHEAT. La
unidad nalizará el ciclo de precalentamiento y pasará
automáticamente al siguiente ciclo de cocción.
7. Cuando la unidad haya terminado de cocinar, la pantalla
LED mostrará End y emitirá tres (3) pitidos.
STAGE
La cocción por etapas se utiliza para cocinar alimentos
a diferentes temperaturas y tiempos durante todo el
proceso de cocción. Se pueden congurar hasta cinco
(5) etapas de cocción. Demora, Precalentar, Sellar 1,
Sellar 2 y Mantener Caliente no se consideran etapas
en el proceso de cocción. La cocción de la Etapa 1
es la predeterminada (360F durante 15 minutos). La
temperatura y el tiempo se pueden ajustar.
1. Presione el botón ON/OFF. La pantalla LED mostrará
360F y temp. Esta es la Etapa 1. Ajuste la temperatura y
el tiempo de cocción usando los botones [↑] y [↓].
2. Para agregar etapas adicionales, presione el botón STAGE
una (1) vez. La pantalla LED mostrará 360F, temp, stage y
2 (stage arriba). Esta es la etapa 2 de cocción.
3. Ajuste la temperatura y el tiempo de cocción de la Etapa
2 usando los botones [↑] y [↓].
4. Para establecer ajustes adicionales de cocción en la
etapa, repita los pasos 2 y 3. El número de la etapa
anterior cambiará a medida que continúe presionando
el botón STAGE y congure la temperatura y el tiempo.
Después de la Etapa 5, si se presiona nuevamente el
botón STAGE, volverá a la Etapa 1. La pantalla LED
mostrará set cooking temperature, temp, stage y 1
(arriba stage).
5. Si solo desea dos (2) etapas de cocción, deje el tiempo a
las 00:00 para las etapas 3 ~ 5 y esas etapas se omitirán.
SPANISH
nuwavenow.com
nuwavenow.com
97
97
Page 98

INSTRUCCIONES
6. Presione el botón de START/PAUSE para comenzar
a cocinar. La unidad cocinará con los parámetros
establecidos.
7. Cuando la unidad haya terminado de cocinar, la pantalla
LED mostrará End y emitirá tres (3) pitidos.
8. El botón STAGE también se usa para desplazarse
por la función de cocción que se ha congurado para
una receta en particular. Presione el botón STAGE, ya
sea antes o durante la cocción, para ver y editar cada
función del ciclo de cocción que desee. Esto se explica
más adelante en este manual.
Nota:
• La pantalla LED solo indicará el número de cocción de
la etapa cuando se utilicen dos (2) o más etapas. La
pantalla LED no mostrará el número de etapa si solo se
utiliza una (1) etapa de cocción.
• Predeterminado Etapa 1: 360F, 00:15
• Etapa 2 ~ 5 predeterminado: 360F, 00:00
• Si no se establece un tiempo para las etapas 2 ~ 5, esas
etapas se omitirán en el ciclo de cocción.
SEAR
Sear 1 SIEMPRE estará directamente antes de la
cocción en la etapa normal y Sear 2 SIEMPRE estará
directamente después de la cocción en la etapa regular.
Sear 1: La temperatura predeterminada de Sear 1 es
400F y el tiempo predeterminado de Sear 1 es de cinco
(5) minutos (00:05).
1. Presione el botón ON/OFF y ajuste la temperatura y el
tiempo de cocción para la cocción por etapas.
2. Presione el botón SEAR una (1) vez. Esto activará la
función Sear 1.
3. La pantalla LED mostrará 400F, sear, 1 (parpadeando)
y temp.
• La temperatura de abrasión de Sear 1 se puede
ajustar usando los botones [↑] y [↓] encima y debajo
del ícono de temperatura. 400F es la temperatura
máxima de abrasión.
• El tiempo de abrasión de Sear 1 se puede ajustar
usando los botones [↑] y [↓] encima y debajo del icono
de tiempo hasta cinco (5) minutos (00:05).
98
98
instrucciones
Page 99

4. Presione el botón de START/PAUSE para comenzar
a cocinar. La pantalla LED mostrará sear 1 (ashing),
time, y el tiempo de sellado (00:05 predeterminado) con
el ":" parpadeando.
5. Una vez que se complete el ciclo Sear 1, la unidad
pasará automáticamente a la cocción en etapa (regular).
6. Cuando la unidad haya terminado de cocinar, la pantalla
LED mostrará End y emitirá tres (3) pitidos.
Sear 1 & 2
Sear 1 & 2 se usa para sellar antes y después de la
cocción regular.
1. Presione el botón ON/OFF y ajuste la temperatura y el
tiempo de cocción para la cocción por etapas.
2. Si desea establecer una temperatura y/o tiempo
diferente para Sear 1, oprima el botón SEAR una vez y
ajuste la temperatura y el tiempo para sellar 1.
3. Presione el botón SEAR nuevamente. La pantalla LED
mostrará 400F, sear, 1, 2 (parpadeando) y temp.
4. Ajuste la temperatura y el tiempo de Sear 2 si lo desea.
5. Presione el botón de START/PAUSE para comenzar
a cocinar. La pantalla LED mostrarásear 1
(parpadeando), 2, time y el tiempo establecido de sear
1 con ":" parpadeando.
6. Una vez que se complete el ciclo Sear 1, la unidad
emitirá un pitido una (1) vez y pasará automáticamente
a la cocción de la etapa regular. La pantalla LED
mostrará sear 2, time, y el tiempo de cocción de la
etapa regular establecido (00:15 predeterminado) con
el ":" parpadeando.
7. Una vez que se complete el ciclo de cocción por
etapas, la unidad emitirá un pitido una (1) vez y
entrará automáticamente en la cocción Sear 2. La
pantalla LED mostrará sear 2 (parpadeando), el
tiempo y el tiempo de sellar establecido (00: 05
predeterminado) con el ":" parpadeando.
8. Cuando la unidad haya terminado de cocinar, la pantalla
LED mostrará End y emitirá tres (3) pitidos.
SPANISH
nuwavenow.com
nuwavenow.com
99
99
Page 100

INSTRUCCIONES
Sear 2
La temperatura de sear 2 predeterminada es 400F y
el tiempo de sear 2 predeterminada son cinco ( 5 )
minutos (00: 05 ).
1. Presione el botón ON/OFF y ajuste la temperatura y el
tiempo de cocción para la etapa 1 de cocción.
2. Presione el botón SEAR tres (3) veces. Esto activará la
función Sear 2.
3. La pantalla LED mostrará 400F, sear, 2 (parpadeando)
y temp.
• La temperatura de sellar de Sear 2 se puede
ajustar usando los botones [↑] y [↓] arriba y debajo
del ícono de temperatura. 400F es la temperatura
máxima de abrasión.
• Ajuste el tiempo de sear 2 utilizando las teclas [↑] y [↓]
encima y debajo del icono de tiempo hasta cinco (5)
minutos (00:05).
4. Presione el botón de START/PAUSE para comenzar
a cocinar.
5. Una vez que se complete el ciclo de cocción por
etapas, la unidad emitirá un pitido una (1) vez y entrará
automáticamente en la cocción Sear 2. La pantalla LED
mostrará sear 2 (parpadeando), el tiempo y el tiempo
de sellar establecido (00: 05 predeterminado) con el ":"
parpadeando.
6. Cuando la unidad haya terminado de cocinar, la pantalla
LED mostrará End y emitirá tres (3) pitidos.
WARM
1. Presione el botón de WARM para activar la función de
mantener caliente y así mantener la comida caliente
después de la cocción hasta que esté listo para servirla.
2. La pantalla LED mostrará 145F, temp y warm.
3. Use los botones [↑] y [↓] arriba y debajo del icono de
temperatura para ajustar la temperatura de mantener
caliente.
4. Presione los botones [↑] y [↓] arriba y debajo del ícono
de tiempo para ajustar el tiempo de mantener caliente.
La pantalla LED mostrará 01:00 (predeterminado), time
y warm.
100
100
instrucciones
 Loading...