

Page 1
LED
120V
Models: 65/960, 65/961, 65/962, 65/963, 65/964, 65/965,
65/970, 65/971, 96/972, 65/973, 65/974, 65/975, 65/956, 65/958, 65/959
HI-PRO SHOP LIGHT
INSTALLATION AND SAFETY INSTRUCTIONS
IMPORTANT: Read before installing xture. Retain for future reference.
WARNING: Risk of Fire or Electric Shock
• To avoid damage, falling, electric shock or re, do not modify the lamp or
replace accessories without conrming with the supplier rst.
• Only authorized, qualied personnel should install this xture and should
follow the owner’s manual. Any improper installation might cause failure,
electric shock, re or other injury, damage or hazard.
• Disconnect power before installation or any maintenance of the xture.
• Do not dismantle the xture without the supplier’s authorization.
• Do not touch the power supply when the xture is operating.
• The external flexible cable or cord of this xture cannot be replaced; if the
cord is damaged, the xture shall be destroyed.
• Terminal block not included. The electrical tting must be installed by a
licensed electrician.
• For use in environments where an accumulation of non-conductive dust
on the xture may be expected.
IMPORTANT: This product must be installed in accordance with the
applicable installation code by a person familiar with the construction and
operation of the product and the hazards involved. This product is suitable
for 120V only.
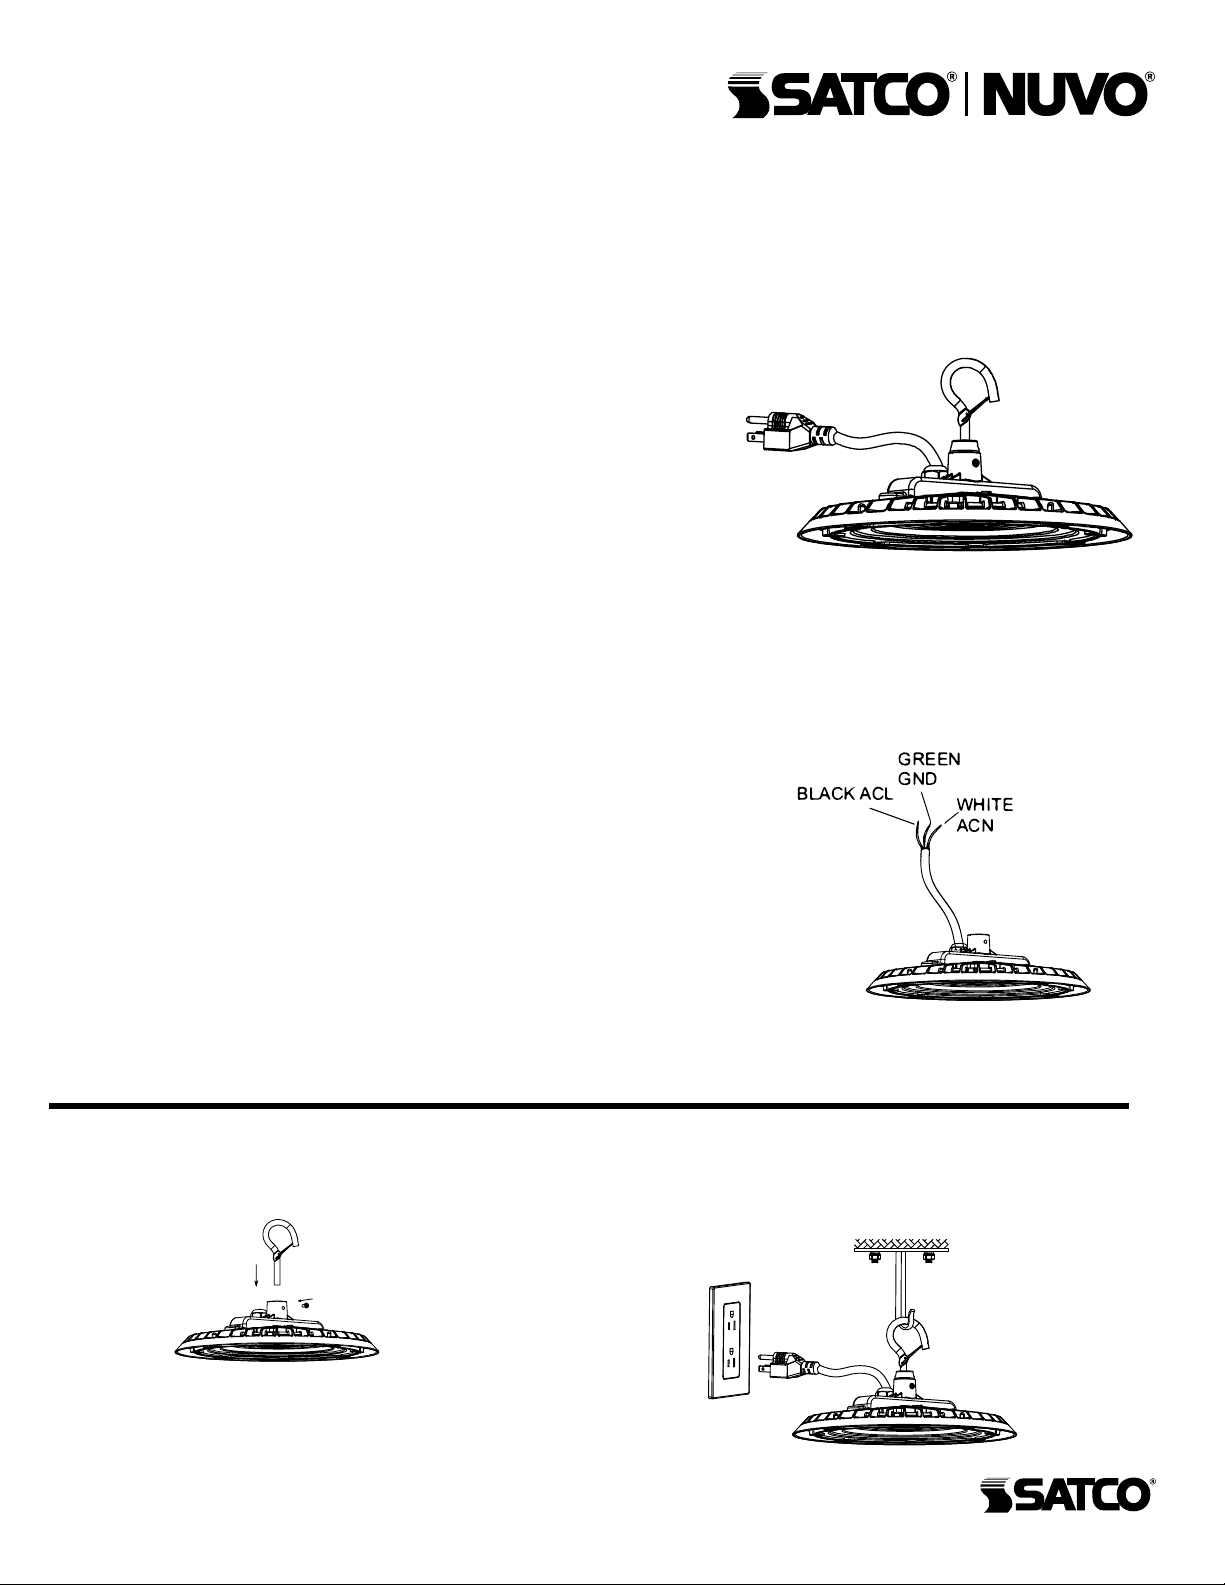
WIRING DIAGRAM & INSTRUCTIONS
This product is suitable for both plug in and hardwire applications.
For hardwired applications, cut plug and strip back the SVT to
access the leads. Make sure power is off and connect the black
wire to the AC Line, the white to the AC Neutral and the green to
the ground. Make sure all connections are capped and sealed. Turn
power back on.
INSTALLATION: Hook Mount
STEP 1: Screw the hook into the fixture, tighten
and secure.
STEP 2: Hang the fixture on the ceiling hook
or chain.
Figure1
STEP 3: Connect wires using the wiring diagram and
instructions on gure 1. Make sure connections are
capped and sealed.
1
Satco Products, Inc.
Br ent wo od , N Y 11717© Copyright 2023 Satco Products, In c. 4/23
Page 2
LED HI-PRO SHOP LIGHT
Models: 65/960, 65/961, 65/962, 65/963, 65/964, 65/965,
65/970, 65/971, 96/972, 65/973, 65/974, 65/975
INSTALLATION AND SAFETY INSTRUCTIONS
IMPORTANT: Read before installing xture. Retain for future reference.
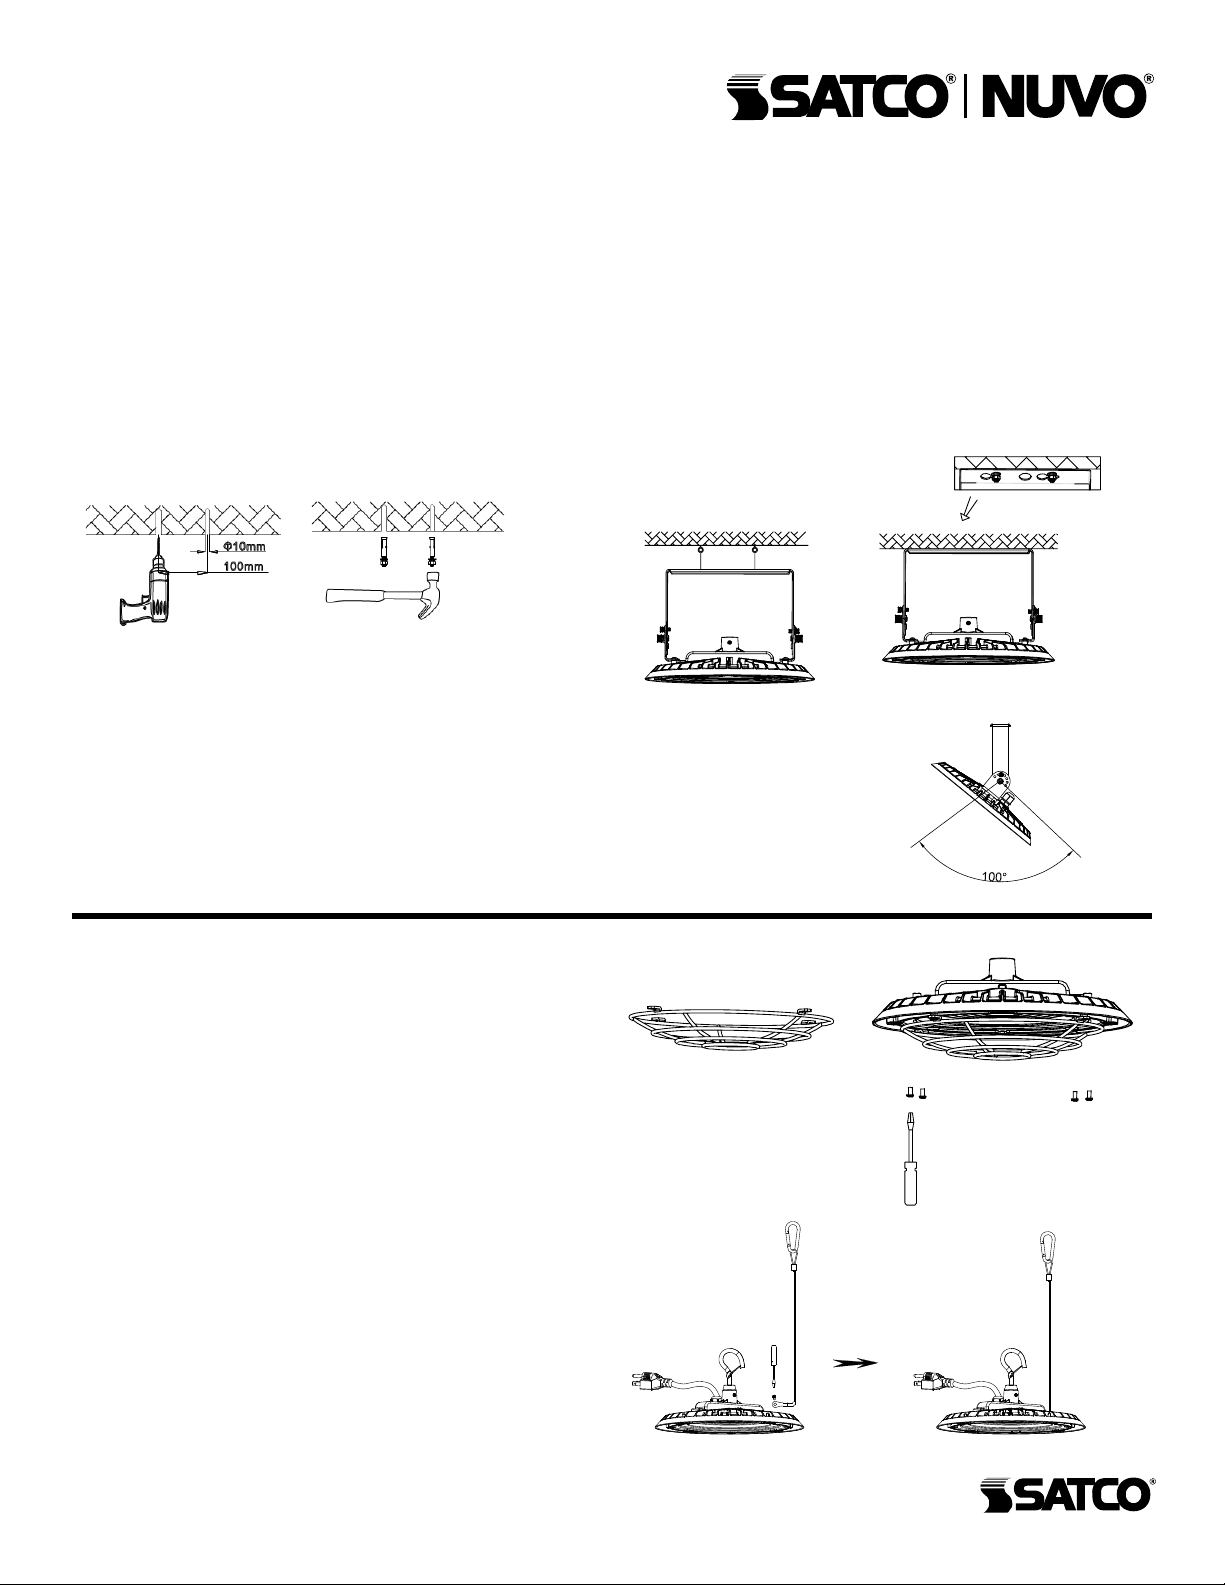
INSTALLATION: Ceiling Mount
STEP 1: Use a pen or sharp tool and mark holes
through the mounting surface on the ceiling and
drill holes. Fix screws into the holes with a hammer.
STEP 2: Align the bracket hole with screw hole
and push the fixture to one side and secure.
STEP 3: Plug xture into outlet or for hardwired
applications follow instructions on page 1. Make
sure connections are capped and sealed.
Additional Accessories:
Wire Guard Installation:
To attach the wire guard, use the provided screws to
attach to the pre-tapped holes on the face of the xture.
Suspension Kit Installation:
To attach the suspension kit, use the provided screws to
attach to the pre-tapped holes on the back of the xture.
NOTE: By adjusting the
bracket screws, the xture
can be angled 50° to the
left or right vertically.
Wire Guard
2
Satco Products, Inc.
Br ent wo od , N Y 11717© Copyright 2023 Satco Products, In c. 4/23
 Loading...