

Page 1
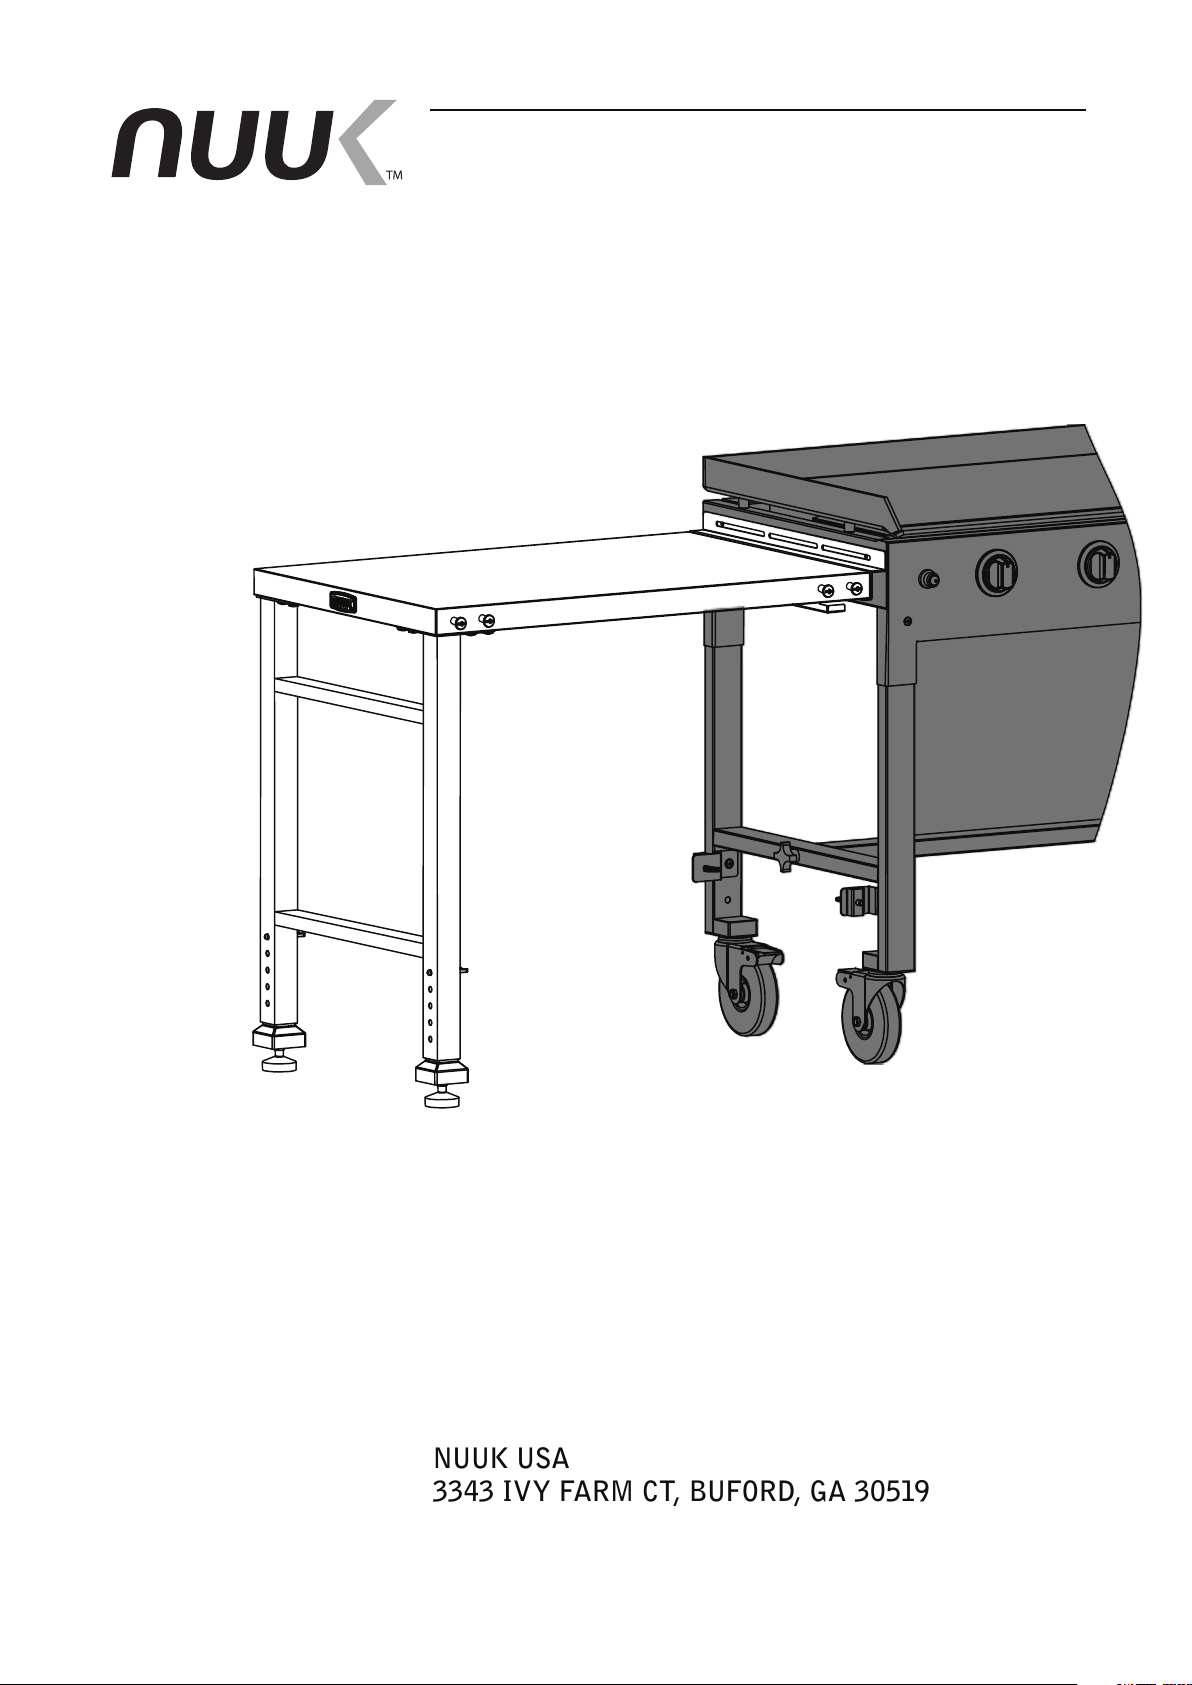
Stainless Steel
Universal Extension
Prep Table
Model: UT100
SKU: 40006
NUUK USA
3343 IVY FARM CT, BUFORD, GA 30519
nuukusa.com
Page 2

Table of Contents
It is the consumer’s responsibility to see that the
unit is properly assembled, installed, and
maintained. Failure to follow the instructions in
the manual could result in bodily injury and/or
property damage.
Table of Contents - page 2
Safety Information - page 3
Customer Support - page 4
Care and Maintenance
Exploded View - page 5
Part List & Hardware - page 6
Assembly Instructions - page 8 – 14
Warranty - page 15
2
Page 3

Safety Information
IMPORTANT: ALL INSTRUCTIONS AND
SAFEGUARDS IN THIS SECTION MUST BE
FOLLOWED TO PREVENT DAMAGE AND/OR
INJURY.
• Not for permanent installation.
• For outdoor use only.
• Use caution with all electric appliances, tools,
extension cords and lights on and around table.
• Surface can become hot in direct sun or high
temperatures.
• Maximum top weight load of 100 LBS.
• Use only on level surfaces.
• Before use ensure wheels are height adjusted
so that the table does not rock when in use.
• Lock wheels when in use.
• Do not allow children to climb the product.
3
CALIFORNIA PROPOSITION 65 WARNING
WARNING: This product can expose you to lead, which
is known to the State of California to cause cancer and
birth defects or other reproductive harm. For more
information go to www.P65warnings.ca.gov.
Page 4

Customer Support
HAVE PROBLEM / QUESTION/ CONCERN
NO WORRY!
Our Customer Service Staff is Here To Help You!
For questions regarding your NUUK products,
installation, replacement parts or your warranty,
please contact
NUUK customer service team
Phone: 1-800-719-8199
Monday through Friday
9:00 am to 5:00 pm, Eastern Time Zone
Email: [email protected]
Care and Maintenance
CLEANING
Painted and Plastic Surface
Wash with mild detergent or non-abrasive cleaner and
warm Water.
Stainless Steel Surface
Wash with mild detergent and warm soapy water or use
stainless steel cleaner. Wipe dry with a soft cloth after
each use.
4
Wash only in the direction of the stainless brushed nish
to avoid damage.
Stainless steel can rust under certain conditions. This
can be caused by acidic marinades, chlorine, saltwater,
exposure to coastal climates, other natural elements, or
improper cleaning tools such as wire or steel wool.
Page 5
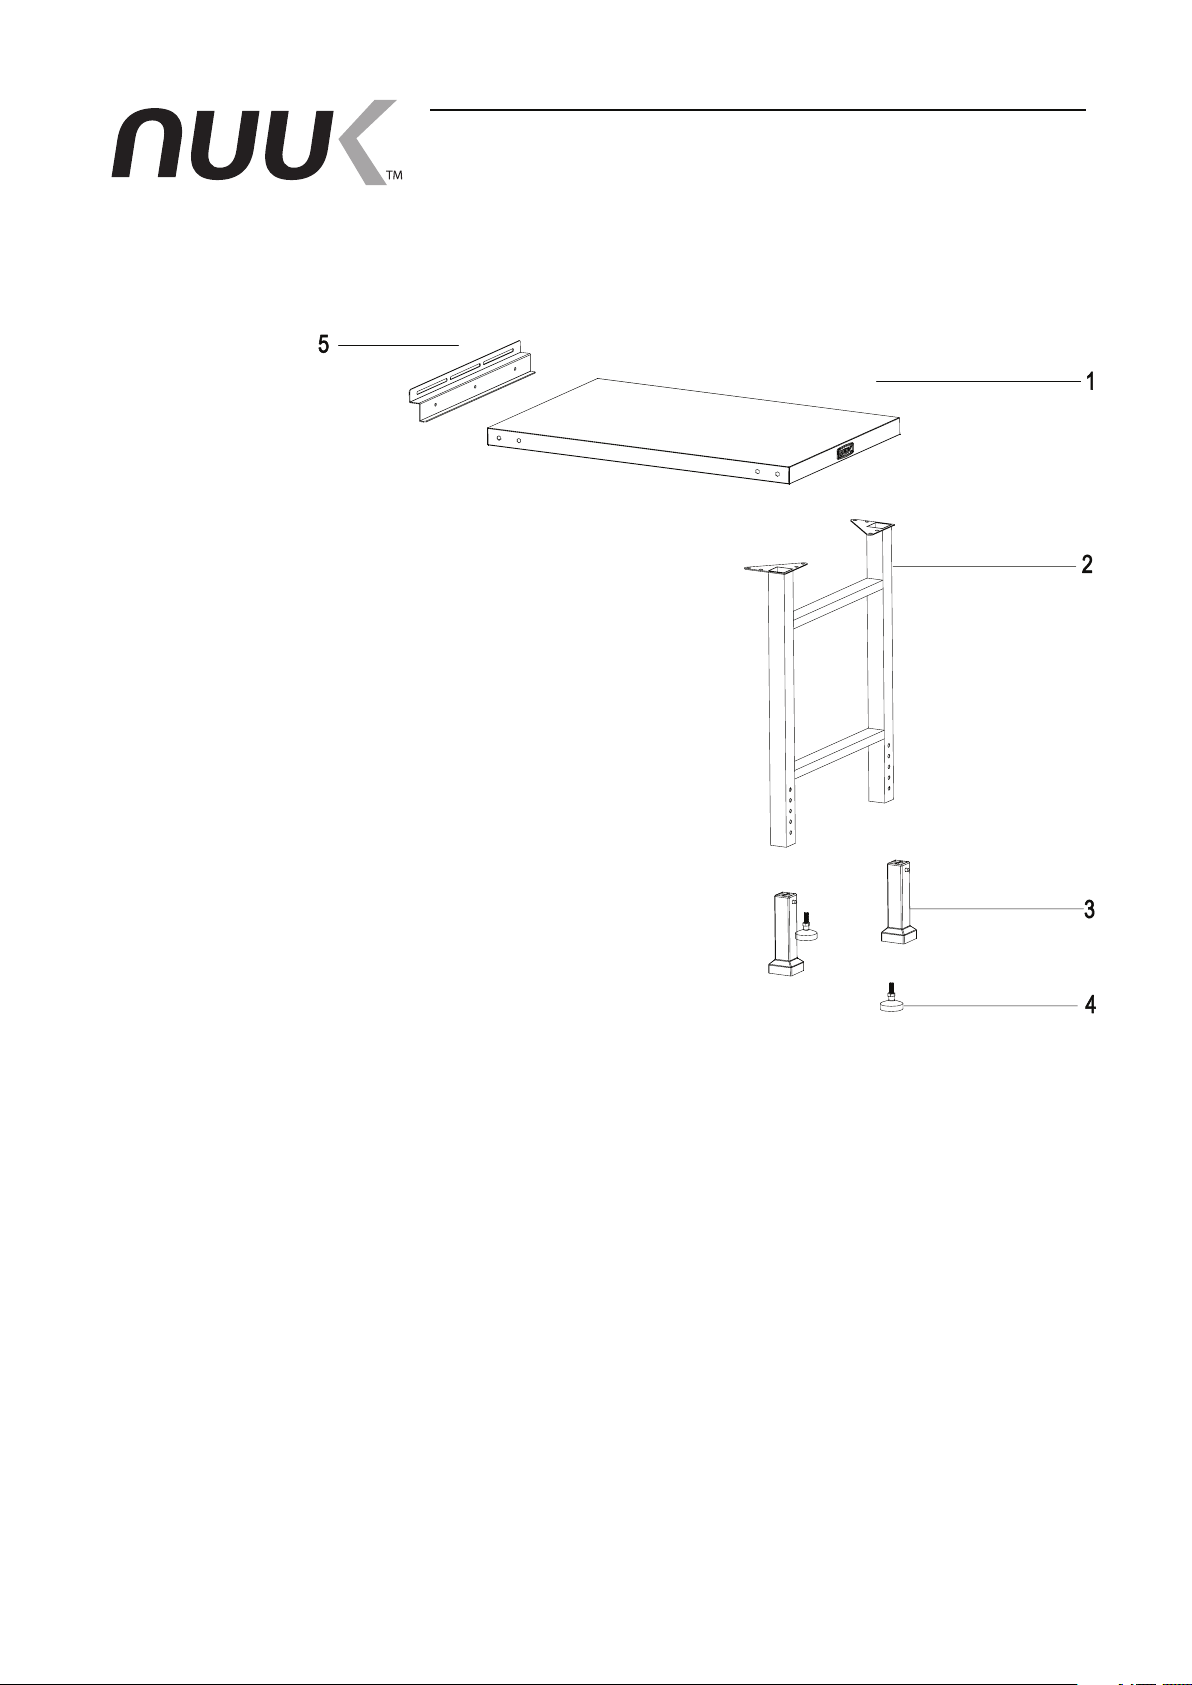
Exploded View
5
If you nd any missing parts, damage parts, please
contact NUUK
Phone: 1-800-719-8199
Monday through Friday
09:00 am to 05:00 pm, Eastern Time Zone
Email: [email protected]
Page 6
Parts
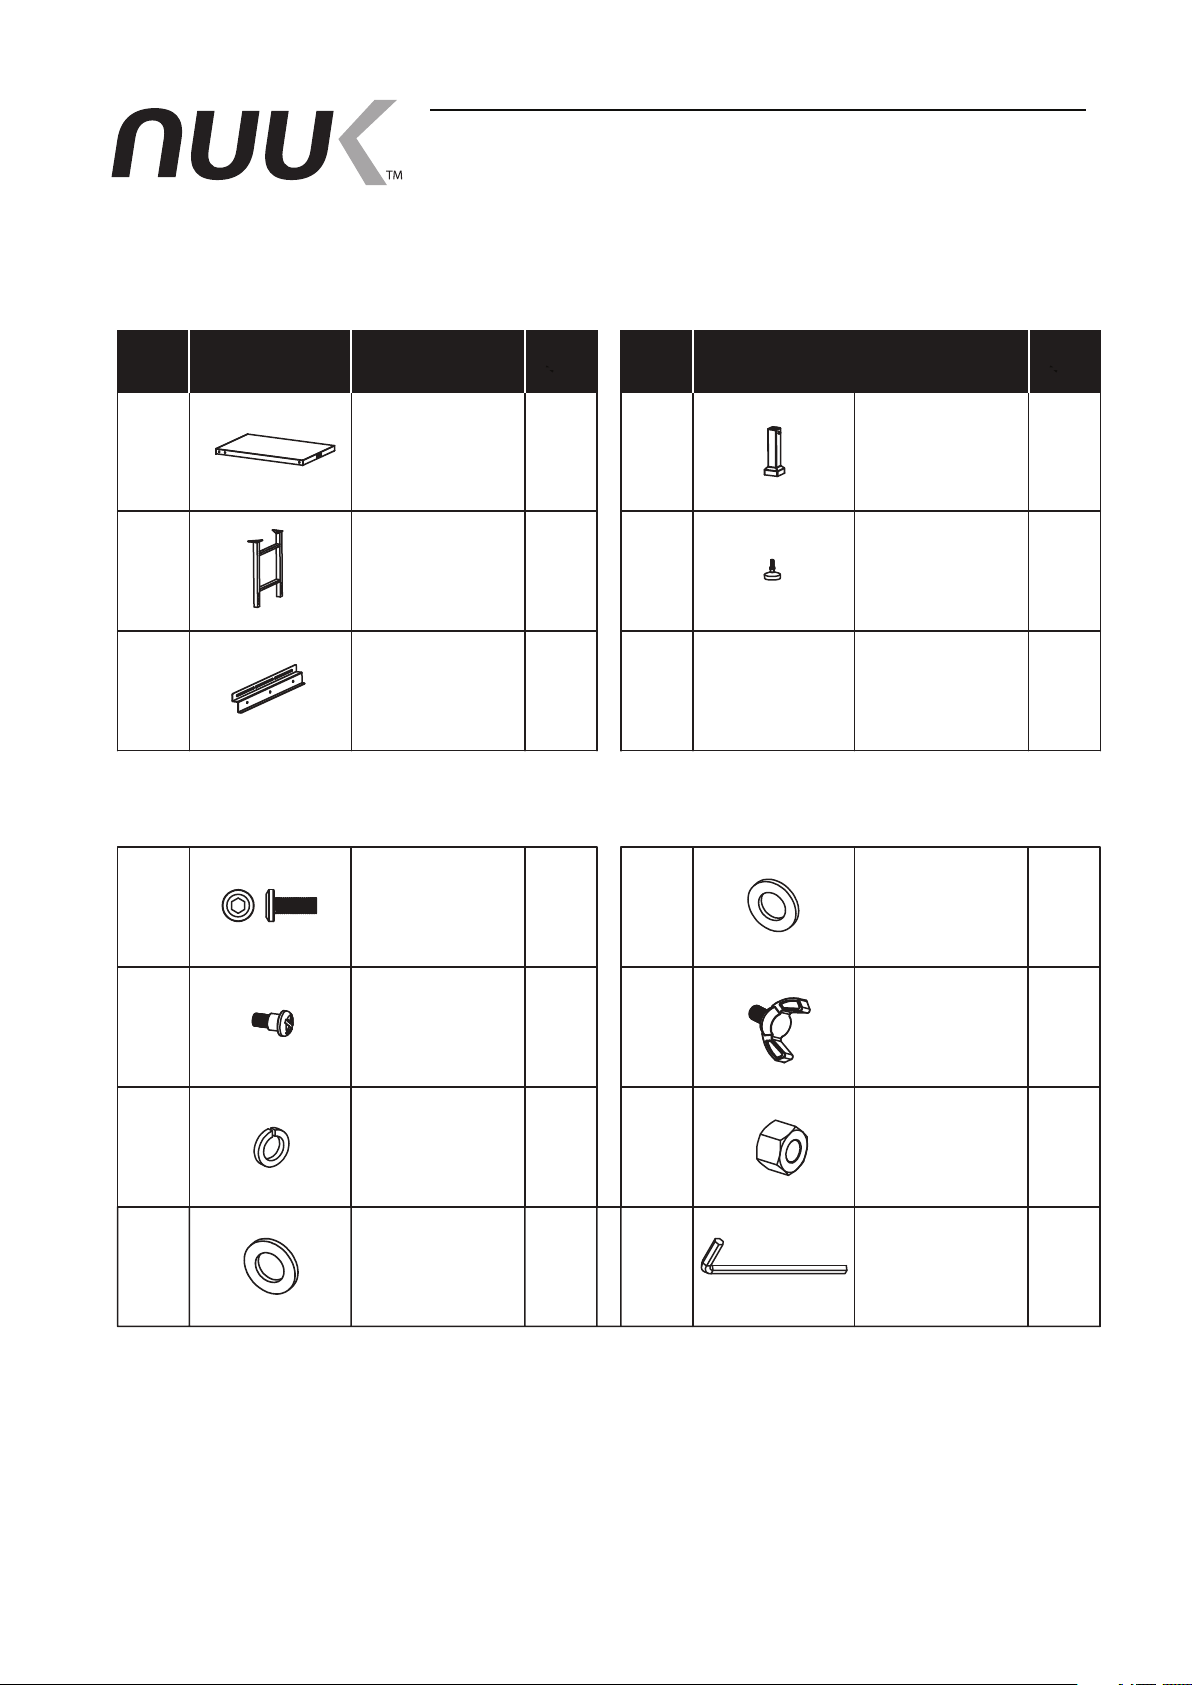
Parts and Hardware List
PART
1
2
5
Hardware
A
DESCRIPTION
Counter Top
Leg
Support
Bracket
Bolt
M6X15
QTY
1
1
1
14
PART
3
4
B
DESCRIPTION
Extension Leg
Adjustable Feet
Flat Washer
M6
QTY
2
2
11
6
C
E
G
Step Screw
Spring Washer
Flat Washer
M8
8
2
2
D
F
Buttery Screw
Nut M6
Allen Wrench
2
6
1
Page 7
Assembly Instruction
Preparation
Please be careful when handling components. Always
wear gloves during assembly and set up. Read and follow
all safety statements, warning, assembly instructions and
use care instructions before attempting to assemble and
use. Before beginning assembly of product, make sure all
parts are present. Compare parts with package contents
listing and hardware contents list. If any part is missing
or damaged, DO NOT attempt to assemble the product.
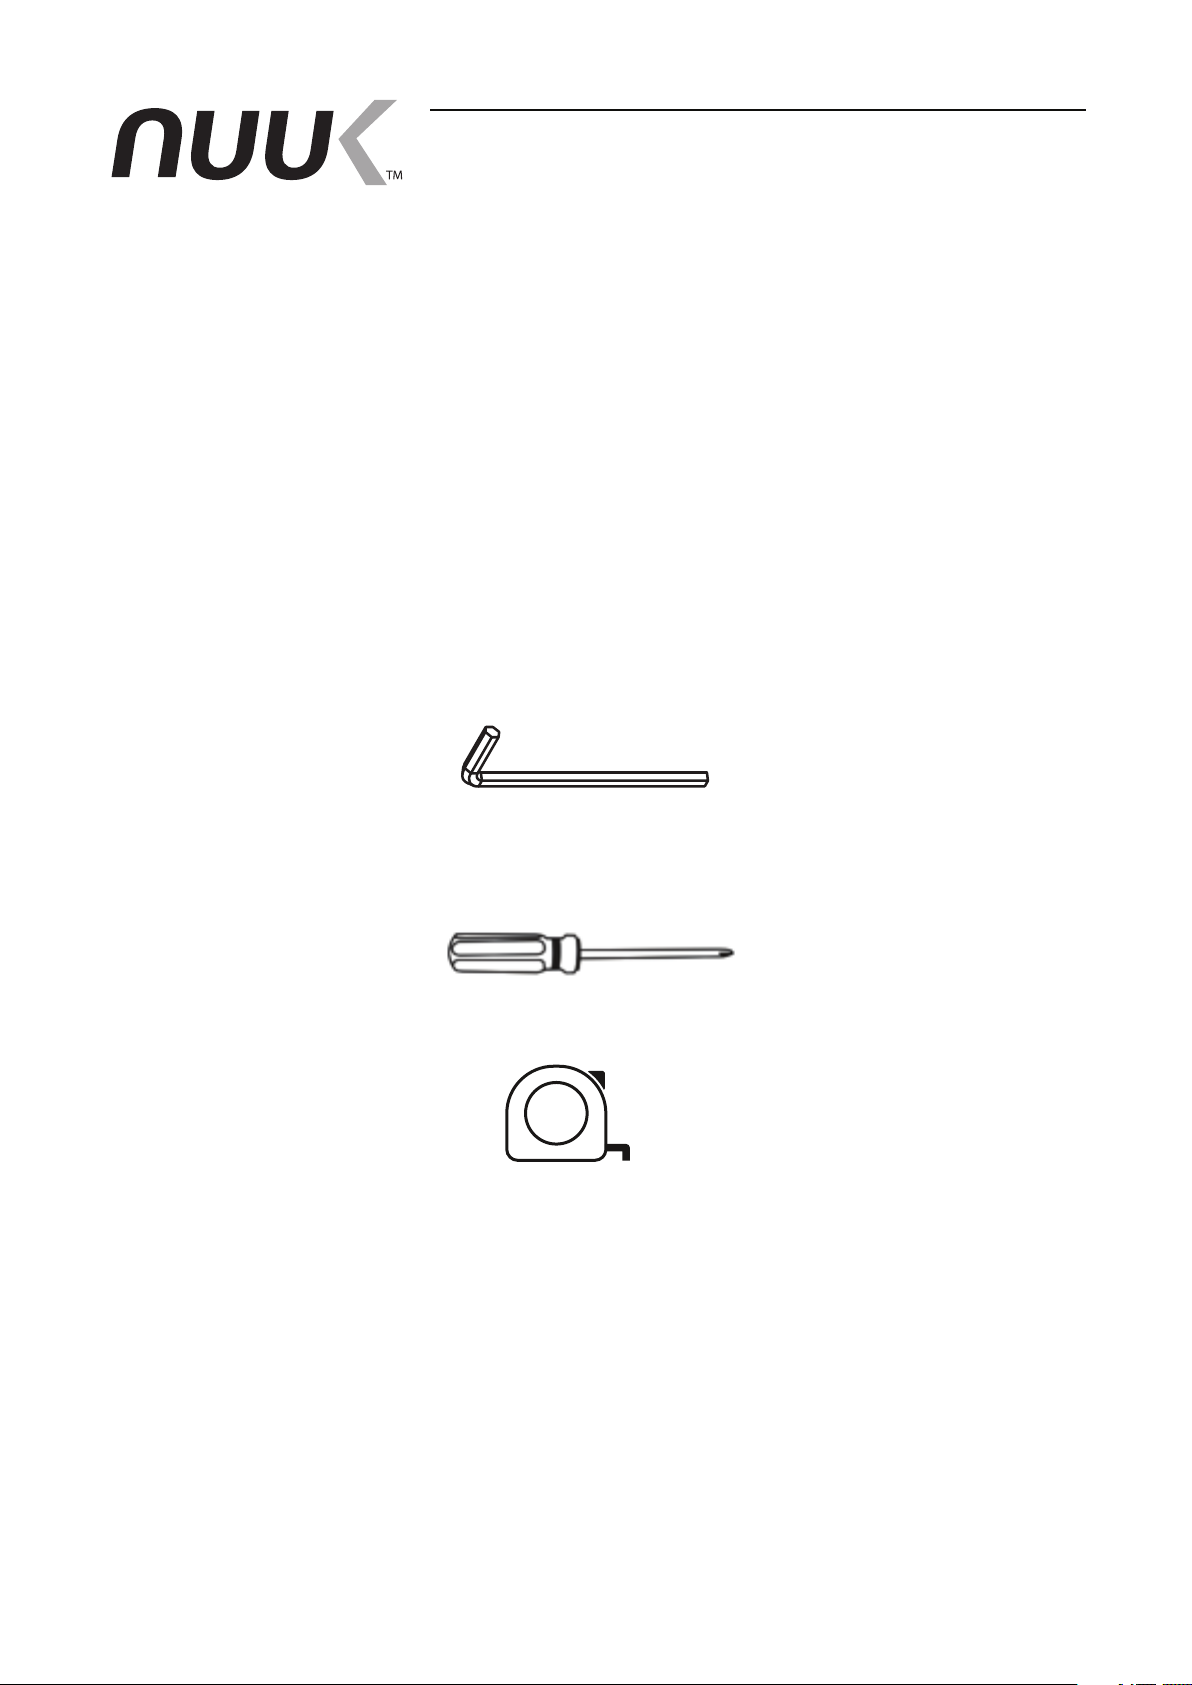
Tools required for assembly
Allen Wrench
(included)
Phillips Screwdriver
(not included)
Measure
(not included)
Assembly tip
To avoid scratching counter top and to protect oor/patio
surface, reuse cardboard packaging and lay parts on top
while assembling.
7
Page 8
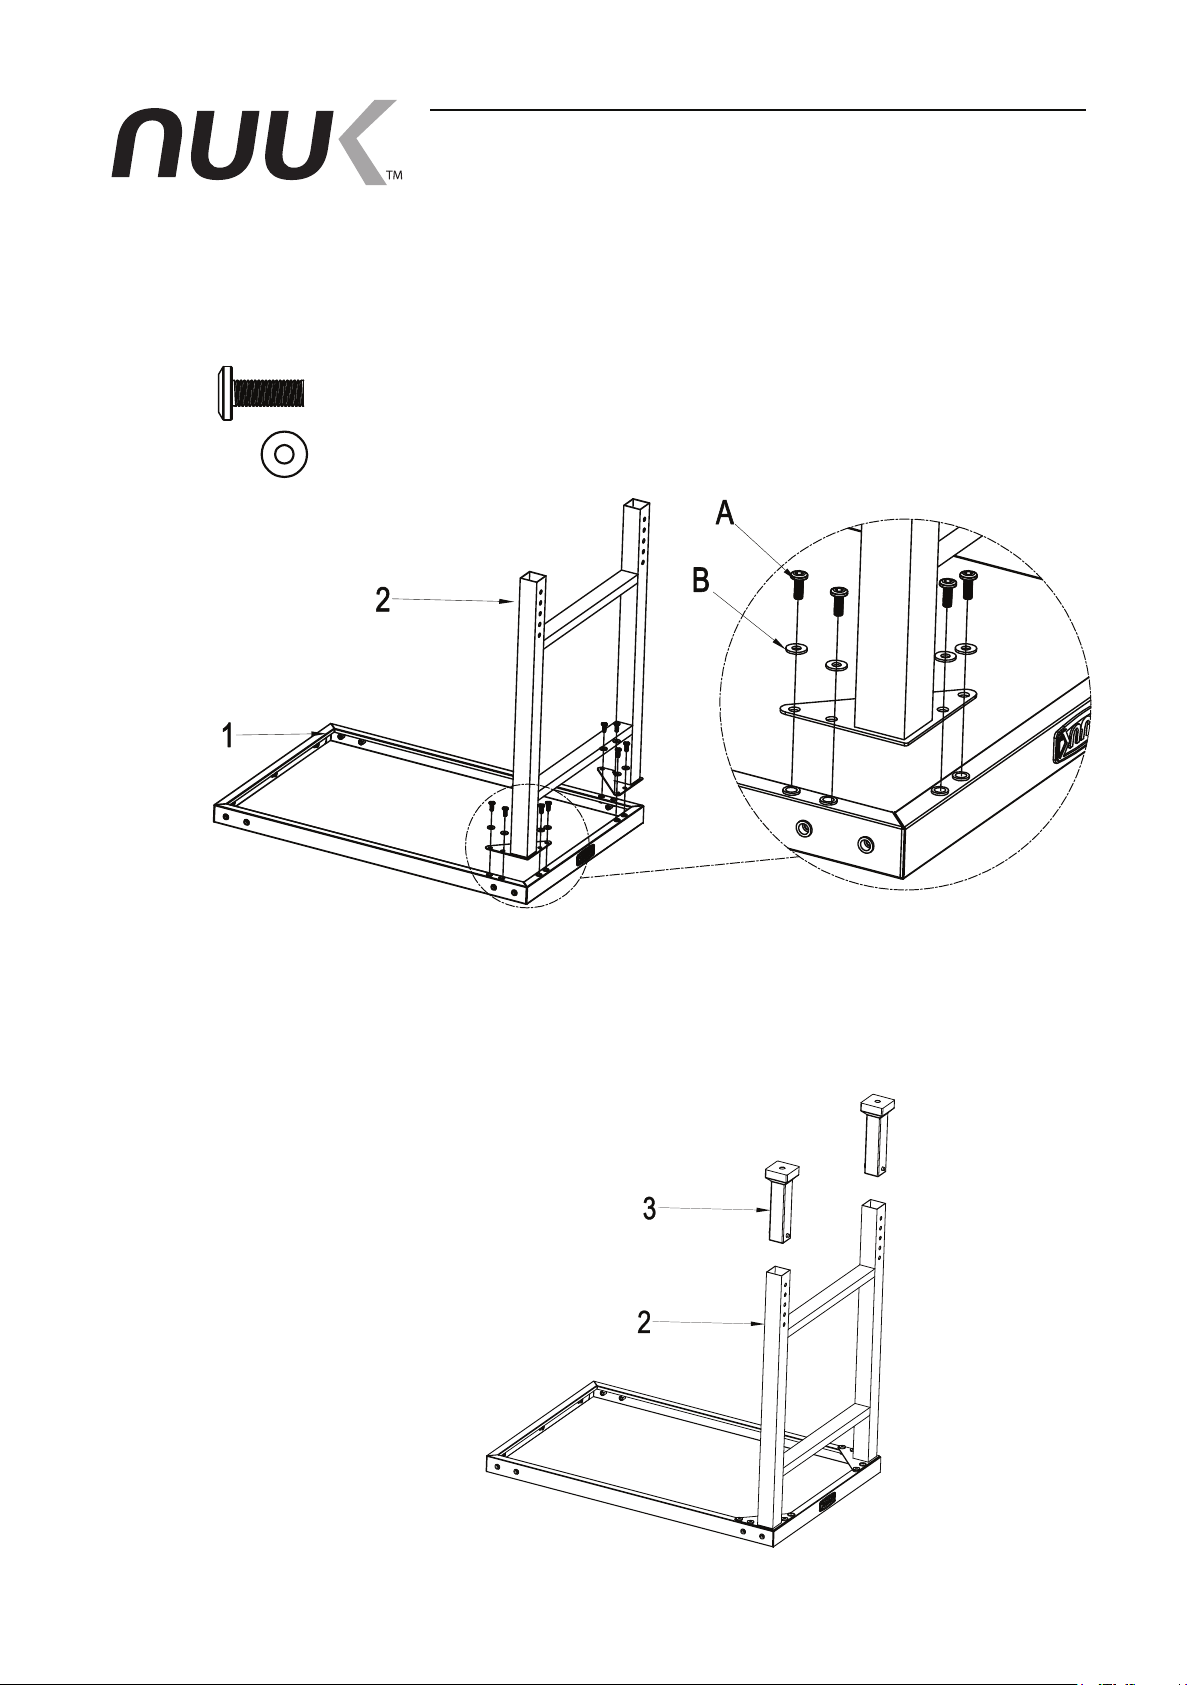
A x 8
B x 8
Assembly Instruction
STEP 1
Assemble the Leg (#2) to Counter Top (#1), use
Eight (8) M6X15-A & Eight (8) Flat Washer-B.
STEP 2
Insert Extension Legs (#3) to end of leg (#2).
8
Page 9
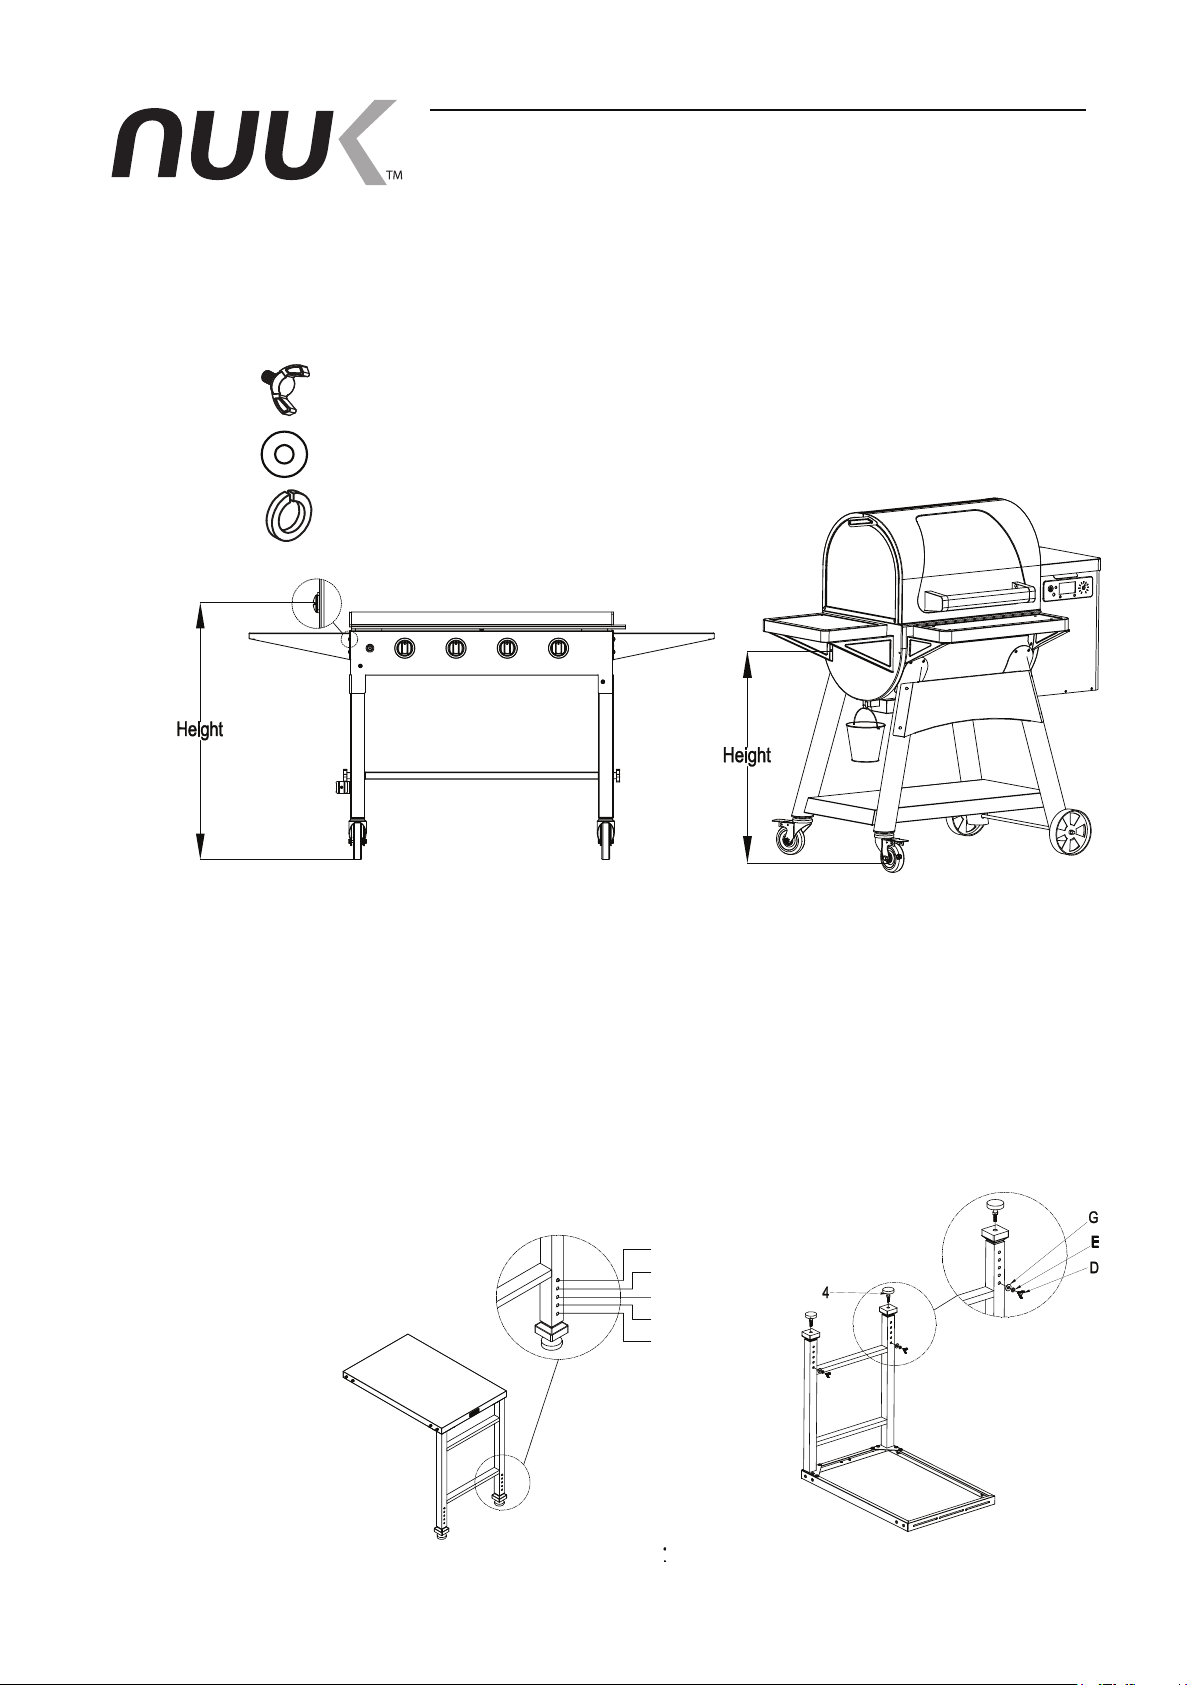
D x 2
G x 2
E x 2
Assembly Instruction
STEP 3
Use measure to check the height from your grill’s side
shelf or side handle to oor (Height).
Note
Grill/Griddle did not include with your purchase.
Compare the height to the data on the leg, nd the
closest number, use Two (2) Flat washer M8-G, and
Two (2) buttery screw–D & Two (2) spring washer-E
to fasten the extension leg.
Assemble adjustable feet (#4) to extension leg (#3)
29.5in-30.5in
30.5in-31.6in
31.6in-32.6in
32.6in-33.6in
33.6in-34.6in
9
Page 10
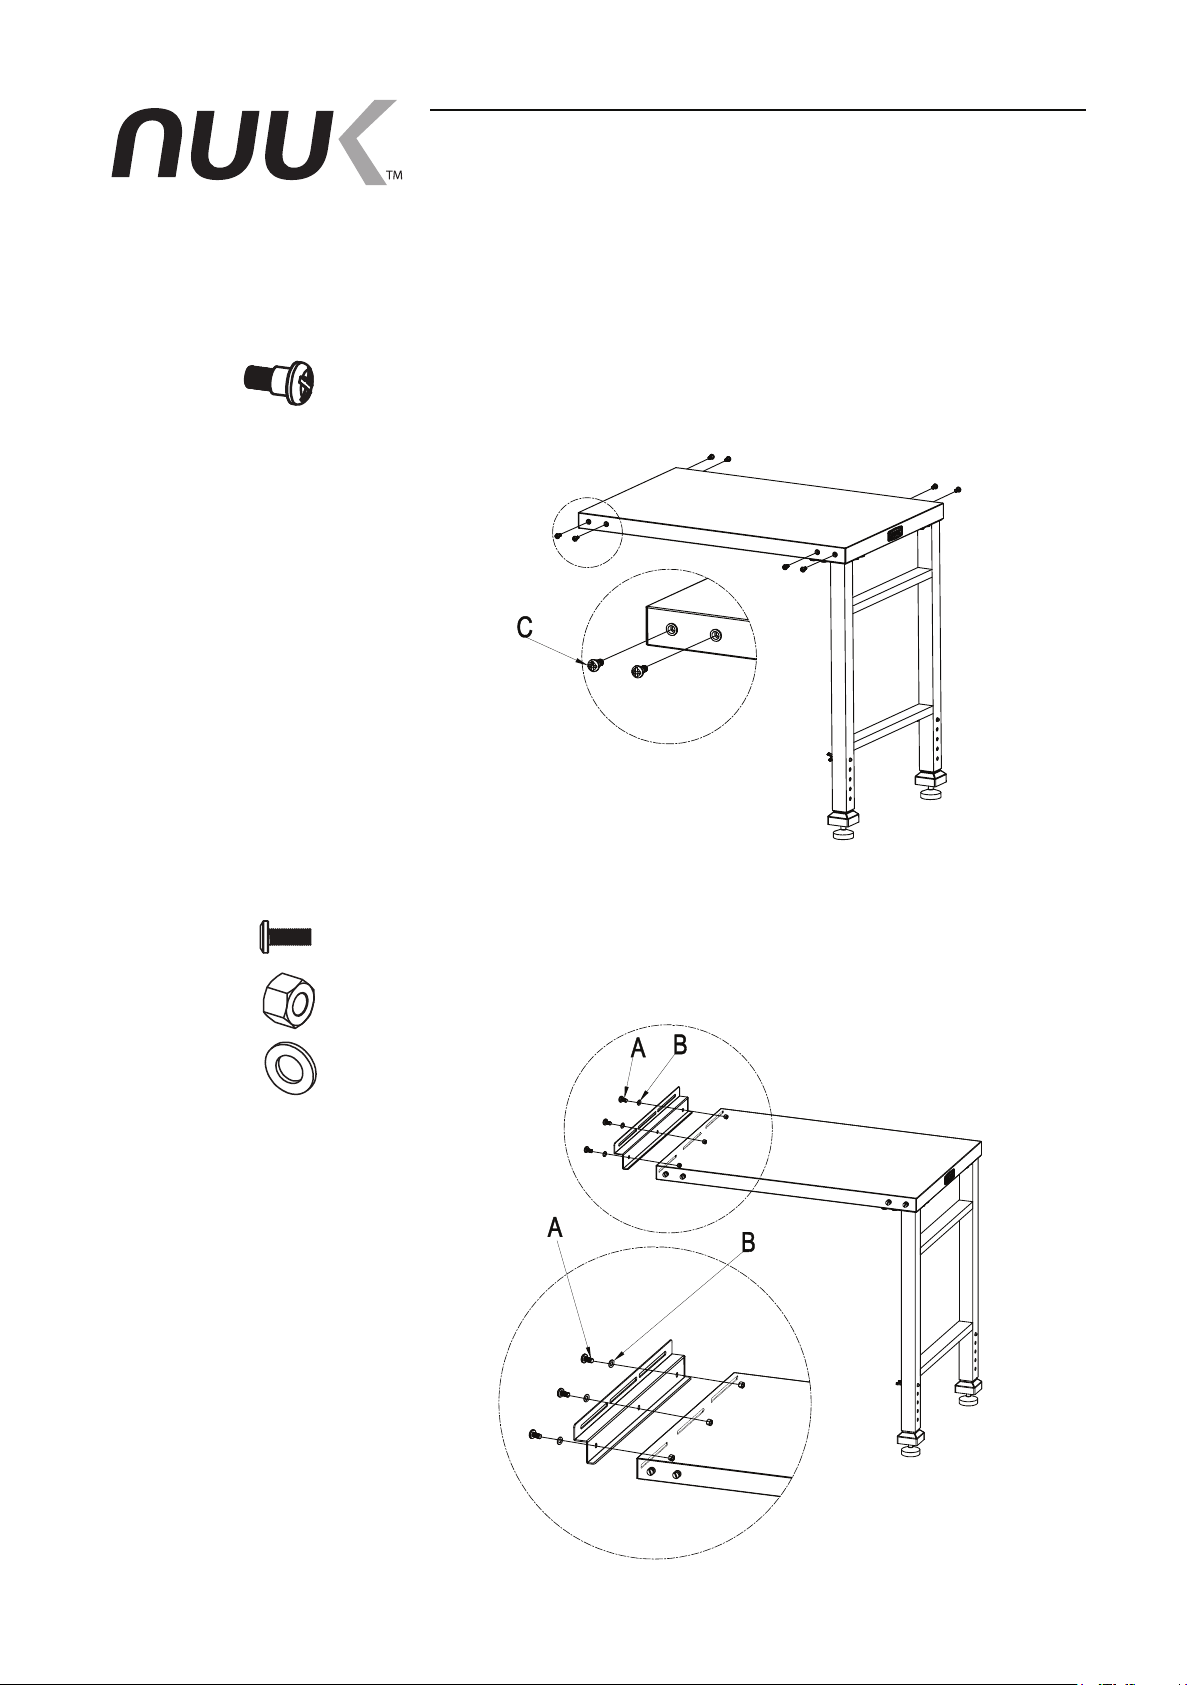
D x 8
Assembly Instruction
STEP 4
Assemble Eight (8) Step Screw-D to counter top.
A x 3
F x 3
B x 3
STEP 5
Assemble the support bracket (#5) to counter top, using
Three (3) M6X15-A, Three (3) Flat washer M6-B
& Three (3) Nut M6-F.
10
Page 11
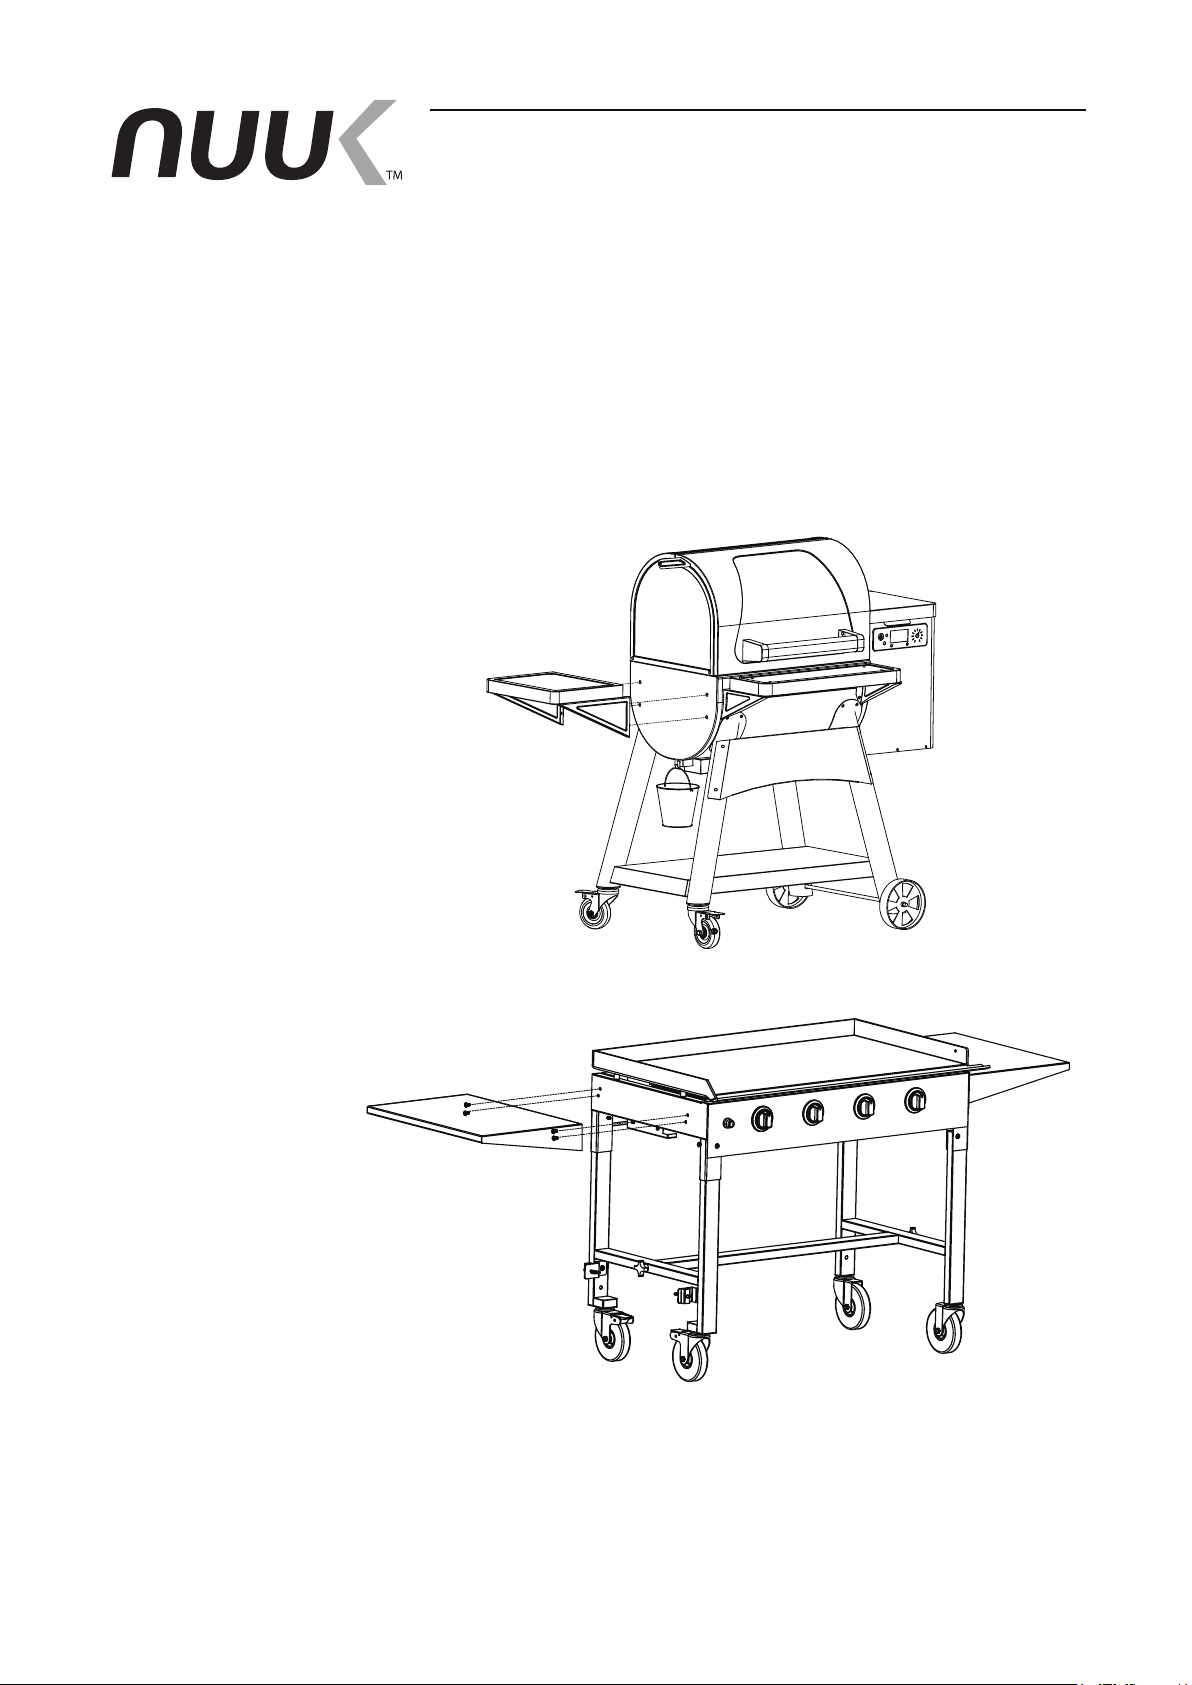
Assembly Instruction
STEP 6
Disassemble the Side Shelf/Side handle from your Grill
(Pellet Grill or Griddle).
Keep the Hardware for further use.
11
NOTE
Grill/Griddle did not include with your purchase.
Page 12
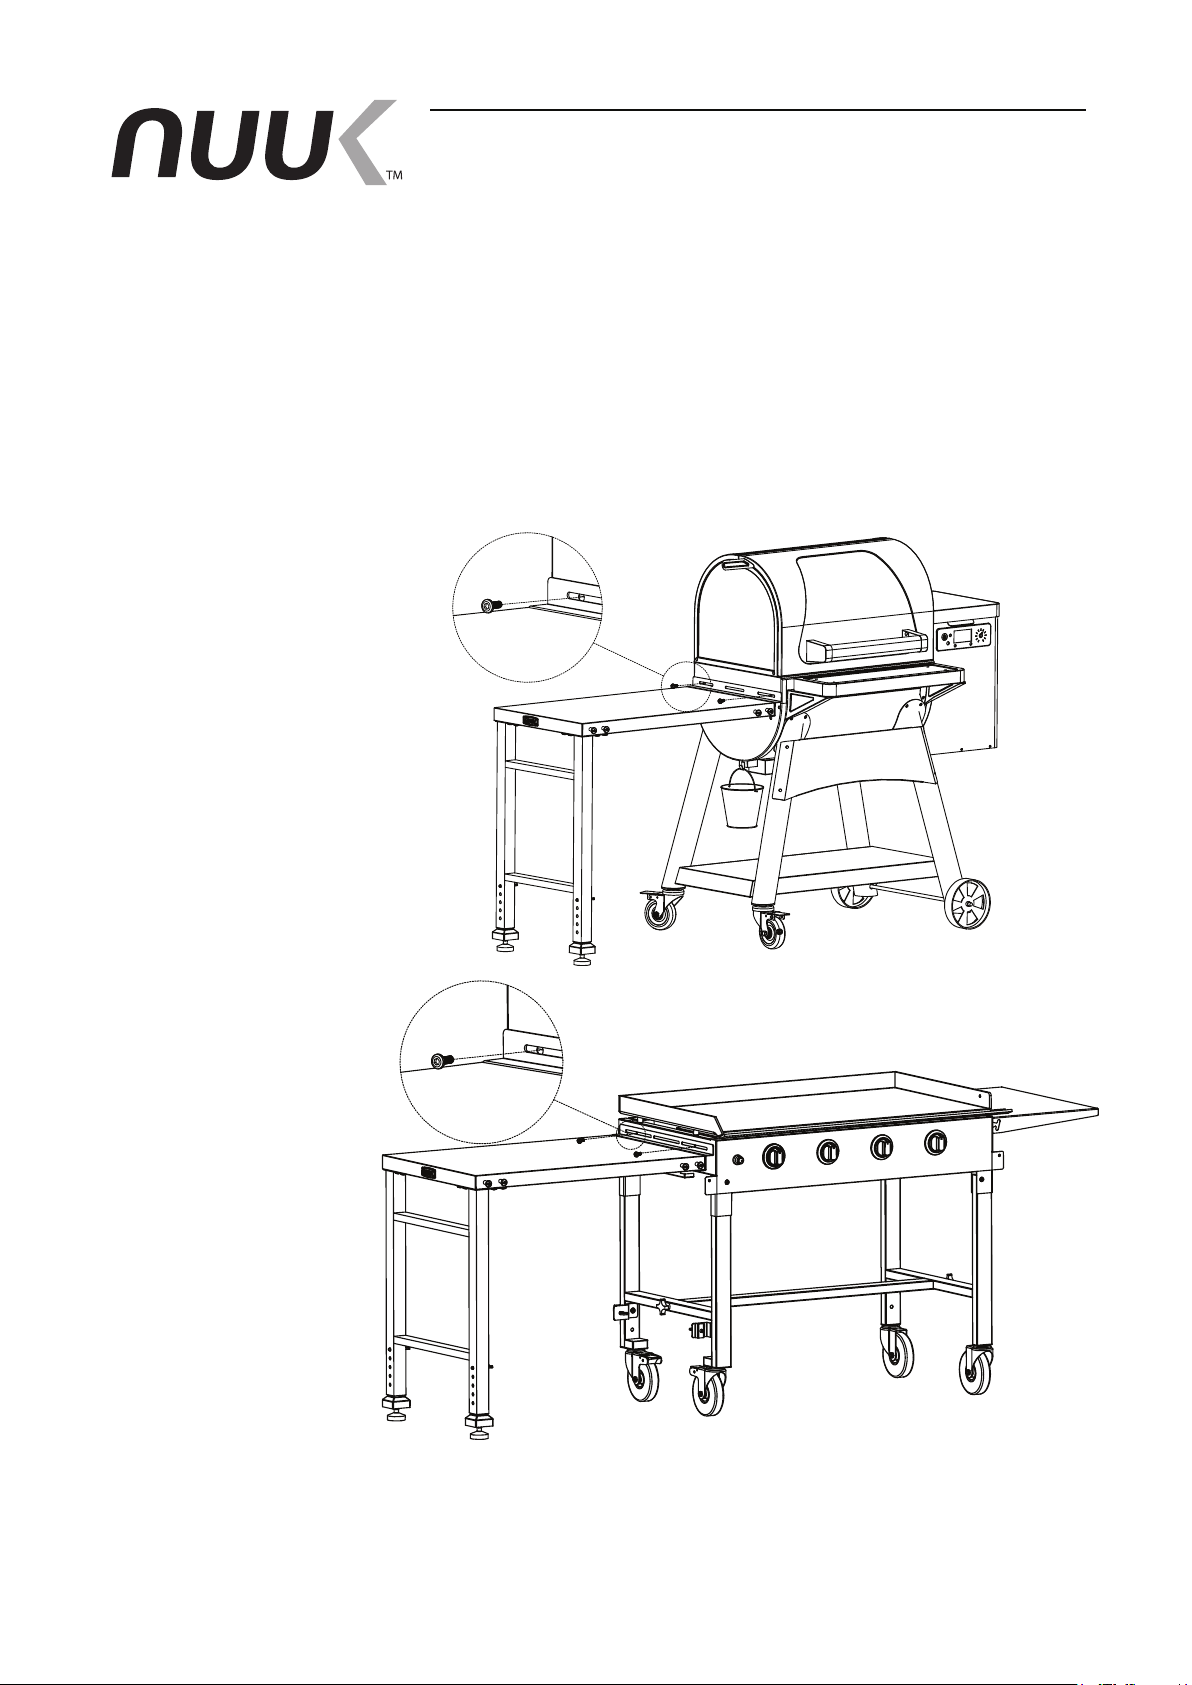
Assembly Instruction
STEP 7
Assemble the whole table through support bracket to
your Pellet Grill/Griddle, use the original hardware.
Or, use the included hardware, Two (2) M6X15-A &
Two (2) Spring washer-E or Two (2) Nut M6-F.
12
NOTE
Grill/Griddle did not include with your purchase.
Page 13
Assembly Instruction
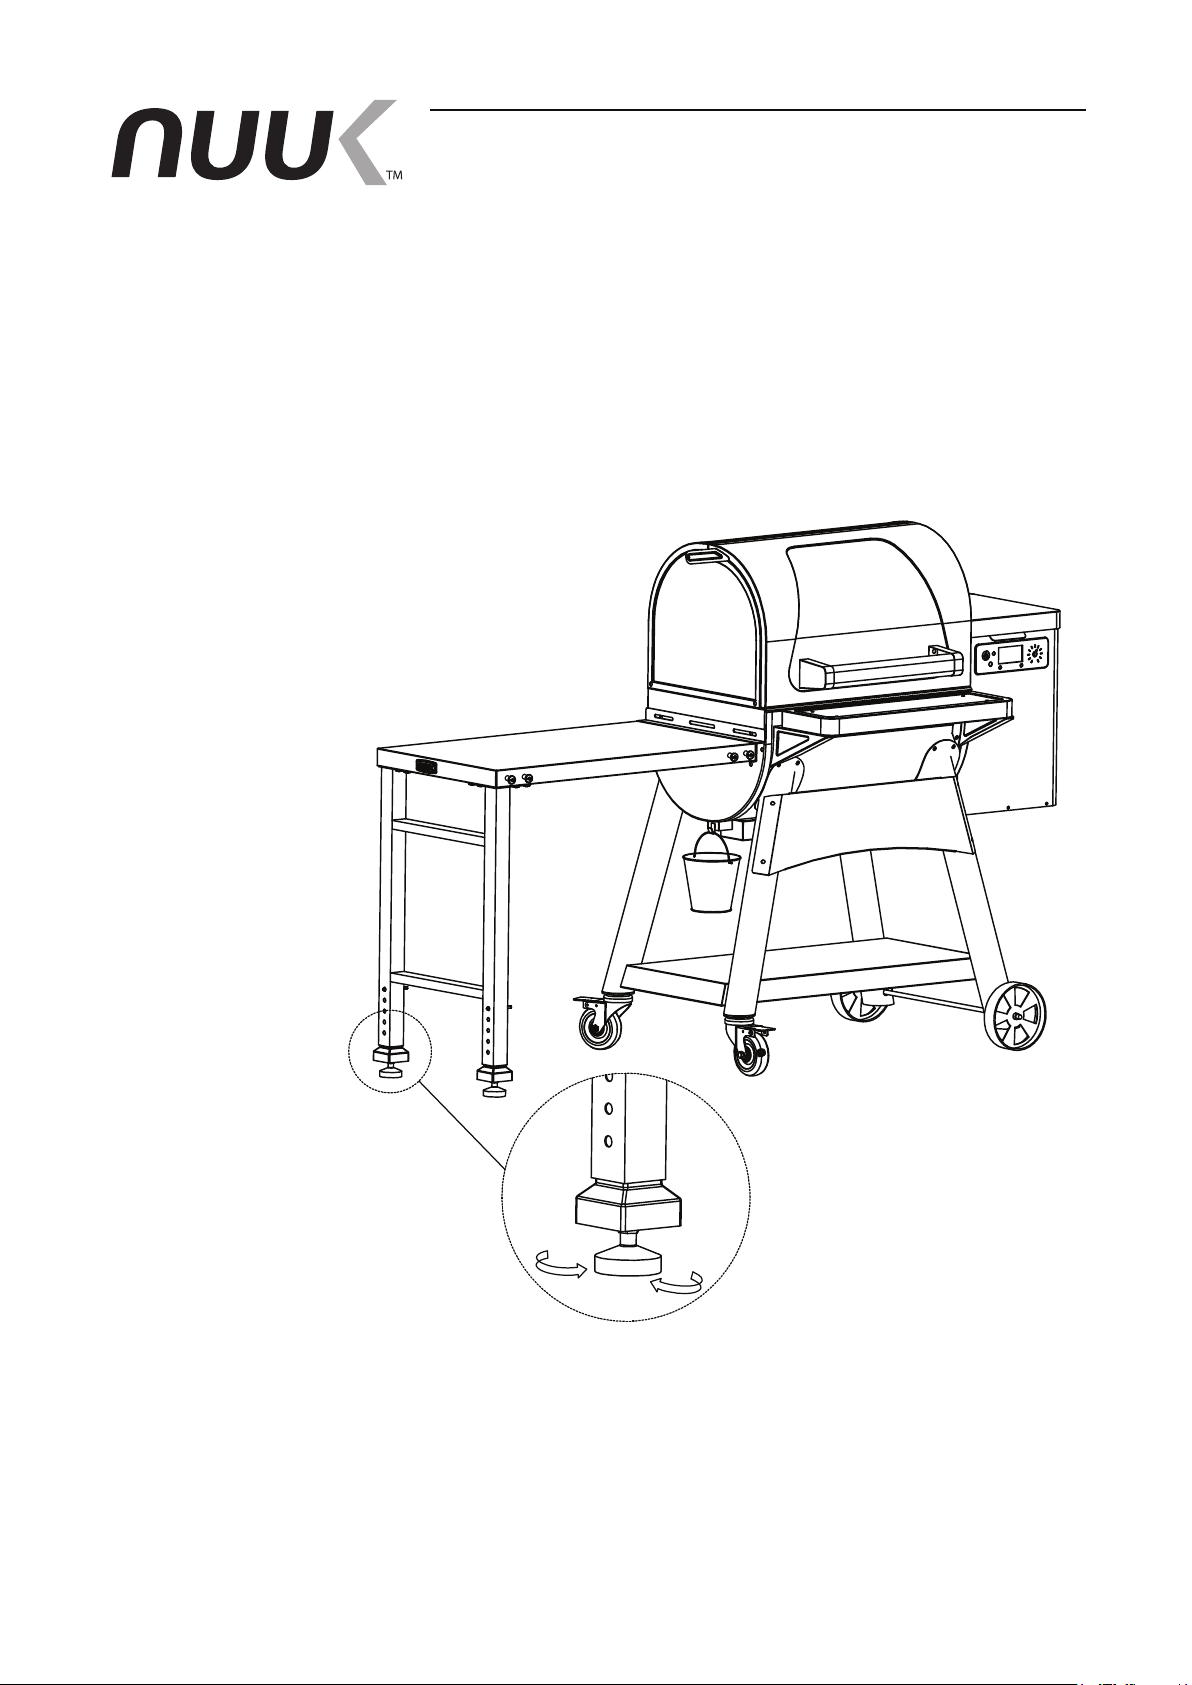
STEP 8
Due to the actual oor condition, table might not
level now.
Use adjustable feet to t the uneven oor.
13
Page 14
Assembly Instruction
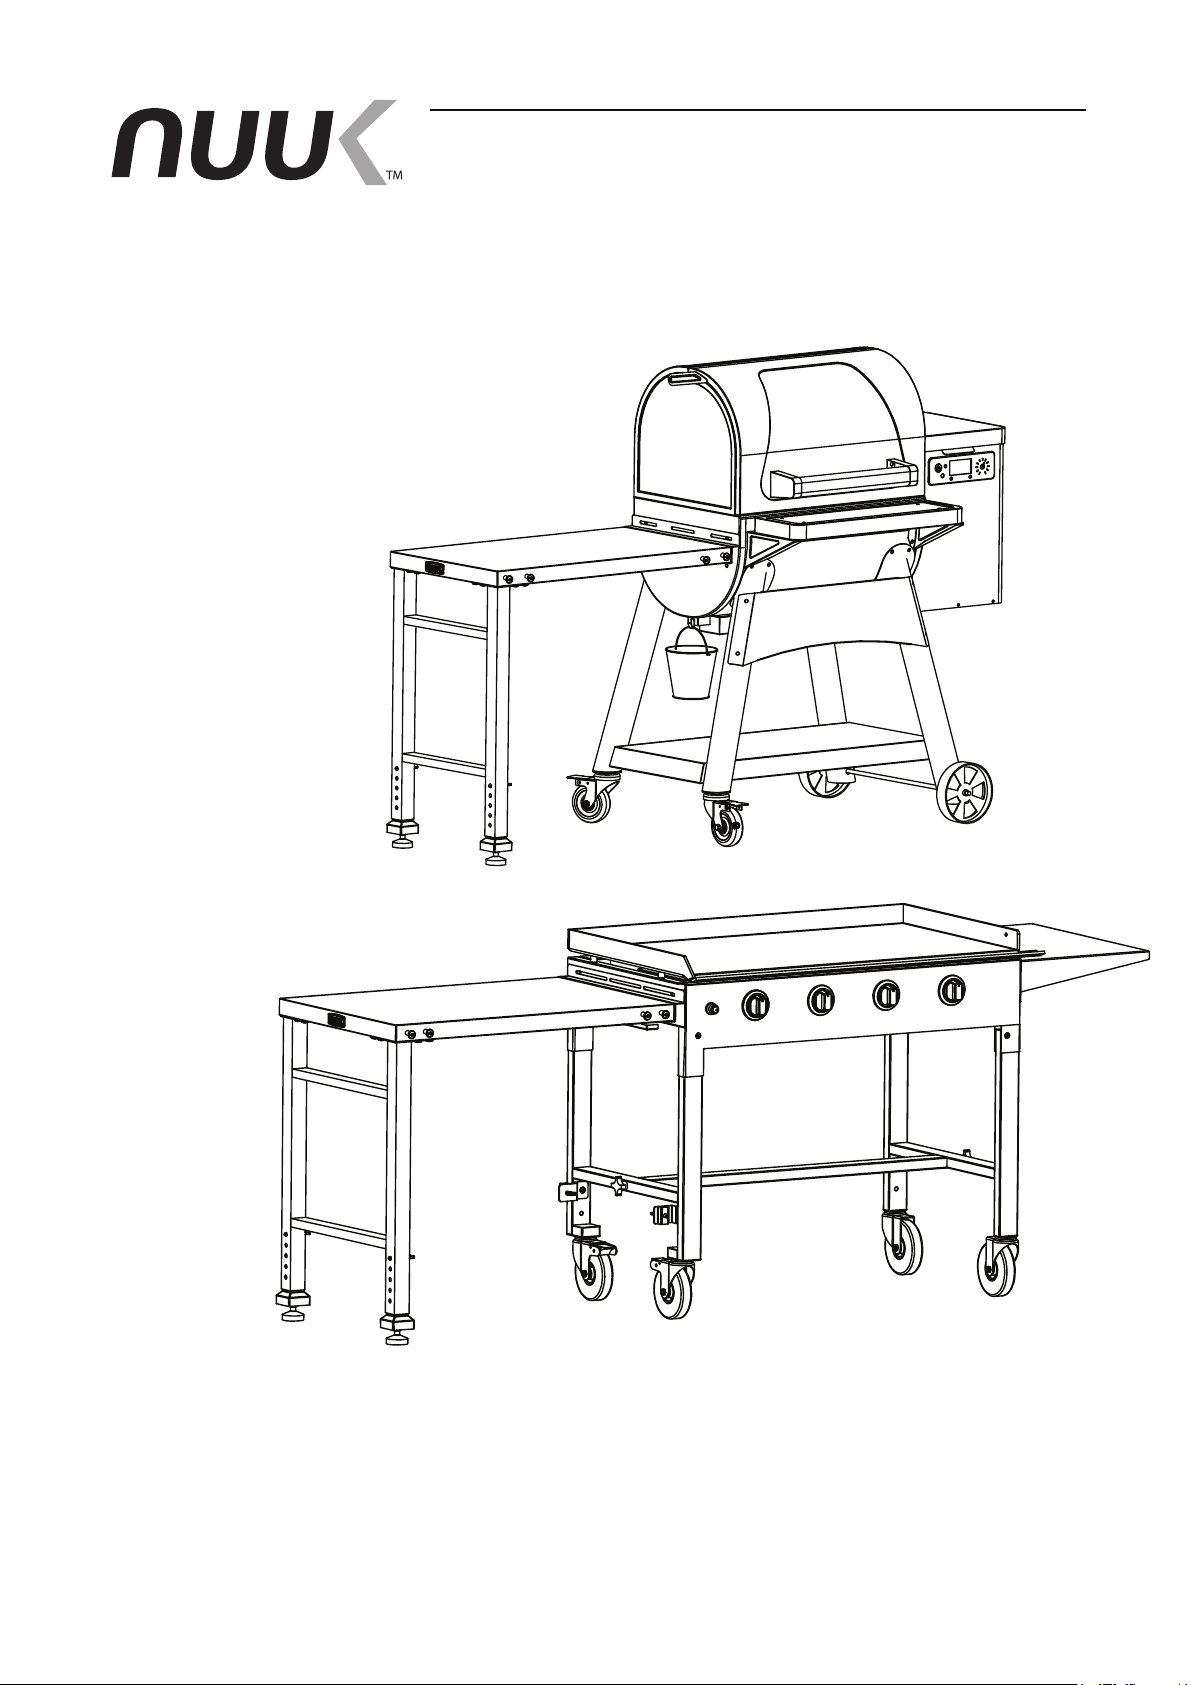
Finished Products
14
NOTE
Grill/Griddle did not include with your purchase.
Page 15

Warranty
NUUK LLC (NUUK USA)
1-YEAR WARRANTY
Proof of purchase is required to access this warranty
program, which is in effect from the date of purchase.
NUUK USA warranty covers one year from the date of
purchase. NUUK will assist you to get the replacement
parts, replace the unit. All warranties are limited to the
original purchase only. This warranty does not cover any
liability for used good purchase. The purchaser must
follow the usage instruction.
Warranty Provisions
• This warranty is non-transferable and does not cover
failure due to misuse, improper installation or
maintenance.
• This warranty is for replacement of defective parts
only. We are not responsible for incidental or
consequential damages or labor costs.
• This warranty does not cover damage caused by
abrasive or chemical cleaners, or any damage to other
components used in the installation or operation of
the table.
15
• Paint is not warranted and may require touch-up.
Page 16
NUUK customer service team
Phone: 1-800-719-8199
Monday through Friday
9:00 am to 5:00 pm, Eastern Time Zone
Email: [email protected]
NUUK USA
3343 IVY FARM CT, BUFORD, GA 30519
nuukusa.com
 Loading...