

Page 1
PKCWC
Page 2
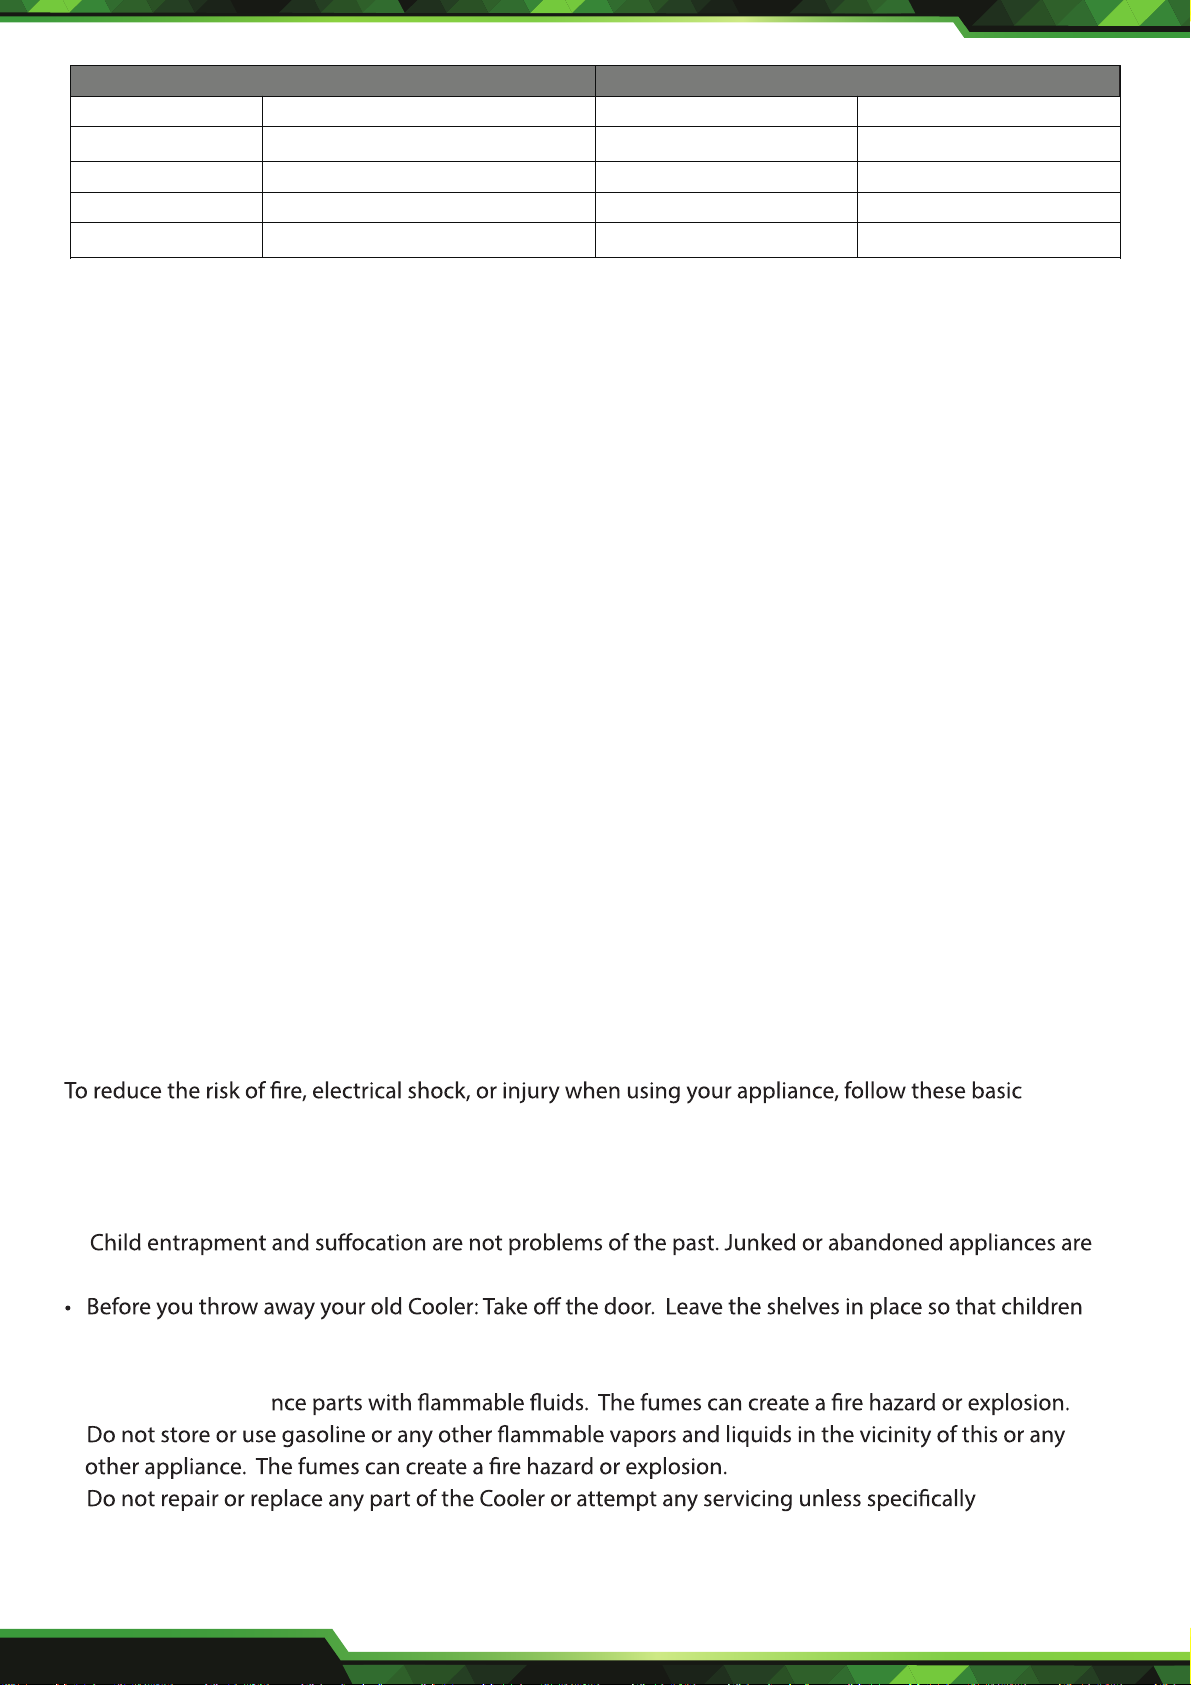
CLASSIC GLASS DOOR SERIES STAINLESS STEEL DOOR SERIES
PKCWC120
PKCWC150
12 bottles
15 bottles
PKCWC12
PKCWC15
12 bottles
15 bottles
PKCWC180
PKCWCDS188
PKCWC240
18 bottles
18 bottles (Dual-Zone)
24 bottles (Dual-Zone)
PKCWC18
PKCWCDS185
PKCWC24
18 bottles
18 bottles (Dual-Zone)
24 bottles (Dual-Zone)
CONTENTS
I. IMPORTANT SAFETY INSTRUCTIONS ..................................................................................................................................... 2
II. PARTS DIAGRAM .......................................................................................................................................................................... 3
INSTALLING THE STAINLESS STEEL HANDLE ...................................................................................................................... 5
III. TEMPERATURE CONTROL ....................................................................................................................................................... 6
IV. ELECTRIC DIAGRAM .................................................................................................................................................................. 8
V. INSTRUCTION ............................................................................................................................................................................... 9
VI. VENTILATION ............................................................................................................................................................................... 9
VII. CLEANING ................................................................................................................................................................................... 9
VIII. TROUBLESHOOTING ............................................................................................................................................................ 10
Please read all instructions carefully and follow all guidelines and rules for optimum performance and
proper appliance usage.
I. IMPORTANT SAFETY INSTRUCTIONS
WARNING
precautions
• Read all instructions before using the Cooler.
• DANGER or WARNING: Risk of child entrapment.
still dangerous even if they will “just sit in the garage a few days”.
may not easily climb inside.
• Never allow children to operate, play with, or crawl inside the appliance.
• Never clean applia
•
•
recommended in the user-maintenance instructions or in published user-repair instructions.
Replace the fuse with the same type.
-Save these instructions-
www.NutrichefKitchen.com
2
Page 3
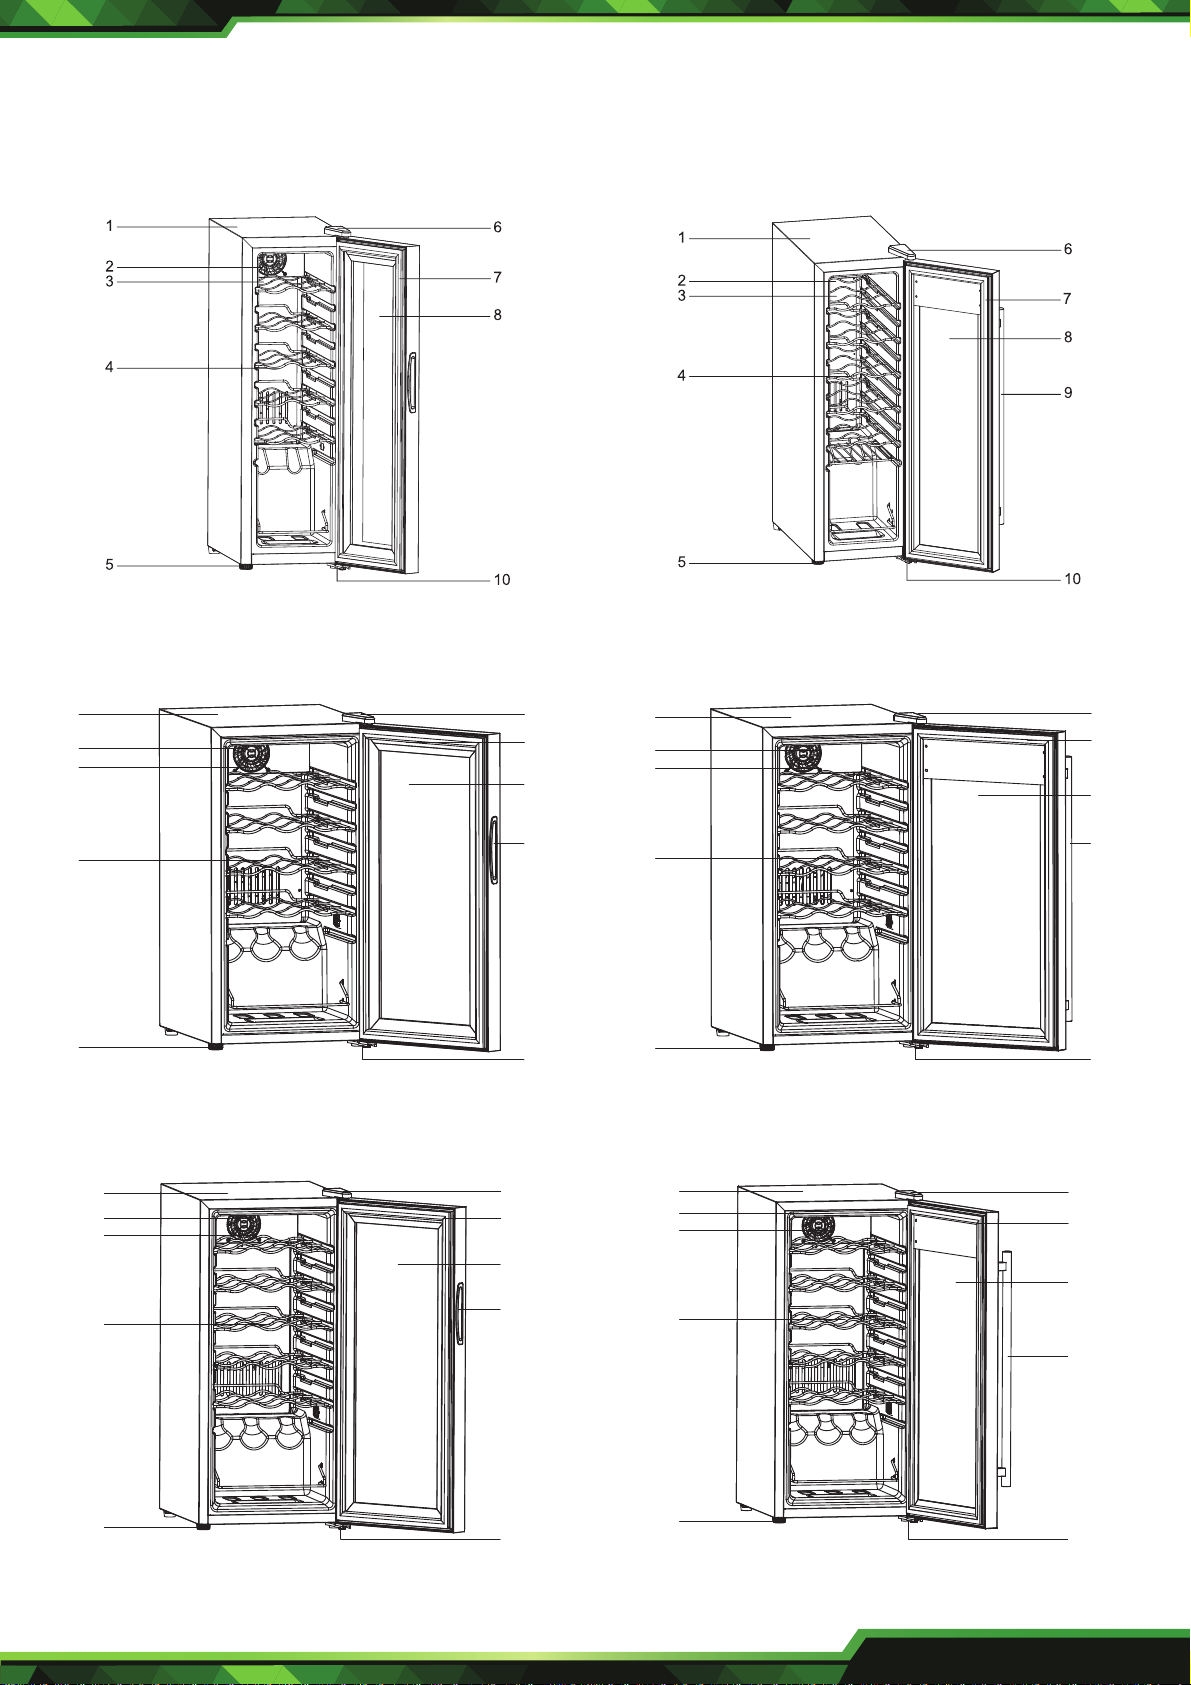
II. PARTS DIAGRAM
• Model No: PKCWC120
• Model No: PKCWC150
1
2
3
• Model No: PKCWC12
• Model No: PKCWC15
6
7
8
1
2
3
6
7
8
9
4
5
10
4
5
• Model No: PKCWC180 • Model No: PKCWC18
1
2
3
4
6
7
8
9
1
2
3
4
9
10
6
7
8
9
5
10
5
www.NutrichefKitchen.com
10
3
Page 4
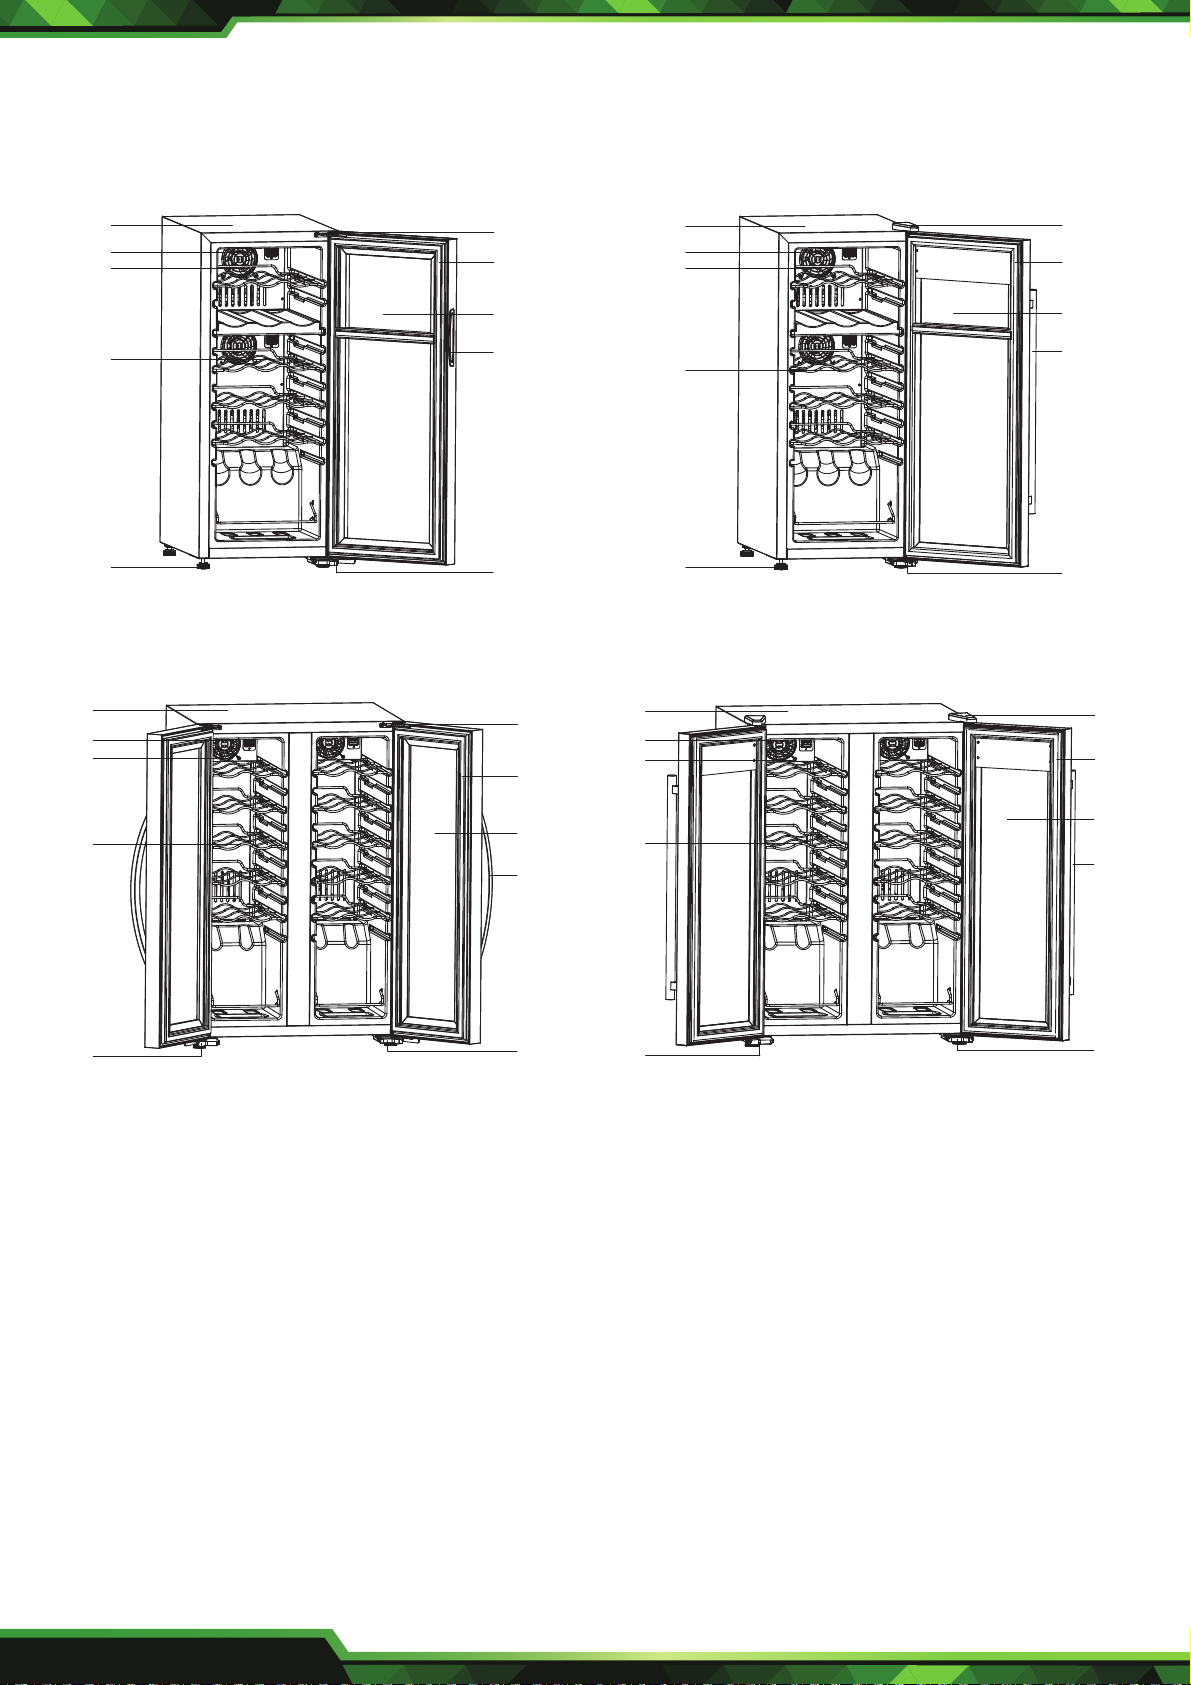
II. PARTS DIAGRAM
• Model No: PKCWCDS188
1
2
3
4
5
• Model No: PKCWC150
1
2
3
6
7
8
9
10
• Model No: PKCWCDS185
1
2
3
4
5
6
7
8
9
10
• Model No: PKCWC15
6
1
2
7
3
6
7
4
5
1. Cabinet
2. Fan
3. Fan Cover
4. Shelves
5. Foot
8
9
10
6. Upper Hinge
7. Door Gasket
8. Glass Door
9. Stainless Steel Handle
10. Bottom Hinge
8
4
9
5
10
www.NutrichefKitchen.com
4
Page 5
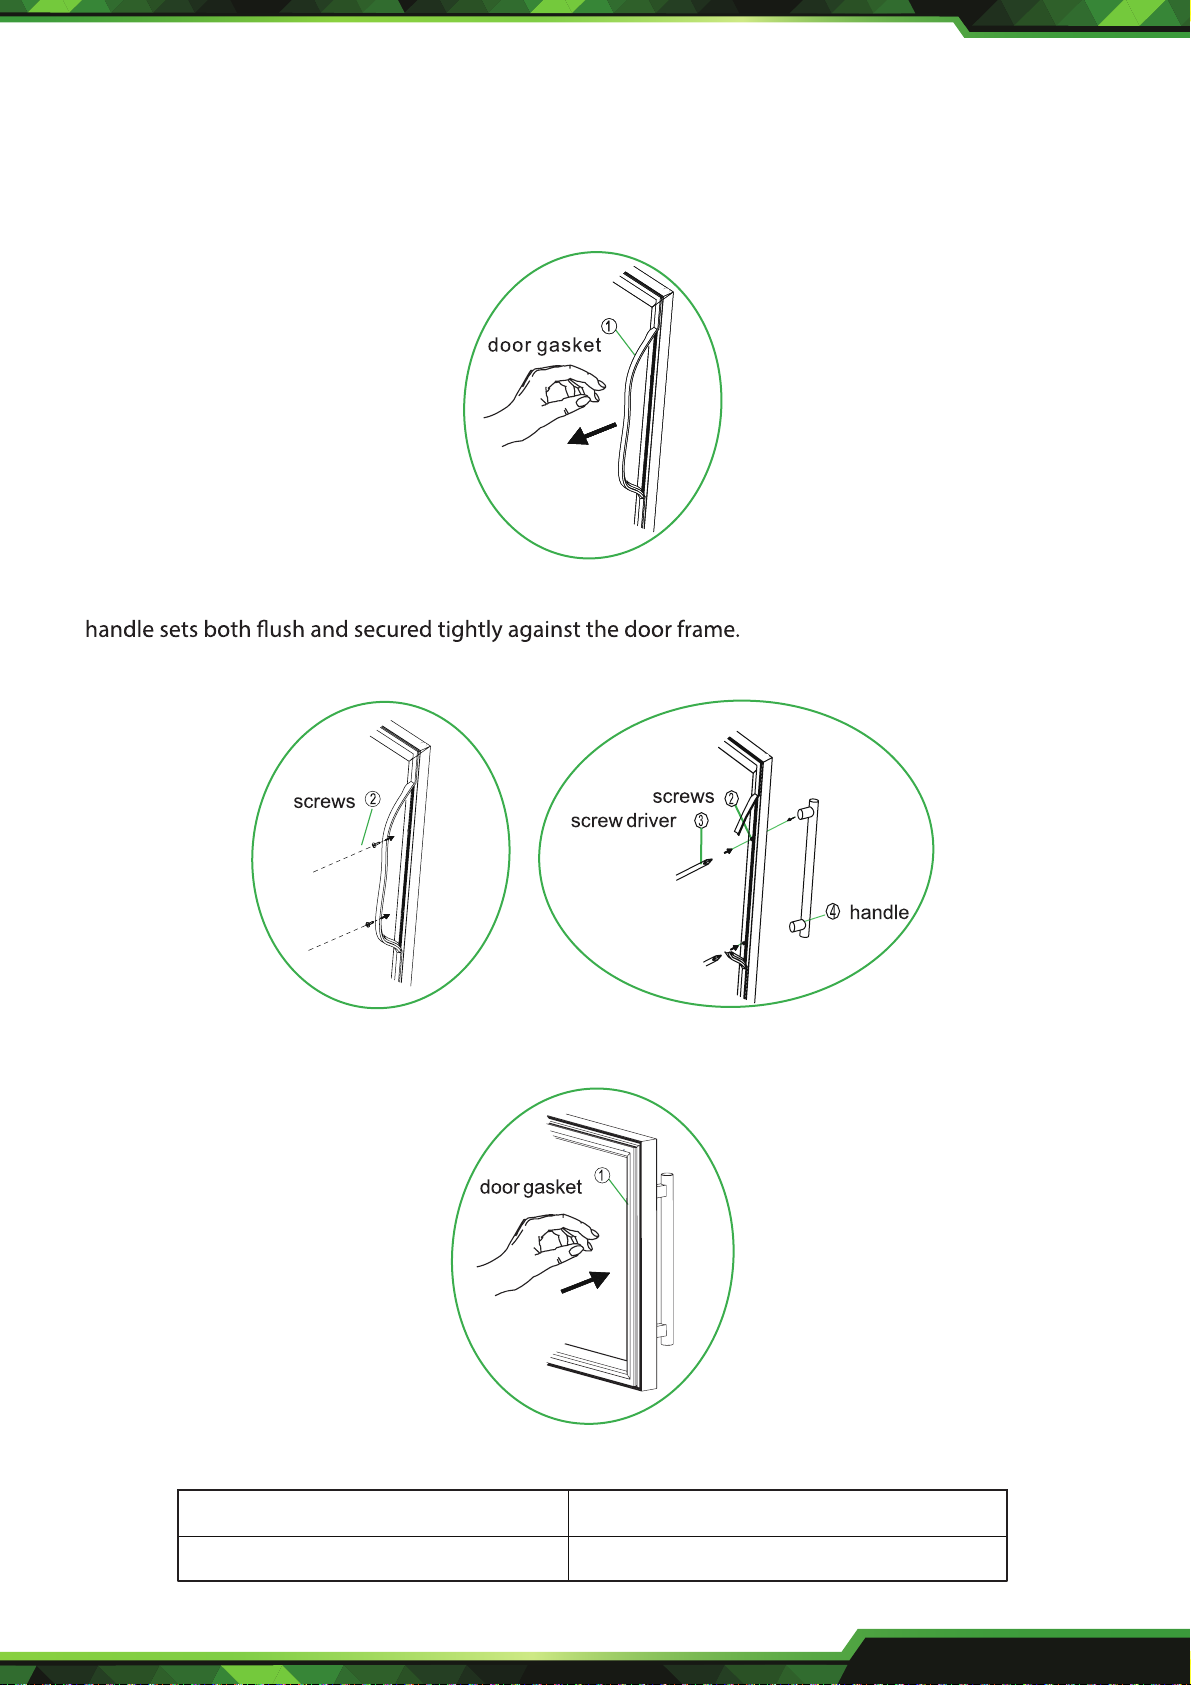
INSTALLING THE STAINLESS STEEL HANDLE
For PKCWC12, PKCWC15 Models only
This wine cellar includes a stainless steel handle. To install the handle please follow the below instructions:
1. Pull away the door gasket in the area where the handle is to be installed on the left side as shown below
in illustration #1. The gasket can easily displaced by hand, no tools are necessary.
2. Align the handle with the screws installed. Tighten the screws using a Phillips head screwdriver until the
(DO NOT over tighten as this will cause damage to the handle assembly).
3. Replace the door gasket to its original position.
1. Gasket
3. Phillips Head Screw
2. Phillips Head Screw Driver
4. Handle
www.NutrichefKitchen.com
5
Page 6
III. TEMPERATURE CONTROL
● It is recommended that the wine cooler should be installed in an area where the ambient temperature
is between 16-26ºC (60-80ºF).
● If the ambient temperature is above or below the recommended ranges, the unit’s performance may be
prevent the optimal range from being reached. In addition, keep in mind that the temperature may
the upper, middle, or lower racks.
RECOMMENDED TEMPERATURES FOR CHILLING WINE
RED WINES
DRY/WHITE WINES
ROSE WINES
14 - 18ºC
9 - 14ºC
10 - 11ºC
57- 65ºF
49- 58ºF
51- 53ºF
TEMPERATURE RANGES FOR YOUR WINE COOLER
PKCWC12/PKCWC120
PKCWC15/PKCWC150
PKCWC18/PKCWC180
PKCWCDS188
PKCWCDS185
PKCWC24
5 - 18°C (Upper Zone)
5 - 18°C (Lower Zone)
5 - 18°C (Left Zone)
PKCWC240 5 - 18°C (Right Zone) 41 - 64°F (Right Zone)
5 - 18°C
5 - 18°C
5 - 18°C
41 - 64°F
41 - 64°F
41 - 64°F
41 - 64°F (Upper Zone)
41 - 64°F (Lower Zone)
41 - 64°F (Left Zone)
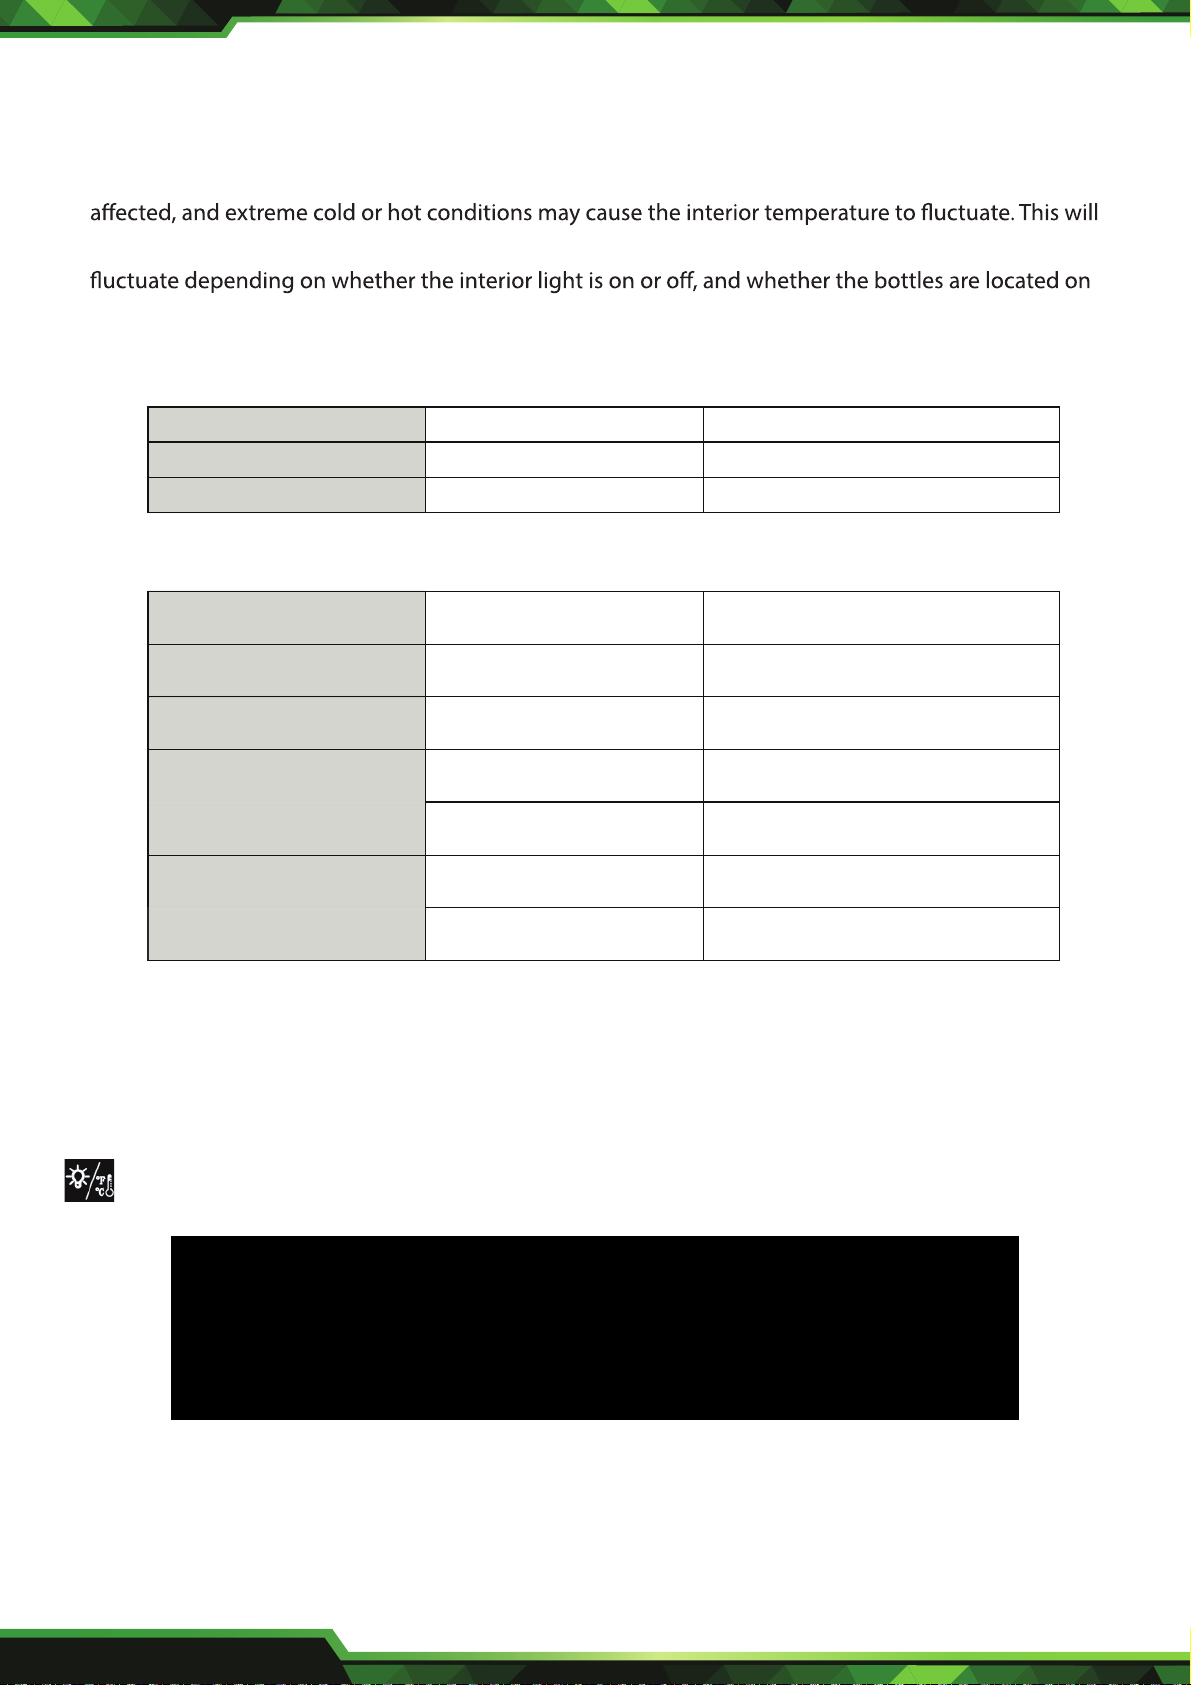
CONTROL PANEL
●
For PKCWC12 / PKCWC120 / PKCWC15 / PKCWC150 / PKCWC18 / PKCWC180 / PKCWC24 / PKCWC240
Models only.
● You can select temperature display between Fahrenheit and Celsius setting by pressing this button
● You can turn the interior light ON or OFF by short pressing this button.
SETTING THE TEMPERATURE CONTROL
● Your cooler is equipped with a control panel lock feature which will lock itself automatically 20 seconds
after the last time a button is pressed.
www.NutrichefKitchen.com
6
Page 7
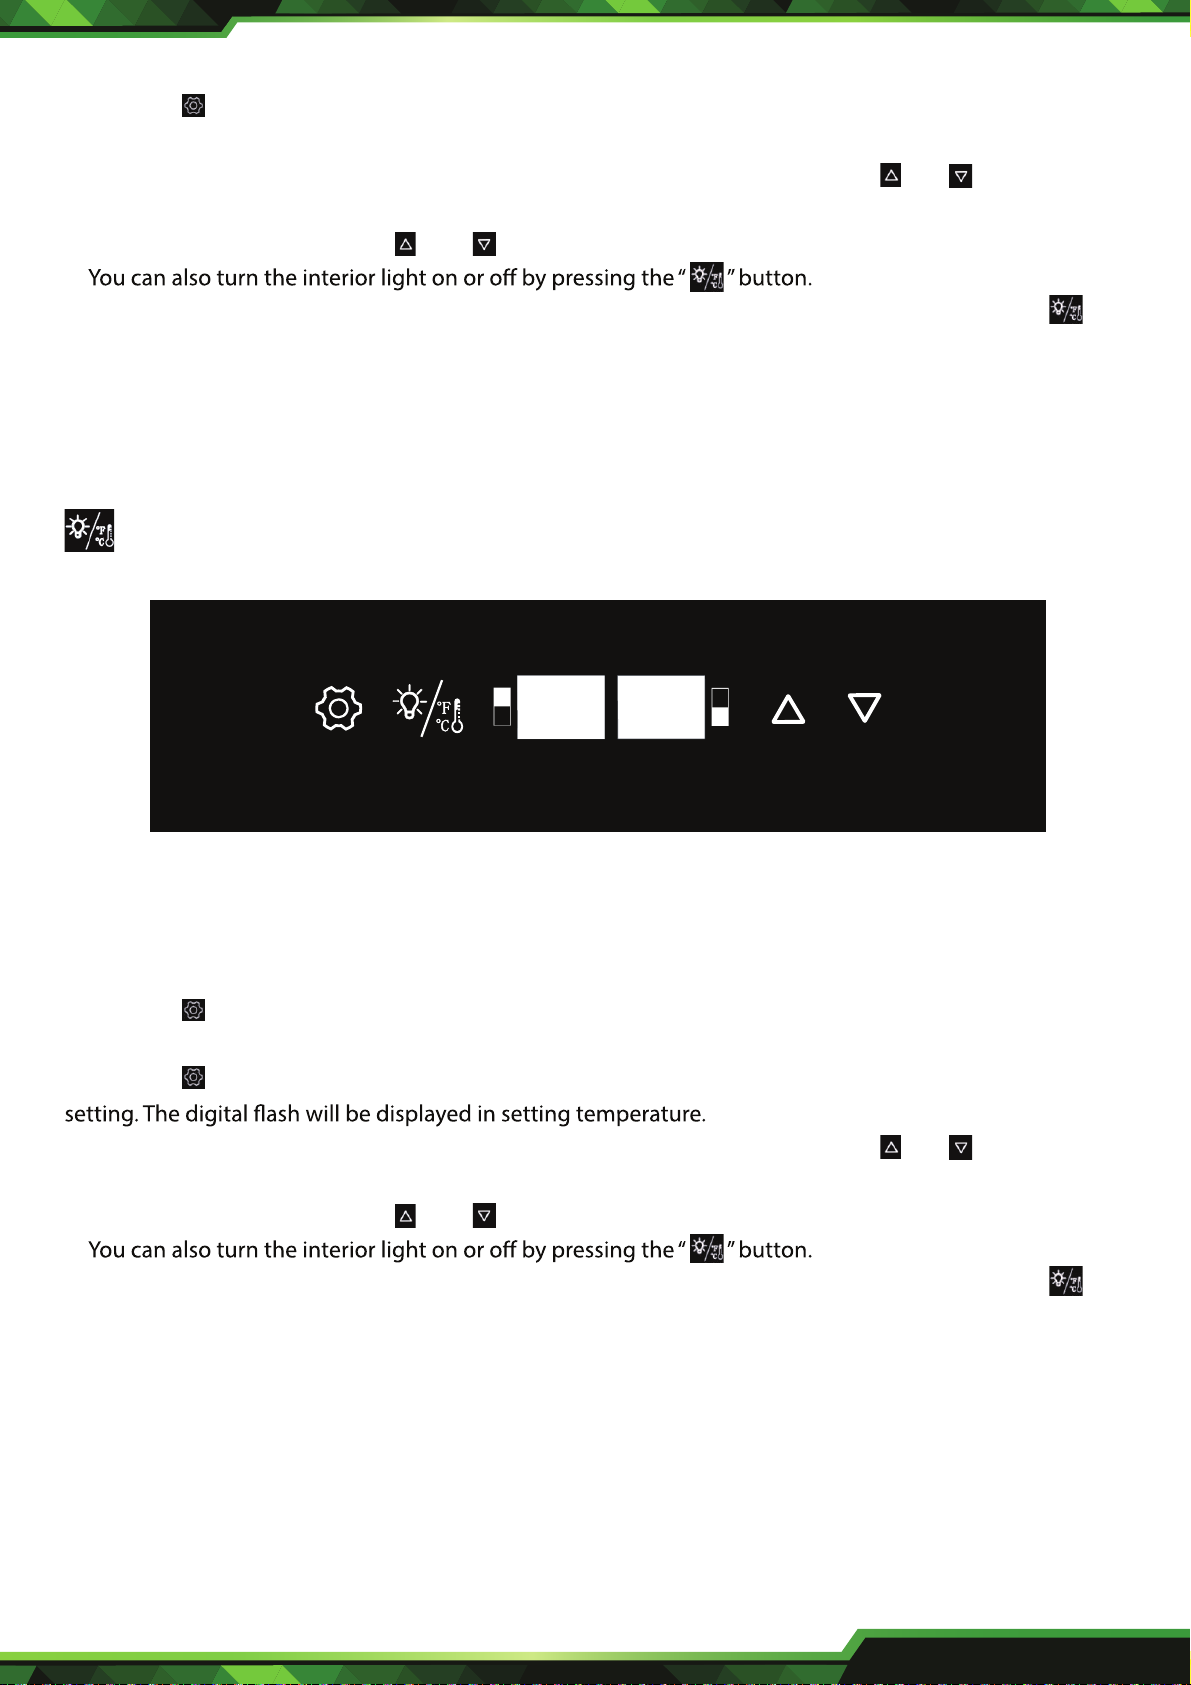
● Press the button to unlock the control panel. You will hear a “BEEP” sound to alert you that the
control is now active.
● You can manually adjust the temperature inside Cooler by pressing the buttons and on the display
panel.
The two buttons on the panel and adjust the temperature in increments of 1ºC or 1ºF
●
● The light will be turned OFF automatically if it remains ON for 10 minutes. You have to push the “ ”
CONTROL PANEL
●
For PKCWCDS188 / PKCWCDS185 Models only.
● You can select temperature display between Fahrenheit and Celsius setting by pressing this button
● You can turn the interior light ON or OFF by short pressing this button.
SETTING THE TEMPERATURE CONTROL
● Your cooler is equipped with a control panel lock feature which will lock itself automatically 20 seconds
after the last time a button is pressed.
● Press the button to unlock the control panel. You will hear a “BEEP” sound to alert you that the
control is now active.
● Press the button shortly to select and switch the lower zone and switch upper zone for temperature
● You can manually adjust the temperature inside Cooler by pressing the buttons and on the display
panel.
The two buttons on the panel and adjust the temperature in increments of 1ºC or 1ºF
●
● The light will be turned OFF automatically if it remains ON for 10 minutes. You have to push the “ ”
www.NutrichefKitchen.com
7
Page 8
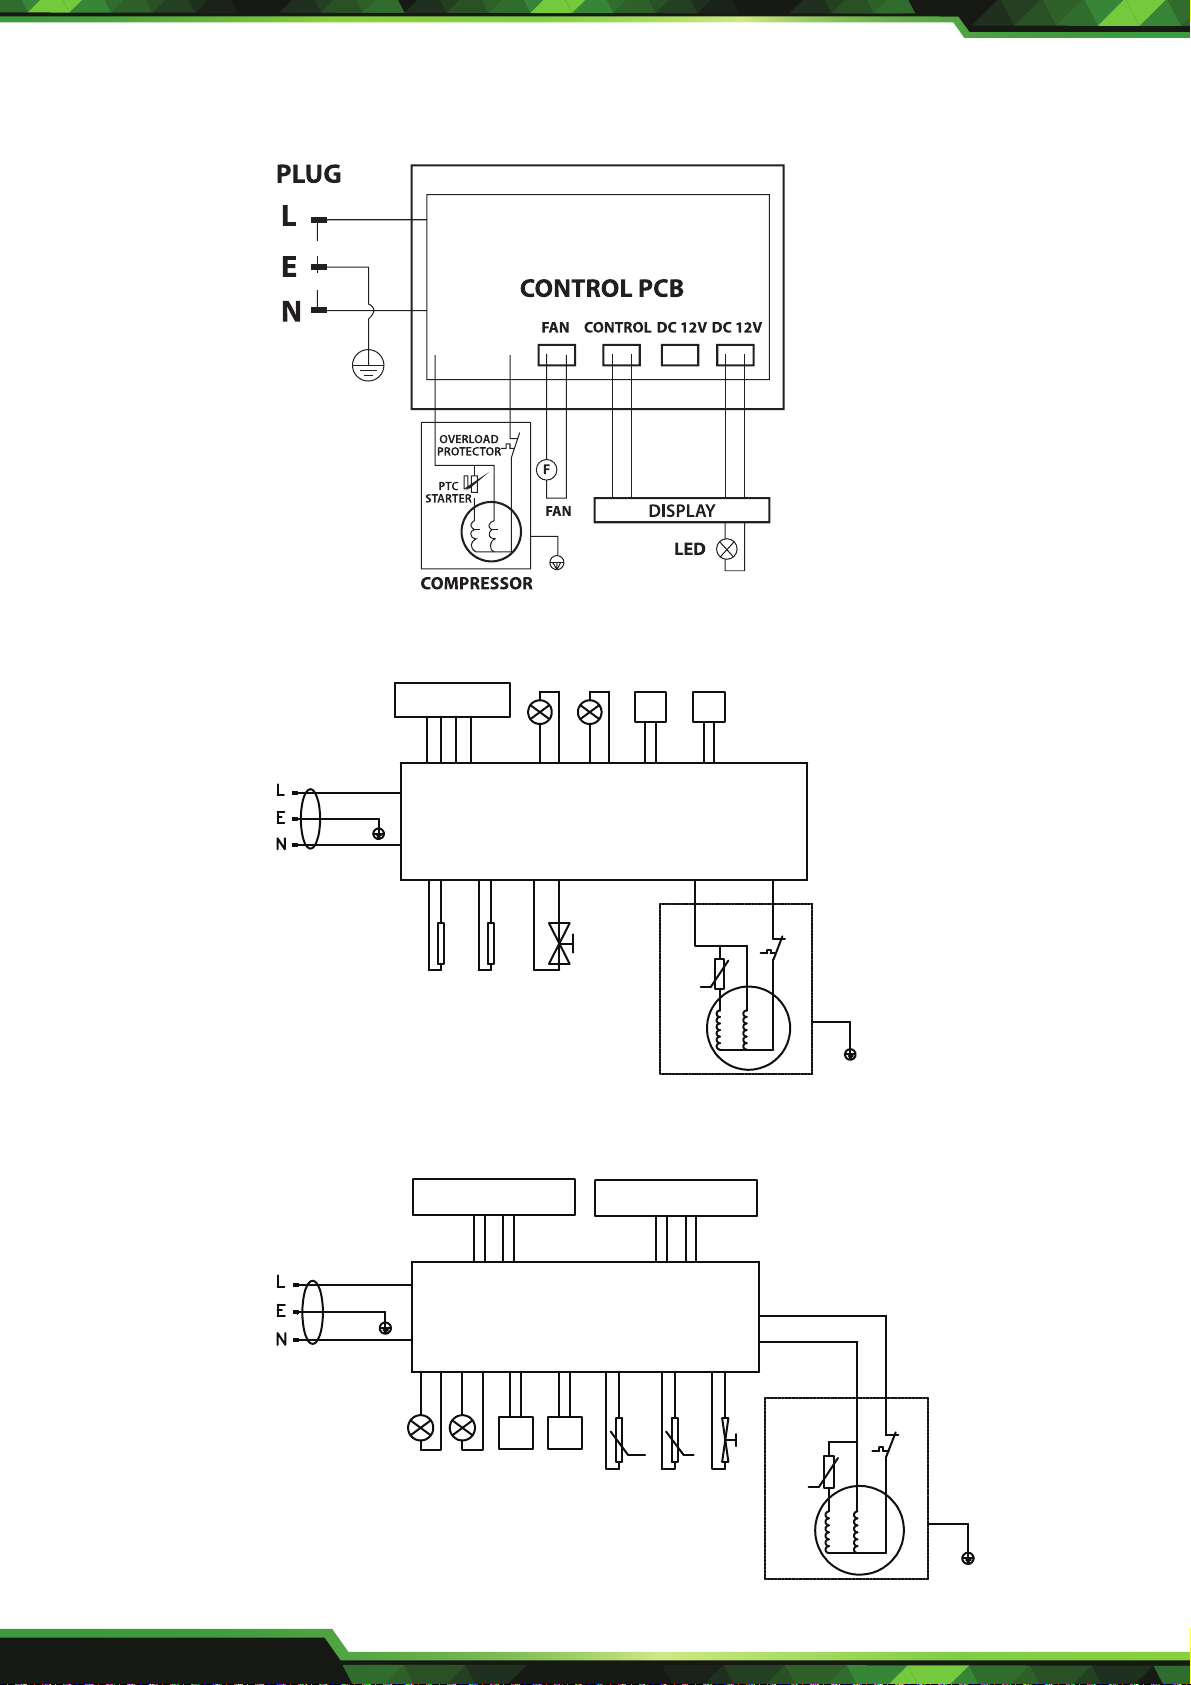
IV. ELECTRIC DIAGRAM
(For PKCWC120, PKCWC150, PKCWC180, PKCWC12, PKCWC15, PKCWC18 only)
(For PKCWCDS188, PKCWCDS185 only)
PLUG
YE/GN
(For PKCWC240, PKCWC24 only)
DISPLAY
NTC1 NTC2
DISPLAY 1
LED1
LED2
Control board
electromagnetic
Valve
FAN1 FAN2
PTC
STARTER
θ
COMPRESSOR
DISPLAY 2
OVERLOAD
PROTECTOR
www.NutrichefKitchen.com
8
PLUG
YE/GN
LED1
LED2
Control board
FAN1 FAN2
NTC1
θ
NTC1
electromagnetic
Valve
PTC
θ
STARTER
θ
COMPRESSOR
OVERLOAD
PROTECTOR
YE/GN
Page 9
V. INSTRUCTION
Note:
● Position your wine cooler so that the plug is accessible
● Keep your wine cooler out of direct sunlight.
● Do not place next to heat generating appliance.
● Place the wine cooler on a leveled surface that is strong enough to support the unit when it is fully
loaded. To level your wine cooler, adjust the front feet located at the bottom of the unit.
Important:
● Position the cooler in a dry and airy place with ambient temperature between 5-32°C (41-90°F).
● Before connecting the unit to a power source, allow it stand upright for approximately 2 hours. This will
reduce the possibility of any system malfunctions which may have occurred from handing during
transportation.
● When positioning the wine cooler, 6 inches of space at the back and 10 inches of space both sides are
suggested. Do not put any objects on top of the unit which may block the air circulation.
Power Connection:
● This wine cooler should be properly grounded for your safety and in order to minimize the possibility of
outlets.
● Never cut or remove the ground wire from the supplied power cord.
● The use of extension cords is not recommended.
● This unit requires a standard 110V-60Hz electrical outlet with a 3-pin plug.
● The cord should be secured behind the wine cooler. Also, to prevent accidental injury, do not expose or
dangle the cord.
VI. VENTILATION
● Do not install the wine cooler in a closed cabinet without proper ventilation.
● Please leave at least 6 inches distance between the wall and the wine cooler.
● Do not remove the feet of the wine cooler. Keep at least 50mm of ground clearance.
VII. CLEANING
● UNPLUG the Wine Chiller, and remove all items including shelves.
● Wash the inside surfaces with a warm water and baking soda solution. The solution should be about 2
tablespoons of baking soda to a quart of water.
● Wash the shelves with a mild detergent solution.
● Wring excess water out of the sponge or cloth when cleaning area of the controls, or any electrical parts.
● Wash the outside cabinet with warm water and mild liquid detergent. Rinse well and wipe dry with a
clean soft cloth.
www.NutrichefKitchen.com
9
Page 10
VIII. TROUBLE SHOOTING
PROBLEM POSSIBLE CAUSES AND MAINTENANCE MEASURES
The wine cooler will not operate
The wine cooler is not cold enough
The wine cooler vibrates while
operating
The wine cooler produces
a lot of noise
●
the circuit breaker may be tripped or there is a blown fuse.
● Check the temperature control settings, as the external
The most ideal ambient temperature for compressor cooling
wine cooler is 5C-32C (41F-90F).
● The door may be opened too frequently.
● The door is not closed completely.
● The door seal does not seal properly.
●
near Heat sink fan on the back within 10cm area.
● The wine cooler includes too much items, as the IT need
some time to cool down and remain stable. Please wait for
24h and check again.
● Make sure the unit is leveled.
Please adjust the foot if necessary
● The unit may not be leveled.
● Check the fan, as noise will increasing if your wine cooler
have much dust on the fan after using for a long time.
Please use hair dryer and set strong position to blow away
dust on the fan.
The wine cooler will not
close properly
The LED display does not work
There is an LED display error
The buttons do not function
Frost or ice developed
inside the wine cooler
● The unit may not be leveled.
● The doors are reversed and not properly installed.
● The seal is weak.
● There may be a problem with the main control board.
● There is a problem with the plug. Please check to assure
plug is be in good connection with socket or already
plugged in.
● The digital control panel will lock automatically after
10 seconds if no further operation Please press the
unlock button to activate the wine cooler.
● There is a PCB problem.
● The temperature control panel may be damaged.
● Ambient temperature too low.
● The wine cooler needed to be restarted
Questions? Issues?
We are here to help!
Phone: (1) 718-535-1800
Email: [email protected]
www.NutrichefKitchen.com
10
This product can expose you to a chemical or group of checmicals, which may include
”Styrene” which is known in the state of California to cause cancer, birth defects, or other
reproductive harm. For more info, go to https://www.p65warnings.ca.gov/.
Page 11

 Loading...