

Page 1
WS-LD
water Sensor
Ϥ
˄
5
Ϥ
2
Ϥ
Item 001
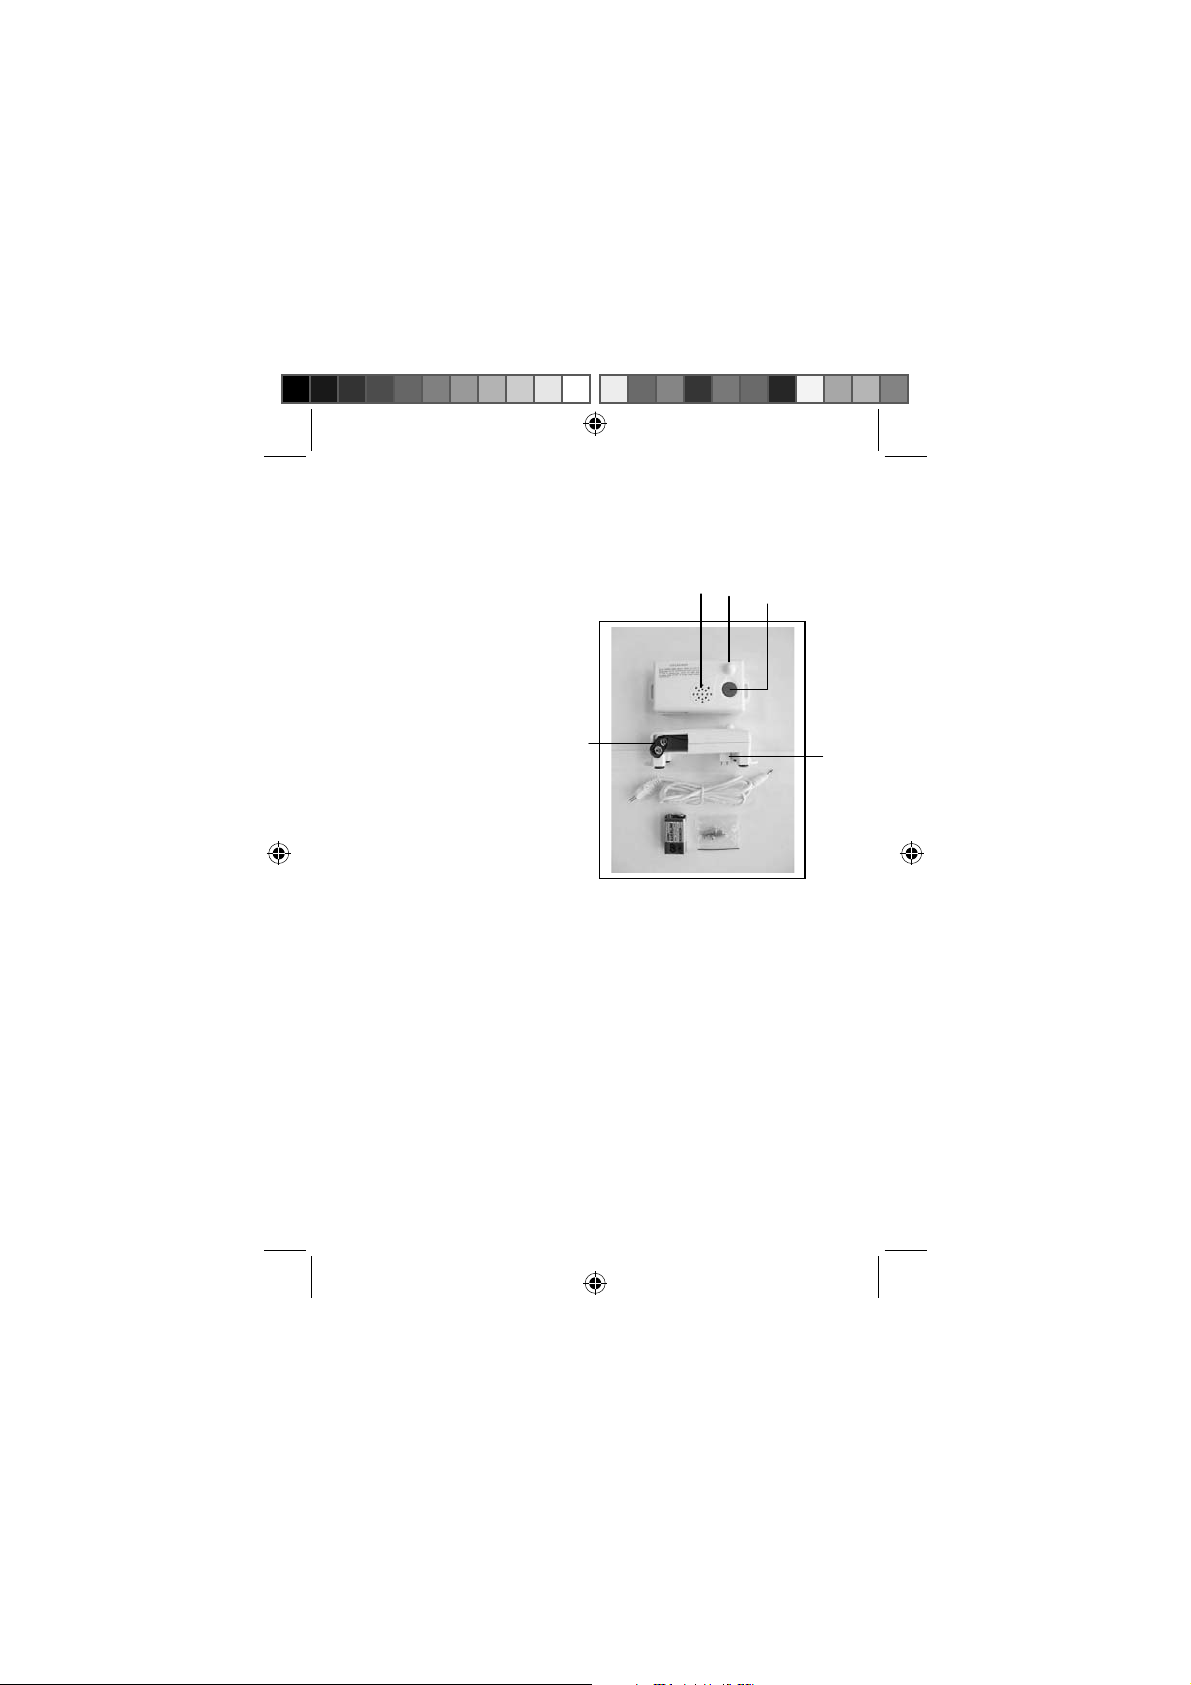
Identifying the Parts:
1. Antenna
2. Learn I Test Button
3. Probe (Water Detection)
4. Battery Lid
5. Buzzer
Accessories:
1 Probe cable
1 Set of mounting screws
1 Battery
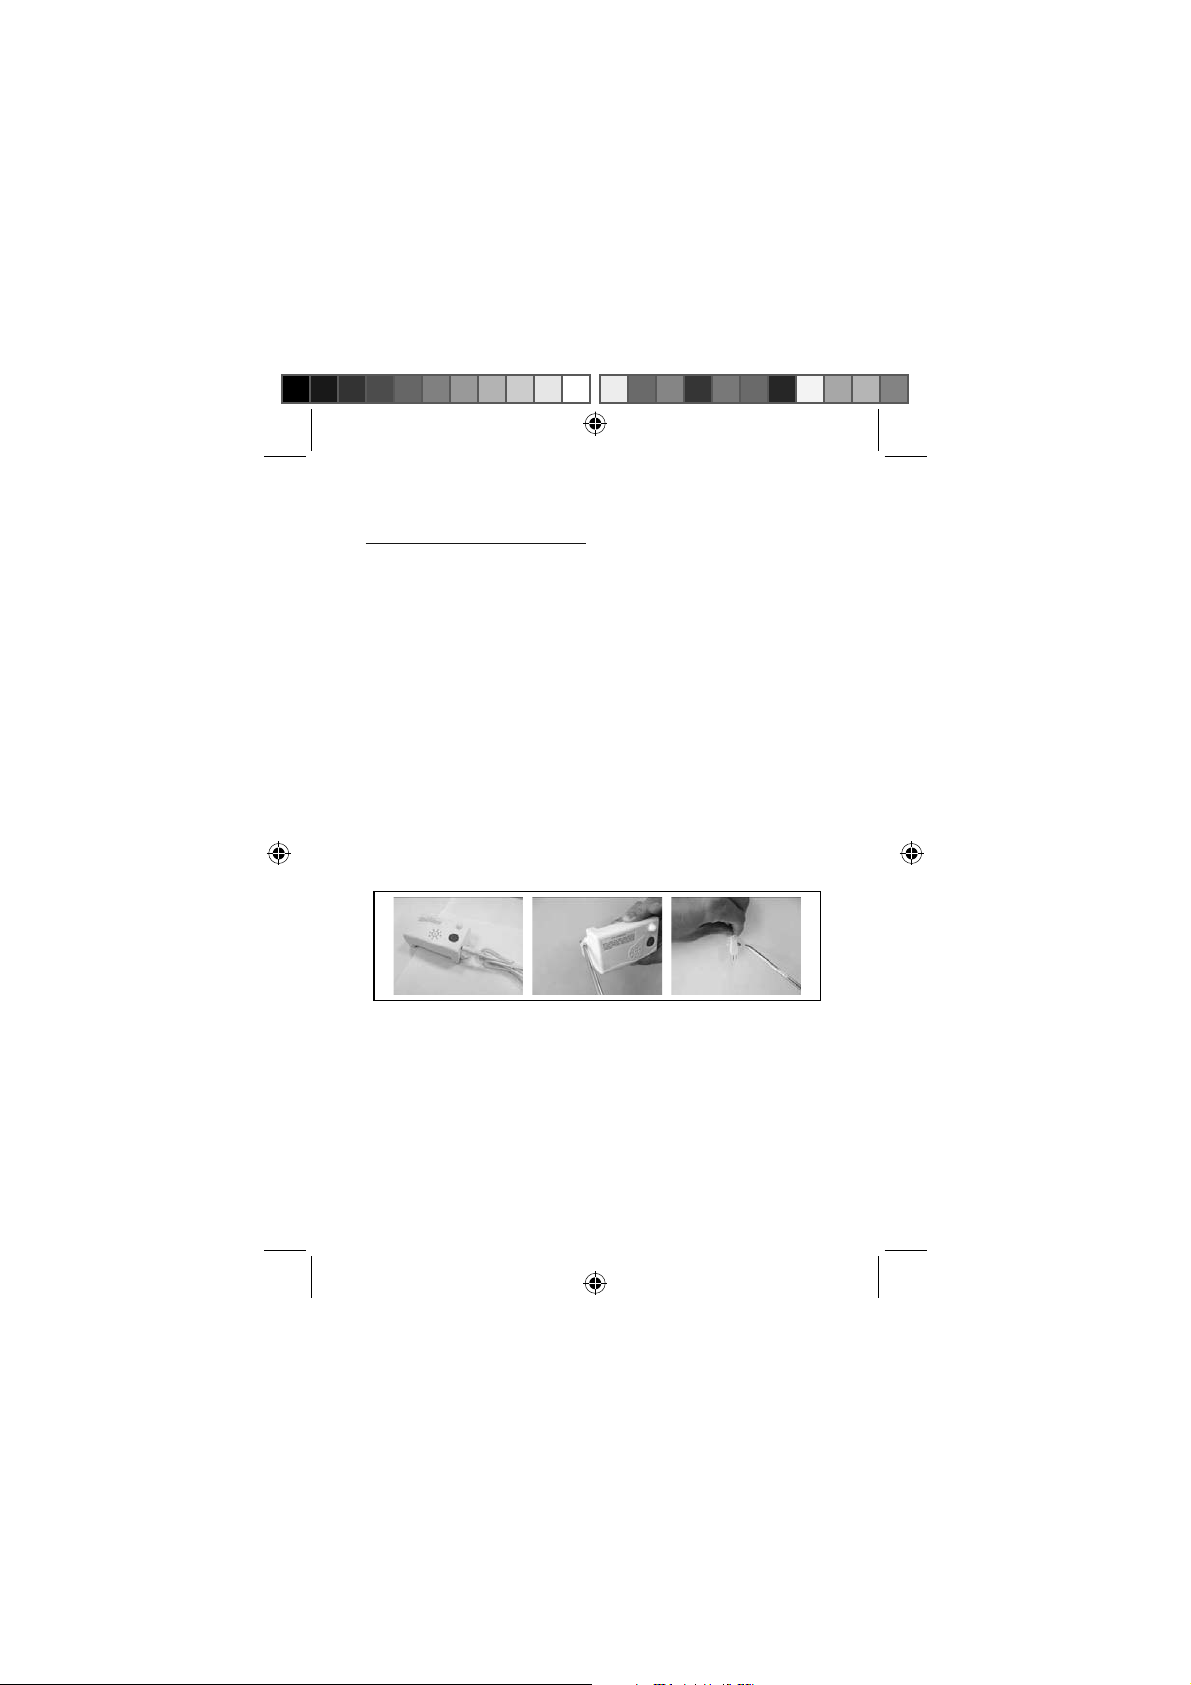
Getting Started
Remove battery lid by sliding it the direction of the arrow
.
on the bottom of the water sensor.
.
Pull battery clip out and connect to battery then re-insert into
the water sensor.
* Programming Sensor to Receiving Devices:
Put the receiving device in to Learning mode (see
instruction for your particular receiving device). Press Red
Button on Sensor being learned. If additional sensors need
to be learned press Red button on next device.
Ϥ
4
Ϥ
3
Page 1
XT.MExbufstfotpsnbovbm/qeg!!!2XT.MExbufstfotpsnbovbm/qeg!!!2 312105026!!!Πϱ!14;42;3:312105026!!!Πϱ!14;42;3:
Page 2
Programming the Water Sensor directly to a Motorized Valve
Control Unit:
. Enter VCU's in to learning mode by holding the red button
Located on the
release the button, the VCU will sound a long beep and the LED will
turn on.
bottom panel for 5 seconds. A short beep will sound
. Now on the Sensor press the Red Button, two beeps indicate
Successful learning. Press VCU's red button to exit Learning mode.
Positioning the Water Sensor
Mount using the provided screws.
* Probe Extender may be used to monitor hard-to-reach places.
Or when the unit is mounted high up on the wall, or when a pad
is required to cover a larger radius space.
To activate the extender, insert probe extender plug into the
socket on the Sensor's probe and mount using the screws
provided
in place on level surface or wall
ʳ
Page 2
XT.MExbufstfotpsnbovbm/qeg!!!3XT.MExbufstfotpsnbovbm/qeg!!!3 312105026!!!Πϱ!14;42;55312105026!!!Πϱ!14;42;55
Page 3
Normal Operation:
.
When the probe touches water, the sensor will sound an alarm
and send a signal to a receiving device. If the signal is sent to a VCU
unit, it will close the valve. Sensor will continue alert until the probe
is dry. Sensor can be reset or alarm silenced by pressing the Red
Button.
.
For FCC Compliance
NOTE: To comply with the FCC RF exposure
compliance requirements, no change to the antenna or
the device is permitted. Any change to the antenna or the
device could result in the device exceeding the RF
exposure requirements and void user’s authority to
operate the device.
Furthermore:
by the party responsible for compliance could void the user’s authority to
operate the equipment.
Page 3
XT.MExbufstfotpsnbovbm/qeg!!!4XT.MExbufstfotpsnbovbm/qeg!!!4 312105026!!!Πϱ!14;42;55312105026!!!Πϱ!14;42;55
The changes or modifications not expressly approved
Page 4

Limited Warranty
Condoplex warrants it’s products for a period of two years from the date of purchase,
this product will be free from defects in material and workmanship. Condoplex at its
option will repair or replace this product or any component of the product found to be
defective during the warranty period. Replacement will be made with a new or
remanufactured product or component. Product requires an RMA number and shall be
shipped to Condoplex or authorized service centre at the customer`s expense,
Condoplex will return repaired product ground service back to customer.
If the product is no longer available replacement may be made with a similar product.
This is your exclusive, nontransferable warranty. Keep the original sales receipt. Proof
of purchase is required to obtain warranty performance. Condoplex service centers, or
retail stores selling this products do not have the right to alter, modify or in any way
change the terms and condition of this warranty. This warranty does not cover normal
wear of parts or damage resu1ting from any of the following: negligent use or misuse
of the product,
use of improper voltage or current, use contrary to the operating instructions,
disassembly, repair or alteration by anyone other than Condoplex or an authorized
service center. Further, the warranty does not cover acts of God such as fire, flood,
hurricanes and tornadoes or any batteries that are used in this unit.
It is your responsibility to regularly test the function ability of the product to ensure
proper operation. Condoplex shall not be liable to any party for any damages that
results from the failure of this product. Condoplex shaI1 not be liable for any incidental
or consequential damages caused by the breach of any express or implied warranty.
Except to the extent prohibited by applicable law, any implied warranty or
merchantability or fitness for a particular purpose is limited in duration to the duration
of the above warranty. Some states, province or jurisdiction do not allow the exclusion
or limitation of incidental or consequential damages or limitations on how long an
implied warranty lasts, so the above limitations or exclusions may not apply to you.
This warranty gives you specific legal rights, and you may also have other rights that
vary from state to state or province to province.
Page 4
XT.MExbufstfotpsnbovbm/qeg!!!5XT.MExbufstfotpsnbovbm/qeg!!!5 312105026!!!Πϱ!14;42;55312105026!!!Πϱ!14;42;55
Page 5

equipment. Such modifications could void
the user’s authority to operate th
equipment.
FCC ID : ELVNTJD
This device complies with FCC Rules Part
15 Operation is subject to the following
two conditions (1) This device may not
cause harmful interference and (2) this
device must accept any interference that
may be received, including interference
that may cause undesired operation.
NOTE:The manufacturer is not responsible
for any radio or TV interference caused
by unauthorized modifications to this
e
NOTE: This equipment has been tested and found to comply with the limits for a
Class B digital device, pursuant to Part 15 of the FCC Rules. These limits are
designed to provide reasonable protection against harmful interference in a
residential installation. This equipment generates, uses and can radiate radio
frequency energy and, if not installed and used in accordance with the
instructions, may cause harmful interference to radio communications. However,
there is no guarantee that interference will not occur in a particular installation.
If this equipment does cause harmful interference to radio or television reception,
which can be determined by turning the equipment off and on, the user is
encouraged to try to correct the interference by one or more of the following
measures:
-- Reorient or relocate the receiving antenna.
-- Increase the separation between the equipment and receiver.
-- Connect the equipment into an outlet on a circuit different
from that to which the receiver is connected.
-- Consult the dealer or an experienced radio/TV technician for help.
 Loading...