

Page 1
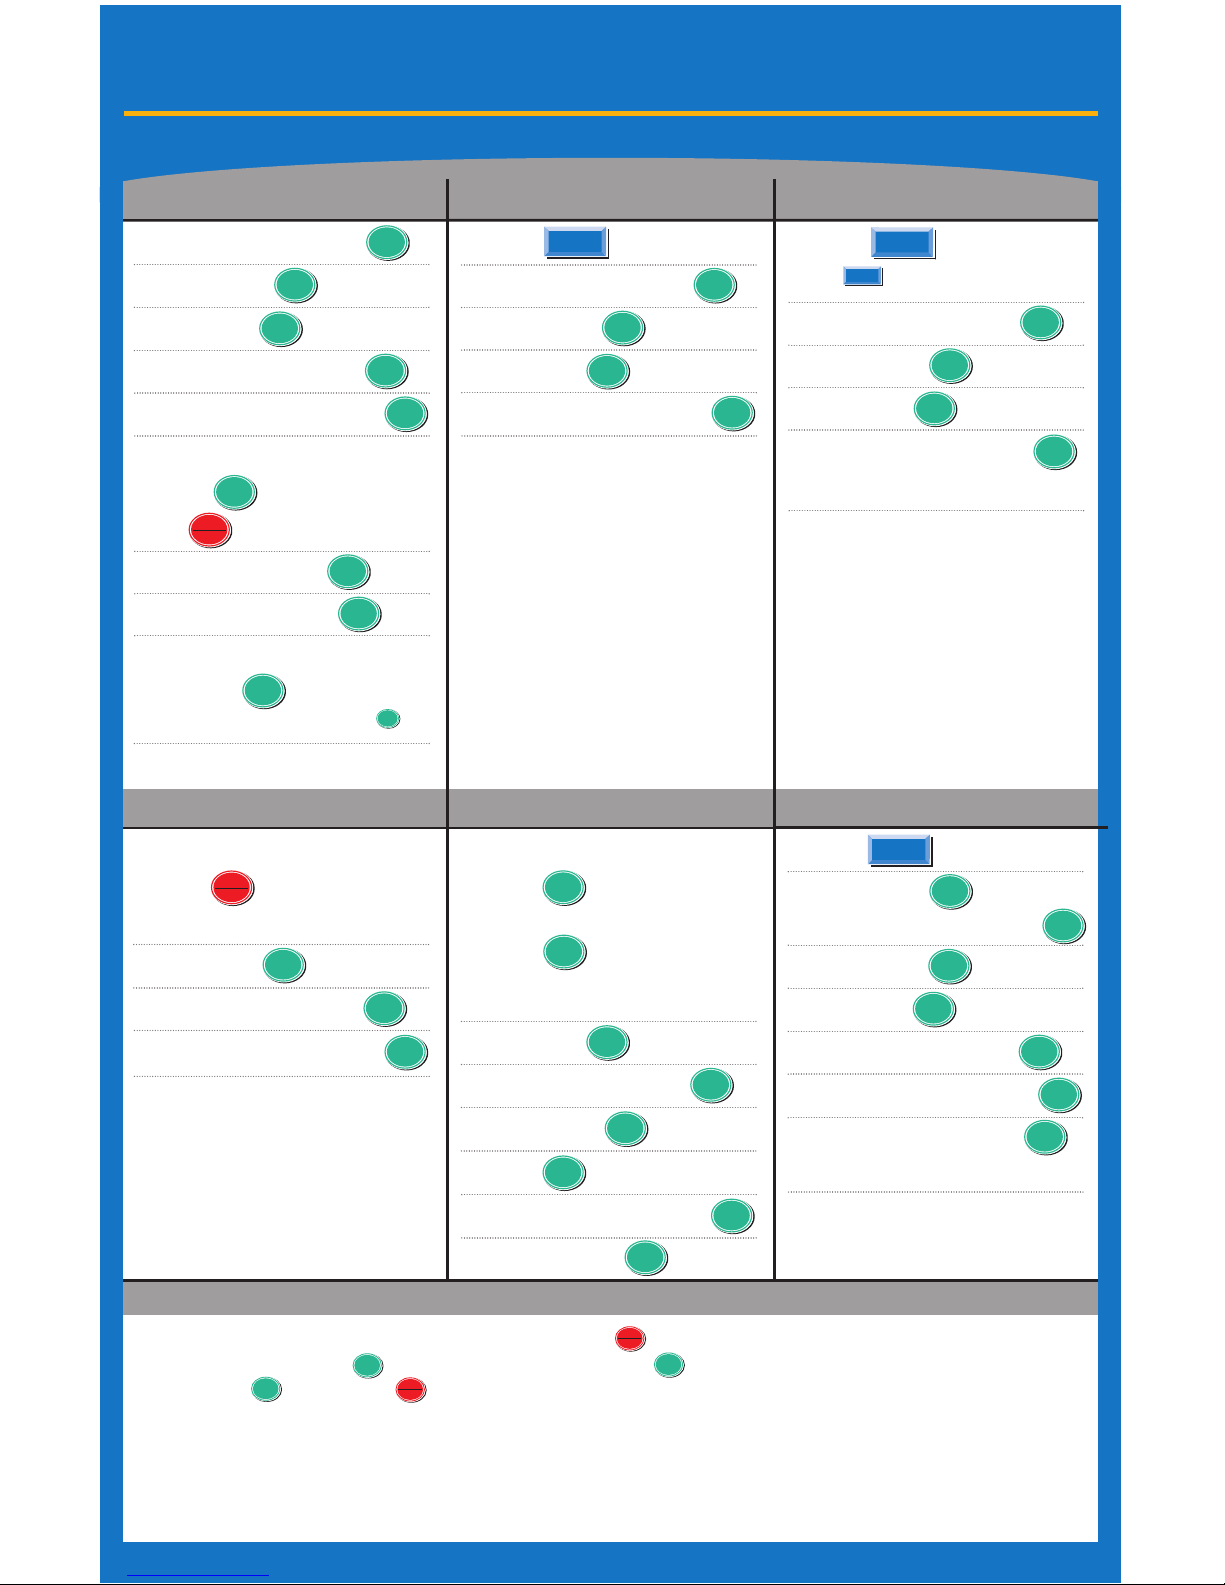
Credit Card Sale Debit Sale
Forced Sale
› Swipe Card
› Press for Credit Card if
Prompted, or Skip to Next Step
› Amount +
› Enter Tip Amount
››
+
› Enter Server Number +
› Press
› Swipe Card
Or Enter Acct Number +
› Exp. Date +
› Amount +
› Enter Tip Amount
››
+
› Enter Server Number +
› Enter Auth Number +
NOTE:
* CVV2 (also CVC2 and CID) codes are often requested for manually entered transactions. These codes normally appear on the
back of the card as the last three digits on the right of the signature panel, directly below the mag stripe.
›› Optional Prompts Include: Tip Amount, Invoice Number, Table Number, Number of Guests, Zip Code and Street Address on
Manual Entries (use numbers only for street address).
Use numbers only for street address.
›› Enter ID (1-X): User must select a merchant number prior to initiating the transaction. (X = Number of merchants using the terminal).
› Press
› Enter Acct Number +
› Exp. Date +
› Amount +
› Enter Server Number +
› Enter Acct Number +
› Exp. Date +
› Amount +
› Enter Tip Amount
››
+
› Enter Server Number +
Card Present?
› Press for Yes
› Or for No
› Enter Zip Code +
› Street Address
+
› Enter CVV2, CVC2, or CID
Code* +
Manual Credit Card Sale
Credit Card Refund
Voids
Return
R
ESTAURANT
Forced
Enter
Paymt
Menu
ESC
Enter
Paymt
Enter
Paymt
Enter
Paymt
Enter
Paymt
Enter
Paymt
Enter
Paymt
If code is not known or not present, press
and choose the appropriate numeric response.
*These items above prompt if the card is not present. Discover
cards will prompt when the card is present as well. The AVS
and CVV2 or CID response will print on the receipt.
Enter
Paymt
Enter
Paymt
Enter
Paymt
› Press
› Enter Acct Number +
› Exp. Date +
› Amount +
› Enter Server Number +
Enter
Paymt
Enter
Paymt
Enter
Paymt
Void
Enter
Paymt
Enter
Paymt
Enter
Paymt
Enter
Paymt
Enter
Paymt
Enter
Paymt
Enter
Paymt
Enter
Paymt
Press once to VOID sale, twice to VOID a
return or three times to VOID a forced sale.
Enter
Paymt
Enter
Paymt
Enter
Paymt
Enter
Paymt
Void
The terminal will look for a transaction that matches the data
entered to VOID, or it will read. “Trans not found” if no match.
Menu
ESC
Enter
Paymt
Enter
Paymt
Enter
Paymt
› Swipe Card
› Press for Debit Card
Or
› Press
Until DEBIT Appears on the
Screen Then Swipe Card
› Amount +
› Enter Tip Amount
››
+
› Cash Back +
› Press if No Cashback
› Enter Server Number +
› PIN Number +
Enter
Paymt
Enter
Paymt
Enter
Paymt
Enter
Paymt
Enter
Paymt
Enter
Paymt
Enter
Paymt
Enter
Paymt
Use the six digit authorization number previously obtained
for this transaction. The receipt will read “Ticket Only”.
- Tip Prompt: To have tip prompt during the transaction, press the key, 5 (system Options), 6 (Working Mode), 1, (Tip Options),
Enter password then press key, 1 (Tip 1=ON), 2 (For ON), Press key until display says “Tip 1 Options - 2 In Transaction”.
Press 2 then key, then press key 4 times to return to idle prompt. Tip can still be adjusted later. See “Add Tips” on this card.
Menu
ESC
Enter
Paymt
Enter
Paymt
Enter
Paymt
Menu
ESC
Quick Reference Guide
Nurit 8320/3020
Page 2
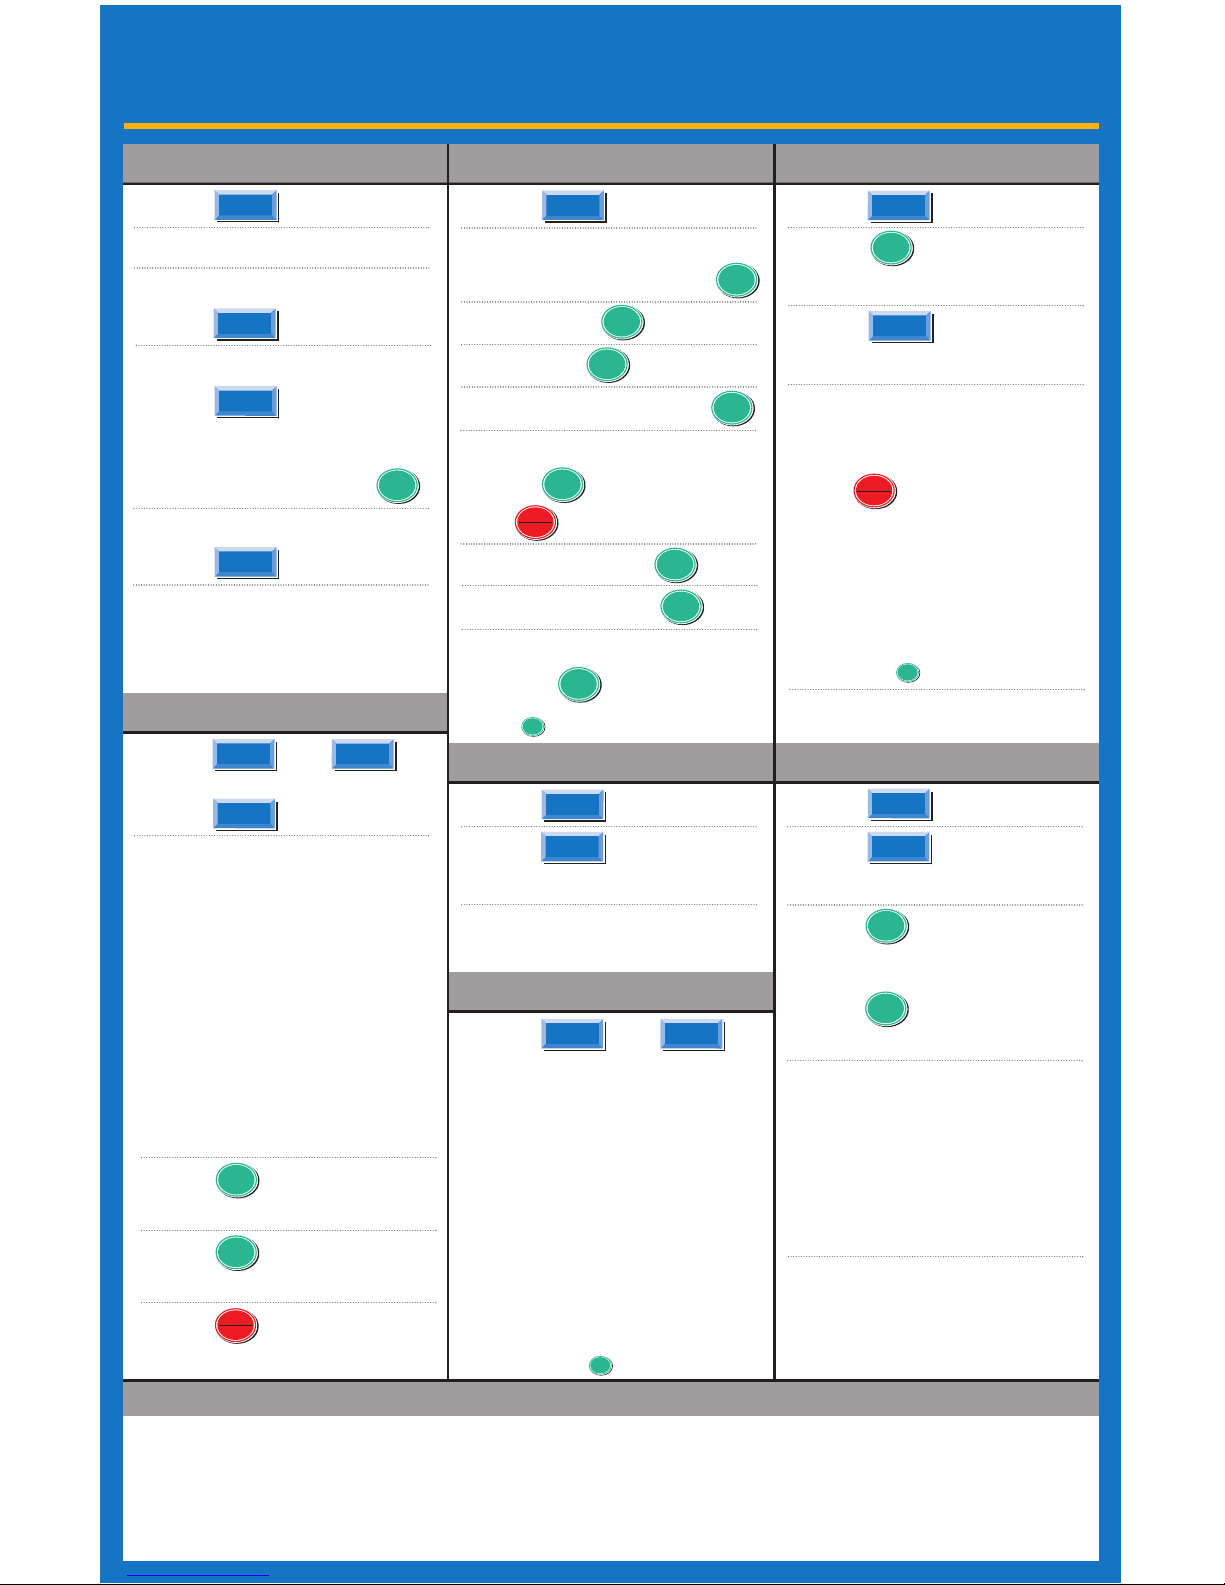
Open/Close Tab
› Press and
at the Same Time, Then
Select Desired Function From
the List on the Display:
1. Add Tips
2. Open a Tab
3. Close a Tab
4. Delete a Tab
5. Show Tabs
6. Tab Report
7. Open Tab Report
8. Close Tab Report
NOTE:
Duplicate
Card Verify Server Report
Add Tips
Detail Report Settle Batch
› Press and
at the Same Time
› Press to Add Tips
› Choose Transaction Retrieval
Method of Your Choice:
2 = By Invoice Number
3 = Scroll Open
4 = By Server Number
5 = By Transaction Number
6 = By Card Type
7 = By Card Number
After Selection is Made, Enter
Requested Data Such as Inv
Number, Serv Number, etc.,
the Transaction Will Display.
› Press
To Add the Tip
› Press
After Adding the Tip
› Press
to Return to the Idle Prompt
› Press
› Press
for Reports
Nurit Will Print a Detailed
Report of All Transactions
› Press
› Press
for Batch
› Press
for Batch To Host
-Or-
› Press
To Batch All Hosts
Note: If transactions without
tips exist, before prompting to
close batch, the terminal will
display “Crd Trns Untipped”
1 = Scroll 2 = Ignore
Press 1 to add tips or 2 to
proceed with settlement.
› Press
› Select 1, 2 or 3 (see below)
To Print Last Customer Receipt
› Press
To Print Any Receipt
› Press
Then Choose the Card Type
2, 3 or 4, and Enter the
Transaction Number +
To Print Last Merchant Receipt
› Press
› Press
› Press
To See Hot Keys
› Press
For Server Report
To Print a Report for a
Specific Server:
Alpha
Copy
R
ESTAURANT
00-39-5006NSB 01-2006
Nurit 8320/3020
Review
1
2
Enter
Paymt
3
1
Enter
Paymt
Func
1
* CVV2 (also CVC2 and CID) codes are often requested for manually entered transactions. These codes normally appear on the
back of the card as the last three digits on the right of the signature panel, directly below the mag stripe.
›› Optional Prompts Include: Tip Amount, Invoice Number, Table Number, Number of Guests, Zip Code and Street Address on
Manual Entries (use numbers only for street address).
* User Must Enter Password Where Prompted
›› Enter ID (1-X): User must select a merchant number prior to initiating the transaction. (X = Number of merchants using the terminal).
Func
Enter
Paymt
Menu
ESC
Enter
Paymt
Verify
Enter
Paymt
Enter
Paymt
Enter
Paymt
Enter
Paymt
Menu
ESC
*Will prompt if card is not present. If code is not known or not
present, press and choose the appropriate numeric response.
Enter
Paymt
Enter
Paymt
Enter
Paymt
Enter
Paymt
A current report will print listing
transactions for each active server.
Press , Enter Password
››
Press 1 = Reports
Press 2 = Current Report
Press 2 = Short Report
Press 2 = Specific Server
Enter the Server ID
Follow display prompts to select EDC,
card and transaction types needed on report
or Press three times for ALL.
› Press
› Swipe Card
Or Enter Acct Number +
› Exp. Date +
› Amount +
› Enter Server Number +
Card Present?
› Press for Yes
› Or for No
› Enter Zip Code +
› Street Address
+
› Enter CVV2, CVC2, or CID*
Code +
Enter
Paymt
Func
1
Enter
Paymt
Review
Func
Enter
Paymt
Note: If Tab amount exceeds additional authorization, terminal
will prompt user to Press to obtain new authorization.
Func
2
Enter
Paymt
Enter
Paymt
Menu
ESC
 Loading...