

Page 1

This book is an integral and essen-
al part of the product and must be given to
h
e user. Read this book carefully. It provies important information concerning safety
f installation, use and maintenance. Save it
r future reference.
After un packing, make sure the
ppliance is complete. In case of doubts, do
ot use the appliance, but consult a qualified
e
chnician. The packing items which are
otentially dangerous (plastic bags, polysty-
ne foam, nails, etc.) must be kept out of
hildren's reach.
Before connecting the appliance
ake the rating plate data correspond with
e mains. This plate is on the front panel of
e appliance at the top and to the right. The
ppliance must be installed by qualified
chnicians in accordance with current stan-
ards and manufacturer's instructions.
n
correct installation could harm or injure
ersons, animals, or things for which the
anufacturer cannot be considered liable.
lectric safety of the appliance is assured
nly when an efficient ground connection is
ade as required by existing safety regulaons. This safety requirement must be veried and in case of doubt a professional skil-
e
d expert must be called on to check the
iring.
he manufacturer is not liable for any damae caused due to failure to ground the
ystem .
ake sure the electric power of the system
s
sufficient to absorb the maximum power
n
put stated on the plate. In case of doubt,
ontact a qualified technician who must also
ake sure in particular that the size of the
iring cables is sufficient to absorb power
put.
We recommend against using adapters,
multiple sockets or extensions.
If they prove necessary, only use extensions, single or multiple adapters or plugs
that meet safety regulations, making sure,
h o w e v e r, not to exceed the rated current
limit marked on the single adapter and
extension and the maximum input marked
on the multiple adapter.
Unit must be connected in according with all local plumbing and health by
laws.
This appliance must only be used
for the designed purpose. Any other usage
is considered incorrect and therefore dangerous. The manufacturer shall not be liable
for any damage caused due to improper,
incorrect and unreasonable use.
The following basic rules must be
observed when using any electric appliance:
- do not touch the appliance when hands or
feet are wet or damp
- do not use the appliance when barefoot;
- do not use extensions in bath or shower
rooms
- do not pull the supply cord out of the
socket to disconnect it from the mains
- do not leave the appliance exposed to
atmospheric agents (tain, sun, etc.) unless
expressly provided for;
- do not let the appliance be used by children or anyone not familiar with it.
Before servicing the appliance,
disconnect it from the mains by pulling out
the plug or switching off the electricity.
To clean the appliance, follow the
instructions in this book.
If the appliance breaks down or
fails to work properly, switch it off and do not
attempt repairs or other operations. Contact
qualified experts only.
Repairs should only be made by the manufacturer or authorized service centres. Only
original spare parts must be used.
Failure to observed the above, could damage the appliance or make it unsafe.
For installation, an omnipolar switch must be used in accordance with safety
regulations with over 3 mm between contacts.
To avoid dangerous overheating,
make sure the supply cord is fully uncoiled.
Do not obstruct exhaust or dissipation grids, in particular the cup warmer.
The user must not replace the
appliance supply cord. If the cord is damaged, switch off the appliance and have a
qualified technician change the cord.
If no longer using the appliance, we
recommend making it inoperative by disconnecting the supply cord and cutting it.
E N G L I S H
ENERAL INSTRUCTIONS
ND SAFETY WARNING
Page 2
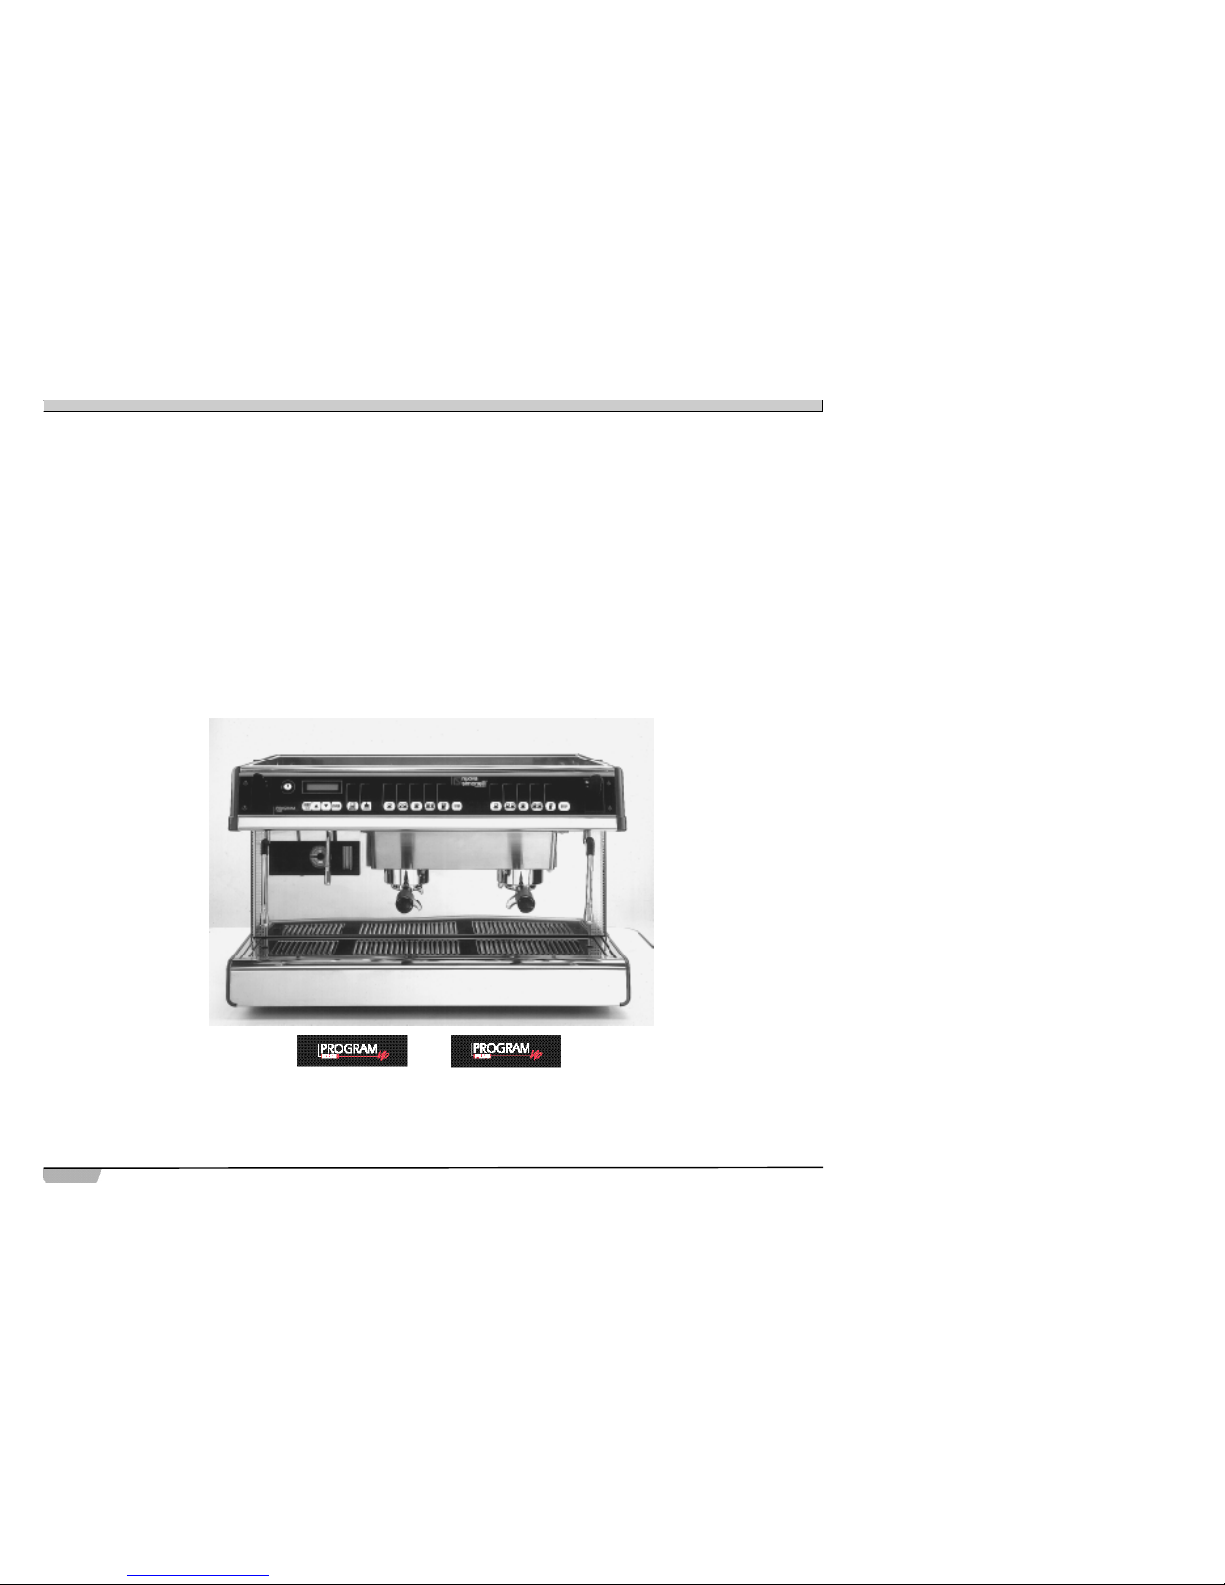
Congratulations on having made such a good choice!
Many different factors are involved when you purchase a professional espresso machine: the manufacturer’s name, the specific functions of
machine, technical reliability, the availability of a prompt and efficient after sales service and of course, the price. Naturally, you will have weighed up all of these factors and then decided: “I am going to choose the Program Vip”. We think that you have made the best choice, but this
is something you will be able to see for yourself. Espresso after espresso, cappuccino after cappuccino, you will find out just how easy and
practical it is to work with Program Vip.
If you are buying a Nuova Simonelli machine for the very first time, then we are pleased to welcome you to top class preparation. If you are
already a Nuova Simonelli Customer, we are flattered by your loyalty to our products.
Thank you for choosing us,
Nuova Simonelli s.r.l.
Page 3
fter checking that nothing is missing from
e packaging, position the machine as
quired and ensure that it is perfectly level,
djusting the feet if necessary (Fig. 1-2, no.
). If the foot extension is required, assemly should be carried out by first unscrewing
e foot completely and attaching it to the
etal insert provided with the extension.
ext thread the cylindrical, plastic shell onto
e insert (the groove should be facing
ownwards).
lace the water softener into the space pro-
ided (Fig. 3, no. 1). Please remember that
n all Nuova Simonelli models the pump is
lly incorporated and, for this reason, all
onnection operations are much simpler.
tandard equipment also includes flexible
bes to be used when connecting the
ater softener.
lease Note: to guarantee increased pump
e l i a b i l i t y, a mesh filter ( 150m) should be
tted between the softener and the machine
t
self, to prevent impurities such as sand,
oating particles of lime scale and rust from
amaging the delicate graphite surfaces
ig. 3, no. 2).
efore connecting the machine to the water
u p p l y, water softner must be flushed run ing some water through to eliminate any
purities or greasy deposits.
fter carrying out the above operations,
roceed to connect the machine to the
ater supply as shown in the diagram (Fig.
). Ensure that all tubes are free of contracons and that the outlet is clean. If the elec-
ic cable supplied is not of sufficient length,
lways use another of the same section.
ake sure that the mains power supply is
quipped with an efficient grounding
system, which should be connected to the
machine using the green and yellow wire.
Always protect the machine with an
automatic safety cut-out switch that is
compatible with the mains power supply.
The Company cannot be held responsible
for any damage to persons or property caused by failure to observe the safety standards in force.
For the correct functioning of the machine,
mains water pressure should not exceed 4
bars and if this is not the case, a pressure
reducer should be fitted upstream of the
water softener.
The water inlet tube should have an internal
diameter of no less than 8 mm.
PLEASE NOTE: Before connecting the
machine to the mains power supply, first
make sure that the supply voltage corresponds to that shown on the nameplate
attached to the machine (Fig. 1-2, no. 12)
and if this is not the case, carry out the
necessary modifications (Figs. 4-5-6).
Starting the Machine
Filling the Boiler
Although, all Nuova Simonelli machines are
fitted with an automatic filling device, it is
good practice, during the initial operation
phases, to fill the boiler manually in order to
avoid damaging the electric resistance, thereby causing the electronic protection device to be triggered (this locks the machine if
the automatic filling device remains switched on for longer than 90 seconds. Should
this occur, it is sufficient to switch the
machine off and then on again, to complete
the boiler filling operation). Please refer to
the part relative to refill errors in the diagnostic section.
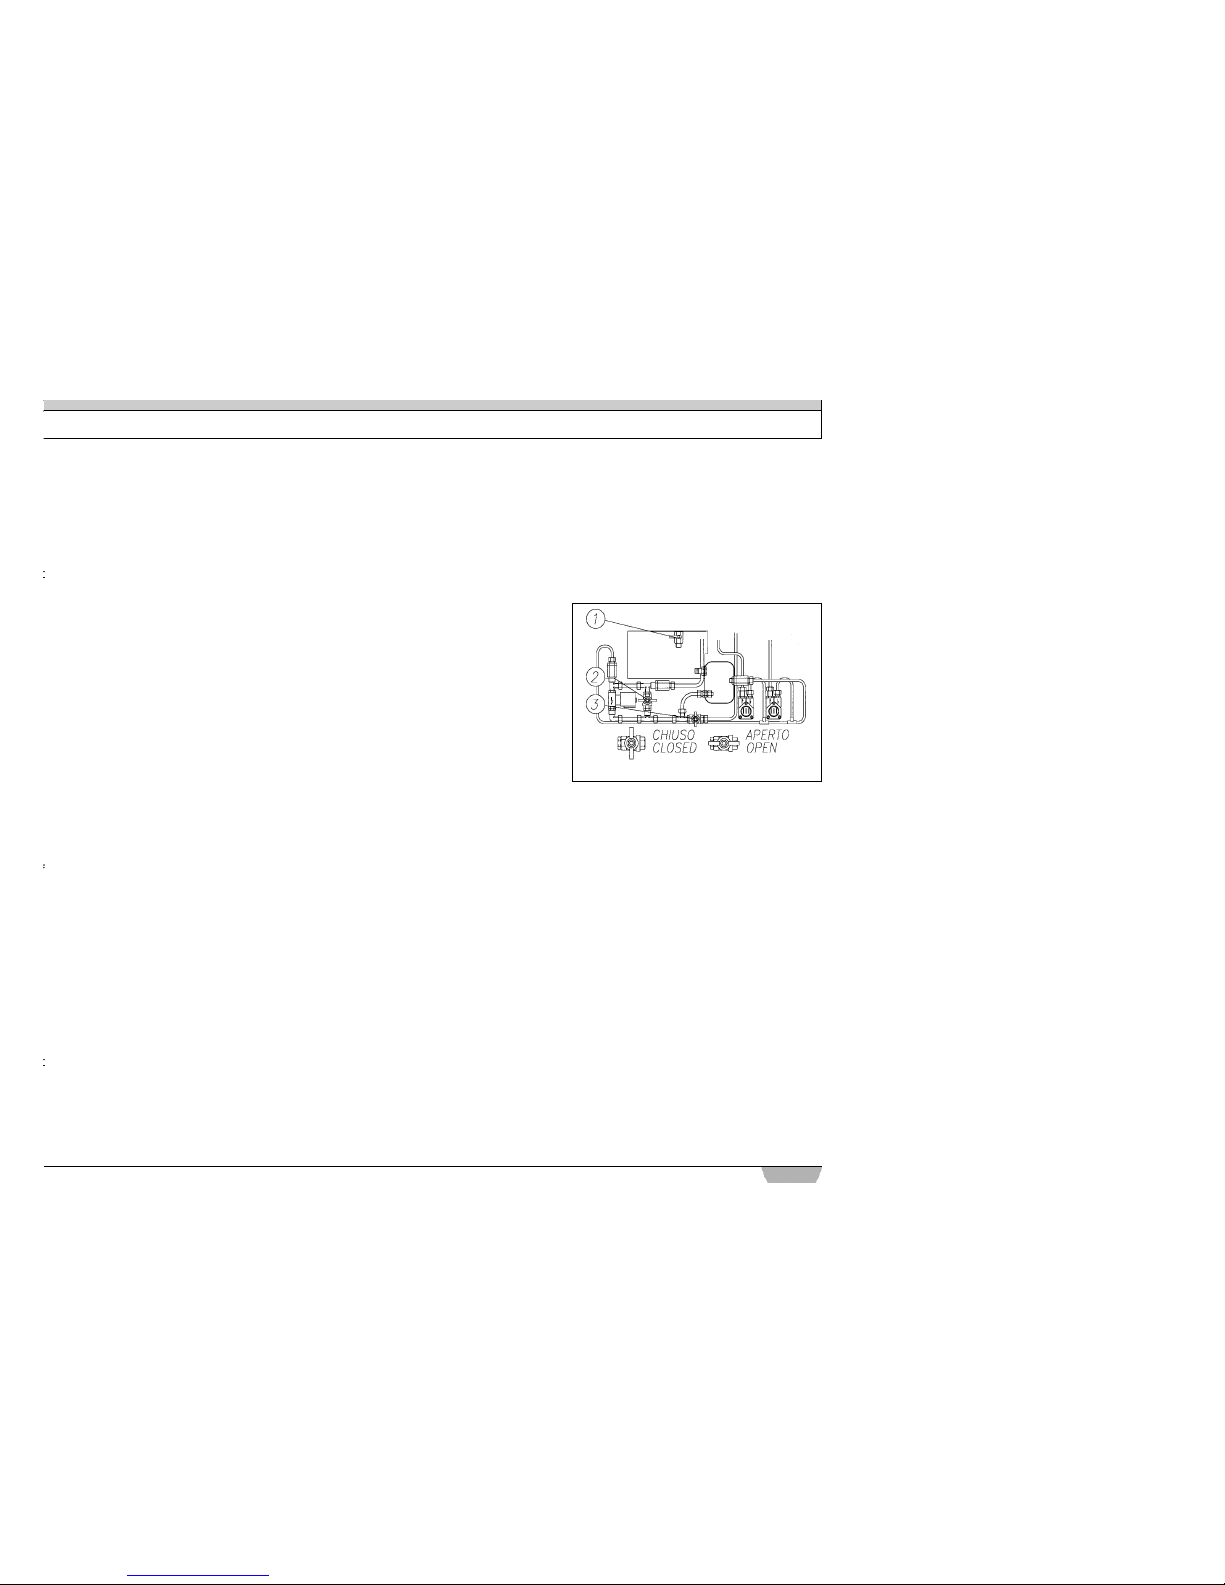
To fill the machine, use the manual filling
taps (Fig. 7) found underneath the work top
(remove the safety closure beforehand).
A) Filling the boiler manually: turn on tap 1;
turn on tap 2; turn on tap 3. Once the correct level has been reached (shown on the
water gauge), turn off tap 2.
B) Normal operating conditions: tap 1 on;
tap 2 off; tap 3 on.
C) Automatic filling device cut-out. Should
the automatic filling device malfunction (it
continues to load water), turn off tap 3.
Should it be necessary to fill the machine
m a n u a l l y, (the device does not load any
water), turn on tap 2.
INSTALLATION INSTRUCTIONS
Figure 7
Page 4
nce the machine has been connected to
e power supply and the main switch enaled (Fig. 1-2, no. 6), the display, which will
ot be lit, will read OFF. The machine is not
perational because the main switch per-
its power to be supplied to the electronic
ard only.
lease Note: For this reason, in cases of
lectronic card maintenance, it is impor-
nt to turn off the machine using the main
witch.
witching ON/OFF Manually
utomatic On-Off (Not Programmed)
ress the OI (RESET) key for two seconds,
he buzzer will make a beep sound, the
isplay will light up for approx. 1 sec. - indiating EPROM release - the control will
arry out a self-diagnostic check of the
nctions and all select key leds will light
p. When the diagnosis has been comple-
d, the display will read HEATING, as well
s showing the date and the time.
s soon as a temperature of 100 °C has
een reached, the word H E ATING w i l l
isappear. The display will show MACHINE
EADY.
NOTE: all select keys are enabled as soon
s the self-diagnosis is completed).
rogrammed Automatic On-Off
The main switch is always turned to ON).
ith the machine switched off, press the
ey OI (RESET) for 2 sec., the buzzer the
uzzer will make a beep sound, the display
ill light up for approx. 1 sec. - indicating
PROM release - the control will carry out a
elf-diagnostic check of the functions and
ll select key leds will light up. When the
iagnosis has been completed, the display
ill read HEATING, as well as showing the
ate and the time.
As soon as a temperature of 100 °C has
been reached, the word H E ATING w i l l
disappear. The display will show MACHINE
READY. The machine will switch off itself at
the first off time programmed.
(NOTE: all select keys are enabled as soon
as the self-diagnosis has been completed).
With the machine switched on, press the
key OI (RESET) for 2 sec. The machine will
switch off and the display will read OFF.
The machine will switch on itself at the first
on time programmed.
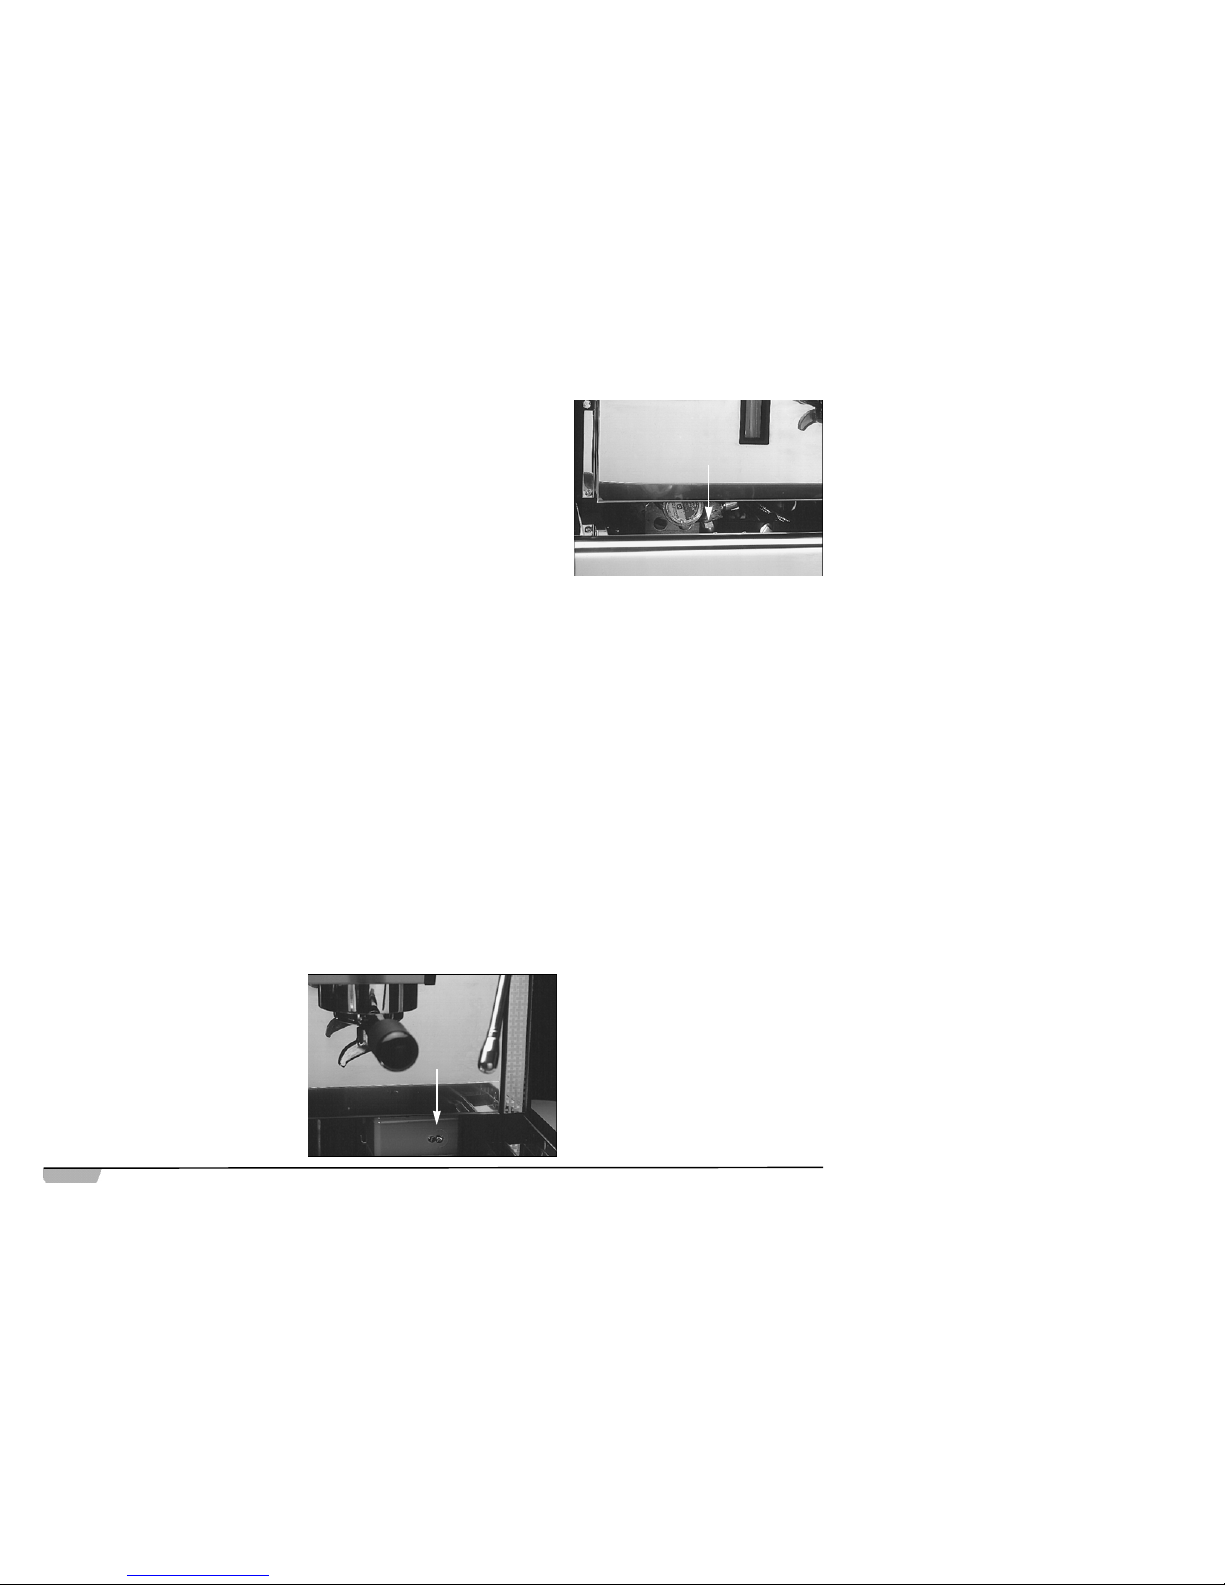
Pressure Switch/Pump Adjustment
To modify boiler working pressure (and
therefore, temperature), to meet diff e r e n t
requirements and the characteristics of the
c o ffee being used, it is sufficient to raise
the work top and turn the pressure switch
adjustment screw (Fig. 8, no. 1). Pressure
is increased by turning the screw in an
anticlockwise direction, (recommended
value: 1 bar).
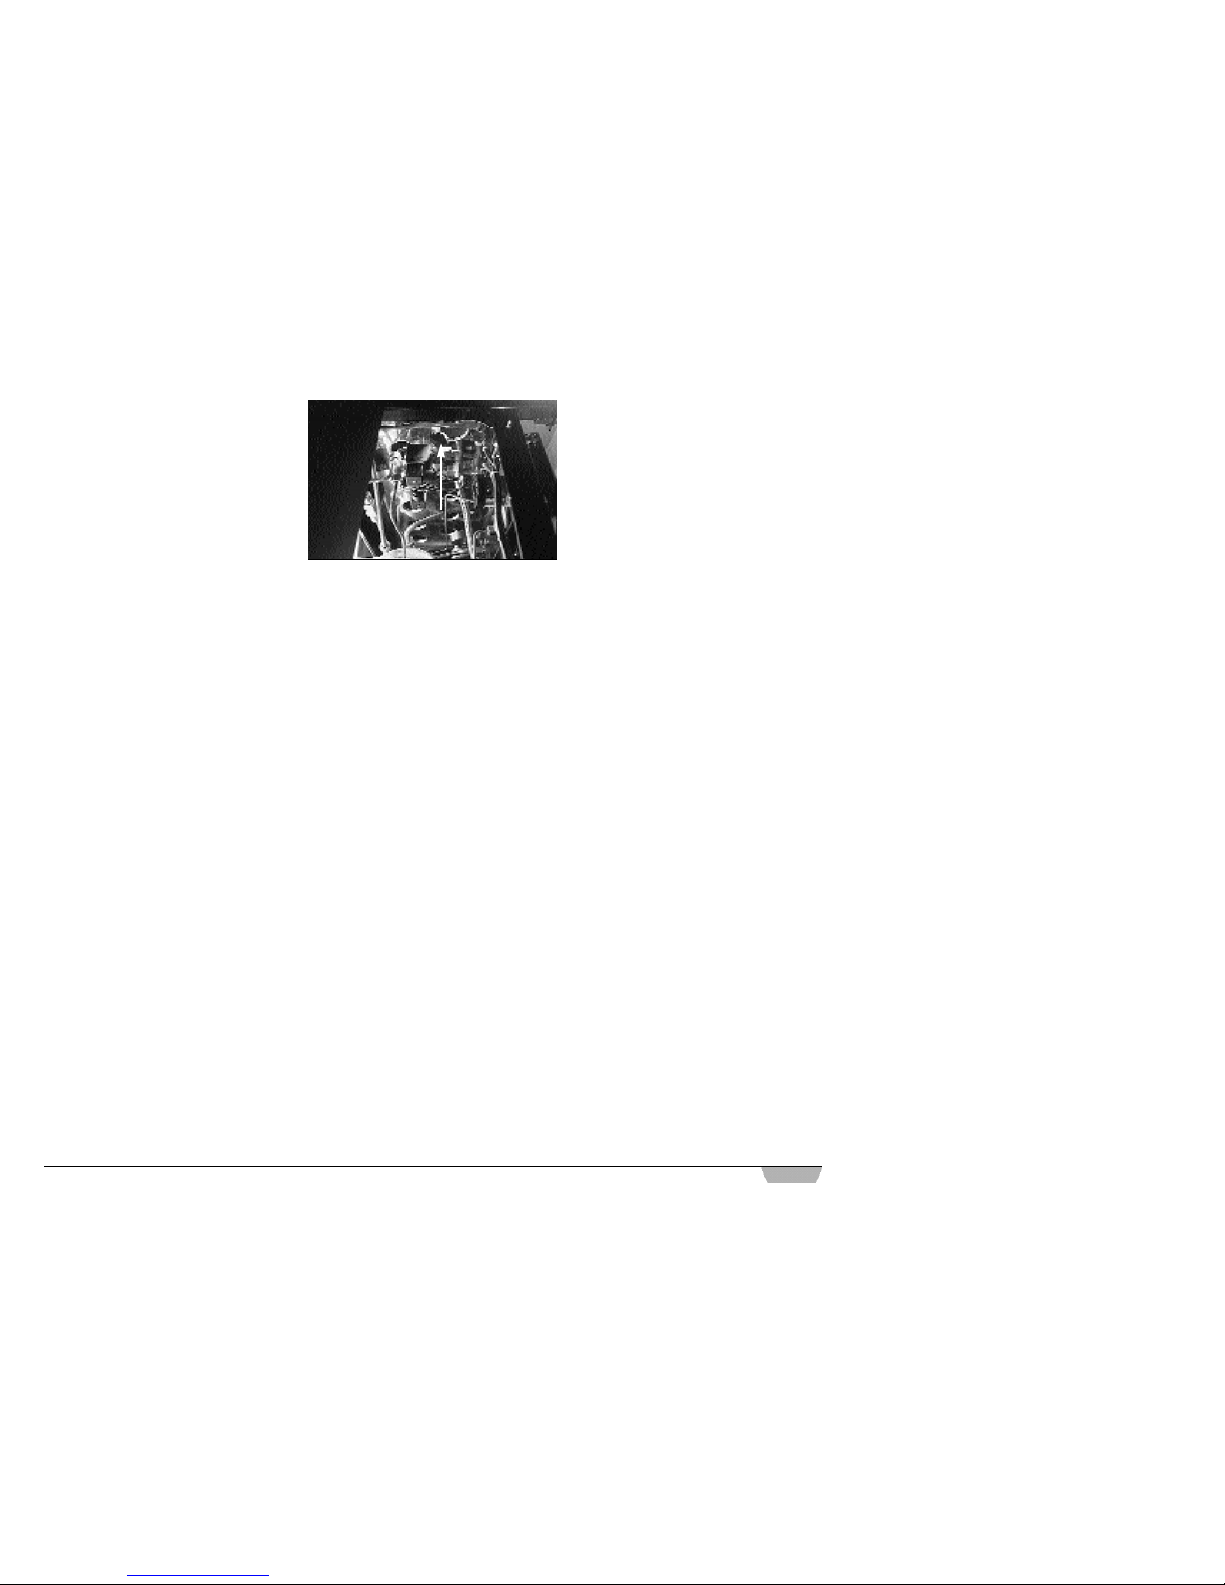
Pump pressure is displayed on the lower
part of the pressure gauge (Figs. 1-2, no.
5). It is possible to vary pressure by turning
the pump adjustment screw (Fig. 9, no. 1).
Pressure is increased by turning the screw
in a clockwise direction (recommended
value: 9 bars).
Note: pump pressure is indicated on gauge
only when pump is running.
Using Steam
To use the steam it is sufficient to pull or
push the special lever (Figs. 1-2 no. 8-11).
By pulling the lever all the way it will remain
locked in the position for maximum steam
delivery; while pushing the lever will cause
it to return automatically into place. The two
steam tubes are articulated to make them
easier to use.
Preparing Cappuccino
First release steam from wand to prepare
machine for 1-2 seconds.
To obtain the typical frothy milk, immerse
the steam nozzle to the bottom of a 3/4 full
container (preferably with a cut-off cone
shape). Release the steam and when the
milk has boiled, lower the container. Using
small, vertical movements, bring the steam
nozzle into contact with the surface of the
milk. At the end of this operation, always
clean the steam tube using a soft cloth.
Display Functions
Please Note: the Program Vip Plus Model is
equipped with a system of machine keys for
staff (nos. 1-14) and for management U
(no. 15). For this reason, different keys cor respond to different functions (see the fol lowing sections).
Figure 8
Figure 9
Page 5
sert key U (15) to enable (Fig. 1-2, no. 9)
offee Select
nhook the filter holder from the unit and fill
ith one or two measures of ground coffee,
ccording to the filter being used. Use the
ress supplied to push down the coffee and
move any residues from around the edge
f the filter (this guarantees a better gasket
rip, as well as less wear). Insert the filter
older into the unit.
y pressing the button for the dose of cof-
e desired, the pump and solenoid valve
ill be activated and the coffee will be deli-
ered. This operation is indicated by the
i
ghting up of the relative led. When the
ose is equal to the set value, delivery
tops automatically.
lease Note: During pauses, leave the filter
older inside the unit, so that it remains
arm. The delivery units have a temperature
alance function that runs using a hot water
irculation system, in order to guarantee
aximum thermal endurance during use.
ot Water Select:
he hot water solenoid valve is activated and
elivery is started by pressing the correct
utton. This operation is indicated by the
i
ghting up of the relative led. When delivery
me is equal to the set value, the system
t
self will close the solenoid. Hot water can
e delivered at the same time as coff e e .
lease Note: The “Program Vip Plus”
odel is equipped with a hot water mixer to
nable the temperature regulation of the
ater being released and to maximize the
erformance of the system. The mixer is
gulated by first removing the left hand
anel of the machine and turning the regi ter knob. Tightening this knob will increase
mperature (Fig. 10).
Programming Coffee Doses
Insert key U to enable.
By pressing ▼, the display will read P R OGRAM DOSES. If ENTER is then pressed,
the display will read PROGRAM DOSES
S E L E C T. All leds for programmable keys
will begin to flash (except those of the continuous delivery keys). If the key is pressed
for the amount of coffee to be programmed
(the led stays lit), the display will read
VOLUME C.C. followed by the amount
already programmed and which can be
varied using the ▼▲ keys.
To set a new dose, press the key once
more and delivery will commence. In the
meantime, the other selection leds will switch off. Press STOP when the required coffee dose has been delivered.
The display will show the new dose, which
can still be modified using the ▼▲ keys. By
passing on to the next selection stage or
pressing ENTER, the programmed dose led
will switch off. To exit press RESET.
Note: coffee grounds absorb water.
Programming Hot Water Doses
Insert key U than enter in P R O G R A M
DOSES, SELECT mode.
If you press the H. WATER key (the led will
stay lit) the display will read SECONDS f o llowed by the time already programmed and
which can be varied using the ▼ ▲ keys. To
set a new dose, press the key once more and
delivery will commence. Press the H. WAT E R
key when the required dose has been delivered. The display will show the new dose,
which can still be modified using the ▼ ▲
keys. By passing on to the next selection
stage or pressing ENTER, the programmed
dose led will switch off. If the RESET key is
pressed and if no modifications have been
made to the doses, the machine will return to
the normal state: PROGRAM DOSES
S E L E C T. Press ▲ to exit or remove key.
Dose Transfer
To transfer the values for programmed
doses (PROGRAM DOSES SELECT ) ,
press ▼ , the display will read D O S E S
T R A N S F E R , SELECT GROUP (the continuous delivery leds for the 2nd, 3rd and 4th
units will begin to flash). If one or more of
the CONTINUOUS keys are selected (the
led will stay lit), the values programmed for
unit 1 will be transferred to the other units.
To confirm this selection and return to PRO-
GRAM DOSES SELECT, press ENTER (to
quit without saving the selection, press
RESET,▲ or remove key).
Standard Doses
To restore standard dose values, (in
DOSES TRANSFER, SELECT GROUP) ,
press ▼ . The display will read D E FA U LT
SETTING, SELECT G R O U P (the continuous delivery leds for the 2nd, 3rd and 4th
units will begin to flash). If one or more of
the CONTINUOUS keys are selected (the
led will stay lit) the standard doses will be
reset for the selected units.
To confirm this selection and return to PRO-
GRAM DOSES SELECT, press ENTER.
All selections can be programmed for a
max. delivery time of 2 minutes. After this
time the display will flash ERROR.
To pass on to the next page, press RESET
and▼. Press s to return to the previous page.
Fig. 10
Page 6

he display will read PROGRAM. ON-OFF.
ress ENTER and the display will read
o n d a y, together with the ON-OFF times
se the ▼ key to pass on to following days).
.g.: ON07:30 OFF23:30
ress ENTER and the set switching on time
ill begin to blink. Use the ▼ ▲ keys to
hange the time setting. Press ENTER to
onfirm and to pass on to the switching off
me, which will begin to blink. Use the ▼▲
eys to change the time setting and press
NTER to confirm and to pass on to the fol-
wing day (use the ▼▲ keys to pass on to
llowing/previous days).
o disable the on-off functions for the
eekly day off, press the RESET key. The
isplay will read DAY OFF (to reset, press
e RESET key).
fter the display has read Sunday, if the ▼
ey is pressed again, a beep sound will indiate the passage on to the following page.
elivery Counting
sert key U.
he display will read D E L I V E RY C O U N T.
ress ENTER and the display will read
O TA L S E L E C T. The leds of the select keys
ill begin to blink and when a select key is
ressed, the display will show the number of
elative deliveries made. This number can be
et to zero using the RESET key (the CONTI-
UOUS COFFEE function counts as one
elivery). Use the ENTER key to display the
perator delivery counts (if fitted). Press ▼ t o
ass from TO T A L SELECT to the G R O U P
O TA L sub-page. The leds for the SHORT
SPRESSO keys of all groups will begin to
link and if, for example, the SHORT
SPRESSO key of group 1 is pressed (the
d remains lit), the display will read G R O U P
TO TA L, together with the total number of
eliveries (this can be set to zero using the
R E S E T key). Use the ENTER key to display
the operator delivery counts. Press ▼ f r o m
the G R O U P TO TA L page to display the
MACHINE TO TA L (the total number of deliveries made), which can be set to zero using
the RESET k e y. Press ENTER to display the
operator totals. To return to the D E L I V E RY
COUNTpage, press ▲ then press ▼ to pass
on to the next page.
Cup Warmer Programming
Insert key U.
The display will read C U P WA R M E R
P R O G. By pressing ENTER, the left hand
side of the display will flash ON followed by
the programmed value (0-60 min.), while
the right hand side of the display will read
OFF followed by the programmed value (060 min.).
e.g.: ON 05-OFF 60
The ▼▲ keys can be used to vary cup warmer activation times. ENTER confirms this
setting and passes on to the cup warmer
stop time setting, which is carried out using
the ▼▲ keys once the display has begun to
flash. To pass on to the next page, press
ENTER.
PLEASE NOTE: The cup warmer is started
automatically as soon as the temperature
drops to below 95°C, or rises to above
125°C. In the latter case, the display will
flash PRESSURE ERROR and the relay
switch will disconnect the resistance until
the temperature returns to normal levels.
By setting one of the values to zero, this
function is excluded.
When the cup warmer has been program med, the relative led flashes slowly.
Clock Setting
Insert key U.
The display will read D ATE - HOUR. I f
ENTER is pressed, the time already pro-
grammed will be displayed,
e.g.: MONDAY 08:22 31 MAY 1997
The ▼ ▲ keys can be used to change the
time setting which will begin to flash.
Confirm with the ENTER key to pass on to
the minutes setting and then again to the
d a y, month and year settings. At the end,
use the ENTER key to pass on to the following page.
Grinding Control programming
Insert key U.
Please Note: the Program Vip Plus model is
equipped with an electronic system that is
capable of detecting delivery parameter
variations that depend upon the grinding
fineness of the coffee. For this reason,
values should be programmed (min. and
max. delivery times for a sample quantity of
10 c.c. for a single espresso and 30 c.c. for
a double espresso).
The display will read GRINDING, and when
ENTER is pressed, it will read 1 ESPRES-
SO followed by the set values (min. 0-max.
40). The bottom line of the display will read
2 ESPRESSO followed by the set values,
(min. 0-max. 40).
e.g.: 1 ESPRESSO 02-06
2 ESPRESSO 03-07
The first value, which will begin to blink, can
be changed by using the ▼▲ keys and then
confirming with ENTER to pass on to the
following value. After the final value has
been set, press ENTER to pass on to the
next page.
If the system detects a delivery time that is
lower than the minimum time set, the
display will show the message C O A R S E
GRINDING (see the Diagnostics Section).
At this point, the grinder must be regulated
and the grinding fineness reduced. If the
system detects a delivery time above the
maximum time set (for the sample quantity),
Page 7

RINDING (see the Diagnostics Section).
t this point, the grinder must be regulated
nd the grinding fineness increased.
values are set at 00-40, this function will
e excluded.
ault History
sert key U.
y pressing ▼ once, the display will read
AULT HISTORY. Press ENTER to display
RROR 01. By pressing the ▼ c o n s e c u t i-
ely the last ten errors held in memory will
e scrolled. After this has been viewed,
ressing ▼ again will display the next page.
aintenance schedule programming
he display will read M A I N T E N A N C E.
ress ENTER to display DELIVERIES and
AT E and set these values with the ▼ ▲
eys, pressing the ENTER key to confirm.
ress ENTER again to pass on to the next
age.
hen the set limit has been reached (the
rst of the two), the display will read MAIN-
ENANCE.
sert the U-key (15) to set to zero with the
ESET key.
ress the ▼ key to pass on to the next
age.
anguage Select
he display will read LANGUAGE and by
ressing ENTER, the set language (ITALIA-
O or ENGLISH) will appear. Use the ▼▲
eys to change the selected language and
is will change instantly. Use the ENTER
ey to confirm the selection and to pass on
the following page.
isplay Functions with Keys 1-14
a key from 1-14 is inserted into the machi e, access will be given to the normal work
functions. The following menus will be
displayed but no modifications will be possi ble.
Coffee and Hot Water Doses
By pressing the ▼ key, the display will read
DOSES and all coffee and hot water leds
will flash. If selection is attempted (the key
led stays lit), the display will indicate that
the relative value cannot be modified. Use
the ▼ key to pass on to the following page.
Delivery Count
The display will read D E L I V E RY C O U N T
and all selection leds will flash. If a key relative to the selected dose is pressed (the
led stays lit), the number of deliveries made
will be displayed (the CONTINUOUS COFFEE function counts as one delivery). Use
the ▼ key to visualise the UNIT TO TA L.
The leds of SHORT ESPRESSO keys for
all units will flash and if one of these keys is
pressed (the led stays lit), the display will
show the total number of deliveries. Press
the ▼ key to display the MACHINE TOTAL
together with the total number of deliveries
Press ▼ to return to the normal display.
Diagnostics
Diagnosis Alarm
If, at the time of diagnosis, the system
encounters any malfunctions, the display
will read DIAGNOSIS ERROR, the functions will be blocked and the machine will
not begin to heat up.
Delivery Alarm
Once the delivery time limit has been reached (120 sec.), if the flowmeter has not
transmitted the programmed number of
water counts, the display will flash D E L I-
V E R Y ERROR and the led of the CONTINUOUS key for the relative unit will also
flash. The display will return to its normal
configuration if RESET, or STOP is pressed
or a new selection is made.
Flowmeter Alarm
If, in the first 3 seconds, the flowmeter
sends no water counts, the display will flash
FLOWMETER ERROR and the led of the
CONTINUOUS key for the relative unit will
also flash. If delivery is not manually interrupted then the automatic time limit lock
(120 sec.) will be triggered. The display will
return to its normal configuration if RESET
is pressed or a new selection is made.
Refill Alarm
If, 90 seconds from the start of filling, the
refill level has not been reset, the display
will flash REFILL ERROR, the pump will be
automatically disabled and all functions will
be inhibited.
The functions can be restarted by switching
the machine first off and then on again.
Excess Pressure Alarm
When the boiler temperature exceeds
125°C, the cup warmer is started automatically and the resistance is stopped (the
system resets itself when the temperature
drops to below 125°C) and the display will
flash PRESSURE ERROR.
Grinding Alarm
When the grinding control system detects
values which differ from those programmed,
the display will read FINE GRINDING if it is
necessary to increase the grinding fineness, or ROUGH GRINDING in the opposite case. The display will return to its normal
function configuration if RESET, STO P, is
pressed or a new selection is made.
Please Note: If the machine is left in the
programming state, after 10 minutes, the
system will return to its original configura tion and the display will indicate normal
functioning.
Page 8

witching On/Off
he machine is switched on by the main
witch (Figs. 1-2, no. 6), and the machine
nctioning state is shown by the pilot light
n the keyboard. At the same time, the cup
armer is started automatically, in order to
stablish the internal pressure of the boiler.
lease Note: this function avoids unpleasant
ow back into the boiler from the steam
be, caused by depressions created in the
oiler itself when the machine is switched
ff. For this reason, if the system is to func -
on correctly, it is necessary to wait until the
up warmer switches off automatically (after
pprox. 15 min.), and therefore, the machi e must not be operated manually.
offee Select
nhook the filter holder from the unit and fill
ith one or two measures of ground coffee,
ccording to the filter being used. Use the
ress supplied to push down the coffee and
emove any residues from around the edge
f the filter (this guarantees a better gasket
rip, as well as less wear). Insert the filter
older into the unit.
y pressing the button for the dose of cof-
e desired, the pump and solenoid valve
ill be activated and the coffee will be deliered. This operation is indicated by the
ghting up of the relative led. Press STOP
finish coffee delivery.
lease Note: During pauses, leave the filter
older inside the unit, so that it remains
arm. The delivery units have a temperature
alance function that runs using a hot water
irculation system, in order to guarantee
aximum thermal endurance during use.
ot Water Select:
he hot water solenoid valve is activated and
elivery is started by pressing the correct
button. This operation is indicated by the
lighting up of the relative led. When delivery
time is equal to the set value, the system
itself will close the solenoid. Hot water can
be delivered at the same time as coff e e .
Please Note: The “Program Vip Esse” model
is equipped with a hot water mixer that ena bles temperature regulation of the water
being released and to maximise the perfor mance of the system. The mixer is adjusted
by first removing the left hand panel of the
machine and turning the register knob.
Tightening this knob will increase tempera ture (Fig. 10).
Switching on the Cup Warmer
The cup warmer is switched on using the
relative key on the control panel. The cup
warmer is switched off by pressing stop.
General Cleaning Standards
To preserve the machine characteristics over
time, it should be kept scrupulously clean.
All chrome-plated and steel parts, including
the steam and hot water tubes, should be
cleaned with a damp cloth. Once a week,
the stainless steel sprinklers should be
disassembled, cleaned and checked to
ensure that the perforations are not blocked
in any way. To carry out this operation, use
a screwdriver to loosen the central screw of
the sprinkler.
Cleaning the Unit With the Blind Filter
After replacing the filter with the blind one
supplied, insert two teaspoons of specialpurpose detergent powder and place the filter holder inside the unit. Press one of the
c o ffee keys and stop after 10 seconds.
Repeat the operation several times, then
remove the filter holder and effect some deliveries to eliminate any detergent residues.
Cleaning the Filters and Filter Holders
Mix two teaspoons of special-purpose
detergent in half a litre of hot water and
soak both the filter and filter holder (not the
handle), for half an hour. Next, rinse under
plenty of running water.
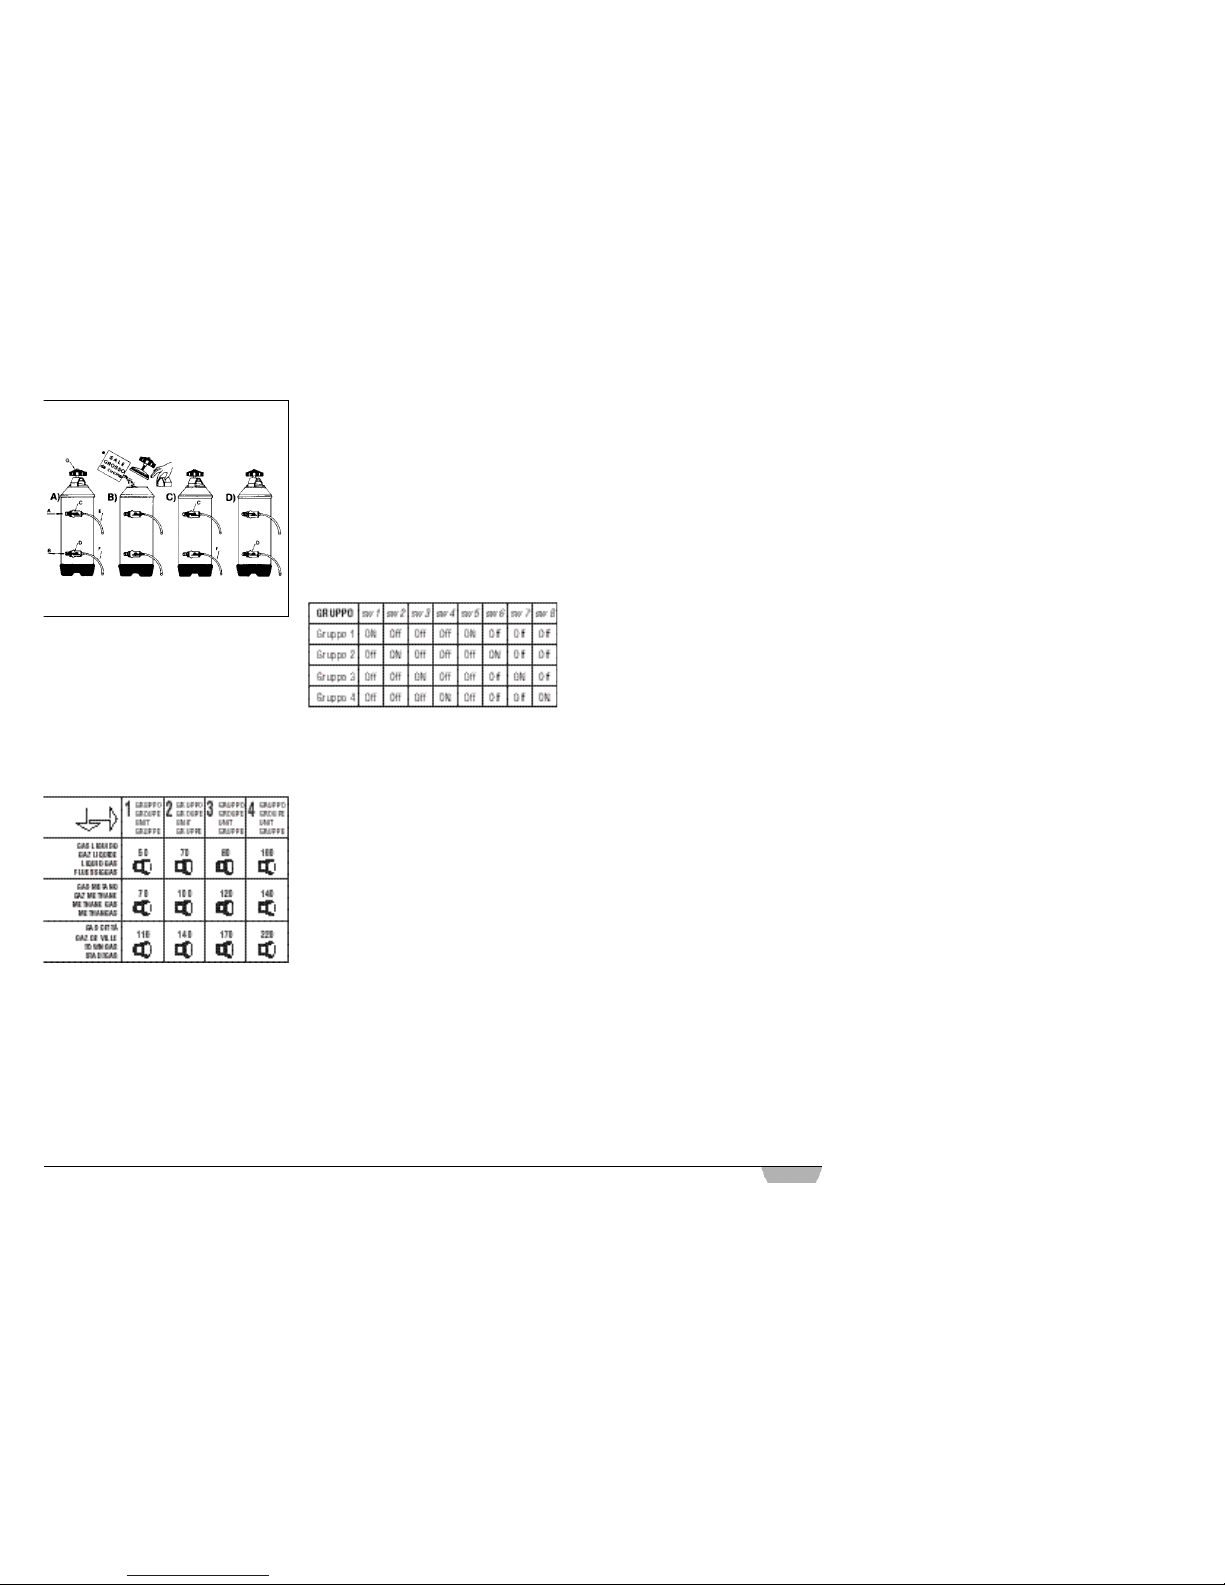
Recharging
To avoid the formation of lime scale deposits inside the boiler and heat exchangers,
the water softener must be kept in perfect
working order. For this reason, the ionic
resins must be recharged on a regular
basis.
Recharging times must be established
according to the quantity of coffee delivered
during a day and to water hardness.
Indications have been given in the diagram
shown in Fig. 11.
A) switch off the machine and place a contai-
ner with a capacity of at least 5 litres
underneath the tube E (Fig. 12-A). Tu r n
the levers C and D from left to right (Fig.
12-B), remove the plug by unscrewing the
knob G and pour in a kilo of cooking salt.
B) Replace the plug and turn the lever C
back to the left (Fig. 12-C), leaving the
salt water to run out of the tube F until it
returns fresh (approx. 1/2 hour).
C) Then turn the lever D back to the left
(Fig. 12-D).
Figure 11
Page 9
as Heating
as heating is fitted as an optional extra
nd is fitted with piezoelectric ignition and
utomatic safety cut-out should the flame
o out accidentally.
ince each type of gas used corresponds to
different calorific level, it is necessary to
se the table in Fig. 13 to define the most
uitable jet.
Technical Notes:
Keyboard Replacement
For correct functioning, at the time of replacement, each keyboard card must be personalised using the selectors to be found
on the cards themselves (keys side), as
shown below (Fig. 14).
Clock Battery
The electronic control system of the Plus
version has been equipped with a lithium
battery to supply autonomous power to the
machine clock for approximately three
years, after which it may be necessary to
replace the battery.
If the machine is switched off, it is possible
to stop the clock as follows: with the machine display reading O F F , hold down the
ENTER key for 5 seconds and the display
will read S TO P C L O C K . The clock will
restart as soon as the machine has been
reconnected to the power supply.
*Coarse sea salt
Grobes Meersalz
Gros sel de cuisine
Sal grueso de cocina
Figure 12
Figure 13
Figure 14
 Loading...