

LIBRETTO ISTRUZIONI
USER HANDBOOK - MANUEL D’INSTRUCTIONS
Istruzioni Originali -
Translation of the Original Instructions - Traduction des Instructions Originales

IT
PRESCRIZIONI DI SICUREZZA
Il presente libretto costituisce parte
integrante ed essenziale del prodotto e
dovrà essere consegnato all’utilizzatore.
Leggere attentamente le avvertenze contenute nel presente libretto in quanto forniscono importanti indicazioni riguardanti la
sicurezza di installazione, d’uso e manutenzione. Conservare con cura questo
libretto per ogni ulteriore consultazione.
Dopo aver tolto l’imballaggio assicurarsi
dell’integrità dell’apparecchio. In caso
di dubbio non utilizzare l’apparecchio e
rivolgersi a personale professionalmente
qualificato. Gli elementi dell’imballaggio
(sacchetti in plastica, polistirolo espanso,
chiodi, ecc..) non devono essere lasciati
alla portata dei bambini in quanto potenziali fonti di pericolo, né essere dispersi
nell’ambiente.
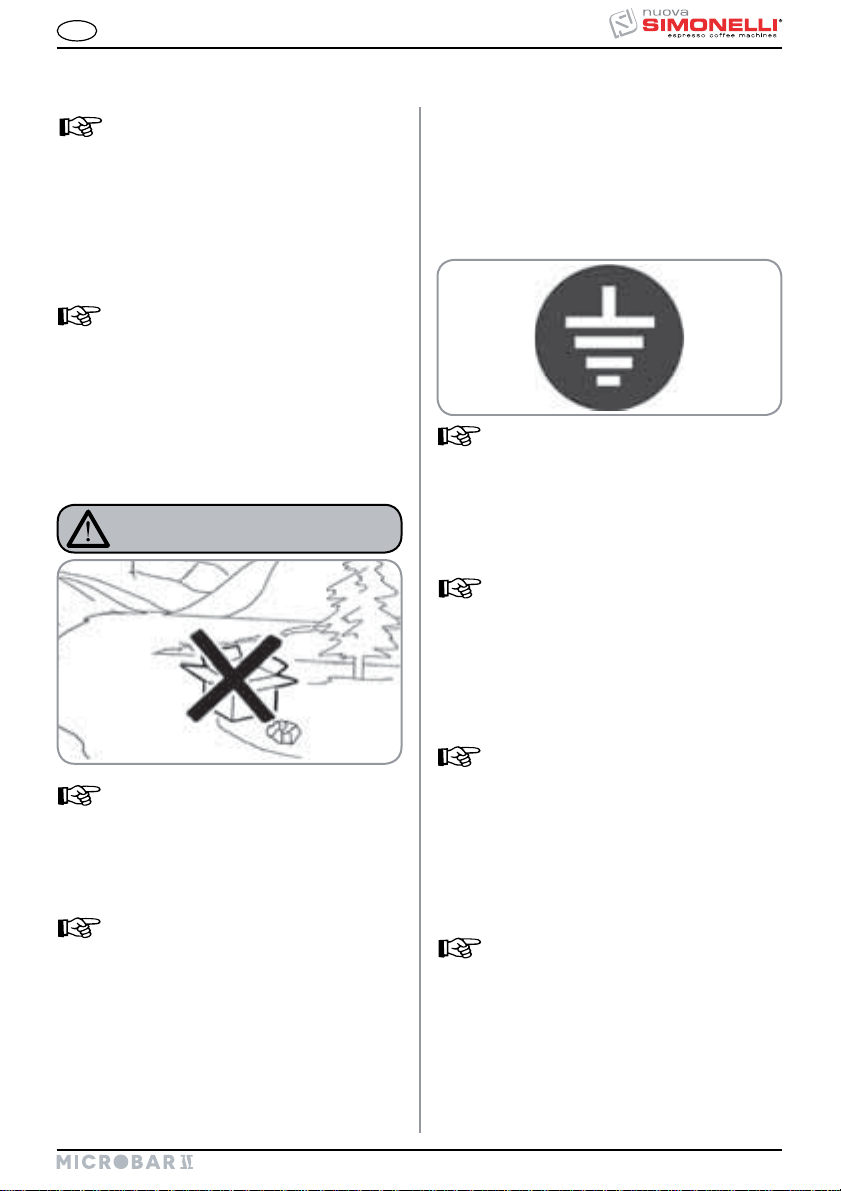
PERICOLO DI INQUINAMENTO
La macchina è adatta per essere installa-
ta in ambienti quali locali di servizio per
il personale presso negozi, uffici e altri
ambienti di lavoro, in agriturismi, presso
gli spazi per clienti in hotels, motels, bed
and breakfast e altri ambiti residenziali.
Prima di collegare l’apparecchio accertarsi
che i dati di targa siano rispondenti a quelli
della rete di distribuzione elettrica. La targa
è situata sul retro della macchina in basso
a sinistra. L’installazione deve essere effettuata in ottemperanz
secondo le istruzioni del costruttore e da
personale qualificato.
Il costruttore non può essere considerato
responsabile per eventuali danni causati
dalla mancanza di messa a terra dell’im-
a alle norme vigenti,
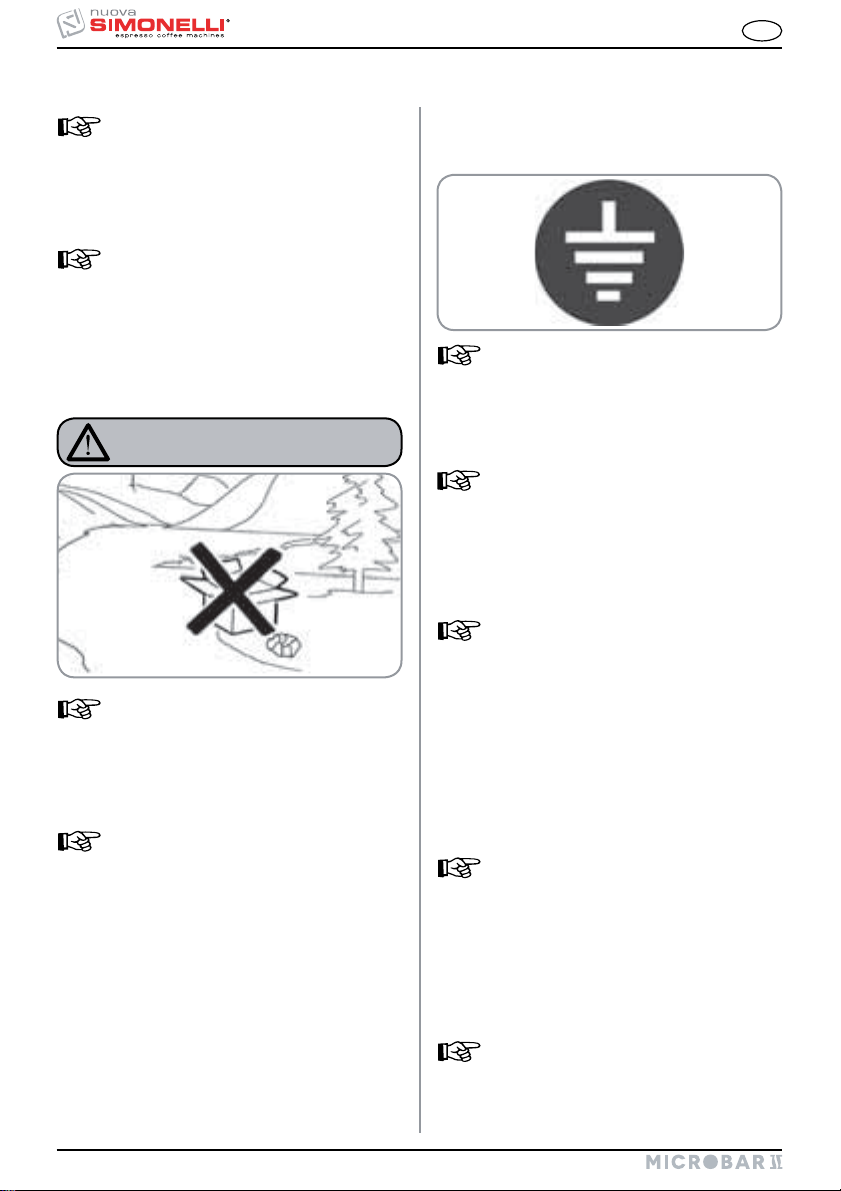
pianto. Per la sicurezza elettrica di questo
apparecchio è obbligatorio predisporre l’impianto di messa a terra, rivolgendosi ad un
elettricista munito di patentino, che dovrà
verificare che la portata elettrica dell’impianto sia adeguata alla potenza massima
dell’apparecchio indicata in targa.
In particolare dovrà anche accertare che la
sezione dei cavi dell’impianto sia idonea
alla potenza assorbita dall’apparecchio. È
vietato l’uso di adattatori, prese multiple e
prolunghe. Qualora il loro uso si rendesse
indispensabile è necessario chiamare un
elettricista munito di patentino.
Durante l'installazione del dispositivo
devono essere utilizzati i componenti
e i materiali in dotazione al dispositivo
stesso. Qualora fosse necessario l'utilizzo di altra componentistica, l'installatore
deve verificare l'idoneità dello stesso ad
essere utilizzato a contatto con l'acqua
per consumo umano.
L'installatore deve eseguire i collegamen-
ti idraulici rispettando le norme di igiene
e sicurezza idraulica di tutela ambientale
vigenti nel luogo di installazione. Quindi
per l’impianto idraulico rivolgersi ad un
tecnico autorizzato. Per il collegamento
alla rete idrica utilizzare sempre il tubo
nuovo in dotazione, i tubi vecchi non
devono essere utilizzati.
L'alimentazione del dispositivo deve
essere effettuata con acqua idonea al
consumo umano conforme alle disposizioni vigenti nel luogo di installazione.
L'installatore deve acquisire dal proprietario/gestore dell'impianto conferma che
l'acqua rispetti i requisiti sopra indicati.
1
OK
IT
Questo apparecchio dovrà essere desti-
nato solo all’uso descritto in questo
manuale. Il costruttore non può essere
considerato responsabile per eventuali
danni causati da usi impropri, erronei ed
irragionevoli.
Al termine dell'installazione, il dispositivo
viene attivato e portato fino alla condizione
nominale di lavoro lasciandolo in condizioni di “pronto al funzionamento”.
Successivamente il dispositivo viene spen-
to e tutto il circuito idraulico viene svuotato
della prima acqua immessa in modo da
eliminare eventuali impurità iniziali.
In seguito il dispositivo viene nuovamen-
te caricato e portato fino alle condizioni
nominali di funzionamento.
Dopo il raggiungimento dello stato di
“pronto al funzionamento” si effettuano
le seguenti erogazioni:
100% del circuito caffè attraverso l'ero-
gatore caffè (per più erogatori si divida
in uguale misura);
100% del circuito acqua calda attraver-
so l'erogatore acqua (per più erogatori
si divida in uguale misura);
Apertura di ciascuna uscita vapore
per 1 minuto.
Al termine dell'installazione sarebbe
buona regola stilare un rapporto di quanto effettuato.
L’uso di un qualsiasi apparecchio elet-
trico comporta l’osservanza di alcune
regole fondamentali.
In particolare:
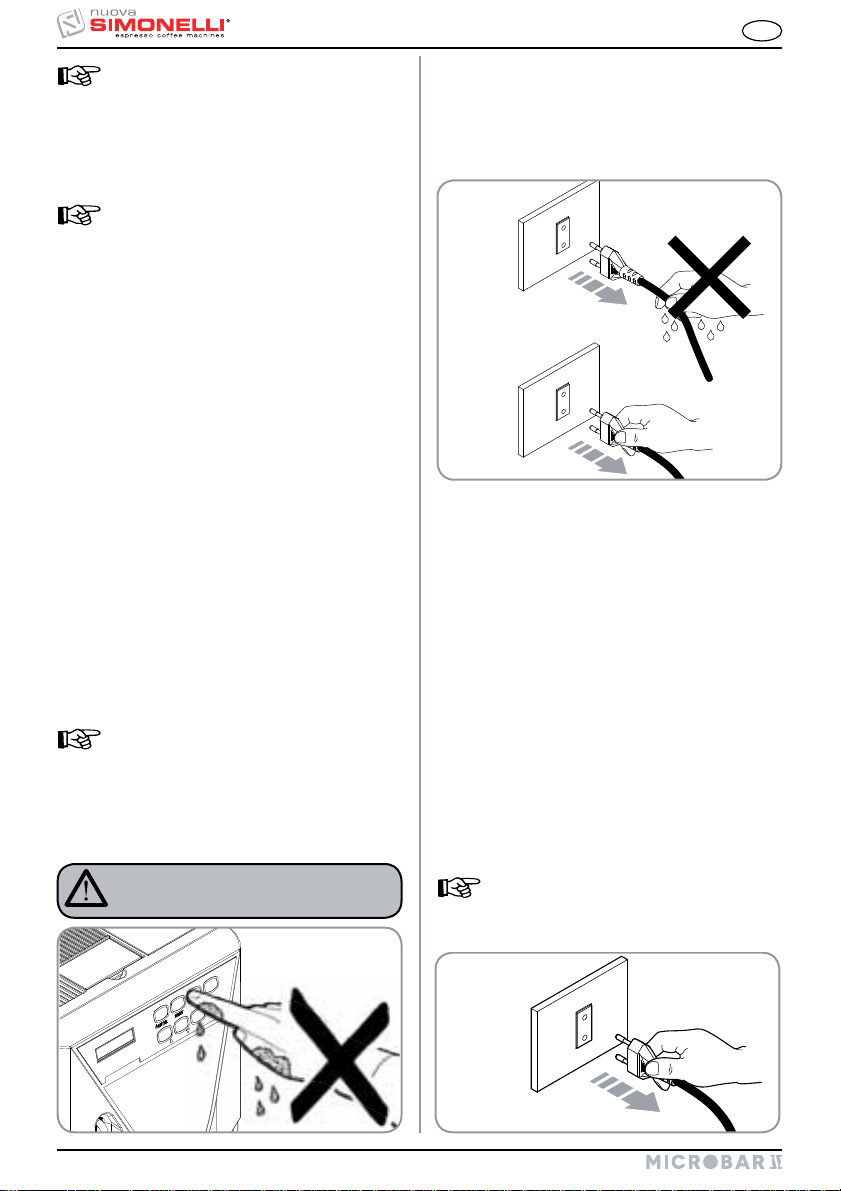
Non toccare l’apparecchio con mani o
piedi bagnati;
ATTENZIONE
PERICOLO DI SCOSSA ELETTRICA
Non usare l’apparecchio a piedi nudi;
Non usare, prolunghe in locali adibiti a
bagno o doccia;
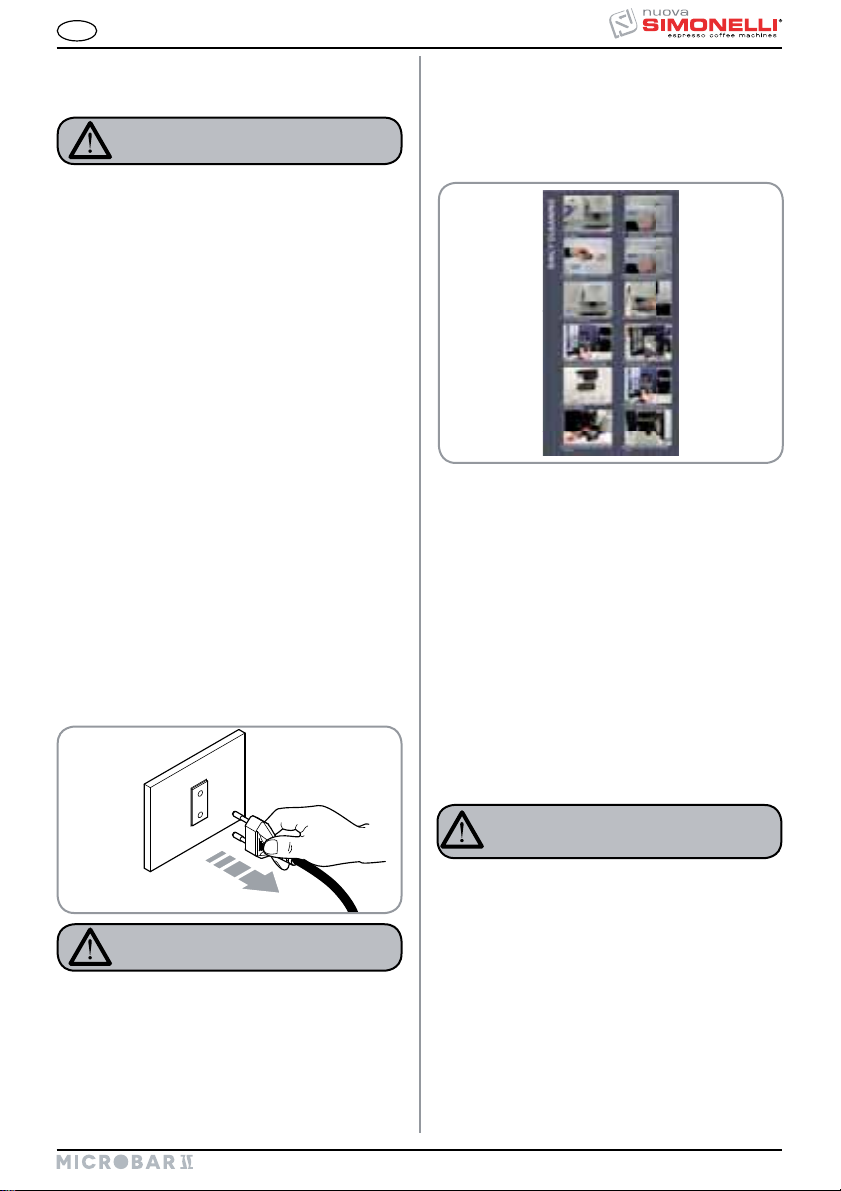
Non tirare il cavo di alimentazione, per
scollegare l’apparecchio dalla rete di
alimentazione;
Non lasciare esposto l’apparecchio ad
agenti atmosferici (pioggia, sole, ecc.),
o in ambienti soggetti a getti d'acqua;
L’apparecchio può essere utilizzato
da bambini di età non inferiore a 8
anni e da persone con ridotte capacità fisiche, sensoriali o mentali, o
prive di esperienza o della necessaria conoscenza, purché sotto sorveglianza oppure dopo che le stesse
abbiano ricevuto istruzioni relative
all’uso sicuro dell’apparecchio e alla
comprensione dei pericoli ad esso
inerenti. I bambini non devono giocare con l’apparecchio. La pulizia e
la manutenzione destinata ad essere
effettuata dall’utilizzatore non deve
essere effettuata da bambini senza
sorveglianza.
Il tecnico autorizzato deve, prima di effet-
tuare qualsiasi operazione di manutenzione, staccare la spina e spegnere l’interruttore della macchina.
OK
2
IT
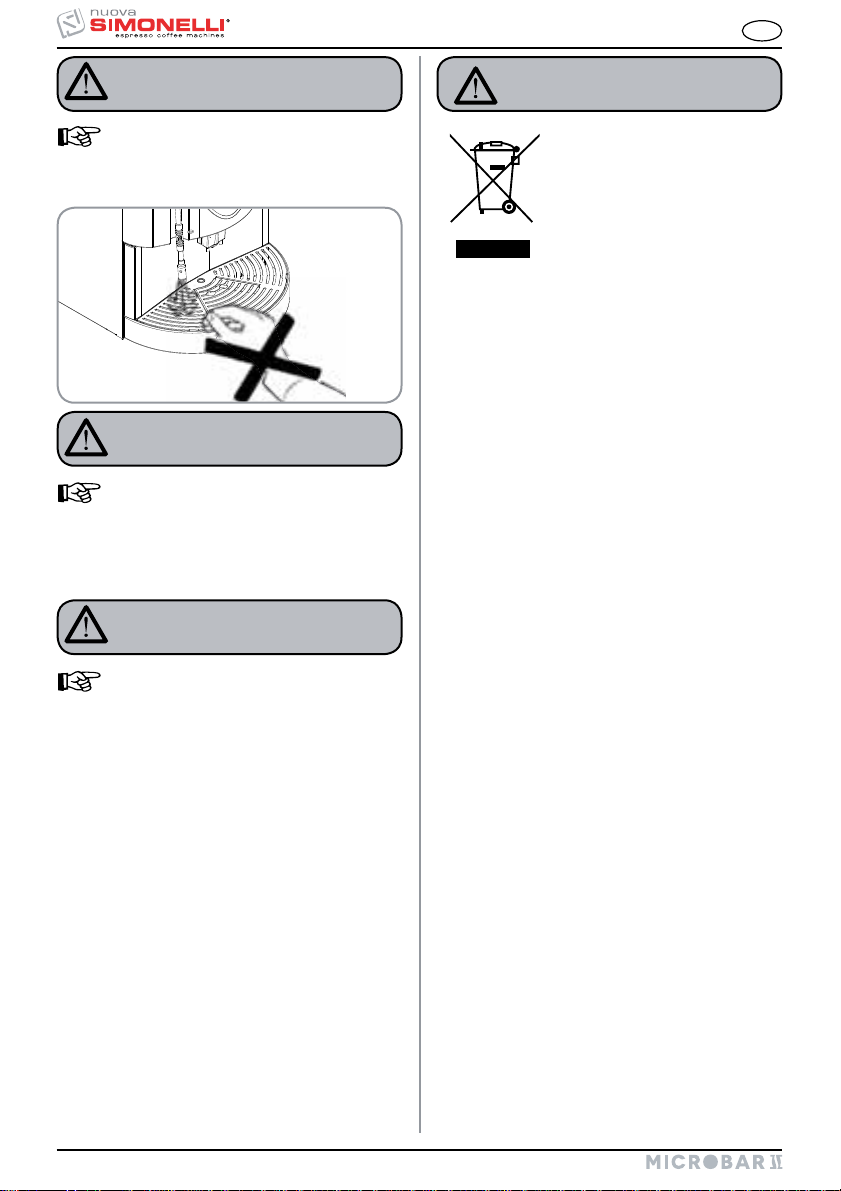
Per le operazioni di pulizia portare la
macchina a stato energetico “OFF”, cioè
“INTERRUTTORE MACCHINA SPENTO E
SPINA STACCATA” ed attenersi esclusi-
vamente a quanto previsto nel presente
libretto.
Il cavo di alimentazione di questo appa-
recchio non deve essere sostituito
dall’utente. In caso di danneggiamento, spegnere l’apparecchio e per la sua
sostituzione rivolgersi esclusivamente a
personale professionalmente qualificato.
Per Pulizia e manutenzione periodica fare
riferimento al capitolo 7.
In caso di guasto o di cattivo funzionamento
dell’apparecchio, spegnerlo. È severamente
vietato intervenire. Rivolgersi esclusivamente
a personale professionalmente qualificato.
L’eventuale riparazione dei prodotti dovrà
essere effettuata solamente dalla casa
costruttrice o da centro di assistenza auto-
rizzato utilizzando esclusivamente ricambi
originali.
Il mancato rispetto di quanto sopra può com-
promettere la sicurezza dell’apparecchio.
All’installazione, l’elettricista munito di
patentino dovrà prevedere un interruttore
onnipolare come previsto dalle normative
di sicurezza vigenti con distanza di aper-
tura dei contratti che consenta la discon-
nessione completa nelle condizioni della
categoria di sovratensione III.
Per evitare surriscaldamenti pericolosi si
raccomanda di svolgere per tutta la sua
lunghezza il cavo di alimentazione.
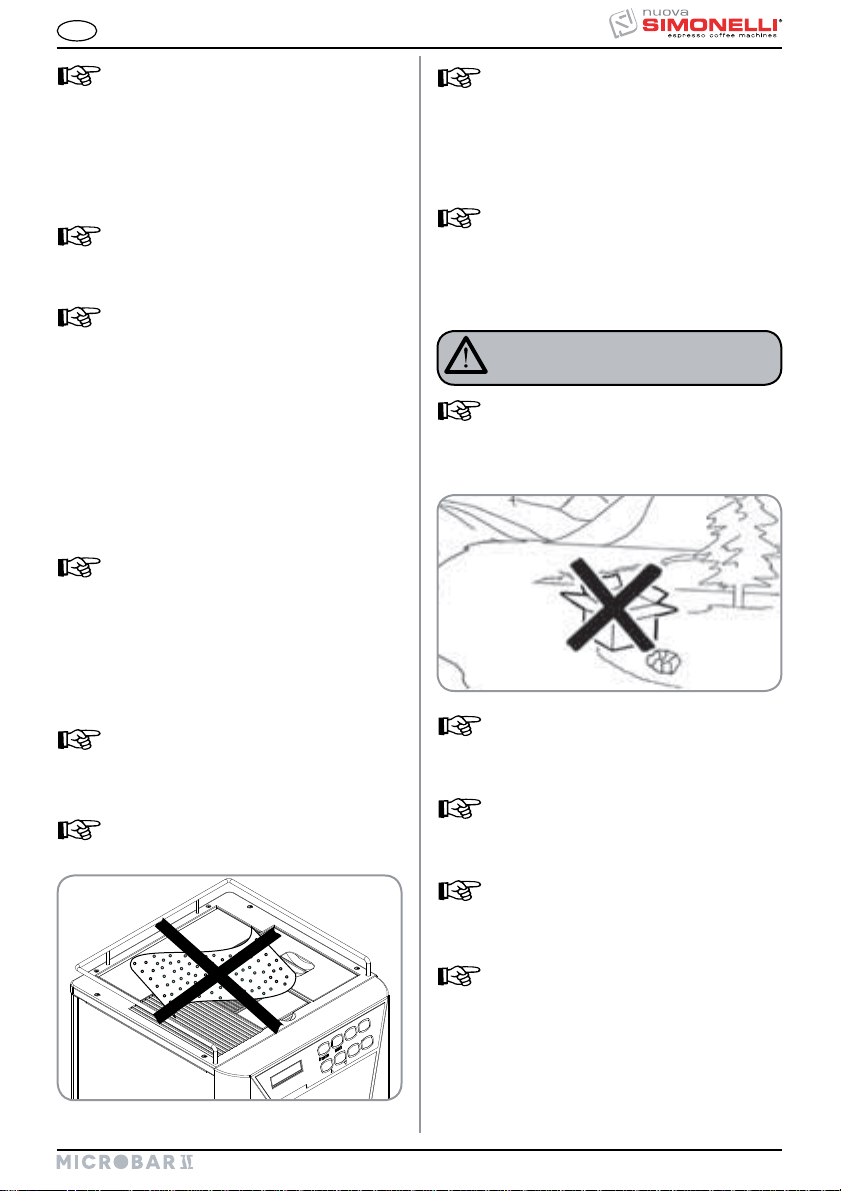
Non ostruire le griglie di aspirazione e/o di
dissipazione in particolare dello scaldatazze.
Allorché si decida di non utilizzare più
un apparecchio di questo tipo si raccomanda di renderlo inoperante dopo
aver staccato la spina, tagliare il cavo di
alimentazione.
ATTENZIONE
PERICOLO DI INQUINAMENTO
Non disperdere la macchina nell’ambien-
te: per lo smaltimento rivolgersi ad un
centro autorizzato o contattare il costruttore che darà indicazioni in merito.
Per favorire l’areazione della macchina
posizionarla a cm 15 (5,9 in) da muri o
altre macchine dalla parte dell’areazione.
Posizionare la macchina su un piano
orizzontale per evitare qualsiasi possibile
malfunzionamento.
La macchina è predisposta per operare
in un range di temperatura +5°C - +40°C
(41°F - 104°F).
Una volta iniziato il lavaggio della mac-
china, non interromperlo, possono rimanere dei residui di detergente all’interno
del gruppo erogazione.
3
IT
PERICOLO DI INTOSSICAZIONE
ATTENZIONE
Durante l’uso della lancia del vapore, pre-
stare molta attenzione e non mettere le
mani sotto di esso e non toccarla subito
dopo l’uso.
ATTENZIONE
PERICOLO DI USTIONE
Ricordare che prima di effettuare qualsi-
asi operazione di installazione, manuten-
zione, scarico, regolazione, l’operatore
qualificato deve indossare i guanti da
lavoro e le scarpe antinfortunistiche.
ATTENZIONE
PERICOLO DI CESOIAMENTO
L’operatore nel momento dell’aggiunta
del caffè, non deve mettere le mani all’in-
terno del contenitore.
ATTENZIONE
INFORMAZIONE AGLI UTENTI
Ai sensi dell’ art. 13 del Decreto
Legislativo 25 luglio 2005, n.
151 “Attuazione delle Direttive
2002/95/CE, 2002/96/CE e
2003/108/CE, relative alla riduzione dell’ uso di sostanze peri-
colose nelle apparecchiature
elettriche ed elettroniche, nonché allo smaltimento dei rifiuti”.
Il simbolo del cassonetto barrato riportato sull’apparecchiatura indica che il prodotto alla fine della propria vita utile deve essere raccolto separatamente
dagli altri rifiuti. L’ utente dovrà, pertanto, conferire
l’ apparecchiatura giunta a fine vita agli idonei centri
di raccolta differenziata dei rifiuti elettronici ed
elettrotecnici, oppure riconsegnarla al rivenditore al
momento dell’acquisto di una nuova apparecchiatura di tipo equivalente, in ragione di uno a uno. L’
adeguata raccolta differenziata per l’ avvio successivo dell’ apparecchiatura dimessa al riciclaggio,
al trattamento e allo smaltimento ambientalmente
compatibile contribuisce ad evitare possibili effetti
negativi sull’ ambiente e sulla salute e favorisce il
riciclo dei materiali di cui è composta l’ apparecchiatura. Lo smaltimento abusivo del prodotto da parte
dell’ utente comporta l’ applicazione delle sanzioni
amministrative di cui al D.Lgs.n.22/1997” (articolo 50
e seguenti del D.Lgs.n.22/1997).
4

Mod. MICROBAR II
Operating Pressure 0,165 MPa MAX Inlet Pressure 0,65 Mpa
S.N. XXXXXX Date 09 / 03 /2015
P = 2100 W220 - 240 V
50 / 60 Hz
IT
TRASPORTO E MOVIMENTAZIONE
IDENTIFICAZIONE
MACCHINA
Per qualsiasi comunicazione con il costruttore Nuova
Simonelli, citare sempre il numero di matricola della
macchina.
TRASPORTO
La macchina viene trasportata in pallett con più
macchine dentro scatoloni assicurati al pallett con
delle centine.
Prima di procedere a qualsiasi operazione di trasporto o movimentazione, l’operatore deve:
indossare guanti e scarpe antinfortunistici ed una
tuta con elastici alle estremità.
Il trasporto del pallett deve essere effettuato con un
mezzo di sollevamento adeguato (tipo muletto).
MOVIMENTAZIONE
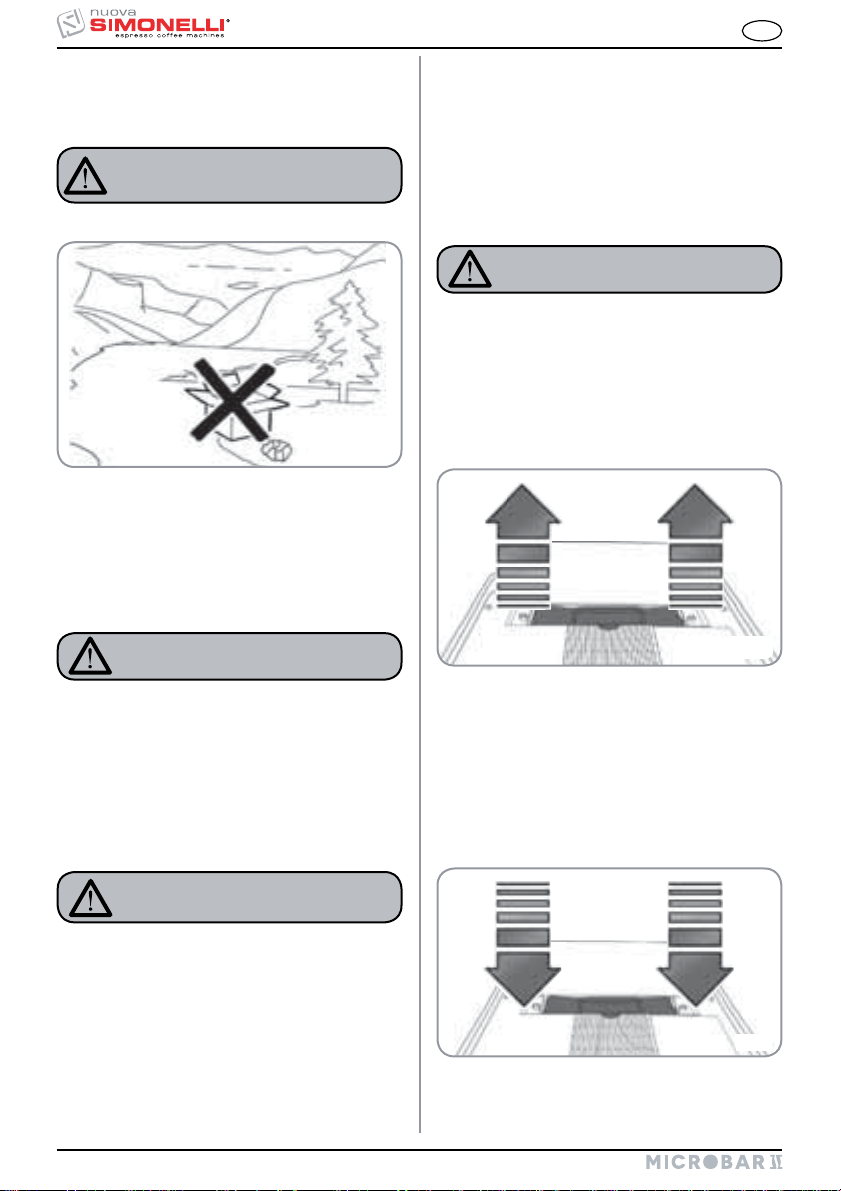
ATTENZIONE
PERICOLO DI URTO
O SCHIACCIAMENTO
Prima della seguente operazione verificare che il
carico sia a posto e che con il taglio delle centine
non cada.
L’operatore con guanti e scarpe antinfortunistiche, deve procedere al taglio delle centine e allo
stoccaggio del prodotto, in questa operazione
consultare le caratteristiche tecniche del prodotto per vedere il peso della macchina da immagazzinare e potersi regolare di conseguenza.
ATTENZIONE
PERICOLO DI INQUINAMENTO
ATTENZIONE
PERICOLO DI URTO
O SCHIACCIAMENTO
L’operatore durante tutta la movimentazione,
deve avere l’attenzione che non ci siano persone, cose od oggetti nell’area di operazione.
Sollevare lentamente il pallett a circa 30 cm (11,8
in) da terra e raggiungere la zona di carico. Dopo
aver verificato che non ci siano ostacoli, cose o
persone, procedere al carico.
Una volta arrivati a destinazione, sempre con un
mezzo di sollevamento adeguato (es. muletto),
dopo essersi assicurati che non ci siano cose
o persone nell’area di scarico, portare il pallett
a terra e movimentarlo a circa 30 cm (11,8 in) da
terra, fino all’area di immagazzinamento.
5
IT
Complimenti,
con l’acquisto del modello MICROBAR II lei ha fatto un’ottima scelta.
Lei, infatti, ora ha a disposizione non un semplice distributore di caffè, ma una vera e propria macchina per caffè
espresso completamente automatica ed interamente gestita da un microprocessore. Questo vuol dire estrema
affidabilità e facilità di utilizzo. Siamo certi che il nostro modello MICROBAR II accrescerà la fiducia verso la
Nuova Simonelli e Lei certamente consiglierà ad altri l’acquisto di questa macchina per caffè, dal momento
che il modello MICROBAR II è stato scelto per aumentare la redditività del servizio caffetteria ottimizzando al
massimo i costi di esercizio. Questa macchina è stata costruita seguendo le direttive CEE 89/392, CEE 89/336,
CEE 73/23, CEE 89/109 e successive modifiche.
Cordialmente
Nuova Simonelli S.p.a.
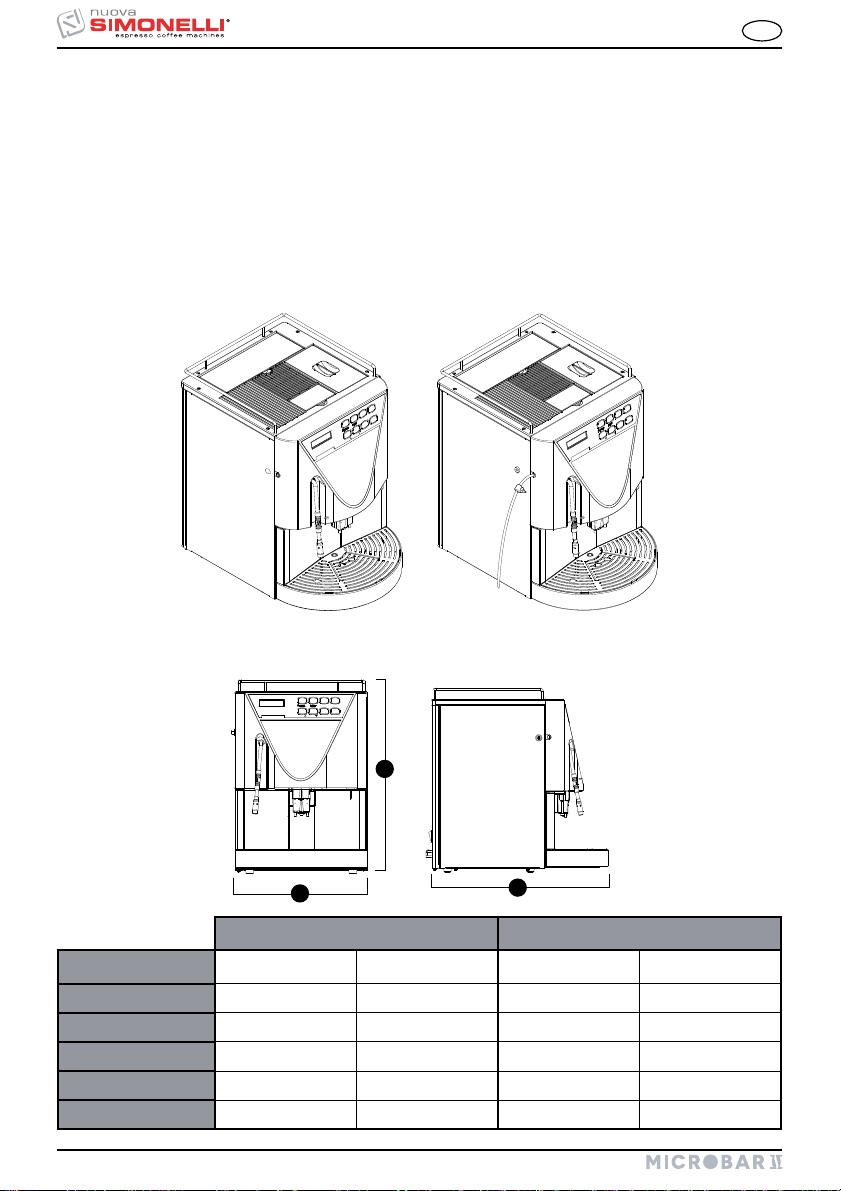
CARATTERISTICHE TECNICHE
H
L
CAFFÈ CAPPUCCINO
PESO NETTO 26 Kg 57 lb 27 Kg 59 lb
PESO LORDO 30 Kg 66 b 31 Kg 68 lb
POT. TERMICA 1000 W 1000 W 2000 W 2000 W
13/16
L 325 mm 12
H 460 mm 18
P 480 mm 18
inc 325 mm 12
2/16
inc 460 mm 18
7/8
inc 480 mm 18
6
P
13/16
2/16
7/8
inc
inc
inc

IT
INDICE
PRESCRIZIONI DI SICUREZZA ...........1
TRASPORTO E MOVIMENTAZIONE .....5
IDENTIFICAZIONE MACCHINA .......................5
TRASPORTO ....................................................5
MOVIMENTAZIONE..........................................5
CARATTERISTICHE TECNICHE ..........6
1. DESCRIZIONE ...............................8
1.1 DESCRIZIONE TASTIERA
(Configurazione standard) .............................. 9
1.2 DESCRIZIONE INTERNA MICROBAR II ...........9
2. INSTALLAZIONE E
OPERAZIONI PRELIMINARI........10
2.1 INSTALLAZIONE MACCHINA
VERSIONE CON TANICA ...............................10
2.2 INSTALLAZIONE MACCHINA VERSIONE
AD ALLACCIO DIRETTO ................................11
2.3 RIEMPIMENTO CONTENITORE CAFFÈ .........11
2.4 ACCENSIONE ................................................12
2.5 SPEGNIMENTO .............................................. 12
3. REGOLAZIONI DEL
TECNICO QUALIFICATO .............13
3.1 REGOLAZIONE DEL GRADO
DI MACINATURA ...........................................13
3.2 REGOLAZIONE ARIA
(versione CAPPUCCINO) ............................... 13
3.3 REGOLAZIONE FLUSSO DEL LATTE
(Regolazione Temperatura) ..........................13
4. UTILIZZO ................................... 14
4.1 ACCENSIONE ................................................14
4.2 SPEGNIMENTO .............................................. 14
4.3 CONFIGURAZIONE STANDARD ..................... 14
4.4 CONFIGURAZIONE SELEZIONI ..................... 15
4.5 PREPARAZIONE CAFFÈ ................................15
4.6 PREPARAZIONE 2 CAFFÈ .............................16
4.7 PREPARAZIONE CAPPUCCINO /
CAFFELATTE (versione CAPPUCCINO) ........16
4.8 PREPARAZIONE CAFFÈ
DECAFFEINATO IN POLVERE .......................16
4.9 ACQUA CALDA ..............................................17
4.10 VAPORE ......................................................... 17
4.11 PREPARAZIONE SELEZIONI ......................... 18
7. PULIZIA E MANUTENZIONE ......29
7.1 PULIZIA DELLA CARROZZERIA ....................29
7.2 PULIZIA DEL GRUPPO EROGATORE
E CAPPUCCINATORE ....................................29
7.3 RIPRISTINO DI UN
LAVAGGIO INTERROTTO ..............................30
7.4 PULIZIA DEL CONTENITORE
E DEL CONVOGLIATORE DEL CAFFÈ ...........30
7.5 PULIZIA DELLA LANCIA VAPORE.................31
7.6 PULIZIA DELLA GRIGLIA
CONTENITORE RACCOGLIGOCCE ................31
7.7 PULIZIA DEL CONTENITORE
RACCOGLIGOCCE .........................................31
7.8 PULIZIA SERBATOIO ACQUA ........................31
7.9 PULIZIA GUARNIZIONE GRUPPO .................32
7.10 PULIZIA CAPPUCCINATORE .........................32
8. TABELLA DATI
IMPOSTAZIONI STANDARD ........33
9. MESSAGGI FUNZIONI
MACCHINA..................................34
10. MESSAGGI ALLARME
BLOCCHI MACCHINA .................36
CONFIGURAZIONE ...................112
IMPIANTO ELETTRICO
(Versione CAFFÈ) ....................113
IMPIANTO ELETTRICO
(Versione CAPPUCCINO) ........115
IMPIANTO IDRAULICO
(Versione CAFFÈ) ....................117
IMPIANTO IDRAULICO
(Versione CAPPUCCINO) ........119
REGOLAZIONE
CONTRASTO DISPLAY..............121
5. PROGRAMMAZIONE ....................19
5.1 PULSANTIERA STANDARD ...........................19
5.2 PROGRAMMAZIONE ......................................19
5.3 USCITA DALLA PROGRAMMAZIONE ............20
5.4 CICLO DI PROGRAMMAZIONE
MODALITÀ UTENTE ......................................20
5.5 CICLO DI PROGRAMMAZIONE
MODALITÀ TECNICO .....................................22
6. FUNZIONI SPECIALI
TARATURE MACCHINA .............28
6.1 AZZERAMENTO CONTATORE
LITRI DEPURATORE ......................................28
6.2 AZZERAMENTO CICLI DI LAVAGGIO ............28
6.3 AZZERAMENTO PARAMETRI MACCHINA ..... 28
6.4 MOVIMENTAZIONE MANUALE
GRUPPO EROGAZIONE CAFFÈ .....................28
7
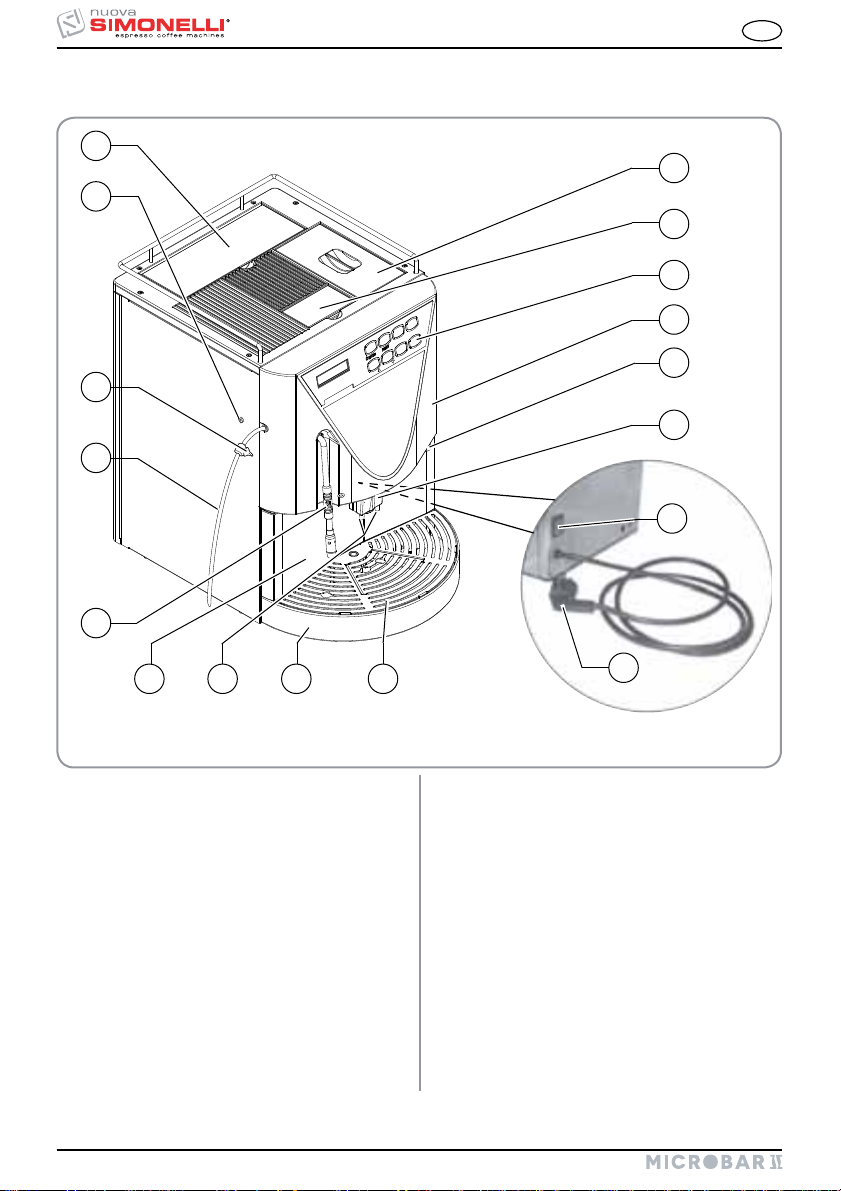
1. DESCRIZIONE
15
13
12
11
IT
1
2
3
14
4
5
16
10
9
8 6
7
LEGENDA
1 Tappo accesso contenitore caffè in grani
2 Sportello accesso convogliatore
caffè macinato
3 Pannello comandi
4 Chiave Apertura / Chiusura
portello di comando
5 Becco erogazione latte / cappuccino
6 Griglia contenitore raccogligocce
7 Contenitore raccogligocce acqua
8 Erogatori caffè
9 Cassetto fondi
8
17
Fig. 1
10 Lancia Vapore / Lancia Acqua calda
11 Tubo aspirazione latte (solo versione
CAPPUCCINO)
12 Rubinetto regolazione flusso latte (solo versio-
ne CAPPUCCINO)
13 Vite regolazione aria cappuccinatore (solo ver-
sione CAPPUCCINO)
14 Porta anteriore
15 Sportello accesso serbatoio acqua
16 Interruttore generale (ON / OFF)
17 Spina di collegamento alla rete
IT
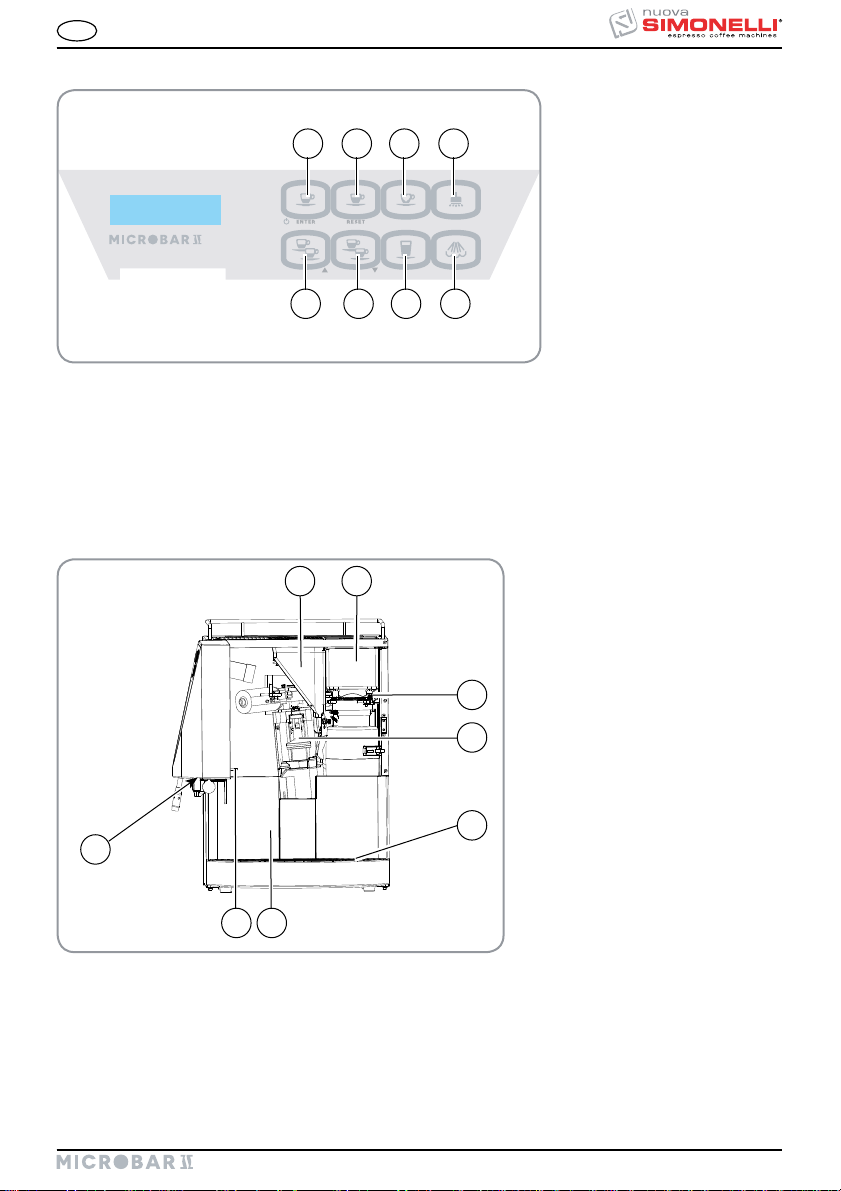
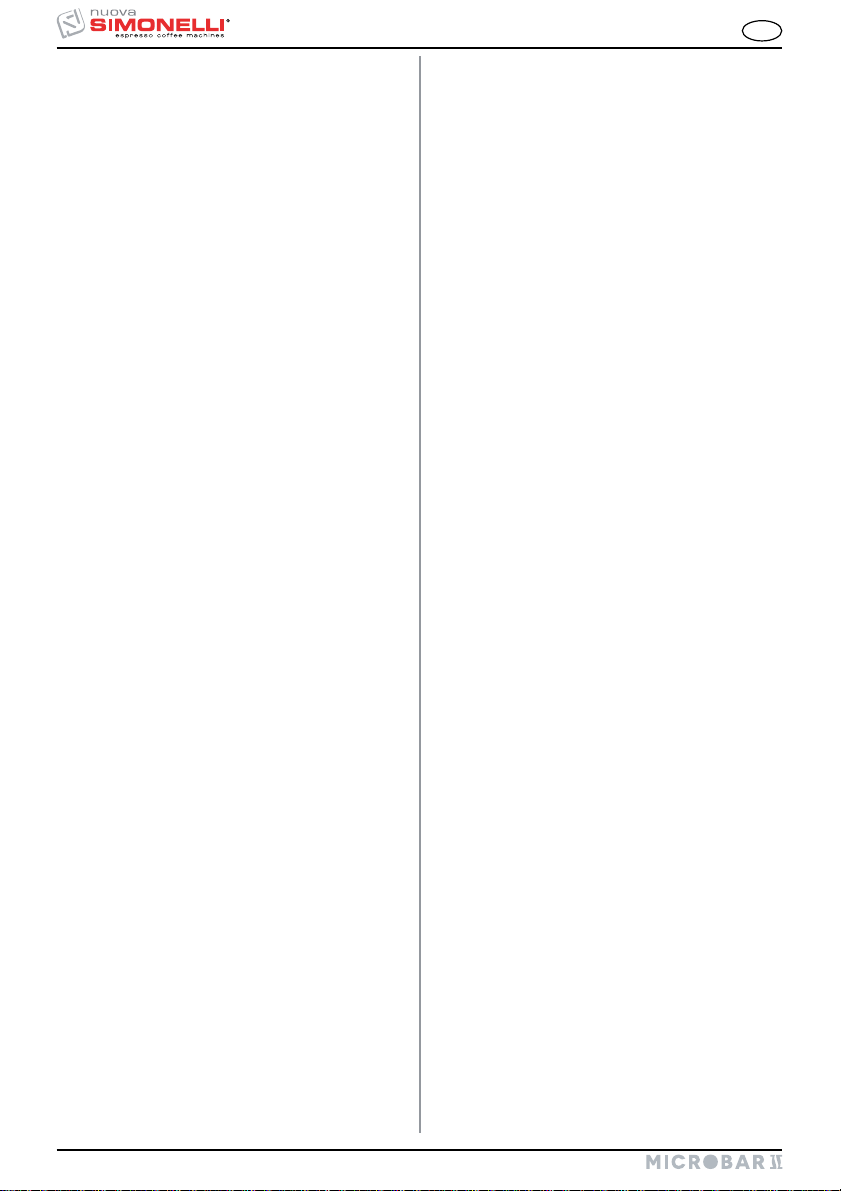
1.1 DESCRIZIONE TASTIERA (Configurazione standard)
LEGENDA
1 3 5 7
2 4 6 8
Fig. 2
1.2 DESCRIZIONE INTERNA MICROBAR II
1 2
LEGENDA
1 Convogliatore caffè macinato
2 Contenitore caffè in grani
3 Vite regolazione macinatura caffè
3
4 Gruppo erogatore
5 Contenitore raccogligocce
4
6 Cassetto fondi
7 Micro apertura porta
8 Chiave - Serratura porta
Tasto 1 Espresso
1
2
Tasto 2 Espressi
3
Tasto 1 Caffè
4
Tasto 2 Caffè
5
Tasto decaffeinato, Ciclo Lavaggio
6 Tasto Caffelatte
7
Tasto Acqua Calda
8 Tasto Vapore
in grani
5
8
6 7
Fig. 3
9
IT
2. INSTALLAZIONE
E OPERAZIONI
PRELIMINARI
ATTENZIONE
PERICOLO DI INQUINAMENTO
Non disperdere l’imballo nell’ambiente.
Fig. 4
Prima di procedere a qualsiasi operazione di
installazione e regolazione, devono essere lette e
ben comprese le PRESCRIZIONI DI SICUREZZA di
questo manuale. L'azienda non risponde di alcun
danno a cose o a persone derivante da una mancata osservanza delle prescrizioni di sicurezza,
installazione e manu tenzione, di questo manuale.
NOTA: In caso di esercizi in cui il servizio è conti-
nuativo effettuare i ricambi di sopra descritti
almeno con frequenza settimanale.
2.1 INSTALLAZIONE
MACCHINA VERSIONE
CON TANICA
ATTENZIONE
Spengere la macchina prima di riempire o estrarre il serbatoio.
Una volta estratta la macchina dall’imballo comportarsi come descritto di seguito:
1 Posizionarla su un piano orizzontale.
2 Aprire lo sportello.
3 Estrarre il serbatoio dell’acqua tirando verso l’alto.
ATTENZIONE
La macchina è idonea ad operare con i seguenti
alimenti:
Caffè in grani;
Caffè decaffeinato in polvere;
Latte non in polvere (solo versione
CAPPUCCINO).
Qualsiasi utilizzo della macchina con alimenti
diversi da quelli sopra citati può provocare gravi
danni alla macchina stessa.
ATTENZIONE
PERICOLO DI CORTOCIRCUITO
Prima di collegare la macchina alla rete elettrica,
verificare che ci sia corrispondenza tra il voltaggio per cui essa è stata predispo sta e quello
dell'impianto.
NOTA: All'inizio della attività giornaliera e comun-
que nel caso in cui vi siano pause maggiori
di 8 ore bisogna procedere ad effettuare il
ricambio del 100% dell'acqua contenuta nei
circuiti utilizzando gli erogatori preposti.
10
Fig. 5
4 Specialmente la prima volta, lavare con acqua e
sapone il serbatoio stesso e risciacquare accuratamente avendo cura di rimuovere ogni residuo di
sapone.
5 Riempire di acqua il serbatoio.
6
Assicurarsi che l’esterno del serbatoio sia asciutto.
7 Reinserire il serbatoio dell’acqua nel proprio allog-
giamento.
Fig. 6
8 Chiudere lo sportellino.
IT
ATTENZIONE
La durezza dell’acqua deve essere inferiore ai
4° - 6° fr (gradi francesi).
Altrimenti verranno a decadere le condizioni di
Garanzia della macchina.
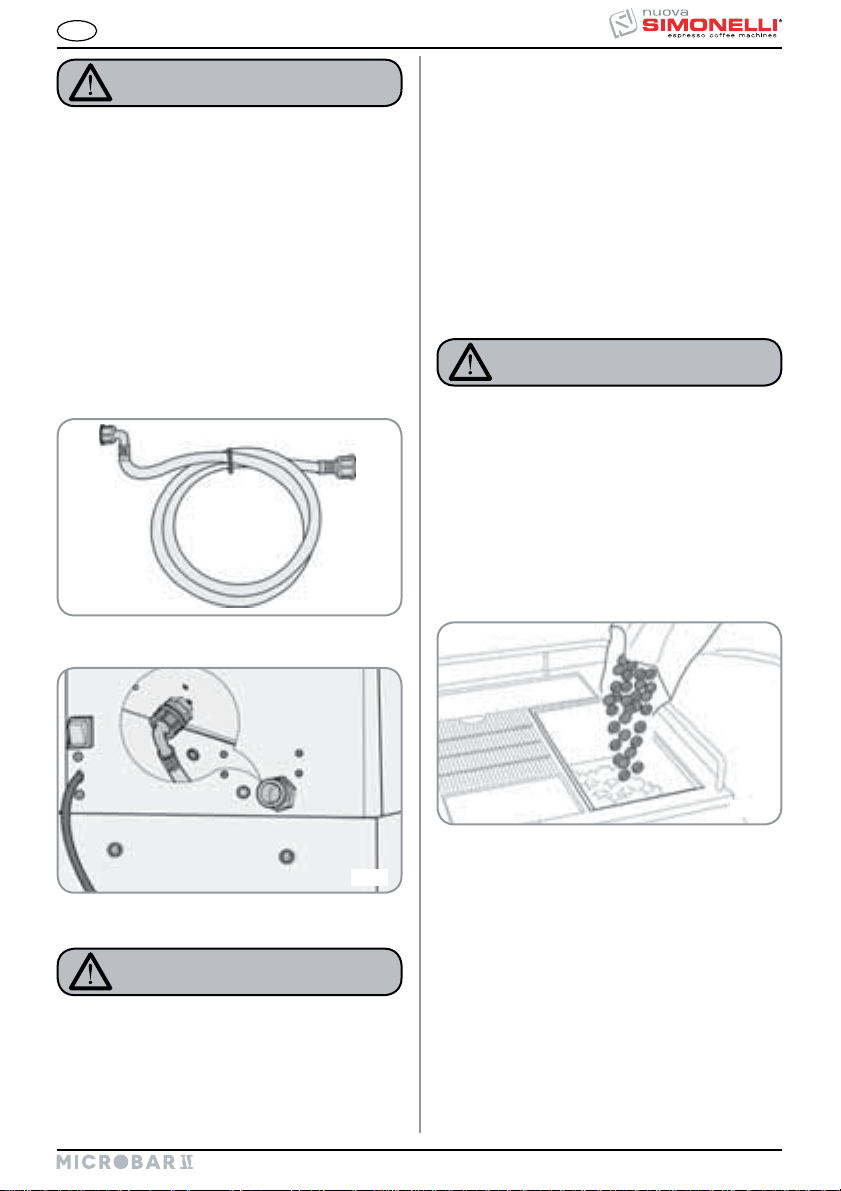
2.2 INSTALLAZIONE
MACCHINA VERSIONE
AD ALLACCIO DIRETTO
Una volta estratta la macchina dall’imballo comportarsi come descritto di seguito:
1 Posizionarla su un piano orizzontale.
2 Estrarre il tubo con allaccio da 3/4” dallo sportel-
lino nella parte superiore delle macchina.
Fig. 7
3 Collegare un’estremità del tubo al raccordo da 3/4”
situato nella parte posteriore della macchina.
La macchina deve essere installata
+
secondo le norme (codici) applicabili
federali, statali e locali in vigore per
gli impianti idraulici che comprendono
dispositivi antiriflusso. Per questo motivo, i collegamenti idraulici devono essere
eseguiti da un tecnico qualificato.
2.3 RIEMPIMENTO
CONTENITORE CAFFÈ
1 Rimuovere il tappo accesso contenitore caffè in
grani.
ATTENZIONE
Versare nel contenitore SOLO caffè in grani tostati. Qualsiasi altro genere di caffè, ad esempio
macinato, danneggia il macina caffè.
Non versare caffè in grani precedentemente trattato con caramello, zucchero o similari, caffè
istantaneo o altre bevande contenenti zucchero,
poiché danneggia la macchina.
2 Versare il caffè tostato in grani nel contenitore
senza raggiungere la massima capienza in modo
tale da permettere la chiusura del tappo.
Fig. 8
4 Collegare l’altra estremità del tubo alla rete idrica.
ATTENZIONE
La durezza dell’acqua deve essere inferiore ai
4° - 6° fr (gradi francesi).
Altrimenti verranno a decadere le condizioni di
Garanzia della macchina.
Fig. 9
3 Chiudere il tappo.
11
IT
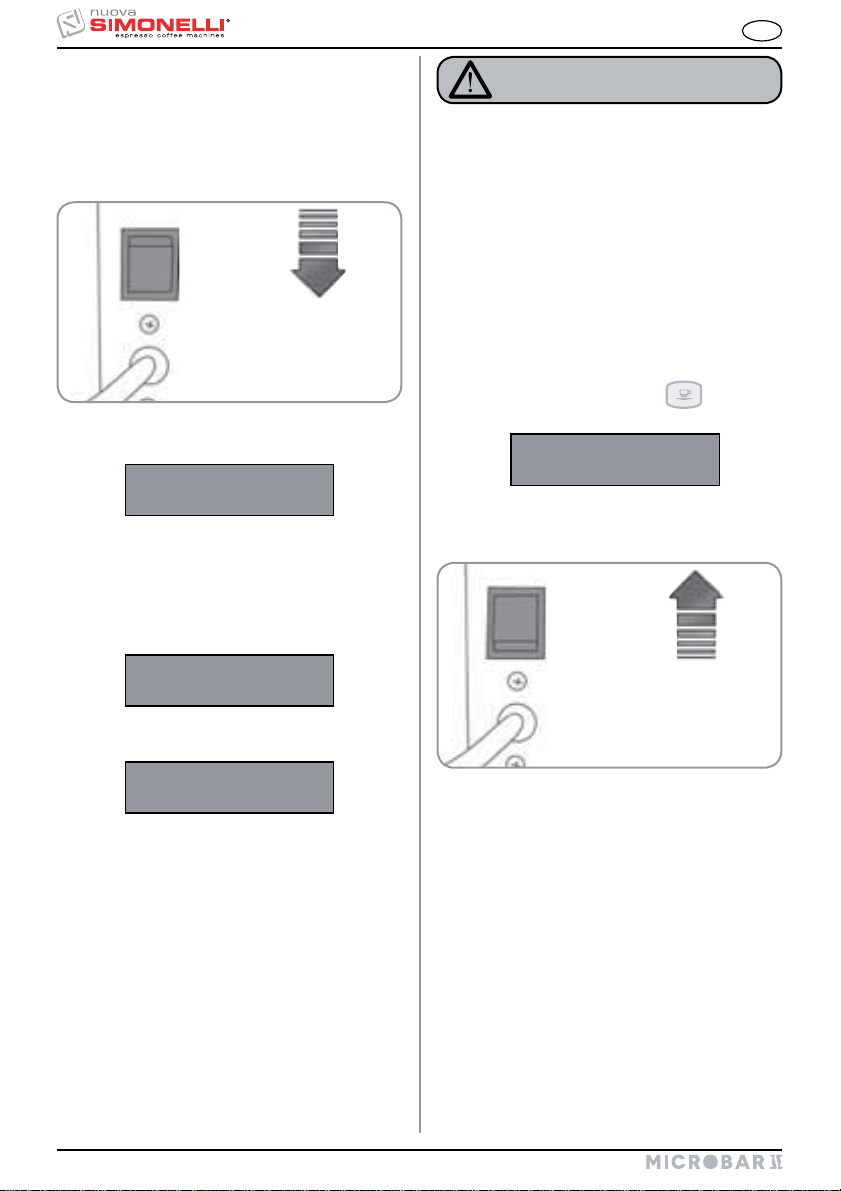
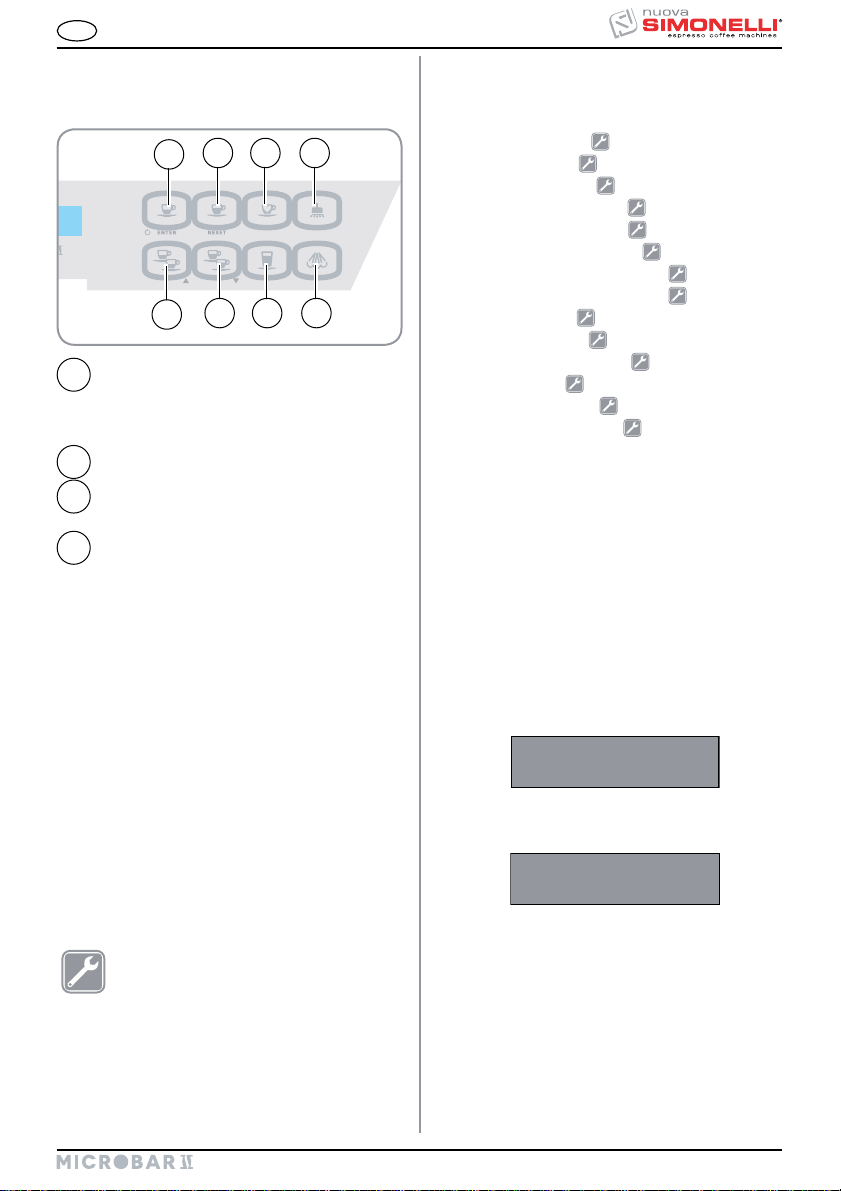
2.4 ACCENSIONE
Dopo aver terminato le Operazioni Preliminari di
Installazione:
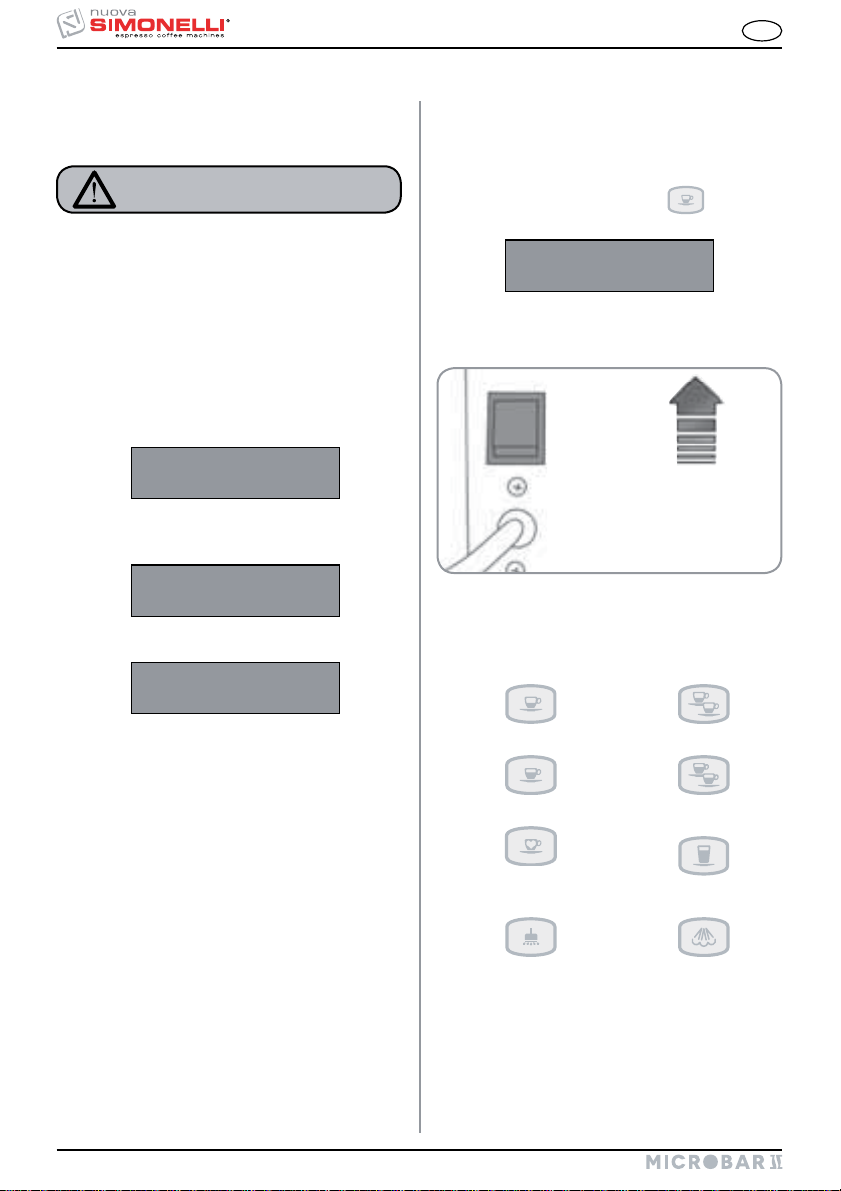
1 Premere l’interruttore generale della macchina e
portarlo nella posizione “ON”.
ON
Fig. 10
Successivamente il display si accende e visua-
lizza per alcuni secondi la schermata:
MICRO2015R.1.13B
La macchina carica automaticamente l’acqua in
caldaia ed inizia il riscaldamento.
Il display visualizza la seguente schermata fino
al termine del riscaldamento:
ATTENZIONE
IN CASO DI PRIMA INSTALLAZIONE O SUCCESSIVAMENTE ALLA MANUTENZIONE DEL GRUPPO CALDAIE, PRIMA DI EROGARE BEVANDE
CAFFÈ, PREMERE IL TASTO EROGAZIONE
ACQUA CALDA, SE NECESSARIO PIÙ VOLTE,
FINO A CHE NON SI OTTIENE UN FLUSSO
REGOLARE DELLA LANCIA.
2.5 SPEGNIMENTO
Se si desidera spengere la macchina operare come
descritto di seguito:
Dallo stato di macchina accesa, tenere premuto
per 5 secondi il tasto “ENTER”
Il display LCD visualizzerà la scritta:
Macchina OFF
Giorno Ora
Per arrestare completamente la macchina preme-
re l’interruttore generale e portarlo nella posizione
“OFF”.
.
Attendere
Riscaldamento
Raggiunta la temperatura impostata il display
visualizzerà la scritta:
Macchina pronta
Giorno Ora
NOTA: La macchina è dotata di un sistema di
sicurezza, che dopo circa 1,5 minuti di funzionamento continuo della pompa, arresta
la macchina (per evitare il surriscaldamento
della pompa stessa). In questo caso, spengere la macchina con l’interruttore generale
e riaccenderla.
La preparazione della macchina è finita ed è pronta
per l’utilizzo.
12
OFF
Fig. 11
IT
+
-
- C°
+C°
GROSSA
FINE
3. REGOLAZIONI DEL TECNICO QUALIFICATO
3.2 REGOLAZIONE ARIA
ATTENZIONE
Le regolazioni di seguito elencate devono essere
eseguite SOLO dal Tecnico Specializzato.
La Nuova Simonelli non risponde di alcun danno
a cose o persone, derivanti da una mancata osservanza delle prescrizioni di sicurezza,
descritte in questo manuale.
3.1 REGOLAZIONE DEL
GRADO DI MACINATURA
ATTENZIONE
Eseguire la procedura di registrazione della
macinatura con il macinino in funzione.
NOTA: Operazione eseguibile anche a macchina
accesa.
Inserire la chiave nell’apposita serratura.
Ruotare la chiave apertura portello di comando in
senso antiorario.
Aprire il portello di comando, per accedere alla
vite di regolazione della macinatura. Seguendo
la direzione delle frecce, si puz regolare più
GROSSA (senso antiorario) o più FINE (senso
orario) la macinatura del caffè in grani agendo
con una chiave a brugola 3 mm (0,12 in).
Richiudere il portello, chiudendolo a chiave.
NOTA: Operazione eseguibile anche a macchina
Per modificare la quantità di aria al cappuccinatore,
e quindi la quantità di schiuma, agire sulla apposita
vite di regolazione situata sul lato sinistro come
indicato in figura, in modo da aumentare / diminuire
l’aria al cappuccinatore.
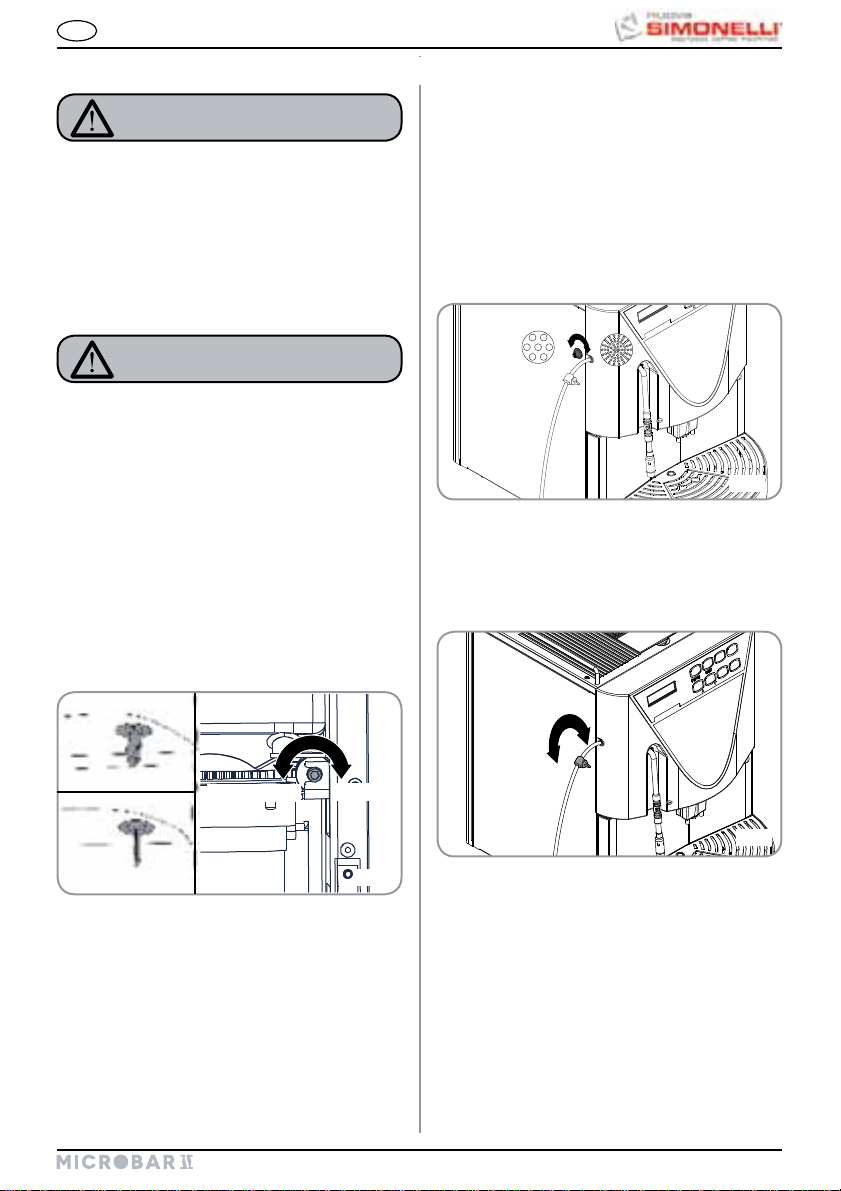
3.3 REGOLAZIONE FLUSSO
(versione CAPPUCCINO)
accesa.
DEL LATTE (Regolazione
Temperatura)
Fig. 13
APERTO
CHIUSO
Fig. 12
Fig. 14
NOTA: Operazione eseguibile anche a macchina
accesa.
Per modificare il flusso di latte aspirato, e quindi la
temperatura del latte erogato, agire sull’apposito
rubinetto di regolazione come descritto di seguito:
Ruotare il rubinetto aspirazione latte in senso
ORARIO / ANTIORARIO per AUMENTARE /
DIMINUIRE il flusso di aspirazione del latte e
quindi DIMINUIRE / AUMENTARE la temperatura.
Agire sul rubinetto fino a quando non si raggiun-
ge la temperatura desiderata del latte erogato.
13
4. UTILIZZO
IT
L’operatore deve prima di iniziare la lavorazione,
accertarsi di aver letto e ben compreso le prescrizioni di sicurezza di questo manuale.
ATTENZIONE
Nel caso in cui l’autodiagnosi indichi anomalie o
guasti, chiamare il centro di assistenza, l’operatore non deve intervenire.
4.1 ACCENSIONE
NOTA: Nel caso la sequenza qui sotto descrit-
ta non si verifichi, consultare il Capitolo
“ANOMALIE E RIMEDI”.
Premere l’interruttore macchina e successiva-
mente il display si accende e visualizza la scritta:
MICRO2015R.1.13B
Parallelamente la macchina inizia la fase di
riscaldamento e caricamento acqua in caldaia e,
dopo alcuni secondi, il display visualizza:
Attendere prego
Riscaldamento
Al termine del riscaldamento, la macchina è
pronta e il display visualizza:
Macchina pronta
Giorno Ora
4.2 SPEGNIMENTO
Se si desidera spengere la macchina operare come
descritto di seguito:
Dallo stato di macchina accesa, tenere premuto
per 5 secondi il tasto “ENTER”
Il display visualizzerà la scritta:
Macchina OFF
Giorno Ora
Per arrestare completamente la macchina pre-
mere l’interruttore generale e portarlo nella posizione “OFF”.
.
OFF
Fig. 15
4.3 CONFIGURAZIONE
ST AND ARD
LEGENDA TASTI
(Configurazione standard)
NOTA: Il tempo iniziale è circa 3 minuti.
NOTA: La macchina è dotata di un sistema di
sicurezza, che dopo circa 1,5 minuti di funzionamento continuo della pompa, arresta
la macchina (per evitare il surriscaldamento
della pompa stessa). In questo caso, spengere la macchina con l’interruttore generale
e riaccenderla.
La preparazione della macchina è finita ed è pronta
per l’utilizzo.
14
1 Espresso 2 Espresso
1 Caffè 2 Caffè
Decaffeinato
Ciclo Lavaggio
Acqua calda Vapore
NOTA:
Sui tasti n 1 - 2 - 3 - 4 - 6 (vedi relativa descrizione
“DISPLA<”), è possibile attribuire una diversa bevanda a seconda del proprio gusto e delle abitudini del
proprio paese (vedi capitolo PROGRAMMA=IONE e
paragrafo CONFIGURA=IONE SELE=IONI).
Caffelatte
IT
4.4 CONFIGURAZIONE
SELEZIONI
Impostare la funzione desiderata sui tasti a disposizione n 1 - 2 - 3 - 4 - 6 della pulsantiera (vedi
capitolo “DISPLA<”), tramite le procedure di programmazione (vedi Capitolo Programmazione).
I tasti 1 - 3 sono configurabili solo come bevande
caffè i tasti 2 - 4 - 6 sono configurabili con tutte le
bevande.
Applicare poi l’adesivo specifico fornito in dotazione.
Fig. 16
LEGENDA TASTI
(Configurazione selezioni)
CAPPUCCINO
Cappuccino
MACCHIATO
Macchiato
CAPPUCCINO
Big Cappuccino
MILK
Latte
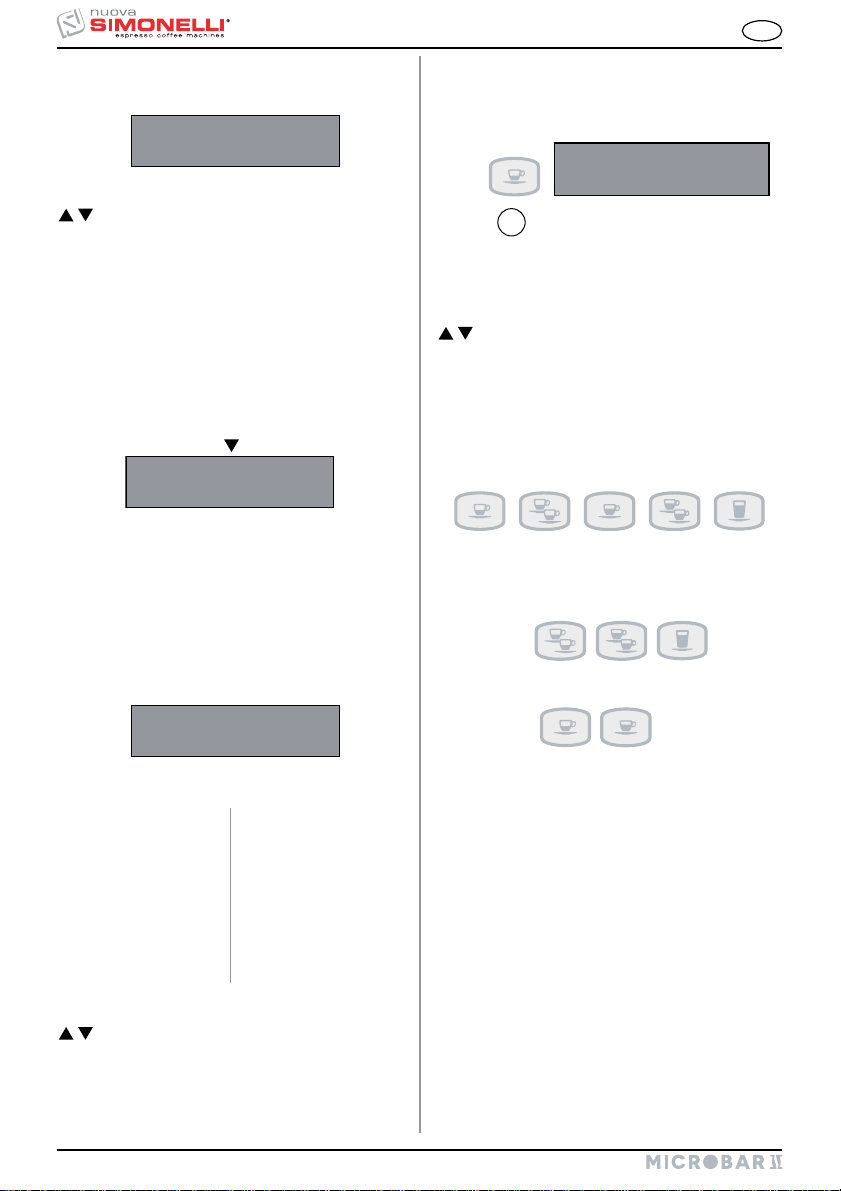
4.5 PREPARAZIONE CAFFÈ
La modalità di preparazione è la stessa per caffè
espresso e caffè lungo.
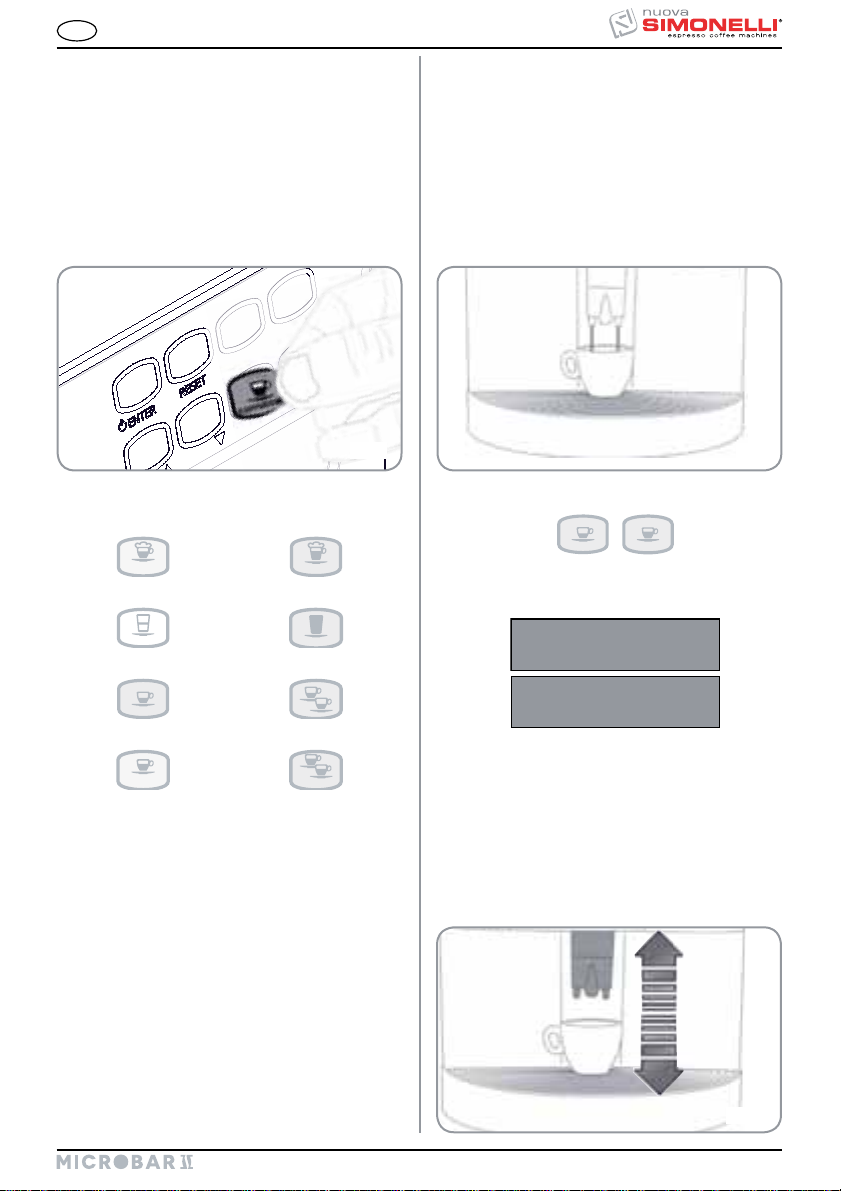
Posizionare una tazza sotto gli erogatori caffè.
Le bevande fuoriescono sempre contemporaneamente da entrambi gli erogatori.
Fig. 17
Premere una volta sul tasto erogazione del caffè
desiderato.
Il caffè è in preparazione.
Il display visualizza una scritta a seconda del tipo
di caffè selezionato.
Espresso
Caffe
1 Caffè Ristretto 2 Caffè Ristretto
CAFE CREM
1 Cafè Creme
CAFE CREM
2 Cafè Creme
Lasciare la tazza sotto gli erogatori per il tempo
di visualizzazione delle scritte sul display.
NOTA: Gli erogatori caffè possono essere regolati
in altezza per adattarsi a ogni tipo di tazza.
Posizionare gli erogatori con cautela nella posizione
desiderata in modo da imitare lo spazio tra tazza ed
erogatore.
Fig. 18
15
4.6 PREPARAZIONE
2 CAFFÈ
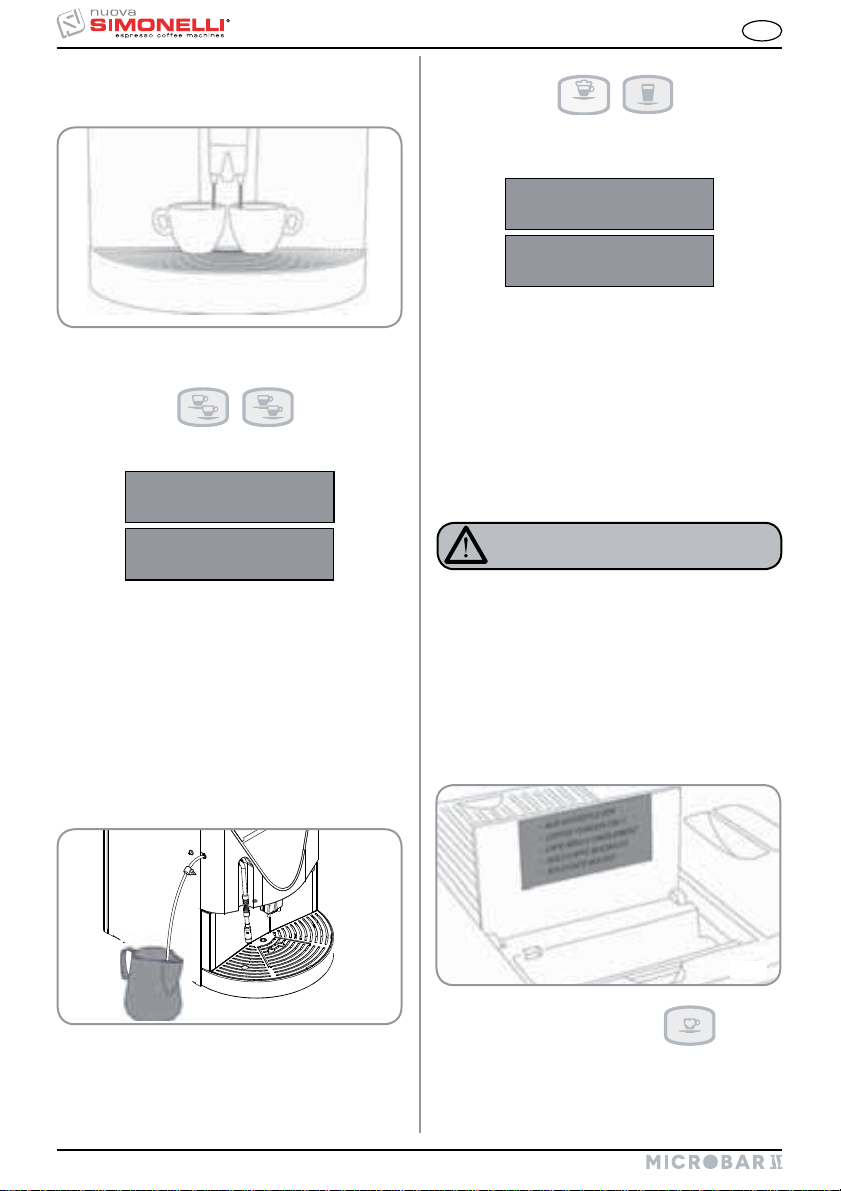
Sistemare una tazza sotto ciascun erogatore.
Premere il tasto di erogazione cappuccino/caffelatte.
CAPPUCCINO
La bevanda è in preparazione.
Il display visualizza la seguente scritta:
Cappuccino
Caffe latte
IT
Fig. 19
Premere una volta sul tasto erogazione del caffè
desiderato.
Il caffè è in preparazione. Il display visualizza una
scritta a seconda del tipo di caffè selezionato.
2 Espresso
2 Caffe
Lasciare le due tazzine sotto gli erogatori per il
tempo di visualizzazione delle scritte sul display.
4.7 PREPARAZIONE
CAPPUCCINO /
CAFFELATTE (versione
CAPPUCCINO)
Posizionare un contenitore con del latte a fianco
della macchina.
Immergere il tubo aspirazione latte all’interno del
recipiente.
Lasciare la tazza sotto gli erogatori per il tempo
di visualizzazione delle scritte sul display.
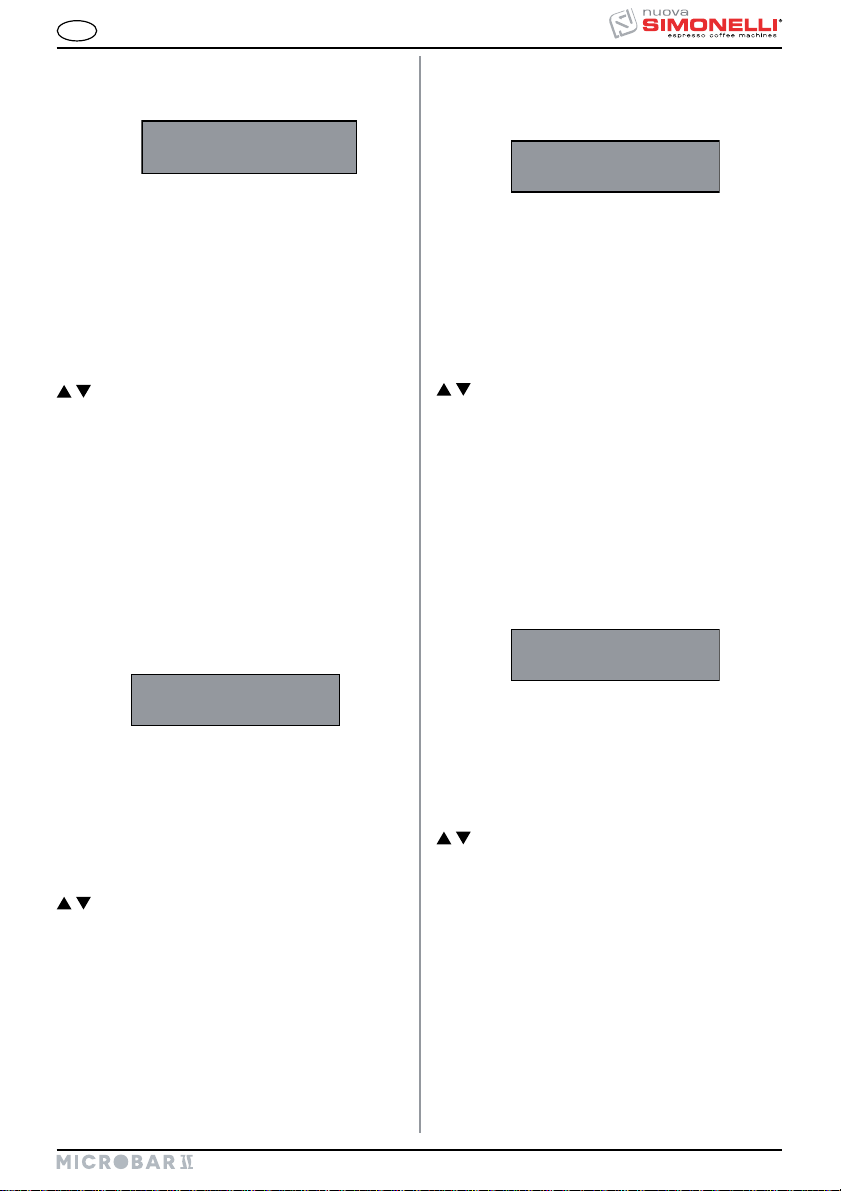
4.8 PREPARAZIONE
CAFFÈ DECAFFEINATO
IN POLVERE
Aprire lo sportello accesso convogliatore caffè
macinato.
ATTENZIONE
Versare nel convogliatore solo caffè macinato.
Qualsiasi altro genere di caffè, danneggia la
macchina.
Non versare ad esempio caffè in grani precedentemente trattato con caramello, zucchero o similari, caffè istantaneo o altre bevande contenenti
zucchero, poiché danneggiano la macchina.
Inserire al suo interno SOLO 1 DOSE di caffè
decaffeinato macinato.
Posizionare una tazza sotto l'erogatore.
16
Fig. 21
Fig. 20
Premere il tasto di erogazione .
IT
Sul display apparirà:
Decaffeinato
Giorno Ora
Premere il tasto relativo al tipo di bevanda deside-
rata (caffè/cappuccino).
La bevanda è in preparazione.
Il display visualizza la seguente scritta (esempio):
Decaffeinato
Espresso
Lasciare la tazzina sotto gli erogatori per il
tempo di visualizzazione della scritta sul display.
4.9 ACQUA CALDA
ATTENZIONE
Prima di effettuare la seguente operazione assicurarsi che vi sia acqua all’interno del serbatoio.
In caso contrario, provvedere al ripristino.
Consente l’erogazione di acqua calda per preparare
tè, camomilla e tisane.
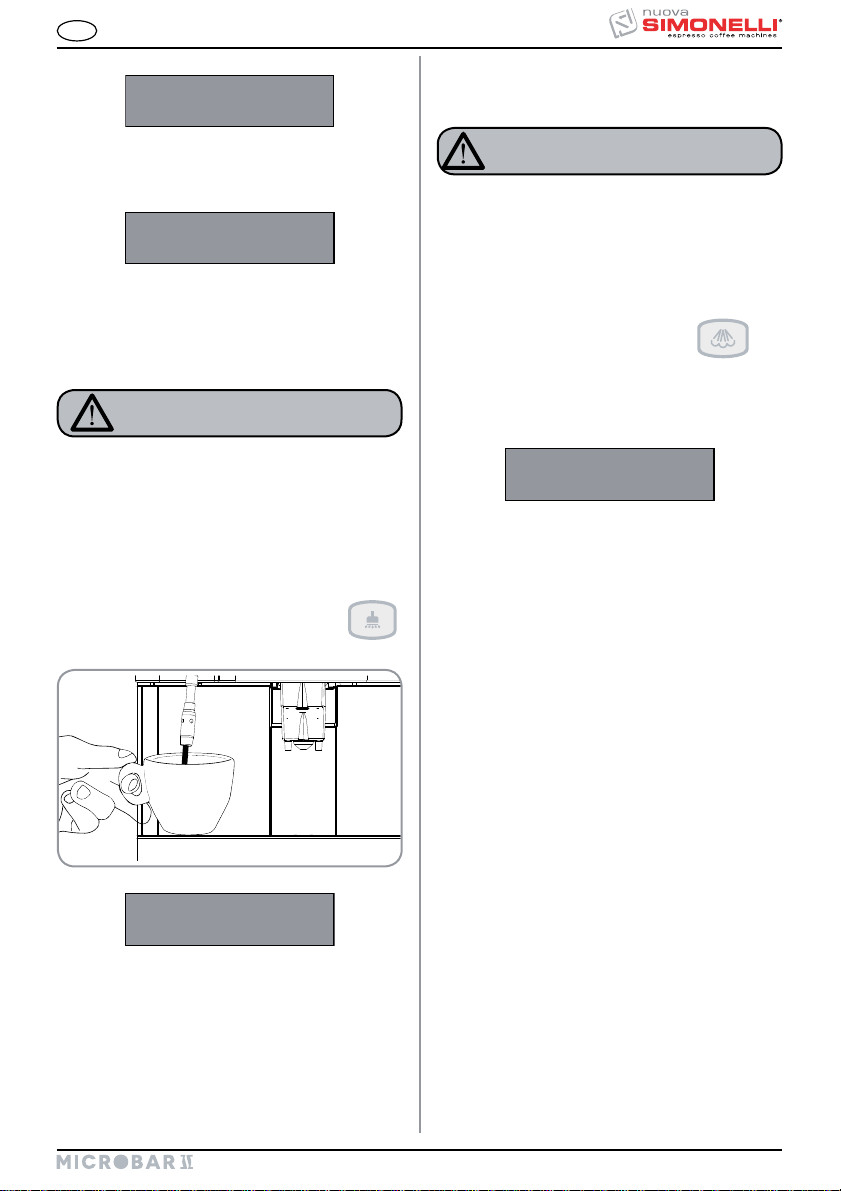
Posizionare un recipiente sotto la lancia vapore /
acqua calda.
Premere il tasto erogazione Acqua Calda
La lancia vapore eroga acqua calda.
4.10 VAPORE (Solo versione
CAPPUCCINO)
ATTENZIONE
Durante l’erogazione del vapore, non toccare con
le parti del corpo la lancia, ne mettere le mani
sotto la lancia, quindi mantenerla sempre inclinata verso il basso sulla griglia appoggiatazze.
Consente l’erogazione di vapore per emulsionare il
latte, oppure per riscaldare altri liquidi.
Premere il tasto erogazione Vapore
Dalla lancia vapore fuoriesce l’acqua di condensa
residua e non appena dall’erogatore fuoriesce il
vapore utilizzarlo per il tempo desiderato.
Il display visualizza la seguente scritta (esempio):
Vapore
Quando è stata raggiunta la quantità programmata,
l'erogazione viene interrotta automaticamente.
IMPORTANTE:
Al termine di ogni erogazione pulire accuratamente la
lancia vapore con un panno umido.
.
NOTA: L'utilizzo della lancia vapore deve essere
sempre preceduta dall'operazione di spurgo
della condensa per almeno 2 secondi o
seguendo le istruzioni del costruttore.
.
Fig. 22
Il display visualizza la seguente scritta:
Macchina pronta
Te
Quando è stata raggiunta la quantità programmata,
l'erogazione viene interrotta automaticamente.
17
4.11 PREPARAZIONE
SELEZIONI
NOTA: Queste selezioni sono erogabili solo dopo
che sono state configurate.
Per configurare le selezioni, vedere il
relativo paragrafo CONFIGURA=IONE
SELE=IONI.
Per la preparazione delle seguenti bevande:
Big Cappuccino
Macchiato
Latte
vedere le procedure di erogazione del CAPPUCCINO/
CAFFELATTE.
Per la preparazione delle seguenti bevande:
1 Cafè Creme
2 Cafè Creme
vedere le procedure di erogazione del CAFFÈ
ESPRESSO e CAFFÈ LUNGO.
IT
18
IT
5. PROGRAMMAZIONE
5.1
PULSANTIERA STANDARD
3 5 7
1
4 6 8
2
1
Ta st o ENTER:
per entrare all’interno del
menù e/o confermare
Fig. 23
valori e passare allo step
successivo.
Ta st o CURSORI:
2
scorrimento dei menù ed
incremento / decremento
4
3
Ta st o RESET:
valori.
per confermare e ritornare allo step precedente.
LISTA FUNZIONI PROGRAMMABILI
Funzioni accessibili dalla modalità UTENTE e dalla
modalità TECNICO
1. LINGUA
2. NOME PRODOTTO
3. PROG. DOSI
4. PROG. MACININO
5. DOSE LATTE (versione CAPPUCCINO)
6. GIORNO/ORA
7. PROGRAM. ON/OFF
8. RISPARMIO ENERGIA
Funzioni accessibili dalla “SOLA” modalità TECNICO.
Le funzionalità a cui si darà accesso nella modalità
OPERAZIONE ESEGUIBILE SOLO DA
TECNICO SPECIALIZZATO.
LA REGOLAZIONE DA PARTE DI
TECNICI NON QUALIFICATI O DI ALTRE
PERSONE, POTREBBE INVALIDARE LA
GARANZIA.
TECNICO in aggiunta alle precedenti sono:
9. PREINFUSIONE
10. PRESSATURA
11. NUMERO FONDI
12. ALL. LAVAGG. LATTE
13. ALLARME LAVAGGIO
14. RISCIACQUO GRUPPO
15. REGOLAZIONE GRUPPO 1
16. REGOLAZIONE GRUPPO 2
17. TEMP. CAFFÈ
18. TEMP. VAPORE
19 CONTEGGIO TOTALE
20. PASSWORD
21. FILTRO ACQUA L
22. DECALCIFICAZIONE
5.2 PROGRAMMAZIONE
Entrando in programmazione si ha accesso a tutte
le funzioni della modalità UTENTE e nella modalità
TECNICO.
Per entrare negli ambienti di programmazione, operare come descritto:
NOTA: Operazione eseguibile a macchina accesa.
Inserire la chiave nell’apposita serratura.
Ruotare la chiave apertura portello di comando in
senso antiorario.
Aprire il portello di comando, il display visualizza:
Macchina Off
Porta Aperta
Tenendo premuto il tasto ENTER, chiudere lo
sportello macchina, il display visualizza:
Attendere prego
Riscaldamento
19
IT
Terminato il ciclo di espulsione, il gruppo si posi-
ziona in fase di riposo e il display visualizza la
prima voce del menù di programmazione:
Lingua
FUNZIONALITÀ TASTI
: Scorrimento Lista Funzioni Programmabili
e/o decremento / incremento valori.
ENTER: Ingresso Menù e conferma dati.
RESET: Ritorno al menù precedente.
5.3 USCITA DALLA
PROGRAMMAZIONE
Per uscire dagli ambienti di programmazione sia
UTENTE che TECNICO è necessario scorrere tutte
le funzioni tramite il tasto
Macchina Pronta
Giorno Ora
fino alla visualizzazione:
5.4 CICLO DI
PROGRAMMAZIONE
MODALITÀ UTENTE
1 . LINGUA
Premendo il tasto ENTER è possibile accedere alle impostazioni. Viene impostata la lingua
di interfaccia, tra la macchina e l’operatore,
visualizzata dal display.
Lingua
Le lingue a disposizione sono le seguenti:
Italiano Svedese
Inglese Danese
Spagnolo Finnico
Tedesco Norvegese
Francese Russo
Olandese Giapponese
2. NOME PRODOTTO:
Premendo il tasto ENTER è possibile accedere alle impostazioni. Viene assegnata la
bevanda ad ogni singolo tasto. Esempio:
Nome prodotto: 1
Al tasto 1 in questo caso è stata assegnata la
bevanda “Espresso”.
FUNZIONALITÀ TASTI
: Scorrimento delle bevande a disposizione
per ogni tasto.
ENTER: Conferma la bevanda impostata per il
tasto in esame e scorre alla selezione
della bevanda per il tasto successivo.
RESET: Ritorno al menù precedente.
I tasti programmabili sono i seguenti:
Terminata la programmazione dell’ultimo tasto, premendo ENTER si passa alla voce di menù successiva.
NOTA: I tasti sono pro-
grammabili come bevande a base di latte e
come bevande caffè.
I tasti
solo come bevande
NOTA: È possibile assegnare a ciascun tasto la
funzione DISABLE ed in questo caso il tasto
risulterà disabilitato.
Espresso
caffè.
sono programmabili
FUNZIONALITÀ TASTI
: Scorrimento elenco lingue.
ENTER: Conferma lingua selezionata.
RESET: Ritorno al menù precedente.
20
IT
3. PROG. DOSI
Premendo il tasto ENTER è possibile accedere
alle impostazioni.
Prog. Dosi
Vengono programmate le dosi di acqua utilizzate per ogni singola bevanda.
1 Prog Dose caffè Ristretto
2 Prog Dose caffè Espresso
3 Prog Dose caffè 2 Ristretto
4 Prog Dose caffè Macchiato
5 Prog Tempo acqua Tè (s)
6 Tempo massimo vapore (s)
5.
DOSE LATTE (solo versione
CAPPUCCINO)
Premendo il tasto ENTER è possibile accedere
alle impostazioni.
Dose Latte
Viene programmato il tempo di erogazione del
latte (sec.).
1 Latte
2 Caffellatte
3 Macchiato
4 Cappuccino
5 Big Cappuccino
FUNZIONALITÀ TASTI
: Incremento / decremento delle quantità
di acqua impiegata durante l'erogazione
delle bevande.
Per il Tè, incrementa / decrementa il
tempo massimo di erogazione vapore.
ENTER: Conferma il valore impostato per la bevan-
da in esame e scorre all'impostazione
della bevanda successiva.
RESET: Ritorno al menù precedente.
4. PROG. MACININO
Premendo il tasto ENTER è possibile accedere
alle impostazioni.
Prog. Macinino
È possibile impostare i tempi di macinatura per
ogni bevanda (sec.).
1 Tempo Macinatura Ristretto
2 Tempo Macinatura Espresso
3 Tempo Macinatura 2 Ristretto
4 Tempo Macinatura Macchiato
FUNZIONALITÀ TASTI
: Incremento / decremento del tempo di
macinatura impiegato per l'erogazione
della bevanda.
ENTER: Conferma il valore impostato per la bevan-
da in esame e scorre all'impostazione
della bevanda successiva.
RESET: Ritorno al menù precedente.
FUNZIONALITÀ TASTI
: Incremento / decremento del tempo di
erogazione del latte per preparare una
bevanda.
ENTER: Conferma il valore impostato per la bevan-
da in esame e scorre all'impostazione
della bevanda successiva.
RESET: Ritorno al menù precedente.
6. GIORNO/ORA
Premendo il tasto ENTER è possibile accedere
alle impostazioni.
Giorno / Ora
Viene programmato il giorno, l’ora ed i minuti
che visualizzerà il display della macchina.
1 Giorno
2 Ora
3 Minuti
FUNZIONALITÀ TASTI
: Incremento / decremento del valore della
data e dell'ora.
ENTER: Conferma il valore impostato per il dato in
esame e scorre all'impostazione del dato
successivo. Dopo la conferma del giorno
torna al menù precedente.
RESET: Ritorno al menù precedente.
21
IT
7. PROGRAM. ON/OFF
Premendo il tasto ENTER è possibile accedere all'impostazione di accensione/spegnimento
(ON/OFF) automatico della macchina, solo con
l’interruttore della macchina in posizione ON.
Il display visualizza il seguente messaggio:
Domenica
Riposo Settiman.
NOTA:
Di default la macchina è impostata con
tutti i giorni della settimana settati nella
modalità “RIPOSO”, quindi per accendere / spengere la macchina, è necessario utilizzare l’interruttore generale.
FUNZIONALITÀ TASTI
: Se utilizzati fuori dalle impostazioni con-
sentono di scorrere i giorni della settimana e visualizzarne le impostazioni. Dopo
il giorno SABATO premendo il tasto
si torna al menù precedente. Se utilizzati
all'interno delle impostazioni incrementano/decrementano il valore da impostare.
ENTER: Accesso all'impostazione dei singoli gior-
ni. Se premuto all'interno delle impostazioni, conferma il valore impostato e
scorre al valore successivo.
RESET:
Il display visualizza il seguente messaggio:
Ritorno alla visualizzazione delle impostazioni giornaliere. Se premuto di nuovo, azzera le impostazioni del giorno visualizzato.
Domenica
ON07 : 30 OFF23 : 30
8. RISPARMIO ENERGIA
Premendo il tasto ENTER è possibile accedere all'impostazione del tempo dopo il quale la macchina attiva
il dispositivo di risparmio energetico, mantenendo
comunque la caldaia a temperatura di esercizio. Il
display visualizza:
Risparmio Energia
00 : 00
FUNZIONALITÀ TASTI
: Incremento/decremento del tempo di atti-
vazione del RISPARMIO ENERGIA, con
passi di 30 minuti.
Con il contatore impostato a zero, la fun-
zione viene disattivata.
ENTER: /
RESET: Ritorno al menù precedente con conferma
del valore impostato.
5.5 CICLO DI
PROGRAMMAZIONE
Per accedere alle funzioni programmabili solo nella
MODALITÀ TECNICO scorrere tutte le funzioni
accessibili della MODALITÀ UTENTE fino a quando
il display visualizza il messaggio:
Inserire la password corretta per accedere alla prima
voce del menù di programmazione accessibile nella
MODALITÀ TECNICO.
NOTA: La password standard impostata dal
MODALITÀ TECNICO
Password
* * * * *
Costruttore è 5 volte il pulsante
2
:
22
NOTA: Qualora venga introdotta una password
errata, la macchina uscirà automaticamente dalla programmazione, portandosi nello
stato di macchina pronta.
IT
9. PRE-INFUSIONE
Premendo il tasto ENTER è possibile accedere
alle impostazioni.
Preinfusione
Viene programmata, per ogni singola bevanda,
la possibilità di effettuare la pre-infusione della
pastiglia del caffè (SI o NO).
1 Preinfusione Ristretto
2 Preinfusione Espresso
3 Preinfusione 2 Ristretto
4 Preinfusione Macchiato
FUNZIONALITÀ TASTI
: Abilita/disabilita la pre-infusione della
pastiglia.
ENTER: Scorre ogni singola voce e ne conferma
l'abilitazione/disabilitazione.
RESET: Ritorno al menù principale con conferma
del valore impostato.
10. PRESSATURA
Premendo il tasto ENTER è possibile accedere
alle impostazioni.
Pressatura
Viene programmata, per ogni singola bevanda, la
compressione della pastiglia (SI o NO).
1 Pressatura Ristretto
2 Pressatura Espresso
3 Pressatura 2 Ristretto
4 Pressatura Macchiato
FUNZIONALITÀ TASTI
: Abilita/disabilita la pressatura della pasti-
glia per l'erogazione della bevanda.
ENTER: Scorre ogni singola voce e ne conferma
l'abilitazione/disabilitazione.
RESET: Ritorno al menù precedente con conferma
del valore impostato.
11. NUMERO FONDI
Premendo il tasto ENTER è possibile accedere
alle impostazioni.
Numero Fondi
Viene programmato il numero di fondi, raggiunto il quale viene visualizzato il messaggio
di svuotare il cassetto fondi e la macchina si
blocca per permettere la procedura in tutta
sicurezza.
FUNZIONALITÀ TASTI
: Aumentare/diminuire il numero di fondi
prima della visualizzazione del messaggio.
ENTER: /
RESET: Ritorno al menù precedente con conferma
del valore impostato.
12 . ALL. LAVAGG. LATTE
(solo ver-
sione CAPPUCCINO)
Premendo il tasto ENTER è possibile accedere
alle impostazioni.
All. Lavag. Latte
Viene programmato il numero di ore, dall’ultima
erogazione bevanda latte, dopo il quale viene
visualizzato l’avviso pulizia cappuccinatore.
FUNZIONALITÀ TASTI
: Aumentare/diminuire il numero di ore
prima della visualizzazione del messaggio.
ENTER: /
RESET: Ritorno al menù precedente con conferma
del valore impostato.
23
IT
13. ALLARME LAVAGGIO
Premendo il tasto ENTER è possibile accedere
alle impostazioni.
Allarme Lavaggio
Viene programmato il numero di cicli dopo il
quale viene visualizzato l’avviso pulizia gruppo.
FUNZIONALITÀ TASTI
: Aumentare/diminuire il numero di cicli
prima della visualizzazione del messaggio.
ENTER: /
RESET: Ritorno al menù precedente con conferma
del valore impostato.
14. RISCIACQUO GRUPPO
Premendo il tasto ENTER è possibile accedere
alle impostazioni.
Risciacquo Gruppo
Viene programmato un ciclo di risciacquo del
gruppo erogatore.
Se abilitato (ON), la macchina esegue un ciclo
di risciacquo del gruppo dopo 20 minuti dall'ultima attività svolta (se la macchina non svolge
attività prima dei 20 minuti).
FUNZIONALITÀ TASTI
: Aumentare/diminuire il numero di impulsi
dell’ENCODER.
ENTER: /
RESET: Ritorno al menù precedente con conferma
del valore impostato.
IMPORTANTE:
Si raccomanda di variare l’impostazione solo nel
caso in cui in motoriduttore originale venga sostituito
con uno di tipo diverso.
16. REGOLAZ. GRUPPO 2
Premendo il tasto ENTER è possibile accedere
alle impostazioni.
Regolaz. Gruppo 2
0000
Viene programmato il numero di impulsi
dell’ENCODER perché la camera di infusione raggiunga la posizione superiore (camera
chiusa).
FUNZIONALITÀ TASTI
: Aumentare/diminuire il numero di impulsi
dell’ENCODER.
ENTER: /
RESET: Ritorno al menù precedente con conferma
del valore impostato.
FUNZIONALITÀ TASTI
: Abilita/disabilita (ON/OFF) il risciacquo del
gruppo.
ENTER: Conferma l'impostazione e torna al menù
precedente.
RESET: Ritorno al menù precedente.
15. REGOLAZ. GRUPPO 1
Premendo il tasto ENTER è possibile accedere
alle impostazioni.
Regolaz. Gruppo 1
0000
Viene programmato il numero di impulsi
dell’ENCODER perché la camera di infusione
raggiunga la posizione di stand-by.
24
IMPORTANTE:
Si raccomanda di variare l’impostazione solo nel
caso in cui in motoriduttore originale venga sostituito
con uno di tipo diverso.
17. TEMPERATURA CAFFÈ
Premendo il tasto ENTER è possibile accedere
alle impostazioni.
Temp. Caffe
0098 C 0208 F
Viene programmata la temperatura della caldaia caffè.
FUNZIONALITÀ TASTI
: Aumentare / diminuire la temperatura della
caldaia caffè.
impostabile è 105C (221F).
La temperatura massima
IT
ENTER: /
RESET: Ritorno al menù precedente con conferma
del valore impostato.
18. TEMP VAPORE (solo versione
CAPPUCCINO)
Premendo il tasto ENTER è possibile accedere
alle impostazioni.
Temp. Vapore
0125 C 0257 F
Viene programmata la temperatura della caldaia vapore.
FUNZIONALITÀ TASTI
: Aumentare / diminuire la temperatura della
caldaia vapore.
impostabile è 130C (266F).
ENTER: /
RESET: Ritorno al menù precedente con conferma
del valore impostato.
La temperatura massima
19. CONTEGGIO TOTALE
Premendo il tasto ENTER è possibile accedere
alle impostazioni.
Totale Selezioni
Vengono visualizzati:
Il numero di cicli effettuati per ogni tasto
bevanda.
Totale decaffeinato.
Totale Cicli di lavaggio.
Totale Vapore.
Totale Acqua Calda.
Totale litri di Acqua.
FUNZIONALITÀ TASTI
: Scorrimento voci.
ENTER: /
RESET: Ritorno al menù precedente.
NOTA: Nella prima posizione tenendo premuto il
tasto
viene visualizzato il totale assoluto
delle dosi prodotte dalla macchina.
Per azzerare i conteggi dei vari cicli e i totali decaffeinato, vapore, acqua calda, premere contemporaneamente i tasti
. Il display visualizza il messaggio:
Azzeramento
20. PASSWORD
Premendo il tasto ENTER è possibile accedere
alle impostazioni.
Password
Viene programmata la nuova password di
accesso alle funzioni programmabili nella
MODALITÀ TECNICO.
Digitare una combinazione di 5 tasti (degli 8 a
disposizione da tastiera) ed impostare la nuova
password desiderata.
FUNZIONALITÀ TASTI
ENTER: Conferma del valore impostato.
RESET: Ritorno al menù precedente senza confer-
ma del valore impostato.
21. FILTRO ACQUA L
Premendo il tasto ENTER è possibile accedere
alle impostazioni.
Filtro Acqua l.
0000
Viene programmato il numero di litri di acqua
erogata per la visualizzazione del messaggio
pulizia filtro acqua.
FUNZIONALITÀ TASTI
: Aumentare / diminuire il numero di litri di
acqua erogata prima della visualizzazione
del messaggio.
ENTER: /
RESET: Ritorno al menù precedente con conferma
del valore impostato.
25

IT
22. DECALCIFICAZIONE
(versione Tanica)
Premendo il tasto ENTER è possibile accedere
alle impostazioni
Il primo messaggio che comparirà è relativo
alla possibilità di poter impostare la durezza
dell'acqua:
Tramite il tasto
cificazione vero e proprio.
Durezza Acqua Fr
FUNZIONALITÀ TASTI
: Consentono di selezionare una delle due
funzioni.
ENTER: Consente di eseguire la funzione selezio-
nata.
RESET: Ritorno al menù precedente.
.
è possibile accedere ciclo di decal-
Decalcificazione
Inizio ciclo?
22.1 IMPOSTAZIONE DUREZZA ACQUA
È possibile impostare la durezza dell'acqua in gradi
francesi, e quindi l'allarme per l'esecuzione del ciclo
di decalcificazione.
Alla comparsa del messaggio:
Durezza Acqua Fr
Premendo il tasto ENTER è possibile entrare nella
funzione.
Il display visualizzerà:
Durezza Acqua Fr
00
FUNZIONALITÀ TASTI
: Aumentare/diminuire il parametro durezza
acqua.
ENTER: torna al menù precedente salvando il dato
impostato.
RESET: Ritorno al menù precedente non salvando
il dato impostato.
Nella seguente tabella è possibile individuare la corrispondenza tra la durezza impostata ed il numero di
litri di acqua consumata oltre i quale apparirà il messaggio “ESEGUIRE DECALCIFICAZIONE”.
DUREZZA ACQUA °FR LITRI ACQUA
1-7 1500
8-30 1000
31 500
00
NOTA:
L'allarme “ESEGUIRE DECALCIFICAZIONE”
non interrompe il funzionamento della macchina,
e si resetta dopo aver eseguito il ciclo di decalcificazione insieme al contatore dei litri.
Se il valore impostato è “00” l'allarme è disattivato
Allarme
disattivato
22.2 CICLO DI DECALCIFICAZIONE
Viene eseguito il ciclo automatico di decalcificazione
delle caldaie della macchina.
Alla comparsa del messaggio:
Decalcificazione
Inizio ciclo?
Premendo il tasto ENTER si da inizio al ciclo di
decalcificazione.
OPERATIVAMENTE:
Prima di iniziare il ciclo di decalcificazione, riem-
pire la tanica con la soluzione di acqua e prodotto
decalcificante.
NOTA:
Utilizzare almeno 2 litri (0.52 gal) di soluzione.
Al messaggio:
Decalcificazione
Inizio ciclo?
Premere il tasto ENTER;
La macchina inizierà a risucchiare la soluzione
dalla tanica espellendo in contemporanea acqua
calda dalla lancia.
La macchina mostrerà:
Decalcificazione
Attendere Prego
Terminato di risucchiare il primo litro di soluzione la
macchina si fermerà per 5 min. e quindi inizierà a
risucchiare un altro litro di soluzione.
26
IT
Al termine dell’attesa il display visualizzerà:
Risciacquo
Riempire Tanica
Risciacquare la tanica e riempirla di nuovo con
acqua pulita (senza spegnere la macchina).
NOTA: utilizzare almeno 4 litri (1.06 gal) di soluzio-
ne, altrimenti è necessario riavviare il ciclo.
Attendere poi circa 5 minuti.
Al termine dell’attesa il display visualizza:
Risciacquo
Premere ENTER
Premendo il tasto ENTER, la macchina inizierà il
ciclo di risciacquo, prelevando 2lt di acqua della
tanica espellendola dalla lancia.
Durante questa fase la macchina visualizzerà:
Risciacquo
Attendere Prego
Al termine dei 2 lt di acqua prelevati della tanica la
macchina visualizzerà di nuovo:
Risciacquo
Premere ENTER
Premendo il tasto ENTER di nuovo la macchina
inizierà la seconda fase del ciclo di risciacquo prelevando altri 2 lt di acqua della tanica, e visualizzerà:
Risciacquo
Attendere Prego
ATTENZIONE
Al termine del ciclo di decalcificazione, è consigliabile azionare per qualche minuto il vapore.
Al termine della fase di risciacquo la macchina
visualizzerà il messaggio:
Riscaldamento
Attendere Prego
Attendere il riscaldamento della macchina per pochi
minuti, al termine del quale la macchina si riporterà
nello stato di macchina pronta.
ATTENZIONE
Durante la fase di riscaldamento, si potranno
notare gocce di acqua e vapore uscire dalla lancia dell’acqua calda.
27
6. FUNZIONI SPECIALI TARATURE MACCHINA
IT
6.1 AZZERAMENTO
CONTATORE LITRI
DEPURATORE
Mediante questa funzione è possibile azzerare il
numero totale di litri d’acqua consumati.
La procedura si esegue nel seguente modo:
Togliere tensione alla macchina agendo sull’in-
terruttore generale (OFF).
Dare tensione alla macchina agendo sull’inter-
ruttore generale (ON), mantenendo premuto il
tasto:
7
sino a quando il display visualizza il messaggio:
Reset Filtro Acqua
Attendere Prego
6.2 AZZERAMENTO
CICLI LAVAGGIO
Mediante questa funzione è possibile azzerare il
numero totale dei cicli di lavaggio effettuati.
La procedura si esegue nel seguente modo:
Togliere tensione alla macchina agendo sull’in-
terruttore generale (OFF).
Dare tensione alla macchina agendo sull’inter-
ruttore generale (ON), mantenendo premuto il
tasto:
sino a quando il display visualizza il messaggio:
Reset Lavaggi
Attendere Prego
5
6.3 AZZERAMENTO
PARAMETRI MACCHINA
Mediante questa funzione è possibile rimuovere dati
di funzionamento non corretti e riportare ai valori
di Programmazione Standard (vedi tabella VALORI
DI PRESET. La procedura si esegue nel seguente
modo:
Togliere tensione alla macchina agendo sull’in-
terruttore generale (OFF).
Dare tensione alla macchina agendo sull’in-
terruttore generale (ON), mantenendo premuti
contemporaneamente i tasti:
ENTER
e RESET ;
il display visualizzerà:
1
3
Attendere Prego
Preset. Dati
6.4 MOVIMENTAZIONE
MANUALE GRUPPO
EROGAZIONE CAFFÈ
Mediante questa funzione è possibile attivare
manualmente il motore che costituisce l’automatismo del gruppo di erogazione caffè. La procedura si
esegue nel seguente modo:
Togliere tensione alla macchina agendo sull’in-
terruttore generale (OFF).
Dare tensione alla macchina agendo sull’in-
terruttore generale (ON), mantenendo premuti
contemporaneamente
i tasti
il display visualizzerà:
IMPORTANTE: All’accensione della macchina, a
Premere il tasto
Premere il tasto
2 e 4;
Moviment. Manuale
causa del fatto che si impiega il
tasto
per accedere a questo
ambiente, partirà automaticamente il movimento pistone verso il
basso.
verso il BASSO.
verso l’ALTO.
Togliere e ridare tensione alla macchina tramite
l’interruttore generale, per terminare la procedura.
4 per muovere il pistone
2 per muovere il pistone
28
OK
IT
7. PULIZIA E
MANUTENZIONE
ATTENZIONE
Non utilizzare MAI getti d'acqua per la pulizia
della macchina.
Per la pulizia e la manutenzione utilizzare:
Un panno morbido inumidito
Un detergente per superfici
Pastiglie e liquido detergente per specifici
Un recipiente con acqua
Un scovolino
Un spazzolino
Durante la manutenzione/riparazione i componenti
utilizzati devono garantire di mantenere i requisiti di
igiene e sicurezza previsti per il dispositivo. I ricambi
originali forniscono questa garanzia.
Dopo una riparazione o una sostituzione di componenti che riguardano parti a contatto con acqua e alimenti, deve essere effettuata la procedura di lavaggio o seguendo le procedure indicate dal costruttore.
7.1 PULIZIA DELLA
CARROZZERIA
Prima di effettuare qualsiasi operazione di pulizia,
bisogna portare la macchina a stato energetico
“O” (cioè interruttore macchina spento e spina
staccata).
7.2 PULIZIA DEL GRUPPO
EROGATORE E
CAPPUCCINATORE
NOTA:
Seguire anche le istruzioni riportate sull’adesivo applicato all’interno della porta anteriore.
Fig. 25
NOTA: Prima di eseguire il ciclo di lavaggio è buona
regola controllare e ripristinare il livello dell’acqua all’interno del serbatoio.
La macchina è predisposta per il lavaggio del gruppo
erogazione tramite pastiglie e del circuito latte tramite
il liquido detergente.
La macchina inizierà il ciclo di pulizia che consiste in
erogazioni di acqua calda intervallate da un tempo di
attesa, tutto il ciclo ha una durata di circa 4 minuti.
ATTENZIONE
Non utilizzare solventi, prodotti a base di cloro,
abrasivi.
Pulizia zona lavoro: togliere il pianolavoro solle-
vandolo anteriormente verso l’alto e sfilarlo, togliere
il sottostante piatto raccogliacqua e pulire il tutto con
acqua calda e detersivo. Pulizia carena: per pulire i
pannelli utilizzare un panno morbido inumidito.
Fig. 24
Si raccomanda di effettuare il LAVAGGIO almeno
una volta al giorno con gli appositi detergenti.
ATTENZIONE
PERICOLO DI INTOSSICAZIONE
Ricordiamo di non interrompere il lavaggio con
pastiglie detergenti una volta avviato, possono
rimanere residui di pastiglie nella macchina.
Per eseguire la procedura di lavaggio procedere
come segue:
1. Posizionare un recipiente con acqua a fianco
della macchina.
2. Inserire al suo interno il tubo di aspirazione.
3. Aggiungere il prodotto specifico per la pulizia
(20 ml [0.005 Gal] di Puly Milk).
29

Fig. 26
4. Premere il seguente tasto:
5. Mantenerlo premuto per circa 5 secondi fino alla
visualizzazione del seguente messaggio:
Lavaggio
Detergente
6. Aprire lo sportello accesso caffè macinato.
7. Inserire al suo interno la pastiglia di detergente
(Puly Caff) e chiudere lo sportello.
IT
Risciacquo
Premere ENTER
Riposizionare un recipiente con solo acqua, e premere il tasto ENTER, la macchina eseguirà il ciclo di
risciacquo ed il display visualizzerà:
Risciacquo
NOTA: Durante la fase di lavaggio e risciacquo è
consigliabile mettere un recipiente sotto al
gruppo erogatore oppure svuotare il contenitore raccogligocce, alla fine del ciclo di
lavaggio e risciacquo
7.3 RIPRISTINO DI UN
LAVAGGIO
INTERROTTO
Nel caso in cui s’interrompa il lavaggio, togliendo
alimentazione alla macchina, alla successiva
accensione il gruppo si posizionerà in fase di
riposo ed il display visualizzerà:
Eseguire lavagg.
Premere nuovamente il tasto “DECAFFEINATO”
in modo da ripetere le procedure appena
descritte nel paragrafo “PULIZIA DEL GRUPPO
EROGATORE E CAPPUCCINATORE”.
Fig. 27
8. Premere il seguente tasto:
Il display visualizzerà:
Lavaggio
ATTENZIONE
Nel caso in cui non si prema il tasto
“DECAFFEINATO”, la macchina provvede dopo
un tempo di circa 20 secondi a proseguire il ciclo
di lavaggio automaticamente.
NOTA:
Durante il lavaggio i tasti dose sono disabilitati.
Al termine del ciclo di lavaggio il display visualiz-
zerà:
30
7.4 PULIZIA DEL
CONTENITORE E DEL
CONVOGLIATORE
DEL CAFFÈ
ATTENZIONE
PERICOLO DI USTIONE
Portare la macchina a stato energetico “O”.
Inserire la chiave nell’apposita serratura.
Ruotare la chiave apertura portello di comando in
senso antiorario.
Aprire il portello di comando.
Fig. 28

IT
Rimuovere l’eventuale residuo di caffè deposita-
to sulle pareti del convogliatore.
Fig. 29
7.5 PULIZIA DELLA
LANCIA VAPORE
Pulire la lancia vapore ogni volta che lo si utilizza per
riscaldare bevande.
ATTENZIONE
PERICOLO DI USTIONE
Se la pulizia avviene con la lancia calda, evitarne
il contatto a mani nude.
Utilizzare un panno leggermente imbevuto di acqua
calda e/o di detergente neutro.
7.7 PULIZIA DEL
CONTENITORE
RACCOGLIGOCCE
Pulire il contenitore raccogligocce con acqua
calda e sapone utilizzando eventualmente una
spazzola.
NOTA: Il contenitore raccogligocce può essere lava-
to utilizzando una lavastoviglie.
Fig. 32
ATTENZIONE
Non utilizzare mai nessun tipo di solvente.
7.8 PULIZIA
SERBATOIO ACQUA
ATTENZIONE
Fig. 30
7.6 PULIZIA DELLA
GRIGLIA CONTENITORE
RACCOGLIGOCCE
Pulire la griglia con acqua calda e sapone utiliz-
zando una spazzola.
Fig. 31
Spengere la macchina prima di riempire o estrarre il serbatoio.
Pulire il serbatoio con acqua calda e sapone
utilizzando eventualmente uno scovolino.
Fig. 33
NOTA: Risciacquare accuratamente in modo da
evitare che si depositino residui indesiderati
sul fondo del serbatoio.
31

OK
7.9 PULIZIA
GUARNIZIONE GRUPPO
Con l’utilizzo di uno spazzolino, pulire da incro-
stazioni o residui di caffè il pistone e la camera
del gruppo erogatore, nonché tutte le altri parti
sporche di caffè.
Fig. 34
7.10 PULIZIA
CAPPUCCINA TORE
NOTA:
Seguire anche le istruzioni riportate sull’adesivo applicato all’interno della porta anteriore.
IT
1
Scollegare tutti i tubi ad esso collegati.
Smontare il cappuccinatore e lavarlo accurata-
mente.
NOTA: Per intervalli di tempo tra un cappuccino
e l’altro superiori ad un’ora, si consiglia di
effettuare un lavaggio del cappuccinatore
facendo pescare il tubo di aspirazione del
latte, nell’acqua calda anziché nel latte.
2
Fig. 37
Fig. 38
Portare la macchina a stato energetico “O”.
Inserire la chiave nell’apposita serratura.
Ruotare la chiave apertura portello di comando in
senso antiorario.
Aprire il portello di comando.
IMPORTANTE: Procedere con cautela.
Estrarre tutto il gruppo erogatore compreso di
cappuccinatore tirandolo verso di sé.
Estrarre il cappuccinatore dal gruppo erogatore,
sfilandolo verso l’alto.
30
Fig. 35
Fig. 36
Per il rimontaggio procedere in senso inverso
facendo attenzione al collegamento dei tubi del
cappuccinatore.
NOTA: Per facilitare il rimontaggio è stato applicato
un adesivo esplicativo, all’interno della porta
anteriore:
Provvedere alla pulizia del contenitore raccogli-
gocce (vedi paragrafo “PULIZIA CONTENITORE
RACCOGLIGOCCE).

IT
8. TABELLA IMPOSTAZIONI STANDARD
BEVANDE DOSE TEMPO DOSE PRE-INFUSIONE PRESSATURA NUMERO
CAFFÈ MACINATURA LATTE
(cc) (sec) (sec)
Ristretto 40 7 No Sì
2 Ristretto 80 9 No No
Espresso 50 7 No Sì
2 Espresso 100 9 No No
Caffè 60 7 No Sì
2 Caffè 120 9 No No
Caffè Creme 100 7 No No
2 Caffè Creme 200 9 No No
Cappuccino 50 7 12 No Sì
Big Cappuccino 60 7 15 No Sì
Macchiato 50 7 12 No Sì
Caffellatte 60 7 12 No Sì
Latte 15
Acqua Calda 20
Vapore 55
Numero fondi 20
Allarme lavaggio latte 00
Allarme lavaggio 00
Regolazione gruppo 1 275
Regolazione gruppo 2 540
Temperatura caffè 98 (°C)
Temperatura vapore 125 (°C)
Filtro acqua 00
Regolazione macinino 00
Lavaggio fine servizio No
Password
Smart Card No
Risparmio Energia 00
Durezza Acqua °Fr 00
33

9. MESSAGGI FUNZIONI MACCHINA
INDICAZIONE DISPLAY CAUSA EFFETTO SOLUZIONE
CASSETTO FONDI PIENO
Macchina Pronta
Cassetto Pieno
Cassetto fondi
pieno. Il numero
di fondi caffè presenti nel cassetto ha raggiunto il
valore impostato
in fase di programmazione.
Blocco delle
erogazioni tasti
a base caffè.
Estrarre il cassetto fondi e
svuotarlo all’interno di un contenitore raccogli immondizia.
Reinserire lo stesso, quando il
display visualizza il seguente
messaggio:
Macchina Pronta
Cassetto Aperto
IT
CASSETTO FONDI
FUORI POSTO
Macchina Pronta
Cassetto Aperto
POSIZIONE SPORTELLO
MACCHINA
Macchina OFF
Porta Aperta
NECESSITÀ DI EFFETTUARE IL
CICLO DI LAVAGGIO
Allarme lavaggio
Cassetto fondi
fuori posto.
Sportello aperto. Blocco delle
È stato superato
il numero di cicli
impostato dopo il
quale è necessario effettuare la
pulizia del gruppo.
Blocco delle
erogazioni tasti
a base caffè.
funzioni macchina.
Viene visualizzato il messaggio ma la macchina continua
ad erogare le
bevande.
Inserire il cassetto fondi nell’apposito vano.
Se questo allarme si manifesta
durante l’esecuzione di una bevanda a base caffè:
Sino all’infusione l’allarme è
visualizzato sul display, ma la
bevanda viene dispensata;
Dopo l’infusione il ciclo in corso
è sospeso. Solo al ripristino del
cassetto il ciclo caffè viene ripre-
so con la fase di espulsione.
Se questo allarme si manifesta
durante una fase di reset movimento gruppo:
Il movimento viene sospeso.
Al ripristino del cassetto il ciclo
di reset gruppo viene ripetuto.
Chiudere lo sportello macchina.
Effettuare un ciclo di lavaggio
(vedi relativo paragrafo “PULIZIA
DEL GRUPPO EROGATORE E
CAPPUCCINATORE”).
34

IT
INDICAZIONE DISPLAY CAUSA EFFETTO SOLUZIONE
NECESSITÀ DI PULIRE
IL CIRCUITO LATTE
All. lavagg. latte
LAVAGGIO FINE SERVIZIO
Lav. Fine Servizio
Premere Enter
È stato superato
il numero di ore
impostato dall’ultima erogazione
di una bevanda
a base latte dopo
di che è necessario il lavaggio
del circuito latte.
È stato impostato
il lavaggio di fine
servizio del gruppo erogatore in
fase di programmazione.
Viene visualizzato il messaggio ma la macchina continua
ad erogare le
bevande.
È necessario eseguire il
lavaggio di fine
servizio prima
di spegnere la
macchina.
Effettuare un ciclo di lavaggio
del solo cappuccinatore. Come
nel caso del lavaggio completo è
necessario tenere premuto il tasto
per 5 sec senza però dover
introdurre le pastiglie detergenti
per la pulizia del gruppo.
(vedi i soli punti 1, 2, 3, 4 del
paragrafo “PULIZIA DEL
GRUPPO EROGATORE E
CAPPUCCINATORE” ).
Premere il tasto ENTER come
indicato nel display. La macchina eseguirà automaticamente il
lavaggio di fine servizio erogando
circa 50cc di acqua e si spegnerà.
NECESSITÀ DI EFFETTUARE IL
CICLO DI DECALCIFICAZIONE
Eseguire
Decalcificazione
È stato superato
il numero di litri
dopo il quale è
necessario effettuare il ciclo di
decalcificazione.
Viene visualizzato il messaggio ma la
macchina continua ad erogare
bevande.
Effettuare ciclo di decalcificazione (VEDI relativo paragrafo
"DECALCIFICAZIONE").
35

10. MESSAGGI ALLARME BLOCCHI MACCHINA
INDICAZIONE DISPLAY CAUSA EFFETTO SOLUZIONE
ALLARME GRUPPO MOTORE
PISTONE SUPERIORE
Xxxxxx
Errore Gruppo
ALLARME RIEMPIMENTO
CALDAIA
Livello
Durante la fase
di movimentazione gruppo il
pistone superiore ha superato il
tempo massimo
impostato di 10
secondi prima
del riconoscimento spunto
motore.
La fase di riempimento caldaia ha
superato il tempo
massimo di 3
minuti; la sonda
livello è scoperta.
L’unità di controllo blocca
l’eventuale
ciclo in corso,
spegnendo sia
gli attuatori che
gestiscono la
movimentazione, sia gli
attuatori adibiti
alla erogazione
delle bevande;
l'operatore non
può esercitare selezioni a
bordo testiera.
Macchina si
ferma.
Aprire e chiudere lo sportello
macchina.
Se l’allarme ricompare una
seconda volta, contattare il
Tecnico Qualificato.
Contattare il Tecnico Qualificato.
IT
ALLARME TURBINA
Ad allarme rilevato l’unità di controllo alterna a display il messaggio relativo alla bevanda in
corso con il messaggio di errore
associato a questa funzione. Ad
esempio:
Errore Dosatore
ALLARME SERBATOIO VUOTO
Riemp. serbatoio
36
Il contatore
volumetrico non
invia impulsi alla
centralina per
un tempo di 5
secondi.
Il serbatoio
dell’acqua è
vuoto.
L’erogazione
continua sino
allo scadere
del tempo di 60
secondi o alla
pressione di un
qualsiasi tasto
a base caffè.
Non viene erogato il caffè e
s’interrompe la
dose in corso.
Aprire e chiudere lo sportello
macchina. L’unità di controllo
ripete la procedura di riaccensione della macchina.
Nel caso la condizione di allarme
persista, la macchina può essere
utilizzata come se si operasse su
di una macchina manuale.
Premere il tasto desiderato per
avviare la dose;
Premere lo stesso tasto per
arrestare la dose in corso, una
volta verificata la dose in tazza.
Chiamare il Servizio Tecnico.
Riempire il serbatoio dell’acqua.
Utilizzare il tasto Acqua Calda per
eliminare eventuali bolle d’aria.

IT
INDICAZIONE DISPLAY CAUSA EFFETTO SOLUZIONE
ALLARME DEPURATORE
Filtro Acqua l.
20
ALLARME SONDA
TEMPERATURA GUASTA
Err temp caffe’
Err temp vapore
Il contatore volumetrico ha raggiunto il numero
di litri d’acqua
erogabili, determinato in programmazione.
Rottura di una
delle due sonde
di temperatura.
Non viene erogato il caffè,
non s’interrompe la dose o
questa è variabile.
Non viene erogato il caffè.
Rigenerare i sali del depuratore.
Per annullare l’allarme vedere
paragrafo “AZZERAMENTO
CONTATORE LITRI
DEPURATORE”.
Questo allarme non blocca le
erogazioni. È possibile eliminare l’allarme depuratore programmando il valore di litri a
zero (vedi relativo paragrafo
“PROGRAMMAZIONE”).
Sostituire la sonda guasta.
Questo allarme blocca le erogazioni.
ALLARME QUANTITÀ CAFFÈ
Err Q.ta’ caffe’
Troppo caffè
nella camera.
Non viene erogato il caffè, e
viene effettuato un ciclo di
espulsione.
Ridurre la quantità di caffè.
37
SAFETY INSTRUCTIONS
EN
This book is an integral and essential part
of the product and must be given to the
user. Read this book carefully. It provides
important information concerning safety
of installation, use and maintenance.
Save it carefully for future reference.
After removing the packaging, verify
appliance integrity. In case of doubts,
do not use the appliance, but consult
a qualified technician. Packaging items
which are potentially dangerous (plastic
bags, polystyrene foam, nails, etc..) must
be kept out of children’s reach and must
not be disposed of in the environment.
RISK OF POLLUTION
The machine is intended to be installed
in staff kitchen areas in shops, offices
and other working environments, farm
houses by clients in hotels, motels and
other residential type environments bed
and breakfast type environments.
Before connecting the appliance make
sure the rating plate data correspond with
the mains. The nameplate is located on
the back of the machine, on the left-hand
side at the bottom. The appliance must
be installed by qualified technicians in
accordance
manufacturer’s instructions.
The manufacturer is not liable for any
damage caused due to failure to ground
the system. For the electrical safety of
the appliance, it is necessary to equip
the system with the proper grounding.
This must be carried out by a qualified
electrician who must ensure that the elec-
with current standards and
tric power of the system is sufficient to
absorb the maximum power input stated
on the plate.
In particular you must ensure that the
size of the wiring cables is sufficient to
absorb power input. The use of adapters,
multiple sockets or extensions is strictly
forbidden. If they prove necessary, call a
fully qualified electrician.
When installing the device, it is nec-
essary to use the parts and materials
supplied with the device itself. Should
it be necessary to use other parts, the
installation engineer needs to check their
suitability for use in contact with water
for human consumption.
The hydraulic system of this machine
must be installed according to the applicable standards concerning hydraulic
hygiene and safety for environmental
protection. For this reason, the plumbing connections must be carried out by
a qualified technician. The machine with
water main connection must be installed
using a new pipe furnished with the
machine. Never use old pipings to connect the machine.
The device needs to be supplied with
water that is suitable for human consumption and compliant with the regulations in force in the place of installation. The installation engineer needs
confirmation from the owner/manager of
the system that the water complies with
the requirements and standards stated
above.
This appliance must only be used as
described in this handbook. The manufacturer shall not be liable for any damage caused due to improper, incorrect
and unreasonable use.
38

OK
EN
At the end of installation, the device is
switched on and taken to rated operating
conditions, leaving it in a state in which it
is “ready for operation”.
The device is then switched off and the
whole hydraulic circuit is bled of the first
lot of water in order to remove any initial
impurities.
The device is then refilled and taken to
rated operating conditions.
After reaching the “ready for operation”
condition, the following dispensing operations are carried out:
100% of the coffee circuit through the
coffee dispenser (for more than one
dispenser, this is divided equally);
100% of the hot water circuit through
the water dispenser (for more than one
dispenser, this is divided equally);
opening of each steam outlet for 1
minute.
At the end of installation, it is good prac-
tice to draw up a report of the operations.
The use of any electrical device must
comply with fundamental regulations.
In particular:
do not touch the appliance when
hands or feet are wet;
WARNING
ELECTRIC SHOCK HAZARD
do not leave the appliance exposed to
atmospheric agents (rain, sun, etc..);
Never install the machine in areas
where it could come into contact with
jets of water.
The appliance is not to be used by
children or persons with reduced
physical, sensory or mental capabilities, or lack of experience and knowledge, unless they have been given
supervision or instruction. Children
don't have to play with this appliance.
Cleaning and maintenance don't have
to be performed by unsupervised children.
Before servicing the appliance, the
authorised technician must first switch
off the appliance and unplug it.
do not use the appliance when bare-
foot;
do not use extensions in bath or show-
er rooms;
do not pull the supply cord out of the
socket to disconnect it from the mains;
OK
For cleaning, bring the machine to state
“OFF”, that is to say “machine switched
off and socket unplugged” and follow
only instructions in the present manual.
For cleaning and maintenance please
refer to chapter 7.
39

In case of breakdown or wrong function-
ing of the machine, switch it off. Any
intervention is strictly forbidden. Contact
qualified experts only.
Repairs should only be made by the man-
ufacturer or authorized service centres.
Only original spare parts must be used.
Failure to observe the above, could make
the appliance unsafe.
EN
For installation, the qualified electrician
must fit an omnipolar switch in accord-
ance with the safety regulations in force
and which performs a complete discon-
nection under the conditions of over
tension category III.
Once a machine wash cycle has been
started, do not interrupt it, as detergent
residues may then be left inside the deliv-
ery group.
Do not obstruct the extraction and/or
dissipator grids, especially of the cup
warmer.
The power cable is not to be replaced by
the user. If the cord is damaged, switch
off the appliance and have a qualified
technician change the cord.
If no longer using the appliance, we recom-
mend making it inoperative; after removing
the plug from the mains electricity, cut the
power supply cable.
WARNING
RISK OF POLLUTION
Do not dispose of the machine in the
environment: for waste disposal, contact
a specialised authorised centre or con-
tact the manufacturer that will give you
information about this.
To ensure that the machine is properly
ventilated, place it with the ventilation
side at a distance of 15 cm (5.9 in) from
walls or other objects.
To avoid dangerous overheating, make
sure the supply cord is fully uncoiled.
Place the machine on a flat, level surface
to avoid any possible malfunctioning.
The machine is designed to operate at
temperatures ranging from +5°C to +40°C
(41°F - 104°F).
WARNING
RISK OF INTOXICATION
Handle the vapour spear with care when
using it, do not put hands under it and
avoid to touch it immediately after use.
WARNING
RISK OF BURNS OR SCALDING
Before carrying out any operation of
installation, maintenance, download, or
setting, the qualified operator must wear
working gloves and safety shoes.
WARNING
RISK OF CUTTING
When adding coffee beans, the machine
operator must not place his/her hands
inside the container.
40
EN
WARNING
INFORMATION TO THE USERS
Pursuant to Art. 13 of the
Legislative Decree dated
25th -uly 2005, No. 151
“Implementation of the 2002/95/
EC, 2002/96/EC, and 2003/108/
EC on the restriction of the use
in Electrical and Electronic Equipment as well as
on waste disposal”.
The symbol of the crossed large rubbish container
that is present on the machine points out that the
product at the end of its life cycle must be collected
separately from the other wastes. The user for this
reason will have to give the equipment that got to its
life cycle to the suitable separate waste collection
centres of electronic and electrotechnical wastes, or
to give it back to the seller or dealer when buying a
new equipment of equivalent type, in terms of one
to one. The suitable separate waste collection for
the following sending of the disused equipment to
recycling, the dealing or handling and compatible
environment disposal contributes to avoid possible
negative effects on the environment and on the
people’s health and helps the recycling of the
materials the machine is composed of. The user’s
illegal disposal of the product implies the application of administrative fines as stated in Law Decree
n.22/1997” (article 50 and followings of the Law
Decree n.22/1997).
of certain hazardous substances
41
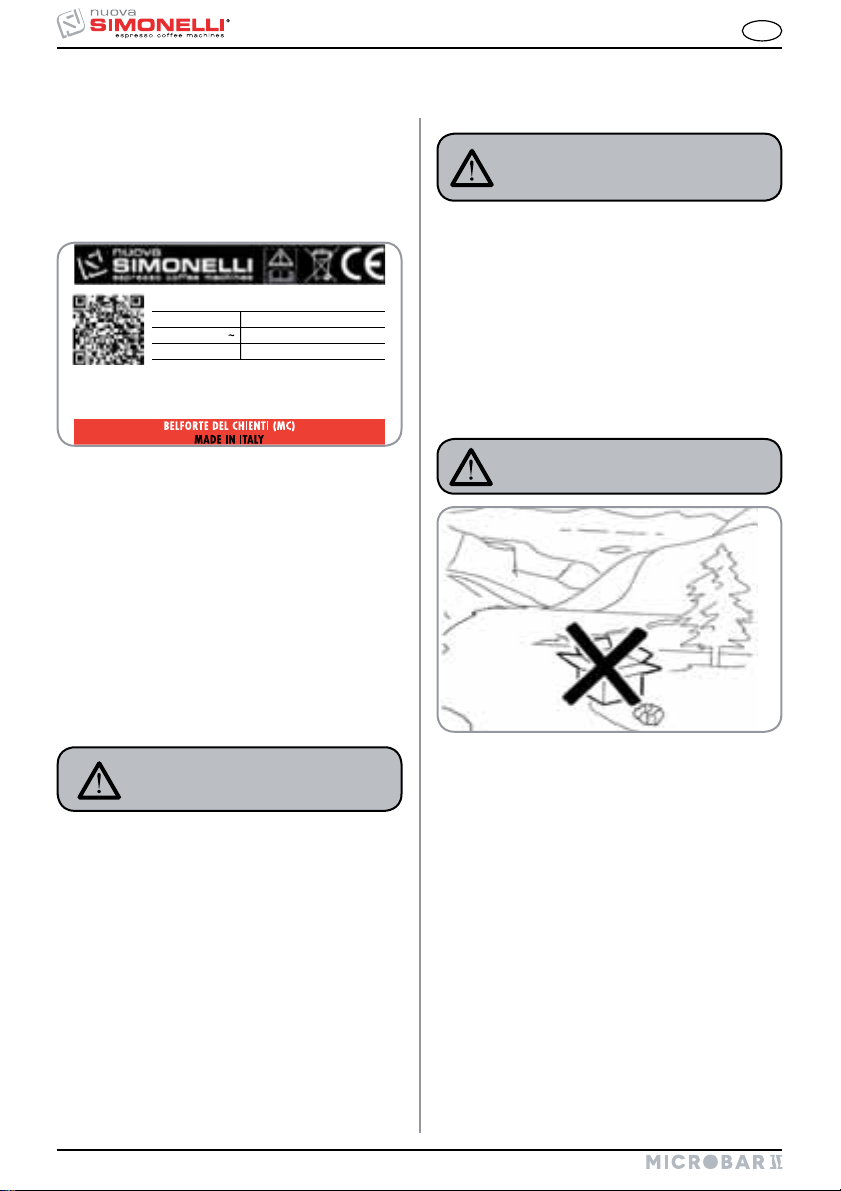
Mod. MICROBAR II
Operating Pressure 0,165 MPa MAX Inlet Pressure 0,65 Mpa
S.N. XXXXXX Date 09 / 03 /2015
P = 2100 W220 - 240 V
50 / 60 Hz
TRANSPORT AND HANDLING
EN
MACHINE
IDENTIFICATION
Always quote the machine serial number in all communications to the manufacturer, Nuova Simonelli.
TRANSPORT
The machine is transported on pallets which also
contain other machines - all boxed and secured to
the pallet with supports.
Prior to carrying out any transport or handling operation, the operator must:
put on work gloves and protective footwear, as
well as a set of overalls which must be elasticated at the wrists and ankles.
The pallet must be transported using a suitable
means for lifting (e.g., forklift).
HANDLING
WARNING
RISK OF IMPACT
OR CRASHING
Before carrying out the following operation, the
load must be checked to ensure that it is in the
correct position and that, when the supports are
cut, it will not fall.
The operator, who must first put on work gloves
and protective footwear, will proceed to cut the
supports and to storing the product. To carry
out this operation, the technical characteristics
of the product must be consulted in order to
know the weight of the machine and to store it
accordingly.
WARNING
RISK OF POLLUTION
WARNING
RISK OF IMPACT
OR CRASHING
During all handling operations, the operator
must ensure that there are no persons, objects
or property in the handling area.
The pallet must be slowly raised to a height of
30 cm (11.8 in) and moved to the loading area.
After first ensuring that there are no persons,
objects or property, loading operations can be
carried out.
Upon arrival at the destination and after ensuring
that there are no persons, objects or property in
the unloading area, the proper lifting equipment
(e.g. forklift) should be used to lower the pallet to
the ground and then to move it (at approx. 30 cm
(11.8 in) from ground level), to the storage area.
42

EN
Congratulations,
upon the wise choice you have made by purchasing the MICROBAR II model.
In fact, you are now the owner of not just a simple coffee dispenser, but a true espresso coffee-making machine
which is fully automatic and completely controlled by a microprocessor. This means absolute reliability and simple to use. We are certain that our MICROBAR II model will increase your confidence in Nuova Simonelli and
that you will undoubtedly recommend others to purchase this coffee-making machine, since the MICROBAR
II model has been chosen to increase the profitability of the coffee shop, thus fully optimising running costs.
This machine has been manufactured in compliance with the EEC directives 89/392, 89/336, 73/23, 89/109 and
subsequent modifications.
With best wishes
Nuova Simonelli S.p.a.
TECHNICAL CHARACTERISTICS
H
L
COFFEE CAPPUCCINO
NET WEIGHT
GROS WEIGHT
POWER
L
H
D
26 Kg 57 lb 27 Kg 59 lb
30 Kg 66 b 31 Kg 68 lb
1000 W 1000 W 2000 W 2000 W
325 mm 12
460 mm 18
480 mm 18
13/16
inc 325 mm 12
2/16
inc 460 mm 18
7/8
inc 480 mm 18
D
13/16
inc
2/16
inc
7/8
inc
43

INDEX
EN
SAFETY INSTRUCTIONS ...................38
TRANSPORT AND HANDLING ...........42
MACHINE IDENTIFICATION ..........................42
TRANSPORT ..................................................42
HANDLING ..................................................... 42
TECHNICAL CHARACTERISTICS ......43
1. DESCRIPTION .............................45
1.1 KEYBOARD DESCRIPTION
(Standard configuration) .............................. 46
1.2 MICROBAR II INTERNAL DESCRIPTION .......46
2. INSTALLATION AND
PRELIMINARY OPERATIONS ......47
2.1 MACHINE INSTALLATION
(VERSION WITH TANK) .................................47
2.2 MACHINE INSTALLATION
(DIRECT FITTING VERSION) .........................48
2.3 FILLING THE COFFEE CONTAINER ..............48
2.4 SWITCHING ON .............................................49
2.5 SWITCHING OFF............................................ 49
3. ADJUSTMENTS TO
BE MADE BY A QUALIFIED
TECHNICIAN ONLY ....................50
3.1 GRINDING ADJUSTMENT ............................. 50
3.2 MILK FOAMER ADJUSTMENT
(CAPPUCCINO version) ................................. 50
3.3 MILK FLOW ADJUSTMENT
(Temperature adjustment)............................50
4. USE ...........................................51
4.1 SWITCHING ON ............................................. 51
4.2 SWITCHING OFF............................................ 51
4.3 STANDARD CONFIGURATION .......................51
4.4 SELECTION CONFIGURATION ......................52
4.5 HOW TO MAKE COFFEE ................................52
4.6 HOW TO MAKE TWO COFFEES ..................... 53
4.7 HOW TO MAKE CAPPUCCINO /
CAFFELATTE (CAPPUCCINO version) ..........53
4.8 HOW TO MAKE POWDER
DECAFFEINATED COFFEE ............................ 53
4.9 HOT WATER...................................................54
4.10 STEAM .......................................................... 54
4.11 SELECTION PREPARING ...............................55
7. CLEANING AND MAINTENANCE 66
7.1 CLEANING THE OUTSIDE ............................. 66
7.2 CLEANING THE DELIVERY UNIT
AND CAPPUCCINATORE ...............................66
7.3 REINSTATING AN
INTERRUPTED WASHING CYCLE .................67
7.4 COFFEE HOLDER
AND COFFEE DELIVERY UNIT CLEANING ...67
7.5 CLEANING THE STEAM NOZZLE .................. 68
7.6 CLEANING THE DROP
COLLECTING TRAY GRID .............................68
7.7 CLEANING THE WATER
COLLECTING TRAY .......................................68
7.8 CLEANING THE WATER TANK ...................... 68
7.9 CLEANING THE GASKET .............................. 69
7.10 CLEANING THE MILK FOAMER ....................69
8. STANDARD
SETTING TABLE .........................70
9. MACHINE FUNCTION
MESSAGES .................................71
10. MACHINE BLOCK
ALARM MESSAGES ....................73
CONFIGURATION .....................112
ELECTRIC SYSTEM
(COFFEE version) .....................113
ELECTRIC SYSTEM
(CAPPUCCINO version) ............115
HYDRAULIC SYSTEM
(COFFEE version) .....................117
HYDRAULIC SYSTEM
(CAPPUCCINO version) ............119
CONTRAST DISPLAY
ADJUSTMENT ...........................121
5. PROGRAMMING ..........................56
5.1 STANDARD KEYBOARD.................................56
5.2 PROGRAMMING .............................................56
5.3 EXITING PROGRAMMING .............................57
5.4 PROGRAMMING CYCLE
USER MODE ..................................................57
5.5 TECHNICIAN MODE
PROGRAMMING CYCLE ................................59
6. SPECIAL MACHINE
SCALING FUNCTIONS ................65
6.1 RESETTING THE CLEANING
FILTRE LITRE COUNTER ..............................65
6.2 RESETTING WASHING CYCLES ....................65
6.3 RESETTING MACHINE PARAMETRES ..........65
6.4 HANDLING MANUAL
COFFEE DELIVERY GROUP ..........................65
44

EN
1. DESCRIPTION
15
13
12
11
1
2
3
14
4
5
16
10
9
8 6
KEY
1 Coffee bean holder cap
2 Ground coffee
conveyor hatch
3 Control panel
4 Control panel hatch
opening / locking key
5 Milk/Cappuccino nozzle
6 Drop collecting tray grid
7 Water collecting tray
8 Coffee nozzles
9 Coffee grounds drawer
7
17
Fig. 1
10 Steam pipe / Hot water pipe
11 Milk suction tube (only CAPPUCCINO version)
12 Milk flow adjusting tap (only CAPPUCCINO
version)
13 Milk Foamer air regulator screw
(CAPPUCCINO version only)
14 Front door
15 Water tank opening
16 Main switch (ON / OFF)
17 Mains connecting plug
45

1.1 KEYBOARD DESCRIPTION (Standard configuration)
KEY
EN
1 3 5 7
1 1-Espresso key
2 2-Espresso key
3 1-Coffee key
4 2-Coffee key
5 Decaffeinated, Clean cycle
6 Caffelatte key
2 4 6 8
7 Hot water key
8 Steam key
Fig. 2
1.2 MICROBAR II INTERNAL DESCRIPTION
1 2
8
KEY
1 Ground coffee conveyor
2 Coffee bean holder left-hand
grinder
3 Coffee grinder adjusting screw
3
4
right-hand grinder
4 Delivery unit
5 Water collecting dray
6 Coffee grounds drawer
7 Door microswitch
8 Door Key
5
key
46
6 7
Fig. 3

EN
2. INSTALLATION
AND PRELIMINARY
OPERATIONS
CAUTION
RISK OF POLLUTION
Do not dispose of packaging in the environment
Fig. 4
Before carrying out any installation and adjustment operations you must read and fully understand the SAFETY INSTRUCTIONS of this handbook. The company cannot be held responsible
for damage to things or injury to persons caused
by failure to comply with the safety instructions
and installation and maintenance instructions
contained in this handbook.
NOTE: In case of use where service is continuous,
make the above changes at least once a
week.
2.1 MACHINE
INSTALLATION
(VERSION WITH TANK)
CAUTION
Switch off the machine before filling or removing
the water tank.
Once the machine has been withdrawn from the
packaging, carry out the following instructions:
1 Position the unit on a horizontal surface.
2 Open the hatch.
3 Withdraw the water tank by pulling it upwards.
CAUTION
The machine can be used with the following:
Coffee beans
Decaffeinated coffee powder
Milk (not powder) (only CAPPUCCINO version)
The use of any other substance not listed
here above may cause serious damage to the
machine itself.
CAUTION
RISK OF SHORT CIRCUITS
Before connecting the machine to the mains
power supply, please check that the supply voltage corresponds to the machine voltage.
NOTE: At the beginning of the daily activities and in
any case, for pauses longer than 8 hours, it
is necessary to change 100% of the water in
the circuits, using the relevant dispensers.
Fig. 5
4 Particularly the first time, wash the tank with
soapy water and then carefully, rinsing off any
soap residue.
5 Fill the water tank with water.
6 Make sure that the outside of the water tank is
dry.
7 Return the water tank to its housing.
Fig. 6
8 Close the front panel.
47

EN
CAUTION
The water hardness must be below 4° - 6° fr
(French degree).
Otherwise the conditions of guarantee of the
machine will expire.
2.2 MACHINE
INSTALLATION
(VERSION FOR DIRECT
CONNECTION)
Once the machine has been withdrawn from the
packaging, carry out the following instructions:
1 Position the unit on a horizontal surface.
2 Remove the pipe with 3/4” coupling from the
hatch in the top of the machine.
Fig. 7
3 Connect a pipe end to the 3/4” coupling placed
on the top of the machine.
The machine must be installed according
to the applicable federal, state and local
standards (codes) in force with regard
to plumbing systems including backflow
prevention devices. For this reason, the
plumbing connections must be carried
out by a qualified technician.
2.3 FILLING THE
COFFEE CONTAINER
1 Remove the cap to access the granulated coffee
bean container.
CAUTION
Pour ONLY toasted coffee beans into the coffee
bean holder. Any other kind of coffee, for example
ground coffee, will damage the coffee grinder.
Don’t insert caramelized, sugar coated, instant
coffee or other sugary beverages to prevent the
appliance from being damaged.
2 Don’t fill to the brim but pour just enough toasted
coffee beans into the coffee bean holder to
ensure correct closure of the unit.
Fig. 8
4 Connect the other end of the pipe to the hydrau-
lic system.
CAUTION
The water hardness must be below 4° - 6° fr
(French degree).
Otherwise the conditions of guarantee of the
machine will expire.
48
Fig. 9
3 Close the cap.
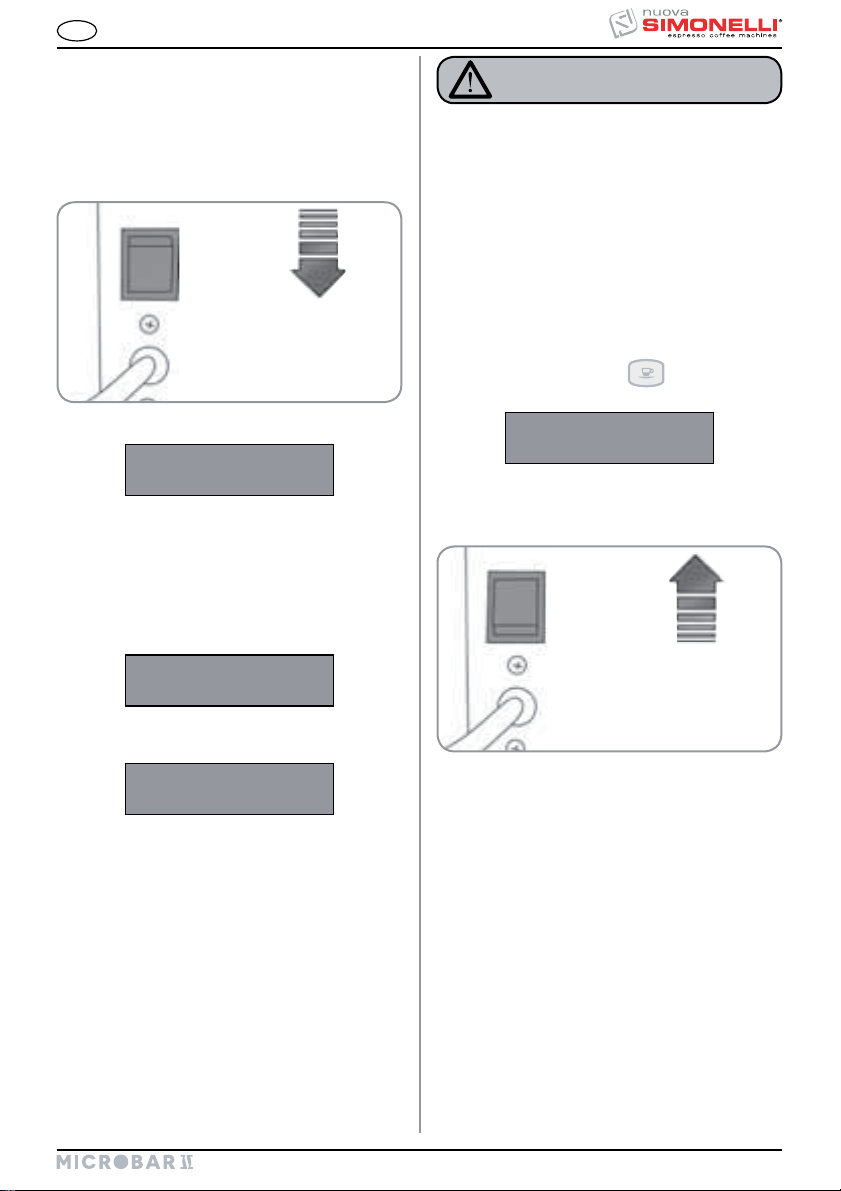
EN
2.4 SWITCHING ON
After the preliminary operations:
1 Press the machine’s main switch and turn it to
“ON”.
ON
Fig. 10
The LCD will then light up and read as follows:
MICRO2015R.1.13B
The machine automatically loads the heater with
water and begins heating operations.
The display will show the following display until
the end of heating:
CAUTION
WHEN INSTALLING THE MACHINE FOR THE
FIRST TIME OR AFTER WATER HEATER UNIT
MAINTENANCE, PRESS THE BUTTON TO DISPENSE HOT WATER BEFORE DISPENSING COFFEE. REPEAT THIS OPERATION AS REQUIRED
AND UNTIL THERE IS AN EVEN FLOW OF
WATER FROM THE NOZZLE.
2.5 SWITCHING OFF
To switch off the machine, proceed as follows:
Hold the “ENTER” key down for 5 seconds with
the machine switched on
The LCD will read as follows:
Machine Off
Day Hour
To stop the machine completely, press the main
switch and turn it to the “OFF” position.
.
Please Wait
Heating
When the desired temperature is reached, the
display will show the following message:
Machine Ready
Day Hour
NOTE: The appliance is equipped with a secu-
rity system that will stop the machine after
about 1.5 minutes of continuous functioning
of the pump (to avoid pump overheating). In
this case, switch off the main switch of the
machine and then turn it on again.
The machine is now ready to be used.
OFF
Fig. 11
49

+
-
- C°
+C°
COARSE
FINE
3. ADJUSTMENTS TO BE MADE BY A QUALIFIED
TECHNICIAN ONLY
3.2 MILK FOAMER
CAUTION
The adjustments listed here below may be performed by Specialist Technical Engineers ONLY.
Nuova Simonelli cannot accept any liability for
damage to people or property arising from failure to follow the safety regulations listed in this
manual.
3.1 GRINDING
ADJUSTMENT
CAUTION
Switch on the grinder to carry out the grinding
adjustment procedures.
NOTA: The procedure is possible also with the
appliance on.
Insert the key in the lock.
Turn the Front panel key counter-clockwise.
Open the hatch door, to gain access to the
adjusting screw. Following the direction of the
arrows and using a 3 mm (0,12 in) Allen wrench,
grinding of the coffee beans can be adjusted in
COARSER (counter-clockwise) or FINER (clockwise).
Lock the hatchdoor.
NOTE: The procedure is possible also with the
To change the air flow to the milk foamer and therefore the flow of foam, use the adjustment screw as
illustrated in the figure so as to increase / reduce the
air to the milk foamer.
3.3 MILK FLOW
ADJUSTMENT
(CAPPUCCINO version)
appliance on.
Fig. 13
ADJUSTMENT
(Temperature
Regulation)
EN
50
OPEN
CLOSED
Fig. 12
Fig. 14
NOTE: The procedure is possible also with the
appliance on.
To adjust both the flow and the temperature of the
milk delivery, turn the adjusting tap as follows:
Turn the milk suction tap CLOCKWISE/
COUNTER-CLOCKWISE to INCREASE/
DECREASE the milk suction and then
DECREASE/INCREASE the temperature.
Turn the tap until the milk reaches the desired
temperature.

EN
4. USE
Before starting usage of the appliance, the operator
must read and fully understand the safety instructions in this handbook.
CAUTION
If the self-diagnostic function indicates anomalies or failures, call the assistance centre.
Operators must never intervene.
4.1 SWITCHING ON
NOTE: In case the following procedure shouldn’t
take effect, see the chapter on “Problems
and Solutions”.
Press the main switch so that the LCD display
turns on showing the message:
MICRO2015R.1.13B
At the same time, the machine automatically fills
the heater with water and begins heating operations, and then, after few seconds, the display
will show:
Please Wait
Heating
At the end of the heating cycle, the machine is
ready and the display will read:
Machine Ready
Day Hour
4.2 SWITCHING OFF
To switch off the machine, proceed as follows:
Hold the “ENTER” key down for 5 seconds with
the machine switched on
The LCD will read as follows:
Machine Off
Day Hour
To stop the machine completely, press the main
switch and turn it to the “OFF” position.
.
OFF
Fig. 15
4.3 STANDARD
CONFIGURATION
(Standard Configuration)
1 Espresso 2 Espresso
KEY
NOTE: The starting time is about 3 minutes.
NOTE: The appliance is equipped with a secu-
rity system that will stop the machine after
about 1.5 minutes of continuous functioning
of the pump (to avoid pump overheating). In
this case, switch off the main switch of the
machine and then turn it on again.
The machine is now ready to be used.
1 Coffee 2 Coffees
Decaffeinated coffee
Cleaning Cycle
Hot water Steam
NOTE:
Keys 1-2-3-4-6 (see µDISPLA<’ description) may cor-
respond to a different beverage according to one’s
taste and local habits (see chapter PROGRAMMING
and paragraph SELECTIONS CONFIGURATION).
Caffelatte
51

EN
4.4 SELECTIONS
CONFIGURATION
Set the desired function on keyboard keys n. 1-2-34-6 (see µDISPLA<’ chapter), by following the programming procedures (see chapter Programming).
Keys 1-3 can correspond only to coffee beverages;
keys 2-4-6 can correspond to all beverages.
Apply then the corresponding label supplied.
Fig. 16
(Selection configurations)
CAPPUCCINO
Cappuccino
MACCHIATO
Macchiato
KEY
CAPPUCCINO
Big Cappuccino
MILK
Milk
4.5 HOW TO MAKE
COFFEE
The procedure for making espresso and long
coffee is the same.
Position a cup under the nozzles.
The beverages always flow from both nozzles.
Fig. 17
Press the desired coffee delivery key once.
The coffee preparation is in progress.
According to the kind of coffee selected, the
display will show a message.
Espresso
Coffee
1 Coffee Ristretto 2 Coffee Ristretto
CAFE CREM
1 Coffee Crème
CAFE CREM
2 Coffee Crème
52
Leave the cup beneath the nozzles until the messages on the display disappear.
NOTE: The nozzles can be adjusted in height to fit
all kinds of cups.
Position the nozzles carefully in such a way as to
limit the space between cup and nozzles.
Fig. 18

EN
4.6 HOW TO MAKE
TWO COFFEES
Position a milk container next to the machine.
Fig. 19
Press the desired coffee delivery key once.
The coffee preparation is in progress. According
to the kind of coffee selected, the display will
show a message.
2 Espresso
2 Coffee
Leave the cup beneath the nozzles until the messages on the display disappear.
4.7 HOW TO MAKE
CAPPUCCINO
/ CAFFELATTE
(CAPPUCCINO version)
Insert a milk container on the side of the machine.
Insert the milk suctioning tube inside the milk
container.
Press the dispensing key cappuccino/caffelatte.
CAPPUCCINO
The beverage preparation is in progress.
The display will show as follows:
Cappuccino
Caffe latte
Leave the cup beneath the nozzles until the messages on the display disappear.
4.8 HOW TO MAKE
POWDER
DECAFFEINATED
COFFEE
Open the ground coffee conveyor hatch.
CAUTION
Insert only ground coffee into the conveyor. Any
other kind of coffee, will damage the appliance.
Never add, for example, caramelised, sugarcoated coffee beans or similar products into the
coffee bean holder and do not use instant coffee
or other sugary beverages because they will
damage the machine.
Insert ONL< 1 DOSE of decaffeinated ground
coffee.
Position a cup under the nozzles.
Fig. 20
Fig. 21
Press the dispensing key .
53

EN
The display will show:
Decaf.
Day Hour
Press the key corresponding to the required
beverage (coffee/cappuccino).
The beverage preparation is in progress.
The display will show as follows (example):
Decaf.
Espresso
Leave the cup beneath the nozzles until the messages on the display disappear.
4.9 HOT WATER
CAUTION
Before proceeding with the following operations,
ensure that there is water inside the tank, otherwise, fill it.
It permits the delivery of hot water for brewing tea,
chamomile-tea or herb teas.
Position a suitable container under the Steam nozzle
/ hot water pipe.
Press the Hot water delivery key
The steam nozzle delivers hot water.
.
4.10 STEAM(CAPPUCCINO
version only)
CAUTION
During steam delivery, never touch the steam
pipe with any part of you body and do not put
your hands underneath it. Keep the steam pipe
inclined downwards the grid where the cup is
positioned.
It permits the delivery of steam to emulsify milk and
to heat other liquids.
Press the Steam delivery key
Residual water will drip from the steam pipe and,
as soon as the steam starts being delivered, use
it for the required time.
The display will show as follows (example):
Steam
When reaching the set amount, the delivery is
stopped automatically.
IMPORTANT:
At the end of every delivery, carefully clean the steam
nozzle with a damp cloth.
NOTE: Before using the steam nozzle, always
discharge any condensation for at least 2
seconds or according to the manufacturer’s
instructions.
.
Fig. 22
The display will show as follows:
Machine Ready
The
When reaching the set amount, the delivery is
stopped automatically.
54

EN
4.11 SELECTION
PREPARING
NOTE: These selections can be delivered only after
their configuration.
To set the selections, see the paragraph
SELECTION CONFIGURATION.
For preparing the following beverages:
Big Cappuccino;
Macchiato;
Milk.
See the delivery procedure of CAPPUCCINO/
CAFFELATTE.
For preparing the following beverages:
1 Coffee Crème;
2 Coffee Crème.
See the delivery procedure of ESPRESSO and
LONG COFFEE.
55

5. PROGRAMMING
EN
5.1 STANDARD KEYBOARD
3 5 7
1
4 6 8
2
ENTER key: used to enter menus
1
and/or to confirm values
Fig. 23
and pass on to the next
step.
Cursor keys: used to scroll through
2
the menus and to
4
increase / decrease
value settings.
RESET Key: to confirm and go back
3
to the previous step.
LIST OF PROGRAMMABLE FUNCTIONS
Functions that can be accessed from the USER and
TECHNICIAN modes.
1. LANGUAGE
2. PRODUCT NAME
3. DOSE PROGR.
4. GRINDER PROGR.
5. MILK DOSE (CAPPUCCINO version)
6. DATE/TIME
7. ON/OFF PROGR.
8. ENERGY SAVING
Additional functions that can be accessed from the
TECHNICIAN mode are:
9. PREINFUSION
10. TAMPING
11. GROUNDS NUMBER
12. MILK CLEANING AL.
13. CLEANING ALARM
14. RINSING UNIT
15. GROUP 1 ADJUSTMENT
16. GROUP 2 ADJUSTMENT
17. COFFEE TEMP.
18. STEAM TEMP.
19 TOTAL COUNT
20. PASSWORD
21. WATER FILTER L
22. DE-SCALE
5.2 PROGRAMMING
Entering the programming function gives access to
all of the USER and TECHNICIAN mode functions.
To access the programming environment, proceed
as follows:
NOTE: The procedure is possible also with the
appliance on.
Insert the key in the lock.
Turn the Front panel key counter-clockwise.
Open the Front panel and the display will show:
Machine Off
Front Panel Open
Keeping the ENTER key pressed, close the front
panel, the display will read:
Please Wait
Heating
Functions that can “ONLY” be accessed from the
TECHNICIAN mode.
THIS OPERATION MAY ONLY BE
PERFORMED BY A SKILLED
TECHNICIAN.
ADJUSTMENTS MADE BY UNQUALIFIED
TECHNICIANS OR OTHER PEOPLE MAY
RENDER THE GUARANTEE NULL AND
VOID.
56
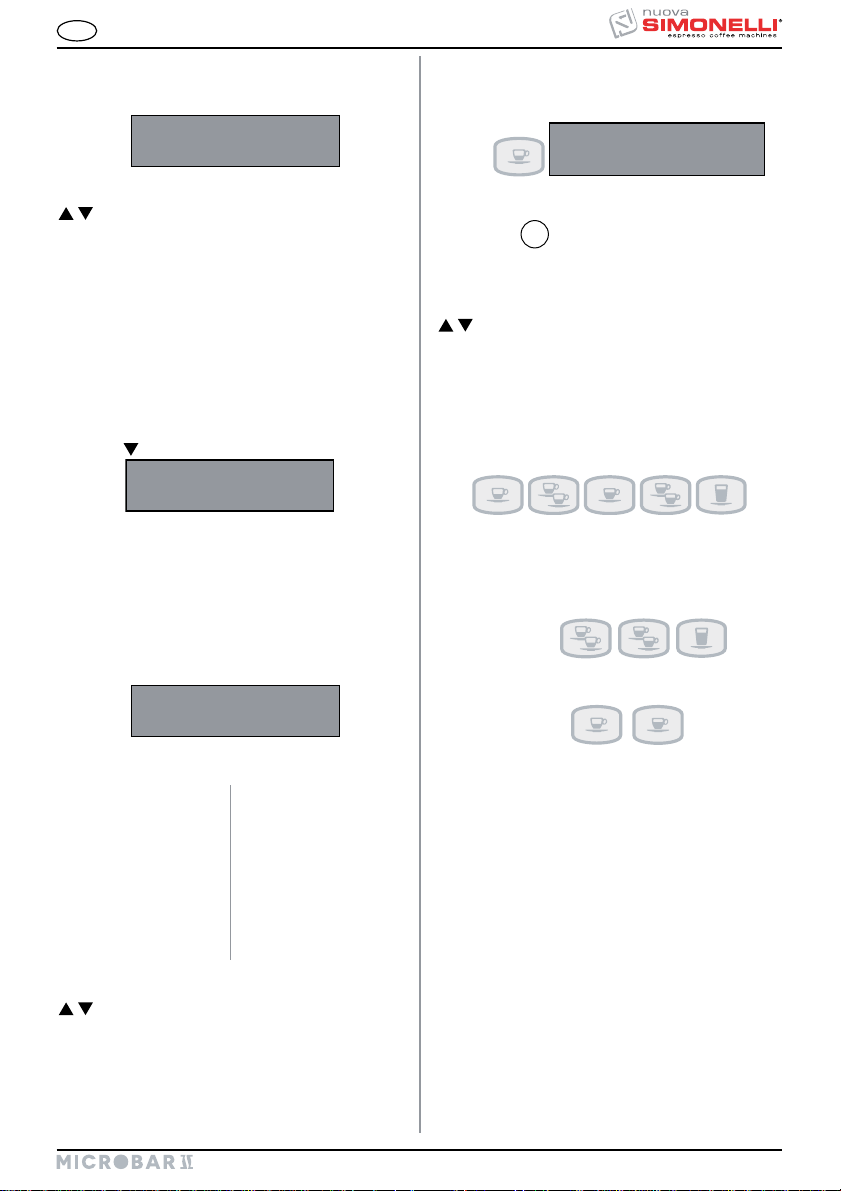
EN
Once the ejection cycle is over, the unit will enter
resting phase position and the display will show
the first item on the programming menu:
Language
KEY FUNCTIONS
: Scrolling of the list of Programmable
functions and/or decreasing / increasing
ENTER: Menu access and data confirmation.
RESET: Return to the previous menu.
values.
5.3 PROGRAMMING
EXIT
To exit the programming environment both USER
and TECHNICIAN, scroll through all the functions
using the
key until the display reads:
Machine Ready
Day Hour
5.4 PROGRAMMING CYCLE
USER MODE
1. LANGUAGE
Press the ENTER key to access the setting. This sets the language of the operatormachine interface, as shown on the display.
Language
2. PRODUCT NAME:
Press the ENTER key to access the setting. A
beverage is assigned to each key. Example:
Product Name: 1
In this case the beverage ‘Espresso’ is assigned to
key number
KEY FUNCTIONS
: Scrolling of beverages for each key.
The ENTER key confirms the type of
RESET: Return to the previous menu.
The programmable keys are the following:
Once the programming of the final key has been
completed, pressing ENTER the next menu item is
accessed.
NOTE: The keys
1
beverage for the key number being taken
into consideration and then passes on to
the beverage of the next key.
programmed for both milk-based beverages
and coffee drinks.
Espresso
.
can be
The available languages are as follows:
Italian Swedish
English Danish
Spanish Finnish
German Norwegian
French Russian
Dutch Japanese
KEY FUNCTIONS
: Scrolling of language list.
ENTER: Confirmation of the selected language.
RESET: Return to the previous menu.
The keys
grammed only for coffee beverages.
NOTE: The function DISABLE can be assigned
to each key and in this case the key is
disabled.
can be pro-
57

EN
3. DOSE PROGR.
Press the ENTER key to access the setting.
Program Doses
The doses of water to be used for each single
drink can be programmed.
1 Dose Prog Ristretto
2 Dose Prog Espresso
3 Dose Prog 2 Ristretto
4 Dose Prog Macchiato
5 Tea water time prog (s)
6 Maximum steam time (s)
KEY FUNCTIONS
: Increase / decrease of the water flow used
during delivery.
For tea, it increases/decreases the max.
time of steam delivery.
ENTER: Confirmation of the set value for the con-
cerned beverage and scrolling to the next
beverage setting.
RESET: Return to the previous menu.
4. GRINDER PROGR.
Press the ENTER key to access the setting.
Grind Time
It is possible to set the grinding times for each
beverage (sec.).
1 Grind Time Ristretto
2 Grind Time Espresso
3 Grind Time 2 Ristretto
4 Grind Time Macchiato
KEY FUNCTIONS
: Increase / decrease of the grinding time for
the beverage delivery.
ENTER: Confirmation of the set value for the con-
cerned beverage and scrolling to the next
beverage setting.
RESET: Return to the previous menu.
5. MILK DOSE
(CAPPUCCINO version only)
Press the ENTER key to access the setting.
Milk Time
The milk delivery time is programmed (sec.).
1 Milk
2 Caffellatte
3 Macchiato
4 Cappuccino
5 Big Cappuccino
KEY FUNCTIONS
: Increase / decrease of the delivery time for
preparing a beverage.
ENTER: Confirmation of the set value for the con-
cerned beverage and scrolling to the next
beverage setting.
RESET: Return to the previous menu.
6. DATE/TIME
Press the ENTER key to access the setting.
Day / Hour
This is used to set the date and the time to be
displayed on the machine.
1 Day
2 Hour
3 Minutes
KEY FUNCTIONS
: Increase / decrease of the date and time
value.
ENTER: Confirmation of the set value for the value
tested and scrolling to the setting of the
next value. After the confirmation of the
day, it returns to the previous menu.
RESET: Return to the previous menu.
56

EN
7. ON/OFF PROGRAM.
By pressing the ENTER key, it is possible to
access the setting of the automatic switching ON/OFF of the machine, only with the
machine switch in the ON position.
The display will read as follows:
Sunday
Day Off
NOTE: The default setting for the machine
has all days of the week set to
“STANDBY” and therefore, to switch
the machine on/off, the main switch
must be used.
KEY FUNCTIONS
: When not used for setting, allow to scroll
the days of the week and show their setting. After SATURDAY, press the
to return to the previous menu. When
used in the setting, the value to set is
increased/decreased.
ENTER: Access to single day setting. When
pressed in setting, it confirms the value
set and scrolls to the next one.
RESET: Return to the daily setting visualization.
When pressed once more, it resets the
setting of the visualized day.
The display will read as follows:
Sunday
ON07 : 30 OFF23 : 30
key
8. ENERGY SAVING
By pressing the ENTER key, it is possible to set the
time after which the machine enables the energysaving device, whilst keeping the water tank at working temperature. The display will read:
Energy Saving
00 : 00
KEY FUNCTIONS
: Increase / decrease of the activation time
of the ENERGY SAVING, with intervals of
The function is deactivated when the timer
ENTER: /
RESET: Return to the previous menu with the con-
5.5 TECHNICIAN
To access the functions that can only be programmed
using the TECHNICIAN MODE, scroll through all of
the functions that can be accessed from the USER
MODE until the display reads as follows:
Enter the correct password to view the first item in
the programming menu that can be accessed from
the TECHNICIAN MODE.
NOTE: The default standard password is 5 times
30 minutes.
is left at zero.
firmation of the value set.
MODE PROGRAMMING
CYCLE
Password
* * * * *
key number
2
:
NOTE: If an incorrect password is entered, the
machine will automatically quit the programming mode to enter the machine ready
mode.
57

EN
9. PREINFUSION
Press the ENTER key to access the setting.
Pre Brewing
The possibility of pre-infusion of the coffee
tab (YES or NO) for each single beverage is
programmed.
1 Pre-infusion Ristretto
2 Pre-infusion Espresso
3 Pre-infusion 2 Ristretto
4 Pre-infusion Macchiato
KEY FUNCTIONS
: The pre-infusion of the tab is enabled/
disabled.
ENTER: It scrolls every single item and confirms
the enabling/disabling.
RESET: Return to the previous menu with the con-
firmation of the value set.
10. TAMPING
Press the ENTER key to access the setting.
Tamping
The tamping of the tab (YES or NO) for each
single beverage is programmed.
1 Tamping Ristretto
2 Tamping Espresso
3 Tamping 2 Ristretto
4 Tamping Macchiato
KEY FUNCTIONS
: The tab tamping for beverage delivery is
enabled/disabled.
ENTER: It scrolls every single item and confirms
the enabling/disabling.
RESET: Return to the previous menu with the con-
firmation of the value set.
11. GROUNDS NUMBER
Press the ENTER key to access the setting.
Grounds Number
When the number has been reached, a message will be displayed instructing you to empty
the coffee grounds drawer and the machine
will stop working to allow the procedure to be
done safely.
KEY FUNCTIONS
: Increase/decrease of the ground number
before message visualization.
ENTER: /
RESET: Return to the previous menu with the con-
firmation of the value set.
12. MILK CLEANING AL.
(CAPPUCCINO version only)
Press the ENTER key to access the setting.
Milk Cleaning Warning
This allows you to program after how many
hours, following the last milk delivery, the milk
foamer cleaning warning will be displayed.
KEY FUNCTIONS
: Increase/decrease of the ground number
before message visualization.
ENTER: /
RESET: Return to the previous menu with the con-
firmation of the value set.
56

EN
13. CLEANING ALARM
Press the ENTER key to access the setting.
Cleaning Warning
It allows you to program the number of cycles
after which the group clean warning will be
displayed.
KEY FUNCTIONS
: Increase/decrease of the cycle number
ENTER: /
RESET: Return to the previous menu with the con-
before message visualization.
firmation of the value set.
14. RINSING UNIT
Press the ENTER key to access the setting.
Rinse Group
A rinsing cycle of the delivery unit is programmed.
When enabled (ON), the machine carries out a
rinsing cycle of the unit after 20 minutes from
the last activity (if the machine does not perform any activity before 20 minutes).
KEY FUNCTIONS
:
Enabling/disabling (ON/OFF) the unit rinsing.
ENTER: Confirmation of the setting and return to
RESET: Return to the previous menu.
the previous menu.
KEY FUNCTIONS
: Increase/decrease of the pulse number of
the ENCODER.
ENTER: /
RESET: Return to the previous menu with the con-
firmation of the value set.
IMPORTANT:
It is recommended to modify the setting only in case
the original reduced gear is replaced with a different
type.
16. GROUP 2 ADJUSTMENT
Press the ENTER key to access the setting.
Group Setting 2
0000
The number of ENCODER pulses is pro-
grammed so that the infusion chamber reaches
the upper position (chamber closed).
KEY FUNCTIONS
: Increase/decrease of the pulse number of
the ENCODER.
ENTER: /
RESET: Return to the previous menu with the con-
firmation of the value set.
IMPORTANT:
It is recommended to modify the setting only in case
the original reduced gear is replaced with a different
type.
15. GROUP 1 ADJUSTMENT
Press the ENTER key to access the setting.
Group Setting 1
0000
The number of ENCODER pulses is pro-
grammed so that the infusion chamber reaches
the stand-by position.
17. COFFEE TEMPERAT.
Press the ENTER key to access the setting.
Coffee Temperat.
0098 C 0208 F
The temperature of the coffee heater is programmed.
KEY FUNCTIONS
: Increase / decrease of the coffee boiler
temperature. The max. temperature that
can be set is 105°C (221°F).
ENTER: /
RESET: Return to the previous menu with the con-
firmation of the value set.
57

EN
18 STEAM TEMP.
(CAPPUCCINO version only)
Press the ENTER key to access the setting.
Steam Temperat.
0125 C 0257 F
The temperature of the steam boiler is set.
KEY FUNCTIONS
: Increase / decrease of the coffee boiler
temperature. The max. temperature that
can be set is 130°C (266°F).
ENTER: /
RESET: Return to the previous menu with the con-
firmation of the value set.
19. TOTAL COUNT
Press the ENTER key to access the setting.
Total Drink
The following are visualised:
The number of cycles made for each bever-
age key.
Total decaffeinated coffee.
Total washing cycles.
Total steam.
Total hot water.
Total water litres.
KEY FUNCTIONS
: Scrolling of items.
ENTER: /
RESET: Return to the previous menu.
20. PASSWORD
Press the ENTER key to access the setting.
Password
This programmes a new password to access
the functions that can be programmed in the
TECHNICIAN MODE.
Enter a combination of 5 keys (from the 8 keys
available on the keyboard) and set the new
required password.
KEY FUNCTIONS
ENTER: Confirmation of the value set.
RESET: Return to the previous menu without the
confirmation of the value set.
21. WATER FILTER L
Press the ENTER key to access the setting.
Water Filter l
0000
The litres of water delivered for the display of
the message clean water filter are set.
KEY FUNCTIONS
: Increase / decrease of the delivered water
litres before the message visualization.
ENTER: /
RESET: Return to the previous menu with the con-
firmation of the value set.
NOTE: In the first position, keeping the Ÿ key
pressed, the absolute total of the doses
produced by the machine is shown.
To zero the counting of the various cycles and the
totals of decaffeinated coffee, steam and hot water,
simultaneously press the Ÿź keys. The display will
read as follows:
Counters Reset
56

EN
22. DE-SCALE
(Tank version)
Press the ENTER key to access the setting.
The first message appearing concerns the possibility to set water hardness:
Through the
accessed.
KEY FUNCTIONS
: They allow to select one of the two func-
ENTER: Allows to perform the selected function.
RESET: Return to the previous menu.
key the descaling cycle can be
Water Hardness Fr
Decalcification
Start Cycle?
tions.
22.1 WATER HARDNESS SETTING
The water hardness may be set in French degrees,
as well as the execution alarm of the descaling cycle.
When the following message appears:
Water Hardness Fr
Press the ENTER key to access the function.
The display will read:
Water Hardness Fr
00
KEY FUNCTIONS
: Increase/decrease of the water hardness
ENTER: it returns to the previous menu saving the
RESET: Return to the previous menu without sav-
The following table shows the correspondence
between the hardness set and the used water
litres, above which the message “CARRY OUT
DESCALING“.
parameter.
data set.
ing the data set.
WATER HARDNESS °FR WATER LITRES
1-7 1500
8-30 1000
31 500
00
NOTE:
The alarm “CARRY OUT DESCALING” does
not interrupt the machine functioning and is
reset after having carried out the descaling cycle
together with the litre counter.
When the value set is “00”, the alarm is deacti-
vated.
Alarm
disabled
22.2 DESCALING CYCLE
The automatic descaling cycle of the machine boilers
is carried out.
When the following message appears:
Decalcification
Start Cycle?
By pressing the ENTER key, the descaling cycle
begins.
OPERATIONALLY:
Before starting the descaling cycle, fill the tank
with water and descaling agent.
NOTE: Use at least 2 litres (0.52 gal) of solution.
When the following message appears:
Decalcification
Start Cycle?
Press the ENTER key to confirm.
The machine starts sucking up the solution in the
tank delivering at the same time hot water from
the nozzle.
The machine will show:
Decalcification
Please Wait
Once it has sucked up the first litre of solution, the
machine will stop for 5 minutes and then it will start
to suck up another litre of solution.
57

At the end of this cycle, the display will read as
follows:
Rinse
Refill WaterTank
Rinse out the tank and refill it with clean water
(without switching off the machine).
NOTE: Use at least 4 litres (1.06 gal) of solution,
otherwise it will be necessary to restart the
cycle.
Wait at least 5 minutes.
At the end, the display will read as follows:
Rinse
Press ENTER
Press the ENTER key and the machine will begin
a rinse cycle, taking 2 litres of water from the
container and then expelling it through the nozzle.
During this stage, the machine display will read as
follows:
Rinse
Please Wait
When the machine has finished the 2 litres taken
from the container, the display will again read:
Rinse
Press ENTER
Press the ENTER key again for the machine to start
the second stage of the rinse cycle, taking a further
2 litres from the container. The machine display will
then read:
Rinse
Please Wait
EN
CAUTION
During the heating phase, some drops of water
and steam may come out from the hot water
nozzle.
CAUTION
At the end of the descaling cycle, it is recommended to activate the steam for some minutes.
At the end of the rinse cycle, the machine display
will read as follows:
Heating
Please Wait
Leave the machine to heat up for a few minutes; at
the end of this time, the machine will return to its
ready status.
56

EN
6. SPECIAL MACHINE CALIBRATION FUNCTIONS
6.1 RESETTING THE
CLEANING FILTER
LITRE COUNTER
This function allows you to reset the total amount of
water used.
Proceed as follows:
Disconnect the machine by turning the main
switch off (OFF).
Connect the machine by turning the main switch
on (ON) and simultaneously pressing down on
the key:
7
until the display reads:
Reset H2O Filter
Please Wait
6.2 RESETTING
WASHING CYCLES
This function makes it possible to reset the total
number of washing cycles.
Proceed as follows:
Disconnect the machine by turning the main
switch off (OFF).
Connect the machine by turning the main switch
on (ON) and simultaneously pressing down on
the key:
until the display reads:
5
Reset Clean
Please Wait
6.3 RESETTING
MACHINE PARAMETRES
This function makes it possible to remove incorrect functioning data and to reinstate the Standard
Programming settings (see PRESET SETTINGS
chart). Proceed as follows:
Disconnect the machine by turning the main
switch off (OFF).
Connect the machine by turning the main switch
on (ON) and simultaneously pressing down on
the keys
ENTER
and RESET ;
1
3
until the display reads:
Please Wait
Preset Data
6.4 MANUAL HANDLING
OF COFFEE DELIVERY
GROUP
This function makes it possible to activate the motor
manually forming the automation of the manual coffee delivery group. Proceed as follows:
Disconnect the machine by turning the main
switch off (OFF).
Connect the machine by turning the main switch
on (ON) and simultaneously pressing down
on the arrow keys
until the display reads:
Manual Movement
IMPORTANT: When the machine is switched
Press the arrow key
DOWNWARDS.
Press the arrow key
UPWARDS.
Release and reinstate voltage using the main
switch to end the procedure.
2 and 4;
on, since the arrow key
to access this site, the piston will
automatically start to move downwards.
4 to move the piston
2 to move the piston
is used
57
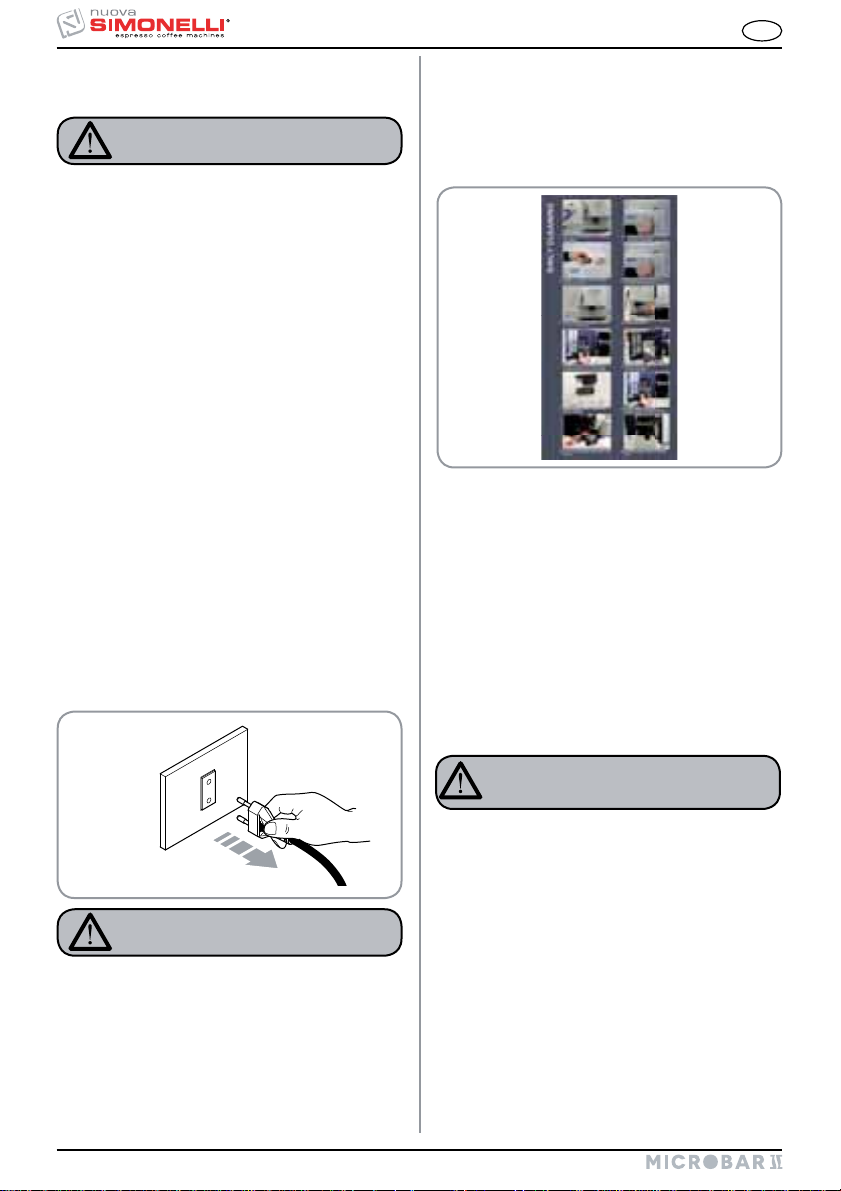
EN
7. CLEANING AND
MAINTENANCE
CAUTION
NEVER use water jets to clean the machine.
For cleaning and maintenance use:
A soft cloth moistened;
A surface cleaner;
Tablets and liquid detergent for specific;
A container with water;
A brush;
A toothbrush.
During maintenance/repairs, the parts used must
be able to guarantee compliance with the safety
and hygiene requirements envisaged for the device.
Original replacement parts can offer this guarantee.
After repairs to/replacement of a part that comes
into contact with foods or water, it is necessary to
carry out a washing procedure or to follow the steps
indicated by the manufacturer.
7.1 CLEANING THE
OUTSIDE
OF THE MACHINE
Before carrying out any cleaning operations, set the
machine to the “O” energy level, (machine switched
off and plug removed from the mains).
7.2 CLEANING THE
DELIVERY UNIT AND
THE MILK FOAMER
NOTE: Follow the instructions on the label applied
on the inside of the front door.
Fig. 25
NOTE: Before starting the washing cycle check and
refill the level of water in the water tank.
The machine is equipped to wash the delivery unit
with detergent tablets and the milk circuit with liquid
cleansers.
The machine will begin a wash cycle that consists
of hot water deliveries alternated with pauses. The
whole cycle lasts approximately 4 minutes.
We recommend that you carry out a WASHING
CYCLE at least once a day using special cleansers.
OK
CAUTION
Never use solvents, chlorine-based products,
abrasives.
Cleaning the work area: remove the worktop, lift-
ing it up from the front and sliding it out. Remove
the water collection dish underneath and clean
everything with hot water and cleansers. Cleaning
the external surfaces: To clean the panels, use a
soft, damp cloth.
Fig. 24
66
CAUTION
RISK OF INTOXICATION
We remind you not to interrupt a washing cycle
using detergent tablets once started, otherwise detergent residues may remain inside the
machine.
In order to execute the washing procedure proceed
as follows:
1. Position a container with water beside the
machine.
2. Put the suction tube inside it.
3. Add the specific cleaning product (20 ml [0.005
Gal] of Puly Milk).

EN
Rinse
Press ENTER
Position another container of just water and press
the ENTER key; the machine will perform a rinse
cycle and the display will read:
Rinse
Fig. 26
4. Press the following key:
5. Keep pressing down on the key for about 5 seconds until the display reads:
Cleaning
Insert Cleanser
6. Open the ground coffee conveyor hatch.
7. Insert the cleanser tablet (Puly Caff) and close
the hatch.
Fig. 27
8. Press the following key:
The display will read:
Cleaning
CAUTION
NOTE: During the washing and rinsing cycles keep-
ing a container under the delivery unit is
advisable or empty the water collector once
the wash and rinse cycles have been completed.
7.3 REINSTATING AN
INTERRUPTED
WASHING CYCLE
Should the washing cycle be interrupted by elec-
tricity failure, when the appliance is next turned
on the unit will be in rest position and the display
will read:
Please Clean
Press the DECAFFEINATED key again in order
to repeat the procedure described above in the
paragraph ‘CLEANING THE DELIVERY UNIT
AND Milk Foamer.
7.4 COFFEE HOLDER AND
COFFEE DELIVERY
UNIT CLEANING
CAUTION
RISK OF BURNS OR SCALDING
Set the machine to the “O” energy level.
Insert the key in the lock.
Turn the Front panel key counter-clockwise.
Open the Front panel.
If the DECAFFEINATED key is not pressed, after
about 20 seconds the machine will automatically
continue the washing cycle.
NOTE: During the washing cycle the dose keys are
disabled.
At the end of the washing cycle, the display will
read:
Fig. 28
67
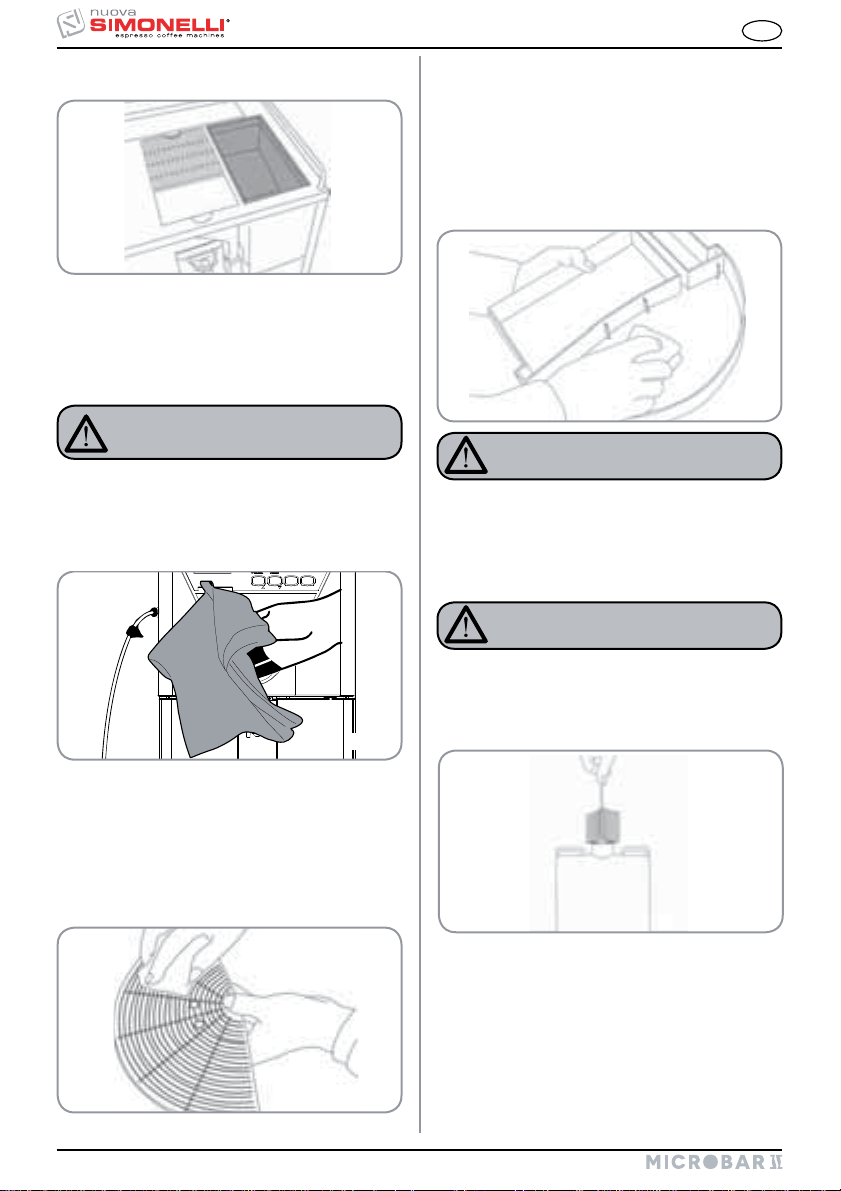
EN
Remove any coffee residues deposited on the
delivery unit sides.
Fig. 29
7.5 CLEANING THE
STEAM NOZZLE
Clean the steam nozzle each time it is used to warm
up drinks.
CAUTION
RISK OF BURNS OR SCALDING
If cleaned when the nozzle is still hot, avoid
touching it with bare hands.
Use a cloth dipped in hot water and/or a neutral
cleanser.
7.7 CLEANING THE WATER
COLLECTING TRAY
Clean the water collecting tray with hot water and
soap, if necessary using a brush.
NOTE: The water collecting tray can be washed in
the dishwasher.
Fig. 32
CAUTION
Never use any sort of solvent.
7.8 CLEANING THE
WATER TANK
CAUTION
Fig. 30
7.6 CLEANING THE DROP
COLLECTING
TRAY GRID
Wash the grid clean with a brush and hot water
and soap.
Fig. 31
68
Switch off the machine before filling or removing
the tank.
Clean the water tank with hot water and soap, if
necessary using a swab.
Fig. 33
NOTE: rinse carefully so that undesirable residues
aren’t deposited on the bottom of the tank.

EN
7.9 CLEANING THE
GASKET
Use a small brush to clean any deposits or coffee
residues off the piston and the delivery unit site
or any other areas soiled with coffee.
Fig. 34
7.10 CLEANING THE
MILK FOAMER
NOTE: Follow the instructions on the label applied
on the inside of the front door.
1
Disconnect all the tubes attached to it.
Disassemble the milk foamer and wash it care-
fully.
NOTE: If the pause between one cappuccino and
another is over one hour long, it is advisable
to wash the milk foamer by fishing the milk
suction tube in hot water rather than in milk.
2
Fig. 37
Fig. 38
OK
Set the machine to the “O” energy level.
Insert the key in the lock.
Turn the Front panel key counter-clockwise.
Open the Front panel
IMPORTANT: Proceed with caution
Extract the whole delivery unit including the milk
foamer, pulling it towards you.
Extract the milk foamer from the delivery group by
sliding it upwards.
Fig. 35
Fig. 36
To reassemble proceed inversely, attaching the
milk foamer tubes properly.
NOTE: To make the reassembling procedure easier,
an explanatory label has been attached to
the front door.
Clean the drop collector (see paragraph THE
DROP COLLECTING TRAY GRID).
69

EN
8. STANDARD SETTING TABLE
BEVERAGE WATER GRINDING MILK PRE-BREWING TAMPING NUMBER
COFFEE GRINDING MILK
(cc) (sec) (sec)
Ristretto 40 7 No yes
2 Ristretto 80 9 No No
Espresso 50 7 No yes
2 Espresso 100 9 No No
Coffee 60 7 No yes
2 Coffee 120 9 No No
Coffee Creme 100 7 No No
2 Coffee Creme 200 9 No No
Cappuccino 50 7 12 No yes
Big Cappuccino 60 7 15 No yes
Macchiato 50 7 12 No yes
Caffellatte 60 7 12 No yes
Milk 15
Hot Water 20
Steam 55
Grounds number 20
Milk cleaning warning 00
Clean warning 00
Group 1 adjustment 275
Group 2 adjustment 540
Coffee temperature 98 (°C)
Steam temperature 125 (°C)
Water filter 00
Grinder setting 00
Shut down clean No
Password
Smart Card No
Energy Saving 00
Water hardness°Fr 00
70

EN
9. MACHINE FUNCTION MESSAGES
DISPLAY INDICATION CAUSE EFFECT SOLUTION
GROUNDS DRAWER FULL
Machine Ready
Drawer Full
GROUNDS DRAWER
OUT OF PLACE
Machine Ready
Drawer Out
MACHINE FRONT PANEL
POSITION
Grounds drawer
full. The number
of coffee grounds
in the drawer
has reached the
number set during programming
stage.
Grounds drawer
out of place.
Front panel
open.
Keys delivering
coffee based
drinks are
blocked.
Keys delivering
coffee based
drinks are
blocked.
The machine
functions are
blocked.
Pull out the grounds drawer and
empty it into a garbage bag.
Put the drawer back into place,
when the display reads:
Machine Ready
Drawer Out
Insert the grounds drawer into its
special slot.
Should this alarm turn on during
the delivery of a coffee based
drink:
Up until brewing, the alarm is
displayed but the drink will be
delivered.
After brewing, the cycle in
progress will be suspended.
The coffee cycle will recommence only when the drawer has been put back in its
place.
Should this alarm turn on during
the group movement phase:
the movement will be inter-
rupted.
When the drawer is back in its
place, the reset group will be
repeated.
Close the front panel.
Macchine OFF
Front Panel Open
WASHING CYCLE IS
REQUIRED
Clean Warning
The set number
of cycles programmed before
washing, has
been exceeded.
The message
will appear on
the display but
the machine
will continue to
deliver drinks.
Do a washing cycle (see
paragraph “WASHING THE
DELIVERY UNIT AND MILK
FOAMER”).
71

DISPLAY INDICATION CAUSE EFFECT SOLUTION
MILK CIRCUIT CLEANING
REQUIRED
Milk Clean Warning
SHUT DOWN CLEAN
Shout Down Clean
Press Enter
NEED FOR DE-SCALING
CYCLE
Please Decalcif.
The set number
of hours programmed from
time of last milk
based drink
before washing, has been
exceeded.
An end of service
wash was set for
the delivery unit
during the programming stage.
The number of
litres after which
a de-scaling
cycle is required
has been
exceeded.
The message
will appear on
the display but
the machine
will continue to
deliver drinks.
An end of
service wash
must be performed before
the machine is
switched off.
This message
is displayed but
the machine will
continue to dispense drinks
Perform a washing cycle for the
milk foamer only. As in the case
of a complete washing cycle, you
must keep the key pressed down
for 5 seconds without, however, inserting cleanser tablets
for this group’s washing.
(See only points 1, 2, 3, 4 of
the paragraph ‘WASHING THE
DELIVERY UNIT AND MILK
FOAMER).
Press the ENTER key as shown
on the display. The machine will
automatically perform an end of
service wash, dispensing approx.
50cc of water and will then switch
off.
Carry out a de-scaling cycle
(SEE the relevant section entitled
"DE-SCALING CYCLE")
EN
72

EN
10. MACHINE BLOCK ALARM MESSAGES
DISPLAY INDICATION CAUSE EFFECT SOLUTION
UPPER PISTON MOTOR
GROUP ALARM
Xxxxxx
Group Error
HEATER FILLING ALARM
Boiler Filling
TURBINE ALARM
Once having detected the alarm,
on the display, the control unit
alternates the message relative
to the current beverage with the
error message concerning such
function. For instance:
Flowmeter Error
WATER TANK EMPTY ALARM
Refill WaterTank
During the group
handling phase,
the upper piston
exceeded maximum set time
by 10 seconds
before recognizing motor pickup.
The heater filling stage has
exceeded the 3
minute maximum
time; the probe
level is uncovered.
The volume
counter will
not send any
impulses to the
control unit for 5
seconds.
The water tank is
empty.
The control unit
will halt whatever cycle is on by
turning off both
the movement
actuator and
those for drink
delivery; the
operator will not
be able to make
selections on
the keyboard.
The machine
will stop.
The delivery will
continue for up
to 60 seconds
or for as long
as any of the
coffee based
drink keys are
pressed.
The coffee will
not be delivered
and the dosing
will be halted
while in progress.
Open and close the machine
door.
If the alarm reappears after the
second time of taying, call the
Service Technician.
Contact the Service Technician.
Open and close the machine
door. The control unit will repeat
the machine starting up procedure.
In case the alarm persists, the
machine can be used as a manual appliance.
Press the selected key to start
the dosing;
Once the desired dose has
been delivered in the cup, press
the same key to halt the dose
being delivered.
Call the Service Technician.
Fill the water tank.
Use the Hot Water key to eliminate any air bubbles.
73

DISPLAY INDICATION CAUSE EFFECT SOLUTION
CLEANING FILTER ALARM
Water Filter l.
20
TEMPERATURE PROBE
MALFUNCTION ALARM
Alarm: CoffeeTemp
Alarm: Steam Temp
The volume
counter has
reached the
number of litres
of deliverable
water set during
programming
phase.
One of the two
temperature
probes is broken.
Coffee will not
be delivered;
the dose will not
be halted or it is
variable.
Coffee will not
be delivered.
Regenerate cleaning filter salts.
To erase the alarm see paragraph
on ‘RESETTING CLEANING
FILTER LITRE COUNTER’.
This alarm blocks all deliveries.
The cleaning filter alarm can be
eliminated by programming the
number of litres to zero (see paragraph on ‘PROGRAMMING’).
Replace the broken probe.
This alarm blocks all deliveries.
EN
COFFEE QUANTITY ALARM
Too Much Coffee
Too much coffee. Coffee will not
be delivered
and an ejection
cycle will be
effected.
Reduce the quantity of coffee.
74

FR
PRESCRIPTIONS DE SÉCURITÉ
Ce manuel est partie intégrante et essen-
tielle du produit et il doit par conséquent
être remis à l’utilisateur. Lire attentivement les conseils qu’il contient car ils
fournissent des indications particulièrement importantes sur la sécurité de l’installation, son utilisation et son entretien.
Conserver ce manuel avec soin de façon
à pouvoir le consulter si nécessaire.
Après l'avoir retiré de son emballage, vérifier
l'intégrité de l'appareil. En cas du moindre
doute, ne pas l’utiliser et s’adresser à un
technicien qualifié. Les éléments de l’emballage (sacs plastique, polystyrène expansé,
clous, etc..) ne doivent pas être laissés à la
portée des enfants car ils peuvent constituer
une source potentielle de danger. Ne pas
répandre ces éléments dans l’environnement.
RISQUE DE POLLUTION
La machine est indiquée pour être installée dans les locaux de service pour le personnel employé dans les magasins, les
bureaux et autres lieux de travail. Ainsi
que dans les chambres d'hôtes, dans les
espaces destinés aux clients des hôtels et
autres structures résidentielles.
Avant de brancher l’appareil, vérifiez que
les données indiquées sur la plaquette
correspondent à celles du réseau électrique. La plaquette est située au dos de
la machine en bas à gauche. L’installation
doit être réalisée dans le respect
normes en vigueur, suivant les instructions fournies par le fabricant et effectuée
par un technicien qualifié.
Le fabricant ne pourra en aucun cas être
retenu responsable des éventuels dommages causés par une absence de mise à la
terre de l’installation. Pour la sécurité élec-
des
trique de cet appareil, il est obligatoire de
prévoir une installation de mise à la terre,
en s’adressant à un électricien qualifié et
dûment autorisé à cet effet, afin qu’il vérifie
que la portée électrique de l’installation
soit appropriée à la puissance maximum de
l’appareil indiquée sur la plaquette.
En particulier, l’électricien devra s’assurer
que la section des câbles de l’installation
soit bien adaptée à la puissance absorbée
de l'appareil. Il est interdit d'utiliser des
adaptateurs, des prises multiples et des
rallonges. Si leur usage s’avère indispensable, il faut absolument s’adresser à un
électricien dûment autorisé à cet effet.
Lors de l’installation du dispositif, utiliser
les composants et les matériaux fournis en
dotation avec le dispositif. Si l’utilisation de
composants supplémentaires s’avère nécessaire, l’installateur doit vérifier l’adéquation
de ces derniers pour un emploi au contact
de l’eau pour la consommation humaine.
L'installateur doit effectuer les branche-
ments hydrauliques en respectant les
normes d'hygiène et de sécurité hydraulique de protection de l'environnement en
vigueur dans le lieu d'installation. Il faut
donc que l'installation hydraulique soit
réalisée par un technicien autorisé.
Pour le raccordement de l'eau toujours
utiliser nouveau tuyau fourni, les vieux
tuyaux ne doit pas être utilisé.
L'alimentation du dispositif doit être effectuée avec de l’eau adéquate pour la consommation humaine conformément aux dispositions en vigueur dans le pays d'installation.
L’installateur doit recevoir de la part du propriétaire/gérant de l’installation, une confirmation écrite indiquant que l’eau respecte
les caractéristiques susmentionnées.
75
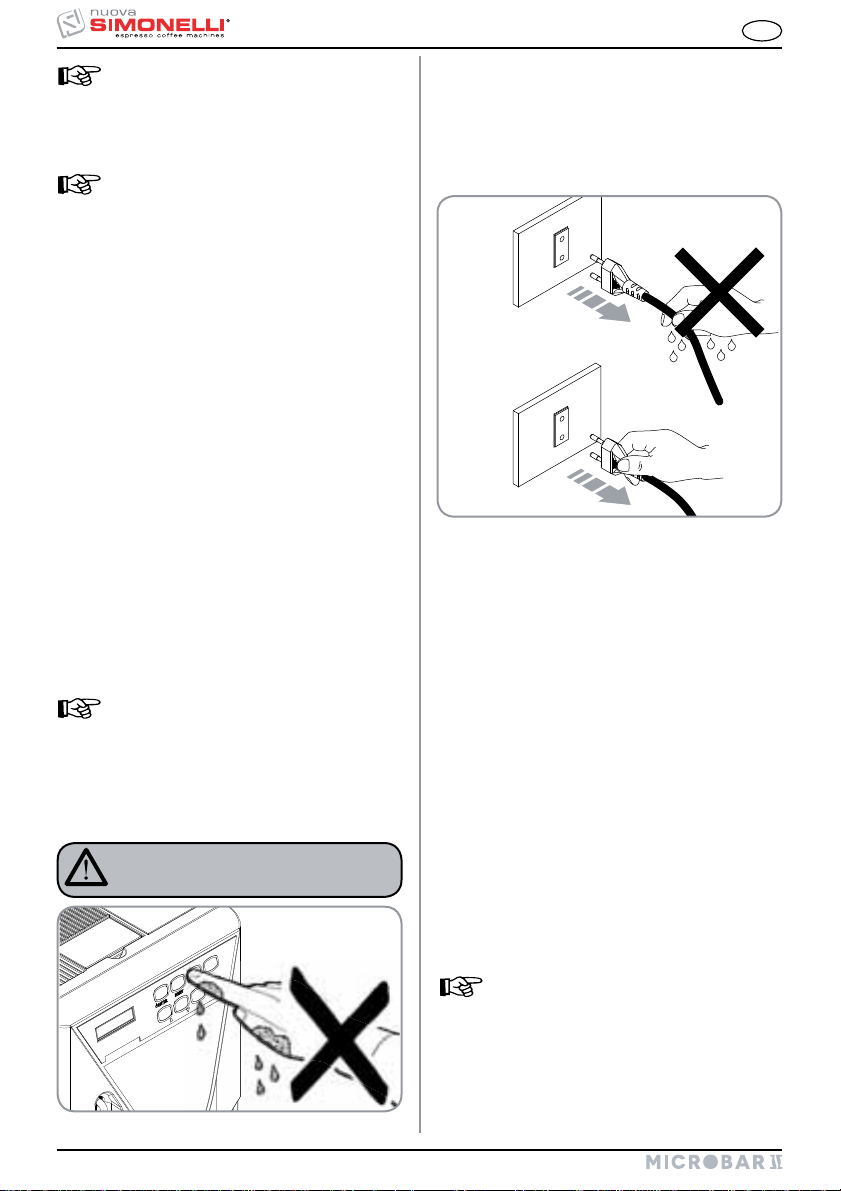
OK
FR
Cet appareil doit être destiné uniquement à
l’usage expressément décrit dans ce manuel.
Le fabricant ne pourra en aucun cas être retenu
responsable des dommages éventuels causés
par une mauvaise ou déraisonnable utilisation.
Au terme de l’installation, le dispositif doit
être actionné jusqu’à ce qu’il atteigne la
condition nominale de travail en le laissant
en condition de “prêt au fonctionnement”.
Éteindre ensuite le dispositif et vider
entièrement le circuit hydraulique de sa
première eau afin d’éliminer toute impureté éventuelle.
Le dispositif doit être ensuite à nouveau
chargé et actionné jusqu’aux conditions
nominales de fonctionnement.
Lorsqu’on atteint la condition “prêt au
fonctionnement”, effectuer les distributions suivantes:
100% du circuit café à travers le distri-
buteur de café (pour plusieurs distributeurs, diviser en mesures égales;
100% du circuit de l'eau chaude à
travers le distributeur d’eau (pour
plusieurs distributeurs, diviser en
mesures égales);
Ouverture de chaque sortie vapeur
pendant 1 minute.
Au terme de l’installation, il serait pré-
férable de rédiger un rapport des opérations effectuées.
L’utilisation de tout appareil électrique
comporte le respect de certaines règles
fondamentales.
Et notamment:
Ne pas toucher l’appareil avec les
mains ou les pieds mouillés ou
humides;
ATTENTION
RISQUE DE SECOUSSE ÉLECTRIQUE
Ne pas utiliser l’appareil pieds nus;
Ne pas employer de rallonges dans les
Ne pas tirer sur le cordon électrique
Ne pas installer la machine dans des lieux
salles de bain ou les douches;
pour débrancher l'appareil du réseau
d'alimentation;
Ne laissez pas l’appareil exposé aux
agents atmosphériques (pluie, soleil, etc..).
où elle pourrait entrer en contact avec des
jets d'eau.;
Le dispositif peut être utilisé par des
enfants âgés de moins de 8 ans et
les personnes atteintes de réduit physique, sensorielles ou mentales, ou le
manque d'expérience ou de la nécessaire connaissances, fourni sous surveillance ou après la même a reçu
des instructions relative à l'utilisation
sûre de l'appareil et de comprendre les
dangers inhérents à ce. la Les enfants
ne devraient pas jouer avec l'appareil.
Le nettoyage et l'entretien destinées à
être effectuée par l'utilisateur ne doit
pas être effectué par des enfants sans
surveillance.
Le technicien autorisé doit, avant d’effec-
tuer toute opération d’entretien, débrancher la prise après avoir éteint l’interrupteur de la machine
76
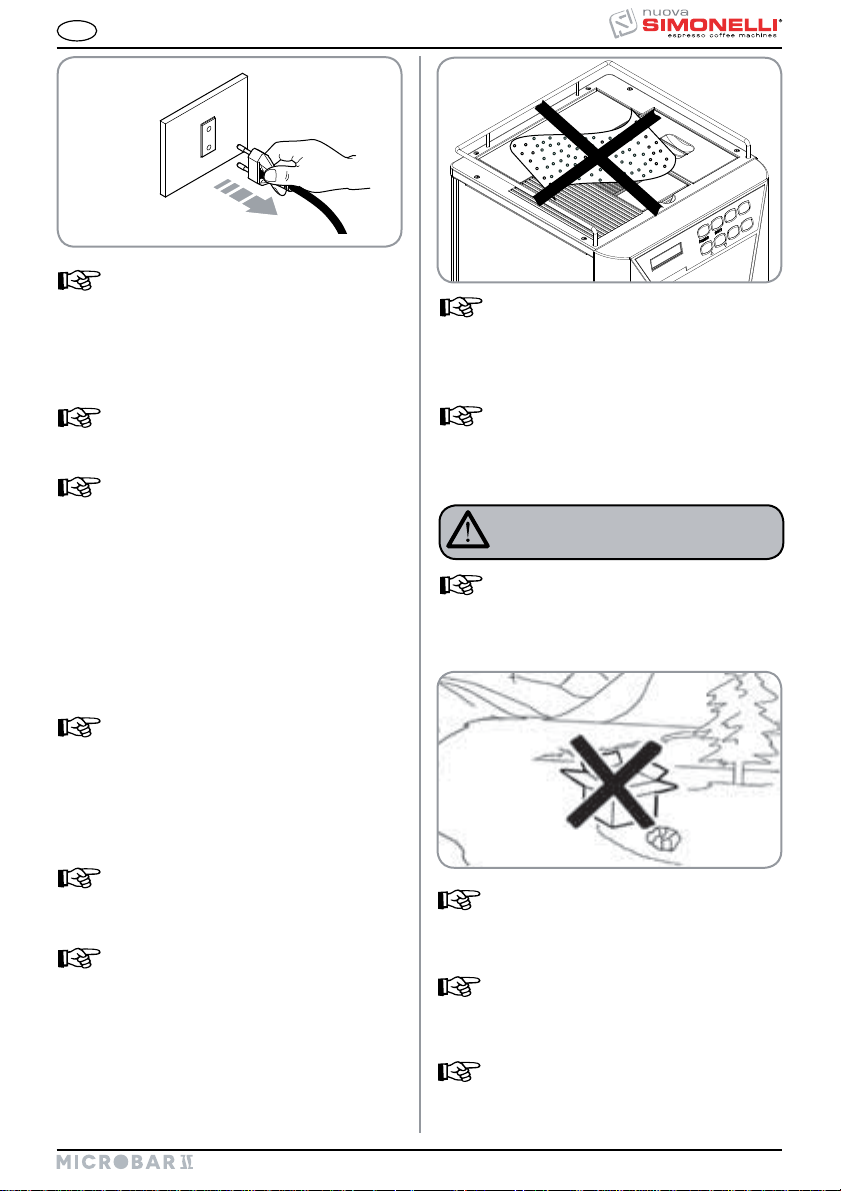
FR
OK
Pour les opérations de nettoyage, mettre
la machine à l'état énergétique "OFF",
à savoir "INTERRUPTEUR MACHINE
ÉTEINT ET FICHE DÉBRANCHÉE" et res-
pecter rigoureusement les prescriptions
prévues dans ce manuel.
Pour le nettoyage et l'entretien de routine
voir le chapitre 7.
En cas de panne ou de mauvais fonctionne-
ment de l’appareil, éteignez-le. Il est stric-
tement interdit d’intervenir. Adressez-vous
uniquement au personnel qualifié.
La réparation éventuelle des produits ne
devra être effectuée que par la Maison
Constructrice ou par un centre de service
après vente dûment autorisé, en utilisant
uniquement des pièces détachées originales.
L’inobservance de ces indications pourrait
compromettre la sécurité de l’appareil.
Le câble d'alimentation de cet appareil
ne doit pas être remplacé par l'utilisateur. En cas d’endommagement du câble,
éteindre l’appareil et le faire remplacer
uniquement par un technicien qualifié.
Si vous décidez de ne plus utiliser cet
appareil, il est vivement conseillé de le
rendre inefficace en coupant le câble
d’alimentation, après avoir débranché le
câble du réseau d’alimentation électrique.
ATTENTION
RISQUE DE POLLUTION
Ne jamais abandonner l’appareil dans
l’environnement: pour son élimination
totale, s’adresser à un centre autorisé ou
contacter le fabricant afin de recevoir les
instructions à ce sujet.
Lors de l’installation, l’électricien auto-
risé devra prévoir un disjoncteur omnipo-
laire conforme aux normes en vigueur qui
prévoient que les contacts qui permet la
déconnexion complète dans la catégorie de
surtension III conditions.
Afin d’éviter des surchauffes dangereuses,
il est conseillé de bien dérouler sur toute la
longueur le câble d’alimentation.
Vérifier que les grilles d'aspiration et/ou de
dissipation ne soient pas bouchées, en parti-
culier celles du chauffe-tasses.
Pour favoriser l’aération de la machine,
cette dernière doit être positionnée à 15
cm des murs et des autres machines, du
côté de l'aération.
Lorsque le lavage de la machine a com-
mencé, ne l'arrêtez pas, des résidus de
produit nettoyant peuvent restés à l'intérieur du groupe de distribution.
Positionner la machine sur une surface
horizontale pour éviter toute anomalie de
fonctionnement.
77

FR
La machine est prédisposée pour tra-
vailler à une température comprise entre
+5°C - +40°C (41°F - 104°F).
ATTENTION
RISQUE D’INTOXICATION
Lors de l’utilisation du bec à vapeur, ne
jamais exposer les mains à la vapeur et
ne jamais toucher le bec tout de suite
après son utilisation.
ATTENTION
RISQUE DE BRÛLURES
Pour effectuer toute opération relative à
l’installation, l’entretien, le déchargement
et la mise au point, l’opérateur qualifié
devra toujours porter ses gants de travail
et ses chaussures de protection.
ATTENTION
RISQUE DE CISAILLEMENT
ATTENTION
INFORMATION POUR LES
UTILISATEURS
Aux sens de l’art. 13 du
Décret Législatif du 25 juillet
2005, n.151 “Réalisation des
Directives 2002/95/CE, 2002/96/
CE et 2003/108/CE, relatives à
la réduction de l’utilisation de
substances dangereuses dans les appareillages
électriques et électroniques, ainsi qu’à l’enlèvement des ordures“.
Le symbole de la poubelle barrée reporté sur
l’appareillage indique que le produit, à la fin de
sa propre vie utile, doit être recueilli séparément
d’autres ordures. L ‘utilisateur devra, donc, transmettre l ‘appareillage arrivé à la fin de sa vie aux
centres aptes à la récolte différenciée des déchets
électroniques et électrotechniques, ou le rendre au
détaillant au moment de l’achat d’un nouvel appareillage de même type, à raison d’échange un à un. La
récolte différenciée pour le recyclage de l’appareil,
le traitement de ses composants et leur élimination
dans le respect de l'environnement contribue à éviter
les possibles effets négatifs sur l'environnement et
sur la santé et il favorise le recyclage des matériaux
dont est composé l'appareil. L’enlèvement illégal du
produit de la part de l’utilisateur comporte l ‘application des sanctions administratives dont au D.L.n.
22/1997” (article 50 et suivants du D.L.n.22/1997).
Au moment où il ajoute du café l'opéra-
teur ne doit pas introduire ses mains à
l'intérieur du récipient.
78

Mod. MICROBAR II
Operating Pressure 0,165 MPa MAX Inlet Pressure 0,65 Mpa
S.N. XXXXXX Date 09 / 03 /2015
P = 2100 W220 - 240 V
50 / 60 Hz
FR
TRANSPORT ET MANUTENTION
IDENTIFICATION
MACHINE
Pour toute communication avec le fabricant Nuova
Simonelli, indiquer toujours le numéro de série de
la machine.
TRANSPORT
La machine est transportée sur des palettes avec
d’autres machines et à l’intérieur de cartons; le
tout étant fixé aux palettes au moyen des courroies
appropriées.
Avant de procéder à toute opération de transport ou
de déplacement, l’opérateur doit:
Porter des gants et des chaussures de protection
ainsi qu’une salopette munie d’élastiques aux
extrémités.
Le transport des palettes doit être effectué au
moyen d’un appareil de soulèvement approprié (du
type chariot élévateur à fourches).
ATTENTION
RISQUE DE HEURT
OU D'ÉCRASEMENT
Avant de procéder à l’opération décrite ci-après,
s’assurer que le matériel chargé soit bien positionné et qu’il ne tombe pas après la coupure
des courroies.
Pour couper les courroies et stocker le produit,
l’opérateur doit toujours être muni de gants et de
chaussures de protection; pour effectuer cette
opération, consulter les caractéristiques techniques du produit afin de contrôler le poids de la
machine devant être emmagasinée et de pouvoir
agir en conséquence.
ATTENTION
RISQUE DE POLLUTION
MANIPULATION
ATTENTION
RISQUE DE HEURT
OU D'ÉCRASEMENT
Lors des opérations de déplacement, l’opérateur
doit s’assurer qu’aucune personne, chose ou
objet ne se trouve dans la zone d’opération.
Soulever lentement la palette à 30 cm environ de
terre et rejoindre la zone de chargement. Après
avoir vérifié l'absence d'obstacles, de choses ou
de personnes, procéder au chargement.
Après avoir atteint la zone de chargement et
après avoir vérifié l’absence d’obstacles, de
choses ou de personnes, poser la palette à
terre toujours au moyen d’un appareil de levage
approprié (par exemple, un chariot élévateur à
fourches), puis la déplacer en la soulevant à 30
cm environ de terre jus qu’à la zone de stockage.
79

FR
Compliments,
Vous avez fait un excellent choix en achetant notre modèle MICROBAR II.
Vous disposez à présent d'une véritable machine à café espresso entièrement automatique et entièrement
commandée par un microprocesseur. Cela signifie une fiabilité extrême et une grande facilité d'emploi. Nous
sommes certains que notre modèle MICROBAR II augmentera votre confiance envers Nuova Simonelli et que
vous conseillerez certainement à vos amis l'achat de cette machine à café car le modèle MICROBAR II a été
choisi pour augmenter le rendement du service cafétéria en optimisant au maximum les coûts de fonctionnement. Cette machine a été fabriquée conformément aux directives CEE 89/392, CEE 89/336, CEE 73/23, CEE
89/109 et modifications successives.
Cordialement,
Nuova Simonelli S.p.a.
CARACTÉRISTIQUES TECHNIQUES
H
P
POIDS NET
POIDS BRUT
PUISSANCE
THERMIQUE
80
L
CAFÉ CAPPUCCINO
26 Kg 57 lb 27 Kg 59 lb
30 Kg 66 b 31 Kg 68 lb
1000 W 1000 W 2000 W 2000 W
L
H
P
325 mm 12
460 mm 18
480 mm 18
13/16
inc 325 mm 12
2/16
inc 460 mm 18
7/8
inc 480 mm 18
13/16
2/16
7/8
inc
inc
inc

FR
TABLE DES MATIÈRES
PRESCRIPTIONS DE SÉCURITÉ .......75
TRANSPORT ET DÉPLACEMENT ......79
IDENTIFICATION DE LA MACHINE ...........79
TRANSPORT ..................................................79
DÉPLACEMENT .............................................79
CARACTÉRISTIQUE TECHNIQUES ...80
1. DESCRIPTION .............................82
1.1 DESCRIPTION CLAVIER
(Configuration standard) .............................. 83
1.2 DESCRIPTION INTERNE MICROBAR II ......... 83
2. INSTALLATION ET
OPÉRATIONS PRÉLIMINAIRES ..84
2.1 INSTALLATION MACHINE
VERSION AVEC RÉSERVOIR .........................84
2.2 INSTALLATION MACHINE VERSION
A BRANCHEMENT DIRECT ...........................85
2.3 REMPLISSAGE RÉCIPIENT CAFÉ .................85
2.4 MISE EN MARCHE .........................................86
2.5 ARRÊT ..........................................................86
3. RÉGLAGES DU
TECHNICIEN QUALIFIE ..............87
3.1 RÉGLAGE DU DEGRÉ
DE MOUTURE ................................................87
3.2 RÉGLAGE AIR
(version CAPPUCCINO) ................................. 87
3.3 RÉGLAGE DU FLUX DE LAIT
(Réglage Température) .................................87
4. UTILISATION ..............................88
4.1 MISE EN MARCHE .........................................88
4.2 ARRÊT ..........................................................88
4.3 CONFIGURATION STANDARD .......................88
4.4 CONFIGURATION SÉLECTIONS .................... 89
4.5 PRÉPARATION DU CAFÉ ...............................89
4.6 PRÉPARATION DE 2 CAFÉS ..........................90
4.7 PRÉPARATION CAPPUCCINO /
CAFÉ AU LAIT (version CAPPUCCINO) ........90
4.8 PRÉPARATION CAFÉ
DÉCAFÉINÉ EN POUDRE ..............................90
4.9 EAU CHAUDE ................................................ 91
4.10 VAPEUR .........................................................91
4.11 PRÉPARATION SÉLECTIONS ........................92
5. PROGRAMMATION......................93
5.1 CLAVIER STANDARD .....................................93
5.2 PROGRAMMATION ........................................93
5.3 QUITTER LA PROGRAMMATION ...................94
5.4 CYCLE DE PROGRAMMATION
MODALITÉ UTILISATEUT .............................. 94
5.5 CYCLE DE PROGRAMMATION
MODALITÉ TECHNICIEN ...............................96
6. FONCTIONS SPÉCIALES
CALIBRAGES MACHINE ...........102
6.1 MMISE A ZÉRO COMPTEUR
LITRES DEPURATEUR ................................. 102
6.2 MISE A ZÉRO CYCLES DE LAVAGE ............102
6.3 MISE A ZÉRO PARAMÈTRES MACHINE ......102
6.4 DÉPLACEMENT MANUEL
GROUPE DE DISTRIBUTION CAFÉ .............102
7. NETTOYAGE ET ENTRETIEN ....103
7.1 NETTOYAGE DE LA CARROSSERIE ............103
7.2 NETTOYAGE DU GROUPE DE DISTRIBUTION
ET GROUPE A CAPPUCCINO ......................103
7.3 REPRISE D'UN
LAVAGE INTERROMPU................................104
7.4 NETTOYAGE DU RÉCIPIENT
ET DU CONVOYEUR DU CAFÉ ....................104
7.5 NETTOYAGE DE LA LANCE VAPEUR ..........105
7.6 NETTOYAGE DE LA GRILLE
TIROIR A GOUTTES ....................................105
7.7 NETTOYAGE DU RÉCIPIENT
TIROIR A GOUTTES ....................................105
7.8 NETTOYAGE RÉSERVOIR EAU ....................105
7.9 NETTOYAGE JOINT GROUPE ...................... 106
7.10 NETTOYAGE GROUPE A CAPPUCCINO ......106
8. TABLEAU DONNÉES
PROGRAMMATIONS
STANDARD ................................107
9. MESSAGES FONCTIONS
MACHINE ..................................108
10. MESSAGES D'ALARME
BLOCAGES MACHINE ...............110
CONFIGURATION .....................112
INSTALLATION ÉLECTRIQUE
(Version CAFÉ) .........................113
INSTALLATION ÉLECTRIQUE
(Version CAPPUCCINO) ............115
INSTALLATION HYDRAULIQUE
(Version CAFÉ) .........................117
INSTALLATION HYDRAULIQUE
(Version CAPPUCCINO) ............119
RÉGLAGE
CONTRASTE AFFICHEUR .........121
81

1. DESCRIPTION
15
13
12
11
FR
1
2
3
14
4
5
16
10
9
8 6
7
LÉGENDE
1 Bouchon d'accès au récipient café en grains
2 Portillon d'accès convoyeur
café moulu
3 Panneau de commandes
4 Clé Ouverture / Fermeture
porte de commande
5 Bec verseur lait / cappuccino
6 Grille tiroir à gouttes
7 Tiroir à gouttes eau
8 Distributeurs café
9 Tiroir à Marcs
82
17
Fig. 1
10 Lance Vapeur / Lance Eau chaude
11 Tube aspiration lait (seulement version
CAPPUCCINO)
12 Robinet de réglage flux lait (seulement version
CAPPUCCINO)
13 Vis de réglage air groupe à cappuccino
(seulement version CAPPUCCINO)
14 Porte avant
15 Portillon d'accès réservoir eau
16 Interrupteur général (ON / OFF)
17 Fiche de branchement au réseau

FR
1.1 DESCRIPTION CLAVIER (Configuration standard)
LÉGENDE
1 3 5 7
2 4 6 8
Fig. 2
1.2 DESCRIPTION INTERNE MICROBAR II
1 2
LÉGENDE
1 Convoyeur café moulu
2 Récipient café en grains
3 Vis de réglage mouture café en
3
4 Groupe de distribution
5 Tiroir à gouttes
4
6 Tiroir à Marcs
7 Micro ouverture porte
8 Clé - Serrure porte
Touche 1 Expresso
1
2
Touche 2 Expressos
3
Touche 1 Café
4
Touche 2 Cafés
5
Touche décaféiné, Cycle Lavage
6 Touche Café au Lait
7
Touche Eau Chaude
8 Touche Vapeur
grains
5
8
6 7
Fig. 3
83

FR
2. INSTALLATION
ET OPÉRATIONS
PRÉLIMINAIRES
ATTENTION
RISQUE DE POLLUTION
N'abandonnez pas l'emballage dans l'environnement.
Fig. 4
Avant d'installer ou de régler la machine, l’opérateur doit avoir lu et compris toutes les prescriptions de sécurité contenues dans ce manuel.
Nuova Simonelli ne répond pas des dommages
aux personnes ou aux choses dérivant du non
respect des prescriptions de sécurité, d'installation ou d'entretien contenues dans ce manuel.
ATTENTION
La machine est indiquée pour travailler avec les
aliments suivants:
Café en grains
Café décaféiné en poudre
Lait non en poudre (seulement version
CAPPUCCINO)
Toute usage de la machine avec d'autres aliments que ceux indiqués ci-avant peut provoquer de graves dommages.
NOTE: Pour les exercices où le service est continu,
effectuer les vidanges susmentionnées au
moins une fois par semaine.
2.1 INSTALLATION
MACHINE VERSION
AVEC RÉSERVOIR
ATTENTION
Éteindre la machine avant de remplir ou d'extraire le réservoir.
Après avoir extrait la machine de son emballage,
procéder comme suit:
1 Positionner la machine sur une surface horizon-
tale.
2 Ouvrir le portillon.
3 Extraire le réservoir de l'eau en tirant vers le haut.
Fig. 5
4 Surtout la première fois, laver le réservoir avec de
l'eau et du savon et rincer abondamment en ayant
soin d'éliminer tout résidu de savon.
5 Remplir le réservoir d'eau.
6
Contrôler que l'extérieur du réservoir soit sec.
7 Remettre le réservoir de l'eau sa place.
ATTENTION
RISQUE DE COURT CIRCUIT
Avant de brancher la machine au réseau électrique, vérifier la correspondance entre le voltage pour lequel elle a été prédisposée et celui
de l'installation.
NOTE: En début de journée et en cas de pauses
dépassant les 8 heures, il est nécessaire
de procéder à la vidange complète de l’eau
(100%) contenue dans les circuits, à travers
les distributeurs respectifs.
84
Fig. 6
8 Fermer le portillon.

FR
ATTENTION
La dureté de l'eau doit être inférieure 4° - 6° fr
(degrés français).
Autrement, les conditions de Garantie de la
machine seront déchues.
2.2
INSTALLATION
MACHINE VERSION A
BRANCHEMENT DIRECT
Après avoir extrait la machine de son emballage,
procéder comme suit:
1 Positionner la machine sur une surface horizon-
tale.
2 Extraire le tube avec la prise de 3/4” du portillon
situé sur la partie supérieure de la machine.
Fig. 7
3 Brancher une extrémité du tube au raccord de 3/4”
situé sur la partie arrière de la machine.
La machine doit être installée selon les
+
normes fédérales, étatiques et locales
(codes) en vigueur en ce qui concerne les
systèmes de plomberie, y compris des
dispositifs anti-refoulement. Pour cette
raison, les raccords de plomberie doivent
être effectués par un technicien qualifié.
2.3 REMPLISSAGE
RÉCIPIENT CAFÉ
1 Retirer le bouchon d'accès au récipient du café
en grains.
ATTENTION
Verser dans le récipient SEULEMENT du café en
grains. Tout autre genre de café, par exemple du
café moulu, endommage le moulin à café.
Ne versez pas de café en grains précédemment
traité avec du caramel, du sucre ou similaires, du
café instantané ou d'autres boissons contenant
du sucre, car cela endommage la machine.
2 Verser le café en grains dans le récipient sans
atteindre la capacité maximum de façon permettre la fermeture du bouchon.
Fig. 8
4 Brancher l'autre extrémité du tube à l'arrivée d'eau.
ATTENTION
La dureté de l'eau doit être inférieure 4° - 6° fr
(degrés français).
Autrement, les conditions de Garantie de la
machine seront déchues.
Fig. 9
3 Fermer le bouchon.
85

FR
2.4 MISE EN MARCHE
Après avoir terminé les Opérations Préliminaires
d'Installation:
1 Appuyer sur l'interrupteur général de la machine
et le positionner sur “ON”.
ON
Fig. 10
Dans un deuxième temps, l'afficheur s'allume et
visualise pendant quelques secondes la page
vidéo:
MICRO2015R.1.13B
La machine charge automatiquement l'eau dans
la chaudière et le réchauffement démarre.
L'afficheur visualise la deuxième page vidéo
jusqu'à la fin du réchauffement.
ATTENTION
LORS DE LA PREMIÈRE INSTALLATION OU
APRÈS L'ENTRETIEN DU GROUPE CHAUDIÈRES, AVANT DE DISTRIBUER DES BOISSONS AU CAFÉ, APPUYER SUR LA TOUCHE DE
DISTRIBUTION DE L'EAU CHAUDE, SI BESOIN
PLUSIEURS FOIS, JUSQU'À OBTENIR UNE FLUX
RÉGULIER DE LA LANCE.
2.5 ARRÊT
Si on désire éteindre la machine, procéder comme
suit:
Depuis l'état de machine allumée, appuyer sur la
touche “ENTER” pendant 5 secondes
L'afficheur LCD visualise le message:
Machine OFF
Jour Heure
Pour arrêter entièrement la machine, appuyer
sur l'interrupteur général en le positionnant sur
“OFF”.
.
Attendre Merci
Chauffage
Quand la température programmée est atteinte,
l'afficheur visualise le message:
Machine Prete
Jour Heure
NOTE: La machine est équipée d'un système de
sécurité qui, après 1,5 minute environ de
fonctionnement continu de la pompe, arrête
la machine (pour éviter la surchauffe de la
pompe). Dans ce cas, éteindre la machine
avec l'interrupteur général puis la rallumer.
La préparation de la machine est terminée et elle est
prête pour l'emploi.
86
OFF
Fig. 11
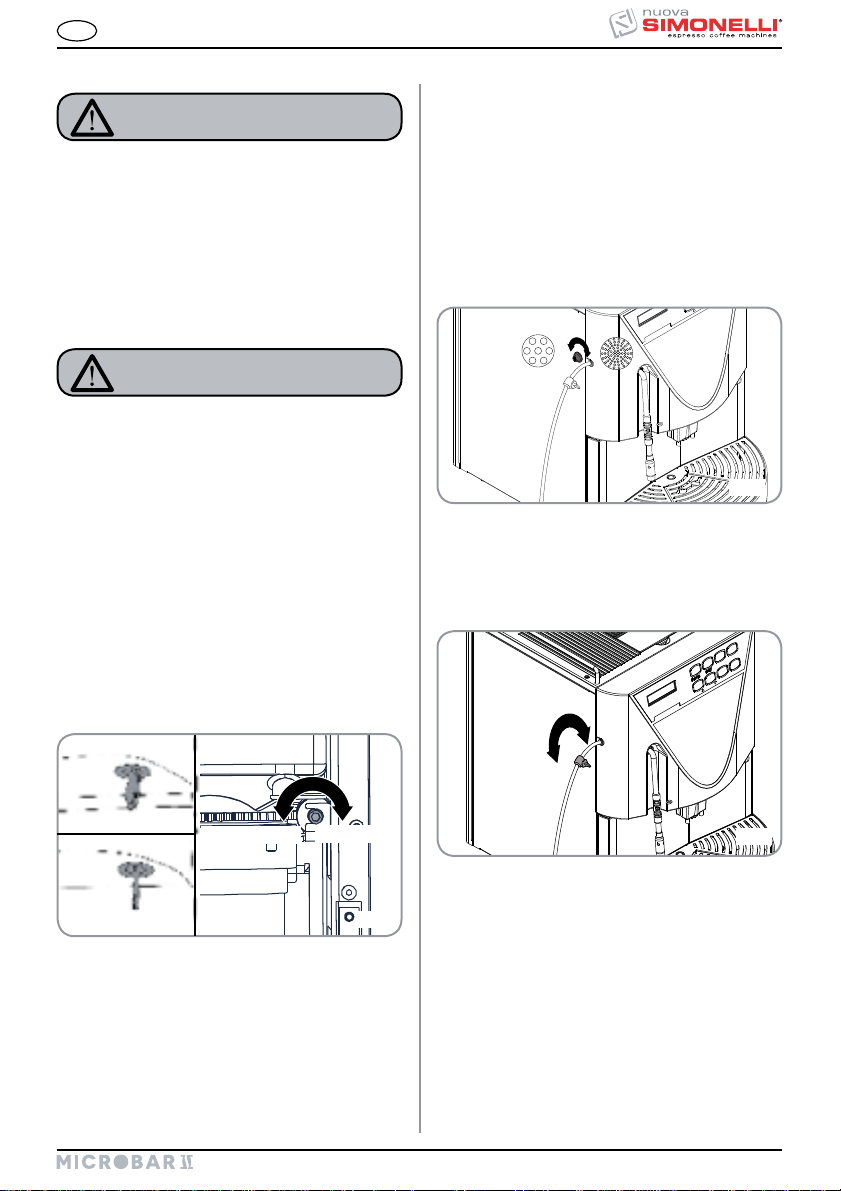
+
-
- C°
+C°
GROSSIER
AMENDE
FR
3. RÉGLAGES DU TECHNICIEN QUALIFIE
3.2 RÉGLAGE AIR (version
ATTENTION
Les réglages indiqués ci-dessous doivent être
effectués UNIQUEMENT par un Technicien
Qualifié.
Nuova Simonelli ne répond pas des dommages
aux personne sou aux choses dérivant du non
respect des prescriptions de sécurité indiquées
dans ce manuel.
3.1 RÉGLAGE DU DEGRÉ
DE MOUTURE
ATTENTION
Effectuer la procédure de réglage de la mouture
avec le moulin en marche.
NOTE: Cette opération peut être effectuée aussi
Pour modifier la quantité d'air dans le groupe à
cappuccino, et donc la quantité de mousse, agir sur
la vis de réglage située sur le côté gauche, comme
indiqué en figure, de façon à augmenter / diminuer
l'air du groupe à cappuccino.
CAPPUCCINO)
avec la machine allumée.
NOTE: Cette opération peut être effectuée aussi
avec la machine allumée.
Introduire la clé dans sa serrure.
Tourner la clé d'ouverture du portillon de com-
mande vers la gauche.
Ouvrir le portillon de commande pour accéder
la vis de réglage de la mouture. En suivant la
direction des flèches, il est possible de régler la
mouture du café en grains plus GROSSE (vers la
gauche( ou plus FINE (vers la droite, l'aide d'une
clé tête hexagonale de 3 mm (0,12 in).
Refermer le portillon en le fermant clé.
OUVERT
Fig. 12
FERME
Fig. 13
RÉGLAGE DU FLUX
3.3
DE LAIT (Réglage
Température)
Fig. 14
NOTE: Cette opération peut être effectuée aussi
avec la machine allumée.
Pour modifier le flux du lait aspiré, et donc la température du lait distribué, agir sur le robinet de réglage,
comme indiqué ci-dessous:
Tourner le robinet d'aspiration du lait vers la
DROITE / GAUCHE pour AUGMENTER /
DIMINUER le flux d'aspiration du lait et donc pour
DIMINUER / AUGMENTER la température.
Agir sur le robinet jusqu'à ce qu'on atteigne la
température désirée du lait versé.
87

4. UTILISATION
FR
Avant de commencer à travailler, l’opérateur doit
avoir lu et compris toutes les prescriptions de sécurité indiquées dans ce manuel.
ATTENTION
Si l'auto-diagnostic indique des anomalies ou
des pannes de fonctionnement, appeler le service d'assistance; l'opérateur ne doit pas intervenir.
4.1 MISE EN MARCHE
NOTE: Si la séquence décrite ci-dessous ne se véri-
fie pas, consulter le chapitre "ANOMALIES
ET SOLUTIONS”.
Appuyer sur l'interrupteur machine; l'afficheur
s'allume et visualise le message:
MICRO2015R.1.13B
Parallèlement, la machine entame la phase de
réchauffement et de chargement de l'eau dans
la chaudière et, après quelques secondes, l'afficheur visualise:
Attendre Merci
Chauffage
A la fin du réchauffement, la machine est prête et
l'afficheur visualise:
Machine Prete
Jour Heure
4.2 ARRÊT
Si on désire éteindre la machine, procéder comme
suit:
Depuis l'état de machine allumée, appuyer sur la
touche “ENTER” pendant 5 secondes
L'afficheur visualise le message:
Machine OFF
Jour Heure
Pour arrêter entièrement la machine, appuyer
sur l'interrupteur général en le positionnant sur
“OFF”.
.
OFF
Fig. 15
4.3 CONFIGURATION
STANDARD
LÉGENDE TOUCHES
(Configuration standard)
1 Expresso 2 Expresso
NOTE: Le temps initial est de 3 minutes environ.
NOTE: La machine est équipée d'un système de
sécurité qui, après 1,5 minute environ de
fonctionnement continu de la pompe, arrête
la machine (pour éviter la surchauffe de la
pompe). Dans ce cas, éteindre la machine
avec l'interrupteur général puis la rallumer.
La préparation de la machine est terminée et elle est
prête pour l'emploi.
88
1 Café 2 Cafés
Décaféiné
Cycle Lavage
Eau chaude Vapeur
NOTE:
Sur les touches n. 1 - 2 - 3 - 4 - 6 (voir description
“AFFICHEUR”), il est possible d'attribuer une boisson différente selon les goûts et les habitudes du
pays d'installation (voir chapitre PROGRAMMATION
et paragraphe CONFIGURATION SeLECTIONS).
Café au Lait

FR
4.4 CONFIGURATION
SÉLECTIONS
Programmer la fonction désirée sur les touches
disposition n. 1 - 2 - 3 - 4 - 6 du clavier (voir chapitre
“AFFICHEUR”), à travers les procédures de programmation (voir chapitre Programmation).
Les touches 1 - 3 sont configurables seulement
comme boissons café; les touches 2 - 4 - 6 sont
configurables avec toutes les boissons.
Appliquer ensuite l'étiquette fournie en dotation.
Fig. 16
LÉGENDE TOUCHES
(Configuration sélections)
CAPPUCCINO
Cappuccino
MACCHIATO
Avec Lait
CAPPUCCINO
Big Cappuccino
MILK
Lait
4.5 PRÉPARATION CAFÉ
La modalité de préparation est la même pour les
café expresso et pour le café léger.
Placer une tasse sous les distributeurs de café.
Les boissons sont versées simultanément par
les deux distributeurs.
Fig. 17
Appuyer une fois sur la touche de distribution du
café désiré.
Le café est en préparation.
L'afficheur visualise un message selon le type de
café sélectionné.
Express
Cafe
1 Café Serré 2 Cafés Serrés
CAFE CREM
1 Café Crème
CAFE CREM
2 Cafés Crème
Laisser la tasse sous les distributeurs pendant
tout le temps d'affichage des messages sur
l'afficheur.
NOTE: Les distributeurs de café peuvent être
réglés en hauteur pour pouvoir les adapter
tous les types de tasse.
Positionner les distributeurs avec précision dans la
position désirée de façon à limiter l'espace entre la
tasse et le distributeur.
Fig. 18
89

4.6 PRÉPARATION 2
CAFÉS
Placer une tasse sous chaque distributeur.
FR
Appuyer sur la touche de distribution cappuccino/
café au lait.
CAPPUCCINO
La boisson est en phase de préparation.
L'afficheur visualise le message suivant:
Cappuccino
Cafe Lait
Fig. 19
Appuyer une fois sur la touche de distribution du
café désiré.
Le café est en préparation. L'afficheur visualise
un message selon le type de café sélectionné.
2 Express
2 Cafe
Laisser les deux tasses sous les distributeurs
pendant tout le temps d'affichage des messages
sur l'afficheur.
4.7 PRÉPARATION
CAPPUCCINO / CAFÉ
AU LAIT (version
CAPPUCCINO)
Positionner un récipient contenant du lait près de
la machine.
Plonger le tube d'aspiration lait à l'intérieur du
récipient.
Laisser la tasse sous les distributeurs pendant
tout le temps d'affichage des messages sur
l'afficheur.
4.8 PRÉPARATION CAFÉ
DÉCAFÉINÉ EN
POUDRE
Ouvrir le portillon d'accès du convoyeur café
moulu.
ATTENTION
Verser dans le convoyeur seulement du café
moulu. Tout autre genre de café endommage la
machine.
Ne versez pas par exemple de café en grains
précédemment traité avec du caramel, du sucre
ou similaires, du café instantané ou d'autres
boissons contenant du sucre, car cela endommage la machine.
Introduire l'intérieur SEULEMENT 1 DOSE de
café décaféiné moulu.
Placer une tasse sous le distributeur.
90
Fig. 21
Fig. 20
Appuyer sur la touche de distribution .

FR
L'afficheur visualisera:
Decaf
Jour Heure
Appuyer sur la touche relative au type de boisson
désirée (café/cappuccino).
La boisson est en phase de préparation.
L'afficheur visualise le message suivant (exemple):
Decaf.
Express
Laisser la tasse sous les distributeurs pendant
tout le temps d'affichage du message sur l'afficheur.
4.9 EAU CHAUDE
ATTENTION
Avant d'effectuer l'opération suivante, contrôler
que le réservoir contienne de l'eau. Dans le cas
contraire, remplir le réservoir avec de l'eau.
Permet la distribution d'eau chaude pour la préparation du thé, de la camomille et des tisanes.
Positionner un récipient sous la lance vapeur / eau
chaude:
Appuyer sur la touche de distribution Eau
Chaude
La lance vapeur distribue de l'eau chaude.
.
4.10 VAPEUR (Seulement
version CAPPUCCINO)
ATTENTION
Pendant la distribution de la vapeur, ne touchez
pas la lance avec les parties de votre corps, ne
mettez pas vos mains sous la lance, et maintenez-la toujours inclinée vers le bas sur la grille
de support des tasses.
Permet la distribution de vapeur pour émulsionner le
lait ou pour réchauffer d'autres liquides.
Appuyer sur la touche de distribution Vapeur
.
L'eau de condensation résiduelle sort de la lance
vapeur et dès que la vapeur sort du distributeur,
utilisez-la pendant le temps désiré.
L'afficheur visualise le message suivant (exemple):
Vapeur
Lorsqu'on atteint la quantité programmée, la distribution est automatiquement interrompue.
IMPORTANT:
A la fin de chaque distribution, nettoyer soigneusement la lance vapeur à l'aide d'un chiffon humide.
NOTE: L’utilisation de la lance vapeur doit être pré-
cédée d’une purge d’au moins 2 secondes
de l’eau de condensation ou selon les instructions du constructeur.
Fig. 22
L'afficheur visualise le message suivant:
Machine Prete
The
Lorsqu'on atteint la quantité programmée, la distribution est automatiquement interrompue.
91

4.11 PRÉPARATION
SÉLECTIONS
NOTE: Ces sélections peuvent être distribuées
seulement après avoir été configurées.
Pour configurer les sélections, voir le para-
graphe CONFIGURATION SeLECTIONS.
Pour la préparation des boissons suivantes:
Big Cappuccino;
Avec Lait;
Lait.
Voir les procédures de distribution du CAPPUCCINO/
CAFe AU LAIT.
Pour la préparation des boissons suivantes:
1 Café Crème;
2 Cafés Crème.
Vois les procédures de distribution du CAFe
E;PRESSO et CAFe LeGER.
FR
92

FR
5. PROGRAMMATION
5.1
CLAVIER STANDARD
1
2
Touche ENTER:
1
3 5 7
4 6 8
pour accéder au menu
et/ou confirmer les
Fig. 23
valeurs et passer à la
phase suivante.
Touche CURSEURS:
2
défilement des menus
et incrément / décré-
4
Touche RESET:
3
ment valeurs.
pour confirmer et revenir
à la phase précédente.
LISTE DES FONCTIONS
PROGRAMMABLES
Fonctions accessibles depuis la modalité UTILISATEUR et depuis la modalité TECHNICIEN:
1. LANGUE
2. NOM PRODUIT
3. PROG. DOSES
4. PROG. MOULIN A CAFÉ
5. DOSE LAIT (version CAPPUCCINO)
6. JOUR / HEURE
7. PROGRAM. On/Off
8. ÉCONOMIE D'ÉNERGIE
Fonctions accessibles “SEULEMENT” depuis la
modalité TECHNICIEN.
CETTE OPÉRATION PEUT ÊTRE
EFFECTUÉE SEULEMENT PAR UN
TECHNICIEN SPÉCIALISÉ.
LE RÉGLAGE DE LA PART DE
TECHNICIENS NON QUALIFIES OU
D'AUTRES PERSONNES PEUVENT
FAIRE DÉCHOIR LA GARANTIE.
Les fonctions auxquelles on accède dans la modalité
TECHNICIEN en plus des précédentes sont:
9. PRE-INFUSION
10. PRESSAGE
11. NOMBRE DE MARCS
12. LAVAGE LAIT
13. ALARME LAVAGE
14. RINÇAGE GROUPE
15. RÉGLAGE GROUPE 1
16. RÉGLAGE GROUPE 2
17. TEMP. CAFÉ
18. TEMP. VAPEUR
19 COMPTAGE TOTAL
20. MOT DE PASSE
21. FILTRE EAU L
22. DÉCALCIFICATION
5.2 PROGRAMMATION
En accédant à la programmation, on accède à toutes
les fonctions de la modalité UTILISATEUR et à la
modalité TECHNICIEN.
Pour accéder aux milieux de programmation, procéder comme suit:
NOTE: Cette opération doit être effectuée avec la
machine allumée.
Introduire la clé dans sa serrure.
Tourner la clé d'ouverture du portillon de com-
mande vers la gauche.
Ouvrir le portillon de commande, l'afficheur visua-
lise:
Machine OFF
Porte Ouverte
En maintenant la touche ENTER appuyée, fer-
mer le portillon machine, l'afficheur visualise:
Attendre Merci
Chauffage
93

FR
A la fin du cycle d'expulsion, le groupe se posi-
tionne en phase de repos et l'afficheur visualise
la première option du menu de programmation.
Language
FONCTION DES TOUCHES
: Défilement Liste Fonctions
Programmables et/ou décrément / incrément valeurs.
ENTER: Entrée Menu et confirmation données.
RESET: Retour au menu précédent.
5.3 QUITTER LA
PROGRAMMATION
Pour quitter les milieux de programmation
UTILISATEUR ou TECHNICIEN il est nécessaire de
faire défiler toutes les fonctions à travers la touche
jusqu'à l'affichage de:
Machine Prete
Jour Heure
5.4 CYCLE DE
PROGRAMMATION
MODALITÉ UTILISATEUR
1. LANGUE
En appuyant sur la touche ENTER il est
possible d'accéder aux programmations.
Programmation de la langue d'interface, entre
la machine et l'opérateur, affichée par l'afficheur.
Language
2. NOM PRODUIT:
En appuyant sur la touche ENTER il est
possible d'accéder aux programmations.
Une boisson est associée à chaque touche.
Exemple:
Nom Produit: 1
Dans ce cas, la touche 1 a été associée à la
boisson “Expresso”.
FONCTION DES TOUCHES
: Défilement des boissons à disposition
pour chaque touche.
ENTER: Confirme la boisson programmée pour la
touche en examen et passe à la sélection
de la boisson pour la touche suivante.
RESET: Retour au menu précédent.
Les touches programmables sont les suivantes:
A la fin de la programmation de la dernière touche,
en appuyant sur ENTER on passe à l'option de menu
suivante.
NOTE: Les touches sont
programmables comme boissons à base de
lait et comme boissons café.
Les touches
mables seulement comme boissons
Express
sont program-
café.
Les langues à disposition sont les suivantes:
Italien Suédois
Anglais Danois
Espagnol Finlandais
Allemand Norvégien
Français Russe
Hollandais Japonais
FONCTIONS TOUCHES
: Défilement liste des langues.
ENTER: Confirmation de la langue sélectionnée.
RESET: Retour au menu précédent.
94
NOTE: Il est possible d'attribuer à chaque touche la
fonction DISABLE et dans ce cas la touche
est exclue.

FR
3. PROG. DOSES
En appuyant sur la touche ENTER il est possible d'accéder aux programmations.
Prog. Doses
Programmation des doses d'eau employées
pour chaque boisson.
1 Prog Dose café Serré
2 Prog Dose café Expresso
3 Prog Dose 2 cafés Serrés
4 Prog Dose café Avec lait
5 Prog Temps eau Thé (s)
6 Temps maximum vapeur (s)
5.
DOSE LAIT
(seulement version CAPPUCCINO)
En appuyant sur la touche ENTER il est possible d'accéder aux programmations.
Prog. Dose Lait
Programmation du temps de distribution du
lait (sec.).
1 Lait
2 Café au Lait
3 Avec lait
4 Cappuccino
5 Big Cappuccino
FONCTION DES TOUCHES
: Incrément / décrément des quantités d'eau
employée pendant la distribution des boissons.
Pour le thé, incrémente/décrémente le
temps maximum de distribution vapeur.
ENTER: Confirme la valeur programmée pour la
boisson en examen et passe à la programmation de la boisson suivante.
RESET: Retour au menu précédent.
4. PROG. MOULIN A CAFÉ
En appuyant sur la touche ENTER il est possible d'accéder aux programmations.
Temps Moulin
Il est possible de programmer les temps de
mouture pour chaque boisson (sec).
1 Temps Mouture Café Serré
2 Temps Mouture Café Expresso
3 Temps Mouture 2 Cafés Serrés
4 Temps Mouture Café avec Lait
FONCTION DES TOUCHES
: Incrément / décrément du temps de mou-
ture employé pour la distribution de la
boisson.
ENTER: Confirme la valeur programmée pour la
boisson en examen et passe à la programmation de la boisson suivante.
RESET: Retour au menu précédent.
FONCTION DES TOUCHES
: Incrément / décrément du temps de distri-
bution du lait pour préparer une boisson.
ENTER: Confirme la valeur programmée pour la
boisson en examen et passe à la programmation de la boisson suivante.
RESET: Retour au menu précédent.
6. JOUR / HEURE
En appuyant sur la touche ENTER il est possible d'accéder aux programmations.
Jour / Heure
Programmation du jour, de 'heure et des
minutes que l'afficheur de la machine visualisera.
1 Jour
2 Heure
3 Minutes
FONCTION DES TOUCHES
: Incrément / décrément de la valeur de la
date et de l'heure.
ENTER: Confirme la valeur programmée pour la
donnée en examen et passe à la programmation de la donnée suivante. Après
la confirmation du jour, retour au menu
précédent.
RESET: Retour au menu précédent.
93

FR
7. PROGRAM. On/Off
En appuyant sur la touche ENTER il est
possible d'accéder à la programmation de
marche/arrêt (ON/OFF) automatique de la
machin, seulement avec l'interrupteur de la
machine en position ON.
L'afficheur visualise le message suivant:
Dimanche
Repos Hebdo
NOTE:
Par défaut, la machine est programmée avec tous les jours de la semaine
réglés sur la modalité “REPOS”, par
conséquent pour allumer / éteindre
la machine, il est nécessaire d'utiliser
l'interrupteur général.
FONCTIONS TOUCHES
: Si elles sont utilisées en dehors des
programmations, elles permettent de faire
défiler les jours de la semaine et d'afficher
leurs programmations. Après le SAMEDI,
en appuyant sur la touche
sur le menu précédent. Si elles sont
utilisées à l'intérieur des programmations,
elles incrémentent/décrémentent la valeur
ENTER: Accès à la programmation de chaque
RESET:
L'afficheur visualise le message suivant:
à programmer.
journée. Si on appuie sur cette touche
à l'intérieur des programmations, elle
confirme la valeur programmée et passe
à la valeur suivante.
Retour à l'affichage des programmations
quotidiennes. Si on appuie de nouveau sur
cette touche, elle remet à zéro les programmations du jour affiché.
Dimanche
ON07 : 30 OFF23 : 30
on revient
8. ÉCONOMIE D'ÉNERGIE
En appuyant sur la touche ENTER, e il est possible
d'accéder à la programmation du temps au bout
duquel la machine actionne le dispositif d'économie
d'énergie, en maintenant cependant la chaudière à
sa température de service. L'afficheur visualise:
Economie Energie
00 : 00
FONCTIONS TOUCHES
: Incrément/décrément du temps d'action-
nement de l'ÉCONOMIE D'ÉNERGIE, à
Avec le compteur programmé sur zéro, la
ENTER: /
RESET: Retour au menu précédent avec confirma-
5.5 CYCLE DE
Pour accéder aux fonctions programmables seulement en MODALITÉ TECHNICIEN faire défiler
toutes les fonctions accessibles de la MODALITÉ
UTILISATEUR jusqu'à ce que l'afficheur visualise
le message:
Renseigner le mot de passe correct pour accéder
à la première option du menu de programmation
accessible en MODALITÉ TECHNICIEN.
NOTE: Le mot de passe standard programmé par
travers des pas de 30 minutes.
fonction est exclue.
tion de la valeur programmée.
PROGRAMMATION
MODALITÉ TECHNICIEN
Password
* * * * *
le Fabricant est 5 fois la touche
2
:
94
NOTE: Si on renseigne un mot de passe erroné,
la machine quitte automatiquement la programmation et se place dans l'état de
machine prête.

FR
9. PRE-INFUSION
En appuyant sur la touche ENTER il est possible d'accéder aux programmations.
Pre-Infusion
Programmation, pour chaque boisson, de la
possibilité d'effectuer la pré-infusion de la pastille de café (OUI ou NON).
1 Pré-infusion café Serré
2 Pré-infusion café Expresso
3 Pré-infusion 2 cafés Serrés
4 Pré infusion café avec lait
FONCTIONS TOUCHES
: Valide/exclue la pré-infusion de la pastille.
ENTER: Fait défiler chaque option et confirme sa
validation/exclusion.
RESET: Retour au menu principal avec confirma-
tion de la valeur programmée.
10. PRESSAGE
En appuyant sur la touche ENTER il est possible d'accéder aux programmations.
Pressage
11. NOMBRE DE MARCS
En appuyant sur la touche ENTER il est possible d'accéder aux programmations.
Nombre Fonds
Programmation du nombre de marcs de café
après lequel l'afficheur visualise un message
qui signale qu'il faut vider le tiroir à marcs et
la machine se bloque pour permettre la procédure en toute sécurité.
FONCTIONS TOUCHES
: Augmentation/diminution du nombre de
ENTER: /
RESET: Retour au menu précédent avec confirma-
12. ALARME LAVAGE LAIT
marcs avant l'affichage du message.
tion de la valeur programmée.
(seule-
ment version CAPPUCCINO)
En appuyant sur la touche ENTER il est possible d'accéder aux programmations.
Alarme Lav. Lait
Programmation, pour chaque boisson, de la
compression de la pastille (OUI ou NON).
1 Pressage café Serré
2 Pressage café Expresso
3 Pressage 2 cafés Serrés
4 Pressage café avec lait
FONCTION DES TOUCHES
: Valide/exclue le pressage de la pastille
pour la distribution de la boisson.
ENTER: Fait défiler chaque option et confirme sa
validation/exclusion.
RESET: Retour au menu précédent avec confirma-
tion de la valeur programmée.
Programmation du nombre d'heures, depuis la
dernière distribution boisson lait, après lequel
l'afficheur visualise l'avis de nettoyage du
groupe à cappuccino.
FONCTIONS TOUCHES
: Augmentation/diminution du nombre
d'heures avant l'affichage du message.
ENTER: /
RESET: Retour au menu précédent avec confirma-
tion de la valeur programmée.
93
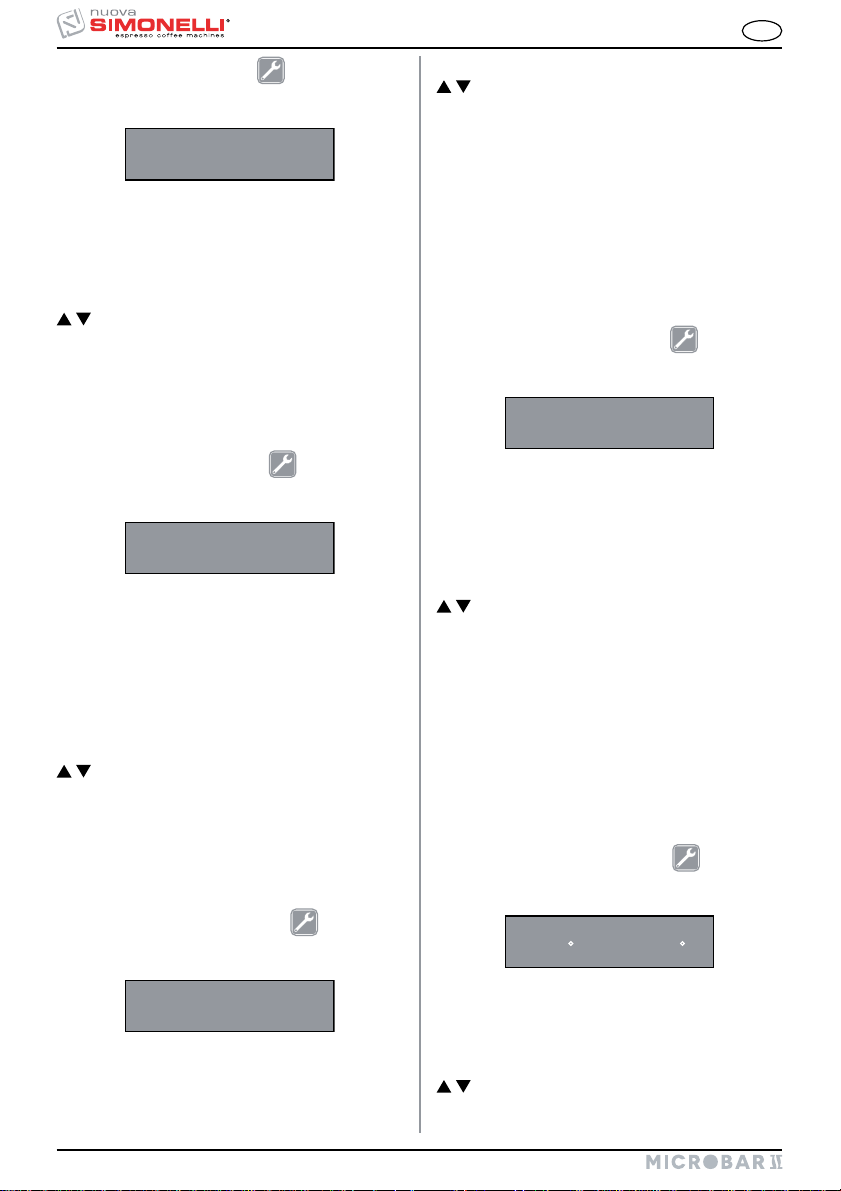
FR
13. ALARME LAVAGE
En appuyant sur la touche ENTER il est possible d'accéder aux programmations.
Alarme Lavage
Programmation du nombre de cycles après
lequel l'afficheur visualise l'avis de nettoyage
du groupe.
FONCTIONS TOUCHES
: Augmentation/diminution du nombre de
cycles avant l'affichage du message.
ENTER: /
RESET: Retour au menu précédent avec confirma-
tion de la valeur programmée.
14. RINÇAGE GROUPE
En appuyant sur la touche ENTER il est possible d'accéder aux programmations.
Groupe Rincage
Programmation d'un cycle de rinçage du groupe
de distribution.
Si cette touche est validée (ON), la machine exécute un cycle de rinçage du groupe 20 minutes
après le dernier fonctionnement (si la machine
n'effectue aucune activité avant 20 minutes).
FONCTIONS TOUCHES
: Valide/exclue (ON/OFF) le rinçage du
groupe.
ENTER: Confirme la programmation et revient sur
le menu précédent.
RESET: Retour au menu précédent.
15. RÉGLAGE GROUPE 1
En appuyant sur la touche ENTER il est possible d'accéder aux programmations.
Reglage Groupe 1
0000
FONCTIONS TOUCHES
: Augmentation/diminution du nombre d'im-
pulsions de l’ENCODER.
ENTER: /
RESET: Retour au menu précédent avec confirma-
tion de la valeur programmée.
IMPORTANT:
Il est recommandé de modifier la programmation
seulement si le moto-réducteur original est remplacé
par un autre de type différent.
16. RÉGLAGE GROUPE 2
En appuyant sur la touche ENTER il est possible d'accéder aux programmations.
Reglage Groupe 2
0000
Programmation du nombre d'impulsions de
l’ENCODER pour que la chambre d'infusion
atteigne la position supérieure (chambre fermée).
FONCTIONS TOUCHES
: Augmentation/diminution du nombre d'im-
pulsions de l’ENCODER.
ENTER: /
RESET: Retour au menu précédent avec confirma-
tion de la valeur programmée.
IMPORTANT:
Il est recommandé de modifier la programmation
seulement si le moto-réducteur original est remplacé
par un autre de type différent.
17. TEMPÉRATURE CAFÉ
En appuyant sur la touche ENTER il est possible d'accéder aux programmations.
Temperature Cafe
0098 C 0208 F
Programmation de la température de la chaudière café.
Programmation du nombre d'impulsions de
l’ENCODER pour que la chambre d'infusion
atteigne la position de stand-by.
94
FONCTIONS TOUCHES
: Augmentation/diminution de la tempéra-
ture de la chaudière café.
maximum programmable est 105°C (221°F).
La température
 Loading...