

Page 1

LIBRETTO ISTRUZIONI
USER HANDBOOK
Page 2

Page 3

IT
Complimenti,
con l’acquisto del modello TALENTO lei ha fatto un’ottima scelta.
Lei, infatti, ora ha a disposizione non un semplice distributore di caffè, ma una vera e propria macchina per caffè
espresso completamente automatica ed interamente gestita da un microprocessore. Questo vuol dire estrema
affidabilità e facilità di utilizzo. Siamo certi che il nostro modello TALENTO accrescerà la fiducia verso la Nuova
Simonelli e Lei certamente consiglierà ad altri l’acquisto di questa macchina per caffè, dal momento che il
modello TALENTO è stato scelto per aumentare la redditività del servizio caffetteria ottimizzando al massimo i
costi di esercizio. Questa macchina è stata costruita seguendo le direttive CEE 89/392, CEE 89/336, CEE 73/23,
CEE 89/109 e successive modifiche.
Cordialmente
Nuova Simonelli S.p.a.
CARATTERISTICHE TECNICHE
PESO NETTO
PESO LORDO
POT. TERMICA
DIMENSIONI
65 Kg 143.3 lb
74 Kg 163.1 lb
6000 W -
3000W
6000 W -
3000W
A 400 mm A 15.748 inc
B 607 mm B 23.897 inc
C 844 mm C 33.228 inc
D 154 mm D 6.063 inc
E 41,5 mm -
141,5 mm
E 1.634 inc -
5.571 inc
A
D
C
D
B
1
Page 4

INDICE
IT
CARATTERISTICHE TECNICHE ....1
1. DESCRIZIONE ...............................3
1.1 DESCRIZIONE TASTIERA
(Configurazione standard) .............................. 4
2. PRESCRIZIONI DI SICUREZZA .....5
3. TRASPORTO E
MOVIMENTAZIONE ....................... 8
3.1 IDENTIFICAZIONE MACCHINA ......................... 8
3.2 TRASPORTO .................................................... 8
3.3 MOVIMENTAZIONE ................................................8
4. INSTALLAZIONE E
OPERAZIONI PRELIMINARI .......... 9
4.1 INSTALLAZIONE MACCHINA ................................9
4.2 RIEMPIMENTO CONTENITORE CAFFE’ ..........10
4.3 ACCENSIONE MACCHINA ...................................10
4.4 SPEGNIMENTO MACCHINA.................................10
5. REGOLAZIONI DEL
TECNICO QUALIFICATO ................11
5.1 REGOLAZIONE DEL GRADO DI MACINATURA ..11
5.2 REGOLAZIONE ARIA CAPPUCCINATORE ..........11
5.3 REGOLAZIONE FLUSSO DEL LATTE
(Regolazione Temperatura) .................................11
9. PULIZIA E MANUTENZIONE .........25
9.1 PULIZIA DELLA CARROZZERIA .......................25
9.2 PULIZIA DEL GRUPPO EROGATORE
E CAPPUCCINATORE .........................................25
9.3 PULIZIA DEL CONTENITORE E DEL
CONVOGLIATORE DEL CAFFE’ ........................26
9.4 PULIZIA DELLA LANCIA VAPORE ...................27
9.5 PULIZIA DELLA GRIGLIA
CONTENITORE RACCOGLIGOCCE ...................27
9.6 PULIZIA DEL CONTENITORE
RACCOGLIGOCCE ................................................27
9.7 PULIZIA GUARNIZIONE GRUPPO .....................27
9.8 PULIZIA CAPPUCCINATORE ..............................28
10. TABELLA DATI
IMPOSTAZIONI STANDARD ..........29
11. MESSAGGI
FUNZIONI MACCHINA ...................30
IMPIANTO IDRAULICO ..................64
IMPIANTO ELETTRICO ..................66
6. UTILIZZO .......................................12
6.1 EROGAZIONE DECAFFEINATO ...........................12
6.2 EROGAZIONE DOSE DOPPIA ..............................12
6.3 UTILIZZO MACININO SINISTRO .........................12
7. PROGRAMMAZIONE ......................13
7.1 ENTRATA IN PROGRAMMAZIONE ......................13
7.2 PROGRAMMAZIONE MODALITÁ UTENTE .........13
7.3 PROGRAMMAZIONE MODALITÁ TECNICO ........13
8. FUNZIONI SPECIALI
TARATURE MACCHINA .................23
8.1 RESET DATA .................................................. 23
8.2 TEST .............................................................. 23
8.3 TEST ELETTROVALVOLE .............................. 23
8.4 TEST RESISTENZE E MOTORI ...................... 24
2
Page 5

IT
1. DESCRIZIONE
1
10
9
2
3
11
12
6
LEGENDA
1 Tappo accesso contenitore caffè in grani
2 Pannello comandi
3 Porta anteriore
4 Lancia Vapore / Lancia Acqua calda
5 Griglia contenitore raccogligocce
6 Cassetto fondi
7 Erogatori caffè
8 Becco erogazione latte / Cappuccino
9 Chiave Apertura / Chiusura
portello di comando
4
8
5
13
7
Fig. 1
10 Sportello accesso convogliatore
caffè macinato
11 Tubo aspirazione latte
12 Rubinetto regolazione flusso latte
13 Contenitore raccogligocce acqua
3
3
Page 6

1.1 DESCRIZIONE TASTIERA (Configurazione standard)
IT
LEGENDA
1
7
5
6
4
2
3
Fig. 2
1 Tasto
2 Tasto
3 Tasto
4
5
Macinino sinistro
On/Off
Vapore
Tasto Acqua calda
Tasti programmazione
6 Tasti dosi prodotto
7
Tasto dose dopia/ciclo pulizia
4
Page 7

IT
2. PRESCRIZIONI DI SICUREZZA
Il presente libretto costituisce parte
integrante ed essenziale del prodotto e
dovrà essere consegnato all’utilizzatore.
Leggere attentamente le avvertenze contenute nel presente libretto in quanto forniscono importanti indicazioni riguardanti la
sicurezza di installazione, d’uso e manutenzione. Conservare con cura questo
libretto per ogni ulteriore consultazione.
Dopo aver tolto l’imballaggio assicurarsi
dell’integrità dell’apparecchio. In caso
di dubbio non utilizzare l’apparecchio e
rivolgersi a personale professionalmente
qualificato. Gli elementi dell’imballaggio
(sacchetti in plastica, polistirolo espanso,
chiodi, ecc.) non devono essere lasciati
alla portata dei bambini in quanto potenziali fonti di pericolo, né essere dispersi
nell’ambiente.
PERICOLO DI INQUINAMENTO
Fig. 3
Prima di collegare l’apparecchio accertarsi
che i dati di targa siano rispondenti a quelli
della rete di distribuzione elettrica. La targa
è situata sul retro della macchina in basso
a sinistra. L’installazione deve essere effettuata in ottemperanza alle norme vigenti,
secondo le istruzioni del costruttore e da
personale qualificato.
Il costruttore non può essere considerato
responsabile per eventuali danni causati
dalla mancanza di messa a terra dell’impianto. Per la sicurezza elettrica di questo
apparecchio è obbligatorio predisporre
l’impianto di messa a terra, rivolgendosi
ad un elettricista munito di patentino, che
dovrà verificare che la portata elettrica
dell’impianto sia adeguata alla potenza
massima dell’apparecchio indicata in targa.
In particolare dovrà anche accertare che la
sezione dei cavi dell’impianto sia idonea
alla potenza assorbita dall’apparecchio. È
vietato l’uso di adattatori, prese multiple e
prolunghe. Qualora il loro uso si rendesse
indispensabile è necessario chiamare un
elettricista munito di patentino.
La macchina deve essere installata in
accordo alle normative sanitarie locali
vigenti per gli impianti idraulici. Quindi
per l’impianto idraulico rivolgersi ad un
tecnico autorizzato.
Questo apparecchio dovrà essere desti-
nato solo all’uso descritto in questo
manuale. Il costruttore non può essere
considerato responsabile per eventuali
danni causati da usi impropri, erronei ed
irragionevoli.
L’uso di un qualsiasi apparecchio elet-
trico comporta l’osservanza di alcune
regole fondamentali.
In particolare:
•nontoccarel’apparecchioconmanio
•nonusarel’apparecchioapiedinudi;
•nonusare,prolungheinlocaliadibitia
•nontirareilcavodialimentazione,per
Fig. 4
piedi bagnati;
ATTENZIONE
PERICOLO DI SCOSSA ELETTRICA
Fig. 5
bagno o doccia;
5
Page 8

scollegare l’apparecchio dalla rete di
alimentazione;
Fig. 6
IT
rizzato utilizzando esclusivamente ricambi
originali.
Il mancato rispetto di quanto sopra può com-
promettere la sicurezza dell’apparecchio.
All’installazione, l’elettricista munito di
patentino dovrà prevedere un interruttore
onnipolare come previsto dalle normative
di sicurezza vigenti con distanza di apertura dei contratti uguale o superiore a 3 mm.
Per evitare surriscaldamenti pericolosi si
raccomanda di svolgere per tutta la sua
lunghezza il cavo di alimentazione.
Non ostruire le griglie di aspirazione e/o di
dissipazione in particolare dello scaldatazze.
•non lasciare esposto l’apparecchio
•nonpermettereche l’apparecchio sia
L’eventuale riparazione dei prodotti dovrà
ad agenti atmosferici (pioggia, sole,
ecc.);
usato da bambini, o da personale non
autorizzato e che non abbia letto e ben
compreso questo manuale.
Il tecnico autorizzato deve, prima di effet-
tuare qualsiasi operazione di manutenzione, staccare la spina e spegnere l’interruttore della macchina.
Fig. 7
Per le operazioni di pulizia portare la macchina
a stato energetico “O”, cioè “INTERRUTTORE
MACCHINA SPENTO E SPINA STACCATA” ed
attenersi esclusivamente a quanto previsto
nel presente libretto.
In caso di guasto o di cattivo funzionamento
dell’apparecchio, spegnerlo. È severamente
vietato intervenire. Rivolgersi esclusivamente
a personale professionalmente qualificato.
essere effettuata solamente dalla casa
costruttrice o da centro di assistenza auto-
Il cavo di alimentazione di questo appa-
recchio non deve essere sostituito
dall’utente. In caso di danneggiamento, spegnere l’apparecchio e per la sua
sostituzione rivolgersi esclusivamente a
personale professionalmente qualificato.
Allorché si decida di non utilizzare più
un apparecchio di questo tipo si raccomanda di renderlo inoperante dopo
aver staccato la spina, tagliare il cavo di
alimentazione.
ATTENZIONE
PERICOLO DI INQUINAMENTO
Non disperdere la macchina nell’ambien-
te: per lo smaltimento rivolgersi ad un
centro autorizzato o contattare il costruttore che darà indicazioni in merito.
Fig. 8
6
Page 9

IT
Per favorire l’areazione della macchina
posizionarla a cm 15 (5,9 in) da muri o
altre macchine dalla parte dell’areazione.
Una volta iniziato il lavaggio della mac-
china, non interromperlo, possono rimanere dei residui di detergente all’interno
del gruppo erogazione.
PERICOLO DI INTOSSICAZIONE
Durante l’uso della lancia del vapore, pre-
stare molta attenzione e non mettere le
mani sotto di esso e non toccarla subito
dopo l’uso.
ATTENZIONE
Fig. 9
ATTENZIONE
PERICOLO MECCANICO
Non premere e/o tirare l’interruttore di
sicurezza.
Fig. 11
ATTENZIONE
INFORMAZIONE AGLI UTENTI
Ai sensi dell’ art. 13 del Decreto
Legislativo 25 luglio 2005, n.
151 “Attuazione delle Direttive
2002/95/CE, 2002/96/CE e
2003/108/CE, relative alla riduzio-
se nelle apparecchiature elettriche ed elettroniche, nonché allo smaltimento dei rifiuti”.
ne dell’ uso di sostanze pericolo-
ATTENZIONE
PERICOLO DI USTIONE
Ricordare che prima di effettuare qualsia-
si operazione di installazione, manutenzione, scarico, regolazione, l’operatore
qualificato deve indossare i guanti da
lavoro e le scarpe antinfortunistiche.
ATTENZIONE
PERICOLO DI CESOIAMENTO
L’operatore nel momento dell’aggiunta
del caffè, non deve mettere le mani all’interno del contenitore.
Fig. 10
Il simbolo del cassonetto barrato riportato sull’apparecchiatura indica che il prodotto alla fine della
propria vita utile deve essere raccolto separatamente
dagli altri rifiuti. L’ utente dovrà, pertanto, conferire
l’ apparecchiatura giunta a fine vita agli idonei centri di raccolta differenziata dei rifiuti elettronici ed
elettrotecnici, oppure riconsegnarla al rivenditore al
momento dell’acquisto di una nuova apparecchiatura
di tipo equivalente, in ragione di uno a uno. L’ adeguata raccolta differenziata per l’ avvio successivo
dell’ apparecchiatura dimessa al riciclaggio,al trattamento e allo smaltimento ambientalmente compatibile contribuisce ad evitare possibili effetti negativi
sull’ ambiente e sulla salute e favorisce il riciclo dei
materiali di cui è composta l’ apparecchiatura. Lo
smaltimento abusivo del prodotto da parte dell’ utente
comporta l’ applicazione delle sanzioni amministrative di cui al D.Lgs.n.22/1997” (articolo 50 e seguenti
del D.Lgs.n.22/1997).
7
Page 10

3. TRASPORTO E
MOVIMENTAZIONE
IT
a terra e movimentarlo a circa 30 cm (11,8 in) da
terra, fino all’area di immagazzinamento.
3.1 IDENTIFICAZIONE
MACCHINA
Per qualsiasi comunicazione con il costruttore
Nuova Simonelli, citare sempre il numero di matricola della macchina.
Fig. 12
3.2 TRASPORTO
La macchina viene trasportata in pallett con più
macchine dentro scatoloni assicurati al pallett con
delle centine.
Prima di procedere a qualsiasi operazione di trasporto o movimentazione, l’operatore deve:
• indossare guanti e scarpeantinfortunisticieduna
tuta con elastici alle estremità.
Il trasporto del pallett deve essere effettuato con un
mezzo di sollevamento adeguato (tipo muletto).
ATTENZIONE
PERICOLO DI URTO
O SCHIACCIAMENTO
Prima della seguente operazione verificare che il
carico sia a posto e che con il taglio delle centine
non cada.
L’operatore con guanti e scarpe antinfortunistiche, deve procedere al taglio delle centine e allo
stoccaggio del prodotto, in questa operazione
consultare le caratteristiche tecniche del prodotto per vedere il peso della macchina da immagazzinare e potersi regolare di conseguenza.
ATTENZIONE
PERICOLO DI INQUINAMENTO
Fig. 13
3.3 MOVIMENTAZIONE
ATTENZIONE
PERICOLO DI URTO
O SCHIACCIAMENTO
L’operatore durante tutta la movimentazione,
deve avere l’attenzione che non ci siano persone, cose od oggetti nell’area di operazione.
Sollevare lentamente il pallett a circa 30 cm (11,8
in) da terra e raggiungere la zona di carico. Dopo
aver verificato che non ci siano ostacoli, cose o
persone, procedere al carico.
Una volta arrivati a destinazione, sempre con un
mezzo di sollevamento adeguato (es. muletto),
dopo essersi assicurati che non ci siano cose
o persone nell’area di scarico, portare il pallett
8
Page 11

IT
4. INSTALLAZIONE
E OPERAZIONI
PRELIMINARI
ATTENZIONE
PERICOLO DI INQUINAMENTO
Non disperdere l’imballo nell’ambiente.
Fig. 14
Prima di procedere a qualsiasi operazione di
installazione e regolazione, devono essere lette e
ben comprese le PRESCRIZIONI DI SICUREZZA di
questo manuale. L'azienda non risponde di alcun
danno a cose o a persone derivante da una mancata osservanza delle prescrizioni di sicurezza,
installazione e manu tenzione, di questo manuale.
ATTENZIONE
Posizionare la macchina su un piano orizzontale
per evitare qualsiasi possibile malfunzionamento.
PERICOLO DI CORTOCIRCUITO
ATTENZIONE
Prima di collegare la macchina alla rete elettrica,
verificare che ci sia corrispondenza tra il voltaggio per cui essa è stata predispo sta e quello
dell'impianto.
4.1 INSTALLAZIONE
MACCHINA
Una volta estratta la macchina dall’imballo comportarsi come descritto di seguito:
1 Posizionarla su un piano orizzontale.
2 Estrarre il tubo con allaccio da 3/4” dallo sportel-
lino nella parte superiore delle macchina.
Fig. 15
3 Collegare un’estremità del tubo al raccordo da 3/4”
situato nella parte posteriore della macchina.
ATTENZIONE
Non installare la macchina in ambienti in cui essa
possa venire a contatto con getti d'acqua.
ATTENZIONE
La macchina è idonea ad operare con i seguenti
alimenti:
- Caffè in grani
- Caffè decaffeinato in polvere
- Latte (non in polvere)
Qualsiasi utilizzo della macchina con alimenti
diversi da quelli sopra citati può provocare gravi
danni alla macchina stessa.
ATTENZIONE
La macchina è predisposta per operare in un
range di temperatura +5°C - +40°C (41°F - 104°F).
Fig. 16
4 Collegare l’altra estremità del tubo alla rete idrica.
ATTENZIONE
La durezza dell’acqua deve essere inferiore ai
4° - 6° fr (Gradi francesi).
Il contenuto di cloro non deve superare i 100mg
per litro (0.00000361lb/cu in).
Altrimenti verranno a decadere le condizioni di
Garanzia della macchina.
9
Page 12

La macchina deve essere installata in
accordo alle normative sanitarie locali
vigenti per gli impianti idraulici. Quindi
per l’impianto idraulico rivolgersi ad un
tecnico autorizzato.
4.2 RIEMPIMENTO
CONTENITORE CAFFE’
1 Rimuovere il tappo accesso contenitore caffè in
grani.
ATTENZIONE
IT
Premere il tasto ON/OFF.
La macchina eseguirà un ciclo di posizionamento
gruppo, il ciclo di caricamento acqua in caldaia, al
termine del quale, nel caso di macchina fredda il ciclo
di riscaldamento e comparirà a display l’indicazione:
ATTENDERE
terminata la fase di riscaldamento comparirà a display:
SELECT PRODUCT
Versare nel contenitore SOLO caffè in grani tostati. Qualsiasi altro genere di caffè, ad esempio
macinato, danneggia il macina caffè.
Non versare caffè in grani precedentemente trattato con caramello, zucchero o similari, caffè
istantaneo o altre bevande contenenti zucchero,
poichè danneggia la macchina.
2 Versare il caffè tostato in grani nel contenitore
senza raggiungere la massima capienza in modo
tale da permettere la chiusura del tappo.
Fig. 17
3 Chiudere il tappo.
4.3 ACCENSIONE
MACCHINA
NOTA: Nel caso la sequenza qui sotto descrit-
ta non si verifichi, consultare il Capitolo
“ANOMALIE E RIMEDI”.
e la macchina sarà pronta per essere utilizzata.
La fase di riscaldamento richiede circa 5 min.
NOTA: La macchina è dotata di un sistema di
sicurezza, che dopo circa 1,5 minuti di funzionamento continuo della pompa, arresta
la macchina (per evitare il surriscaldamento
della pompa stessa). In questo caso, spengere la macchina con l’interruttore generale
e riaccenderla.
La preparazione della macchina è finita ed è pronta
per l’utilizzo.
ATTENZIONE
IN CASO DI PRIMA INSTALLAZIONE O SUCCESSIVAMENTE ALLA MANUTENZIONE DEL GRUPPO CALDAIE, PRIMA DI EROGARE BEVANDE
CAFFÈ, PREMERE IL TASTO EROGAZIONE
ACQUA CALDA, SE NECESSARIO PIÙ VOLTE,
FINO A CHE NON SI OTTIENE UN FLUSSO
REGOLARE DELLA LANCIA.
4.4 SPEGNIMENTO
MACCHINA
Se si desidera spengere la macchina operare come
descritto di seguito:
• Premere il tasto ON/OFF
.
Dopo aver terminato le Operazioni Preliminari di
Installazione:
10
Page 13

+
-
- C°
+C°
FIN
O
FINE
GOARSE
GROSSO
IT
5. REGOLAZIONI DEL TECNICO QUALIFICATO
ATTENZIONE
Le regolazioni di seguito elencate devono essere
eseguite SOLO dal Tecnico Specializzato.
La Nuova Simonelli non risponde di alcun danno a
cose o persone, derivanti da una mancata osservanza delle prescrizioni di sicurezza, descritte in
questo manuale.
5.1 REGOLAZIONE DEL
GRADO DI MACINATURA
ATTENZIONE
Eseguire la procedura di registrazione della
macinatura con il macinino in funzione.
NOTA: Operazione eseguibile anche a macchina
accesa.
• Inserire la chiave nell’apposita serratura.
• Ruotare la chiave apertura portello di comando
in senso antiorario.
• Aprire il portello di comando, per accedere alla
vite di regolazione della macinatura. seguendo
la direzione delle freccie, si può regolare più
GROSSA (senso antiorario) o più FINE (senso
orario) la macinatura del caffè in grani agendo
con un cacciavite a taglio.
• Richiudere il portello, chiudendolo a chiave.
vite di regolazione come indicato in figura , in modo
da aumentare / diminuire l’aria al cappucinatore.
5.3 REGOLAZIONE FLUSSO
DEL LATTE (Regolazione
Temperatura)
Fig. 19
APERTO
CHIUSO
Fig. 18
5.2 REGOLAZIONE ARIA
CAPPUCCINATORE
NOTA: Operazione eseguibile anche a macchina
Per modificare la quantità di aria al cappuccinatore,
e quindi la quantità di schiuma, agire sulla apposita
accesa.
Fig. 20
NOTA: Operazione eseguibile anche a macchina
accesa.
Per modificare il flusso di latte aspirato, e quindi la
temperatura del latte erogato, agire sull’apposito
rubinetto di regolazione come descritto di seguito:
• Ruotare il rubinetto aspirazione latte in senso
ORARIO / ANTIORARIO per AUMENTARE /
DIMINUIRE il flusso di aspirazione del latte e
quindi DIMINUIRE / AUMENTARE la temperatura.
• Agire sul rubinetto fino a quando non si raggiunge la temperatura desiderata del latte
erogato.
11
Page 14

6. UTILIZZO
L’operatore deve prima di iniziare la lavorazione,
accertarsi di aver letto e ben compreso le prescrizioni di sicurezza di questo manuale.
ATTENZIONE
Nel caso in cui l’autodiagnosi indichi anomalie o
guasti, chiamare il centro di assistenza, l’operatore non deve intervenire.
6.1 EROGAZIONE
DECAFFEINATO
• Aprire lo sportello del decaffeinato.
• Inserire il caffè macinato nello scivolo e richiu-
dere lo sportello.
• Selezionare entro 30 secondi la bevanda che
si vuole erogare utilizzando il caffè in polvere
inserito nello scivolo.
6.2 EROGAZIONE DOSE
DOPPIA
• Premere il tasto DOSE DOPPIA .
• il display diventerà di colore blu:
• Selezionare il tasto della bevanda che si vuole
erogare.
(E’ possibile utilizzare il tasto DOSE DOPPIA in con-
comitanza del tasto MACININO SINISTRO, il display
diventerà di colore verde).
IT
6.3 UTILIZZO MACININO
SINISTRO
• Preme il tasto MACININO SINISTRO .
• il display diventerà di colore verde.
• Selezionare il tasto della bevanda che si vuole
erogare.
(Possibile utilizzare il tasto MACININO SINISTRO in
concomitanza del tasto DOSE DOPPIA).
12
Page 15

IT
7. PROGRAMMAZIONE
7.1 ENTRATA IN
PROGRAMMAZIONE
Da macchina spenta tenere premuto il tasto ON/OFF
(circa 5 secondi) fino a che a display non
compaia la prima funzione della programmazione:
SELECT LANGUAGE
I tasti da utilizzare nella fase di programmazione
sono:
Tasto ENTER: Per entrare all’interno del
menù e/o confermare il
valore impostato.
Tasto CURSORI: Scorrimento del menù
e incremento / decremento dei valori.
Tasto RESET: Per ritornare allo step pre-
cedente.
7.2 PROGRAMMAZIONE
MODALITÁ UTENTE
1 . SELECT LANGUAGE
(SELEZIONE LINGUA)
Premendo il tasto ENTER è possibile
entrare nel sottomenù.
Viene impostata la lingua di interfaccia, tra la
macchina e l’operatore, visualizzata a display.
Tramite i tasti
desiderata.
Le lingue selezionabili sono: ENGLISH, ITALIANO,
FRANCAIS, DEUTSCH, ESPANOL.
Confermare la selezione e passare alla funzione
successiva premendo ENTER
7.3 PROGRAMMAZIONE
MODALITÁ TECNICO
Per accedere alle funzioni programmabili solo
nella MODALITA’ TECNICO dal menù SELECT
LANGUAGE, premere il tasto freccia in alto
il display visualizza il messaggio:
selezionare la lingua
.
LISTA DELLE FUNZIONI PROGRAMMABILI
Funzioni accessibili dalla modalità UTENTE e dalla
modalità TECNICO:
1. SELECT LANGUAGE (SELEZIONE
LINGUA)
Funzioni accessibili dalla “SOLA” modalità TECNICO.
2. CONTATORI
3. PROG DOSI
4. SETTAGGI
5. SALVARE I DATI
PASSwORD
Inserire la password corretta per accedere alla prima
voce del menù di programmazione accessibile nella
MODALITA’ TECNICO.
La PASSWORD standard impostata è 4 volte il tasto
MACININO SINISTRO:
2. CONTATORI
Premendo il tasto ENTER è possibile entrare
nel sottomenù.
2.1 CONT. BEVANDE
(Conteggio bevande)
Premere il tasto ENTER per entrare nel sottomenù, tutti i tasti delle bevande (1-8) lampeggiano.
13
Page 16

Premere il tasto bevanda per leggere il numero di
bevande erogate, es:
CONT BEVAND
COFFEE
DX 000024
SX 000036
IT
2.4 TOT CICLI (Totale Cicli)
Premere il tasto ENTER per entrare nel
sottomenù, rimangono accesi e nel display compare:
TOT CICLI
N. 0002563
Premere il tasto ENTER
azzerare il contatore.
Premere il tasto RESET
conteggio della bevanda selezionata, premere nuovamente RESET
dal sottomenù.
per 6 secondi per
per uscire dal
per 3 secondi per uscire
2.2 TOT BEVANDE (Totale bevande)
Premere il tasto ENTER per entrare nel sottomenù, tutti i tasti delle bevande (1-8) lampeggiano.
Premere il tasto bevanda per leggere il numero di
bevande erogate, es:
TOT BEVANDE
N. 000060
Premere il tasto ENTER
azzerare il contatore.
Premere il tasto RESET
sottomenù.
per 6 secondi per
per uscire dal
2.3 CONT CICLI (Conteggio cicli)
Premere il tasto ENTER per entrare nel sottomenù, tutti i tasti delle bevande (1-8) lampeggiano.
Premere il tasto bevanda per leggere il numero di
bevande erogate, es:
CONT CICLI
TASTO 2
DX. 000020
SX. 000030
I cicli sono riferiti alle bevande singole, premere il
tasto 2X
alle bevande doppie
Premere il tasto ENTER
azzerare il contatore.
Premere il tasto RESET
conteggio della bevanda selezionata, premere nuovamente RESET
dal sottomenù.
per leggere il numero dI cicli riferiti
per 6 secondi per
per uscire dal
per 3 secondi per uscire
Il numero di cicli è la sommatoria di tutte le bevande
sia singole che doppie.
Premere il tasto ENTER
leggere il totale assoluto (non azzerabile):
TOT CICLI
TOT ASSOLUT
N. 0006500
Dal menù totale assoluto premere il tasto ENTER
per 6 secondi per azzerare il contatore TOT
CICLI.
Premere il tasto RESET
sottomenù.
per 10 secondi per
per uscire dal
2.5 TOT MAC DX
(Totale macinino destro)
Premere il tasto ENTER per entrare nel
sottomenù, rimangono accesi e nel display compare:
TOT MAC DX
H : MIN
000000:63
Premere il tasto ENTER
leggere il totale assoluto (non azzerabile):
TOT MAC DX
TOT ASSOLUT
H : MIN
000000:63
Dal menù totale assoluto premere il tasto ENTER
per 6 secondi per azzerare il contatore TOT
MAC DX.
Premere il tasto RESET
sottomenù.
per 10 secondi per
per uscire dal
14
Page 17

IT
2.6 TOT MAC SX
(Totale macinino sinistro)
Premere il tasto ENTER per entrare nel
sottomenù, rimangono accesi e nel display compare:
TOT MAC SX
H : MIN
000000:63
Premere il tasto ENTER
leggere il totale assoluto (non azzerabile):
TOT MAC SX
TOT ASSOLUT
H : MIN
000000:63
Dal menù totale assoluto premere il tasto ENTER
per 6 secondi per azzerare il contatore TOT
MAC SX.
Premere il tasto RESET
sottomenù.
per 10 secondi per
per uscire dal
2.7 TOT ACQUA C
(Totale acqua calda)
Premere il tasto ENTER per entrare nel
sottomenù, tutti i tasti delle bevande (1-8) rimangono
accesi e nel display compare:
TOT ACQUA CALDA
N. 00000008
2.8 TOT VAPORE (Totale Vapore)
Premere il tasto ENTER per entrare nel
sottomenù, tutti i tasti delle bevande (1-8) rimangono
accesi e nel display compare:
TOT VAPORE
N. 00000008
Premere il tasto ENTER
leggere il totale assoluto (non azzerabile):
TOT VAPORE
TOT ASSOL UTO
N. 00000008
Dal menù totale assoluto premere il tasto ENTER
per 6 secondi per azzerare il contatore TOT
VAPORE.
Premere il tasto RESET
sottomenù.
per 10 secondi per
per uscire dal
2.9 LITRI TOT (Litri totali)
Premere il tasto ENTER per entrare nel
sottomenù, tutti i tasti delle bevande (1-8) rimangono
accesi e nel display compare
LITRI TOT
LITRI
0000032.56
Premere il tasto ENTER
leggere il totale assoluto (non azzerabile):
TOT ACQUA CALDA
TOT ASSOLUTO
N. 00000008
Dal menù totale assoluto premere il tasto ENTER
per 6 secondi per azzerare il contatore TOT
ACQUA CALDA.
Premere il tasto RESET
sottomenù.
per 10 secondi per
per uscire dal
Premere il tasto ENTER
leggere il totale assoluto (non azzerabile):
LITRI TOT
TOT ASSOLUTO
0000056.08
Dal menù totale assoluto premere il tasto ENTER
per 6 secondi per azzerare il contatore
LITRI TOT.
Premere il tasto RESET
sottomenù.
per 10 secondi per
LITRI
per uscire dal
15
Page 18

2.10 TOT LAVAGGI (Totale cicli lavaggio)
Premere il tasto ENTER per entrare nel
sottomenù, tutti i tasti delle bevande (1-8) rimangono
accesi e nel display compare
TOT LAVAGGI
N. 000000056
Premere il tasto ENTER
per 10 secondi per
leggere il totale assoluto (non azzerabile):
TOT LAVAGGI
TOT ASSOLUTO
N. 00000056
Dal menù totale assoluto premere il tasto ENTER
per 6 secondi per azzerare il contatore TOT
LAVAGGI.
Premere il tasto RESET
per uscire dal
sottomenù.
Premere nuovamente il tasto RESET per
uscire dal sottomenù.
3. PROG DOSI (Programmazione dosi)
Premendo il tasto ENTER è possibile entrare
nel sottomenù e scegliere con i tasti
il tasto che si vuole programmare. La numerazione,
da 1 a 8 è indicata in fig. 21
IT
Premere nuovamente il tasto ENTER per
entrare nella programmazione delle funzioni per il
singolo tasto. Con i tasti
è possibile
selezionare la bevanda desiderata:
TASTO OFF: tasto disabilitato
COFFEE: ciclo caffè
MILK COFFEE: ciclo latte + ciclo caffè
COFFEE MILK: ciclo caffè + latte
CAFFELATTE: ciclo latte + caffè insieme
MACCHIATO: ciclo latte + pausa (3 secondi) + caffè
MILK: ciclo latte.
Premere ENTER
per confermare la bevanda
desiderata.
Lista delle funzioni programmabili per la bevanda
COFFEE:
• TEMPO MAC (permette di impostare il tempo
di macinatura)
• SEL MACINA (permette di impostare il macini-
no di default)
• VOLUME CC. (permette di impostare il volume
di acqua nel caffè)
• PREINFUS (permette di impostare il tempo di
preinfusione)
• PRESSATURA (permette di attivare/disattivare
la pressatura)
• ACQUA CC. (permette di impostare la quantità
di acqua calda in aggiunta)
1
2
3
4
16
5
6
7
8
Fig. 21
Lista delle funzioni programmabili per la bevanda
MILK COFFEE:
• TEMPO LATTE (permette di impostare il
tempo/quantità di latte)
• NO TEM ARIA (permette di impostare il tempo/
quantità di latte senza schiuma)
• LAVAGGIO (permette di impostare il tempo del
lavaggio fine erogazione)
• TEMPO MAC (permette di impostare il tempo
di macinatura)
• SEL MACINA (permette di impostare il macini-
Page 19

IT
no di default)
• VOLUME CC. (permette di impostare il volume
di acqua nel caffè)
• PREINFUS (permette di impostare il tempo di
preinfusione)
• PRESSATURA (permette di attivare/disattivare
la pressatura)
Lista delle funzioni programmabili per la bevanda
COFFEE MILK:
• TEMPO MAC (permette di impostare il tempo
di macinatura)
• SEL MACINA (permette di impostare il macini-
no di default)
• VOLUME CC. (permette di impostare il volume
di acqua nel caffè)
• PREINFUS (permette di impostare il tempo di
preinfusione)
• PRESSATURA (permette di attivare/disattivare
la pressatura)
• TEMPO LATTE (permette di impostare il
tempo/quantità di latte)
• NO TEM ARIA (permette di impostare il tempo/
quantità di latte senza schiuma)
• LAVAGGIO (permette di impostare il tempo del
lavaggio fine erogazione)
Lista delle funzioni programmabili per la bevanda
CAFFELATTE:
• TEMPO MAC (permette di impostare il tempo
di macinatura)
• SEL MACINA (permette di impostare il macini-
no di default)
• VOLUME CC. (permette di impostare il volume
di acqua nel caffè)
• PREINFUS (permette di impostare il tempo di
preinfusione)
• PRESSATURA (permette di attivare/disattivare
la pressatura)
• TEMPO LATTE (permette di impostare il
tempo/quantità di latte)
• NO TEM ARIA (permette di impostare il tempo/
quantità di latte senza schiuma)
• LAVAGGIO (permette di impostare il tempo del
lavaggio fine erogazione)
Lista delle funzioni programmabili per la bevanda
MACCHIATO:
• TEMPO LATTE (permette di impostare il
tempo/quantità di latte)
• NO TEM ARIA (permette di impostare il tempo/
quantità di latte senza schiuma)
• LAVAGGIO (permette di impostare il tempo del
lavaggio fine erogazione)
• TEMPO MAC (permette di impostare il tempo
di macinatura)
• SEL MACINA (permette di impostare il macini-
no di default)
• VOLUME CC. (permette di impostare il volume
di acqua nel caffè)
• PREINFUS (permette di impostare il tempo di
preinfusione)
• PRESSATURA (permette di attivare/disattivare
la pressatura)
Lista delle funzioni programmabili per la bevanda
MILK:
• TEMPO LATTE (permette di impostare il
tempo/quantità di latte)
• NO TEM ARIA (permette di impostare il tempo/
quantità di latte senza schiuma)
• LAVAGGIO (permette di impostare il tempo del
lavaggio fine erogazione)
TEMPO MAC (Tempo di Macinatura):
E’ possibile impostare il tempo di macinatura in sec. e
quindi la quantità di caffè macinato utilizzato.
Premendo il tasto ENTER
nel sottomenù, i tasti
aumentare/diminuire il tempo di macinatura.
Premere ENTER per confermare l’impostazione.
è possibile entrare
consentono di
17
Page 20

SEL MACINA (Selezione Macinino di Default):
E’ possibile impostare il macinino di default (sinistro
SX o destro DX).
Premendo il tasto ENTER
nel sottomenù, i tasti
selezionare il macinino destro o sinistro.
Premere ENTER per confermare l’impostazione.
VOLUME CC. (Volume di Acqua):
E’ possibile impostare il volume di acqua per il caffè
in cc.
Premendo il tasto ENTER
nel sottomenù, i tasti
aumentare/diminuire il volume di acqua.
Premere ENTER
zione.
PREINFUS (Tempo Preinfusione):
E’ possibile impostare il tempo di preinfusione in sec.
è possibile entrare
consentono di
è possibile entrare
consentono di
per confermare l’imposta-
IT
NO TEM ARIA (Tempo Aria disattivata):
E’ possibile impostare la parte del tempo latte totale,
in cui l’elettrovalvola dell’aria è chiusa in modo da
regolare la quantità di schiuma nel latte.
Premendo il tasto ENTER
nel sottomenù, i tasti
aumentare/diminu- ire il tempo
latte in cui l’elettrovalvola è chiusa.
Premere ENTER per confermare l’impostazione.
LAVAGGIO (Autolavaggio tubo latte):
E’ possibile impostare il tempo di lavaggio con acqua
fredda al termine dell’erogazione di latte.
Premendo il tasto ENTER
nel sottomenù, i tasti
aumentare/diminuire il tempo di lavaggio.
Premere ENTER
zione.
è possibile entrare
consentono di
è possibile entrare
consentono di
per confermare l’imposta-
Premendo il tasto ENTER
nel sottomenù, i tasti
aumentare/diminuire il tempo di preinfusione.
Premere ENTER per confermare l’impostazione.
PRESSATURA (Pressatura):
E’ possibile attivare/disattivare la pressatura (SI o NO).
Premendo il tasto ENTER è possibile entrare
nel sottomenù, i tasti
di selezionare SI o NO per attivare/disattivare la
pressatura.
Premere ENTER per confermare l’impostazione.
TEMPO LATTE (Tempo Latte):
E’ possibile impostare il tempo e quindi la quantità
di latte.
Premendo il tasto ENTER
nel sottomenù, i tasti
aumentare/diminuire il tempo e quindi la quantità
del latte. Premere ENTER
l’impostazione.
è possibile entrare
consentono di
consentono
è possibile entrare
consentono di
per confermare
Per la programmazione della doppia dose, dopo
essere entrati nel menù del tasto desiderato:
PRG TASTO X
COFFEE
premere il tasto
re la medesima lista di funzioni per la dose doppia.
ACQUA CALDA (Tempo Acqua calda):
Premendo il tasto
CALDA, premere il tasto ENTER
nel sottomenù, i tasti
di attivare/disattivare la funzione (SI/NO). Premere
ENTER
la funzione è attivata, SI, i tasti
consentono di aumentare/diminuire il tempo e quindi
il volume di acqua. Premere ENTER
confermare l’impostazione.
: sarà possibile programma-
si arriva al menù ACQUA
per entrare
consentono
per confermare l’impostazione, se
per
18
Page 21

IT
VAPORE (Tempo Vapore):
Premendo il tasto
premere il tasto ENTER per entrare nel sottomenù,
i tasti
vare il vapore (SI/NO) oppure attivare l’AUTOSTE-
AM. Premere ENTER per confermare l’impostazione,
se la funzione è attivata, SI, i tasti
consentono di aumentare/diminuire il tempo del
vapore, se è attivata la funzione AUTOSTEAM, i tasti
la temperatura. Premere ENTER per confermare
l’impostazione.
consentono di attivare/disatti-
consentono di aumentare/diminuire
si arriva al menù VAPORE,
4. SETTAGGI
Premendo il tasto ENTER è possibile entrare
nel sottomenù e scegliere con i tasti
la funzione che si vuole programmare.
Premere nuovamente il tasto ENTER
entrare nella funzione.
4.1 SELEZ TEMP (Selezione unita’ di misura
della temperatura)
E’ possibile programmare l’unita’ di misura per la
visualizzazione della temperatura, CELCIUS –
FAHRENAIT.
Premendo il tasto ENTER
nel sottomenù, i tasti
selezionare l’unita’ di misura preferita, CELCIUS –
FAHRENAIT.
Premere ENTER
zione.
4.2 TEMP CAFFE (Temperatura caldaia caffè)
E’ possibile programmare la temperatura dell’acqua
nella caldaia caffè.
Premendo il tasto ENTER
nel sottomenù, i tasti
aumentare/diminuire la temperatura dell’acqua nella
caldaia del caffè (min 80°C max. 100°C).
Premere ENTER
zione.
è possibile entrare
consentono di
per confermare l’imposta-
è possibile entrare
consentono di
per confermare l’imposta-
per
4.3 TEMP VAPORE (Temperatura caldaia vapore)
E’ possibile programmare la temperatura del vapore
nella caldaia servizi.
Premendo il tasto ENTER
nel sottomenù, i tasti
aumentare/diminuire la temperatura del vapore nella
caldaia servizi (min 80°C max. 150°C).
Premere ENTER
zione.
è possibile entrare
consentono di
per confermare l’imposta-
19
Page 22

4.4 TEMP GRUPPO (Temperatura gruppo
erogazione)
E’ possibile programmare la temperatura del gruppo
erogazione.
Premendo il tasto ENTER
nel sottomenù, i tasti
di aumentare/diminuire la temperatura del gruppo
erogazione. (min 80°C max. 105°C).
Premere ENTER
zione.
4.5 CASS FONDI (Cassetto fondi)
E’ possibile programmare il numero di cicli dopo di
che è necessario svuotare il cassetto fondi.
Premendo il tasto ENTER
nel sottomenù, i tasti
selezionare l’opzione con CASSETTO oppure con
scarico DIRETTO.
Premendo il tasto ENTER
nel sottomenù, i tasti
aumentare/diminuire il numero di cicli (min. 1 - max.
40 per l’opzione con CASSETTO, min. 50 - max. NO
LIMIT per l’opzione con scarico DIRETTO).
Premere ENTER
zione.
Per azzerare il conteggio cicli per lo svuotamento
del cassetto fondi estrarre per almeno 15 secondi il
cassetto fondi
4.6 CICLO DI LAVAGGIO (Ciclo di lavaggio)
E’ possibile programmare il ciclo di lavaggio,
COMPLETO o solamente GRUPPO.
è possibile entrare
consentono
per confermare l’imposta-
è possibile entrare
consentono di
è possibile entrare
consentono
per confermare l’imposta-
IT
Ogni volta che verrà azionato il ciclo lavaggio, questo
seguirà l’impostazione data in questa funzione.
4.7 ORARI LAVAGGIO (Orari allarme lavaggio)
E’ possibile programmare quattro orari per attivare
l’allarme lavaggio.
Premendo il tasto ENTER
nel sottomenù, i tasti
no di selezionare l’orario che si vuole impostare.
Es. ORARIO 1, premendo il tasto ENTER
è possibile entrare nel sottomenù, i tasti
consentono di selezionare l’ora,
ORE, e i minuti, MIN, a cui deve comparire l’allarme
lavaggio. Premere ENTER
per impostare l’ora ORE e i minuti MIN.
Premere ENTER
zione.
Quando si raggiunge l’orario o gli orari impostati nel
display comparirà la scritta LAVAGGIO; la scritta
scompare dopo aver eseguito il lavaggio. Se nella
funzione ORARI 1,2,3,4 sono impostati ORE 00 e
MIN 00, l’allarme è disattivato.
4.8 ALLARME LAVAGGIO (Cicli allarme lavaggio)
Premendo il tasto ENTER è possibile entrare
nel sottomenù. Viene programmato il numero di cicli
dopo il quale viene visualizzato l’avviso pulizia gruppo. I tasti
/ diminuire il numero di cicli per la visualizzazione
del messaggio di pulizia gruppo (min. 50 – max. NO
LIMIT).
Premere ENTER
zione.
consentono di aumentare
è possibile entrare
consento-
e i tasti
per confermare l’imposta-
per confermare l’imposta-
Premendo il tasto ENTER
nel sottomenù, i tasti
di selezionare l’opzione ciclo lavaggio COMPLETO
(consigliata per macchine con cappuccinatore),
oppure ciclo lavaggio GRUPPO (consigliata per macchine senza cappuccinatore e con AUTOSTEAM).
Premere ENTER per confermare l’impostazione.
è possibile entrare
consentono
20
4.9 ALLARME LAVAGGIO LATTE
(Allarme lavaggio latte)
Premendo il tasto ENTER
nel sottomenù. Viene programmato il numero di ore,
dall’ultima erogazione bevanda latte, dopo il quale
viene visualizzato l’avviso pulizia cappuccinatore.
I tasti
consentono di aumentare /
è possibile entrare
Page 23

IT
diminuire il numero di ore per la visualizzazione del
messaggio di pulizia cappuccinatore (min. NO LIMIT
– max. 12H).
Premere ENTER
zione.
4.10 RISCALDAMEN SEQUENZIALE
(Riscaldamento sequenziale)
per confermare l’imposta-
LUNEDI
ON ORA
LUNEDI
OFF ORA
LUNEDI
ON MIN
LUNEDI
OFF MIN
Premendo il tasto ENTER
nel sottomenù, i tasti
di attivare/disattivare la funzine RISCALDAMENTO
SEQUENZIALE (SI – NO). Con la funzione
RISCALDAMENTO SEQUENZIALE attivata SI la
centralina riscalderà prima la resistenza del caffè poi
quella dei servizi; con la funzione RISCALDAMENTO
SEQUENZIALE disattivata NO, la centralina riscalderà contemporaneamente le due caldaie.
4.11 PROG ON OFF (Programmazione accen-
sione/spegnimento auomatico)
Viene programmato l’ON/OFF (accensione / spegnimento) automatico della macchina.
Di default la macchina è impostata con tutti i giorni
della settimana settati nella modalità “RIPOSO”,
quindi per accendere / spengere la macchina, utilizzare il tasto ON/OFF
Premendo ENTER
sottomenù, ed il display visualizza il seguente messaggio:
è possibile entrare
consentono
.
è possibile entrare nel
LUNEDI’
CHIUSURA
Premere ENTER
re il tasto RESET
4.12 RISPARMIO ENERGIA
E’ possibile attivare/disattivare il risparmio energetico
(SI o NO).
Premendo il tasto ENTER
nel sottomenù, i tasti
selezionare SI o NO per attivare/disattivare il risparmio energetico. Se attivato SI, quando la macchina
viene spenta manualmente o automaticamente le
temperature delle caldaie scendono rispettivamente
a 80C per la caldaia del caffe’ e 100C per la caldaia
vapore.
Premere ENTER
zione, poi premere il tasto RESET
dal sottomenù.
per confermare, poi preme-
per uscire dal sottomenù.
è possibile entrare
consentono di
per confermare l’imposta-
per uscire
LUNEDI
i tasti
impostazioni di tutti i giorni della settimana.
Premere ENTER
della settimana desiderato, i tasti
consentono di selezionare ore e minuti di accensione
e ora e minuti di spegnimento.
consentono di visualizzare le
per impostare il giorno
4.13 RISCIACQUO GRUPPO
E’ possibile programmare il tempo di riposo dopo di
che la macchina esegue un ciclo di risciacquo del
gruppo solo con acqua calda per tenere caldo e pulito
il circuito del caffe’.
Premendo il tasto ENTER
nel sottomenù, i tasti
selezionare OFF – 5 – 10 – 20 – 40.
Premere ENTER
zione, poi premere il tasto RESET
dal sottomenù.
è possibile entrare
consentono di
per confermare l’imposta-
per uscire
21
Page 24

4.14 GIORNO ORA
Viene programmato il giorno, l’ora ed i minuti che
visualizzerà il display della macchina.
IT
Premendo il tasto ENTER
nel sottomenù, i tasti
selezionare il giorno desiderato.
Premere ENTER
GIORNO
VENERDI’
Spostarsi con i tasti
ORA e MIN.
Premere il tasto RESET
sottomenù.
4.15 CAMBIO PASSWORD
E’ possibile impostare una nuova password per l’accesso alle funzioni programmabili nella
modalità tecnico.
Premendo il tasto ENTER
nel sottomenù.
Digitare la vecchia password:
VECCHIA PASSWORD XXXX
è possibile entrare
consentono di
per confermare.
per impostare
per uscire dal
è possibile entrare
Digitare la nuova password come combinazione di 4 tasti:
NUOVA PASSWORD XXXX
Confermare la stessa password impostata precedentemente:
CONFERMA PASSWORD XXXX
5. SAVE DATA
Premendo il tasto ENTER è possibile memorizzare tutti i dati impostati durante la programmazione. Premendo RESET
dalla programmazione senza salvare i dati.
22
e’ possibile uscire
Page 25

IT
8. FUNZIONI SPECIALI
TARATURE
MACCHINA
Eseguibili solo da tecnico specializzato.
8.1 RESET DATA
Mediante questa funzione è possibile rimuovere dati
di funzionamento non corretti e ritornare ai valori di
Programmazione Standard (vedi tabella VALORI DI
PRESET).
Per resettare i parametri della macchina e tornare
alle impostazioni standard, con la macchina spenta,
OFF, mantenere premuti i tre tasti indicati, ENTER
, RESET e X2/CLEAN ,
per 8 secondi.
8.2 TEST
Per controllare i carici della macchina, elettrovalvole,
resistenze e motori, con la macchina spenta, OFF,
premere i due tasti indicate,
8 secondi.
, per
8 .3 TEST
ELETTROVALVOLE
Dopo aver premuto i due tasti il display mostra:
TEST
Premere il tasto LEFT GRINDER per controllare il corretto funzionamento della bobina delle
elettrovalvole.
1
2
3
4
5
6
7
8
Fig. 23
1
LEGENDA
1 RESET DATA
2 TEST
2
Fig. 22
Fig. 21
LEGENDA:
1 ELETTROV. CAFFE’
2 ELETTROV. ALLUNGO
3 ELETTROV. AUTOLIVELLO
4 ELETTROV. ACQUA CALDA
5 ELETTROV. CAPPUCCINO
6 ELETTROV. AUTOLAVAGGIO
7 ELETTROV. ARIA LATTE
8 ELETTROV. VAPORE
23
Page 26
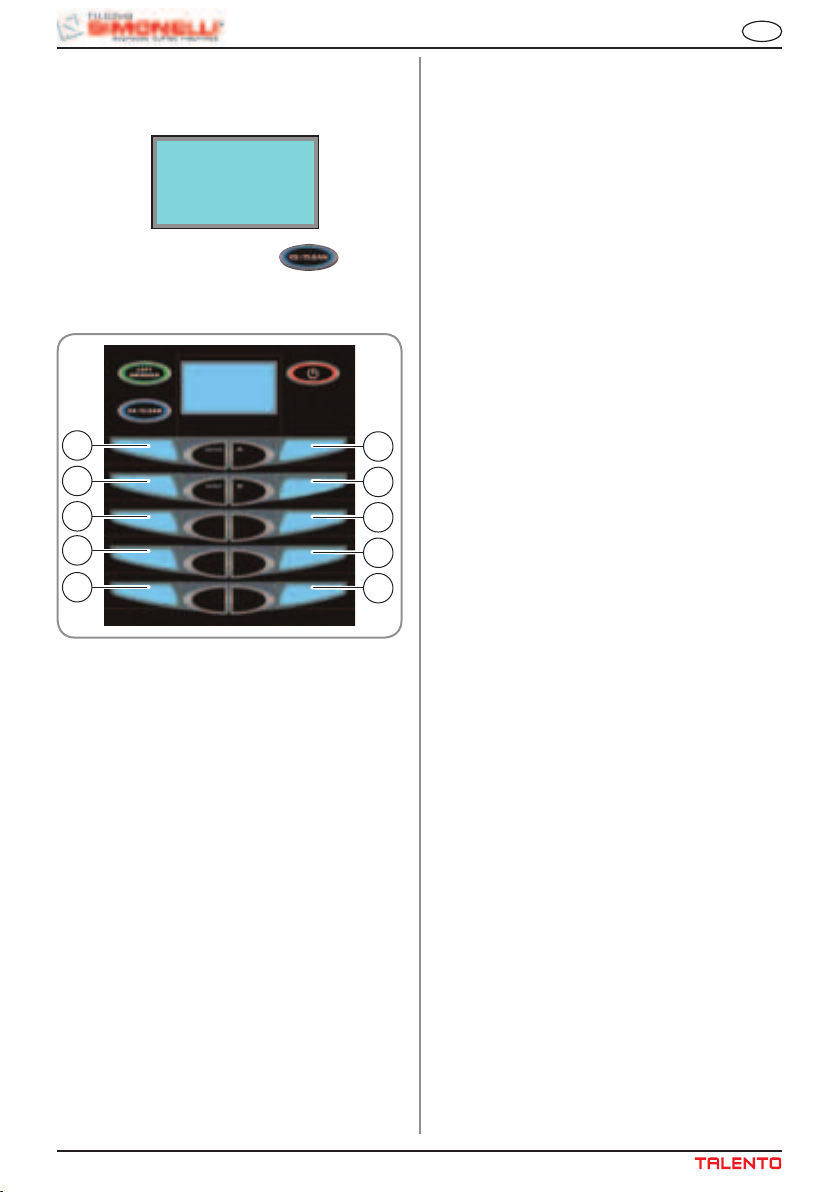
8.4 TEST RESISTENZE E
MOTORI
Dopo aver premuto i due tasti il display mostra:
TEST
Premere il tasto 2X/CLEANING per controllare il corretto funzionamento delle resistenze e
dei motori
IT
1
2
3
4
5
LEGENDA:
1 RESISTENZA CALDAIA CAFFE’
2 RESISTENZA CALDAIA VAPORE
3 RESISTENZA GRUPPO
4 MOTORE MACININO DX
5 MOTORE MACININO SX
6 POSIZIONE SUPERIORE GRUPPO
7 POSIZIONE INFERIORE GRUPPO
8 POSIZIONE INTERMEDIA GRUPPO
9 MOTORE POMPA
10 RELE’ 5V5
6
7
8
9
10
Fig. 24
24
Page 27
IT
9. PULIZIA E
MANUTENZIONE
ATTENZIONE
Non utilizzare MAI getti d'acqua per la pulizia
della macchina.
9.1 PULIZIA DELLA
CARROZZERIA
Prima di effettuare qualsiasi operazione di pulizia,
bisogna portare la macchina a stato energetico “O”
(cioè interruttore macchina spento e spina staccata).
Fig. 25
Fig. 26
La macchina è predisposta per il lavaggio del gruppo
erogazione tramite pastiglie e del circuito latte tramite
il liquido detergente.
La macchina inizierà il ciclo di pulizia che consiste in
erogazioni di acqua calda intervallate da un tempo di
attesa, tutto il ciclo ha una durata di circa 4 minuti.
Si raccomanda di effettuare il LAVAGGIO almeno
una volta al giorno con gli appositi detergenti.
ATTENZIONE
Non utilizzare solventi, prodotti a base di cloro,
abrasivi.
Pulizia zona lavoro: togliere il pianolavoro solle-
vandolo anteriormente verso l’alto e sfilarlo, togliere
il sottostante piatto raccogliacqua e pulire il tutto con
acqua calda e detersivo.
Pulizia carena: per pulire i pannelli utilizzare un
panno morbido inumidito.
9.2 PULIZIA DEL GRUPPO
EROGATORE E
CAPPUCCINATORE
NOTA:
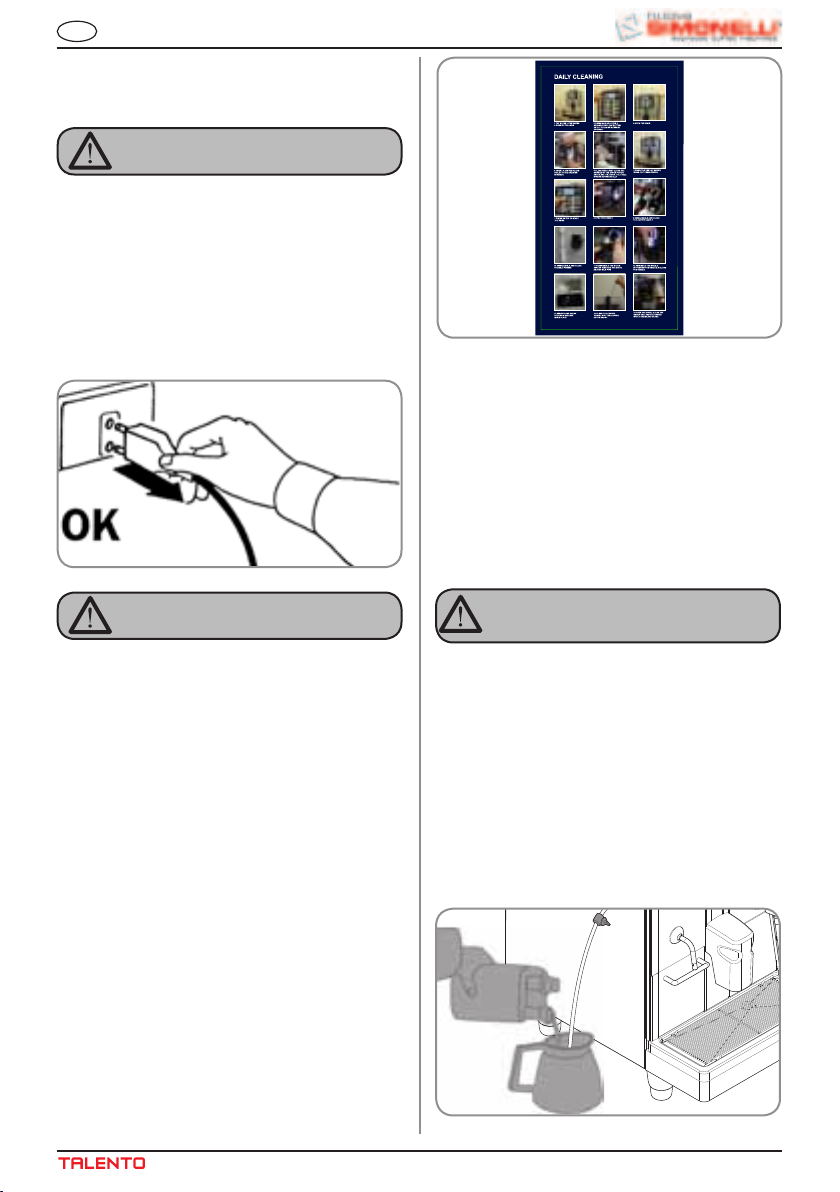
Seguire anche le istruzioni riportate sull’adesivo applicato all’interno della porta anteriore.
PERICOLO DI INTOSSICAZIONE
ATTENZIONE
Ricordiamo di non interrompere il lavaggio con
pastiglie detergenti una volta avviato, possono
rimanere residui di pastiglie nella macchina.
Per eseguire la procedura di lavaggio procedere
come segue:
1. Posizionare un recipiente con acqua a fianco
della macchina.
2. Inserire al suo interno il tubo di aspirazione.
3. Aggiungere il prodotto specifico per la pulizia
(20 ml [0.005 Gal] di Puly Milk).
Fig. 27
25
Page 28

4. Premere il seguente tasto :
5. Mantenerlo premuto per circa 6 secondi fino alla
visualizzazione del seguente messaggio:
LAVAGGIO
APRIRE PORTA
INSERIRE DETERGENTE
CHIUDERE LA PORTA
6. Aprire lo porta frontale della macchina.
7. Inserire all’interno della camera di erogazione la
pastiglia di detergente (Puly Caff).
Fig. 28
8. Premere con un panno umido la parte inferiore,
doccetta, del pistone superiore.
9. Chiudere lo sportello.
Il display visualizzerà:
IT
alimentazione alla macchina, alla successiva accensione il gruppo si posizionerà in fase di riposo ed il
display visualizzerà:
LAVAGGIO
APRIRE PORTA
INSERIRE DETERGENTE
CHIUDERE LA PORTA
1. Aprire lo porta frontale della macchina.
2. Inserire all’interno della camera di erogazione la
pastiglia di detergente (Puly Caff).
3. Premere con un panno umido la parte inferiore,
doccetta, del pistone superiore.
4. Chiudere lo sportello.
9.3 PULIZIA DEL
CONTENITORE E DEL
CONVOGLIATORE
DEL CAFFE’
ATTENZIONE
PERICOLO DI USTIONE
• Portare la macchina a stato energetico “O”.
• Inserire la chiave nell’apposita serratura.
• Ruotare la chiave apertura porta in senso
antiorario.
• Aprire la porta frontale.
LAVAGGIO
NOTA: Durante il lavaggio i tasti dose sono disabili-
tati.
Al termine del ciclo di lavaggio il display visualizzerà:
RISCIAQUO
PREMERE ENTER
Riposizionare un recipiente con solo acqua, e premere il tasto ENTER
, la macchina eseguirà
il ciclo di risciacquo ed il display visualizzerà:
RISCIACQUO
RIPRISTINO DI UN
LAVAGGIO INTERROTTO
Nel caso in cui s’interrompa il lavaggio, togliendo
26
Fig. 29
• Rimuovere l’eventuale residuo di caffè depositato sulle pareti del convogliatore tramite lo
scovolino dato in dotazione.
Fig. 30
• Per pulire le campane del caffè in grani, utilizzare un panno leggermente imbevuto di acqua
calda e/o di detergente neutro.
Page 29
IT
9.4 PULIZIA DELLA
LANCIA VAPORE
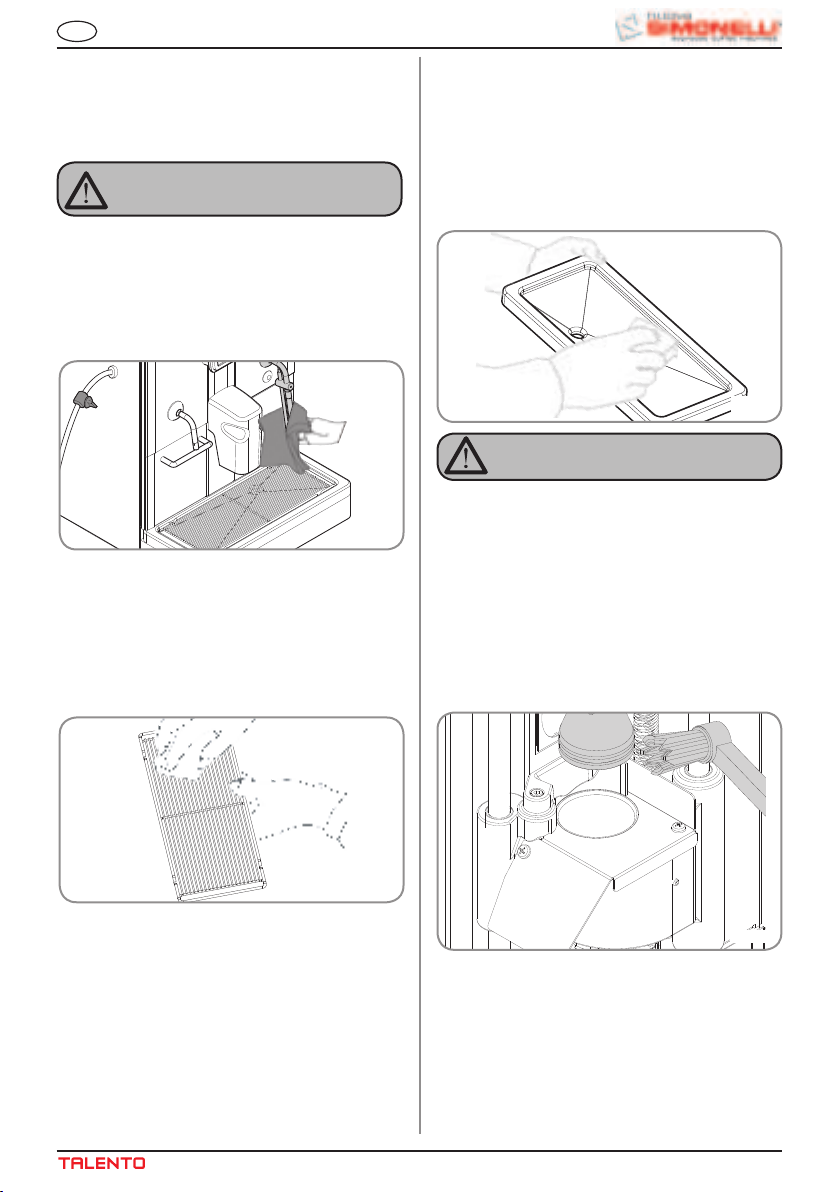
Pulire la lancia vapore ogni volta che lo si utilizza per
riscaldare bevande.
ATTENZIONE
PERICOLO DI USTIONE
Se la pulizia avviene con la lancia calda, evitarne
il contatto a mani nude.
Utilizzare un panno leggermente imbevuto di acqua
calda e/o di detergente neutro.
Fig. 31
9.5 PULIZIA DELLA
GRIGLIA CONTENITORE
RACCOGLIGOCCE
• Pulire la griglia con acqua calda e sapone
utilizzando una spazzola.
9.6 PULIZIA DEL
CONTENITORE
RACCOGLIGOCCE
• Pulire il contenitore raccogligocce con acqua
calda e sapone utilizzando eventualmente una
spazzola.
NOTA: Il contenitore raccogligocce può essere lava-
to utilizzando una lavastoviglie.
Fig. 33
ATTENZIONE
Non utilizzare mai nessun tipo di solvente.
9.7 PULIZIA
GUARNIZIONE GRUPPO
• Con l’utilizzo di uno spazzolino, pulire da incrostazioni o residui di caffè il pistone e la camera
del gruppo erogatore, nonchè tutte le altri parti
sporche di caffè.
Fig. 32
Fig. 34
27
Page 30

9.8 PULIZIA
CAPPUCCINATORE
NOTA:
Seguire anche le istruzioni riportate sull’adesivo applicato all’interno della porta anteriore.
IMPORTANTE: Procedere con cautela.
• Estrarre il coperchio del becco erogatore tirandolo verso di sè.
• Estrarre il cappuccinatore dal becco erogatore,
sfilandolo verso l’alto.
• Scollegare tutti i tubi ad esso collegati.
• Smontare il cappuccinatore e lavarlo accura-
tamente.
NOTA: Per intervalli di tempo tra un cappuccino
e l’altro superiori ad tre ora, si consiglia di
effettuare un lavaggio del cappuccinatore
facendo pescare il tubo di aspirazione del
latte, nell’acqua calda anzichè nel latte.
• Per il rimontaggio procedere in senso inverso
facendo attenzione al collegamento dei tubi del
cappuccinatore.
•
NOTA: Per facilitare il rimontaggio è stato applicato
un adesivo esplicativo, all’interno della porta
anteriore:
IT
28
Fig. 35
Page 31

IT
10. TABELLA DATI IMPOSTAZIONI STANDARD
RISTRETTO
2 RISTRETTO
ESPRESSO
2 ESPRESSO
COFFEE'
2 COFFEE'
AMERICANO
2 AMERICANO
CAPPUCCINO
2 CAPPUCCINO
MACCHIATO
2 MACCHIATO
CAFFELLATTE
MILK TIME
NO AIR TIME
WASHING
MILK TIME 2
NO AIR TIME 2
12 22 10 18 15 22 15 20
0 0 10 18 15 22 15 20
1 1 1 1 1 1 1 1
10 18
0 0
CAFFELLATTE
MILK
2 MILK
GRINDER TIME
GRINDER
VOLUME CC
PREINFUSIONE
PRESSING
WATER
2,5 3,5 3 4 3,5 4,5 2,5 4,5 2,5 3,5 2,5 3,5 3 3,5
DX DX DX DX SX SX DX DX DX DX DX DX SX SX
42 55 45 65 120 160 50 70 50 70 40 55 60 90
1,5 1,5 1,5 1,5 0 0 1,5 1,5 1,5 1,5 1,5 1,5 0 0
Y N Y N N N Y N Y N N N Y N
0 0 0 0 0 0 95 135 0 0 0 0 0 0
29
Page 32
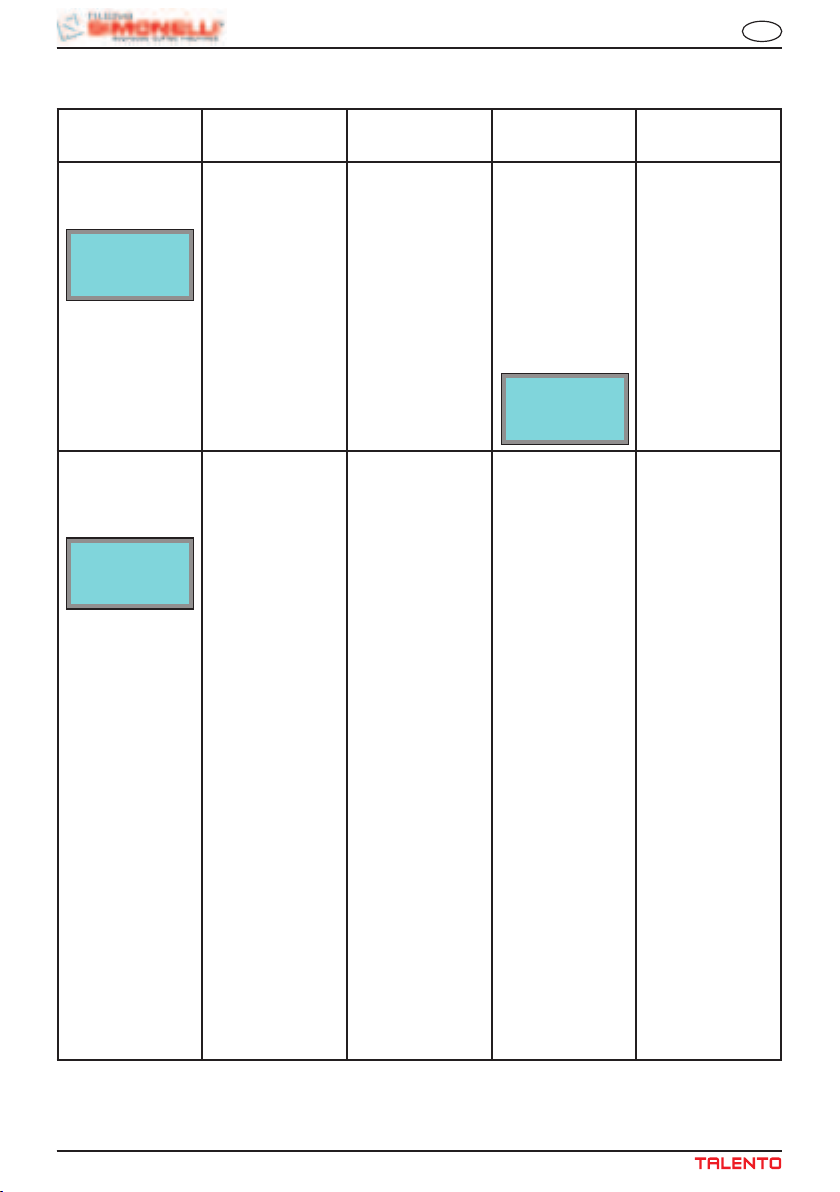
11. MESSAGGI FUNZIONI MACCHINA
IT
INDICAZIONE
DISPLAY
CASSETTO
FONDI PIENO
MACCHINA PRONTA
CASSETTO PIENO
CASSETTO
FONDI FUORI
POSTO
MACCHINA PRONTA
CASSETTO APERTO
CAUSA EFFETTO SOLUZIONE NOTA
Cassetto fondi
pieno. Il numero di
fondi caffè presenti nel cassetto ha
raggiunto il valore
impostato in fase di
programmazione.
Blocco delle erogazioni tasti a base
caffè.
Estrarre il cassetto
fondi e svuotarlo
all’interno di un
contenitore raccogli
immondizia.
Rein serire l o
stesso, quando il
display visualizza il
seguente messaggio:
MACCHINA PRONTA
CASSETTO APERTO
Cassetto fondi fuori
posto.
Blocco delle erogazioni tasti a base
caffè.
Inserire il cassetto
fondi nell’apposito
vano.
Se questo allarme
si manifesta durante l’esecuzione di
una bevanda a
base caffè:
• sino all’infusione
l’allarme è visualizzato sul display, ma
la bevanda viene
dispensata;
• dopo l’infusione
il ciclo in corso è
sospeso. Solo al
ripristino del cassetto il ciclo caffè
viene ripreso con la
fase di esplulsione.
Se questo allarme
si manifesta durante una fase di reset
movimento gruppo:
• il movimento
viene sospeso.
Al ripristino del
cassetto il ciclo di
reset gruppo viene
ripetuto.
30
Page 33

IT
INDICAZIONE
DISPLAY
POSIZIONE
SPORTELLO
MACCHINA
MACCHINA OFF
PORTA APERTA
NECESSITA’ DI
EFFETTUARE
IL CICLO DI
LAVAGGIO
ALLARME LAVAGGIO
ALLARME
GRUPPO
MOTORE
PISTONE
SUPERIORE
XXXXXX
ERRORE GRUPPO
ALLARME
RIEMPIMENTO
CALDAIA
LIVELLO
CAUSA EFFETTO SOLUZIONE NOTA
Sportello aperto. Blocco delle funzio-
ni macchina.
E’ stato superato
il numero di cicli
impostato dopo il
quale è necessario
effettuare la pulizia
Viene visualizzato
il messaggio ma
la macchina continua ad erogare le
bevande.
del gruppo.
Chiudere lo sportello macchina.
Effettuare un ciclo
di lavaggio (vedi
relativo paragrafo “PULIZIA
DEL GRUPPO
E R O G A T O R E
E CA PPU CCINATORE”).
Durante la fase di
movimentazi on e
gruppo il pistone
superiore ha superato il tempo massimo impostato di
10 secondi prima
del riconoscimento
spunto motore.
L’unità di controllo
blocca l’eventuale ciclo in corso,
spegnendo sia gli
attuatori che gestiscono la movimentazione, sia gli
attuatori adibiti alla
erogazione delle
Aprire e chiudere lo
sportello macchina.
bevande; loperatore non può esercitare selezioni a
bordo testiera.
La fase di riempi-
Macchina si ferma. Se l’allarme ricommento caldaia ha
superato il tempo
massimo di 3 minuti; la sonda livello è
scoperta.
Se l’allarme ricompare una seconda
volta, contattare il
Tecnico Qualificato.
pare una seconda
volta, contattare il
Tecnico Qualificato.
31
Page 34

IT
INDICAZIONE
DISPLAY
ALLARME
TURBINA
Ad allarme rilevato
l’unità di controllo
alterna a display il
messaggio relativo alla bevanda in
corso con il messaggio di errore
associato a questa
fuinzione.
Ad esempio:
ERRORE DOSATORE
ALLARME SONDA
TEMPERATURA
GUASTA
ERR TEMP CAFFĖ
CAUSA EFFETTO SOLUZIONE NOTA
Il contatore volumetrico non invia
impulsi alla centralina per un tempo
di 5 secondi.
L’ erogazione con-
tinua sino allo sca-
dere del tempo di
60 secondi o alla
pressione di un
qualsiasi tasto a
Aprire e chiudere lo
sportello macchina.
L’unità di controllo
ripete la procedura di riaccensione
della macchina.
base caffè.
Rottura di una delle
due sonde di tem-
Non viene erogato
il caffè.
Sostituire la sonda
guasta.
peratura.
Nel caso la condizione di allarme
persista, la macchina può essere utitlizzata come se si
operasse su di una
macchina manuale.
• Premere il tasto
desiderato per
avviare la dose;
•Premerelostesso
tasto per arrestare
la dose in corso,
una volta verificata
la dose in tazza.
Ch iamare il
Servizio Tecnico.
Questo allarme
blocca le erogazioni.
ERR TEMP VAPORE
32
Page 35

EN
Congratulations,
upon the wise choice you have made by purchasing the TALENTO model.
In fact, you are now the owner of not just a simple coffee dispenser, but a true espresso coffee-making machine
which is fully automatic and completely controlled by a microprocessor. This means absolute reliability and
simple to use.
We are certain that our TALENTO model will increase your confidence in Nuova Simonelli and that you will
undoubtedly recommend others to purchase this coffee-making machine, since the TALENTO model has been
chosen to increase the profitability of the coffee shop, thus fully optimising running costs.
This machine has been manufactured in compliance with the EEC directives 89/392, 89/336, 73/23, 89/109 and
subsequent modifications.
With best wishes
Nuova Simonelli S.p.a.
TECHNICAL CHARACTERISTICS
NET WEIGHT
GROS WEIGHT
POWER
DIMENSIONS
65 Kg 143.3 lb
74 Kg 163.1 lb
6000 W -
3000W
6000 W -
3000W
A 400 mm A 15.748 inc
B 607 mm B 23.897 inc
C 844 mm C 33.228 inc
D 154 mm D 6.063 inc
E 41,5 mm -
141,5 mm
E 1.634 inc -
5.571 inc
A
D
C
D
B
33
Page 36

INDEX
EN
TECHNICAL CHARACTERISTICS 33
1. DESCRIPTION ............................. 35
1.1 KEYBOARD DESCRIPTION
(Standard configuration) .............................. 36
2. SAFETY INSTRUCTIONS ............37
3. TRANSPORT AND HANDLING ....40
3.1 MACHINE IDENTIFICATION ........................... 40
3.2 TRANSPORT .................................................. 40
3.3 HANDLING ............................................................40
4. INSTALLATION AND
PRELIMINARY OPERATIONS ......41
4.1 MACHINE INSTALLATION ...................................41
4.2 FILLING THE COFFEE CONTAINER ....................42
4.3 SWITCHING ON ....................................................42
4.4 SWITCHING OFF ...................................................42
5. ADJUSTMENTS TO BE MADE
BY A QUALIFIED
TECHNICIAN ONLY .......................43
5.1 GRINDING ADJUSTMENT ....................................43
5.2 MILK FOAMER ADJUSTMENT ............................43
5.3 MILK FLOW ADJUSTMENT
(Temperature Regulation) ...................................43
9. CLEANING AND MAINTENANCE ..56
9.1 CLEANING THE OUTSIDE
OF THE MACHINE .........................................56
9.2 CLEANING THE DELIVERY
UNIT AND THE MILK FOAMER ..................... 56
9.3 COFFEE HOLDER AND
COFFEE DELIVERY UNIT CLEANING ........... 57
9.4 CLEANING THE STEAM NOZZLE .................. 58
9.5 CLEANING THE DROP
COLLECTING TRAY GRID ................................58
9.6 CLEANING THE WATER COLLECTING TRAY . 58
9.7 CLEANING THE GASKET ...................................58
9.8 CLEANING THE MILK FOAMER .......................59
10. STANDARD SETTING TABLE ........60
11. MACHINE FUNCTIONS
MESSAGES .....................................61
PLUMBING SYSTEM ......................64
ELECTRIC SYSTEM .......................66
6. USE .................................................44
6.1 POURING DECAFFEINATED COFFEE .................44
6.2 DISPENSING DOUBLE DOSES ............................44
6.3 USING THE LEFT GRINDER ................................44
7. PROGRAMMING .............................45
7.1 ENTERING THE PROGRAMMING MODE ............45
7.2 PROGRAMMING IN USER MODE ........................45
7.3 PROGRAMMING IN
SERVICE ENGINEER MODE .................................45
8. SPECIAL MACHINE
SCALING FUNCTIONS ................54
8.1 RESET DATA .................................................. 54
8.2 TEST ............................................................. 54
8.3 SOLENOID VALVE TEST ............................... 54
8.4 HEATING ELEMENTS AND MOTORS TEST ... 55
34
Page 37
EN
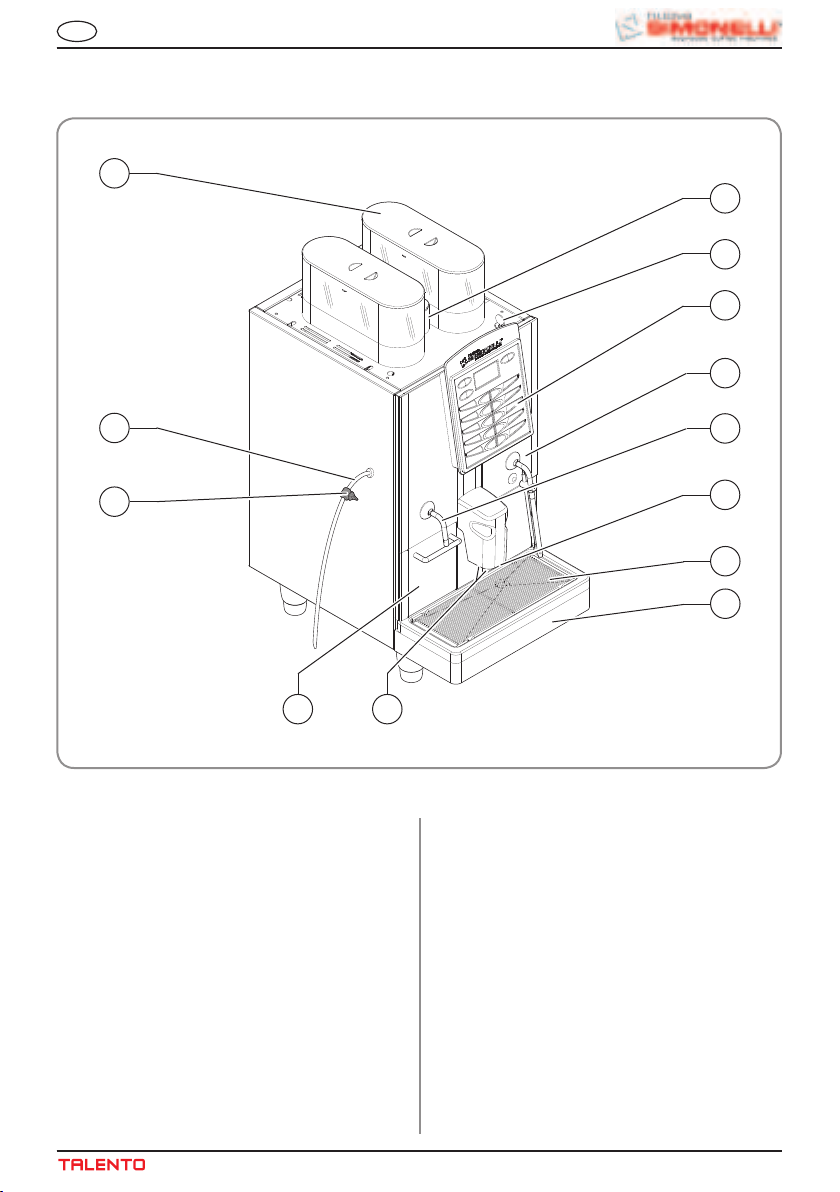
1. DESCRIPTION
1
10
9
2
3
11
12
6
LEGEND
1 Coffee bean holder cap
2 Control panel
3 Front door
4 Steam pipe / Hot water pipe
5 Drop collecting tray grid
6 Coffee grounds drawer
7 Coffee nozzles
8 Milk/Cappuccino nozzle
9 Control panel hatch opening / locking key
10 Ground coffee conveyor hatch
4
8
5
13
7
Fig. 1
11 Milk suction tube
12 Milk flow adjusting tap
13 Water collecting tray
35
35
Page 38
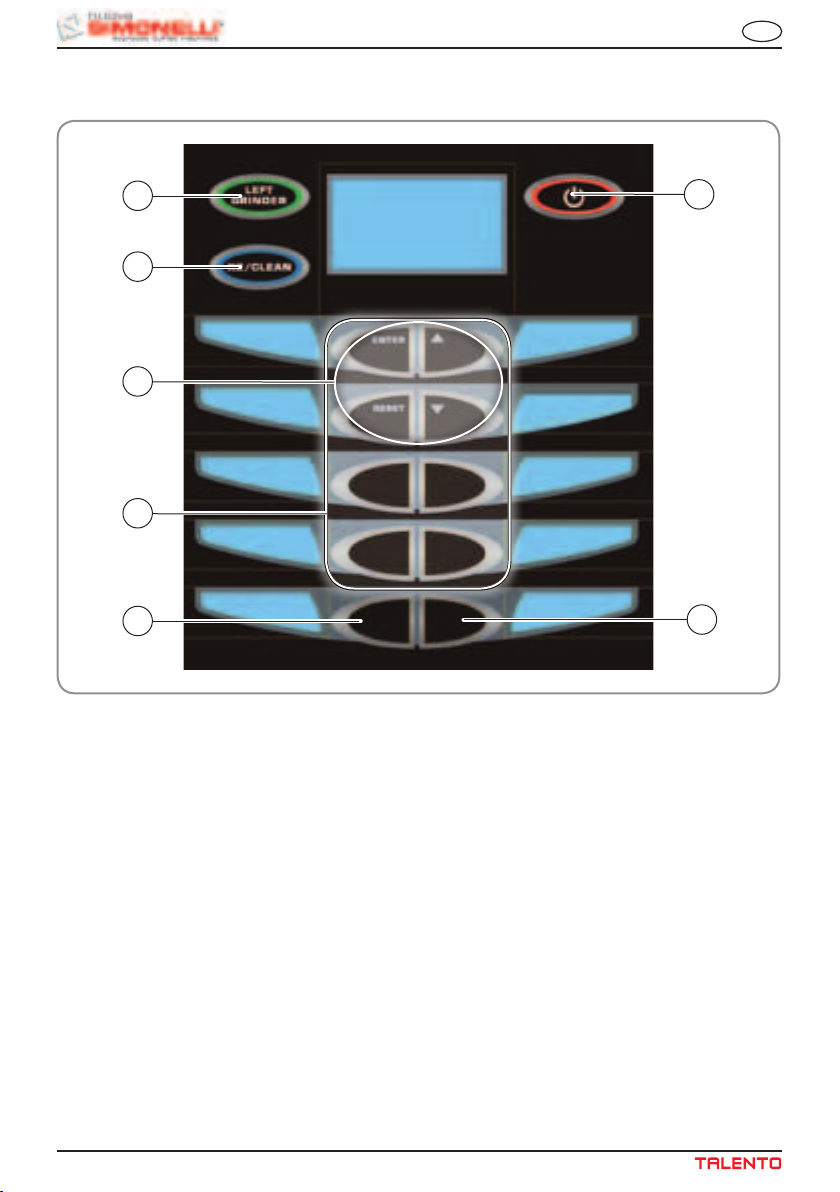
1.1 KEYBOARD DESCRIPTION (Standard configuration)
EN
LEGEND
1
7
5
6
4
2
3
Fig. 2
1 Left grinder key
2 On/Off key
3 Steam key
Hot water key
4
5
Programming key
6 Product dose keys
7
Double dose/cleaning cycle key
36
36
Page 39
EN
2. SAFETY INSTRUCTIONS
This book is an integral and essential part
of the product and must be given to the
user. Read this book carefully. It provides
important information concerning safety
of installation, use and maintenance. Save
it carefully for future reference.
After unpacking, make sure the appliance
is complete. In case of doubts, do not
use the appliance, but consult a qualified technician. Packaging items which
are potentially dangerous (plastic bags,
polystyrene foam, nails, etc.) must be
kept out of children’s reach and must not
be disposed of in the environment.
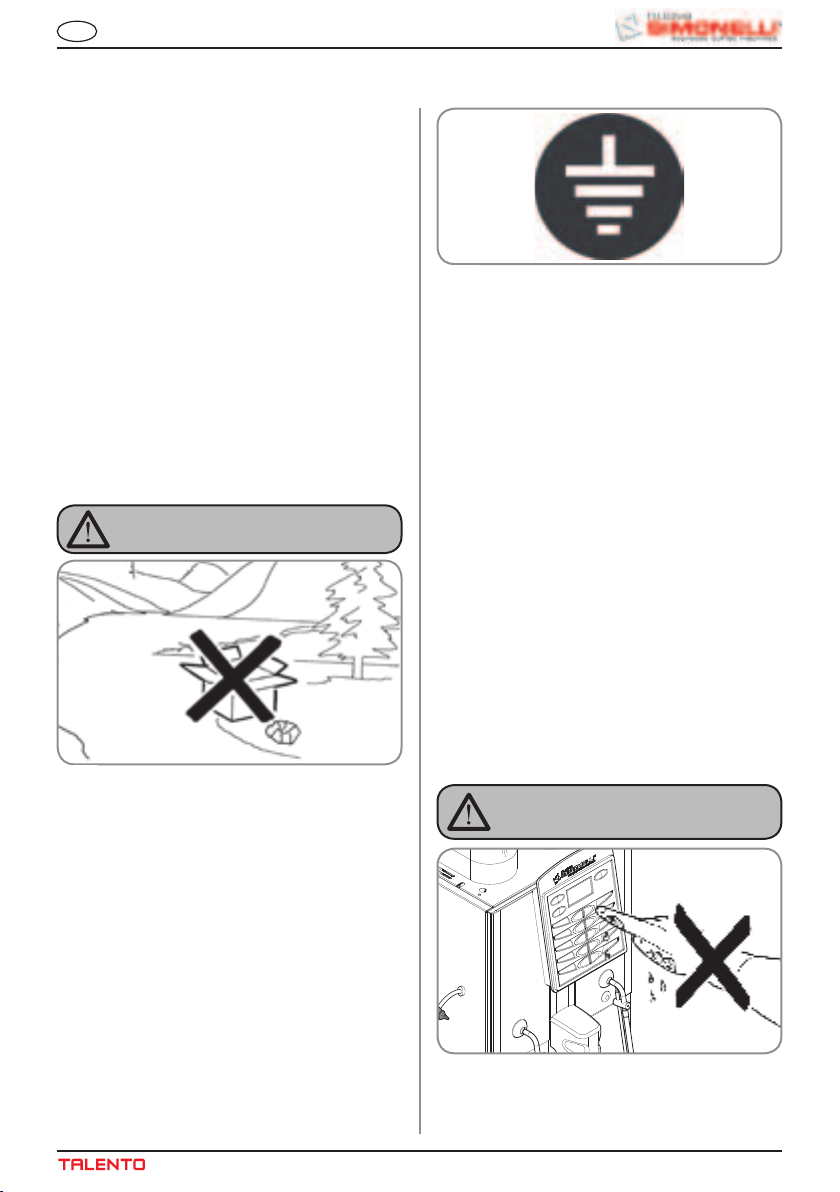
RISK OF POLLUTION
Fig. 4
In particular you must ensure that the size
of the wiring cables is sufficient to absorb
power input.
The use of adapters, multiple sockets or
extensions is strictly forbidden. If they
prove necessary, call a fully qualified electrician.
The machine must be installed according
to the local standards in force with regard
to plumbing systems. For this reason, the
plumbing connections must be carried
out by a qualified technician.
This appliance must only be used as
described in this handbook. The manufacturer shall not be liable for any damage
caused due to improper, incorrect and
unreasonable use.
Fig. 3
Before connecting the appliance make sure
the rating plate data correspond with the
mains. The nameplate is located on the back
of the machine, on the left-hand side at the
bottom. The appliance must be installed by
qualified technicians in accordance with current standards and manufacturer’s instructions.
The manufacturer is not liable for any dam-
age caused due to failure to ground the
system. For the electrical safety of the appliance, it is necessary to equip the system
with the proper grounding. This must be carried out by a qualified electrician who must
ensure that the electric power of the system
is sufficient to absorb the maximum power
input stated on the plate.
Basic rules must be observed when using
any electric appliance.
In particular:
•do not touch the appliance when
•do not use the appliance when bare-
•donotuseextensionsinbathorshow-
hands or feet are wet;
CAUTION
RISK OF ELECTRIC SHOCK
Fig. 5
foot;
er rooms;
37
Page 40

•donotpull the supply cordoutofthe
socket to disconnect it from the mains;
Fig. 6
Failure to
appliance unsafe.
To avoid dangerous overheating, make
observe the above, could make the
For installation, the qualified electrician
must fit an omnipolar switch in accordance with the safety regulations in force
and with 3 (0,12) or more mm (in) between
contacts.
sure the supply cord is fully uncoiled.
Do not obstruct the extraction and/or dissipator grids, especially of the cup warmer.
EN
•donotleavetheapplianceexposedto
•do not let the appliance be used by
Repairs should only be made by the manu-
atmospheric agents (rain, sun, etc.);
children, unauthorised staff or staff
who have not read and fully understood the contents of this handbook.
Before servicing the appliance, the
authorised technician must first switch
off the appliance and remove the plug.
Fig. 7
To clean the appliance, set the machine to
the “0” energy level, that is, “WITH THE
MACHINE SWITCHED OFF AND THE PLUG
REMOVED FROM THE MAINS” and follow the
instructions in this handbook.
If the appliance breaks down or fails to work
properly, switch it off. Any intervention is
strictly forbidden. Contact qualified experts
only.
facturer or authorized service centres. Only
original spare parts must be used.
The user must not replace the appliance
supply cord. If the cord is damaged,
switch off the appliance and have a qualified technician change the cord.
If no longer using the appliance, we
recommend making it inoperative; after
removing the plug from the mains electricity, cut the power supply cable.
CAUTION
RISK OF POLLUTION
Do not dispose of the machine in the
environment: to dispose of the machine,
use an authorised centre, or contact the
manufacturer for relative information.
Fig. 8
38
Page 41

EN
To ensure that the machine is properly
ventilated, place it with the ventilation
side at a distance of 15 cm (5,9 in) from
walls or other objects.
Once a machine wash cycle has been
started, do not interrupt it, as detergent
residues may then be left inside the delivery group.
CAUTION
RISK OF INTOXICATION
Use the steam nozzle with care and never
place hands below the jet of steam. Do
not touch the nozzle immediately after
use.
Fig. 9
WARNING
MECHANICAL HAZARD
Never press and/or pull the safety switch.
Fig. 11
CAUTION
INFORMATION TO THE USERS
Under the senses of art. 13 of
Law Decree 25th July 2005, n. 151
“Implementation of the Directives/
Guidelines 2002/95/CE, 2002/96/CE
and 2003/108/CE, concerning the
substances in electric and electronic equipment, as
well as the disposal of wastes“.
reduction of the use of dangerous
RISK OF BURNS OR SCALDING
We remind you that before carrying out
any installation, maintenance, unloading
or adjustment operations, the qualified
operator must put on work gloves and
protective footwear.
When adding coffee beans, the machine
operator must not place his/her hands
inside the container.
CAUTION
CAUTION
RISK OF CUTTING
Fig. 10
The symbol of the crossed large rubbish container
that is present on the machine points out that the
product at the end of its life cycle must be collected
separately from the other wastes. The user for this
reason will have to give the equipment that got to
its life cycle to the suitable separate waste collection
centres of electronic and electrotechnical wastes, or
to give it back to the seller or dealer when buying a
new equipment of equivalent type, in terms of one to
one. The suitable separate waste collection for the
following sending of the disused equipment to recycling, the dealing or handling and compatible environment disposal contributes to avoid possible negative
effects on the environment and on the people’s
health and helps the recycling of the materials the
machine is composed of. The user’s illegal disposal
of the product implies the application of administrative fines as stated in Law Decree n.22/1997” (article
50 and followings of the Law Decree n.22/1997).
39
Page 42
3. TRANSPORT AND
HANDLING
3.1 MACHINE
IDENTIFICATION
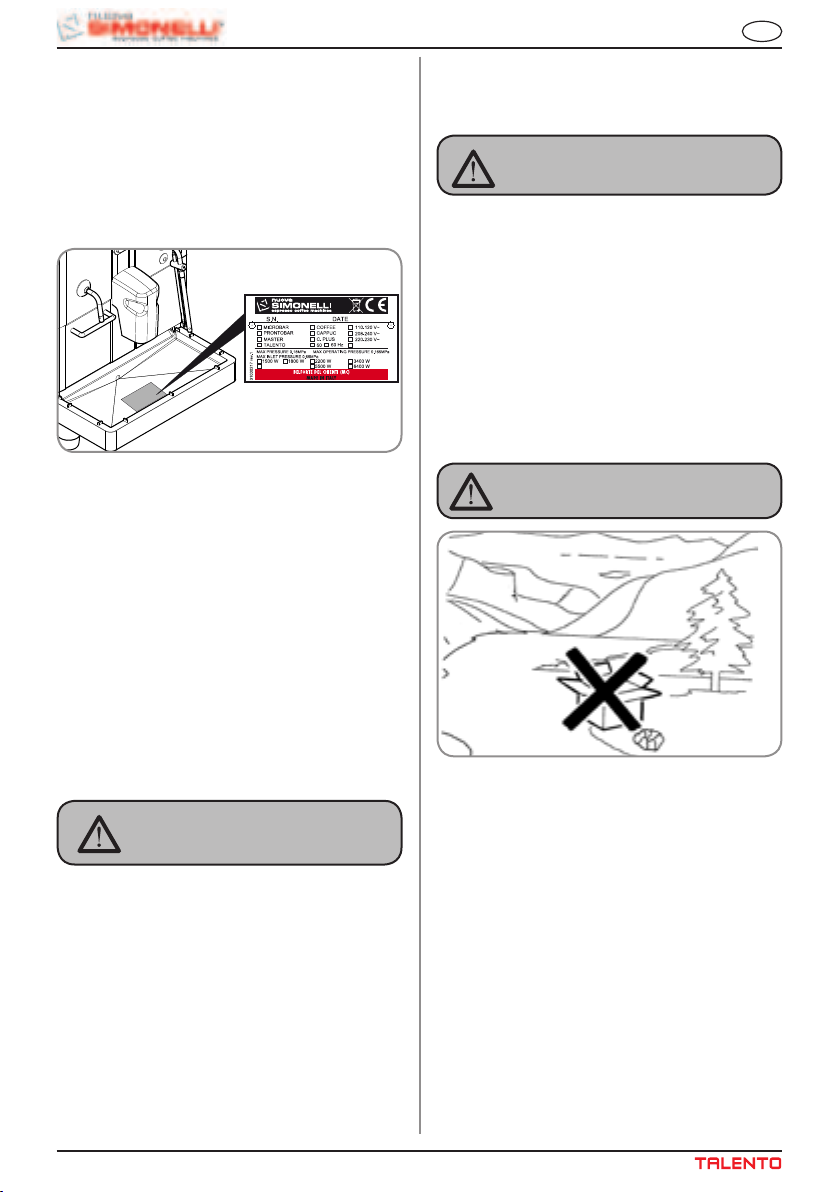
Always quote the machine serial number in all
communications to the manufacturer, Nuova
Simonelli.
Fig. 12
EN
(e.g. forklift) should be used to lower the pallet to
the ground and then to move it (at approx. 30 cm
(11,8 in) from ground level), to the storage area.
CAUTION
RISK OF IMPACT
OR CRASHING
Before carrying out the following operation, the
load must be checked to ensure that it is in the
correct position and that, when the supports are
cut, it will not fall.
The operator, who must first put on work gloves
and protective footwear, will proceed to cut the
supports and to storing the product. To carry
out this operation, the technical characteristics
of the product must be consulted in order to
know the weight of the machine and to store it
accordingly.
3.2 TRANSPORT
The machine is transported on pallets which also
contain other machines - all boxed and secured to
the pallet with supports.
Prior to carrying out any transport or handling operation, the operator must:
• putonworkglovesandprotectivefootwear,aswell
as a set of overalls which must be elasticated at the
wrists and ankles.
The pallet must be transported using a suitable
means for lifting (e.g., forklift).
3.3 HANDLING
CAUTION
RISK OF IMPACT
OR CRASHING
During all handling operations, the operator
must ensure that there are no persons, objects
or property in the handling area.
The pallet must be slowly raised to a height of 30
cm (11,8 in) and moved to the loading area.
After first ensuring that there are no persons,
objects or property, loading operations can be
carried out.
Upon arrival at the destination and after ensuring
that there are no persons, objects or property in
the unloading area, the proper lifting equipment
CAUTION
RISK OF POLLUTION
Fig. 13
40
Page 43

EN
4. INSTALLATION
AND PRELIMINARY
OPERATIONS
CAUTION
RISK OF POLLUTION
Do not dispose of packaging in the environment.
Fig. 14
Before carrying out any installation and adjustment
operations you must read and fully understand the
SAFETY INSTRUCTIONS of this handbook. The company cannot be held responsible for damage to things
or injury to persons caused by failure to comply with
the safety instructions and installation and maintenance instructions contained in this handbook.
WARNING
Place the machine on a flat, level surface to avoid
any possible malfunctioning.
CAUTION
RISK OF SHORT CIRCUITS
Before connecting the machine to the mains
power supply, please check that the supply voltage corresponds to the machine voltage.
4.1 MACHINE
INSTALLATION
Once the machine has been withdrawn from the
packaging, carry out the following instructions:
1 Position the unit on a horizontal surface.
2 Remove the pipe with 3/4” coupling from the
hatch in the top of the machine.
Fig. 15
3 Connect one end of the pipe to the 3/4” inlet on the
back of the machine.
WARNING
Never install the machine in areas where it could
come into contact with jets of water.
WARNING
The machine can be used with the following:
- Coffee grains
- Decaffeinated coffee powder
- Milk (not powdered)
The use of any other substance not listed
here above may cause serious damage to the
machine itself.
WARNING
The machine is designed to operate at temperatures ranging from +5°C to +40°C (41°F - 104°F).
Fig. 16
4 Connect the other end of the pipe to the water
mains.
WARNING
The water hardness must be less then 4° - 6° fr
(french degree).
The chlorine content must not exceed 100mg per
litre (0.00000361lb/cu in).
Otherwise the conditions of guarantee of the
machine will expire.
41
Page 44

The machine must be installed according
to the local standards in force with regard
to plumbing systems. For this reason, the
plumbing connections must be carried
out by a qualified technician.
EN
The machine will carry out a group positioning cycle;
this is the cycle for filling the boiler with water at the
end of which, if the machine is cold, there will be a
heating cycle and the display will read:
PLEASE wAIT
4.2 FILLING THE COFFEE
CONTAINER
1 Remove the cap to access the granulated coffee
bean container.
WARNING
Pour ONLY toasted coffee beans into the coffee
bean holder. any other kind of coffee, for example
ground coffee, will damage the coffee grinder.
Don’t insert caramelized, sugar coated, or similarly coated coffee beans, or instant coffee or
other sugary beverages because they will harm
the appliance.
2 Don’t fill to the brim but pour just enough toasted
coffee beans into the coffee bean holder to
ensure correct closure of the unit.
Fig. 17
3 Close the cap.
after the heating phase, the display will read: and the
machine will be ready for use.
SELECT PRODUCT
The heating stage takes approx, 5 minutes.
NOTE: The appliance is endowed with a security
system that will stop the machine after about
1.5 minutes of constant functioning of the
pump (to avoid pump overheating). In this
case, switch off the main switch of the
machine and then turn it on again.
The machine is now ready to be used.
WARNING
WHEN INSTALLING THE MACHINE FOR THE
FIRST TIME OR AFTER WATER HEATER UNIT
MAINTENANCE, PRESS THE BUTTON TO
DISPENSE HOT WATER BEFORE DISPENSING
ANY COFFEE.
REPEAT THIS OPERATION AS REQUIRED AND
UNTIL THERE IS AN EVEN FLOW OF WATER
FROM THE NOZZLE.
4.3 SWITCHING ON
NOTE: in case the following procedure shouldn’t
take effect, see the chapter on “Problems
and Solutions”.
After the preliminary operations:
Press the ON/OFF
key.
42
4.4 SWITCHING OFF
To switch off the machine, proceed as follows:
• Press the ON/OFF key
.
Page 45

+
-
- C°
+C°
FIN
O
FINE
GOARSE
GROSSO
IT
5. ADJUSTMENTS TO BE MADE BY A QUALIFIED
TECHNICIAN ONLY
WARNING
The adjustments listed here below may be performed by Specialist Technical Engineers ONLY.
NUOVA SIMONELLI cannot accept any liability
for damage to people or property arising from
failure to follow the safety regulations listed in
this manual.
5.1 GRINDING
ADJUSTMENT
WARNING
Switch on the grinder to carry out the grinding
adjustment procedures.
NOTA: The procedure is possible also with the
appliance on.
• Put the key into its lock.
• Turn the control panel hatchdoor key counter-
clockwise.
• Open the control hatch to access the grinding adjustment screw. Follow the direction of
the arrows to increase the COARSE setting
(anticlockwise) or the FINE setting (clockwise)
for grinding the coffee beans, using a flat head
screwdriver.
• Lock the hatchdoor.
adjustment screw as illustrated in the figure so as to
increase / reduce the air to the milk foamer.
Fig. 19
5.3 MILK FLOW
ADJUSTMENT
(Temperature
Regulation))
Fig. 20
OPEN
Fig. 18
CLOSED
5.2 MILK FOAMER
ADJUSTMENT
NOTE: The procedure is possible also with the
To change the amount of air to the milk foamer and
therefore, to change the amount of foam, use the
appliance on.
NOTE: The procedure is possible also with the
appliance on.
To adjust both the flow and the temperature of the
milk delivery, turn the adjusting tap as follows:
• Turn the milk suction tap CLOCKWISE/
COUNTERCLOCKWISE to INCREASE/
DECREASE the milk suction and then
DECREASE/INCREASE the temperature.
• Turn the tap until the milk reaches the desired
temperature.
43
Page 46
6. USE
Before starting usage of the appliance, the operator
must read and fully understand the safety instructions in this handbook.
EN
6.3 USING THE LEFT
GRINDER
• Press the LEFT GRINDER key.
• The display will turn green.
• Select the key for the beverage to be poured.
WARNING
If the self-diagnostic function indicates anomalies or failures, call the assistance centre.
Operators must never intervene.
6.1 POURING
DECAFFEINATED
COFFEE
• Open the decaffeinated coffee hatch.
• Insert the ground coffee into the chute and
close the hatch.
• Select the required beverage to be dispensed
using the powder in the chute within 30 seconds.
6.2 DISPENSING DOUBLE
DOSES
• Press the DOUBLE DOSE button.
• The display will turn blue:
• Select the key for the beverage to be poured.
(It is possible to use the DOUBLE DOSE key
together with the LEFT GRINDER key; the display
will turn green).
(It is possible to use the LEFT GRINDER key
together with the DOUBLE DOSE key).
44
Page 47
EN
7. PROGRAMMING
7.1 ENTERING THE
PROGRAMMING MODE
Hold down the ON/OFF key with the
machine switched off (approx. 5 seconds) until the
display shows the first programming function:
SELECT LANGUAGE
The keys available during the programming stage
are:
ENTER key: To enter the menu and/or
confirm the setting.
CURSORI keys: To scroll through the
menu and increase/
reduce settings.
RESET keys: To go back to the previous
step.
7.2 PROGRAMMING IN
USER MODE
1 . SELECT LANGUAGE
Press the ENTER key to access the
submenu.
This serves to set the language for the
machine/operator interface, which is shown
on the display.
Press the
required language.
The possible languages are as follows: ENGLISH,
ITALIANO, FRANCAIS, DEUTSCH, ESPANOL.
onfirm your selection and move to the next function
by pressing ENTER
7.3 PROGRAMMING IN
To access the functions that can only be programmed
in SERVICE ENGINEER MODE, press the up arrow
key
and the display will read as follows:
keys to select the
.
SERVICE ENGINEER MODE
from the SELECT LANGUAGE menu
LIST OF PROGRAMMABLE FUNCTIONS
Functions that can be accessed from the USER and
TECHNICIAN modes.
1. SELECT LANGUAGE
Functions that can “ONLY” be accessed from the
TECHNICIAN mode.
2. COUNTERS
3. PROG DOSES
4. SETTINGS
5. SAVE DATA
PASSwORD
Enter the correct password to access the first item
on the programming menu that can be accessed in
SERVICE ENGINEER MODE.
The default PASSWORD setting is 4 times the LEFT
GRINDER key:
2. COUNTERS
Pressing the ENTER key it is possible to
enter the submenu.
2.1 BEVERAGE COUNT
(Beverage count)
Press ENTER to enter the sub menu; all of
the beverage keys (1-8) will start to flash.
45
Page 48

Press the beverage key to read the number of beverages poured, e.g.:
DRINK COUNT
COFFEE
DX 000024
SX 000036
EN
2.4 TOT CYCLES (Total Cycles)
Press ENTER to enter the sub menu; the
keys remain lit and the display will read:
TOT CYCLES
N. 0002563
Press and hold down ENTER
to reset the counter.
Press RESET
selected beverage; press RESET
3 seconds to quit the sub menu.
to quit the counter for the
for 6 seconds
again for
2.2 TOT BEVERAGES (Total beverages)
Press ENTER to enter the sub menu; all
of the beverage keys (1-8) will start to flash. Press
the beverage key to read the number of beverages
poured, e.g.:
DRINK TOTAL
N. 000060
Press and hold down ENTER
to reset the counter.
Press RESET
to quit the sub menu.
for 6 seconds
2.3 CYCLE COUNT (Cycle counter)
Press ENTER to enter the sub menu; all
of the beverage keys (1-8) will start to flash. Press
the beverage key to read the number of beverages
poured, e.g.:
COUNT CYCLE
BUTTON 2
DX. 000020
SX. 000030
The cycles refer to single beverages; press 2X
to read the number of cycles for double
beverages.
Press and hold down ENTER
to reset the counter.
Press RESET
selected beverage; press RESET
3 seconds to quit the sub menu.
to quit the counter for the
for 6 seconds
again for
The number of cycles is the sum of all beverages,
single and double.
Press and hold down ENTER
to read the absolute total (not resettable to zero):
TOT CYCLES
ABSOLUTE TOT
N. 0006500
Press and hold down ENTER
seconds from the total absolute menu to reset the
TOT CYCLES counter.
Press RESET
to quit the submenu.
for 10 seconds
ENTER for 6
2.5 RH GRI TOT
(Right hand grinder total)
Press ENTER to enter the sub menu; the
keys remain lit and the display will read:
TOT GRIND R
H : MIN
000000:63
Press and hold down ENTER
to read the absolute total (not resettable to zero):
TOTGRIND R
ABSOLUTE TOT
H : MIN
000000:63
Press and hold down ENTER for 6 seconds
from the total absolute menu to reset the RH GRI
TOT counter.
Press RESET
to quit the submenu.
for 10 seconds
46
Page 49

EN
2.6 LH GRI TOT
(Left hand grinder total)
Press ENTER to enter the sub menu; the
keys remain lit and the display will read:
TOT GRIND LEFT
H : MIN
000000:63
Press and hold down ENTER
to read the absolute total (not resettable to zero):
TOT GRIND LEFT
ABSOLUTE TOT
H : MIN
000000:63
Press and hold down ENTER
from the total absolute menu to reset the LH GRI
TOT counter.
Press RESET
to quit the submenu.
for 10 seconds
for 6 seconds
2.7 HOT WATER TOT
(Hot water total)
Press ENTER to enter the sub menu;all of
the beverage keys (1-8) will start to flash and the
display will read:
THE TOT
N. 00000008
2.8 STEAM TOT (Steam total)
Press ENTER to enter the sub menu; all of
the beverage keys (1-8) will start to flash and the
display will read:
STEAM TOT
N. 00000008
Press and hold down ENTER
to read the absolute total (not resettable to zero):
STEAM TOT
ABSOLUTE TOT
N. 00000008
Press and hold down ENTER
from the total absolute menu to reset the STEAM
TOT counter.
Press RESET
to quit the submenu.
for 10 seconds
for 6 seconds
2.9 LIT TOT (Total litres)
Press ENTER to enter the sub menu; all of
the beverage keys (1-8) will start to flash and the
display will read:
TOT LITRES
LITRES
0000032.56
Press and hold down ENTER
to read the absolute total (not resettable to zero):
THE TOT
ABSOLUTE TOT
N. 00000008
Press and hold down ENTER
from the total absolute menu to reset the HOT
WATER TOT counter.
Press RESET
to quit the submenu.
for 10 seconds
for 6 seconds
Press and hold down ENTER
to read the absolute total (not resettable to zero):
TOT LITRES
ABSOLUTE TOT
LITRES
0000056.08
Press and hold down ENTER
from the total absolute menu to reset the LIT TOT
counter.
Press RESET
to quit the submenu.
for 10 seconds
for 6 seconds
47
Page 50

2.10 WASH TOT (Total wash cycles)
Press ENTER to enter the sub menu: all of
the beverage keys (1-8) will start to flash and the
display will read:
EN
Press ENTER again to enter the function
programming mode for each single key. Use the
to select the required beverage:
CLEANING
N. 000000056
Press and hold down ENTER
for 10 seconds
to read the absolute total (not resettable to zero):
CLEANING
ABSOLUTE TOT
N. 00000056
Press and hold down ENTER
for 6 seconds
from the total absolute menu to reset the WASH TOT
counter.
Press RESET
Press RESET
to quit the submenu.
to quit the submenu.
3. PROG DOSES (Dose programming)
Pressing ENTER it is possible to access the
sub menu and then to use the
to select the key to be programmed. The numbers,
from 1 to 8 are shown in fig.1
1
2
3
4
keys
5
6
7
8
Fig. 21
KEY OFF: key disabled
COFFEE: coffee cycle
MILK COFFEE: milk cycle + coffee cycle
COFFEE MILK: coffee cycle + milk
CAFFELATTE: milk cycle + coffee together
MACCHIATO: milk cycle + pause (3 seconds) + coffee
MILK: milk cycle.
Press ENTER
to confirm the required beverage.
List of functions that can be programmed for the
COFFEE beverage:
• GRIND TIME (used to set the grinding time)
• GRIND SEL (used to set the default grinder)
• CC VOLUME (used to set the volume of water
in the coffee)
• PREINFUS (used to set the pre-infusion time)
• PRESSING (used to enable/disable pressing)
• CC WATER (used to set the amount of addi-
tional hot water)
List of the functions that can be programmed for the
MILK COFFEE beverage:
• MILK TIME (used to set the milk time/amount)
• NO AIR TIME (used to set the milk time/amount
without foam)
• WASH (used to set the washing time at the end
of pouring)
• GRIND TIME (used to set the grinding time)
• GRIND SEL (used to set the default grinder)
• CC VOLUME (used to set the volume of water
in the coffee)
• PREINFUS (used to set the pre-infusion time)
• PRESSING (used to enable/disable pressing)
48
Page 51
EN
List of the functions that can be programmed for the
COFFEE MILK beverage:
• GRIND TIME (used to set the grinding time)
• GRIND SEL (used to set the default grinder)
• CC VOLUME (used to set the volume of water
in the coffee)
• PREINFUS (used to set the pre-infusion time)
• PRESSING (used to enable/disable pressing)
• MILK TIME (used to set the milk time/amount)
• NO AIR TIME (used to set the milk time/amount
without foam)
• WASH (used to set the washing time at the end
of pouring)
List of the functions that can be programmed for the
CAFFELATTE beverage:
• GRIND TIME (used to set the grinding time)
• GRIND SEL (used to set the default grinder)
• CC VOLUME (used to set the volume of water
in the coffee)
• PREINFUS (used to set the pre-infusion time)
• PRESSING (used to enable/disable pressing)
• MILK TIME (used to set the milk time/amount)
• NO AIR TIME (used to set the milk time/amount
without foam)
• WASH (used to set the washing time at the end
of pouring)
List of the functions that can be programmed for the
MACCHIATO beverage:
• MILK TIME (used to set the milk time/amount)
• NO AIR TIME (used to set the milk time/amount
without foam)
• WASH (used to set the washing time at the end
of pouring)
• GRIND TIME (used to set the grinding time)
• GRIND SEL (used to set the default grinder)
• CC VOLUME (used to set the volume of water
in the coffee)
• PREINFUS (used to set the pre-infusion time)
• PRESSING (used to enable/disable pressing)
List of the functions that can be programmed for the
MILK beverage:
• MILK TIME (used to set the milk time/amount)
• NO AIR TIME (used to set the milk time/amount
without foam)
• WASH (used to set the washing time at the end
of pouring)
GRIND TIME (Grinding Time):
It is possible to set the grinding time in seconds and
therefore, the amount of ground coffee used.
Pressing ENTER
sub menu; the
increase/reduce grinding time.
Press ENTER to confirm settings.
GRIND SEL (Selects Default Grinder):
It is possible to set a default grinder (left LH or right
RH).
Pressing ENTER
sub menu; the
select the right or left grinder.
Press ENTER to confirm settings.
CC. VOLUME (Water Volume):
It is possible to set the volume of the water for the
coffee in cc.
Pressing ENTER
sub menu; the
increase/reduce water volume.
Press ENTER
PREINFUS (Pre-infusion Time):
It is possible to set the pre-infusion time in sec.
Pressing ENTER
sub menu; the
increase/reduce pre-infusion time.
Press ENTER to confirm settings.
it is possible to enter the
keys are used to
it is possible to enter the
keys are used to
it is possible to enter the
keys are used to
to confirm settings.
it is possible to enter the
keys are used to
49
Page 52

PRESSING (Pressing):
It is possible to enable/disable pressing (YES or NO).
EN
Press the
gram the same list of functions for the double dose.
: key: it will be possible to pro-
Pressing ENTER it is possible to enter the
sub menu; the
select YES or NO to enable/disable pressing.
Press ENTER to confirm settings.
MILK TIME (Milk Time):
It is possible to set the time and therefore, the
amount of milk.
Pressing ENTER
sub menu; the
increase/reduce the amount of milk. Press ENTER
to confirm settings.
NO AIR TIME (Air Time disabled):
It is possible to set the part of total milk time in which
the air solenoid is closed so as to adjust the amount
of foam in the milk.
Pressing ENTER
sub menu; the
increase/reduce the milk time for which the solenoid
valve is closed.
Press ENTER to confirm settings.
keys are used to
it is possible to enter the
keys are used to
it is possible to enter the
keys are used to
HOT WATER (Hot Water time):
Pressing this
menu; press ENTER
the
the function (YES/NO). Press ENTER
confirm the setting; if the function is enabled, YES,
the
reduce the time and therefore, the volume of water.
Press ENTER
STEAM (Steam Time):
Pressing
menu; press ENTER
the
the function (YES/NO) or enable AUTOSTEAM.
Press ENTER to confirm the setting; if the function
is enabled, YES, the
used to increase/reduce the time and steam; if the
AUTOSTEAM, function is enabled, the
temperature. Press ENTER to confirm settings.
keys are used to enable/disable
keys can be used to increase/
keys are used to enable/disable
keys can be used to increase/reduce the
key will open the HOT WATER,
to enter the sub menu,
to
to confirm settings.
this key will open the STEAM
to enter the sub menu,
keys can be
WASH (Automatic milk tube wash):
It is possible to set the cold water washing time at the
end of milk dispensing.
Pressing ENTER
sub menu; the
increase/reduce the washing time.
Press ENTER
To program the double dose, after entering the menu
for the required key:
it is possible to enter the
keys are used to
to confirm settings.
X
COFFEE
50
Page 53

EN
4. SETTINGS
Pressing ENTER it is possible to enter the
sub menu and use the
the function to be programmed.
Press ENTER
4.1 TEMP. SELECT (Selects unit of measure for
temperature)
It is possible to program the unit of measure for viewing the temperature, CELCIUS – FAHRENAIT.
Pressing ENTER
sub menus, the
select the preferred unit of measurement CELCIUS
– FAHRENAIT.
Press ENTER
4.2 COFFEE TEMP (Coffee boiler temperature)
It is possible to programme the temperature of the
water in the coffee boiler.
Pressing ENTER
sub menu; the
increase/reduce the temperature of the water in the
coffee boiler tank (min. 80°C max. 100°C).
Press ENTER
4.3 STEAM TEMP (Steam boiler temperature)
It is possible to programme the temperature of the
steam in the services boiler.
Pressing ENTER
sub menu; the
increase/reduce the temperature of the steam in the
services boiler tank (min 80°C max. 150°C).
Press ENTER
4.4 GROUP TEMP (Pouring group temperature)
It is possible to programme the temperature of the
pouring group.
Pressing ENTER
keys to select
again to open the function.
it is possible to enter the
keys are used to
to confirm settings.
it is possible to enter the
keys are used to
to confirm settings.
it is possible to enter the
keys are used to
to confirm settings.
it is possible to enter
the sub menu; the
to increase/reduce the temperature of the pouring
group. (min. 80°C max. 105°C).
Press ENTER
4.5 DREGS DRAW (Dregs Drawer)
It is possible to programme the number of cycles after
which it is necessary to empty out the dregs drawer.
Pressing ENTER
sub menu; the
select the option with DRAWER or with DIRECT
discharge.
Pressing ENTER
sub menu; the
increase/reduce the number of cycles (min. 1 - max.
40 for the option with DRAWER; min. 50 - max. NO
LIMIT for the option with DIRECT discharge).
Press ENTER
To reset the cycle count for emptying the dregs
drawer, remove the drawer for at least 15 seconds.
4.6 WASH CYCLE (Wash cycle)
It is possible to programme a FULL wash cycle or a
GROUP wash cycle only.
Pressing ENTER
the sub menu; the
to select the FULL wash cycle (recommended for
machines with cappuccino maker) or the GROUP
wash cycle (recommended for machines without cappuccino maker and with AUTOSTEAM).
Press ENTER to confirm settings.
Each time that the wash cycle is enabled, it will follow
the settings entered during this function.
4.7 WASH TIMES (Wash alarm times)
It is possible to programme four times at which to
enable the wash alarm.
Pressing ENTER
keys are used
to confirm settings.
it is possible to enter the
keys are used to
it is possible to enter the
keys are used to
to confirm settings.
it is possible to enter
keys are used
it is possible to enter the sub
51
Page 54
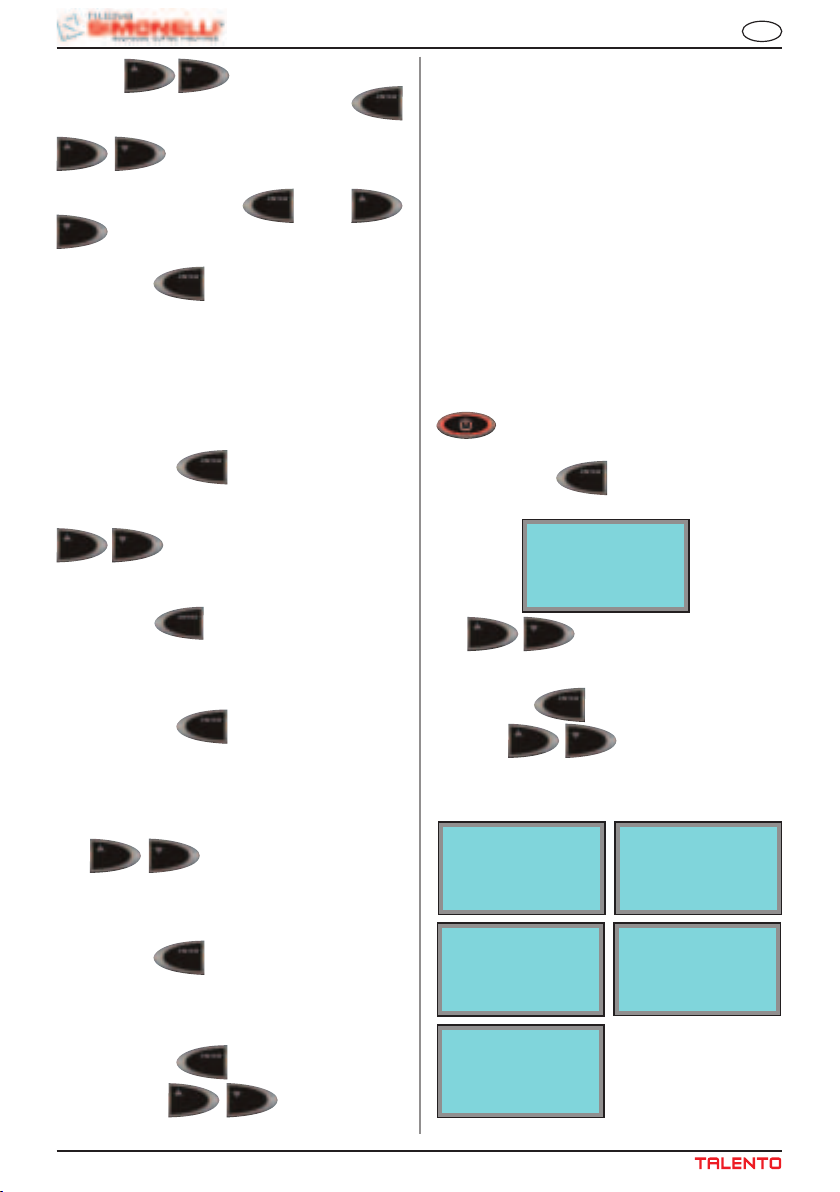
menu; the
time to be set. E.g. TIME 1, pressing ENTER
it is possible to enter the sub menu; the
keys are used to select the time,
HOURS and minutes MIN at which the wash alarm
must appear. Press ENTER
keys to set the time HOURS and minutes
MIN.
Press ENTER
At the set time or times, the display will read WASH;
this will disappear once the wash has been completed. If 00 is set for HOURS and 00 for MIN at the
TIMES 1,2,3,4, the alarm is not enabled.
4.8 WASH ALARM (Wash alarm cycles)
Pressing ENTER it is possible to enter the
sub menu. This programmes the number of cycles
after which the group wash warning is displayed. The
keys are used to increase/decrease
the number of cycles for viewing the group wash
message (min. 50 – max. NO LIMIT).
Press ENTER
4.9 MILK WASH ALARM
(Milk wash alarm)
Pressing ENTER
sub menu. This programmes the number of hours
from the last milk beverage being dispensed, after
which the cappuccino maker cleaning warning is
displayed.
The
decrease the number of hours before the cappuccino maker clearing message is displayed (min. NO
LIMIT – max. 12H).
Press ENTER
keys are used to select the
and the
to confirm settings.
to confirm settings.
it is possible to enter the
keys are used to increase /
to confirm settings.
(YES – NO) function. With the SEQUENTIAL
HEATING function enabled, YES, the control board
will first heat up the coffee heating element and then
the services heating element; with the SEQUENTIAL
HEATING function disabled, NO, the control board
will heat the two boilers at the same time.
4.11 PROG ON OFF (Programming automatic
switch on/off)
This is to programme the automatic ON/OFF times
for the machine.
The default setting is for the machine to be set to
“STANDBY” every day of the week and therefore,
it needs to be switched on/ off using the ON/OFF
key.
Pressing ENTER
sub menu and the display will read as follows:
The
tings for each day of the week.
Press ENTER
week; the
the hour and minutes for switching on and the hour
and minutes for switching off.
keys are used to view the set-
MONDAY
ON HOURS
MONDAY
OFF HOURS
it is possible to enter the
MONDAY
to set the required day of the
keys are used to select
MONDAY
ON MIN
MONDAY
OFF MIN
EN
4.10 SEQUENTIAL HEATING
(Sequential heating)
Pressing ENTER
sub menu. The
enable/disable the SEQUENTIAL HEATING
it is possible to enter the
keys are used to
52
MONDAY
DAY OFF
Page 55
EN
Press ENTER to confirm and then press
RESET
4.12 ENERGY SAVING
It is possible to enable/disable the power saving
mode (YES or NO).
Pressing ENTER
the sub menu, the
to select YES or NO to enable/disable the power
saving mode. If enabled, YES; when the machine
is switched off manually or automatically, the boiler
temperatures drop respectively to 80C for the coffee
boiler and 100C for the steam boiler.
Press ENTER
RESET
4.13 GROUP RINSE
It is possible to programme a standby time after
which the machine will carry out a group rinse cycle
using hot water only, to keep the coffee circuit hot
and clean.
Pressing ENTER
sub menu, the
select OFF – 5 – 10 – 20 – 40.
Press ENTER
RESET
to quit the sub menu.
it is possible to enter
keys are used
to confirm and then press
to quit the sub menu.
it is possible to enter the
keys are used to
to confirm and then press
to quit the sub menu.
Use the
MIN.
Press RESET
4.15 CHANGING THE PASSWORD
It is possible to set a new password to access the
programmable functions in technical mode.
Pressing ENTER
sub menu.
Enter the old password:
OLD PASSWORD XXXX
Enter the new password using a combination of 4 keys:
NEW PASSWORD XXXX
Confirm the password set previously:
CONFIRM PASSWORD XXXX
keys to set the HOUR and
to quit the sub menu.
it is possible to enter the
5. SAVE DATA
Pressing ENTER is possible to store all data
set during the programming stage in the machine’s
memory. Pressing RESET
quit the programming mode without saving.
it is possible to
4.14 DAY TIME
This programmes the day, hour and minutes, which
will be shown on the machine display.
Pressing ENTER
sub menu, the
select the required day.
Press ENTER
it is possible to enter the
keys are used to
to confirm.
DAY
FRIDAY
53
Page 56
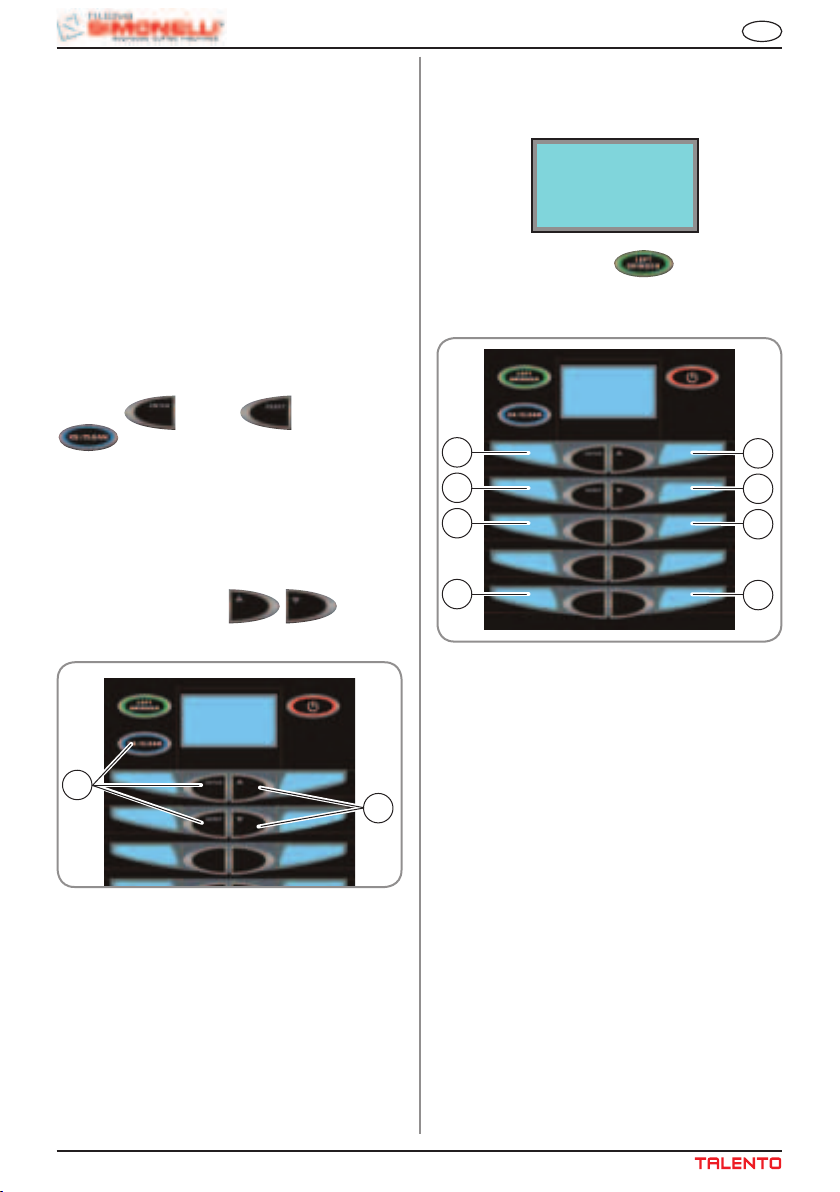
EN
8. SPECIAL MACHINE
SCALING FUNCTIONS
This operation may only be performed by a Specialist
Technician.
8.1 RESET DATA
With this function it is possible to remove incorrect operating data and to return to Standard
Programming settings (see PRESET VALUES).
To reset the machine parameters and return to
standard settings, with the machine switched off,
OFF, hold down the three keys:
, ENTER
8.2 TEST
To check machine charges, solenoid valves, heating
elements and motors, with the machine switched
off, OFF, hold down the,
8 seconds.
, RESET and X2/CLEAN
, for 8 seconds.
, keys for
8 .3 SOLENOID VALVE
TEST
After pressing the two keys, the display will read:
TEST
Press the LEFT GRINDER key to check the
correct operation of the solenoid valve coil.
1
2
3
4
5
6
7
8
Fig. 23
1
KEY
1 DATA RESET
2 TEST
54
2
Fig. 22
Fig. 21
KEY:
1 COFFEE SOLENOID’
2 LONG SOLENOID
3 AUTO LEVEL SOLENOID
4 HOT WATER SOLENOID
5 CAPPUCCINO SOLENOID
6 AUTOWASH SOLENOID
7 MILK AIR SOLENOID
8 STEAM SOLENOID
Page 57

EN
8.4 HEATING ELEMENTS
AND MOTORS TEST
After the two keys are pressed, the display shows:
TEST
Press the 2X/CLEANING key to check
the correct operation of the heating elements and
motors.
1
2
3
4
5
KEY:
1 COFFEE BOILER HEATING ELEMENT
2 STEAM BOILER HEATING ELEMENT
3 GROUP HEATING ELEMENT
4 RH GRINDER MOTOR
5 LH GRINDER MOTOR
6 GROUP TOP POSITION
7 GROUP BOTTOM POSITION
8 GROUP INTERMEDIATE POSITION
9 PUMP MOTOR
10 5V5 RELAY
6
7
8
9
10
Fig. 24
55
Page 58
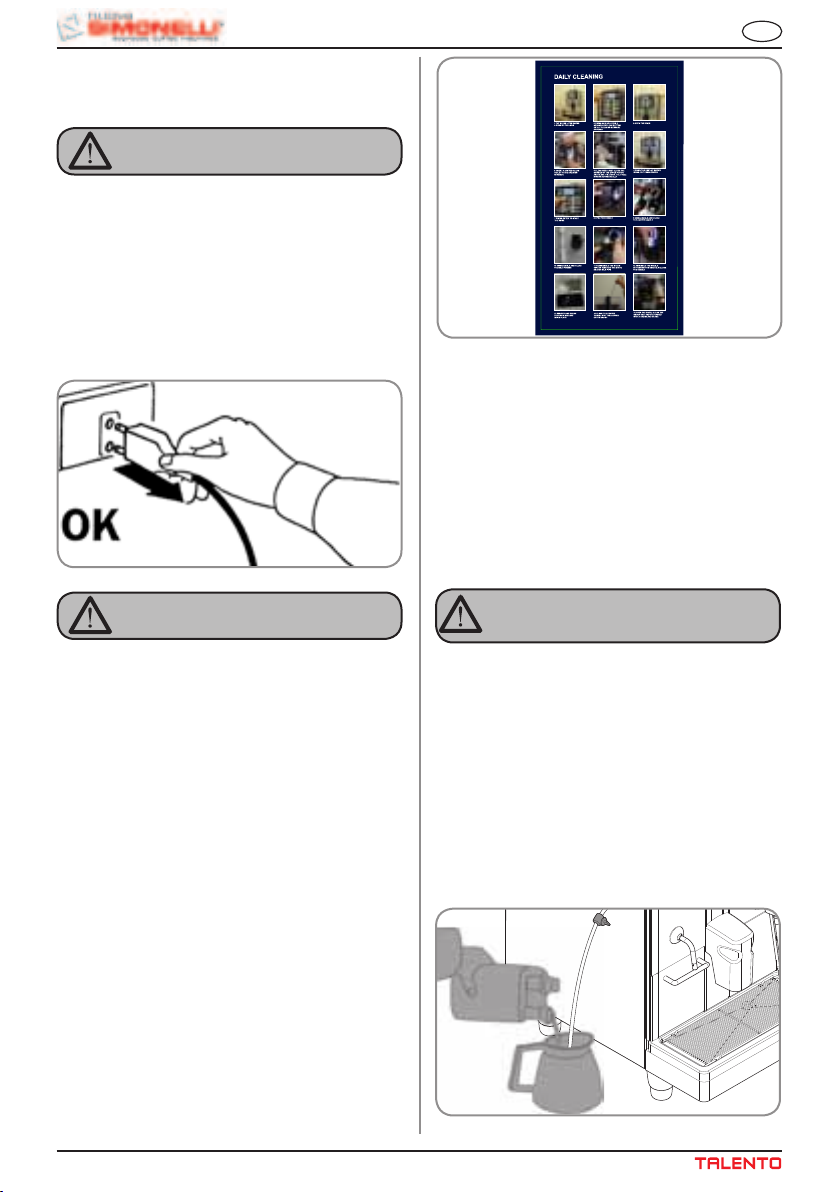
9. CLEANING AND
MAINTENANCE
WARNING
NEVER use water jets to clean the machine.
9.1 CLEANING THE
OUTSIDE OF THE
MACHINE
Before carrying out any cleaning operations, set the
machine to the “O” energy level, (machine switched
off and plug removed from the mains).
Fig. 25
EN
Fig. 26
The machine is equipped to wash the delivery unit
with detergent tablets and the milk circuit with liquid
cleansers.
The machine will begin a wash cycle that consists
of hot water deliveries alternated with pauses. The
whole cycle lasts approximately 4 minutes.
We recommend that you carry out a WASHING
CYCLE at least once a day using special cleansers.
WARNING
Never use solvents, chlorine-based products,
abrasives.
Cleaning the work area: remove the worktop, lifting
it up from the front and sliding it out. Remove the
water collection dish underneath and clean everything with hot water and cleansers.
Cleaning the external surfaces: To clean the panels, use a soft, damp cloth.
9.2 CLEANING THE
DELIVERY UNIT AND
THE MILK FOAMER
NOTE:
Follow the instructions on the label applied on
the inside of the front door.
56
CAUTION
RISK OF INTOXICATION.
We remind you not to interrupt a washing cycle
using detergent tablets once started, otherwise detergent residues may remain inside the
machine.
In order to execute the washing procedure proceed
as follows:
1. Position a container with water beside the
machine.
2. Put the suction tube inside it.
3. Add the specific cleaning product (20 ml [0.005
Gal] of Puly Milk).
Fig. 27
Page 59

EN
4. Press the following key:
5. Keep pressing down on the key for about 6 sec-
onds until the display reads:
AUTOwASHING
OPEN DOOR
INSERT CLEANSER
CLOSE DOOR
6. Open the front hatch on the machine.
7. Insert the cleanser tablet (puly Caff) and close
the hatch.
to the machine, when it is switched on again, the
group will position itself in the standby phase and the
display will read:
AUTOwASHING
OPEN DOOR
INSERT CLEANSER
CLOSE DOOR
1. Open the front hatch of the machine.
2. Place a detergent tab (Puly Caff) inside the
pouring chamber.
3. Press the bottom part, shower, of the top piston
with a damp cloth.
4. Close the hatch.
9.3 COFFEE HOLDER AND
COFFEE DELIVERY
UNIT CLEANING
Fig. 28
8. Press the bottom part, shower, of the top piston
with a damp cloth.
9. Close the hatch.
The display will read:
CLEANING
NOTE: Dose keys are disabled during washing.
At the end of the wash cycle, the display will read:
RINSE
PRESS ENTER
Position a container of plain water and press ENTER
, the machine will carry out a rinse cycle and
the display will read:
RINSE
RESTORATION OF A wA-
SHING DISCONTINUED
If the washing cycle is interrupted by cutting off power
RISK OF BURNS OR SCALDING
CAUTION
• Set the machine to the “O” energy level.
• Insert the key in the lock.
• Turn the key to open the hatch anticlockwise.
• Open the front hatch.
Fig. 29
• Remove any coffee residues that may have
deposited on the sides of the conveyor using
the fine brush provided.
Fig. 30
• Use a damp cloth and/or a little mild detergent
to clean the coffee bean bells.
57
Page 60
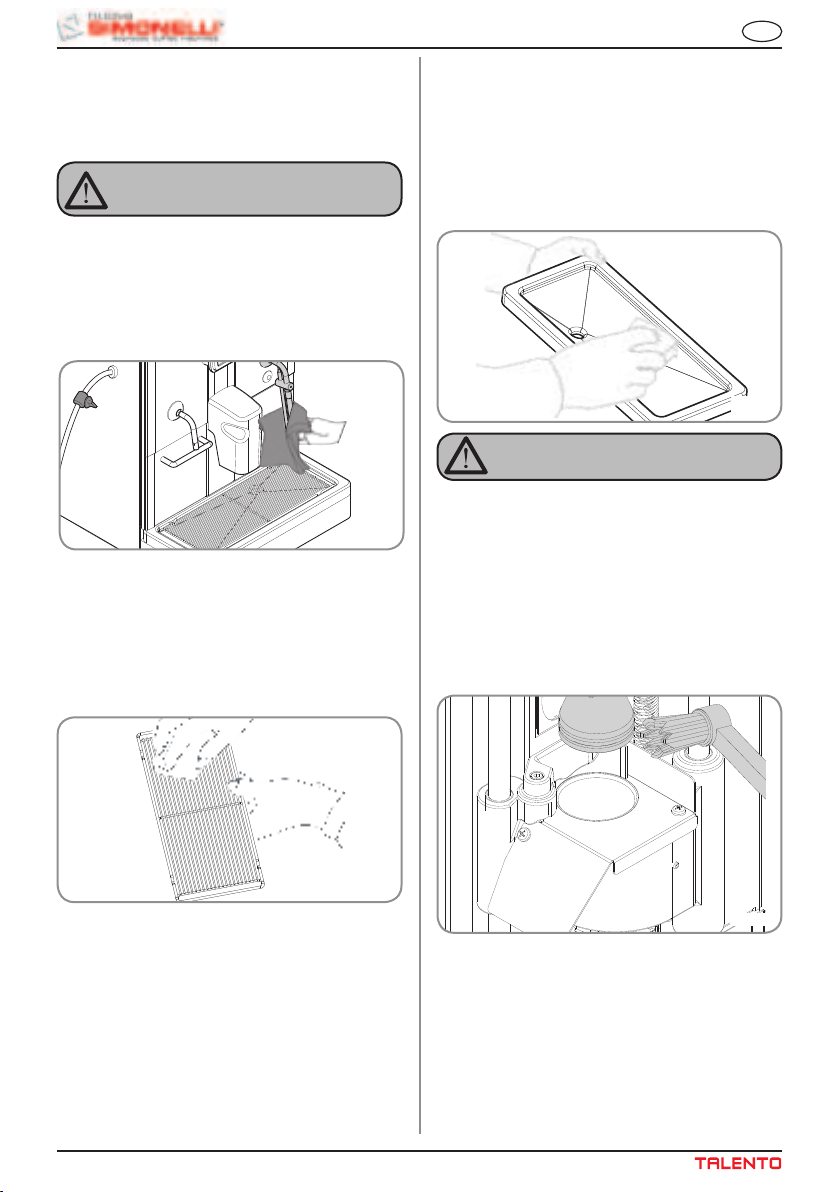
EN
9.4 CLEANING THE STEAM
NOZZLE
Clean the steam nozzle each time it is used to warm
up drinks.
CAUTION
RISK OF BURNS OR SCALDING
If cleaned when the nozzle is still hot, avoid
touching it with bare hands.
Use a cloth dipped in hot water and/or a neutral
cleanser.
Fig. 31
9.5 CLEANING THE DROP
COLLECTING TRAY
GRID
• Wash the grid clean with a brush and hot water
and soap.
9.6 CLEANING THE WATER
COLLECTING TRAY
• Clean the water collecting tray with hot water
and soap, if necessary using a brush.
NOTA: The water collecting tray can be washed in
the dishwasher.
Fig. 33
CAUTION
Never use any sort of solvent.
9.7 CLEANING THE
GASKET
• Use a small brush to clean any deposits or
coffee residues off the piston and the delivery
unit site or any other areas soiled with coffee.
58
Fig. 32
Fig. 34
Page 61
EN
9.8 CLEANING THE MILK
FOAMER
NOTE:
Follow the instructions applied on the label on
the inside of the front door too.
IMPORTANT: Proceed with caution
• Remove the lid of the pouring nozzle by pulling
it towards you.
• Remove the cappuccino maker from the nozzle
by sliding it upwards.
• Disconnect all of the connected pipes.
• Remove the cappuccino maker and wash it
with care.
NOTE: For intervals of more than three hours
between one cappuccino and the next, it is
advisable to wash the cappuccino maker by
taking in water through the milk suction pipe
instead of milk.
• To reassemble proceed inversely, attaching the
milk foamer tubes properly.
NOTA: To make the reassembling procedure easier,
an explanatory label has been attached to
the front door.
Fig. 35
59
Page 62
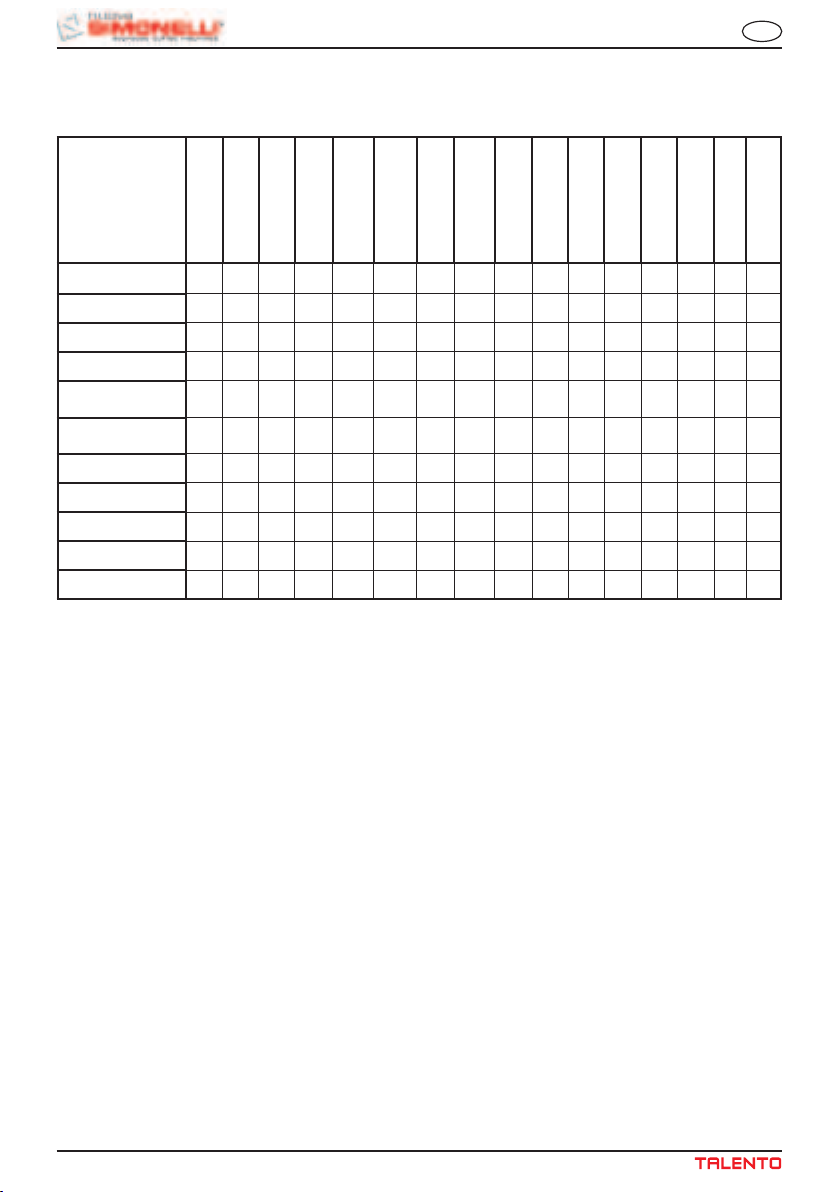
10. STANDARD SETTING TABLE
RISTRETTO
2 RISTRETTO
ESPRESSO
2 ESPRESSO
COFFEE'
2 COFFEE'
AMERICANO
2 AMERICANO
MILK TIME
NO AIR TIME
WASHING
MILK TIME 2
NO AIR TIME 2
12 22 10 18 15 22 15 20
0 0 10 18 15 22 15 20
1 1 1 1 1 1 1 1
10 18
0 0
CAPPUCCINO
2 CAPPUCCINO
MACCHIATO
EN
2 MACCHIATO
CAFFELLATTE
CAFFELLATTE
MILK
2 MILK
GRINDER TIME
GRINDER
VOLUME CC
PREINFUSIONE
PRESSING
WATER
2,5 3,5 3 4 3,5 4,5 2,5 4,5 2,5 3,5 2,5 3,5 3 3,5
RH
RH RH
42 55 45 65 120 160 50 70 50 70 40 55 60 90
1,5 1,5 1,5 1,5 0 0 1,5 1,5 1,5 1,5 1,5 1,5 0 0
Y N Y N N N Y N Y N N N Y N
0 0 0 0 0 0 95 135 0 0 0 0 0 0
RH LH LH RH RH RH
RH
RH RH LH LH
60
Page 63

EN
11. MACHINE FUNCTIONS MESSAGES
DISPLAY CAUSA EFFECT SOLUTION NOTE
GROUNDS
DRAWER FULL
MACHINERY READY
CASSETTO PIENO
Grounds drawer
full. The number
of coffee grounds
in the drawer
has reached the
number set during programming
stage.
Keys delivering coffee based drinks
are blocked.
Pull out the grounds
drawer and empty it
into a garbage bag.
Put the drawer
back into place,
when the display
reads:
MACHINERY READY
DRAwER OUT
GROUNDS
DRAWER OUT OF
PLACE
MACHINERY READY
DRAwER OUT
FRONT PANEL
POSITION
Grounds drawer
out of place.
Keys delivering coffee based drinks
are blocked.
Front panel open. The machine func-
tions are blocked.
Insert the grounds
drawer into its special slot.
Should this alarm
turn on during the
delivery of a coffee
based drink:
• up until brewing,
the alarm is displayed but the drink
will be delivered;
•afterbrewing,the
cycle in progress
will be suspended.
The coffee cycle
will recommence
only when the
drawer has been
put back in its
place.
Should this alarm
turn on during the
group movement
phase:
• the movement
will be interrupted
When the drawer is
back in its place,
the reset group will
be repeated.
Close the front
panel.
MACHINERY OFF
FRONT PANEL OPEN
61
Page 64

DISPLAY CAUSA EFFECT SOLUTION NOTE
WASHING CYCLE
IS NEEDED
AUTOwASHING ALARM
The set number of
cycles programmed
before washing,
has been exceeded.
The message will
appear on the
display but the
machine will continue to deliver drinks.
Do a washing
cycle (see paragraph WASHING
THE DELIVERY
UNIT AND MILK
FOAMER).
EN
UPPER PISTON
MOTOR
GROUP ALARM
XXXXXX
GROUP ALARM
HEATER FILLING
ALARM
FILLING ALARM
TURBINE ALARM
For alarm found
the display control
unit alternates with
the message about
drink under way
with the error message associated
with this function.
Eg:
DOSING ERROR
During the group
handling phase,
the upper piston
exceeded maximum set time by
10 seconds before
recognizing motor
pickup.
The heater filling
stage has exceeded the 3 minute
maximum time;
the probe level is
uncovered.
The volume counter will not send
any impulses to the
control unit for 5
seconds.
The control unit will
halt whatever cycle
is on by turning off
both the movement
actuator and those
for drink delivery;
the operator will not
be able to make
selections on the
keyboard.
The machine will
stop.
The delivery will
continue for up to
60 seconds or for
as long as any of
the coffee based
drink keys are
pressed.
Open and close the
machine door.
Open and close the
machine door.
The control unit will
repeat the machine
starting up procedure.
If the alarm reapp
ears after the second time of taying,
call the Service
Technician.
If the alarm reapp
ears after the second time of taying,
call the Service
Technician.
In case the alarm
persist s, the
machine can be
used as a manual
appliance.
• Press the selected key to start the
dosing;
• Once the desired
dose has been
delivered in the
cup, press the
same key to halt
the dose being
delivered.
Call the Service
Technician.
62
Page 65

EN
DISPLAY CAUSA EFFECT SOLUTION NOTE
TEMPERATURE
PROBE
MALFUNCTION
One of the two temperature probes is
broken.
Coffee will not be
delivered.
Substitute the broken
probe.
This alarm blocks
all deliveries.
ALARM
ALARM:
COFFEE TEMP
ALARM:
STEAM TEMP.
63
Page 66
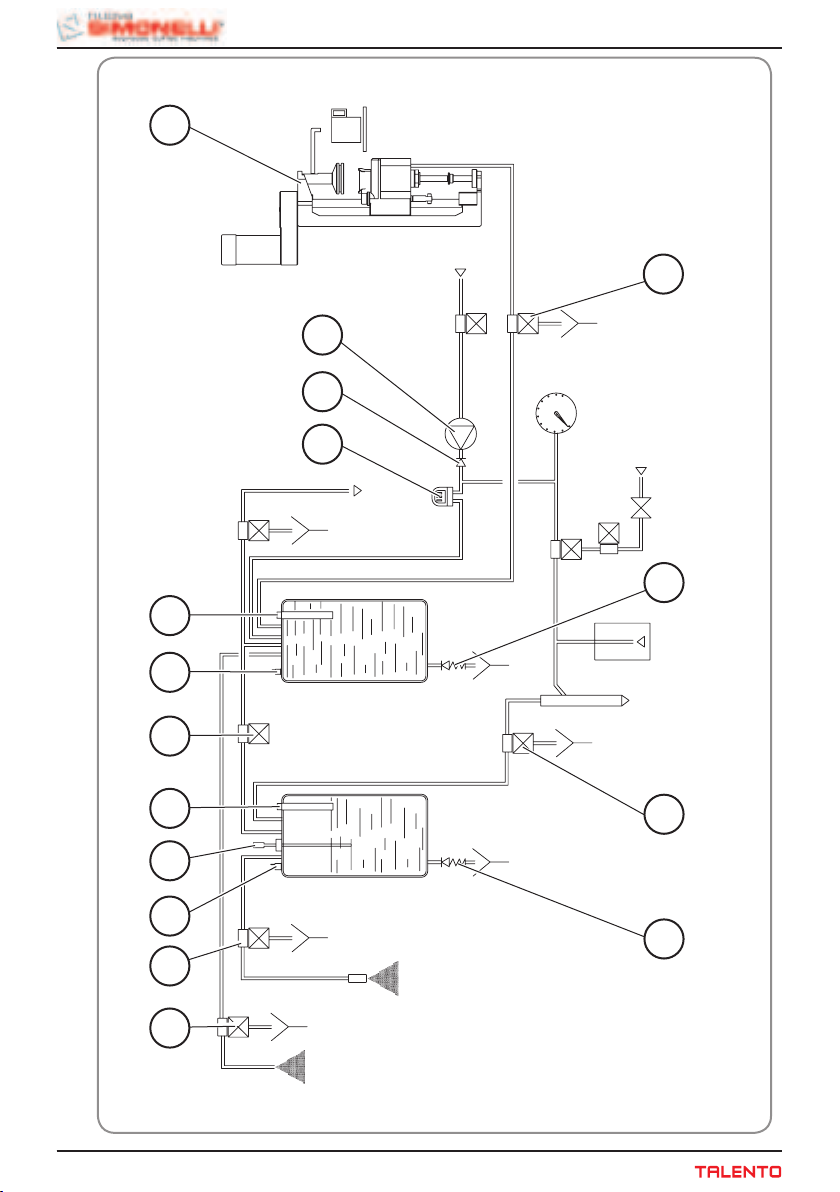
3215
5
4114
IMPIANTO IDRAULICO / PLUMBING SYSTEM
64
13 12 9 8 10 7 9 10 1
Page 67

LEGEND
1 Brewing unit
2 Retaining valve
3 Pump
4 Safety valve
5 Delyvery solenoid valve
6 Heating element
7 Level solenoid valve
8 Level probe
9 Safety termostat
10 Temperature probe
11 Milkfoamer solenoid valve
12 Steam solenoid valve
13 Hot water solenoid valve
14 Water tank
15 Flowmeter
IMPIANTO IDRAULICO / PLUMBING SYSTEM
LEGENDA
1 Unità di produzione
2 Valvola di ritegno
3 Pompa
4 Valvola sicurezza
5 Elettrovalvola erogatore
6 Elettrovalvola livello
7 Sonda livello
8 Termostato sicurezza
9 Sonda temperatura
10 Elettrovalvola Milkfoamer
11 Elettrovalvola vapore
12 Elettrovalvola acqua calda
13 Elettrovalvola acqua calda
14 Serbatoio acqua
15 Flussimetro
65
Page 68
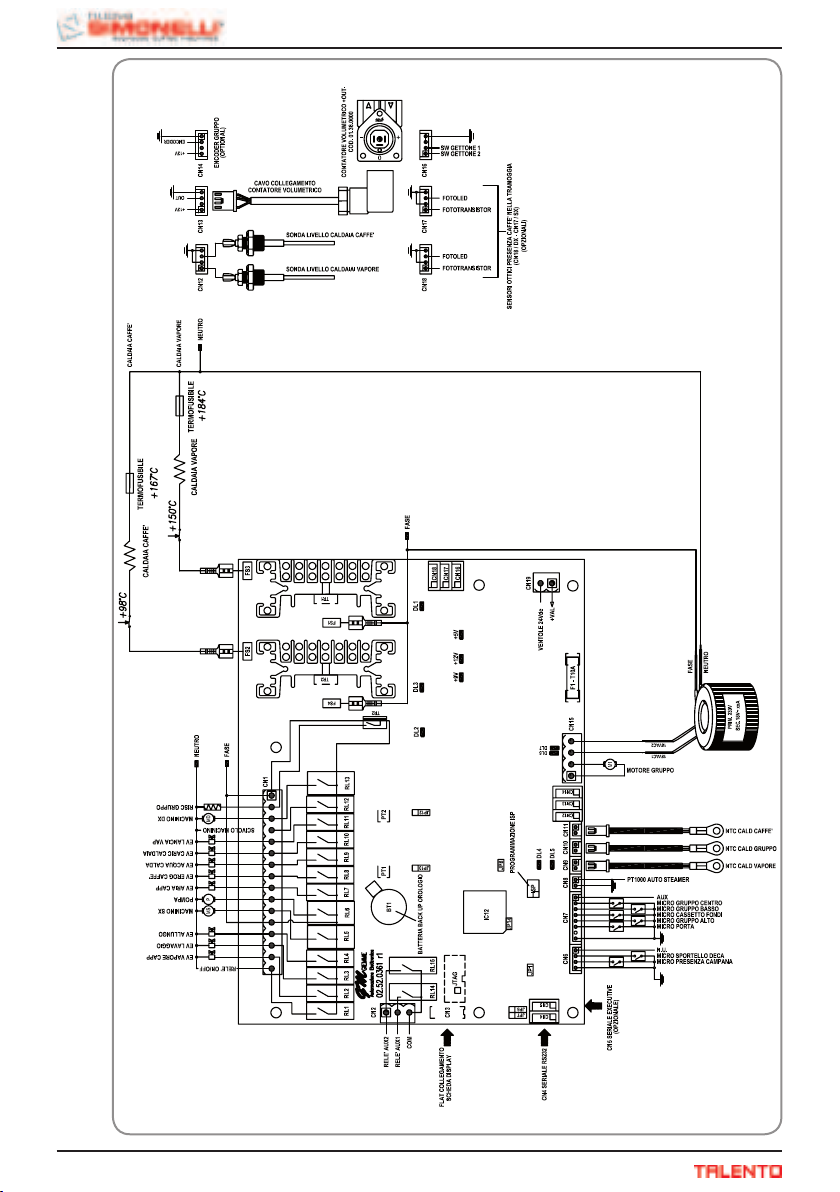
IMPIANTO ELETTRICO / ELECTRICAL SYSTEM
66
Page 69

LED KEY
IMPIANTO ELETTRICO / ELECTRICAL SYSTEM
LEGENDA LED
DL1 Command steam heating boiler
DL2 Heating control group
DL1 Comando riscaldamento caldaia vapore
DL2 Comando riscaldamento gruppo
DL3 Command boiler heating coffee
DL4 Pulse meter volumetric
DL3 Comando riscaldamento caldaia caffè
DL4 impulsi contatore volumetrico
DL5 Volumetric pulse encoder
DL6 Engine group climb
DL7 Engine Group down
DL5 impulsi encoder volumetrico
DL6 Motore gruppo salita
DL7 Motore gruppo discesa
+9V 9V Regulator
+12V 12V Regulator
+5V 5V Regulator
+9V Regolatore 9V
+12V Regolatore 12V
+5V Regolatore 5V
JUMPER KEY
JP1 N.U.
JP2 N.U.
LEGENDA JUMPER
JP1 N.U.
JP2 N.U.
JP3 N.U.
JP3 N.U.
JP4 N.U.
JP4 N.U.
JP5 N.U.
JP6 Serial RS232 or Executive
JP5 N.U.
JP6 Seriale RS232 o Executive
JP7 Serial RS232 or Executive
JP8 Enabling watch dog
JP9 Electric sensor presence hopper right
JP7 Seriale RS232 o Executive
JP8 Abilitazione watch dog
JP9 Sensore elettrico presenza tramoggia dx
JP10 Logical inversion optical sensor right
JP10 Inversione logica sensore ottico dx
JP11 Electric sensor presence hopper left
JP11 Sensore elettrico presenza tramoggia sx
JP12 Logical inversion optical sensor left
JP12 Inversione logica sensore ottico sx
JP13 Serial Power +5 V / +12 V
JP13 Alimentazione seriale +5V / +12V
detect coffee in the hopper right
JUMPER KEY
PT1 Adjusting sensitivity optical sensor to
presenza caffè nella tramoggia dx
LEGENDA JUMPER
PT1 Regolazione sensibilità sensore ottico
detect coffee in the hopper left
PT2 Adjusting sensitivity optical sensor to
presenza caffè nella tramoggia dx
PT2 Regolazione sensibilità sensore ottico
67
BT1 Battery back-up clock
BT1 Batteria back up orologio
Page 70

NOTE:
...................................................................................................................................
...................................................................................................................................
...................................................................................................................................
...................................................................................................................................
...................................................................................................................................
...................................................................................................................................
...................................................................................................................................
...................................................................................................................................
...................................................................................................................................
...................................................................................................................................
...................................................................................................................................
...................................................................................................................................
...................................................................................................................................
...................................................................................................................................
...................................................................................................................................
...................................................................................................................................
...................................................................................................................................
...................................................................................................................................
...................................................................................................................................
...................................................................................................................................
...................................................................................................................................
...................................................................................................................................
...................................................................................................................................
...................................................................................................................................
...................................................................................................................................
...................................................................................................................................
Page 71

Page 72

Eprom 0.16
Codice 31000344
Edizione 01 del 09/2009
Nuova Distribution Centre
LLC 6940Salashan PKWY BLDG A 98248 Ferdale, WA
Tel. +1.360.3662226
Fax +1.3603664015
videoconf.+1.360.3188595
www.nuovasimonelli.it
Graphics by: TYPE ENGINEERING S.r.l
Via M. d’Antegiano, 6
62020 Belforte del Chienti
Macerata Italy
Tel. +39.0733.9501
Fax +39.0733-950242
www.nuovasimonelli.it
E-mail: [email protected]
La Nuova Simonelli si riserva di apportare tutte le modifiche ritenute necessarie.
 Loading...