

Page 1

Easy User Guide
MAC 600
ECG SYSTEM
Page 2
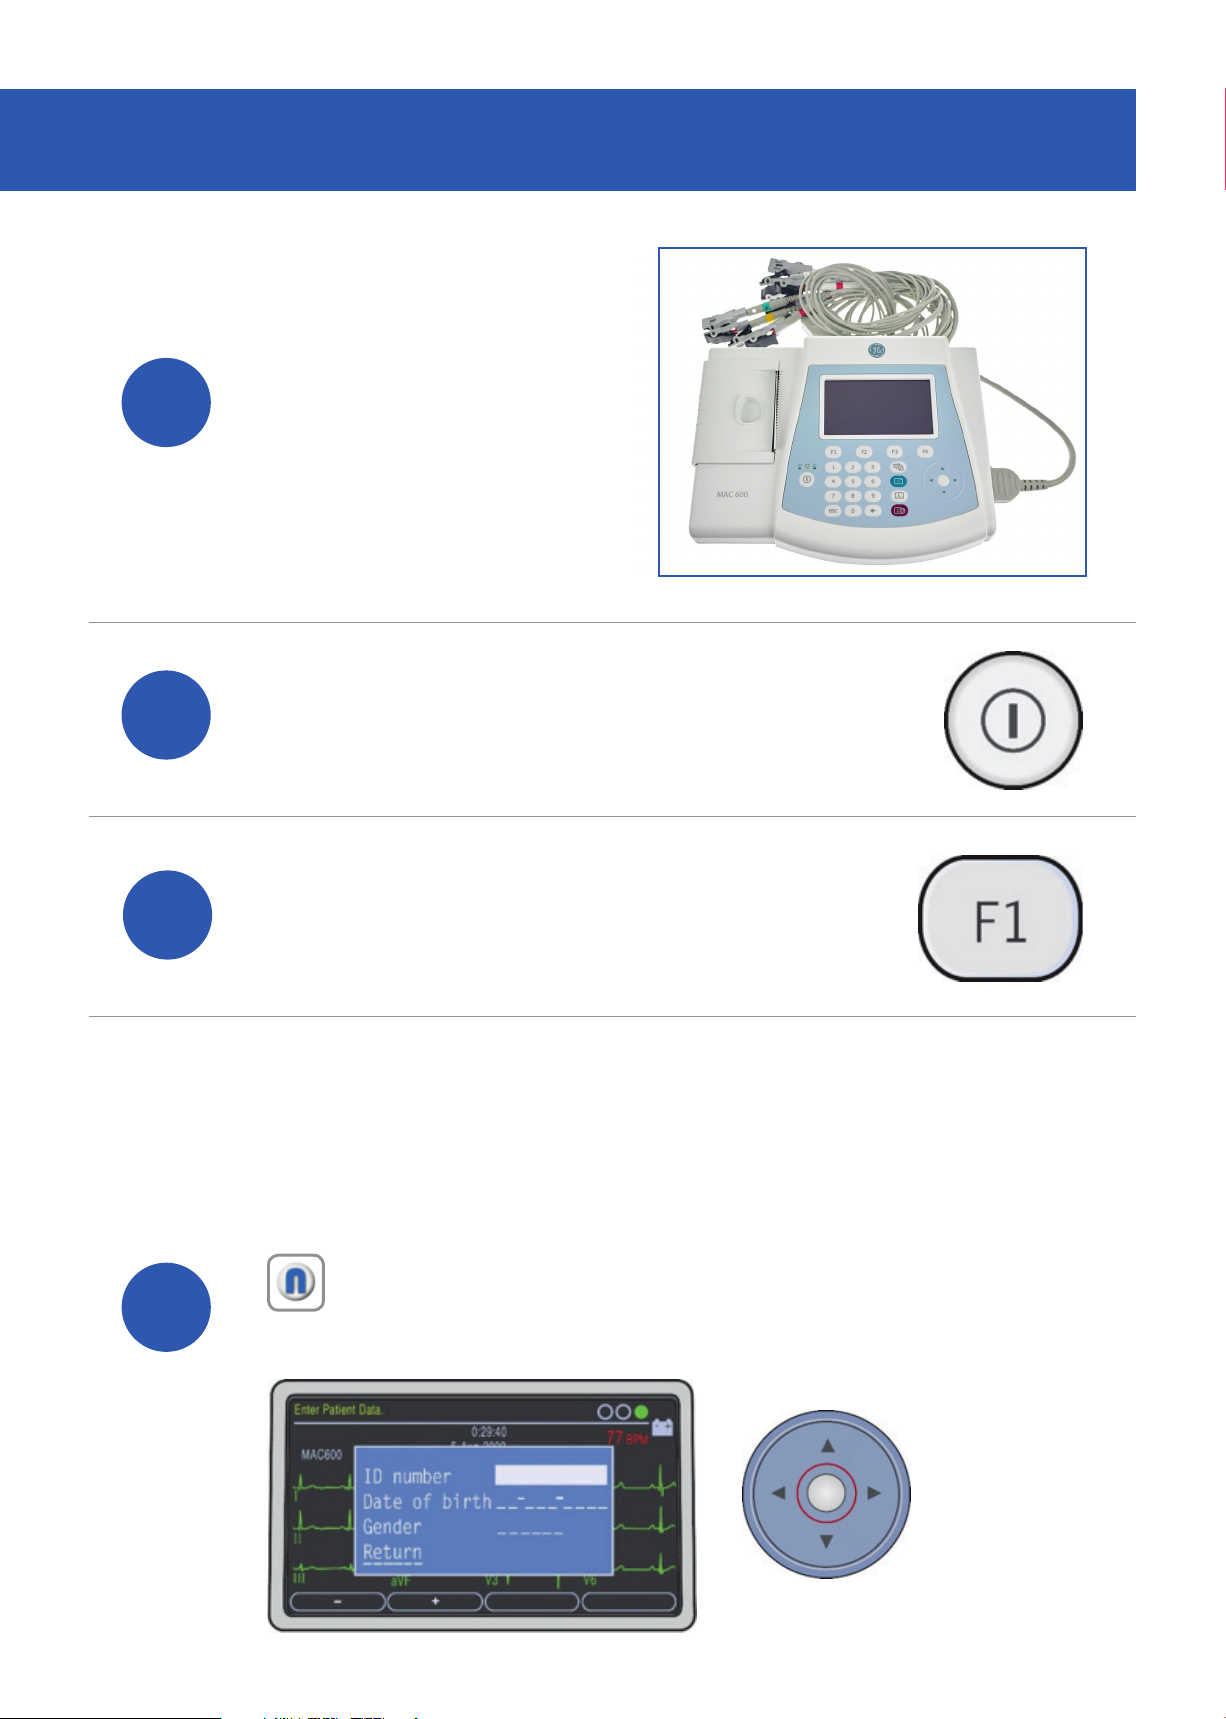
ACQUIRING AN ECG
Connect the patient
1
2
3
lead to the MAC 600
ECG system.
Power on the device.
Press the ‘F1’ key to access
the patient details screen.
4
Enter your patient’s details using the keypad
and arrow pad. To conrm the details, press
the white circle which is located in the centre
of the arrow pad.
Note: The Patient ID for EMIS Clinical Systems is the patient’s EMIS
Number. For the TPP SystmOne and InPS Vision clinical systems the
Patient ID is the patient’s NHS/CHI Number.
Page 3
5
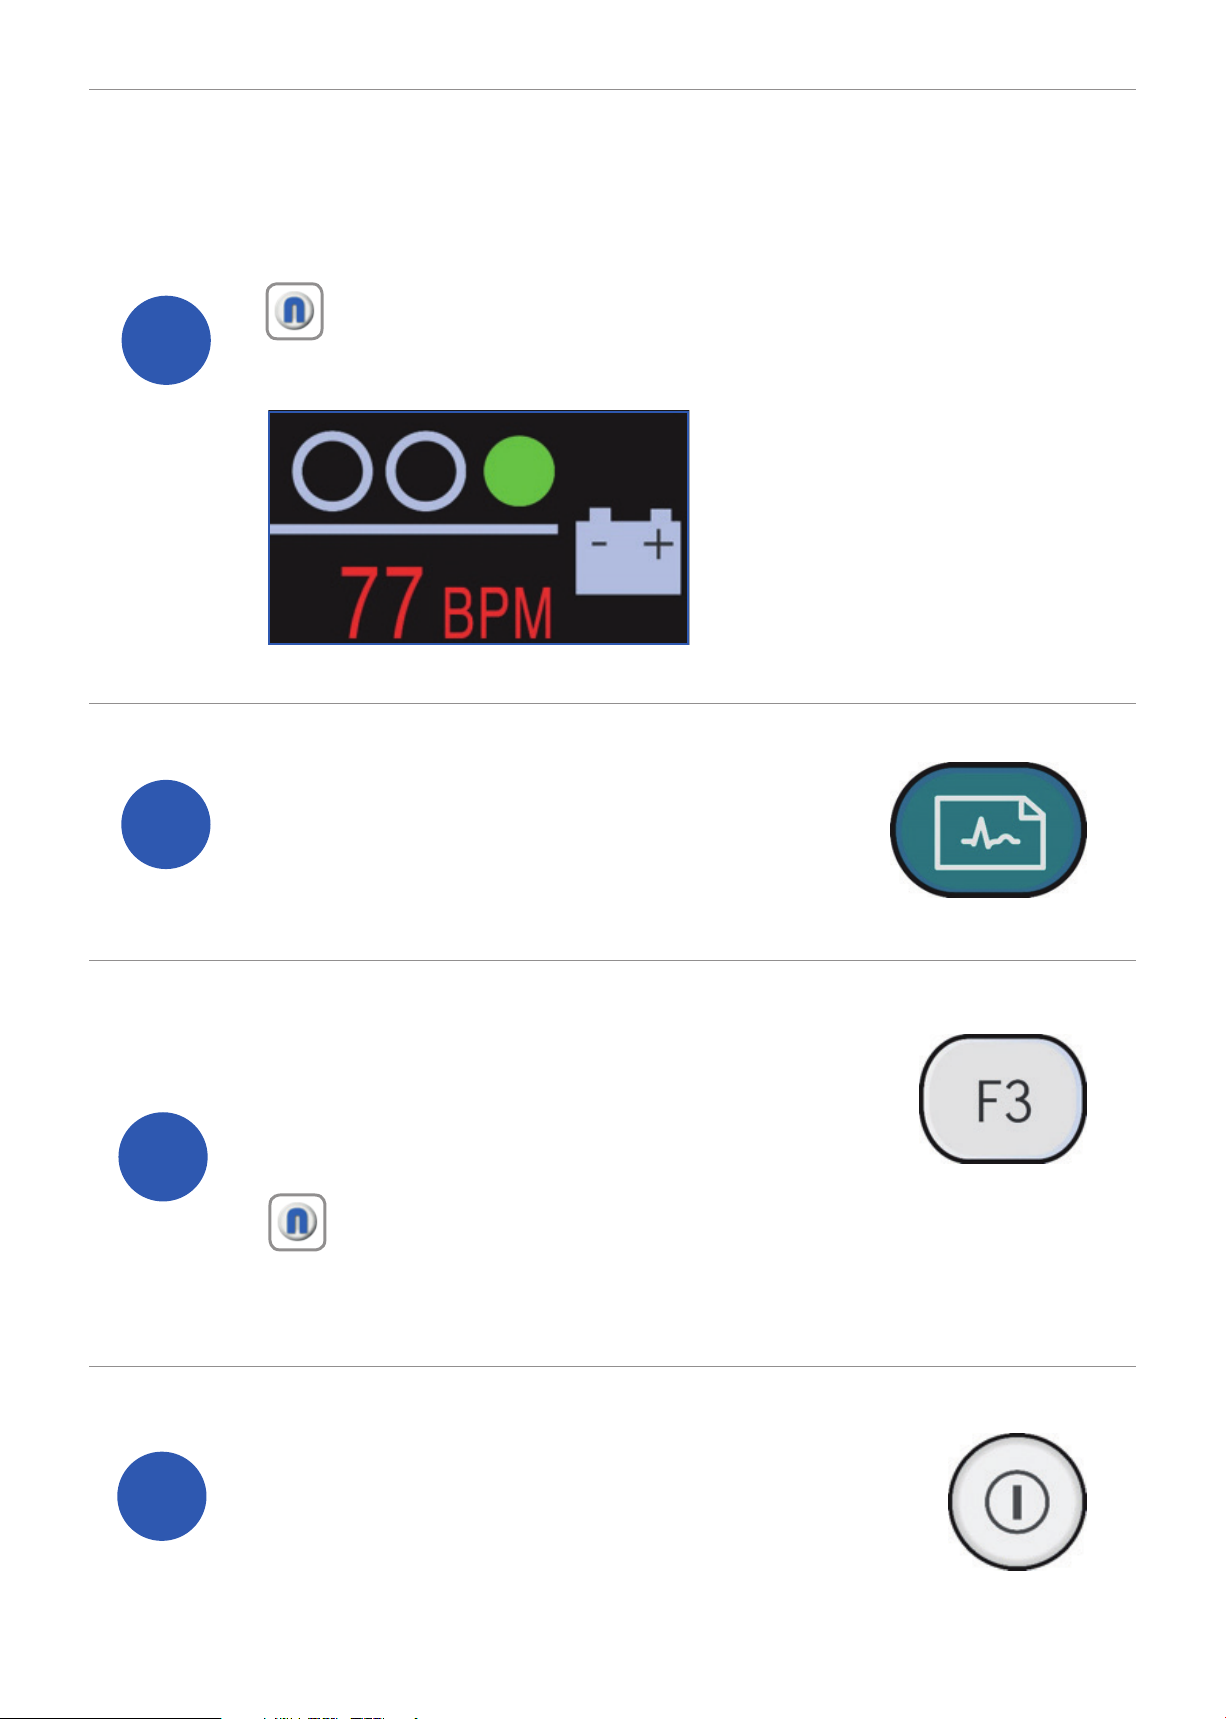
To check the quality of your ECG, use the
trace indicator which is located in the top right
of the screen.
Note: Green symbolises good connectivity with the patient.
Orange and Red indicates interference and/or possible lead
disconnections.
6
7
To capture your ECG trace press
the ‘ECG acquisition’ button.
If the captured ECG meets your
requirements, press the ‘F3’ button
to store the ECG to the SD card.
Note: If you would like a print out of your ECG, press the ‘F1’
button after completing the storage process. If you would like
to recapture your ECG you can press the ‘F4’ button.
8
Power off the system and remove
the lead wires from the patient.
Page 4
1
DOWNLOADING THE RESULTS
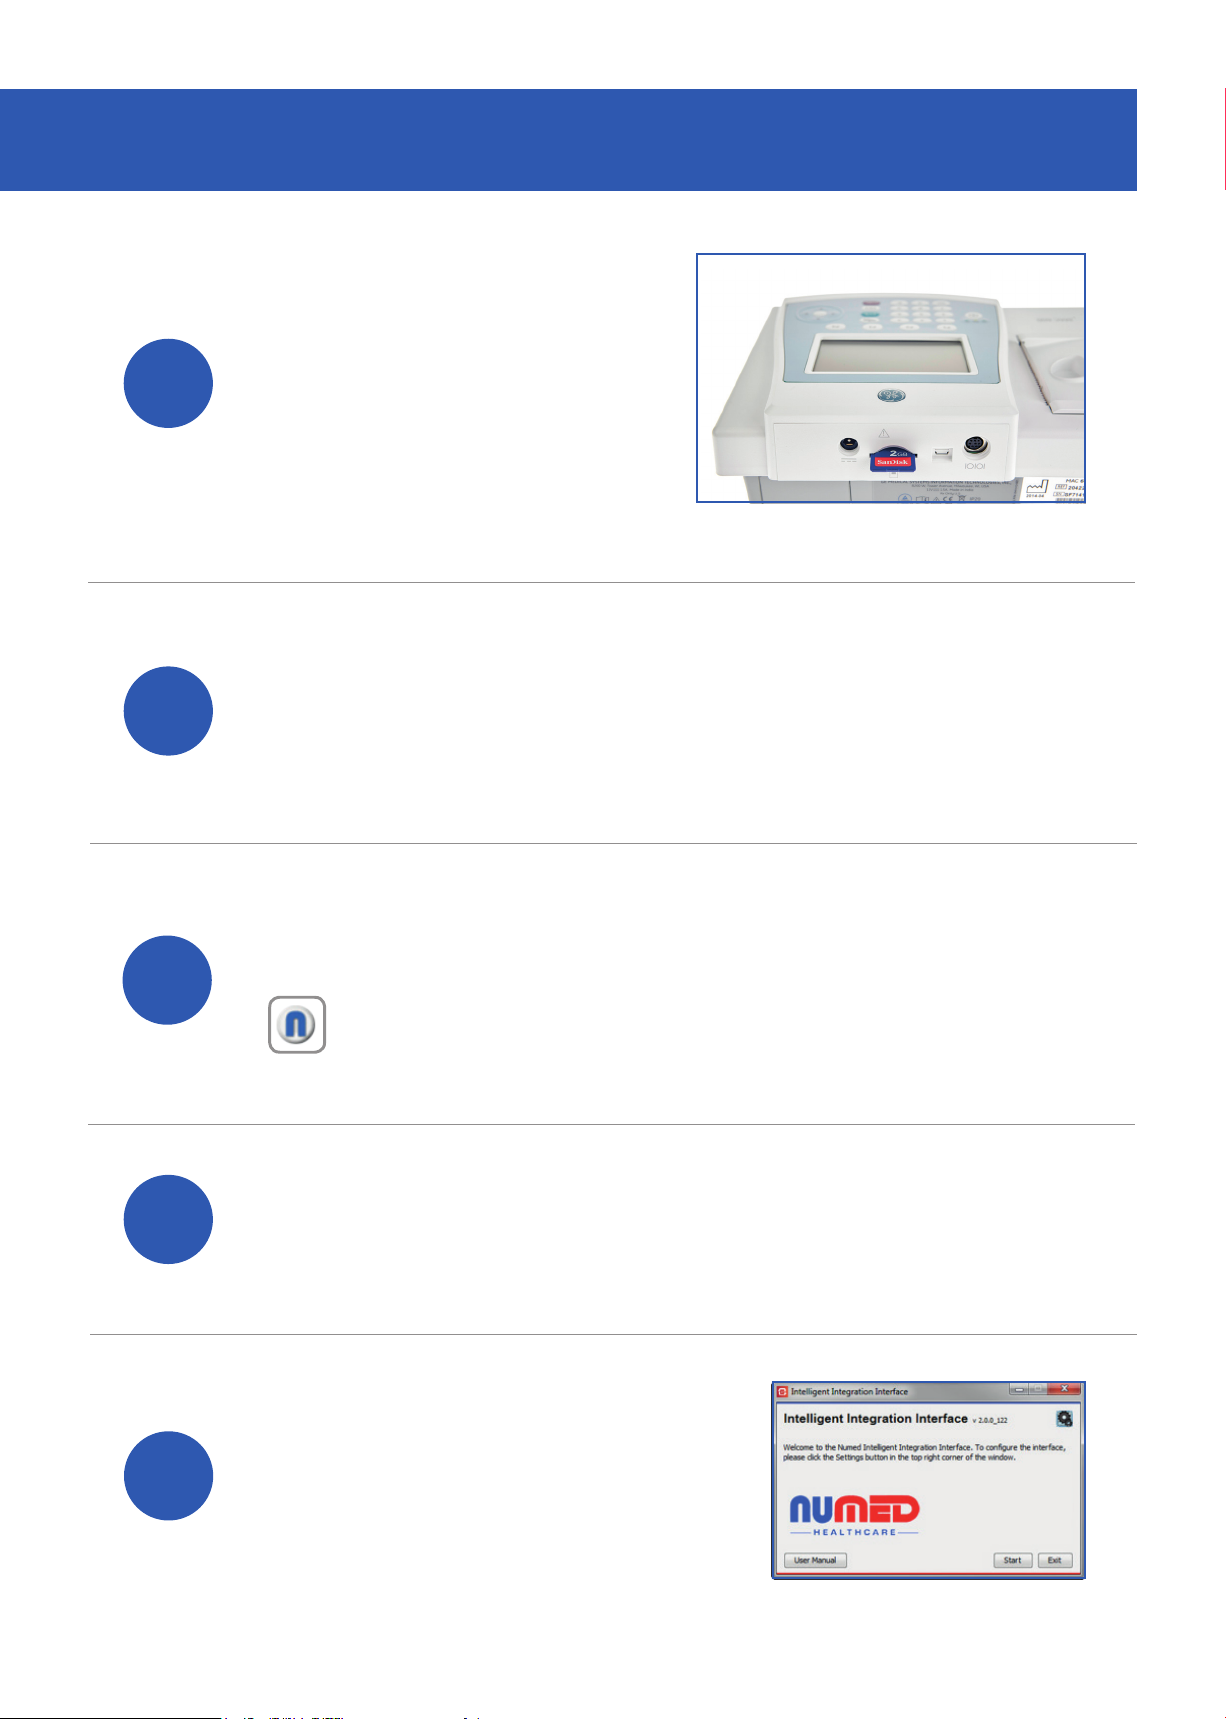
Locate and remove the
SD card that is plugged
into the back of the
MAC 600 ECG system.
2
3
4
Connect the card reader to your PC (if it is not
already connected) and place the SD card into
the corresponding slot.
Open the patient’s medical record in your
clinical system.
Note: InPS Vision hosted and AEROS sites must ensure
that Numed Enterprise Link software is running on the
remote desktop.
Double click the I3 icon, this is usually found
on your taskbar or desktop. This will launch the
5
I3 software.
Click the ‘Start’ button.
Page 5
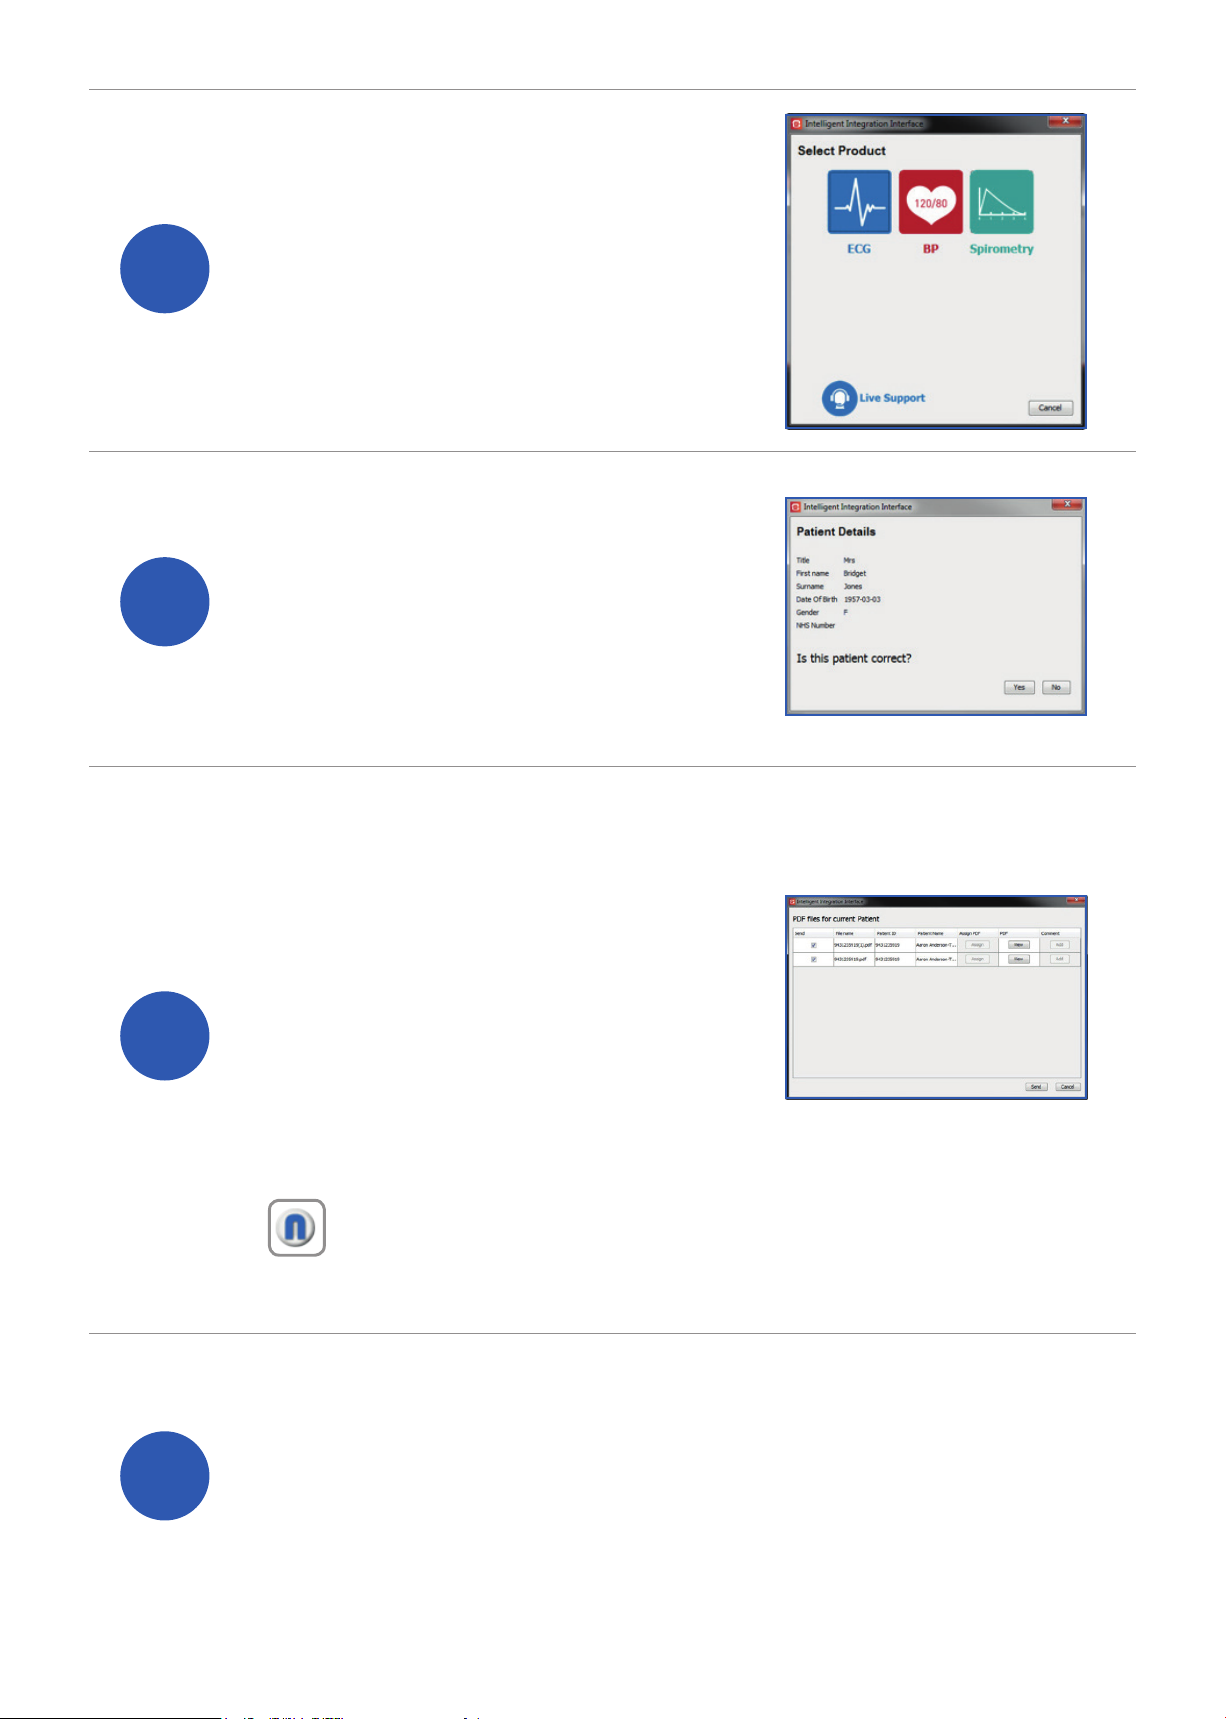
Select ‘ECG’ from the product
selection screen – if you have
6
7
more than one ECG system
you may need to select
‘MAC PDF ler’.
If requested, conrm the
patient’s details are correct
then click ‘Yes’.
You will then be presented
8
9
with a list of ECGs that are
ready to be uploaded to
the patient’s medical record.
ECGs that match the
currently selected patient
within the clinical system will
be automatically selected.
Note: Batch processing (more than one ECG) is only available
for EMIS and InPS clinical system users.
Selected items will be automatically transferred.
If you do not wish to upload a particular ECG,
deselect the item you wish to exclude. When you
are ready transfer the results click ‘Send’.
Page 6
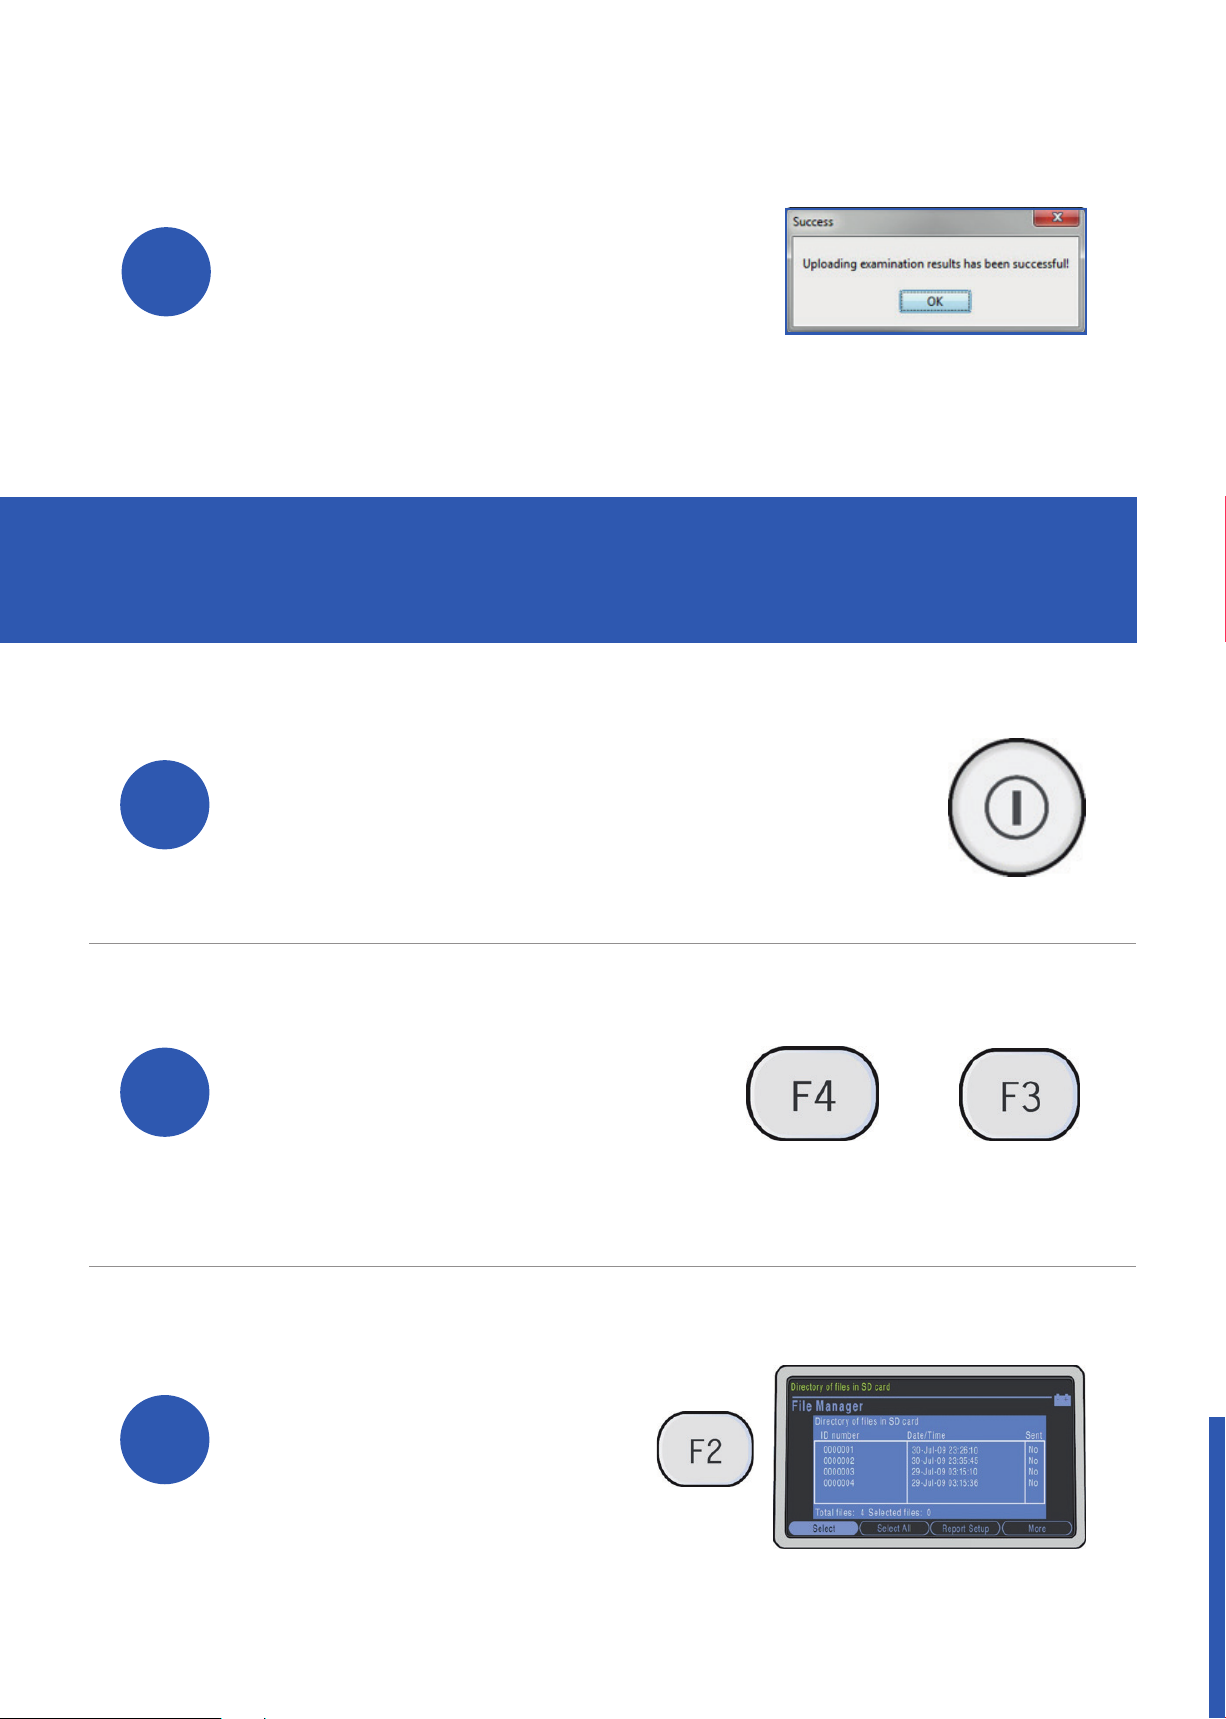
A conrmation message
will be displayed when
the ECG(s) have been
10
1
successfully uploaded to
the patient’s medical record.
Click ‘OK’ to complete the
process.
ADDITIONAL: HOW TO DELETE
THE CONTENTS OF YOUR SD CARD
Power on the MAC 600 ECG system.
2
3
Access File Manager by
pressing ‘F4’ for More and
then ‘F3’ for File Manager.
Once File Manager
has loaded, press
‘F2’ to select all ECGs.
+
Page 7
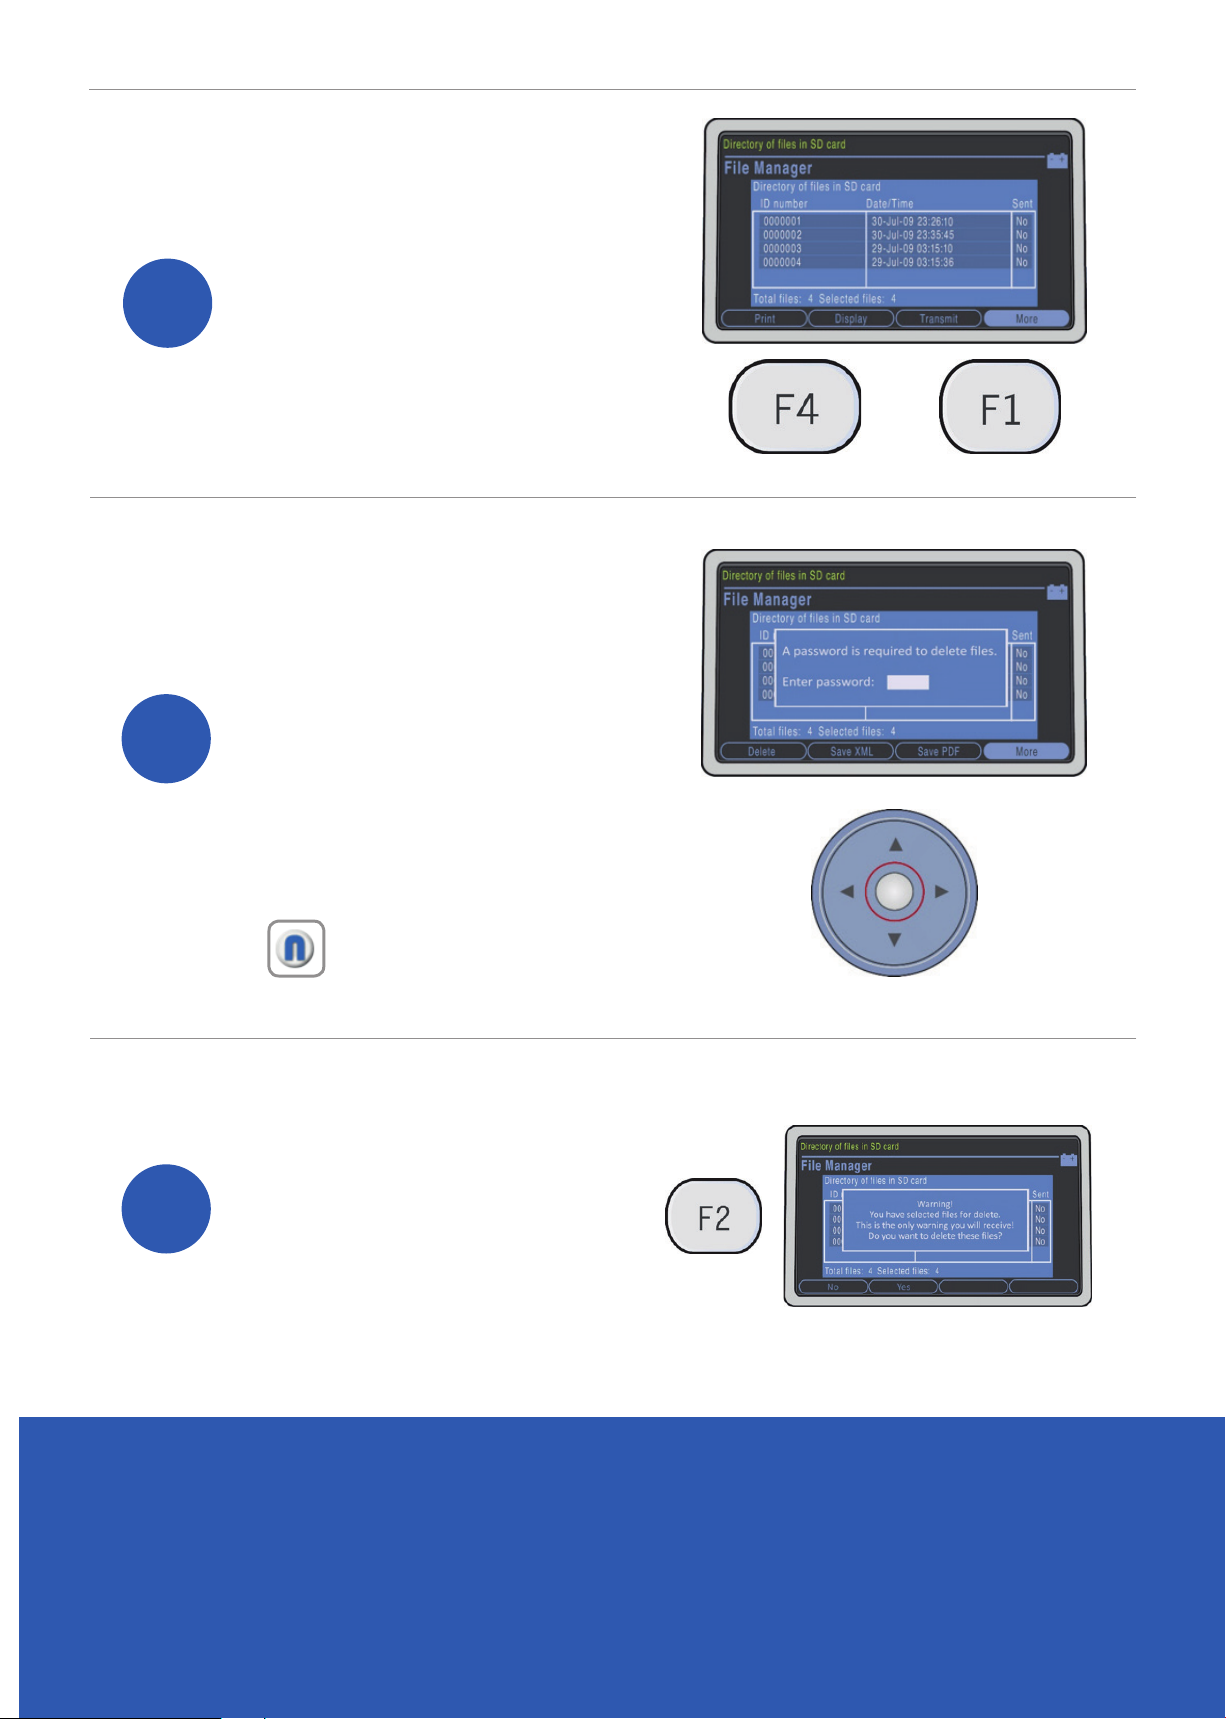
Press ‘F4’ to access
4
5
more options and then
‘F1’ to delete.
You will be prompted
to enter your system
password. Use the
keypad to enter your
password and then
submit using the white
circle in the middle
of the arrow pad.
+
6
Note: The default password is ‘1111’.
You will receive a
nal warning message,
press ‘F2’ to accept
this. This has now
deleted the contents
of your SD card.
If you experience any problems using the
MAC 600 ECG System, please contact our technical
support team on: 0114 399 0010 or visit: www.numed.co.uk/support
Page 8

SUPPLY | INSTAL LATION | TR AINING | SUPPOR T
Alliance House, Roman Ridge Road, Sheffield, S9 1GB Telephone: 0114 243 3896 Fax: 0114 243 3413
www.numed.co.uk
 Loading...