

Numatic CRO 8055 Troubleshooting Manual
Trouble Shooting and Help Guide
FloorCare
CRO 8055
The CRO has been designed to scrub and dry a variety of hard oors.
This machine has not been designed to pick up large objects, make sure you pre-sweep the oor before use.
For optimum performance make sure you keep the lters, hoses and oor tool blades clean and free from debris.
Make sure you read and fully
understand your CRO manual
before using the machine.
PROBLEM CAUSE SOLUTION
Machine will not operate Fuses
Key in the ‘OFF’ position
Low battery charge
Stop button in ‘OFF’ mode
Connected and charging
Vacuum will not operate Floor tool in raised position Lower oor-tool
Poor water pick-up Waste-water tank full
Vacuum hose
Loose hose connections
Debris basket lter
Poor separator seal
Damaged separator seal
Damaged vacuum hose
Damaged oor-tool blades
Low battery charge
No brush / scrub function No brushes tted
Brush deck raised
Little or no water ow Clean-water tank empty
Clean-water tank lter
Incorrect water ow setting
Brush deck raised
Machine just ‘stops’ while
operating
After every time the machine is used.
The machine should be left in a clean and tidy state, drain
all uids, clean all lters, pipes and place the
Load on the brush system Reset the machine
battery on charge.
Fit or replace fuse
Turn key to ‘ON’
Charge batteries
Reset stop button
Take off charge
Empty waste-water tank
Remove and clean
Push tight connections
Remove and clean
Clean and ret
Renew
Renew
Renew
Recharge batteries
Check and t
Lower brush deck
Fill clean-water tank
Remove and clean
Adjust as desired
Lower brush deck
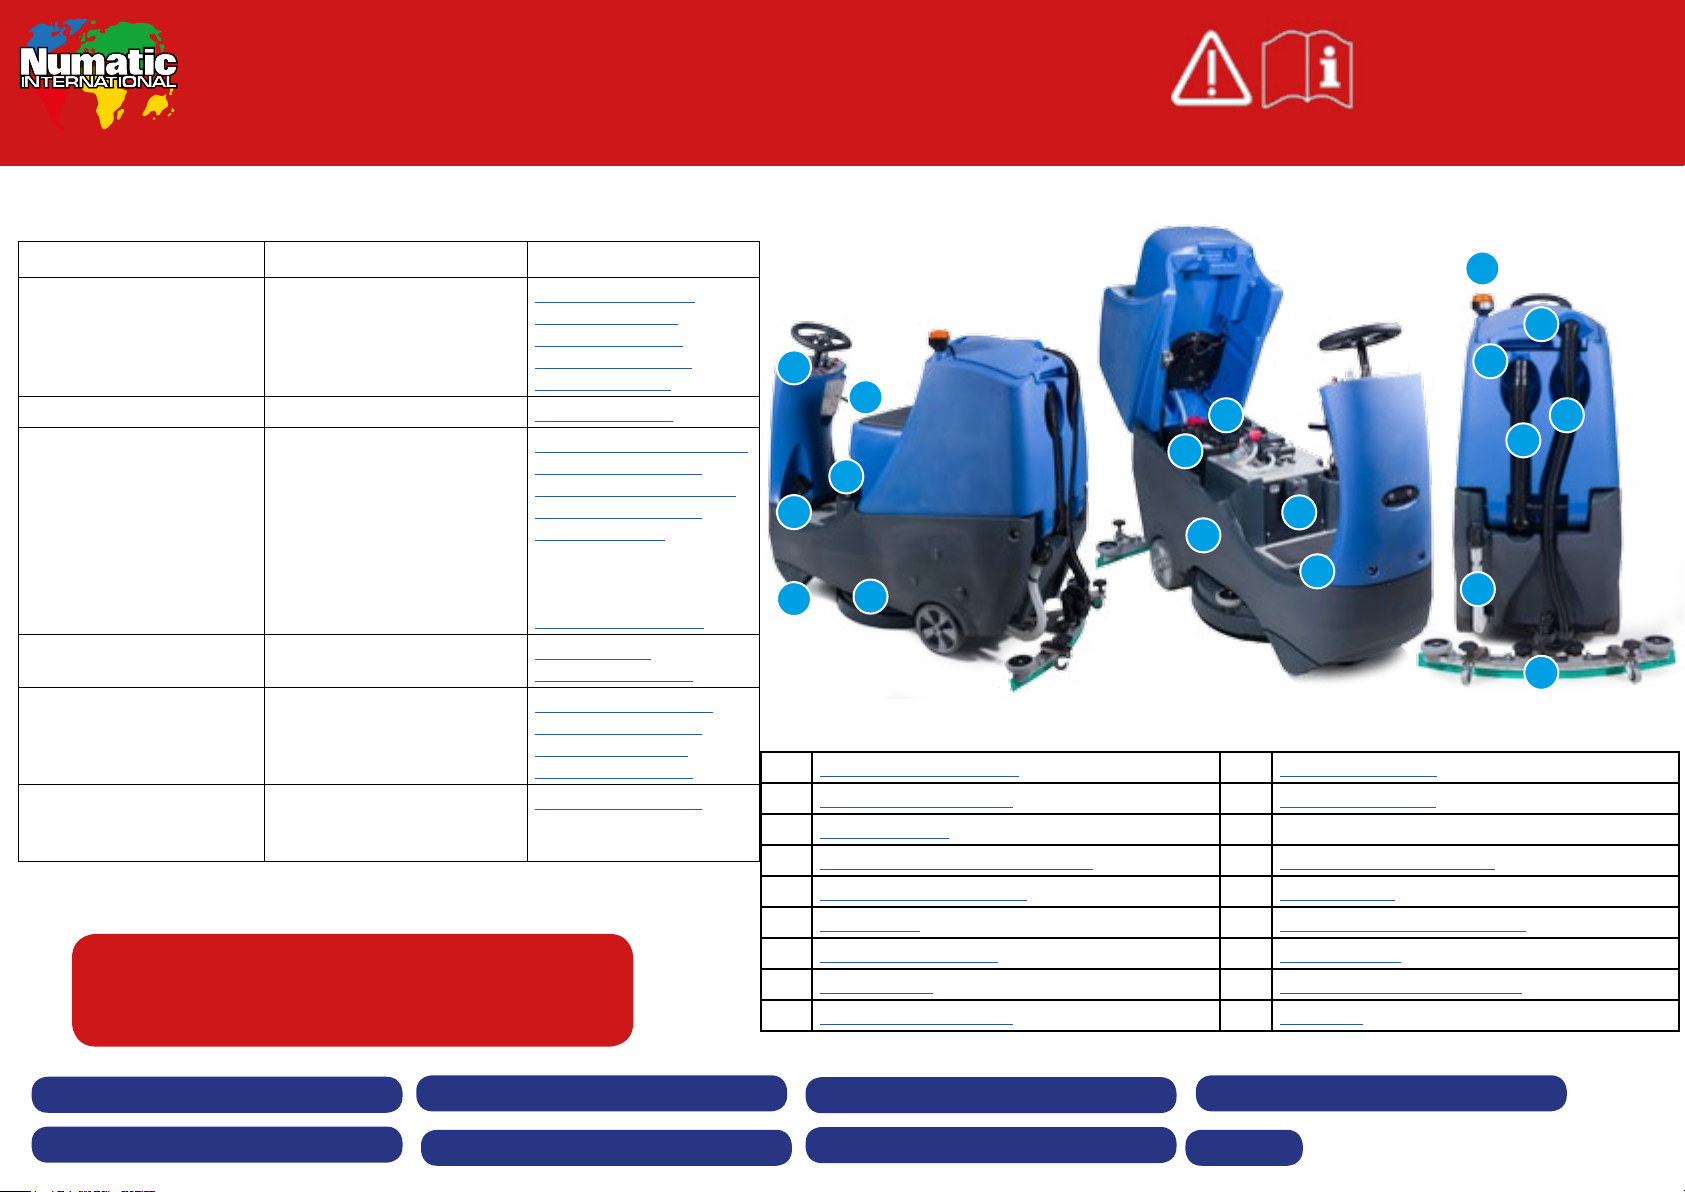
12
1
4
5
2
3
1 Operator control panel 10 On board charger
2 Brush deck foot pedal 11 Accelerator pedal
3 Anti-tip buffers 12 Pedestrian light
4 Floor tool raise and lower lever 13 Floor tool transit bracket
5 Clean water lling point 14 Air separator
6 Brush deck 15 Waste water emptying hose
7 40 Amp battery fuse 16 Vacuum hose
8 Gel batteries 17 Clean water emptying hose
9 Clean water tank lter 18 Floor tool
6
7
8
10
9
11
13
17
14
16
15
18
Fuses, Key, Floor tool
Brush, Brush deck, Filling
Controls, Brush Pressure, Stop button
Using the machine, Speed, Anti Tip
Empty waste water
Cleaning the machine, Hose clip
Changing oor tool blades
Charging

Index Page
Fuses
Key
Setting up
Located under the Top tank is the 40 Amp fuse, make sure the fuse is tted correctly and in good condition.
Make sure no metal objects come into contact the battery terminals.
When inserting the fuse you may notice a spark, this is normal.
Insert key into ignition and turn quarter-turn clockwise to the ‘ON’ (1) position.
DO NOT depress accelerator pedal while software initialises.
Note*
The seat is tted with a pressure sensor that disables the machine until the operator is seated.
Raise / Lower oor tool
Fuses, Key, Floor tool
Brush, Brush deck, Filling
To lower the oor-tool move the oor-tool lever into the upper position.
To raise the oor-tool move the oor-tool lever into the lower position.
Note*
The machine will not operate in reverse with the Floor-tool lowered.
Controls, Brush Pressure, Stop button
Using the machine, Speed, Anti Tip
Empty waste water
Cleaning the machine, Hose clip
Changing oor tool blades
Charging
Index Page
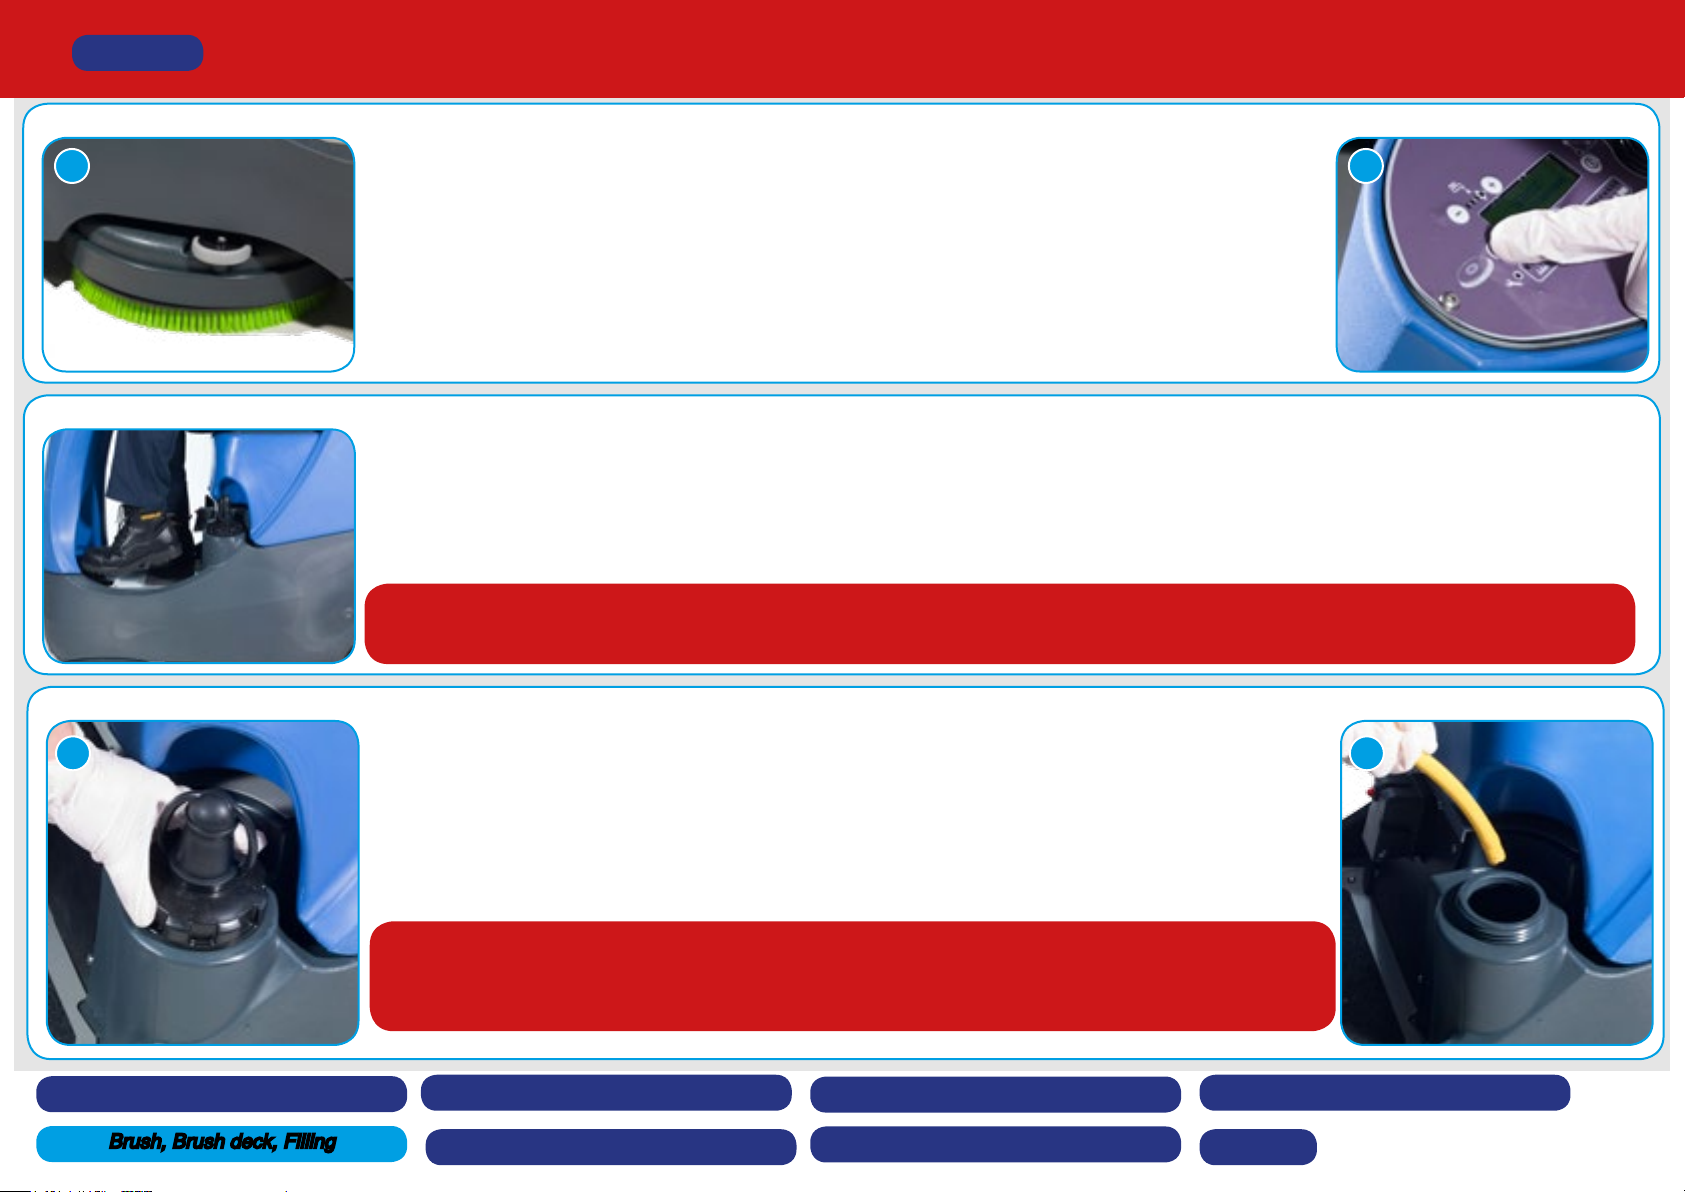
Fitting the brush
Setting up
1 2
Make sure the brush deck is in the raised position and place the brush under the brush deck make sure the
brush is central to the chuck (g 1), then lower the brush deck (see below).
Turn on the machine by inserting the key and turning a quarter-turn clockwise.
Press the brush engage button and the machine will pick up the brush (g 2).
Turn off the machine by turning the key a quarter-turn anti clockwise.
To disengage the brush press the brush engage button with the brush deck in the raised position.
Raise / Lower the brush deck
The left foot pedal controls the raising and lowering of the brush deck.
To lower the brush deck slide the brush deck foot pedal forward with your foot and gently release the foot pedal.
The brush deck is now in the lowered position.
To raise the brush deck slowly depress the foot pedal, making sure it is in the forward position and slide your foot back to lock the pedal in place.
The brush deck is now in the raised position.
Note:
Do not lift the brush deck until the brush has stopped revolving or the brush will release.
Make sure you raise the brush deck before driving to the cleaning site.
Filling the bottom (clean water) tank
Key
1 2
To ll the clean water tank extend the Flexill hose, remove the rubber seal and ll from a suitable water
outlet. The uid capacity of the CRO is 80 litres maximum.
Replace seal and hose to original position when nished (g 1).
Fuses, Key, Floor tool
Brush, Brush deck, Filling
Alternatively unscrew the ller cap completely and ll the tank using a hose or preferred method (g 2).
Note:
Great care must be taken to make sure that contaminants (leaves, hair, dirt, etc.) are not allowed
to enter the clean-water tank during the lling process. If using a bucket or similar, ensure it is
always clean and free from debris.
Controls, Brush Pressure, Stop button
Using the machine, Speed, Anti Tip
Empty waste water
Cleaning the machine, Hose clip
Charging
Changing oor tool blades
 Loading...