

Page 1
Page 2

NTT DoCoMo 800MHz Digital Mobile Phone
Thank you for your purchase of the new
“Mova SO213iS” mobile phone.
Before using the Mova SO213iS, please read
“Safety Precautions” carefully.
Read this manual carefully before or when you
use the Mova SO213iS. Always refer to the
manual when you need information on using
the Mova. The information helps you to use
the Mova properly and more effectively.
The Mova SO213iS is a useful partner in daily
life. Use it correctly and it will serve you as a
highly reliable tool for a long time.
Before Using the Mova
●
The Mova establishes communication with radio waves. It is impossible to use the Mova in
locations without radio waves, with weak radio
waves and outside the service area; inside a
tunnel, building, underground, etc. The Mova
may be disconnected on occasions when being
in areas with strong radio waves, even if you
see the antenna icon, which indicates full reception of the radio waves in the display, and
when on upper floors of tall apartments and
buildings without obstructions around.
● Use discretion and mind your manners when
using the Mova in public areas, crowded or
quiet place to keep from bothering others.
● Note that your calls are at risk of being inter-
cepted by the third party because of its operation on radio waves. However, the digital
system automatically scrambles all calls
through a private call feature. Therefore, even
if the third party successfully intercepts your
call, they will hear just the noise.
● Since the Mova establishes communications
on radio frequency energy converting voice
into digital signals, it may not be restored accurately under the adverse radio wave condition and the voice received in the call may
differ slightly from the actual one.
● Always keep the information you have saved
to the Mova in a separate note. Under no condition will DoCoMo be held liable for any damaged or lost data saved to the Mova.
● The user hereby agrees that the user shall
be solely responsible for the result of the use
of SSL. Neither DoCoMo nor the certifiers as
listed herein make any representation and
warranty as for the security in the use of SSL.
In the event that the user shall sustain damage or loss due to the use of SSL, neither
DoCoMo nor the certifiers shall be responsible
for any such damage or loss.
Certifiers: VeriSign Japan K.K.
● The Mova is exclusively for use in Japan.
Betrusted Japan Co., Ltd.
Please read this manual carefully prior to using the Mova. For details on the battery and
the adapter (including charger), refer to their
respective user’s manuals provided with them.
If you have any further questions, please contact us at any of the numbers below.
For inquiries (in English)
From ordinary phones
0120 - 005 - 250 (toll-free)
※ Can be called from DoCoMo mobile phones
and PHSs.
For inquiries (in Japanese only)
From DoCoMo mobile phones or PHSs
(No prefix) 151 (toll-free)
※ Cannot be called from ordinary phones.
From ordinary phones
0120 - 800 - 000 (toll-free)
※ Can be called from DoCoMo mobile phones
and PHSs.
Check the number you call and dial it correctly.
Please note that “Mova SO213iS” is called
“Mova” in this “Mova SO213iS User Guide”.
Page 3

Contents
Before Using the Mova
Call
Phonebook
Manner Mode
Ringer and Display
Operation Restrictions
Clock and Schedule
i-mode
Mail Service
Network Services
Other Functions
Entering Text
Appendix
Troubleshooting
Index
※ For your convenience to search for
each chapter, use the same colored
and same positioned index at the side
(P.2) of the manual.
1
Page 4
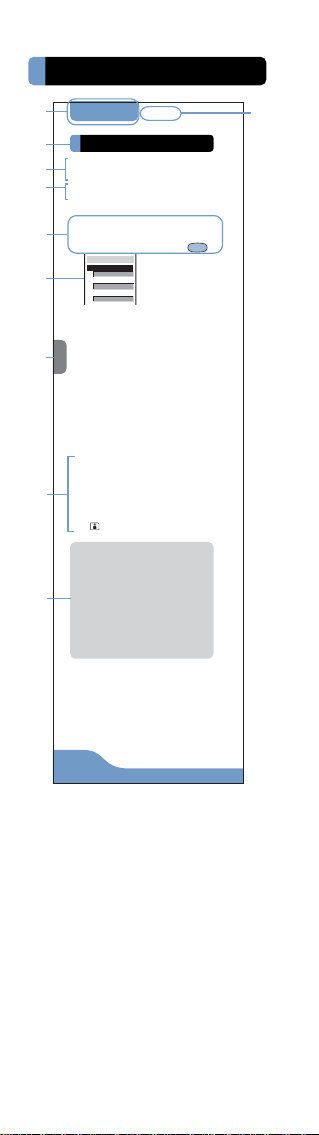
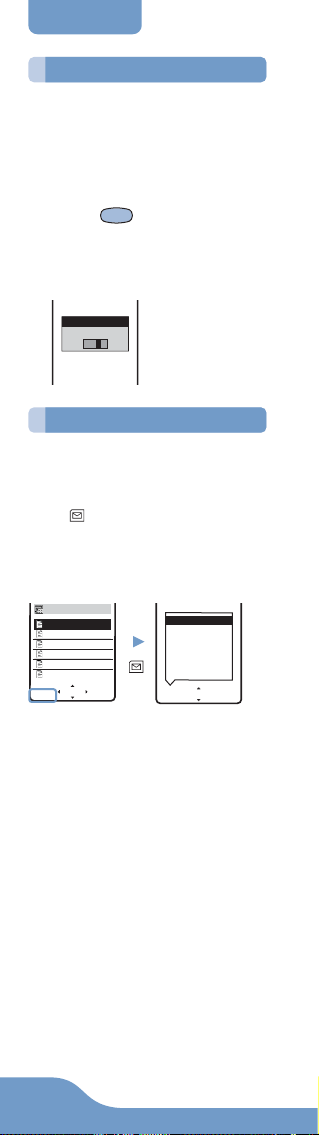
How To Use This Manual
1
Ringer and Display
2
The ring tone can be set depending on
3
what is incoming, such as call, mail, etc.
•The ring tone does not sound when the
4
Ring volume is [OFF].
e.g. Setting the ring tone for a call
1
5
6
7
2
8
●
9
●
Ring Tone
Ring Tone
From the menu, select
[Settings] → [Ringer] →
[Ring tone] and press
Select ring tone
Ring tone
Type1
Transfer tone
None
Mail tone
None
▼
[Ring tone]:
Set a ring tone for a call.
[Transfer tone]:
Set a ring tone for when the Voice Mail
Service or the Call Forwarding Service
is activated.
[Mail tone]:
Set a ring tone for mail.
[Msg R tone]:
Set a ring tone for Message R.
[Msg F tone]:
Set a ring tone for Message F.
Select a ring tone at [Ring
tone].
The ring tone is set.
To mu te the ring tone
Select [Silent].
To set other than [Ring tone]
[None] can also be selected. The ring tone
set at the Ring tone sounds.
To check the ring tone
Move the cursor to the ring tone and press
(listen).
If multiple ring tones are set, the following order of priority applies to them.
1. Ring tone of My phone no. (when
the Number Plus Service is subscribed and it is set, etc.)
2. Ring tone of the designated phone
3. Ring tone of the designated group
4. Ring tone during i-mode
5. Transfer tone
6. Ring tone of the phone
Even if the Mail tone is set, the Designated ring tone (P.80) set for mail has
priority over the Mail tone setting.
.
2
78
2
Page 5

1 Chapter title
2 Each section title, function name,
etc.
3
Outline and objectives of this function
4 Additional notes and restrictions of
this function
5 The operation procedure is described
in bold letters. Perform this procedure
according to the step number on the
left.
6 Example of display information
7 Index at the side by which you can
search each chapter in the Contents colored and positioned same
8 If there are multiple options available,
they are described here.
9 Useful and additional information and
points of caution are described here.
● The illustrations of the Mova display on
this manual are different from the actual
display in tinge of color and character
style. They are based on the [Type1] of
the Color taste (P.88). Additionally, some
parts of the keys are deformed or omitted in the illustrations.
3
Page 6
Features of the Mova SO213iS
It’s amazing because
it’s i-mode
By subscribing to i-mode, the following services become available.
※ i-mode is a paid service that requires a
subscription.
Site Connection Service
An online service that allows you to use
the services provided by IP (information
service providers) with simple key operations. For example, you can check bank
balances, reserve various kind of tickets, download ring tones, etc. on the display of the Mova.
(The contents of the service vary by
bank. Some services may require a
separate subscription.)
i-mode Mail
A service that allows to exchange mail
with the mobile phone alone. Mail exchange is available not only between imode subscriber mobile phones, but also
with e-mail over the Internet.
Internet Connection
Direct input of site address takes you to
the Internet site you wish to view.
(Note that web sites other than those
compatible with i-mode may not be displayed correctly.)
SSL Compatible
You can access an SSL-enabled site
without any extra operation. SSL (encryption technology) assures that services with strict security requirements
such as home banking service are available without worry (P.120).
Ultra Compact Mobile Phone
premini
“premini” is a newly coined word based
on the concept of premier and mini.
The premini-S is the new series of premini
on the theme of “Soft”, “Sophisticated”
and “Sport”. The roundish gentle form and
keys and adhering even to details produce refined texture. The “blue-light key”
that a key light beautifully illuminates in
blue when a key is pressed is used.
4
Page 7
Convenient Features of Simple Operation
Up to 700 phone numbers can be saved
to the Phonebook. 3 phone numbers (up
to 700) and 3 mail addresses (up to 2,100)
per name can be saved.
P.62
EV-Link
Phonebook
Mail can easily be sent to a recipient
saved to the record. You can also place
a call easily to the sender of the received
mail.
P.217
Prediction Conversion Entry
“POBox”
“POBox” (Predictive Operation Based On
eXample) displays a list of recommended
words predicted from the entered characters. You can quickly enter text with
fewer key operations by selecting the text
from the list. “POBox” has a learning
function so you can enter characters
more smoothly by frequently using this
function.
P.228
Versatile Features for Mail
Mail Management Using Folders
Received and sent mail can be sorted
and saved to 12 folders, respectively.
P.172
Transmission Ranking
Up to 20 people to whom you frequently
send mail are saved to the record automatically. When composing a mail, you
can select the mail address from the recorded list.
P.151
Up to 5 mail lists of up to 10 addresses
can be saved to send mail at the same
time.
P.174
Lineup of Network Services
Network Services
You can use several network services.
• Voice Mail Service (paid)
• Call Waiting Service (paid)
• Call Forwarding Service (toll-free)
(You need to sign up for the above 3
services.)
• Caller ID Display Request Service (toll-
Mail List
free)
P.181
5
Page 8
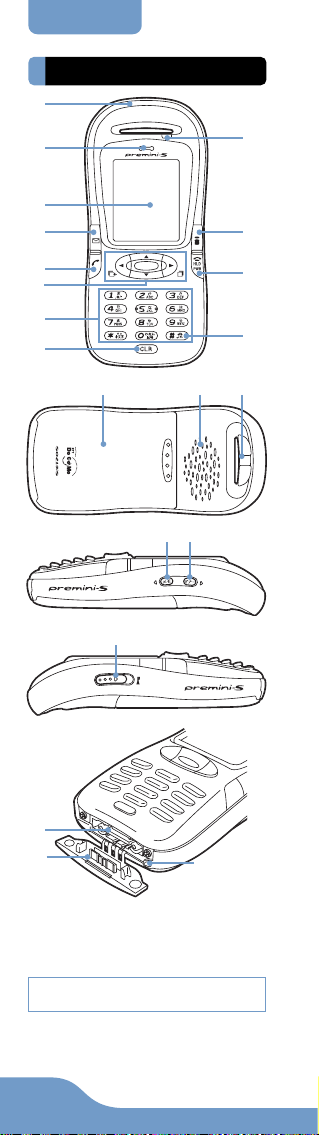
Parts and Functions
Parts and Functions
1
2
3
4 0
5
6
7
8
qgqfqd
qjqh
qk
9
qa
qs
ql
w;
wa
Mova SO213iS
Dimensions: 43 × 92 × 22 mm (W × H × D)
Weight: About 67 g (a battery attached)
※ The earphone mic is not available.
6
Page 9
Parts and Functions
1Antenna (invisible built-in antenna)
To use under better conditions, do not place
the antenna close to metal objects or cover
it with your hands.
2Earpiece
The caller’s voice is heard from here.
3Display
Shows information such as the entered
phone number and functions (P.9).
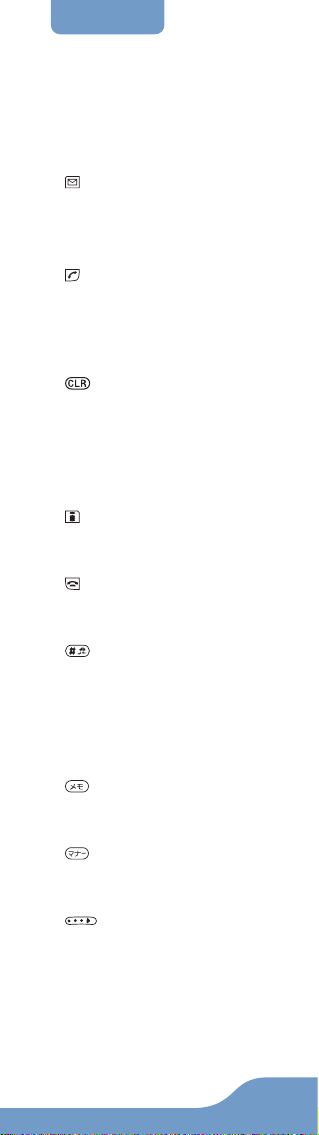
4 Mail Key
Press in the stand-by display to show the Mail
menu (P.150).
Press for over a second in the stand-by display for the Check new message (P.142, 153).
Press to select an item displayed in the guidance area (P.8).
5 Call Key
Press to place or receive a call.
6Four-way Key and Enter Key
Use to show the menu, redial record, received
record and Phonebook, and to select menu
items, etc. (P.8).
7Keypad
Enter phone numbers or text.
8 Clear Key
Press to cancel the current operation and return to the previous display or delete the entered text (P.227).
9
Incoming/Charge/Power Saver Indicator
Flashes when receiving a call/mail. It keeps
flashing when there is a missed call or new
mail/unread message. Lights in red while
charging the battery (P.31). Flashes in green
when in the Power saver mode (P.204).
0 i-mode Key
Press in the stand-by display to show the imode menu (P.119).
Press to select an item displayed in the guidance area (P.8).
qa Power/End/Hold Key
Press to power the Mova ON/OFF (P.35).
Press to hang up or return to the stand-by
display. Press while receiving a call to put it
on hold (P.44).
qs #/Driving Mode Key
Press to reverse the text display order while
entering text or enter a line feed. Press for
over a second in the stand-by display to set
the Driving mode (P.56).
qdRear Cover (P.30)
qfSpeaker
Sounds the ring tone, etc. from here.
qgStrap Attachment
Attach the strap here.
qh Memo Key
Press for over a second in the stand-by display to set the Record message (P.58).
Press during a call to set the Voice memo (P.203).
Scroll down the next display.
qj Manner Key
Press for over a second in the stand-by display to set the Manner mode (P.72).
Press during a call to set the Whisper mode (P.44).
Scroll up the previous display.
qk Lock Key
Slide while in the stand-by display to lock the
keypad (P.100).
If unlocked, the sound effect is heard (P.79).
qlExternal Connection Terminal
The terminal to connect the AC or DC adapter
(P.32, 33).
w;Terminal Cover
Do not pull the terminal cover forcibly.
waMicrophone
Picks up the sound of your voice. Do not
cover the microphone with your hands, etc.
7
Page 10
Parts and Functions
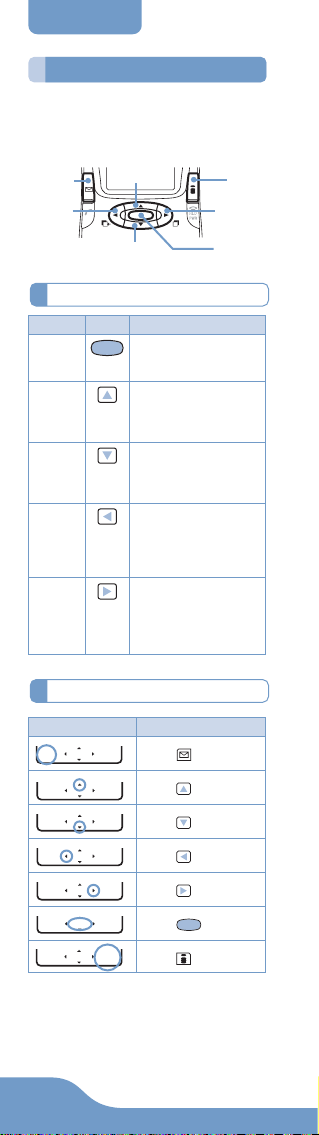
How to Use
To utilize the Mova’s function, operate
the Mail key, the Four-way key (Up/
Down/Left/Right key), Enter key and
the i-mode key.
Mail key
Left key
Up key
i-mode
key
Right key
Down key
Enter key
Four-way Key and Enter Key
Key
Symbol
Enter key Set a selected item. Press
Up key
Down key
Left key
Right key
Description
in the stand-by display to
show the menu display.
Move the cursor upward.
Press in the stand-by
display to show the
Phonebook.
Move the cursor downward. Press in the standby display to show the
Phonebook.
Move the cursor to the left
or return to the previous
display. Press in the standby display to show the received record.
Move the cursor to the
right or go to the next display. Press in the standby display to show the redial record.
Guidance Area
Display Operation
mail
i−mode
mail
mail
mail
mail
mail
mail
menu
menu
menu
menu
menu
menu
menu
i−mode
i−mode
i−mode
i−mode
i−mode
i−mode
Press .
Press .
Press .
Press .
Press .
Press .
Press .
8
Page 11

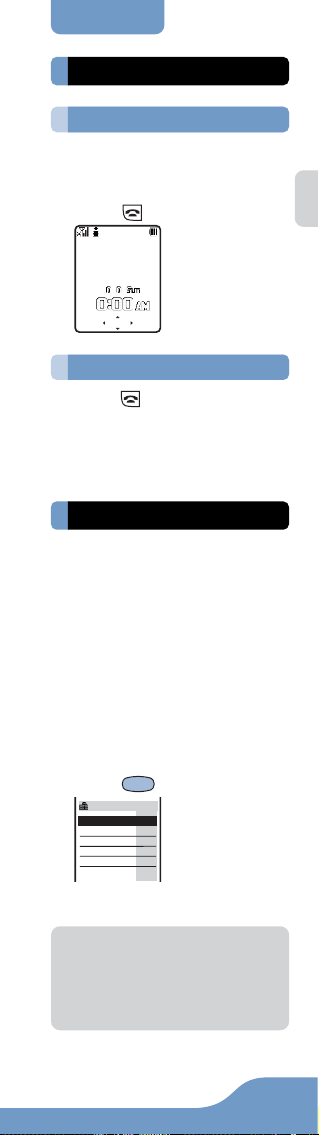
Display
Display
1234567890
qaqsqd qf qg qh qj qk
ql
1 Lights within the service area
Flashes during a call when the Battery saver is [ON] (P.205)
2 Radio wave condition
Out of the service area
Self mode is [ON] (P.219)
3 Lights when i-mode communication
is enabled
Flashes during i-mode in stand-by (P.125)
During i-mode connection
During i-mode communication
i-mode lock is [ON] (P.139)
While an SSL site is displayed (P.120)
4 Unread mail (P.154)
The Mova is full of received mail
5 New mail/message at the i-mode
center
The i-mode center is full
6
Record message is [ON] (there are nonplayed back record messages) (P.58)
Record message is [ON] (there is no
non-played back record message) (P.58)
7 / /
Number of record messages (P.58)
8
A car adapter is being connected (P.50)
9 Secret mode is [Display ON] (P.68)
0 / / /
Battery level (P.34)
qa Vibrator is [ON] (P.75)
qs Phone volume is [OFF] (P.82)
qd
Manner mode is [ON] ( is pink) (P.72)
Silent mode is [ON] (P.72)
Original manner mode is [ON] ( is
blue) (P.72)
Driving mode is set (P.56)
qf Unread Message R (P.140)
The Mova is full of Message R
qg Unread Message F (P.140)
The Mova is full of Message F
qh Appears when the Call billing is [ON]
and the total call cost exceeds the
limit (P.211)
qj Message at the Voice Mail Service
Center (P.186)
qk Clock alarm is [ON] (P.105)
ql Key guard is set (P.100)
● The SO213iS display is manufactured
based on the leading edge technologies, which may cause some pixels
unlit or lit constantly to appear on the
display. This is not a malfunction.
9
Page 12
Safety Precautions
Safety Precautions
■ For safe and proper use of
the Mova, please read the
“Safety Precautions” prior to
use. Keep the User Guide in
a safe place for future reference.
■ ALWAYS observe the safety
precautions since they intend to prevent personal injury or property damage.
■ The following symbols indi-
cate the different levels of
injury or damage that may
result if the guidelines are
not observed and the Mova
is used improperly.
DANGER
Failure to observe these guidelines may immediately result in
death or serious injury.
WARNING
Failure to observe these guidelines may result in death or
serious injury.
CAUTION
Failure to observe these guidelines may result in injury and
property damage.
10
Page 13

Safety Precautions
■ The following symbols indi-
cate specific directions.
Don’t
Indicates prohibited
Don’t
actions.
No Disassembly
Indicates not to disassemble.
No
Disassembly
No liquids
Indicates not to use
liquids
wet.
where it could get
No
No wet hands
Indicates not to
No wet
hands
handle with wet
hands.
Do
Indicates compulsory actions in accor-
Do
dance with instructions.
Unplug
Indicates to remove
Unplug
the power plug from
the outlet.
■ “Safety Precautions” are de-
scribed in the following categories:
Handlings Precautions
(in common) ................................... 12
The Mova ....................................... 14
Battery ........................................... 16
Adapter (including charger) .......... 19
Near Electronic Medical
Equipment ..................................... 21
11
Page 14
Safety Precautions
Handlings Precautions (in common)
DANGER
Use the battery and adapter
(including charger) specified
for the Mova by DoCoMo.
Do
The use of products that are not
specified may cause the Mova
and the battery to leak, overheat, explode, ignite fire or malfunction.
Battery: SO010, AC Adapter:
SO004, DC Adapter: SO001,
Car Adapter: SO002, Battery
Holder: SO001
※Contact DoCoMo service counter
(DoCoMo shop) for information on
other compatible products.
WARNING
Do not place the Mova, battery or adapter (including
charger) inside cooking ap-
Don’t
pliance, such as a microwave
oven or high-pressure containers.
Doing so may cause the battery
to leak, overheat, explode or
catch fire or the Mova and
adapter (including charger) to
overheat, smoke, catch fire or
damage the circuit parts.
Do not allow the charge and
external connection terminals
to come in contact with con-
Don’t
ducting foreign substances (a
piece of metal, pencil lead,
etc.). Never allow these objects to get into the Mova, battery or adapter.
Doing so may cause fire or malfunction due to short circuits.
Do not subject the Mova, battery or adapter to excessive
force or throw it.
Don’t
Doing so may cause the battery
to leak, overheat, explode or
catch fire or cause the equipment to malfunction or catch fire.
Do not use the Mova in a place
where a fire or explosion
could occur, such as gas sta-
Don’t
tions.
The use of the Mova in a place
where flammable gases such as
propane or gasoline, or dust exist may cause explosion or fire
12
.
Page 15
Safety Precautions
CAUTION
Do not keep in a place that is
very humid, dusty or subject
to high temperature.
Don’t
Doing so may cause malfunction.
Do not place on an unstable
or inclined platform.
Doing so may cause the equip-
Don’t
ment to fall and cause injury or
malfunction.
Do not use or leave the Mova,
battery or adapter in a place
subject to high temperature,
Don’t
such as under direct sunlight
or in a car on an extremely
hot day.
Doing so may cause the battery
to leak, overheat, explode or
catch fire. The phone may become deformed or damaged as
a result. Also, part of the case
may heat up and cause burns.
Keep the Mova, battery and
adapter out of the reach of babies and infants.
Do
Failure to do so may cause accidental swallowing or injury.
If children use the Mova, parents or guardians should give
them the proper instructions
Do
for use. Make sure that they
use the Mova as instructed.
Failure to do so cause injury.
13
Page 16
Safety Precautions
The Mova
WARNING
Do not use the Mova while
driving a vehicle.
Doing so may interfere safe driv-
Don’t
ing and cause accident. Stop
the vehicle to park in a safe
place before using the Mova or
use the Driving mode.
By revision of the Road Traffic
Law, using the mobile phone
while driving is a penal regulation from November 1, 2004.
Do not put the Mova in your
breast pocket or inside pocket
if you are wearing any electronic
Don’t
medical equipment.
If the Mova is used close to electronic medical equipment, it may
cause malfunction due to exposure to radio waves.
Do not touch the glass fragment, if the display part of the
Mova should damage.
Don’t
Although the display part is
hardly spattering glass making,
touching some unfortunately
spattered glass edge may
cause injury.
Do not use or leave the battery in a place with high temperature such as close to fire
Don’t
or heater.
Doing so may cause accidents,
such as overheating or igniting
fire, or malfunction.
Do not disassemble or modify
the Mova.
Doing so may cause accident
No
such as fire, injury or electric
Disassembly
shock or malfunction.
Power OFF the Mova in a place
where the use is prohibited
such as in airplane or hospital.
The Mova may affect electronic
Do
equipment and electronic medical equipment. If the Mova set
the automatic power-ON function, cancel the setting before
powering OFF the Mova. Follow
the instructions of each medical facility for the use of mobile
phones on their premises.
In addition, prohibited acts such
as using a mobile phone in an
aircraft may be punished according to law.
14
Page 17
Safety Precautions
If you have a weak heart, set
the vibrator and ring volume
carefully.
Do
The Mova has a possibility to
affect a heart.
Power OFF the Mova near
electronic equipment operating on high precision control
Do
or weak signals.
Failure to do so may interfere
with the operation of electronic
equipment.
※
The following are some electronic equipment that you should be careful of:
Hearing aids, implantable cardiac
pacemaker, implantable cardioverter
defibrillator, other electronic medical
equipment, fire detector, automatic
door and other automatically controlled
equipment.
If you use an implantable cardiac pacemaker, implantable cardioverter
defibrillator or other electronic medical equipment, check with the relevant
medical electronic equipment manufacturer or vendor whether the operation can be affected by radio waves.
CAUTION
Do not swing the Mova around
by holding the strap.
The Mova may hit you or others
Don’t
or the strap gets cut away from
the Mova. It may cause accident
such as injury, or damage to the
Mova or other property.
Do not place your ear too close
to the speaker while the ring
tone sounds or the melody is
Don’t
played back.
Doing so may cause difficulty in
hearing.
Do not place magnetic cards
between the Mova.
Magnetic data on bankcards,
Don’t
credit cards, telephone cards,
floppy disks, etc. may be erased.
Also, always check the Mova
before using to make sure a pin
or other metal is not stuck in the
speaker as it may cause injury.
Do not get the Mova wet.
If liquids such as water or pet urine
get into the Mova, it may cause
No
overheating, electric shock or mal-
liquids
function. Be careful where and how
you use the Mova.
15
Page 18
Safety Precautions
In rare cases, using the Mova
may interfere with the operation of electronic equipment
Do
in some types of vehicle.
If there is any interference, do
not use the Mova when driving
for safety reasons.
If you hear thunder while using the Mova outdoors, power
OFF immediately and take
Do
shelter in a safe place.
Failure to do so may cause injury or electric shock from the
lightning.
Battery
■ Check the type by the label
on the battery.
Display
Li-ion
Type
Lithium ion Battery
DANGER
Do not throw the battery into
fire.
Doing so may cause the battery
Don’t
to leak, overheat, explode or
catch fire.
Do not stick a nail into the
battery, hit it with a hammer
or step on it.
Don’t
Doing so may cause the battery
to leak, overheat, explode or
catch fire.
Do not forcibly connect the
battery to the Mova. Also
make sure to connect the bat-
Don’t
tery in the correct direction.
Doing so may cause the battery
to leak, overheat, explode or
catch fire.
Do not use or leave the battery in a place with high temperature such as close to fire
Don’t
or heater.
Doing so may cause the battery
to leak, overheat, explode or
catch fire.
16
Page 19

Do not connect the battery
terminal to metal objects
such as wires. Also, do not
Don’t
carry or keep the battery together with metal objects
such as a necklace.
Doing so may cause the battery
to leak, overheat, explode or
catch fire.
Do not disassemble or modify the battery and do not directly solder it to the Mova.
No
Doing so may cause the battery
Disassembly
to leak, overheat, explode or
catch fire.
Do not get the battery wet.
If liquids such as water or pet
urine get into the battery, it may
No
cause overheating, electric
liquids
shock or malfunction. Be careful where and how you use the
Mova.
If the battery fluid gets into
your eyes, do not rub, rinse
with clean running water and
Do
get medical treatment immediately.
Failure to do so may cause
blindness.
Safety Precautions
17
Page 20
Safety Precautions
WARNING
Do not use or leave the battery
in a place subject to high temperature such as under direct
Don’t
sunlight or in a car on an extremely hot day.
Doing so may cause the battery
to leak, overheat and decrease
the battery performance and
life.
If you notice anything unusual about the battery such
as an unusual odor, overheat-
Don’t
ing, discoloration or deformation during operation, charging or storage, immediately
remove the battery from the
Mova and do not use the battery.
Failure to do so may cause the
battery to leak, overheat, explode or catch fire.
Stop charging if the Mova is
not charged within the specified charging time.
Do
Failure to do so may cause the
battery to leak, overheat, explode or catch fire.
If the battery leaks or emits
an unusual odor, immediately
stop using Mova and move it
Do
away from fire.
The leaking liquid may ignite
fire, catch fire or explode.
If the battery fluid gets on your
skin or clothes, immediately stop
using the battery and rinse with
Do
clean running water.
Failure to do so may cause injury on your skin.
CAUTION
Do not dispose of the battery
together with other garbage.
The battery may become the
Don’t
source of fire or environmental
destruction. Affix a tape on the terminal of a used battery to insulate and take it to DoCoMo service counter (DoCoMo shop) or
follow the instructions of the local authorities that collect and dispose of the battery.
18
Page 21
Safety Precautions
Adapter (including charger)
WARNING
Do not use the adapter (including charger) if the cord of
the adapter or the power cord
Don’t
is damaged.
Doing so may cause electric
shock, overheating or fire.
Do not use the AC adapter in
a very humid or steamy place
such as in a bathroom.
Don’t
Doing so may cause electric
shock.
Do not short-circuit the charge
terminal of the charger while the
power plug is connected to the
power outlet or cigarette lighter
Don’t
socket. Do not touch the charge
terminal with your hands, fingers or any part of your body.
Doing so may cause fire, malfunction, electric shock or injury.
The DC adapter and car adapter
are for use in vehicles with a
negative ground. Never use
them in vehicles with a positive
Don’t
ground.
Doing so may cause fire.
Place the charger on a stable
platform while charging. Do not
cover or wrap the charger with
Don’t
a cloth or bedding.
Doing so may heat up and
cause fire or malfunction.
Do not disassemble or modify
the adapter.
Doing so may cause electric
No
shock, fire or malfunction.
Disassembly
Do not get the adapter (including charger) wet.
If liquids such as water or pet
No
urine get into the adapter (in-
liquids
cluding charger), it may cause
overheating, electric shock or
malfunction. Be careful where
and how you use the Mova.
Do not touch the cord of the
adapter (including charger)
or the power outlet with wet
No wet
hands.
hands
Doing so may cause electric
shock.
19
Page 22
Safety Precautions
Use the adapter only on the
specified power supply and
voltage.
Do
Failure to do so may cause fire
or malfunction. Additionally, using it in other countries causes
the Adapter to malfunction.
AC adapter:
AC 100V (must be plugged in
the household wall outlet of
100V)
DC adapter:
DC 12V/24V (exclusively used
for vehicles with a negative
ground)
Do not touch the Mova and
adapter (including charger) if
you hear thunder.
Do
Failure to do so may cause injury or electric shock from the
lightning.
When you connect the AC
adapter to the power outlet,
make sure that it does not
Do
come in contact with metal
objects such as metal strap
and insert it firmly.
Failure to do so may cause electric shock, short circuit or fire.
If the fuse of the DC adapter
or car adapter is blown, replace it with the specified fuse.
Do
The use of an incorrect fuse
may cause fire or malfunction.
See the user’s manual supplied
with the adapter for the specified fuse.
Clean dust from the plug.
Failure to do so may cause fire.
Do
Remove the power plug from
the power outlet when not
used for a long period of time.
Unplug
Failure to do so may cause electric shock, fire or malfunction.
If liquid such as water get into
the adapter, immediately remove it from the power out-
Unplug
let or cigarette lighter socket.
Failure to do so may cause electric shock, smoking or fire.
20
Page 23
Safety Precautions
CAUTION
Do not place any heavy objects on the cord of the
adapter (including charger)
Don’t
or the power cord.
Doing so may cause electric
shock or fire.
Charge the battery that is not
wet.
Doing so may cause overheat-
Don’t
ing, fire, or explosion.
Hold the plug, not the cord of
the adapter (including
charger) or the power cord,
Do
when you remove the adapter
(including charger) from the
power outlet or cigarette
lighter socket.
Pulling the cord may damage it
and cause electric shock or fire.
Before cleaning, remove the
power plug from the power
outlet or cigarette lighter
Unplug
socket.
Failure to do so may cause
electric shock.
Near Electronic Medical Equipment
■ The following instructions ob-
serve the guidelines of the
Electromagnetic Compatibility
Conference, Japan to protect
electronic medical equipment
from radio waves from mobile
phones.
WARNING
If you use an implantable cardiac pacemaker or implantable
cardioverter defibrillator, keep
Do
a mobile phone (0.8W transmission output) more than 22
cm away from the implant at all
times. Similarly, keep a car
phone and shoulder phone
(2.0W transmission output)
more than 30 cm away from the
implant.
The radio waves from the Mova
may affect the operation of implantable cardiac pacemaker or
implantable cardioverter
defibrillator.
21
Page 24

Safety Precautions
Power OFF the Mova in crowded places such as rush-hour
trains. There may be a person
Do
with an implantable cardiac
pacemaker or implantable
cardioverter defibrillator near
you.
The radio waves from the Mova
may affect the operation of implantable cardiac pacemaker or
implantable cardioverter
defibrillator.
If you need to use electronic
medical equipment other
than implantable cardiac
Do
pacemaker or implantable
cardioverter defibrillator at
home or outside medical facilities, check with the relevant medical electronic
equipment manufacturer or
vendor whether the operation
may be affected by radio
waves.
The radio waves from the Mova
may affect the operation of implantable cardiac pacemaker or
implantable cardioverter
defibrillator.
Please observe the following
guidelines in medical facilities.
Do
• Do not take the Mova into the operating rooms, ICU (Intensive Care Unit) or
CCU (Coronary Care Unit).
• Power OFF the Mova inside hospital
wards.
• Power OFF the Mova in the lobby and
other places if there are any electronic
medial equipment operating in the vicinity.
• Follow the instructions of each medical
facility when they specify areas forbidding to use and carrying a mobile
phone.
• If the Mova set the automatic powerON function, cancel the setting before
powering OFF the Mova.
22
Page 25

Handling Precautions
Handling Precautions
◆ Common Precautions
● Do not expose to water.
• The Mova, battery and adapter (including
charger) are not waterproof. Do not use them
in a humid place such as bathroom or in the
rain. If you carry the Mova on your body, perspiration may corrode the internal parts of
the Mova and cause malfunction. Note that
if a trouble is diagnosed as exposure to water or other liquid, repairs of the Mova may
not be covered by the Warranty or it may not
be possible to repair such phones.
In that case, if the Mova can be repaired,
you must pay for the repairs.
● Do not leave the Mova in a place where
it may be subject to excessive force.
• Do not put the Mova in a bag full of items
or sit down with the Mova in your hip
pocket. This may damage the LCD screen
and internal circuit board and cause the
Mova to malfunction. The Warranty will not
apply in such a case.
● Clean the Mova with a dry soft cloth.
• The color liquid crystal display of the Mova
has a special coating on it for better visibility. Do not use unnecessary force to wipe
the display when you are cleaning it with a
dry cloth. The display and its coating may
be damaged. Handle the display with care
and use a dry soft cloth (such as used for
cleaning eyeglasses) to clean it. If the display is left with water drops or stains, stains
may become permanent or the display
coating may be peeled off.
• Do not use alcohol, thinner, benzene or
cleaning detergent, etc. to clean the Mova.
These chemicals may erase the printing on
the Mova or cause discoloration.
● Clean the terminals occasionally with
a dry cotton swab.
• Soiled terminals may cause poor connection and loss of power. If the terminals are
dirty, use a dry cloth or cotton swab to wipe
them clean.
● Do not leave the Mova near the air con-
ditioning vent.
• Extreme temperature changes may produce
condensation and corrode the internal parts
of the Mova, causing it to malfunction.
● Make sure to see the user’s manual
supplied with the battery and adapter
(including charger).
◆ Mova Precautions
● Do not use the Mova in extremely hot
or cold places.
• Use the Mova within a temperature range
of 5°C to 35°C and a humidity range of 45%
to 85%.
● Using the Mova near ordinary phone,
television or radio may cause interference in these electric appliances.
Make sure to move far away from them
when using the Mova.
23
Page 26

Handling Precautions
● Always keep the information saved to
the Mova in a separate note.
• Under no condition will DoCoMo be held liable
for any damaged or lost data saved to the Mova.
● Do not sit down with the Mova in the
hip pocket of your trousers or skirt.
Also, do not keep the Mova in a place
where it may be subject to excessive
force such as at the bottom of a bag.
• Failure to do so may cause malfunction to
the Mova.
● The Mova may get warmer while us-
ing and charging, however, it is not
malfunction. You can keep using.
◆ Battery Precautions
● Charge the battery in an environment
with the proper ambient temperature
(5°C to 35°C).
● Make sure to charge the battery before
you use the Mova for the first time or
when you have not been using it for a
long period of time.
● The operating time of the battery var-
ies depending on the operating environment and the secular degradation
of the battery.
● The battery is a consumable accessory.
•The operating time of the Mova varies depending on the operating conditions and
other factor even when it is fully charged.
When the length of time you can use the
phone (operating time) on a charged battery becomes unusually short, it is time to
replace the battery. Purchase the battery
specified in this manual.
● Do not dispose of the expended bat-
tery together with other garbage.
• The battery may become the source of fire
or environmental destruction. Affix a tape
on the terminal of a used battery to insulate and take it to DoCoMo service counter
(DoCoMo shop) or follow the instructions
of the local authorities that collect and dispose of the battery.
◆ Adapter (including charger)
Precautions
● Do not charge in the following places.
•Places where the ambient temperature is
lower than 5°C or higher than 35°C.
•Places that are very humid, dusty or exposed to strong vibrations.
• Near ordinary phone, TV or radio.
● The adapter (including charger) could
become warm while charging. This
condition is not abnormal and you can
continue charging the battery.
● When you charge the battery using the
DC adapter or car adapter, keep the car
engine running.
• Charging the battery with the engine turned
off may drain your car battery.
● When you use the power outlet with a
mechanism to prevent the plug from
being removed, follow the instructions
on the outlet’s user’s manual.
24
Page 27
Package Contents
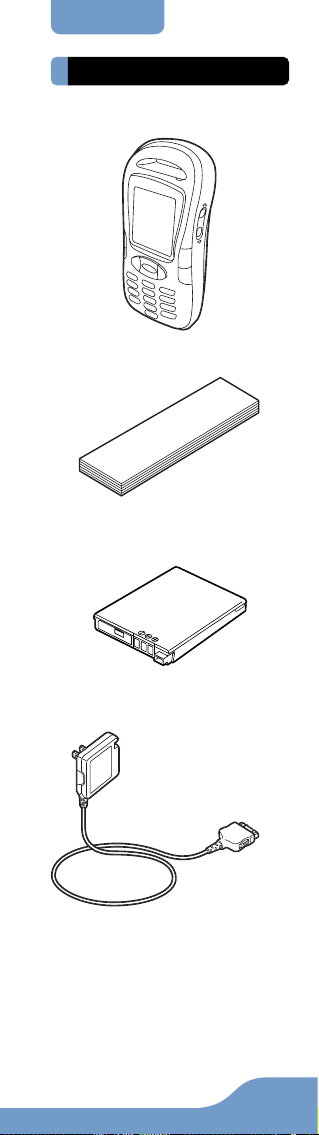
Package Contents
Mova SO213iS
(a rear cover and a warranty card included)
User Guide (this manual)
Battery (SO010)
(w/user’s manual)
AC Adapter (SO004)
(w/user’s manual)
※ Mova SO213iS has no desktop holder.
※ For optional units, see P.263.
25
Page 28
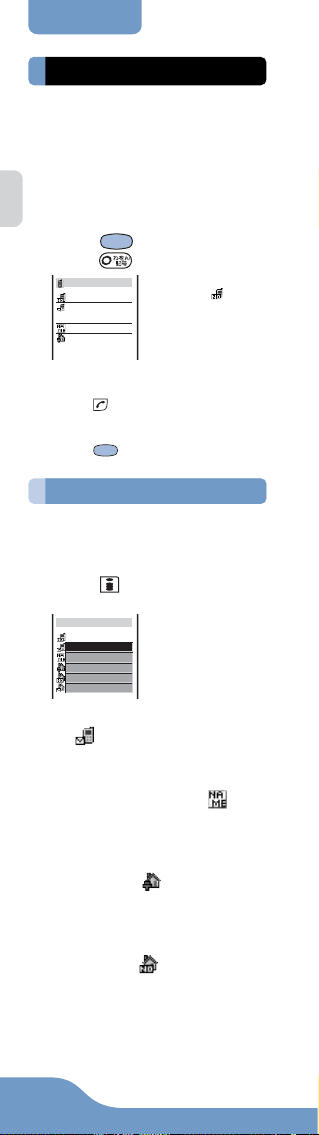
Selecting Functions
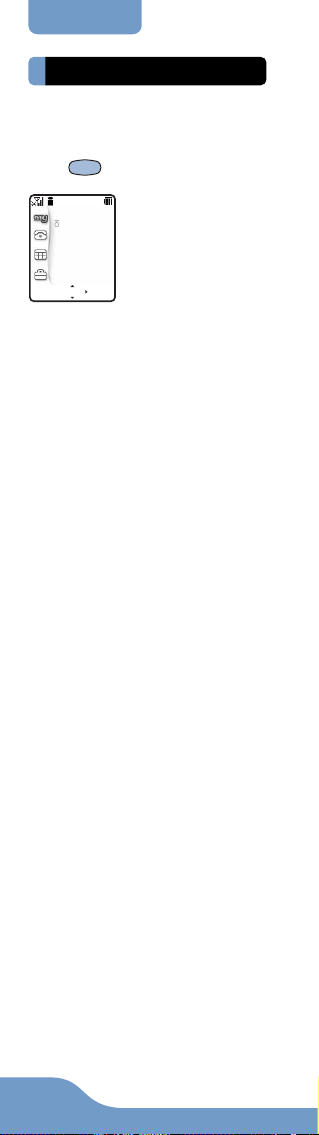
Selecting Functions
The Mova allows you to select and execute various functions from the menu.
The function can be brought up also
by entering the assigned number.
Press
display as below.
mode
Mail
Ring volume
Ring tone
Check msg
return
MySelection
Phone
Tool
Settings
(menu) to show the menu
MySelection
▼
select
Up to 20 menu items of i-mode, mail, etc.
can be selected. Setting often-used menu
items makes selecting an item quick and
easy.
Used to access functions mainly related
to placing and receiving a call such as the
Phonebook, Call record and Record message.
Used to access tools such as the Schedule, Memo and Calculator.
Used to set items such as Ringer, Display, Manner and Security.
26
Page 29
Selecting Functions
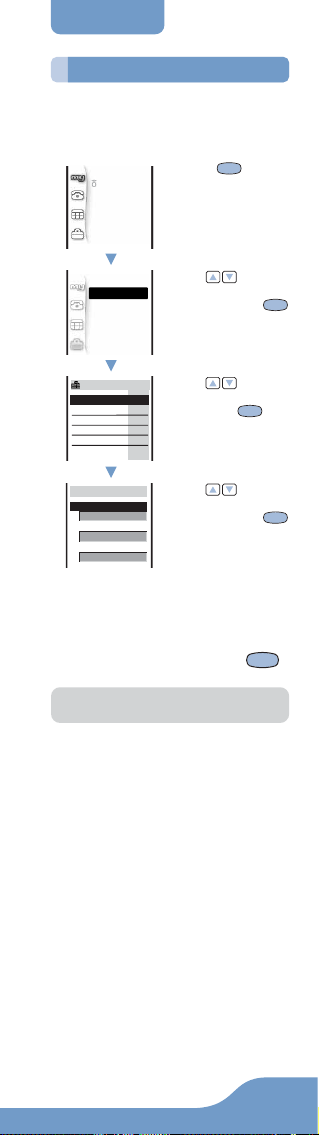
Menu Display
Throughout this manual the operations
for selecting a menu item are described as follows:
●
Actual operations
MySelection
mode
Mail
Ring volume
Ring tone
Check msg
▼
1 Press (menu)
in the stand-by display.
M31
Type1
None
None
2 Use to move
the cursor to [Settings] and press
(select).
3 Use to move
the cursor to [Ringer]
and press (select).
4 Use to move
the cursor to [Ring
tone] and press
(select).
Settings
Ringer
Display
Manner
Call
i−mode/mail
▼
Ringer
Ring volume
Ring tone
Designated
Alert time
Sound effect
Melody fld
▼
Select ring tone
Ring tone
Transfer tone
Mail tone
▼
● The notation example in this manual
From the menu, select
1
[Settings] → [Ringer] →
[Ring tone] and press .
● Unavailable menu items are displayed
in gray.
27
Page 30
new
Memo list
Recommended wi
Moving helper
Le Pichet045−1
Present for Mi
090XXXXXXXX
123456
▼
Selecting Functions
Menu Number
The menu items can be easily accessed by entering the menu numbers.
For the menu number, see Menu List
(P.260).
e.g. Selecting the Memo with the menu
number “21”
Press (menu) in the
1
stand-by display.
Enter the menu number
2
“21”.
The Memo list display
appears.
Menu no.
2
Submenu
A submenu is a menu that plays an
auxiliary role for each menu item.
Whenever a submenu is available, [option] appears in the guidance area.
to display a list of available
Press
submenus.
• The contents of submenu vary depending
on the functions and displays. For details,
see the description of operation for the individual option.
edit
delete
delete all
copy
send all
back
option
select
close
select
28
Page 31

Before Using the Mova
Attaching/Removing Battery ..... 30
Charging the Mova ...................... 31
Battery Level ................................ 34
Power ON/OFF ............................. 35
Initial Setting ................................ 35
Date and Time .............................. 36
Send Own Number ...................... 37
Own Number ................................ 38
29
Page 32
Before Using the Mova
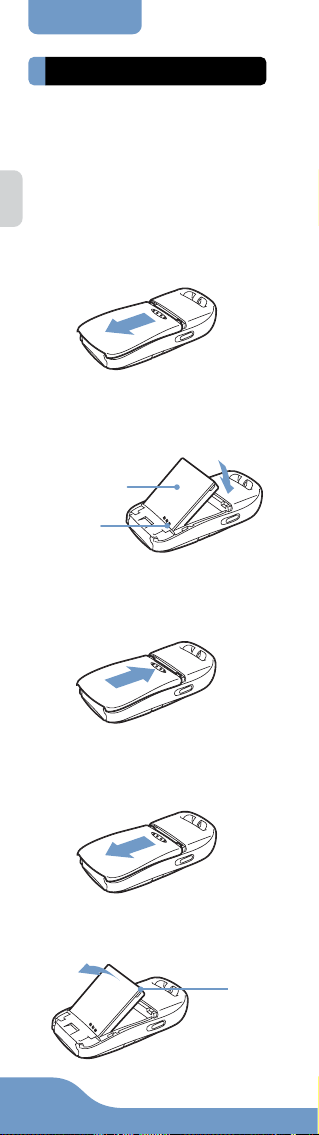
Attaching/Removing Battery
Attaching/Removing Battery
Make sure that the Mova is powered
OFF when replacing the battery.
• The terminal on the Mova may be damaged if you attach the battery forcibly.
• Holding too hard or attaching/removing the
battery in a manner other than described
below may damage the rear cover.
● Attaching
1 Slide the rear cover in the
direction of the arrow.
2 Align the terminals on the
Mova and the battery with the
warning label facing up and set
in the direction of the arrow.
Warning label
Ter minal
Slide a rear cover in the direction
3
of an arrow in accordance with
the slot of the Mova when about
2 mm is opened.
● Removing
1 Slide the rear cover in the
direction of the arrow.
2 Hold the battery by the tab and
lift in the direction of the arrow
to remove.
Tab
30
Page 33

Before Using the Mova31Charging
About Battery
To make full use of the Mova, use the
specified battery.
● Battery life
The battery is a consumable part. The life of
any rechargeable battery decreases each time
it is recharged.
When the duration of operation becomes less
than half in comparison with a new battery,
the life of the battery can be considered over.
(The average life of a battery is about 1 year.
However, depending on the frequency of use,
the life may become shorter.)
Return all spent batteries to
NTT DoCoMo or a dealer, or
a recycling shop to protect the
environment.
Li-ion
Charging the Mova
At the time of purchase, the battery is
not fully charged. Make sure to fully
charge the battery with the specified
charger before using the Mova.
About Charging
•When connecting the Mova to the AC
adapter, DC adapter, car adapter or battery holder, make sure to attach the battery to the Mova. The battery cannot be
charged unless it is attached to the Mova.
• If the charge indicator of the Mova flashes
in red, remove and attach the battery again
(P.30). If it continues to flash in red, the
battery may be defective. Stop charging
immediately and contact DoCoMo service
counter (DoCoMo shop).
● Estimated charging time/up-time
Charging time (AC adapter)
Continuous call
(communication) time
Continuous stand-by time
• The charging time is for when the battery is
empty and the Mova is powered OFF. When
charging with the Mova powered ON, the
charging time becomes longer. It may take
time to complete the charging when the Power
saver (P.204) is [OFF].
• The continuous call time listed above refers to
a condition with the maximum power send and
Battery saver [OFF]. The continuous stand-by
time refers to a condition moving in areas where
it has normal reception. Note that the call (communication) time and stand-by time can be reduced to about half the time shown above depending on the condition of the battery charge,
function settings such as the Power saver in
stand-by, ambient temperature and the radio
wave condition (out of the service area or in
areas with weak radio wave strength). Also, imode communication reduces the call (communication) time and stand-by time from the guidelines given above. Composing mail also reduces
the call (communication) time and stand-by
time, even without making a call or performing
i-mode communication.
About 105 minutes
About 110 minutes
About 310 hours
Page 34
Before Using the Mova
Charging
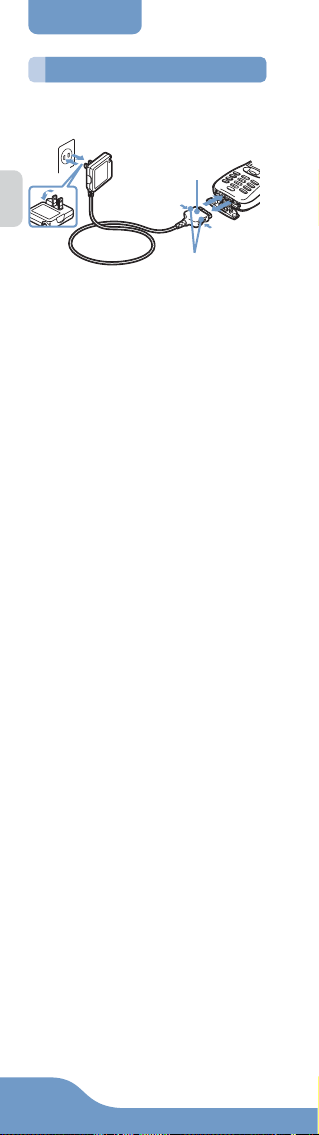
Charging with AC Adapter
Make sure to see the user’s manual of
AC Adapter SO004.
4
2
1 Open the terminal cover at the
bottom of the Mova and attach
the connector of the AC
adapter to the terminal with the
warning label facing down.
2 Lift the power plug of the AC
adapter and plug it into an AC
100 V outlet.
When the charging starts, the red charge
indicator is turned on. The indicator is
turned off when it is completed.
If you charge the Mova with the Mova
powered ON
The battery level icon flashes, and the
tone notifying the start of the charging
sounds. When the charging completes,
the icon lights, and the tone notifying the
end of the charging sounds.
• The tones mentioned above can be set
to mute (P.79).
If you charge the Mova with the Power
saver ON
The charge/power saver indicator that has
been lighting in red turns to flash in green
at the interval of about 5 seconds. This is
not the malfunction of the battery.
If you charge the Mova while the missed
call indicator is flashing
The charge/incoming indicator that has been
lighting in red turns to flash in the designated
color at the interval of about 5 seconds. This
is not the malfunction of the battery.
※ When the battery level is 0, the indi-
cator may not be turned on immediately at the start of charging. But the
charging has started.
3 When the charging is
completed, hold down the lock
buttons and remove the
connector from the Mova.
※ Close the terminal cover.
4 Remove the power plug of the
AC adapter from the outlet.
※ When not using the AC adapter for a
long period of time, remove the power
plug from the outlet.
Connect the adapter
with the warning
label facing
down
1
3
Lock buttons
32
Page 35

Before Using the Mova33Charging
Charging with DC Adapter
The DC adapter is a DC 12V/24V
adapter that enables to charge the
Mova by the cigarette lighter socket of
a vehicle.
Make sure to see the user’s manual of
DC Adapter SO001.
Cigarette lighter socket
2
Plug
Power indicator
1 Open the terminal cover at the
bottom of the Mova and attach
the connector of the DC
adapter to the terminal with the
warning label facing down.
2 Insert the DC adapter into the
cigarette lighter socket.
When charging starts, the green power
indicator of the DC adapter and the red
charge indicator of the Mova light.
The charge indicator turns off as the
charging completes.
If you charge the Mova with the Mova
powered ON
The battery level icon flashes, and the
tone notifying the start of the charging
sounds. As the charging completes, the
icon lights, and the tone notifying the end
of the charging sounds.
• The tones mentioned above can be set
If you charge the Mova with the Power
saver ON
The charge/power saver indicator that has
been lighting in red turns to flash in green
at the interval of about 5 seconds. This is
not the malfunction of the battery.
If you charge the Mova while the missed
call indicator is flashing
The charge/incoming indicator that has been
lighting in red turns to flash in the designated
color at the interval of about 5 seconds. This
is not the malfunction of the battery.
※ When the battery level is 0, the indi-
cator may not be turned on immediately at the start of charging. But the
charging has started.
3
When the charging is
completed, hold down the lock
buttons and remove the
connector from the Mova.
※Close the terminal cover.
4 Remove the plug of the DC
adapter from the cigarette
lighter socket.
4
to mute (P.79).
Lock buttons
Connect the
adapter with the
warning label
facing down
1
3
Page 36
Before Using the Mova
● The DC adapter is designed exclu-
sively for use on vehicles with a negative ground. Do not use the adapter in
a positively grounded vehicle.
● There are some vehicle models that
cannot use the DC adapter. If the plug
does not match, please purchase an
optional conversion socket.
● When using the DC adapter, be sure
to keep the engine running. Otherwise,
the car battery may be worn down.
● The fuse (1.0 A) of the DC adapter is
a consumable part. When you replace
it, purchase an equivalent fuse (1.0 A)
at neighborhood automobile parts
stores.
Battery Level
Battery Level
The estimated battery level is indicated
in the display.
• Use this level only estimated.
• The confirmation beep does not sound
when the Keypad sound is [OFF] (P.75).
From the menu, select
1
[Settings] → [Call] → [Batt
level] and press .
The current battery level is displayed by
bars in the display for about 3 seconds.
The confirmation beep sounds according to the remaining battery level.
Display
Beep Charge Level
three Sufficiently charged.
two Slightly low.
one Very low.
It is recommended to
charge.
– No battery power re-
maining. Charge.
● Checking the battery level during a call
results in the call being muted while
the confirmation beep sounds.
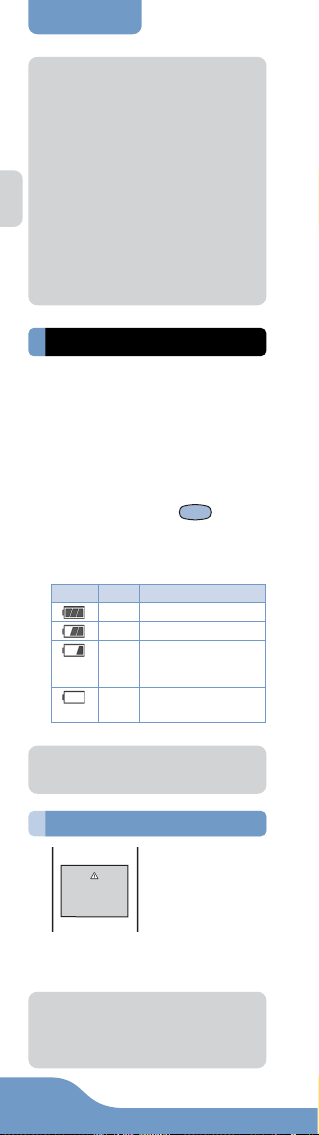
Time to Charge
When the battery level
becomes 0, the display
Charge or
replace
battery
● When charging becomes necessary
during a call, the warning sound is
heard from the earpiece and the Mova
automatically powers OFF after about
15 seconds.
34
appears as the illustration on the left shown
and the warning tone
sounds. About 15 seconds later, the warning
tone sounds again and
the Mova powers OFF.
Page 37
Before Using the Mova
Power ON/OFF
Initial Setting
Power ON/OFF
Powering ON
When the Mova is powered ON, the
display and keypad backlights are
turned on.
Press for over a second.
1
mail
menu
The Mova is powered
ON and the Wake-up
image (animation) is
displayed. After a
while, the stand-by
display appears.
i−mode
Powering OFF
Press for over 2 seconds.
1
The Mova is powered OFF after the
Power OFF image (animation) appears.
If this is done during a call, the Mova is
powered OFF after the call is disconnected.
Initial Setting
The Initial setting can be used to make
basic settings such as Change code,
Date/time and Send own number. See
the respective pages for details on the
settings.
● Items you can set
Change code (P.94)
Date/time (P.36)
Ring tone (P.78)
Stand-by (P.84)
Send own no. (P.37)
Edit my data (P.38)
From the menu, select
1
[Settings] → [Initial] and
press .
Initial setting
Change code Yet
Date/time
Ring tone
Stand−by
Send own no.
Edit my data
Select each item and set it up.
2
Yet
Yet
● If settings are reset or there are any
incomplete initial settings, the message “Format incompleted. Format?”
appears in the display when the Mova
is powered ON. The display of step 1
appears when selecting [Yes] and you
can set items for the Initial setting.
35
Page 38

Before Using the Mova
Date and Time
Date and Time
Set the date and time of the Mova.
• The date and time can be set even during
a call.
From the menu, select
1
[Tool] → [Clock] → [Date/
time] and press .
Date/time
2000/ 00/ 00
00: 00
Enter the year, date and
2
time.
From 2000/Jan/01 to 2099/Dec/31
From 00:00 to 23:59 (in 24-hour format)
If the Call billing is [ON]
Enter the Security code then enter the
year, month, date and time.
Press (cmplt).
3
The date and time are set.
• If the keypad is used for entry, the
setting is completed when the 2nd
digit of the minute is entered. (If the
minute will be 1 digit, attach “0” before the digit.)
● The date and time you have set retains
after changing a battery. However, removing a battery/attaching a burned
battery for a long period of time may
cause resetting them to “2000/00/00/
00:00”.
● Functions such as Schedule, Alarm
and Auto power on/off are not available unless the date and time are set.
In addition, no date and time are saved
for redial records, received records,
etc.
36
Page 39

Before Using the Mova
Send Own Number
Send Own Number
When placing a call or sending Short
Mail, your phone number (caller ID)
can be shown in the display of the
recipient’s phone you are calling.
• The Send own number is only available
when the recipient’s phone is equipped
with the caller ID display feature.
•Your caller ID is important information.
Decide very carefully whether to change
the setting.
From the menu, select
1
[Settings] → [Call] → [Send
own no.] and press .
The Security code screen appears.
Enter the Security code.
2
Send own no.
• The Security code is
ON
OFF
Select [ON]/[OFF] and press
3
.
The Send own number is set.
● When hearing the guidance asking
whether to send the caller ID, call
again after setting the Send own number to [ON].
set to “0000” at the
time of purchase.
37
Page 40
Before Using the Mova
Own Number
Own Number
Your Mova’s phone number can be
checked. You can also save your
name, mail address, etc.
• If your Own number is saved as Secret,
data other than Mova’s phone number,
mail address and My phone no. are not
displayed. To display all data, set the Secret mode to [Display ON] (P.68).
Press (menu) and
1
press .
Own number
090XXXXXXXX
docomo.taro.△△
@docomo.ne.jp
Jane Smith
3−X−XX Kitaaoy
ama Minato−ku
▼
To call your home or office
Move the cursor to the phone number and
press
To send a mail to your home or office
Move the cursor to the mail address and
press
Saving Your Personal Data
Your personal data such as your name,
postal address and e-mail address can
be saved and displayed at any time.
Press (edit) in the Own
1
number display.
Edit my data
090XXXXXXXX
▼
Enter Mova’s mail address
2
at [ ].
Up to 50 half-width alphanumeric characters
Enter your name at [ ].
3
Up to 10 full-width or 20 half-width characters
Enter your home postal
4
address at [ ].
Up to 64 full-width or 128 half-width characters
Enter your home phone
5
number at [ ].
Up to 24 digits
Mova’s phone number
appears at [ ]. If data
other than the phone
number are saved,
those data also appear.
.
(mail).
38
Page 41

Before Using the Mova
Enter your home mail
6
Own Number
address at [ ].
Up to 50 half-width alphanumeric characters
Enter your office name at
7
[ ].
Up to 64 full-width or 128 half-width characters
Enter your office postal
8
address at [ ].
Up to 64 full-width or 128 half-width characters
Enter your office phone
9
number at [ ].
Up to 24 digits
Enter your office mail
10
address at [ ].
Up to 50 half-width alphanumeric characters
Enter your birthday at [ ].
11
Select ON/OFF at [ ] to
12
save as Secret.
Press (cmplt).
13
Your personal data is saved.
To change back to the default
From the submenu in the Own number
display, select [delete all] → [Yes].
● Mova’s phone number appears at [ ]
and set My phone no. (P.194) by such
as the Number Plus Service appears
at [ ] and [ ]. These numbers cannot be edited or deleted.
● At the time of purchase, your mail ad-
dress is not set to appear. To check
your mail address, pres (i-mode)
and select [i Menu] → [English] →[Options] → [Mail Settings] → [Confirm
Mail Address]. Change your mail address in the Own number display if
your mail address changes.
39
Page 42

Page 43

Call
Placing/Receiving Calls .............. 42
Whisper Mode .............................. 44
Holding a Call .............................. 44
Putting a Call on Hold ................. 44
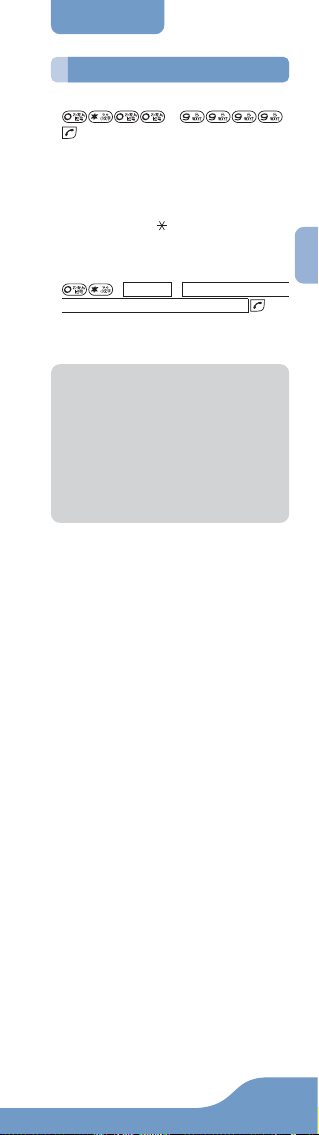
International Call (WORLD CALL) ...
Short Dial/Malicious Caller Block ...
Pause ............................................ 48
Calling a Pager*......................... 49
Hands-free Mode ......................... 50
Rejecting No Caller ID ................ 51
Accepting/Rejecting by
Phone Numbers/Groups ............ 52
Redial/Received Record ............. 54
Missed Call ................................... 55
Driving Mode ................................ 56
Record Message .......................... 58
*The paging service provided by NTT DoCoMo is
called QUICKCAST as of January 2001.
45
46
41
Page 44

Call
Placing/Receiving Calls
Placing/Receiving Calls
Placing a Call
Check the radio wave condition and
enter a phone number.
•To call under better conditions, do not cover
the antenna with your hands.
Enter a phone number.
1
03XXXXXXXX
When you press the wrong number
Press . Press for less than a
second to delete the entered digits one
by one from the right. Press
a second to delete all digits.
When you prefix 186/184
Enter a phone number, press (call)
and select a call menu.
• If the number you dialed proves to be
more than 24 digits including the prefix, the call menu does not appear.
• Prefixing 186 notifies the recipient of
your phone number. Prefixing 184 does
not notify the recipient of your phone
number.
Press .
2
03XXXXXXXX
•You can enter a
phone number of up
to 24 digits.
• Remember to include the area code,
even for a local call.
for over
A ringing sound is
heard when the call is
connected.
When you hear beep sound at the
other end
The line is busy. Press to hang up and
call again after a while.
When an audio guidance is given
Follow the guidance and call again
after a while.
Press to hang up.
3
● The call can also be placed by per-
forming step 2 before step 1. If you
press the wrong number, press ,
then wait a few seconds and call again.
● To delete the text message
When the text message shown below
appears, the line is very busy. Call
again after a while. Press for over
a second to delete the message.
タタ゛イマタイヘンコミアッテイマ
ス
42
Page 45

Call
Placing/Receiving Calls
Receiving a Call
The Mova notifies you of a call being
received by the indicator flash, ring
tone, vibrator, etc.
• The operation of the Mova when receiving
a call varies depending on the current settings for the Vibrator, Manner mode, etc.
When receiving a call,
1
press to answer it.
A phone number appears in the display
when the caller sends it.
Incoming call
03XXXXXXXX
When the caller’s information is saved
to the Phonebook
When the caller’s phone number is not
displayed
To control the Phone volume
Press to hang up.
2
If saved to the Phonebook, the name and
phone number of the caller are displayed
(P.62).
The reason appears when the caller’s
phone number is not displayed.
“User unset” :
Call from a person who intentionally does
not notify the caller’s phone number.
“Payphone” :
Call placed from a payphone, etc.
“Not support” :
Call that cannot notify the caller’s phone
number.
Control the volume by using while
receiving. The set volume is kept even
after the call.
• The Phone volume can also be controlled while in stand-by (P.82). The volume is set as controlled last.
Call duration
12:34
● The call can also be received by press-
ing to , , or
(call) (Any Key Answer).
● You may hear beeps (ring tone during
a call) while talking on the Mova.
If “1450” is set with the Voice Mail Service, the Call Forwarding Service or
the Call Waiting Service subscribed,
the beeps (the ring tone during a call)
sound and the following operations are
available when there is another incoming call during a call:
<Contents of subscription>
-Voice Mail Service:
Forward a call to the Voice Mail Service
Center (P.182).
- Call Forwarding Service:
Forward a call to a forwarding phone
number (P.189).
- Call Waiting Service:
Put the first call on hold and answer the
second call (P.187).
43
Page 46

Call
Whisper Mode/Holding a
Call/On Hold
Whisper Mode
The recipient can hear your voice at
normal volume level even when you
speak in a low voice.
Press during a call.
1
Whisper mode
To cancel the Whisper mode
Press again.
• When you finish a call, the Whisper
mode is canceled automatically.
• The Whisper mode
can also be set by
selecting [Whisper
12:34
mode] from the
submenu during a
call.
Holding a Call
The call can be put on hold during a
call so that your voice cannot be heard
by the other end.
• Even when a call is put on hold, the caller
is charged for the call.
• The Holding is not available during the
Three-Way Calling Service.
Press (option) during a
1
call, select [Holding] and
press .
Both you and the recipient hear the
melody “Hamabe no uta”.
To cancel the Holding
Press (call).
Putting a Call on Hold
When unable to answer a call immediately, the call can be put on hold.
• Even when the call is put on hold, the caller
is charged for the call.
Press when receiving a call.
1
On hold
00:03
03XXXXXXXX
• The guidance is played back to the
caller informing that you are currently
unable to answer the call.
• If you press while the call is put on
hold, the call on hold is disconnected.
• If the Phone volume is [OFF], the
beeps do not sound.
When ready to answer the
2
call, press .
•You can answer also by the Any key
answer function (P.43).
The On hold is canceled and you can talk.
44
The beeps sound and
the call is put on hold.
While the call is put on
hold, the beeps sound
about every 30 seconds.
Page 47

Call
WORLD CALL
International Call (WORLD CALL)
WORLD CALL is the international call
service that allows you to use from
DoCoMo mobile phones.
How to place an international call
009130 + 010 + Country code + Area
code + Phone number
※ You can save the above procedure to
the Phonebook of the Mova.
※ If an area code begins with “0”, omit
the “0” when dialing (except when calling ordinary phones, etc. in Italy).
•You cannot prefix “186” or “184” to a phone
number for the international call.
•You can place calls to about 220 countries
and regions in the world.
•
Charges for this service are billed together with
the monthly charges for your mobile phone.
• No application fees or monthly basic charges
are required (application is required).
•
You can check the approximate duration and
cost of the most recent international call on
your mobile phone when using WORLD CALL.
※ For details on operation, see P.208.
• Some of the price plans are not available.
◎Change in the dial procedure for the
international call
Since mobile communications such as mobile phones are beyond the scope of the
“MYLINE” service, the “MYLINE” service
cannot be used also for WORLD CALL.
With the introduction of the “MYLINE” service, however, the dial procedure for the
international call on mobile phones has
been changed. Note that the old dial procedure (excluding “010” from the above dial
procedure) is not available.
This is an optional service (free) that requires a subscription.
For information on WORLD CALL:
For inquiries (in English)
From ordinary phones
0120 - 005 - 250 (toll-free)
※ Can be called from DoCoMo mobile phones
and PHSs.
For inquiries (in Japanese only)
From DoCoMo mobile phones or PHSs
(No prefix) 151 (toll-free)
※ Cannot be called from ordinary phones.
From ordinary phones
0120 - 800 - 000 (toll-free)
※ Can be called from DoCoMo mobile phones
and PHSs.
Check the number you call and dial it correctly.
※ To use international call service companies
other than DoCoMo, contact them directly.
WORLD CALL is provided as the standard ser-
※
vice for users who subscribe to the mobile phone
service after May 23, 2002. However, the application is required of users who previously refused
this service on subscription, but now wish to use.
45
Page 48

Call
Short Dial
Short Dial/Malicious Caller Block
Short Dial
Up to 20 phone numbers (max. 11
digits) can be saved to the DoCoMo
network.
Malicious Caller Block
Up to 19 ordinary phone numbers can
be saved to the DoCoMo network
from which you wish to block calls
(such as malicious caller’s numbers).
•You can use either the Short Dial or Malicious Caller Block. The default setting is
the Short Dial. Make sure to take notes of
the saved numbers because they are not
saved to the Mova.
•You cannot save any numbers while “ ”
or “ ” appears in the display.
• On your itemized billing report (optional),
the phone numbers are printed even for
the calls by the Short Dial.
Saving Short Dial
Enter + 2-digit
1
Short Dial number + phone
number and press .
• For 2-digit Short Dial number, enter a
Short Dial number between 00 and 19.
If you enter “00”, save “9999” and
press , the Malicious Caller Block
is enabled and all Short Dial numbers
saved for 00 to 19 are deleted.
The short beeps sound while the Short
Dial is being saved. When the beeps
sound, the saving is completed.
Press .
2
• If is not pressed, the call is connected
to the saved phone number.
Using Short Dial
Enter + 2-digit Short
1
Dial number and press .
• The phone number saved to the Short
Dial is not displayed.
46
Page 49
Call
Malicious Caller Block
Malicious Caller Block
● Starting Malicious Caller Block
.
When the beeps sound, the saving is completed.
To change back to the Short Dial
The Malicious Caller Block is canceled by
saving an available phone number other
than 9999 for 0
phone number). The phone number saved
is available as the Short Dial number “00”.
● Saving numbers to reject
number from which to block a call .
When the beeps sound, the saving is com-
pleted.
● If you overwrite a phone number with
a new one, the old phone number is
deleted.
● This function is not available for FOMA
if you subscribe to the Dual Network
Service.
● For the Malicious Caller Block, only
“ordinary phone numbers” can be
saved and “mobile phone numbers”
cannot.
+
00 (such as your home
+ 01 to 19 + the ordinary phone
47
Page 50

Call
Pause
Pause
For making ticket reservations, playing back recorded messages from your
home answering machine, etc., touchtones (up to 24 digits) can be sent.
e.g. Sending the touch-tone “1234#”
Place a call.
1
Press “1234#”.
2
Press (call), select
3
[Send all] and press .
The touch-tone (“1234#” in this case) is
sent.
1234#
Voice notify
Send all
Call
▼
After all touch-tones are sent, the calling display appears.
● Saving touch-tones as phone numbers
to the Phonebook beforehand is convenient. In this case, enter “P (pause)”
between a phone number and touchtones (P.62).
● Depending on the phone number you
dialed, touch-tone is sent just after performing step 2. In this case, step 3 is
unnecessary.
1234#
48
Page 51

Call
Calling a Pager
Calling a Pager
Messages can be sent from the Mova
to a pager.
• If you send a message during the pager guidance playback, you can skip the guidance.
*
Sending Numeric Messages
Numeric messages can be sent from
the Mova to a pager.
•
Note that you may not be able to send messages
correctly to pagers other than the DoCoMo’s.
Call a pager.
1
The guidance is played back and the
beeps sound.
Enter numeric messages.
2
Press twice.
3
Press when you hear the
4
guidance informing you that the
message is going to be sent.
Sending Text Messages
Messages can be sent from the Mova
to a pager that has a display.
• Save text messages you wish to send to
the Memo beforehand (P.216).
• Check the recipient’s pager type before
sending messages. The text type and number that the pager can receive vary depending on its type.
Call a pager.
1
The guidance is played back and the
beeps sound.
From the menu, select [Tool]
2
→ [Memo] and press .
Select a memo and press
3
(option).
The submenu appears.
Select [send all] → [Yes]
4
and press .
The contents of the memo are sent. After
the sending, the calling display reappears.
Press when you hear the
5
guidance informing you that the
message is going to be sent.
● Full-width characters cannot be sent
to the DoCoMo QUICKCAST “02•DO”
service.
*The paging service provided by NTT DoCoMo is
called QUICKCAST as of January 2001.
49
Page 52

Call
Hands-free Mode
Hands-free Mode
You can use the Car Adapter (optional)
to talk on the Mova without using your
hand (hands-free) while driving a vehicle by attaching it to the Mova.
For details, see the user’s manual of
the Car Adapter (optional).
•To use the Mova hands-free in a vehicle, the
optional Car Holder, Hands-Free Microphone, Power Cable, Hands-Free Remote
Control and Antenna for Hands-Free Operation are required in addition to the optional
Car Adapter.
From the menu, select
1
[Settings] → [Call] →
[Hands-free] and press .
The Hands-free display appears.
Select [ON]/[OFF] and press
2
.
The Hands-free mode is set.
● This function is available only by us-
ing the Car Adapter.
● If you connect car adapters other than
the Car Adapter SO002, “ ” may not
be displayed correctly.
50
Page 53

Call
Rejecting No Caller ID
Rejecting No Caller ID
When receiving a call without the
caller’s phone number displayed, the
reason for not displayed is shown. You
can decide whether to accept a call
based on the reason.
Non-display Description
reason
User unset When a call is received from
Payphone When a call is received from
Not support
• The Short Mail and i-mode mail can be received regardless of this function.
•When you set the Denied no ID to [ON]
and receive a call with no caller ID, the
message “Missed call” appears without
connecting. The call is saved to the received record.
From the menu, select
1
[Settings] → [Security] →
[Denied no ID] and press
The Security code screen appears.
Enter the Security code.
2
a person who intentionally
does not notify the caller’s
phone number.
a payphone, etc.
When a call that cannot notify the caller’s phone number, such as calling from
overseas or through the call
forwarding services, is
received.(However, the
caller’s phone number may
be provided depending on
the telephone company forwarding the call.)
.
Denied no ID
OFF
User unset
OFF
Payphone
OFF
Not support
Select ON/OFF by each
3
non-display reason and
press .
The Denied no ID is set.
51
Page 54

Call
Accepting/Rejecting by Phone Numbers/Groups
Accepting/Rejecting by
Phone Numbers/Groups
You can set to accept/reject calls only
from designated phone numbers. Save
the phone number of the caller to be
accepted/rejected beforehand. Up to
20 phone numbers can be saved for
either to accept or to reject (Number).
The Mova can also be set to accept/reject calls only from designated groups
in the Phonebook. Up to 3 groups can
be saved for either to accept or to reject
(Group).
This function is valid only when a caller
sends the phone number. It is recommended to set the Caller ID Display
Request Service (P.196) and the Denied
no ID (P.51) together with this function.
• The Short Mail and i-mode mail can be
received regardless of this function.
• When the Accept calls is [ON] and receiving a call from other than the designated
phone numbers/groups, the message
“Missed call” appears without connecting.
The call is saved to the received record.
• When the Reject calls is [ON] and receiving a call from a designated phone number/group, the message “Missed call”
appears without connecting. The call is
saved to the received record.
•You cannot set a phone number to ON to
both accept and reject at the same time.
This is same as for a group.
•When you designate a caller to accept/reject by both the phone number and the
group, the designation by the phone number has priority.
52
Page 55

Call
e.g. Accepting calls only from designated
phone numbers
From the menu, select
1
Accepting/Rejecting by
Phone Numbers/Groups
[Settings] → [Security] →
[Accept calls] and press
.
The Security code screen appears.
To set the Reject calls
From the menu, select [Settings] → [Se-
curity] → [Reject calls].
Enter the Security code.
2
Accept calls
Number OFF
OFF
Group
Select [Number] and press
3
.
Number
Set
OFF
0/20
List
To designate a group
Select [Group] then select a group name
from the List.
Select ON/OFF at [Set].
4
Select [List] and press .
5
List
①
②
③
▼
Enter a phone number in a
6
Number input field
number input field.
To delete a phone number/group
Move the cursor to the number or group
input field. From the submenu, select [delete] → [Yes]. To delete all numbers/
groups, select [delete all] → [Yes].
Press (cmplt).
7
The List is saved.
Press (cmplt).
8
The Accept calls from designated phone
numbers is set.
53
Page 56
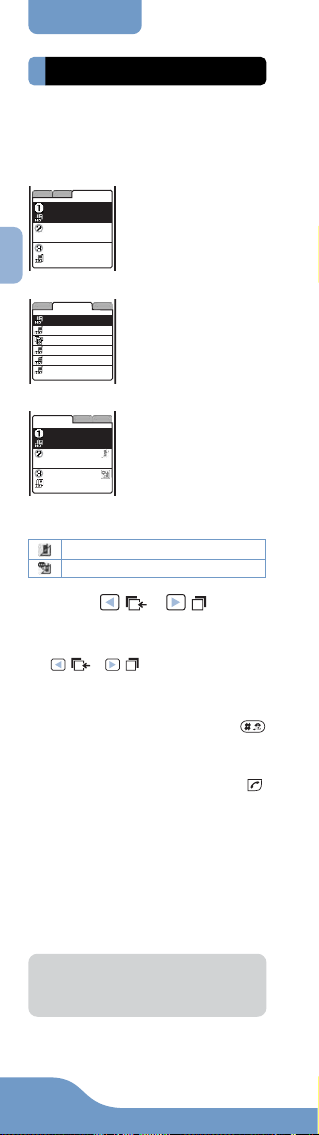
Call
▼
▼
Redial/Received Record
Redial/Received Record
Once received/called numbers, the
callers’/recipients’ names, incoming/
outgoing times and dates are saved to
the record.
Redial record
Redial
Recv Freq
Nov30 10:32
Brian Millar
Nov29 10:00
03XXXXXXXX
Nov29 9:35
Anthony Smith
▼
Dial Frequency record
Recv
DialFreq Redl
Brian Millar
Anthony Smith
03XXXXXXXX
Carol Wong
Emily Howard
David Lee
▼
Received record
Received Freq Redl
Nov30 10:32
Brian Miller
Nov29 10:00
03XXXXXXXX
Nov29 9:35
Anthony Smith
▼
• The following icons show you incoming status of missed calls.
No record message
Some record message
Once called numbers are
saved up to 30 to the
redial record. If the same
number has been called
repeatedly, the latest call
remains.
Saving redialed numbers
up to 30 in descending
order of frequency.
Once received calls are
saved up to 30 to the received record.
You can check a ring time
of a missed call.
Press ( )/ ( ).
1
Names/phone numbers in the record
appears.
The record display can be switched with
( )/ ( ).
To display a phone number
If there are any entries in the Phonebook,
their names and phone types appear instead of phone numbers. Pressing
switches the display between names and
numbers temporarily.
To place a call
Move the cursor to the record and press .
To check a ring time of a missed call
Move the cursor to the missed call in the
record. From the submenu, select [ringing time].
• The ring time cannot be checked as for
a missed call with a record message.
To send a mail
If the phone number and the mail address
is saved to the Phonebook, the mail can
be sent by EV-link (P.217).
● If a caller uses a Dial-in phone number,
the number displayed in the received
record may appear different from the
caller’s Dial-in number.
54
Page 57

Call
Missed Call
Deleting Redial/Received Record
The records remain even after powering OFF the Mova once. If you do not
wish others to see them, delete them.
From the record display,
1
select a record and press
(option).
The submenu appears.
Select [delete] → [Yes] and
2
press .
The selected record is deleted.
To delete all records
From the submenu, select [delete all], enter the Security code and select [Yes].
● If you delete the redial record, the dial
frequency record is deleted as well.
Missed Call
If a call is not answered, the message
“Missed call X” appears in the standby display. The received record shows
the date, time and caller (P.54).
To delete the message “Missed call”
Press for over a second.
Turning off the power can also delete the message “Missed call”.
55
Page 58

Call
Driving Mode
Driving Mode
The Driving mode (answering message
function while driving) is an automated
answering service that supports safe
driving. When the Driving mode is set,
the guidance informs the caller that you
are unable to answer because you are
driving, then the call is disconnected.
• The Driving mode can only be set or canceled in stand-by (it can be set even when
“ ” appears in the display).
• The call can be placed normally even while
the Driving mode is set.
• The Driving mode cannot be used during
data and fax communications.
•
If the Caller ID Display Request Service is
[ON] and you receive a “User unset” call, the
caller ID request guidance is played back (the
Driving mode guidance is not played back).
Press for over a second.
1
To cancel the Driving mode
Press for over a second in the standby display. The Driving mode is canceled
and “
● If the mode is set
The ring tone does not sound when there is an
incoming call. The message “Missed call X” appears in the display and the call is saved to the
received record (P.54).
The guidance informs the caller that you are
unable to answer because you are driving,
then the call is disconnected. If the Mova is
powered OFF, or “
is not played back but the same guidance as
provided when “
● If Voice Mail Service is also set
The call is forwarded to the Voice Mail Service
Center without connecting. The message
“Missed call X” appears in the display and the
call is saved to the received record (P.54).
The guidance informs the caller that the call is
connected to the Voice Mail Service Center because you are driving and are unable to answer.
Then, the call is forwarded automatically to the
Voice Mail Service Center.
When the ring tone duration of Voice Mail Service is set to 0 second, the message “Missed
call X” does not appear in the standby display
and the call is not saved to the received record.
The guidance which informs the call is connected to the Voice Mail Service Center plays
instead of the guidance of Driving mode.
● If Call Forwarding Service is also set
The call is forwarded to a designated phone
number without connecting. The message
“Missed call X” appears in the display and the
call is saved to the received record (P.54).
The guidance is played back (or not) depending on the setting made by “1429”. If the forwarding guidance is “ON”, the guidance informs
the caller that the call is forwarded to another
phone number because you are driving and
unable to answer. If the forwarding guidance is
“OFF”, the guidance is not played back.
The Driving mode is
set and “ ” appears.
” disappears.
” appears, the guidance
” appears is played back.
56
Page 59

Call
● While the i-mode communication with
Voice Mail/Call Forwarding Service setting
to “1450”
The guidance to be played back varies depending on the settings of the Call during
i-mode (P.134).
Call during
i-mode settings
Voice mail
Forward
w/ msg
Forward
w/o msg
Notification
Answer
• The settings above are invalid if “1451”,
“1452” or “1459” (P.185, 192) is set when
subscribing to the Voice Mail Service or
the Call Forwarding Service.
● If keypad is locked remotely during
Driving mode set
When the number of missed calls from the authorized number reaches the specified value (P.98),
the guidance informs the caller that the Keypad
lock is set instead of that you are driving.
● When the Manner mode is also set,
the Driving mode has priority.
●
To set the Driving mode, press . Do
not set the Driving mode by “14151 (ON)”
or “14150 (OFF)” since it is not effective
when the Mova is powered ON but effective only when the Mova is powered OFF
or out of the service area. If the Driving
mode is set by “14151 (ON)”, cancel the
mode by “14150 (OFF)”.
● While the Driving mode is set, the fol-
lowing tones do not sound:
- Phone tone - Mail/Message tone
- Clock alarm tone
- Schedule alarm tone
- Battery alarm - Wake-up tone
- Starting charge tone
- Completed charge tone
Driving Mode
Guidance messages
Following the guidance
informing that packet
communication is in
progress, the guidance informs the caller that the
call is connected to the
Voice Mail Service Center
because you are driving.
Following the guidance
informing that packet
communication is in
progress, the guidance
informs the caller that the
call is forwarded to the
forwarding phone number
because you are driving.
The guidance is not
played back (the Driving
mode guidance is not
also played back).
Only the Driving mode
guidance is played back
(the Voice Mail Service
and the Call Forwarding
Service are not activated
even if they are set to ON).
Only the Driving mode
guidance is played back
(the Voice Mail Service
and the Call Forwarding
Service are not activated
even if they are set to ON).
57
Page 60

Call Record Message
Record Message
When the Record message is set, the
Mova can play back an answering message and record a caller’s message when
you are unable to answer.
• When 3 messages are recorded, the
Record message no longer operates. Delete unnecessary messages.
• While the Driving mode is set, the Record
message does not operate.
● Record Message and Voice Mail Service
The Record Message and the Voice Mail
Service are different in the following items:
Item
Max. no. of
messages
Max. recording time
Max. holding time
Holding
place
Location for
playback
Location for
recording
Condition
for recording
Press for over a second.
1
To cancel the Record message
Press for over a second. The Record
message is canceled and “
Record
Message
3 messages
About 20
seconds
Unlimited
The Mova
Inside or
outside of the
service area
Inside the
service
area only
The Mova
is powered
ON
20 messages
About 3
minutes
72 hours
Voice Mail
Service Center
Inside the
service area
only
Inside or
outside of the
service area
The Mova is
powered ON
or OFF
The Record message
is set and “ ” appears.
Voice Mail
Service
” disappears.
If Receiving a Call
Play ans msg
03XXXXXXXX
After the Mova rings for
the set duration and the
indicator flashes, the
answering message is
played back for the caller.
The guidance and the
caller’s voice are heard
from the earpiece.
To talk to the caller
Press .
After the caller’s message
is recorded, the stand-by
display reappears.
Number of record
messages
There is a record
message that has not
been played back
58
Page 61

Call
Record Message
Record Message Setting
Press , select [Set msg]
1
and press .
Set record msg
OFF
Set
To answer
10
sec
(01−29)
Rec answer msg
Msg setting
Std
Select ON/OFF at [Set].
2
Enter the time until the
3
Record message starts
playing at [To answer].
From 01 to 29 seconds
Record an answering
4
message at [Rec answer msg].
Your voice is picked up by the microphone
and recorded. In 10 seconds, it automatically
stops and the Msg setting is set to [Orig].
If an answering message has been
already recorded
The newly recorded message records
over the previous one.
To play back the answering message
Select [Msg setting], move the cursor to
[Original msg] and press
To set the answering message back
to the Standard message
Select [Msg setting] then select [Standard msg].
Press (cmplt).
5
The Record message is set.
● To give the Record message priority while
setting the Voice Mail Service, the Call
Forwarding Service and Record message
at the same time, set the answering time
of the Record message shorter than the
ring tone durations of the Voice Mail Service and the Call Forwarding Service.
In addition, if 3 messages are recorded
by the function, the Voice Mail Service and
the Call Forwarding Service start up.
(play).
Quick Record Message
The Record message can be set temporarily by hand while receiving a call
even if the Record message is [OFF].
• If 3 record messages are saved, the Quick
record message does not operate. Delete unnecessary messages.
• The maximum number of messages, the maximum recording time, the Message setting of
the Quick record message are same as those
of the Record message.
1
Press while receiving a call.
Play ans msg
03XXXXXXXX
The answering message automatically
starts and the Mova
starts recording the
caller’s message.
The guidance and
the caller’s voice are
heard from the earpiece.
59
Page 62

Call
Record Message
Playing Back
e.g. Playing back a record message
Press , select [Play msg]
1
and press .
Play record msg
Nov 30 10:32
Brian Miller
Nov
29 22:00
User unset
Nov 29 7:50
Carol Wong
To play back a voice memo
Select [Play memo].
Select a record message
2
and press (play).
Play record msg
Nov 30 10:32
Brian Miller
□□□□□□□□□□
Playing
18sec
To stop the playback on the way
Press (stop).
To play back the next record message
Press (skip) during the playback.
To delete the record message during
the playback
Press (delete) during the playback and
select [Yes].
The record message
is played back.
Deleting
Up to 3 record messages and 2 voice
memos can be recorded. Delete the
unnecessary message or memo.
e.g. Deleting a record message
Press , select [Play msg]
1
and press .
To delete a voice memo
Select [Play memo].
Select a record message
2
and press (option).
The submenu appears.
Select [delete] → [Yes] and
3
press .
The selected record message is deleted.
To delete all record messages
From the submenu, select [delete all] →
[Yes]. When all record messages are deleted, the number of record messages in
the stand-by display disappears.
60
Page 63

Phonebook
Saving to Phonebook ................. 62
Editing Phonebook ..................... 64
Editing Group Name ................... 65
Deleting Phonebook ................... 66
Searching Phonebook ................ 66
Phonebook Displaying Method ... 67
Memory Status ............................. 67
Secret Mode ................................. 68
Placing a Call from Phonebook ... 69
2-touch Dial .................................. 69
61
Page 64
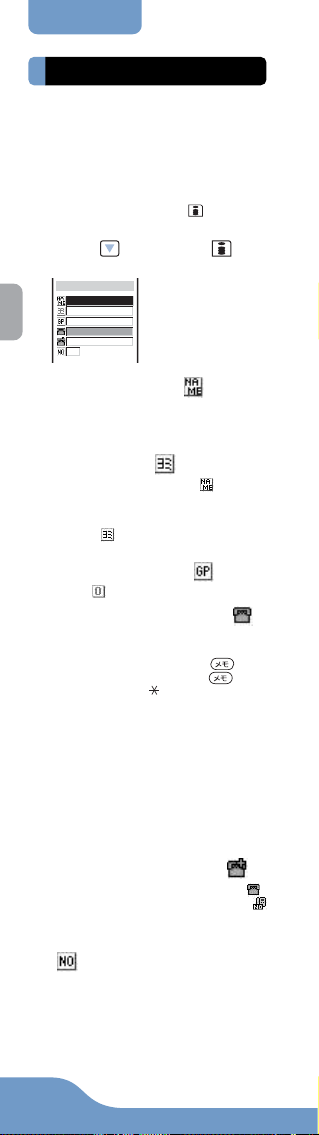
Phonebook Saving
Saving to Phonebook
Up to 700 entries can be saved to the
Phonebook.
• Up to 3 each of phone numbers and mail
addresses per name can be entered. Up to
700 phone numbers and up to 2,100 mail
addresses can be saved to the Phonebook.
• If one of those, “name”/“phone number”/
“mail address”, is entered, (cmplt) appears and it becomes registrable.
1 Press then press
(new).
Edit phonebook
▼
Enter a name at [ ].
2
Up to 10 full-width or 20 half-width characters
Check whether the reading
3
is correct at [ ].
When a name is entered at [ ], its reading is automatically saved.
To correct the reading
Select [ ] and enter the reading within
18 half-width characters.
Select a group at [ ].
4
Group “ ” is automatically entered.
Enter phone numbers at [ ].
5
Up to 3 phone numbers, 24 digits per
number
•To enter “-” (hyphen), press once.
To enter “P” (pause), press twice.
• If an asterisk “ ” or sharp (#) is included in the middle of a phone number, the Mova cannot place a call to
the number. (If these symbols are attached to the end of the number, the
call can be placed.)
• If “P” is included in the middle of a phone
number, the digits up to “P” are sent.
• If “184” or “186” is prefixed and the
phone number is selected as an imode mail address, the mail cannot
be sent correctly.
Select a phone type at [ ].
6
When a phone number is entered at [ ],
the phone type is automatically set to [
Public].
Enter a memory number at
7
[ ].
From 000 to 699
• The least number available is automatically entered.
• Use the memory number when you
place a call by the 2-touch dial.
62
Page 65

Phonebook Saving
Enter a mail address at [ ].
8
Up to 3 mail addresses, 50 half-width
alphanumeric characters per address
•When sending a mail to an i-mode
compatible mobile phone, you need
to specify the mail address before the
@ only.
Select a mail type at [ ].
9
When a mail address is entered at [ ],
the mail type is automatically set to [
Public].
Enter a Secret code at [ ].
10
If the recipient has already saved a Secret
code, that designated Secret code (P.165)
must be entered in your Phonebook. When
sending a mail, it is used.
•
If you save a mail address as “phone
number + Secret code@docomo.ne.jp”
to the Phonebook, you cannot send a
mail or reply to this address. To avoid
this, change the mail address to “phone
number@docomo.ne.jp” then save a
Secret code.
•
A Secret code is masked by “ ”.
Only when the Secret mode is set to
[Display ON], the number is displayed.
Enter an address at [ ].
11
Up to 64 full-width or 128 half-width characters
Select ON/OFF at [ ] to save
12
as Secret.
To display the entry saved as Secret
Set the Secret mode to [Display ON]
(P.68).
Press (cmplt).
13
The entered data are saved to the
Phonebook.
● Always keep the data in a separate
note.
The saved data may be lost as a result of malfunction, repair, change of
the Mova or other handlings. Although
the data of the Phonebook is kept for
about 3 weeks after the battery is removed or run out, the data may be lost
after the period.
Under no condition will DoCoMo be
held liable for any damaged or lost
data saved to the Phonebook, etc.
● The following data can be copied to a
new mobile phone at the DoCoMo service counter (DoCoMo shop) when you
change the model: “the first phone
number”, “Katakana and Kanji names”,
“Group setting”, “the first mail address”, “bookmarks” and “Secret”.
Note that some data of the Mova may
not be copied depending on the specifications of the newer model.
63
Page 66
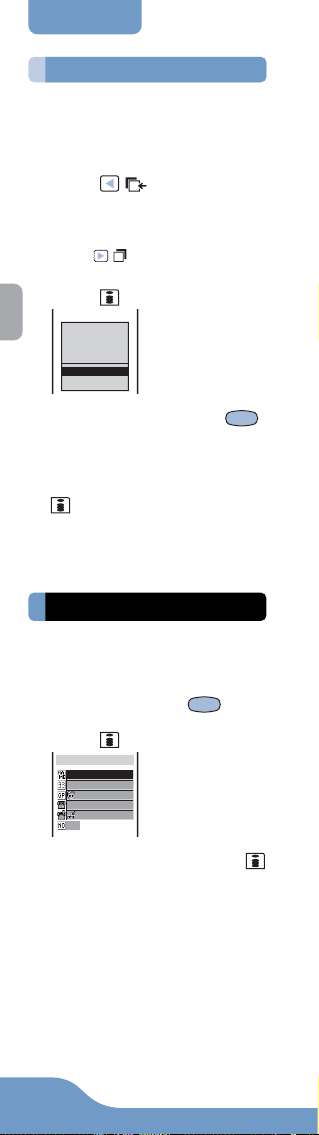
Phonebook
Saving/Editing
Saving from Redial/Received Record
A phone number saved to the record can
be directly added to the Phonebook.
e.g. Saving the received record as a new
entry
Press ( ) and select a
1
received record.
To sav3e a number from the redial
record
Press ( ) and move the cursor to the
redial record.
Press (save).
2
Select way to
save to
phonebook
New
Add
Select [New] and press .
3
When [Add] is selected
Select the name to add.
Save each item and press
4
(cmplt).
• Follow the same steps as in the Saving to Phonebook (P.62, step 2 to 13).
The entered data is saved to the Phonebook.
Editing Phonebook
The data saved to the Phonebook can
be edited.
From the Phonebook, select
1
a name and press .
Press (edit).
2
Edit phonebook
Anthony Smith
AnthonySmith
イシFriend
090XXXXXXXX
Mobile1
015
▼
Edit each item and press
3
(cmplt).
• Follow the same steps as in the Saving to Phonebook (P.62, step 2 to 13).
The edited data is saved to the Phonebook.
64
Page 67
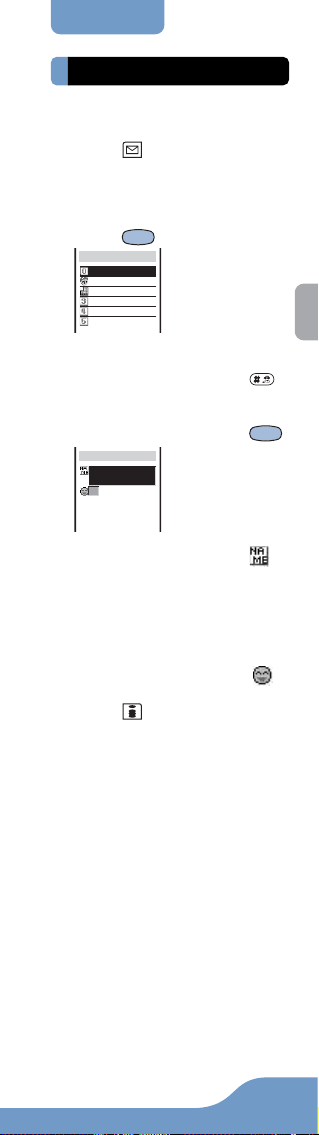
Phonebook
Editing Group Name
Editing Group Name
Up to 10 groups can be saved to the
Phonebook.
Press (option) in the
1
Phonebook.
The submenu appears.
Select [group name] and
2
press .
Edit group name
Friend
Company
▼
To display group numbers
When saved, group icons are displayed
instead of group numbers. Press
switch the display temporarily between
group icons and group numbers.
Select a group and press .
3
Edit group0
ナシ
Enter a group name at [ ].
4
Up to 10 full-width or 20 half-width characters
• In the display other than the Edit group
display, the group name appears only
up to 7 full-width/14 half-width characters.
Select a group icon at [ ].
5
to
Press (cmplt).
6
The Group name is set.
65
Page 68
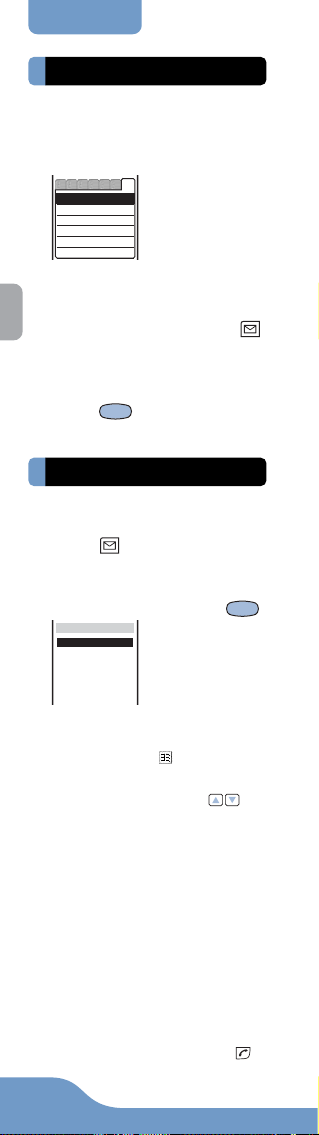
Phonebook
Deleting/Searching
Deleting Phonebook
You can delete Phonebook entries by
2 methods.
e.g. Deleting an entry
Display the Phonebook.
1
なはまやらわ A
Anthony Smith
Brain Miller
Carol Wong
David Lee
Emily Howard
To delete all
From the submenu, select [delete all], enter the Security code and select [Yes].
Select a name and press
2
(option).
The submenu appears.
Select [delete]→[Yes] and
3
press .
The selected name is deleted.
Searching Phonebook
You can search the Phonebook by
[Name], [Memory no.], etc.
Press (option) in the
1
Phonebook.
The submenu appears.
Select [search] and press .
2
Search by
Name
Memory no.
Group
E−mail
Phone number
[Name]:
Up to 18 half-width characters
Enter part of the saved reading (from
the first letter) at [ ].
[Memory no.]:
Enter 3 digits from “000” to “699”.
•Without input, pressing displays the Phonebook entry in the
memory number format.
[Group]:
Select a group.
[E-mail]:
Up to 50 half-width alphanumeric characters
Enter part of a mail address.
[Phone number]:
Up to 24 digits
Enter part of a phone number.
Select a search method and
3
enter an item.
The searching result appears.
To place a call
Select a phone number and press .
66
Page 69
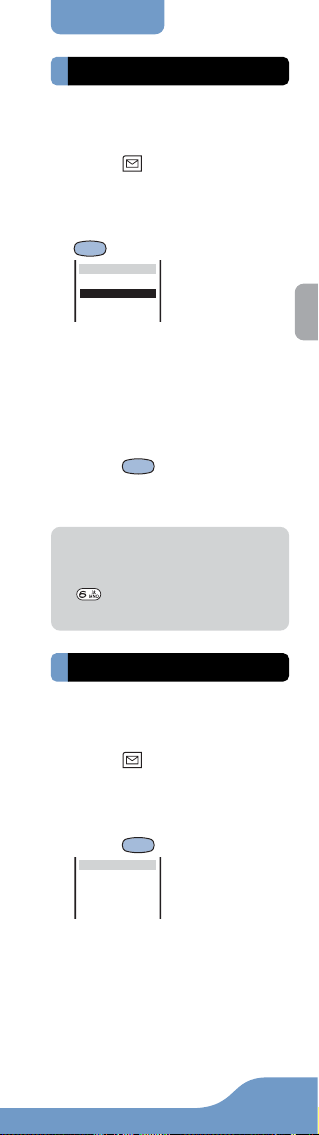
Phonebook
Displaying Method/
Memory Status
Phonebook Displaying Method
You can select the Phonebook display
format from 3 types. Set the format as
you wish.
Press (option) in the
1
Phonebook.
The submenu appears.
Select [display] and press
2
.
Display by
Alphabet
Group
Number
[Alphabet]:
Display in Japanese alphabetical reading format.
[Group]:
Display in group format.
[Number]:
Display in memory number format.
Select a display format and
3
press .
The Phonebook is displayed in the selected format.
● The pages can be switched between
tabs by the keypad when displayed in
Japanese alphabetical format. For example, to go to the tab “は”, press
key marked with the letter “は”.
However, it is impossible to go to the
tab “A”/“ETC” with the keypad.
Memory Status
The number of entries saved to the
Phonebook, the number of entries still available and saved as Secret can be checked.
Press (option) in the
1
Phonebook.
The submenu appears.
Select [memory status] and
2
press .
Memory status
Remaining 550
Used
Secret
[Remaining]:
[Used]:
[Secret]:
150
5
Display the number of entries available.
Display the number of entries saved
(including entries as Secret).
Display the number of entries saved
as Secret (displayed only when the
Secret mode is set to [Display ON]).
67
Page 70

Phonebook
Secret Mode
Secret Mode
The Phonebook, Own number and
Schedule saved as Secret are not displayed unless the Secret mode is set
to [Display ON]. Make sure to save the
Phonebook, Own number and Schedule as Secret if you do not wish others
to see them.
• Even if the Secret mode is set to [Display
ON], it is changed to [Display OFF] when
you power OFF the Mova.
From the menu, select
1
[Settings] → [Security] →
[Secret mode] and press
.
The Security code screen appears.
Enter the Security code.
2
The Secret mode display appears.
Select [Display ON]/
3
[Display OFF] and press
.
The Secret mode is set.
When the Secret mode is set to [Display
ON], “ ” appears.
● When the Secret mode is set to [Dis-
play ON], a phone number, name, and
phone type appear in the Redial/Received record, and a name appears in
the sent/received mail even if entry is
saved as Secret in the Phonebook.
Even if the Secret mode is changed to
[Display OFF] later, the record and received/sent mail remain in appearing
(P54, 159).
68
Page 71
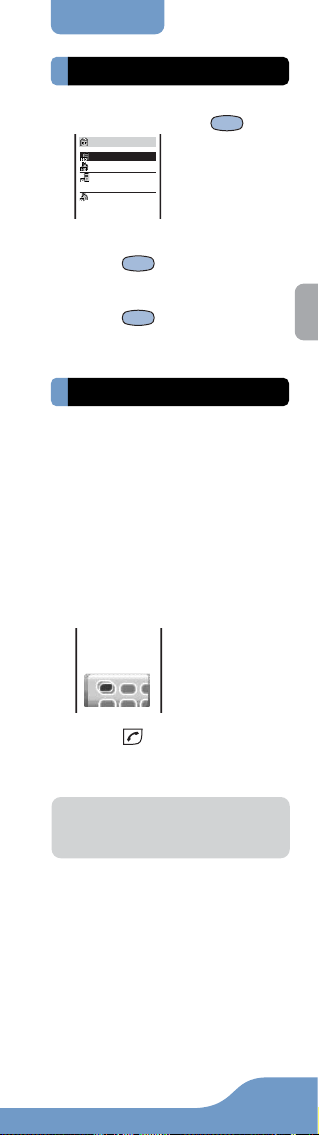
Phonebook
Placing a Call/2-touch Dial
Placing a Call from Phonebook
From the Phonebook, select
1
a name and press .
Carol Wong
090XXXXXXXX
03XXXXXXXX
docomo.taro.△△
@docomo.ne.jp
docomotaro@△△.
□□□.co.jp
▼
Select a phone number and
2
press (call).
Select a call menu and
3
press .
The call is connected in accordance with
the selected menu.
2-touch Dial
The call can be placed easily to a
phone number saved to the memory
number 000 to 009. It is useful to save
often-used phone numbers to the
memory numbers 000 to 009.
• When the Secret mode is set to [Display
OFF], the 2-touch dial cannot be used to
place a call to a phone number saved as
Secret.
e.g. Placing a call to a phone number
saved to the memory number 001
Enter the memory number.
1
Enter the last 1 digit of
the memory number (0
to 9).
1
Press .
2
The call is connected to the number
saved to the memory number 001.
● The call can be placed to phone num-
bers saved to memory numbers 010
to 099 by entering the last 2 digits (10
to 99).
69
Page 72

70
Page 73

Manner Mode
Manner Mode ............................... 72
Manner Mode Setting .................. 74
Vibrator ......................................... 75
Keypad Sound ............................. 75
71
Page 74

Manner Mode72Manner Mode
Manner Mode
All sounds of the phone can be muted
to avoid disturbing others by the Manner mode.
There are 3 types. They can be set at
the Manner mode setting (P.74).
Press for over a second.
1
Manner ( is pink)
Silent
Original ( is blue)
To cancel the Manner mode
Press for over a second. The Manner mode is canceled and the icon disappears.
● If you press during a call, the
Whisper mode is set/canceled (P.44).
The Manner mode is
set and the icon for
the current Manner
mode appears.
Page 75

Manner Mode
Manner Mode
● Functions of each mode
Vibrator (P.75)
Type1
OFF
OFF
Setting range: [OFF/Type1/
Type2]
Phone volume (P.82)
※
OFF
OFF
StepDown
Setting range: [OFF/1 to 5/
StepDown/StepUp]
※ Each mode of the sound effect volume
is same as that of the Phone volume.
Mail volume (P.82)
※
OFF
OFF
3
Setting range: [OFF/1 to 5]
※ The ring volume of the Message R/F
is same as that of the Mail volume.
Alarm volume (P.104, 112)
OFF
OFF
3
Setting range: [OFF/1 to 5]
Keypad sound (P.75)
OFF
OFF
1
Setting range: [OFF/1 to 2]
Battery alarm (P.34)
※
OFF
OFF
ON
Setting range: [ON/OFF]
※ The battery alarm sounds during a call
regardless of the setting. The Mova
vibrates even when the battery alarm
is [OFF]. (The Silent mode during a
call is the exception.)
Record message (P.58)
※
–
※
–
OFF
Setting range: [ON/OFF]
※ The settings for Record message do
not change even if the Manner mode
or Silent mode is set.
Whisper mode (P.44)
ON
OFF
OFF
Setting range: [ON/OFF]
73
Page 76

Manner Mode
Manner Mode Setting
Manner Mode Setting
The Manner mode can be selected
from 3 types.
From the menu, select
1
[Settings] → [Manner] →
[Manner mode] and press
.
Manner mode
Set
OFF
Mode
Manner
Select ON/OFF at [Set].
2
Select a mode type at
3
[Mode].
Press (cmplt).
4
The type of the mode is changed.
Original Manner Mode
The operations of the Original manner
can be customized. For the items you
can set, see “Functions of each mode”
(P.73).
• The Original manner cannot be saved
during a call or while the Manner mode is
set.
• The Record message setting does not
change even if you set the Record message to [OFF] in the Original manner while
the Record message is set.
e.g. Setting the battery alarm
From the menu, select
1
[Settings] → [Manner] →
[Orig manner] and press
.
Orig manner mode
Vibrator OFF
SD
3
3
1
ON
Phone volume
Mail volume
Alarm volume
Keypad sound
Batt alarm
▼
Select ON/OFF at [Batt alarm].
2
Press (cmplt).
3
The Original manner is changed.
74
Page 77

Manner Mode
Vibrator/Keypad Sound
Vibrator
The vibration can be set to notify you
of receiving a call or mail/message.
• The Vibrator cannot be set while the Manner mode is set.
From the menu, select
1
[Settings] → [Ringer] →
[Vibrator] and press .
Vibrator
OFF
Type1
Type2
[OFF]:
Do not set the vibrator.
[Type1]:
Set short intermittent vibration.
[Type2]:
Set long intermittent vibration.
To check the vibration
Move the cursor to the type and press
(confm).
Select a vibration type and
2
press .
The Vibrator is set and “ ” appears.
Keypad Sound
The keypad volume can be set when a
key on the Mova is pressed (Keypad
sound).
• The keypad volume cannot be set while
the Manner mode is set.
From the menu, select
1
[Settings] → [Ringer] →
[Keypad sound] and press
.
Keypad sound
1
Use to control the
2
volume and press
(ok).
Select from [OFF] and [1] to [2].
• Every time you press, the keypad
sound is heard at the selected volume
level.
To set the volume to [OFF]
Press further at the level 1.
75
Page 78

Page 79

Ringer and Display
Ring Tone ...................................... 78
Sound Effect ................................ 79
Designated Ring Tone ................. 80
Preset Melodies ........................... 81
Earpiece Volume Control ............ 81
Ring Tone Volume Control .......... 82
Alert Duration .............................. 83
Stand-by Display ......................... 84
Animation ..................................... 85
Call Picture ................................... 86
Display Light ................................ 87
LCD Color Taste ........................... 88
Font Size ....................................... 88
Indicator ....................................... 89
Set Language ............................... 92
77
Page 80
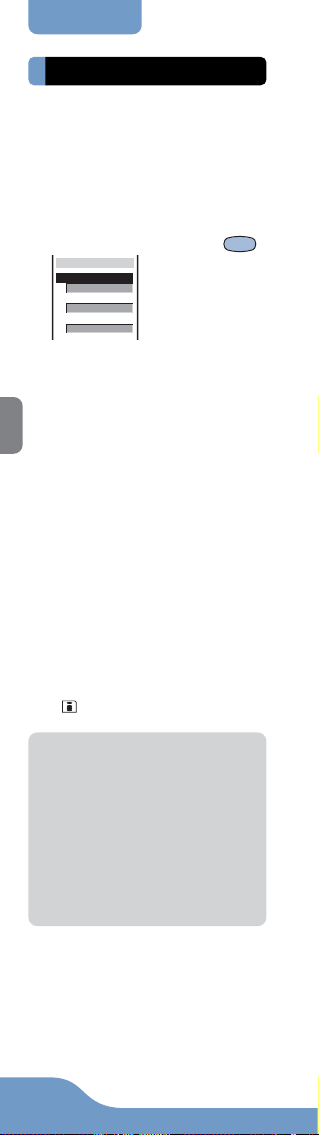
Ringer and Display
Ring Tone
Ring Tone
The ring tone can be set depending on
what is incoming, such as call, mail, etc.
• The ring tone does not sound when the
Ring volume is [OFF].
e.g. Setting the ring tone for a call
From the menu, select
1
[Settings] → [Ringer] →
[Ring tone] and press .
Select ring tone
Ring tone
Type1
Transfer tone
None
Mail tone
None
▼
[Ring tone]:
Set a ring tone for a call.
[Transfer tone]:
Set a ring tone for when the Voice Mail
Service or the Call Forwarding Service
is activated.
[Mail tone]:
Set a ring tone for mail.
[Msg R tone]:
Set a ring tone for Message R.
[Msg F tone]:
Set a ring tone for Message F.
Select a ring tone at [Ring
2
tone].
The ring tone is set.
To mute the ring tone
Select [Silent].
To set other than [Ring tone]
[None] can also be selected. The ring tone
set at the Ring tone sounds.
To check the ring tone
Move the cursor to the ring tone and press
(listen).
● If multiple ring tones are set, the fol-
lowing order of priority applies to them.
1. Ring tone of My phone no. (when
the Number Plus Service is subscribed and it is set, etc.)
2. Ring tone of the designated phone
3. Ring tone of the designated group
4. Ring tone during i-mode
5. Transfer tone
6. Ring tone of the phone
● Even if the Mail tone is set, the Desig-
nated ring tone (P.80) set for mail has
priority over the Mail tone setting.
78
Page 81
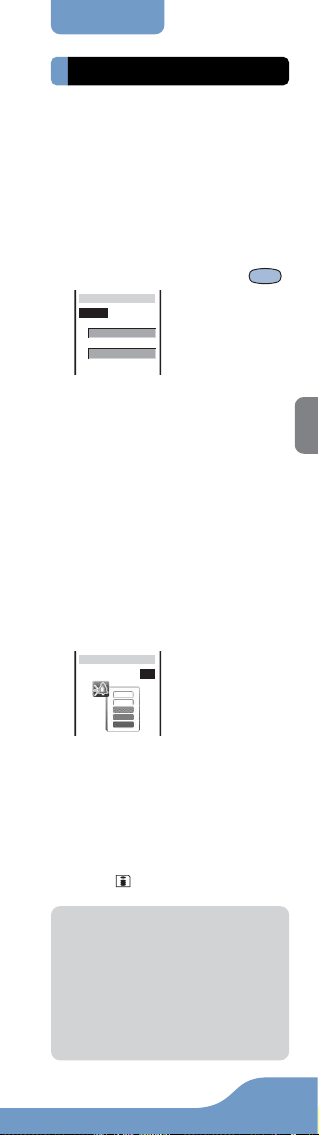
Ringer and Display
Sound Effect
Sound Effect
You can set the sound effect when the
Mova is powered ON, a mail is sent,
etc. The type and volume of the sound
effect can be set.
• The volume cannot be controlled while the
Manner mode is set.
e.g. Setting a sound effect when sending mail
From the menu, select
1
[Settings] → [Ringer] →
[Sound effect] and press .
Sound effect
Volume
Key guard rel.
Sound effect2
Send mail
Silent
Check new msg
▼
[Key guard rel.]:
Set a sound effect when releasing the
Key guard.
[Send mail]:
Set a sound effect when sending mails.
[Check new msg]:
Set a sound effect when checking new
messages/mails.
[Wake-up]:
Set a sound effect when powering ON
the Mova.
[Starting charge]:
Set a sound effect when the charging
starts.
[Completed charge]:
Set a sound effect when the charging
is completed.
Control the volume at [Volume].
2
S effect volume
3
Select from [OFF] and
3
[1] to [5].
Select a sound effect at
3
[Send mail].
The sound effect for sending mails is set.
To mute the sound effect
Select [Silent].
To check the sound effect
Move the cursor to the sound effect and
(listen).
press
● The sound effect is not heard during a
call, communication and when [Phone
volume] for the Manner mode is set to
[OFF] (P.73).
●
The sound effect set for [Wake-up], [Starting charge] and [Completed charge] is not
heard while the Driving mode is set (P.56).
● The keypad sound is heard while the
Key guard is set and the sound effect
cannot be changed.
79
Page 82

Ringer and Display
Designated Ring Tone
Designated Ring Tone
You can set the Mova to emit an exclusive ring tone for calls/mails from the designated phone numbers or groups.
This function is valid only when the
callers send their phone numbers.
e.g. Setting the Designated ring tone for
a call
From the menu, select
1
[Settings] → [Ringer] →
[Designated] and press .
Designated tone
Des phone
Des mail
Select [Des phone] and
2
press .
Des phone tone
Number
0/20
Group
0/10
To set the Designated ring tone for a
mail
Select [Des mail].
Select [Number] and press
3
.
Number
①
②
③
▼
To designate a group
Select [Group] then select a ring tone for
each group.
Enter a phone number in a
4
number input field.
To delete a phone number/group
Move the cursor to the number/group input
field. From the submenu, select [delete] →
[Yes]. To delete all numbers/groups, from
the submenu, select [delete all]/[reset all]
→ [Yes].
Select a ring tone at the
5
ring tone input field.
To set no ring tone
Select [None].
To mute a ring tone
Select [Silent].
To check the ring tone
Move the cursor to the ring tone and press
(listen).
Press (cmplt).
6
The Designated ring tone is set.
Number input field
Ring tone input field
80
Page 83
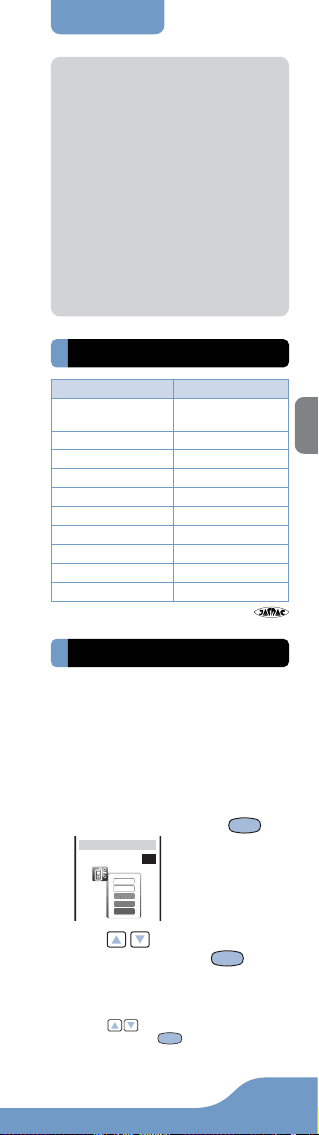
Ringer and Display
●
When you designate a ring tone by both
the phone number/mail address and the
group, the designation by the phone
number/mail address has priority.
● When My phone no. of the Number
Plus Service receives a call, regardless of the designated ring tone settings, the ring tone that has been set
for My phone no. (P.195) sounds.
● When you receive a call/mail from the
one saved to a designated group as
Secret, the regular ring tone sounds.
To enable the Designated ring tone for
the designated group, set the Secret
mode to [Display ON] (P.68).
● When you receive a call/mail while the
Keypad lock is [ON], the regular ring
tone sounds.
Preset Melodies/
Earpiece Volume
Preset Melodies
Melody name Composer
Born Slippy Nuxx
RingDaRap ー
Jupiter HOLST GUSTAV
White Surf ー
Who’s There? ー
Spital Hall S ー
Here You Go! ー
Second Step ー
Choir ー
Violin ー
HYDE KARL /
SMITH RICK (GB 2)
*License No.: T–0490079
Earpiece Volume Control
The caller’s voice volume (earpiece volume) can be controlled from level 1 (smallest) to level 5 (largest).
• The earpiece volume can be controlled
during a call. The volume is set as controlled last.
From the menu, select
1
[Settings] → [Ringer] →
[Volume] and press .
Volume
3
Use to control the
2
volume and press (ok).
The earpiece volume is set.
To control the earpiece volume during a call
Use to control the volume during a
call and press
is kept even after finishing the call.
(ok). The set volume
81
Page 84
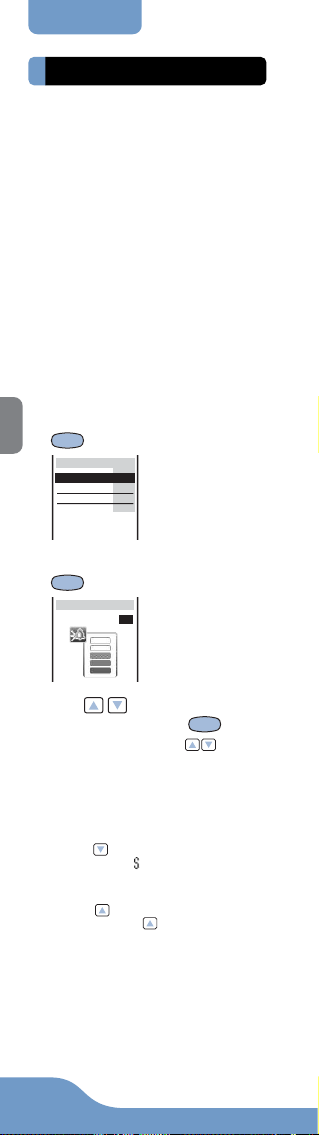
Ringer and Display
Ring Tone Volume
Ring Tone Volume Control
Depending on what is incoming (a call,
mail, etc.), the ring volume can be controlled between 8 levels: OFF (silent),
level 1 (smallest) to level 5 (largest),
StepUp (the sound becomes gradually
larger about every 6 seconds) and
StepDown (the sound becomes gradually smaller about every 6 seconds).
• The StepUp and StepDown tones are only
available for the Phone volume.
• The ring volume cannot be controlled while
the Manner mode is set.
• The Phone volume can be controlled while
receiving a call (P.43). The volume is set
as controlled last.
e.g. Controlling the Phone volume
From the menu, select
1
[Settings] → [Ringer] →
[Ring volume] and press
.
Ring volume
Phone 3
Mail 3
Msg R 3
Msg F 3
2 Select [Phone] and press
.
Phone volume
3
Use to control the
3
volume and press (ok).
•Every time you press , the ring
tone sounds for about 2 seconds at
the selected volume level (it sounds
at level 5 for [StepDown] and at level
1 for [StepUp]).
The ring tone volume is set.
To set the volume to [OFF]
Press at level 1. When the Phone volume is [OFF], “
To set the volume to [StepDown]/
[StepUp]
Press at level 5 to set the volume to
[StepDown] and
to set to [StepUp].
” appears.
further from that state
82
Page 85
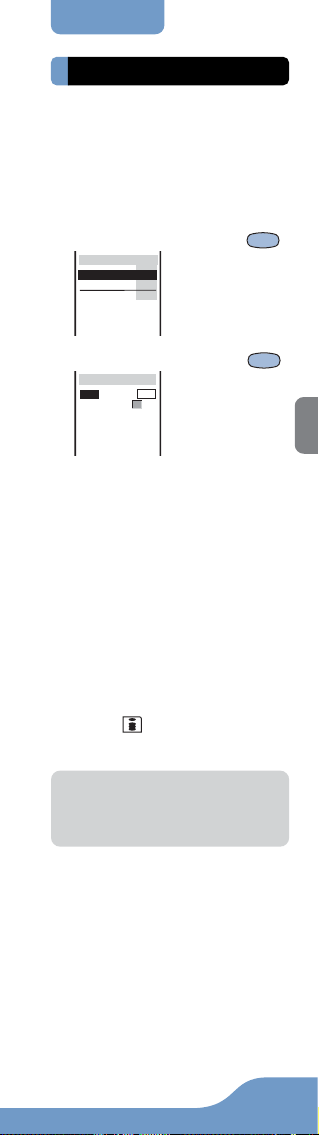
Ringer and Display
Alert Duration
Alert Duration
The alert duration of the ring tone when
mail or message is received can be
set.
e.g. Setting the alert duration of the Mail
tone
From the menu, select
1
[Settings] → [Ringer] →
[Alert time] and press .
Alert time
Mail 4
Msg R 4
4
Msg F
Select [Mail] and press .
2
Mail alert time
Play
Alert 04sec
Select ON/OFF at [Play].
3
[ON]:
[OFF]:
Enter the ring tone duration
4
at [Alert].
From 00 to 30 seconds
Press (cmplt).
5
The alert duration of the Mail tone is set.
OFF
(00ー30)
Play a certain cycle of the ring tone. The
alert duration cannot be set.
• As for a downloaded melody that its
certain part is given by the site, the
only designated melody part is
played once.
Play the ring tone according to the duration set at [Alert].
● When the alert duration is set to 0 sec-
ond, the ring tone does not sound upon
reception of mail and message. The
indicator and vibrator do not operate
either.
83
Page 86
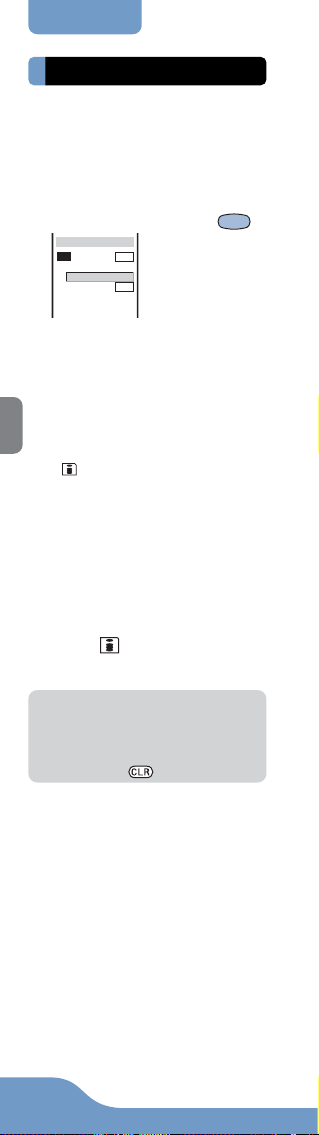
Ringer and Display
Stand-by Display
Stand-by Display
An image can be set for the stand-by
display.
• The image exceeding 128 × 128 dots in
size may not be displayed correctly.
From the menu, select
1
[Settings] → [Display] →
[Stand-by] and press .
Stand−by display
Set
Type
preminiーS( logo
Clock
Select ON/OFF at [Set].
2
Select an image at [Type].
3
To display the Schedule calendar
To check the image
Select a clock type at [Clock].
4
[OFF]:
[12h]:
[24h]:
[ANLG]:
Press (cmplt).
5
The stand-by display is set.
ON
12h
Select [Calendar].
Move the cursor to the image and press
(viewer).
Display no clock.
Display in 12-hour format.
Display in 24-hour format.
Display an analog clock.
● Even if the clock is set to [ANLG], the
clock display becomes digital if the
“Missed call” or “New mail” appears in
the stand-by display. To reset the display, check the missed call, display the
mail or press for over a second.
84
Page 87
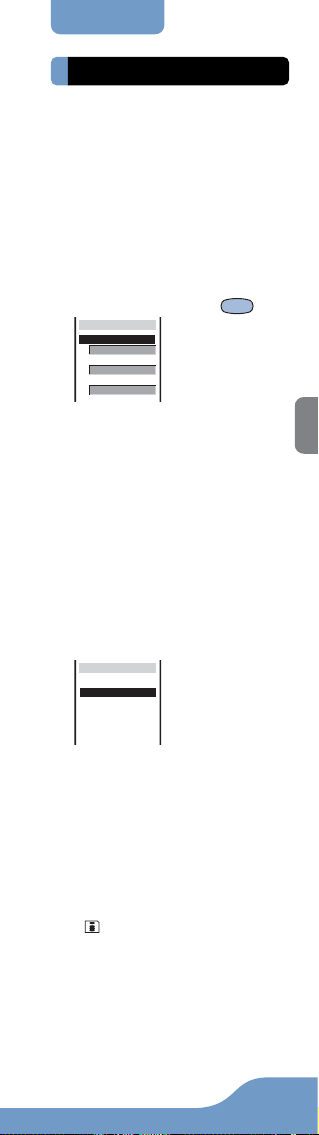
Ringer and Display
Animation
Animation
An image can be set to appear when
powering ON/OFF or placing/receiving
a call. This image can be selected from
the preset images or graphics downloaded from i-mode, etc.
• The image exceeding 100 ×50 dots in
size may not be displayed correctly.
e.g. Setting an image appearing when the
Mova is powered ON
From the menu, select
1
[Settings] → [Display] →
[Anime] and press .
Anime setting
Wake−up
preminiーS( logo
Power off
preminiーS( logo
Sending
preminiーS( imag
▼
[Wake-up]:
Set an image when powering ON.
[Power off]:
Set an image when powering OFF.
[Sending]:
Set an image when placing a call.
[Receiving]:
Set an image when receiving a call.
[Mail receiving]:
Set an image when receiving mails.
[Mail sending]:
Set an image when sending mails.
[Check new msg]:
Set an image when checking mails.
Select a type of image at
2
[Wake-up].
Wake-up
preminiーS(logo)
preminiーS(image)
OFF
[premini-S(logo)]/[premini-S(image)]:
Display an image.
[OFF]:
Display no image.
The Wake-up image is set.
To select other than [Wake-up] or [Power
off]
The display for selecting an image appears. Select an image.
To check the image
Move the cursor to the image and press
(viewer).
85
Page 88

Ringer and Display
Call Picture
Call Picture
You can change the image which appears while placing/receiving a call to/
from the designated phone number
and groups to a downloaded image.
This function is valid only when the
callers sent their phone numbers.
• The image exceeding 120 × 100 dots in
size may not be displayed correctly.
From the menu, select
1
[Settings] → [Display] →
[Call picture] and press
.
Call picture
①
No.:0 Gp:0
②
No.:0 Gp:0
③
No.:0 Gp:0
▼
Select an image input field
2
and press (option).
To delete an image
Move the cursor to the image input field.
From the submenu, select [delete] →
[Yes]. To delete all images, from the
submenu, select [delete all] → [Yes].
Select [add picture] and
3
press .
Image input field
Select an image and press
4
.
To check the image
Move the cursor to the image and press
(viewer).
Select the image input field
5
and press .
Sunflower
<Number>
①
②
<Group>
To delete a phone number/group
Move the cursor to the number/group input field. From the submenu, select [delete] → [Yes]. To delete all numbers/
groups, from the submenu, select [delete
all] → [Yes].
Enter a phone number in a
6
Number input field
Group input field
number input field.
To designate a group
Enter a group name in the group input field.
Press (cmplt).
7
The Call picture is set.
86
Page 89

Ringer and Display
● When you designate a call picture by
both the phone number and the group,
the designation by the phone number
has priority.
● When you place a call to/receive a call
from the one saved to a designated
group as Secret, the regular image appears. To enable the Call picture for
the designated group, set the Secret
mode to [Display ON] (P.68).
● When you receive a call while the Key-
pad lock is [ON], the regular image appears.
Display Light
Display Light
The brightness of the display backlight
and for the charging can be set.
From the menu, select
1
[Settings] → [Display] →
[Displaylight] and press .
Display light
Adjust light
Charging
[Adjust light]:
[Charging]:
Adjust the brightness at
2
[Adjust light].
Adjust light
3
OFF
Set the display brightness.
Set whether to turn on the display and
keypad backlights when a DC/car
adapter is connected to the external
connection terminal.
The brightness can be
3
adjusted from level 1
(darkest) to level 4
(brightest).
To change back to the default brightness
Press (reset).
Select ON/OFF at [Charging].
3
The backlight is set.
87
Page 90

Ringer and Display
LCD Color Taste/
Font Size
LCD Color Taste
You can select a design, color and icon
of the menu display from 5 types.
• Depending on the selected LCD color
taste, the characters in some sites could
hardly view.
From the menu, select
1
[Settings] → [Display] →
[Color taste] and press
.
LCD color taste
Type1
Type2
Type3
Type4
Type5
Select a type and press
2
When the cursor is
moved to a type, the
display changes in the
highlighted type.
.
The LCD color taste is set.
Font Size
The font size can separately be set for
the Phonebook, call records and mails.
Set a font size as you wish to display
characters larger or display more information in one display.
e.g. Setting the Phonebook font size
From the menu, select
1
[Settings] → [Display] →
[Font size] and press .
Font size
Phonebook L
Call record L
Mail L
[Phonebook]:
Select the Phonebook font size from
[Largest font] and [Large font].
[Call record]:
Select the call record font size from
[Largest font] and [Large font].
[Mail]:
Select the font size for the main body
in the mail content display and the text
input display from [Largest font], [Large
font], [Small font] and [Smallest font].
Select a font size at
2
[Phonebook].
The Phonebook font size is changed.
88
Page 91
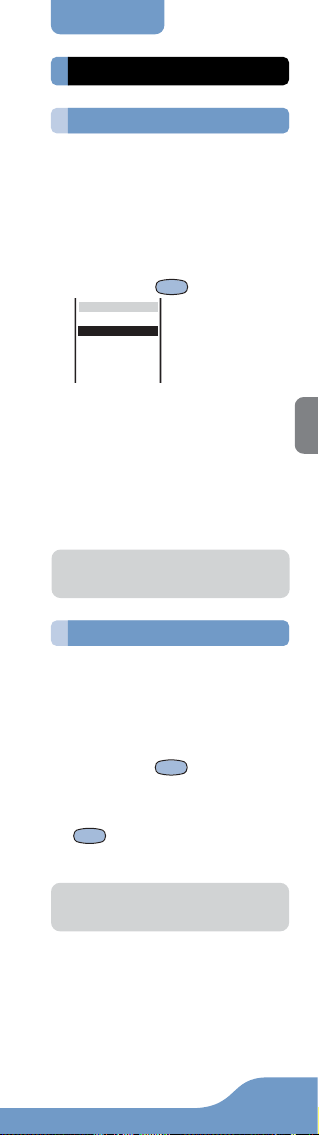
Ringer and Display
Indicator
Indicator
Color Taste
Depending on what is incoming (a call,
mail, etc.), the indicator color can be
selected from 8 types: [CL 1] to [CL 7]
and [ALL] (the 7 colors light in turn).
From the menu, select
1
[Settings] → [Display] →
[Indicator] → [Color taste]
and press .
Color taste
〈Phone〉
CL1
CL1
Indicator
Type Std
<Mail>
Indicator
Type Std
▼
Select a color at [Indicator].
2
When the cursor is moved to a color, the
indicator flashes in the highlighted color.
Select a flashing type at
3
[Type].
When the cursor is moved to a type, the
indicator flashes in the highlighted type.
● The Designated indicator (P.90) has
priority over those for the Phone set
at the Color taste.
Call Indicator
The indicator lights in 7 colors during
a call.
From the menu, select
1
[Settings] → [Display] →
[Indicator] → [Call light]
and press .
The Call light display appears.
Select [ON]/[OFF] and press
2
.
The indicator during a call is set.
● When you charge the battery during a
call with Call light setting [ON], the
charge indicator does not light.
89
Page 92

Ringer and Display
Indicator
Designated Indicator
You can change the indicator colors
which flash while receiving a call from the
designated phone numbers and groups.
This function is valid only when the
callers send their phone numbers.
From the menu, select
1
[Settings] → [Display] →
[Indicator] → [Designated]
and press .
Des indicator
Number
0/20
Group
0/10
Select [Number] and press
2
.
Number
①
Indicator
②
Indicator
③
Indicator
▼
To designate a group
Select [Group] then select a color for each
group.
Enter a phone number in a
3
number input field.
To delete a phone number/group
Move the cursor to the number/group input field. From the submenu, select [delete] → [Yes]. To delete all numbers/
groups, from the submenu, select [delete
all]/[reset all] → [Yes].
Select a color at the color
4
input field.
When the cursor is moved to a color, the
indicator flashes in the highlighted color.
To set no color
Select [None].
Press (cmplt).
5
The Designated indicator is set.
● When you designate an indicator color
by both the phone number and the
group, the designation by the phone
number has priority.
● The flashing pattern becomes same as
that selected at <Phone> of Color taste
(P.89).
● When you receive a call from the one
saved to a designated group as Secret, the regular indicator flashes. To
enable the Designated indicator for the
designated group, set the Secret mode
to [Display ON] (P.68).
● When you receive a call while the Key-
pad lock is [ON], the regular indicator
flashes.
Number input field
----
Color input field
----
----
90
Page 93

Ringer and Display91Indicator
Missed Call Indicator
The indicator can be set to flash for
about 5 seconds to notify you of a
missed call or new mail/unread message. The indicator is turned off after
a missed call is checked or mail/message is displayed.
From the menu, select
1
[Settings] → [Display] →
[Indicator] → [Missed call]
and press .
The Missed call display appears.
Select [ON]/[OFF] and press
2
.
The Missed call is set.
● The indicator color for a missed call is
set at the Color taste (P.89).
● The indicator color flashes in the fol-
lowing order of priority when there are
mix of missed calls and new mail/unread messages.
1. Incoming call
2. Incoming mail
3. Incoming Message R
4. Incoming Message F
When there is a number of the same
level in priority, the indicator of the latest incoming has priority.
Page 94

Ringer and Display
Set Language
Set Language
Menus, messages and other displays
can be set in either Japanese or English.
From the menu, select [設定]
1
→ [画面設定] → [Bilingual]
and press .
Bilingual
日本語
English
[日本語]:
Set the display language to Japanese.
[English]:
Set the display language to English.
When the display language is set to English
Select [Settings] → [Display] → [Set language].
Select [English] and press
2
.
The display language is set to English.
92
Page 95

Operation Restrictions
Security Code .............................. 94
Phonebook Lock ......................... 96
Keydial Lock ................................ 97
Record Display ............................ 97
Keypad Lock ................................ 98
Mail Security .............................. 100
Key Guard ................................... 100
93
Page 96

Operation Restrictions
Security Code
Security Code
Some of the Mova’s useful functions
require the security code input. There
are 3 security codes: the Security code
for various functions, the network security code used for the service you
subscribe to and the i-mode password.
• Note that you are required to bring the
Mova and official identification (such as
driver’s license) to the DoCoMo service
counter (DoCoMo shop) to verify your
identity if you forget one of the security
codes.
●Security code
This is the Security code used for the functions listed below.
It is set to “0000” at the time of purchase.
This number can be changed as you wish.
Make sure to take a note of your Security
code and keep it in a safe place.
• The Security code is not changed back
to the default even if you reset the Mova.
Deleting all data for various functions
Setting the Denied no ID ON/OFF
Setting the Accept/Reject calls
ON/OFF
Resetting
Changing the Security code
Setting the Reconnect ON/OFF
Setting/Resetting the Host
Setting the i-mode lock ON/OFF
Setting the Mail security ON/OFF
Setting SSL certificate valid/invalid
Resetting the Total calls
Deleting all schedules before
the selected date
Setting the Secret mode ON/OFF
Setting the Send own number ON/
OFF
Setting the Phonebook lock ON/
OFF
Setting the Keypad lock ON/OFF
Setting the Remote keypad
lock ON/OFF
Setting the Record display ON/OFF
Setting the Keydial lock ON/OFF
Setting the Call billing ON/OFF
and deleting its icon
Setting the date and time while
the Call billing is ON
P.66,
etc.
P.51
P.52
P.220
P.95
P.207
P.136
P.139
P.100
P.138
P.208
P. 11 0
P.68
P.37
P.96
P.98
P.99
P.97
P.97
P.210
P.36
94
Page 97

Operation Restrictions
●Network security code
This code is determined when you subscribe to the Voice Mail Service, the Call
Forwarding Service, etc. It is required to
access the DoCoMo e-site.
※ This network security code cannot be
changed by the user from the Mova or
other phones.
●i-mode password
The i-mode password is used for saving/
deleting My Menu and subscribing to/
unsubscribing from the message service
or the paid i-mode services.
It is set to “0000” when subscribing to
i-mode. This password can be changed as
you wish (P.126).
※There may be other passwords for the
i-mode used by IP (information service
providers).
From the menu, select
1
Security Code
[Settings] → [Security] →
[Change code] and press
.
Change code
Security code
Enter the current Security
2
code.
• The Security code is set to “0000” at
the time of purchase.
When you enter the wrong Security
code
The message “Invalid security code” appears. Select [Change code] again and
enter the correct Security code.
Enter the new Security
3
code, select [Yes] and
press .
The Security code is changed.
95
Page 98

Operation Restrictions
Phonebook Lock
Phonebook Lock
The use of all functions can be restricted regarding the Phonebook,
such as displaying, saving, editing and
searching. In this case, the 2-touch dial
and EV-link are also restricted, and you
cannot place a call by the received
record. To cancel the Phonebook lock
temporarily, enter the Security code.
•To set the Phonebook lock to [ON], it is
necessary to delete the redial records.
They can be deleted during the setting
procedure.
1 Press (option) in the
Phonebook.
The submenu appears.
2 Select [phonebook lock]
and press .
The Security code screen appears.
3 Enter the Security code.
The Phonebook lock display appears.
4
Select [ON]/[OFF] and press
.
The Phonebook lock is set.
When there is data in the redial record
The message confirming that the redial
record is deleted appears. Select [Yes] to
delete the redial record and set the
Phonebook lock.
● If you receive a call while the Phonebook
lock is [ON], the caller’s name does not
appear.
96
Page 99
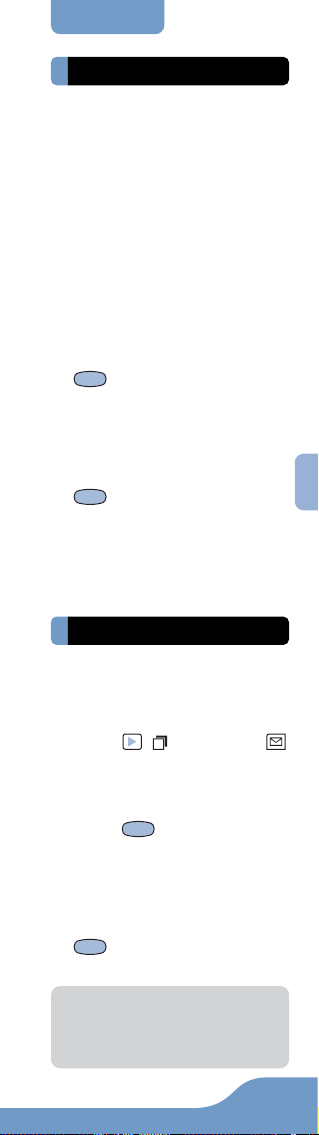
Operation Restrictions
Keydial Lock/Record Display
Keydial Lock
The keypad can be locked to restrict
dialing. Short Mail cannot also be sent.
To cancel the Keydial lock temporarily,
enter the Security code.
•
To set the Keydial lock to [ON], it is necessary to delete the redial records. They can
be deleted during the setting procedure.
• Only the following calls can be placed
while the Keydial lock is set to [ON].
- Call emergency numbers (110, 119, 118)
- Call from the Phonebook (including the
2-touch dial) or the redial records saved
after the Keydial lock is set
1
From the menu, select
[Settings] → [Security] →
[Keydial lock] and press
.
The Security code screen appears.
2 Enter the Security code.
The Keydial lock display appears.
3
Select [ON]/[OFF] and press
.
The Keydial lock is set.
When there is data in the redial record
The message confirming that the redial
record is deleted appears. Select [Yes] to
delete the redial record and set the
Keydial lock.
Record Display
The Redial, Dial Frequency and Received records can be set not to be displayed. To cancel the setting temporarily,
enter the Security code.
1 Press ( ) then press
(option).
The submenu appears.
2 Select [record display] and
press .
The Security code screen appears.
3 Enter the Security code.
The Record display appears.
4 Select [ON]/[OFF] and press
.
The Record display is set.
● Data is saved to the Redial or Received
record even when the Record display is
[OFF].
●
The record message can be played back
even when the Record display is [OFF].
97
Page 100

Operation Restrictions
Keypad Lock
Keypad Lock
The Keypad lock secures the Mova
from an unauthorized use.
• Only the following operations are available
while the Keypad lock is set.
- Answer a call, put the Mova on hold, con-
trol the ring volume and play back the answering message for the Record message
- Hang up a call, control the earpiece vol-
ume and switch to the Whisper mode
-Call emergency numbers (110, 119, 118)
- Power ON/OFF
- Stop the Clock or Schedule alarm
- Stop the Mail/Message tone
- Delete the message “Missed call”/ “New
mail” or the Call billing icon
- Set/release the Key guard
1
From the menu, select
[Settings] → [Security] →
[Keypad lock] and press .
The Security code screen appears.
2 Enter the Security code.
The message “Keypad is locked” appears in the stand-by display.
To cancel the Keypad lock
Enter the Security code while the Keypad
lock is set.
●
The Mova is powered OFF after 5 unsuccessful attempts to cancel the Keypad lock.
●
If you receive a call while the Keypad lock
is set, the caller’s name and phone number do not appear. The regular ring tone,
indicator and call picture operate regardless of the Designated ring tone, the Designated indicator and the Call picture. If you
receive a mail, the regular ring tone sounds.
● When the message “Missed call” or
“New mail” appears in the display, the
message “Keypad is locked” does not
appear even if the Keypad lock is set.
Press for over a second to delete
the message “Missed call” or “New mail”.
Locking Keypad Remotely
The keypad of the Mova can be locked
not at hand but remotely from other
phones. When a call previously specified as a Registered number is placed
within the specified monitoring duration and number of times, the guidance
informs you that the Keypad lock is set.
1
From the menu, select
[Settings] → [Security] →
[Remote lock] and press .
The Security code screen appears.
98
 Loading...