

NTI ST-IPUSB4K-L-VW, ST-IPUSB4K-R-VW Setup Manual

1
ST-IPUSB4K-L/R-VW
4K2K HDMI with USB
Over Gigabit IP Ethernet
Setup Guide
2
Panel and Connectors
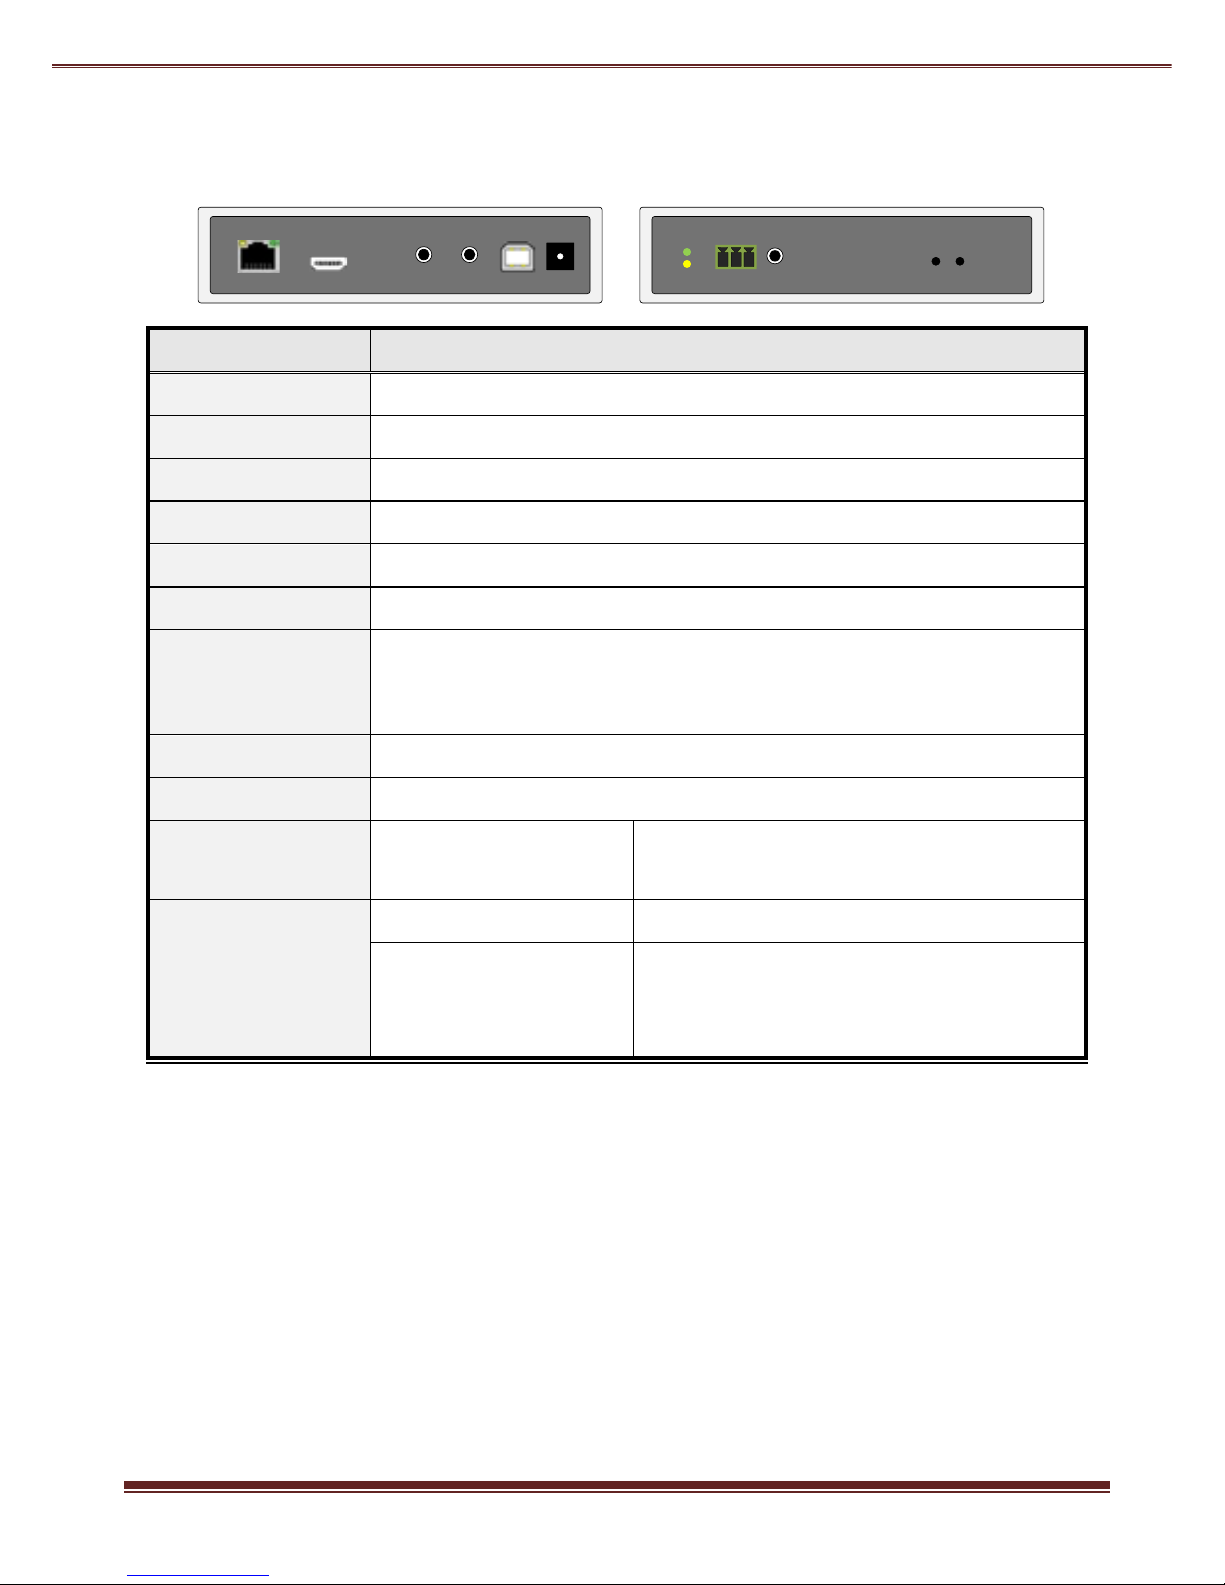
ST-IPUSB4K-L-VW Transmitter
No. Connector
Description
1 Gigabit Ethernet
Connect to Gigabit Ethernet switch or directly to Receiver.
2 HDMI in
Connect to HDMI Source, or use HDMI-to-DVI adapter cable for DVI source.
3 Line in
Audio line in, it will be extended to the Line Out of the Receiver.
4 Line out
Audio line out, it is extended from Mic. In of the Receiver.
5 USB-to-PC
Connect this USB-B to PC for USB 2.0 extension.
6 DC 12V In
System power input.
7 System LED (Green)
Link LED (Amber)
Green Blinking/Amber Off: System is starting up.
Green On/Amber Off: System is ready, but TX/RX not connected.
Green On/Amber Blinking: TX/RX connected, but waiting for HDMI input.
Green On/Amber On: TX/RX connected, HDMI input is ready.
8 RS-232
Provide Serial-over-IP function. (Pin assignment: TxD-RxD-GND)
9 IR Blaster
Connect to external IR Transmitter
10 (Button 1)
Press and Hold at Power
ON until Green and Amber
LED blinking
1. Reset to the Factory default setting.
2. Enter Setup and Firmware upgrade mode in
192.168.0.88
11 (Button 2)
Short press
Set to Video/Graphic mode.
Long press (3 sec.)
To Enable/Disable Anti-Dither.
Note: For some of ATI graphic card with
Dithering function enabled, you may enable
Anti-Dither to achieve the better video quality.
7 9 108 11
1 2 3 4 5 6
3
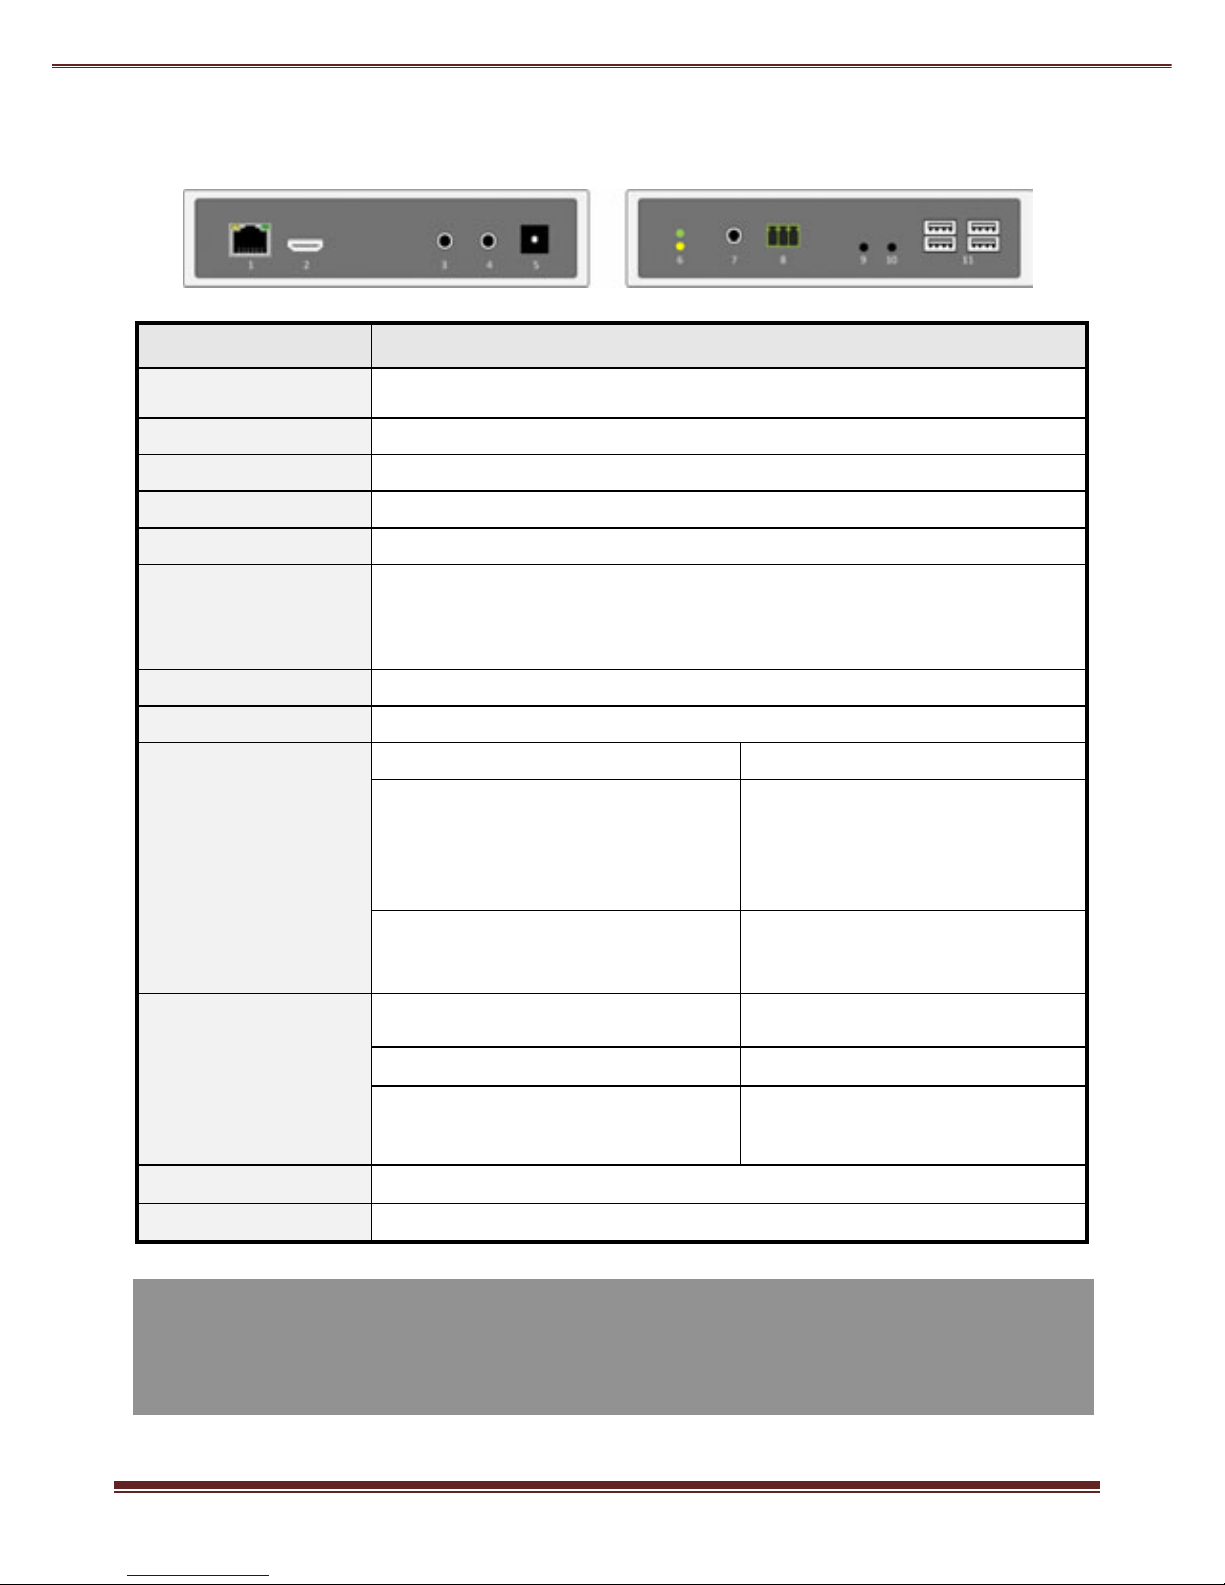
ST-IPUSB4K-R-VW Receiver
No. Connector
Description
1 Gigabit Ethernet
Connect to Gigabit Ethernet switch or directly to Transmitter.
2 HDMI Out
This HDMI output connector supports HDMI 4K2k, 1080p output.
3 Mic. IN
Microphone Input, it will be extended to the Line Out of Transmitter.
4 Line OUT
Audio line out, it is extended from Line In of Transmitter.
5 DC 12V In
System power input.
6 System LED (Green)
Link LED (Amber)
Green Blinking/Amber Off: System is starting up.
Green On/Amber Off: System is ready, but TX/RX not connected.
Green On/Amber Blinking: TX/RX connected, but waiting for HDMI input.
Green On/Amber On: TX/RX connected, HDMI input is ready.
7 IR Receiver
Remote Universal IR receiver (optional).
8 RS-232
Provide Serial-over-IP function. (Pin assignment: TxD-RxD-GND)
9 Mode button
Short press
Set to Video or Graphic mode.
Long press (3 sec.)
To Enable/Disable Anti-Dither.
Note: For some of ATI graphic card
with Dithering function enabled, you
may enable Anti-Dither to achieve
the better video quality.
Press and Hold at Power ON until
Green LED blinking
Get and Use this RX’s EDID as the
system EDID (update Transmitter
EDID)
10 Link button
Short press
To enable/disable Transmitter List
OSD
Long press (3 sec.)
To get the USB access right.
Press and Hold at Power ON until
Green and Amber LED blinking
1. Reset to the Factory default.
2. Enter Setup and Firmware
upgrade mode in 192.168.0.88
11 USB 1.1 Host
2 USB-A ports for USB 1.1 devices like Keyboard, Mouse, Printer, …
12 USB 2.0 Host
2 USB-A ports for USB 2.0 devices like USB Disk, Touch Screen, …
4
Configuration
The TX/RX unit built with Web page that supports Setup mode and Operation mode configuration.
Setup Mode Configuration
1. Press and Hold the unit’s [Button 1]/[Link] button and Power ON until Green and Amber LED blinking then
release the [Button 1]/[Link] button. This will
force TX/RX enter Setup mode.
2. Directly connect TX or RX to PC LAN port, set
PC IP to 192.168.0.1, Net Mask 255.255.255.0.
3. Open PC’s Web Browser and enter
192.168.0.88 <Enter>
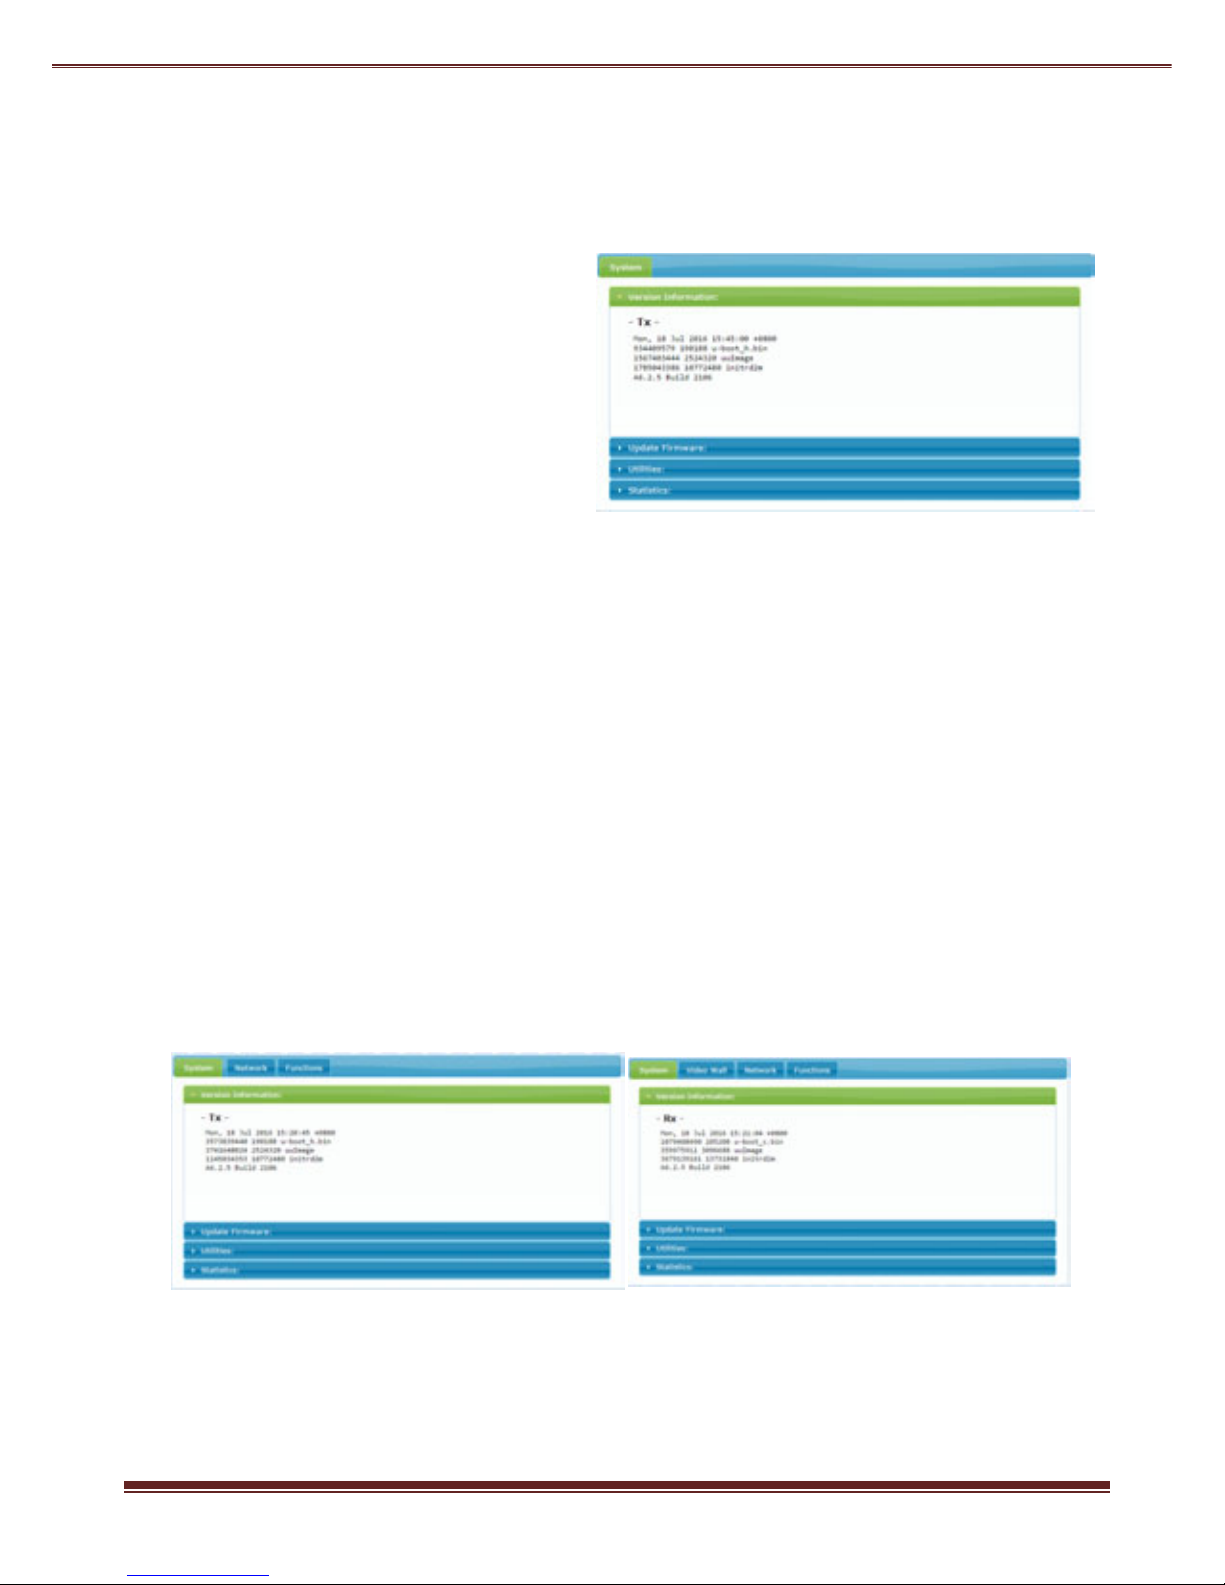
4. The Setup Mode Web page contains [System]
tab with sub-tabs of [Version Information],
[Update Firmware], [Utilities], and [Statistics]
as the screenshot on the right:
Reset to Factory default (Setup Mode)
If the device settings lost, you can reset the device back to the factory default:
1. Enter Setup Mode Web page [System] ---> [Utilities] ---> [Factory Default]
(The Factory default setting are shown on the label that under the unit)
Firmware Upgrade (Setup Mode)
1. Enter Setup Mode Web page [System] ---> [Update Firmware] ---> navigate to the firmware file (.bin) then
click [Upload] to start firmware upgrade.
2. The firmware upgrade takes about 3 min., it will display “DONE Rebooting…” to indicate the unit has been
upgraded and rebooted.
Operation Mode Configuration
The TX/RX can be configured in Operation Mode through Ethernet Switch or directly connected.
To enter Operation mode Web page:
1. Set PC IP 10.0.1.1, Net Mask 255.0.0.0.
2. Open Browser then enter TX/RX IP: 10.xx.xx.xx
3. The TX Operation Mode Web page is shown as the below left screenshot which contains 3 tab menus
[System], [Network], Functions]. The RX Operation Mode Web page is shown as the below right screenshot
which contains 4 tab menus [System], [Video Wall], [Network], Functions].
Firmware Upgrade (Operation Mode)
It is possible to do the firmware upgrade in Operation mode for TX/RX:
1. Enter Operation Mode Web page [System] ---> [Update Firmware] ---> navigate to the firmware file (.bin)
then click [Upload] to start firmware upgrade.
 Loading...