

NTI Splitmux-C5HDR-4LC Installation And Operation Manual
®
SPLITMUX
Series
SPLITMUX-C5HDR-4LC
HDMI 4x1 Quad Multi-Viewer
With Seamless Switcher
Installation and Operation Manual
MAN233 REV 1/22/15

1. Introduction
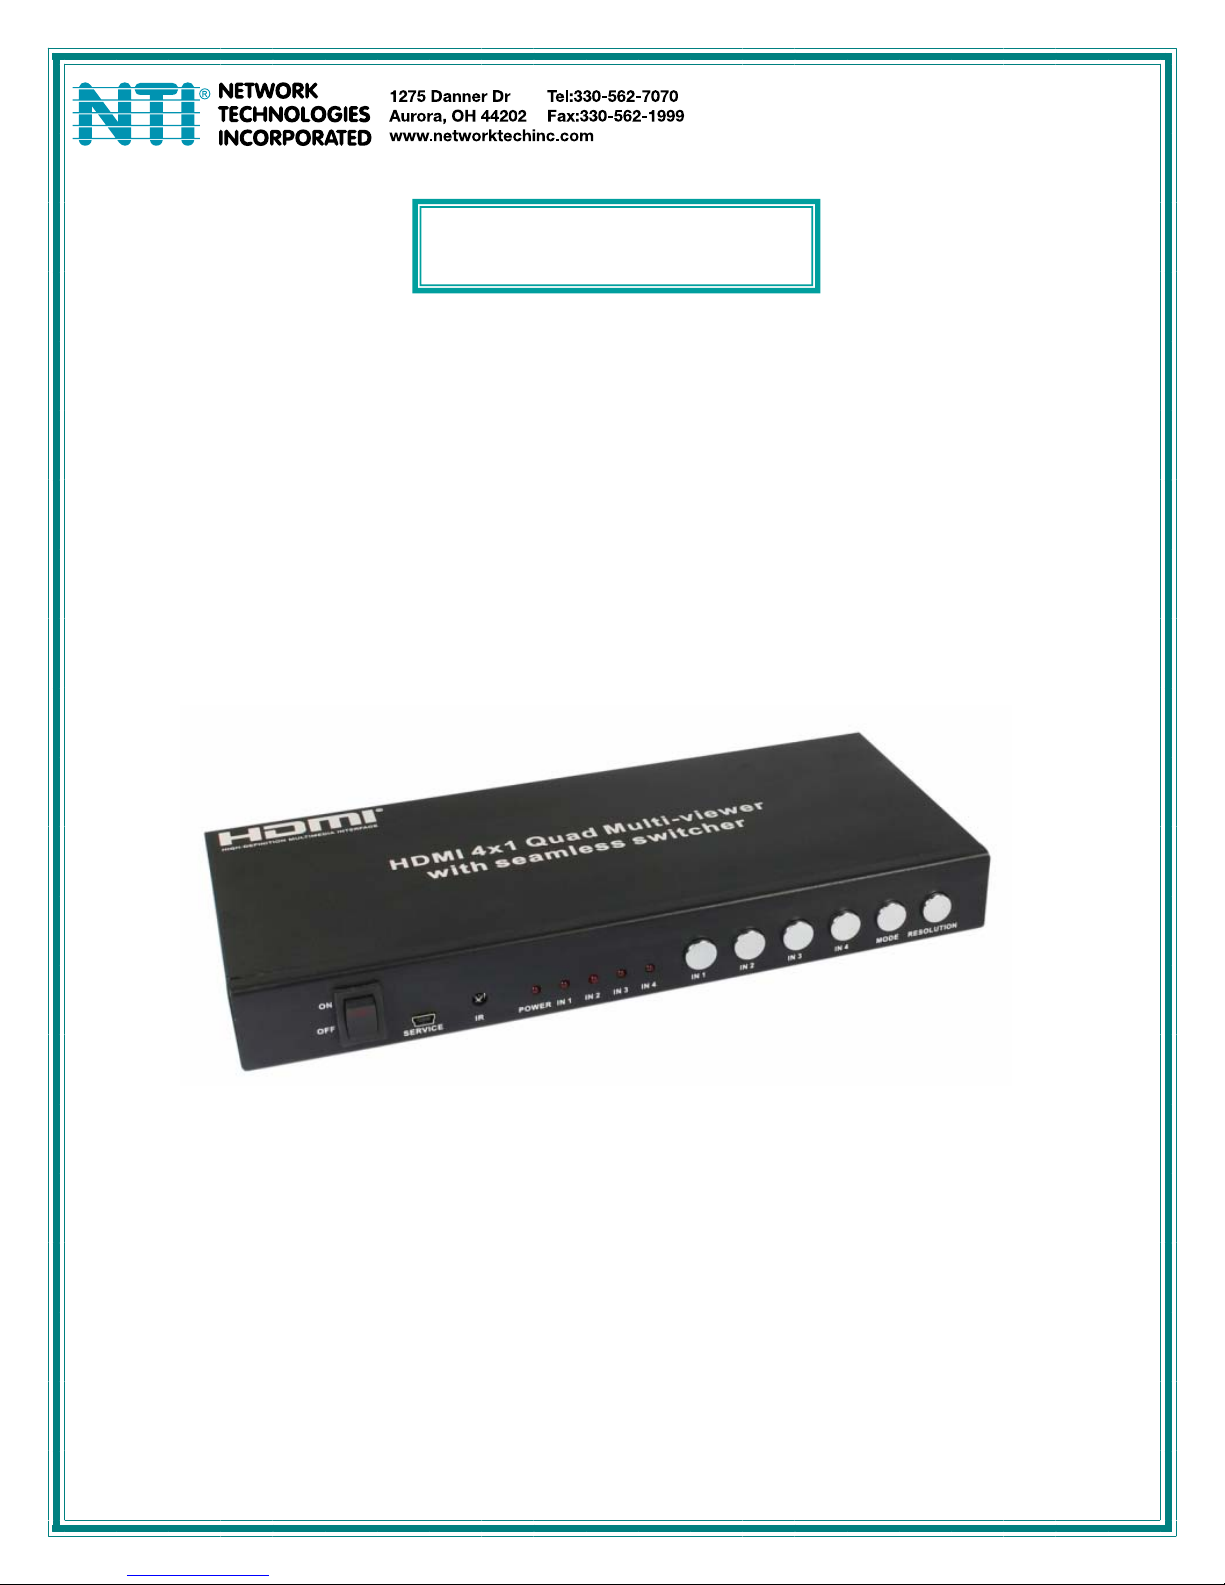
The SPLITMUX-C5HDR-4LC (SPLITMUX) is a high performance 4 by 1 Quad Multi-Viewer
with seamless switcher. It supports four High-definition input sources displaying on one
screen, and has three multi-view effect modes. As a switcher, it can also seamlessly switch
the four HD inputs freely. The SPLITMUX can be controlled by the front panel buttons,
IR control, or RS232 control. The SPLITMUX provides an S/PDIF link to output the HDMI
source audio at the same time.
The SPLITMUX can also extend the video and audio signals over a single CAT5e/6/6a/7
cable up to 250 foot (76m) with Bi-directional IR control (see table on page 8).
2. Features
¾ Compliant with HDMI 1.3a,HDCP 1.2
¾ Supports multiplexed HDMI 4-input and 1-output
¾ Supports up to 1080p High Definition resolution
¾ Supports 4by1 Quad Multi-viewer and seamless switch
¾ Supports scale-up/scale-down function
¾ Supports multi-output resolution
¾ Supports digital audio format LPCM/AC3/DTS
¾ Supports button, IR and RS232 control
¾ IR system allowing for control of source at display end
¾ Allows HDMI Audio/Video and IR signals to be transmitted over a single Cat5e/6/6a/7
cable
3. Package Contents
¾ 1-SPLITMUX-C5HDR-4LC HDMI Quad Multi-Viewer
¾ 1-CAT5e/6 Remote Unit
¾ 1-12V/2.5A DC power adaptor
¾ 1-5V/1A DC power adaptor
¾ 1-Remote Control
¾ 2-Wide-band IR Receiver
¾ 5-Wide-band IR Transmitter
¾ 1-RS232 Cable (4.6ft 9DB male to 9DB female)
¾ 2-Wall mount brackets with case-mounting screws
¾ 1-CD with Operation Manual and RS232 Control Application
1
4. Functions
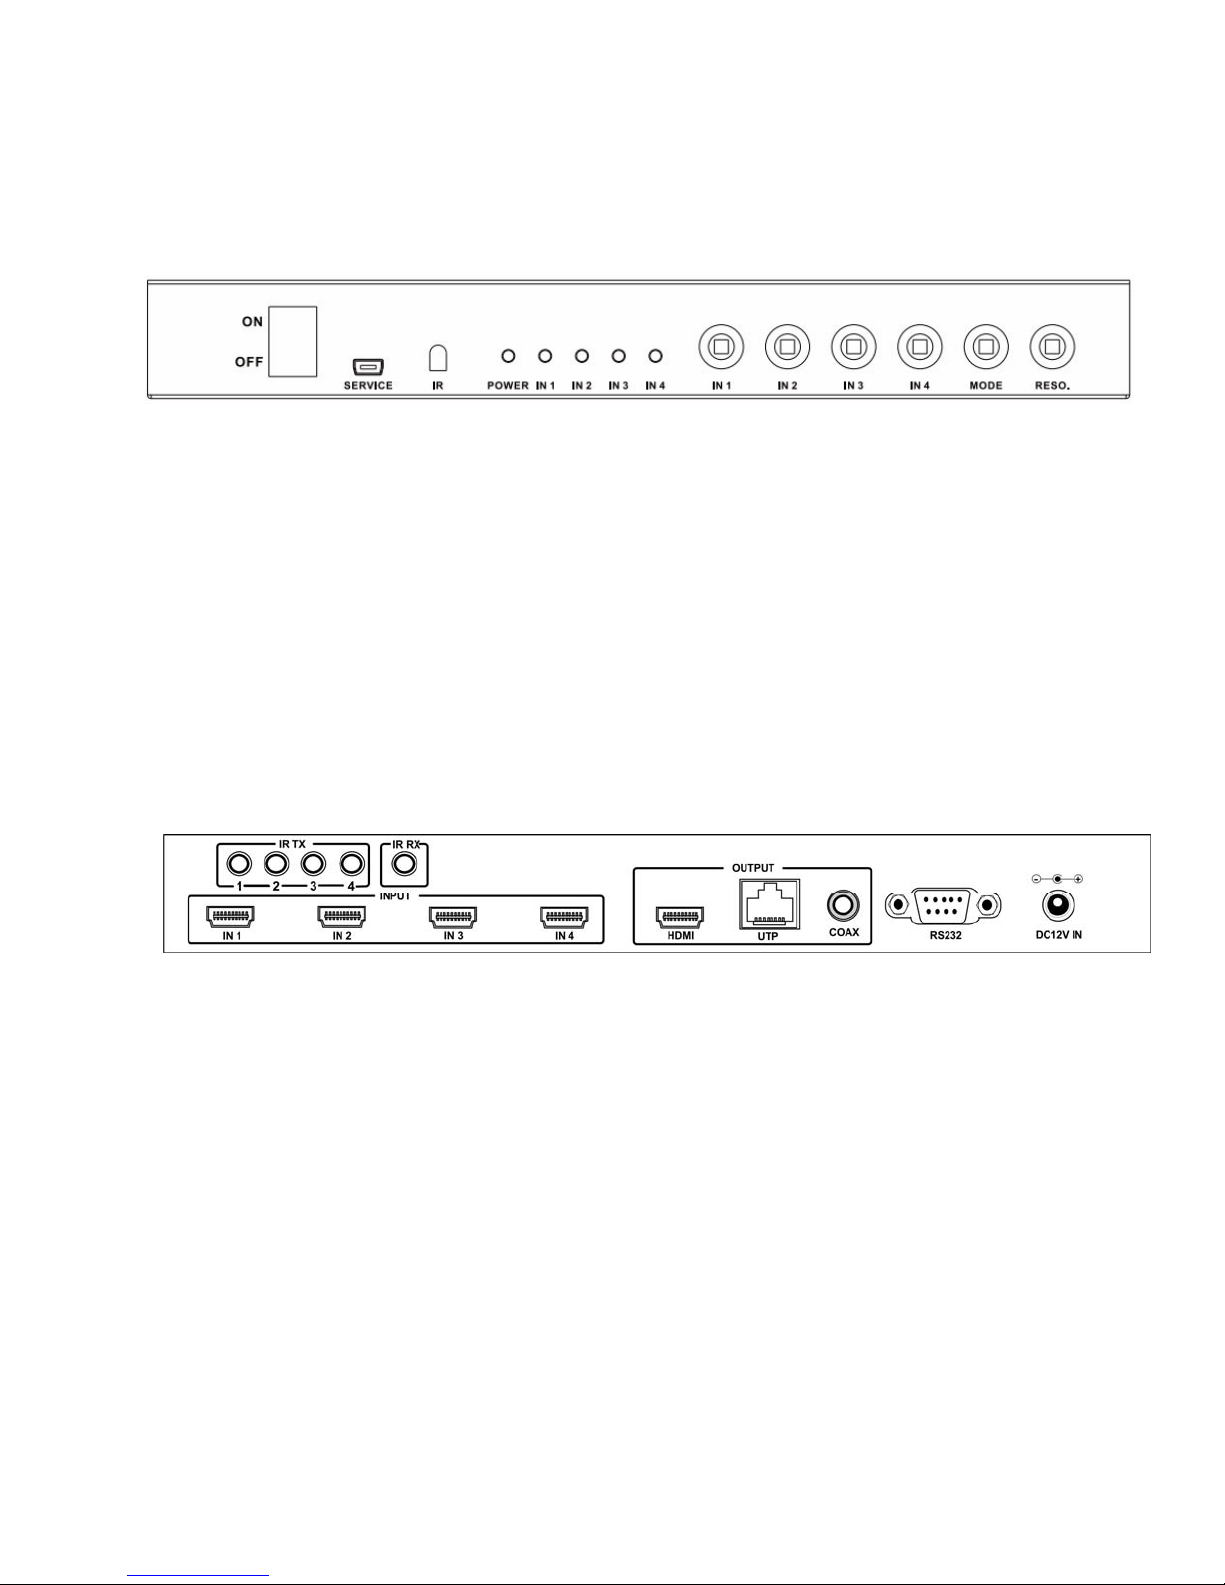
4.1 Front panel
1. ON/OFF: Power ON/OFF switch.
2. SERVICE: For factory use only.
3. IR : Remote control receiver window.
4. POWER LED: This red LED illuminates when the device is connected with power supply.
5. IN1,2,3,4 LED: These red LEDs illuminate when the output is switched to the
corresponding input.
6. INPUT BUTTON: Press this button to select the input source.
7. MODE BUTTON: Press this button to select the multi-view display mode.
See the detail description in Chapter 5.2.
8. RESO BUTTON: Press this button to select the HDMI output resolution.
4.2 Rear panel
1. INPUT: Connect the HDMI source outputs from DVD, PS3, Set-top Box and Note Book.
2. OUTPUT: HDMI for connecting the HDTV or monitor with HDMI cable for
input source display.
UTP port for connecting to CATx Receiver by CATx cable for
signal extension.
Coax for connection to an amplifier with coaxial cable.
3. IR RX: Connect to the IR Receiver for IR signal reception. Ensure that remote control
being used is within the direct line-of-sight of the IR receiver.
4. IR TX: Connect the IR Blaster cable included in the package for IR signal transmission.
Place the IR blaster in direct line-of-sight of the equipment to be controlled.
5. RS232: Connect the RS232 port to the PC or notebook using RS232 Cable (provided).
6. DC 12V: Plug the 12V DC power supply into the unit and connect the adaptor to AC wall
outlet.
2
 Loading...