

NTI ENVIROMUX-STSP-SL-7 Installation Manual
ENVIROMUX-STSP-SL-7
Strap-On Pipe Temperature Sensor-Spring-Loaded
Installation Manual
The ENVIROMUX-STSP-SL-7 is a temperature sensor designed to work in combination with an ENVIROMUX-2D/5D/16D
Enterprise Environment Monitoring System.
Features include:
• Mount to the outside of an insulated metal pipe (up to 1/4" wall).
o Cable ties secure sensor to pipe diameters from 5” up to 14".
o Mounts with insulation thicknesses from ½” – 2-1/2”.
• Copper contact transmits surface temperature to thermal sensor.
o Spring-loaded contact enables minimal removal of pipe insulation.
• NEMA 1 and IP20 rated metal enclosure
• Applications from -40 to 185°F (-40 to 85°C).
• Accurate to within ±1.0°F (±0.5°C).
• Response time: <1 minute for temperature changes of ±2°F.
• High resistance to external influences on the cable due to digital output signal.
• Re-calibration is not necessary after initial set-up.
• MTBF: 1,942,123 hrs.
• Length: 7 feet.
• Includes an RJ45 coupler to extend the sensor up to 1,000 feet using CATx cable (minimum 24AWG).
• Powered by ENVIROMUX-2D/5D/16D.
• Compatible with ENVIROMUX-2D/5D/16D.
• Regulatory approvals: CE, RoHS.
• Compatible with ENVIROMUX-FSC Fiber Converter/Extender.
o Use to extend sensor up to 1.2 miles (2 km) from the ENVIROMUX unit.
Installation
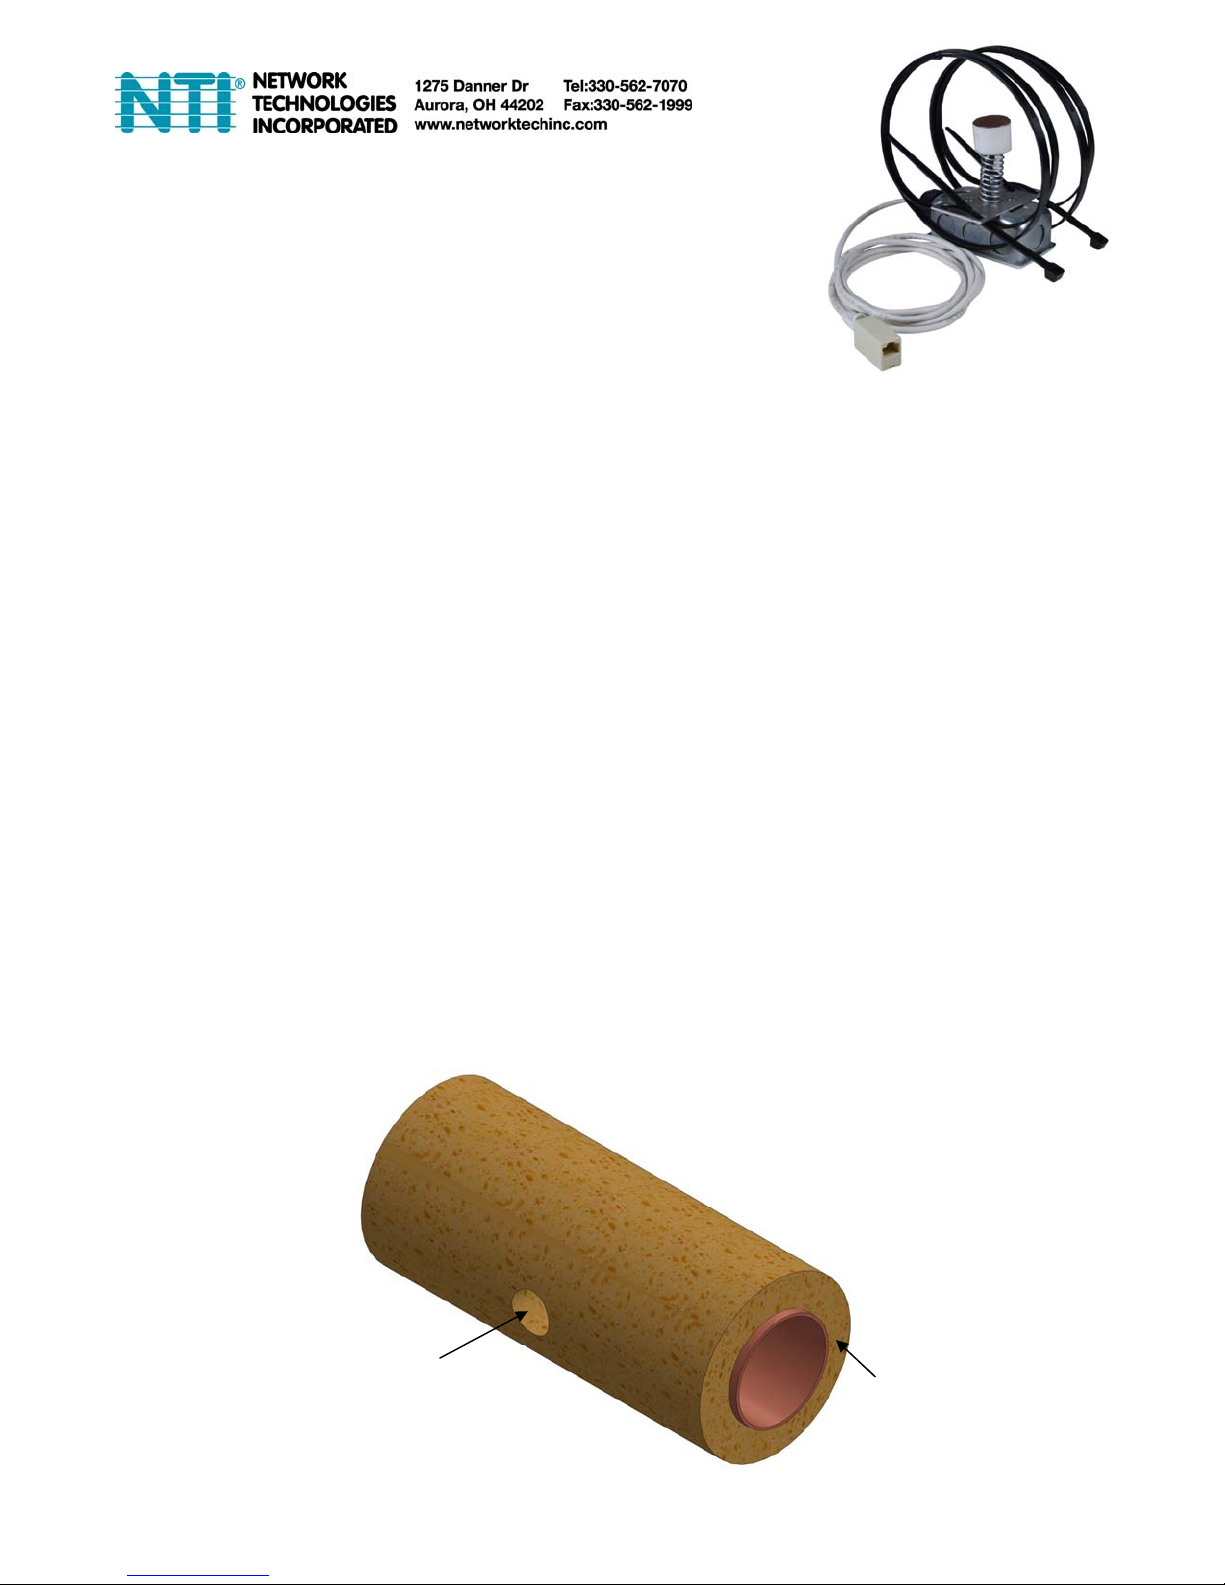
1. Cut a 1-1/2” diameter opening in the insulation surrounding the pipe through to the surface of the pipe.
Cut a 1-1/2” diameter
opening through the
insulation
Pipe insulation
2. Clean off any insulation, rust, or other debris inside the opening or from the pipe to promote solid contact of the copper plate to
the pipe.
Before installing the sensor, make sure the pipe surface where the sensor will make contact is clean and free of oil, dirt,
or grease.
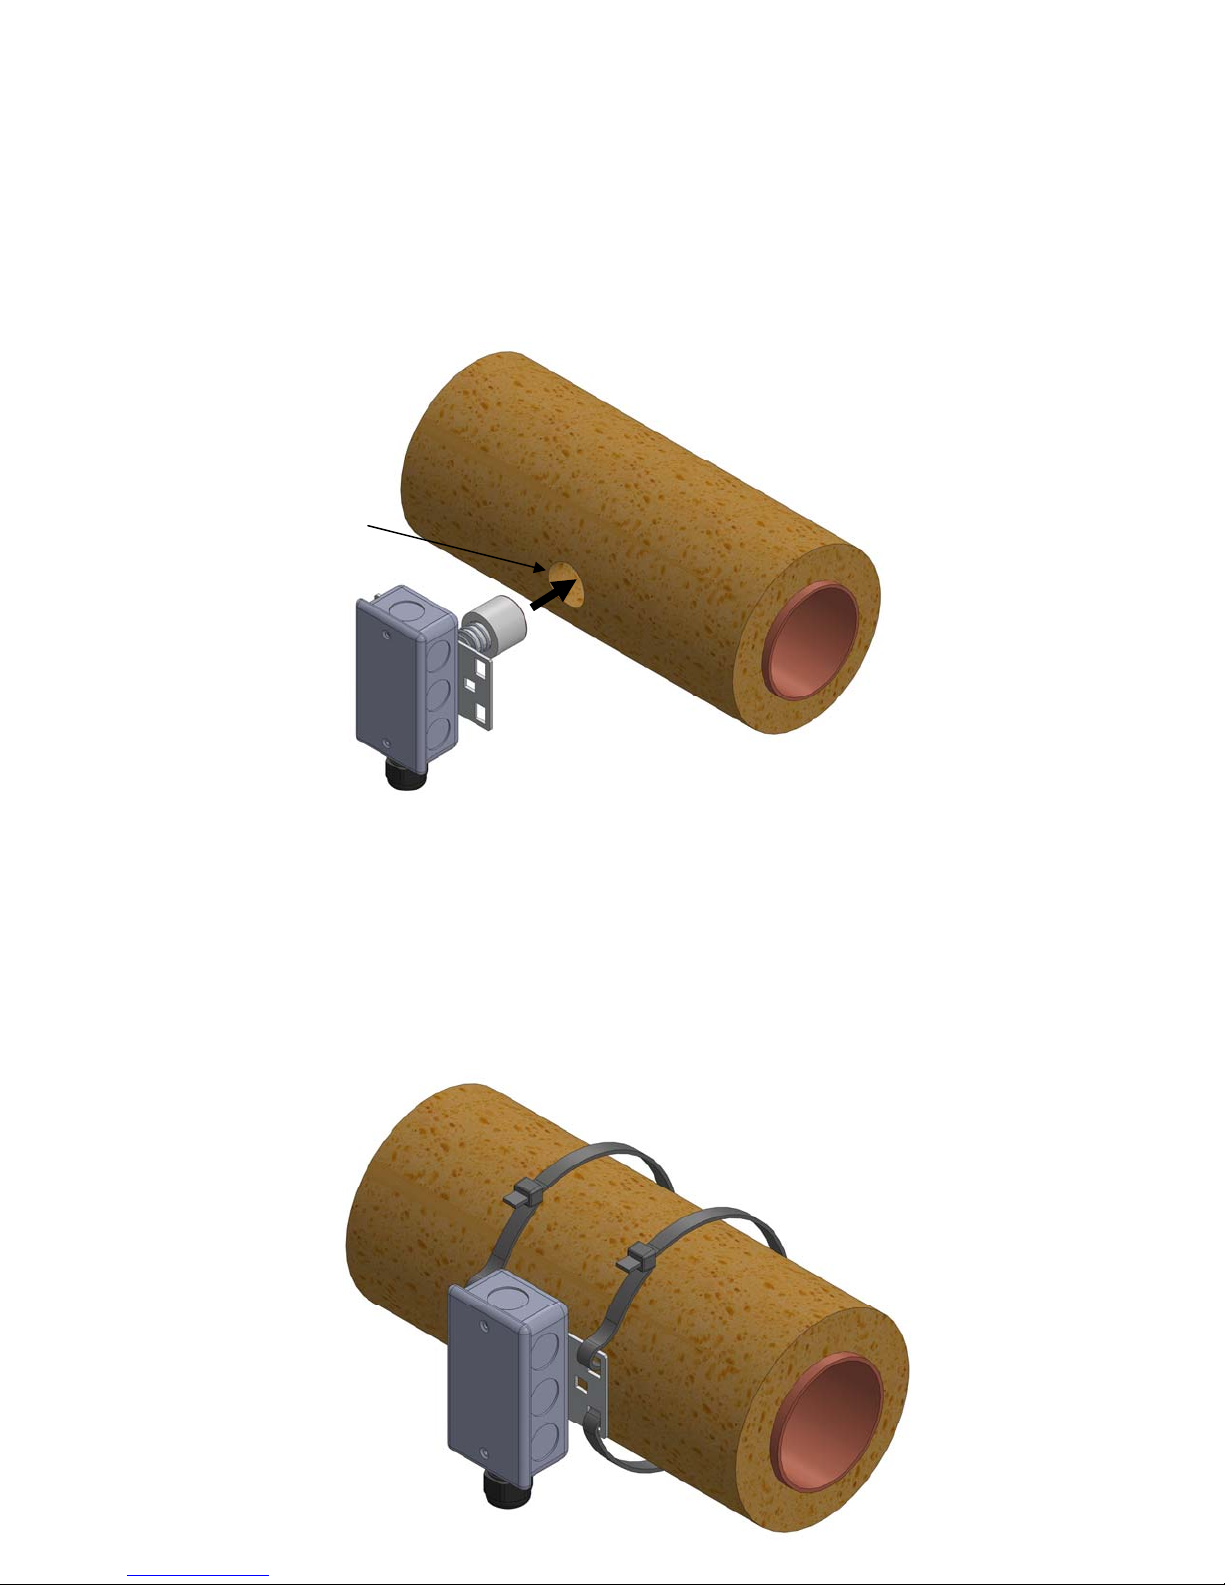
3. Insert the temperature sensor through the insulation and press against the pipe.
Tip: Faster response from the sensor can be achieved by applying a thermal conductive compound to the copper se nsor plate
before inserting the sensor.
4.
1-1/2” diameter opening
Insert the tie straps through the openings in the mounting plate, around the pipe and connect to the other ends. Tighten the
straps and compress the spring such that the mounting plate is pressed against the insulation for a firm mount.
Installation Note: The sensor and spring assembly is designed to work with insulation thicknesses from ½” up to 2-1/2”,
so if your insulation is thin, you may not be able to press the mounting plate up against the insulation without adding
something to fill in the gap. Whether you fill the gap between the mounting plate and the insulation or not has no
bearing on the sensor performance.
 Loading...