

Page 1
®
ONE CHANNEL DIGITAL TIMER
MODEL#: DIN100B
INPUT VOLTAGE:
CONTACT CONFIGURATION:
SWITCH RATING:
NUMBERS OF EVENTS:
ATTENTION: Read carefully before attempting to install this control. Failure to comply with instructions could result in personal injury and/or property damage!
This control must be installed in accordance with National and Local Electrical Codes. Disconnect power at main panel before installing or servicing this device.
Do not exceed the ratings of this device, and current capacity of conductors. This control should not operate any equipment which would cause bodily injury or
The lithium battery inside timers will be covered by a very thin insulation film which should be
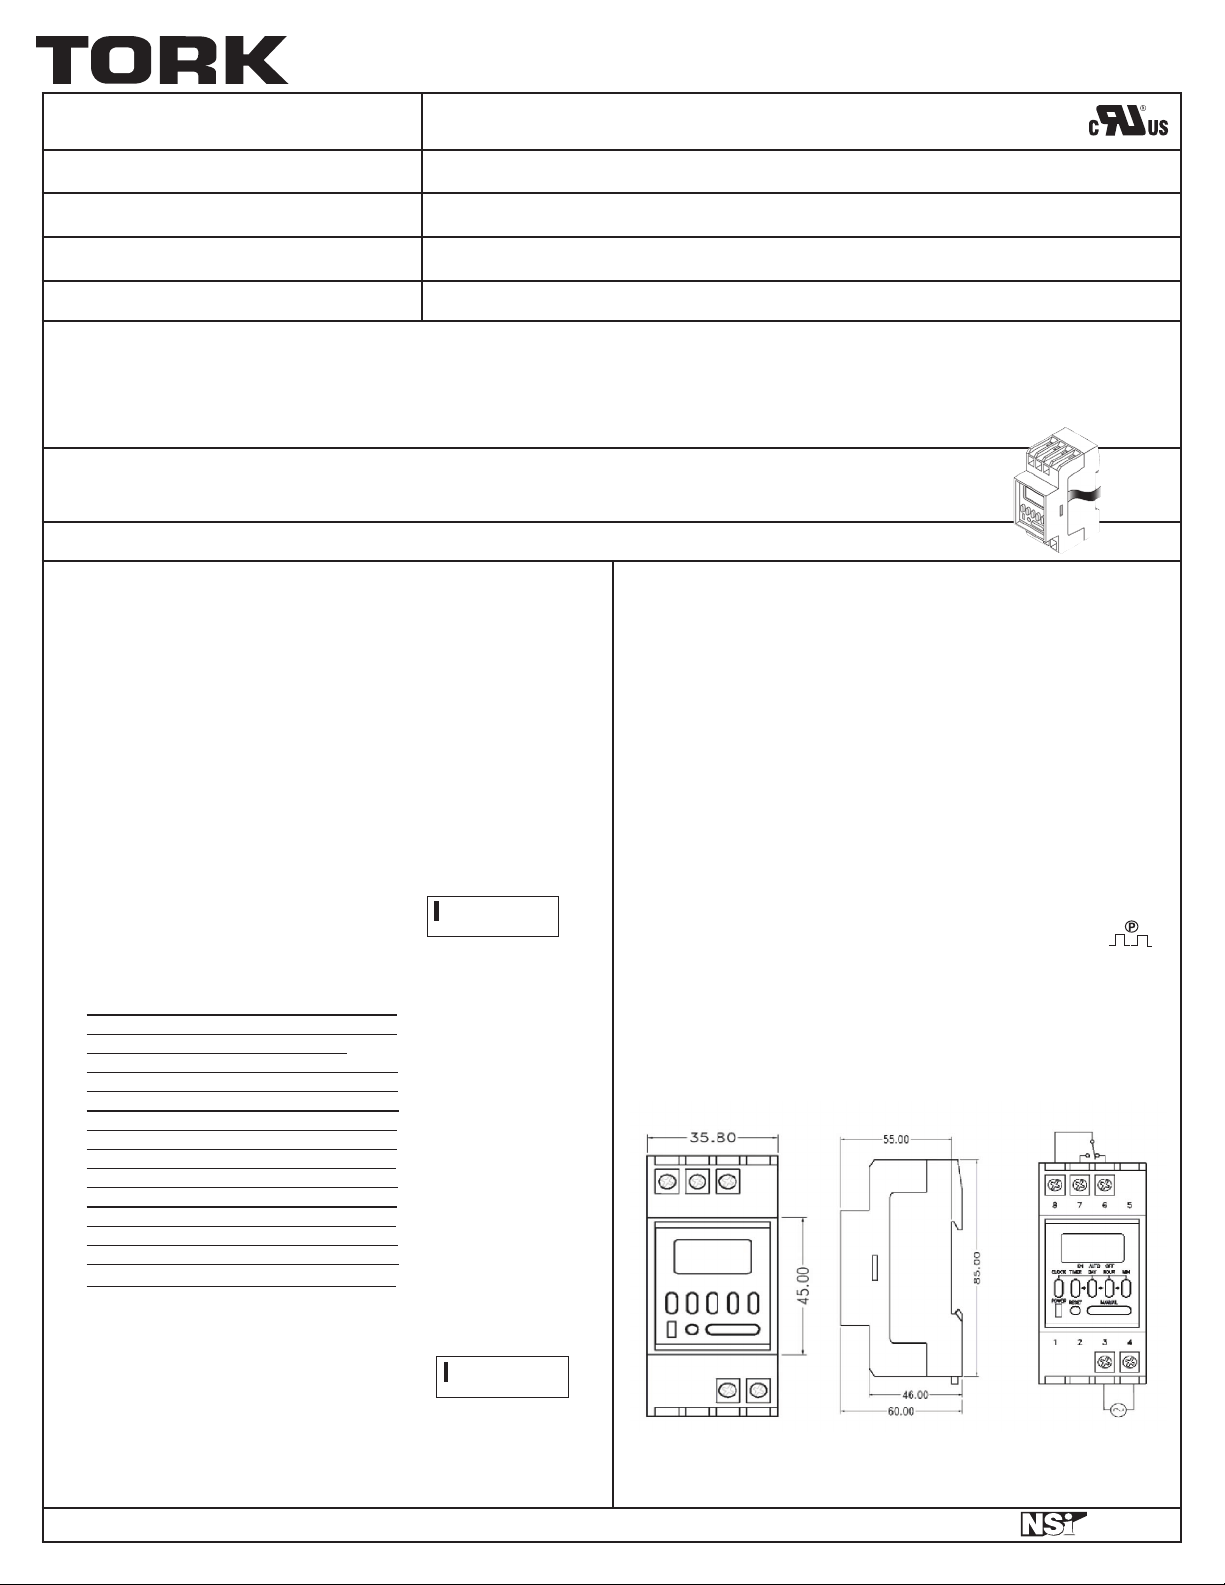
DIGITAL CONTROL
120VAC 50/60Hz, 4VA
Dry Contact SPDT
16A 120VAC Resistive, 8A 120VAC General Purpose, 1/2HP @120VAC
8 ON/OFFs
IMPORTANT SAFETY INSTRUCTIONS
READ & FOLLOW ALL INSTRUCTIONS – SAVE THESE INSTRUCTIONS
property damage should it be activate unexpectedly.
BATTERY INSTRUCTIONS
removed while/after installation
E315214
PROGRAMMING THE TIMER
KEYPAD FUNCTIONS DESCRIPTION:
TIMER: To set/review/modify events. MANUAL: Changes the load
control to either ON, AUTO, or OFF.
CLOCK: To enable clock set and exit programming. DAY: To set the
day(s). HOUR: To set hour. MIN: To set minute.
RESET: Resets the timer and clears all memory.
SETTING THE CLOCK: Press and hold CLOCK button and then
press DAY, HOUR, and MIN buttons to set the current time and day-ofthe-week.
PROGRAMMING SCHEDULE:
NOTE: Please press the RESET button prior to installation and initial
programming.
1: Press TIMER button: This is the first ON event. The LCD should show:
ON --:-- _ _
2: Press DAY button to select the desired day-of-the-week setting. Each
press advances the selection for each of the possible 15 daily combinations.
1. MO TU WE TH FR SA SU
2. MO
3. TU
4. WE
5. TH
6. FR
7. SA
8. SU
9. MO TU WE TH FR
10. SA SU
11. MO TU WE TH FR SA
12. MO TU WE
13. TH FR SA SU
14. MO WE FR
15. TU TH SA
TO REVIEW/MODIFY PROGRAMS: Press TIMER button. Each
time you press the TIMER button you advance between alternate ON
and OFF events, numbered 1 to 8 and then back to 1. Modify events
as needed by using DAY, MIN, and HOUR buttons as before. Press
TIMER button to store the changes and advance to the next event.
OVERRIDE: In the AUTO mode, you can turn the load either ON
or OFF by pressing MANUAL button. Using the same button you can
return back to the AUTO mode to resume schedules.
LOAD STATUS INDICATORS: There is an LED, marked “Power”
to indicate current load status.
RANDOM SCHEDULES OVERRIDE: To execute a random sched-
ule (ON and OFF time varies in a random pattern every 10 to 120
minutes) press and hold DAY button then press MIN button. While in
the Random mode, the LCD will display the following symbol:
To return to normal schedules, press and hold DAY button, then press
MIN button.
3: Press HOUR and MIN buttons respectively to set the event time.
4: Press the TIMER button to store this event, and advance to the next
event, the first OFF event. The LCD should show:
5: The unit will alternate ON and OFF events every time you press the
TIMER button. Repeat steps 2-4 for each required event.
After you’ve finished programming the timer, press CLOCK button to
exit programming mode.
LI-797(A)
TORK, INC. • 888.500.4598 • www.TORK.com
OFF --:-- _
A DIVISION OF
NSi INDUSTRIES, LLC
 Loading...