

Page 1
NRG INSTRUCTIONS
Windcube v2 Winter Performance Kit | Assembly Instructions
Windcube_v2_Winter_Package_Instructions
Rev. 8.0
[email protected] | Page 1
7 March 2018
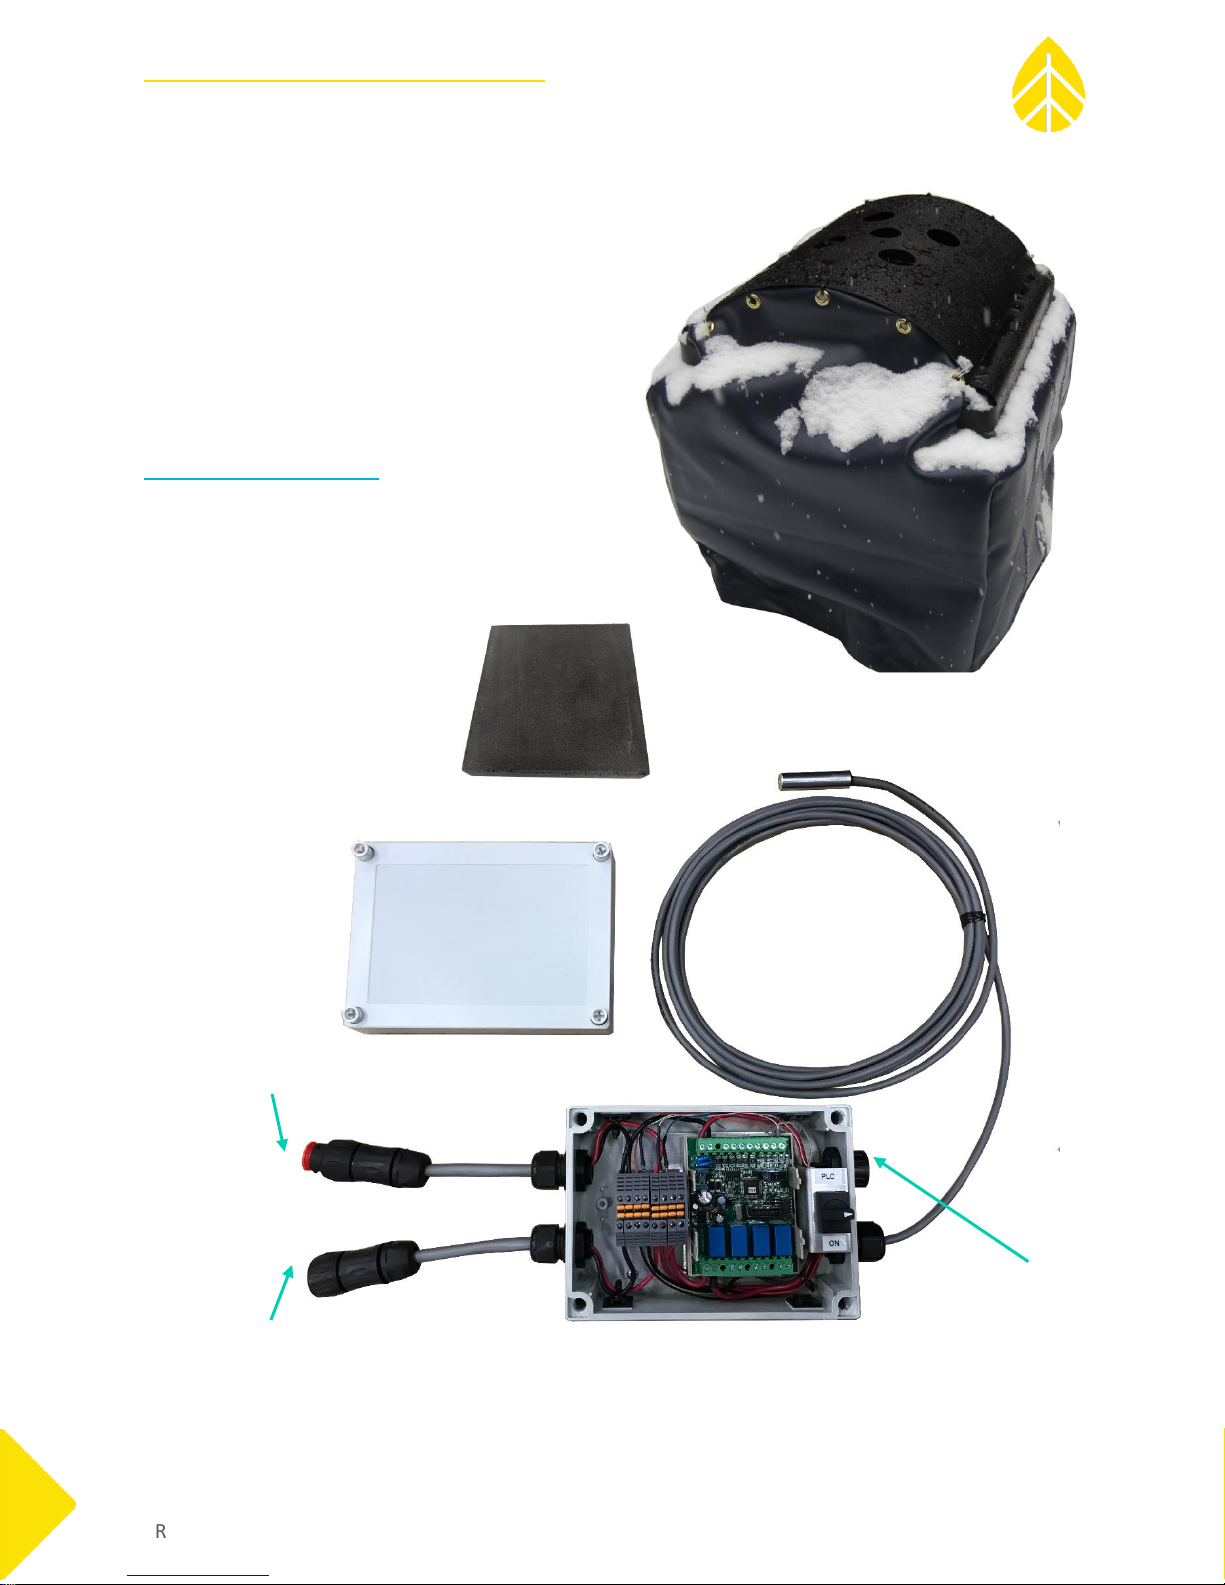
24V DC to Windcube
Temperature
Sensor
24V DC from Power Source
Heater Plate & IR Sensor
Connector for Wiper
Heater
Controller Box
Foam
Insert
SUMMARY
Below are instructions for installing the Winter
Performance Kit with Windcube Profiler Lidars. To
uninstall, follow the procedure in reverse order.
Please contact NRG Technical Services if there are
any questions during installation:
+1 (802) 482-2255 x3
COMPONENTS
Tent assembly
Heater Controller Box
Temperature probe
IR Sensor
Foam inserts
Page 2
NRG INSTRUCTIONS
Windcube v2 Winter Performance Kit | Assembly Instructions
Windcube_v2_Winter_Package_Instructions
Rev. 8.0
[email protected] | Page 2
7 March 2018
ASSEMBLY INSTRUCTIONS
1) Power off Windcube Profiler Lidar
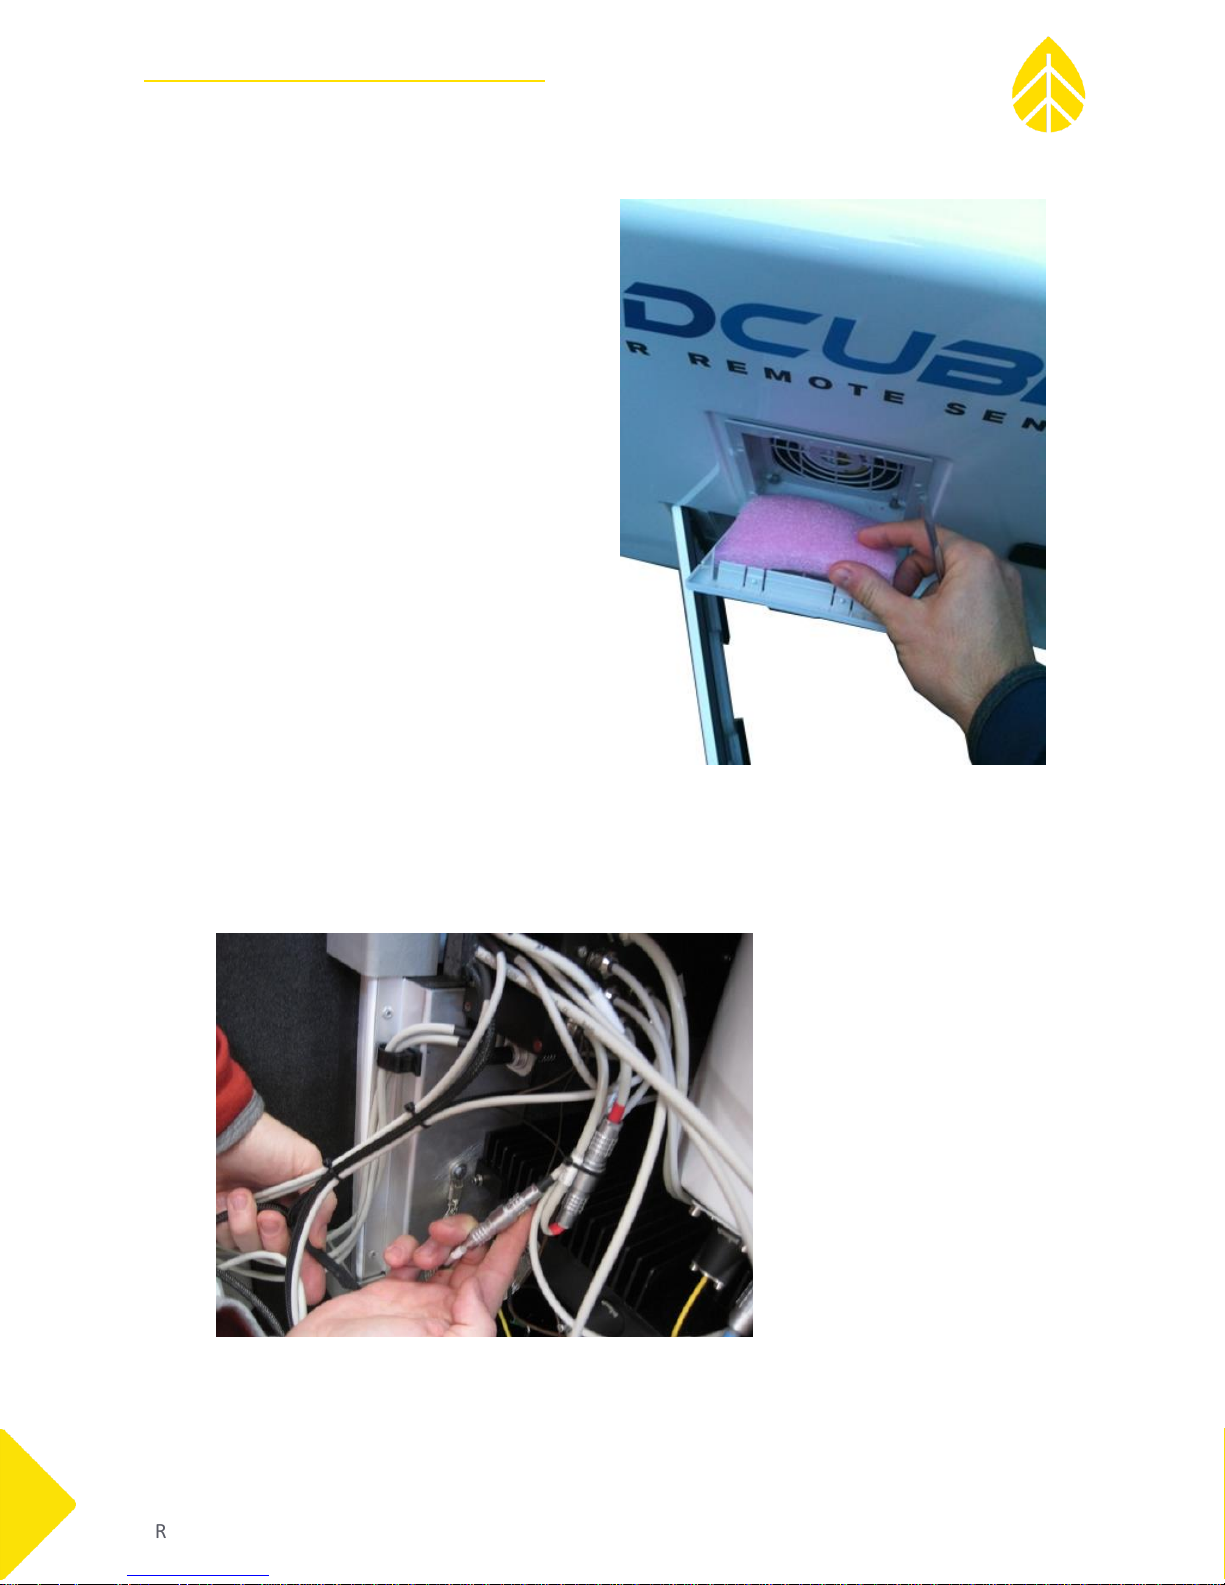
2) Insert the foam inserts into door vents
a. Open door vents (use fingers or
flat screwdriver)
b. Remove and retain filters
c. Insert foam and close vents
3) Disconnect fan power
a. Locate the fan power connector inside main door
b. Pull collar apart
c. To reconnect, line up red dots and press together
Page 3
NRG INSTRUCTIONS
Windcube v2 Winter Performance Kit | Assembly Instructions
Windcube_v2_Winter_Package_Instructions
Rev. 8.0
[email protected] | Page 3
7 March 2018
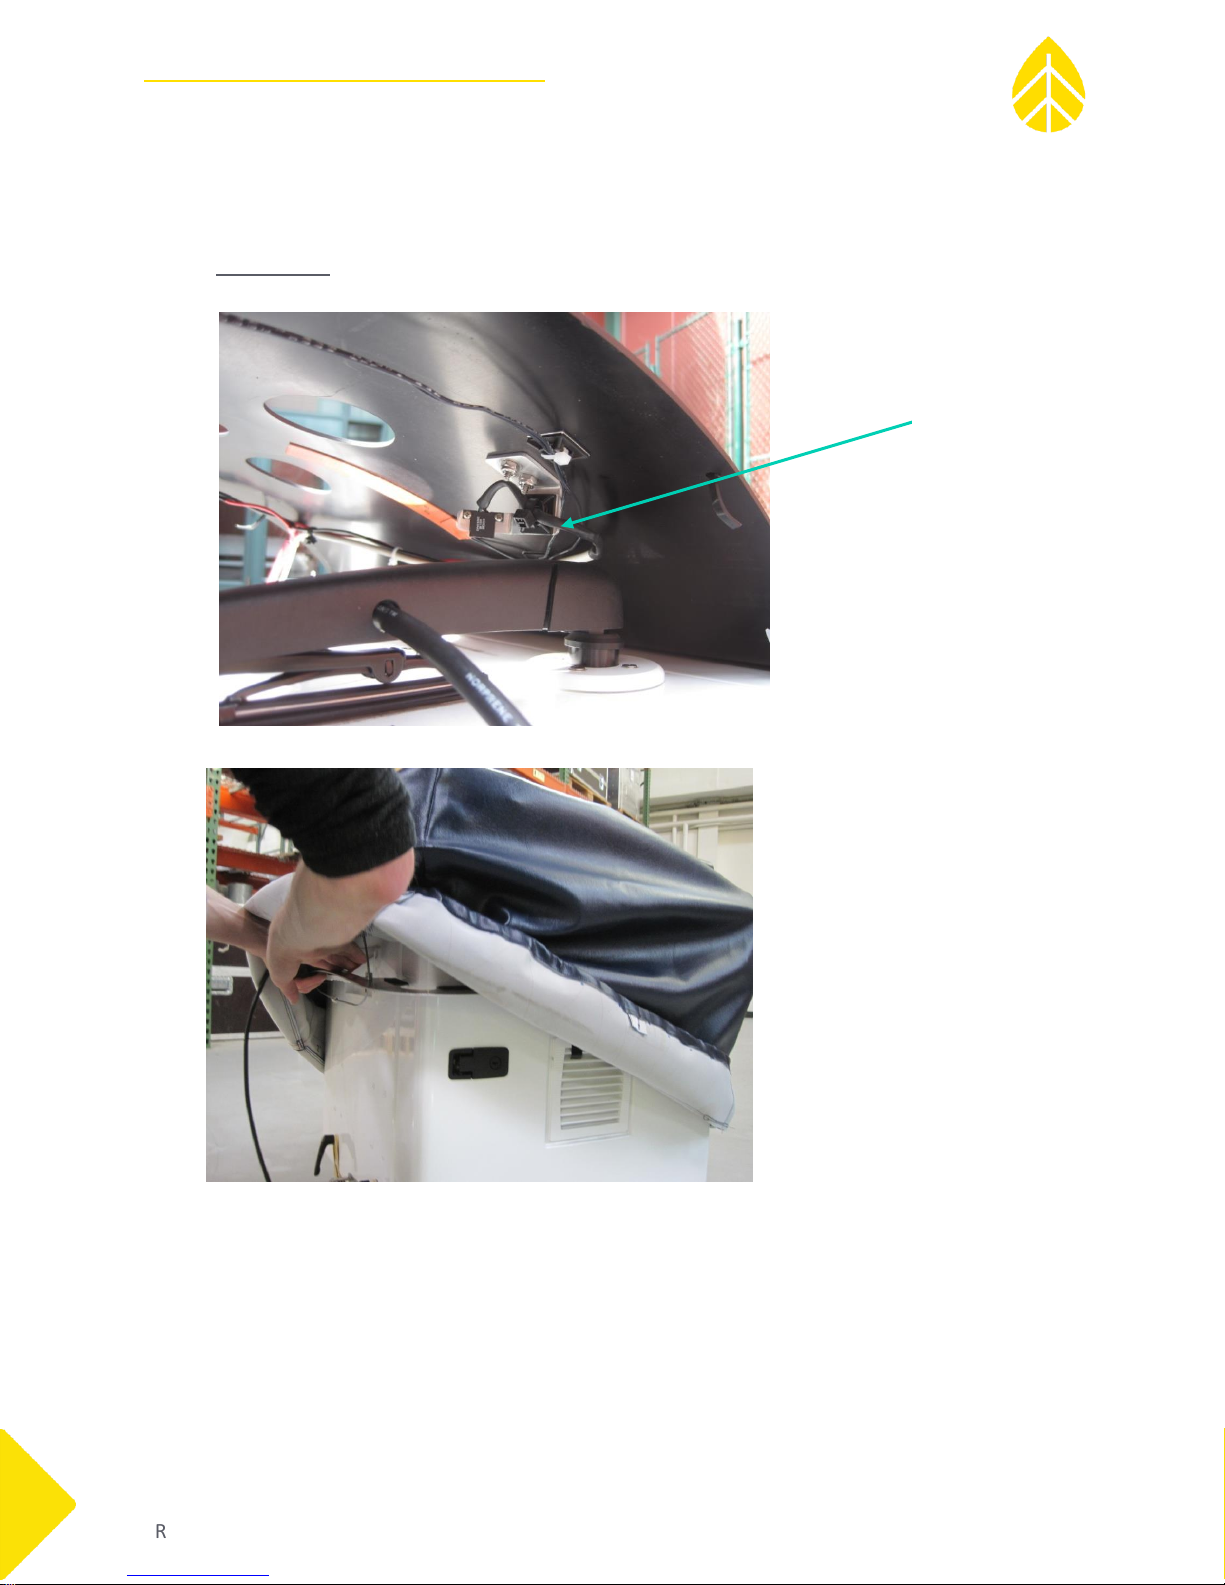
Wiper Sensor
4) Connect power to Controller box as shown above and place controller on the ground near the
Windcube (it is OK for the controller box to get buried in snow):
5) Lower the Tent assembly down onto the Windcube
IMPORTANT! Orient the tent assembly on the Windcube so that the wiper sensor is near the
wiper shaft, as shown in the photo below:
6) Carefully slide the tent over the Windcube as shown below and tighten the bottom draw string.
7) Place the temperature sensor in a location that is representative of ambient air and won’t get
covered with snow (not on the heater plate or under the snow tent).
8) Open the controller box and turn switch to “Off”, “PLC” or “On”
“PLC” will run the heater plate off of the sensors and use 25% less power than “On”
“On” will run the heater plate constantly (100 Watts)
“Off” will turn the heater plate off (there will still be power to the Windcube)
 Loading...