

Page 1
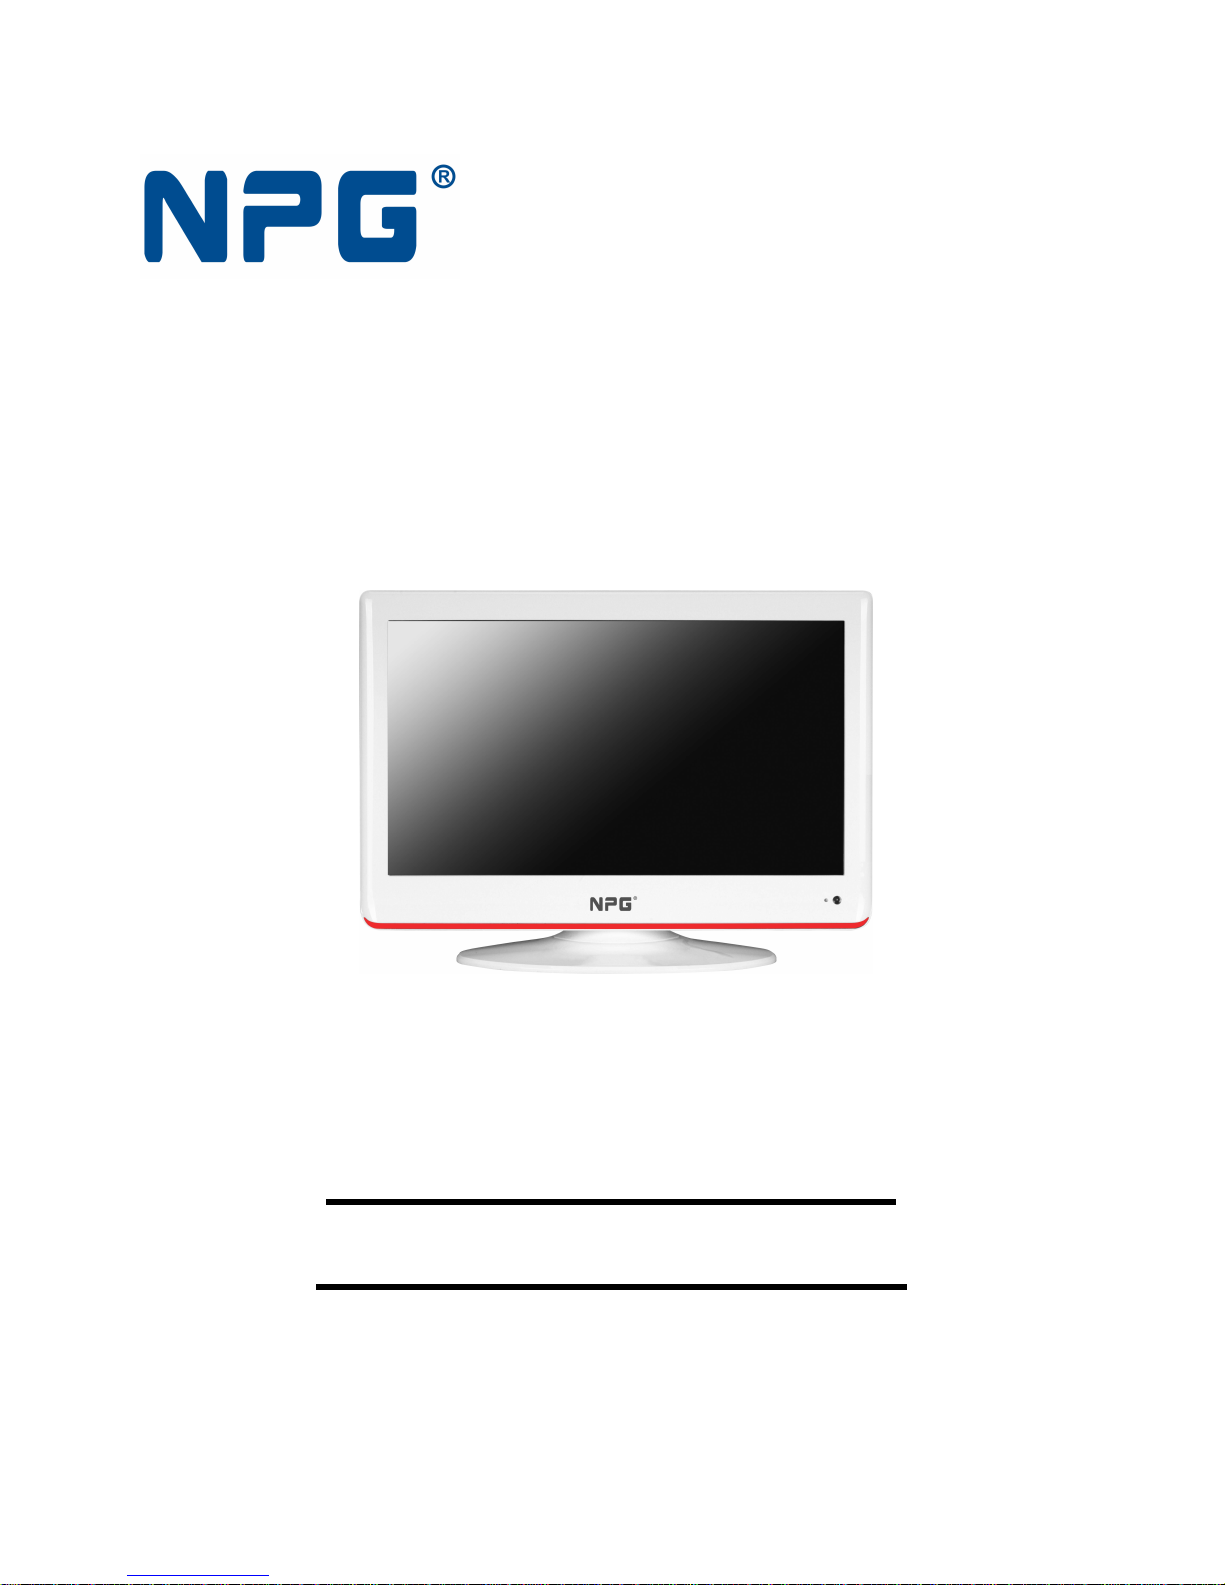
LCD COLOR TELEVISION
TELEVISIÓN TFT LCD
NT-229W-P
OPERATION MANUAL
MANUAL DE USUARIO
Please read this manual carefully before operation.
Por favor lea este manual atentamente antes de su uso.
Page 2

Contents
Warning…………………………………………………………………………….……2
Safety Instructions…………………………………………………………………….4
Introduction…………………………………………………….….……………………6
Installing Batteries………………………………...………….………...……………6
Cable Installation……………………………………………..………………………7
8
Operation………………………………………………………………………………10
10
Input Source…………………………………………………………………………11
Using the Function………………………………………………………………….11
Channel Menu………………………………………………………………………11
Picture Menu………………………………………………………………………..12
Sound Menu………………………………………………………………………...13
Time Menu…………………………………………………………………………..14
Option Menu…………………………………………………………………………14
STORAGE………………………………………………………………………......18
TELETEXT……………………………………………………………...…………..19
Trouble Shooting……………………………………………………………………..20
Maintenance…………………..……………………………………………………….21
1
Lock Menu…………………………………………………………………………..17
Remote Control………………………………………………………………………...
Choosing a TV channel………………….………………………………………...
Turning on and off the TV………………………………………………………… 10
No signal………………………………………………………………………….…10
Volume adjustment………………………………………………………………... 10
Page 3
Warning
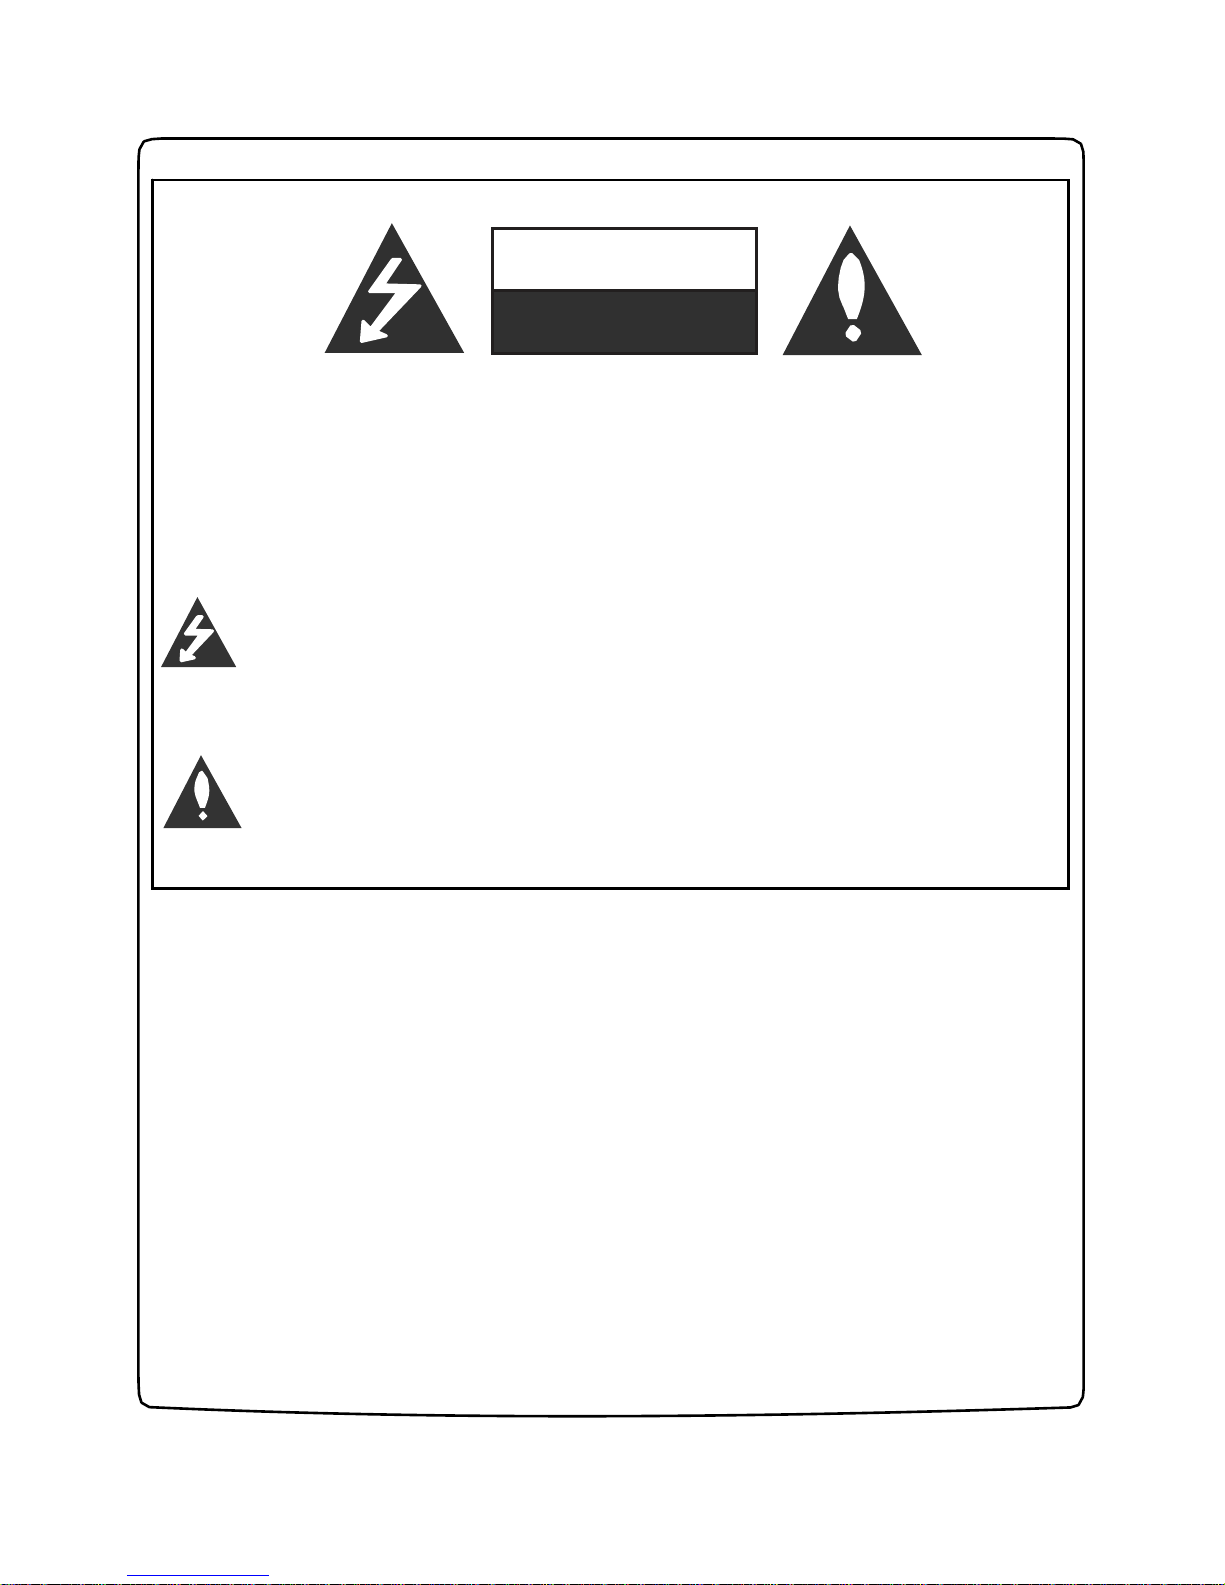
CAUTION
RISK OF ELECTRIC SHOCK
DO NOT OPEN
WARNING:
TO REDUCE THE RISK OF ELECTRIC SHOCK DO NOT REMOVE
COVER(OR BACK).NO USER SERVICEABLE PARTS INSIDE. REFER
TO QUALIFIED SERVICE PERSONNEL.
The lightning flash with arrowhead symbol, within an equilateral triangle, is
intended to alert the user to the presence of uninsulated "dangerous
voltage"within the products enclosure that may be of sufficient magnitude
to constitute a risk of electric shock to persons.
The exclamation point within an equilateral triangle is intended to alert the
user to the presence of important operating and maintenance(servicing)
instructions in the literature accompanying the appliance.
REGULATORY INFORMATION
This equipment generates, uses and can radiate radio frequency energy and, if not
installed and used in accordance with the instructions, may cause harmful
interference to radio communication. However, there is no guarantee that interference
will not occur in a particular installation. If this equipment does cause harmful
interference to radio or television reception, which can be determined by turning the
equipment off and on, the user is encouraged to try to correct the interference by one
or more of the following measures:
-Relocate the receiving antenna.
-Increase the separation between the equipment and receiver.
-Connect the equipment into an outlet on a circuit different from that to which the
receiver is connected.
-Consult the dealer or experienced radio/TV technician for help.
Any changes or modifications not expressly approved by the party responsible for
compliance could void the user's authority to operate the equipment.
2
Page 4
Warning
CAUTION:
DO not attempt to modify this product in any way without written authorization from
suppiler.Unauthorized modification could void the user's authority to operate this
product.
It is not recommended to keep a certain still image displayed on the screen for a long
time as well as displaying extremely bright images on screen.
CAUTION connecting the Power Cord
Most appliances recommend they be placed upon a dedicated circuit; that is,
a single outlet circuit which powers only that appliance and has no additional
outlets or branch circuits.
Do not overload wall outlets. Overloaded wall outlets, loose or damaged wall outlets,
extension cords, frayed power cords, or damaged or cracked wire insulation are
dangerous. Any of these conditions could result in electric shock or fire. Periodically
examine the cord of your appliance, and its if appearance indicates damage or
deterioration, unplug it, discontinue use of the appliance, and have the cord replaced
with an exact replacement part by an authorized servicer. Protect the power cord from
physical or mechanical abuse, such as being twisted, kinked, pinched,closed in a door,
or walked upon. Pay particular attention to plugs, wall outlets, and the point where the
cord exits the appliance.
On Disposal
- The fluorescent lamp used in this product contain a small amount of mercury.
- Do not dispose of this product with general household waste.
- Disposal of this product must be carried out in accordance to the regulations of your
local authority.
3
WARNING:
To ReduceThe Risk Of Fire Or Electric Shock, Do Not Expose This
Apparatus To Rain Or Moisture.
filled with liquids, such as vases, shall be placed on the apparatus.
The Mains plug is used as the disconnect device, and the disconnect device
shall remain readily operable.
The product needs electrostatic prevention.Restart the product when fail to
start due to the static caused by product terminals such as TV,AV,SCART,
HDMI.
The Apparatus shall not be exposed to dripping or splashing and no objects
Page 5
Safety instructions
IMPORTANT SAFETY INSTRUCTIONS
1.Read these instructions.
2.Keep these instructions.
3.Heed all warnings.
4.Follow all instructions.
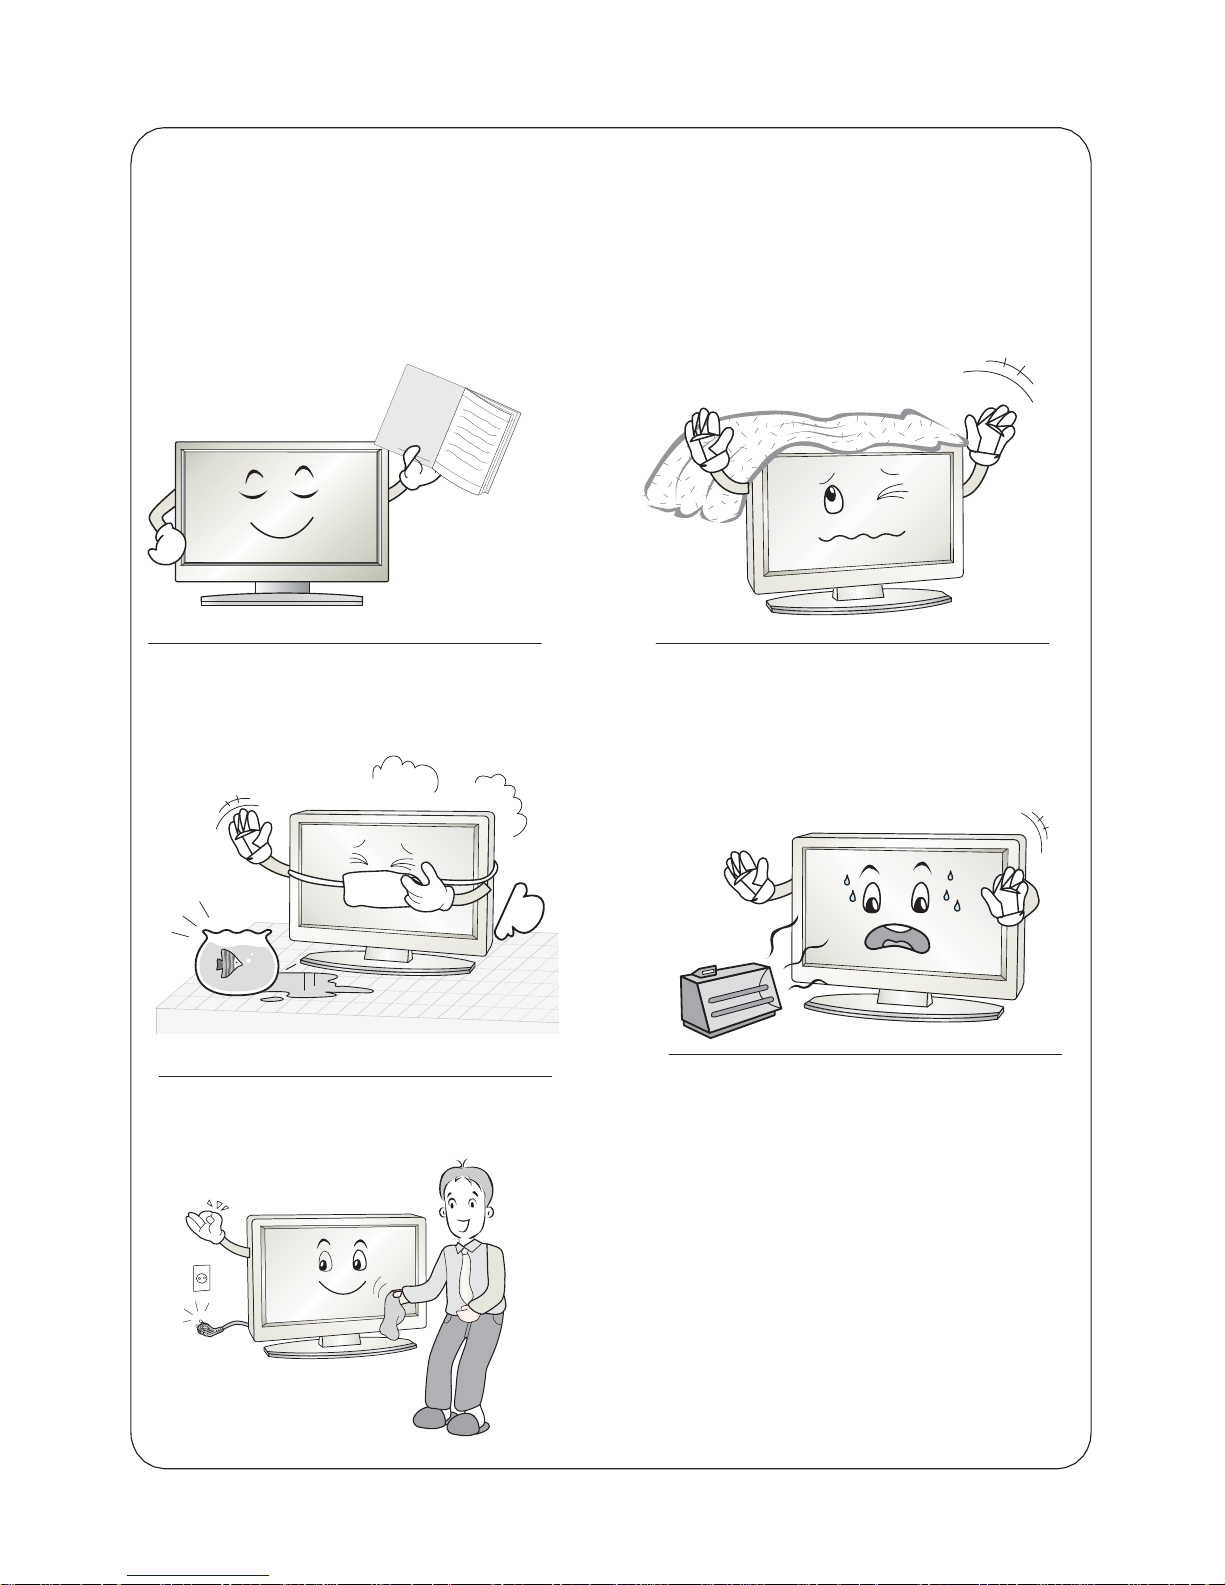
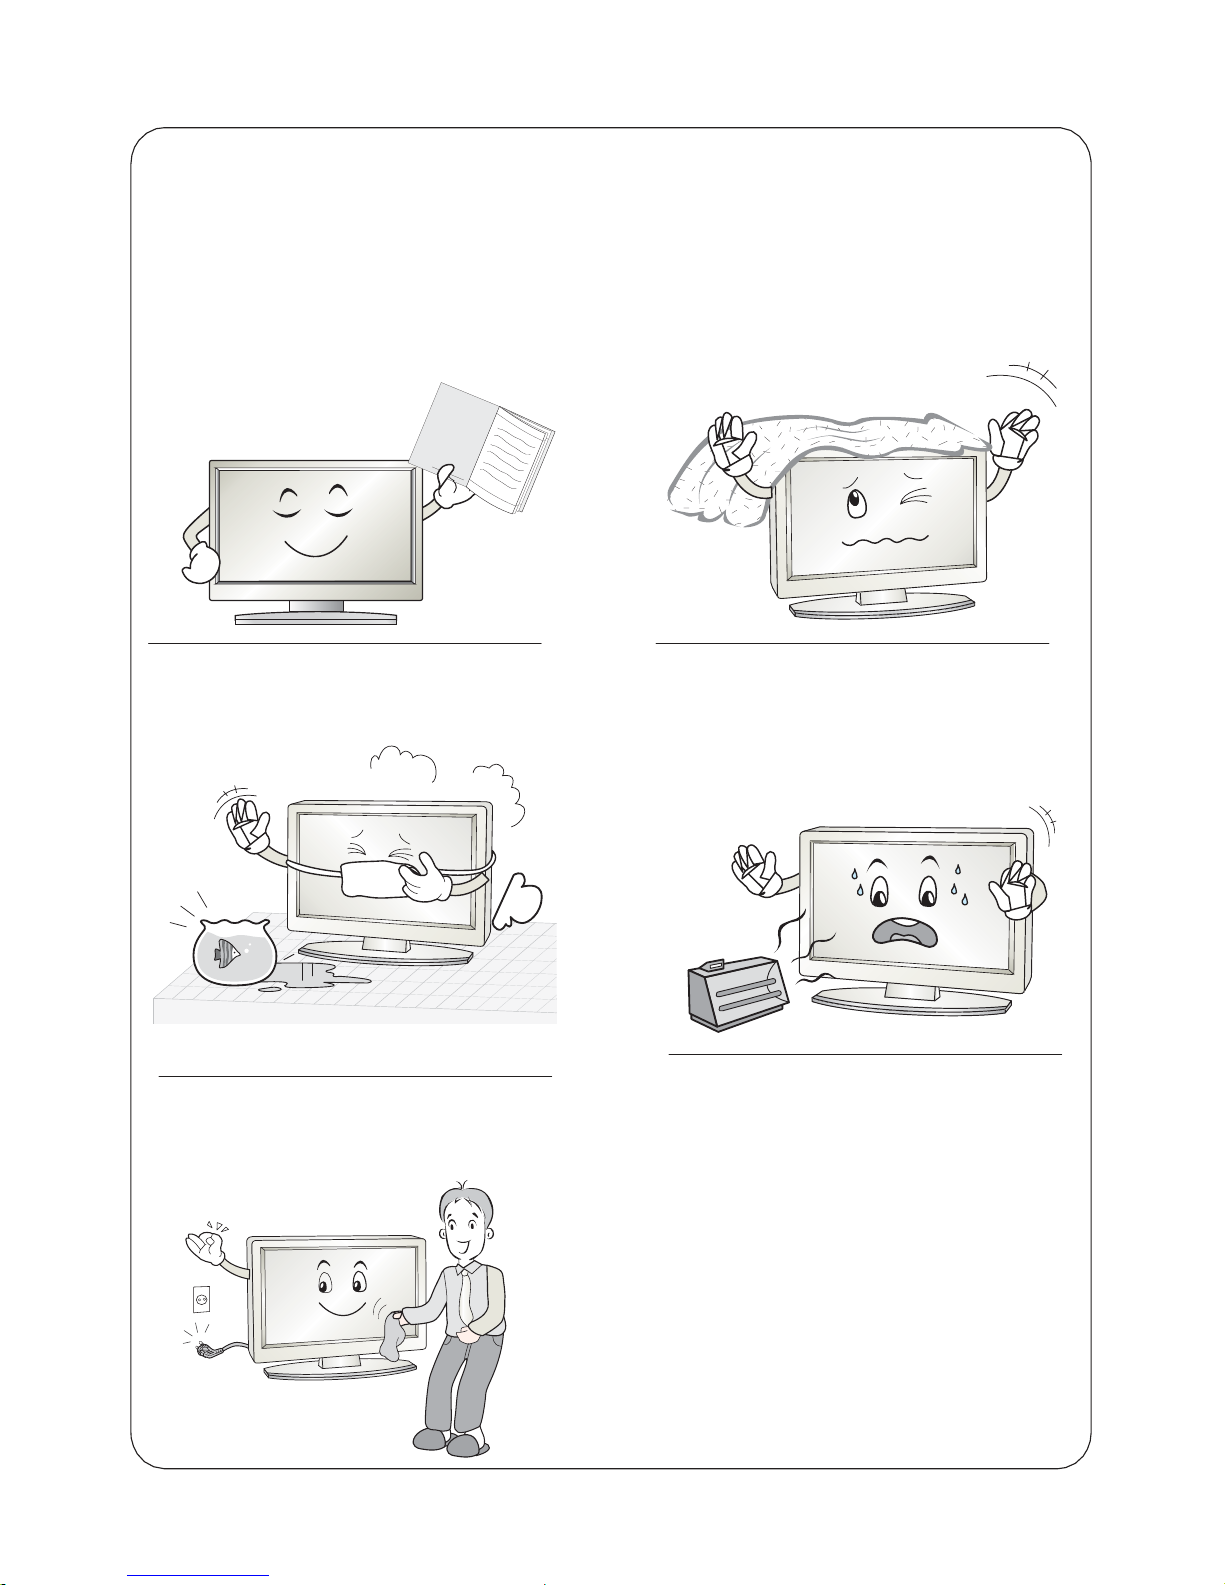
5.Do not use this apparatus near water.
6.Clean only with a dry cloth.
7.Do not block any of the ventilation
openings.Install in accordance with
the manufacturer's instructions.
8.Do not install near any heat source
such as radiators,heat registers,
stoves,or other apparatus(including
amplifiers)that produce heat.
9.Do not defeat the safety purpose of
the polarized or grounding type plug. A
polarized plug has two blades with one
wider than other. A grounding type plug
has two blades and a third grounding
prong. The wide blade or the third
prong is provided for your safety. When
the provided plug does not fit into your
outlet, consult an electrician for
replacement of the obsolete outlet.
4
O w n er'sManual
Page 6
Safety instructions
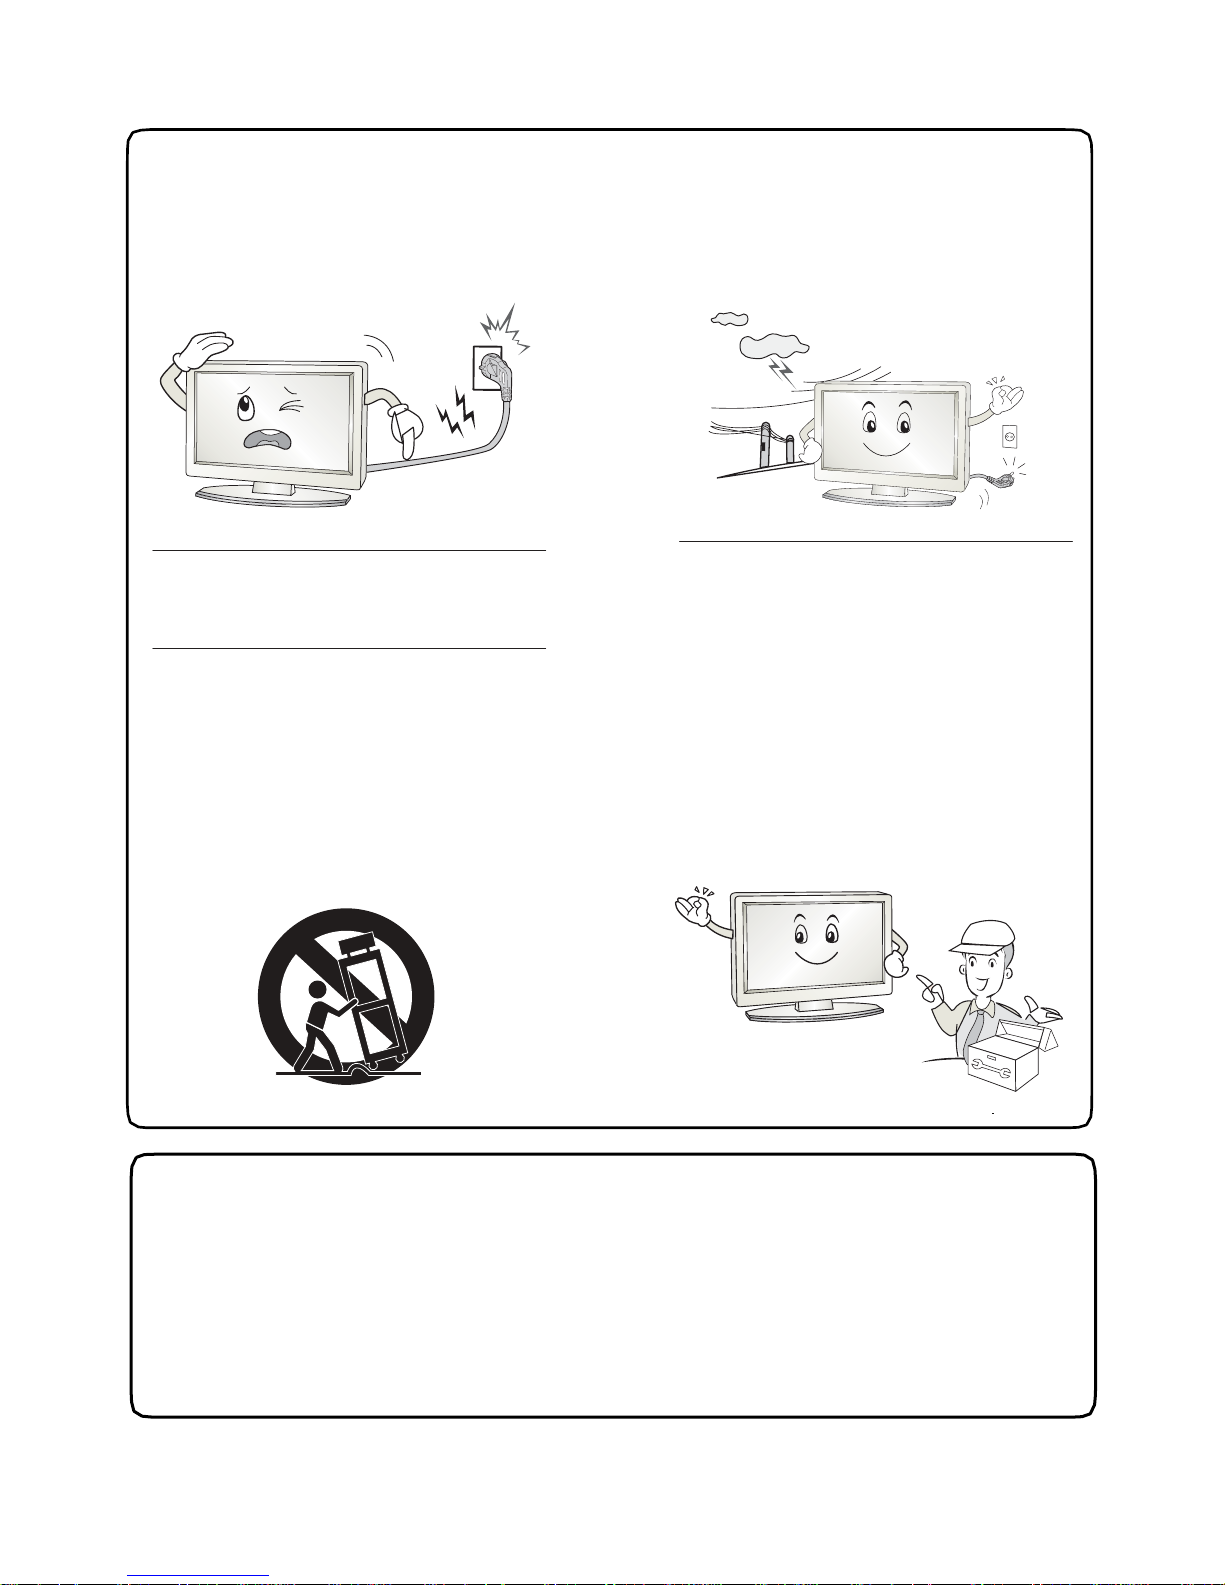
10.Protect the power cord from being
walked on or pinched particularly at
plugs,convenience receptacles, and
the point where they exit from the
apparatus.
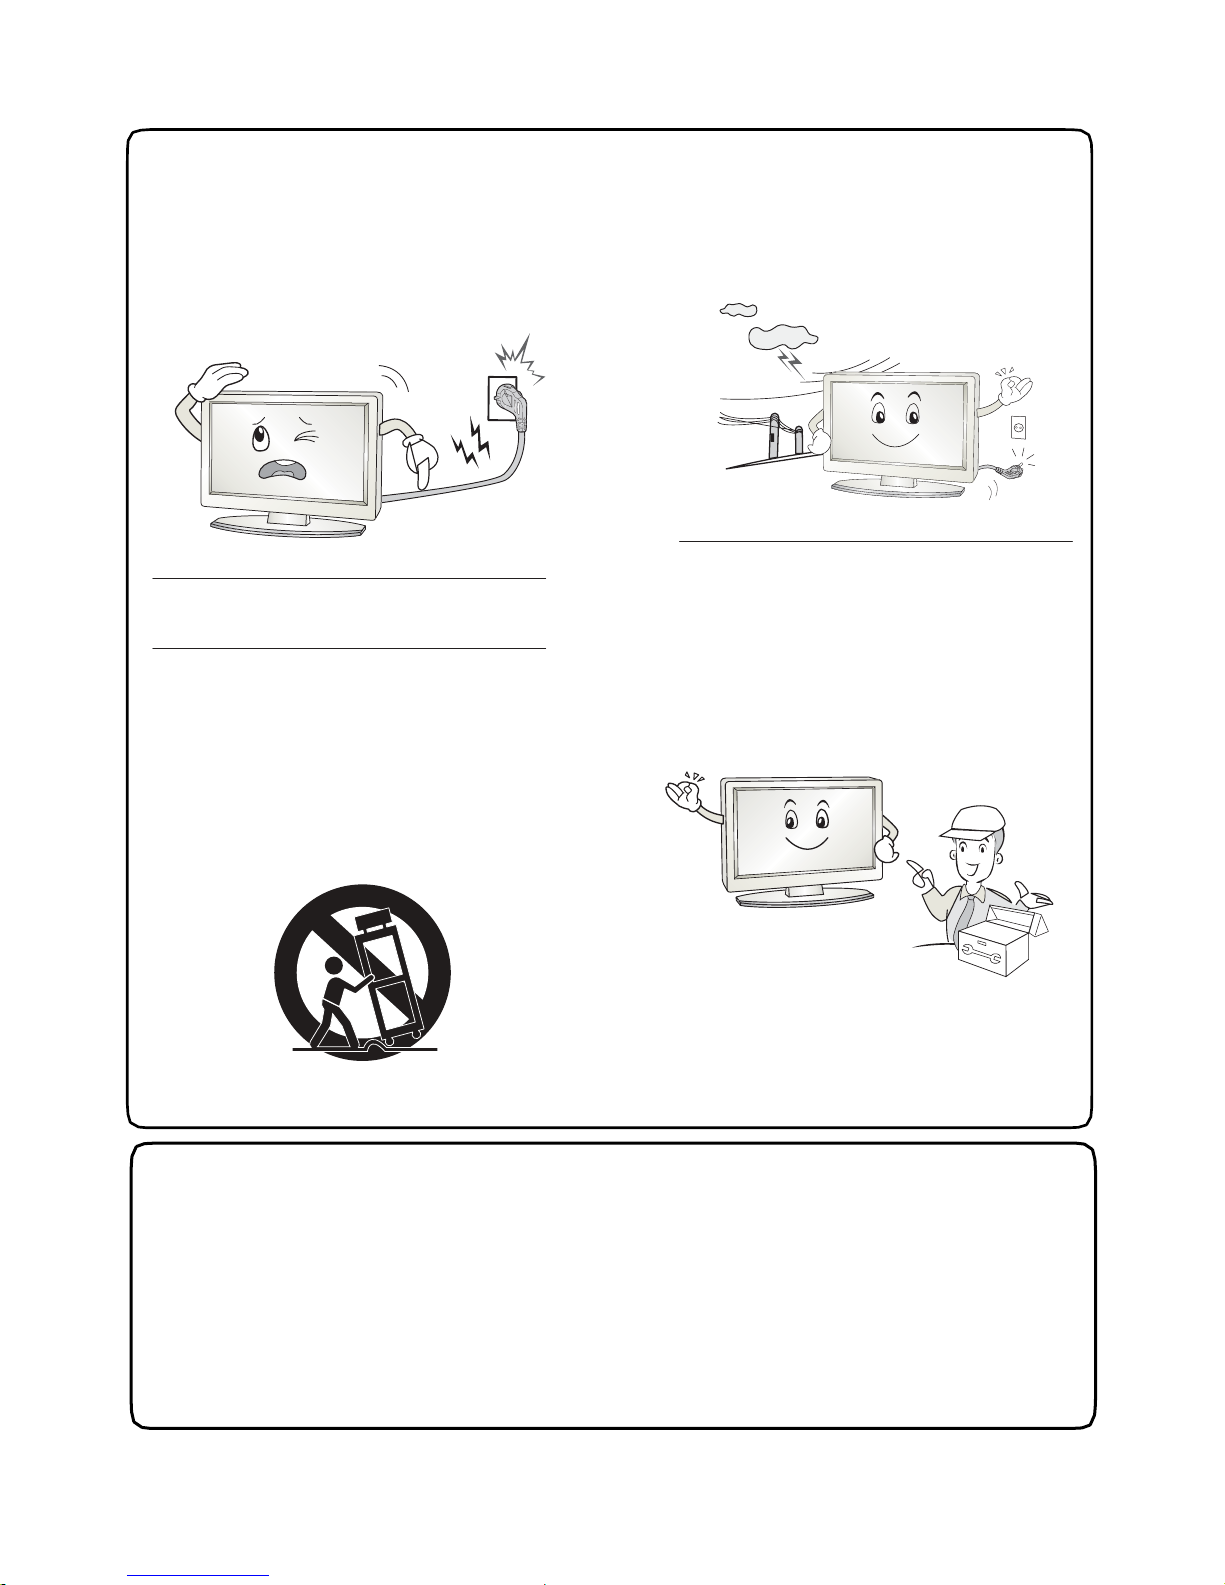
13.Unplug this apparatus during
lightning storms or when unused for
long periods of time.
14.Refer all servicing to qualified
service personnel. Servicing is required
when the apparatus has been
damaged in any way, such as power
supply cord or plug is damaged, liquid
has been spilled or objects have fallen
into the apparatus, the apparatus has
been exposed to rain or moisture, does
not operate normally, or has been
dropped.
11.Only use the attachments/
accessories specified by the
manufacturer.
12.Use only with a cart, stand, tripod,
bracket, or table specified by the
manufacturer, or sold with the
apparatus.When a cart is used, use
caution when moving the cart/
apparatus combination to avoid
injury from tip-over.
Note
- If the TV feel cold to the touch, there may be a small "flicker" when it is turned on.
This is normal, there is nothing wrong with TV.
- Some minute dot defects may be visible on the screen, appearing as tiny
red,green, or blue spots. However there have no adverse effect on the monitor's
performance.
- Avoid touching the screen or holding your finger(s) against it for long periods of time.
Doing so may produce some temporary distortion effect on the screen.
5
Page 7
Introduction
Installing Batteries
1
2
3
Push down to open the battery cover.
Insert two1.5V AAA size batteries in correct
polarity.
Don't mix old or used batteries with new
ones.
Close up the cover until the lock clicks.
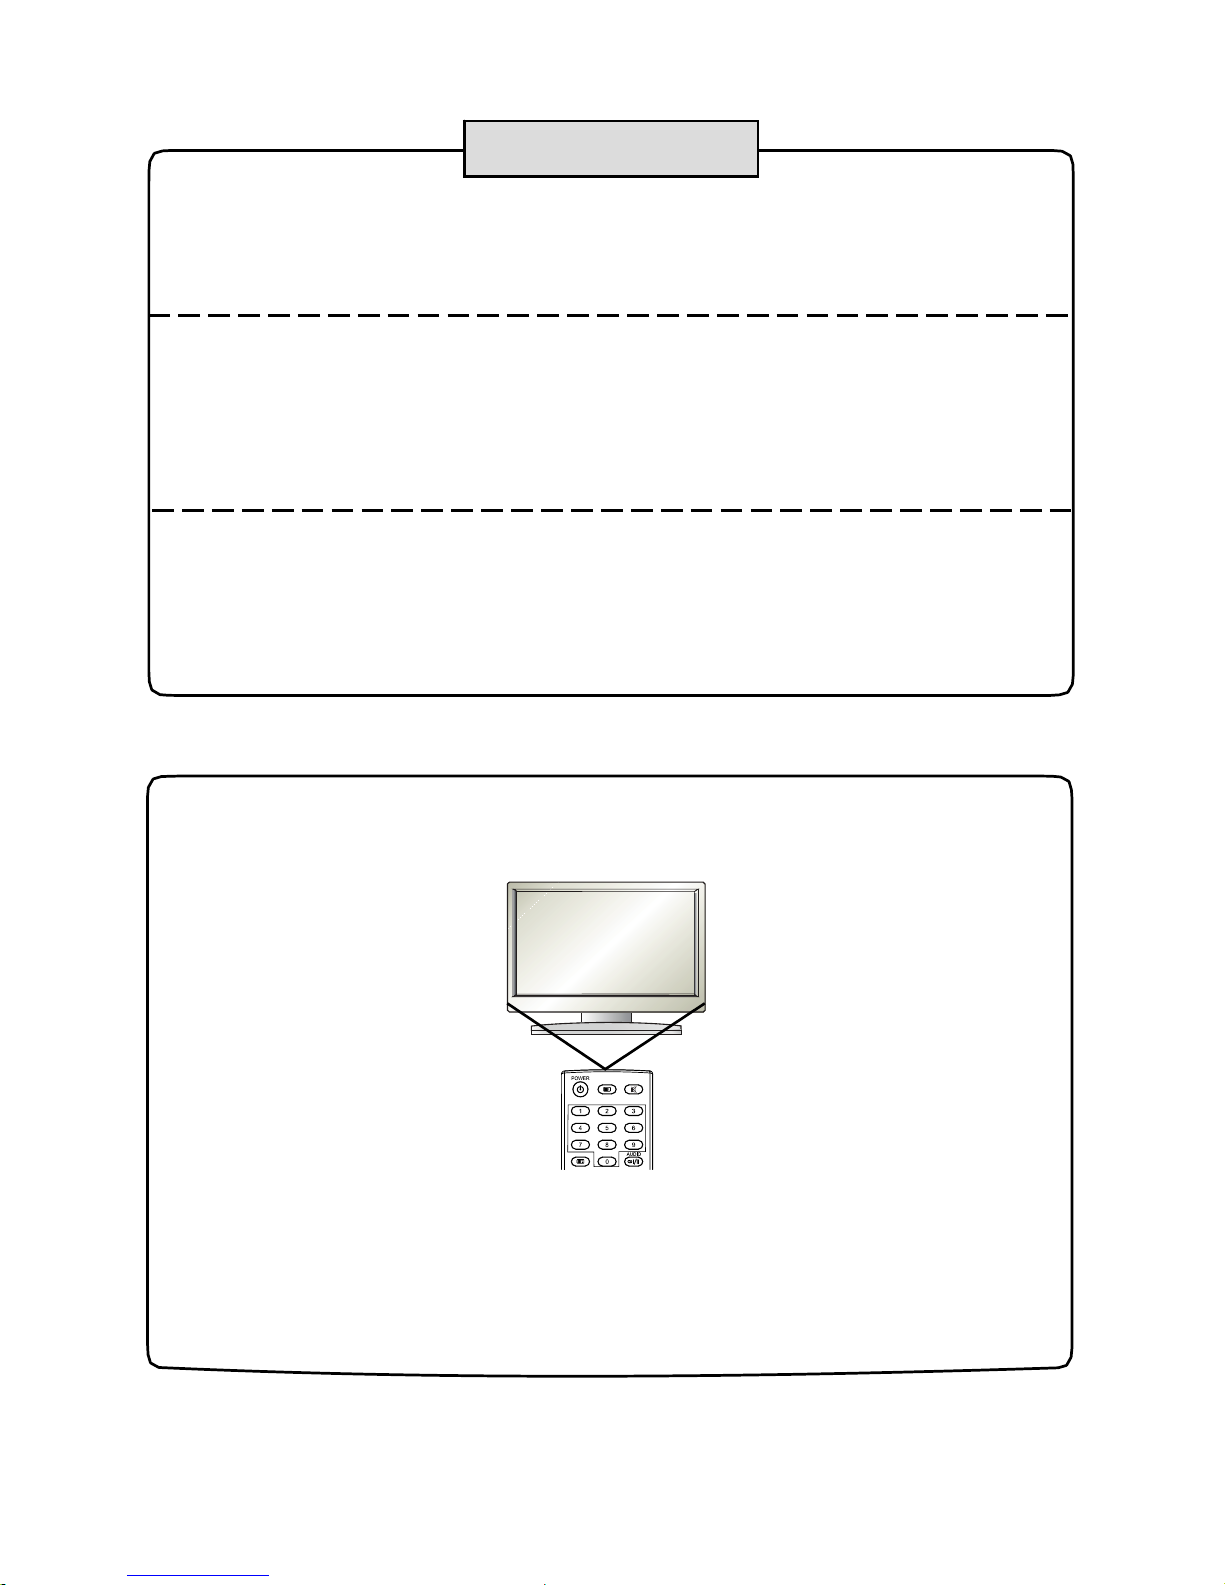
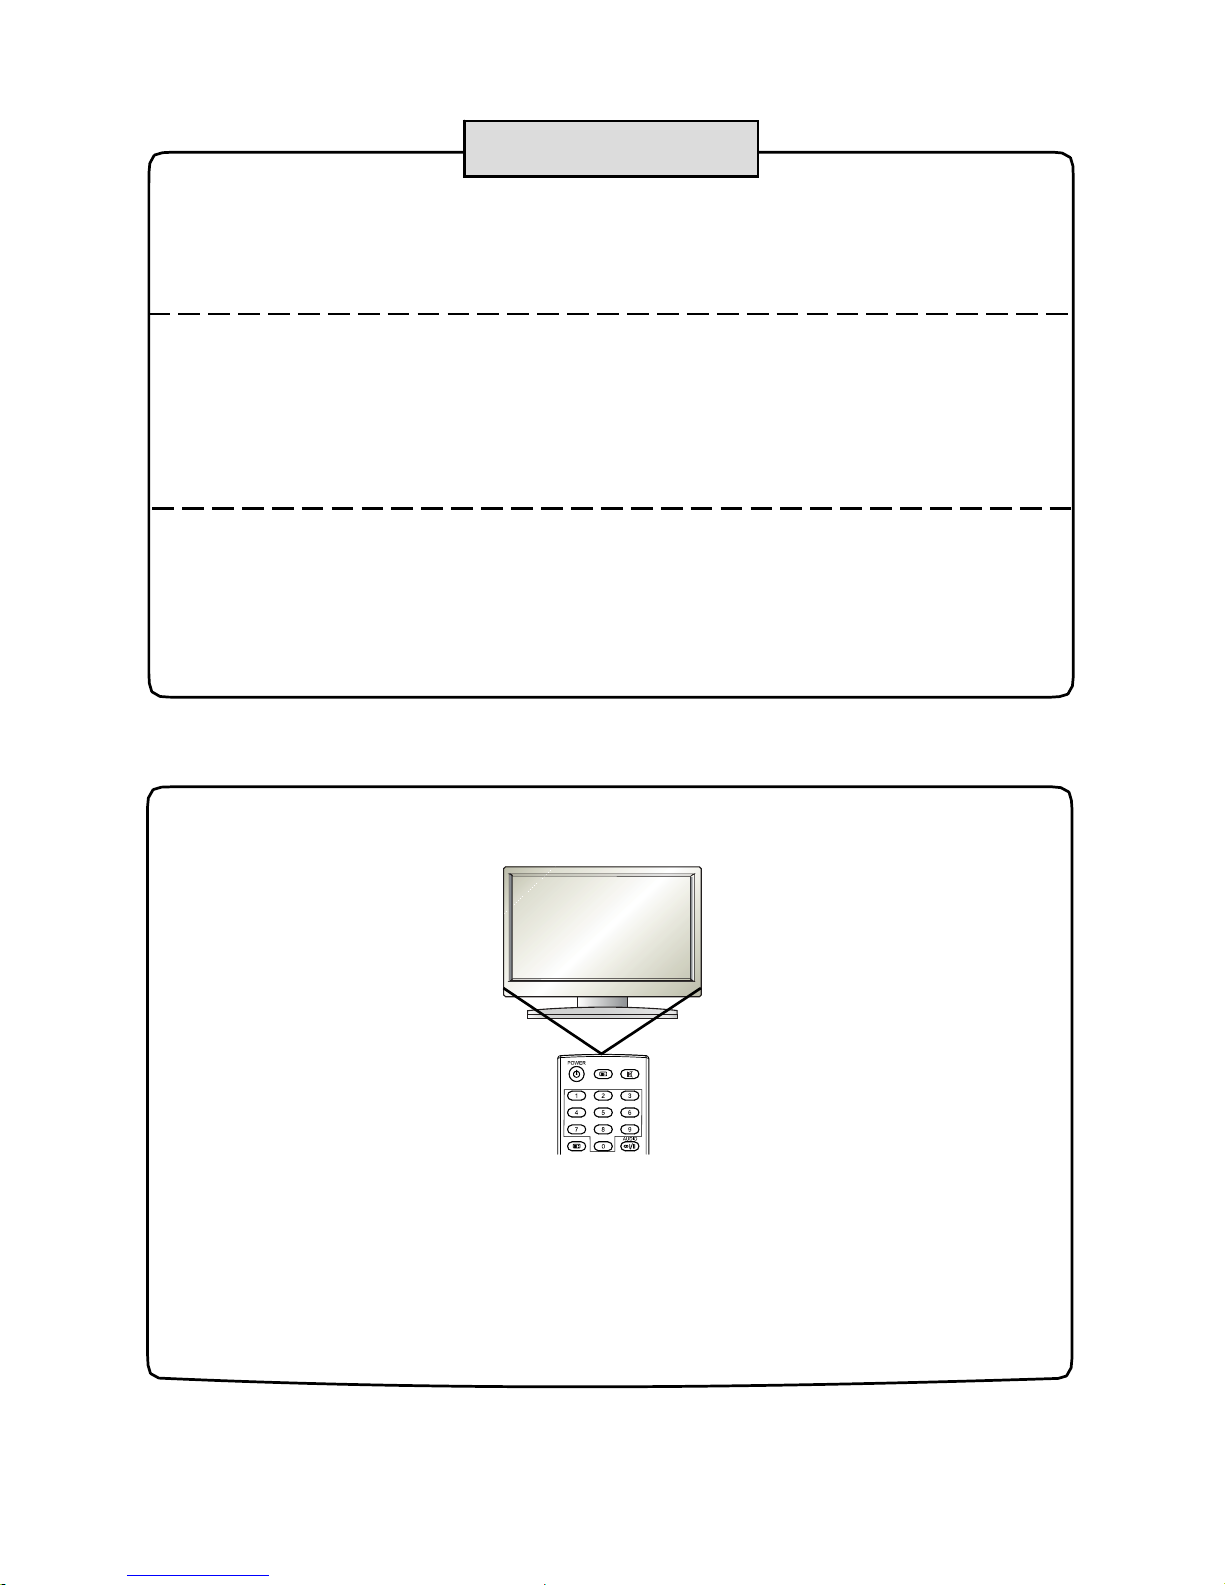
● Point the remote towards the remote control sensor of the wireless TV and
use it within 7 meters.
● Put the used batteries into the recycling bin since it can negatively affect
the environment.
6
NOTE: The batteries (battery pack or batteries installed )shall not be
exposed to excessive heat such as sunshine
, fire or the like.
SOURCE
INFO
Page 8

Introduction
Cable Installation
- Before the installation and use, please read carefully the relevant content in "Notice
for Maintenance and Safety".
1.Take the LCD TV from the wrapping package and put it in a drafty and LCD place.
Notice:
When you plug or unpluy the LCD TV,computer or other equipments, you must make
sure that the AC power has been already shut down; when unplugging the power
cable or signal cable, please hold the plug(the insulated part), do not draw the body
of the cable.
2.The RF output terminal can be connected with the RF input port of the TV.
3.The output AV terminal of DVD can be connected with the AV input port of the TV
through AV cable.
4.Connect one end of the VGA cable with the VGA port on computer, connect the other
end of the VGA cable with the VGA port on the TV, and tighten the bolts clockwise on
the each end of VGA cable.
Notice:
While connecting the 15-pin VGA, please do not insert the plug overexertedly, for
fear the pin might be broken.
5.Connect one end of the HDMI cable with HDMI output port, connect the other end of
the HDMI cable with the HDMI port on the TV.
Notice:
While connecting the HDMI,please aim at carefully,do not insert overexertedly, for
fear the pin might be broken.
6.Check and make sure that all AV cables are connected with the corresponding ports
correctly.
7
8.Connect the other end of the AC power cable with the AC power port on the TV.
connect the TV power input port with the AC power out of the above range.
Please hold the insulated part of the plug when you are unplugging the power cable, do
not touch directly the metallic part of the cable.
7.Connect the AC power cable with 100V-240V~ power supply.
Caution:The range of power input for the LCD TV is 100-240V~ 50/60Hz, do not
Page 9
Remote Control
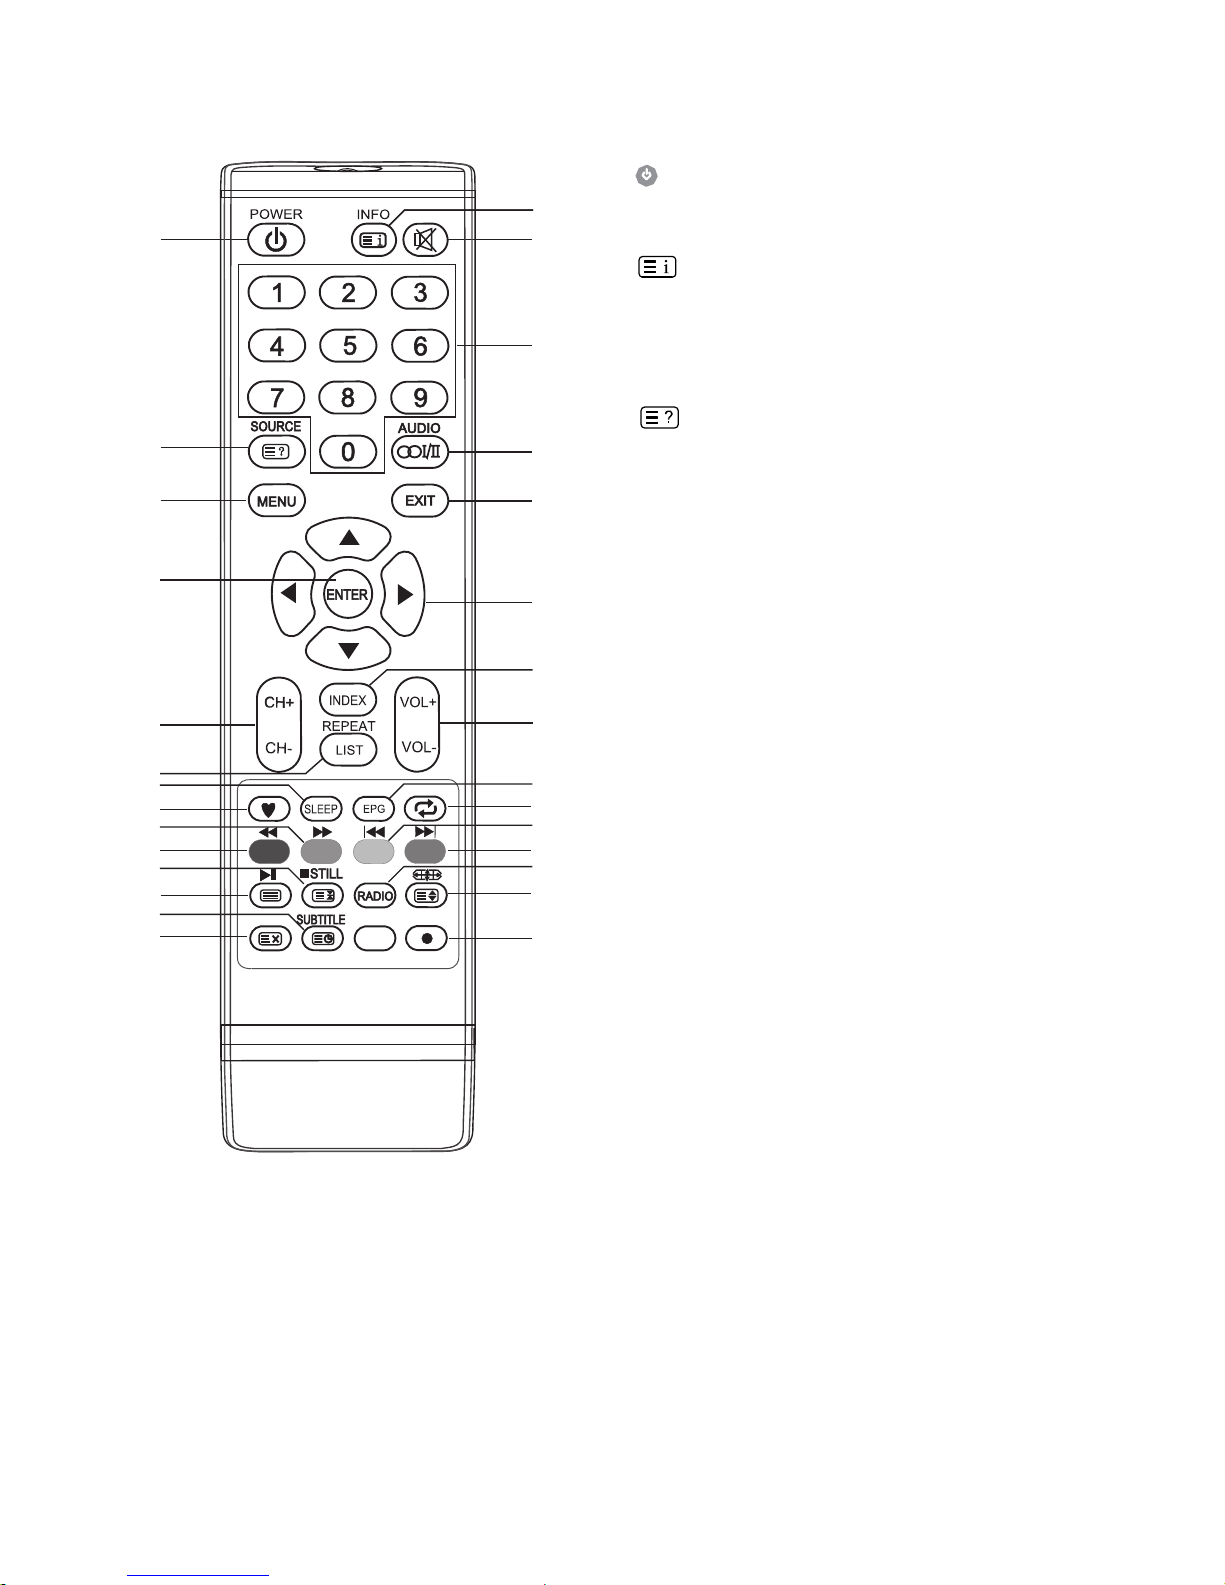
The buttons of the original remote control are as following:
NOTE:
All pictures in this manual are
examples, only for reference, actual
product may differ from the pictures.
8
1
2
3
4
5
6
7
8
9
10
11
12
13
14
15
16
17
18
22
23
24
25
26
27
28
29
19
20
21
1.
: Power, switch on or off TV set.
2. INFO: Press to display the current
program information on the screen.
3. MUTE: Press to mute or restore sound.
4. NUMBER BUTTONS: Choose channels
or password importation.
5. SOURCE: Press to select signal source.
7. MENU: Press to enter the menu screen
for various optional adjustable settings.
8. EXIT: Return the last layer OSD Menu o
r
exit OSD Menu.
9. ENTER: Press to execute the selected
item in the menu screen or enter the
desired value in any input mode.
10. w/x/y/z: To select the direction.
11. CH+/CH-: Press to select channels in
ascending or descending order.
12. VOL+/VOL-: Press to adjust the volume
level up or down.
14. REPEAT: Press to select the repeat play
mode (in Storage mode ).
LIST: Press to call up the channel list.
Press again to exit it.
15. SLEEP: Press to set the sleep timer.
When the preset length of time has
passed, the TV set enters standby
mode.
: Go to the index page.
for some teletext pages.
: Reveal the hidden information
6. AUDIO(
∞Ⅰ/
Ⅱ
): The button can be used to
switch among NICAM DUAL I, NICAM
MONO. And switch Audio language in
DTV mode.
DUAL II, NICAM DUAL I+II,STEREO,
13. INDEX:Press to enter the Record list.
Page 10
Remote Control
9
1
2
3
4
5
6
7
8
9
10
11
12
13
14
15
16
17
18
22
23
24
25
26
27
28
29
19
20
21
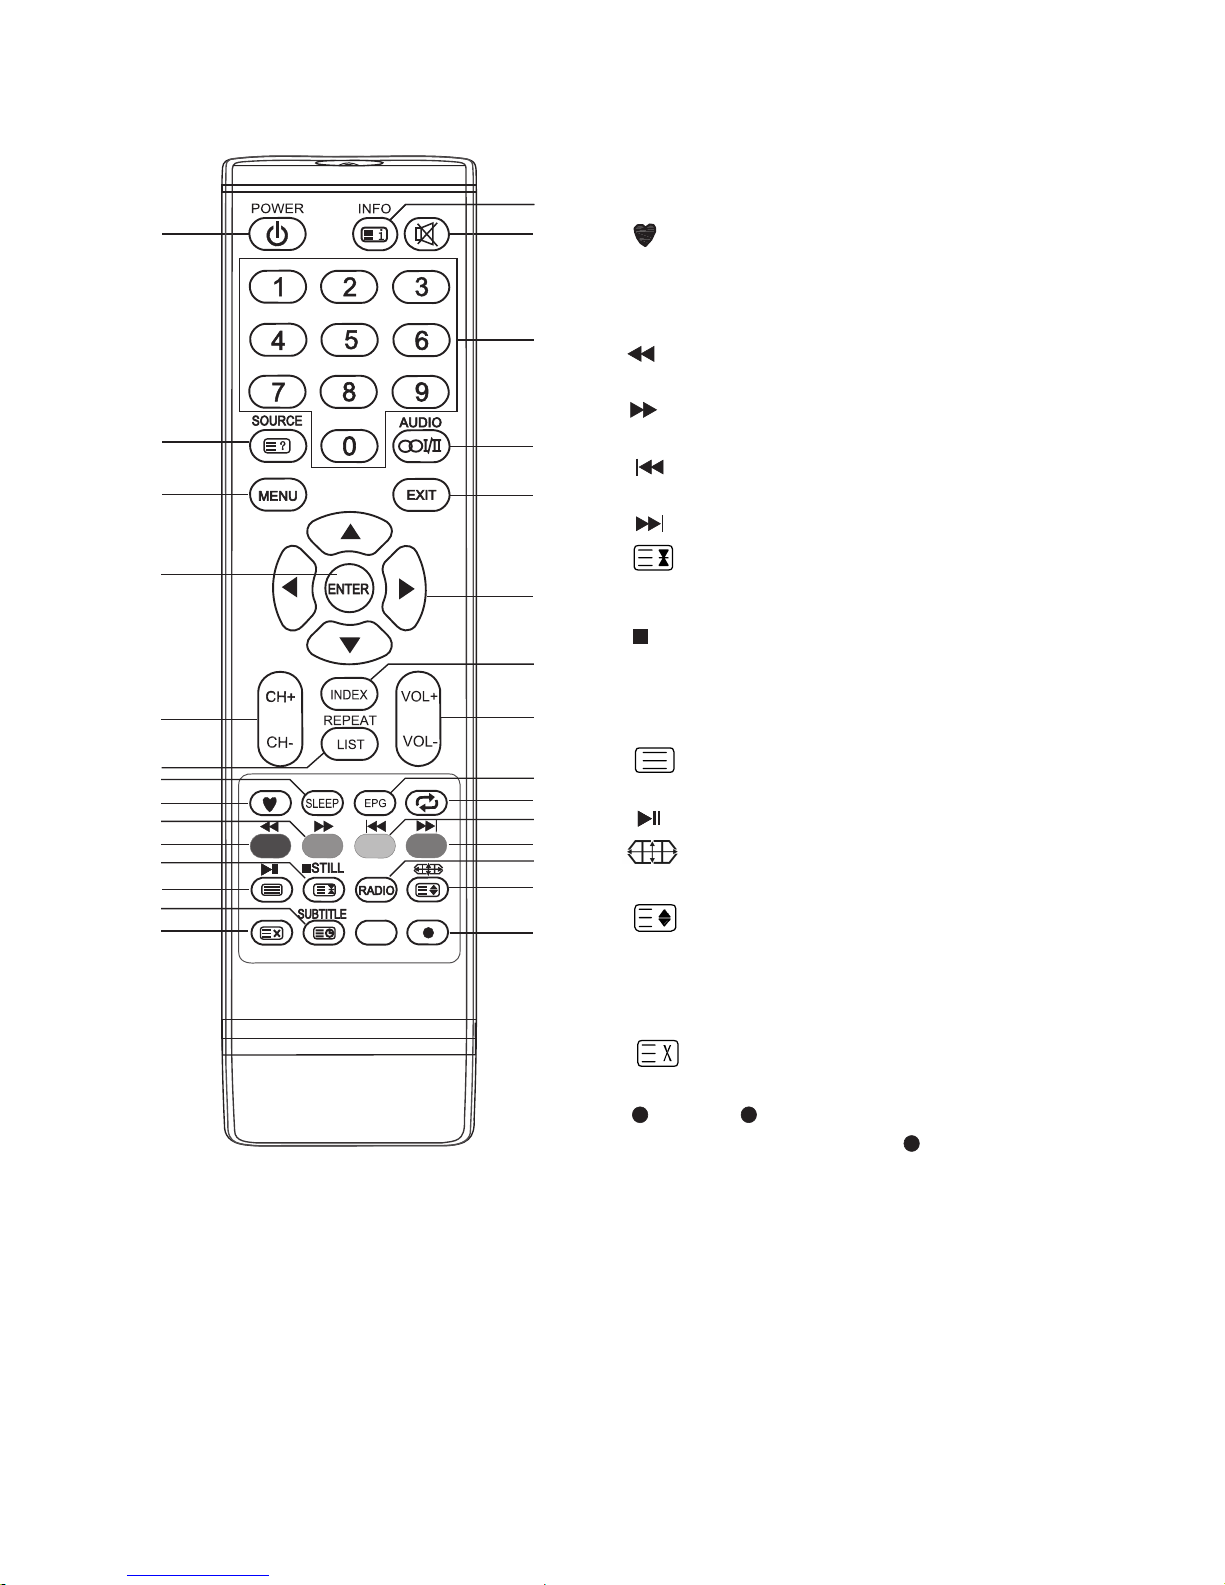
16. EPG: Electronic Program Guide, use in
the DTV mode.
17.
18. RECALL: Return to last viewed program.
19. Red button: Fast Control Keys.
: Fast reverse (in Storage mode ).
20. Green button: Fast Control Keys.
: Fast forward (in Storage mode ).
21. Yellow button: Fast Control Keys.
: Previous (in Storage mode ).
22. Blue button: Fast Control Keys.
: Next (in Storage mode ).
23.
: Stop (in Storage/DVR mo de ).
24. RADIO: Press to interchange the Radio
and DTV programs when there is Radio
program ( In DTV mode ).
25.
: Play / Pause (in Storage mode ).
26.
27. SUBTITLE: Enter into subtitle mode or
subpage.
28.
29. : Press button to start recording.
Recording in use. Press button to
: Switch on/off the favorite programs
list.
press again to release. STILL: Press to
hold the picture.
: Hold the teletext page on display,
: Enter the teletext, press again for
MIX mode,press this button again to exit.
: The button can be used to select
the size of the screen display.
display mode.
: Change size of teletext screen in
exit teletext, press again to exit.
: Cancel the teletext but not to
zoom the record menu. (in DVR mode ).
Page 11
Turning on and off the TV
TURN ON LCD TV
1. Connect the AC input cable then turn on the power switch of the TV . At this time the
TV will enter standby mode.
2. Press button on TV or button on remote control can turn on LCD TV from
standby mode .
TURN OFF LCD TV
Press button or button on the remote control to enter standby mode.
No signal
- There is No Signal menu on screen when there is no input signal. In TV/DTV/VGA
mode, if there is no signal in five minutes, the LCD TV will turn off automatically.
Choosing a TV channel
1. Using the CH+/CH- on the panel of TV or on the remote control.
• Press CH+ to increase channel number.
• Press CH - to decrease channel number.
2. Using 0- 9 digital buttons
You can select the channel number by pressing 0 to 9. (In TV,DTV mode)
3. Example:
• To select - channel (e.g. Channel 5): Press 5 .
• To select -- channel (e.g. Channel 20): Press 2 and 0 in a short time.
Volume adjustment
1. Press VOL+/- to adjust the volume.
2. If you want to switch the sound OFF, press the MUTE .
3. You can release mute by pressing MUTE or VOL+.
10
Page 12
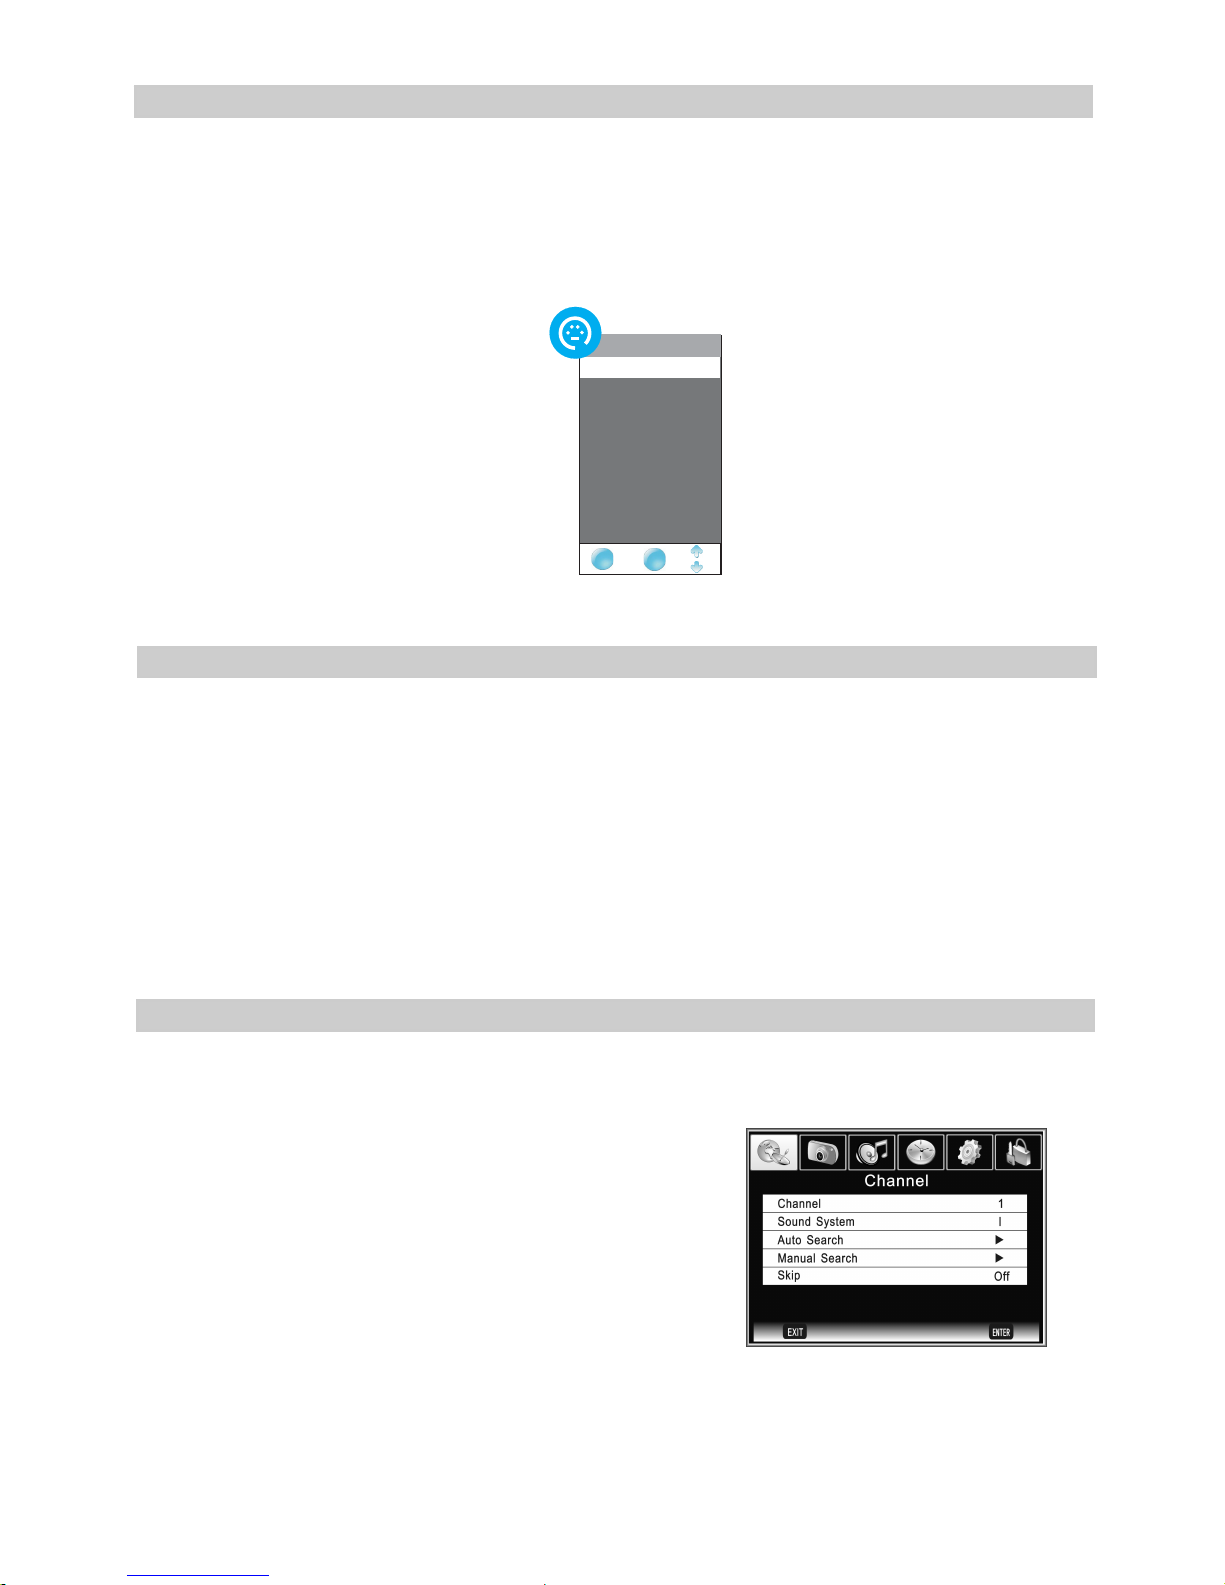
Input Source
You can select the input source by pressing the SOURCE button on the remote control.
Press【y】/【z】button or Source button to cycle through the input source.
Or you can select input source by pressing TV/AV button on television.〖CH+〗/〖CH-〗
button is used to cycle through different input sources. You can press TV/AV button to
confirm after choose some input source. If you do not confirm the input source within 1
minute,TV will automatically enter into certain source. For example:
NOTE: The picture is just for reference. Please operate with the OSD MENU of
concrete TV and refer to the AV terminal board.
Using the Function
Menu overview
Many function settings and adjustments of the LCD TV will begin from the menu
choosing. All operation can be followed as help bar shows. Press【MENU】button to
display the main menu; Press MENU button or【w】/【x】button to cycle through the
main menu: Channel, Picture, Sound, Timer, Option ,Lock. Press【y】/【z】button to
highilght the item to be adjusted.
Press【w】/【x】button to adjust the submenu or subitem. When you satisfied with your
adjustment, press【EXIT】button to exit the main menu.
When an item in MENU is displayed gray, it means that the item is not available or
cannot be adjusted.
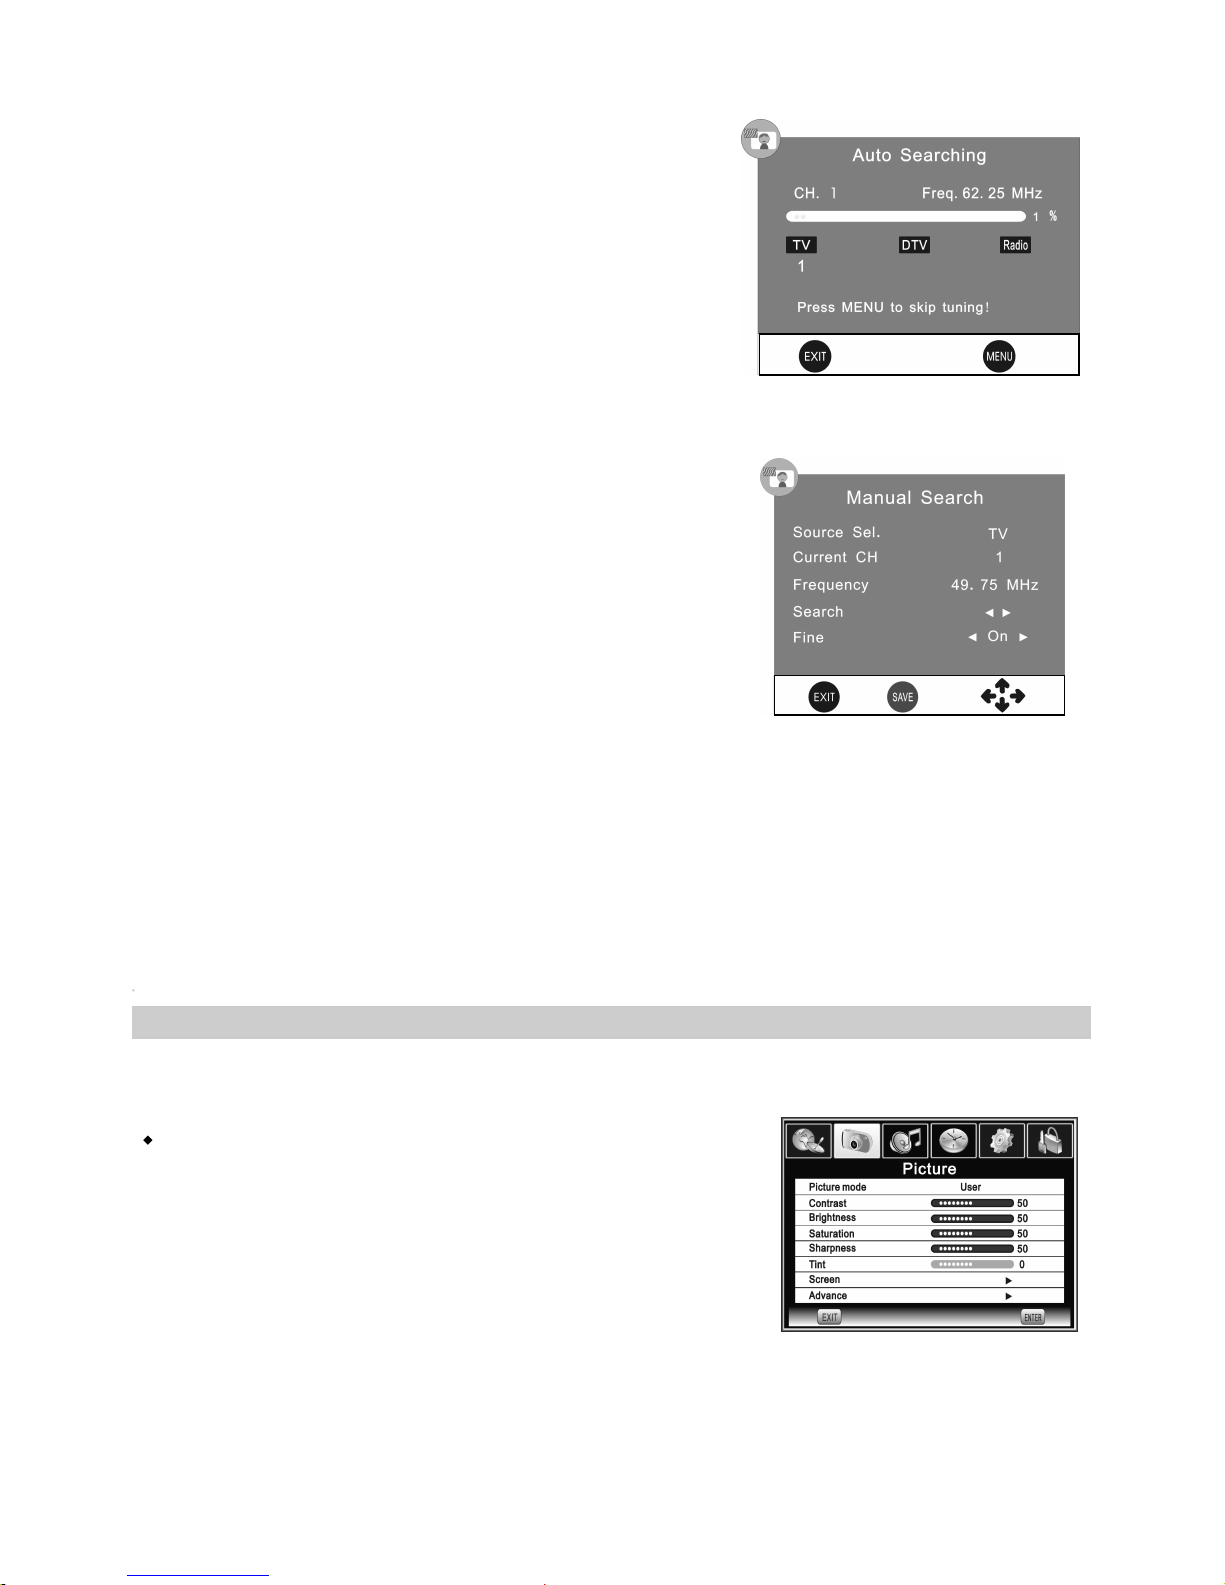
Channel Menu (In TV, DTV mode)
Press MENU button on the TV set or on the remote control to select the Channel menu.
Shown as below:
•
Channel
To display the current channel number and press
【w】/【x】button to adjust it.
•
Sound System
Four modes to be selected : D/K, I , B /G, L (In TV
mode) .
11
Input Source
DTV
TV
SCART
Component
PC RGB
-PC RGB-
OK
ENTER
EXIT
EXIT
AV
S Video
-S Video-
HDMI
S t o r a g e
Page 13
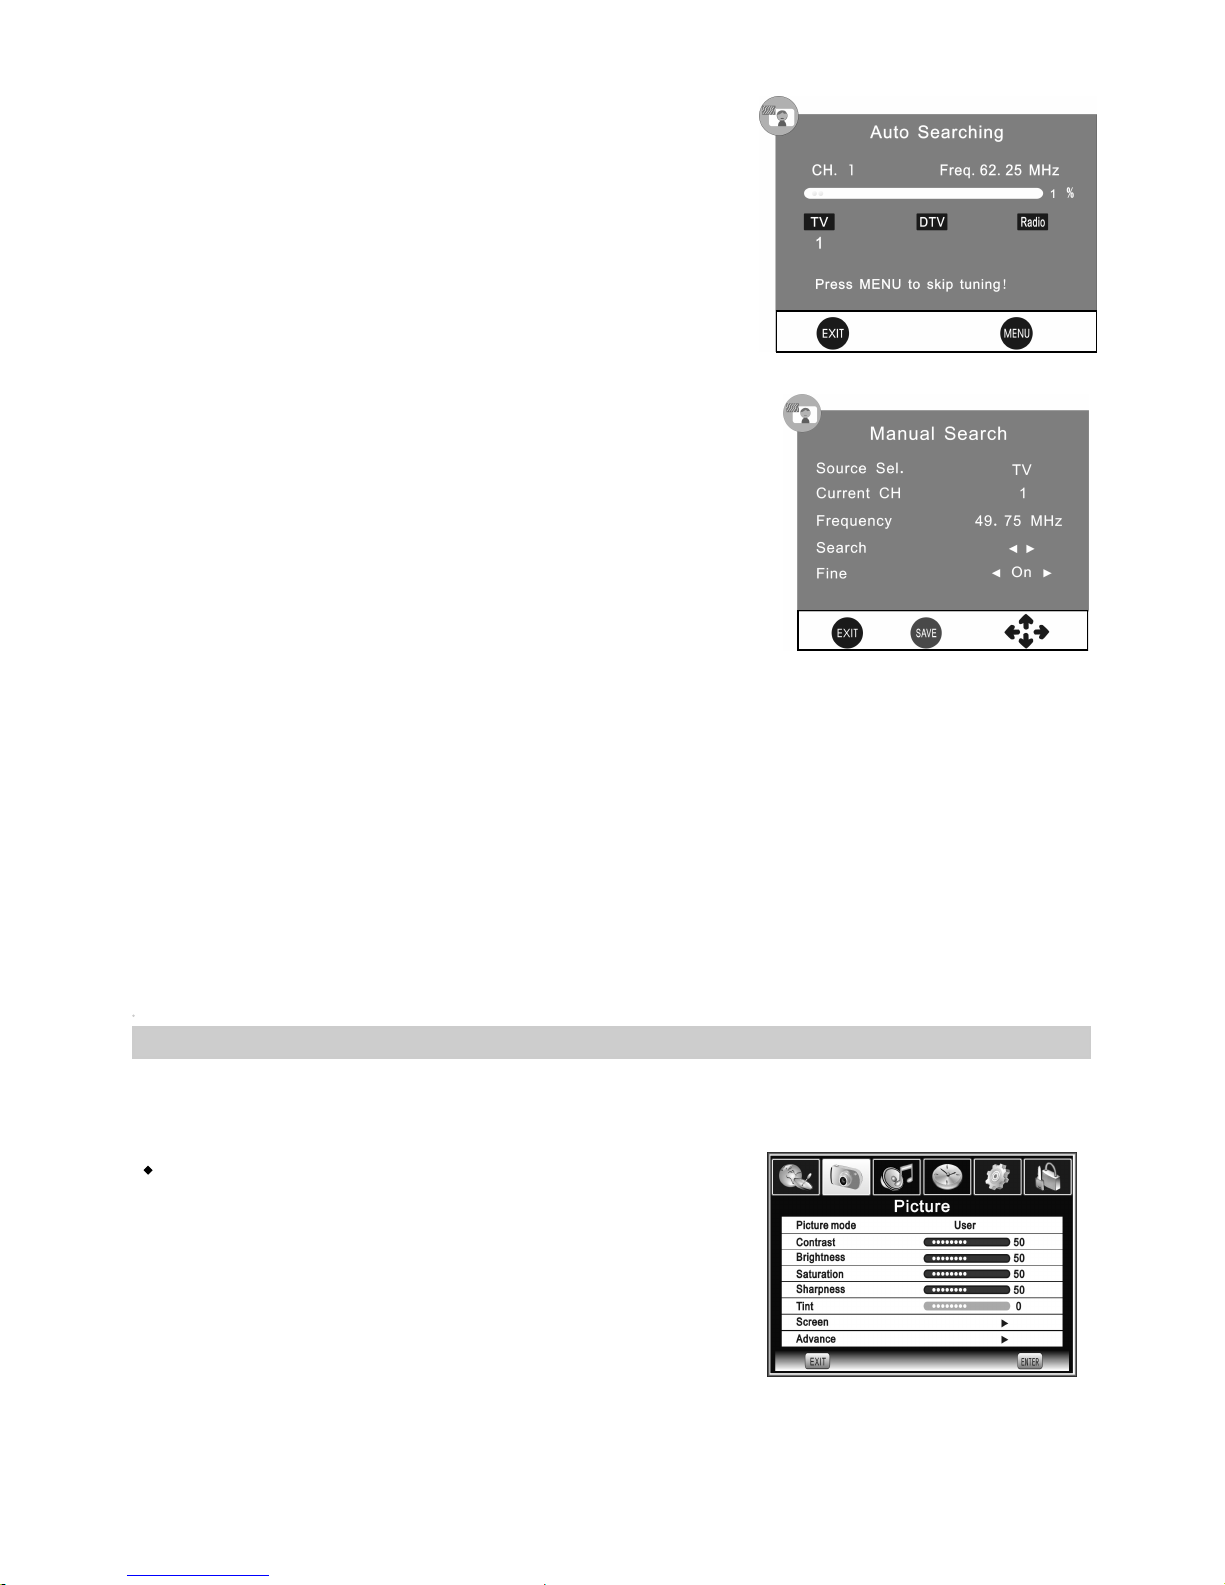
•Auto Search
Select the【x】button to start auto search . Once the
progress bar is full, the found channels will be stored
and the unit will proceed to the search for TV, DTV,
Radio. If you pr ess M ENU button in TV searching ,
the Auto Searching will skip to DTV searching as the
suggestive picture shows.
•Manual Search
Mannul search option allows you to preset programs
one by one. The first Source Sel. is TV, the other
one is DTV.The display that you are searching
program on screen. Press red button to save your
choice of program.
Source Sel.: Two modes to select:TV, DTV.
Current CH: To display the current physics
channel .number.
Frequency: To display the frequency of the
searching program.
Search: To decrease and increase frequency you
want. (In TV mode)
Fine: To little adjust the frequency (In TV mode).
After adjustment, the current channel number
changes yellow.
NOTE: In DTV mode, when highlighting Current CH
or Frequency, the TV begin DTV Manual Search.
•Skip
Skip the current program. When setting the program skip as on, 【CH+/CH-】 button
cannot select it. But you can select the skipped program by pressing the number
buttons directly. After adjustment, the current channel number changes to red.
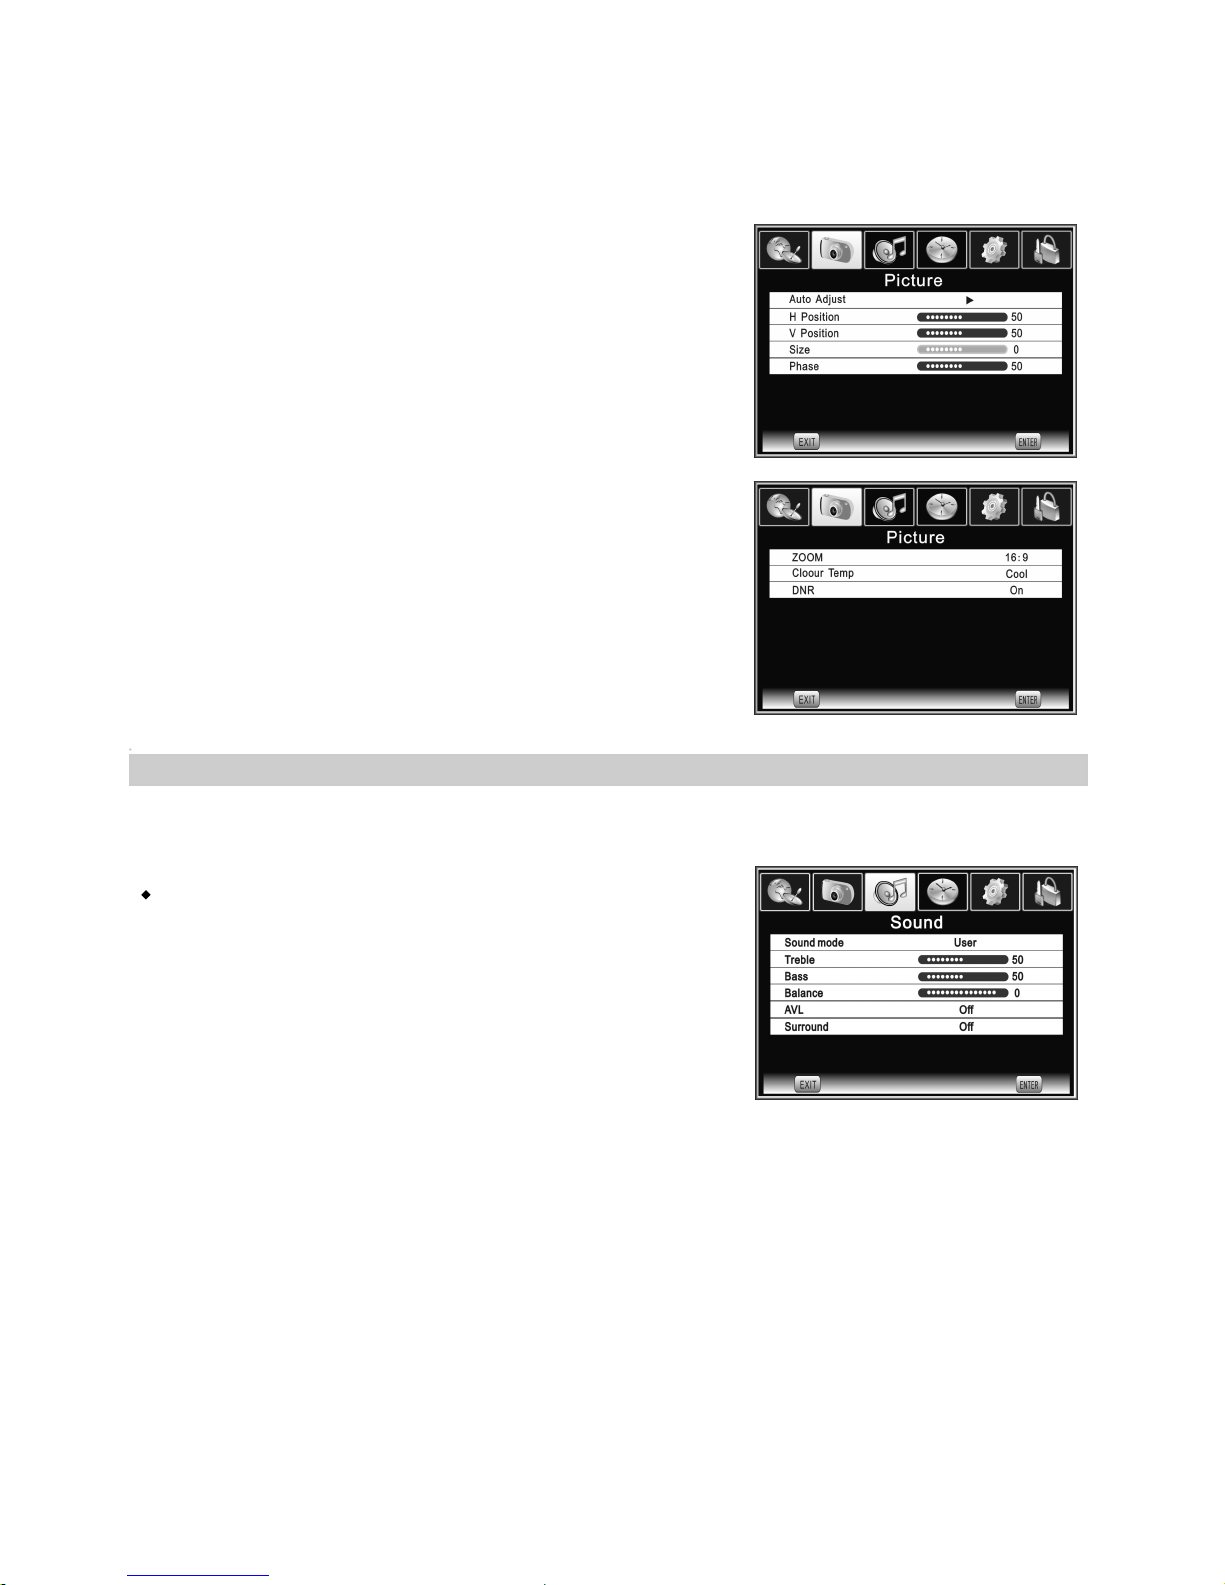
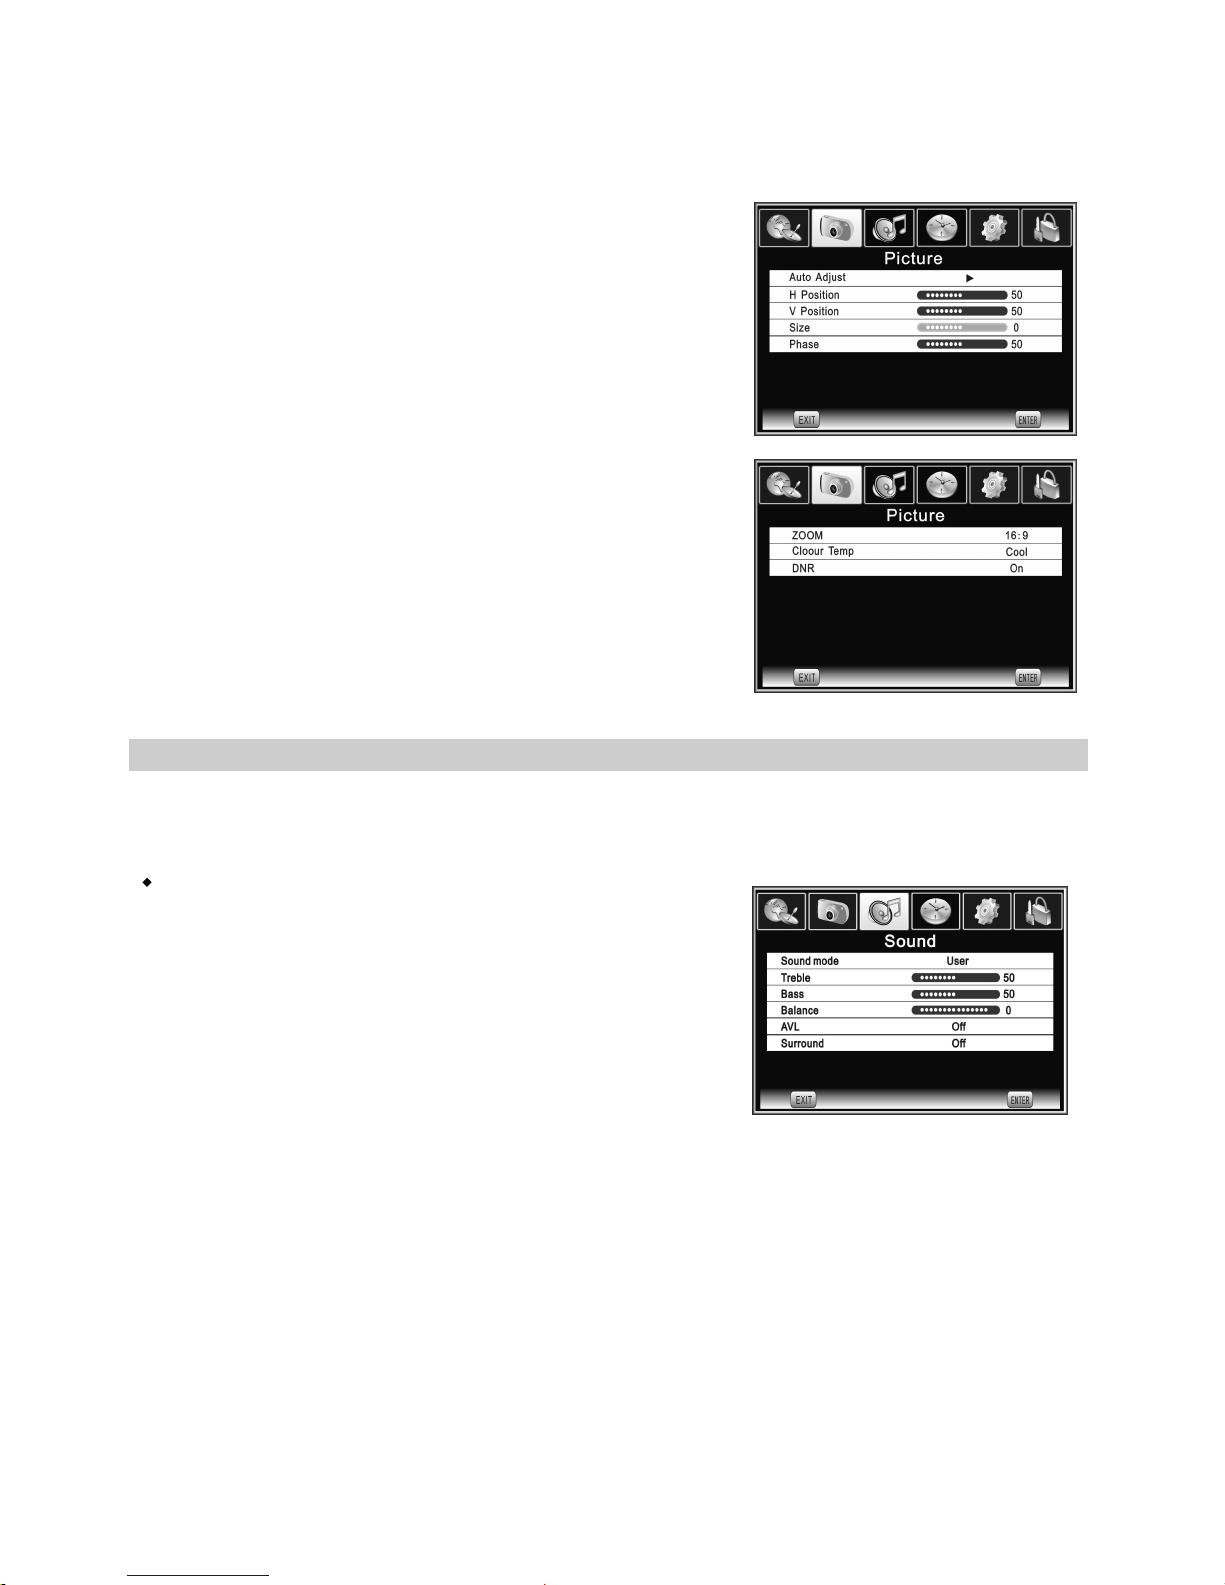
Picture Menu
Press MENU button on the TV set or on the remote control to select the Picture menu.
Shown as below:
12
•Contrast / Brightness
Press【w】/【x】button to adjust the contrast /
brightness of the
picture.
•Saturation
Press【w】/【x】button to adjust the colour saturation.
Picture mode
Select the Picture mode.
The manufacture's recommendation mode is HOME.
Page 14
•Sharpness
Press【w】/【x】button to adjust the Sharpness level
of the picture.
•Tint (NTSC)
Press【w】/【x】button to adjust the tint of the picture.
•Screen (In PC-RGB mode )
Auto Adjust :Press【x】button to adjust the position
of the picture automatically.
H Position / V Position : Press【w】/【x】button to
adjust the horizontal / vertical position.
Size /Phase:Press【w】/【x】button to adjust the size
/ phase of picture.
•Advance
ZOOM:Press【w】/【x】button to select the ZOOM
mode.
Colour Temp : Press【w】/【x】button to select the
Colour Temp mode.
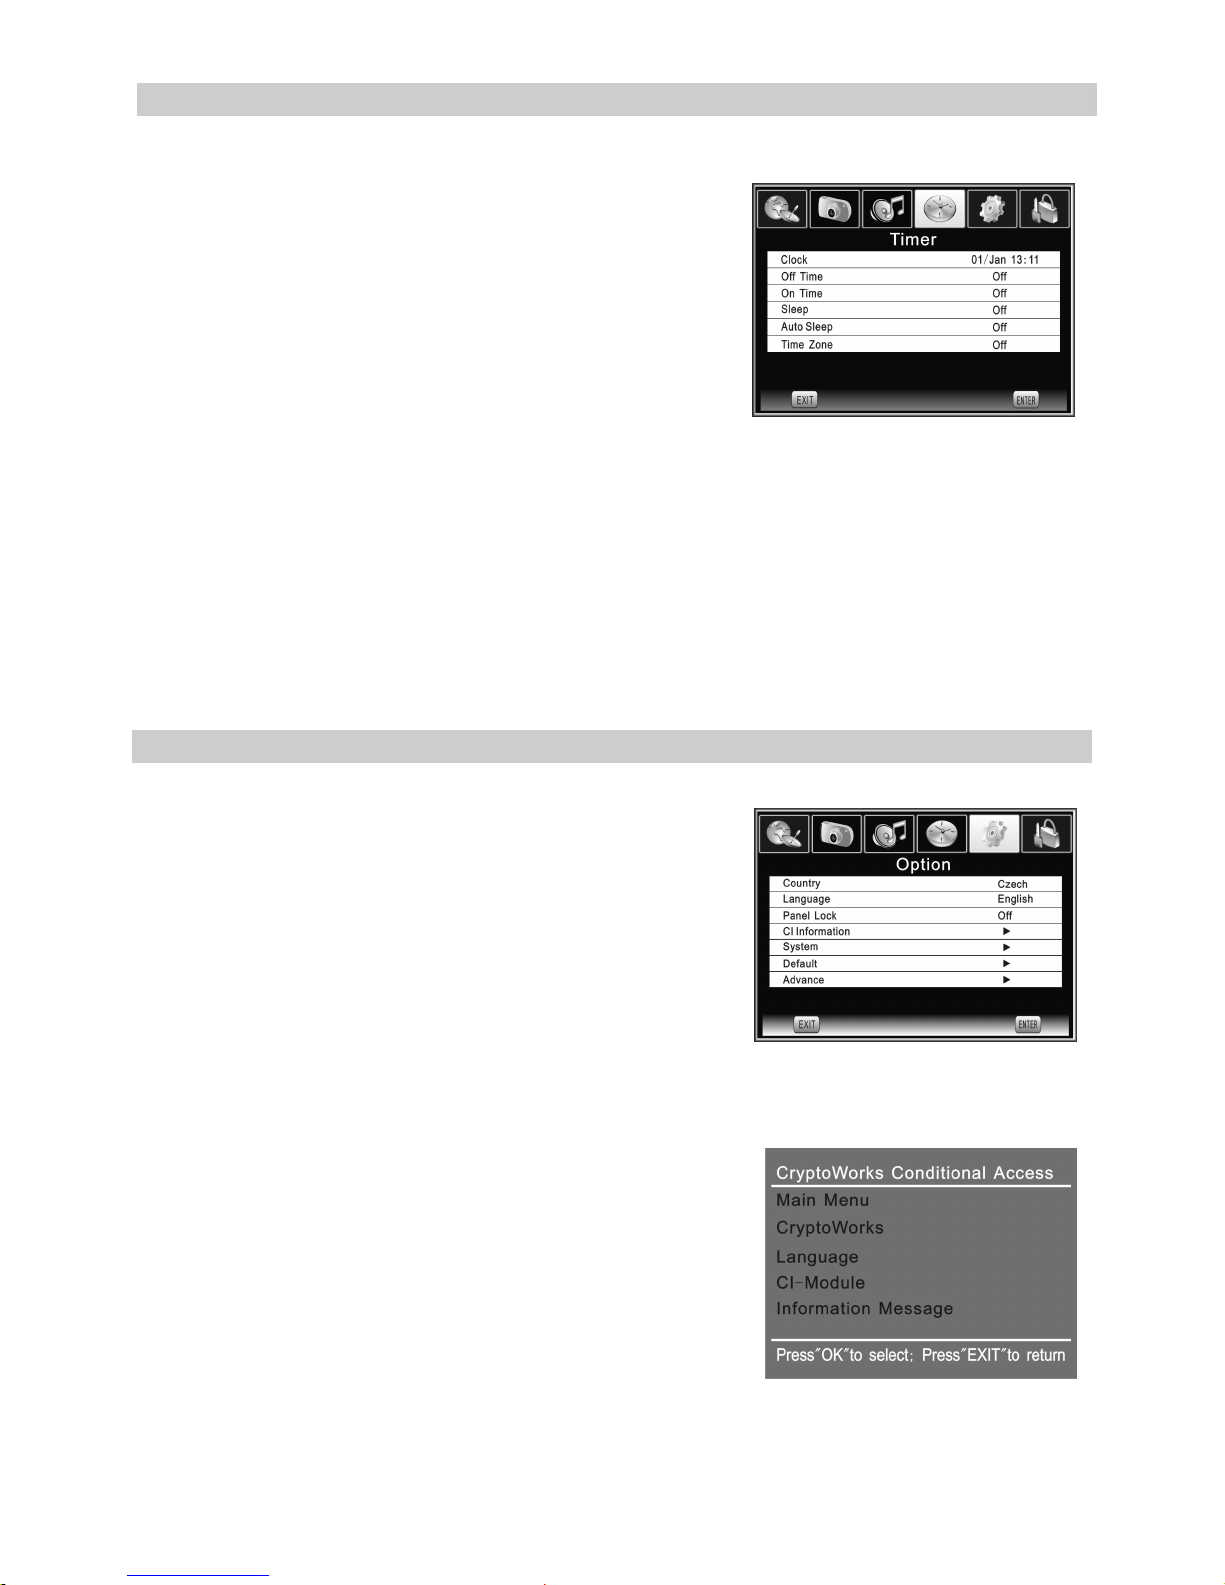
Sound Menu
Press MENU button on the TV set or on the remote control to select the Sound menu.
Shown as below:
13
reduction treatment.
DNR :Provide the picture with dynamic noise
•Treble / Bass
Press【w】/【x】button to increase and decrease the
level of the high-pitcher / low-pitcher sounds.
•Balance
Press【w】/【x】button to adjust the audio output
between left and right speakers.
•AVL
AVL(Automatic Volume Control) is used to control
the volume automatically.
•Surround
Press【w】/【x】button to switch the surround sound.
Sound mode
Select the Sound mode.
Page 15
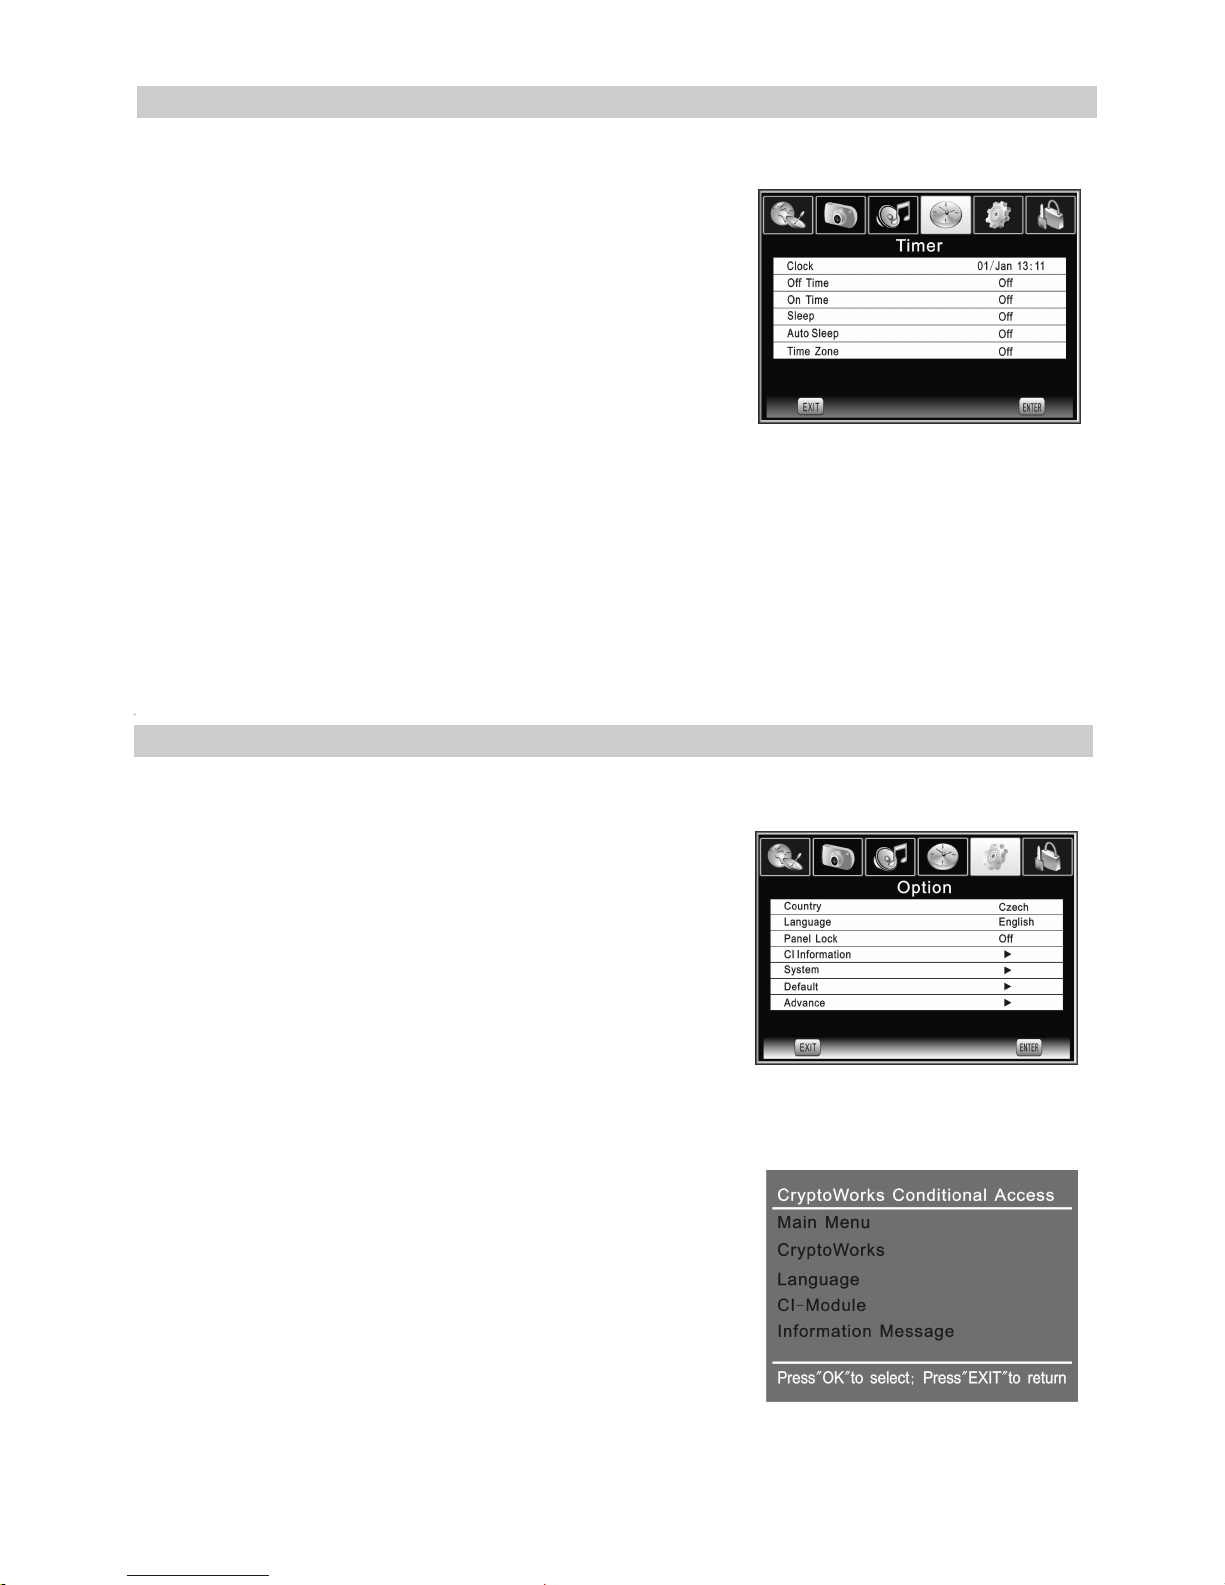
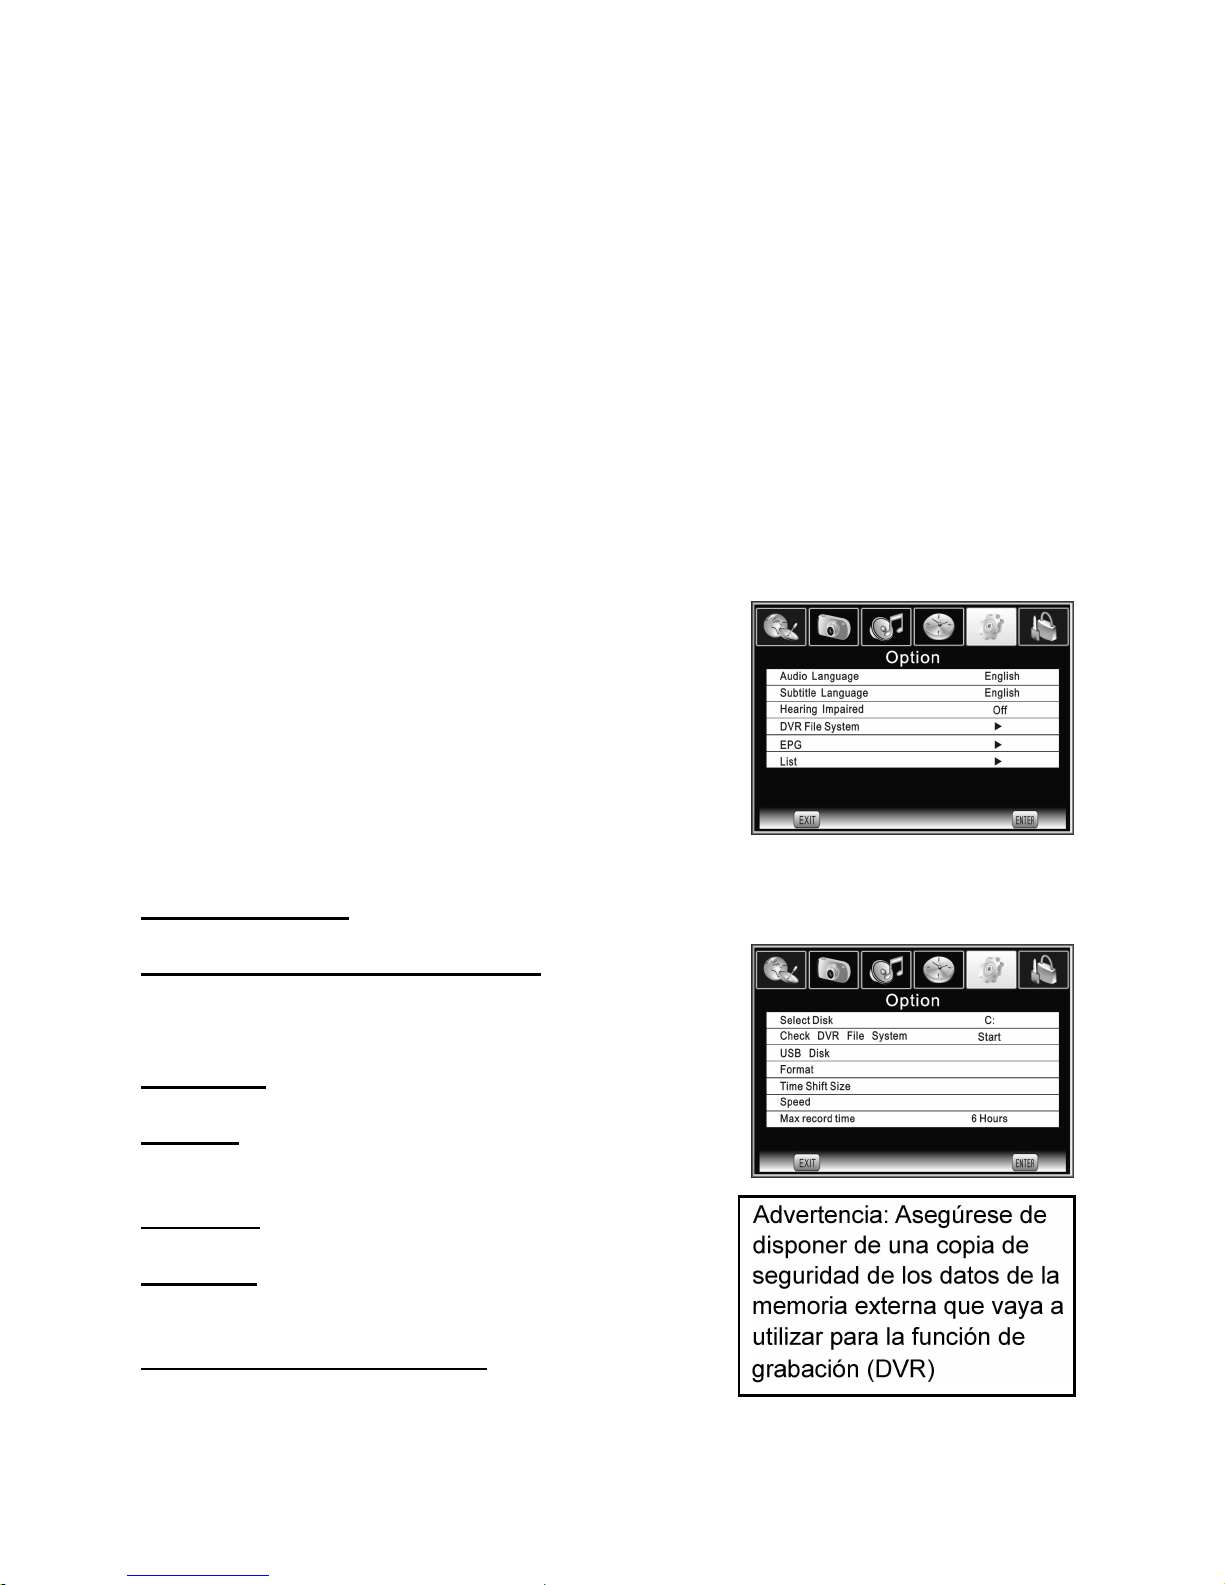
Timer Menu
Press MENU button on the TV set or on the remote control to select the Timer menu.
Shown as below:
•Clock
Display the System time gotten from DTV signal
stream or set the system time.
•Off Time
Press【x】button to set the time for turning off the TV.
•On Time
Press【x】button to set the time for turn ing on the
TV .
•Sleep
Press【w】/【x】button to select the Sleep Time you
want.
•Time Zone
Press【w】/【x】button to select the time one.
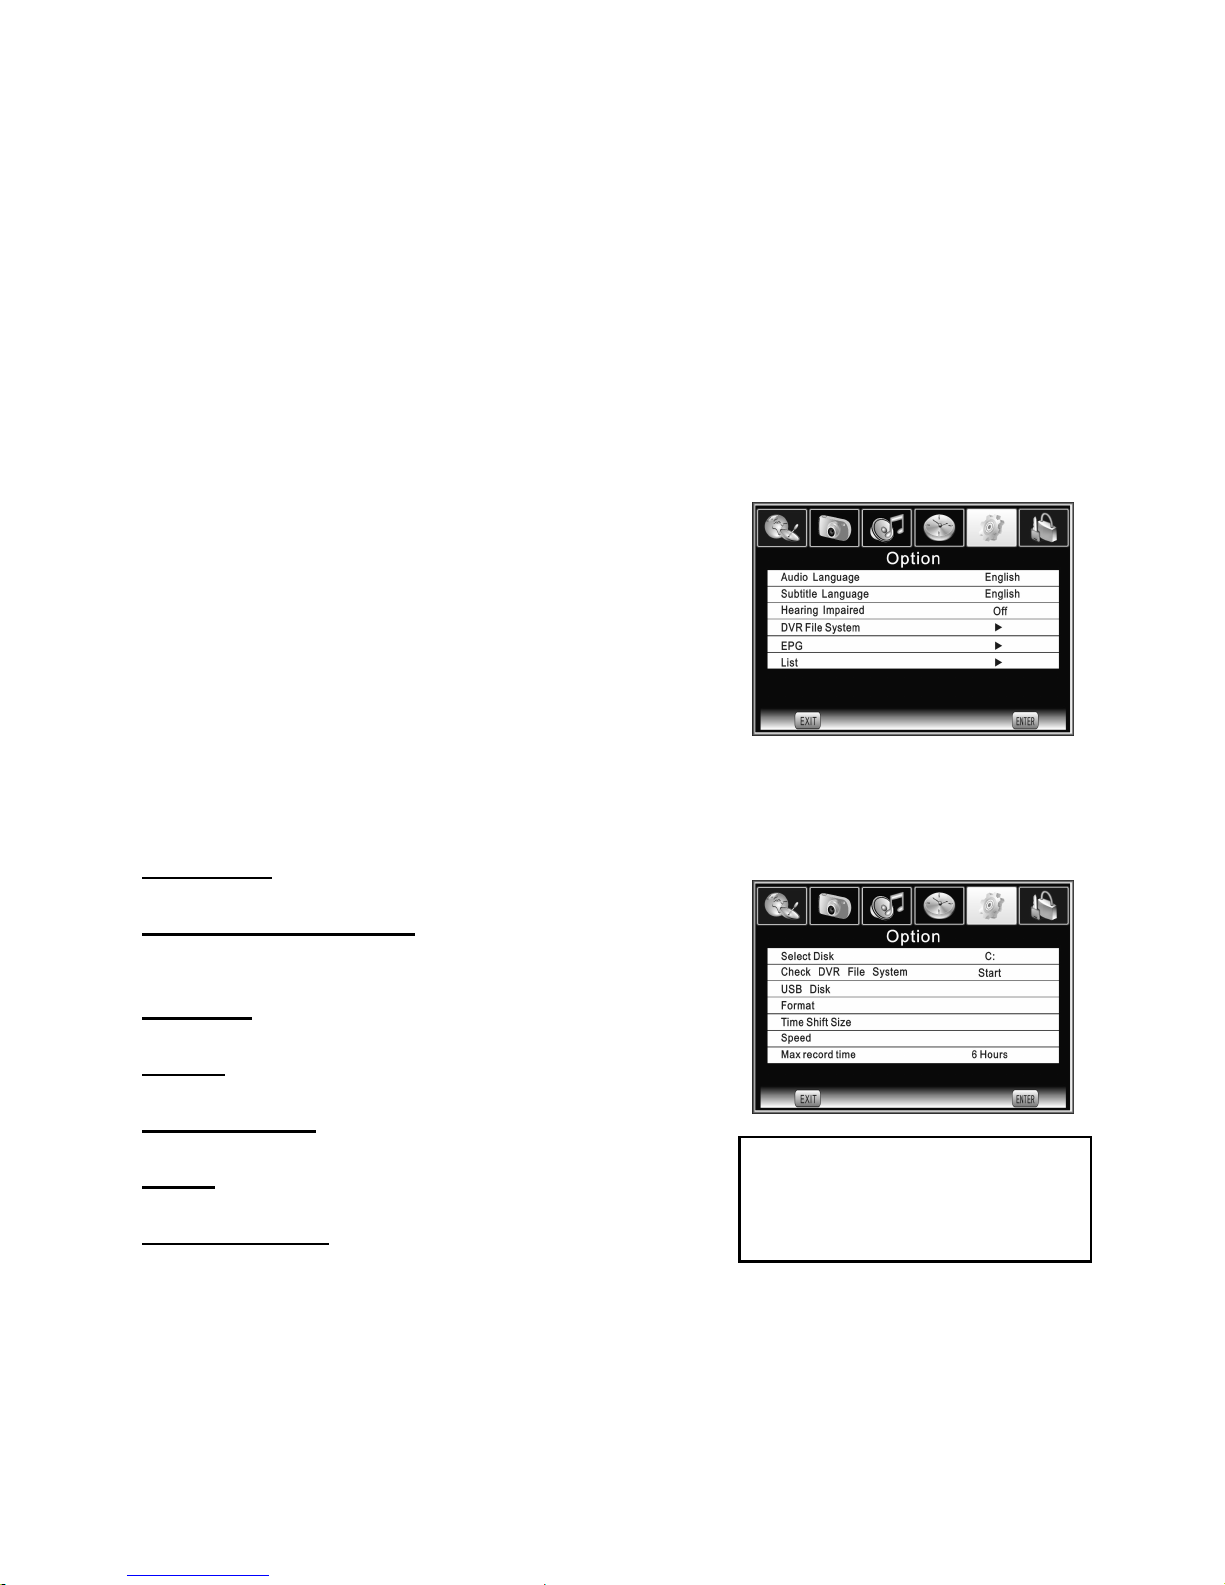
Option Menu
Press MENU button on the TV set or on the remote control to select the Option menu.
Shown as below:
•Country
Press【w】/【x】button to select country.
•Language
Press【w】/【x】button to select OSD language.
•Panel Lock
Press【w】/【x】button to switch the Panel Lock.
When the Panel Lock is set as On, all of the buttons
are locked,losing their functions ( Press any button
for more than 5 seconds to release it ). When it is set
as Off, the buttons of TV are in normal mode.
•CI Information
Note: The function can only be gotten when CI slot is
available.
To watch encrypted programs under DTV mode,
please insert CI card.
Operation: Please insert CI card into the PCMCIA
slot according to the arrow on the CI card. Notice:
Please do not insert or pull out the CI card when
power on. Do not insert or pull out the CI card
frequently so as to avoid any damages of the TV and
the CI card.
14
•Auto Sleep
Press【w】/【x】button to select the Auto Sleep mode.
operation in set time (the set time is 4 hours when leave the factory).
The TV will enter into standby mode autoatically when there is no any
Page 16
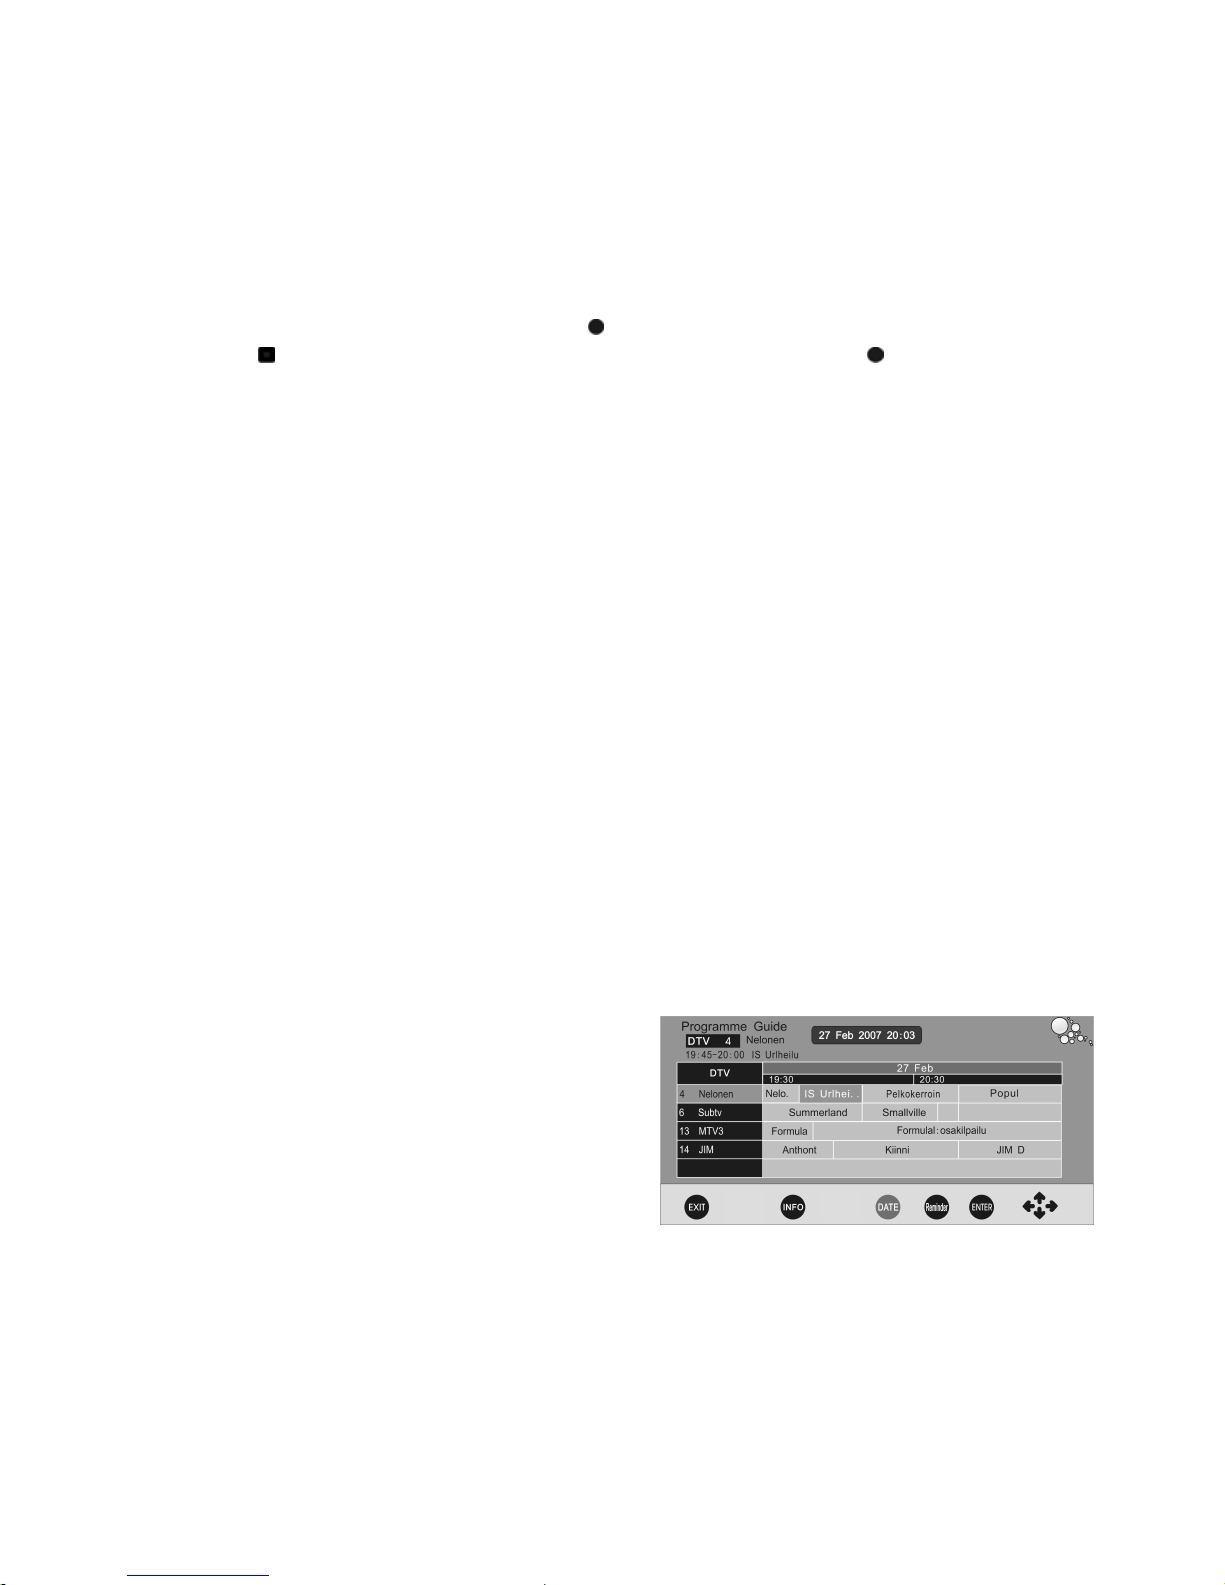
Language:To set the language of menu.
CI- Module :Enter this menu to set module informatiom and software download.
Information Message: To receive the mail informatiom from TV station.
•System
Press【x】button to display the System Information:Software Information and Signal
Information (Signal Information only in DTV mode).
•Default
Press【x】button to clear all programs or resume default setting .
•Advance
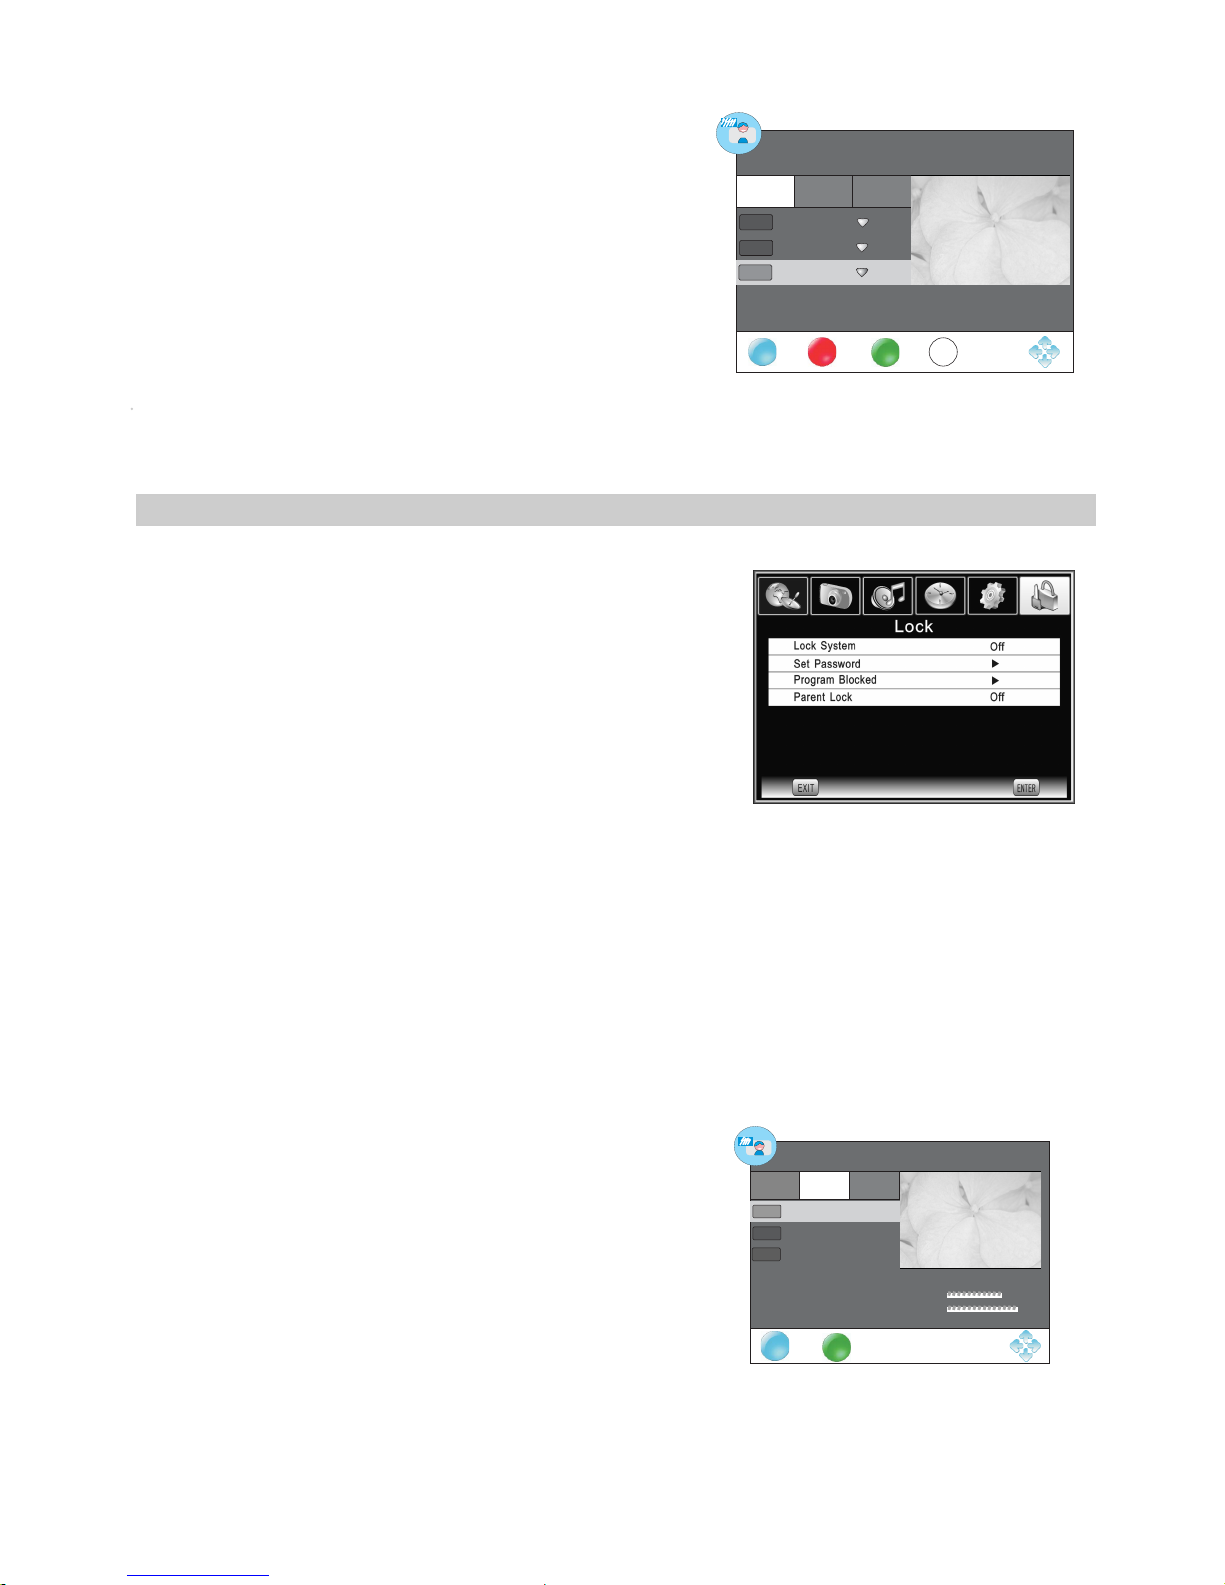
Audio Language/ Subtitle Language:
Press【w】/【x】to set the default Audio Language/
the default Subtitle Language.
Hearing Impaired:
When hearing Impaired is ON, the TV screen will
give some information to the people whose hearing
are impaired when Hearing Impaired is Off, the
information will be hidden.
DVR File System (DVR only use for DTV source)
Select Disk
Select the disk used for DVR.
Check DVR File System
Check the file disk, and set the size recording file
system.
USB Disk
USB activated or not.
Format
Format USB disk, and create DVR file system.
Time Shift Size
Show the time to do TSR.
Speed
Read and write speed of the storage device.
Max record time
Record time biggest can establish time as 6 hours.
15
Warning: Make sure you have
a backup of your external
memory data which you use for
recording function (DVR)
During initialization of the CI card, please don't operate the TV.
CryptoWorks:Different cards have different information, taking CryptoWorks as a
example. Enter this menu to look through the provider information of Cryptoworks.
Page 17
When the format tons, notice thurns, will drop all contents deletie save important data,
please back up the data before formatting. If USB disk in some virus meeting formats
turn failure.
DVR function is only available in DTV.
If the usage contains many ambulation hard drives that divide area, can at DVR File
System the menu win election to choose DVR to in response to the disk sign.
If DVR recording system is used all the time,it will exit DVR system automatically.
USB memory must be support USB2.0 high-speed sepcification.
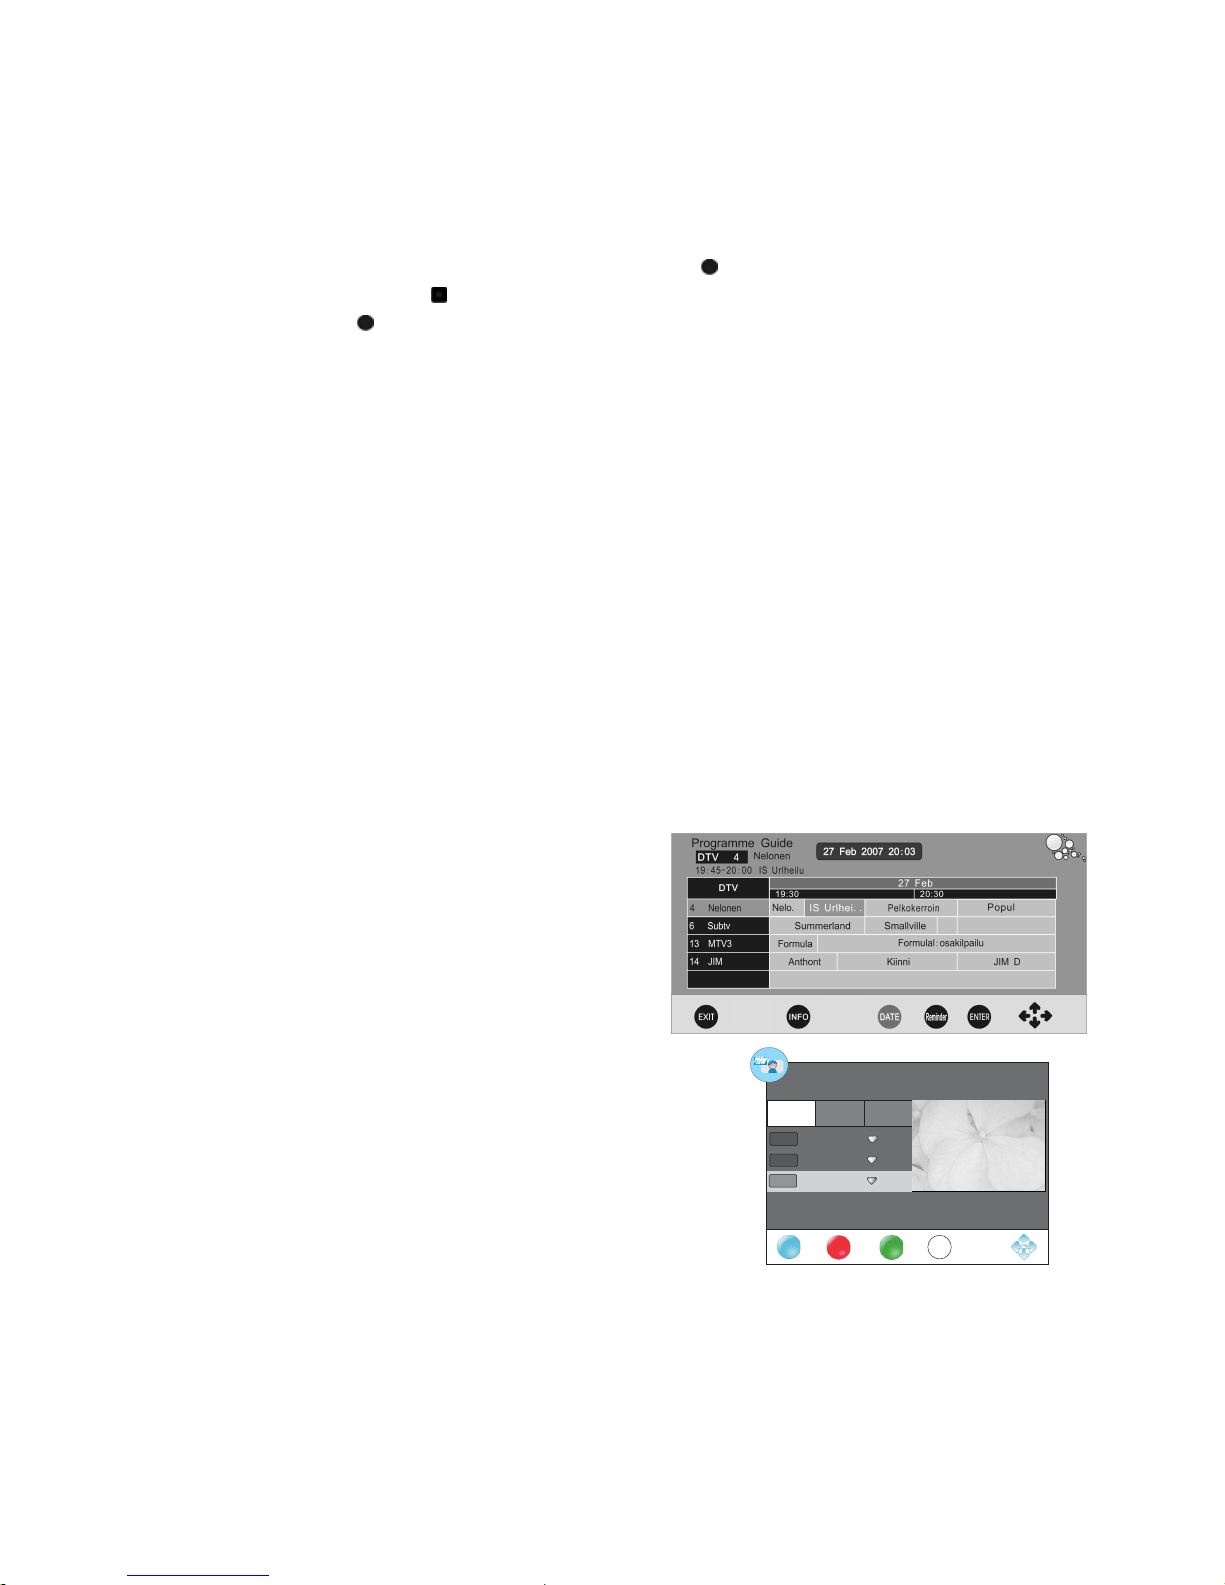
EPG ( In DTV mode):
This function let you know the detailed information of the channel, indicating the time of
the program playing. From the EPG it is possible to check the program information for
the next eight days( If the information is available from the broadcaster).
ENTER: Press to change channel.
INFO: Press to see the detailed information of
the current channel.
DATE: Press the yellow button to see the
detailed information of the next eight days, and
you canpress【w】/【x】button to select the
concrete date information.
Reminder : Press the blue button to book
program.
16
Digital program recording
Insert a U disk, select Settings menu under the DVR File System option, and before it
you should copy your information. In the USB , in case lose the information. Select
check DVR File System option, if not previously formatted USB disk, the system will
automatically prompt U disk formatting.
If you choose the greater the capacity, then you can burn more of the time.
◆ Carve-recording begins when Press
button, and it can recording all the time till
press
button or the memory is full. Recording in use. Press button to zoom
the record menu.
◆ After the completion of recording, go to storage mode of play.
NOTE:
USB disk at least the capacity with 512MB.
Page 18
new password has been input twice, the setting is finished successfully. The TV will go
back to previous menu.
•Set Password
Press【x】to see the Set Password submenu. Press the number buttons to enter the
password.You can set your private password.
Program Blocked(In TV,DTV mode)
Press the green button “LOCK” to lock the available
program you want. Press the green button again to
unlock it.
Parent Lock (In DTV mode)
Limit the proper age children to watch the program
which they can accept.
17
DTV
TV
Radio
DTV
Program Blocked
FrequencyFrequency
EXIT
EXIT
LOCK
3 ITV1
4 Channel 4
6 ITV2
Quality
Strength
DTV
DTV
490.00MHZ
83%
98%
•
•
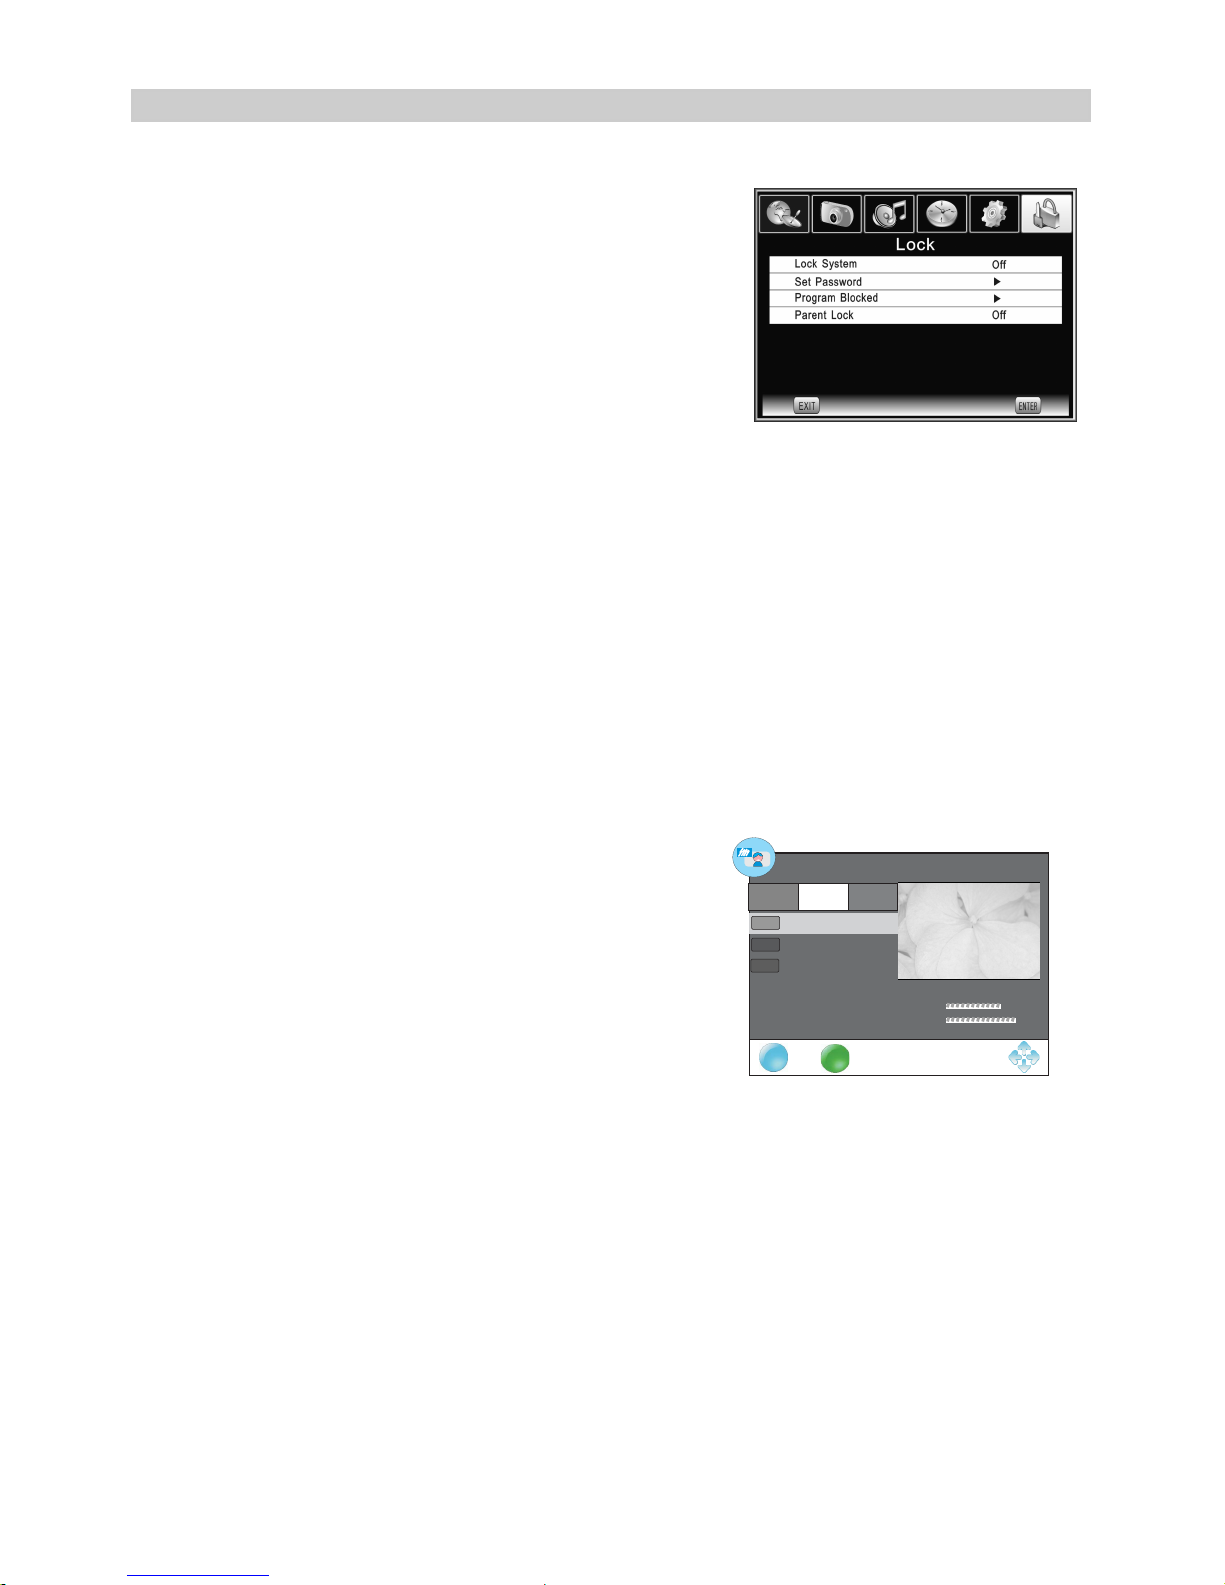
Lock Menu
Press MENU button on the TV set or on the remote control to select the Lock menu.
Shown as below:
•Lock System
When Lock System is on and the system is locked,
we must input the system password at Auto Search,
Manual Search, Clear All Programs or List. Press the
right number buttons for the password.
The default password is “0000”.
※After a password correction has been confirmed, please remember it for entering into
the Parent Guide menu, all functions can not be activated until the correct password is
entered. If you forget, the super password of “1225 ” still valid.
Press the number buttons on the remote control to set the new password. When the
List( In TV/DTV mode ):
Press【x】button to display the List picture. The list
of program include TV ,DTV,Radio. When press
【y】/【z】button to change programs, the signal
quality , singal strength , frequency will display on
screen.(Only frequency in TV mode.)
DELETE:Press red button to delete the channel.
FAV:Press green button to set the channel as you
favorite channel.
MOVE:Press yellow button to move the position of
channel.
2C42-2C42-
TV
1S02-1S02-
TV
TV
Radio
DTV
Channel List
FrequencyFrequency
EXIT
EXIT
3C44-3C44-
TV
DELETE
MOVE
FAV
49.75 M H z
Page 19
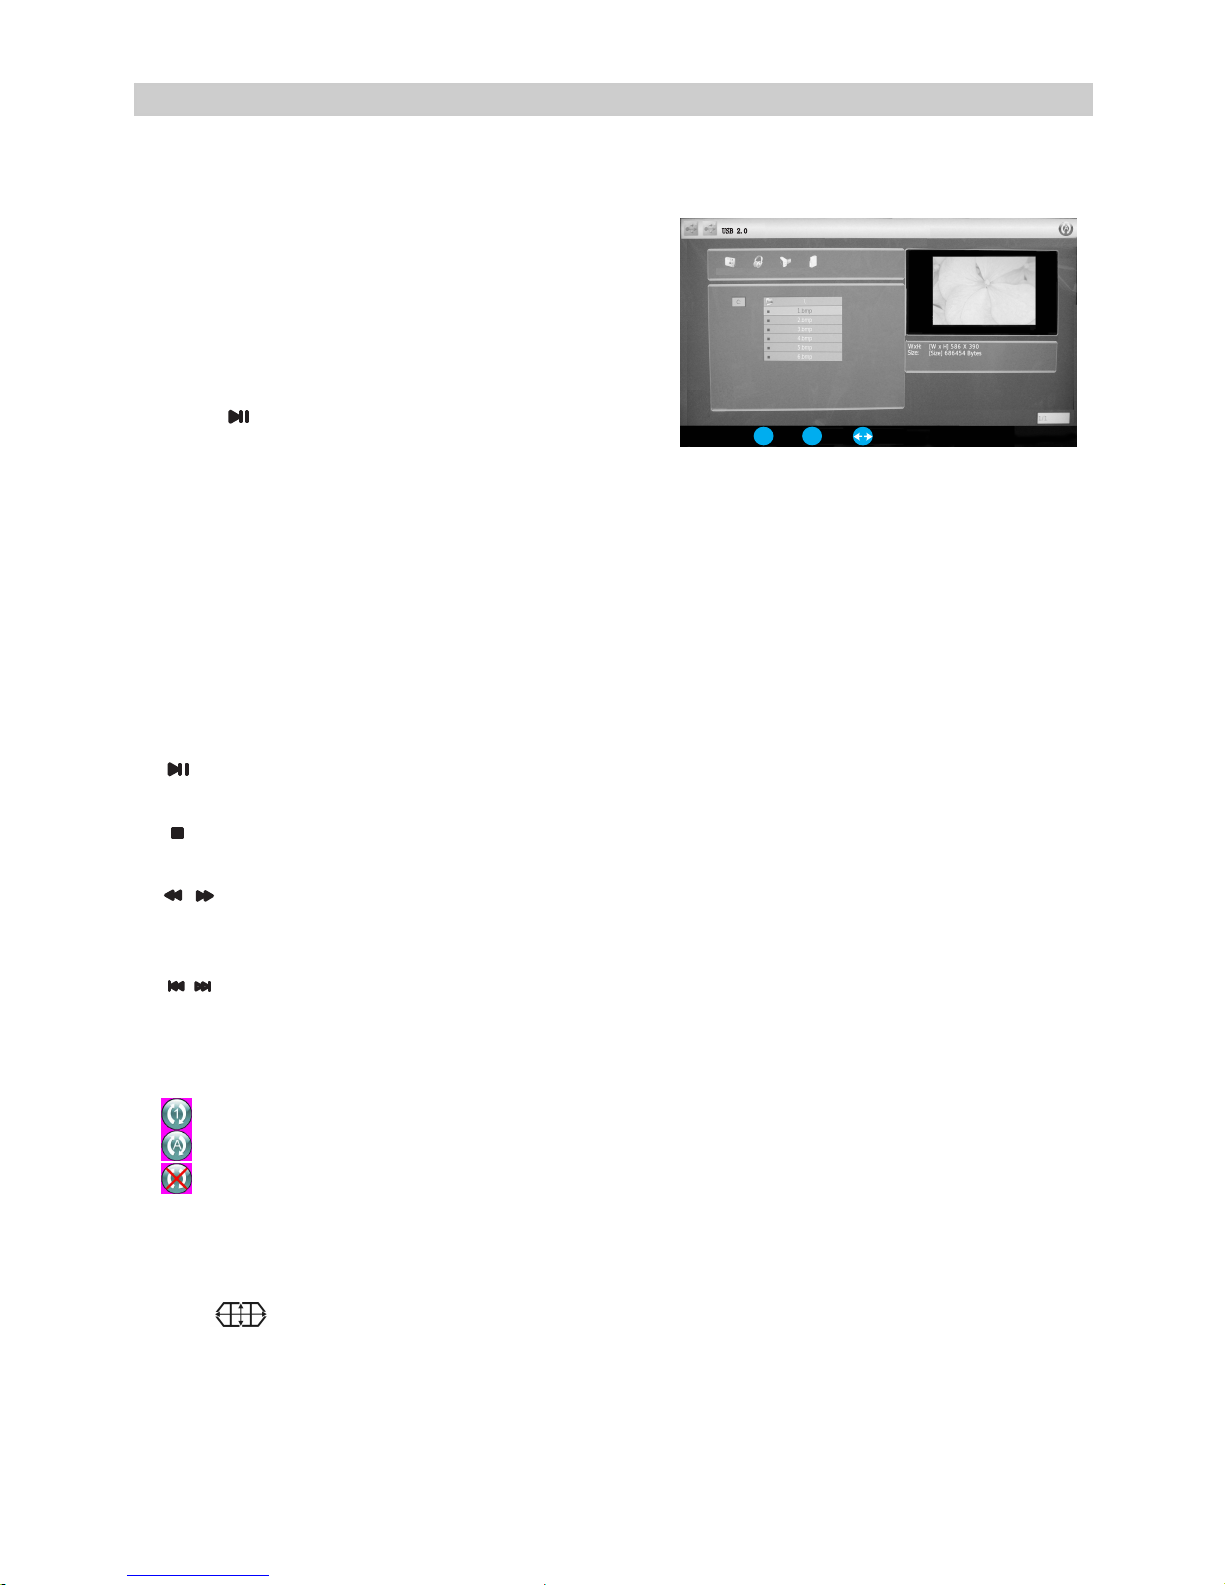
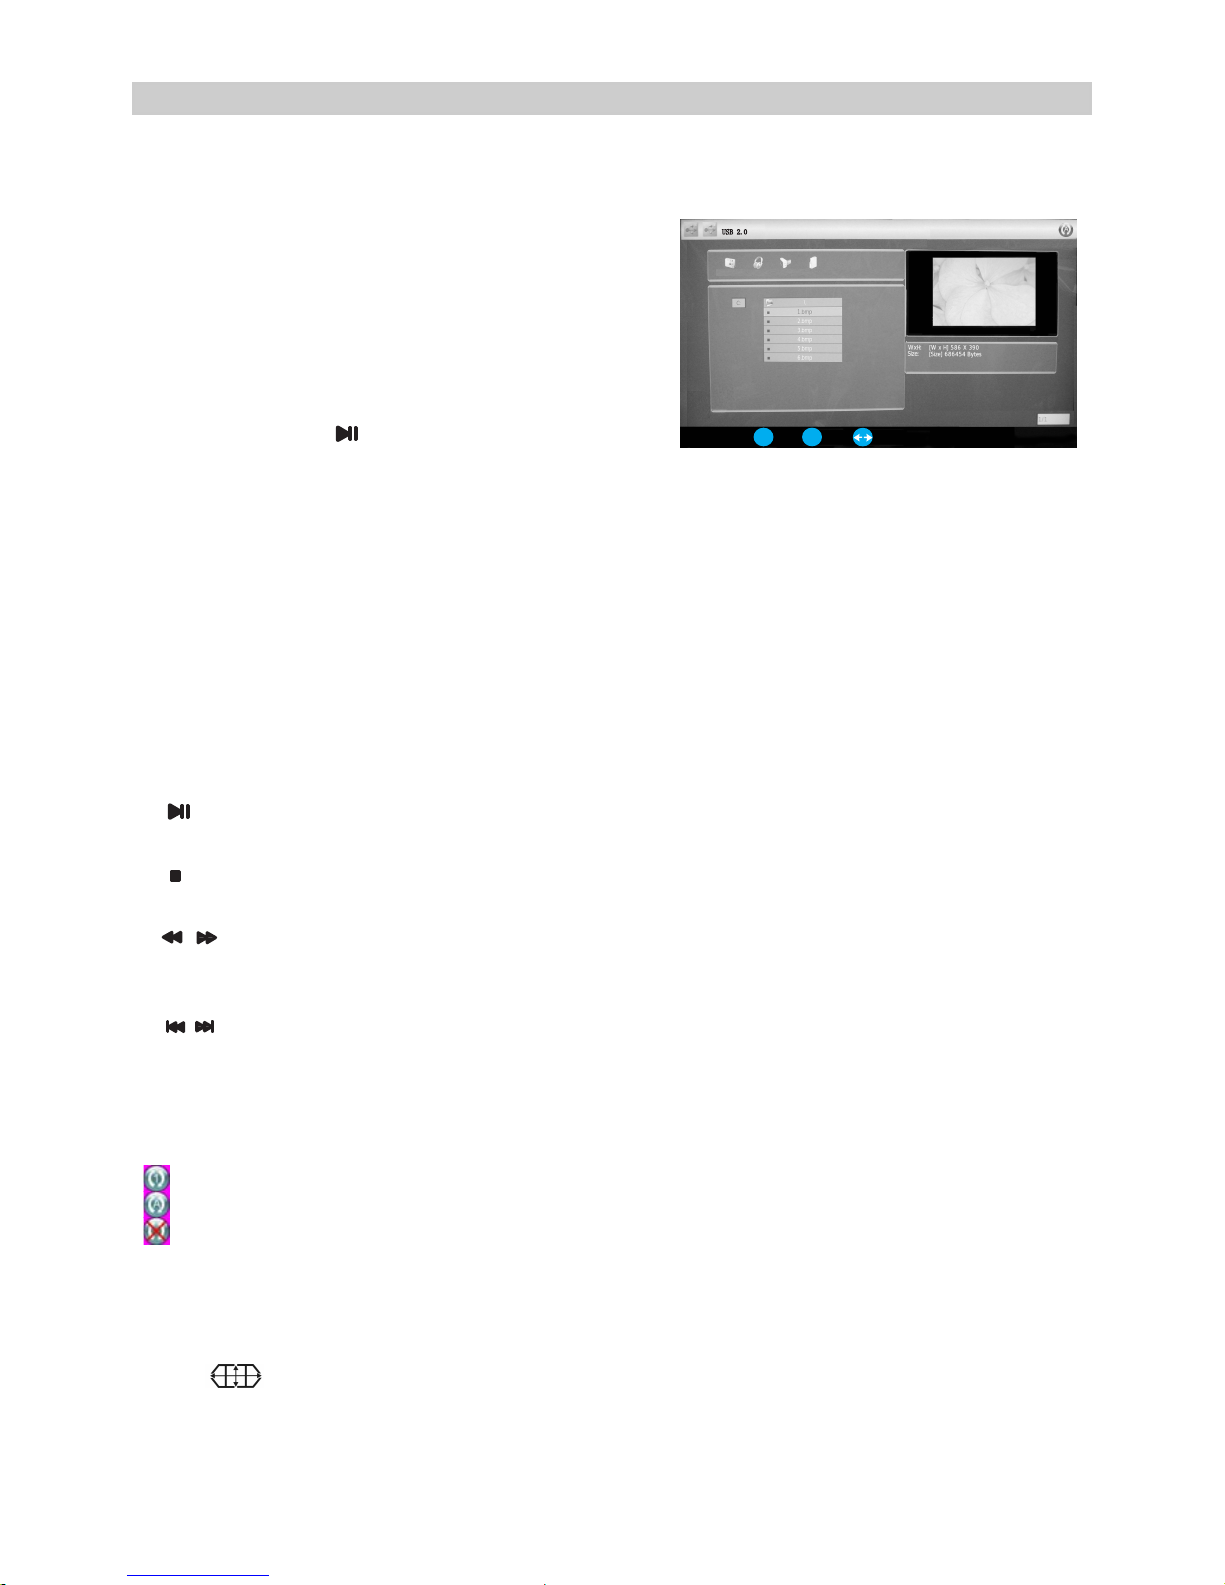
STORAGE
Connect an USB device. Press the SOURCE button to display the signal source menu,
then press【y】/【z】button to select the Storage.
Press【w】/【x】to select
PHOTO,MUSIC,MOVIE,TEXT.
Press【ENTER】button to enter.
Press【y】/【z】to select items.
Press【ENTER】button to enter into the
desired submenu.
Press【
】button to play or pause.
Press【EXIT】button to return.
It can play PHOTO, MUSIC, MOVIE or TEXT files.
Photo Format Support: JPEG, BMP, PNG.
Music Format Support : MP3, AAC.
Movie Format Support: MPEG -1 / MPEG-2/MPEG-4,TS,RM.
Text Format Support: .txt .
NOTE: Special algorithm documents may not be or well be supported by the USB .
Basic operation
1.
Play/ Pause
Start playing the selected file of a folder or pause.
2. Stop
Stop the playing files.
3.
/ Fast Reve rse/Fast Forward
Fast Reverse: There are 2/4/8/16 levels of rewind speed.
Fast Forward: There are 2/4/8/16 levels of fast forward speed.
4.
/ Previous/Next
You can select the desired files manually in normal condition.
5. REPEAT
Page up or page down the files.
7. ZOOM
Press button to zoom Movie Picture.
EXIT
ENTER
18
Select repeat play mode.
Circulating play for single file.
Circulating play for all file.
No circulating play.
【w】/【x】
6.
Page 20
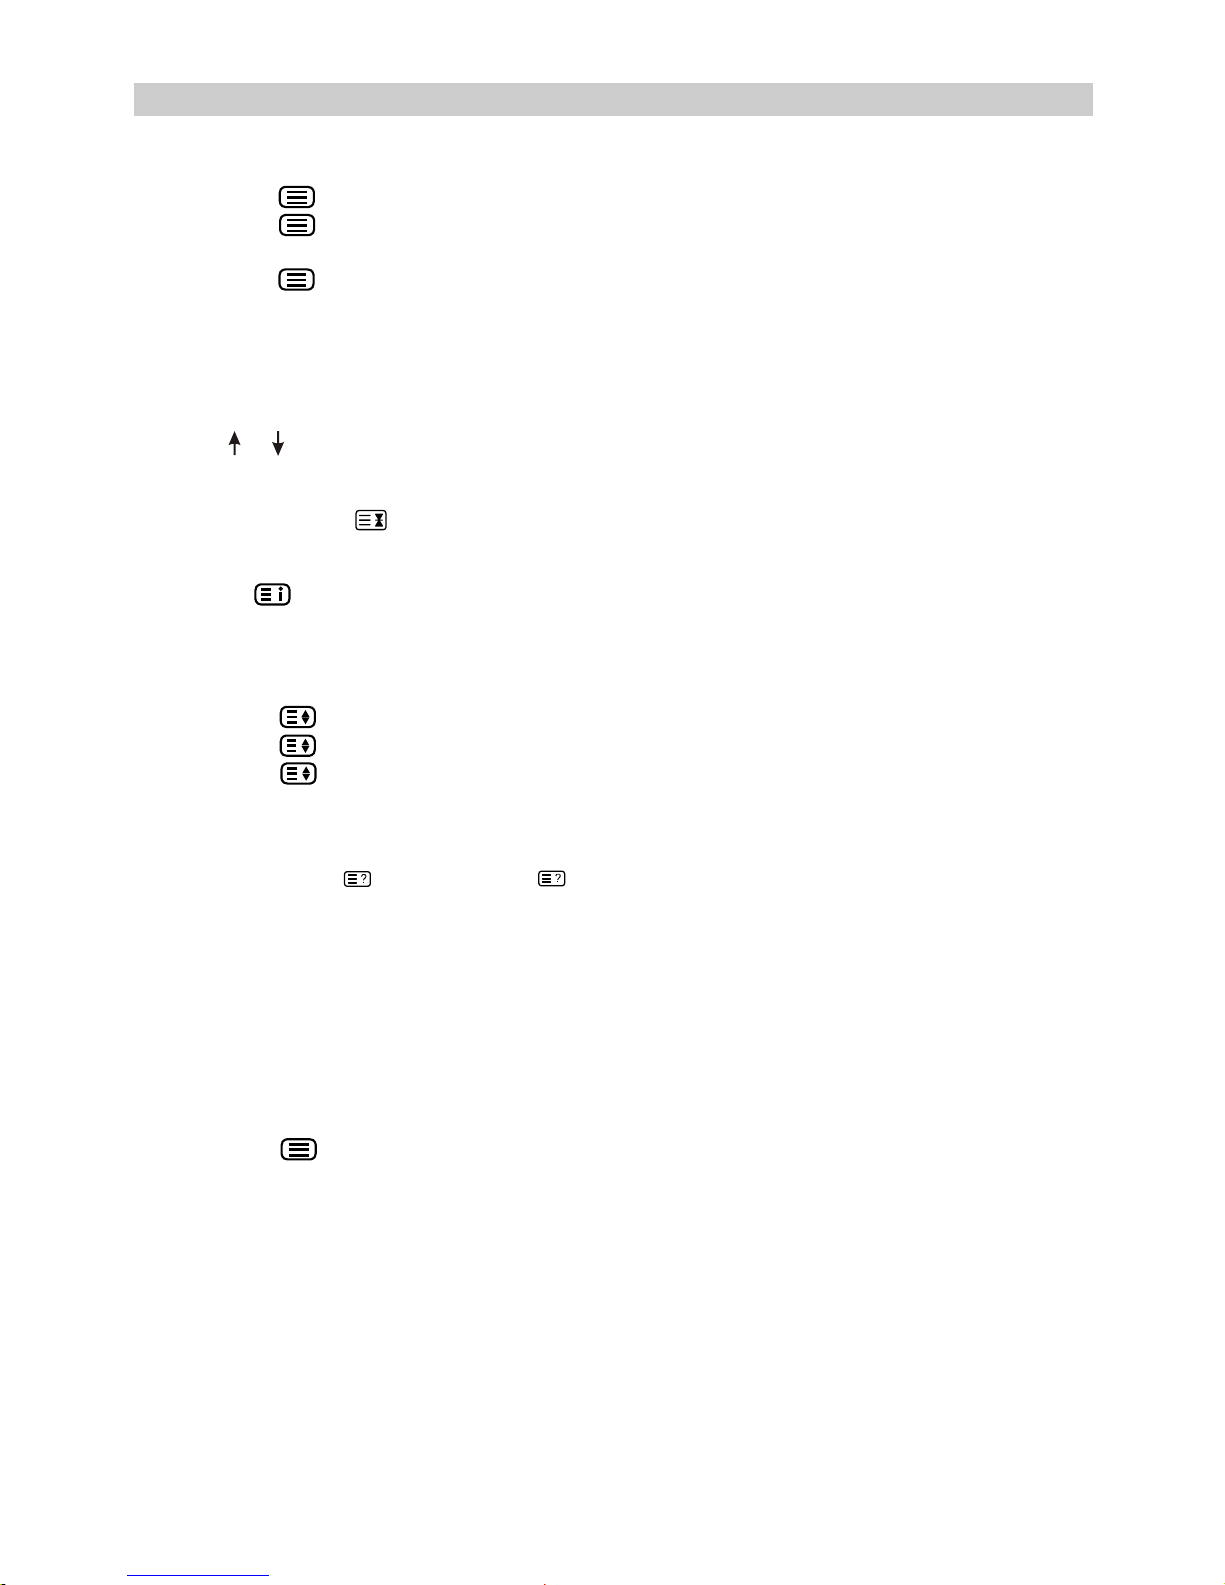
TELETEXT Operation
19
Display teletext
1.Select a TV station with a teletext signal.
2.Press the
button to enter teletext mode.
3.Press the button 2nd to enter Mix mode,this function enables you to
superimpose the teletext page over the TV program.
4.Press the
button 3rd return or exit to the normal TV/DTV mode.
Page selection
1.Enter the page number (three digits) using the number buttons.If you press a
wrong number during input,you must complete the three digit number and
then reenter the correct page number.
2.The
【 】/【 】
Hold
You can press the button to hold a page,and press it again to release the page.
Index
Press the
button to enter the main index page directly.
Enlarging Text
When a page is displayed, you can double the size of the text to make it easier
to read.
2.Press the
button again to enlarge the bottom half of the page.
1.Press the
button to enlarge the top half of the page.
3.Press the
button once more to return to the normal display.
Reveal mode
You can display concealed teletext information(e.g.Answer to puzzles or riddles
etc.) by pressing
button again to remove the information
from the display.
Subpage
Some teletext may contain several sub-pages which are automatically paged in
a certain cycle by the TV station.
1.Yon can enter into a certain subpage by pressing the SUBTITLE button directly
and select the page number with number buttons.Enter the subpage number
(e.g.0003) for the third subpage.
2.Press the button again to exit the subpage mode.
3.Press the button to return to the normal TV mode.
Colour buttons(Red,Green,Yellow,Cyan)
Press these buttons to access directly to the corresponding colour pages
displayed at the lower part of the teletext screen.
button.Press
button can be used to select the preceding or following page.
Page 21
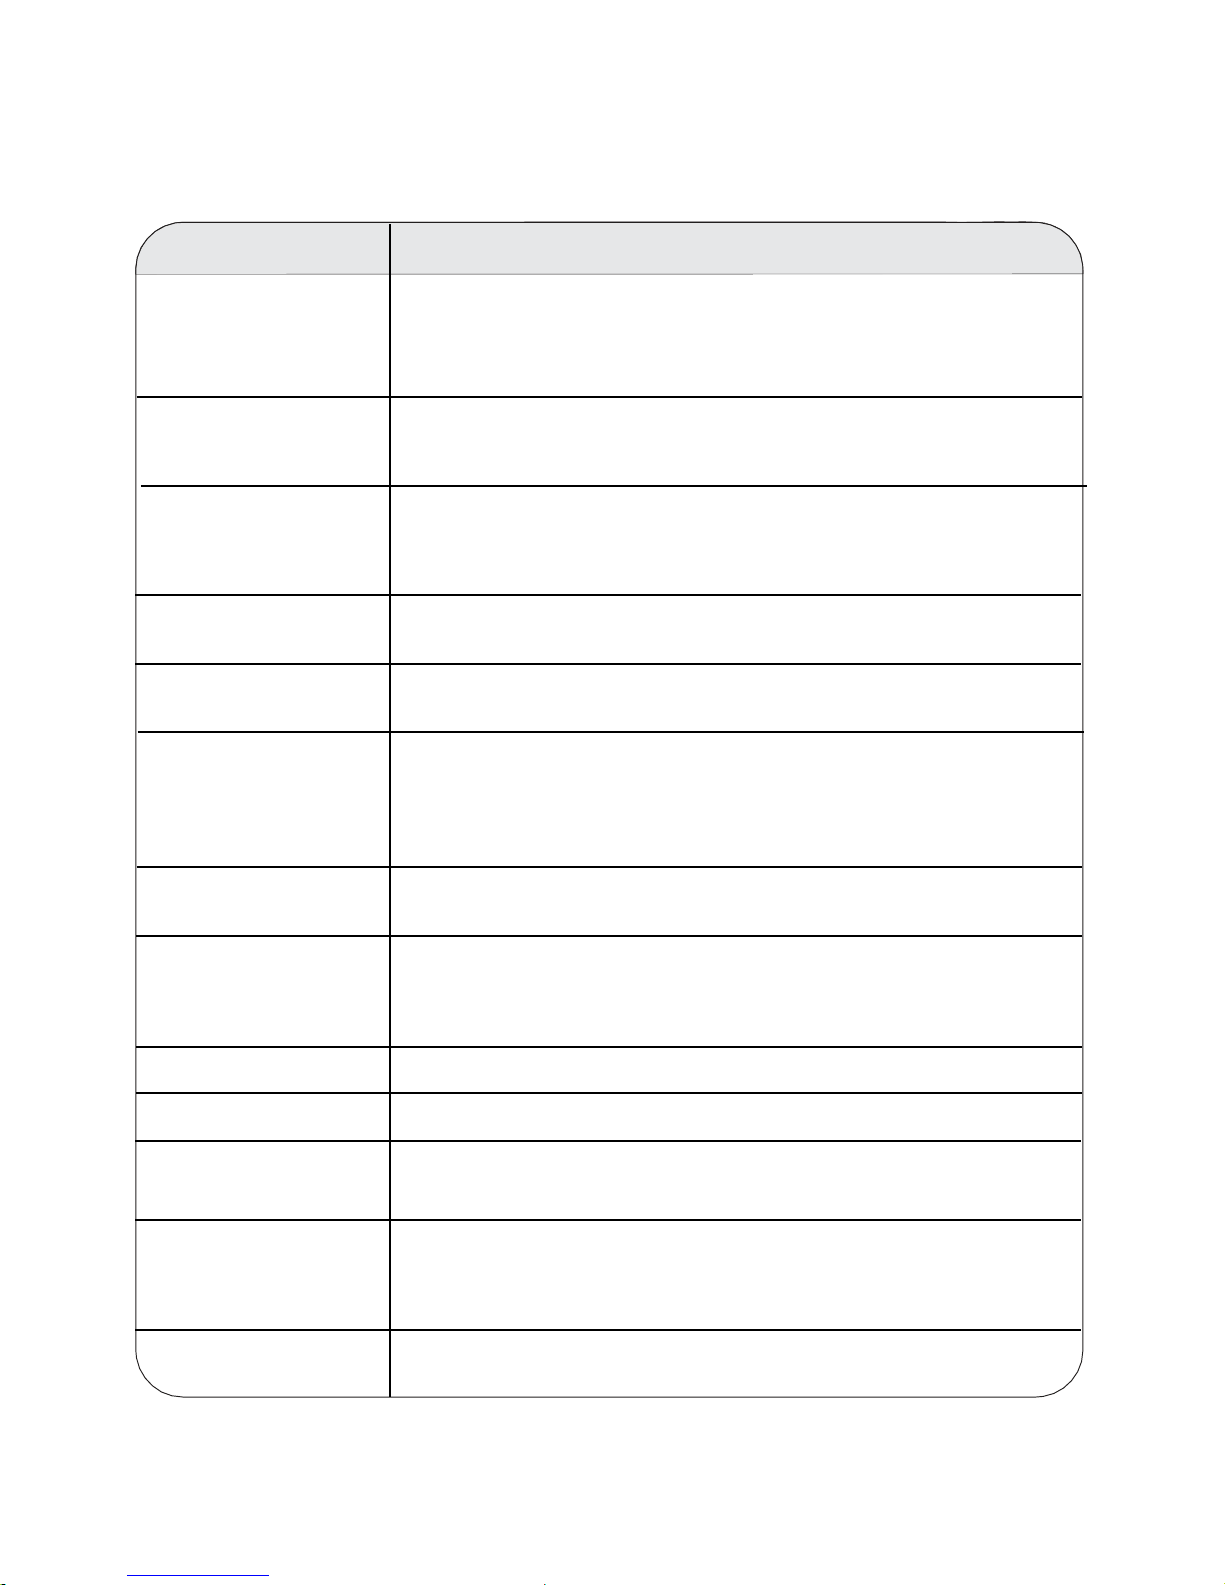
Trouble Shooting
Before contrast the service technician, perform the following simple checks. If any
program still persists, unplug the LCD TV and calling for serving.
POSSIBLE SOLUTION
PROBLEM
- Check whether the main plug has been connected to a wall
let.
No sound and picture
- Check whether you have pressed the POWER button on the
front of TV set.
- Check the picture contrast and brightness settings.
- Check the volume.
Normal picture but no
sound
- Sound muted? Press the MUTE button.
- Try another channel , the problem may be with the broadcast.
- Are the audio cables installed properly?
- Check to see if there any object between the product and
remote control Causing obstruction.
The remote control
does not work
- Are batteries installed with correct polarity(+ to +,- to -).
- Correct remote operating mode set: TV, VCR etc.?
- Install new batteries
- Is the sleep timer set?
Power is suddenly
turned off
- Check the power control settings. Power interrupted.
- No broadcast on station tuned with auto activated.
Picture appears
slowly after switching
on
- This is normal, the image is muted during the product startup
process. Please contact your service center, if the picture has
not appeared after five minutes.
- Adjust the colour in menu option.
- Keep a sufficient distance between the product and the VCR.
- Try another channel, the problem may be with the broadcast.
No or poor colour or
poor picture
- Are the VIDEO cables installed properly?
- Activate the any function to restore the brightness of the
picture.
Horizontal/vertical
bars or picture
shaking
- Check for local interference such as an electrical appliance or
power tool.
- Station or cable product experiencing problems. Tune to
another station.
Poor reception on
some channels
- Station signal is weak, reorient antenna to receive weaker
station.
- Check for sources of possible interference.
Lines or streaks in
pictures
- Check the antenna(Change the direction of the antenna).
No output from one of
the speakes
- Adjust balance in menu option.
- Adjust resolution, horizontal frequency, or vertical frequency.
The signal is out of
range.
- Check it whether the signal cable is connected or loose.
-
Check the input source.
Vertical bar or stripe
on back
ground&Horizontal
- Work the auto configure or adjust clock, phase, or H/V
position.
Noise&Incorrect
position.
Screen colour is
unstable or single
colour.
- Check the signal cable.
- Reinstall the PC video card.
NOTE:
There is a problem in VGA mode (Only VGA mode applied).
20
Page 22

Maintenance
Early malfunctions can be prevented. Careful and regular cleaning can extend the
amount of time you will have your new TV. Be sure to turn the power off and unplug the
power cord before you begin any cleaning.
Cleaning the screen
1. Here’ s a great way to keep the dust off your screen for a while. Wet a soft cloth in a
mixture of lukewarm water and a little fabric softener or dish washing detergent. Wring
the cloth until it’s almost dry, and then used it to wipe the screen.
2. Make sure the excess water is off the screen, and then let it air-dry before you turn
on your TV.
Cleaning the cabinet
To remove dirt or dust, wipe the cabinet with a soft, dry, lint-free cloth. Please be sure
not to use a wet cloth.
Extended Absence
If you expect to leave your TV dormant for a long time(such as a vacation), it’s a
good idea to unplug the power cord to protect against possible damage from
lightning or power surges.
-The ventilation should not be impeded by covering the ventilation openings with
items, such as newspapers, table-cloths, curtains, etc;
- No naked flame sources, such as lighted candles, should be placed on the apparatus;
-Attention should be drawn to the environmental aspects of battery disposal. Don’t
throw used batteries in dustbin. Please contact your retailer in order to protect the
environment.
-Don’t use the apparatus in tropical climates;
-The apparatus shall not be exposed to dripping or splashing and that no objects filled
with liquids, such as vases, shall be placed on the apparatus.
-Where the mains plug is used as the disconnect device, the disconnect device shall
remain readily operable. The main plug shall remain readily operable.
-Keep minimum distances(5cm)around the apparatus for sufficient
ventilation;( Minimum distance around the apparatus for sufficient ventilation.)
Disposal of old electrical appliances
The European directive 2002/96/EC on Waste Electrical and Electronic
Equipment (WEEE), requires that old household electrical appliances must
not be disposed of in the normal unsorted municipal waste stream. Old
appliances must be collected separately in order to optimize the recovery
and recycling of the materials they contain, and reduce the impact on human
health and the environment.
The crossed out “wheeled bin” symbol on the product reminds you of your
obligation, that when you dispose of the appliance, it must be separately
collected.
Consumers should contact their local authority or retailer for information
concerning the correct disposal of their old appliance.
21
Page 23

Contenido
Introducción………………………………………………….….…………………....27
Instrucciones de Seguridad………………………………………………………..25
Instalación de baterías…………………………...………….………...…………..27
Instalación del Cable………………………………………..……………………...28
Control Remoto……………………………………………………………………….29
Operaciones………………………………………………………………………….. 31
31
31
31
32
32
32
33
35
35
38
ALMACENAMIENTO...................................................................................... 39
40
41
Mantenimiento…………………..……………………………………………………42
22
Encender y apagar el TV……………………………………………………….....
No señal…………………………………………………………………………..…
Elección de un canal de TV…………………………………………………….… 31
Ajuste del volumen……………………………………………………………....…
Fuente de entrada…………………………………………………………….....…
Uso de la función………………………………………………………………...…
Canal de menú…………………………………………………………………...…
Menú de Imagen…………………………………………………………………....
Menú de Sonido………………………………………………………………….....34
Menú del temporizador……………………………………………………….....…
Menú de opciones…………………………………………………………….....…
Bloqueo del menú……………………………………………………………….....
TELETEXTO………………………………………………………...…………......
Solución de Problemas…………………………………………………………..…
Advertencia……………………………………………………………………….…..23
Page 24
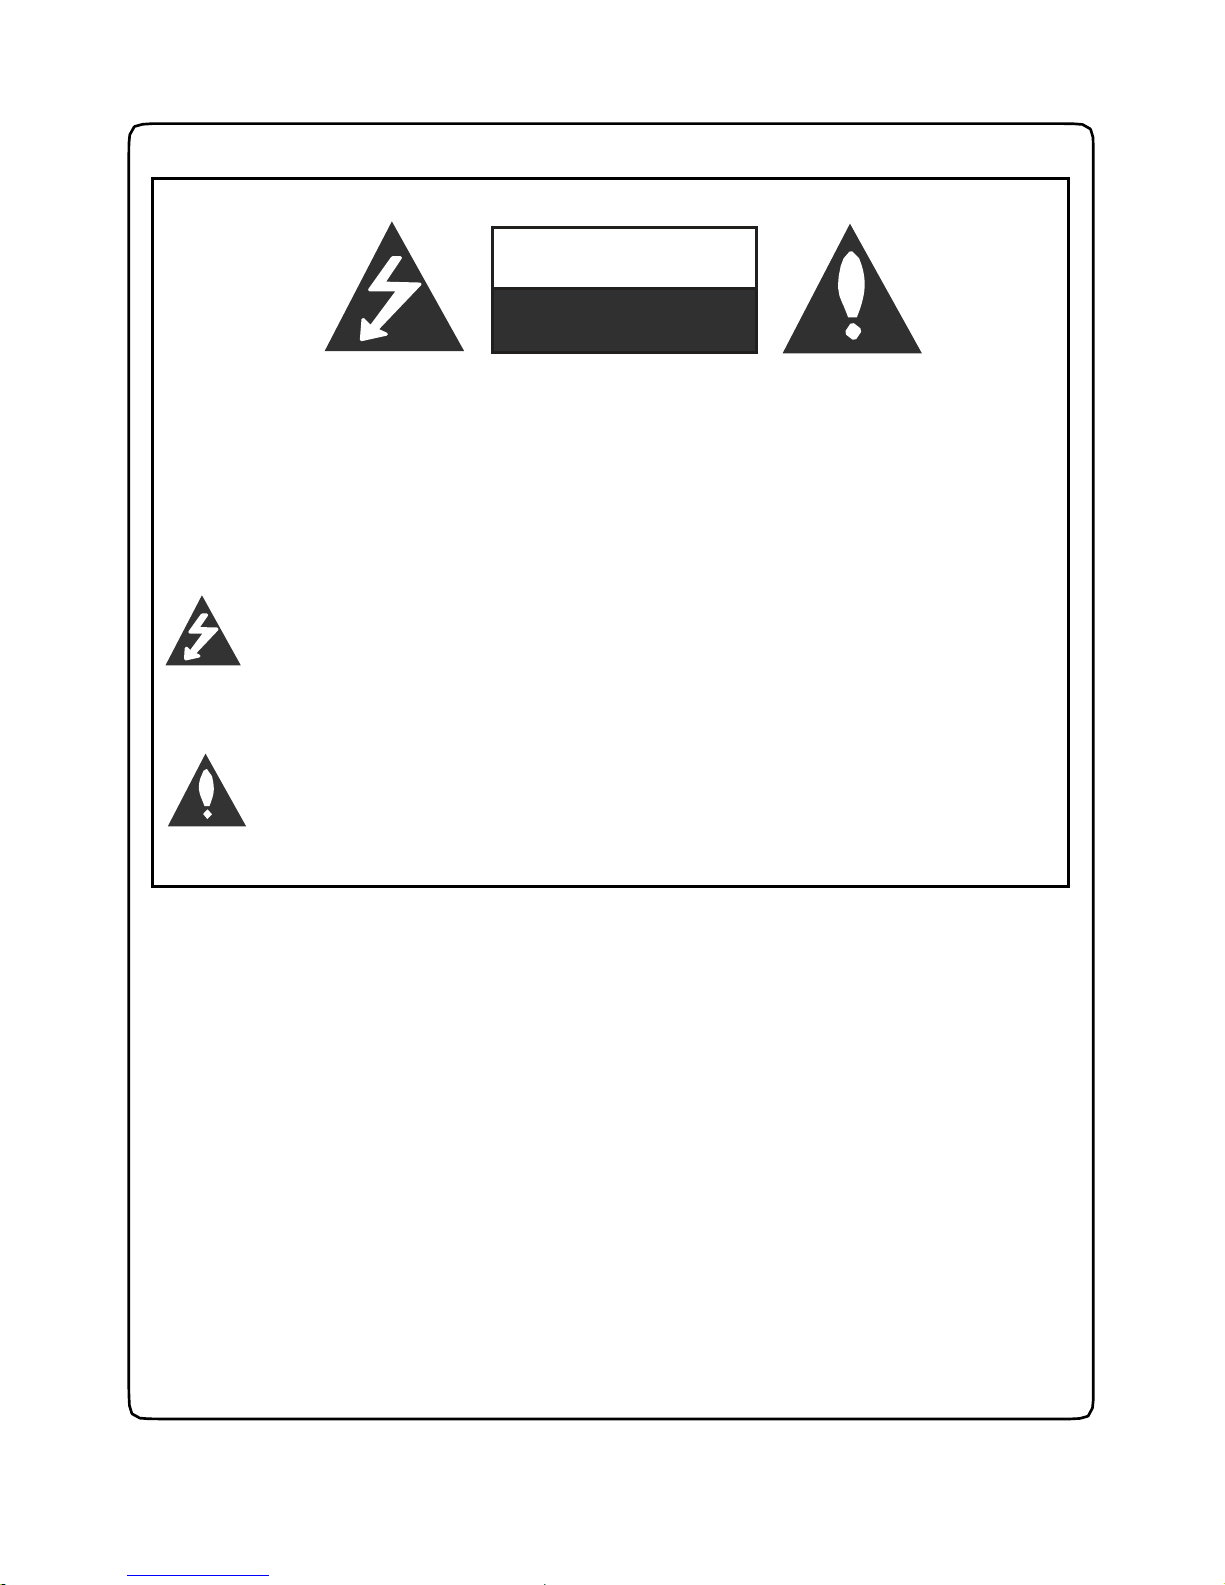
Advertencia
ATENCIÓN
RIESGO DE ELECTROCUCIÓN
NO ABRIR
ADVERTENCIA:
CON EL PROPÓSITO DE REDUCIR EL RIESGO DE DESCARGA
ELÉCTRICA NO QUITE LA CUBIERTA (O TAPA). NO HAY PARTES
OPERABLES PARA LOS USUARIOS DENTRO DEL EQUIPO. ACUDA A
PERSONAL DE SERVICIO CALIFICADO.
Este “rayo” indica que el material no aislado existente dentro de la unidad
puede causar descargas eléctricas. Por la propia seguridad de las
personas del hogar, no quite la carcasa del producto.
El “signo de admiración” llama la atención de las características cuya
documentación adjunta debe leer para evitar problemas de
funcionamiento y mantenimiento.
INFORMACIÓN
Este equipo genera, usa y puede emitir energía de frecuencia de radio, por lo cual si
no se instala y se usa de acuerdo con las instrucciones, se podrían causar
interferencias dañinas a la comunicación de radio. Sin embargo, no se garantiza que
las interferencias no ocurran en alguna instalación en particular. Si el equipo no cuasa
interferencia dañina a la recepción de radio o televisión, que pueda ser determinada
por encender y apagar el equipo, se recomienda que el usuario intente corregir la
interferencia por medio de una o varias de las medidas siguientes:
- Oriente correctamente la antena.
- Amplie la separación entre el equipo y el receptor.
- Conecte el equipo a una salida diferente del circuito de antena.
- Consulte al distribuidor o técnico cualificado.
Cualquier cambio o modificación sin autorización del fabricante, invalida
inmediatamente la garantía y el derecho a reclamar por parte del cliente
23
Page 25
Advertencia
PRECAUCIÓN:
No trate de modificar el producto sin la autorización escrita del proveedor o fabricante.
La modificación no autorizada puede invalidar la garantía.
No se recomienda mantener una imagen estática visualizada en pantalla durante un
periodo largo de tiempo, así como visualizar imágenes sumamente brillantes en
pantalla.
El producto necesita prevención electrostática. Reinicie el dispositivo cuando no
responda debido a la electroestática causada por terminales del producto, tales como
TV, AV, SCART, HDMI.
ADVERTENCIA:
Para Reducir el riesgo de Fuego o Descarga Eléctrica, No Exponga el Aparato a lluvia
o Humedad.
No debe exponer el aparato a grasa o salpicaduras, ni ponga objetos llenos de
líquidos, como jarrones, encima del aparato.
El enchufe se utilice como dispositivo de desconexión. El dispositivo de desconexión
debe de estar bien accesible
El cable de corriente del aparato se usa como dispositivo independiente que debe ser
operable.
PRECAUCIÓN acerca de conexión del cable de potencia
Se recomienda conectar cada aparato eléctrico a una toma diferente de corriente
No sobrecargue los enchufes. Evite enchufes sobrecargados, sueltos o rotos,
alargadores, cables de potencia desgastados o alambre con cubierta de aislamiento
dañada o fracturada. Dichas condiciones pueden causar descargas eléctricas o
incendios. Verifique periódicamente el cable de su aparato y si se descubre daño o
deterioración en el aparato, debe desenchufarlo inmediatamente, detener el uso del
aparato y reemplazar el cable por uno de iguales características. Proteja el cable de
potencia contra golpes y pinzamientos, evite enrollar el cable, no presione el cable
con muebles, otros aparatos y no lo coloque donde pueda ser pisado. Preste atención
particular a clavijas, tomas de enchufes en pared y puntos donde existan conexiones.
Sobre Disposición
- La lámpara fluorescente utilizada en este producto contiene una pequeña cantidad
de mercurio.
- No elimine este producto con los desechos domésticos.
- La eliminación de este producto debe realizarse de acuerdo a las regulaciones de
las autoridades locales.
24
Page 26
Instrucciones de Seguridad
INSTRUCCIONES DE SEGURIDAD
1. Lea las instrucciones.
2. Guarde las instrucciones.
7. No bloquee las salidas de ventilación.
Instálelo de acuerdo con las
instrucciones del fabricante.
3. Preste atención a todas las
advertencias.
4. Observe todas las instrucciones.
5. No use el aparato cerca del agua.
8. No lo instale cerca de fuentes de
calor, tales como radiadores,
registradores de calor, hornos u otros
aparatos incluyendo amplificadores)
que generen calor.
6. Sólo límpielo con paños secos.
9. No fuerce la clavija ni la manipule si
no encaja en el enchufe. Avise a un
electricista cualificado para que le
asesore sobre su problema o al
fabricante.
25
O w n er'sManual
Page 27
Instrucciones de Seguridad
13. Desenchufe el aparato durante una
tormenta eléctrica o cuando no valla
a usarse en un periodo largo de
tiempo.
10. Proteja el cable de potencia de
golpes y evite colocarlo en zonas
donde puede ser pisado o aplastado
por cualquier otro objeto. Sobre todo
proteja la zona de conexión con el
enchufe.
14. Confíe las reparaciones a personal
cualificado y servicio técnico oficial
cuando el aparato haya sufrido algún
daño.
11. Use únicamente los accesorios
recomendados por el fabricante.
12. Utilice el aparato solamente con un
carro, base, trípode, soporte o mesa
especificado por el fabricante o vendido
junto con el aparato. Si utiliza
un carro, preste atención cuando lo
desplace para evitar daños por caída.
Nota
- Si nota que el televisor está frio, puede haber pequeños "parpadeos" cuando está
encendido. Esto puede ser normal, espere a que el aparato alcance una temperatura
adecuada o intente evitar temperaturas excesivamente bajas
- Pueden aparecer diminutos puntos o pixels en pantalla. Aparecen como pequeños
puntos rojos, verdes o azules. Esto no supone un problema de rendimiento para el
monitor
- Evite tocar la pantalla con la palma de la mano o dedos durante periodos largos de
tiempo. Si lo hace, puede provocar fallos temporales e incluso permanentes en la
pantalla del televisor.
26
Page 28
Introducción
Instalación de baterías
1
2
3
Empuje hacia abajo para abrir la tapa de la batería.
Inserte dos baterías de tamaño AAA de 1.5
V en la polaridad correcta. No se debe
mezclar las baterías antiguas o usadas con
otras nuevas.
Cierre la tapa hasta que se escuche un “clic”.
NOTA: Las baterías no deben de ser expuestas a fuentes de calor externas tales como
estufas, radiadores o a la luz directa del sol
● Apunte el control remoto hacia el sensor del control remoto del TV y úselo
dentro de 7 metros de distancia aproximadamente.
● No deseche las baterías usadas con la basura corriente. Recicle y
colabore a proteger el medio ambiente.
27
SOURCE
INFO
Page 29

Introducción
Instalación del Cable
- Antes de la instalación y uso, por favor lea cuidadosamente el contenido pertinente en
"Aviso para el mantenimiento y la seguridad".
1. Desempaquete el TV LCD con cuidado de no ser golpeado y colóquelo donde tanga
una ventilación adecuada.
Aviso:
Al conectar o desconectar el TV LCD a otros equipos, debe asegurarse de
desenchufar de la corriente eléctrica los aparatos y cuando desconecte el cable
de alimentación o el cable de señal, por favor, tenga cuidado de no pisar el cable.
2. El terminal de salida de RF se puede conectar con el puerto de entrada de RF del
TV.
3. El terminal de salida AV del DVD se puede conectar con el puerto de entrada de AV
del TV mediante un cable AV.
4. Conecte un extremo del cable VGA al puerto VGA del ordenador, conectar el otro
extremo del cable VGA al puerto VGA del TV y apriete los tornillos en el sentido de
las agujas del reloj en cada extremo del cable VGA.
Aviso:
Cuando conecte el cable VGA asegúrese de no forzar la conexión ya que puede
partir un Pin del conector
5. Conecte un extremo del cable HDMI con el puerto de salida HDMI del dispositivo,
conecte el otro extremo del cable HDMI con el puerto HDMI del televisor.
Aviso:
Cuando conecte el cable HDMI asegúrese de no forzar la conexión ya que puede
partir un Pin del conector.
6. Compruebe y asegúrese de que todos los cables AV se conectan con los puertos
correspondientes correctamente.
28
CA.
8. Conecte el otro extremo del cable de alimentación de CA con el puerto de
alimentación de CA en el televisor.
CA de la gama anterior.
Por favor, mantenga desconecte el cable de corriente siempre tocando la parte
aislada, nunca tocando la parte metálica.
7. Conecte el cable de alimentación de CA with100-240V~ fuente de alimentación de
Precaución: La gama de potencia de entrada para el televisor LCD es de 100240V~ 50/60Hz, no conecte con el puerto de alimentación de entrada del TV de
Page 30
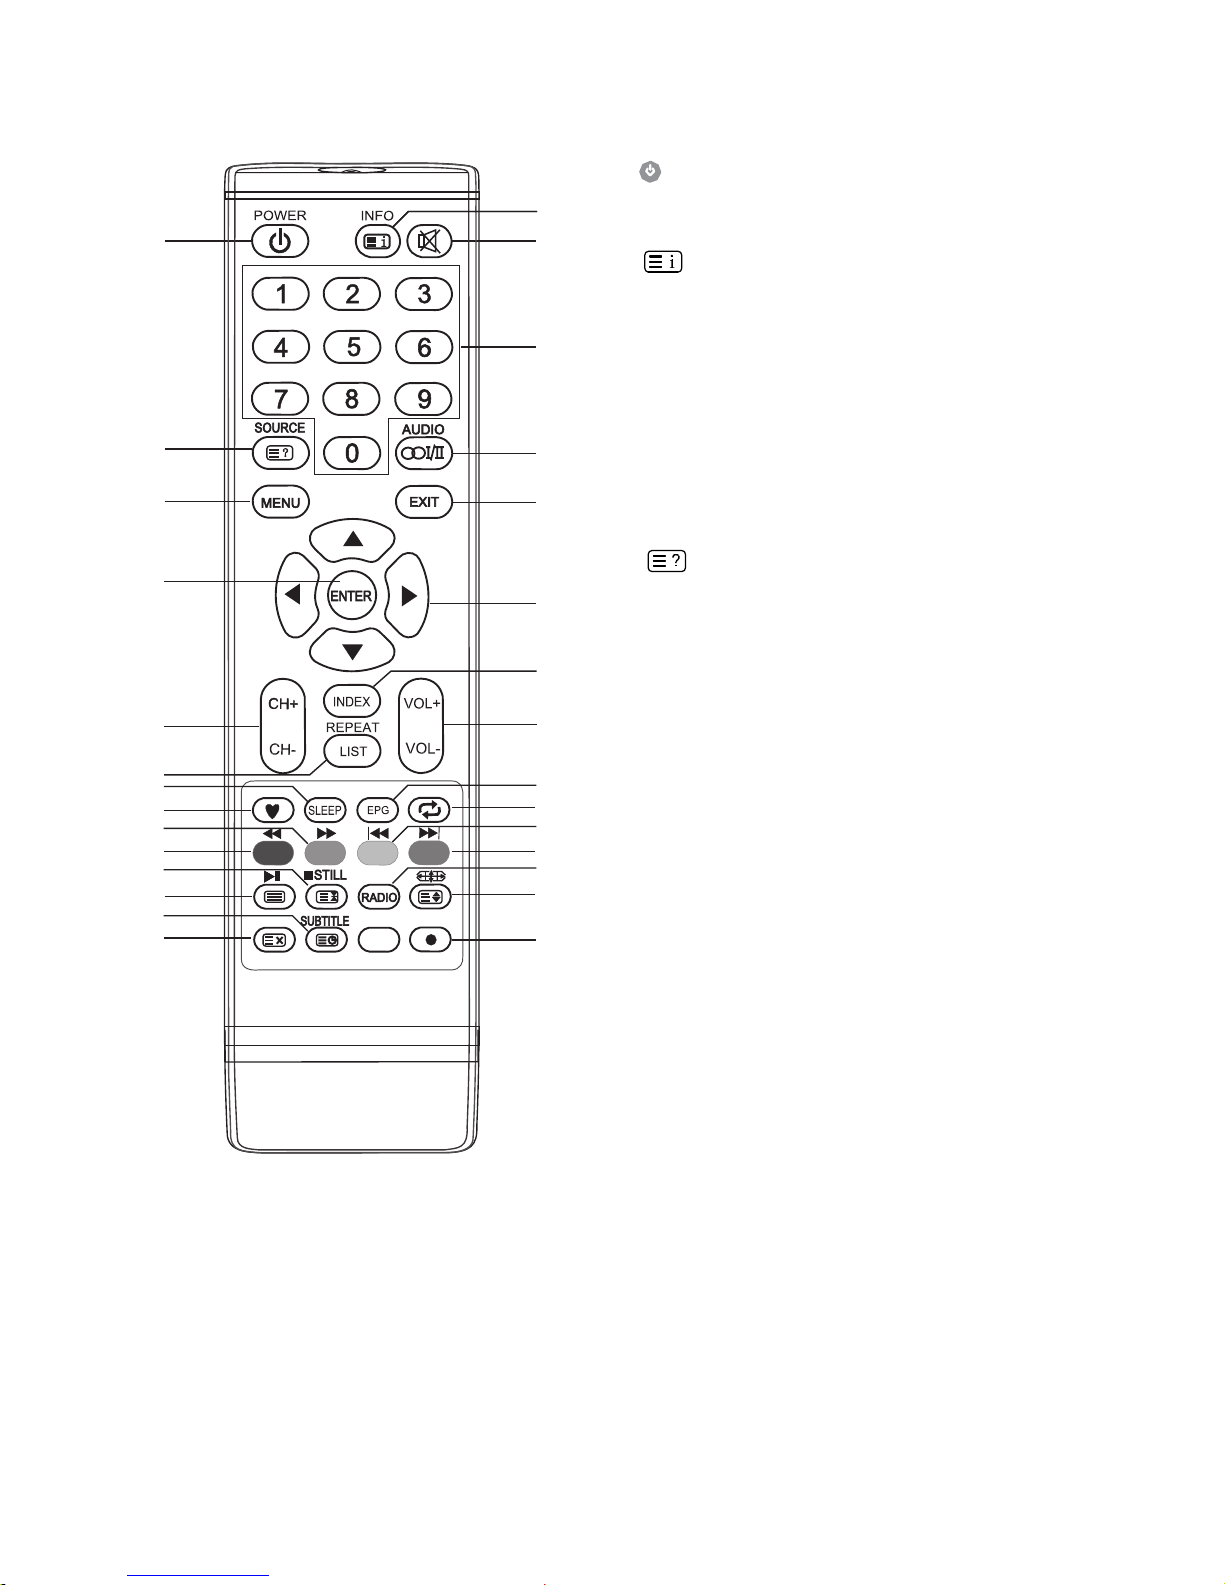
Control Remoto
Definición de los botones del control remoto:
Aviso:
Todas las imágenes de este
manual son ejemplos, sólo como
referencia, el producto real puede
diferir de las imágenes.
29
1. : Encender o apagar el televisor.
2. INFO: Pulse para mostrar la información
del programa actual en la pantalla.
3. MUTE: Pulse para silenciar o restaurar el
sonido.
4. Botones numéricos (0-9): En la
modalidad de televisión, estos botones se
usan para introducir el número de canal.
También sirven para introducir las claves
de bloqueo parental.
5. SOURCE: Pulse para seleccionar la fuente
de la señal.
6. AUDIO(
∞Ⅰ/
Ⅱ
): El botón se puede utilizar
para cambiar entre NICAM DUAL I, NICAM
DUAL II, NICAM DUAL I + II, STEREO,
Audio MONO. También cambia el idioma
en el modo DTV.
7. MENU: Pulse para entrar en la pantalla de
menú para varias configuraciones
opcionales ajustables.
8. EXIT: Vuelve al menú anterior o sale del
Menú OSD.
9. ENTER: Pulse para ejecutar el elemento
seleccionado en la pantalla de l menú o
escriba el valor deseado en cualquier
modo de entrada.
10. w/x/y/z: Para seleccionar la opción
deseada en los Menús
11. CH+/CH-: Presione para seleccionar
canales en orden ascendente y
descendente.
12. VOL+/VOL-: Presione para ajustar el nivel
de volumen hacia arriba o hacia abajo.
14. REPEAT: Pulse para seleccionar el modo
de repetición de reproducción (en modo de
almacenamiento).LIST: Pulse para llamar
la lista de canales. Pulse otra vez para sali
r
de ella.
15. SLEEP: Presione para ajustar el
temporizador de desconexión. Cuando el
tiempo preestablecido ha pasado el
dispositivo entrará automáticamente en
modo de espera (Stand By).
1
2
3
4
5
6
7
8
9
10
11
12
13
14
15
16
17
18
22
23
24
25
26
27
28
29
19
20
21
habilitadas con esta opción.
: Activa el índice en las páginas
: Revela la información oculta
para algunas páginas del teletexto.
13.
INDICE: Pulse para entrar en la lista
de grabación
Page 31
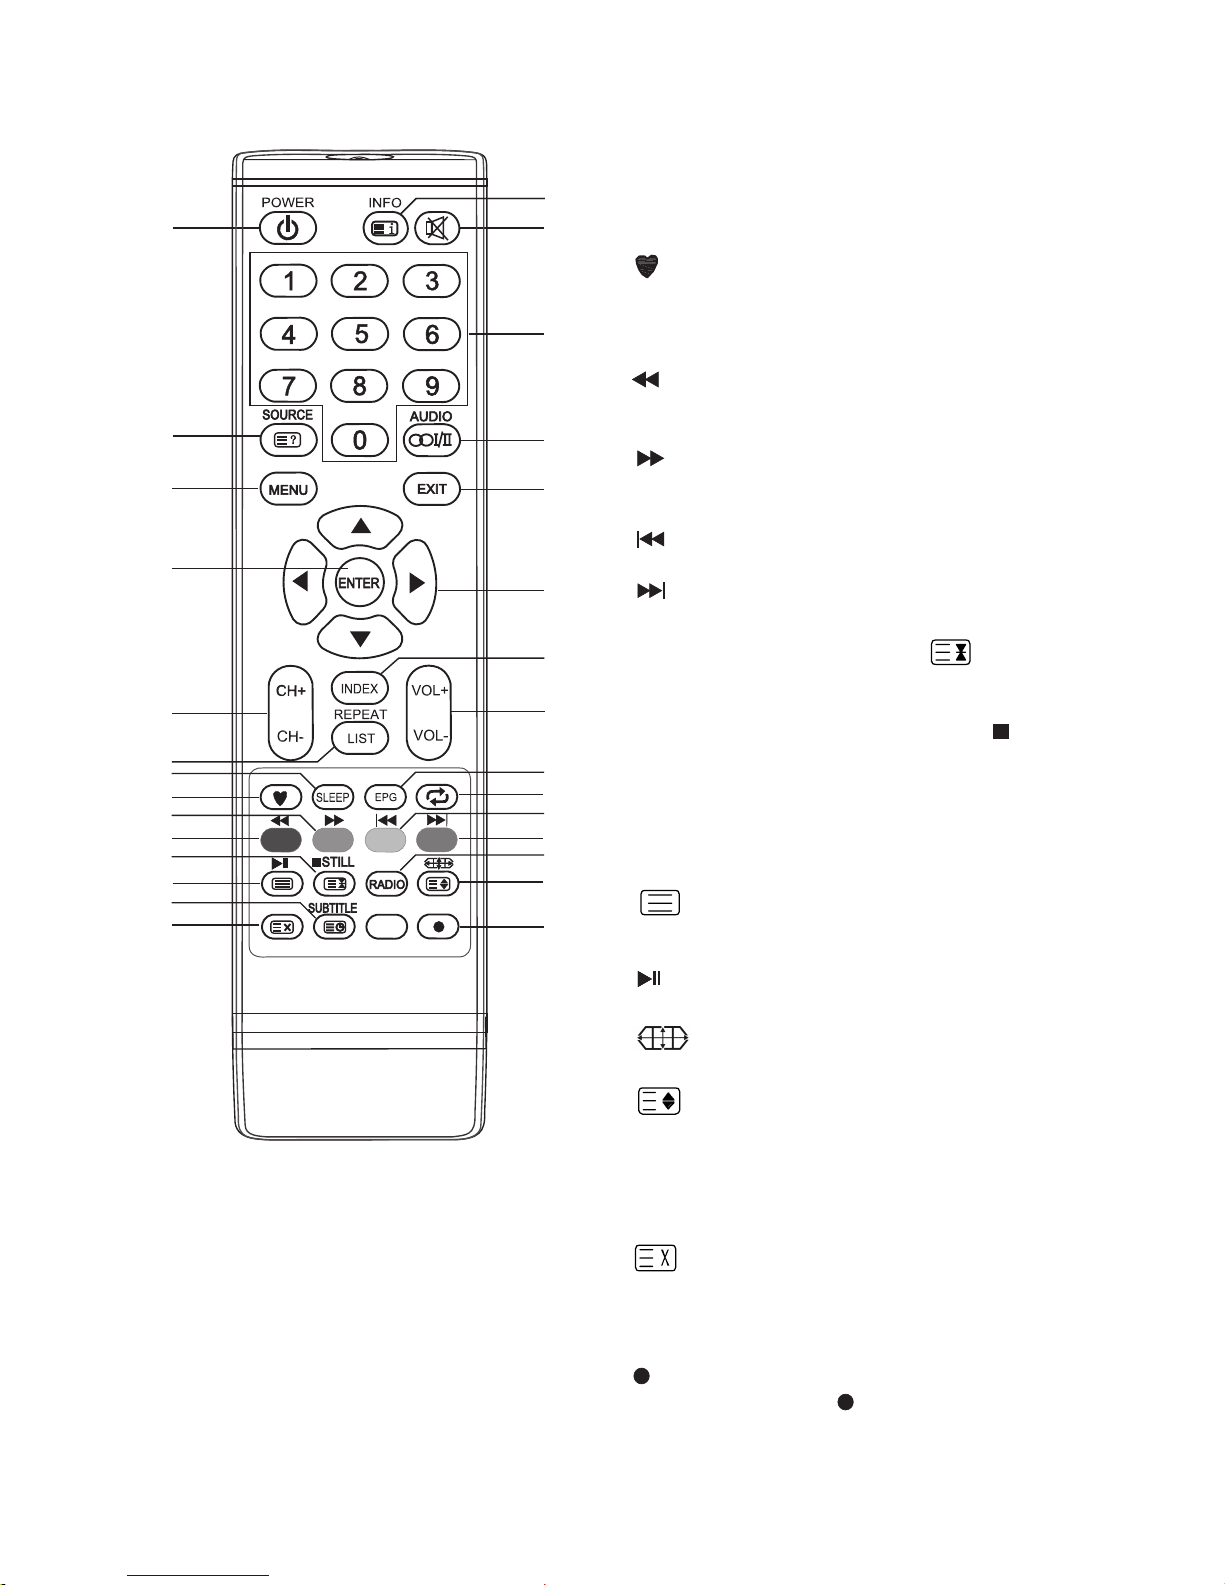
Control Remoto
30
1
2
3
4
5
6
7
8
9
10
11
12
13
14
15
16
17
18
22
23
24
25
26
27
28
29
19
20
21
16. EPG: Pulse para llamar la Guía de
programación o EPG (Electronic Program
Guide) en el modo DTV (TDT). Pulse otra
vez para salir de ella.
17.
18. RECALL: Volver al último programa visto.
19. Red button: Teclas de control rápido.
: Retroceso rápido (en modo de
reproducción).
20. Green button: Teclas de control rápido.
: Avance rápido (en modo de
reproducción).
21. Yellow button: Teclas de control rápido.
: Previo (en modo de reproducción).
22. Blue button: Teclas de control rápido.
: Siguiente (en modo de reproducción)
23.
:
Detener (en almacenamiento/modo DVR).
24. RADIO: Pulsar para cambiar entre
programas de radio y televisión digital
cuando se encuentre en el modo DTV
(TDT).
25.
: Reproducir/Pausa
(en el modo de reproducción).
26.
27. SUBTITLE: Pulse para entrar en el modo
de subtítulos/subpágina /reloj.
28.
29.
: Pulse el botón para iniciar la grabación.
Grabación en uso. Pulse para ampliar
el menú registro. (en modo DVR).
:
Encienda/apague la lista de
programas favoritos.
STILL: Pulse para congelar la imagen y
para fijar la página del teletexto en la
pantalla e impedir que la página cambie.
Pulse de nuevo para desbloquear.
mantenerla fija en pantalla. : Pulse
:
Introduzca el teletexto, pulse de
nuevo para el modo MIX, presione este
botón de nuevo para salir.
: El botón se puede utilizar para
seleccionar el tamaño de la pantalla.
la pantalla de teletexto en el modo de
visualización.
: Presione para cambiar el tamaño de
de teletexto (juegos, puzles o enigmas).
Pulse otra vez para ocultar la información.
información oculta para algunas páginas
: Pulse para revelar la
Page 32
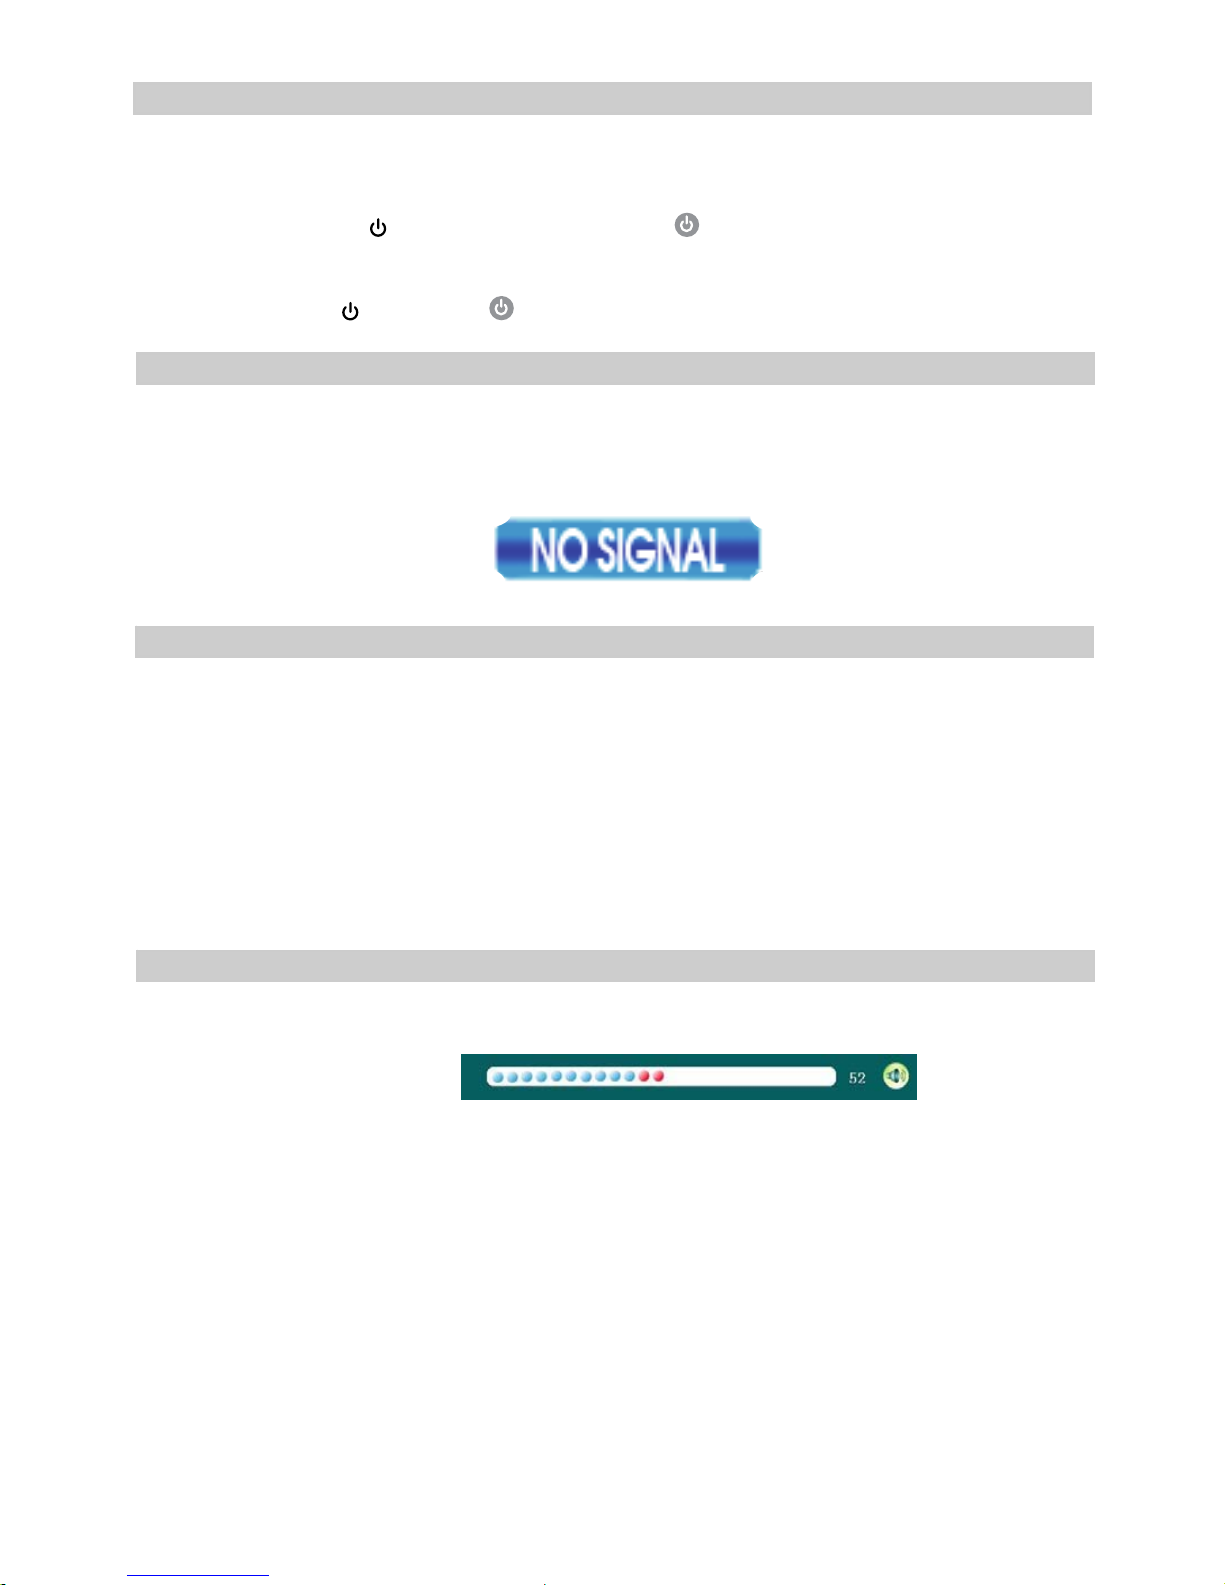
Encender y apagar el TV
Encender el TV LCD
1. Conecte el cable de CA. Encienda el interruptor de encendido del TV. En este
momento el TV entrará en modo de espera.
2. Presione el botón en el televisor o el botón del mando a distancia para
encender el TV LCD.
Apagar el TV LCD
Presione el botón o el botón del mando a distancia para entrar en modo de
espera.
No señal
- Cuando no encuentre señal le aparecerá un mensaje en pantalla de “No señal” en
modo TV / DTV / modo VGA. Si no hay señal en cinco minutos, el TV LCD se apagará
automáticamente.
Elección de un canal de TV
1. Uso de CH+/CH- en el panel del TV o en el control remoto.
• Pulse CH + para aumentar el número de canal.
• Pulse CH - para disminuir el número de canal.
2. Uso de botones numéricos 0-9
Usted puede seleccionar el número del canal pulsando 0 ~ 9. (En la televisión, en
modo DTV)
3. Ejemplo:
• Para seleccionar - canal (por ejemplo, Canal 5): Presione 5.
• Para seleccionar -- canal (por ejemplo, Canal 20): Pulse 2 y seguidamente 0.
Ajuste del volumen
1. Pulse VOL + /- para ajustar el volumen.
2. Si desea apagar el sonido, pulse el botón MUTE.
3. Puede volver a activar el sonido presionando MUTE o VOL +.
31
Page 33
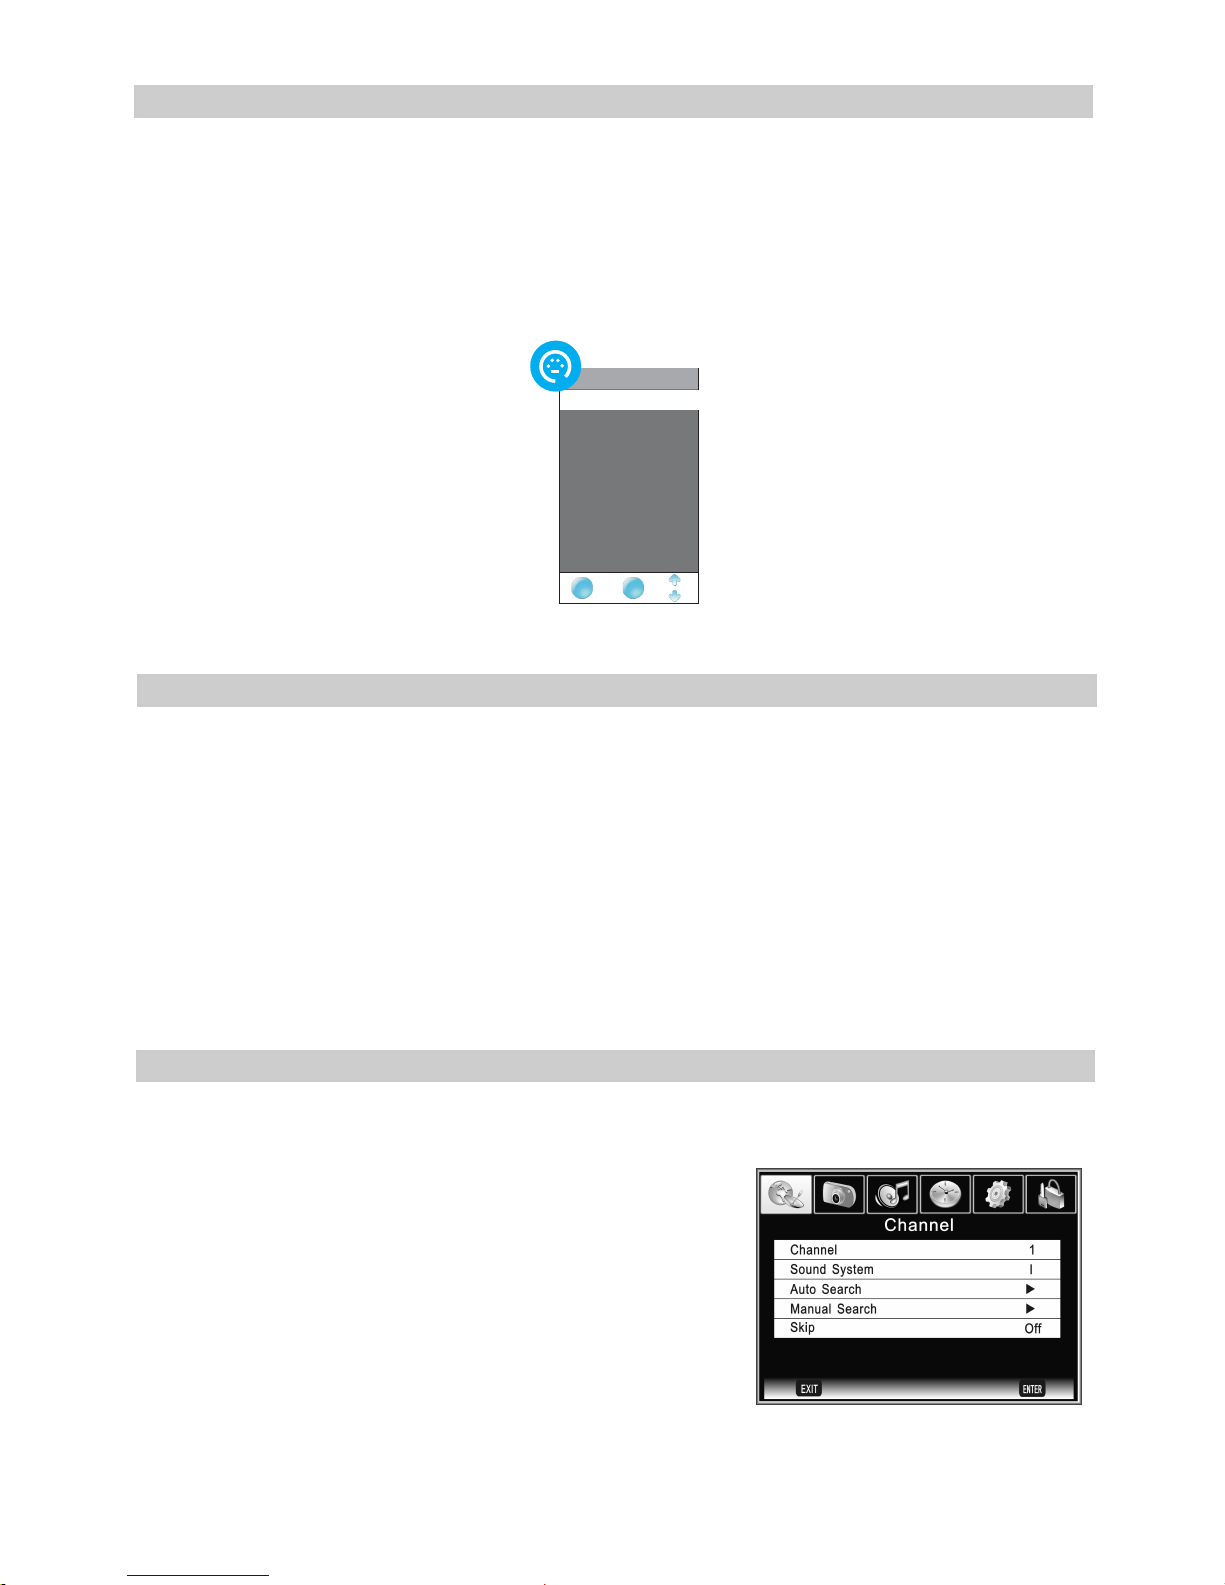
Fuente de entrada
Usted puede seleccionar la fuent el botón SOURCE en el control
fuente de entrada pulsando el botón TV/AV. Pulse los botones〖CH+〗/
e de entrada pulsando
remoto o el botón TV/AV en el panel. Pulse【y】/【z】para desplazarse por la fuente
de entrada.
Seleccione la
〖CH-〗para desplazarse a través de las Fuentes de entrada. Presione el botón TV/AV
para confirmar la selección. Si no pulsa el botón en 1 minuto aproximadamente, el TV
entrará automáticamente en la fuente predeterminada. Por ejemplo:
OTA: La imagen es sólo de referencia. Puede no corresponder con el menú que le
Uso de la función
Menú Principal
guración y ajustes del TV LCD comenzarán a partir de la
a
l
gris, significa que el elemento no está
nú (en TV, el modo DTV)
Pulse el botón MENU seleccionar el menú
úmero de canal. Pulse【w】/【x】para
stem
bles: D/K, I, B/G, L (En el
N
aparece en pantalla.
Muchas opciones de confi
elección del menú. Todas las operaciones se muestran en la barra de operaciones
superior que aparece en la pantalla del menú principal. Pulse el botón【MENU】par
mostrar el menú principal; Pulse el botón MENU o【w】/【x】para desplazarse por el
menú principal: Canal, Imagen, Sonido, Temporizador, Opción, Bloqueo. Pulse【y】/
【z】para destacar el elemento que desea a ajustar. Pulse【w】/【x】para ajustar e
submenú o subtema. Cuando usted esté satisfecho con su ajuste, pulse el botón
【EXIT】para salir del menú principal.
Cuando un elemento de menú aparece
disponible o no puede ajustarse.
Canal de me
en el televisor o en el control remoto para
de canal tal y como se muestra a continuación:
•
Channel
Muestra el n
ajustarlo.
•
Sound Sy
Cuatro modos disponi
modo TV).
32
Input Source
DTV
TV
SCART
Component
PC RGB
-PC RGB-
OK
ENTER
EXIT
EXIT
AV
S Video
-S Video-
HDMI
S t o r a g e
Page 34
•Auto Sear ch
【x】para iniciar la búsqueda
squeda
rch
al permite realizar búsquedas de
a otra
, DTV (TDT).
uencia (en modo TV). Cuando la frecuencia sea la más optima de
ia, la televisión comenzará
l proceso de búsqueda, usted notará que no puede cambiar de canal
ones
Menú de Imagen
Pulse el botón MENU en el televis oto para seleccionar el menú
tar el contraste / brillo de
】para ajustar la saturación de color.
Seleccione el botón
automática. Una vez que la barra de progreso se
complete, los canales encontrados serán
almacenados y la unidad procederá a la bú
de canales de TV, DTV, Radio. Si se presione el
botón MENU durante la búsqueda, esta saltará
automáticamente a la búsqueda de DTV (TDT)
como muestra la imagen siguiente.
•Manual Sea
La Búsqueda Manu
canales de uno en uno. La primera fuente de
búsqueda es TV analógica siendo DTV (TDT) l
opción de búsqueda. Pulse los botones 【w】/【x】
para seleccionar la fuente deseada. Pulse el botón
rojo para guardar su elección de programa.
Fuente Sel: Dos modos para seleccionar: TV
Actual CH: Muestra el número actual del canal a buscar.
Frecuencia: Muestra la frecuencia en la que se realizará la búsqueda.
Buscar: Para disminuir y aumentar la frecuencia que desee.
(En el modo TV)
Fina: Ajusta la frec
recepción, el número de canal actual se pondrá amarillo
NOTA: En el modo DTV, al destacar CH actual o la frecuenc
la búsqueda manual.
• Salto
Durante e
pulsando los botones【CH+/CH-】Deberá seleccionar el canal pulsando los bot
numéricos del mando a distancia. Un vez realizados los ajustes, los cambios los
guardará pulsando el botón rojo.
or o en el control rem
Imagen:
•Contrast / Brightness
Pulse【w】/【x】para ajus
la imagen.
•Saturación
Pulse【w】/【x
33
Modo de imagen
Seleccione el modo de imagen
El fabricante recomienda dejar la configuración en
modo fábrica
Page 35
•Nitidez
Pulse【w】 /【x】para ajustar el nivel de nitidez de la
SC)
】para ajustar el tinte de la imagen.
en modo PC-RGB
)
ustar la posición
ustar la posición
se【w】/【x】para ajustar el
ance
se【w】/【x】para seleccionar el modo
: Pulse【w】/【x】para seleccionar el modo
a a la imagen con tratamiento de
Menú de Sonido
Pulse el botón MENU en el televi moto para seleccionar el menú
ara aumentar y disminuir el nivel
x】para ajustar la salida de audio entre
evel)
rma automática. Cada
x】para cambiar a sonido envolvente.
imagen.
•Tint (NT
Pulse【w】/【x
•Pantalla (
Ajuste automático: Pulse【x】para aj
de la imagen automáticamente.
Posición H/V: Pulse【w】/【x】para aj
horizontal/vertical.
Tamaño / Fase: Pul
tamaño y fase de la imagen.
•Av
ZOOM: Pul
de ZOOM.
Temp Color
de Color Temp.
DNR: Proporcion
reducción de ruido.
sor o en el control re
Sonido:
•Agudos / Bajos
Pulse【w】/【x】p
de Bajos y Graves en el sonido.
•Balance
Pulse【w】/【
izquierda y derecha.
•AVL(Auto Volume L
AVL Ajusta el volumen de fo
estación de radiodifusión tiene su propia señal, el
ajuste de volumen puede ser necesario cada vez
que cambie de canal. Esta característica permite
que al cambiar de canal no haya cambios bruscos
del volumen del audio.
•Surround
Pulse【w】/【
34
Modo de sonido
Seleccione el modo de sonido.
Page 36
Menú del temporizador
Pulse el botón MENU en el tele ara seleccionar el menú
la hora del sistema obtenida de la
tablecer
pagado
apagado automático
de auto-encendido
a encendido
】/【x】para seleccionar el tiempo apagado
para seleccionar la zona horaria.
Pulse el botón MENU en el televisor o en el control remoto para seleccionar el menú de
/【x】para seleccionar país.
x】para seleccionar el idioma del OSD.
ambiar el bloqueo del panel.
r
ir que
ar
ón
o funciona cuando se dispone
as codificados en el modo DTV,
eta de CI en la ranur
visor o en el control remoto p
temporizador:
•Hora
Muestra
información de la señal de TV Digital o al es
la hora del sistema.
•Tiempo de auto-a
Pulse【x】para ajustar la hora
del TV.
•Tiempo
Pulse【x】para establecer la hor
automático del TV.
•Sleep
Pulse【w
del TV.
•Zona horaria
Pulse【w】/【x】
Menú de opciones
Opciones
:
•Country
Pulse【w】
•Lenguaje
Pulse【w】/【
•Bloqueo del panel
Pulse【w】/【x】para c
Cuando el bloqueo del panel está configurado como
Activar, todos los botones están bloqueados,
perdiendo sus funciones (El televisor puede se
controlado por el mando a distancia, esta
característica puede ser usada para preven
toquen los botones los niños por ejemplo). Pulse
cualquier botón durante cinco segundos para liber
el bloqueo. Cuando está definido como Desactivado,
los botones del panel del TV funcionan
normalmente
.
•CI Informaci
Nota: La función sól
de ranura de CI.
Para ver program
por favor, insertar la tarjeta de CI
.
Operación: Por favor, insertar la tarj a PCMCIA de acuerdo con la
.
flecha en la tarjeta de CI
35
•Auto Sleep
Pulse los botones 【w】/【x】para establecer el modo Auto apagado
El TV se pondrá automáticamente en modo “Standby” o reposo cunado no
detecte ninguna operación determinada o no encuentre ninguna señal ( el plazo
establecido de fábrica son 4 horas hasta que el TV se apague automáticamente)
Page 37
e la tarjeta de CI cuando se enciende la cámara.
a
tarjeta de CI, por favor, no realice ninguna otra
contiene información diferente. Entre en este menú para
l módulo de información y descarga
formación: Para recibir información de la estación de televisión.
para mostrar el Sistema de Información: Información sobre el software y la
ar todos los programas o reanudar la configuración por defecto.
o /Idioma de Subtítulo:
ioma de audio
ición ON,
.
s.
Aviso: Por favor, no insertar o saqu
No inserte ni extraiga la tarjeta de CI con frecuencia a fin de evitar cualquier daño en l
televisión y la tarjeta de CI.
Durante la inicialización de la
operación en la televisión.
CryptoWorks: Cada tarjeta
buscar a través de la información del proveedor de Cryptoworks.
Idioma: Para configurar el idioma de menú.
Módulos CI: Acceda a este menú para configurar e
del software.
Mensaje de in
•Sistema
Pulse【x】
señal de Información (Información de señal sólo en el modo DTV).
•Predeterminado
Pulse【x】para borr
•Advance
Idioma Audi
Pulse【w】/【x】para configurar el id
predeterminado / por defecto de subtítulos.
Personas con problemas auditivos:
Cuando la opción audición, está en pos
aparecerá información del programa en la pantalla
Cuando la opción está en posición OFF esta
información desaparecerá. Esta opción está
orientada a personas con deficiencias auditiva
DVR Sistema de archivos (DVR solo está
disponible en modo DTV)
Seleccionar disco
Seleccione la unidad de disco para grabar.
Comprobar el sistema de archivos
Compruebe el sistema de archivos de la unidad de
disco y establezca el tamaño de sistema de
grabación de archivos.
Disco USB
USB activado o no.
Formato
Formatea el disco USB y crea el sistema de
t
archivos.
Time Shif
empo para hacer TSR.
Muestra el ti
Velocidad
Velocidad de lectura y escritura del dispositivo de
e grabación
almacenamiento.
Tiempo máximo d
de establecer son 6 El máximo de tiempo que se pue
horas.
36
Page 38
rograma de grabación
one Configuración del menú en la opción Sistema de
one
spositivo.
P
Inserte un disco U, selecci
archivos DVR, copie antes la información del disco que no desee perder. Selecci
Comprobar DVR opción de sistema de archivos. Si antes no ha formateado el disco
USB, el sistema automáticamente le indicará el formato del disco U
Si elige la mayor capacidad puede grabar más veces en un mismo di
◆ La grabación comienza cuando pulsa el botón
. Puede grabar hasta que pulse
nuevamente el botón
Pulse el botón
para ampliar el menu de registro.
Después de la f nalización de la grabación, vaya al m
◆ i odo de almacenamiento.
dad mínima del disco USB no debe ser inferior a 512MB.
que perderá toda la
TV.
ar particiones de disco. Esto hará
iempo, se cerrará de forma automática
do DTV (TDT):
icio y final de
tra los detalles de la programación de 8 días.
mación detallada del canal.
otón amarillo para ver el
o
ar
programa
V / modo DTV):
lista de programas de
a
liminar el canal.
nal fa
NOTA:
La capaci
Guarde todos los datos que crea conveniente de su disco USB ya
información del disco al realizar el formateo.
La función DVR solo está disponible en modo D
En algunas unidades de Disco duro se pueden realiz
ganar tiempo en la respuesta del disco.
Si el sistema de grabación se utiliza todo el t
El dispositivo USB debe ser USB2.0 de alta velocidad.
EPG (Guía electrónica de Programación) sólo en mo
El suministro de información de EPG, tales como listas de programas, in
programa, y otros servicios, aparecen cuando pulsamos el botón EPG en el mando a
distancia
EPG mues
Esta función le permite conocer la información de la progra
Nota: Esta función depende del servicio que ofrezca el operador del canal.
del canal actual
.
DATE:
Pulse el b
detalle de información de los próximos och
días. Puede pulsar
【w】/【x】para seleccion
la información de la fecha concreta
.
Reminder : Pulse el botón azul en el
deseado.
Lista (en T
Pulse para visualizar la【x】
TV, DTV, Radio. Cuando pulse【y】/【z】para
cambiar entre programas, la calidad de la señal, l
fuerza, la frecuencia, se mostrarán en pantalla.
(Sólo frecuencia en el modo de TV).
ELIMINAR: Pulse el botón rojo para e
FAV: Pulse el botón verde para poner el canal como ca vorito.
37
2C42-2C42-
TV
1S02-1S02-
TV
TV
Radio
DTV
Channel List
FrequencyFrequency
EXIT
EXIT
3C44-3C44-
TV
DELETE
MOVE
FAV
49.75 M H z
o hasta que la memoria esté llena . Recording in use.
ENTER: Pulse para cambiar de canal.
INFO: Pulse para ver la información det
allada
MOVE: Pulse el botón amarillo para mover la posición del canal.
Page 39
Bloqueo del menú
e evitar que alguien haga uso del
el sistema está encendido y el
seña de 4 dígitos, recuerde activar
a
cos en el control remoto para establecer la nueva contraseña.
enú Establecer contraseña. Pulse los botones numéricos
l (En el modo DTV)
s niños vean
Pulse el botón MENU en el televisor o en el control remoto para seleccionar el menú de
bloqueo. Se muestra a continuación
:
•Lock System
Esta función pued
TV sin su autorización a menos que introduzca la
contraseña de cuatro dígitos que usted puede
preestablecer
.
Cuando el bloqueo d
sistema esté bloqueado, es necesario introducir la
contraseña al sistema de Búsqueda Automática,
Búsqueda Manual, Borrar Todos los Programas o
Lista. Pulse los botones numéricos de acuerdo a la
contraseña.
La contraseña por defecto es "0000".
※
Una vez que usted ha preestablecido una contra
la función en “Parent Lock” o control parental. Ahora cada vez que intente realizar
algún cambio o borrar algún canal le pedirá esta contraseña. Si olvida la contraseñ
puede introducir "1225".
Pulse los botones numéri
Cuando la nueva contraseña se ha introducido dos veces, la configuración ha
finalizado con éxito. El televisor volverá al menú anterior
.
• Establecer contraseña
Pulse【x】t para ver el subm
para introducir la contraseña. Usted puede configurar su propia contraseña privada
.
Programa bloqueado (En la televisión, el modo DTV)
Presione el Botón verde para bloquear el programa
que desee. Presione el botón verde de nuevo para
desbloquearlo
.
Control Parenta
Esta característica puede evitar que lo
programas de televisión para adultos, de acuerdo a
la clasificación establecida por edades. Esta función
actúa según la información del operador de TV. Si
señal contiene información incorrecta, esta función
no funciona
.
38
DTV
TV
Radio
DTV
Program Blocked
FrequencyFrequency
EXIT
EXIT
LOCK
3 ITV1
4 Channel 4
6 ITV2
Quality
Strength
DTV
DTV
490.00MHZ
83%
98%
Page 40
ALMACENAMIENTO
Conecte un dispositivo USB. Pul ara visualizar el menú de
ulse【w】/【x】para seleccionar FOTOS,
ntrar.
elementos.
se el botón SOURCE p
fuente de señal, a continuación, presionar
【y】/【z】para seleccionar el
almacenamiento
.
P
MÚSICA, VIDEO, TEXTO.
Pulse el botón ENTER para e
Pulse【y】/【z】para seleccionar
Pulse el botón ENTER para entrar en el
submenú deseado
.
Prensa el botón【 】para reproducir o pausar
T
uede reproducir archivos de FOTOS, MÚSICA, VIDEO o TEXTO.
PEG-2/MPEG-4,TS,RM.
OTA: Cuando un archivo no sea soportado le aparecerá un mensaje en pantalla
to básico
.
Pulse el botón EXI para volver.
P
Formato de imagen soportado: JPEG, BMP,PNG.
Formato de audio soportado: MP3,AAC.
Formato de video soportado: MPEG-1 / M
Formato de texto soportado: txt.
N
indicándoselo
.
Funcionamien
1.
Reproducir / Pausa
rchivo seleccionado de una carpeta o realiza una pausa.
Empieza a reproducir el a
2.
Parar
Detener la reproducción de películas.
3.
/ Retroceso Rápido / Avance rápido
ad de rebobinado 2/4/8/16.
Retroceso rápido: Hay 4 niveles de velocid
Avance rápido: Hay 4 niveles de velocidad de avance rápido 2/4/8/16.
4.
/ Anterior/Siguiente
Usted puede seleccionar los archivos deseados de forma manual en condiciones
modo de repetición.
ompleto.
acia arriba y hacia abajo.
para ampliar la imagen.
normales
.
5.
REPEAT
Seleccione el
Repetición de una pista
Repetición del archivo c
Sin repetición.
Cambia la página h
7. ZOOM
Pulse
EXIT
ENTER
39
【w】/【x】
6.
Page 41

Operación TELETEXTO
40
Mostrar teletexto
1.
2.Pulse
para entrar en el modo de teletexto.
1.
【 】/【 】
anterior o siguiente
Mantener
Pulse
Ampliar Texto
Revelar el modo
acertijos, etc) pulsando
paginado en un ciclo
1.Yon puede entrar en una
2.
3.
Botones de color (rojo, verde, amarillo, cian)
Seleccione una estación de televisión con una señal de teletexto.
3.Pulse
por 2 veces para entrar en el modo Mix, esta
función le permite
superponer la página de
teletexto sobre el programa de televisión.
4.Pulse
por 3 veces para volver o salir a la TV normal, el modo DTV.
Página de selección
Introduce el número de página (tres sdigit) utilizando los botones numéricos.
Si pulsa un número quivocado durante la entrada, usted debe completar el
número de tres dígitos y luego vuelva a introducir
el número de página correcto.
2.El
página.
Puede presionar
para mantener una página, y pulse de nuevo para liberar la página.
Índice
para entrar en la página principal directamente.
Cuando una página se muestra, se puede duplicar el tamaño del texto para hacerlo más
fácil de leer.
2.Pulse
1.Pulse
para agrandar la mitad superior de la página.
3.Pulse
de nuevo para ampliar la mitad inferior de la página.
una vez más para volver a la pantalla normal.
Puede mostrar la información de teletexto oculto (por ejemplo, respuesta a puzzles o
. Presione
de nuevo para eliminar la información de pantalla
Subpágina
Algunos de teletexto puede contener varias sub-páginas que son automáticamente
determinado por la estación de televisión.
página de determinados subsectores pulsando el botón
SUBTITLE directamente y seleccionar el
número de página con los botones de
número. Introduzca el número de sub-página (por ejemplo, 0003) para la
sub-página tercero.
Pulse el botón de nuevo para salir del modo de sub-página.
Pulse el botón para volver al modo de televisión normal.
Pulse estos botones para acceder directamente a las páginas correspondientes de
color
aparece en la parte inferior de la pantalla de teletexto.
y el panel de teclas CH + / CH- se puede utilizar para seleccionar el
Page 42
S olución de Problemas
icio Técnico, realice las siguientes
l Servicio
OTA: Este problema es solo en modo VGA.
POSIBLE SOLUCIÓN
No hay sonido ni
-
Compruebe que el rrectamente al
Imagen normal pero no
la transmisión
.
El control remoto no
R del
amente
.
El aparato se apaga de
a
Imagen aparece
entiza durante el
No hay color o imagen
y el VCR.
n.
Se ven barras
hori les
o
M
antena. Conecte otro cable.
en la
antena).
N
ra de
.
e no esté flojo.
vertical o rayas
juste la resolución de la pantalla.
C
deo para PC.
Antes de llamar a un técnico o al Serv
comprobaciones. Si el problema persiste, desenchufe el TV LCD y avise a
Técnico oficial
.
PROBLEMA
TV LCD esté conectado co
enchufe
.
-
Compruebe si ha pulsado el botón POWER en el frente del
imagen
televisor
.
-
.
Compruebe el contraste de la imagen y los ajustes de brillo
-
Compruebe el volumen
.
lsado el botón MUTE
.
Compruebe que no ha pu
-
Pruebe con otro canal, el problema puede ser de
-
hay sonido
Compruebe que los cables de audio estén correctamente
-
conectados.
- C
Apunte correctamente con el Control Remoto al sensor I
TV LCD
.
-
Evite objetos entre el TVLCD y el control remoto
.
funciona
Compruebe que las baterías se han instalado correct
-
-
Instale baterías nuevas
-
ebe que no tiene Compru encendida la función de apagado
automático.
-
Compruebe la configuración de control de potencia. Potenci
repente
interrumpida
.
-
.
No hay difusión en la emisora sintonizada
-
Esto es normal, la imagen se congela o se ral
inicio del producto. proceso de
Póngase en contacto con su centro de servicio si la imagen no ha lentamente
aparecido después de la conexión de cinco minutos.
-
Ajustar el color en el menú.
iciente entre el producto
-
Mantenga una distancia suf
-
Pruebe con otro canal, el problema puede ser con la transmisió
pobre
¿Están los cables de vídeo instalados correctamente?
agen.
-
- Activar la función de cualquier restaurar el brillo de la im
- Compruebe si hay interferencias locales, tales como un aparat
nzontales/vertica
o la imagen parpadea
eléctrico o herramientas eléctricas.
- Compruebe el estado del cable de
- La señal es demasiado débil, reorientar la antena para recibir
ala recepción en
mejor la señal de la estación.
algunos canales
Líneas o rayas
- Compruebe las fuentes de interferencia posible .
- Compruebe la antena (Cambiar la dirección de la
imagen
o hay sonido en uno
- Ajuste el balance del audio en la opción de menú.
de los altavoces
La señal está fue
- Ajustar la resolución, frecuencia horizontal/vertical
- Compruebe que el cable de señal si está conectado o qu
rango.
Barra
- Compruebe la fuente de entrada.
- Ajuste el TV en modo de fábrica. A
Ruido horizontal y
posición incorrecta.
- Compruebe el cable de señal.
individual.
olor inestable o
- Vuelva a instalar la tarjeta de ví
N
41
Page 43
Mantenimiento
Para prevenir posibles a verías o fallos en el aparato, se recomienda una limpieza
se
paño con agua tibia y un poco de detergente o
e esta
agua. Deje secar la pantalla
, no utilice un paño húmedo, simplemente con un paño
arato.
cer un largo periodo de tiempo fuera de casa, por favor no
n el
- No cu parato y evite situarlo en lugares
aparato, tales como velas, estufas,
deseche las baterías con la basura corriente. Proceda a su correcta
o en zonas donde la humedad sea muy elevado;
e que no haya
ara pder
para su correcta
Eliminación de los aparatos eléctricos
bre residuos de aparatos eléctricos y
d
bolo en el producto le recuerda su obligación,
or
jo.
regular del aparato y evite lugares con excesivo nivel de suciedad o polvo. Asegúre
de desconectar el aparato cuando baya a limpiar para evitar descargas eléctricas.
Limpieza de la pantalla
1. Humedezca ligeramente un
suavizante, luego escurra bien el paño hasta que quede prácticamente seco. D
forma evitará que se le llene de polvo por un tiempo.
2. Asegúrese de que en la pantalla no haya exceso de
correctamente antes de encender el TV.
Limpieza de la caja
Para eliminar el polvo
completamente seco y que no suelte pelusas, retire el polvo de la carcasa del ap
Ausencia prolongada
Si va a permane
olvide desconectar el aparato de la corriente eléctrica para prevenir daños e
aparato debido a posibles subidas de tensión o tormentas eléctricas, incl
uso
incendios debido a cortocircuitos.
bra los orificios de ventilación del a
excesivamente cerrados o con poca ventilación;
- No coloque fuentes de calor externas cerca del
chimeneas…
- Por favor no
eliminación en centros de reciclaje o contenedor específico. Ayude a conservar el
Medio Ambiente.
- No use el aparat
- El aparato no debe ser expuesto a goteos o salpicaduras, y cuide d
objetos que contengan líquidos, como jarrones, floreros… cerca del aparato.
- Intente que el enchufe al que está conectado el aparato sea de fácil acceso p
desconectar el aparato con facilidad de la corriente eléctrica.
Mantenga las distancias mínimas (5 cm) alrededor del aparato
ventilación.
La directiva europea 2002/96/CE so
electrónicos (RAEE), exige que los aparatos eléctricos del hogar no deban
ser eliminados junto con los residuos normales urbanos. Los aparatos viejos
deben ser recogidos por separado a fin de optimizar la recuperación y el
reciclado de los materiales que contienen y reducir el impacto sobre la salu
humana y el medio ambiente
.
El tachado "de ruedas bin" sím
que al disponer del aparato, este debe ser desechado por separado
.
Los consumidores deben contactar con la autoridad local o distribuid
para información sobre la correcta eliminación de su electrodoméstico vie
42
Page 44

 Loading...