

Page 1
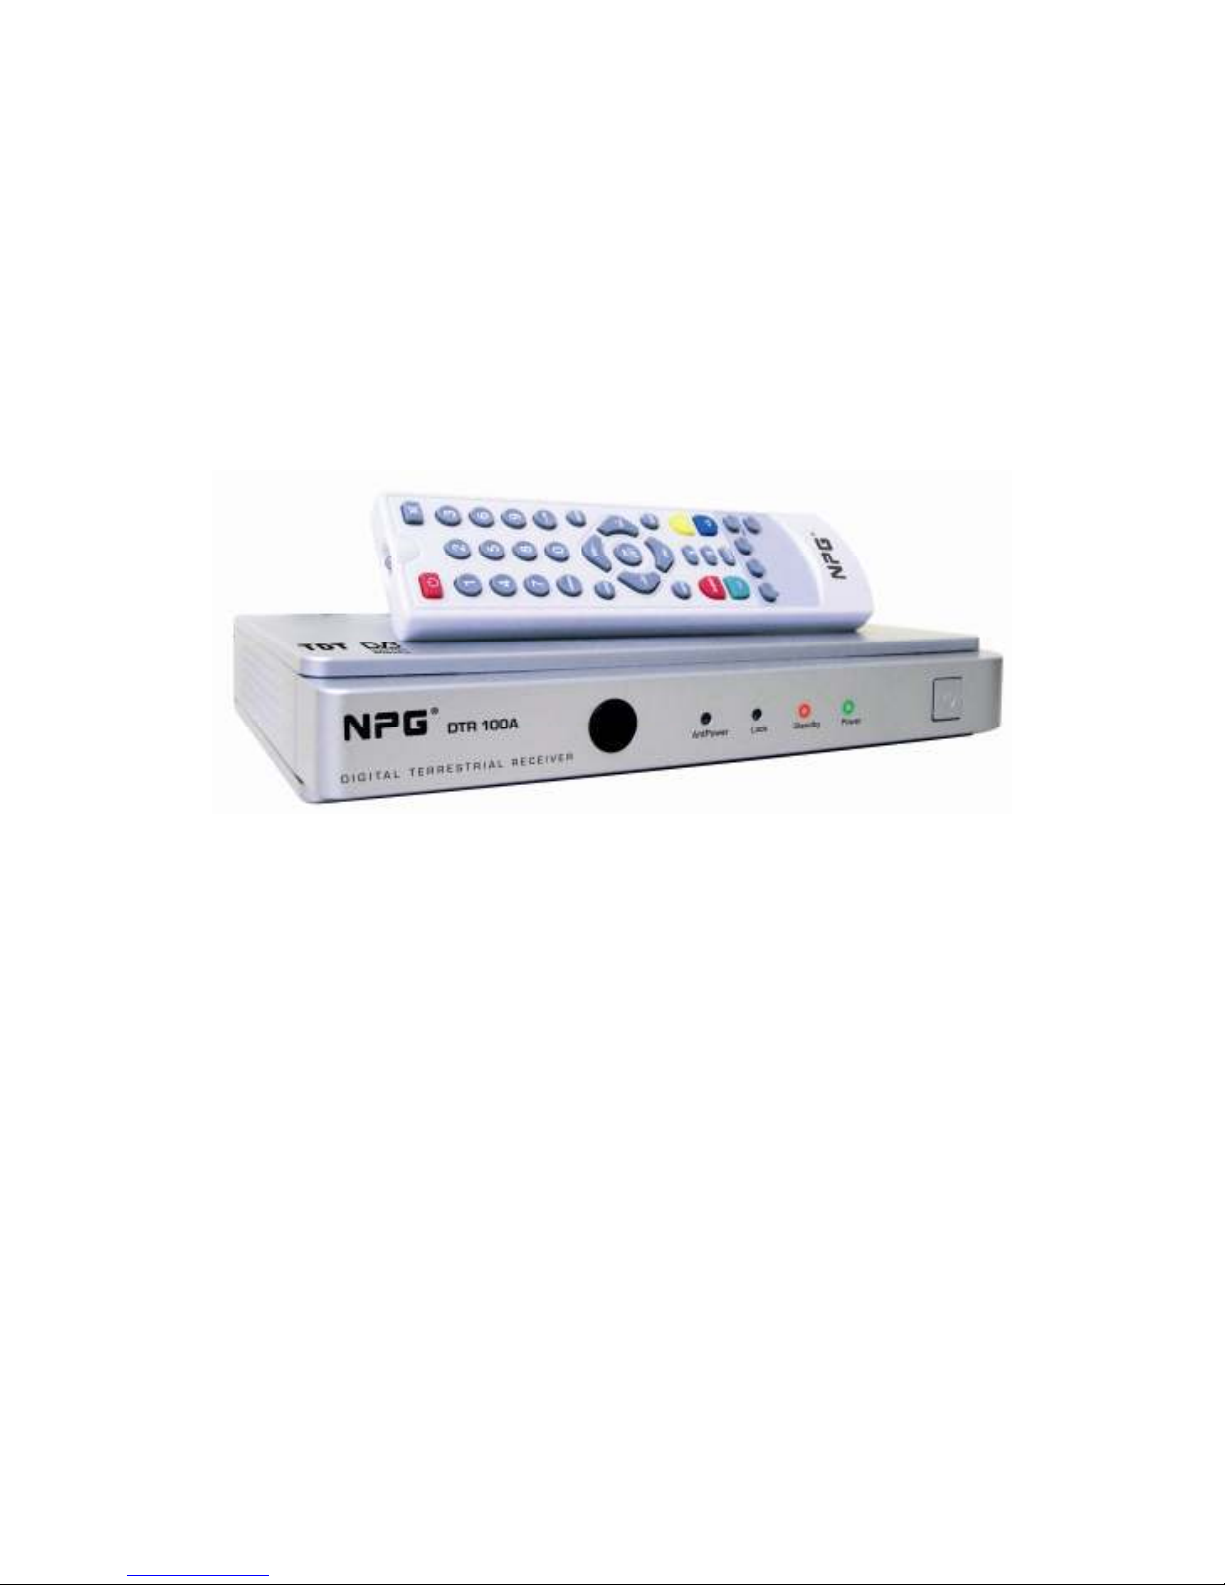
User’s Guide.
English
.
Page 2

2
CONTENTS
General information
Main features
For your safety
Unpacking
General operation
RCU
Rear panel
Installation
Welcome Page
Main menu
1. Channel
1.1. TV Channel list.
1.2. Radio channel list.
1.3. Delete all favourites.
1.4. Delete all.
1.5. Rename group.
2. Installation.
2.1. Auto scan
2.2. Channel scan.
2.3. Tuner setting.
3. Setup.
3.1. OSD language.
3.2. TV setting.
3.3. Region and time.
3.4. Timer setting.
3.5. OSD setting.
3.6. Parental lock.
4. Tools.
4.1. Receiver information.
4.2. Game.
4.3. Local factory default.
4.4. Software upgrade.
5. Hot key.
5.1. Number.
5.2. TV/Radio.
5.3. Up/Down (Channel).
5.4. Left/Right. (Volume +/-).
5.5. Mute.
5.6. Pause.
5.7. Teletext
5.8. OK.
5.9. Audio.
5.10. Recall.
5.11. Info.
5.12. FAV.
5.13. Multi-picture.
Troubleshooting.
Page 3

3
GENERAL INFORMATION
This digital terrestrial receiver (DTR) will take you to the new and exciting
world of crystal clear widescreen pictures, digital sound, more information and
new services. All this and more on “Free to air” digital TV.
To make full use of your new DTR please take the time to familiarize
yourself with the extensive features of the unit detailed in this User’s Guide.
If you need help in setting up please call your dealer or a customer
service adviser.
Main features
• MPEG-2 digital & fully DVB-T compliant.
• SCPC and MCPC receivable from C/Ku band satellite.
• Automatic PAL/NSTSC conversion.
• 1000 channels TV and radio programmable.
• 8 different favourites group selection.
• English, French, German, Portuguese, Italian, Spanish.
• Fully support to 7 days Electronic Program Guide (EPG).
• Picture in Graphics (PIG) support.
• 256 colour On Screen Display.
• Channel search in automatic, manual and network search.
• Various channel editing function (favourite, move, lock, skip, delete,
rename, find, sort).
• Parental control for channels.
• Software upgrades through RS232 port and receiver to receiver.
• Time set by GMT offset automatic and manual. DST support.
• 5 event timers (off, Once, Daily, Weekly, Monthly).
• Subtitle support DVB EN300743 and EBU.
• Teletext support DVB ETS300472 by VBI and OSD.
• Automatic save for last channel.
• Support Logic Channel Number (LCN).
• Active antenna power supply control.
Page 4
4
GENERAL INFORMATION
For your Safety.
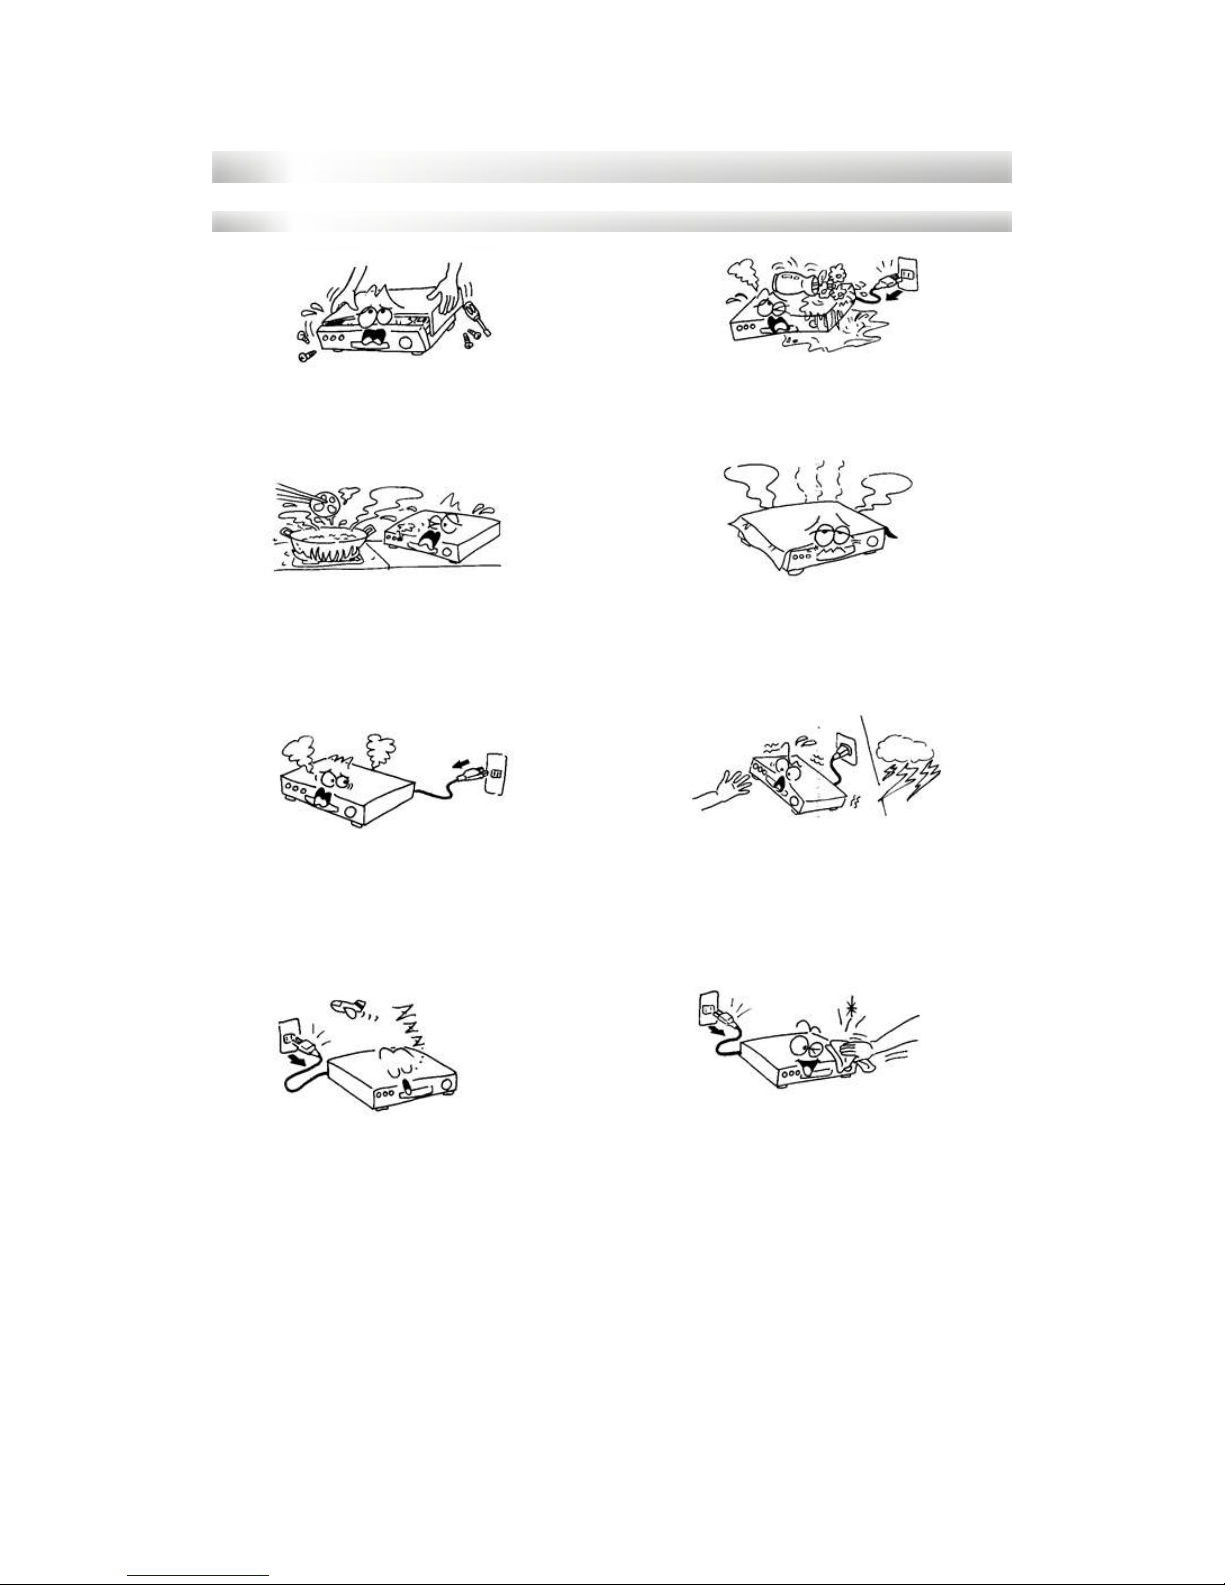
To avoid electric-shock hazards, do
not open the cabinet; refer servicing
to qualified personnel only.
Keep the receiver away from flower
vases, tubs, sinks, etc., in order to
avoid damaging the equipment.
Do not expose the receiver to direct
sunlight. Keep it away form heat
sources.
Do not block ventilation holes of the
receiver so that air can circulate
freely.
When an abnormal phenomenon
occurs, you should cut off the power
immediately.
Do not touch the receiver during
thunderstorm, since that might
create electric shock hazards.
Switch the receiver off whenever it
remains out of service for an
extended period.
Be sure to turn the receiver off and
disconnect the AC power cord
before cleaning the receiver surface.
If the surface is dirty, wipe clean
with a cloth which has been dipped
in a weak soap and water solution
and wrung out thoroughly, and wipe
again with a dry cloth.
Page 5
5
GENERAL INFORMATION
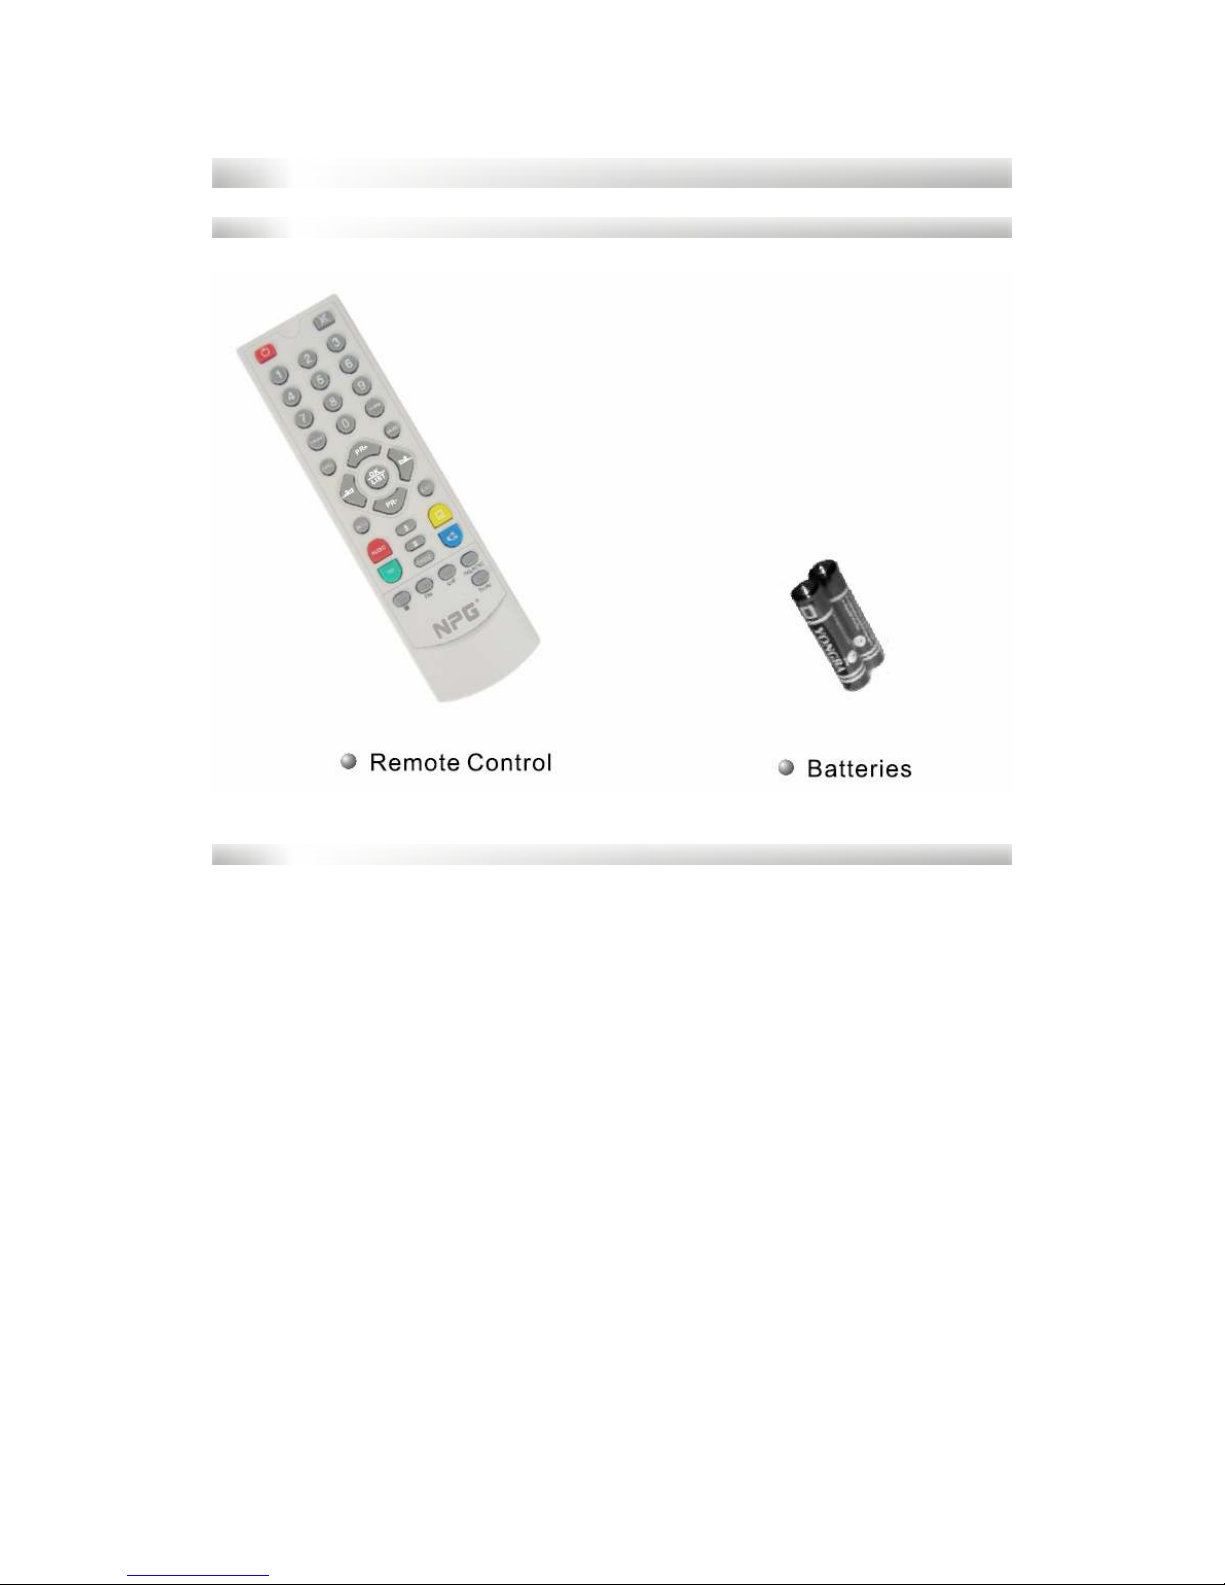
Unpacking
General operation.
• Throughout this manual you will notice that everyday operation of the
receiver is based on a series of user friendly on screen displays and
menus. These menus will help you to get the most from your receiver,
guiding you through installation, channel organizing, viewing and many
other functions.
• All functions can be carried out using the buttons on the RCU, and some
of the functions can also be carried out using the buttons on the frontal
panel.
• The receiver is easy to use, always at your command and adaptable for
future advances.
• Please be aware that new software may change the functionality of the
receiver.
• Should you experience any difficulties with the operation of your receiver,
please consult the relevant section of this manual, including the
troubleshooting, or alternatively call your dealer or a customer service
adviser.
Page 6
6
GENERAL INFORMATION
RCU
Key
Function
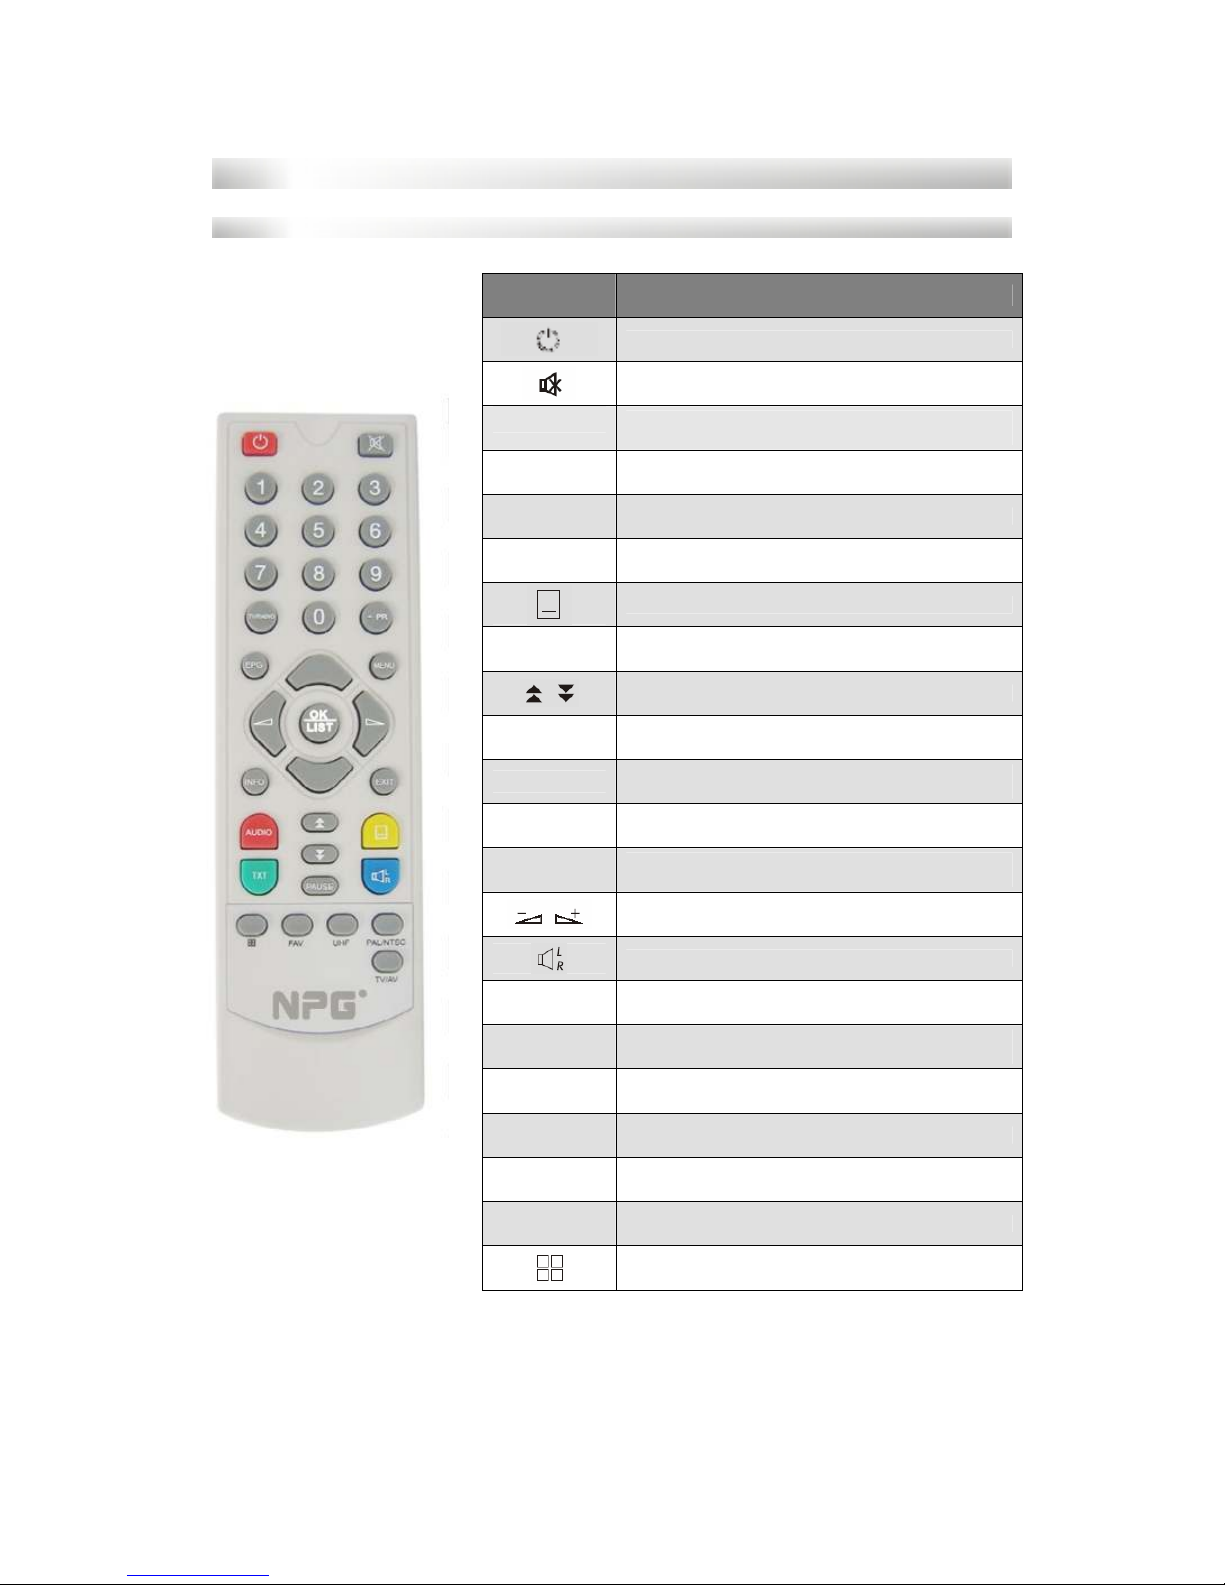
Turns power ON/OFF on the DTR.
When watching a program, mute the sound.
0-9
Enter number of the required menu item or select a
program number to watch.
TV/RADIO
Switches between TV and radio mode.
PR
Switches back to previous program.
FAV
Display the favourite program list.
Switches to subtitle mode.
AUDIO
Choose audio mode.
Moves up/down a page in the program list.
MENU
Press this key one time to run menu onscreen, and call
command box.
PR+, PR-
When watching a program, change programs or move to
the next higher or lower item in menu.
OK, LIST
Executes the selected item in the menu screen or enters
the desired value in input mode.
EXIT
Returns to previous menu on the menu screen or escape
from the menu.
When watching a program, adjust the volume or move to
the left or right item in the menu.
Selects the different audio modes.
EPG
Calls up the EPG (Electronic Program Guide)
PAUSE
Press once to pause the screen picture, press once again
to go to normal mode.
TV/AV
Switches between TV and AV modes.
TXT
Switches to teletext mode.
UHF
No function.
PAL/NTSC
Switches between PAL and NSTC mode
Enter into nine-picture mode display on the screen.
Page 7
7
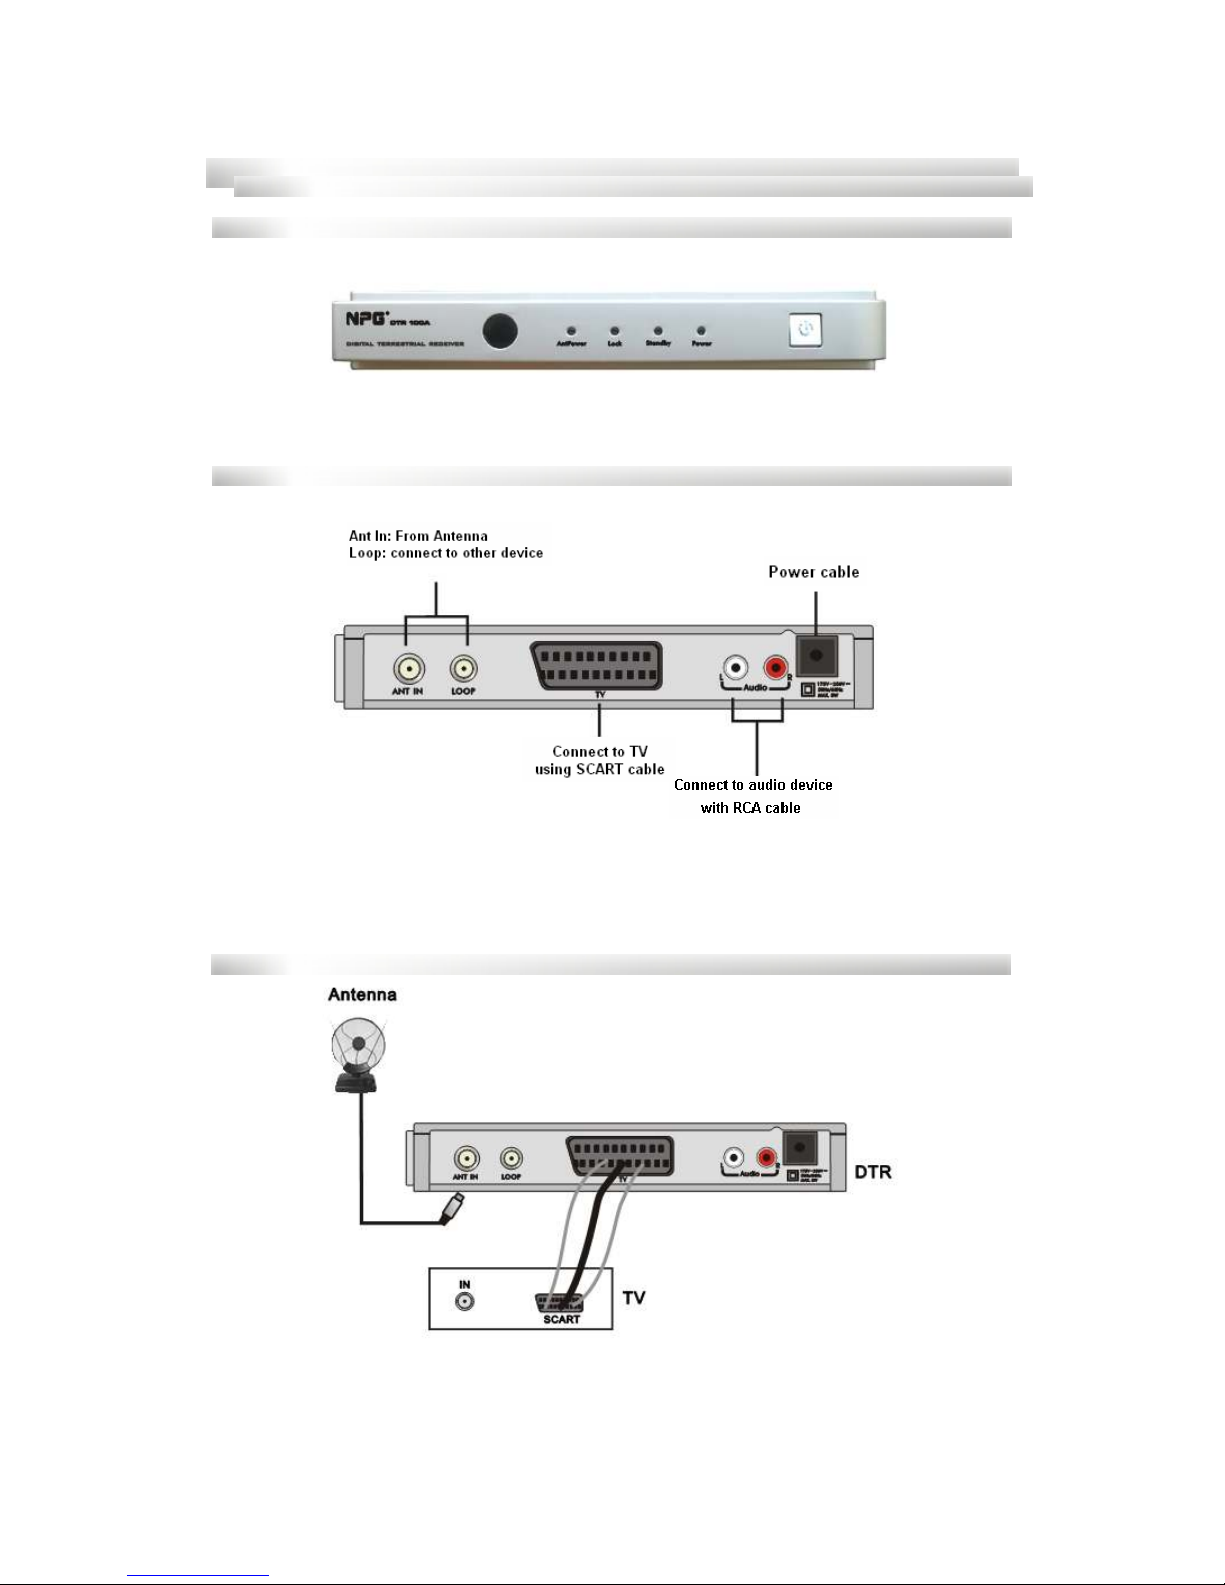
INSTALLATION
Front panel
Rear panel
Connecting to TV using SCART support
Page 8
8
WELCOME PAGE
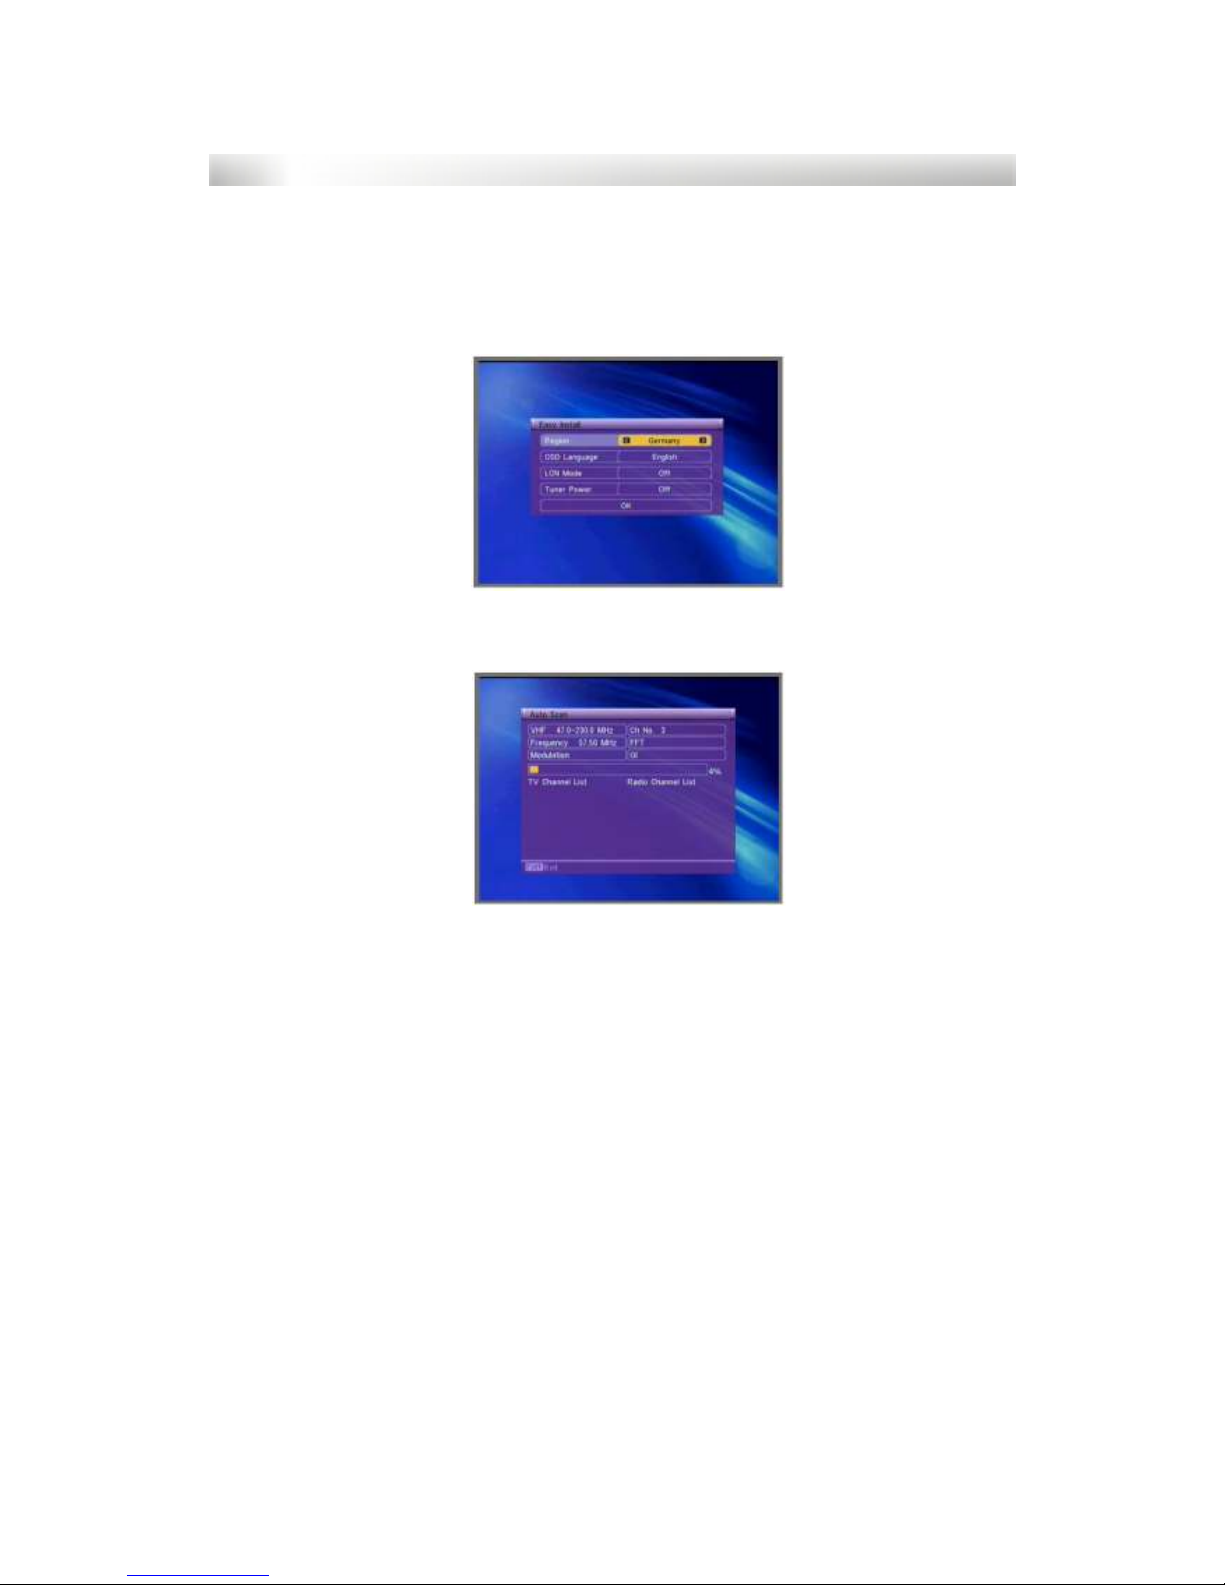
• When powered on for the first time, it will show a welcome page like
shown below. Press [up/down] Key to move highlighted selection and
choose your option.
• Press [left/right] key to move selection to choose Region, LCN mode,
Tuner power and OSD language.
• Move selection to [OK] option and press [enter] key to enter “Auto scan”
menu.
• Press [EXIT] key to exit this menu.
Page 9
9
MAIN MENU
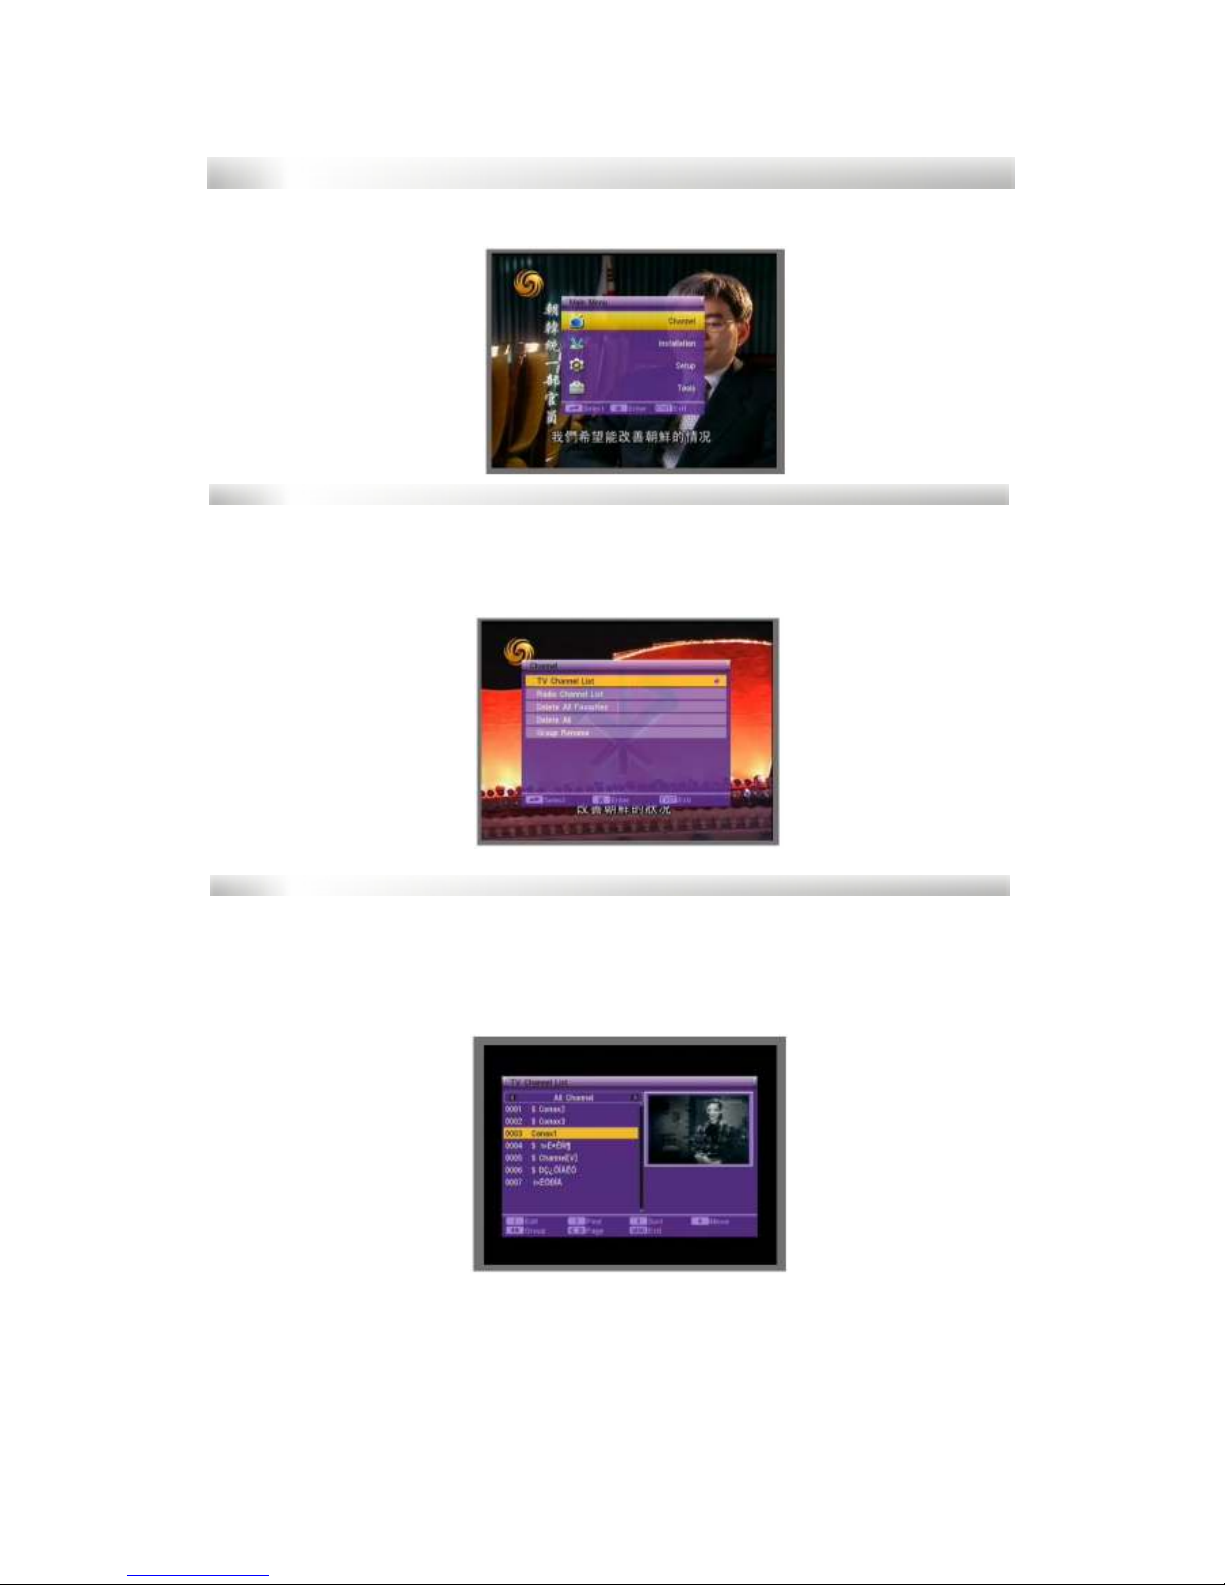
When you press [MENU] key, you can enter the Main Menu. This menu
consists of four major sub-menus as shown below.
- Channel
- Installation
- Setup
- Tools
1. Channel
Move selection to channel item and press [OK] key to enter channel menu as
shown below.
This menu has five sub-menus such: TV channel list, Radio channel list, Delete
all favourites, Delete all, Group rename.
1.1 TV Channel list
When you enter “Channel list” menu, the screen will display as shown below.
You can move selection by pressing [Up/Down] key and preview the highlighted
program in the preview window beside the channel list.
You can press [Page up/Page down] key to use the page up or page down
function.
You can press [OK] key or [EXIT] key to enter full screen mode.
Press number keys [0]-[4] to carry out the corresponding functions that are
shown at the bottom of screen.
Page 10
10
MAIN MENU
1.1.1 Edit.
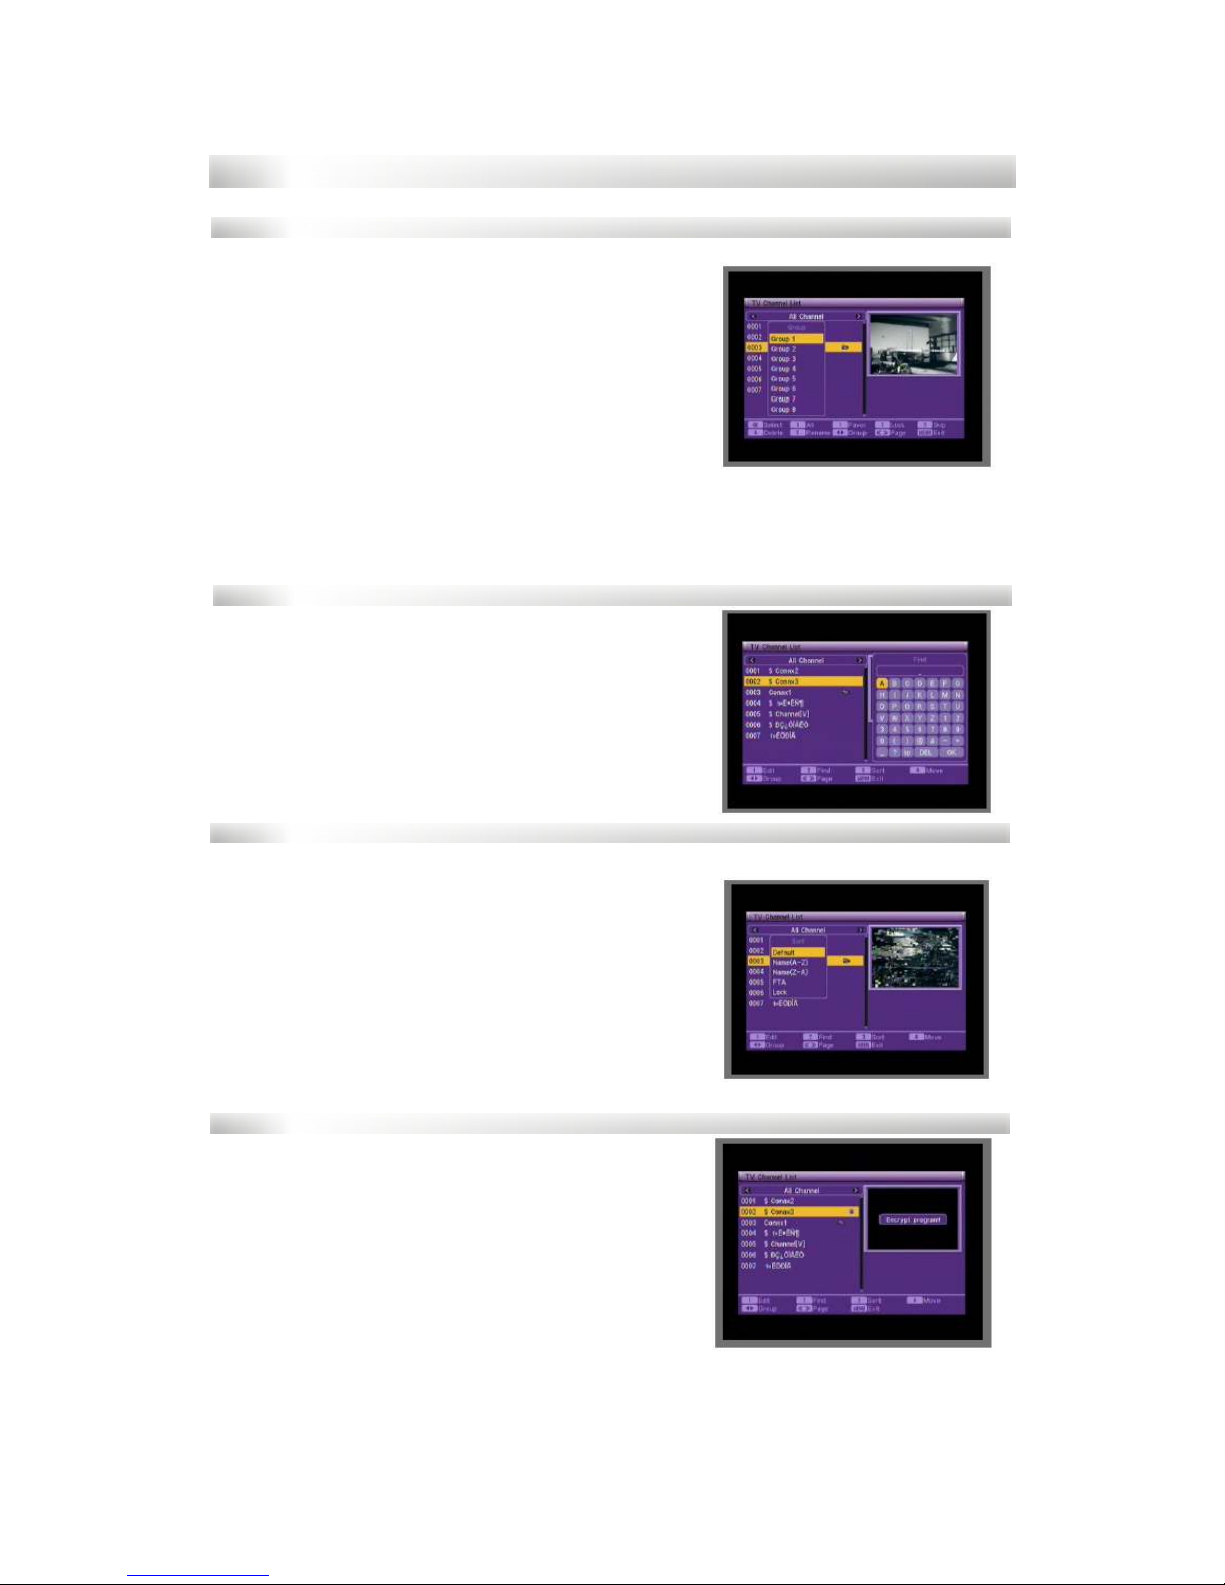
Pressing number key [1] pops up the edit dropdown list.
Pressing [Up/Down] key to move the selection
up and down. You can choose from Group1 to
Group 8.
Pressing [OK] key will pop up a dialogue to ask
whether to assign the channel to the group or
not.
Press [Ok] key at the Yes button to assign the
channel, or press [EXIT] key to cancel the operation.
1.1.2 Find.
Pressing number key [2] will enter Find window.
Pressing [Up/Down] key or [Left/Right] key to
choose the letter in right window.
Move selection to [OK] button and press to find
the channel you want.
1.1.3 Sort.
Pressing number [3] key will pop up the sort
drop-down list.
Name (A-Z): The ascending order, omitting the $
character, numbers first, then capital letters, then
lowercase letters.
Name (Z-A): The opposite of the above order.
Free/Scramble: All FTA programs are listed first,
while all scrambled programs are listed last.
Lock: all locked programs are listed last.
1.1.4 Move
Pressing number [4] key, a moving mark will
appear on the right of the selected channel.
Then, you can move the selected channel to the
position where you want to place it by press
[Up/Down] key. Press [OK] to confirm your
decision.
Page 11
11
MAIN MENU
2. Radio channel list.
Basically, the operation of “Radio Channel List” is the same as “TC Channel
List”. But there is only one difference: In “Radio Channel List” mode, there is no
video information, so it always displays the Radio’s logo in the preview window.
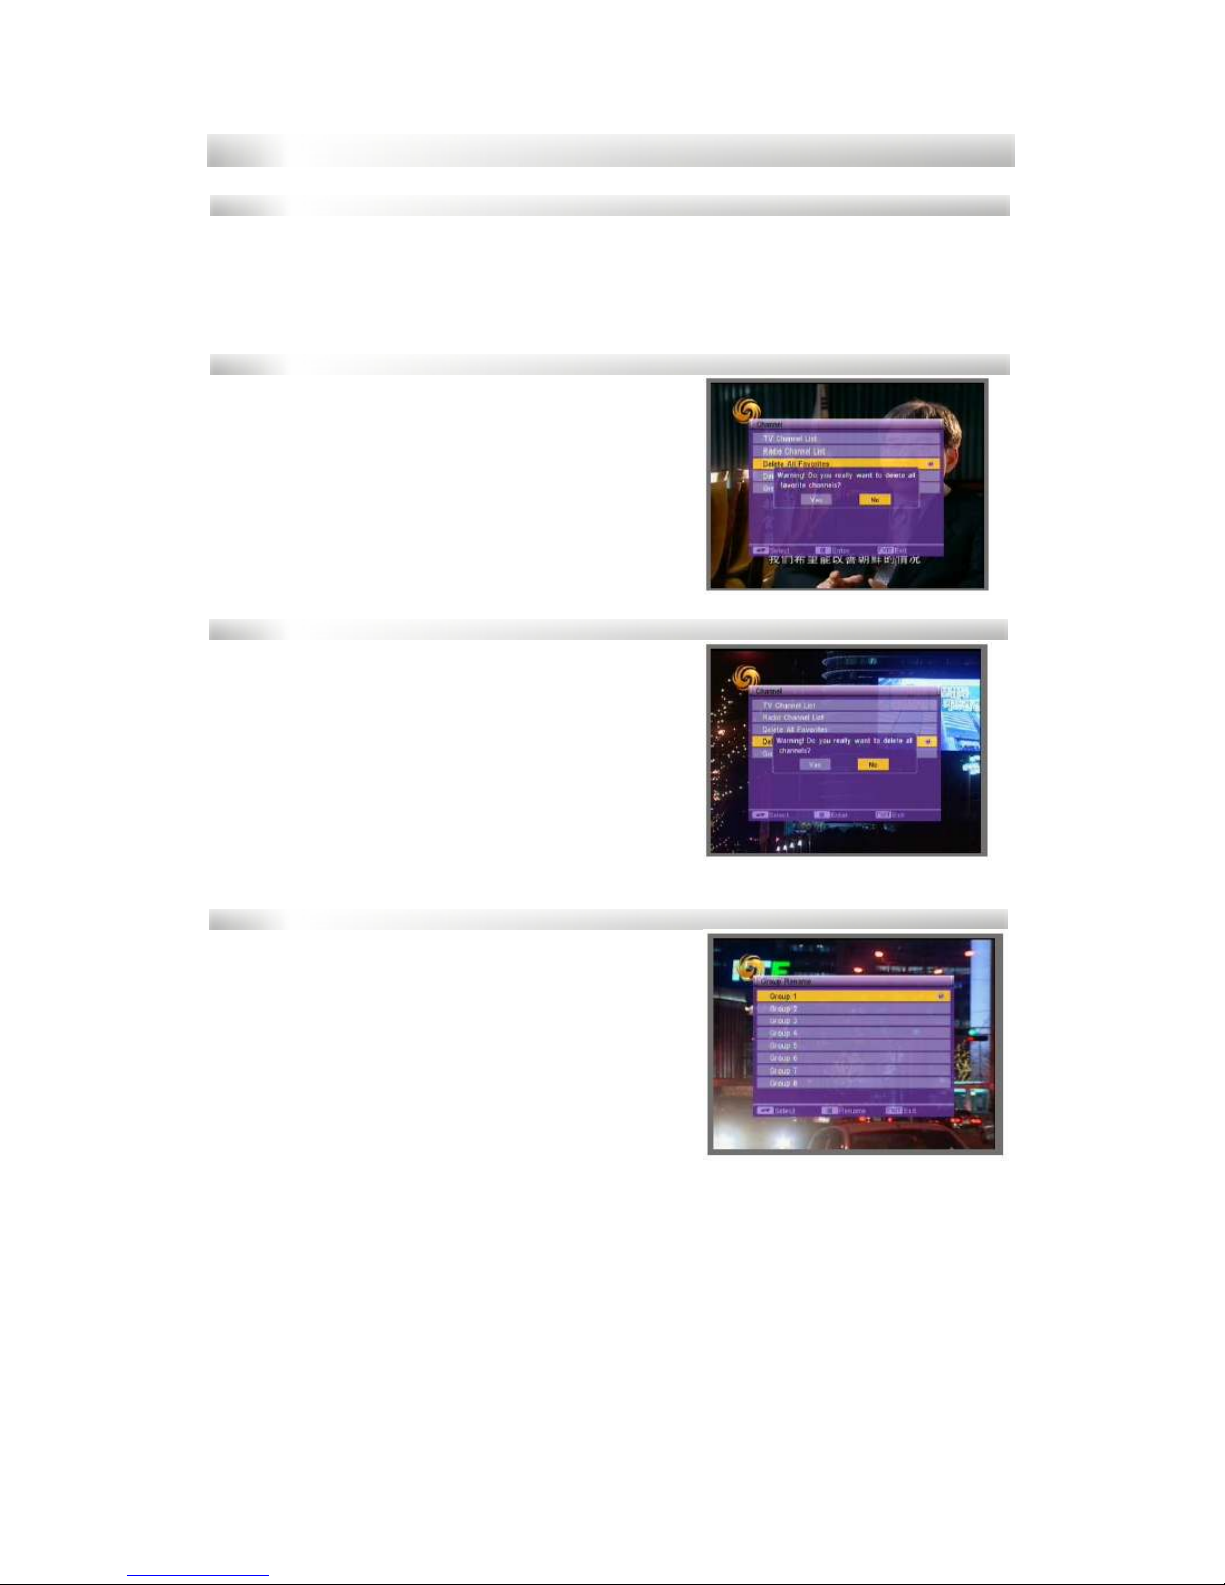
2.1 Delete all favourites
When you move selection to this option and
press [OK] key, a message box will appear and
ask you to choose yes or no.
If you choose yes, it will remove all the
favourite channels (include TV and Radio
favourite channels) from the favourite list.
2.2 Delete all.
When you move selection to this option and
press [OK] key, the “Input password” dialogue
will pop up: You can not enter into this menu
unless the correct password is inputted. The
default password is “0000”.
This operation is the same as 1.3, but it will
delete all the channels including TV channels
and Radio channels.
2.3 Group Rename.
When you enter “Group rename” menu, the
screen will display as below.
Press [Up/Down] keys to move the selection up
and down.
Press [OK] key to enter Group Rename
window.
The operation is the same as 1.1.2: Find, here
we will not explain it any further.
Page 12
12
MAIN MENU
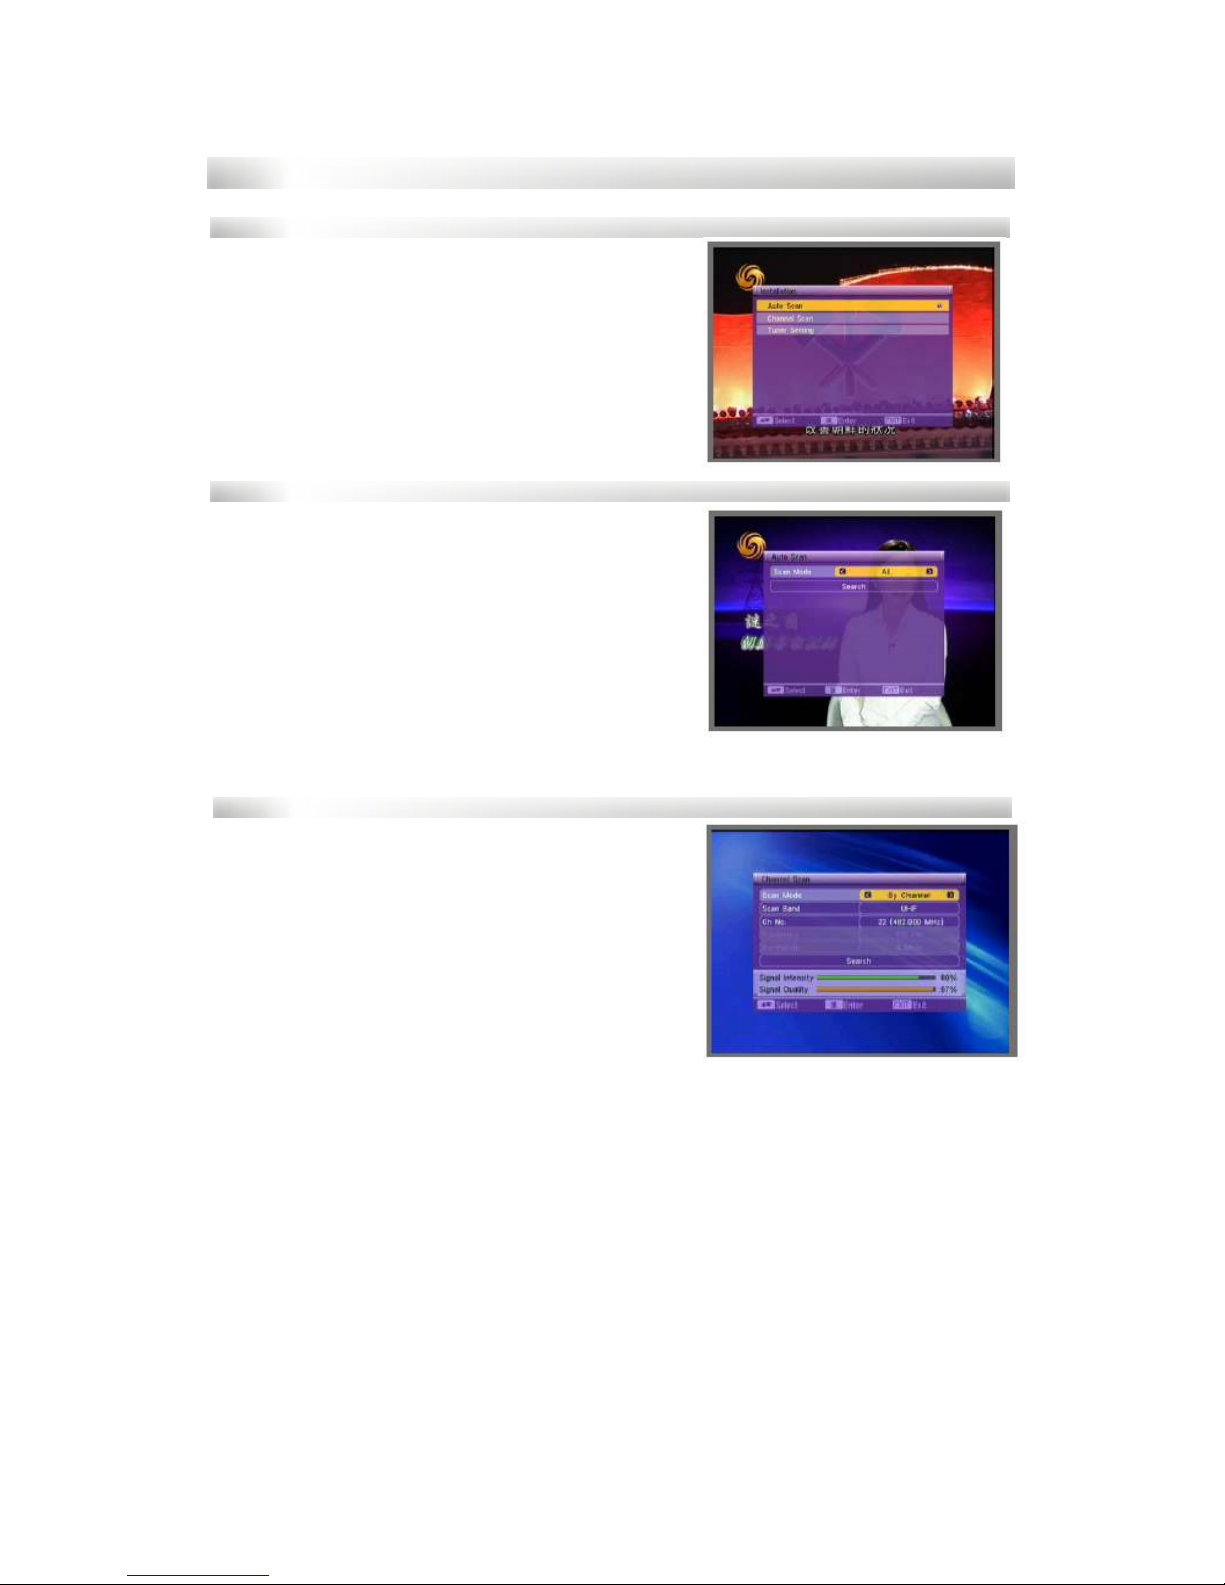
3. Installation.
When you enter Installation menu, the screen
will display as shown beside.
In this menu, you can press [Up/Down] key to
select sub-menus and press [OK] key to enter
the chosen menu.
2.1 Auto Scan.
When you enter Auto scan menu, the screen
will display as shown beside.
In Scan Mode item, press [Left/Right] key to
choose Scan all the channels or just Scan free
channels.
Move the selection to the search option, and
press [OK] key to start scanning.
Press [EXIT] key to exit this menu.
2.2 Channel Scan.
When you enter Channel Scan, the screen will
display as beside.
There are two scan modes for you. You can
choose to scan by channel or by frequency.
When you complete you configure, move
highlight to the search option, and press [OK]
key to start scanning.
Press [EXIT] key to exit the scanning and save
the current parameters.
Page 13
13
MAIN MENU
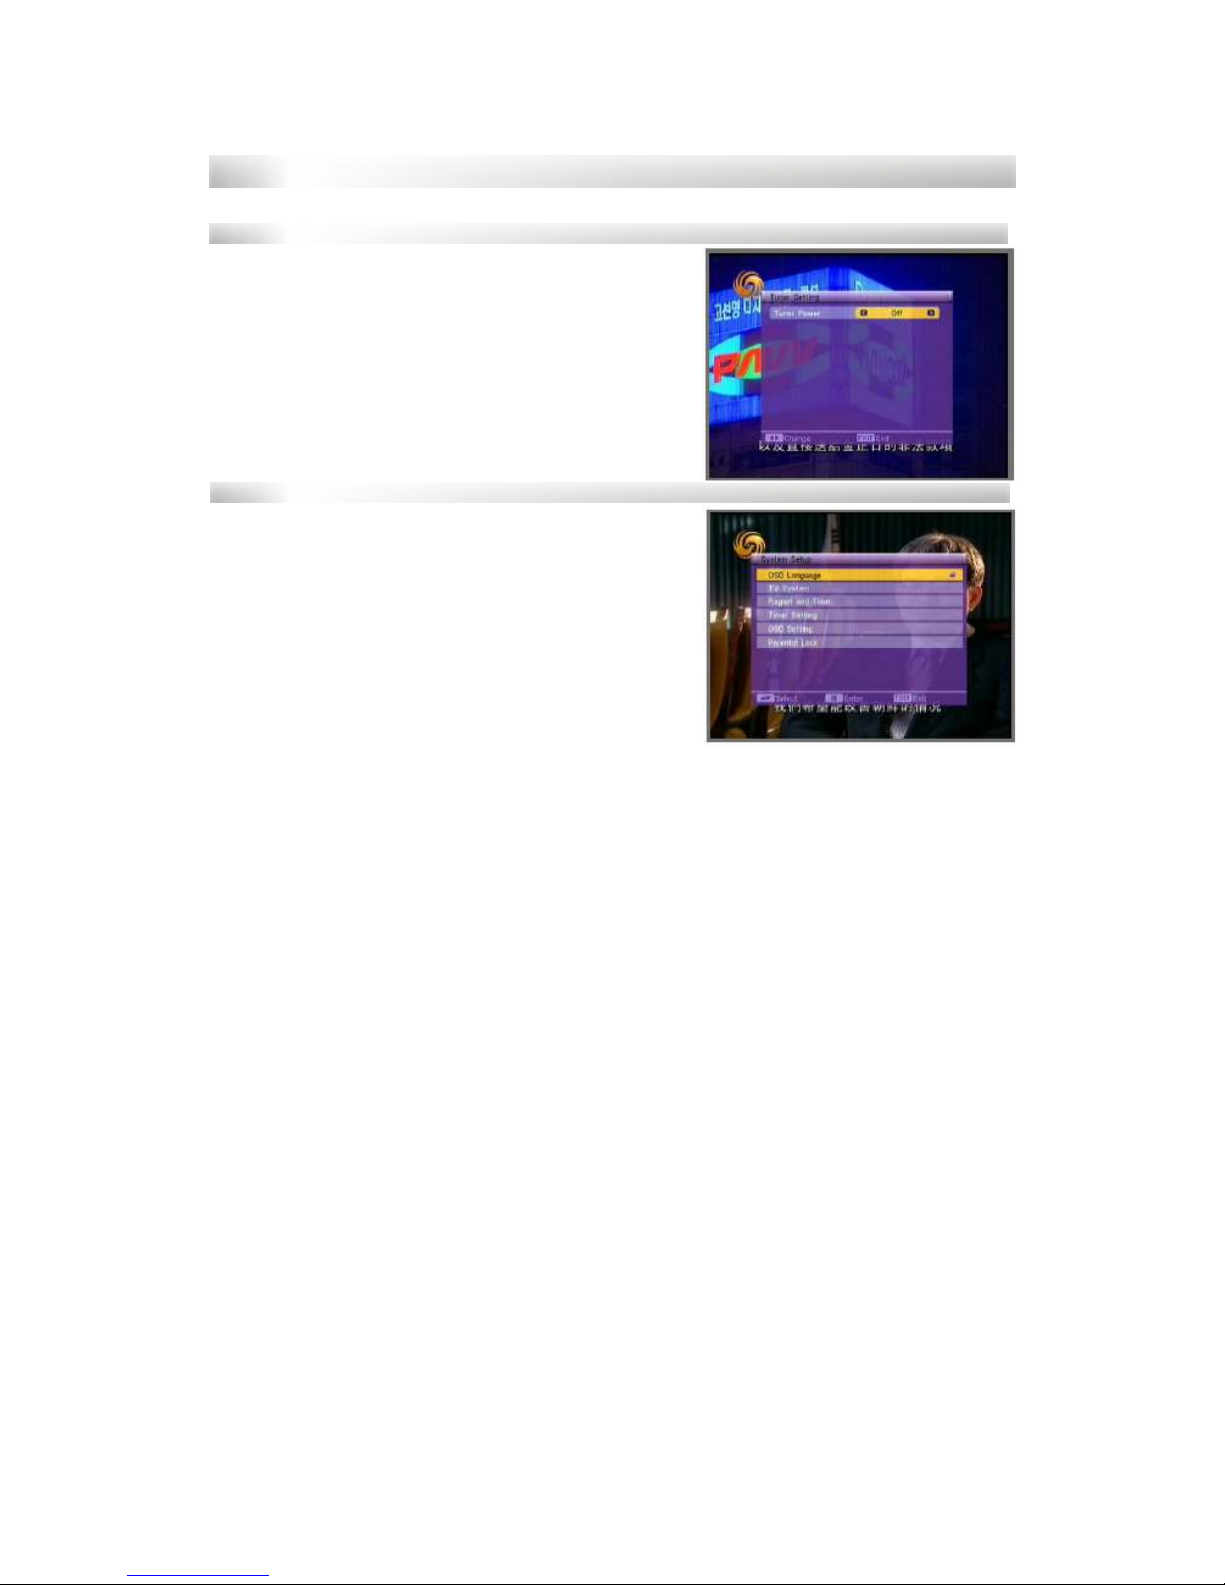
2.3 Tuner Setting.
When you enter Tuner Setting, the screen will
display as beside.
In Tuner Power item, press [Left/Right] key to
choose off or on.
2.4 Setup.
When you enter System Setup Menu, you will
see the screen like below.
It contains six sub-menus such as: OSD,
Language, TV System, Region and Time,
Timer Setting, OSD Setting and Parental Lock.
Press [Up/Down] key to select menu among all
the items.
Press [OK] key to enter the selected item.
Page 14
14
MAIN MENU
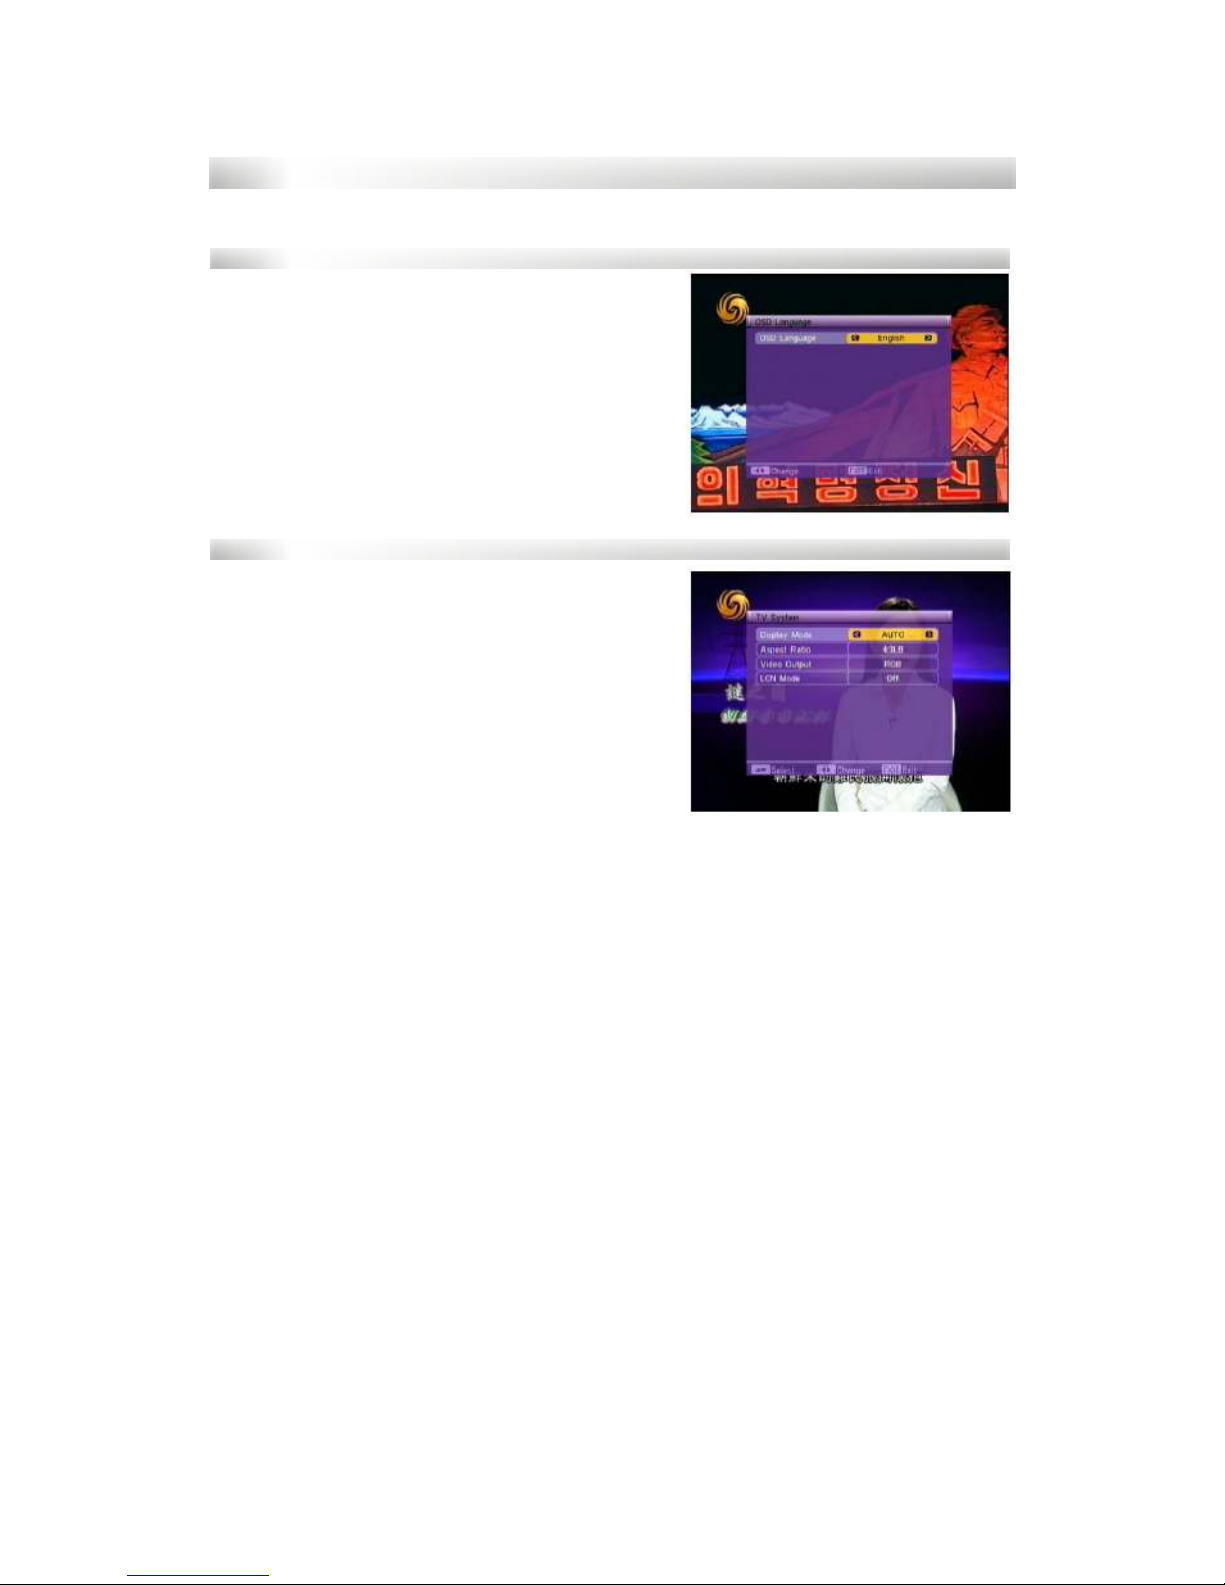
3.1 OSD Language.
When you enter OSD Language, the screen
will display as shown beside.
You can press [Left/Right] key to choose
OSD Language.
3.2 TV System.
When you enter TV System, you will see the
screen as shown beside.
1) Display mode is used for selected
screen-displaying mode. We provide
three display modes that are Auto,
PAL and NSTSC. You can press
[Left/Right] key to select each mode.
2) Aspect Ratio is used for switching the
screen aspect ratio mode. We provide
several options: 4:3LB, 4:3PS, 16:9.
You can press [Left/Right] key to select each mode.
3) Video Output is used for switching the video mode. We provide two
modes: Svideo and RGB. You can press [Left/Right] key to choose.
4) LCN Mode can control the whether the channels are sorted by the
sequence information in streams. You should press [Left/Right] key to
choose between on and off.
Page 15
15
MAIN MENU
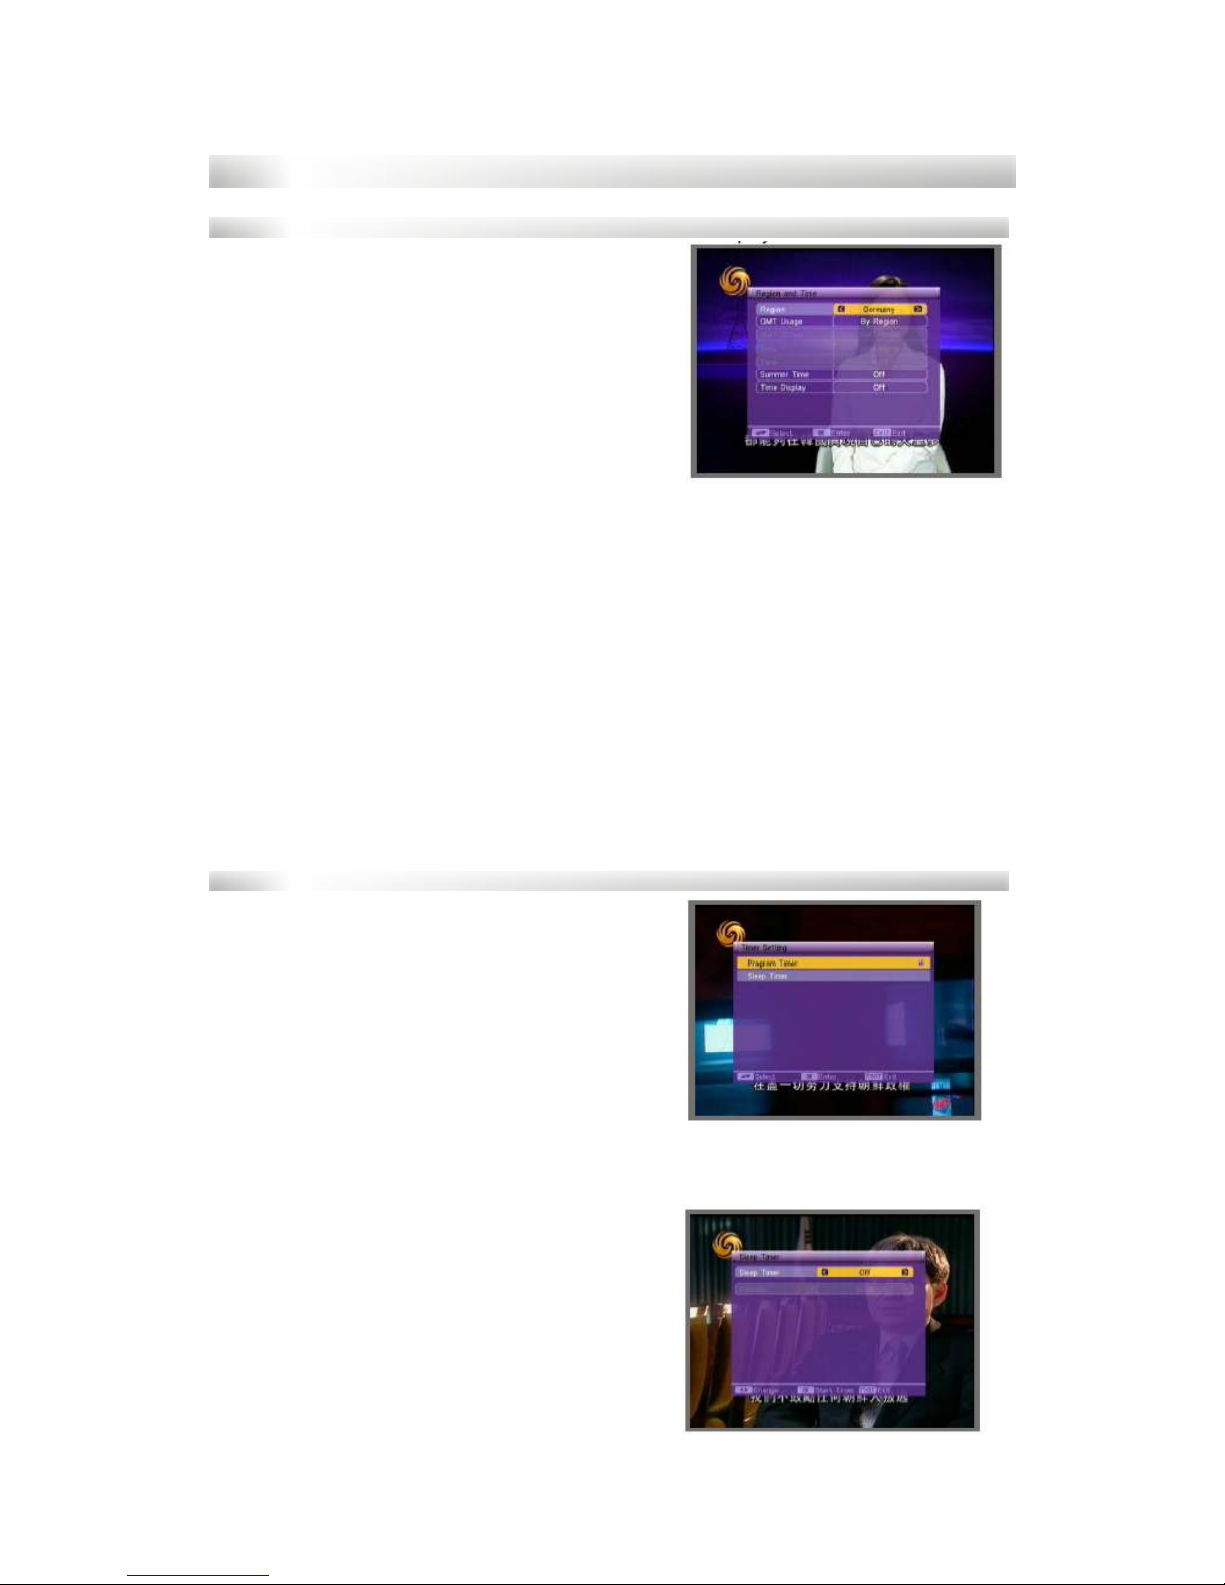
3.3 Region and Time
When you enter Region and Time, the screen
will display as shown beside.
1) Region: You can press [Left/Right] key
to choose the country which you are in
by the option of region.
2) GMT Usage: This option is used to
open the usage of GMT. You can
press [Left/Right] key to switch
between “Off/User Define/by Region”.
3) GMT Offset: This option is able just
when the GMT usage mode is User Define. You can press [Left/Right]
key to change “GMT Offset” value, the range is “-12:00 to +12:00”,
increase each half hour progressively.
4) Date: This option is able just when GMT Usage mode is off. You can
press [OK] key to begin setup. Then you can setup the date using the
number keys.
5) Time: The operation of this option is same as Date.
6) Summer Time: This option is able just when the GMT Usage mode is
Region. You can press [Left/Right] key to choose.
7) Time Display: The item can control whether the time will display on the
screen or not.
8) Exit: Press [EXIT] key to draw back from Time menu.
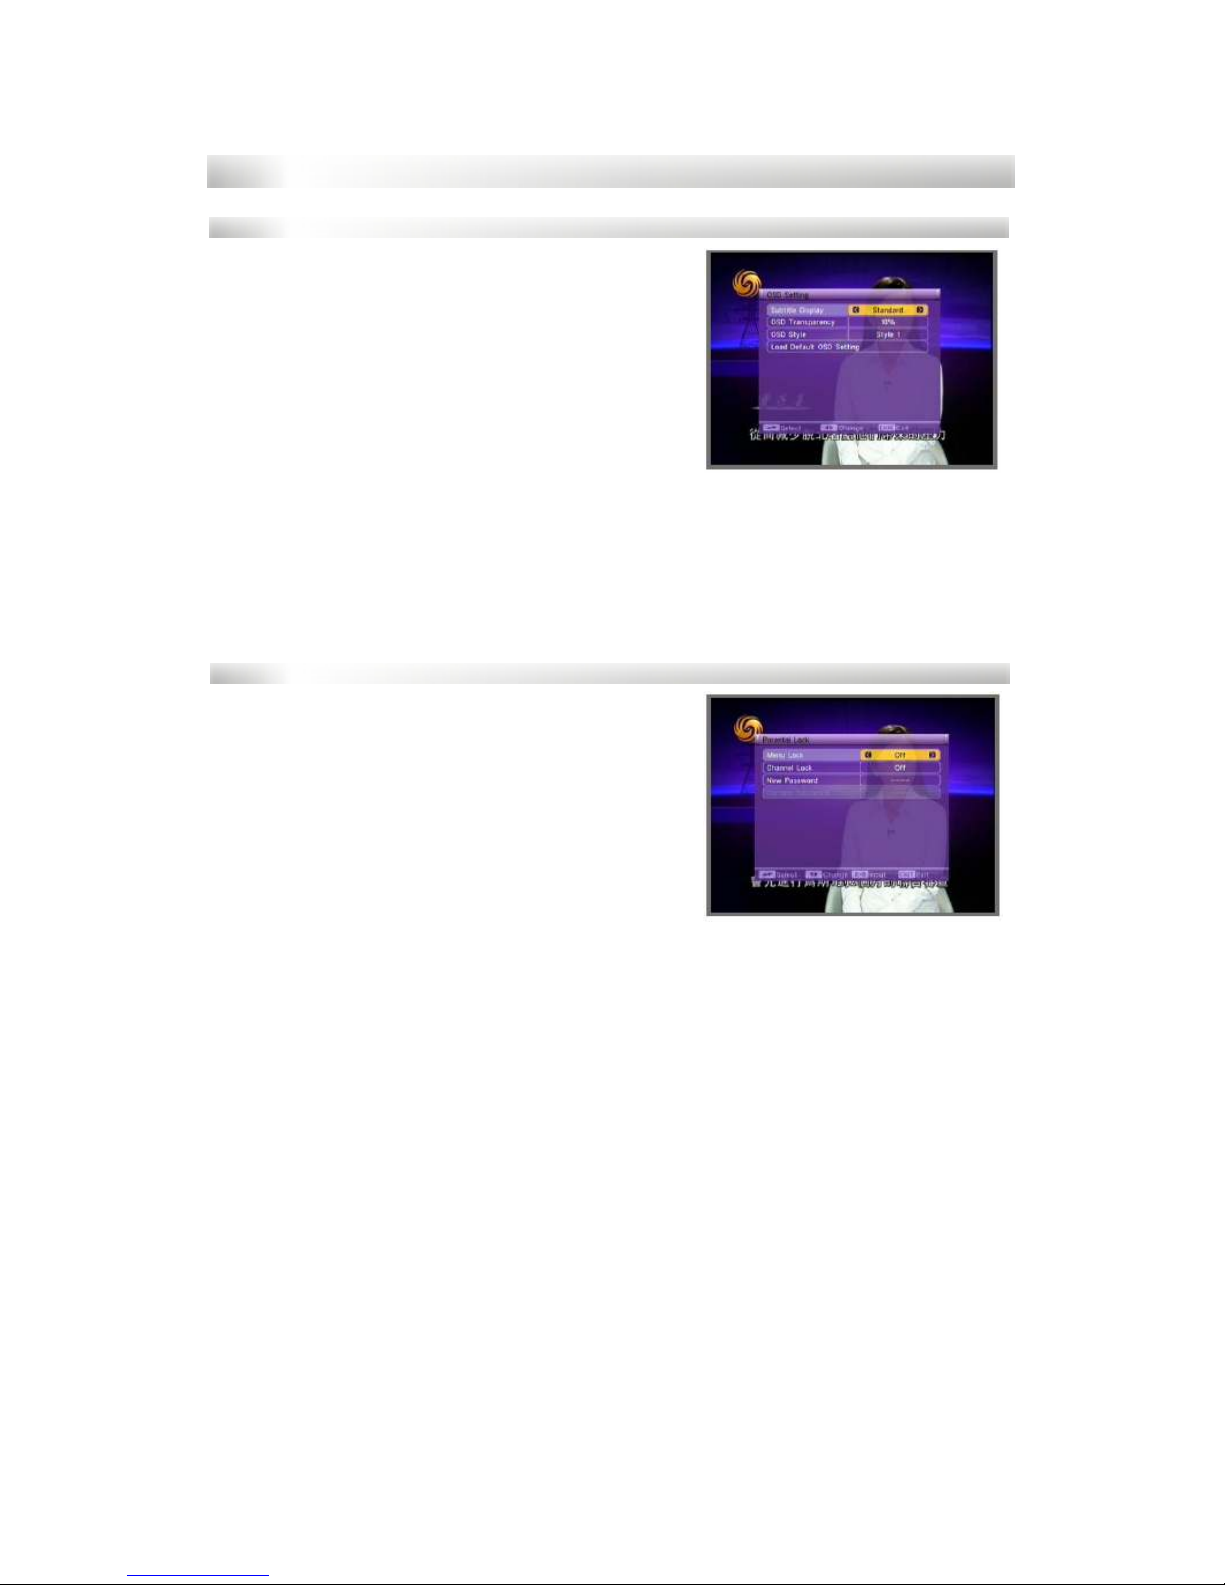
3.4 Timer Setting.
When you enter Timer Setting you will see
the screen as shown beside.
Press [Up/Down] key to select menu among
all the items.
Press [OK] key to enter the selected item.
Program Timer contains Timer number and
Timer Mode.
Timer Number: press [Left/Right] key, you
can select between 1 and 8.
Timer Mode: press [Left/Right] key, you can choose between on and off.
Sleep Timer can set the time when the
system will enter standby mode
automatically.
You can press [Left/Right] key to switch the
parameter presented in this item. Then press
the [OK] key to active it.
After you active it, the option of remain will
show you the remaining time. This option is
only used to display, but not to be modified.
Press [EXIT] key to exit the current, menu.
Page 16
16
MAIN MENU
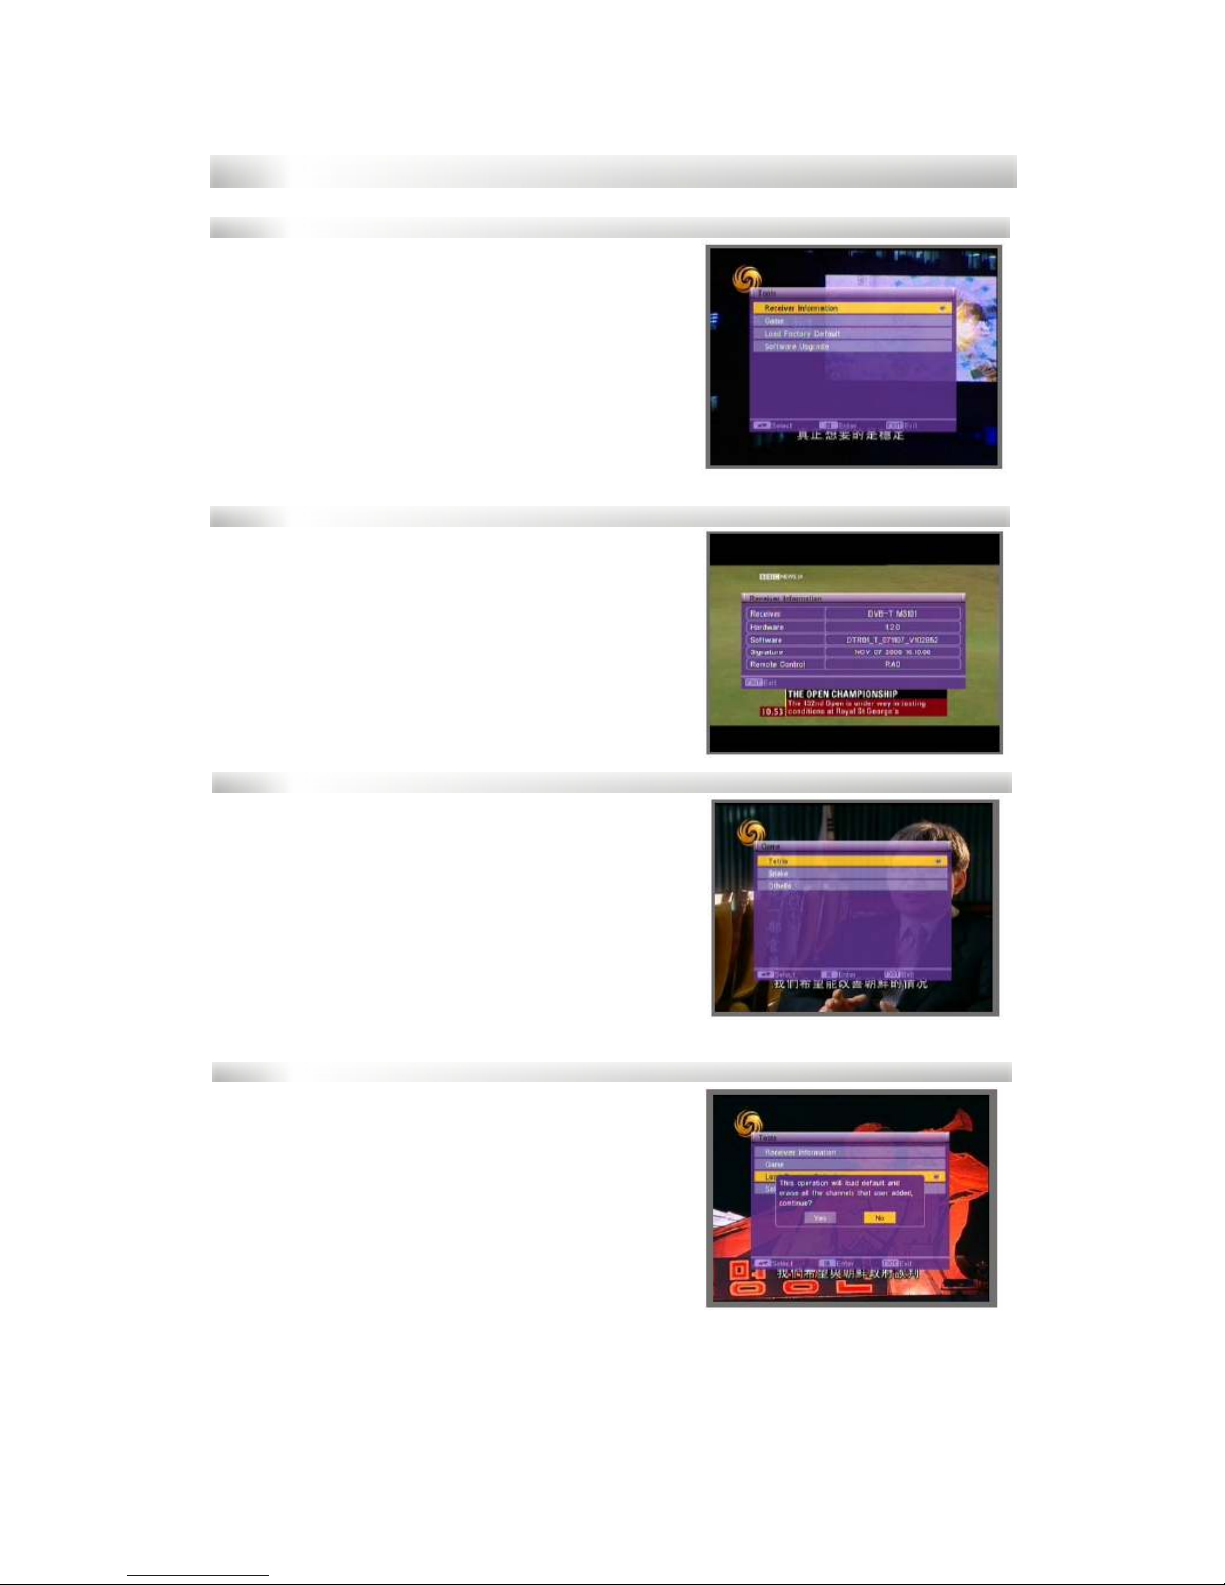
3.5 OSD Setting.
When you enter OSD Setting, you will see the
screen as shown beside.
1) Subtitle Display: You can press
[Left/Right] key to select: Off, Standard,
Teletext.
2) OSD Transparency: You can set the
transparency of OSD. Press [Left/Right]
key to select the values. There are five
levels of the transparency: 10%, 20%
30%, 40%, 50% and off.
3) OSD Style: You can only select Style 1.
4) Load Default OSD Settings: You can set the Load Default OSD Setting.
Press [OK] key, the OSD transparency will turn to 10%.
5) Press [EXIT] key to draw back from current menu.
3.6 Parental Lock.
When you choose the Parental Lock option
and press [OK] key, the input password dialog
will pop up. The default password is 0000. If
you input the correct password you will see a
screen like beside.
1) Menu Lock: Menu lock determines
whether the user has to input the
Password or not when he wishes to
enter “Installation” menu. If the setting of
“Menu lock” is Yes it means user have to input password.
2) Channel Lock: Channel lock can set a channel which the user wants to
lock.
3) New password: You should use number keys to set the password. When
you enter 4 digits, the selection will skip to Confirm Password
automatically. You should enter the password again to confirm it.
Page 17
17
MAIN MENU
4. Tools.
When you enter Tools Menu. You will see the
screen like shown beside.
It contains four sub-menus: Receiver
Information, Game, Load Factory Default, and
Software Upgrade. Press [Up/Down] key to
select among all the items. Press [OK] key to
enter the selected item.
4.1. Receiver information.
When you enter Receiver information menu,
you should see the screen like shown beside.
This screen displays receiver information. You
should press [EXIT] key to cancel this menu.
4.2. Game.
When you enter Game menu like shown
beside, you will find it provides games for you
to play.
When you choose game and press [OK] key to
enter.
Then you can play the game which you have
chosen according to the clues on the screen.
4.3. Load Factory Default.
When you Choose the option of Load Factory
Default and press [OK], you will see the screen
like shown beside. If you choose Yes, all the
parameters of this receiver will reset to the
default value.
Note: please use this function carefully.
Page 18
18
MAIN MENU
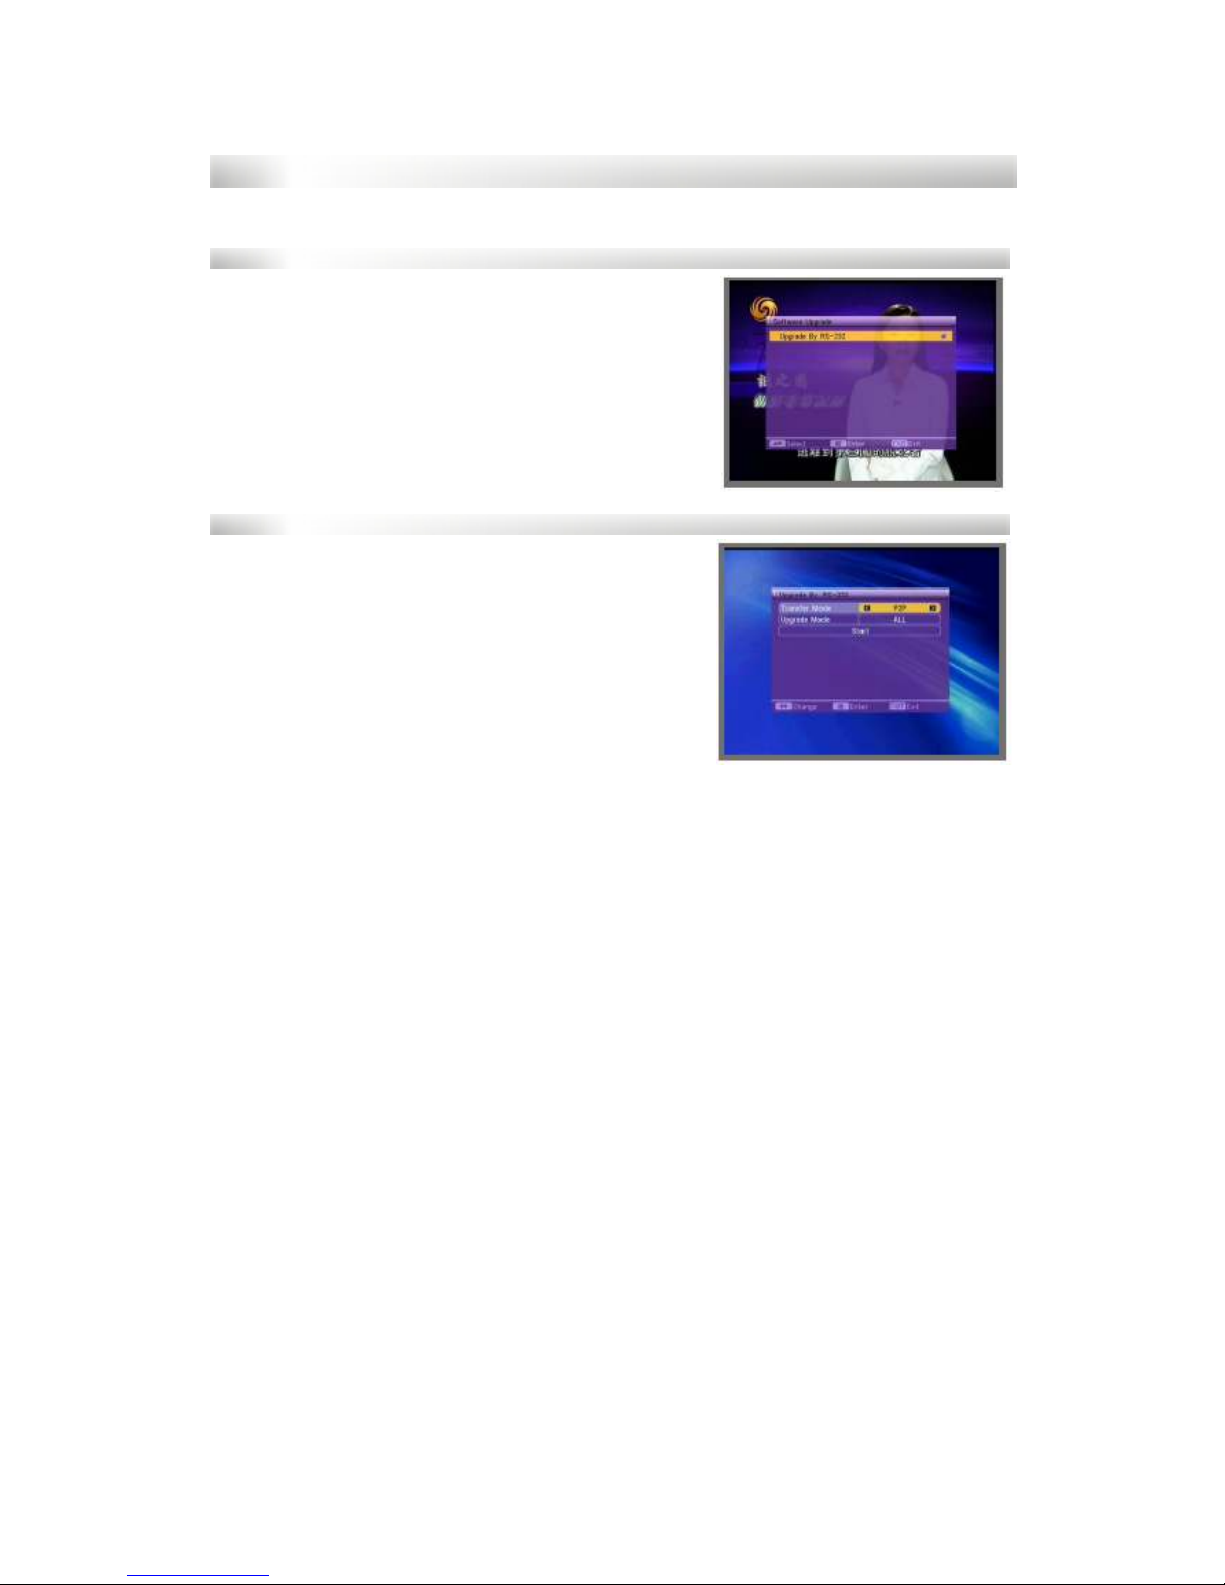
4.4. Software Upgrade.
In this function, we offer an upgrade service for
users. Press [Up/Down] key to select menu
among all items. Press [Ok] key to enter the
selected item. Press [EXIT] key to save the
parameters and go back.
4.4.1. Upgrade by RS-232.
Transfer Mode: Press [Right/Left] key to select
between among P2P and P2M.
Upgrade Mode: If you select the P2P mode, we
provide five upgrade modes for you ALL, CODE,
LOGO, COUNTRYBAN, DATABASE. Move
selection to start and press [OK] key to start
upgrade.
Press [EXIT] key to save the parameters and go
back.
Page 19
19
MENU INFORMATION
5. Hot Key.
5.1. Number.
Use numeric keys [0-9] to input the number of the desired channel. If the
inputted number is beyond the valid channel number, system will show “Invalid
number”. Press [OK] to close this message.
5.2. TV/Radio.
In normal mode, press [TV/Radio] key to switch between TV mode and Radio
mode.
5.3. Up/Down (Channel change).
Press [PR+/PR-] keys to change the channel up or down.
5.4. Left/Right (Volume +/-).
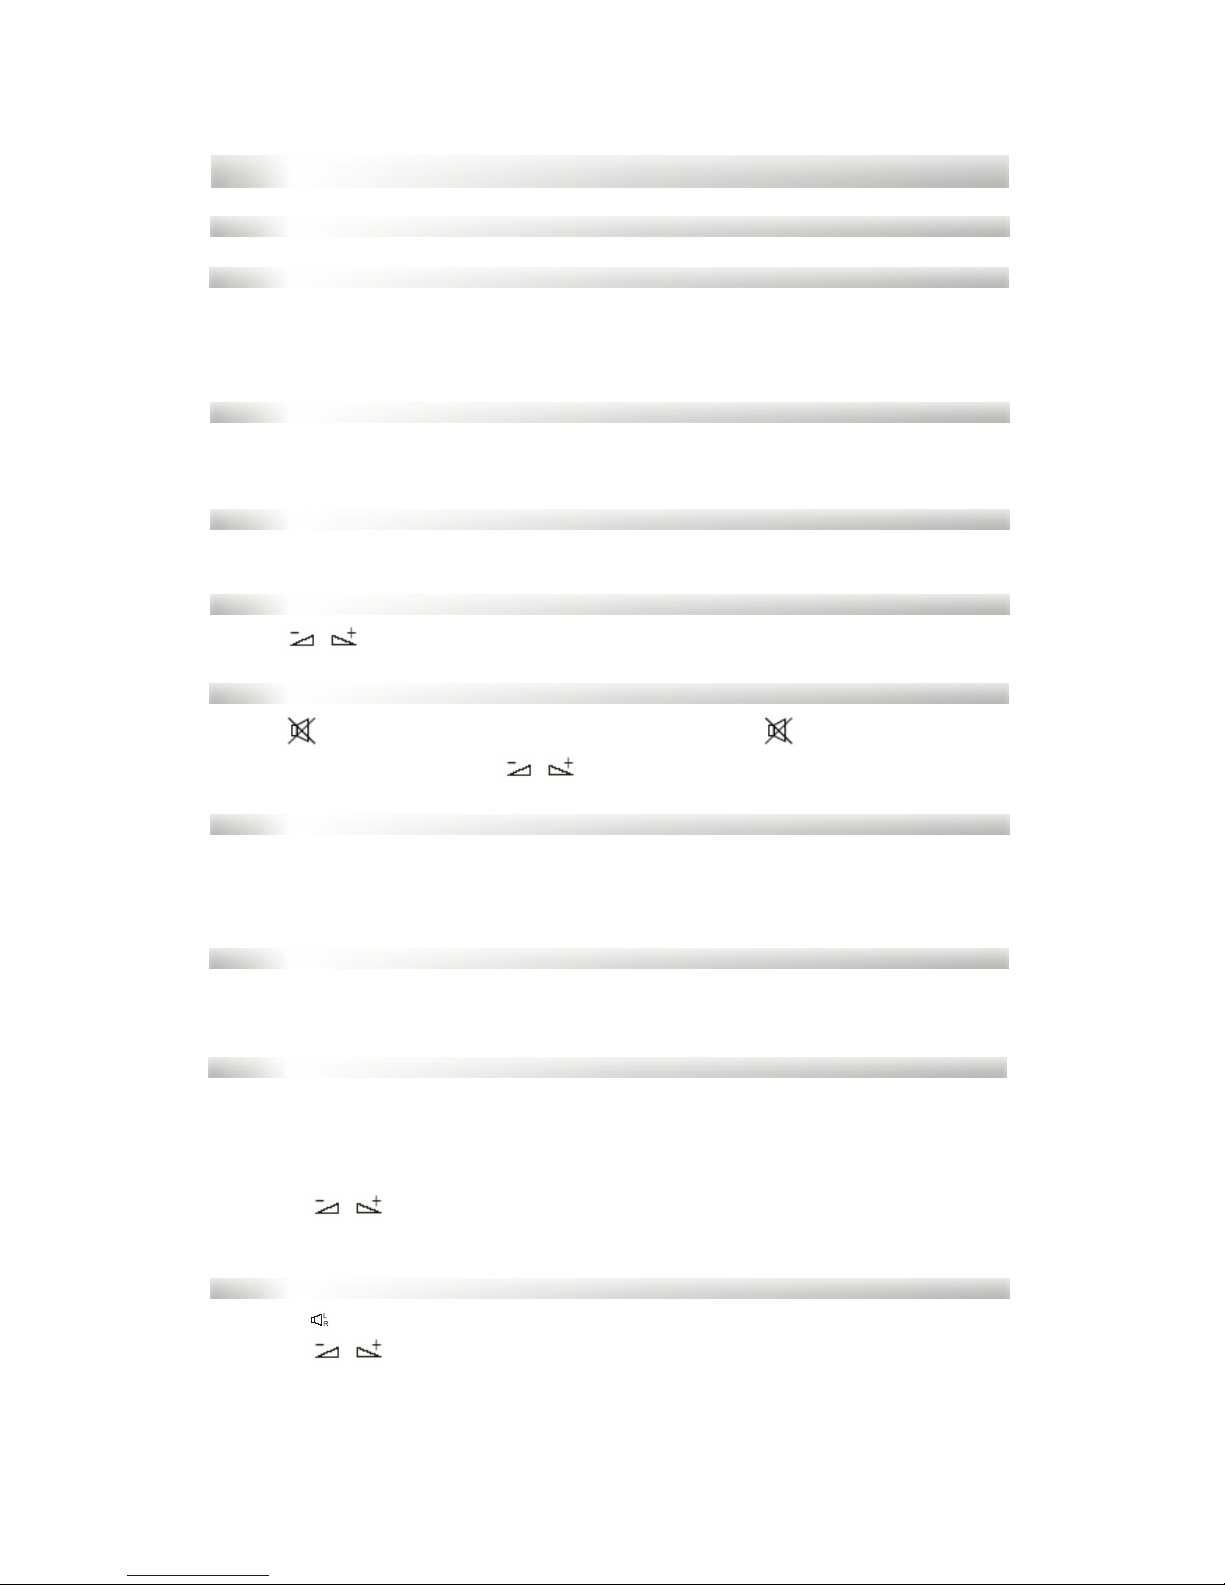
Press [ / ] keys to change the volume.
5.5. Mute.
Press [ ] key to shut the volume off. You can press [ ] once again to
restore the volume or press [
/ ] key to change the volume.
5.6. Pause.
During the viewing, you can press [PAUSE] key to stop the picture while the
volume continues. You can resume the image by pressing [PAUSE] key once
again.
5.7. Teletext.
Press [TXT] keys to open the teletext on the screen. If there is no teletext,
system will inform “No Teletext Data”. Press [EXIT] key to exit.
5.8. OK.
1. During the viewing or listening, press [OK] key to pop up the TV program list
or the radio program list.
2. Press [PR+/PR-] keys to select the channel up or down, and then press [OK]
key to play this channel in full screen.
3. Press [
/ ] keys to select the satellite.
4. Press [MENU] or [EXIT] key to close this window.
5.9. Audio.
1. Press [ ] to enter the Audio menu.
2. Press [
/ ] keys to select between left, right and stereo.
3. Changing the audio mode is only connected with the current channel, not all
the channels.
4. Press [MENU] or [EXIT] key to close this window.
Page 20
20
MENU INFORMATION
5.10. Recall.
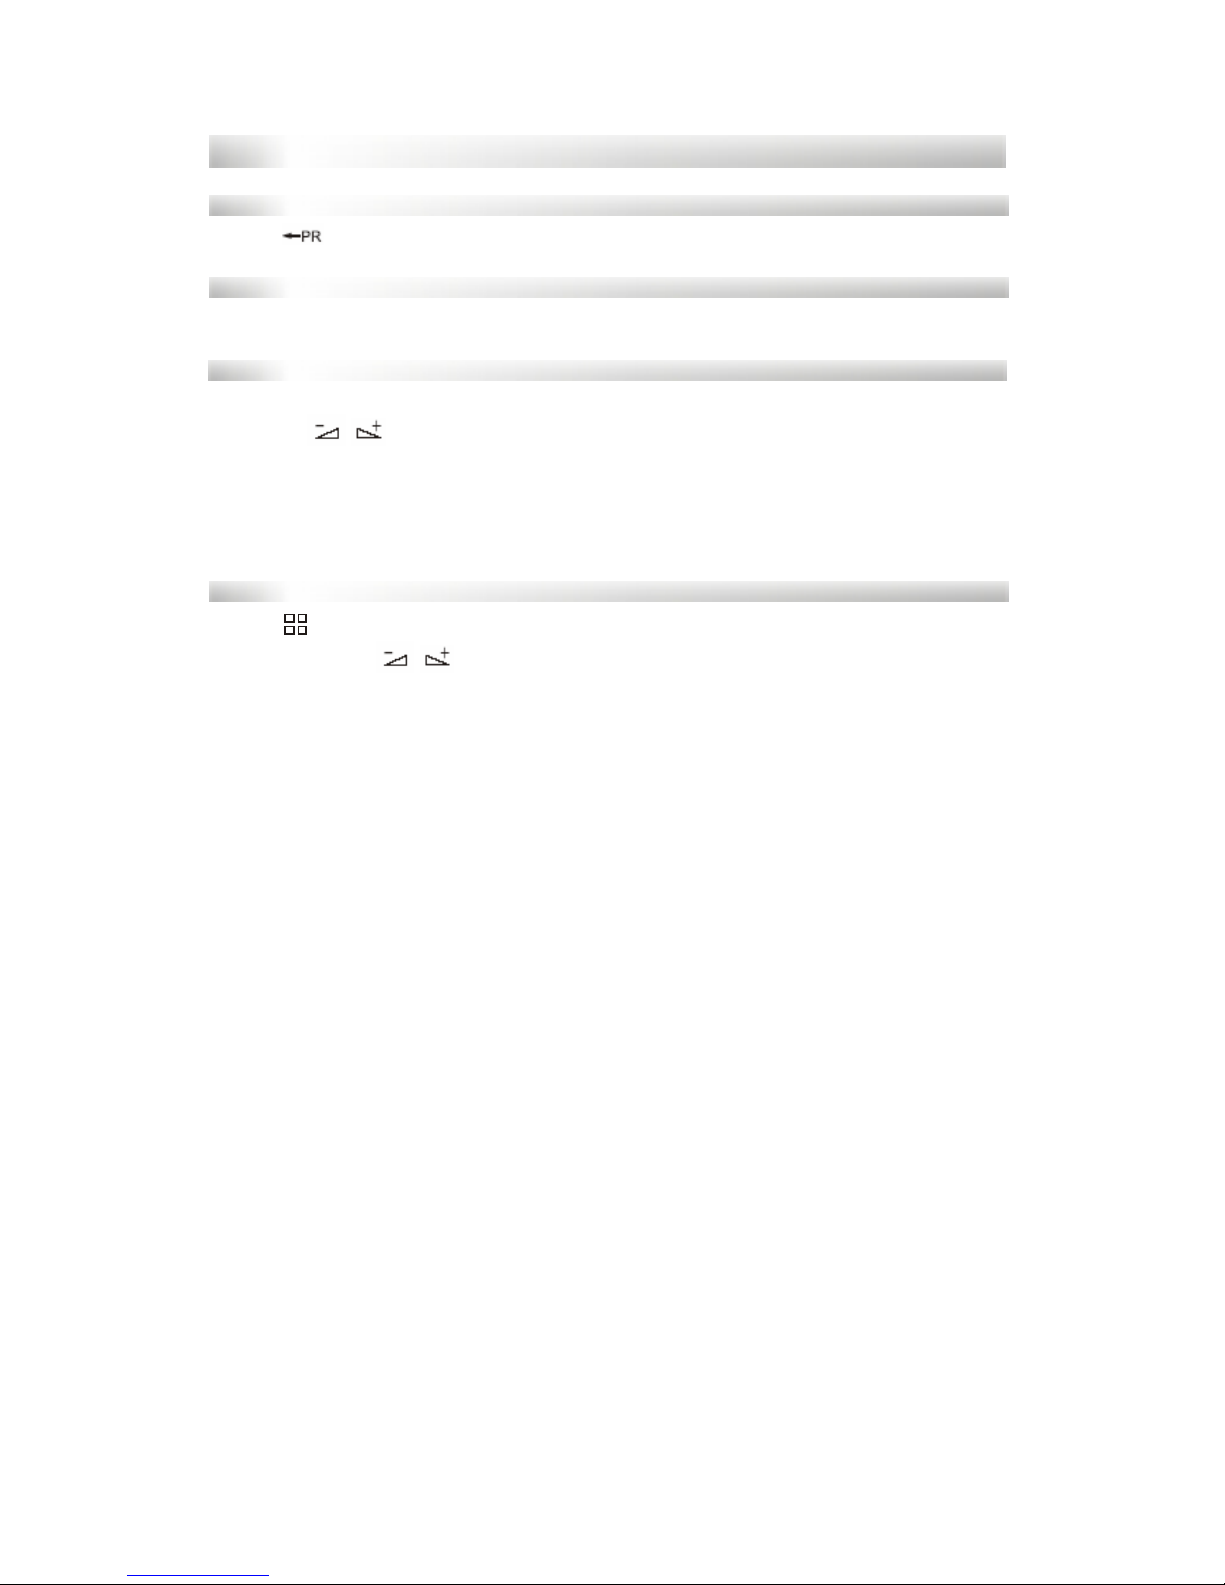
Press [ ] key to switch the current channel to the previous channel.
5.11. Info.
Press [INFO] key to enter into the information window.
5.12. FAV.
1. Press [FAV] key to pop up the favourite group window.
2. Press [
/ ] keys to select the favourite group. Press [PR+/PR-] keys to
select the channel up or down. Press [OK] key at the selected channel to view it
in full-screen. Press [MENU] or [EXIT] key to exit.
3. If there is no favourite channel, system will inform “No FAV Channel” when
you press [FAV] key.
5.13. Multi-picture.
Press [ ] to begin multi-picture on the screen. If you want to select a channel,
use [PR+/PR-], [
/ ] keys on the RCU to select a cell and press [OK] key to
enter.
Page 21
21
TROUBLESHOOTING
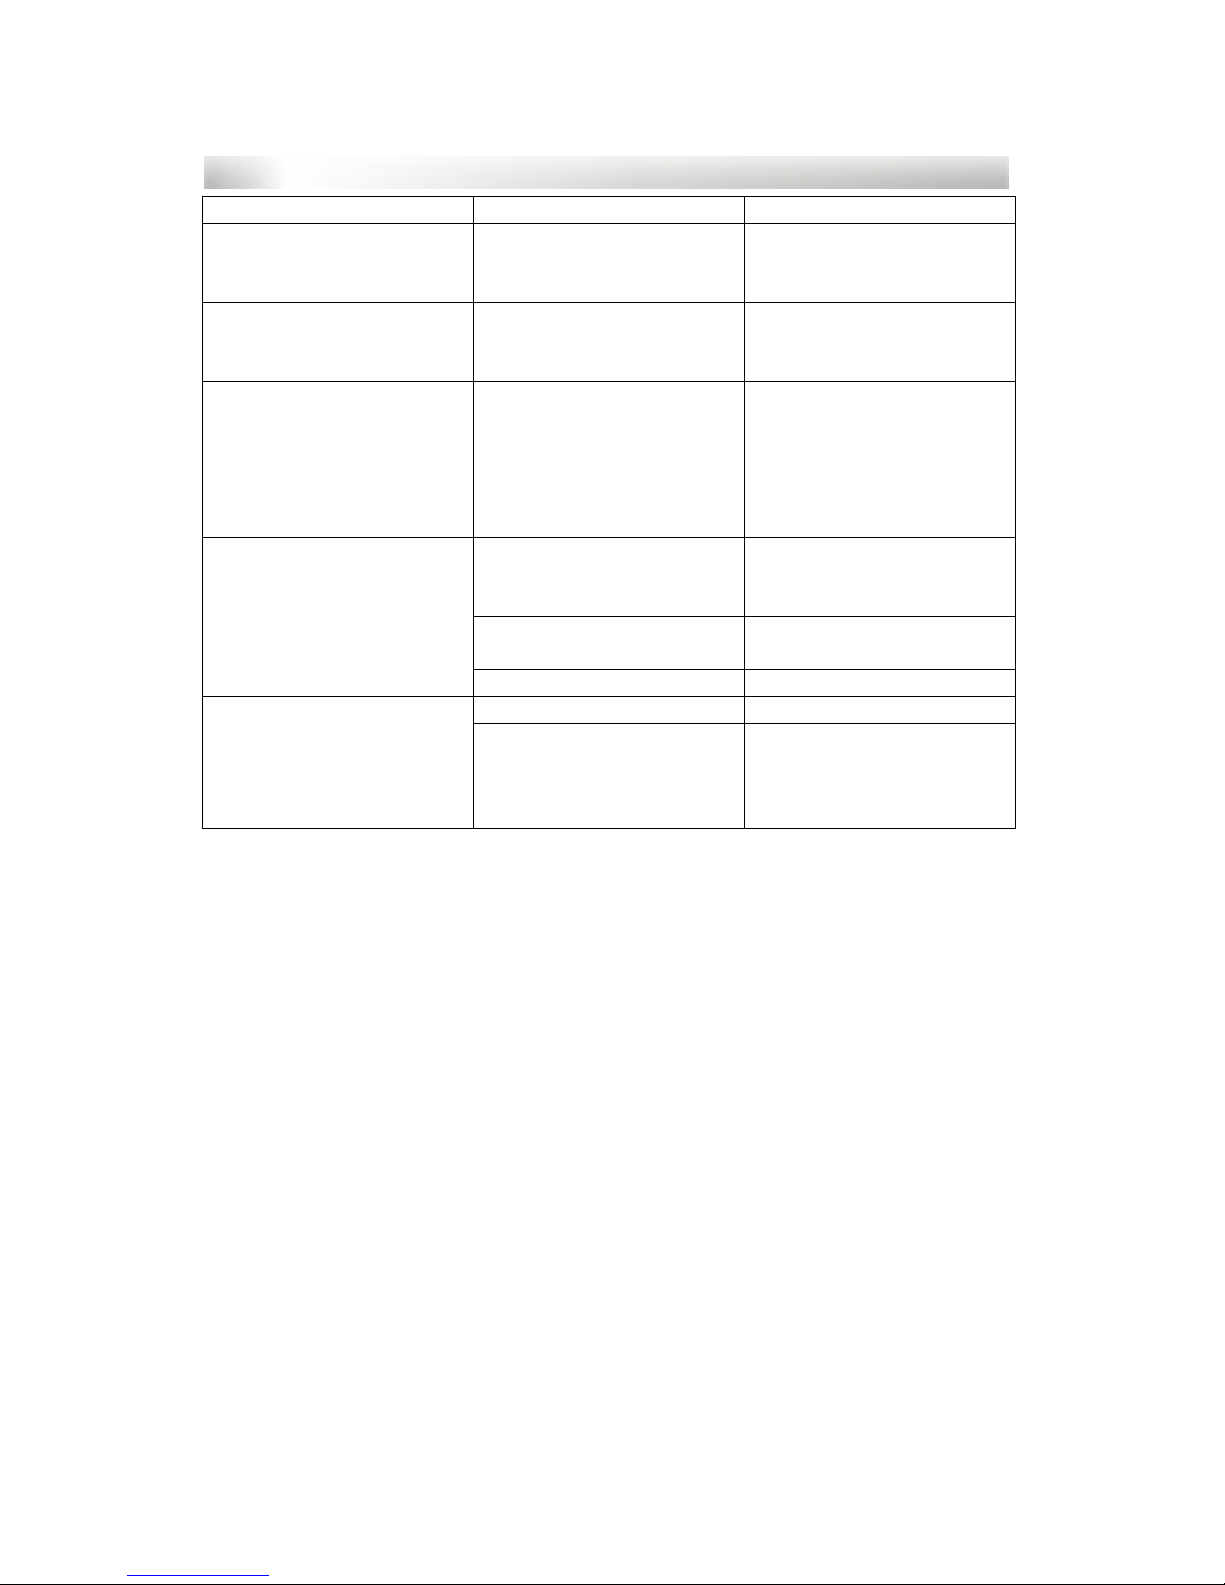
PROBLEM POSSIBLE CAUSES WHAT TO DO
The display on the front
panel does not light up.
Main cable is not
connected.
Check that the main
cable is plugged into the
power socket.
No sound or picture, but
the front panel shows
red light.
The receiver is in
standby mode.
Press standby button.
No sound or picture. No signal or weak
signal.
Check the cable
connections, antenna
and other equipment
connected between the
antenna and the
receiver.
Signal is too strong. Connect a signal
attenuator to the
antenna input.
Antenna noise factor too
high.
Change to an antenna
with lower noise factor.
Bad picture/blocking
error.
The antenna is faulty Change the antenna.
Battery exhausted Change the batteries The RCU is not working
RCU is incorrectly
aimed.
Aim the RCU at the
receiver or check that
nothing blocks the front
panel.
Note: If you have tried all of the actions suggested above, without solving the
problem, please contact your dealer or a customer device adviser.
 Loading...