

Page 1
Agent Installation Guide
ZENworks Patch Management Server v6.4
Page 2
02_017N_6.4.2.14
Novell, Inc.
1800 South Novell Place
Provo, UT 84606
Phone: 800.858.4000
www.novell.com
Copyright © 1997-2007 PatchLink® Corporation. ALL RIGHTS RESERVED. U.S. Patent
No. 6,990,660, Other Patents Pending. This manual, as well as the software described in it, is
furnished under license. No part of this manual may be reproduced, stored in a retrieval system, or
transmitted in any form—electronic, mechanical, recording, or otherwise—except as permitted by
such license.
LIMIT OF LIABILITY/DISCLAIMER OF WARRANTY: PATCHLINK® CORPORATION
MAKES NO REPRESENTATIONS OR WARRANTIES IN REGARDS TO THE ACCURACY
OR COMPLETENESS OF THE INFORMATION PROVIDED IN THIS MANUAL.
PATCHLINK® CORPORATION RESERVES THE RIGHT TO MAKE CHANGES TO THE
INFORMATION DESCRIBED IN THIS MANUAL AT ANY TIME WITHOUT NOTICE AND
WITHOUT OBLIGATION TO NOTIFY ANY PERSON OF SUCH CHANGES. THE
INFORMATION PROVIDED IN THE MANUAL IS NOT GUARANTEED OR WARRANTED
TO PRODUCE ANY PARTICULAR RESULT, AND THE ADVICE AND STRATEGIES
CONTAINED MAY NOT BE SUITABLE FOR EVERY ORGANIZATION. NO WARRANTY
MAY BE CREATED OR EXTENDED WITH RESPECT TO THIS MANUAL BY SALES
REPRESENTATIVES OR WRITTEN SALES MATERIALS. PATCHLINK® CORPORATION
SHALL NOT BE LIABLE FOR ANY LOSS OF PROFIT OR ANY OTHER DAMAGES
ARISING FROM THE USE OF THIS MANUAL, INCLUDING BUT NOT LIMITED TO
SPECIAL, INCIDENTAL, CONSEQUENTIAL, OR OTHER DAMAGES
Trademarks:
PatchLink™, PatchLink.com™, securing the enterprise™, WebConsole™, PatchLink
Update™, PatchLink Quarantine™, PatchLink Enterprise Reporting Services™, PatchLink
Scanner Integration Module™, PatchLink Developers Kit™, and their associated logos are
registered trademarks or trademarks of PatchLink® Corporation.
Novell, Novell ZENworks®, Novell ZENworks® Patch Management Server, and Novell Agent
are registered trademarks or trademarks of Novell, Inc.
RSA Secured® is a registered trademark of RSA Security Inc.
Apache is a trademark of the Apache Software Foundation
In addition, other companies' names and products mentioned in this document, if any, may be
either registered trademarks or trademarks of their respective owners.
Feedback:
Your feedback lets us know if we are meeting your documentation needs. E-mail the Novell
Technical Publications department at techpubs@patchlink.com to tell us what you like best,
what you like least, and to report any inaccuracies.
- ii -
Page 3

ZENworks Patch Management Server v6.4 - Agent Installation Guide
Table of Contents
Table of Contents ___________________________________________ iii
Preface ___________________________________________________ v
About This Guide ...................................................................................................v
Document Conventions ......................................................................................... vi
Chapter 1: Preparing for Agent Installation _______________________ 1
Installation Methods ..............................................................................................1
Supported Operating Systems (ZENworks Patch Management Agent) ...........................2
Supported Languages ............................................................................................2
Requirements .......................................................................................................3
Agent for Windows ............................................................................................3
Agent for Linux, UNIX, Mac, and Netware .............................................................4
Chapter 2: Installing Agents ___________________________________ 5
Downloading the Installer .......................................................................................5
Installing the Single Agent for Windows (32 or 64 bit) ................................................6
Installing the Agent for Windows Vista (32 and 64 bit) .............................................12
Installing the Agent for Linux, UNIX, Mac, and Netware ............................................18
Chapter 3: Automating the Agent Installation ____________________ 21
Automating the Windows MSI Installer ...................................................................21
Creating a Network Share ................................................................................21
Modifying the MSI File ..................................................................................... 25
Creating an Organizational Unit ........................................................................30
Performing a Silent Install from a Command Prompt ................................................34
Installing the Windows Agent ...........................................................................34
Installing the Linux/UNIX/Mac/Netware Agent ....................................................35
Appendix A: Index __________________________________________ 37
- iii -
Page 4

Table of Contents
- iv -
Page 5

Preface
This ZENworks® Patch Management Agent Installation Guide is a resource written for all users of
ZENworks Patch Management. This guide defines the concepts and procedures for installing and
implementing a successful installation of ZENworks Patch Management.
About This Guide
This guide contains the following chapters:
• Chapter 1, “Preparing for Agent Installation”
• Chapter 2, “Installing Agents”
• Chapter 3, “Automating the Agent Installation”
Tip: This document is updated on a regular basis. To acquire the latest version of this
document please refer to the Novell Support Web site (www.novell.com/support
ZENworks Patch Management Server v6.4 - Agent Installation Guide
)
- v -
Page 6
Preface
Document Conventions
The following conventions are used throughout this document to help you identify various
information types:
Table 0.1 Document Conventions
Convention Usage
bold
italics
UPPERCASE SQL commands and keyboard keys
monospace
Command names, database names, options, wizard names, window and
screen objects (i.e. Click the
New terms, variables, and window and page names
File names, path names, programs, executables, command syntax, and
property names
OK
button)
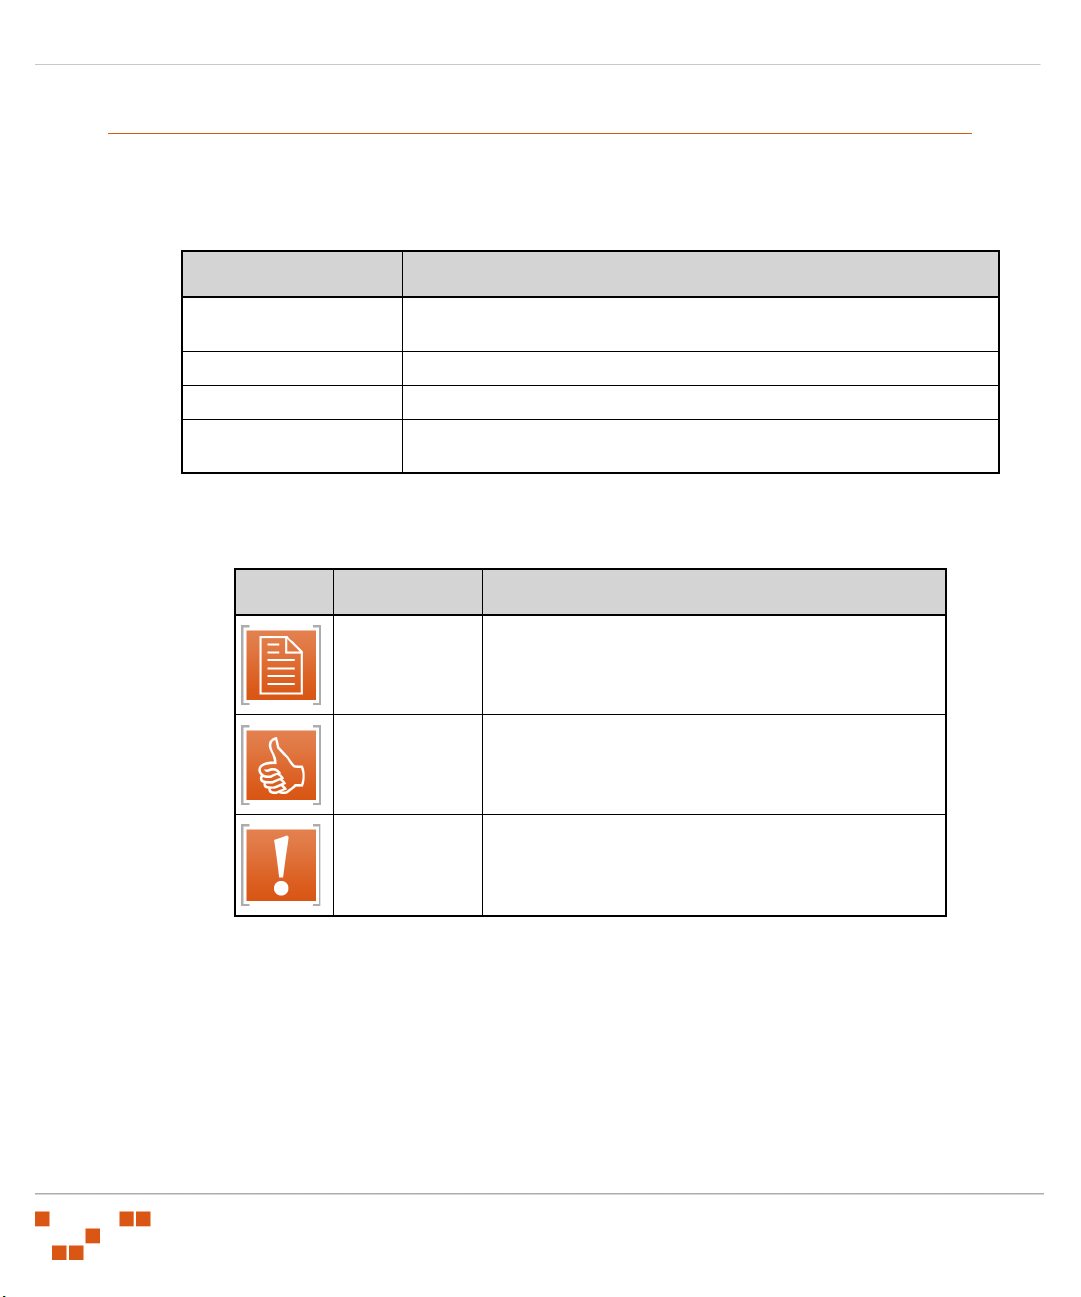
The icons used throughout this document identify the following types of information:
Table 0.2 Icons Used
Icon Alert Label Description
Identifies paragraphs that contain notes or
Note:
Tip:
Warning:
recommendations.
Identifies paragraphs that contain tips, shortcuts, or other
helpful product information.
Identifies paragraphs that contain vital instructions,
cautions or critical information.
- vi -
Page 7

ZENworks Patch Management Server v6.4 - Agent Installation Guide
1
Preparing for Agent Installation
Having successfully installed your ZENworks Patch Management Server (Patch Management
Server), you can now proceed to the installation of your ZENworks Patch Management Agents.
Following installation the agent is monitored and maintained by the Patch Management Server
requiring no additional maintenance.
Installation Methods
ZENworks Patch Management Agents can be deployed using any one (or combination) of the
following methods:
Table 1.1 Installation Options
Installation Type Description
Single Agent Windows
MSI Installer
Single Agent Windows
x64 MSI Installer
Single Agent Installer for
Linux/Unix/Mac/Netware
Single Agent Installer for
Windows Vista
Allows you to run the installer, entering the information as prompted. Also,
you can modify the Microsoft Software Installer (MSI) file, using an MSI
.msi
.msi
.
.msi
file can be
file can be
file can be
editor, to include your organization’s configuration. The
delivered by using a login script, Active Directory Group Policy Object (GPO),
or other remote software installation method. The method eliminates the
need to physically visit each target computer.
Allows you to run the installer, entering the information as prompted. Also,
you can modify the Microsoft Software Installer (MSI) file, using an MSI
editor, to include your organization’s configuration. The
delivered by using a login script, Active Directory Group Policy Object (GPO),
or other remote software installation method.
Allows you to run the installer, entering the information as prompted. You
rsh
or
can also perform a silent installation using
Allows you to run the installer, entering the information as prompted. Also,
you can modify the Microsoft Software Installer (MSI) file, using an MSI
editor, to include your organization’s configuration. The
delivered by using a login script, Active Directory Group Policy Object (GPO),
or other remote software installation method.
ssh
Warning: Regardless of the installation method it is vital that, when installing agents,
you enter the same serial number used to install your server. Failure to do so could lock
out the PLUS_AGENT user account disabling ALL agent communication.
- 1 -
Page 8

Preparing for Agent Installation
Supported Operating Systems (ZENworks Patch Management Agent)
The following table lists the supported platforms on which the ZENworks Patch Management Agent
6.4 is supported.
Table 1.2 ZENworks Patch Management Agent 6.4 Supported Platforms
Operating
System
Apple Mac OS X 10.2.8 -
HP-UX 11.00 -
IBM AIX 5.1 - 5.3
Microsoft
Windows 9x
Microsoft
Windows NT
Microsoft
Windows XP
Microsoft
Windows Vista
Novell Netware
Novell SUSE
Linux
Red Hat Linux 2.1 - 4 Enterprise AS,
Sun Solaris 2.6 - 10
OS
Versions
10.4.10
11.23
98 Second
Edition
4.0 SP6A 2003 R2
All
All All 32/64 bit x86 32/64 bit N/A
(3)
6.5 All 32 bit x86 32 bit 1.3.0+
9 - 10 Enterprise 32/64 bit
OS Edition
All 32/64 bit x86(Intel)/
All 64 bit PA-RISC 64 bit 1.4.0+
All 32/64 bit PowerPC 32/64 bit 1.4.0+
All 32 bit x86 32 bit N/A
(1)
All
Professional
ES, WS
All 32/64 bit SPARC/x86 32/64 bit 1.4.0+
(2)
OS Data
Width
32/64 bit x86 32/64 bit N/A
32/64 bit x86 32/64 bit N/A
32/64 bit
Processor
Family
PowerPC
x86 32/64 bit 1.4.0+
x86 32/64 bit 1.4.0+
Processor
Data
Width
32/64 bit 1.4.0+
Min.
JRE
(1) Datacenter edition is not supported
(2) Home, Media Center and Tablet PC editions are not supported
(3) Windows Vista support requires .NET 3.0
Supported Languages
ZENworks Patch Management Agent 6.4 is supported on the following languages:
en-AU: English (Australia)
en-BZ: English (Belize)
- 2 -
Page 9
ZENworks Patch Management Server v6.4 - Agent Installation Guide
en-CA: English (Canada)
en-JM: English (Jamaica)
en-NZ: English (New Zealand)
en-ZA: English (South Africa)
en-GB: English (United Kingdom)
en-US: English (United States)
es-ES: Spanish (Spain)
fi-FI: Finnish (Finland)
fr-FR: French (France)
de-DE: German (Germany)
it-IT: Italian (Italy)
ja-JP: Japanese (Japan)
ko-KR: Korean (Korea)
nl-NL: Dutch (Netherlands)
pt-BE: Portuguese (Brazil)
sv-SE: Swedish (Sweden)
zh-CN: Chinese (Simplified)
zh-CHS: Chinese (Simplified)
zh-TW: Chinese (Traditional)
zh-CHT: Chinese (Traditional)
Requirements
The following section lists the hardware and software requirements for the Agent.
Note: You must disable any virus-scanning software prior to the installation of the
Novell ZENworks Patch Management Agent for Windows. Failure to do so may result in
an unsuccessful agent installation.
Agent for Windows
• Local or Domain Administrator or Administrator equivalent
Warning: The install (and uninstall) must be done by a Administrator or Administrator
equivalent.
• 500 MHz Processor or higher
• 256 MB RAM
- 3 -
Page 10
Preparing for Agent Installation
• 20 MB of free disk space for agent installation
• A single 10 Mbps network connection (with access to the Update Server)
• Sufficient free disk space to download and install patches (varies dependent upon size of patch)
• Windows Installer 2.0 or higher
• Microsoft Internet Explorer 5.01 or higher (Internet Explorer 5.5 or higher if using SSL)
• Network connectivity to your ZENworks Patch Management Server (6.4 or higher)
Note: Windows 2000 computers require Service Pack 1
Windows NT 4.0 computers require Service Pack 6a
Agent for Linux, UNIX, Mac, and Netware
• Superuser privileges on the target machine
Warning: The install (and uninstall) must be done by the root user (superuser).
• 2 MB of free disk space for agent installation
• 500 MHz or greater processor
• 256 MB RAM
• 10 Mbps network connection (with access to the Update Server)
• Sufficient free disk space to download and install patches
• Network connectivity to your ZENworks Patch Management Server
• Presence of
processing.
/tmp
directory (
/var/tmp
directory on Solaris) for temporary file storage and
Warning: There must be no whitespaces (such as a space, tab, or newline character) in
the absolute path of the installation directory.
- 4 -
Page 11

ZENworks Patch Management Server v6.4 - Agent Installation Guide
2
Installing Agents
The following section includes instructions for installing the ZENworks Patch Management Agent.
In this chapter
“Installing the Single Agent for Windows (32 or 64 bit)”
“Installing the Agent for Windows Vista (32 and 64 bit)”
“Installing the Agent for Linux, UNIX, Mac, and Netware”
Downloading the Installer
The standard agent install requires logging into the Patch Management Server administration
console from the target computer then downloading the installer to that computer.
To Download an Installer
1. Log on to the target computer as the local
LOCAL_ADMINS
2. Launch your web browser.
3. Type your ZENworks Patch Management Server URL in your web browser’s Address field.
Press Enter.
4. Type your User Name in the User name field. Press TAB .
5. Type your password in the Password field.
6. Click OK.
The ZENworks Patch Management Server Home screen opens.
7. Select Devices.
group).
administrator
(or a member of the
- 5 -
Page 12
Installing Agents
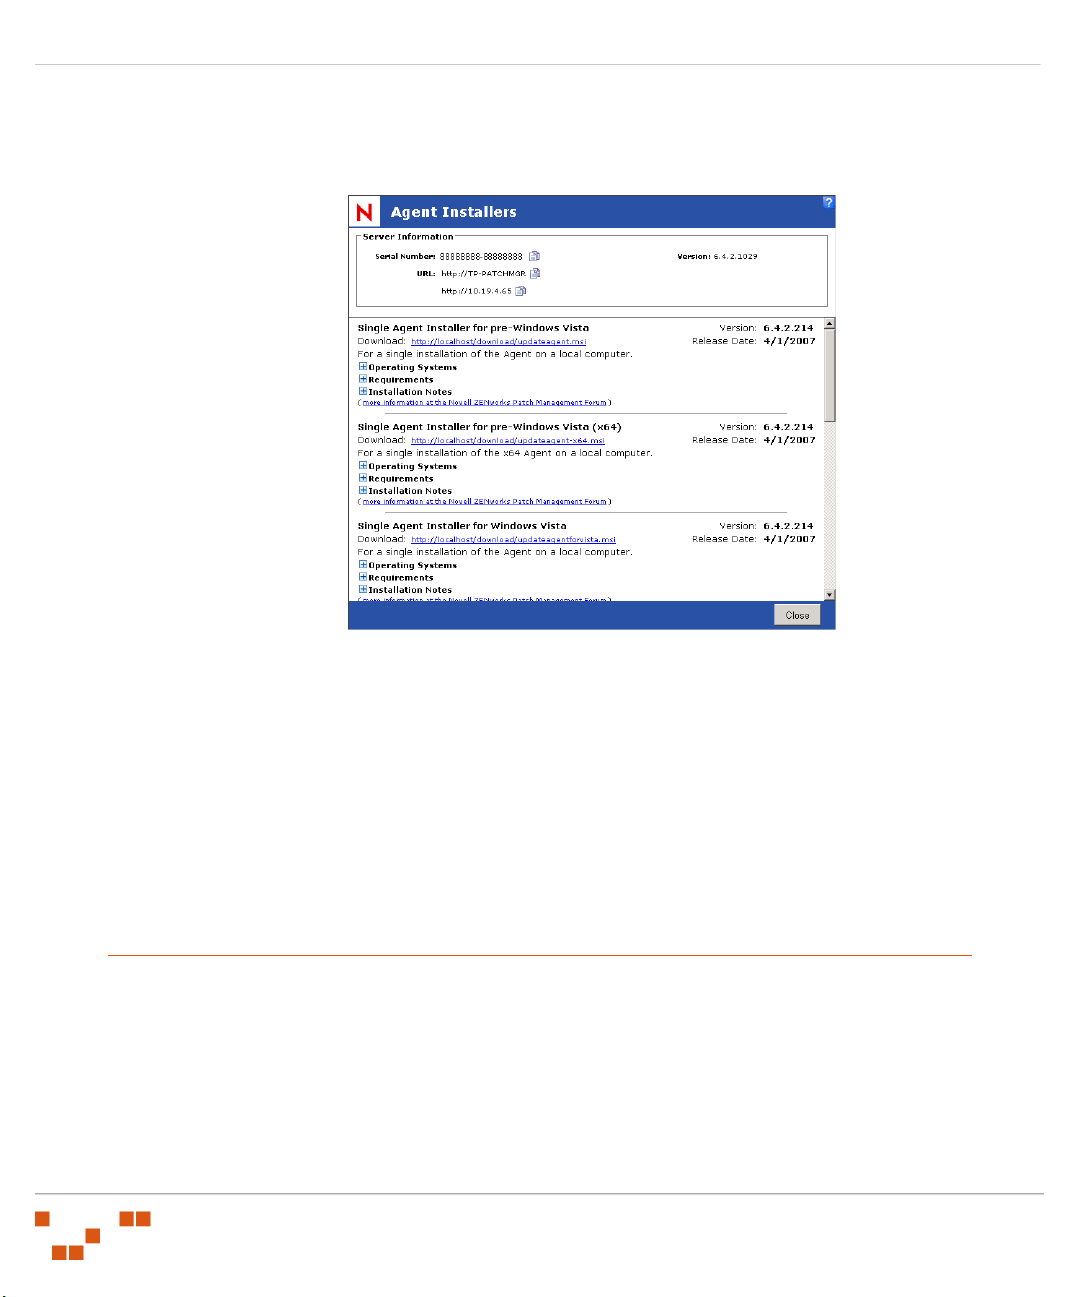
8. Click Install.
The Agent Installers page opens.
Figure 2.1 Agent Installers
9. Select the download link corresponding with the installer you need to start the download.
The Download dialog box opens.
10. Click Save.
The installer downloads to the location you specify on your computer.
11. In the Agent Installers screen, click Close.
The Agent Installers screen closes.
Installing the Single Agent for Windows (32 or 64 bit)
The following steps apply to both the Single Agent Windows MSI Installer and the Single Agent
Windows x64 MSI Installer. To install the agent for Windows Vista, refer to __.
- 6 -
Page 13
ZENworks Patch Management Server v6.4 - Agent Installation Guide
To Install the Agent
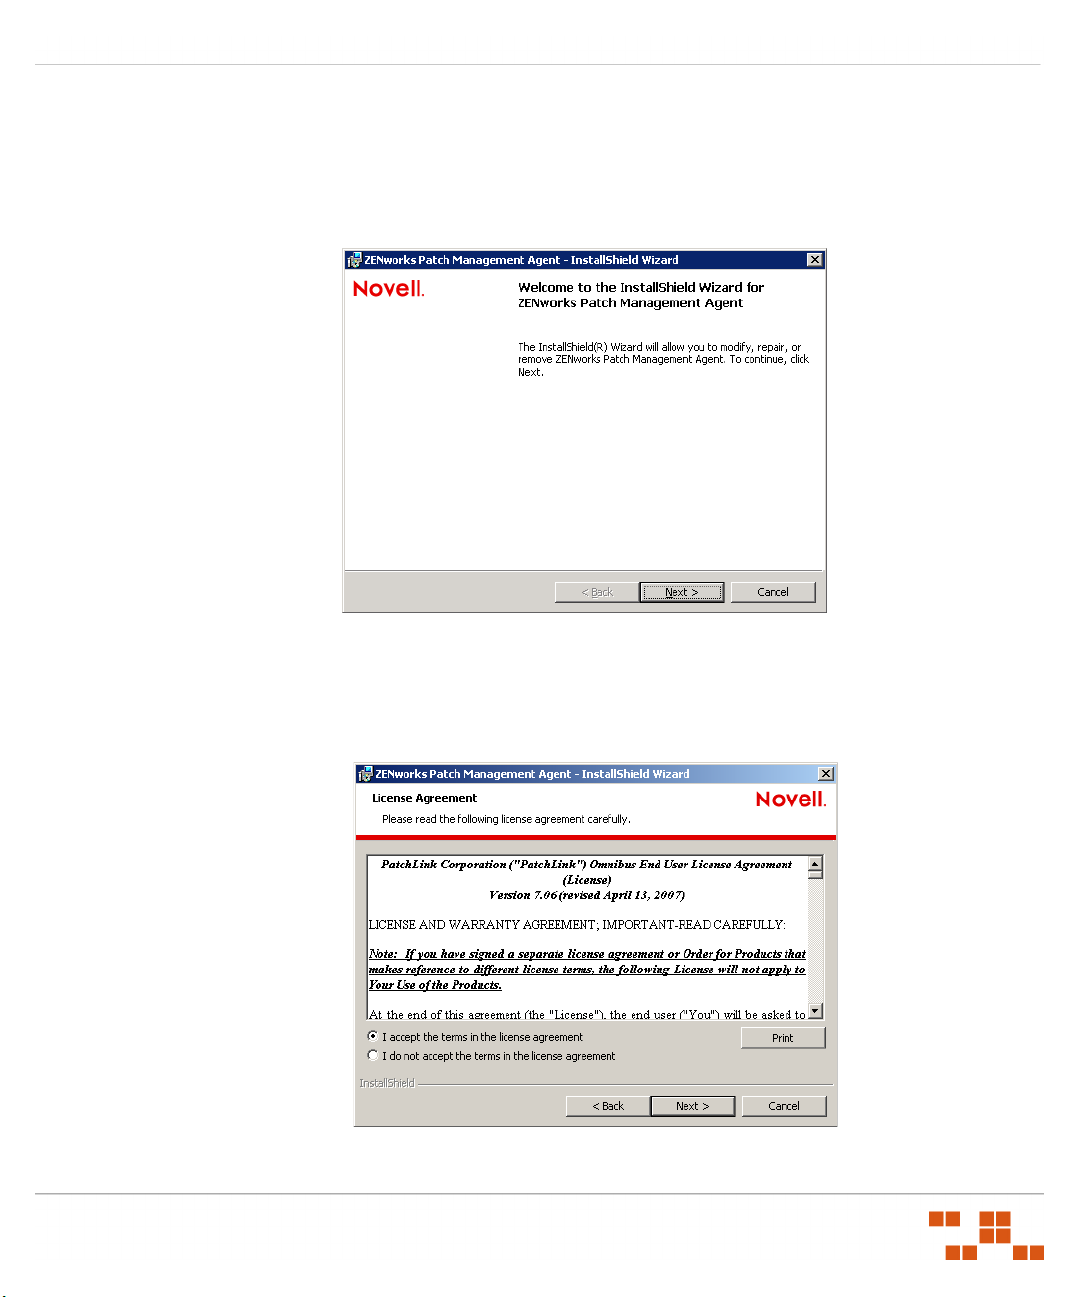
1. From the downloaded location, select the updateagent.msi to extract the ZENworks Patch
Management Agent for Windows InstallShield Wizard.
The Agent Install Welcome screen opens.
Figure 2.2 Agent Install Welcome Screen
2. Click Next.
The License Agreement page opens.
Figure 2.3 License Agreement
- 7 -
Page 14
Installing Agents
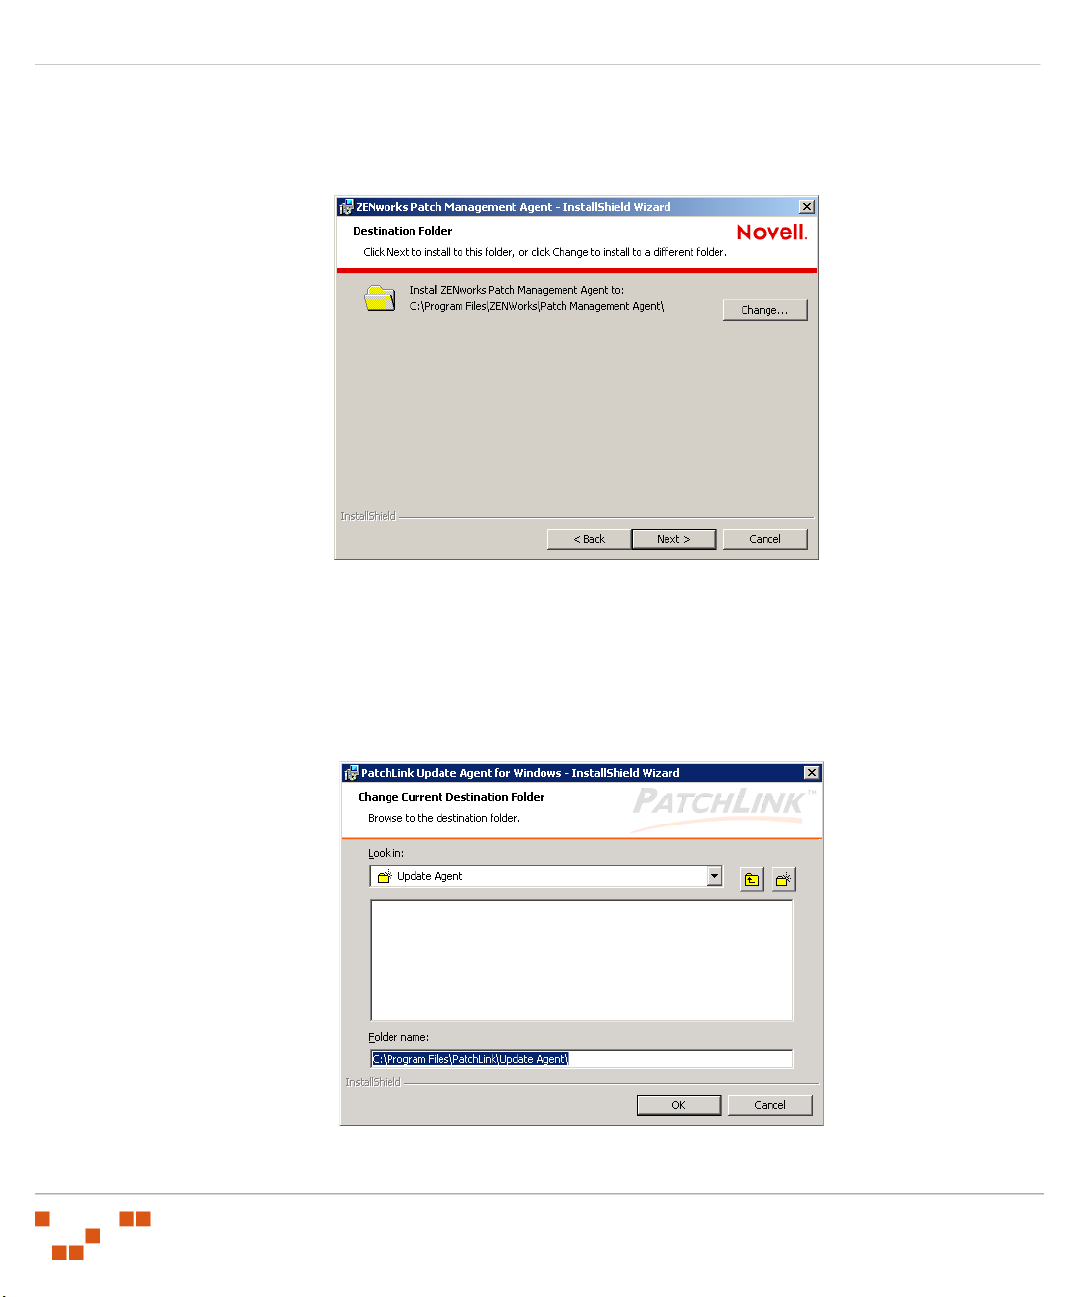
3. If you agree to the license terms select the I accept the terms option and click Next
The Destination Folder page opens.
Figure 2.4 Agent Destination
4. To change the location of the Agent:
a. Click Change.
The Change Current Destination Folder window opens.
Figure 2.5 Change Current Destination Folder
- 8 -
Page 15

ZENworks Patch Management Server v6.4 - Agent Installation Guide
b. Change the installation to the location you need.
c. Click OK.
The Change Current Destination Folder closes and the Destination Folder window reflects
the new location.
5. Click Next.
The Agent Registration window opens.
Figure 2.6 Agent Registration
6. Type the appropriate URL in the Update Server URL field including the protocol (
or
serverAddress
https://ServerAddress
for a secure server).
http://
7. Type your serial number in the ZENworks Patch Management Server Serial Number field.
Note: Use the same serial number that was used for the installation of your ZENworks Patch
Management Server otherwise the agent will be unable to communicate with the server.
- 9 -
Page 16

Installing Agents
8. If your LAN uses a proxy server:
a. Select Use a Proxy Server.
The Proxy Information window opens.
Figure 2.7 Proxy Information
b. In the Proxy URL field, type the Proxy URL (and Port if required).
c. If you are using an Authenticated Proxy:
i. In the Username field, type the user name.
ii. In the Password field, type a new password for the proxy.
Note: In many LAN environments, although a proxy is used for Internet access, a proxy
bypass is used to for all access within the corporate network. Therefore, only enter proxy
information if your agents will be required to use a proxy to access your ZENworks
Patch Management Server.
- 10 -
Page 17

ZENworks Patch Management Server v6.4 - Agent Installation Guide
9. Click Next.
The Ready to Install the Program page opens.
Figure 2.8 Begin Installation
10. Click Install to install the agent.
The agent is installed and the Installation Complete page displays.
Figure 2.9 Installation Finish
11. Click Finish to exit the wizard.
- 11 -
Page 18

Installing Agents
Installing the Agent for Windows Vista (32 and 64 bit)
The following steps apply to the Single Agent Windows Vista MSI Installer and the Single Agent
Windows Vista x64 MSI Installer.
1. From the downloaded location, select the ZENworks Patch ManagementAgentForVista.msi
to extract the ZENworks Patch Management Agent for Windows Vista InstallShield Wizard.
The Agent Install Welcome screen opens.
Figure 2.10 Agent Install Welcome Screen
- 12 -
Page 19

ZENworks Patch Management Server v6.4 - Agent Installation Guide
2. Click Next.
The License Agreement page opens.
Figure 2.11 License Agreement
3. If you agree to the license terms select the I accept the terms option and click Next.
The Destination Folder page opens.
Figure 2.12 Agent Destination
- 13 -
Page 20

Installing Agents
4. To change the location of the Agent:
a. Click Change.
The Change Current Destination Folder window opens.
Figure 2.13 Change Current Destination Folder
b. Change the installation to the location you need.
c. Click OK.
The Change Current Destination Folder closes and the Destination Folder window reflects
the new location.
- 14 -
Page 21

ZENworks Patch Management Server v6.4 - Agent Installation Guide
5. Click Next.
The Agent Registration window opens.
Figure 2.14 Agent Registration
6. Type the appropriate URL in the ZENworks Patch Management Server URL field including
the protocol (
http://ServerAddress
or
https://ServerAddress
for a secure server).
7. Type your serial number in the ZENworks Patch Management Server Serial Number field.
Note: Use the same serial number that was used for the installation of your ZENworks Patch
Management Server otherwise the agent will be unable to communicate with the server.
- 15 -
Page 22

Installing Agents
8. If your LAN uses a proxy server:
a. Select Use a Proxy Server.
The Proxy Information window opens.
Figure 2.15 Proxy Information
b. In the Proxy URL field, type the Proxy URL.
c. If required, enter the port in the Proxy Port field.
d. If you are using an Authenticated Proxy:
i. Select the My proxy server requires authentication option.
ii. In the Username field, type the user name.
iii. In the Password and Confirm Password fields, type the password for the proxy.
Note: In many LAN environments, although a proxy is used for Internet access, a proxy
bypass is used to for all access within the corporate network. Therefore, only enter proxy
information if your agents will be required to use a proxy to access your ZENworks
Patch Management Server.
- 16 -
Page 23

ZENworks Patch Management Server v6.4 - Agent Installation Guide
9. Click Next.
The Ready to Install the Program page opens.
Figure 2.16 Begin Installation
10. Click Install to install the Agent.
The agent installs and the Installation Complete page opens.
Figure 2.17 Installation Finish
- 17 -
Page 24

Installing Agents
11. Click Finish to exit the wizard.
Installing the Agent for Linux, UNIX, Mac, and Netware
Prior to installing the Agent, you must ensure that the currently installed Java version meets the
requirements defined under “Supported Operating Systems (Update Agent)”
After ensuring the computer contains an appropriate version of Java, complete the following steps to
install the Agent.
To Install the Linux, Unix, Mac, and Netware Agents
1. In the /root directory, create a UpdateAgent directory.
2. From the downloaded location (refer to “Downloading the Installer”) select the
UnixUpdateAgent.tar
/root/UnixUpdateAgent
file, and extract the file’s contents to:
Figure 2.18 UnixUpdateAgent directory
3. Open a Terminal Window (Main Menu > System Tools > Terminal).
4. Navigate to the
5. Type .
/install
/root/UnixUpdateAgent/
to start the installation process.
directory.
6. At the Enter the Directory where ZENworks Patch Management Agent should be installed
ENTER
[/usr/local]: prompt, type the desired installation path or press
to accept the default path
of /usr/local.
Note: The Enter the Directory... prompt identified in step 6 does not apply to the
Netware installation.
- 18 -
Page 25

ZENworks Patch Management Server v6.4 - Agent Installation Guide
7. At the Please enter a name for this machine prompt, type a name for the location to which
you are installing.
8. At the Enter your ZENworks Patch Management Server address, type the URL or IP of the
ZENworks Patch Management Server, to which the agent will be communicating, in the format
of http://ServerAddress or https://ServerAddress.
9. At the Enter the product serial number that appears as xxxxxxxx-xxxxxxxx: prompt, type
your serial number.
Note: You must enter your serial number in the
not have your serial number please contact Novell Support
10. At the Do you have a Proxy [Y/N]: prompt; type y to configure a proxy, or press
xxxxxxxx-xxxxxxxx
www.novell.com
format. If you do
/support
ENTER
continue without configuring a proxy server.
11. At the Do you wish to add this agent to existing groups on “Novell ZENworks Patch
Management Server”? [Y/N]: prompt, type y to add the agent to a group or n to continue.
The installation completes and the terminal link can be disconnected.
Warning: Some issues when installing the ZENworks Patch Management Agent for Linux/
Unix/Mac/Netware may include:
• An incorrect Patch Management Server address (if using SSL, the URL starts with
https://
).
• An incorrect serial number.
• Networking problems.
• An incorrect proxy address or port.
to
- 19 -
Page 26

Installing Agents
- 20 -
Page 27

ZENworks Patch Management Server v6.4 - Agent Installation Guide
3
Automating the Agent Installation
The following section includes instructions for automating the installation of the ZENworks Patch
Management Agent to a device.
In this chapter
“Automating the Windows MSI Installer” on page 21
“Performing a Silent Install from a Command Prompt” on page 34
• “Installing the Windows Agent” on page 34
• “Installing the Linux/UNIX/Mac/Netware Agent” on page 35
Automating the Windows MSI Installer
The Single Agent Windows MSI Installer can be used to perform a single installation on the current
computer or through the use of the MSI Installer, Group Policy Objects (GPOs), and the Orca
package editor on multiple computers. Using these tools you can install the ZENworks Patch
Management Agent on all windows computers within your domain.
To use the MSI Installer with Group Policy Objects:
1. Create a Network share as defined in “Creating a Network Share” on page 21.
2. Modify the Single Agent Windows MSI Installer (.msi) file as defined in “Modifying the MSI
File” on page
3. Create an Organizational Unit as defined in “Creating an Organizational Unit” on page 30.
25.
Warning: Microsoft Group Policy Object (GPO) allows for mandatory software distribution
to computers under control of a particular Organizational Unit (OU) and can be used to
distribute the Novell Agent. However, the GPO installation does not check for an existing
installation of the Novell Agent on the target computer and will reinstall the Agent on any
computers in the OU. In order to avoid potential problems caused by reinstalling the Agent
ensure that computers with existing Update Agents are NOT members of the OU which
contains the Novell software GPO.
Creating a Network Share
Create a network share (with Read-Only access) from which all users will be able to access and
install the Novell Agent using the MSI installer.
To Create The Network Share
1. Create the Novell MSI folder on a network computer.
2. Right-click the Novell MSI folder and select Properties.
3. Select the Sharing tab.
- 21 -
Page 28

Automating the Agent Installation
4. Select the Share this folder option. If needed, change the Share name.
5. Click Permissions.
The Permissions for Novell MSI window opens.
Figure 3.1 Sharing Tab
Figure 3.2 Permissions window
- 22 -
Page 29

ZENworks Patch Management Server v6.4 - Agent Installation Guide
6. Click Add...
The Select Users, Computers, or Groups window opens.
Figure 3.3 Select Users
7. In the add the Domain Users and Domain Admins groups, select the Domain Users group. If
you cannot locate the groups, type the names in the Enter the object names to select field and
click Check Names.
Figure 3.4 Group Search
- 23 -
Page 30

Automating the Agent Installation
8. Click OK.
The Select Users, Computers, or Groups window closes and displays the Permissions for
Novell MSI window
.
Figure 3.5 Share Permissions
9. Select the Everyone group and choose Deny Change and Allow Read access.
10. Select the Domain Admins group, and choose Allow Full Control access.
11. Click OK.
The Permissions window closes and displays the Properties window.
12. Select the Security tab.
- 24 -
Page 31

ZENworks Patch Management Server v6.4 - Agent Installation Guide
13. Add the Domain Users, Domain Admins, and Everyone groups (refer to steps 6 through 8)
applying Read & Execute permission to the Everyone and Domain Users groups and Full
Control to the Domain Admins group.
Figure 3.6 Security Tab
14. Click OK to close the Novell MSI Properties window.
15. Copy
updateagent.msi
from the ZENworks Patch Management Server (in the
<InstallDirectory>\Novell\ZENworks Patch Management
Server\WebRoot\Download\
) directory to the Novell MSI folder you created.
Modifying the MSI File
To fully automate the Agent installation you must modify the MSI file to include your Host Name
and Serial Number. Microsoft Orca allows you to make changes to the application so your users
will not have to manually enter their name and serial number for their installs. This also allows the
application to be installed remotely.
The user customized installer properties are defined in the following table:
Table 3.1 Description of Installation Properties
Property Description
HOST
SERIAL
The URL (or IP) of your ZENworks Patch Management Server.
The Serial Number of your ZENworks Patch Management Server.
- 25 -
Page 32

Automating the Agent Installation
Table 3.1 Description of Installation Properties
Property Description
USEPROXY
PROXYURL
PROXYUSER
PROXYPASS
GROUPLIST
Whether or not a proxy is used. 0=No, 1=Yes.
The URL (or IP) of your Proxy.
Login user for an Authenticated Proxy.
Login password for an Authenticated Proxy.
Automatically add the Agent to the defined Group(s). Either the
Group Name or Distinguished Name can be used. If the Group
Name is used, the agent will be added to all of the groups with
that name.
Note: Modifying the digitally signed MSI file will invalidate the digital signature
assigned by Novell. Depending upon your security settings, this may introduce security
warnings and restrictions during Agent installation.
To modify the MSI file using
Microsoft Orca
1. Install Microsoft Orca (or a similar MSI editor tool) to your management workstation.
Note: Orca is installed from the Microsoft Windows Installer SDK which can be
downloaded from http://msdn.microsoft.com/library/default.asp?url=/library/en-us/msi/
setup/orca_exe.asp.
2. Select Start > Programs > Orca to open Microsoft Orca.
- 26 -
Page 33

ZENworks Patch Management Server v6.4 - Agent Installation Guide
3. Open the
updateagent.msi
Orca displays the updateagent.msi file.
Figure 3.7 Orca Initial display
file that you copied to the network share you created
4. Scroll through the Tables list and select the Property table.
The Rows field populates with the rows associated with the Property table.
5. Locate the Host row, and click the Val ue field.
The Va l ue field is activated and can be edited.
6. Type t h e Patch Management Server URL in the format:
https://ServerName
for a secure server) in the Va l ue field.
http://ServerName
7. Locate the Serial row, and click the Val ue field.
The Va l ue field is activated and can be edited.
- 27 -
(or
Page 34

Automating the Agent Installation
8. Type your PLUS serial number in the Va lu e field.
Figure 3.8 Enter Serial Number
9. If you are using a Proxy Server, add the necessary proxy entries as follows:
a. Right-click in the right window pane and select Add Row.
The Add Row dialog box opens.
Figure 3.9 Right-Mouse Menu
- 28 -
Page 35

ZENworks Patch Management Server v6.4 - Agent Installation Guide
b. Enter USEPROXY as the Property Column field.
Figure 3.10 Add Row Property
c. Select Value and type 1 to indicate that proxy is enabled.
Figure 3.11 Add Row Value
d. Click OK.
The Proxy row is added to the Property table.
e. Add additional rows as needed for the following proxy entries:
Table 3.2 Proxy specific entries
Property Value
USEPROXY 1
PROXYURL http://yourproxyserver:port
PROXYUSER
PROXYPASS
(optional) Authenticated proxy login user
(optional) Authenticated proxy login user’s password
- 29 -
Page 36

Automating the Agent Installation
10. To automatically add the agent to an existing group, add the following entry:
a. Right-click in the right window pane and select Add Row
The Add Row dialog box opens.
b. Enter GROUPLIST as the Property Column field.
c. Select Value and enter the Group Names in the format:
“GroupName1;GroupName2;GroupNameN”
d. Click OK.
The GROUPLIST row is added to the Property table.
11. Click Save.
Orca saves the changes to the
12. Close Microsoft Orca.
updateagent.msi
file.
Note: You can now use the
updateagent.msi
file to manually install the ZENworks
Patch Management Agent by browsing, from the target computer, to the network share you
created and manually opening the
updateagent.msi
file.
Creating an Organizational Unit
To Create a New Organizational Unit
1. Click Start >Administrative Tools > Active Directory Users and Computers.
The Active Directory Users and Computers management console opens.
2. Right-click the domain tree (mydomain.com) and select New > Organizational Unit.
Figure 3.12 Create New OU
- 30 -
Page 37

ZENworks Patch Management Server v6.4 - Agent Installation Guide
3. Assign a Name (
NovellMSI
) to your Organizational Unit (OU) and click OK.
4. Right-click the new OU and select Properties.
5. In the Group Policy Tab, click New and assign a name (
new Group Policy.
Figure 3.13 OU Group Policy Tab
Install Windows Agent
) to the
6. Select your new Group Policy and click Edit.
The Group Policy Editor opens.
7. Expand the Software Settings sub-branch of the Computer Configuration branch.
- 31 -
Page 38

Automating the Agent Installation
8. Right click Software Installation and select Properties opening the Software Installation
Properties window.
Figure 3.14 General Tab
9. In the General tab, select the Assign radio button.
10. Select the Uninstall the applications when they fall out of the scope of management
checkbox in the General tab (in the Advanced tab in Windows 2003).
11. Click OK.
12. Right-click Software Installation and select New > Package.
- 32 -
Page 39

ZENworks Patch Management Server v6.4 - Agent Installation Guide
13. Browse to the shared folder you created and select the modified
Figure 3.15 Group Policy
updateagent.msi
package.
14. Close the Group Policy editor and click Close.
15. In the Active Directory Users and Computers management console, select the Computers
branch of your domain tree (mydomain.com).
- 33 -
Page 40

Automating the Agent Installation
16. Select the computers to be added to the new OU.
Figure 3.16 Add Computers to OU
17. Right-click and select Move... to add them to the OU.
18. Select your OU (
NovellMSI
) from the Move window.
19. Close the Active Directory Users and Computers management console.
Performing a Silent Install from a Command Prompt
Installing the Windows Agent
In addition to the ZENworks Patch Management Server URL (or IP) and Serial Number, you can
define a Proxy and Auto-Assign groups when performing a silent install using the Single Agent
Windows MSI Installer:
To Perform a Silent Install from the Command Line
1. Open a command prompt.
2. Define the host location, serial number, and other optional settings using the following syntax:
- 34 -
Page 41

ZENworks Patch Management Server v6.4 - Agent Installation Guide
Syntax
Perform a Silent Install With a Proxy
msiexec /i “C:\UpdateAgent.msi” /qn HOST=”http://myServer” SERIAL=”88888888-88888888”
USEPROXY=1 PROXYURL=”http://myProxy” PROXYUSER=”ProxyUser” PROXYPASS=”ProxyPassword”
GROUPLIST=”GroupName1;GroupName2;GroupNameN”
Perform a Silent Install Without a Proxy
msiexec /i “C:\UpdateAgent.msi” /qn HOST=”http://myServer” SERIAL=”88888888-88888888”
USEPROXY=0 GROUPLIST=”GroupName1;GroupName2;GroupNameN”
Command Line Descriptions
The user customized installer properties are defined in the following table:
Table 3.3 Description of Installation Properties
Property Description
HOST
SERIAL
USEPROXY
PROXYURL
PROXYUSER
PROXYPASS
GROUPLIST
The URL (or IP) of your ZENworks Patch Management Server.
The Serial Number of your ZENworks Patch Management Server.
Whether or not a proxy is used. 0=No, 1=Yes.
The URL (or IP) of your Proxy.
Login user for an Authenticated Proxy.
Login password for an Authenticated Proxy.
Automatically add the Agent to the defined Group(s). Either the
Group Name or Distinguished Name can be used. If the Group
Name is used, the agent will be added to all of the groups with
that name.
Installing the Linux/UNIX/Mac/Netware Agent
In addition to the ZENworks Patch Management Server URL (or IP) and Serial Number, you can
define a Proxy and Auto-Assign groups when performing a silent install using the Single Agent
Installer for
Linux/UNIX/Mac/Netware:
To Perform a Silent Install
1. Open a command prompt.
- 35 -
Page 42
Automating the Agent Installation
2. Define the host location, serial number, and other optional settings using the following syntax:
Syntax
Perform a Silent Install With a Proxy
./install -silent -d “/user/local” -p “http://myServer” -sno “88888888-88888888”
-proxy “http://myProxy” -port ## -g “GroupName1;GroupName2;GroupNameN”
Perform a Silent Install Without a Proxy
./install -silent -d “/user/local” -p “http://myServer” -sno “88888888-88888888”
-g “GroupName1;GroupName2;GroupNameN”
Command Line Descriptions
Table 3.4 Command Line Descriptions
Command Description
-silent Performs installation silently.
-d The install directory.
-p The URL (or IP) of your ZENworks Patch Management Server.
-sno The Serial Number of your ZENworks Patch Management Server.
-proxy The URL (or IP) of your Proxy.
-port The Proxy port.
-g Automatically add the Agent to the defined group(s). Either the
Group Name or Distinguished Name can be used. If the Group
Name is used, the agent will be added to all of the groups with
that name.
- 36 -
Page 43

ZENworks Patch Management Server v6.4 - Agent Installation Guide
A
Index
A
agent requirements........................ 3
I
install
automated ............................. 21
Single Agent for Linux/UNIX/Mac/
Netware ...................... 18
Single Agent for Windows .......... 6
installation methods.......................1
M
Microsoft Group Policy Objects....... 21
S
Single Agent Windows MSI Installer 21
supported operating systems........... 2
- 37 -
Page 44

Index
- 38 -
Page 45

Page 46

Novell, Inc.
1800 South Novell Place
Provo, UT 84606
www.novell.com
phone: 800.858.4000
© PatchLink Corporation 1997 - 2007. ALL RIGHTS RESERVED. U.S. Patent No. 6,990,660.
02_017N ZENworks Patch Management Server v6.4 Agent Installation Guide
 Loading...