


Server Installation Guide
ZENworks Patch Management 6.4 SP2
Document: 02_016N_6.4 SP2_15
Novell, Inc®
1800 South Novell Place
Provo, UT 84606
United States of America
Phone: +1 800.858.4000
E-mail: info@novell.com
Copyright© 1997-2009 Novell, Inc® ALL RIGHTS RESERVED. U.S. Patent No. 6,990,660, Other
Patents Pending. This manual, as well as the software described in it, is furnished under license. No part
of this manual may be reproduced, stored in a retrieval system, or transmitted in any form - electronic,
mechanical, recording, or otherwise - except as permitted by such license.
l
LIMIT OF LIABILITY/DISCLAIMER OF WARRANTY: NOVELL, INC.® MAKES NO
REPRESENTATIONS OR WARRANTIES IN REGARDS TO THE ACCURACY OR
COMPLETENESS OF THE INFORMATION PROVIDED IN THIS MANUAL. NOVELL,
INC.® RESERVES THE RIGHT TO MAKE CHANGES TO THE INFORMATION
DESCRIBED IN THIS MANUAL AT ANY TIME WITHOUT NOTICE AND WITHOUT
OBLIGATION TO NOTIFY ANY PERSON OF SUCH CHANGES. THE INFORMATION
PROVIDED IN THE MANUAL IS NOT GUARANTEED OR WARRANTED TO PRODUCE
ANY PARTICULAR RESULT, AND THE ADVICE AND STRATEGIES CONTAINED MAY
NOT BE SUITABLE FOR EVERY ORGANIZATION. NO WARRANTY MAY BE CREATED
OR EXTENDED WITH RESPECT TO THIS MANUAL BY SALES REPRESENTATIVES OR
WRITTEN SALES MATERIALS. NOVELL, INC.® SHALL NOT BE LIABLE FOR ANY LOSS
OF PROFIT OR ANY OTHER DAMAGES ARISING FROM THE USE OF THIS MANUAL,
INCLUDING BUT NOT LIMITED TO SPECIAL, INCIDENTAL, CONSEQUENTIAL, OR
OTHER DAMAGES.
Trademarks
Novell®, ZENworks®, ZENworks Patch Management Server®, Novell Agent, and their associated logos
are registered trademarks or trademarks of Novell, Inc.®.
RSA Secured® is a registered trademark of RSA Security Inc.
Apache is a trademark of the Apache Software Foundation. In addition, any other companies’ names and
products mentioned in this document may be either registered trademarks or trademarks of their
respective owners.
Feedback
Your feedback lets us know if we are meeting your documentation needs. E-mail the Novell Technical
Publications department at techpubs@novell.com to tell us what you like best, what you like least, and to
report any inaccuracies.
- II -

Table of Contents
Table of Contents iii
Preface v
About This Guide .................................................................................................. v
Typographical Conventions .................................................................................... v
Planning Your Installation 1
System Requirements ........................................................................................... 1
Minimum Hardware Requirements....................................................................... 1
Supported Operating Systems ............................................................................ 1
Other Software Requirements............................................................................. 2
Supported Database Servers .............................................................................. 2
Recommended Configuration.................................................................................. 3
Server Installation Checklist................................................................................... 4
Installing Your Patch Management Server 5
Installing Patch Management Server ....................................................................... 5
Starting Your Patch Management Server .................................................................15
Logging on to ZENworks Patch Management.......
Configuring Your Patch Management Server to use SSL .
.................................................15
...........................................16
Server Installation Checklist 19
- III -

- IV -

Preface
This Server Installation Guide is a resource written for all users of ZENworks Patch
Management 6.4 SP2. This document defines the concepts and procedures for installing,
configuring, implementing, and using ZENworks Patch Management 6.4 SP2.
About This Guide
This guide contains the following chapters and appendices:
• Chapter 1: Planning Your Installation
PREFACE
• Chapter 2: Installing Your Patch Management Se
• Appendix A: Server Installation Checklist
TIP: Novell documentation is updated on a regular basis. To acquire the latest version of this or
any other published document, please refer to the
(http://www.novell.com/documentation/).
Typographical Conventions
The following conventions are used throughout Novell documentation to help you identify
various information types.
Convention Usage
bold Buttons, menu items, window and screen objects.
bold italics Wizard names, window names, and page names.
italics New terms, options, and variables.
UPPERCASE SQL Commands and keyboard keys.
monospace File names, path names, programs, executables, command
synt
rver
Novell Documentation Web page
a
x, and property names.
- V -

PREFACE
- VI -

ZENWORKS PATCH MANAGEMENT SERVER INSTALLATION GUIDE
1
Planning Your Installation
To assist in gathering the information required for a smooth installation, it is recommended
that you use the Server Installation Checklist on pag
System Requirements
Minimum Hardware Requirements
The hardware requirements for ZENworks Patch Management 6.4.2 SP2 vary depending
upon the number of devices you manage. As the device count increases, so do the
requirements. The following, minimum hardware requirements, will support up to 250
devices:
• A single 1.4 GHz Pentium or equivalent processor
• 512 MB RAM
• 36 GB of available disk space
• A single 100 Mbps network connection (with access to the Internet)
For optimal performance please refer to the settings defined under Recommended
Configuration on
Supported Operating Systems
page 3.
e 4.
ZENworks Patch Management 6.4.2 SP2 is supported on the following Operating Systems:
• Microsoft Windows Server™ 2003, Web Edition with SP1 or later
• Windows Server 2003, Standard Edition with SP1 or later
• Windows Server 2003, Enterprise Edition
Windows Server 2003 R2, Standard Edition (SP2 optional but recommended)
•
• Windows Server 2003 R2, Enterprise Edition (SP2 optional but recommended)
NOTE: ZENworks Patch Management must be installed on an Operating System that uses any
English locale (en-US, en-UK, en-CA, etc.) in its default configuration and is not a domain
controller.
NOTE: Prior to installing ZENworks Patch Management 6.4.2 SP2, you must also install the
Update for Windows Server 2003 (KB925336) available from
Article #925336.
- 1 -
with SP1or later
Microsoft Knowledge Base

PLANNING YOUR INSTALLATION
Other Software Requirements
ZENworks Patch Management 6.4.2 SP2 requires the following software:
• Microsoft® Internet Informat
• Microsoft® .NET Framework version 1.1 SP1 and 2.0 (both versions are required)
• Microsoft Internet Explorer 6.x or higher
• Microsoft SQL Server (any version) must not be installe
version of ZENworks Patch Management
ion Services (IIS) 6.0
ss installed by a previous
d unle
Supported Database Servers
ZENworks Patch Management 6.4.2 SP2 is supported on the following database servers:
• SQL Server 2005 Express Edition with SP2
• SQL Server 2005 Standard Edition with SP2
• SQL Server 2005 Enterprise Edition with SP2
NOTE: ZENworks Patch Management installs SQL Server 2005 Express Edition with SP2 during
installation. Therefore, you must not have any database server installed prior to the installation
of ZENworks Patch Management.
- 2 -

Recommended Configuration
Novell recommends the following hardware and software configurations for ZENworks
Patch Management 6.4.2 SP2:
PLANNING YOUR INSTALLATION
Table 1-1: ZENwor
Number
of Nodes
Operating
System
Database
ver
Ser
Processor 1 - 2.4
RAM 1 GB 2 GB 2 GB 4 GB
Storage 1 - 36 GB
NOTE: Refer to the Novell Knowledge Base (http://www.novell.com/support/) for additional
configuration recommendations.
ks Patch Management 6.4.2 SP2 Recommended Configuration
< 1,000 < 2,500 < 5,000 < 10,000 > 10,000
ows
Wind
Server 2003,
Web Edition
with SP2
SQL 200
Express
Hard Drive
5
GHz 1 - Pentium 41 - Dual
Windows
ver 2003,
Ser
Web Edition
with SP2
SQL 2005
Express
1 - 72 GB
Hard Drive
Windows
ver 2003,
Ser
Web Edition
with SP2
SQL 2005
Express
Core,
Non-Xeon
2 - 144 GB
Hard Drives
Windows
ver 2003,
Ser
Standard
Edition with
SP2
SQL 2005
Standard
2 - Dual
Core Xeon
144 GB
4 Hard Drives
Contact
Novell
ofessional
Pr
Services.
- 3 -

PLANNING YOUR INSTALLATION
Server Installation Checklist
Prior to installing ZENworks Patch Management, your must gather and confirm the following
information:
• Your target computer meets or exceeds the requirements defined in System
Requirements on pag
• Your server has a clean operating system installation.
e 1.
• Your server is not a D
• You have installed the Update
Microsoft Knowledge Base Article #925336
• Internet Information Server (IIS) is installed and running (if necessary refer to
http://support.microsoft.com/k
• All required service packs have been installed, as defined in Supported Operating
Systems on page 1.
•
If your server is a member of a domain, only the default security policies are in effect.
• Your server DNS host name is:___________________________________
• The local SMTP mail host name is:________________________________
• Your ZENworks Patch Management serial number is:__________-__________
• Your target system is conn
• If you are using SSL, a valid SSL web certificate has been obtained.
If you are using SSL, you need to obtain a valid web
as Verisign Inc. (www.verisign.com
ZENworks Patch Management.
• If a proxy server will be used, you know the proxy server’s
name, and password.
omain Controller.
for Windows Server 2003 (KB925336) available from
b/324742 for details about IIS information.)
ec
ted to the internet.
) or Entrust (www.entrust.com), prior to installing
certificate, from a trust provider such
name, IP address, port, user
• Name:_____________________
• IP address:____-____-____-____
• Port:_______________________
• User name:__________________
• Password:___________________
- 4 -

ZENWORKS PATCH MANAGEMENT SERVER INSTALLATION GUIDE
2
Installing Patch Management Server
Installing Your Patch Management Server
Complete the following steps to install and configure ZENworks Patch Management Server.
1. From the location you specified for your download, select the ZENworks Patch
Management 6.4.2 SP2 Server installer.
TEP RESULT: The ZENworks Patch Management 6.4.2 SP2 Server Installation wizard
S
opens.
Figure 2-1: ZENworks Patch
Management 6.4.2 SP2 Installation Wizard
- 5 -

INSTALLING YOUR PATCH MANAGEMENT SERVER
2. Click Next.
TEP RESULT: The installation wizard checks to ensure that your server meets the
S
minimum requirements and the System Requirements page opens.
Figure 2-2: Inst
NOTE: If you received any warnings or failures, click View all Failures / Warnings... to
allation Wizard - System Requirements Page
view details about each.
3. Click Next.
TEP RESULT: The Ready to Install page opens.
S
- 6 -

4. Click Install.
TEP RESULT: The 6.4.2 SP2 installation wizard detects that ZENworks Patch
S
Management 6.4 is not already installed and the ZENworks Patch
Management 6.4 Server Installation Wizard opens.
Figure 2-3: Installation Wiz
INSTALLING YOUR PATCH MANAGEMENT SERVER
ard
5. Click Next.
TEP RESULT: The License Agreement page opens.
S
Figure 2-4: Installa
tion Wizard - License Agreement Page
6. Review the license agreement, and if you acce
of the license agreement option.
pt the terms select the I accept the terms
- 7 -

INSTALLING YOUR PATCH MANAGEMENT SERVER
7. Click Next.
TEP RESULT: The System Requirements page opens and checks to ensure that your
S
system meets the minimum system requirements.
Figure 2-5: Inst
NOTE: If you have any questions or require additional assistance please contact the Novell
allation Wizard - System Requirements Page
Technical Support team using the contact information found at
http://www.novell.com/company/contacts-offices/.
8. Click Next.
TEP RESULT: The Choose Destination Location page opens.
S
Figure 2-6: Installation
Wizard - Choose Destination Location Page
- 8 -
9. To change the location of the server:
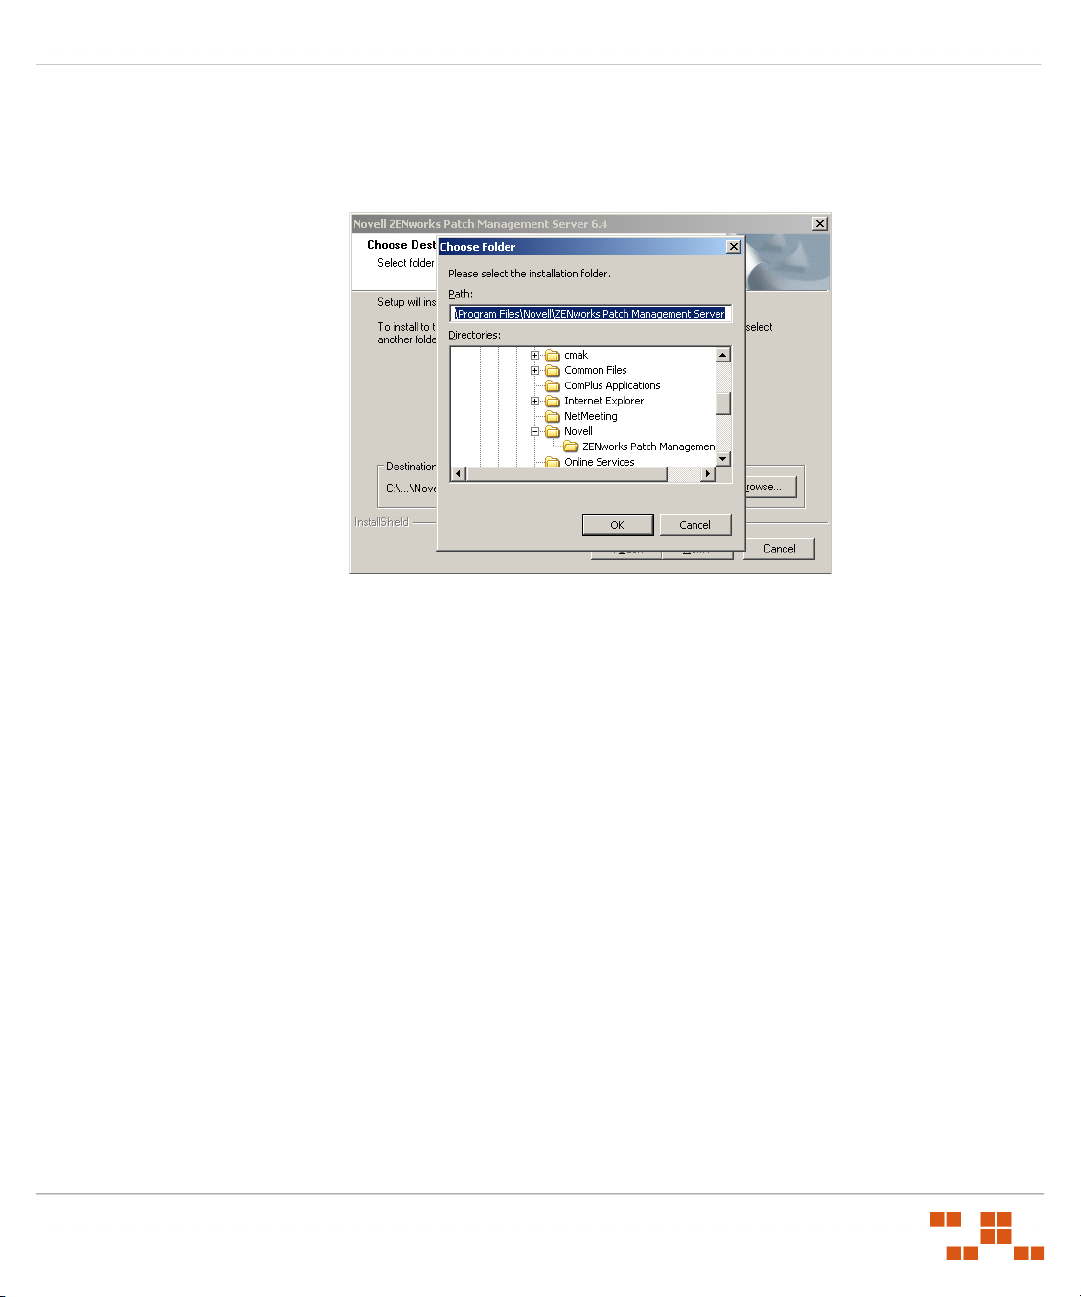
a. Click Browse...
TEP RESULT: The Choose Folder window opens.
S
Figure 2-7: Installa
tion Wizard - Choose Folder Window
b. Select your desired installation location.
NOTE: Although you can change where to install Patch Management Server
components, your system drive must be the C: drive, and Microsoft SQL Server
(and your Patch Management Server databases) will be installed to the system (C:)
drive.
c. Click OK.
TEP RESULT: The Choose Folder window closes and the Choose Destination
S
Location page reflects the new location.
INSTALLING YOUR PATCH MANAGEMENT SERVER
- 9 -
INSTALLING YOUR PATCH MANAGEMENT SERVER
10. Click Next.
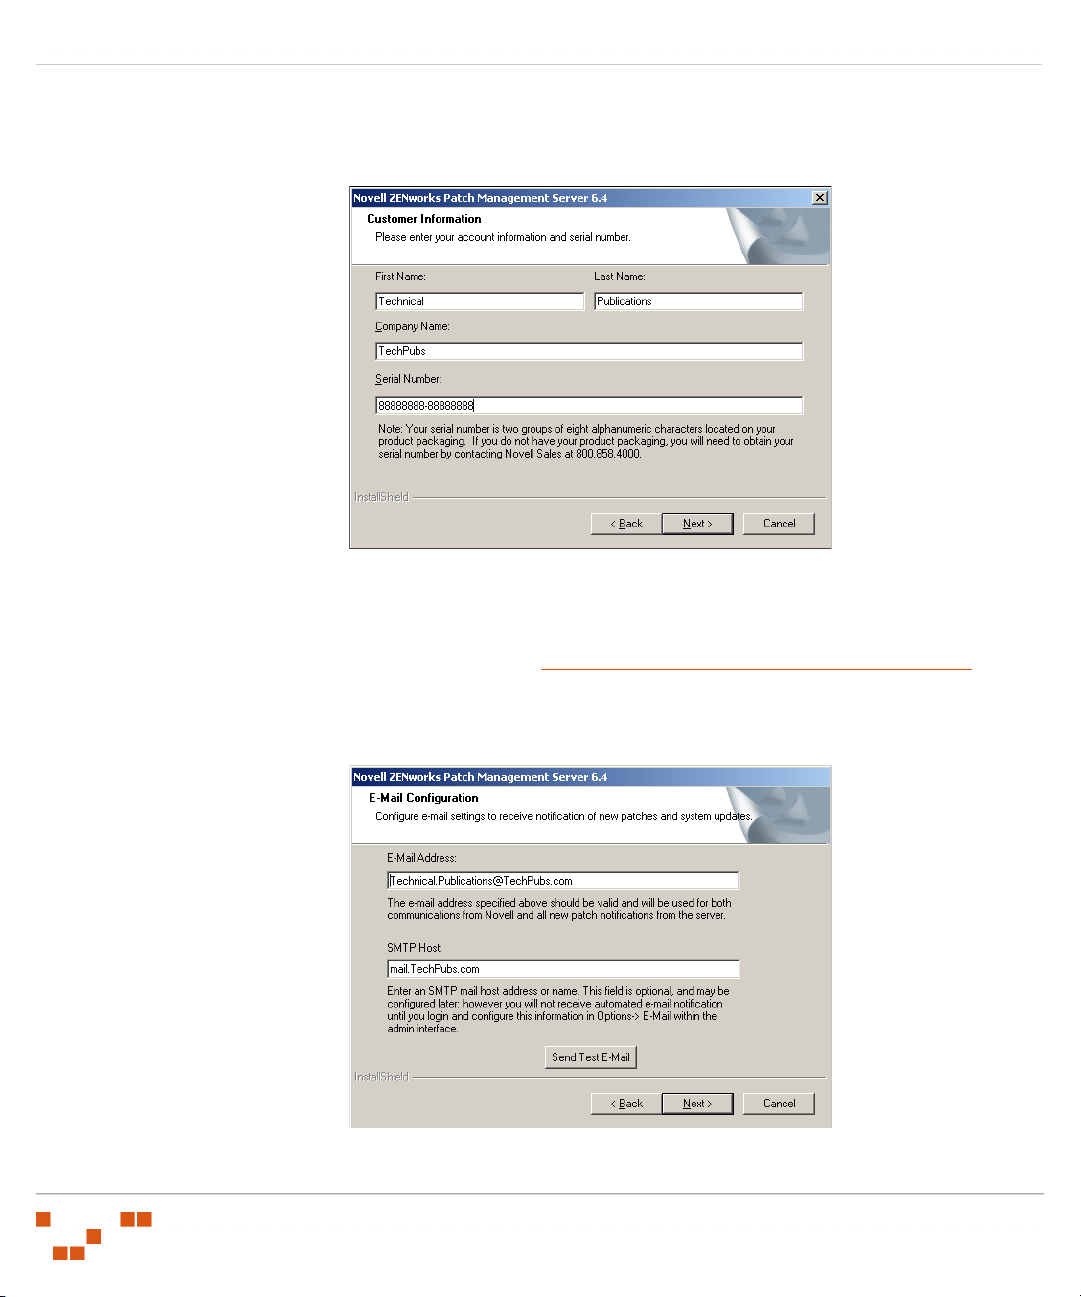
TEP RESULT: The Customer Information page opens.
S
Figure 2-8: Installa
tion Wizard - Customer Information Page
11. Complete the registration information.
NOTE: Your serial number is two groups of eight alphanumeric characters. If you cannot
location your serial number, you will need to contact the Novell Sales organization using
the contact information available at
12. Click Next.
TEP RESULT: The E-mail Configuration page opens.
S
Figure 2-9: Installation
Wizard - E-mail Configuration Page
http://www.novell.com/company/contacts-offices/.
- 10 -
13. Complete the e-mail configuration information.
Field Description
INSTALLING YOUR PATCH MANAGEMENT SERVER
E-Mail Address Type the primary recipients e-mail address in the E-Ma
field. The e-mail notification from Patch Management Server sends
e-mail notifications to this e-mail address as pre-configured server
conditions occur.
SMTP Host Type the name of your SMTP Server in the SMTP Host fie
Patch Management Server uses your corporate Internet (SMTP)
mail server to send e-mail notifications.
14. Click Next.
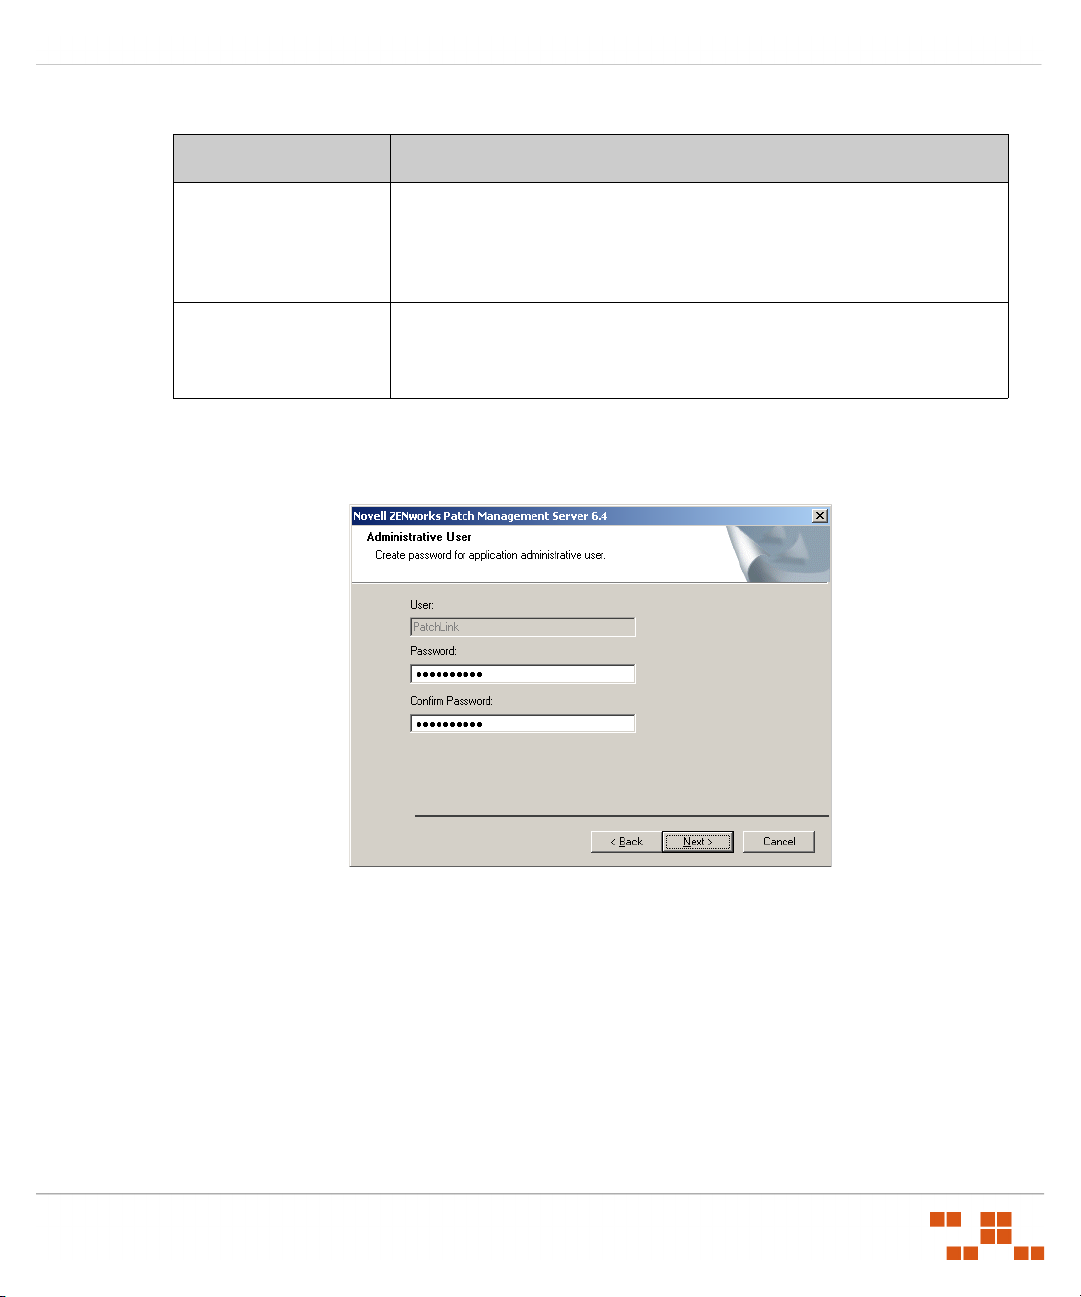
TEP RESULT: The Administrative User page opens.
S
Figure 2-10: Installation Wizard - Adminis
trative User Page
il Address
l
d. The
15. Create and type a password in the Pass
word field. Retyping the password in the Confirm
Password field.
TEP RESULT: The installation creates a default administrator user PatchLink. This user
S
should not be deleted or modified within Windows. If needed, more users
with administrator rights can be created in the User section of Patch
Management Server.
CAUTION: If you have password policy restrictions, failure to meet those restrictions here
will cause the creation of the PatchLink user to fail. Be sure to make a note of the
password as it is required to log in following installation.
- 11 -
INSTALLING YOUR PATCH MANAGEMENT SERVER
16. Click Next.
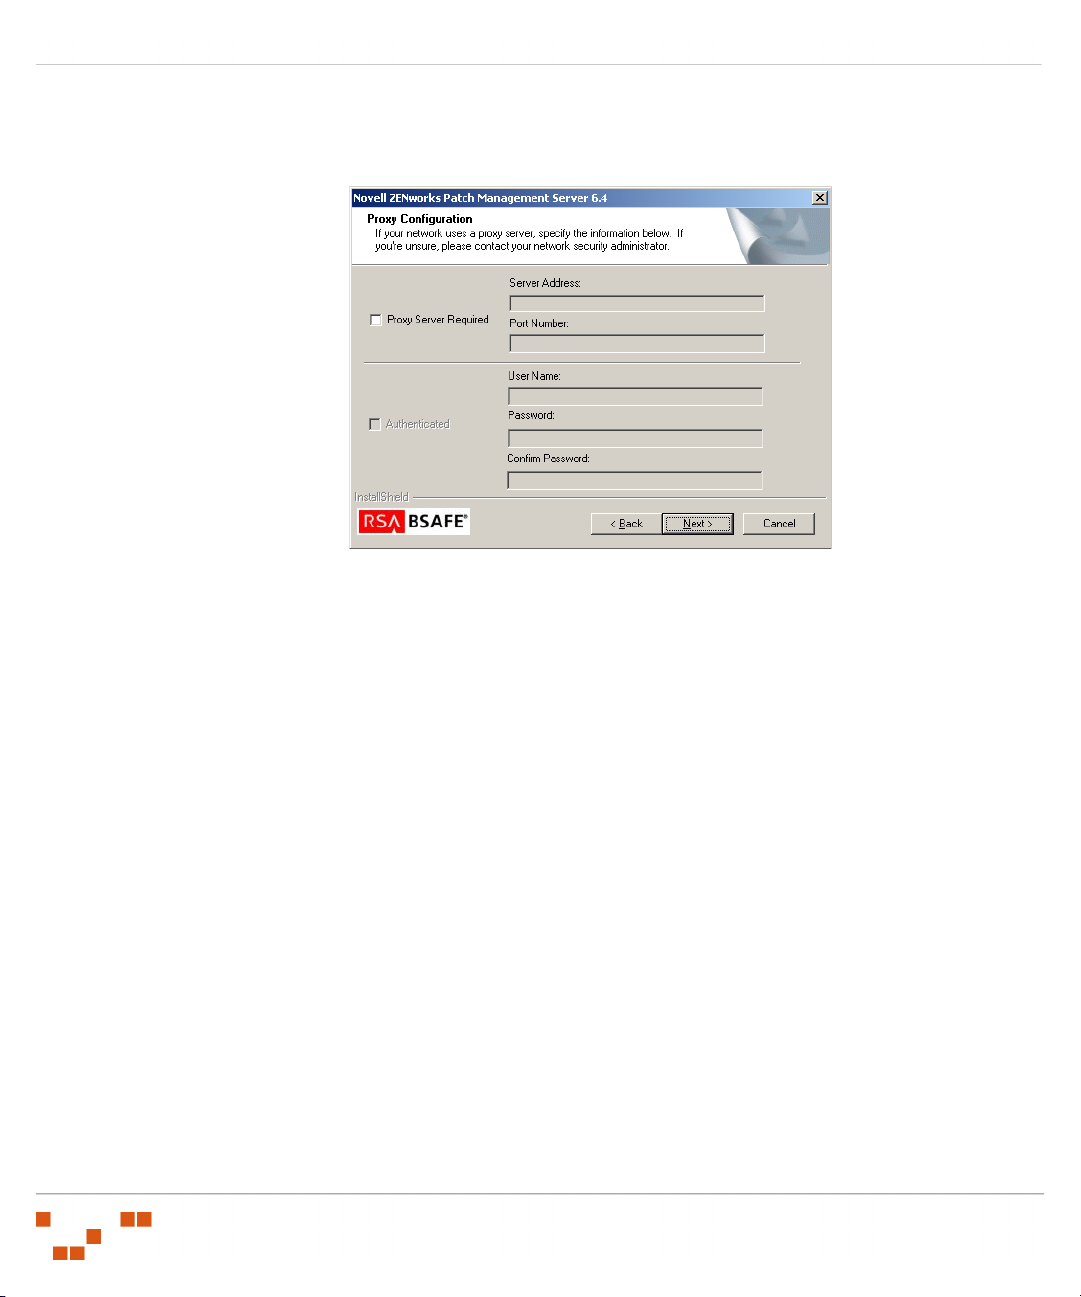
TEP RESULT: The Proxy Configuration page opens.
S
Figure 2-11: In
stallation Wizard - Proxy Configuration Page
17. Configure the Proxy Server information as needed.
a. Select the Proxy Serv
b. In the Server Addr
enter the appropriate proxy server address and port number.
c. Select Aut
henticated if your proxy server is an authenticated proxy.
d. In the User Name, Password, an
user name and password values.
er Required option.
ess (including the http:// prefix) and Port Number fields,
d Confirm Password fields, enter the appropriate
CAUTION: If an incorrect proxy, port, user name, or password is entered, your Patch
Management Server will be unable to connect to the Global Subscription Server.
- 12 -

INSTALLING YOUR PATCH MANAGEMENT SERVER
18. Click Next.
TEP RESULT: The SSL Security page opens. The SSL Security page allows you to
S
define whether to use a secure connection (SSL) between your Patch
Management Server and Patch Management Agents.
NOTE: If you intend to use SSL, it is recommended that you select to do so here, and enter
your certificate prior to rebooting your computer. Otherwise, you must manually configure
the Patch Management Server and each Patch Management Agent to use SSL.
Figure 2-12: Insta
CAUTION: Not using SSL encryption will result in the Patch Management Agent login and
llation Wizard - SSL Configuration Page
password information to be unencrypted.
- 13 -
INSTALLING YOUR PATCH MANAGEMENT SERVER
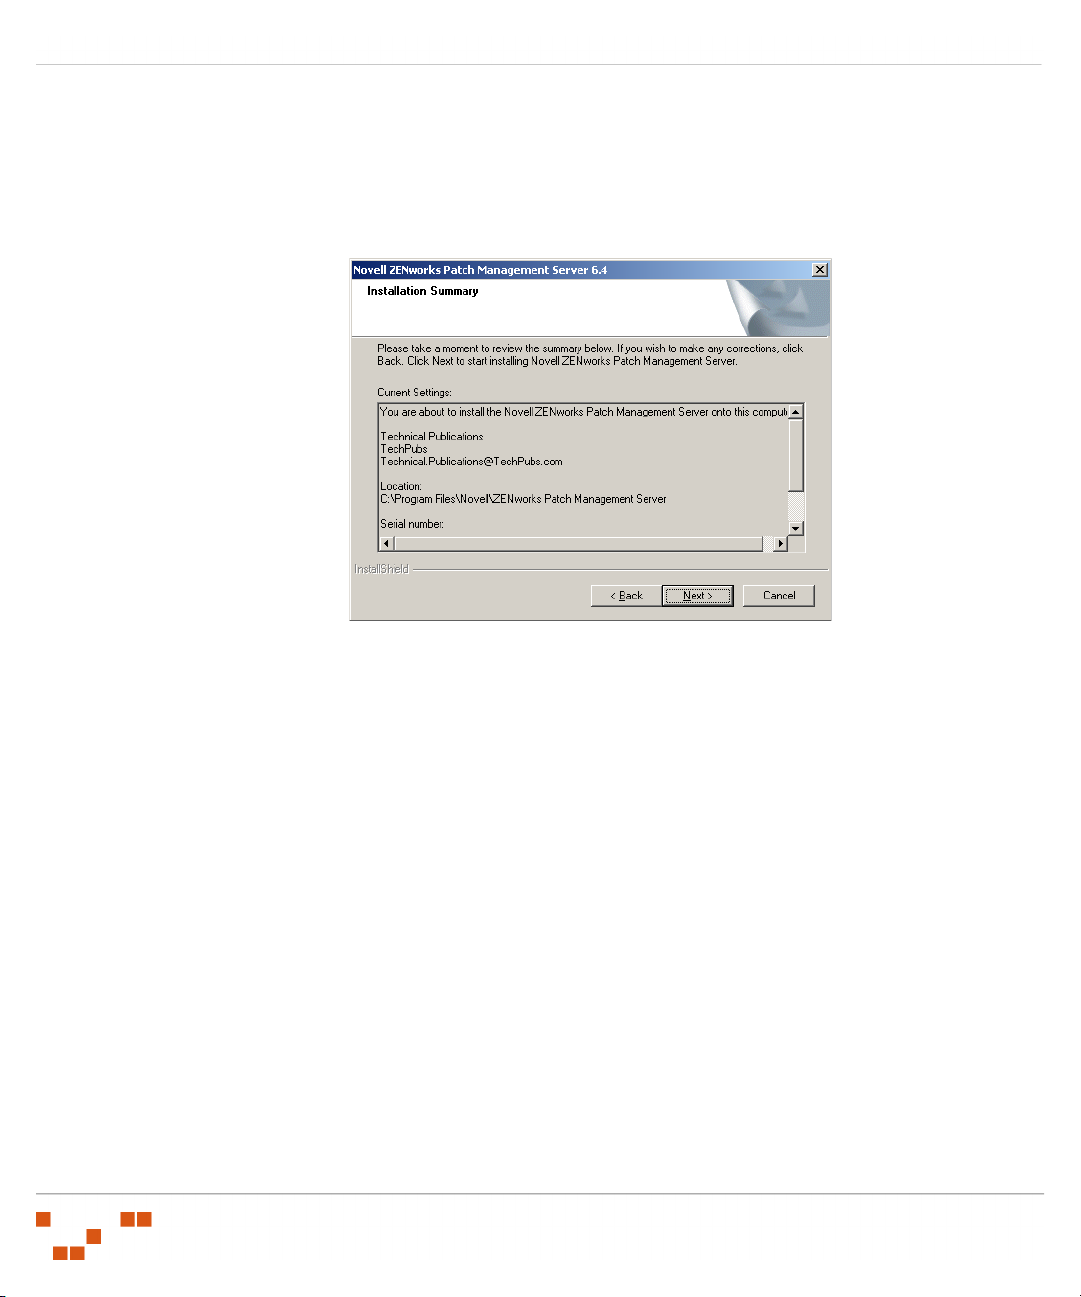
19. Click Next.
TEP RESULT: The Installation Summary page opens. The Installation Summary page
S
allows you to verify all of the selected settings prior to installation. If any of
the settings are incorrect, you must select the Back button at this time and
correct them.
Figure 2-13: Inst
allation Wizard - Inst
allation Summary Page
20. Click Next to
TEP RESULT: The system installs ZENworks Patch Management Server as well as the
S
perform the installation.
files and dependencies required for the Patch Management Server to
communication with the Global Subscription Server.
NOTE: Following the installation of ZENworks Patch Management 6.4 the wizard will then
continue with the installation of ZENworks Patch Management 6.4.2 SP2.
21. Click Finish to complete th
e installation and exit the Installation Wizard.
- 14 -
INSTALLING YOUR PATCH MANAGEMENT SERVER
Starting Your Patch Management Server
Having successfully installed your Patch Management Server, you can now log in and begin
configuring ZENworks Patch Management to meet your organizational needs.
Logging on to ZENworks Patch Management
ZENworks Patch Management is an internet application that conforms to standard web
conventions. You can access the application from an internet browser. From the main
screen, you navigate through the system with menu bars, scroll bars, icons, checkboxes,
and hyperlinks.
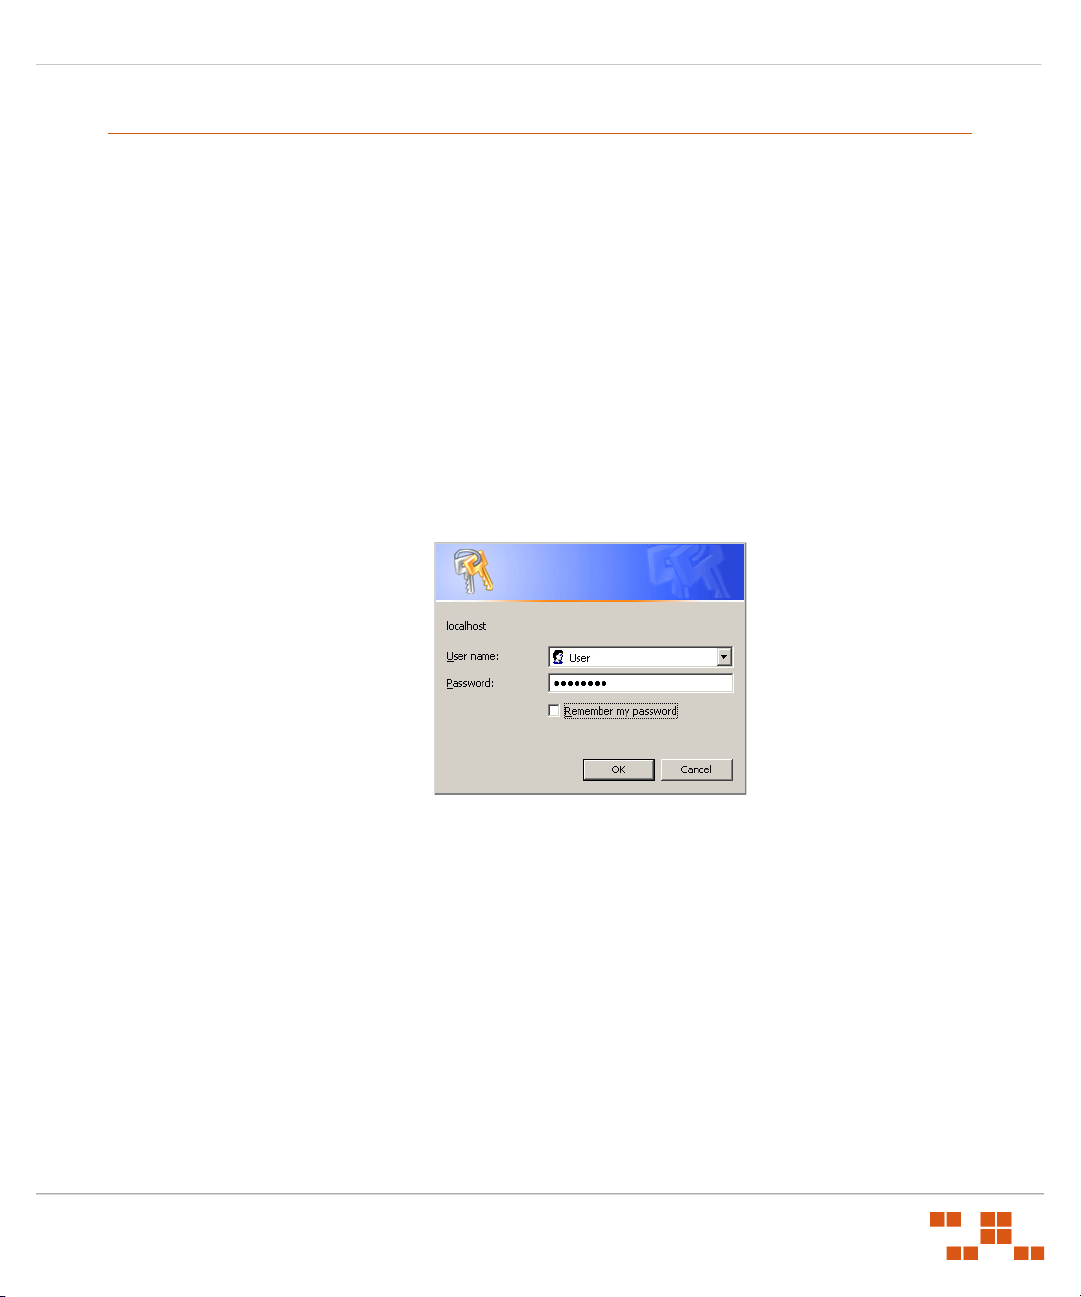
1. Launch your web browser.
2. Type the Server URL in your web browser’s Lo
3. Press Enter.
TEP RESULT: The system displays the Connect to Server dialog box.
S
Figure 2-14: Log
on dialog box
cat
ion field.
4. Type your user name in the Username field.
5. T
6. Click
ype your password in the Password field.
OK.
TEP RESULT: The Home page opens.
S
- 15 -
INSTALLING YOUR PATCH MANAGEMENT SERVER
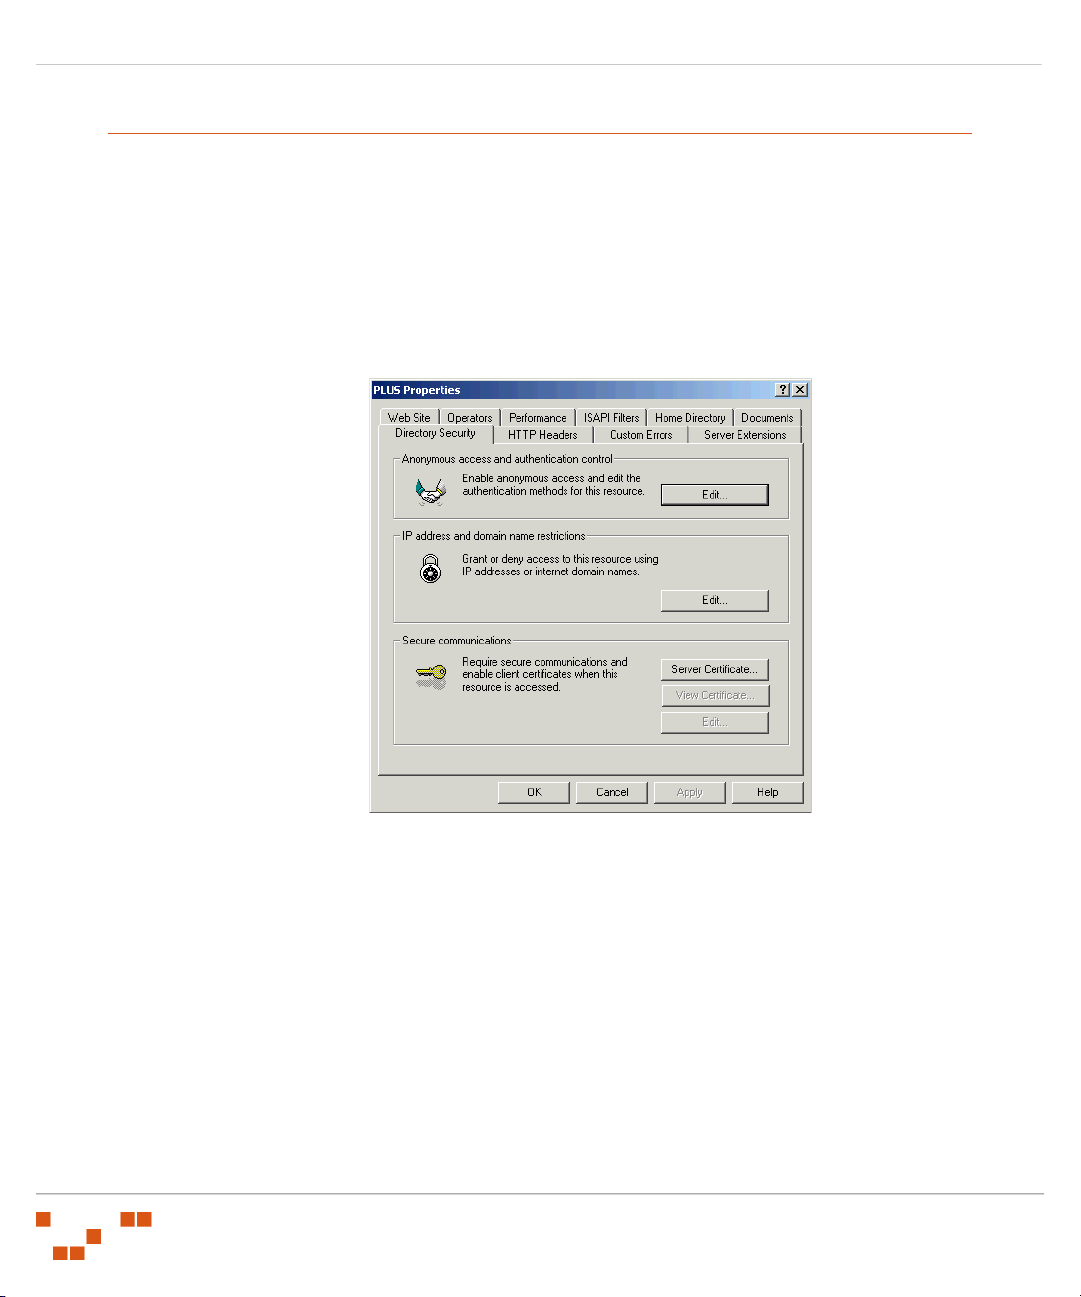
Configuring Your Patch Management Server to use SSL
If you selected the Use SSL security for all agent communication option during installation, you
now must add the SSL Web Certificate to IIS, prior to rebooting.
n
1. Open the Inter
2. Expand the tree view and select the PLUS Web site.
Right-click the PLUS We
3.
TEP RESULT: The Properties dialog box opens.
S
Figure 2-15: Direc
et Information Services manager.
tory Security Tab
b site and select Properties.
4. Select the Direct
ory Security tab.
- 16 -
5. Click Server Certificate...
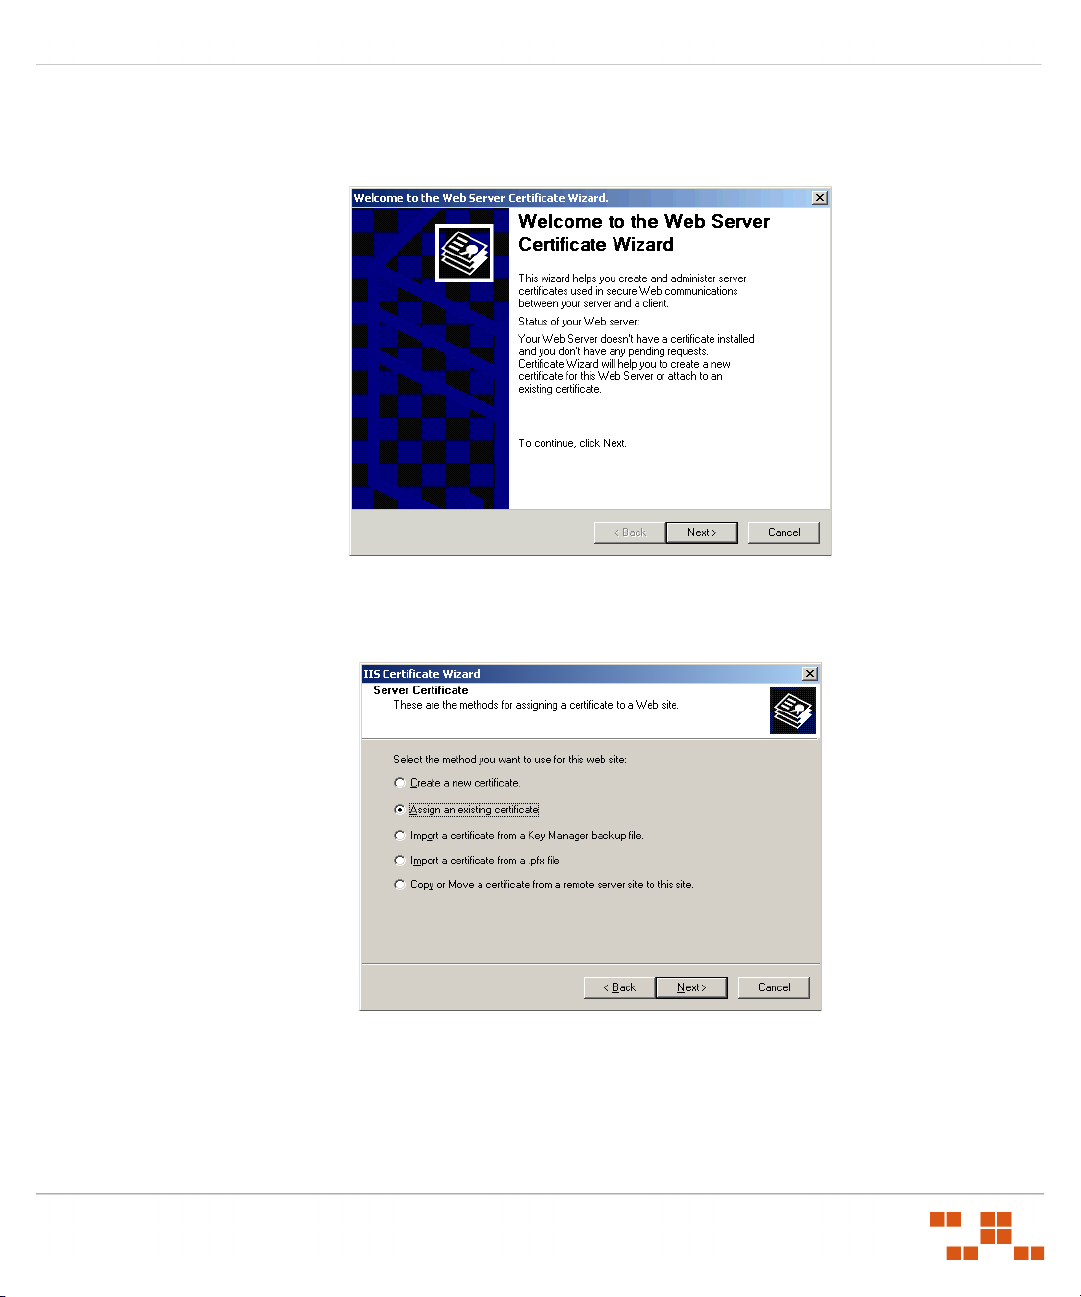
TEP RESULT: The Web Server Certificate Wizard opens.
S
Figure 2-16: We
b Server Certificate Wizard
6. Click Next.
TEP RESULT: The Server Certificate page opens.
S
Figure 2-17: We
b Server Certificate Wizard - Server Certificate Page
INSTALLING YOUR PATCH MANAGEMENT SERVER
7. Select the Assi
NOTE: Be sure to select Assign an existing certificate, since requesting a new certificate
gn an existing certificate option.
can take several days.
8. Click Next and co
ntinue following the Server Certificate Wizard which will guide you
through the remaining steps.
- 17 -

INSTALLING YOUR PATCH MANAGEMENT SERVER
9. Reboot your computer when the wizard completes.
10. Log on to your computer immediately after it restarts.
NOTE: You must log on to your computer to start the registration process. This action
starts the web server, installs the Patch Management Agent, and initiates your patch
subscription.
- 18 -

ZENWORKS PATCH MANAGEMENT SERVER INSTALLATION GUIDE
A
Server Installation Checklist
Prior to installing ZENworks Patch Management, your must gather and confirm the following
information:
• Your target computer meets or exceeds the requirements defined in System
Requirements on pag
• Your server has a clean operating system installation.
• Your server is not a D
• You have installed the Update
Microsoft Knowledge Base Article #925336
• Internet Information Server (IIS) is installed and running (if necessary refer to
http://support.microsoft.com/k
• All required service packs have been installed, as defined in Supported Operating
Systems on page 1.
•
If your server is a member of a domain, only the default security policies are in effect.
• Your server DNS host name is:___________________________________
• The local SMTP mail host name is:________________________________
• Your ZENworks Patch Management serial number is:__________-__________
• Your target system is conn
e 1.
omain Controller.
for Windows Server 2003 (KB925336) available from
b/324742 for details about IIS information.)
ec
ted to the internet.
• If you are using SSL, a valid SSL web certificate has been obtained.
If you are using SSL, you need to obtain a valid web
as Verisign Inc. (www.verisign.com
ZENworks Patch Management.
• If a proxy server will be used, you know the proxy server’s
name, and password.
• Name:_____________________
• IP address:____-____-____-____
• Port:_______________________
• User name:__________________
• Password:___________________
) or Entrust (www.entrust.com), prior to installing
- 19 -
certificate, from a trust provider such
name, IP address, port, user

NOVELL, INC®
1800 SOUTH NOVELL PLACE
PROVO, UT 84606
UNITED STATES OF AMERICA
PHONE: +1 800.858.4000
E-MAIL: INFO@NOVELL.COM
02_016N ZENWORKS PATCH MANAGEMENT SERVER INSTALLATION GUIDE
 Loading...