

Page 1

Novell®
www.novell.com
Administration Guide
ZENworks®
Handheld Management
novdocx (en) 13 May 2009
AUTHORIZED DOCUMENTATION
7 SP1 IR4
June 17, 2009
Novell ZENworks 7 Handheld Management Administration Guide
Page 2

Legal Notices
Novell, Inc. makes no representations or warranties with respect to the contents or use of this documentation, and
specifically disclaims any express or implied warranties of merchantability or fitness for any particular purpose.
Further, Novell, Inc. reserves the right to revise this publication and to make changes to its content, at any time,
without obligation to notify any person or entity of such revisions or changes.
Further, Novell, Inc. makes no representations or warranties with respect to any software, and specifically disclaims
any express or implied warranties of merchantability or fitness for any particular purpose. Further, Novell, Inc.
reserves the right to make changes to any and all parts of Novell software, at any time, without any obligation to
notify any person or entity of such changes.
Any products or technical information provided under this Agreement may be subject to U.S. export controls and the
trade laws of other countries. You agree to comply with all export control regulations and to obtain any required
licenses or classification to export, re-export, or import deliverables. You agree not to export or re-export to entities
on the current U.S. export exclusion lists or to any embargoed or terrorist countries as specified in the U.S. export
laws. You agree to not use deliverables for prohibited nuclear, missile, or chemical biological weaponry end uses.
Please refer to www.novell.com/info/exports/ for more information on exporting Novell software. Novell assumes no
responsibility for your failure to obtain any necessary export approvals.
Copyright © 2009 Novell, Inc. All rights reserved. No part of this publication may be reproduced, photocopied,
stored on a retrieval system, or transmitted without the express written consent of the publisher.
novdocx (en) 13 May 2009
Novell, Inc. has intellectual property rights relating to technology embodied in the product that is described in this
document. In particular, and without limitation, these intellectual property rights may include one or more of the U.S.
patents listed at http://www.novell.com/company/legal/patents/ and one or more additional patents or pending patent
applications in the U.S. and in other countries.
Novell, Inc.
404 Wyman Street, Suite 500
Waltham, MA 02451
U.S.A.
www.novell.com
Online Documentation: To access the online documentation for this and other Novell products, and to get
updates, see www.novell.com/documentation.
Page 3

Novell Trademarks
For a list of Novell trademarks, see the Novell Trademark and Service Mark (http://www.novell.com/company/legal/
trademarks/tmlist.html) list at http://www.novell.com/company/legal/trademarks/tmlist.html.
Third-Party Materials
All third-party trademarks are the property of their respective owners.
novdocx (en) 13 May 2009
Page 4

novdocx (en) 13 May 2009
4 Novell ZENworks 7 Handheld Management Administration Guide
Page 5

Contents
About This Guide 9
1 Setting Up Handheld Import 11
1.1 Creating the Handheld Service Package . . . . . . . . . . . . . . . . . . . . . . . . . . . . . . . . . . . . . . . . . 11
1.2 Configuring the Handheld Import Policy. . . . . . . . . . . . . . . . . . . . . . . . . . . . . . . . . . . . . . . . . . 12
1.3 Associating the Handheld Service Package . . . . . . . . . . . . . . . . . . . . . . . . . . . . . . . . . . . . . . 16
2 Using ZENworks Handheld Management Policies 17
2.1 Understanding ZENworks Handheld Management Policies. . . . . . . . . . . . . . . . . . . . . . . . . . . 17
2.2 Creating Policy Packages . . . . . . . . . . . . . . . . . . . . . . . . . . . . . . . . . . . . . . . . . . . . . . . . . . . . 22
2.3 Setting Up Container Package Policies . . . . . . . . . . . . . . . . . . . . . . . . . . . . . . . . . . . . . . . . . . 22
2.3.1 Search Policy Overview. . . . . . . . . . . . . . . . . . . . . . . . . . . . . . . . . . . . . . . . . . . . . . . 22
2.3.2 Search Policy. . . . . . . . . . . . . . . . . . . . . . . . . . . . . . . . . . . . . . . . . . . . . . . . . . . . . . . 24
2.3.3 Handheld Application Search Policy . . . . . . . . . . . . . . . . . . . . . . . . . . . . . . . . . . . . . 26
2.3.4 Associating the Container Package. . . . . . . . . . . . . . . . . . . . . . . . . . . . . . . . . . . . . . 29
2.4 Setting Up Handheld Package and Handheld User Policies . . . . . . . . . . . . . . . . . . . . . . . . . . 29
2.4.1 BlackBerry Configuration Policy . . . . . . . . . . . . . . . . . . . . . . . . . . . . . . . . . . . . . . . . 30
2.4.2 BlackBerry Inventory Policy . . . . . . . . . . . . . . . . . . . . . . . . . . . . . . . . . . . . . . . . . . . . 32
2.4.3 BlackBerry Security Policy. . . . . . . . . . . . . . . . . . . . . . . . . . . . . . . . . . . . . . . . . . . . . 34
2.4.4 Palm Client Configuration Policy . . . . . . . . . . . . . . . . . . . . . . . . . . . . . . . . . . . . . . . . 36
2.4.5 Palm Configuration Policy . . . . . . . . . . . . . . . . . . . . . . . . . . . . . . . . . . . . . . . . . . . . . 39
2.4.6 Palm Access Point Configuration Policy . . . . . . . . . . . . . . . . . . . . . . . . . . . . . . . . . . 43
2.4.7 Palm File Retrieval Policy . . . . . . . . . . . . . . . . . . . . . . . . . . . . . . . . . . . . . . . . . . . . . 45
2.4.8 Palm Security Policy . . . . . . . . . . . . . . . . . . . . . . . . . . . . . . . . . . . . . . . . . . . . . . . . . 48
2.4.9 WinCE Client Configuration Policy . . . . . . . . . . . . . . . . . . . . . . . . . . . . . . . . . . . . . . 53
2.4.10 WinCE Configuration Policy. . . . . . . . . . . . . . . . . . . . . . . . . . . . . . . . . . . . . . . . . . . . 55
2.4.11 WinCE Access Point Configuration Policy. . . . . . . . . . . . . . . . . . . . . . . . . . . . . . . . . 59
2.4.12 WinCE File Retrieval Policy . . . . . . . . . . . . . . . . . . . . . . . . . . . . . . . . . . . . . . . . . . . . 62
2.4.13 WinCE Remote Management Policy . . . . . . . . . . . . . . . . . . . . . . . . . . . . . . . . . . . . . 66
2.4.14 WinCE Security Policy . . . . . . . . . . . . . . . . . . . . . . . . . . . . . . . . . . . . . . . . . . . . . . . . 68
2.4.15 Associating the Handheld Package or the Handheld User Package . . . . . . . . . . . . . 73
2.4.16 Associating a User Object to a BlackBerry Device . . . . . . . . . . . . . . . . . . . . . . . . . . 74
2.4.17 Scheduling Packages and Policies . . . . . . . . . . . . . . . . . . . . . . . . . . . . . . . . . . . . . . 74
2.5 Setting Up Handheld Service Package Policies. . . . . . . . . . . . . . . . . . . . . . . . . . . . . . . . . . . . 76
2.6 Viewing Policy Status Information . . . . . . . . . . . . . . . . . . . . . . . . . . . . . . . . . . . . . . . . . . . . . . 76
2.6.1 Viewing Status for a Specific Policy. . . . . . . . . . . . . . . . . . . . . . . . . . . . . . . . . . . . . . 76
2.6.2 Viewing Policy Status for a Specific Handheld Device . . . . . . . . . . . . . . . . . . . . . . . 78
novdocx (en) 13 May 2009
3 Using Queries and Groups 81
3.1 Using Queries . . . . . . . . . . . . . . . . . . . . . . . . . . . . . . . . . . . . . . . . . . . . . . . . . . . . . . . . . . . . . 81
3.1.1 Creating a Query . . . . . . . . . . . . . . . . . . . . . . . . . . . . . . . . . . . . . . . . . . . . . . . . . . . . 81
3.1.2 Using Logical Operators . . . . . . . . . . . . . . . . . . . . . . . . . . . . . . . . . . . . . . . . . . . . . . 84
3.2 Using Groups . . . . . . . . . . . . . . . . . . . . . . . . . . . . . . . . . . . . . . . . . . . . . . . . . . . . . . . . . . . . . . 84
3.2.1 Creating Groups . . . . . . . . . . . . . . . . . . . . . . . . . . . . . . . . . . . . . . . . . . . . . . . . . . . . 85
3.2.2 Viewing the Properties of a Group. . . . . . . . . . . . . . . . . . . . . . . . . . . . . . . . . . . . . . . 89
3.2.3 Changing Group Membership . . . . . . . . . . . . . . . . . . . . . . . . . . . . . . . . . . . . . . . . . . 91
3.2.4 Changing the Update Schedule of Query-Based Groups . . . . . . . . . . . . . . . . . . . . . 92
3.2.5 Deleting a Group . . . . . . . . . . . . . . . . . . . . . . . . . . . . . . . . . . . . . . . . . . . . . . . . . . . . 93
Contents 5
Page 6

3.2.6 Viewing Handheld Application Objects Assigned to a Group . . . . . . . . . . . . . . . . . . 93
3.2.7 Changing a Group’s Type . . . . . . . . . . . . . . . . . . . . . . . . . . . . . . . . . . . . . . . . . . . . . 95
4 Distributing Software to Handheld Devices 97
4.1 Understanding Handheld Application Objects . . . . . . . . . . . . . . . . . . . . . . . . . . . . . . . . . . . . . 97
4.1.1 Specifying Source Files . . . . . . . . . . . . . . . . . . . . . . . . . . . . . . . . . . . . . . . . . . . . . . . 97
4.1.2 Understanding Automatic Application Updates . . . . . . . . . . . . . . . . . . . . . . . . . . . . . 98
4.1.3 Installing Software at a Predefined Time Even When the Device is Not Connected to
the Network . . . . . . . . . . . . . . . . . . . . . . . . . . . . . . . . . . . . . . . . . . . . . . . . . . . . . . . . 99
4.2 Distributing Applications to Handheld Devices. . . . . . . . . . . . . . . . . . . . . . . . . . . . . . . . . . . . . 99
4.2.1 Creating a Handheld Application Object . . . . . . . . . . . . . . . . . . . . . . . . . . . . . . . . . . 99
4.2.2 Configuring a Handheld Application Object . . . . . . . . . . . . . . . . . . . . . . . . . . . . . . . 100
4.2.3 Scheduling the Distribution of a Handheld Application Object. . . . . . . . . . . . . . . . . 104
4.3 Displaying Handheld Application Object Status . . . . . . . . . . . . . . . . . . . . . . . . . . . . . . . . . . . 106
4.4 Modifying a Handheld Application Object . . . . . . . . . . . . . . . . . . . . . . . . . . . . . . . . . . . . . . . 107
4.4.1 Modifying the Contents of a Handheld Application Object. . . . . . . . . . . . . . . . . . . . 107
4.4.2 Scanning for Updated Components. . . . . . . . . . . . . . . . . . . . . . . . . . . . . . . . . . . . . 107
4.4.3 Deleting a Handheld Application Object . . . . . . . . . . . . . . . . . . . . . . . . . . . . . . . . . 108
4.4.4 Deleting a Handheld Application Object’s Associations . . . . . . . . . . . . . . . . . . . . . 108
novdocx (en) 13 May 2009
5 Using Inventory and Reports 109
5.1 Viewing Software Inventory . . . . . . . . . . . . . . . . . . . . . . . . . . . . . . . . . . . . . . . . . . . . . . . . . . 110
5.1.1 Viewing Software Inventory for a Specific Handheld Device . . . . . . . . . . . . . . . . . . 111
5.1.2 Viewing Software Inventory Across All Palm OS, BlackBerry, or Windows CE Devices
in Your System . . . . . . . . . . . . . . . . . . . . . . . . . . . . . . . . . . . . . . . . . . . . . . . . . . . . 111
5.1.3 Identifying Files for Windows CE Devices . . . . . . . . . . . . . . . . . . . . . . . . . . . . . . . . 113
5.1.4 Ignoring or Identifying Windows CE Files and Applications. . . . . . . . . . . . . . . . . . . 115
5.2 Viewing Hardware Inventory . . . . . . . . . . . . . . . . . . . . . . . . . . . . . . . . . . . . . . . . . . . . . . . . . 120
5.3 Viewing Network Information . . . . . . . . . . . . . . . . . . . . . . . . . . . . . . . . . . . . . . . . . . . . . . . . . 122
5.4 Using Inventory Reports. . . . . . . . . . . . . . . . . . . . . . . . . . . . . . . . . . . . . . . . . . . . . . . . . . . . . 122
5.4.1 Running Reports . . . . . . . . . . . . . . . . . . . . . . . . . . . . . . . . . . . . . . . . . . . . . . . . . . . 123
5.4.2 Exporting Reports . . . . . . . . . . . . . . . . . . . . . . . . . . . . . . . . . . . . . . . . . . . . . . . . . . 124
5.4.3 Creating Custom Reports . . . . . . . . . . . . . . . . . . . . . . . . . . . . . . . . . . . . . . . . . . . . 125
5.5 Printing Data from the ZENworks Handheld Management Inventory Viewer. . . . . . . . . . . . . 125
6 Remotely Viewing or Controlling the IP-Enabled Windows CE Devices 127
6.1 Configuring WinCE Remote Management Policy. . . . . . . . . . . . . . . . . . . . . . . . . . . . . . . . . . 127
6.2 Setting a VNC Password on the Handheld Device . . . . . . . . . . . . . . . . . . . . . . . . . . . . . . . . 127
6.3 Initiating a Remote View or a Remote Control Session . . . . . . . . . . . . . . . . . . . . . . . . . . . . . 128
6.3.1 Initiating a Remote View or a Remote Control Session from a Device Object . . . . 128
6.3.2 Initiating a Remote View or a Remote Control Session from a User Object . . . . . . 129
7 Making System Configuration Changes 131
7.1 Configuring User Authentication . . . . . . . . . . . . . . . . . . . . . . . . . . . . . . . . . . . . . . . . . . . . . . 131
7.2 Configuring the Proxy Service . . . . . . . . . . . . . . . . . . . . . . . . . . . . . . . . . . . . . . . . . . . . . . . . 133
7.2.1 Configuring Network Settings . . . . . . . . . . . . . . . . . . . . . . . . . . . . . . . . . . . . . . . . . 133
7.2.2 Configuring Network Usage Restrictions . . . . . . . . . . . . . . . . . . . . . . . . . . . . . . . . . 134
7.2.3 Configuring Dial-Up Communications . . . . . . . . . . . . . . . . . . . . . . . . . . . . . . . . . . . 136
7.2.4 Enabling or Disabling Message Transfers . . . . . . . . . . . . . . . . . . . . . . . . . . . . . . . . 136
7.2.5 Configuring Handheld Communications . . . . . . . . . . . . . . . . . . . . . . . . . . . . . . . . . 137
7.2.6 Configuring IP Communication for the ZENworks Handheld Management Access
Point. . . . . . . . . . . . . . . . . . . . . . . . . . . . . . . . . . . . . . . . . . . . . . . . . . . . . . . . . . . . . 137
6 Novell ZENworks 7 Handheld Management Administration Guide
Page 7

7.2.7 Connecting to the ZENworks Handheld Management Server . . . . . . . . . . . . . . . . . 138
7.3 Converting to Microsoft SQL Server . . . . . . . . . . . . . . . . . . . . . . . . . . . . . . . . . . . . . . . . . . . 138
7.4 Compacting and Repairing the Database . . . . . . . . . . . . . . . . . . . . . . . . . . . . . . . . . . . . . . . 140
7.4.1 Compacting the Server Database . . . . . . . . . . . . . . . . . . . . . . . . . . . . . . . . . . . . . . 140
7.4.2 Compacting the Proxy Service Database . . . . . . . . . . . . . . . . . . . . . . . . . . . . . . . . 141
7.4.3 Compacting and Repairing the Database . . . . . . . . . . . . . . . . . . . . . . . . . . . . . . . . 141
7.5 Configuring the ZENworks Handheld Management Access Point and the Desktop
Synchronization Integration . . . . . . . . . . . . . . . . . . . . . . . . . . . . . . . . . . . . . . . . . . . . . . . . . . 141
7.5.1 Configuring Bandwidth Usage . . . . . . . . . . . . . . . . . . . . . . . . . . . . . . . . . . . . . . . . . 142
7.5.2 Configuring Client Retries and Power Down (or Suspend) . . . . . . . . . . . . . . . . . . . 142
7.6 Configuring the ZENworks Handheld Management IP Clients. . . . . . . . . . . . . . . . . . . . . . . . 143
7.6.1 Configuring the ZENworks Handheld Management Palm OS IP Client. . . . . . . . . . 143
7.6.2 Configuring the ZENworks Handheld Management Windows CE IP Client . . . . . . 145
A Troubleshooting 147
A.1 Error Logs . . . . . . . . . . . . . . . . . . . . . . . . . . . . . . . . . . . . . . . . . . . . . . . . . . . . . . . . . . . . . . . 147
A.2 ConsoleOne Status Pages. . . . . . . . . . . . . . . . . . . . . . . . . . . . . . . . . . . . . . . . . . . . . . . . . . . 147
A.3 Error Messages . . . . . . . . . . . . . . . . . . . . . . . . . . . . . . . . . . . . . . . . . . . . . . . . . . . . . . . . . . . 148
A.4 Troubleshooting Strategies . . . . . . . . . . . . . . . . . . . . . . . . . . . . . . . . . . . . . . . . . . . . . . . . . . 149
A.5 Contacting Technical Support . . . . . . . . . . . . . . . . . . . . . . . . . . . . . . . . . . . . . . . . . . . . . . . . 155
novdocx (en) 13 May 2009
B Configuring SSL and HTTP Settings 157
B.1 Configuring the SSL and HTTP Communication between the ZENworks Handheld Management
Server and the ZENworks Handheld Management Access Point . . . . . . . . . . . . . . . . . . . . . 158
B.2 Configuring SSL and HTTP Communication between the ZENworks Handheld Management
Access Point and the Handheld Devices . . . . . . . . . . . . . . . . . . . . . . . . . . . . . . . . . . . . . . . . 160
B.3 Changing the Default Ports on the ZENworks Handheld Management Server and ZENworks
Handheld Management Access Point Communication . . . . . . . . . . . . . . . . . . . . . . . . . . . . . 163
B.4 Changing the Default Ports for the ZENworks Handheld Management Access Point and the
Handheld Devices Communication . . . . . . . . . . . . . . . . . . . . . . . . . . . . . . . . . . . . . . . . . . . . 164
C Security Considerations 167
D Documentation Updates 169
D.1 June 17, 2009 (Support Pack 1 Interim Release 4) . . . . . . . . . . . . . . . . . . . . . . . . . . . . . . . . 169
D.1.1 Appendix A: Troubleshooting. . . . . . . . . . . . . . . . . . . . . . . . . . . . . . . . . . . . . . . . . . 169
D.1.2 Appendix B: Configuring SSL and HTTP Settings . . . . . . . . . . . . . . . . . . . . . . . . . . 170
D.2 July 14, 2006 . . . . . . . . . . . . . . . . . . . . . . . . . . . . . . . . . . . . . . . . . . . . . . . . . . . . . . . . . . . . . 170
D.2.1 Appendix C: Security Considerations . . . . . . . . . . . . . . . . . . . . . . . . . . . . . . . . . . . 170
D.3 December 9, 2005 . . . . . . . . . . . . . . . . . . . . . . . . . . . . . . . . . . . . . . . . . . . . . . . . . . . . . . . . . 170
D.4 October 7, 2005 . . . . . . . . . . . . . . . . . . . . . . . . . . . . . . . . . . . . . . . . . . . . . . . . . . . . . . . . . . . 170
D.4.1 Using Inventory and Reports . . . . . . . . . . . . . . . . . . . . . . . . . . . . . . . . . . . . . . . . . . 170
D.4.2 Using ZENworks Handheld Management Policies . . . . . . . . . . . . . . . . . . . . . . . . . 171
Contents 7
Page 8

novdocx (en) 13 May 2009
8 Novell ZENworks 7 Handheld Management Administration Guide
Page 9

About This Guide
novdocx (en) 13 May 2009
This Administration Guide consists of comprehensive, conceptual information to help you
®
understand and use Novell
ZENworks® 7 Handheld Management.
The sections include:
Chapter 1, “Setting Up Handheld Import,” on page 11
Chapter 2, “Using ZENworks Handheld Management Policies,” on page 17
Chapter 3, “Using Queries and Groups,” on page 81
Chapter 4, “Distributing Software to Handheld Devices,” on page 97
Chapter 5, “Using Inventory and Reports,” on page 109
Chapter 6, “Remotely Viewing or Controlling the IP-Enabled Windows CE Devices,” on
page 127
Chapter 7, “Making System Configuration Changes,” on page 131
Appendix A, “Troubleshooting,” on page 147
Appendix B, “Configuring SSL and HTTP Settings,” on page 157
Appendix C, “Security Considerations,” on page 167
Appendix D, “Documentation Updates,” on page 169
Audience
This guide is intended for system administrators installing ZENworks 7 Handheld Management
software. These users should be familiar with their own network and the hardware configuration of
the management zone where they intend to install this product. A working knowledge of Novell
TM
eDirectory
and Novell ConsoleOne® is required.
Feedback
We want to hear your comments and suggestions about this manual and the other documentation
included with this product. Please use the User Comment feature at the bottom of each page of the
online documentation, or go to Novell Documentation Feedback site (http://www.novell.com/
documentation/feedback.html) and enter your comments there.
Documentation Updates
For the most recent version of the ZENworks 7 Handheld Management Administration Guide, visit
the Novell ZENworks 7 Web site (http://www.novell.com/documentation/zenworks7).
Additional Documentation
For information about installing ZENworks Handheld Management, see the Novell ZENworks 7
Handheld Management Installation Guide.
About This Guide 9
Page 10

Documentation Conventions
In Novell documentation, a greater-than symbol (>) is used to separate actions within a step and
items in a cross-reference path.
®
A trademark symbol (
, TM, etc.) denotes a Novell trademark. An asterisk (*) denotes a third-party
trademark.
When a single pathname can be written with a backslash for some platforms or a forward slash for
other platforms, the pathname is presented with a backslash. Users of platforms that require a
forward slash, such as Linux* or UNIX*, should use forward slashes as required by your software.
novdocx (en) 13 May 2009
10 Novell ZENworks 7 Handheld Management Administration Guide
Page 11

1
Setting Up Handheld Import
Novell® ZENworks® 7 Handheld Management provides simplified, hands-off management of
enterprise handheld devices.
For more information about installing ZENworks Handheld Management, see the Novell ZENworks
7 Handheld Management Installation Guide.
In order to manage the handheld devices, you must do the following:
novdocx (en) 13 May 2009
1
Import handheld devices into Novell eDirectory
The following sections provide information you need for setting up an Import policy:
Section 1.1, “Creating the Handheld Service Package,” on page 11
Section 1.2, “Configuring the Handheld Import Policy,” on page 12
Section 1.3, “Associating the Handheld Service Package,” on page 16
Ensure that the users synchronize their handheld devices using their normal synchronization
process (Microsoft* ActiveSync, Palm* HotSync, and so forth).
After the handheld objects are imported into the directory, you can begin using policy-based
management, distributing software applications to individual handheld devices or to groups of
handheld devices, collecting hardware and software inventory for all enterprise handheld
devices, and more.
Set up the policies that can be associated with handheld objects. For more information, see
Chapter 2, “Using ZENworks Handheld Management Policies,” on page 17.
TM
.
1.1 Creating the Handheld Service Package
A policy package is an eDirectory object containing one or more individual policies. A policy
package groups policies according to function, making it easier to administer them. It also provides
the means for the administrator to change policy settings and to determine how they affect other
eDirectory objects.
In ZENworks Handheld Management, the Handheld Service Package contains only the Handheld
Import policy.
You should create an Organizational Unit (OU) to hold the policy packages. Consider the following
when determining where to place this OU:
Partitions in your tree
The 256-character limit in eDirectory for the full distinguished name
The Search policy that is used to locate the policy package
To minimize tree walking, it is best to create this policy package OU at the root of the partition that
contains the objects with which the policy package is associated. It also maximizes the number of
characters that are available for naming the policy.
Setting Up Handheld Import
11
Page 12
To create the Handheld Service Package:
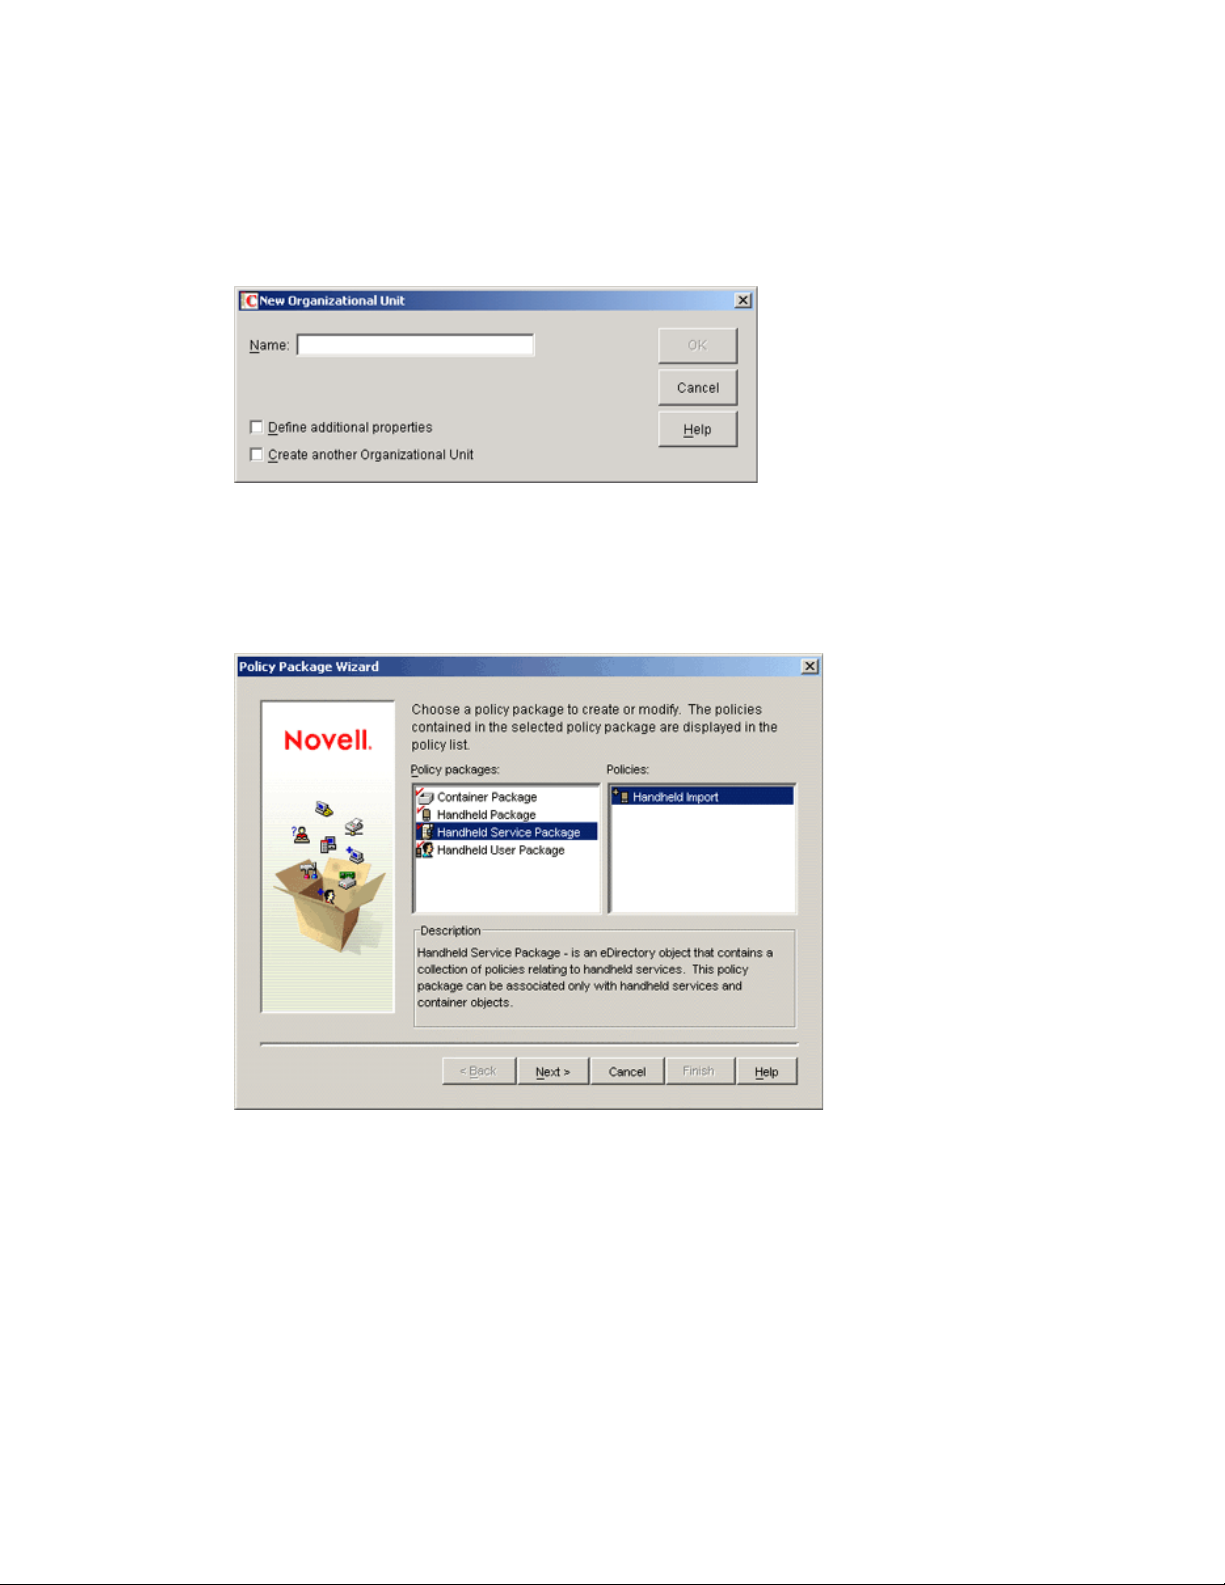
1 In Novell ConsoleOne®, right-click the container where you want the container for the policy
packages placed, click New, then click Organizational Unit.
The New Organizational Unit window is displayed.
2 Give the container a short name, then click OK.
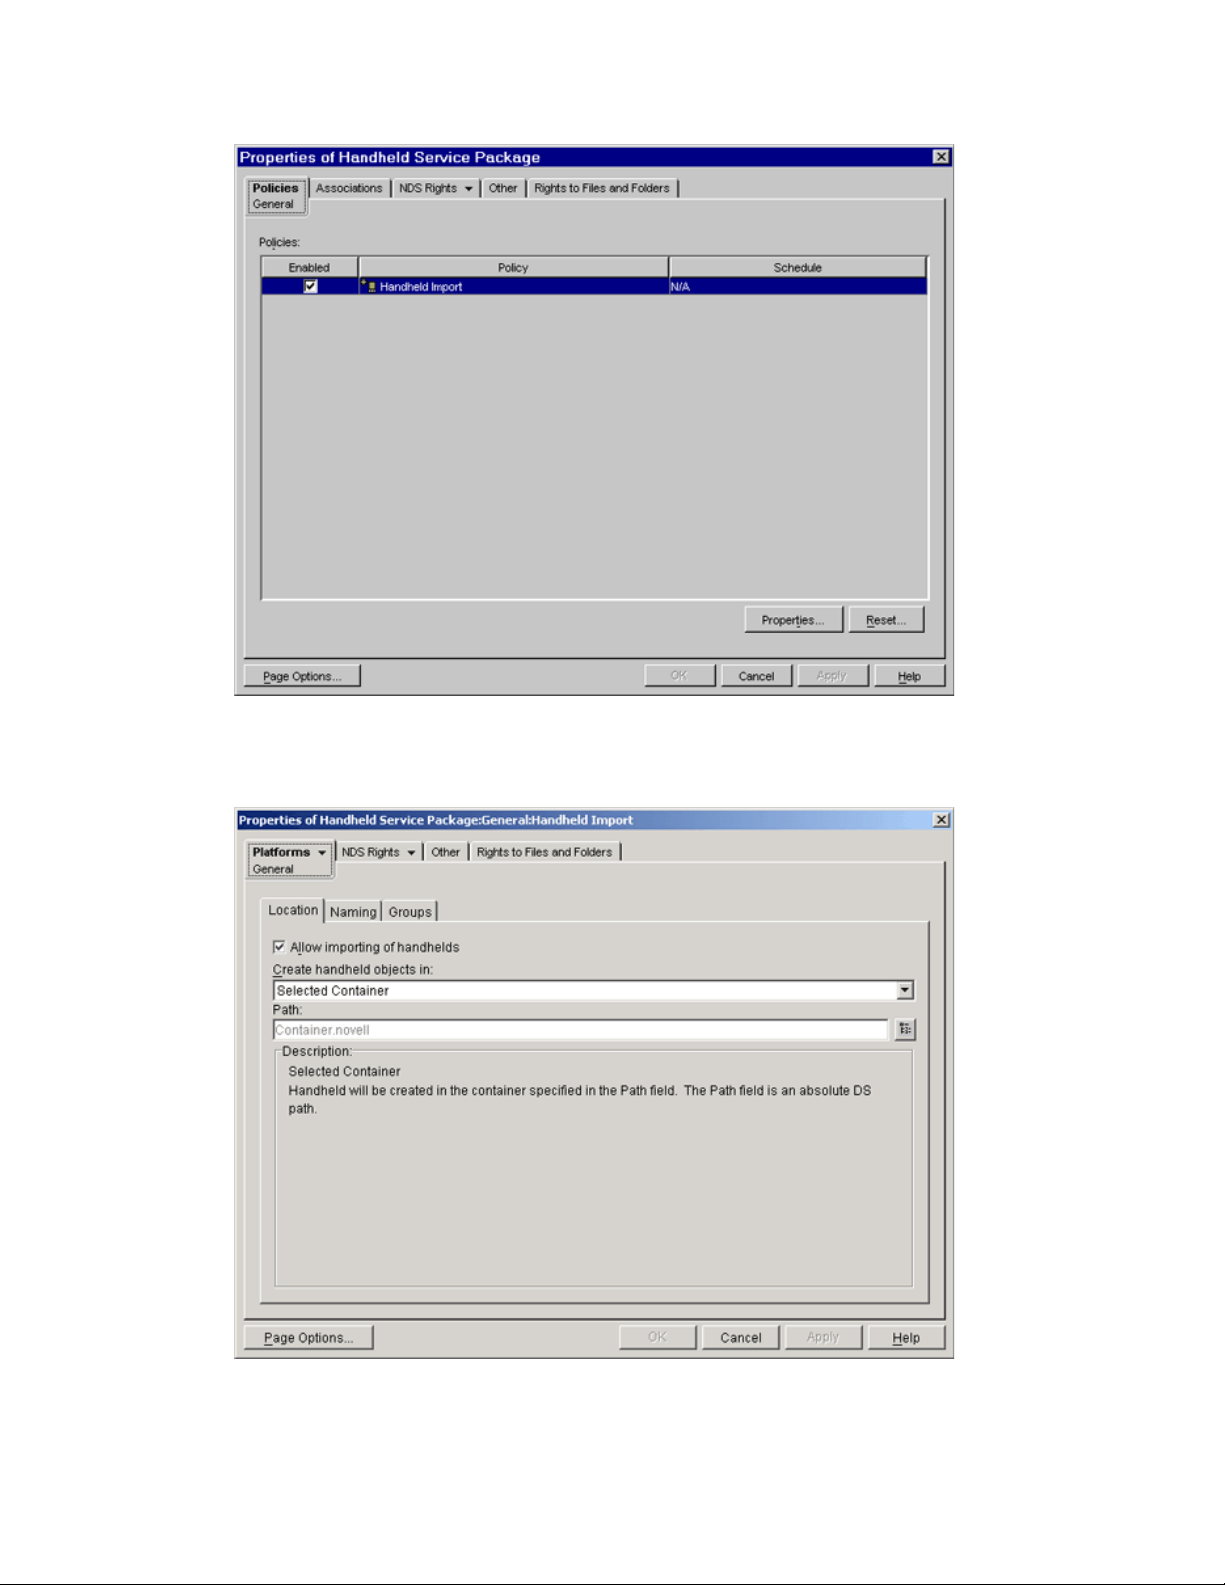
3 Right-click the newly created container that holds your policy packages, click New, then click
Policy Package.
4 Select Handheld Service Package, then click Next.
novdocx (en) 13 May 2009
5 Give the policy package a short name, then click Next.
6 Review the information in the Summary page, then click Finish.
1.2 Configuring the Handheld Import Policy
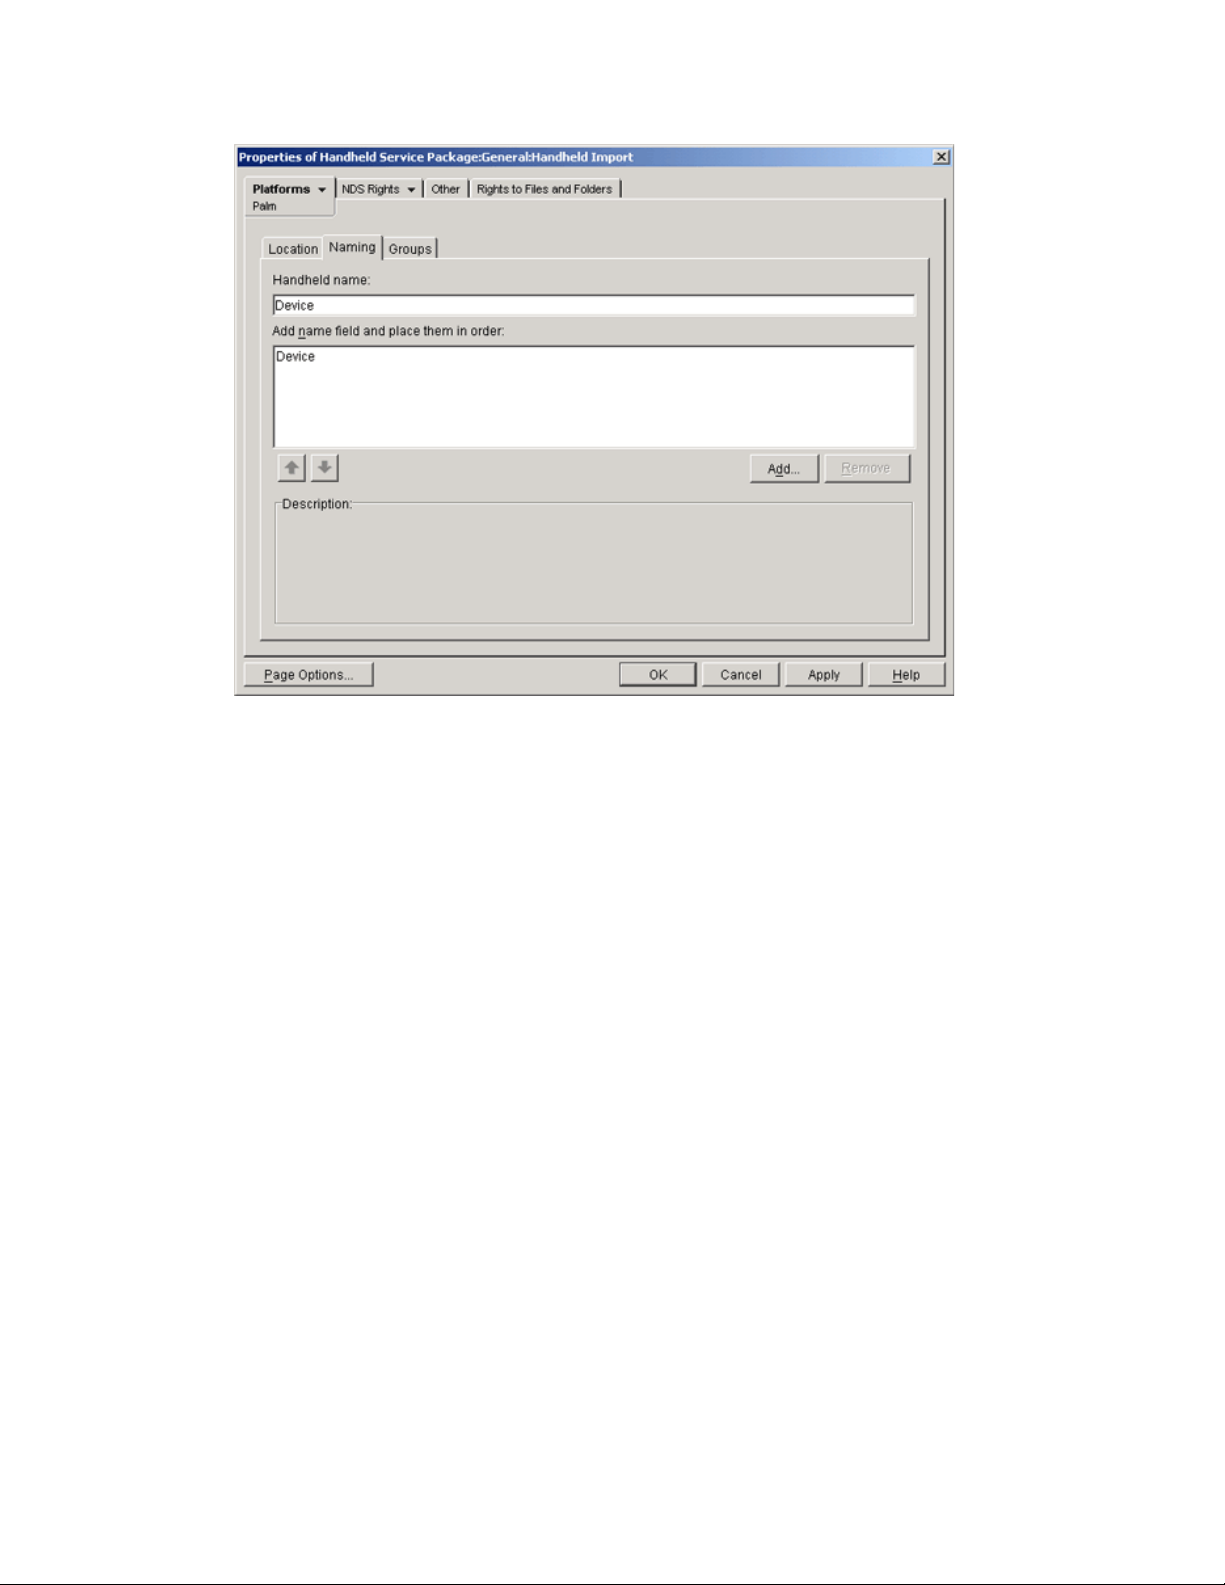
1 In ConsoleOne, right-click the Handheld Service Package object that is created during
Section 1.1, “Creating the Handheld Service Package,” on page 11, then click Properties.
2 Select the check box under the Enabled column for the Handheld Import policy.
This both selects and enables the policy.
12 Novell ZENworks 7 Handheld Management Administration Guide
Page 13
novdocx (en) 13 May 2009
3 Click Properties.
The Location tab of the General page is displayed.
Setting Up Handheld Import 13
Page 14

You can configure the Handheld Import policy on this page to enable importing of
BlackBerry*, Palm OS*, and Windows* CE devices.
In addition to the General page, ZENworks Handheld Management provides three platformspecific pages: BlackBerry, Palm, and Windows CE. If you want to specify different settings for
each type of device, you can use the appropriate platform page. For example, you could specify
different containers to hold the different types of handheld devices.
4 Click the down-arrow on the Platforms tab, then select the desired platform.
5 Fill in the fields:
Enable Platform Settings to Override General Settings: This option displays only on the
BlackBerry, Palm, and WinCE platform pages. Select this option if you want the settings
specified on the BlackBerry, Palm, or WinCE page to override those settings specified on the
General page.
Allow Importing of Handhelds: Enable this option to allow registered handheld devices to be
imported into the directory.
Create Handheld Objects In: Select an option from the drop-down list.
Selected Container: The handheld device objects are created in the container specified in
the Path field. This is an absolute DS path.
Server Container: The handheld device objects are created in the same container where
the handheld service object is created. You can specify a relative DS path from the server
container.
Associated Object Container: The handheld device objects are created in the container
that is associated with the Handheld Import policy. You can specify a relative DS path
from the associated container.
Relative Path = handheld. means to go up one level from the container to create the handheld
device object.
Path: If you are using a relative path, enter a string. The number of periods you end the path
with determines the number of relative levels. If you are using an absolute path, select the
container.
novdocx (en) 13 May 2009
NOTE: The Description box describes where the handheld device objects are created, based
on the settings you selected on the Location page. Review the description and make any
necessary changes.
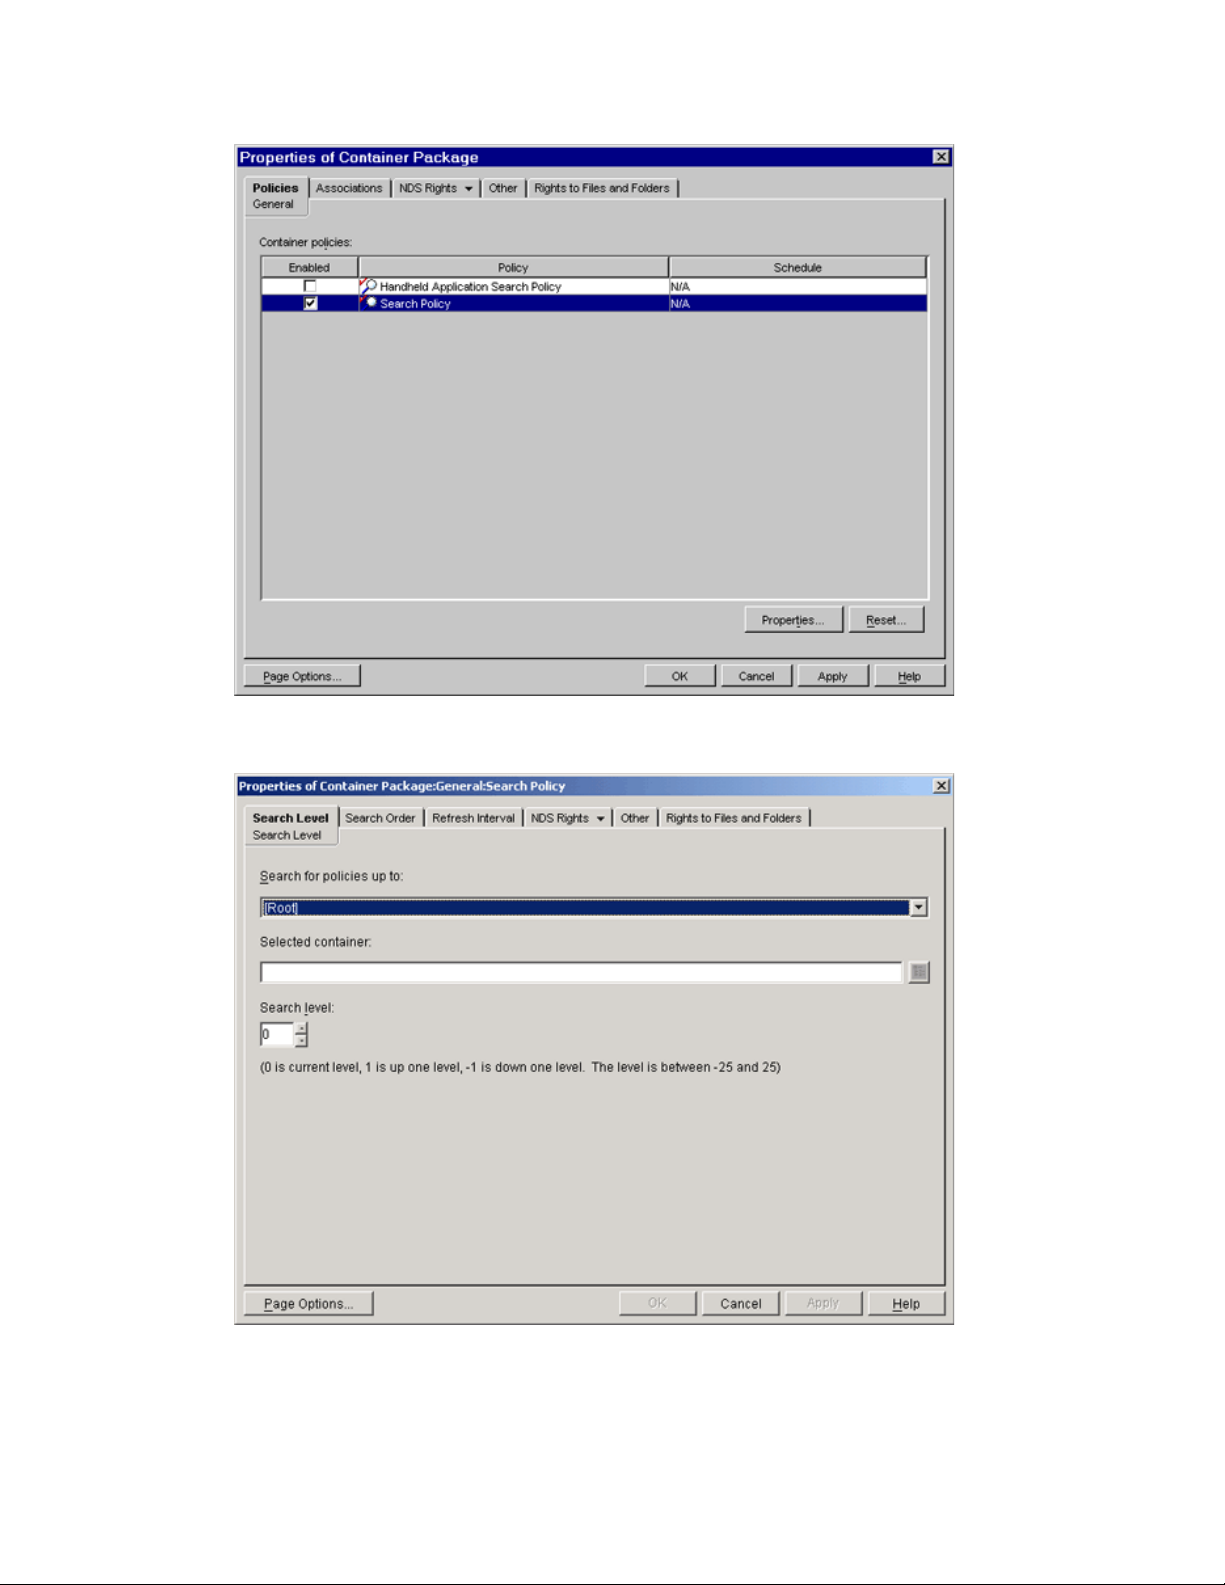
6 Click the Naming tab.
14 Novell ZENworks 7 Handheld Management Administration Guide
Page 15
novdocx (en) 13 May 2009
7 Fill in the fields:
Handheld Name: Displays the handheld naming convention currently defined in the Add
Name Fields and Place Them in Order list.
Whenever there is a potential name conflict (such as two handheld device objects in the same
container with the same name), the system appends a number on the end of the name that you
enter here.
Add Name Field and Place Them in Order: You must have at least one option in this list.
You can add or remove options, or click the arrows to move an option up or down the list. The
handheld device objects are named in the order these options display in the list.
The name options are:
<User Defined>: You can any text here such as the separator between the Device and
User value. For example, Device_UserName. In this example, the underscore ( _ ) is the
user defined value.
Device: The device’s name.
User: The device’s owner name or the name provided by Palm HotSync or Microsoft
ActiveSync.
Computer: The name of the Access Point to which the device is connected.
8 Click the Groups tab.
Setting Up Handheld Import 15
Page 16

novdocx (en) 13 May 2009
9 Click Add, then browse for the Handheld Group objects you want this handheld device object
to belong to when it is imported.
For more information about Handheld Group objects, see Section 3.2, “Using Groups,” on
page 84.
10 Click OK to save the policy.
11 Continue with Section 1.3, “Associating the Handheld Service Package,” on page 16.
1.3 Associating the Handheld Service Package
The Handheld Import policy you configured and enabled is not in effect until you associate its
policy package with the ZENworks Handheld Management Service object directly or with a
container object.
To associate the Handheld Service Package:
1 In ConsoleOne, right-click the Handheld Service Package, then click Properties.
2 Click the Associations tab, then click Add.
3 To associate the package, browse for the ZENworks Handheld Management Service object, the
container containing the Service object, or the container object created during the installation of
ZENworks Handheld Management server components.
4 Click OK.
16 Novell ZENworks 7 Handheld Management Administration Guide
Page 17

2
Using ZENworks Handheld
novdocx (en) 13 May 2009
Management Policies
For Novell® ZENworks® 7 Handheld Management to function properly, you must create the policy
packages so that you can configure, enable, and associate your planned policies.
TM
A policy package is a Novell eDirectory
policy package groups policies according to function, making it easier to administer them. It also
provides the means for the administrator to change policy settings and to determine how they affect
other eDirectory objects.
ZENworks Handheld Management has four policy packages: Container Package, Handheld
Package, Handheld Service Package, and Handheld User Package.
The following sections contain additional information:
Section 2.1, “Understanding ZENworks Handheld Management Policies,” on page 17
Section 2.2, “Creating Policy Packages,” on page 22
Section 2.3, “Setting Up Container Package Policies,” on page 22
Section 2.4, “Setting Up Handheld Package and Handheld User Policies,” on page 29
Section 2.5, “Setting Up Handheld Service Package Policies,” on page 76
Section 2.6, “Viewing Policy Status Information,” on page 76
object containing one or more individual policies. A
2
2.1 Understanding ZENworks Handheld Management Policies
The following table lists each ZENworks Handheld Management policy, indicates the package that
contains the policy, and provides a brief description of the policy.
Table 2-1 List of ZENworks Handheld Management Policies
Policy Container Description
Handheld Import Policy Handheld Service Package Lets you enable handheld import
and configure settings, such as
how handheld device objects are
named, where they are stored in
eDirectory, and which Handheld
Group objects you want certain
handheld device objects
associated with.
For more information, see
Chapter 1, “Setting Up Handheld
Import,” on page 11.
Using ZENworks Handheld Management Policies
17
Page 18

Policy Container Description
Search Policy Container Package Lets you specify how far up the
tree ZENworks Handheld
Management searches for
effective policies.
For more information, see
“Search Policy” on page 24.
novdocx (en) 13 May 2009
Handheld Application Search
Policy
BlackBerry Configuration Policy Handheld Package and Handheld
BlackBerry Inventory Policy Handheld Package and Handheld
Container Package Lets you specify how far up the
User Package
User Package
tree ZENworks Handheld
Management searches for
Handheld Application objects.
For more information, see
“Handheld Application Search
Policy” on page 26.
Lets you set configuration
information for associated
BlackBerry* devices, including
the owner name for the device
and any additional information
you want to include.
For more information, see
“BlackBerry Configuration Policy”
on page 30.
Lets you enable the collection of
hardware and software inventory
from associated BlackBerry
devices.
For more information, see
“BlackBerry Inventory Policy” on
page 32.
BlackBerry Security Policy Handheld Package and Handheld
User Package
Palm Client Configuration Policy Handheld Package Lets you enable user
18 Novell ZENworks 7 Handheld Management Administration Guide
Lets you ensure that a password
is set on associated BlackBerry
devices.
For more information, see
“BlackBerry Security Policy” on
page 34.
authentication on associated
Palm OS* devices.
For more information, see
Section 2.4.4, “Palm Client
Configuration Policy,” on page 36.
Page 19

Policy Container Description
novdocx (en) 13 May 2009
Palm Access Point Configuration
Policy
Palm Configuration Policy Handheld Package and Handheld
Handheld Package and Handheld
User Package
User Package
Lets you assign multiple
ZENworks Handheld
Management Access Points to a
device and also define the order
of the ZENworks Handheld
Management Access Points to
which the Palm OS device must
connect.
For more information, see
Section 2.4.6, “Palm Access
Point Configuration Policy,” on
page 43.
Lets you set general preferences,
such as auto-off, system sound,
and beam retrieve settings;
associate different software
programs with the buttons on the
Palm OS device; assign a feature
users can access when they drag
the pen from the writing area to
the top of the screen on the Palm
OS device; and specify which
software programs are allowed or
not allowed on Palm OS devices.
Also lets you configure the files
that must be automatically
deleted from the Windows CE
device.
Palm File Retrieval Policy Handheld Package and Handheld
User Package
For more information, see “Palm
Configuration Policy” on page 39.
Lets you specify files to retrieve
from the associated Palm OS
device to copy to a specified
location.
For more information, see “Palm
File Retrieval Policy” on page 45.
Using ZENworks Handheld Management Policies 19
Page 20

Policy Container Description
novdocx (en) 13 May 2009
Palm Security Policy Handheld Package and Handheld
User Package
WinCE Access Point
Configuration Policy
Handheld Package and Handheld
User Package
Lets you ensure that a password
is set on the associated Palm OS
device and lets you configure
Auto Lock Configuration and
enhanced password protection.
Lets you set a user’s network
password as the device password
for the Palm OS device.
Also lets you specify self-destruct
settings to disable a Palm device
after a specified number of failed
password attempts or after a
specified number of days since
the device was last synchronized.
For more information, see “Palm
Security Policy” on page 48.
Lets you assign multiple
ZENworks Handheld
Management Access Points to a
device and also define the order
of the ZENworks Handheld
Management Access Points to
which the Windows* CE device
must connect.
WinCE Client Configuration
Policy
For more information, see
Section 2.4.11, “WinCE Access
Point Configuration Policy,” on
page 59.
Handheld Package Lets you enable user
authentication on associated
Windows CE devices.
Also lets you configure the
software or files that must be
automatically uninstalled or
deleted from the Windows CE
device.
For more information, see
Section 2.4.9, “WinCE Client
Configuration Policy,” on page 53.
20 Novell ZENworks 7 Handheld Management Administration Guide
Page 21

Policy Container Description
novdocx (en) 13 May 2009
WinCE Configuration Policy Handheld Package and Handheld
User Package
WinCE File Retrieval Policy Handheld Package and Handheld
User Package
Lets you associate different
software programs or functions
with the buttons on the
associated Windows CE device;
specify which programs you want
to include on the Start menu (on a
Pocket PC) or on the desktop (on
a handheld PC); and specify
power settings for Windows CE
devices.
Also, lets you configure the
software to be uninstalled from
Windows CE device.
For more information, see
“WinCE Configuration Policy” on
page 55.
Lets you specify files to retrieve
from the associated Windows CE
device to copy to a specified
location.
For more information, see
“WinCE File Retrieval Policy” on
page 62.
WinCE Remote Management
Policy
WinCE Security Policy Handheld Package and Handheld
Handheld Package and Handheld
User Package
User Package
Lets the administrator or remote
users perform Remote View or
Remote Control operations on the
IP-enabled Windows CE devices.
For more information, see
Section 2.4.13, “WinCE Remote
Management Policy,” on page 66.
Lets you ensure that a password
is set on the Windows CE device
and configure enhanced security
options for Pocket PCs.
Lets set a user’s network
password as the device password
for the Windows CE device.
Also lets you specify self-destruct
settings to disable a Windows CE
device after a specified number of
failed password attempts or after
a specified number of days since
the device was last synchronized.
For more information, see
“WinCE Security Policy” on
page 68.
Using ZENworks Handheld Management Policies 21
Page 22

2.2 Creating Policy Packages
A policy package is an eDirectory object containing one or more individual policies. Before you can
configure, enable, and associate the policies contained in a policy package, you must create the
policy package.
®
1 In Novell ConsoleOne
New, then click Policy Package.
2 Select Container Package.
or
Select Handheld Package.
or
Select Handheld Service Package.
or
Select Handheld User Package.
TIP: To list the policies that are contained in each policy package, click the name of each
policy in the Policy Packages list on the left side of the Policy Package Wizard page. The
available policies are displayed in the Policies list on the right side of the Policy Package
Wizard page.
, right-click the container that holds your policy packages, the click
novdocx (en) 13 May 2009
3 Click Next.
4 Give the policy package a short name, then click Next.
5 Review the information in the Summary page, then click Finish.
2.3 Setting Up Container Package Policies
In ZENworks Handheld Management, the Container package contains two policies: Search and
Handheld Application Search.
The following sections contain additional information:
“Search Policy Overview” on page 22
“Search Policy” on page 24
“Handheld Application Search Policy” on page 26
“Associating the Container Package” on page 29
2.3.1 Search Policy Overview
ZENworks Handheld Management policies are associated to a handheld device object in any of the
following ways:
To the handheld device object itself
To a User object
To a Handheld Group where the handheld device is a member
To a User Group where the user is a member
To a parent container of the handheld device or User object
22 Novell ZENworks 7 Handheld Management Administration Guide
Page 23

The search order that ZENworks Handheld Management uses is consistent with standard eDirectory
behavior and any search policies that are in the tree. By default, ZENworks Handheld Management
starts at the handheld device or user object, followed by any Handheld groups or User groups that
the device is a member of, and then starts walking up the tree looking for policies to enforce. All
handheld policies are merged and the culmination is applied to the handheld device. If any conflicts
occur, such as two Palm Configuration policies (one associated directly to the handheld device
object and the other associated to a parent container of the handheld device object), the first policy
found is enforced. In this case, the Palm Configuration policy directly associated to the handheld
device object is enforced.
If a policy contained in a Handheld User Package and another policy in the Handheld Package
conflict, the settings in the Handheld User Package are enforced. For example, if you configure and
enable the Palm Configuration policy in the Handheld User Package, but you also have an enabled
Palm Configuration policy in the Handheld Package, the policy is the Handheld User Package takes
precedence.
The File Retrieval policies (Palm File Retrieval and WinCE File Retrieval) present exceptions to
rule that the first policy found is enforced. These policies are both plural (meaning they can be
added many times to a policy package) and cumulative (meaning that many different File Retrieval
policies with different settings can be effective for a single handheld device object, handheld group
object, or container object). Because the File Retrieval policies are plural and cumulative, no
conflicts occur when ZENworks Handheld Management encounters multiple File Retrieval policies:
every effective File Retrieval policy is enforced.
novdocx (en) 13 May 2009
The Search policy is used to limit how far up the tree ZENworks Handheld Management searches
for the effective policies. In addition to limiting how far up the tree ZENworks Handheld
Management searches for policies, both policies let you determine the searching order (object,
group, container) that ZENworks Handheld Management uses as it searches for policies. The search
order is significant because the first policy found is enforced (except for the File Retrieval policies,
as explained previously).
The Handheld Application Search policy is used to limit how far up the tree ZENworks Handheld
Management searches for handheld application objects.
If your directory contains many objects, ZENworks Handheld Management performs significant
tree-walking if no search policies are enabled. For this reason, you should make use of both the
Search policy and the Handheld Application Search policy.
The Search policy and the Handheld Application Search policy provide the following benefits
Improved security
The ability to reorder a search
Better search performance by limiting the search levels traversed in eDirectory and by avoiding
unnecessary LAN traffic
The Search policy specifies how ZENworks Handheld Management determines which policies are
associated with handheld device objects. The Handheld Application Search policy specifies how
ZENworks Handheld Management determines which handheld application objects are associated
with handheld device objects. To make either search policy effective, you associate it with a
container. Both search policies apply to handheld device or user objects within or beneath a given
container.
You can specify the number of levels above or below the location to begin the search:
Using ZENworks Handheld Management Policies 23
Page 24

Table 2-2 Search Levels
Number Description
0 Limits the search to the selected level.
1 Limits the search to one level above the selected level.
For example, if you selected the handheld device object’s parent container, this
would limit the search to one level above the parent level.
-1 Limits the search to one level below the selected level.
For example, if you selected [Root], -1 would limit the search to one level below
[Root].
Without a search policy in effect, the default is to search from the parent container to [Root]. The
search checks each container up the tree towards [Root] for policy packages and handheld
application objects associated with those containers.
The default search policy recognizes the policy package associated with the handheld device object
before it looks in any group or container where such an object resides.
novdocx (en) 13 May 2009
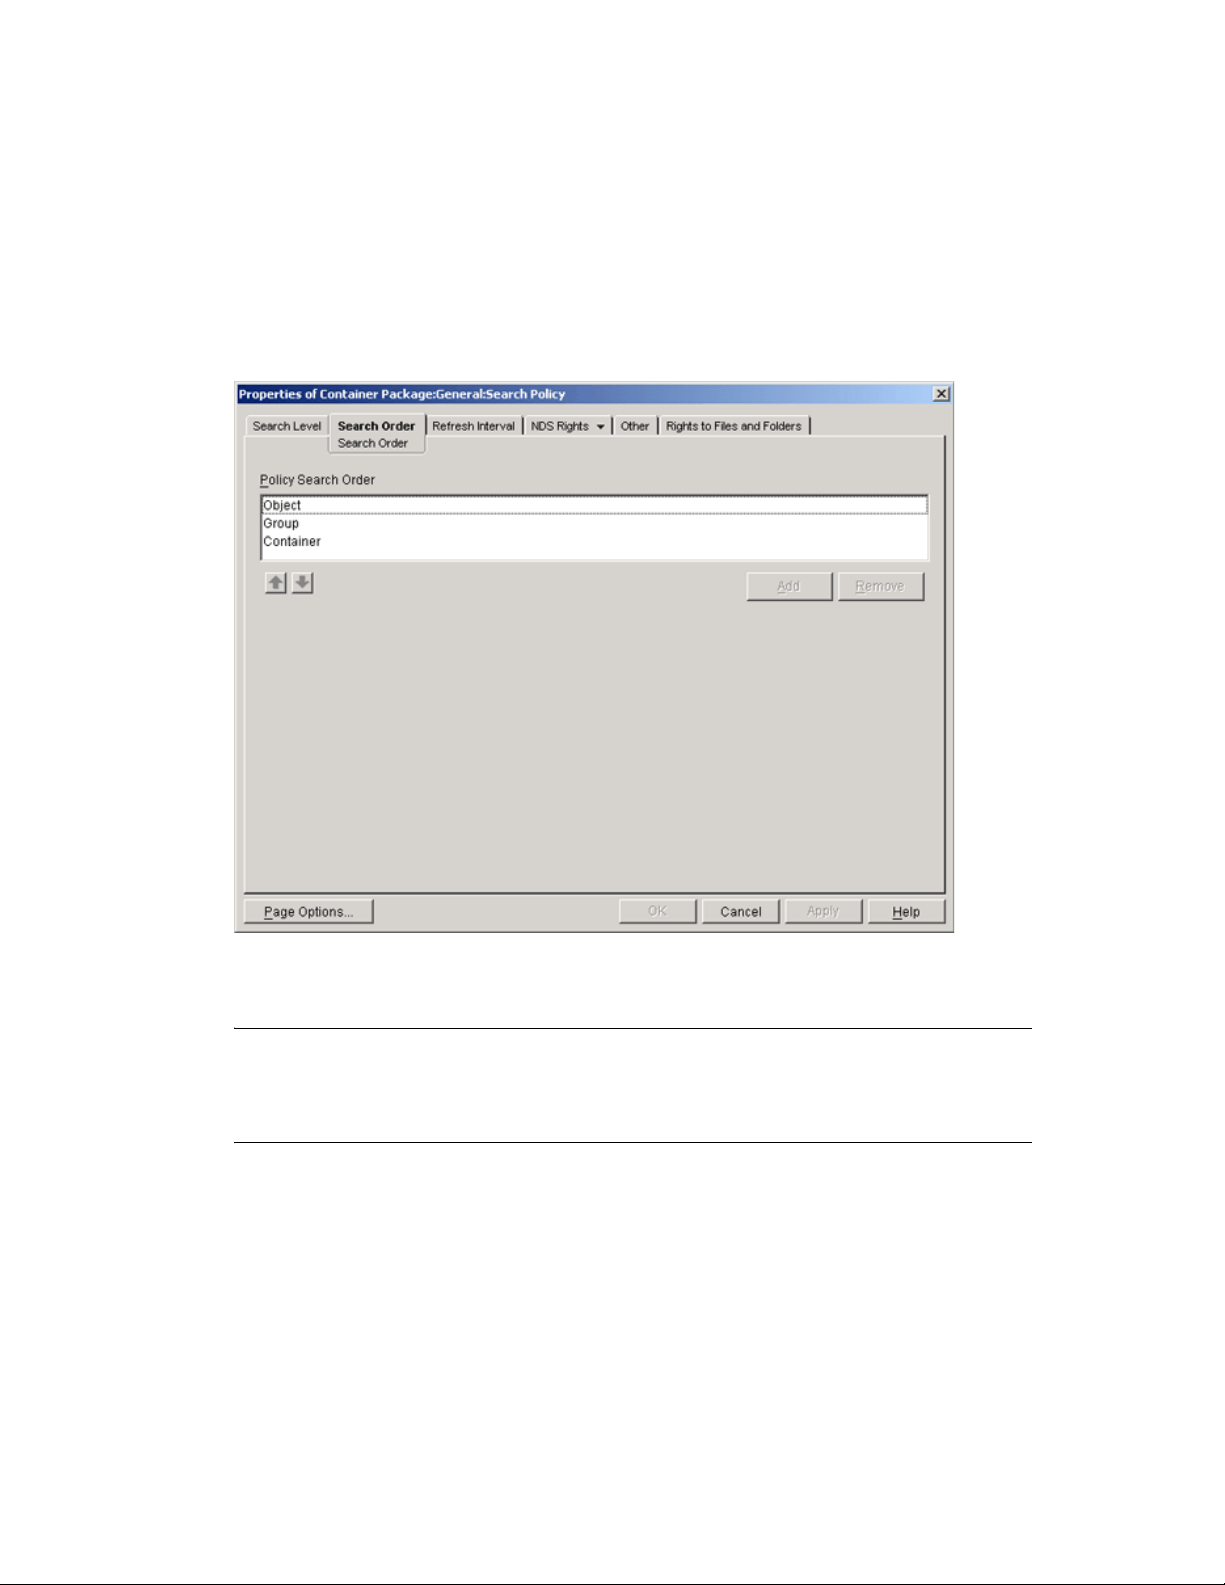
The default search order, Object > Group > Container, can be reordered and can include as few as
one of the locations. For instance, you can exclude Group objects by setting the search order to
Object > Container.
You can avoid unnecessary LAN traffic by searching to an associated container instead of [Root].
The Search policy is required for finding other policies. You set up Search policies at a container
level. Set up as many Search policies as you need to help minimize network traffic.
2.3.2 Search Policy
The Search policy is used to limit how far up the tree ZENworks Handheld Management searches
for the effective policies.
To set up a Search policy:
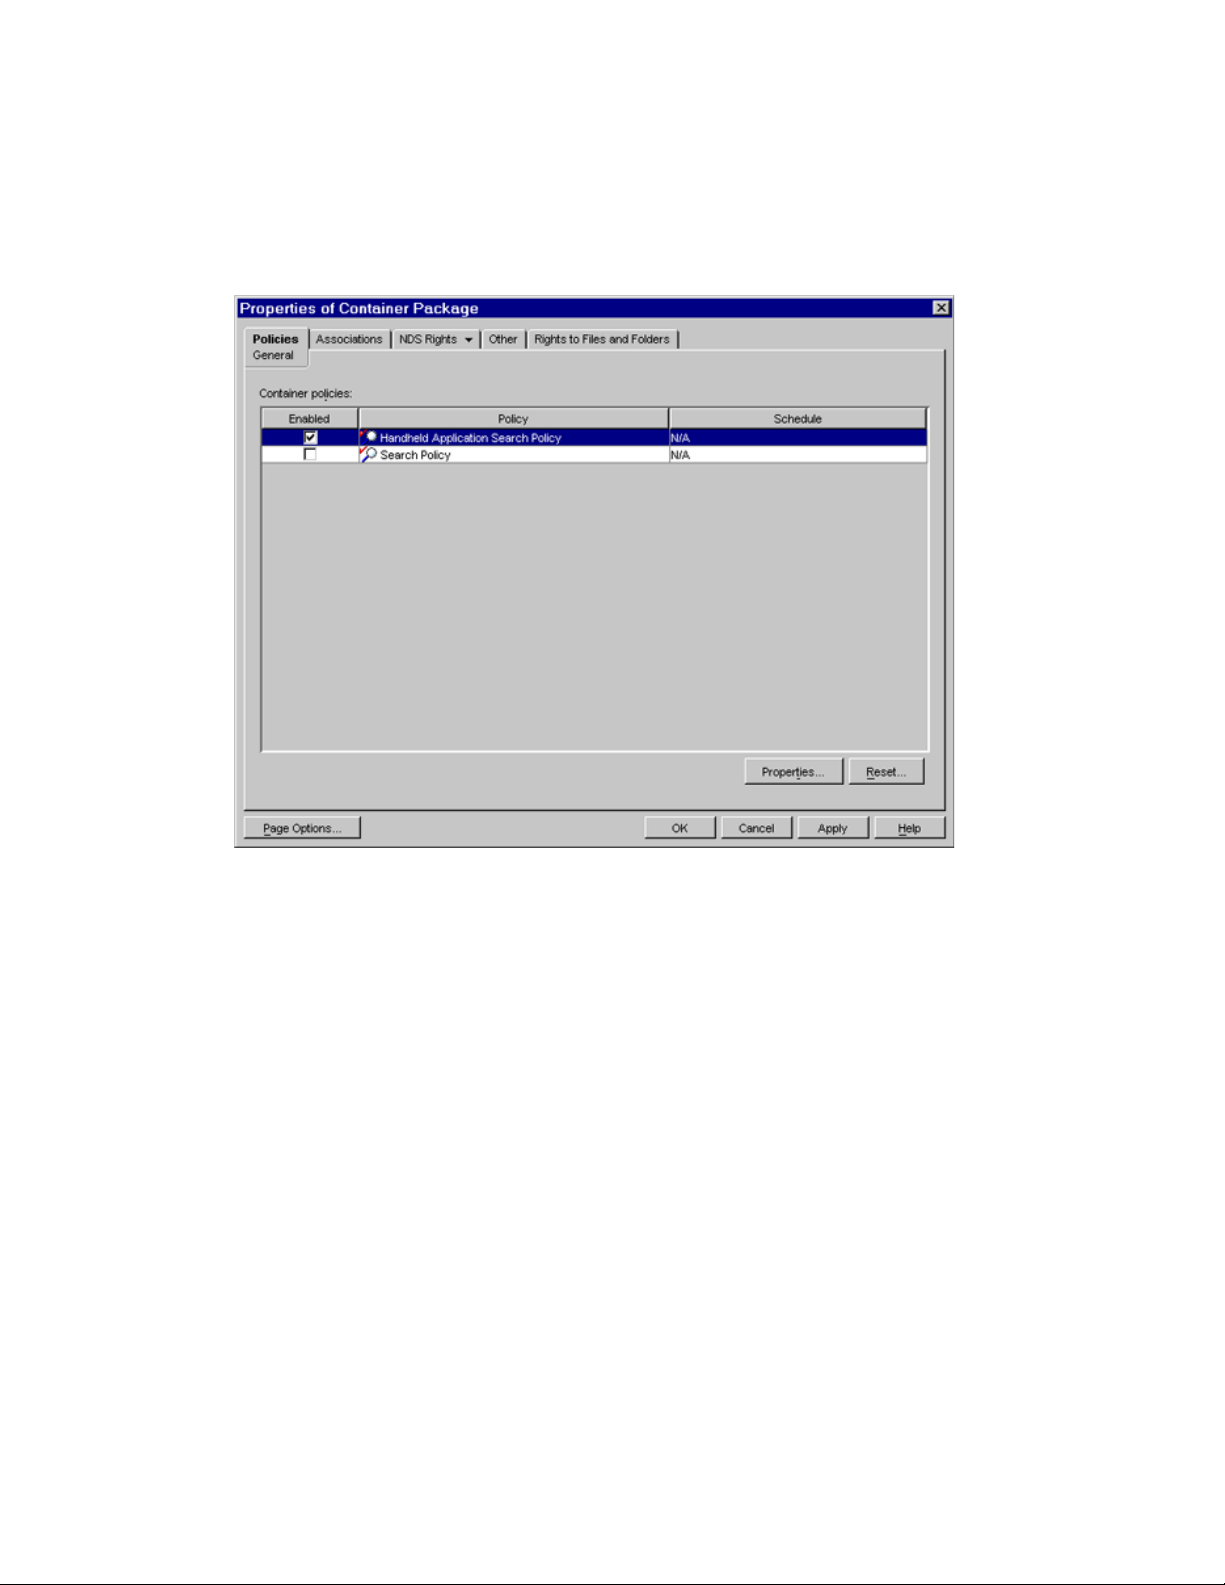
1 In ConsoleOne, right-click the newly created Container Package, then click Properties.
For information on creating the Container Package, see Section 2.2, “Creating Policy
Packages,” on page 22.
2 Select the check box under the Enabled column for the Search policy.
This both selects and enables the policy.
24 Novell ZENworks 7 Handheld Management Administration Guide
Page 25
novdocx (en) 13 May 2009
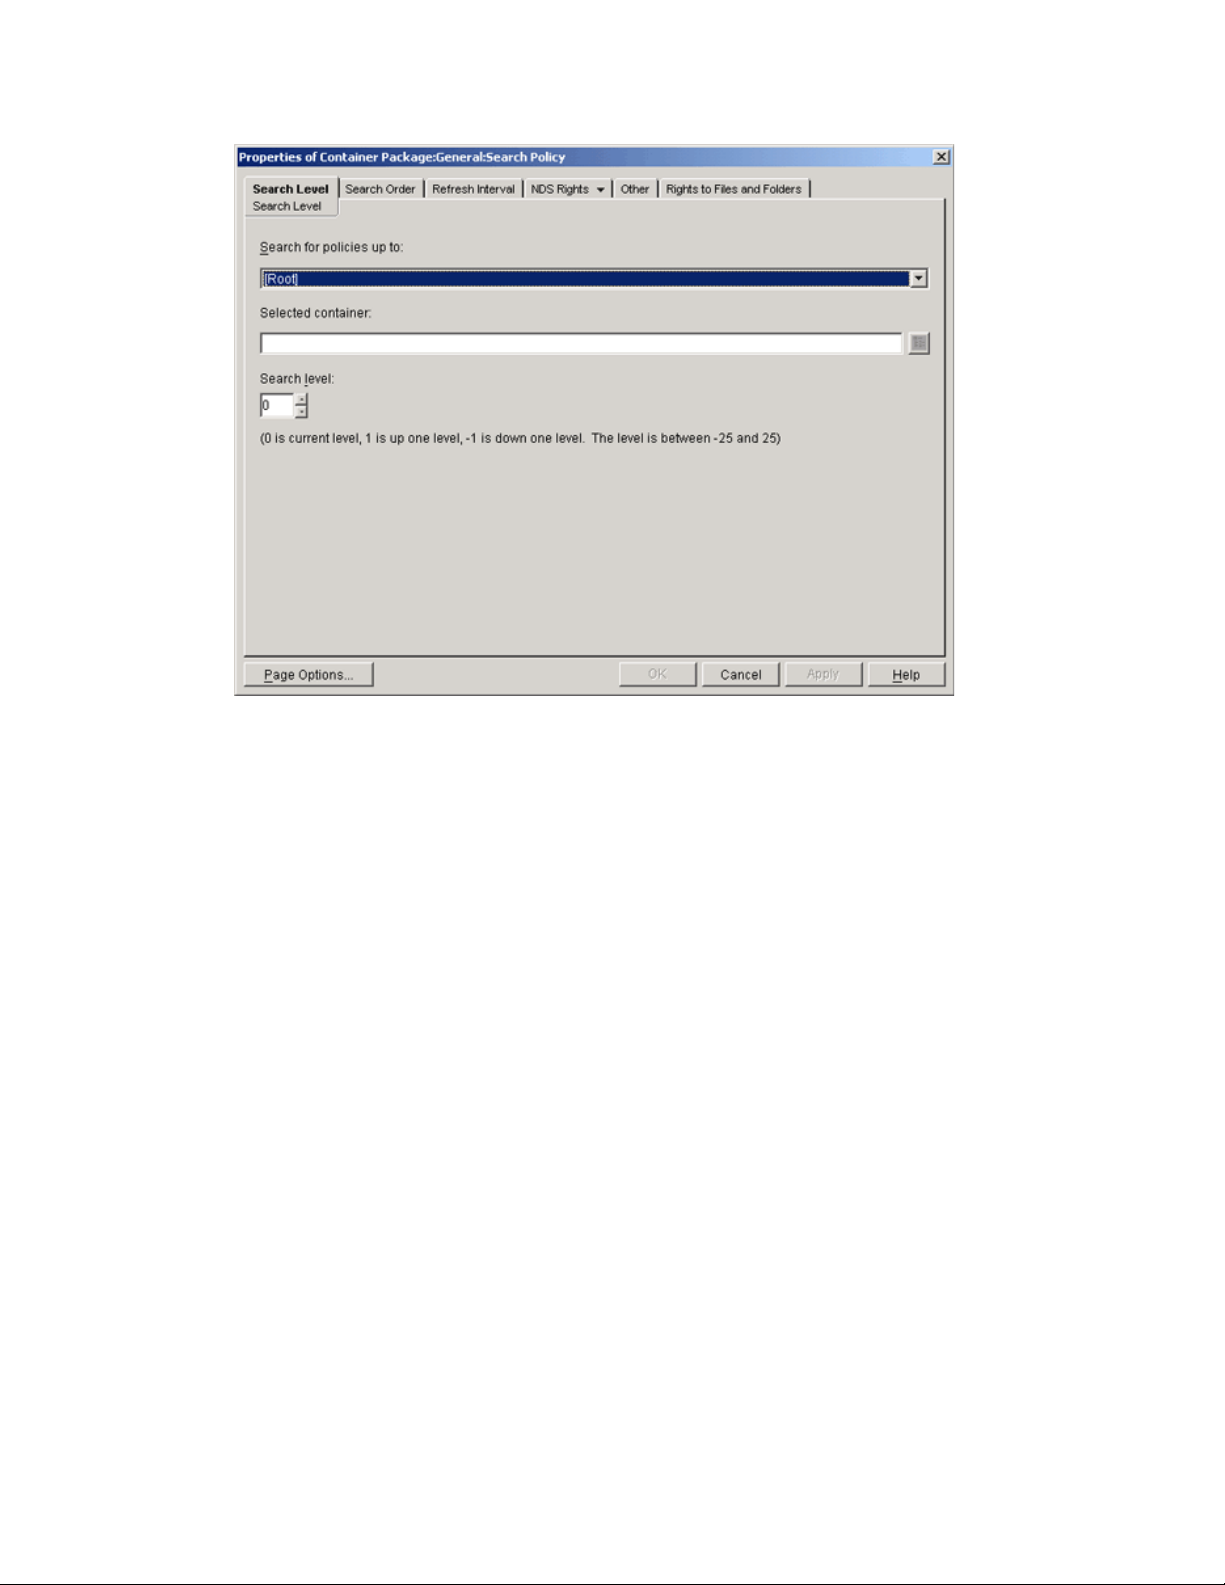
3 Click Properties to display the Search Level page.
4 Select the level to search to from the drop-down list:
[Root]: Search from the handheld device object to the root of the tree.
Using ZENworks Handheld Management Policies 25
Page 26
Object Container: Search from the handheld device object to the parent container of the
object.
Partition: Search from the object to the partition.
Selected Container: Search from the handheld device object to the selected container.
5 If you chose Selected Container, browse to select the container.
6 To determine the searching limits in either direction, specify a number between -25 and 25.
7 Click the Search Order tab.
novdocx (en) 13 May 2009
8 Specify the policy searching order, using the arrow keys, the Add button, and the Remove
button as necessary.
NOTE: Depending on which other ZENworks products (ZENworks Desktop Management and
ZENworks Server Management) are present, ConsoleOne might display a Refresh Interval
page; however, ZENworks Handheld Management does not use the settings on the Refresh
Interval page.
9 Click OK.
10 When you have finished configuring all of the policies for this package, continue with the steps
under “Associating the Container Package” on page 29 to associate the policy package.
2.3.3 Handheld Application Search Policy
The Handheld Application Search policy is used to limit how far up the tree ZENworks Handheld
Management searches for Handheld Application objects.
26 Novell ZENworks 7 Handheld Management Administration Guide
Page 27
To set up the Handheld Application Search policy:
1 In ConsoleOne, right-click the Container Package, then click Properties.
2 Select the check box under the Enabled column for the Handheld Application Search policy.
This both selects and enables the policy.
novdocx (en) 13 May 2009
3 Click Properties to display the Search Level page.
Using ZENworks Handheld Management Policies 27
Page 28
novdocx (en) 13 May 2009
4 Select the level to search to:
[Root]: Search from the handheld device object to the root of the tree.
Object Container: Search from the handheld device object to the parent container of the
object.
Partition: Search from the object to the partition.
Selected Container: Search from the handheld device object to the selected container.
5 If you chose Selected Container, browse to select the container.
6 To determine the searching limits in either direction, specify a number between -25 and 25.
7 Click the Search Order tab.
28 Novell ZENworks 7 Handheld Management Administration Guide
Page 29
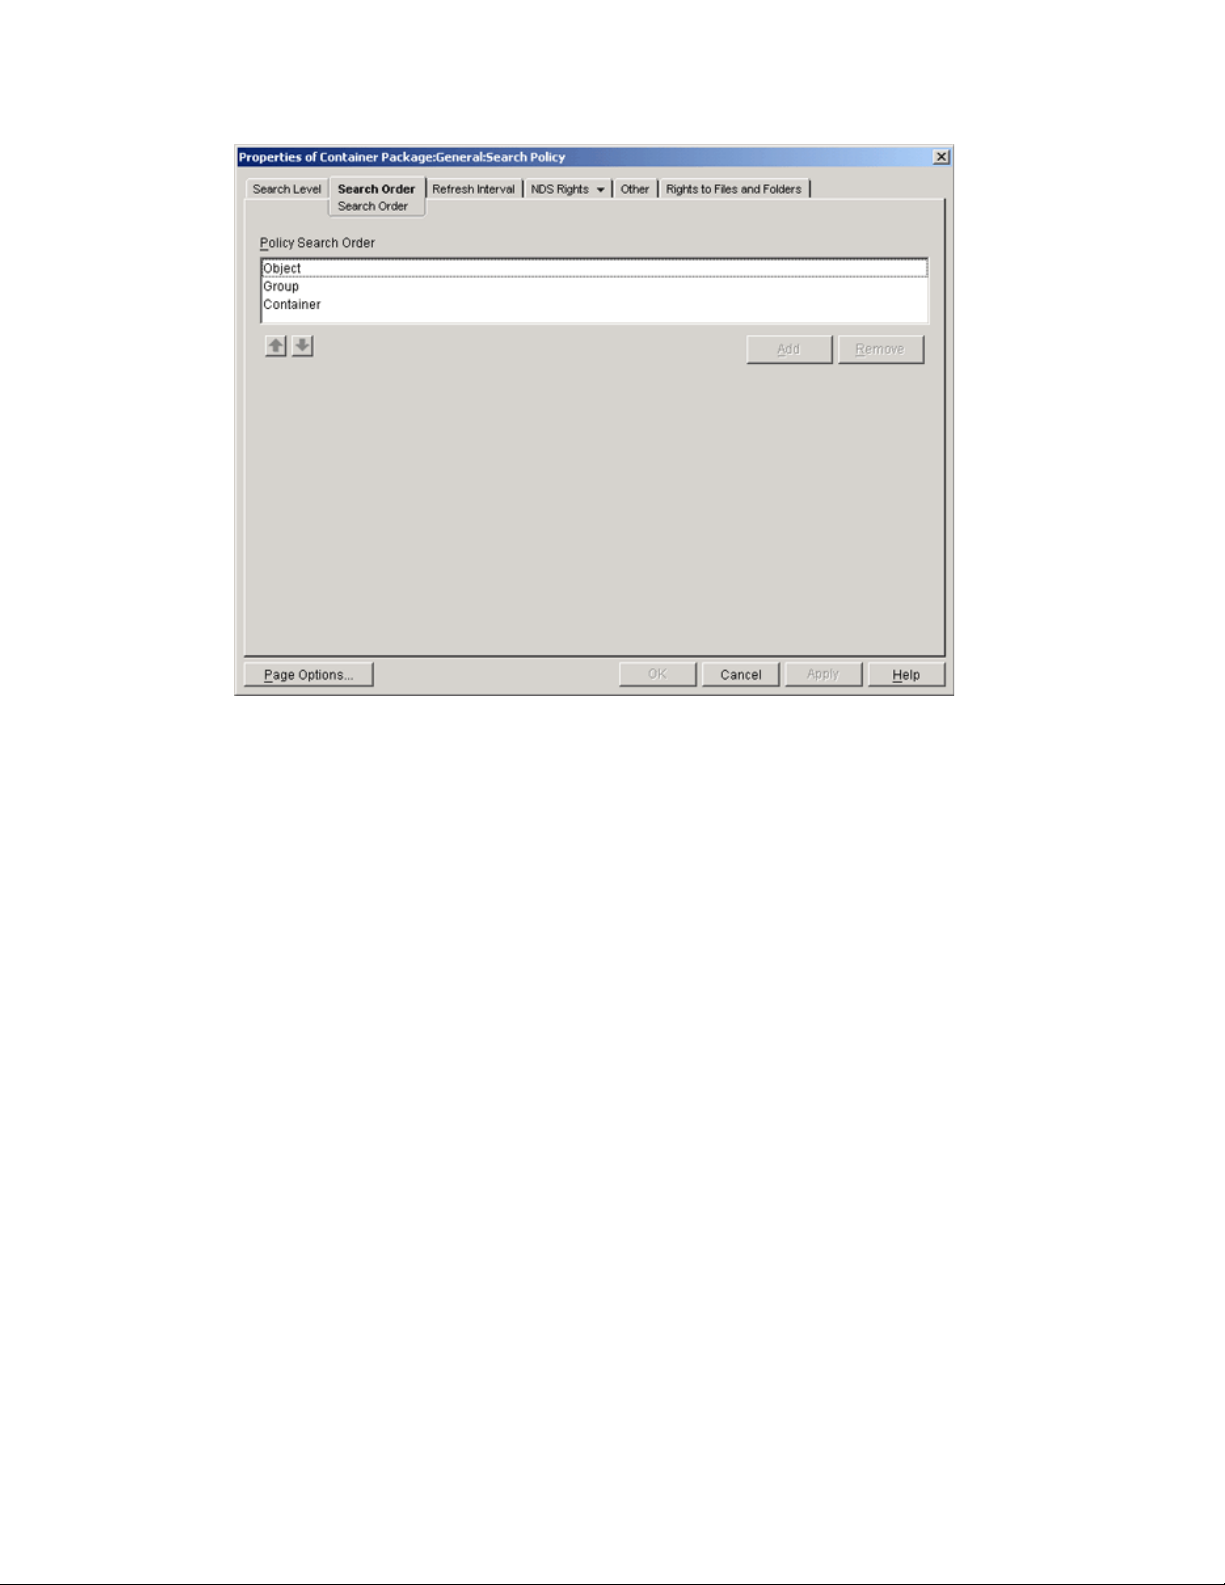
novdocx (en) 13 May 2009
8 Specify the policy searching order.
Use the arrow keys, the Add button, and the Remove button as necessary to create your search
order.
9 Click OK.
10 When you have finished configuring all of the policies for this package, continue with the steps
under “Associating the Container Package” on page 29 to associate the policy package.
2.3.4 Associating the Container Package
The policies you configured and enabled are not in effect until you associate their policy package
with a container object.
1 In ConsoleOne, right-click the Container Package, then click Properties.
2 Click the Associations tab, then click Add.
3 Browse for the container for associating the package, then click OK.
2.4 Setting Up Handheld Package and Handheld User Policies
ZENworks Handheld Management provides Handheld Package and Handheld User Package
policies for the Palm OS, Windows CE, and BlackBerry platforms.
Each platform has its own page where you can view and configure available policies. To display a
desired platform page: In ConsoleOne, right-click the Handheld Package or the Handheld User
Package, click Properties, click the down-arrow on the Policies tab, then click the appropriate
platform: Palm, WinCE, or BlackBerry.
Using ZENworks Handheld Management Policies 29
Page 30

Review the following sections for more information to help you set up the Handheld Package and
Handheld User Package policies:
Section 2.4.1, “BlackBerry Configuration Policy,” on page 30
Section 2.4.2, “BlackBerry Inventory Policy,” on page 32
Section 2.4.3, “BlackBerry Security Policy,” on page 34
Section 2.4.4, “Palm Client Configuration Policy,” on page 36
Section 2.4.5, “Palm Configuration Policy,” on page 39
Section 2.4.6, “Palm Access Point Configuration Policy,” on page 43
Section 2.4.7, “Palm File Retrieval Policy,” on page 45
Section 2.4.8, “Palm Security Policy,” on page 48
Section 2.4.9, “WinCE Client Configuration Policy,” on page 53
Section 2.4.10, “WinCE Configuration Policy,” on page 55
Section 2.4.11, “WinCE Access Point Configuration Policy,” on page 59
Section 2.4.12, “WinCE File Retrieval Policy,” on page 62
Section 2.4.13, “WinCE Remote Management Policy,” on page 66
Section 2.4.14, “WinCE Security Policy,” on page 68
novdocx (en) 13 May 2009
Section 2.4.15, “Associating the Handheld Package or the Handheld User Package,” on
page 73
Section 2.4.16, “Associating a User Object to a BlackBerry Device,” on page 74
Section 2.4.17, “Scheduling Packages and Policies,” on page 74
2.4.1 BlackBerry Configuration Policy
The BlackBerry Configuration policy lets you specify a standard owner name and additional
information that is set on the associated BlackBerry devices. For example, you could specify that
your company name, address, and telephone number be set on all associated BlackBerry devices to
help recover lost devices.
NOTE: This policy is not supported for Java-based BlackBerry devices.
The owner name and information that you specify using this policy does not affect the naming of the
device objects in eDirectory; the owner name and information you specify in this policy displays
only on the actual device.
To set up the BlackBerry Configuration policy:
1 In ConsoleOne, right-click the Handheld Package or Handheld User Package object, then
click Properties.
2 On the Policies tab, click the down-arrow, then click BlackBerry.
3 Select the check box under the Enabled column for the BlackBerry Configuration policy.
This both selects and enables the policy.
30 Novell ZENworks 7 Handheld Management Administration Guide
Page 31

novdocx (en) 13 May 2009
4 Click Properties to display the Owner page.
5 Fill in the fields:
Using ZENworks Handheld Management Policies 31
Page 32

Owner Name: Select the Specify Owner Name To Be Set on the Handheld check box, then type
the owner name that you want to be set on associated BlackBerry devices.
Owner Information: Select the Specify Owner Information To Be Set on the Handheld check
box, then type any additional information that you want to be set on associated BlackBerry
devices.
The owner name and information that you specify using this policy does not affect the naming
of the device objects in Novell eDirectory; the owner name and information you specify in this
policy displays only on the actual device.
6 Click OK to save the policy.
7 When you have finished configuring all of the policies for this package, continue with the steps
under “Associating the Handheld Package or the Handheld User Package” on page 73 to
associate the policy package.
8 If desired, schedule the policy. For more information, see “Scheduling Packages and Policies”
on page 74.
NOTE: For BlackBerry devices, a policy schedule of Custom Event:EventHandheldSync gets
translated on the device to Daily.
novdocx (en) 13 May 2009
2.4.2 BlackBerry Inventory Policy
The BlackBerry Inventory policy lets you enable the collection of hardware and software inventory
from associated BlackBerry devices.
To set up the BlackBerry Inventory policy:
1 In ConsoleOne, right-click the Handheld Package or the Handheld User Package object, then
click Properties.
2 On the Policies tab, click the down-arrow, then click BlackBerry.
3 Select the check box under the Enabled column for the BlackBerry Inventory policy.
This both selects and enables the policy.
32 Novell ZENworks 7 Handheld Management Administration Guide
Page 33

novdocx (en) 13 May 2009
4 Click Properties to display the General page.
5 Fill in the fields:
Using ZENworks Handheld Management Policies 33
Page 34

Hardware: To collect hardware information for associated BlackBerry devices, select the
Enable Collection of Hardware Inventory on the Handheld check box.
Collected data about hardware is stored on a per-device basis and is found on the ZENworks
Inventory page in ConsoleOne or on the Clients: Hardware Inventory page in the ZENworks
Handheld Management Inventory Viewer. To view the ZENworks Inventory page in
ConsoleOne, right-click a handheld device object, click Properties, then click the ZENworks
Inventory tab. To open the ZENworks Handheld Management Inventory Viewer, right-click a
handheld device object, click Actions, then click Inventory. For more information, see
Section 5.2, “Viewing Hardware Inventory,” on page 120.
Software: To collect software information for associated BlackBerry devices, select the Enable
Collection of Software Inventory on the Handheld check box.
Collected data about software is found in the ZENworks Handheld Management Inventory
Viewer. To open the ZENworks Handheld Management Inventory Viewer, right-click a
handheld device object, click Actions, then click Inventory. You can view software inventory
information for a specific device or across all BlackBerry devices in your system. For more
information, see Section 5.1, “Viewing Software Inventory,” on page 110.
6 Click OK to save the policy.
7 When you have finished configuring all of the policies for this package, continue with the steps
under “Associating the Handheld Package or the Handheld User Package” on page 73 to
associate the policy package.
8 If desired, schedule the policy. For more information, see “Scheduling Packages and Policies”
on page 74.
novdocx (en) 13 May 2009
NOTE: You must schedule inventory for BlackBerry devices because they are always
connected to the ZENworks Handheld Management Server. For Palm and Windows CE
devices, you do not need to schedule inventory; software inventory is collected once a day.
For BlackBerry devices, a policy schedule of Custom Event:EventHandheldSync gets
translated on the device to Daily.
2.4.3 BlackBerry Security Policy
The BlackBerry Security policy lets you ensure that a password is set on associated BlackBerry
devices. You can also use the BlackBerry Device Lockout feature to lock a device that you suspect
has been lost or stolen. For more information, see “BlackBerry Device Lockout” on page 36.
NOTE: This policy is not supported for Java-based BlackBerry devices.
To set up the BlackBerry Security policy:
1 In ConsoleOne, right-click the Handheld Package or Handheld User Package object, then
click Properties.
2 On the Policies tab, click the down-arrow, then click BlackBerry.
3 Select the check box under the Enabled column for the BlackBerry Security policy.
This both selects and enables the policy.
34 Novell ZENworks 7 Handheld Management Administration Guide
Page 35

novdocx (en) 13 May 2009
4 Click Properties to display the Security page.
5 Select the Require a Password To Be Set On the Handheld check box.
Using ZENworks Handheld Management Policies 35
Page 36

If your organization has a rule stating that all handheld devices must have a password, you
should enable this policy.
When the BlackBerry Security policy is enforced, if the user does not have a password set, he
or she is prompted to create one. If the user ignores the prompt, he or she is prompted every 15
minutes to create a password for the device.
6 Click OK to save the policy.
7 When you have finished configuring all of the policies for this package, continue with the steps
under “Associating the Handheld Package or the Handheld User Package” on page 73 to
associate the policy package.
8 If desired, schedule the policy. For more information, see “Scheduling Packages and Policies”
on page 74.
NOTE: For BlackBerry devices, a policy schedule of Custom Event:EventHandheldSync gets
translated on the device to Daily.
BlackBerry Device Lockout
The BlackBerry Device Lockout feature lets you disable a BlackBerry device if you suspect that it
has been lost or stolen. After the device is locked, no applications can run on the device other than
ZENworks Handheld Management, which can be used to unlock the device.
novdocx (en) 13 May 2009
To lock or unlock a BlackBerry device:
1 In ConsoleOne, right-click the desired BlackBerry handheld device object, click Actions, then
click Lock/Unlock Device.
2 Click Unlock the Device.
or
Click Lock the Device, then type the text you want displayed on the device when in is locked.
3 Click OK.
2.4.4 Palm Client Configuration Policy
The Palm Client Configuration policy lets you override the user authentication settings of the
ZENworks Handheld Management Service object for associated Palm OS devices.
You can set up user authentication on a global basis for all handheld devices in your ZENworks
Handheld Management system during installation or you can edit the properties of the ZENworks
Handheld Management Service object.
If you do not want to enable user authentication for all handheld devices in your system, you can
choose to not enable global user authentication during installation or by editing the properties of the
ZENworks Handheld Management Service object. You can then configure and enable the Palm
Client Configuration policy by following the procedure in this section to target only specific
handheld devices or groups of handheld devices.
For more information about setting up user authentication on a global basis during installation, see
“Installing the ZENworks Handheld Management Server” in the Novell ZENworks 7 Handheld
Management Installation Guide. For more information about editing the properties of the
ZENworks Handheld Management Service object to enable global user authentication, see
Section 7.1, “Configuring User Authentication,” on page 131.
36 Novell ZENworks 7 Handheld Management Administration Guide
Page 37

If user authentication is enabled, the user is prompted for his or her credentials (username and
password) the first time the device connects/synchronizes. ZENworks Handheld Management then
authenticates the user using LDAP to log in to the directory. After the user is authenticated, you can
target policies and applications to the user of the handheld device.
The user must enter the credentials only once; ZENworks Handheld Management does not prompt
the user for the credentials again. If a user that has been authenticated gives the device to another
person, you should reconfigure the user on the device itself. For more information, see the
documentation that came with your handheld device.
If the device uses the Palm IP client to connect, the user-authentication dialog box displays on the
handheld device. If the device uses Palm HotSync, the user-authentication dialog box displays on
the desktop computer during synchronization. When the user is prompted for authentication, if he or
she clicks Cancel, the handheld device can be managed by device policies, but user-based
management does not function because the user is not authenticated. If the user mis-types the
username or password, he or she is immediately prompted for the credentials again.
NOTE: There are two places in ZENworks Handheld Management where users can be required to
enter a password: to authenticate to the directory as part of the Palm Client Configuration policy and
to power on a handheld device as part of the Palm Security policy. These two passwords are
independent of each other. For more information about the password users must enter to power on a
device, see “Palm Security Policy” on page 48.
novdocx (en) 13 May 2009
To set up the Palm Client Configuration policy:
1 In ConsoleOne, right-click the Handheld Package object, then click Properties.
2 On the Policies tab, click the down-arrow, then click Palm.
3 Select the check box under the Enabled column for the Palm Client Configuration policy.
This both selects and enables the policy.
Using ZENworks Handheld Management Policies 37
Page 38

novdocx (en) 13 May 2009
4 Click Properties to display the Global Settings page.
5 To override the user authentication settings of the ZENworks Handheld Management Service
object, Select the Override the Server Configuration option.
38 Novell ZENworks 7 Handheld Management Administration Guide
Page 39

6 Select the Enable User Based Policies on Handhelds option.
7 Click OK to save the policy.
8 When you have finished configuring all of the policies for this package, continue with the steps
under “Associating the Handheld Package or the Handheld User Package” on page 73 to
associate the policy package.
2.4.5 Palm Configuration Policy
The Palm Configuration policy lets you configure the following:
General Preferences: Lets you set preferences for associated Palm OS devices, for example
how long before an idle device turns itself off, whether or not a device stays on when cradled,
and more.
Buttons: Lets you associate different software programs with the buttons on associated Palm
OS devices. Also lets you assign a feature users can access when they drag the pen from the
writing area to the top of the screen on the Palm OS device. For example, you can select Turn
Off & Lock to make it easier for users to turn off and lock their Palm OS devices.
Programs: Lets you specify which software programs are allowed or not allowed on
associated Palm OS devices. Programs that are not allowed can be automatically removed from
the devices.
Files: Lets you specify the files to be automatically deleted from the Palm devices.
novdocx (en) 13 May 2009
To set up the Palm Configuration policy:
1 In ConsoleOne, right-click the Handheld Package or Handheld User Package object, then click
Properties.
2 On the Policies tab, click the down-arrow, then click Palm.
3 Select the check box under the Enabled column for the Palm Configuration policy.
This both selects and enables the policy.
Using ZENworks Handheld Management Policies 39
Page 40

novdocx (en) 13 May 2009
4 Click Properties.
5 On the General page, make the desired configuration changes, then click Apply.
You can change the settings for the following preferences:
Auto-Off After
Stay On in Cradle
System Sound
Alarm Sound
Alarm Vibrate
Alarm LED
Game Sound
Beam Receive
Each preference in the list contains a Don’t Change setting. If you choose this setting,
ZENworks Handheld Management does not change that preference on associated devices; the
corresponding setting on each device determines its behavior. For example, if you choose the
Don’t Change setting for Auto-Off After, each associated device uses its own preference
settings to determine how long an idle Palm OS device waits until it turns itself off. If you want
to ensure consistency across all associated Palm OS devices, choose the appropriate setting.
6 On the Buttons: Configuration page, make the desired configuration changes, then click Apply.
The Button Column lists the available buttons on the Palm OS device. To change a button’s
association, select a button from the Button list, click Edit, click Set to Application, browse to
an application, then click OK.
40 Novell ZENworks 7 Handheld Management Administration Guide
Page 41

NOTE: Depending on your particular Palm OS device, the available buttons in the Button list
are named differently than those in the preceding illustration.
The Pen Function drop-down list lets you assign a feature users can access when they drag the
pen from the writing area to the top of the screen on the Palm OS device. For example, you can
select Turn Off & Lock to make it easier for users to turn off and lock their Palm OS devices. To
assign a feature, choose an option from the drop-down list.
The following options are available:
Not Specified
Backlight
Keyboard
Graffiti Help
Turn Off & Loc k
Beam Data
7 On the Programs page, make the desired configuration changes, then click Apply.
The Application column lists the applications that you want to allow on the device or remove
from the device.
To add an application to the list, click Add, specify or browse to the application, select one
of the following rules to apply to the application, then click OK.
novdocx (en) 13 May 2009
Allow the Application on the Handheld
Remove the Application from the Handheld
Rather than selecting certain applications to be removed from the device, you might find it
easier to specify a list of allowed applications and select the Remove All Other
Applications from the Handheld check box. When the policy is enforced or when the user
synchronizes the device, all applications not listed in the Applications list with the Allow
rule set are removed from the device.
If the application listed in the Application column list is to be added or removed from
storage card, select the Search for Application on Storage Cards check box.
8 On the Files page, do the following:
Using ZENworks Handheld Management Policies 41
Page 42

novdocx (en) 13 May 2009
8a Click Add.
8b In the Add Files to Delete from Handheld dialog box, specify the name of the file to be
deleted.
The filename is added to the Files to Delete from the Handheld list.
Ensure that the name of the application matches the file properties name because the name
displayed in the Application Launcher screen might not be the actual filename. To
determine the actual filename, you need to use a third-party application such as FileZ, a
shareware application.
8c Click OK.
8d (Optional) Select the Files are Required option if you want Handheld Management to
report a failed status if the specified files do not exist on the handheld device or if the
specified wildcard characters do not provide a match for files on the device.
8e Click Apply, then click Close.
9 Click OK to save the policy.
10 When you have finished configuring all of the policies for this package, continue with the steps
under “Associating the Handheld Package or the Handheld User Package” on page 73 to
associate the policy package.
11 If desired, schedule the policy. For more information, see “Scheduling Packages and Policies”
on page 74.
12 (Optional) To ensure that the Handheld Management Server immediately receives the new
policy changes, right-click the Handheld service object, then click Scan Now.
42 Novell ZENworks 7 Handheld Management Administration Guide
Page 43

2.4.6 Palm Access Point Configuration Policy
The Palm Access Point Configuration Policy lets you assign multiple ZENworks Handheld
Management Access Points to a device and also define the order of the ZENworks Handheld
Management Access Points to which the Palm OS device must connect. If the device is unable to
connect to the ZENworks Handheld Management Access Point configured first, then it
automatically tries to connect to the ZENworks Handheld Management Access Point configured
next in the sequence.
NOTE: The Palm Access Point Configuration policy is not supported on cradled Palm devices.
To configure the Palm Access Point Configuration Policy:
1 In ConsoleOne, right-click the Handheld Package or Handheld User Package object, then click
Properties.
2 On the Policies tab, click the down-arrow, then click Palm.
3 Select the check box under the Enabled column for the Palm Access Point Configuration
policy.
This both selects and enables the policy.
novdocx (en) 13 May 2009
4 Click Properties.
This displays the Access Points - Configuration page.
Using ZENworks Handheld Management Policies 43
Page 44

novdocx (en) 13 May 2009
5 In the Access Points - Configuration page, do the following:
5a If you want to add the ZENworks Handheld Management Access Points to the Configure
IP Address /DNS Name of Access Points list, and define the order of the ZENworks
Handheld Management Access Points to which the handheld device must connect to,
select the Enable Following Access Points option.
If you do not select this check box, the ZENworks Handheld Management Access Points
list is not available on the handheld device.
5b Click Add.
5c In the Add Access Points dialog box, specify the IP address or the full DNS name of the
ZENworks Handheld Management Access Point, or click Select. If you specify the IP
address or the full DNS of the ZENworks Handheld Management Access Point, skip to
Step 5h.
5d By default, the service object of the Handheld Management server is displayed. To select
another service object, click the Browse icon, select the service object, then click OK.
5e Click Display.
The IP address of the ZENworks Handheld Management Access Points associated with
service object is displayed
5f From the Access Points list, select the IP address of the ZENworks Handheld Management
Access Point to which you want to connect the device.
5g Click OK.
The ZENworks Handheld Management Access Points IP address followed by a semicolon
(;) is displayed in the Access Points option.
5h (Optional) To add another ZENworks Handheld Management Access Point, repeat Step 5c
through Step 5g.
44 Novell ZENworks 7 Handheld Management Administration Guide
Page 45

You can add a maximum of eight ZENworks Handheld Management Access Points IP
addresses, but ensure that the IP addresses or the DNS names of the ZENworks Handheld
Management Access Points are separated with semicolons (;).
5i Click Apply.
6 (Optional) To change the order of the ZENworks Handheld Management Access Points in the
Configure IP Address /DNS Name of Access Points list:
6a Select the IP address or the full DNS name of the ZENworks Handheld Management
Access Point.
6b Click Move Up or Move Down.
7 (Optional) To modify the value of an ZENworks Handheld Management Access Point
displayed in the Configure IP Address /DNS Name of Access Points list:
7a Select the IP address or the full DNS name of the ZENworks Handheld Management
Access Point whose value you want to modify.
7b Click Edit.
7c In the Edit Access Points dialog box, change the value of the ZENworks Handheld
Management Access Point.
7d Click OK.
8 Click Apply, then click Close to save the policy.
novdocx (en) 13 May 2009
9 Associate the policy package.
For more information on how to associate the policy package, see the “Associating the
Handheld Package or the Handheld User Package” on page 73.
10 If desired, schedule the policy.
For more information on how to schedule a policy, see the “Scheduling Packages and Policies”
on page 74.
11 (Optional) To ensure that the Handheld Management Server immediately receives the new
policy changes, right-click the Handheld service object, then click Scan Now.
IMPORTANT: If you push
Configuration policy on the device, the Palm Access Point Configuration policy settings are
removed. You must reconfigure the policy.
zfhipclient.pdb
after enforcing the Palm Access Point
2.4.7 Palm File Retrieval Policy
The Palm File Retrieval policy lets you specify source files you want to retrieve from a Palm OS
device and copy to a specified destination location.
The File Retrieval policy is a plural policy, meaning it can be added many times to a policy package.
You can set up as many File Retrieval policies as required to adequately retrieve important files from
the handheld devices in your organization. When you name these plural policies, be sure to give
them descriptive names.
The File Retrieval policy is also cumulative, meaning that many different Palm File Retrieval
policies can be effective for a single handheld device object, handheld group object, or container
object.
Using ZENworks Handheld Management Policies 45
Page 46

NOTE: If you want to retrieve files from handheld devices and store them on a Novell NetWare®
volume, you must install the Novell ClientTM on the ZENworks Handheld Management Server.
To set up the Palm File Retrieval policy:
1 In ConsoleOne, right-click the Handheld Package object or the Handheld User Package object,
then click Properties.
2 On the Policies tab, click the down-arrow, then click Palm.
3 Click Add.
The Add Policy window is displayed.
novdocx (en) 13 May 2009
4 Type a descriptive name in the Policy Name field, then click OK.
The newly created File Retrieval policy is displayed in the Handheld Policies list.
46 Novell ZENworks 7 Handheld Management Administration Guide
Page 47

5 Select the check box under the Enabled column for the newly created Palm File Retrieval
policy.
This both selects and enables the policy.
6 Click Properties to display the Files page.
novdocx (en) 13 May 2009
7 In the Files field, specify the source files to be retrieved from the handheld device.
NOTE: You must specify the Palm database or resource filename in the Files field. A thirdparty file utility tool (such as FileZ, a shareware program) might be necessary to determine the
actual filename.
When you specify source files, be aware that filenames are case sensitive. You can use wildcard
characters to specify source files.
When the policy is enforced, all specified source files are retrieved from the device; the files
are retrieved even if the same files were previously retrieved at another time.
8 Select the Files Are Required check box if you want ZENworks Handheld Management to
report a failed status if the specified files do not exist on the handheld device or if the specified
wildcard characters do not provide a match for files on the device.
For more information about policy status, see Section 2.6, “Viewing Policy Status
Information,” on page 76.
9 Select the Delete Files After Retrieval check box if you want the specified source files to be
deleted from the handheld device after they have been retrieved from the handheld device.
If you do not enable this option, the source files are copied to the specified location but a copy
also remains on the handheld device.
10 In the Path field, browse to or specify the destination location where you want the specified
files copied to.
The renamed file can include variables. To include variables, click the Insert button, then click
the desired variable.
Using ZENworks Handheld Management Policies 47
Page 48

The following variables are available for use:
Variable Description
device The CN of the device. For example, in Dan
m130.Handhelds.NovellBangalore, the string would be Dan m130.
devicedn The full DN of the device. For example, In Dan
m130.Handhelds.NovellWheaton, the string would be Dan
m130.Handhelds.NovellWheaton.
user The username of the device. This is the value stored in the UserName
attribute for the object in the directory. When this value is not configured on
the handheld device, it is set to <Undefined>.
date The date the file was retrieved from the handheld device. This value is the
date only; the time that the file was retrieved is not included. For example, if
the file was retrieved on September 15, 2002 at 3:15 p.m., the string would
be 2002-09-15. The string is always in the format of yyyy-mm-dd.
time The time the file was retrieved from the handheld device. This value is for the
time only; the date that the file was retrieved is not included. For example, if a
file was retrieved on September 15, 2002 at 3:20 p.m., the string would be
15-20. The string is always in the format of hh-mm, with hh representing the
hour in 24-hour format.
novdocx (en) 13 May 2009
guid The GUID for the handheld device.
server The name of the Windows NT server that received the data.
To use a variable, place an @ sign on either side of the variable in the string. For example, you
could use the following syntax:
@user@_filename
11 Select Use the Original File Name(s) to use the original source filenames for the destination
files.
or
Select Rename the Files To and specify new filenames for the destination files.
12 Click OK to save the policy.
13 When you have finished configuring all of the policies for this package, continue with the steps
under “Associating the Handheld Package or the Handheld User Package” on page 73 to
associate the policy package.
14 If desired, schedule the policy. For more information, see “Scheduling Packages and Policies”
on page 74.
2.4.8 Palm Security Policy
The Palm Security policy lets you configure the following:
Password Requirements: Lets you ensure that a password is set on the associated Palm
devices, and also lets you set a user’s password as the device password, configure enhanced
security options, such as the number of days to allow before a password expires, the number of
grace logins permitted before the user must change the password, the minimum number of
48 Novell ZENworks 7 Handheld Management Administration Guide
Page 49

characters to allow for the password, and whether the password must contain a mix of letters
and numbers. For devices running Palm OS 4.x or newer, you can also configure auto-lock
options.
IMPORTANT: Before configuring the policy, you must configure the containers to be
searched to authenticate the handheld user credentials. You can do it either during the
ZENworks 7 Handheld Management server installation or after the installation.
To configure user authentication during the installation, you must select the Enable User
Authentication option, and specify the containers to search for user objects.
To configure user authentication after the installation, see Section 7.1, “Configuring User
Authentication,” on page 131.
There are two places in ZENworks Handheld Management where users can be required to enter
a password: to authenticate to the directory as part of the Palm Client Configuration policy and
to power on a handheld device as part of the Palm Security policy. These two passwords are
independent of each other. For more information about the password users must enter to
authenticate to the directory, see Section 2.4.4, “Palm Client Configuration Policy,” on
page 36.
novdocx (en) 13 May 2009
Self-Destruct Settings: Lets you specify self-destruct settings to disable a Palm device after a
specified number of failed password attempts or after a specified number of days since the
device was last connected or synchronized.
To set up the Palm Security policy:
1 In ConsoleOne, right-click the Handheld Package or Handheld User Package object, then click
Properties.
2 On the Policies tab, click the down-arrow, then click Palm.
3 Select the check box under the Enabled column for the Palm Security policy.
This both selects and enables the policy.
Using ZENworks Handheld Management Policies 49
Page 50

novdocx (en) 13 May 2009
4 Click Properties to display the Security page.
5 In the Security page, do the following:
5a To set a password on the Palm OS device, select the Require a Password to Be Set on the
Handheld option.
This option lets you specify that a password must be set on the Palm OS device. If your
organization has a rule that states that all handheld devices must have a password, you
should enable this policy. If a user does not have a password set, he or she is prompted to
create one.
For Palm OS devices, ZENworks Handheld Management replaces the Palm password
applet if you select Require a Password to Be Set on the Handheld; users see ZENworks
Handheld Management password dialog boxes rather than the default Palm OS dialog
boxes.
5b (Conditional) To set a user’s network password as the device password, select the
Password Matches a Novell eDirectory User Password option.
WARNING: If you forget your network password, you cannot access the Handheld
device. You can access the device only by Hard Reset but this erases all data on the device.
50 Novell ZENworks 7 Handheld Management Administration Guide
Page 51

novdocx (en) 13 May 2009
5c (Conditional) To configure enhanced security options, select Additional Password
Settings, and configure the following options:
Minimum Password Length: Specify the minimum number of characters to allow
for the password on the device. You should choose a number great enough to ensure
adequate security, but small enough not to excessively burden the user.
Contains Alphanumeric Characters: Select this check box to require that the user
use both letters and numbers in the password. To improve the security of a password,
it should contain both letters (uppercase and lowercase) and numbers.
Password Expires In _ Days: Select this check box and specify the number of days
that you want the password to expire in. When the specified number of days has
expired, the user is prompted to change the password for the device.
Limit Grace Logins to _ Attempts: Select this check box and specify the number of
grace logon attempts you want to allow the user before he or she must change the
password for the device. After the number of days in Password Expires in _ Days, the
user is prompted to change the password. The user can choose to ignore this prompt
and keep the same password for the number of logon attempts you specify.
Require Unique Passwords: Select this check box to require that the user enter a
new password; he or she cannot reuse the previous eight passwords.
5d If you want the Palm OS device to be automatically locked when a specified event occurs,
select the Enable Auto Lock Configuration option, then select any of the following events
from the drop-down list:
Never
On Power Off
Using ZENworks Handheld Management Policies 51
Page 52

At Present Time
After a Preset Delay
IMPORTANT: To use this setting, the handheld device must be running Palm OS 4.x or
later.
Using this policy improves the security of the data on your Palm OS devices.
5e Click Apply.
6 Click the Self-Destruct tab.
novdocx (en) 13 May 2009
The Self-destruct page lets you configure self-destruct settings for Palm OS devices so that data
is not accessible from handheld devices that are lost or stolen. When the self-destruct feature is
activated, the data on the device is made unusable and the device must be manually reset,
which restores the device to its out-of-the-box state.
To use the self-destruct options for Palm OS devices, you must select the Require a Password
to Be Set on the Handheld check box on the Security page.
IMPORTANT: Use caution when you use the self-destruct feature. Be sure to allow an
adequate number of password attempts and an adequate number of days since the last
connection or synchronization to prevent data loss to users who incorrectly enter the password
or do not connect or synchronize the device during a short vacation.
For Palm devices using HotSync, if the user synchronizes the device using the same desktop or
laptop machine as usual, the data can be restored by HotSync.
7 Configure the following Self-Destruct settings:
Bad Password Attempts: Select the Enforce Self-destruct check box and specify the
number of bad password attempts to allow before activating the self-destruct feature.
52 Novell ZENworks 7 Handheld Management Administration Guide
Page 53

Time Since Last Connection: Select the Enforce Self-Destruct check box and specify the
number of days after the last connection before activating the self-destruct feature. The
Time Since Last Connection option refers to the last time the handheld device connected to
the ZENworks Handheld Management Access Point.
Each day is made up of 24 hours. If you connect (synchronize) the device on Monday at 2
p.m. and specify three days after the last connection before activating the self-destruct
feature, the self-destruct feature activates Thursday at 2 p.m (72 hours after the last
connection/synchronization) unless the device is connected/synchronized during that
period.
8 Click OK to save the policy.
9 When you have finished configuring all of the policies for this package, continue with the steps
under “Associating the Handheld Package or the Handheld User Package” on page 73 to
associate the policy package.
10 If desired, schedule the policy. For more information, see “Scheduling Packages and Policies”
on page 74.
11 (Optional) To ensure that the Handheld Management Server immediately receives the new
policy changes, right-click the Handheld service object, then click Scan Now.
novdocx (en) 13 May 2009
2.4.9 WinCE Client Configuration Policy
The WinCE Client Configuration policy lets you override the user authentication settings of the
ZENworks Handheld Management Service object for associated WinCE devices.
You can set up user authentication on a global basis for all handheld devices in your ZENworks
Handheld Management system during installation or you can edit the properties of the ZENworks
Handheld Management Service object.
If you do not want to enable user authentication for all handheld devices in your system, you can
choose to not enable global user authentication during installation or by editing the properties of the
ZENworks Handheld Management Service object. You can then configure and enable the WinCE
Client Configuration policy by following the procedure in this section to target only specific
handheld devices or groups of handheld devices.
For more information about setting up user authentication on a global basis during installation, see
“Installing the ZENworks Handheld Management Server” in the Novell ZENworks 7 Handheld
Management Installation Guide. For more information about editing the properties of the
ZENworks Handheld Management Service object to enable global user authentication, see
Section 7.1, “Configuring User Authentication,” on page 131.
If user authentication is enabled, the user is prompted for his or her credentials (username and
password). ZENworks Handheld Management then authenticates the user using LDAP to log in to
the directory. After the user is authenticated, you can target policies and applications to the user of
the handheld device.
If the device uses the Windows IP client to connect, the user-authentication dialog box displays on
the handheld device.
When the user is prompted for authentication, if he or she clicks Cancel, the handheld device can be
managed by device, but user-based management does not function because the user is not
authenticated. If the user mis-types the username or password, he or she is immediately prompted
for the credentials again.
Using ZENworks Handheld Management Policies 53
Page 54

NOTE: There are two places in ZENworks Handheld Management where users can be required to
enter a password: to authenticate to the directory as part of the WinCE Client Configuration policy
and to power on a handheld device as part of the WinCE Security policy. These two passwords are
independent of each other. For more information about the password users must enter to power on a
device, see “WinCE Security Policy” on page 68.
To set up the WinCE Client Configuration policy:
1 In ConsoleOne, right-click the Handheld Package or Handheld User object, then click
Properties.
2 On the Policies tab, click the down-arrow, then click WinCE.
3 Select the check box under the Enabled column for the WinCE Client Configuration policy.
This both selects and enables the policy.
novdocx (en) 13 May 2009
4 Click Properties to display the Global Settings page.
5 To override the user authentication settings of the ZENworks Handheld Management Service
object, select the Override the Server Configuration option.
54 Novell ZENworks 7 Handheld Management Administration Guide
Page 55

novdocx (en) 13 May 2009
6 Select the Enable User Based Policies on Handhelds option.
7 Click OK to save the policy.
8 When you have finished configuring all of the policies for this package, continue with the steps
under “Associating the Handheld Package or the Handheld User Package” on page 73 to
associate the policy package.
2.4.10 WinCE Configuration Policy
The WinCE Configuration policy lets you configure the following:
Buttons: Lets you associate different software programs with the buttons on the Windows CE
device. Also lets you assign another function to a button. For example, you can assign the Start
menu to a button on the Windows CE device, making it easier for users to access the Start
menu.
Programs: Lets you specify which programs you want to include on the Start menu (on a
Pocket PC) or on the desktop (on a Handheld PC). Programs that are not allowed can be
automatically removed from the Start menu/desktop of the device.
Applications: Lets you specify which applications or software you want to uninstall from
Windows CE device.
Power: Lets you specify power settings for associated Windows CE devices. You can specify
power settings that apply to Windows CE devices running on internal batteries or on external
power.
Files: Lets you specify the files to be deleted from the Windows CE devices.
Using ZENworks Handheld Management Policies 55
Page 56

To set up the WinCE Configuration policy:
1 In ConsoleOne, right-click the Handheld Package or Handheld User object, then click
Properties.
2 On the Policies tab, click the down-arrow, then click WinCE.
3 Select the check box under the Enabled column for the WinCE Configuration policy.
This both selects and enables the policy.
novdocx (en) 13 May 2009
4 Click Properties.
5 On the Buttons: Configuration page, do the following:
5a Click Add to change a button’s assignment.
56 Novell ZENworks 7 Handheld Management Administration Guide
Page 57

To view the button naming conventions for your particular handheld device: on the
handheld device, click Start > Settings > Buttons. For example, on a Compaq* iPAQ
Pocket PC, the buttons are named Button 1, Button 2, and so forth. On a HP* Jornada
Pocket PC, the buttons are named Hot key 1, Hot key 2, and so forth.
5b Select a button or type the name of a button, click OK, then select an option:
Reset to Default: Resets the selected button’s association to the factory default
association.
Set to Application: Lets you specify the application to assign to the selected button.
If you specify an application that is not in the Start menu path (or subpath), the button
applet might not show the correct settings. To apply the changes, you are prompted to
restart the handheld device.
Set to Other Function: Lets you specify a function from the drop-down list to
assign a function to the selected button.
5c Click Apply.
6 On the Programs: Start Menu/Desktop page, do the following:
novdocx (en) 13 May 2009
6a Click Add to specify a program to be added to the Short Cut list.
6b In the Edit Program dialog box, fill in the Shortcut Name option (this is the name that
displays in the Start menu or on the desktop), fill in the Ta rge t path (the full path to an
application’s executable file), then click OK.
6c To remove certain programs from the device’s Start menu/desktop, you might find it
easier to specify a list of allowed applications and select the Move All Other Start Menu/
Desktop Items to the Programs Folder check box. When the policy is enforced, all
programs not listed in the Icon Name list are moved to the Programs folder.
6d To hide the names and icons of all listed programs in the Programs folder, select Hide All
Items in the Programs Folder. Using this option lets the user run applications only from
the Start menu (on Pocket PC devices) or on the desktop (on handheld PC devices).
6e Click Apply.
7 On the Applications page, do the following:
7a Click Add.
Using ZENworks Handheld Management Policies 57
Page 58

7b In the Add Application dialog box, type or browse to the software that you want to
uninstall.
IMPORTANT: If you manually type the software name, make sure to type the name
exactly as it appears in the Remove Programs settings of the Windows CE device.
7c Click OK.
7d Click Apply.
novdocx (en) 13 May 2009
8 On the Power page, make the desired configuration changes, then click Apply.
NOTE: The Power settings do not apply to HP Jornada devices running MicrosoftPocket PC
2002 software.
The External Power settings do not apply to Handheld PC.
If you select the Don’t Change setting, ZENworks Handheld Management does not change that
setting on associated devices; the corresponding setting on each device determines its behavior.
For example, if you select the Don’t Change setting, each associated device uses its own
preference settings to determine how long an idle Windows CE device waits until it turns itself
off. If you want to ensure consistency across all associated Windows CE devices, select the
appropriate setting.
If you select the Disable setting, ZENworks Handheld Management disables that setting on all
associated Windows CE devices; the power of Windows CE devices is turned off.
9 On the Files page, do the following:
9a Click Add.
9b In the Add Files to Delete from Handheld dialog box, specify the complete path of the file
and the filename.
58 Novell ZENworks 7 Handheld Management Administration Guide
Page 59

9c Click OK.
9d (Optional) Select the Files are Required option if you want Handheld Management to
report a failed status if the specified files do not exist on the handheld device or if the
specified wildcard characters do not provide a match for files on the device.
9e Click Apply, then click Close.
novdocx (en) 13 May 2009
10 When you have finished configuring all of the policies for this package, continue with the steps
under “Associating the Handheld Package or the Handheld User Package” on page 73 to
associate the policy package.
11 If desired, schedule the policy. For more information, see “Scheduling Packages and Policies”
on page 74.
12 (Optional) To ensure that the Handheld Management Server immediately receives the new
policy changes, right-click the Handheld service object, then click Scan Now.
2.4.11 WinCE Access Point Configuration Policy
The WinCE Access Point Configuration Policy lets you assign multiple ZENworks Handheld
Management Access Points to a device and also define the order of the ZENworks Handheld
Management Access Points to which the Windows CE device must connect. If the device is unable
to connect to the ZENworks Handheld Management Access Point configured first, then it
automatically tries to connect to the ZENworks Handheld Management Access Point configured
next in the sequence.
To configure the WinCE Access Point Configuration Policy:
1 In ConsoleOne, right-click the Handheld Package or Handheld User Package object, then click
Properties.
Using ZENworks Handheld Management Policies 59
Page 60

2 On the Policies tab, click the down-arrow, then click WinCE.
3 Select the check box under the Enabled column for the WinCE Access Point Configuration
policy.
This both selects and enables the policy.
novdocx (en) 13 May 2009
4 Click Properties.
This displays the Access Points - Configuration page.
60 Novell ZENworks 7 Handheld Management Administration Guide
Page 61

novdocx (en) 13 May 2009
5 In the Access Points page, do the following:
5a If you want to add the ZENworks Handheld Management Access Points to the Configure
IP Address /DNS Name of Access Points list, and define the order of the ZENworks
Handheld Management Access Points to which the handheld device must connect to,
select the Enable Following Access Points option.
If you do not select this check box, the ZENworks Handheld Management Access Points
list is not available on the handheld device.
5b Click Add.
5c In the Add Access Points dialog box, specify the IP address or the full DNS name of the
ZENworks Handheld Management Access Point, or click Select. If you specify the IP
address or the full DNS of the ZENworks Handheld Management Access Point, skip to
Step 5h.
5d By default, the service object of the Handheld Management server is displayed. To select
another service object, click the Browse icon, select the service object, then click OK.
5e Click Display.
The IP address of the ZENworks Handheld Management Access Points associated with
service object is displayed
5f From the ZENworks Handheld Management Access Points list, select the IP address of the
ZENworks Handheld Management Access Point to which you want to connect the device.
5g Click OK.
The ZENworks Handheld Management Access Points IP address followed by a semicolon
(;) is displayed in the Access Points option.
5h (Optional) To add another ZENworks Handheld Management Access Point, repeat Step 5c
through Step 5g.
Using ZENworks Handheld Management Policies 61
Page 62

You can add a maximum of eight ZENworks Handheld Management Access Points IP
addresses but ensure that the IP addresses or the DNS names of the ZENworks Handheld
Management Access Points are separated with semicolons (;)
5i Click Apply.
6 (Optional) To change the order of the ZENworks Handheld Management Access Points in the
Configure IP Address /DNS Name of Access Points list:
6a Select the IP address or the full DNS name of the ZENworks Handheld Management
Access Point.
6b Click Move Up or Move Down.
7 (Optional) To modify the value of a ZENworks Handheld Management Access Point displayed
in the Configure IP Address /DNS Name of Access Points list:
7a Select the IP address or the full DNS name of the ZENworks Handheld Management
Access Point whose value you want to modify.
7b Click Edit.
7c In the Edit Access Points dialog box, change the value of the ZENworks Handheld
Management Access Point.
7d Click OK.
8 Click Apply, then click Close to save the policy.
novdocx (en) 13 May 2009
9 Associate the policy package.
For more information on how to associate the policy package, see the “Associating the
Handheld Package or the Handheld User Package” on page 73.
10 If desired, schedule the policy.
For more information on how to schedule a policy, see the Section 2.5, “Setting Up Handheld
Service Package Policies,” on page 76.
11 (Optional) To ensure that the Handheld Management Server immediately receives the new
policy changes, right-click the Handheld service object, then click Scan Now.
2.4.12 WinCE File Retrieval Policy
The WinCE File Retrieval policy lets you specify source files you want to retrieve from a Windows
CE device and copy to a specified destination location.
The WinCE File Retrieval policy is a plural policy, meaning it can be added many times to a policy
package. You can set up as many File Retrieval policies as required to adequately retrieve important
files from the handheld devices in your organization. When you name these plural policies, be sure
to give them descriptive names.
The WinCE File Retrieval policy is also cumulative, meaning that many different WinCE File
Retrieval policies can be effective for a single handheld device object, handheld group object, or
container object.
NOTE: If you want to retrieve files from handheld devices and store them on a NetWare volume,
you must install the Novell Client on the ZENworks Handheld Management Server.
62 Novell ZENworks 7 Handheld Management Administration Guide
Page 63

To set up the WinCE File Retrieval policy:
1 In ConsoleOne, right-click the Handheld Package or Handheld User Package, then click
Properties.
2 On the Policies tab, click the down-arrow, then click WinCE.
novdocx (en) 13 May 2009
3 Click Add.
The Add Policy window is displayed.
4 Type a descriptive name in the Policy Name field, then click OK.
The newly created File Retrieval policy is displayed in the Handheld Policies list.
Using ZENworks Handheld Management Policies 63
Page 64

novdocx (en) 13 May 2009
5 Select the check box under the Enabled column for the newly created WinCE File Retrieval
policy.
This both selects and enables the policy.
6 Click Properties to display the Files page.
64 Novell ZENworks 7 Handheld Management Administration Guide
Page 65

7 In the Path field in the Source Files box, specify the path to the source files.
8 In the Files field, browse to or specify the source files to be retrieved from the Windows CE
device.
You can use wildcard characters to specify source files.
When the policy is enforced, all specified source files are retrieved from the device; the files
are retrieved even if the same files were previously retrieved at another time.
9 Select the Files Are Required check box if you want ZENworks Handheld Management to
report a failed status if the specified files do not exist on the Windows CE device or if the
specified wildcard characters do not provide a match for files on the device.
NOTE: For more information about policy status, see Section 2.6, “Viewing Policy Status
Information,” on page 76.
10 Select the Delete Files After Retrieval check box if you want the specified source files to be
deleted from the Windows CE device after they have been retrieved from the handheld device.
If you do not enable this option, the source files are copied to the specified location but also
remain on the Windows CE device.
novdocx (en) 13 May 2009
11 In the Path field in the Destination Location box, browse to or specify the destination location
where you want the specified files copied to.
The renamed file can include variables. To include variables, click the Insert button, then click
the desired variable.
The following variables are available for use:
Variable Description
device The CN of the device. For example, in Dan
m130.Handhelds.NovellBangalore, the string would be Dan m130.
devicedn The full DN of the device. For example, In Dan
m130.Handhelds.NovellWheaton, the string would be Dan
m130.Handhelds.NovellWheaton.
user The username of the device. This is the value stored in the zfhUserName
attribute for the object in the directory. When this value is not configured on
the handheld device, it is set to <Undefined>.
date The date the file was retrieved from the handheld device. This value is the
date only; the time that the file was retrieved is not included. For example, if
the file was retrieved on September 15, 2002 at 3:15 p.m., the string would
be 2002-09-15. The string is always in the format of yyyy-mm-dd.
time The time the file was retrieved from the handheld device. This value is for
the time only; the date that the file was retrieved is not included. For
example, if a file was retrieved on September 15, 2002 at 3:20 p.m., the
string would be 15-20. The string is always in the format of hh-mm, with hh
representing the hour in 24-hour format.
guid The GUID for the handheld device.
server The name of the server that received the data. This is the Windows NT
name of the server.
Using ZENworks Handheld Management Policies 65
Page 66

To use a variable, place an @ sign on either side of the variable in the string. For example, you
could use the following syntax:
@user@_filename
12 Select Use the Original File Name(s) to use the original source filenames for the destination
files.
or
Select Rename the Files To and specify new filenames for the destination files.
13 Click OK to save the policy.
14 When you have finished configuring all of the policies for this package, continue with the steps
under “Associating the Handheld Package or the Handheld User Package” on page 73 to
associate the policy package.
15 If desired, schedule the policy. For more information, see “Scheduling Packages and Policies”
on page 74.
2.4.13 WinCE Remote Management Policy
novdocx (en) 13 May 2009
1 In ConsoleOne, right-click the Handheld Package or Handheld User Package object, then click
Properties.
2 On the Policies tab, click the down-arrow, then click WinCE.
3 Select the check box under the Enabled column for the WinCE Remote Management policy.
This both selects and enables the policy.
4 Click Properties to display the Remote Management page.
66 Novell ZENworks 7 Handheld Management Administration Guide
Page 67

5 In the Remote Management page, do the following:
5a Select the Allow Remote Control of the Device option.
5b If you want to enable the Windows CE device user to either accept or reject the Remote
Management session initiated by the administrator or remote user, select the Prompt User
for Permission to Remote Control option.
By default, this option is selected.
novdocx (en) 13 May 2009
5c If you want to enable the administrator or the remote user to initiate a Remote
Management session on the Windows CE devices without being prompted to enter the
password set by the device user, select the Ignore the Remote Control Password Set on the
Device option.
5d Click Apply, then click Close.
6 Associate the policy package.
For more information on how to associate the policy package, see the “Associating the
Handheld Package or the Handheld User Package” on page 73.
7 If desired, schedule the policy.
For more information on how to schedule a policy, see the “Scheduling Packages and Policies”
on page 74.
8 (Optional) To ensure that the Handheld Management Server immediately receives the new
policy changes, right-click the Handheld service object, then click Scan Now.
Using ZENworks Handheld Management Policies 67
Page 68

2.4.14 WinCE Security Policy
The WinCE Security policy lets you configure the following:
Password Requirements: Lets you ensure that a password is set on associated Windows CE
devices and also lets you set a user’s network password as the device password, configure
enhanced security options for Pocket PCs, such as the number of days to allow before a
password expires, the number of grace logins permitted before the user must change the
password, the minimum number of characters to allow for the password, and whether the
password must contain a combination of letters and numbers.
IMPORTANT: Before configuring the policy, you must configure the containers to be
searched to authenticate the handheld user credentials. You can do it either during the
ZENworks 7 Handheld Management server installation or after the installation.
To configure user authentication during the installation, you must select the Enable User
Authentication option, and specify the containers to search for user objects.
To configure user authentication after the installation, see Section 7.1, “Configuring User
Authentication,” on page 131.
novdocx (en) 13 May 2009
There are two places in ZENworks Handheld Management where users can be required to enter
a password: to authenticate to the directory as part of the WinCE Client Configuration policy
and to power on a handheld device as part of the WinCE Security policy. These two passwords
are independent of each other. For more information about the password users must enter to
authenticate to the directory, see Section 2.4.9, “WinCE Client Configuration Policy,” on
page 53.
Self-Destruct Settings: Lets you specify self-destruct settings to disable a Windows CE device
after a specified number of failed password attempts or after a specified number of days since
the device was last connected or synchronized.
IMPORTANT: The WinCE Security policy does not function on the Denso devices (BHT-200),
Symbol PPT 8800 or the Jornada Pocket PCs running Microsoft Windows for Pocket PC 2000
software. However, the Jornada Pocket PCs running Microsoft Pocket PC 2002 software can use the
WinCE Security policy.
To set up the WinCE Security policy:
1 In ConsoleOne, right-click the Handheld Package object, then click Properties.
2 On the Policies tab, click the down-arrow, then click WinCE.
3 Select the check box under the Enabled column for the WinCE Security policy.
This both selects and enables the policy.
68 Novell ZENworks 7 Handheld Management Administration Guide
Page 69

novdocx (en) 13 May 2009
4 Click Properties to display the Security page.
5 In the Security page, do the following:
5a To set a password on the Windows CE device, select the Require a Password to Be Set on
the Handheld option.
If your organization has a rule that states that all handheld devices must have a password,
you should enable this policy. If a user does not have a password set, he or she is prompted
to create one.
Using ZENworks Handheld Management Policies 69
Page 70

novdocx (en) 13 May 2009
NOTE: The password set on a Symbol device is not case sensitive.
5b Configure the following Pocket PC Options, which lets you specify enhanced security
options for Pocket PCs. The options in this group box are disabled unless you check
Require a Password to Be Set on the Handheld.
Password Matches a Novell eDirectory User Password: Select this option to set a
user’s network (eDirectory) password as the device password.
WARNING: If you forget your network password, you cannot access the Handheld
device. You can access the device only by Hard Reset but this erases all data on the
device.
Additional Password Settings: Select this option to specify enhanced password
support settings for Pocket PCs.
For Pocket PCs, where enhanced security like biometric is not supported by the
device, if you select Enable Enhanced Password Support, ZENworks Handheld
Management displays it’s own password dialog box instead of default Windows CE
dialog box.
IMPORTANT: For Pocket PCs, where the device supports enhanced security, if you
select Enable Enhanced Password Support, ZENworks Handheld Management
displays a dialog box saying that a password must be set on the device. In that case,
the default Windows CE dialog box is shown.
The Enable Enhanced Password Support option does not function on handheld PCs.
If, in the future, you want to remove the ZENworks Handheld Management password
applet and restore the original Windows CE password applet, you need to reconfigure
the WinCE Security policy and disable the Enable Enhanced Password Support
70 Novell ZENworks 7 Handheld Management Administration Guide
Page 71

option and then resynchronize the device so that the policy is enforced. Uninstalling
the ZENworks Handheld Management handheld client on the device or
disassociating the device from the WinCE Security policy does not remove the
ZENworks Handheld Management password applet.
NOTE: You can replace the bitmap image that displays in the ZENworks Handheld
Management password dialog boxes with a bitmap image of your choosing. For more
information, see “Replacing the ZENworks Handheld Management Password Dialog
Box Bitmap Image” on page 73.
Configure the following additional password settings:
Minimum Password Length: Specify the minimum number of characters to allow
for the password on the device. You should choose a number great enough to ensure
adequate security, but small enough not to excessively burden the user.
Contains Alphanumeric Characters: Select this check box to require that the user
use both letters and numbers in the password. To improve the security of a password,
it should contain both letters (uppercase and lowercase) and numbers.
Password Expires in _ Days: Select this check box and specify the number of days
that you want the password to expire in. When the specified number of days has
expired, the user is prompted to change the password for the Pocket PC.
novdocx (en) 13 May 2009
Limit Grace Logins to _ Attempts: Select this check box and specify the number of
grace logon attempts you want to allow the user before he or she must change the
password for the device. After you enter the number of days in Password Expires in _
Days, the user is prompted to change the password. The user can choose to ignore
this prompt and keep the same password for the number of logon attempts you
specify.
Require Unique Passwords: Select this check box to require that the user enter a
new password; he or she cannot reuse the previous eight passwords.
5c Configure the Pocket PC 2002 and Above option.
The Pocket PC 2002 options lets you specify a time limit that the Pocket PC can remain
idle for before a password prompt is displayed. For Pocket PC 2003, this option lets you
specify a time limit that the Pocket PC can be turned off for before a password prompt is
displayed when the device is turned back on.
For example, if you set this option to 5 minutes, if the user turns the device off and then
back on within 5 minutes, no password is required to use the device. However, if more
than 5 minutes passes, the user must enter a password to use the device.
Display Password Prompt for Unused Devices Within: Select this check box and
choose a time limit from the drop-down list. When the time limit expires, a password
prompt is displayed on the device.
For example, if you set this option to 5 minutes and the user turns the device off and then
back on within 5 minutes, no password is required to use the device. However, if more
than 5 minutes passes, the user must enter a password to use the device
The Windows CE device user can change the corresponding setting on the actual handheld
device; however, the value you enter in the Display Password Prompt for Unused Devices
Within field is the maximum amount of time the user can set; he or she cannot increase the
time limit beyond this value.
Using ZENworks Handheld Management Policies 71
Page 72

IMPORTANT: To use this setting, the handheld device must be running Pocket PC 2002
or later.
5d Click Apply.
6 Click the Self-Destruct tab.
novdocx (en) 13 May 2009
The Self-Destruct page lets you configure self-destruct settings for Windows CE devices so that
data is not accessible from handheld devices that are lost or stolen. When the self-destruct
feature is activated, the data on the device is made unusable and the device must be manually
reset, which restores the device to its out-of-the-box state.
To use the self-destruct options for Windows CE devices, you must select the Enable Enhanced
Password Support check box on the Security page. You cannot use the self-destruct options on
handheld PCs because the Enable Enhanced Password Support option does not function on
them.
IMPORTANT: Use caution when you use the self-destruct feature. Be sure to allow an
adequate number of password attempts and an adequate number of days since the last
connection or synchronization to prevent data loss to users who incorrectly enter the password
or do not connect or synchronize the device during a short vacation.
For Windows CE devices, ActiveSync does not automatically back up data. If the user has
manually backed up the data, he or she can then manually restore the data to the device.
7 Configure the following Self-Destruct settings:
Bad Password Attempts: Select the Enforce Self-Destruct check box and specify the number
of bad password attempts to allow before activating the self-destruct feature.
72 Novell ZENworks 7 Handheld Management Administration Guide
Page 73

Time Since Last Connection: Select the Enforce Self-destruct check box and specify the
number of days after the last connection before activating the self-destruct feature. The Time
Since Last Connection option refers to the last time the handheld device connected to the
ZENworks Handheld Management Access Point.
Each day is made up of 24 hours. If you connect (synchronize) the device on Monday at 2 p.m.
and specify three days after the last connection before activating the self-destruct feature, the
self-destruct feature activates Thursday at 2 p.m (72 hours after the last connection/
synchronization) unless the device is connected/synchronized during that period.
8 Click OK to save the policy.
9 When you have finished configuring all of the policies for this package, continue with the steps
under “Associating the Handheld Package or the Handheld User Package” on page 73 to
associate the policy package.
10 If desired, schedule the policy. For more information, see “Scheduling Packages and Policies”
on page 74.
11 (Optional) To ensure that the Handheld Management Server immediately receives the new
policy changes, right-click the Handheld service object, then click Scan Now.
novdocx (en) 13 May 2009
Replacing the ZENworks Handheld Management Password Dialog Box Bitmap
Image
You can replace the ZENworks Handheld Management bitmap image that displays in the following
ZENworks Handheld Management password dialog boxes with a bitmap image of your choosing:
The login dialog box if you selected Enable Enhanced Password Support in Step 5 on page 69.
The dialog boxes that display when the WinCE Security policy is enforced and you selected
Require a Password to Be Set on the Handheld in Step 5 on page 69.
To replace the bitmap image in these dialog boxes, create a bitmap file called
place it in the ZENworks Handheld Management installation directory on the handheld device.
The size of this bitmap image should be 240 pixels wide by 35 pixels high.
logo.bmp
and
2.4.15 Associating the Handheld Package or the Handheld User Package
The policies you configured and enabled are not in effect until you associate their policy package
with a handheld device object, a User object, a handheld group object, a user group, or a container
object.
1 In ConsoleOne, right-click the Handheld Package or Handheld User Package object, then click
Properties.
2 Click the Associations tab, then click Add.
3 Browse for the object for associating the package, then click OK.
The Handhelds Package can be associated with a handheld device object, a handheld group
object, or a container object containing these objects.
The Handhelds User Package can be associated with a User object, a user group object, or a
container object containing these objects.
Using ZENworks Handheld Management Policies 73
Page 74

2.4.16 Associating a User Object to a BlackBerry Device
1 In ConsoleOne, right-click the BlackBerry device, then click Properties.
The General page is displayed by default.
2 Click the Browse icon next to the Associated User option to browse for and select the user
object.
3 Click OK.
2.4.17 Scheduling Packages and Policies
Some policies can be scheduled to run at a certain time. During creation, all policy packages are
given a default run schedule (EventHandheldSync, by default). This means that all applicable
policies in this package are enforced every time the handheld device synchronizes/connects to the
ZENworks Handheld Management Access Point. However, you can change the entire policy
package schedule, or you can set a policy within the package to run at a different time from the rest
of the package.
If you should enable a policy but fail to schedule it, it runs according to the schedule currently
defined in the Default Package Schedule.
novdocx (en) 13 May 2009
If you have configured and enabled policies, but they have not been enforced on individual handheld
devices, consider the following:
1. When you configure and enable policies, ConsoleOne records the new information in the
directory.
2. The ZENworks Handheld Management Server scans for new information hourly, by default.
You must wait for up to one hour to ensure that the Handheld Management Server has received
the policy changes, depending on when the last scan was performed.
You can force an immediate directory scan to ensure that the Handheld Management Server
receives the new policy changes by right-clicking the ZENworks Handheld Management
Service object, clicking Actions, then clicking Scan Now.
3. For Palm OS and Windows CE devices, the default Policy Package Schedule is
EventHandheldSync (whenever the handheld device connects/synchronizes); for BlackBerry
devices, the default Policy Package Schedule is once per day. If you have changed the default
Policy Package Schedule, it might take longer to enforce the policy changes on the associated
handheld devices. In addition, if the handheld devices were unable to connect to the ZENworks
Handheld Management system (because of connectivity problems, for example), you might
need to reconnect/resynchronize the devices.
The following sections contain additional information:
“Changing the Handheld Package or Handheld User Package Schedule” on page 74
“Changing an Individual Policy’s Schedule” on page 75
Changing the Handheld Package or Handheld User Package Schedule
1 In ConsoleOne, right-click the Handheld Package or Handheld User Package object, click
Properties, then click the desired platform page.
2 Click the Edit button in the Default Package Schedule group box. The Edit Policy Package
Schedule page is displayed.
74 Novell ZENworks 7 Handheld Management Administration Guide
Page 75

novdocx (en) 13 May 2009
3 Make the desired changes to the schedule.
Be aware that changing the policy package’s schedule to run too frequently affects
performance, depending on your environment. The default schedule should be adequate for
most situations.
NOTE: Click the Help button for detailed information about the options in the Edit Policy
Package Schedule dialog box.
4 Click OK.
Changing an Individual Policy’s Schedule
1 In ConsoleOne, right-click the Handheld Package or Handheld User Package object, click
Properties, then click the desired platform page.
2 Select the check box under the Enabled column for the desired policy.
This both selects and enables the policy.
3 Click Properties.
4 Click the Policy Schedule tab, then make the desired changes to the schedule.
Be aware that changing the an individual policy’s schedule to run too frequently affects
performance, depending on your environment. The default schedule should be adequate for
most situations.
NOTE: Click the Help button for detailed information about the options in the Policy Schedule
page.
5 Click OK.
Using ZENworks Handheld Management Policies 75
Page 76

2.5 Setting Up Handheld Service Package Policies
The Handheld Service Package currently contains one policy: Handheld Import. Creating the
Handheld Service Package and configuring and associating the Handheld Import policy are covered
in “Setting Up Handheld Import” on page 11.
2.6 Viewing Policy Status Information
ZENworks Handheld Management lets you view policy status information for each enabled policy,
including a list of all handheld devices and User objects that a policy is associated with, the status of
each policy, and the date and time that the policy was last enforced. You can also view status
information about all policies associated with a specific handheld device.
The following sections contain more information:
“Viewing Status for a Specific Policy” on page 76
“Viewing Policy Status for a Specific Handheld Device” on page 78
novdocx (en) 13 May 2009
2.6.1 Viewing Status for a Specific Policy
1 In ConsoleOne, right-click the Handheld Package or Handheld User Package object, then click
Properties.
2 Select the check box under the Enabled column for the desired policy.
This both selects and enables the policy.
3 Click Properties.
4 Click the Policy Status tab.
76 Novell ZENworks 7 Handheld Management Administration Guide
Page 77

novdocx (en) 13 May 2009
NOTE: Click Display to refresh the information in the Object, Status, and Last Enforced
columns.
Object: Lists the individual handheld device objects that the policy is associated with. You can
select a handheld device in the list, then click Properties to view that device’s properties.
Status: Lists the status of the policy on each handheld device:
Status Description
Successful The policy was successfully enforced on the corresponding handheld
device.
Pending The policy has reached its scheduled run time but has not yet reported
results. For example, the policy has been enforced on the handheld device,
but the ZENworks Handheld Management Access Point has not yet
connected to the ZENworks Handheld Management Server to relay the
information.
Failed The policy was not successfully enforced on the handheld device. For
troubleshooting information, see “Why are policies that I have configured
and enabled not being enforced on individual handheld devices?” on
page 150.
Disabled The policy has been disabled in ConsoleOne. To re-enable a policy, right-
click the Handheld Package or Handheld User Package object, click
Properties, then select the check box in the Enabled column for the desired
policy.
Inactive The policy is inactive. For example, the policy has been disassociated with
the handheld device; however, policy status information still exists in
ZENworks Handheld Management.
Using ZENworks Handheld Management Policies 77
Page 78

Last Enforced: Lists the date and time that the policy was last enforced.
For most policies, the date and time in the Last Enforced column is based on the handheld
device’s date and time. For File Retrieval policies, the date and time in the Last Enforced
column is based on the ZENworks Handheld Management Access Point date and time.
novdocx (en) 13 May 2009
The Status field at the bottom of the page displays
Work Completed
if all information has been
gathered for the policy and for the associated handheld devices. The Status field displays
Connecting to Server
status returns to
Work Completed
if you click Display. When all information has been gathered, the
.
2.6.2 Viewing Policy Status for a Specific Handheld Device
1 In ConsoleOne, right-click the desired Handheld Device object, then click Properties.
2 Click the down-arrow on the ZENworks tab, then click Policy Status.
NOTE: Click Display to refresh the information in the Object, Status, and Last Enforced
columns.
Policy: Lists the individual policies that are associated with the selected Handheld Device
object. Select a policy in the list, then click Properties to view that policy’s properties.
Status: Lists the status of the policy on each handheld device:
Status Description
Successful The policy was successfully enforced on the corresponding handheld
device.
78 Novell ZENworks 7 Handheld Management Administration Guide
Page 79

Status Description
Pending The policy has reached its scheduled run time but has not yet reported
results. For example, the policy has been enforced on the handheld device,
but the ZENworks Handheld Management Access Point has not yet
connected to the ZENworks Handheld Management Server to relay the
information.
Failed The policy was not successfully enforced on the handheld device. For
troubleshooting information, see “Why are policies that I have configured
and enabled not being enforced on individual handheld devices?” on
page 150.
Disabled The policy has been disabled in ConsoleOne. To re-enable a policy, right-
click the Handheld Package or Handheld User Package object, click
Properties, then select the check box in the Enabled column for the desired
policy.
Inactive The policy is inactive. For example, the policy has been disassociated with
the handheld device; however, policy status information still exists in
ZENworks Handheld Management.
novdocx (en) 13 May 2009
Last Enforced: Lists the date and time that the policy was last enforced.
For most policies, the date and time in the Last Enforced column is based on the handheld
device’s date and time. For File Retrieval policies, the date and time in the Last Enforced
column is based on the ZENworks Handheld Management Access Point date and time.
The Status field at the bottom of the page displays
Work Completed
if all information has been
gathered for the policy and for the associated handheld devices. The Status field displays
Connecting to Server
status returns to
Work Completed
if you click Display. When all information has been gathered, the
.
Using ZENworks Handheld Management Policies 79
Page 80

novdocx (en) 13 May 2009
80 Novell ZENworks 7 Handheld Management Administration Guide
Page 81

3
Using Queries and Groups
After handheld devices have registered with Novell® ZENworks® 7 Handheld Management, you
can use queries to quickly find handheld devices that match criteria specified in the query and create
custom groups to make managing handheld devices easier.
The following sections contain additional information:
Section 3.1, “Using Queries,” on page 81
Section 3.2, “Using Groups,” on page 84
3.1 Using Queries
Queries let you quickly find handheld devices that match criteria specified in the query.
Using queries, administrators can save time by automatically creating handheld groups populated
with handheld devices that have the same attributes.
novdocx (en) 13 May 2009
3
For example, you can create a group from a query that contains all devices that have:
A specific processor type (for example, Intel* StrongARM)
RAM greater than 8 MB but less than 64 MB
A specific version of an application installed
You can define separate queries for BlackBerry, Palm OS, and Windows CE devices, but you cannot
create a single query that returns all types of devices.
The following sections contain additional information about creating queries:
Section 3.1.1, “Creating a Query,” on page 81
Section 3.1.2, “Using Logical Operators,” on page 84
3.1.1 Creating a Query
You create queries in the ZENworks Handheld Management Inventory Viewer.
®
1 In Novell ConsoleOne
Inventory.
2 Click Queries, then click Add Query to display the Add Query window.
, right-click a handheld device object, click Actions, then click
Using Queries and Groups
81
Page 82

3 Type a name for the query.
4 Click Palm OS Handhelds in the Query Type drop-down list to create a query for Palm OS
devices.
or
novdocx (en) 13 May 2009
Click Windows CE Devices in the Query Type drop-down list to create a query for Windows CE
devices.
or
Click BlackBerry Devices in the Query Type drop-down list to create a query for BlackBerry
devices.
5 Click the Add Item button .
The following dialog box appears if you are querying on Windows CE devices.
6 Select the first object you want to make part of the query, then click OK.
82 Novell ZENworks 7 Handheld Management Administration Guide
Page 83

The first column lists the attributes you can make part of the query. Click the second column to
display a down-arrow, click the down-arrow, then select the operator that you want to use.
When you click the third column, a browse button displays. Click the browse button, then
select a value for the query.
7 Select the attributes, operator, and values of the object that you want ZENworks Handheld
Management to query on, then click OK.
novdocx (en) 13 May 2009
If you want to the query to contain multiple objects, click the Add Item button again to add a
new object.
NOTE: Select the statements and click the parenthesis button if you want to group
statements using parentheses.
When you select multiple attributes to query on, be aware that they are filtered by the first
object you pick.
For example, if the first attribute you select is OS Version = 3.5 and the second object you
select is Free RAM, when you choose a specific value for Free RAM, the only values in the list
are handheld devices running OS version 3.5.
If you want to review the results of the query that you have defined, click Te st . The result is
displayed in the Test Query dialog box.
Using Queries and Groups 83
Page 84

8 Click OK to save the query.
3.1.2 Using Logical Operators
Logical operators in a query allow you to refine or expand the scope of the query. ZENworks
Handheld Management provides the following logical operators:
novdocx (en) 13 May 2009
Table 3-1 Logical Operators provided by ZENworks Handheld Management
Operator Description Example
AND Find devices that match the object criteria
joined by the AND.
OR Find devices that match at least one of the
criteria joined by the OR.
NOT Find devices that match one criteria but
not another.
All Pocket PC devices AND less than 10 MB
of free RAM.
All Pocket PC devices OR all devices with
more than 8 MB of RAM.
All Palm OS devices and NOT with the
application FileZ installed.
If you insert multiple objects for querying, ZENworks Handheld Management automatically adds an
AND operator between the two object statements.
Understanding the Order of Operations
When evaluating a query, the following order of operations is used:
1. Expressions in parentheses
2. Expressions negated by NOT
3. Expressions joined by AND
4. Expressions joined by OR
3.2 Using Groups
Placing devices in groups can save you time when scheduling distributions, defining filters, and
checking system status. With groups, you can use a single entity to manage multiple devices.
84 Novell ZENworks 7 Handheld Management Administration Guide
Page 85

The following sections contain information to help you create and use groups:
Section 3.2.1, “Creating Groups,” on page 85
Section 3.2.2, “Viewing the Properties of a Group,” on page 89
Section 3.2.3, “Changing Group Membership,” on page 91
Section 3.2.4, “Changing the Update Schedule of Query-Based Groups,” on page 92
Section 3.2.5, “Deleting a Group,” on page 93
Section 3.2.7, “Changing a Group’s Type,” on page 95
3.2.1 Creating Groups
You can create custom groups based on the way you manage the handheld devices in your
organization. For example:
Functional groups: Sales, Marketing, Development, Admin, and so forth.
Geographical location: Central, East, West, Europe, and so forth.
Think about the way you want to manage your handheld devices before you create groups. Keeping
a clean and uncluttered group structure helps minimize confusion when scheduling distributions or
defining filters for multiple groups.
novdocx (en) 13 May 2009
ZENworks Handheld Management provides two types of user-created groups:
Static Groups: Handheld devices are assigned to the group manually by the administrator or
according to the settings specified in the Handheld Import policy.
Query-Based Groups: Handheld devices are automatically placed in a group by ZENworks
Handheld Management because they meet criteria specified in the query (for example,
operating system version, manufacturer, and so forth).
Handheld devices can belong to multiple groups; they do not need to be limited to one group.
The following sections contain additional information about creating and viewing groups:
“Creating Static Groups” on page 85
“Creating Query-Based Groups” on page 87
Creating Static Groups
Handheld devices are manually assigned to a static group by the administrator.
To create a static group and assign members to it:
1 In ConsoleOne, click the container where you want to create the static group.
2 Click File, click New, then click Object.
3 Click Handheld Group, then click OK.
4 Specify a descriptive name for the group, select the Define Additional Properties check box,
then click OK.
5 Select Static Group - Members Updated Manually.
Using Queries and Groups 85
Page 86

novdocx (en) 13 May 2009
6 Click the Members tab.
7 Click Add Select Objects to display the Select Objects dialog box.
86 Novell ZENworks 7 Handheld Management Administration Guide
Page 87

8 Select the handheld device objects that you want to be members of this static group.
You can use Shift+click or Ctrl+click to select multiple handheld device objects.
9 Click OK.
novdocx (en) 13 May 2009
Static groups are indicated by (yellow folder icon) in the ZENworks Handheld Management
Inventory Viewer.
Creating Query-Based Groups
Handheld devices are automatically placed in a query-based group by ZENworks Handheld
Management because they meet criteria specified in the query (for example, operating system
version, manufacturer, and so forth).
To create a query-based group:
1 In ConsoleOne, click the container where you want to create the query-based group.
2 Click File, click New, then click Object.
3 Click Handheld Group, then click OK.
4 Specify a descriptive name for the group, select the Define Additional Properties check box,
then click OK.
5 Select Query-Based Group - Members Are Updated From a Query.
Using Queries and Groups 87
Page 88

novdocx (en) 13 May 2009
6 In the Service field, browse to the ZENworks Handheld Management Service object.
7 In the Query Name field, browse to the query on which you want to base the group, then click
OK.
You need to create a query before it is displayed in the list. For more information, see
Section 3.1, “Using Queries,” on page 81.
NOTE: If you define and base a query-based group on a specific query and you later change
the name of the query in the ZENworks Handheld Management Inventory Viewer, you must reassign the new query to the group (it is not updated automatically). You cannot change the
name of a query in ConsoleOne.
8 Select a Group Update Interval:
Use the Default Server Schedule: Select this option if you want the group to be updated with
new members according to the default server schedule.
The group is populated with handheld device objects during the server’s next maintenance
scan, which is hourly, by default. You can force an immediate update of a specific query-based
group.
To do t h is:
8a In ConsoleOne, right-click the ZENworks Handheld Management Service object, click
Actions, then click Scan Now.
This performs the directory scan.
8b Again in the ConsoleOne, right-click the desired Handheld Group object, click Actions,
then click Update.
This updates the list of handhelds that belong to this group.
88 Novell ZENworks 7 Handheld Management Administration Guide
Page 89

Use a Custom Update Schedule: Select this option if you want to specify a custom
update schedule, then specify the group update interval.
9 Click OK.
The query-based group (indicated by in the ZENworks Handheld Management Inventory
Viewer) is created and populated with the handheld devices that currently match the criteria
specified in the query.
3.2.2 Viewing the Properties of a Group
1 In ConsoleOne, right-click the desired Handheld Group object, then click Properties.
2 Click the Members tab.
novdocx (en) 13 May 2009
From the Members page, you can view which handheld objects are members of the selected
group.
3 Click the ZENworks tab.
Using Queries and Groups 89
Page 90

novdocx (en) 13 May 2009
From the Associated Policy Packages page, you can view which policy packages are associated
to the selected Handheld Group object.
4 Click the Applications tab.
90 Novell ZENworks 7 Handheld Management Administration Guide
Page 91

novdocx (en) 13 May 2009
From the Applications tab, you can view which Handheld Application objects are associated to
the selected Handheld Group object.
3.2.3 Changing Group Membership
From time to time you need to modify static group membership by adding or deleting handheld
device objects.
Query-based groups are updated according to the query parameters; membership cannot be changed
manually without changing the criteria specified in the query.
For example, if you have divided your client groups by functions, and you have a user who transfers
from Sales to Systems Engineering, you might need to delete the user from one group and add the
user to another group.
Whenever you add a handheld device to a group, it automatically inherits any distributions assigned
to that group.
The following sections contain additional information about changing group membership:
“Adding a Device to a Static Group” on page 91
“Removing a Device from a Static Group” on page 92
Adding a Device to a Static Group
1 In ConsoleOne, right-click the desired Handheld Group object, then click Properties.
2 Click the Members tab, then click Add.
3 Select the device you want to include in the group.
Using Queries and Groups 91
Page 92

You can use Shift+click or Ctrl+click to select multiple handheld device objects.
4 Click OK.
Removing a Device from a Static Group
1 In ConsoleOne, right-click the desired Handheld Group object, then click Properties.
2 Click the Members tab.
3 Select the device you want to remove from this group.
You can use Shift+click or Ctrl+click to select multiple handheld device objects.
4 Click Delete.
3.2.4 Changing the Update Schedule of Query-Based Groups
When you create a query-based group, you can choose how often the group should be updated.
Updating runs the query against existing handheld devices to check which devices match the
criteria. Any handheld devices that match the criteria of the query are automatically placed in the
appropriate query-based group; any handheld devices that no longer match the criteria of the query
are automatically removed from the query-based group.
novdocx (en) 13 May 2009
By default, query-based groups are updated once an hour. You can configure updating system wide
so that all groups are updated on the same schedule or on a per-group basis. You can also turn off
group updating (essentially making the query-based group a static group).
The following sections contain additional information:
“Changing the Update Schedule of a Specific Query-Based Group” on page 92
“Changing the Update Schedule of All Query-Based Groups” on page 92
Changing the Update Schedule of a Specific Query-Based Group
1 In ConsoleOne, right-click the desired Handheld Group object, then click Properties.
2 On the General page, select Use a Custom Update Schedule, then specify the Group Update
Interval.
3 Click OK.
If you modify the update schedule, the next maintenance scan (hourly, by default) detects the change
and reschedule the update accordingly.
NOTE: You can force an immediate update of a specific query-based group. In ConsoleOne, rightclick the ZENworks Handheld Management Service object, click Actions, then click Scan Now to
perform a directory scan. Next, right-click the desired Handheld Group object, click Actions, then
click Update.
Changing the Update Schedule of All Query-Based Groups
1 In ConsoleOne, right-click the ZENworks Handheld Management Service object, then click
Properties.
2 Select the desired Group Update Interval.
3 Click OK.
92 Novell ZENworks 7 Handheld Management Administration Guide
Page 93

NOTE: You can force an immediate update of a specific query-based group. In ConsoleOne, rightclick the ZENworks Handheld Management Service object, click Actions, then click Scan Now to
perform a directory scan. Next, right-click the desired Handheld Group object, click Actions, then
click Update.
3.2.5 Deleting a Group
As your installation changes over time, you might want to remove groups based on changes in your
organization or in the types of equipment you are using, or you might just want to change the
grouping scheme you’ve implemented.
To delete a group:
1 In ConsoleOne, right-click the desired Handheld Group object, then click Delete NDS object.
2 Click Ye s to confirm the deletion.
The Handheld Group object is removed from the directory and its update schedule is removed from
ZENworks Handheld Management.
novdocx (en) 13 May 2009
NOTE: When you delete a Handheld Group object, the object is deleted but the handheld device
objects are not deleted from the directory; they simply lose their association with the deleted object
and all distributions the device inherited that were targeted for the group.
3.2.6 Viewing Handheld Application Objects Assigned to a Group
1 In ConsoleOne, right-click the desired Handheld Group object, then click Properties.
2 Click the Applications tab.
Using Queries and Groups 93
Page 94

novdocx (en) 13 May 2009
The Applications list displays the Handheld Application objects that are associated to the
selected Handheld Group object.
3 To view an application object’s details, click a Handheld Application object, then click Details.
94 Novell ZENworks 7 Handheld Management Administration Guide
Page 95

The General page displays the application object’s properties, including its description, when it
becomes available for distribution, and when it is no longer be available for distribution.
novdocx (en) 13 May 2009
NOTE: When you are viewing the Handheld Application objects that are associated with a
Handheld Group object, you only see Handheld Application objects that are associated to that
specific group; you do not see all Handheld Application objects that are associated with all
individual devices in that group.
3.2.7 Changing a Group’s Type
To change a static group to a query-based group or a query-based group to a static group:
1 In ConsoleOne, right-click the desired Handheld Group object, then click Properties.
2 On the General page, click Static Group or Query-Based Group.
If you choose Query-Based, select the query on which you want to base the group.
3 Click OK.
Because you cannot schedule the update of a static group, if you change a query-based group to a
static group, the group’s update schedule is removed from ZENworks Handheld Management.
Using Queries and Groups 95
Page 96

novdocx (en) 13 May 2009
96 Novell ZENworks 7 Handheld Management Administration Guide
Page 97

4
Distributing Software to Handheld
novdocx (en) 13 May 2009
Devices
This section describes how to create and distribute Handheld Application objects to handheld
devices using Novell
The following sections contain detailed information:
Section 4.1, “Understanding Handheld Application Objects,” on page 97
Section 4.2, “Distributing Applications to Handheld Devices,” on page 99
Section 4.3, “Displaying Handheld Application Object Status,” on page 106
Section 4.4, “Modifying a Handheld Application Object,” on page 107
4.1 Understanding Handheld Application Objects
ZENworks Handheld Management software distribution allows you to distribute Handheld
Application objects to handheld devices as part of software distributions. Handheld Application
objects contain collections of files that you want copied to your handheld devices.
Handheld Application objects usually consist of applications to install on handheld devices, for
example,
.cod,
.prc
and
.dll
®
ZENworks® 7 Handheld Management.
files (for Palm OS devices);
files for BlackBerry devices.
.cab
files (for Windows CE devices); and
.alx, .ali
4
,
The following sections contain additional information:
Section 4.1.1, “Specifying Source Files,” on page 97
Section 4.1.2, “Understanding Automatic Application Updates,” on page 98
Section 4.1.3, “Installing Software at a Predefined Time Even When the Device is Not
Connected to the Network,” on page 99
4.1.1 Specifying Source Files
When creating Handheld Application objects, you can select files, directories (and subdirectories),
or both as the components of your object. You can also specify wildcard characters as a source file
specification.
The following sections contain additional information:
“Files for Palm OS Devices” on page 98
“Files for Windows CE Devices” on page 98
“Files for BlackBerry Devices” on page 98
Distributing Software to Handheld Devices
97
Page 98

Files for Palm OS Devices
Only standard Palm OS file types should be selected when creating handheld application objects
targeted for Palm OS devices. Supported file types include:
novdocx (en) 13 May 2009
Application files (
Database files (
Query application files (
Configuration files (
*.prc
*.pdb
)
)
*.pqa
*.pnc
and
)
*.scp
)
Files for Windows CE Devices
Because Windows CE devices support different processor types, ZENworks Handheld
Management ensures that only CAB files compatible with the processor are copied to the
Windows CE device when it synchronizes.
If CAB files are included in the handheld application object, they are automatically extracted
and installed.
Other files such as
.txt
, .
html
, or any other format supported by the handheld device.
Files for BlackBerry Devices
Only standard RIM BlackBerry file types should be selected when creating handheld application
objects targeted for BlackBerry devices. Supported file types include:
Configuration files (
Configuration files (
*.alx
and
*.ali
) along with Dynamic link library files (
*.alx
) along with Java Applications (
*.cod
*.dll
)
)
ZENworks Handheld Management lets you distribute software to BlackBerry devices that are
synchronized with a cradle; ZENworks Handheld Management does not support software
distribution to BlackBerry devices using wireless synchronization.
4.1.2 Understanding Automatic Application Updates
For recurring software distributions (distributions that are scheduled to run more than once, for
example, weekly), ZENworks Handheld Management automatically scans the application’s source
directories at the scheduled time and includes new or changed files with the software distribution.
This allows an administrator to copy new or updated files to the source directory for distribution to
handheld devices without needing to create a new Handheld Application object.
For example, you distribute sales data weekly to your sales staff. Each Monday, before sending out
the distributions, ZENworks Handheld Management scans the application’s source directory. If
there are any new or changed files added during the previous week, they are included in that
Monday’s application distribution. The handheld device receives only the files that have changed.
If the source directory has no changes during the week, the application is not sent (unless new
handheld devices have been added to the list of recipients).
98 Novell ZENworks 7 Handheld Management Administration Guide
Page 99

4.1.3 Installing Software at a Predefined Time Even When the Device is Not Connected to the Network
You can now specify the date and time when you want to install the Handheld Application object
files on the device by configuring the date and time in the Handheld Application object’s properties.
This feature helps you in synchronizing the software updates across the Palm or Windows CE
devices.
4.2 Distributing Applications to Handheld Devices
ZENworks Handheld Management lets you create and distribute Application objects to individual
handheld devices or to groups of handheld devices.
The following sections contain additional information:
Section 4.2.1, “Creating a Handheld Application Object,” on page 99
Section 4.2.2, “Configuring a Handheld Application Object,” on page 100
Section 4.2.3, “Scheduling the Distribution of a Handheld Application Object,” on page 104
novdocx (en) 13 May 2009
4.2.1 Creating a Handheld Application Object
1 In Novell ConsoleOne®, right-click the container where you want to create the Handheld
Application object, click New, then click Object to display the New Object window.
2 Click Handheld Application, then click OK to display the New Application window.
3 In the Name field, type a name for the Handheld Application object, then click OK.
Distributing Software to Handheld Devices 99
Page 100

The object’s name must conform to the following rules:
The name must be unique in the container.
Special characters are allowed. However, plus (+), equals (=), and period (.) must be
preceded by a backslash (\) if used.
Uppercase and lowercase letters, as well as underscores and spaces, are displayed as you
first entered them, but they aren’t distinguished. For example,
ZENworks_Handheld_Management and ZENWORKS_HANDHELD_MANAGEMENT
are considered identical.
4 Click OK.
4.2.2 Configuring a Handheld Application Object
1 In ConsoleOne, right-click the newly created Handheld Application object, then click
Properties to display the General page.
novdocx (en) 13 May 2009
2 Type a description of the Handheld Application object, if desired.
This description is available by viewing the properties of the object in ConsoleOne; users do
not see this description during distribution.
3 Click the Calendar/Clock icon to specify a date and time that the application object is available
for distribution.
If you do not change this setting, the object is distributed the next time the device connects to
the ZENworks Handheld Management Access Point.
4 Select the Expires On option, then specify a date and time that the application object is no
longer be available for distribution.
100 Novell ZENworks 7 Handheld Management Administration Guide
 Loading...