


SUSE Linux Enterprise
www.novell.com11
March17,2009 KDE User Guide
Desktop

KDE User Guide
All content is copyright © 2006- 2009 Novell, Inc.
Legal Notice
This manual is protected under Novell intellectual property rights. By reproducing, duplicating or
distributing this manual you explicitly agree to conform to the terms and conditions of this license
agreement.
This manual may be freely reproduced, duplicated and distributed either as such or as part of a bundled
package in electronic and/or printed format, provided however that the following conditions are fullled:
That this copyright notice and the names of authors and contributors appear clearly and distinctively
on all reproduced, duplicated and distributed copies. That this manual, specically for the printed
format, is reproduced and/or distributed for noncommercial use only. The express authorization of
Novell, Inc must be obtained prior to any other use of any manual or part thereof.
For Novell trademarks, see the Novell Trademark and Service Mark list http://www.novell
.com/company/legal/trademarks/tmlist.html. * Linux is a registered trademark of
Linus Torvalds. All other third party trademarks are the property of their respective owners. A trademark
symbol (®, ™ etc.) denotes a Novell trademark; an asterisk (*) denotes a third party trademark.
All information found in this book has been compiled with utmost attention to detail. However, this
does not guarantee complete accuracy. Neither Novell, Inc., SUSE LINUX Products GmbH, the authors,
nor the translators shall be held liable for possible errors or the consequences thereof.

Contents
About This Guide vii
Part I Introduction 1
1 Getting Started with the KDE Desktop 3
1.1 Logging In . . . . . . . . . . . . . . . . . . . . . . . . . . . . 3
1.2 Exploring the Desktop Components . . . . . . . . . . . . . . . . . . 5
1.3 Leaving Your System . . . . . . . . . . . . . . . . . . . . . . . . 11
1.4 Switching Desktops . . . . . . . . . . . . . . . . . . . . . . . . 13
2 Working with Your Desktop 15
2.1 Starting Programs . . . . . . . . . . . . . . . . . . . . . . . . . 15
2.2 Using Dolphin File Manager . . . . . . . . . . . . . . . . . . . . 19
2.3 Moving Text between Applications . . . . . . . . . . . . . . . . . . 24
2.4 Finding Data on your Computer or in the File System . . . . . . . . . . 24
2.5 Accessing Removable Media and External Devices . . . . . . . . . . . 27
2.6 Using Virtual Desktops . . . . . . . . . . . . . . . . . . . . . . . 28
2.7 Managing Internet Connections . . . . . . . . . . . . . . . . . . . 29
2.8 Exploring the Internet . . . . . . . . . . . . . . . . . . . . . . . 29
2.9 E-Mail and Scheduling . . . . . . . . . . . . . . . . . . . . . . . 29
2.10 Instant Messaging . . . . . . . . . . . . . . . . . . . . . . . . . 30
2.11 Managing Passwords . . . . . . . . . . . . . . . . . . . . . . . . 30
2.12 Opening or Creating Documents with OpenOfce.org . . . . . . . . . 31
2.13 Viewing PDF Files and Other Documents . . . . . . . . . . . . . . . 31
2.14 Taking Screen Shots . . . . . . . . . . . . . . . . . . . . . . . . 32
2.15 Displaying, Decompressing, and Creating Archives . . . . . . . . . . . 33
2.16 Creating CDs or DVDs . . . . . . . . . . . . . . . . . . . . . . . 34
2.17 Viewing and Managing Digital Images . . . . . . . . . . . . . . . . 34

2.18 Managing Your Music Collection . . . . . . . . . . . . . . . . . . 35
2.19 For More Information . . . . . . . . . . . . . . . . . . . . . . . 35
3 Customizing Your Settings 37
3.1 The Personal Settings . . . . . . . . . . . . . . . . . . . . . . . 37
3.2 Conguring Desktop Objects . . . . . . . . . . . . . . . . . . . . 40
3.3 Conguring the Panel . . . . . . . . . . . . . . . . . . . . . . . 46
3.4 Conguring KDE Behavior . . . . . . . . . . . . . . . . . . . . . 47
3.5 Conguring System and Security Aspects . . . . . . . . . . . . . . . 51
Part II Managing Files and Resources 57
4 Viewing PDF Files and Other Documents with Okular 59
4.1 Viewing PDF Files . . . . . . . . . . . . . . . . . . . . . . . . . 59
4.2 Annotating a PDF File . . . . . . . . . . . . . . . . . . . . . . . 60
4.3 For More Information . . . . . . . . . . . . . . . . . . . . . . . 61
5 Accessing Network Resources 63
5.1 General Notes on File Sharing and Network Browsing . . . . . . . . . . 64
5.2 Accessing Network Shares . . . . . . . . . . . . . . . . . . . . . 65
5.3 Sharing Folders in Mixed Environments . . . . . . . . . . . . . . . . 65
5.4 Managing Windows Files . . . . . . . . . . . . . . . . . . . . . . 68
6 Searching with Kerry 73
6.1 Searching Using Kerry . . . . . . . . . . . . . . . . . . . . . . . 73
6.2 Conguring Kerry . . . . . . . . . . . . . . . . . . . . . . . . . 75
7 Managing Print Jobs 77
7.1 Starting Print Jobs in KDE . . . . . . . . . . . . . . . . . . . . . . 77
7.2 Monitoring Print Jobs in KDE . . . . . . . . . . . . . . . . . . . . 79
8 Managing Passwords with KWallet Manager 81
8.1 Starting KWallet . . . . . . . . . . . . . . . . . . . . . . . . . 81
8.2 Managing Your Passwords . . . . . . . . . . . . . . . . . . . . . 82
8.3 Adjusting KWallet Settings . . . . . . . . . . . . . . . . . . . . . 84
8.4 Copying Your Wallet to Another Computer . . . . . . . . . . . . . . 85

9 Controlling Your Desktop’s Power Management 87
9.1 Using the Battery Monitor Widget . . . . . . . . . . . . . . . . . . 87
9.2 Saving Power by Using Proles . . . . . . . . . . . . . . . . . . . 89
9.3 Conguring Power Management . . . . . . . . . . . . . . . . . . 90
9.4 For More Information . . . . . . . . . . . . . . . . . . . . . . . 92


About This Guide
This manual introduces the KDE 4 desktop of SUSE® Linux Enterprise Desktop. It
helps you perform key tasks. It is intended mainly for end users who want to make efcient use of KDE in everyday life.
Many chapters in this manual contain links to additional documentation resources. This
includes additional documentation that is available on the system as well as documentation available on the Internet.
For an overview of the documentation available for your product and the latest documentation updates, refer to http://www.novell.com/documentation or to
the following section.
1 Available Documentation
We provide HTML and PDF versions of our books in different languages. The following
manuals for users and administrators are available on this product:
GNOME User Guide (↑GNOME User Guide)
Introduces the GNOME desktop of SUSE Linux Enterprise Desktop. It guides you
through using and conguring the desktop and helps you perform key tasks. It is
intended mainly for end users who want to make efcient use of GNOME desktop
as their default desktop.
Application Guide (↑Application Guide)
Learn how to use and congure key desktop applications on SUSE Linux Enterprise
Desktop. This guide introduces browsers and e-mail clients as well as ofce applications and collaboration tools. It also covers graphics and multimedia applications.
Deployment Guide (↑Deployment Guide)
Shows how to install single or multiple systems and how to exploit the product
inherent capabilities for a deployment infrastructure. Choose from various approaches, ranging from a local installation or a network installation server to a mass deployment using a remote-controlled, highly-customized, and automated installation
technique.

Administration Guide (↑Administration Guide)
Covers system administration tasks like maintaining, monitoring and customizing
an initially installed system.
Security Guide (↑Security Guide)
Introduces basic concepts of system security, covering both local and network security aspects. Shows how to make use of the product inherent security software
like Novell AppArmor (which lets you specify per program which les the program
may read, write, and execute) or the auditing system that reliably collects information about any security-relevant events.
Virtualization with Xen (↑Virtualization with Xen)
Offers an introduction to virtualization technology of your product. It features an
overview of the various elds of application and installation types of each of the
platforms supported by SUSE Linux Enterprise Server as well as a short description
of the installation procedure.
In addition to the comprehensive manuals, several quick start guides are available:
Installation Quick Start (↑Installation Quick Start)
Lists the system requirements and guides you step-by-step through the installation
of SUSE Linux Enterprise Desktop from DVD, or from an ISO image.
Linux Audit Quick Start
Gives a short overview how to enable and congure the auditing system and how
to execute key tasks such as setting up audit rules, generating reports, and analyzing
the log les.
Novell AppArmor Quick Start
Helps you understand the main concepts behind Novell® AppArmor.
Find HTML versions of most SUSE Linux Enterprise Desktop manuals in your installed
system under /usr/share/doc/manual or in the help centers of your desktop.
Find the latest documentation updates at http://www.novell.com/
viii KDE User Guide

documentation where you can download PDF or HTML versions of the manuals
for your product.
2 Feedback
Several feedback channels are available:
• To report bugs for a product component or to submit enhancements requests, please
use https://bugzilla.novell.com/. If you are new to Bugzilla, you
might nd the Bug Writing FAQs helpful, available from the Novell Bugzilla home
page.
• We want to hear your comments and suggestions about this manual and the other
documentation included with this product. Please use the User Comments feature
at the bottom of each page of the online documentation and enter your comments
there.
3 Documentation Conventions
The following typographical conventions are used in this manual:
•
/etc/passwd: directory names and lenames
•
placeholder: replace placeholder with the actual value
•
PATH: the environment variable PATH
•
ls, --help: commands, options, and parameters
•
user: users or groups
•
Alt, Alt + F1: a key to press or a key combination; keys are shown in uppercase as
on a keyboard
•
File, File > Save As: menu items, buttons
•
Dancing Penguins (Chapter Penguins, ↑Another Manual): This is a reference to a
chapter in another manual.
About This Guide ix


Part I. Introduction


Getting Started with the KDE Desktop
This chapter assists you in becoming familiar with the KDE desktop of your SUSE®
Linux Enterprise Desktop. If you have not yet installed your system, refer to Chapter 3,
Installation with YaST (↑Deployment Guide) or to Installation Quick Start (↑Installation
Quick Start).
KDE stands for K Desktop Environment and is an easy-to-use graphical user interface
graphical user interface that communicates with the underlying Linux system to access
and manage les, folders, and programs. It has many applications designed to help you
in your daily work. KDE also offers many choices to modify your desktop according
to your needs and wishes. Read more about conguring your desktop in Chapter 3,
Customizing Your Settings (page 37).
The following description is based on the default conguration of the KDE 4 desktop
shipped with your product. If you or your system administrator has modied the defaults,
some aspects may be different, such as appearance or keyboard shortcuts.
1.1 Logging In
If more than one user account is congured on your computer, usually all users must
authenticate—unless Auto Login is congured for a certain user. Auto login logs the
user in to the desktop environment automatically on boot. This feature can be enabled
or disabled during installation or at any time using the YaST user management module.
For more information, see Chapter 9, Managing Users with YaST (↑Deployment Guide).
If your computer is run in a network environment and you are not the only person using
the machine, you are usually prompted to enter your username and password when you
1
Getting Started with the KDE Desktop 3
start your system. If you did not set up your system and your user account yourself,
check with your system administrator for your username and password.
The appearance of the login screen depends on the product you use and on the desktop
environment installed on your system. The login process is managed by an application.
For KDE, it is KDM. If the GNOME desktop is additionally installed on your system,
it may be GDM.
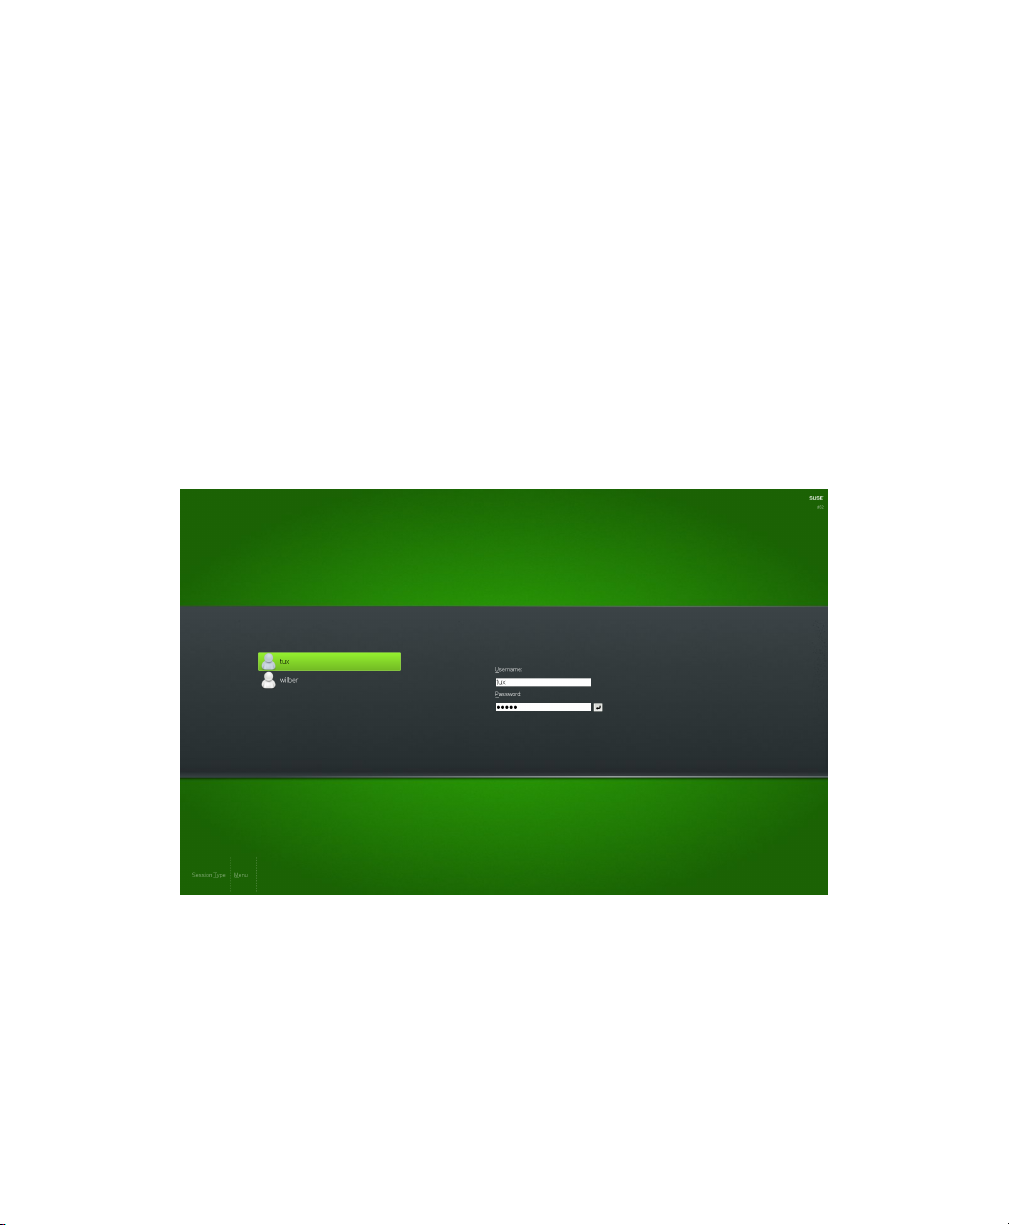
To start a normal login, enter your username and password. If desktops other than KDE
are installed, you can select which desktop environment to start by clicking the Session
Typing menu item at the bottom of the login screen. Press Enter to proceed. For infor-
mation on how to log out or switch to another desktop, see Section 1.3, “Leaving Your
System” (page 11) and Section 1.4, “Switching Desktops” (page 13).
Figure 1.1
If your system administrator has created an encrypted home directory for you (which
is useful as a protection against theft or unauthorized removal of the hard disk), your
home directory is mounted on login. After login, you can directly access the data as
usual—without entering another password.
A KDM Login Screen
4 KDE User Guide

NOTE: Connecting to an Active Directory Server
To access shared network resources, you can also authenticate a KDE client
machine against an Active Directory server. For further details, refer to Chap-
ter 5, Accessing Network Resources (page 63). If your machine is congured
for this kind of authentication, the login screen also provides an additional
eld. In this case, proceed as follows during login:
1. Select the domain from the list.
2. Enter your Windows* username.
3. Enter your Windows password and press Enter.
1.2 Exploring the Desktop Components
After logging in to KDE for the rst time, you see the KDE desktop. It consists of the
following basic elements:
Figure 1.2
Example KDE Desktop
Getting Started with the KDE Desktop 5

Desktop Icons and Desktop Folder Desktop icons represent les, directories, applications, functions, and removable media, like CDs or DVDs. Click an icon on the
desktop to access its associated program or application. By default, your desktop icons
are shown in a Desktop Folder, a transparent region of the screen showing the contents
of the Desktop folder in your home directory. If you drag an icon from the Desktop
Folder and drop it on another part of the desktop, it appear as widget that you can tilt,
enlarge or minimize. Widgets are small applications that can be integrated into your
desktop. Right-click to open a context menu to access the icon properties, or to remove
the icon. For more information, see Conguring Widgets (page 42).
Desktop Context Menu: Right-click an empty area on the desktop to access the
context menu for conguring the appearance of the desktop, adding panels or widgets
to the desktop, locking the widgets in their current position, or for leaving the current
session or locking the screen.
KDE Panel: The panel (in KDE also called “Kicker”) is a bar, typically located at
the top or the bottom of the screen. By default, the panel of your KDE desktop consists
of the following areas (from left to right): quick launcher with the main menu icon on
the left and further program icons, pager (desktop previewer), taskbar, and system tray.
You can add or remove icons in the panel and customize the appearance of the panel
as well as its location on the desktop. If you hold your mouse pointer over an icon in
the panel, a short description is displayed.
Quick Launcher: The quick launcher contains the main menu button and some
larger icons that are shortcuts to frequently used programs, folders, and functions.
Main Menu Button: Use the icon at the far left of the panel to open a menu holding
a search function at the top and several tabs at the bottom. The Applications tab shows
all installed programs in a function-oriented menu structure which makes it easy to nd
the right application for your purpose even if you do not know the application names
yet. For more information, refer to Section 2.1.1, “Using the Main Menu” (page 15) .
Pager (Desktop Previewer): Between the quick launcher and the taskbar, nd a
miniature preview that shows your virtual desktops (if not congured otherwise, they
are numbered). SUSE Linux Enterprise Desktop allows you to organize your programs
and tasks on several desktops, which minimizes the number of windows to arrange on
the screen. To switch between the virtual desktops, click one of the symbols in the
pager. For more information, refer to Section 2.6, “Using Virtual Desktops” (page 28).
6 KDE User Guide

Taskbar: By default, all started applications and open windows are displayed in
the taskbar, which allows you to access any application regardless of the currently active
desktop. Click to open the application. Right-click to see options for moving, restoring,
or minimizing the window.
System Tray: This rightmost part of the panel usually holds some smaller icons,
including the system clock displaying time and date, the volume control, and several
other helper applications such as the device notier, informing you about recently
plugged or inserted devices such as USB sticks, external hard disks, cameras, CDs, or
DVDs. For more information, refer to Section 2.5, “Accessing Removable Media and
External Devices” (page 27).
The integration and handling of desktop objects has changed from KDE 3.x to KDE 4,
which now uses a new desktop and panel interface tool called Plasma. Plasma supports
desktop widgets (also called “plasmoids”), similar to Apple’s dashboard widgets. Learn
more about the key desktop objects in the following sections.
1.2.1 Locking and Unlocking Desktop
Objects
With KDE 4, desktop elements can be locked in their current position to prevent them
from being moved around on the desktop. As long as the desktop elements are locked,
you cannot add, move, or remove any objects to and from your desktop.
To lock or unlock the desktop elements, right-click an empty space on the desktop and
select Lock Widgets or Unlock Widgets.
Figure 1.3
Unlocking Desktop Objects
Getting Started with the KDE Desktop 7

Find how to add, remove and congure widgets and change numerous desktop elements
in Chapter 3, Customizing Your Settings (page 37).
1.2.2 Desktop Icons
By default, the Desktop Folder showing the contents of the ~/Desktop folder, displays
the following icons by default:
My Computer
The My Computer icon is very useful for viewing the most important information
about your hardware, network status, disks (hard disks, removable media, and external devices), operating system, and some common folders at one glance. For
example, nd processor type and speed listed there, information about your RAM
and the current swap status, or your graphics card. OS Information lists the most
important information about your operating system such as the Kernel version included, the current user, version number and type of the operating system, and the
KDE version number. SUSE Linux Enterprise Desktop ships with a number of
further tools (either graphical or command line tools) that you can use to get more
detailed information about your system. If you need detailed hardware information
about your system, use the YaST hardware probing, described in Section “Probing
Your Hardware” (Chapter 5, Setting Up Hardware Components with YaST, ↑De-
ployment Guide).
Firefox
Opens the Firefox Web browser. For more information, refer to Chapter 18,
Browsing with Firefox (↑Application Guide).
Ofce
Opens a new OpenOfce.org document. For an introduction to the ofce suite,
refer to Chapter 1, The OpenOfce.org Ofce Suite (↑Application Guide).
1.2.3 Panel Icons
The quick launch area of your panel as shipped with SUSE Linux Enterprise Desktop
includes the following icons by default:
8 KDE User Guide

Figure 1.4
Panel: Quick Launch Area
Main Menu Icon
Opens the main menu, similar to the Microsoft* Windows start menu.
Device Notier Icon
Informs you about recently plugged or inserted devices such as USB sticks, external
hard disks, cameras, CDs, or DVDs. For more information, refer to Section 2.5,
“Accessing Removable Media and External Devices” (page 27).
Dolphin Icon
Opens Dolphin, the default le manager.
Apart from the larger icons in the quick launcher, the panel also holds a number of
smaller icons in the system tray area on the right:
Figure 1.5
Panel: System Tray
Klipper
KDE's clipboard tool that “remembers” the last entries you have moved to the
clipboard. To view the clipboard contents, click the Klipper icon or press Ctrl +
Alt + V. The most recent entry is listed on top and is marked as active with a black
check mark. To insert the active clipboard entry again, move the mouse pointer to
the target application, then middle-click. For more information, see Section 2.3,
“Moving Text between Applications” (page 24).
KMix
Your desktop's default mixer, KMix helps you to control sound on your desktop
after your sound card has been detected and congured with YaST, the central tool
for installation and conguration of your system. By default, clicking the KMix
icon in the system tray shows the master controller with which to increase or decrease the overall volume. For more information, refer to Section “Mixers”
(Chapter 23, Playing Music and Movies: amaroK, Kaffeine and More, ↑Application
Guide).
Getting Started with the KDE Desktop 9

openSUSE Updater
Helps you keeping your system up to date. When you connect to the Internet, the
openSUSE Updater automatically checks whether software updates for your system
are available. The applet icon changes color and appearance depending on the
availability of updates for your system. For detailed information about how to install
software updates with openSUSE Updater and how to congure openSUSE Updater,
refer to Chapter 1, YaST Online Update (↑Administration Guide).
KNetworkManager
If you manage your network connection with NetworkManager and have enabled
the use of NetworkManager in YaST, the KNetworkManager icon also appears in
your system tray be default. Use it to change and congure network connections.
For detailed information, refer to Chapter 23, Using NetworkManager (↑Adminis-
tration Guide).
Clock
For information about the current date and time, click the clock in the system tray
or hove your mouse pointer over the clock. You can change the clock settings (such
as appearance or additional data to be displayed) from the context menu available
upon right-click. If you need to update the system time, start YaST and select System
> Date and Time. Refer to Section “Clock and Time Zone” (Chapter 3, Installation
with YaST, ↑Deployment Guide) for more information.
Lock Screen
Locks your screen and starts the screen saver. Access to the session can only be
regained with a password.
Log Out
Logs you out and ends your current KDE session. If not congured otherwise in
the KDE 4 Personal Settings, (see Adjusting the Session Handling (page 55), the
session manager will restore the currently open windows by default next time you
log in to KDE.
Cashew Icon
Give access to panel conguration options. For more information, see Customizing
the Panel (page 46).
Of course, you can also change the way your KDE desktop looks and behaves to suit
your own personal tastes and needs. To learn how to congure individual desktop ele-
10 KDE User Guide

ments or how change the overall appearance and behavior of your desktop, refer to
Section 3.1, “The Personal Settings” (page 37).
If you would like to start working with your desktop now, continue reading at Chapter 2,
Working with Your Desktop (page 15). Otherwise you can leave your system with one
of the possibilities described below.
1.3 Leaving Your System
When you have nished using the computer, there are several options how to leave
your system: some of them will leave the system running, others will shutdown the
computer. If your system provides power management, you can also choose to suspend
your computer—in this state, it will consume considerably less power that usual but it
will start much faster than after a complete shutdown and boot process. For more information, refer to Chapter 9, Controlling Your Desktop’s Power Management (page 87).
You can access all the options to leave your session or your system from the main menu.
Click the main menu icon on the left and switch to the Leave tab. Select one of the
following options:
Logout
Ends your current session and leaves your system running. If not congured otherwise in the KDE 4 Personal Settings (see Adjusting the Session Handling (page 55),
the session manager will restore the currently open windows by default next time
you log in to KDE. Find more information about the session manager and conguration options at Adjusting the Session Handling (page 55).
Lock
Prevents unauthorized access by others by locking your screen and starting a screen
saver. Access to the session can only be regained with a password. To unlock, enter
your normal login password. For information about conguring your screen saver,
see Conguring the Screen Saver (page 44).
Switch User
Starts a second session with a graphical user interface on your machine. Your current
session remains active while you are taken to the login screen where you can log
in as a different user. You can access the rst session again by pressing Ctrl + Alt
+ F7. To access a new session, press F8 instead of F7. Additional sessions can be
accessed by pressing Ctrl + Alt + F9 to F12.
Getting Started with the KDE Desktop 11

If more than one desktop environment is installed on your system, you can also
choose to switch to another desktop for the new session as described in Section 1.4,
“Switching Desktops” (page 13).
Hibernate
This menu item is only available if your computer provides power management
functionality. Pauses your computer without logging you out. All your data and
the session data is saved to disk before the system is laid to rest. It is thus protected
against data loss should you loose power in the meantime. Waking the system up
again is much faster than booting it from scratch.
Sleep
This menu item is only available if your computer provides power management
functionality. Pauses your computer without logging you out. All your data and
the session data is saved to RAM. Bringing the system up again is faster than
restoring a session from disk.
Shutdown Computer
Logs you out and turns your computer off.
Restart Computer
Initiates the shutdown process and reboots your computer. Instead of selecting the
desired boot option in the boot manager, you can also select the desired option directly—just click one of the option below Restart Computer.
To access most of the options for leaving, you can also use the keyboard shortcut dened
in the Personal Settings. Usually, this is Ctrl + Alt + L.
TIP: Looking Up KDE Keyboard Shortcuts
If you are interested in other KDE keyboard shortcuts, look them up in the KDE
4 Personal Settings, described in Chapter 3, Customizing Your Settings (page 37).
For a description of how to change KDE keyboard shortcuts, refer to Modifying
KDE Keyboard Shortcuts (page 48).
If you have already logged out, you can still access shutdown and restart option from
the login screen by clicking System and selecting the respective menu items.
12 KDE User Guide

1.4 Switching Desktops
If more than one desktop environment is installed on your system (for example, KDE
and GNOME, or KDE 3.5.x and KDE 4), you can choose to switch to another desktop
when logging in again (or when logging in as a different user). To do so, proceed as
follows:
On the login screen, click Session Type and select the desktop environment to
1
start.
Enter a valid username and password. A new session on the selected desktop
2
environment starts.
To switch back again, log out from the current desktop and select a different
3
Session Type on the login screen. If you do not select a new session type, your
next session will be of the same type as the session before.
Getting Started with the KDE Desktop 13


Working with Your Desktop
After having being introduced to the desktop, you can now start to work with your
desktop.
2.1 Starting Programs
You can start programs either from the main menu or from the command line, using
the Run Command dialog or a shell. Additionally, you can start programs from the
desktop or the panel by left-clicking the respective program icon once.
TIP: Selecting and Starting Objects
Clicking an object once in SUSE Linux Enterprise Desktop usually starts an action
directly: a program starts, a preview of the le is displayed, or the folder is
opened. To former users of Windows, this behavior may be rather unusual. If
you just want to select one or several objects without any other action, press
Ctrl then click the object. Alternatively, alter your mouse settings in the KDE
Personal Settings as described in Adjusting the Mouse Settings (page 47).
2.1.1 Using the Main Menu
2
To open the main menu, click the main menu icon in the panel or press Alt + F1. The
main menu consists of the following elements: a search function at the top and several
tabs at the bottom, providing quick access to the key functions of the menu.
Working with Your Desktop 15

The following tabs are available:
Favorites
Shows a default selection of key programs for quick access.
Applications
Shows all applications installed on your system. The function-oriented menu
structure makes it easy to nd the right application for your purpose even if you
do not know the application names yet. To navigate through the structure, click an
entry and use the arrow icons at the right or the left to switch back and forth. To
switch back to the top-level hierarchy from anywhere in the structure, just click
the tab's name or icon.
Computer
Gives quick access to some places often needed, such as important system folders
(home directory, network folders) and media devices. Also allows you to quickly
access system information and to change your system conguration with YaST, if
necessary.
16 KDE User Guide

Recently Used
Lists the most recently opened programs and les. To reopen a program or le,
just click the entry. To remove all recently used programs or les from the list,
right-click below the respective heading and select Clear Recently Used Applications
or Clear Recently Used Documents.
Leave
Shows several options for leaving the session such as logging out, locking the
screen (access can only be regained with a password), shutting down or restarting
the computer. For more information, see Section 1.3, “Leaving Your System”
(page 11).
Additionally the menu displays your login name and the hostname of your computer.
This information is useful when you are logged in as a different user or on a remote
computer—it always shows you which system you are currently working on.
2.1.2 Using the Run Command Dialog
KRunner is a helper application with lets you quickly start programs. Apart from that,
it offers a search function for nding applications or locations. Refer to Section 2.1.3,
“Searching for Programs” (page 18) for more information.
Press Alt + F2 to open the Run Command dialog. Type a command, for example,
dolphin, and press Enter or click Launch to start the application. The command to
start the application is often (but not always) the application name written in lowercase.
Working with Your Desktop 17
If you want to start an application as a different user (for example, as root), click the
wrench icon in the Run Command dialog. Activate Run as Different User, enter the
user's password and press Enter.
The Run Command dialog also allows you to use the so-called Web shortcuts dened
in Konqueror. With these, you can send search requests directly to a search engine like
Google*, without opening the browser and visiting the Web sites before. For more information, refer to Section “Using Web Shortcuts” (Chapter 17, Browsing with Kon-
queror, ↑Application Guide).
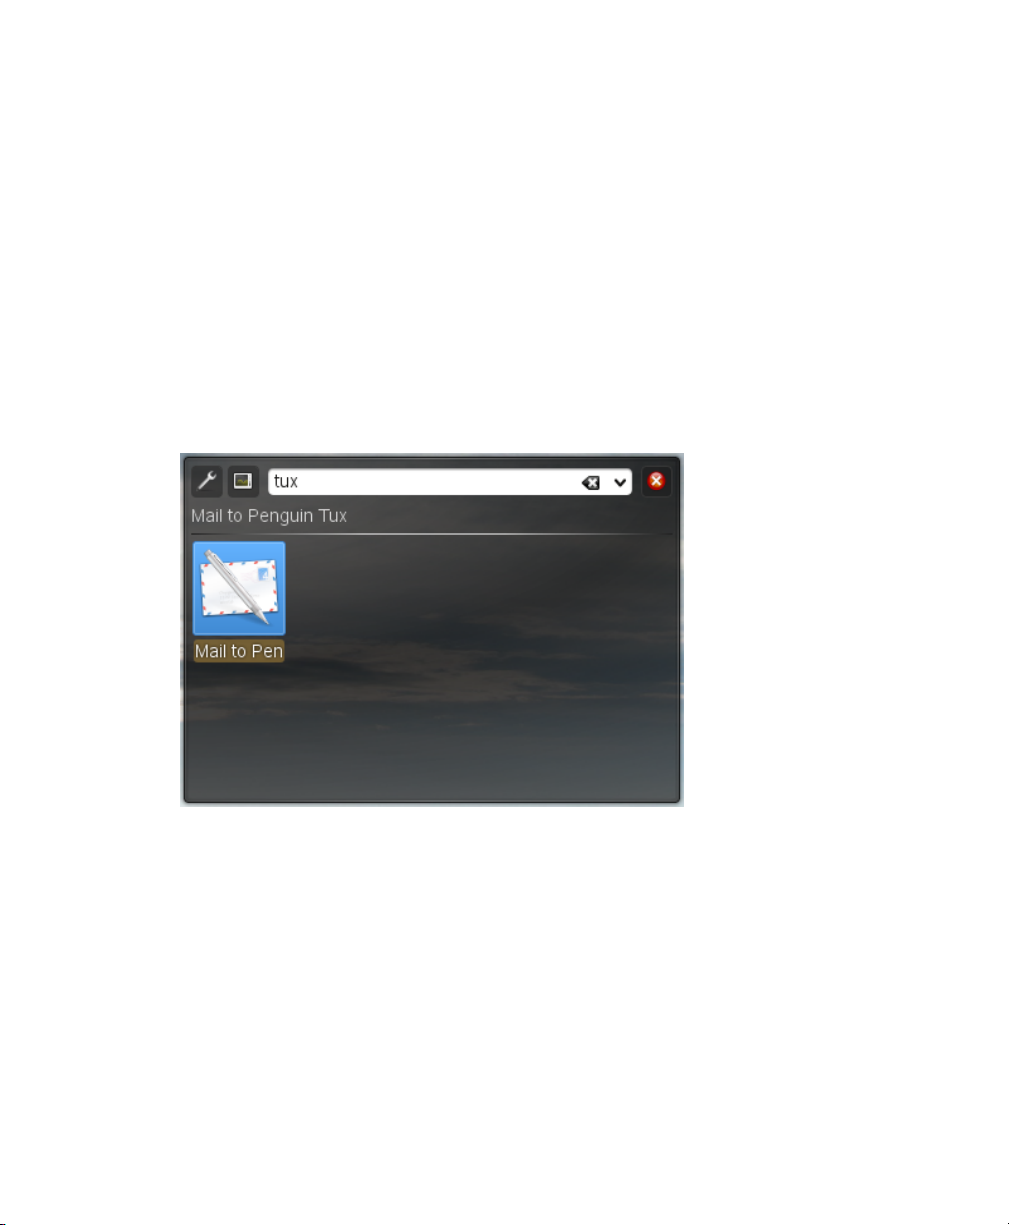
Click the wrench symbol to explore the full range of KRunner's abilities: For example,
if the Contacts plug-in is activated, just enter the name of one of your contacts and then
press Enter to open KMail and to start typing your mail.
If the respective plug-in is activated, you can also use KRunner as calculator or to
convert units.
2.1.3 Searching for Programs
Both the main menu and the Run Command dialog offer a search function that lets you
quickly start programs even if you do not know the exact application name or command
yet. To search for an application, start typing a command or part of the application
name in the main menu Search eld of the menu or the input eld in the Run Command
dialog. Each character you enter narrows down the search.
18 KDE User Guide

From the list below the input eld, choose the application or object matching your
query.
2.2 Using Dolphin File Manager
With KDE 4, Dolphin has replaced Konqueror as the default le manager, while Konqueror remains the default Web browser. For more information about Konqueror as
Web browser, see Chapter 17, Browsing with Konqueror (↑Application Guide). To start
Dolphin, click the card box icon in the panel or press Alt + F2 and enter dolphin.
2.2.1 Dolphin Main Window
The Dolphin main window consists of the following elements:
Menu Bar: The menu bar holds menu items for actions like copying, moving, or
deleting les, changing views, starting additional tools, dening your settings, and
getting help.
Working with Your Desktop 19

Toolbar: The toolbar provides quick access to frequently used functions that can
also be accessed via the menu. If you hover the mouse pointer over an icon, a short
description is displayed.
Location Bar: The location bar displays the path to the current directory. It is
available in two versions: one shows the path to the current directory with icons for
every superordinate folder in a “bread crumb” view. Click any icon in the bread crumb
view to change to that directory. The second version of the location bar shows the path
to the current directory as a string of text you can edit.
Panels: By default, Dolphin shows only the Places panel on the left. It allows quick
access to some often used places like your home directory, the /root directory of the
le system, the trash bin, or removable media. There are several other panels you can
add to the main window.
Display Field (Working Space): The display eld shows the contents of the selected
directory or le. By default, Dolphin displays the contents of your home directory on
start-up. Clicking a folder or le in Dolphin directly starts an action: Dolphin loads the
le into an application for further processing or opens the folder.
Status Bar: Shows the le type and size of the currently selected object and the
available disk space .
2.2.2 Managing Files and Folders
To perform actions like copying, moving, creating or deleting les, you need appropriate
permissions to the folders and les involved in your action.
Procedure 2.1
In order to select one or multiple les and folders in Dolphin, move your mouse
1
pointer over the le or folder but do not click. A green cross appears on the upperleft edge. To select the le or folder now, click the green cross icon. Alternatively,
press Ctrl and click the le or les. To deselect again, click the red minus icon
that appears if the object is currently selected.
Right-click and select Copy or Cut from the context menu.
2
Navigate to the destination folder in which to insert the object.
3
20 KDE User Guide
Copying, Moving, or Delete Files or Folders

To create a new folder at the current location, select File > Create New > Folder
4
or press F10. Enter a folder name in the new window and press Enter.
To insert the object you copied or cut in Step 2 (page 20), right-click the desti-
5
nation folder in the main display eld and select Paste. The object is copied or
moved there.
To delete a le or folder, right-click the object in the main display eld and select
6
Move to Trash from the context menu. The object is moved to the trash bin. From
there, you can restore it if necessary or delete the object irretrievably.
To quickly lter for certain lenames in the current directory, press Ctrl + I or select
Tools > Show Filter Bar to add the Filter input eld to the bottom of the Dolphin main
window. Type any part of the lename you are searching for to see all les in the current
directory containing the search string. For more detailed and advanced searches, press
Ctrl + F to use KFind. For more information, refer to Section 2.4, “Finding Data on
your Computer or in the File System” (page 24).
2.2.3 Conguring Dolphin
Dolphin offers many options to adjust the view and the overall settings according to
your needs and wishes.
Procedure 2.2
To toggle between the bread crumb view and the editable version of the location
1
bar, press Ctrl + L or click at the far right end of the location bar. Enter a path to
a directory by typing it in. After typing an address, press Enter.
To delete the contents of the location bar click the black X symbol on the left.
To switch back to the bread crumb view, press Ctrl + L.
To change the view of the currently displayed folder, either click Icons, Details,
2
or Columns in the toolbar. Dolphin remembers the selected view for each folder.
Alternatively, press Ctrl + 1, Ctrl + 2, or Ctrl + 3 to switch between the view
Changing the View
Working with Your Desktop 21

modes. Click Split or press F3 to view the contents of the current folder in two
separate columns. Now you can navigate to a different directory in each column
and easily drag or drop objects or compare the contents of directories.
To make Dolphin also show hidden les, select View > Show Hidden Files or
3
press Alt + +.
To view more details about the les (like access permissions or ownership), select
4
View > Additional Information and enable the respective options.
22 KDE User Guide

To add further directories to the Places panel, drag a folder from the working
5
space to the Places panel and drop it there. Right-click and use the context menu
to hide, edit or remove entries from Places.
If you want to add more panels to the main window, select View > Panels and
6
select additional panels such as Information, Folders, or Terminal.
•
The Information panel shows the properties and a preview of the currently
selected le. It also lets you add comments to the le.
•
The Folder panel shows a tree view of the whole le system and lets you
navigate trough all subdirectories of /root.
•
The Terminal panel attaches a command line to the bottom of the main
Dolphin window. Whenever you click a directory in the display eld, the
Terminal panel also changes to the according directory, so you can easily
switch to the command line for certain tasks you prefer to execute in a shell.
You can even detach the panels from the main Dolphin window by clicking the left
icon at the top of each panel. Click the panel's title bar and drag it to another place on
the desktop. To reintegrate the panel into the Dolphin window again, click the left
symbol at the top of the panel again.
Procedure 2.3
If you want to change Dolphin's overall behavior or view, select Settings > Congure
Dolphin and explore the options offered in the Dolphin conguration dialog.
To use the same view mode for all folders, click View Modes in the left sidebar.
1
Activate Use Common View Properties for All Folders on the General tab. Adjust
the options for the individual view modes on the other tabs according to your
wishes and click Apply to save the changes.
If you want Dolphin to show a different default directory on start-up, or if you
2
want to permanently use the editable location bar instead of the bread crumb
view, change the according options on the General tab.
Click OK to save the changes and to close the Dolphin conguration dialog.
3
Changing Dolphin's Overall Behavior
Working with Your Desktop 23

2.3 Moving Text between Applications
To copy text to the clipboard and insert it again, former MS Windows users automatically try the keyboard shortcut Ctrl + C and Ctrl + V, which often works in Linux as
well. Copying and inserting texts is even easier in Linux: to copy a text to the clipboard,
just select the text with the mouse then move the mouse cursor to the position to which
to insert the text. Click the middle button on the mouse to insert the text (on a twobutton mouse, press both mouse buttons simultaneously).
With some applications, if a text is already selected in the application where you want
to insert the text, this method does not work because the text in the clipboard is overwritten by the other selected text. For such cases, the KDE application Klipper is very
useful. Klipper “remembers” the last entries you have moved to the clipboard. By default,
Klipper is started when KDE is loaded and appears as a clipboard icon in the panel. To
view the clipboard contents, click the Klipper icon or press Ctrl + Alt + V. The most
recent entry is listed on top and is marked as active with a black check mark. If an extensive text was copied to Klipper, only the rst line of the text is displayed.
To copy an older text fragment from Klipper to an application, select it by clicking it,
move the mouse pointer to the target application, then middle-click. For further information about Klipper, see the Klipper online help.
2.4 Finding Data on your Computer
KDE provides more than one application for nding data on your computer or in the
le system. With Kerry, you can very easily search your personal information space
(usually your home folder) to nd documents, e-mails, Web history, IM/ITC conversations, source code, images, music les, applications, and much more. For more information, refer to Chapter 6, Searching with Kerry (page 73).
With KFind, you can locate les on your computer or in the le system using a variety
of search criteria, such as le content, dates, owner, or le size. Start it from the main
menu with Applications > Find Files/Folders. Alternatively, press Alt + F2 and enter
kfind.
24 KDE User Guide
or in the File System

Figure 2.1
Finding Files with KFind
2.4.1 Finding Files
To perform a search for certain lenames, proceed as follows:
Start KFind from the main menu or command line.
1
Click the Name/Location tab to perform a basic search.
2
Specify the name of the le to nd in Named. You can use the following wild
3
cards:
Asterisk
The asterisk (*) stands for any number of missing characters (even zero).
For example, searching for marc* can nd the les marc, marc.png, and
marc_must_not_read_this.kwd. Searching for mar*.kwd can nd marketplace.kwd and marc_must_not_read_this.kwd.
Question Mark
The question mark (?) stands for exactly one character. For example,
searching for mar? can nd marc, but marc? cannot nd anything if your
les are named marc and marc.png. You can put as many question marks
in the search term as you want. It nds exactly that number of characters.
Working with Your Desktop 25

You can combine those two wild card symbols in any search term.
Specify the folder to search in Look In or click Browse to nd the folder you
4
want. Select Include Subfolders to also search all subfolders starting from your
specied folder.
Press Enter or click Find.
5
2.4.2 Performing an Advanced File Search
For a more detailed search, you can also specify further options, such as a text the le
to nd must contain:
Start KFind from the main menu or the command line.
1
Click the Name/Location tab.
2
Specify the name of the le to nd in Named.
3
Specify the folder in which to search in Look In or click Browse to nd the
4
folder.
Click the Contents tab.
5
In File Type, specify the type of le to nd.
6
In Containing Text, enter the word or phrase the le you are searching for must
7
contain.
If you want to specify further options, click the Properties tab and choose the
8
options you want.
Click Find to perform the search.
9
For detailed information about the search options available, refer to the KFind online
help.
26 KDE User Guide

2.5 Accessing Removable Media and External Devices
If you insert removable media (such as CDs or DVDs) in your computer's drive, or
connect external devices such as USB sticks, external hard disks, media players or
digital cameras, these are usually automatically detected. In KDE 4, a panel widget informs you about recently plugged or inserted devices.
Figure 2.2
Click on the entry to show the device's contents with Dolphin.
If the device is not automatically displayed in the device notier, try to access it manually with Dolphin.
Start Dolphin le manager and switch to the editable version of the location bar as described in Changing the View (page 21). Enter /media to access any type of drive
mounted there. If the medium has been detected, it is also listed in the Places panel.
Click the respective entry to show the contents. Digital cameras can also be accessed
by entering the URL camera:/ into Dolphin's location bar. In case your camera is
not automatically detected, congure it rst with the KDE 4 Personal Settings or with
digiKam as described in Section “Conguring Your Camera” (Chapter 21, Managing
Your Digital Image Collection with DigiKam, ↑Application Guide). Navigate through
the camera's directory structure until the les are shown. Use the usual Dolphin le
management features to copy the les as desired.
Device Notier
Working with Your Desktop 27

Another way to access detected media is to click the My Computer icon on your desktop.
The detected devices are listed in the Disk Information section.
NOTE: Removing Media Safely
If you want to remove or disconnect a medium from your computer, make
sure that the data on the medium is currently not accessed by any application
or user. Otherwise, you risk a loss of data. To safely remove the medium, proceed as follows:
1. Open a view that displays the removable medium (for example, with Dol-
phin or My Computer).
2. Right-click the medium in the Places panel (or below Disk Information)
and select Safely Remove or Eject. Safely Remove unmounts the medium
after which you can disconnect the medium from your computer. Eject
automatically opens the CD or DVD drive of your computer.
2.6 Using Virtual Desktops
The desktop environment allows you to organize your programs and tasks on several
virtual desktops between which you can switch the pager in the panel (see Section 1.2,
“Exploring the Desktop Components” (page 5)). If you often run a lot of programs
simultaneously, this minimizes the number of windows to arrange on your screen. You
might, for example, use one desktop for e-mailing and calendaring and another for word
processing or graphics applications.
Procedure 2.4
You can display a running application on one or all virtual desktops or move it to
other desktops.
Open the application.
1
Right-click the title bar of the application.
2
Click To Desktop.
3
28 KDE User Guide
Moving an Application to Another Virtual Desktop

Select the desktop on which to place the application.
4
To switch between desktops, click the desired desktop in the pager in the panel.
5
Some users might need more desktops than provided by default. Learn how to add additional desktops in Adding Additional Virtual Desktops (page 45).
2.7 Managing Internet Connections
To surf the Internet or send and receive e-mail messages or use Instant Messengers,
you must have congured an Internet connection with YaST or NetworkManager. For
more details, see Section “Conguring a Network Connection with YaST” (Chapter 19,
Basic Networking, ↑Administration Guide) and Chapter 23, Using NetworkManager
(↑Administration Guide).
2.8 Exploring the Internet
When an Internet connection is established, either use Konqueror or Firefox for
browsing. Konqueror is KDE's default Web browser but SUSE Linux Enterprise
Desktop also includes Firefox. To start Konqueror or Firefox, press Alt + F2 and enter
konqueror or firefox.
With features like tabbed browsing, pop-up window blocking, and download and image
management, both browsers combine the latest Web technologies. Their easy access
to different search engines helps you to nd the information you need.
For more information about Firefox, see Chapter 18, Browsing with Firefox (↑Application
Guide). Learn more about Konqueror as a Web browser in Chapter 17, Browsing with
Konqueror (↑Application Guide).
2.9 E-Mail and Scheduling
For reading and managing your mails and appointments, you can use Kontact as your
personal information management tool (PIM). Kontact combines KDE applications
like KMail, KOrganizer, and KAddressBook into a single interface. This gives you
Working with Your Desktop 29

easy access to your e-mail, calendar, address book, and other PIM functionality. KMail
can also manage multiple e-mail accounts, such as your private e-mail and your business
ones. To start Kontact, press Alt + F2 and enter kontact.
Before you can send or receive mails, you must congure an e-mail account. When
starting KMail for the rst time, a conguration wizard appears that assists you in setting
up your account. For detailed information about conguring and using Kontact, see
Chapter 5, Kontact: E-Mailing and Calendaring (↑Application Guide).
2.10 Instant Messaging
Kopete is an online messenger application that allows multiple partners connected to
the Internet to chat with each other. Kopete currently supports a number of common
messenger protocols. To be able to use instant messaging (IM), you must register with
a provider offering IM services and congure a Kopete account.
To start Kopete, press Alt + F2 and enter kopete. Learn more about Kopete in Chapter 14, Instant Messaging with Kopete (↑Application Guide).
2.11 Managing Passwords
When you enter a password in a KDE application for the rst time (in KMail or Konqueror, for example), you are asked if you want to store the password in an encrypted
wallet. If you click Yes, KWallet wizard starts by default. KWallet is a password management tool that can collect all passwords and store them in an encrypted le. For
more information on how to congure and use KWallet, refer to Chapter 8, Managing
Passwords with KWallet Manager (page 81).
Whereas KWallet is designed to centrally manage passwords for several KDE applications, Firefox also offers the ability to store data when you enter a username and a
password on a Web site. If you accept by clicking Remember, the password will be
stored on your hard disk in an encrypted format. Next time you access this site, Firefox
will automatically ll in the login data.
To review or manage your passwords in Firefox, click Edit > Preferences > Security
> Saved Passwords....
30 KDE User Guide

2.12 Opening or Creating Documents
with OpenOfce.org
The ofce suite OpenOfce.org offers a complete set of ofce tools including a word
processor, spreadsheet, presentation, vector drawing, and database components. Because
OpenOfce.org is available for a number of operating systems, you can use the same
data across different computing platforms. You can also open and edit les in Microsoft
Ofce formats then save them back to this format, if needed.
Start OpenOfce.org from the main menu or click the Ofce icon on the desktop. You
can also start individual components, like the word processor, by pressing Alt + F2 and
entering oowriter.
For an introduction to OpenOfce.org, see Chapter 1, The OpenOfce.org Ofce Suite
(↑Application Guide) or view the help in an OpenOfce.org program.
2.13 Viewing PDF Files and Other Documents
Documents that need to be shared or printed across platforms can be saved as PDF
(Portable Document Format) les, for example, in the OpenOfce.org suite. View them
with Okular, the default KDE document viewer.
Start Okular from the main menu or press Alt + F2 and enter okular.
To open a document, select File > Open and choose the desired le from the le system.
Navigate through the documents by using the navigation icons at the top or bottom of
the window. If your PDF document provides bookmarks, you can access them in the
left panel of the viewer.
Okular also allows you to review a document by highlighting certain text parts or adding
annotations. For more information about working with Okular, see Chapter 4, Viewing
PDF Files and Other Documents with Okular (page 59).
Working with Your Desktop 31

2.14 Taking Screen Shots
With KSnapshot, you can create snapshots of your screen or individual application
windows. Start the program from the main menu or by pressing Alt + F2 and entering
ksnapshot. On start-up, KSnapshot already takes a snapshot of the screen and displays
it as preview. You can choose to save the current snapshot, to open it with an graphics
application or to copy it to the clipboard. Before creating a new snapshot, check if the
options in the lower part of the window match your needs. For example, to automatically
capture a dialog window or a certain region (instead of the full screen), adjust the
Capture Mode. If you need to take some other actions rst (like selecting a certain object
in the window), adjust the Snapshot Delay and choose if to Include the window decora-
tions or not. Then click New Snapshot to take a new snapshot which you then can save
or edit further.
Figure 2.3
KSnapshot
32 KDE User Guide

2.15 Displaying, Decompressing, and Creating Archives
To save space on the hard disk, use a packer that compresses les and directories to a
fraction of their original size. The application Ark can be used to manage such archives.
It supports common formats, such as zip, tar.gz, tar.bz2, lha, and rar.
Start Ark from the main menu or from the command line with ark.
Figure 2.4
Once you have opened an archive, perform various actions. Action offers options such
as Add File, Add Folder, Delete, Extract, View, Edit With, and Open With.
Procedure 2.5
To create a new archive, select File > New.
1
Enter the name of the new archive in the dialog that opens and specify the format
2
using Filter.
Ark: File Archive Preview
Creating an Archive
After conrming with Save or by pressing Enter, the Ark window shows an
empty archive.
To ll the archive, drag and drop les and directories from the le manager into
3
this window or click Add File or Add Folder to add the objects you want to add
to the archive.
Working with Your Desktop 33

To remove a le from the archive, select the le and click Delete.
4
If all les to be archived are displayed in the window, just close Ark. Ark auto-
5
matically compresses everything into the previously selected archive format and
saves the archive.
Procedure 2.6
To view the contents of an archive, start Ark and select File > Opento open the
1
le. Alternatively, just drag the archive from an open le manager window to
the Ark window.
To see a preview of individual les, select a le and click Preview.
2
To extract all les from the archive, click Extract.
3
If you want to extract individual les from the archive only, select one or more
les (by keeping the Ctrl key pressed) and click Extract. In the following dialog,
you can still decide to save All Files or the Selected Files Only.
Enter the path to the Destination Folder, select if to Open Destination Folder
4
After Extraction and click OK to extract the les.
Viewing and Extracting Archives
2.16 Creating CDs or DVDs
If you possess a CD or DVD writer, you can burn les to a CD or DVD with K3b. To
start K3b, press Alt + F2 and enter k3b. Learn more about K3b in Chapter 26, Burning
CDs and DVDs With K3b (↑Application Guide).
2.17 Viewing and Managing Digital
You can view digital images in the le manager or with Gwenview. Start Gwenview
by pressing Alt + F2 and entering gwenview. Gwenview can load and save all image
formats supported by KDE. It shows them either as thumbnails, in full screen view, or
34 KDE User Guide
Images

in slide show mode. When browsing JPEG images with EXIF information, Gwenview
automatically rotates them according to the EXIF Orientation tag.
For managing and editing your digital images, digiKam is the right choice: download
your images from the camera, edit and improve them, organize them in albums (or ag
them with tags for easy retrieval, independent of folders or albums), and archive them
on CD or export them to a Web image gallery.
To start digiKam, press Alt + F2 and enter digikam. Find an introduction to digiKam
in Chapter 21, Managing Your Digital Image Collection with DigiKam (↑Application
Guide).
2.18 Managing Your Music Collection
KDE's amaroK music player allows you to play various audio formats, create playlists,
import music from an iPod* (or upload les to your iPod), and listen to streaming audio
broadcasts of radio stations on the Internet. The le types supported depend on the engine
used for amaroK. To start amaroK, press Alt + F2 and enter amarok. On rst start,
amaroK launches a First-Run Wizard with which to dene the folders where amaroK
should look for your music les. For more information about amaroK, refer to Chapter 23, Playing Music and Movies: amaroK, Kaffeine and More (↑Application Guide).
2.19 For More Information
As well as the applications described here for getting started, KDE can run a lot of
other applications. Find detailed information about many important applications in the
other parts of this manual.
•
To learn more about KDE and KDE applications, also refer to http://www.kde
.org/ and http://www.kde-apps.org/.
•
Communicate and discuss topics with other KDE users and get help at http://
forum.kde.org/index.php.
•
To learn more about the helper applications included in the KDE, see also http://
utils.kde.org/.
Working with Your Desktop 35

•
To report bugs or add feature requests, go to http://bugs.kde.org/.
36 KDE User Guide

Customizing Your Settings
You can change the way your KDE desktop looks and behaves to suit your own personal
tastes and needs. There are several ways to inuence the look and feel of the KDE
desktop depending on the scope of changes to make. For users, the following options
are available:
• To change the appearance or behavior of individual desktop objects only, you can
usually access a conguration dialog by right-clicking the object.
• To change the overall appearance and behavior of your KDE desktop, use the
Personal Settings that in KDE 4 replace the former KDE Control Center. The Personal Settings offer access to numerous conguration modules and dialogs, some
of which can also be accessed via the context menu of individual desktop objects.
3.1 The Personal Settings
The Personal Settings are the central place for users to change the overall appearance
and behavior of many components of the KDE desktop. Start the Personal Settings from
the main menu by selecting Favorites > Congure Desktop.
3
Customizing Your Settings 37

Figure 3.1
TIP: Starting Individual Modules
You can also start individual modules of the Personal Settings from the shell
or by adding a special applet to your panel.
Personal Settings
To start modules from a shell, enter kcmshell4 --list to get a list of all
modules available. Then enter kcmshell4 module name to start the desired
module.
Alternatively, add the Settings applet to your panel according to the description
in Section 3.3, “Conguring the Panel” (page 46).
The General and Advanced tabs provide different categories of settings. To get an impression of the numerous possibilities, just click a category icon and explore the possibilities provided there. Performing tasks in some areas of the personal settings requires
system administrator (root) permissions.
38 KDE User Guide

Change the settings as desired. No changes take effect until you click Apply. To discard
changes in the recent view that you have not yet applied, click Reset. To reset all items
in the recent view to the default values, click Defaults.
To get back to the start-up view showing all categories again, click Overview. You can
also enter a search string at the top of the window (for example, Screen Saver) to nd
the category which holds options related to the search string. Each character you enter
in the Search eld narrows down the search.
The following list introduces the major categories and highlights the most important
settings you can change there. Detailed information about the settings of each category
is provided by the Help button on each page of the settings or in the help center.
The General tab holds the following categories:
Look & Feel
Holds settings for the appearance of your KDE 4 desktop, such as themes, window
decorations, and styles of desktop elements. Allows you to congure 3D desktops
effects, increase or decrease the number of virtual (multiple) desktops, or to congure screen saver options. Cursor behavior, window behavior and the splash screen
that appears on KDE start-up can also be inuenced here.
Personal
Holds settings for changing the default paths to some important directories for your
data: Desktop, Autostart, and Documents. Allows you to change the default
applications like e-mail client, text editor, messenger, and Web browser that are
called whenever a KDE application needs to start an application of these types.
Dene country and language-specic options here, such as default spell checking
options, currency, number and date format, and keyboard layouts for different
languages between which you can switch. This category also offers accessibility
options for handicapped users, such as sound and keyboard options and mouse
gestures.
Network & Connectivity
Allows you to set options for local network browsing and proxy servers.
Computer Administration
Allows you to congure date and time settings for your KDE desktop, to change
size and orientation of your display, and to specify power management options for
saving energy. Also holds settings for joysticks, keyboard and mouse. For example,
you can view and modify the predened KDE shortcuts (for example, Alt + Ctrl +
Customizing Your Settings 39

L to lock the screen). You can also install personal or systemwide fonts here and
congure your sound system.
On the Advanced tab, nd the following categories:
Advanced User Settings
Use this category to congure options like encoding or which database to connect
for track listings of audio CDs, to congure your digital camera, or to change the
settings for KWallet (the KDE password management tool). If needed, change the
default le associations to identify a le type and start an appropriate application.
Dene how KDE handles sessions on login or shutdown and dene which applications should be started automatically.
System
Hold option for the login manager, power management and Samba.
In the following sections, nd examples of how to congure some aspects of your KDE
desktop that you might want to customize.
3.2 Conguring Desktop Objects
Your KDE desktop comes with a predened set of desktop icons. By adding various
objects such as folders, les, or widgets, you can create additional icons on your desktop
and arrange them as you like.
Procedure 3.1
To create a link to an application and place it on the desktop or the panel, proceed as
follows:
Click the main menu button and browse to the desired application.
1
Right-click and select Add to Desktop or Add to Panel from the context menu
2
that appears. If these menu items are not available, your desktop elements are
probably locked. Unlock them rst as described in Section 1.2.1, “Locking and
Unlocking Desktop Objects” (page 7).
40 KDE User Guide
Adding Program Icons to the Desktop

If your desktop objects are not locked, you can also just drag items from the main
menu onto the desktop and drop them there to create a link to this application or
folder.
To change the icon position on the desktop, left-click the icon and drag it to the
3
desired place.
To delete an icon from your desktop, right-click the icon icon and select Remove this
Icon.
Procedure 3.2
Widgets are small applications that can be integrated into your desktop or your panel.
To add widgets to you desktop, right-click an empty patch on your desktop and
1
select Add Widgets.
If these menu items are not available, your desktop elements are probably locked.
Unlock them rst as described in Section 1.2.1, “Locking and Unlocking Desktop
Objects” (page 7).
In the dialog box that appears, you can limit the selection of widgets that is shown
2
with the drop-down list at the top.
Adding Widgets to the Desktop
Select a widget and click Add Widget. The widget appears on your desktop or in
3
your panel.
Customizing Your Settings 41

To position the widget on your desktop, left-click the widget and drag it to the
4
desired place. To align all widgets to a grid, right-click an empty patch on the
desktop and select Align Horizontally or Align Vertically.
To remove a widget from your desktop, right-click the widget and select the Remove...
entry. Alternatively, hover your mouse pointer over the widget and click the X symbol
in the frame.
Procedure 3.3
In order to congure widgets, the desktop elements need to be unlocked as described
in Section 1.2.1, “Locking and Unlocking Desktop Objects” (page 7).
To congure a widget, hover your mouse pointer over the widget until a
1
translucent frame appears around the widget, showing a number of symbols.
If the frame does not appear, your widgets are probably locked. Unlock them
rst as described in Section 1.2.1, “Locking and Unlocking Desktop Objects”
(page 7)
Conguring Widgets
To change the widget size, left-click the resize symbol in the frame and keep the
2
mouse button pressed while moving your cursor across the desktop to scale the
widget size.
To rotate the widget in any direction, left-click the arrow symbol in the frame
3
and keep the mouse button pressed while moving your cursor in a circle across
the desktop. There is a sticky boundary in the horizontal and vertical positions
where you can “clamp” the widget, if you like. Of course, you can also arrange
it in any tilted position.
42 KDE User Guide

To change the contents, settings, or properties of a widget, left-click the wrench
4
symbol in the frame. In the conguration dialog box that appears, set the options
according to your wishes.
Use the X symbol in the frame if you want to close the widget.
Procedure 3.4
You can change the background colors of your desktop or select a picture to use as
the background.
Right-click an empty patch of the desktop and select Desktop Settings. A con-
1
guration dialog appears.
In the Wallpaper section, choose from the Type drop-down list if you want to
2
use an Image, a Slide Show or a Color as background.
Changing the Desktop Background
•
For an image wallpaper, choose a wallpaper from the Picture list. Click Get
New Wallpapers to download and install new wallpapers. To use a custom
picture, click the folder button beneath the list and select an image le from
the le system. Dene the Positioning of the image.
•
To have multiple images appear in a Slide Show mode, dene the directory
from which to select the pictures and set the interval after which to change
the images.
Customizing Your Settings 43

Set the other options in the conguration dialog according to your wishes and
3
click OK to save your changes and leave the conguration dialog.
Procedure 3.5
SUSE® Linux Enterprise Desktop comes with predened screen saver settings that
you can adjust.
Start the Personal Settings from the main menu by selecting Favorites > Congure
1
Desktop.
On the General tab, select Desktop.
2
In the dialog that opens, click Screen Saver.
3
In the list of screen savers, click a screen saver to see a preview in the right side
4
of the dialog.
Conguring the Screen Saver
Click Setup to adjust options like speed or shapes.
5
You can also choose to view a blank screen instead or to let KDE start a random
6
screen saver. Find these options at the end of the screen saver list.
44 KDE User Guide

Under Settings, determine after how long a time of inactivity the screen saver
7
should start and whether a password is required to unlock the screen after the
screen saver has started.
Click OK to apply the changes and close the conguration dialog.
8
Procedure 3.6
Some users might need more desktops than provided by default.
Right-click the desktop previewer in the panel and select Congure Desktops.
1
A conguration dialog appears where you can increase or reduce the number of
virtual desktops. You can also change the default names of the desktop.
Adding Additional Virtual Desktops
Click OK to apply the changes and close the conguration dialog.
2
For the names of the desktops to appear in the desktop previewer rather than the
3
number, right-click the desktop previewer and select Pager Options > Desktop
Name.
Customizing Your Settings 45

3.3 Conguring the Panel
You can customize the KDE panel according to your preferences: Applications and
widgets can be added to the quick launch area or the system tray in the main panel or
to additional panels. Panel elements and additional panels can be moved to different
places or be completely removed at any time.
Procedure 3.7
Right-click an empty patch in the panel and select Panel Settings to access
1
any panel conguration options. If the menu item is not available, your desktop
objects are probably locked. To unlock, right-click and select Unlock Widgets.
To move panel objects to a different place within the panel, hover the mouse
2
cursor over the respective panel object (for example, program icon, pager,
task manager, system tray) . The mouse cursor turns into a crosslines-like
form. Move the cursor to the desired position in the panel, then click again to
x the object in the new position.
To change the panel width, click and drag the small arrow icons at the far left
3
and right end of the settings panel.
To change the panel height, click the Height button and move the mouse cursor
4
to the desired end location.
To place the panel at different sides of the screen use the Screen Edge button.
5
Drag and drop the panel to the preferred location.
Customizing the Panel
6
7
46 KDE User Guide
If you need additional widgets on your panel, add them with the Add Widgets...
button as described in Step 2 (page 41).
To remove program icons or widgets from the panel, right-click the respective
object and select the menu item to remove the icon or widget.

The icons in the system tray usually belong to applications running in the
background. Therefore you can only remove those icons if you close the respective application (right-click the icon and select Quit).
To prevent the panel and widgets from being moved accidentally, use Lock
8
Widgets.
For additional congurations options like alignment and functions like auto
9
hide, click More Settings....
If all panel changes are according to your wishes, close the settings panel with
10
the red close button on the right side.
3.4 Conguring KDE Behavior
Procedure 3.8
Open the Personal Settings and select Keyboard & Mouse.
1
To switch to double-clicks to open les and folders, select the corresponding
2
option in the Icons group.
To change the mouse pointer appearance, switch to the Cursor Theme tab and
3
select a different cursor theme.
Adjusting the Mouse Settings
Customizing Your Settings 47

To change the default values of double-click intervals or the distance that the
4
pointer moves over the screen on movement of the mouse, adjust the settings on
the Advanced tab.
Click Apply to apply the changes and close the conguration dialog.
5
Procedure 3.9
KDE comes with a set of predened keyboard shortcuts. You can easily create more
keyboard shortcuts or change existing shortcuts, especially if they should conict
with other application-specic shortcuts.
Open the Personal Settings and select Keyboard & Mouse.
1
Click Keyboard Shortcuts.
2
Modifying KDE Keyboard Shortcuts
Select the KDE Component for which to view or change the shortcuts. For exam-
3
ple, to change the shortcuts for switching between the virtual desktops, select
the KWin entry from the drop-down list. To change the shortcuts for locking the
screen or logging out, select the Run Command Interface entry.
Browse through the list of shortcuts for the selected entry. To lter for certain
4
keywords, enter a search string in the search eld above.
48 KDE User Guide

To change or add a shortcut, select the respective list entry and in the dialog that
5
opens, select Custom.
Click the wrench icon to switch to the input mode.
6
Press the desired key or key combination. If this shortcut cannot be accepted or
7
in case of conict with another existing shortcut, a notication shows. If your
input was successful, the new or modied shortcut appears in the list.
If you want to switch back to the default keyboard shortcut for the selected action,
8
just click the entry again and select Default.
To save the altered settings, click Apply. To reset all shortcuts to the default
9
values, click Defaults then Apply.
Procedure 3.10
There are certain default applications dened in KDE: For example, when you click
a link to a Web page, KDE opens the Konqueror Web browser, when you click an email address, KMail starts.
To change this behavior and set your preferred Web browser or e-mail client as
1
default, open the Personal Settings and click Default Applications.
To change the Web browser:
2
In the list of components, select Web browser.
2a
Select Open http and https URLs in the following browser and click the
2b
browse button beneath.
A dialog opens, showing the main menu structure. Select the Web browser
2c
to set as default and click OK. The component chooser now shows the selected application in the display eld.
Changing Default Applications
Customizing Your Settings 49

To change the e-mail client:
3
In the list of components, select Email Client.
3a
Select Use a different email client and click the browse button.
3b
A dialog showing the main menu structure opens. Select the e-mail client to
3c
set as default and click OK. The component chooser now shows the selected
application in the display eld.
If desired, change other default applications for KDE, like the application for the
4
terminal window or the instant messenger client.
When all options are set according to your wishes, click Apply.
5
Similar to setting the default Web browser or e-mail application, you can change le
associations in KDE. File associations determine which application should be used
to open a le, for example, if you want to start a le from Konqueror.
Open the Personal Settings, click the Advanced tab and select File Associations.
1
To search for an extension, enter the extension in Find File Type or File Name
2
Pattern. Only le types with a matching le pattern appear in the list. For exam-
50 KDE User Guide

ple, to modify the application for *.png les, enter png in Find File Type or File
Name Pattern.
In the Known Types list, click the le type to open the setting dialog for this le
3
type. You can change the icon, the lename patterns, description, and the order
of the applications.
If your tool is not listed, click Add in Application Preference Order then select
the program for the le type.
To change the order of the list entries, click the program to move. Give it a
higher or lower priority by clicking Move Up or Move Down. The application
listed at the top is used by default when you click a le of this type.
When all options are set according to your wishes, click Apply.
4
3.5 Conguring System and Security
Aspects
To adjust settings such as time and date format, number format, or currency, select the
desired country as the default country in KDE. If more than one system language is
Customizing Your Settings 51

installed on your computer, you can also select different languages in which KDE
should show the graphical user interface and application interfaces.
Procedure 3.11
To adjust settings such as time and date format, number format, or currency, select
the desired country as the default country in KDE. If more than one system language
is installed on your computer, you can also select different languages in which KDE
should show the graphical user interface and application interfaces.
To set your default country options, open the Personal Settings and select Regional
1
& Accessibility.
Adjusting Regional Settings
On the Locale tab, click Change next to the Country or Region entry. In the dialog
2
that opens, select the region and country you want to set as default in KDE and
click OK.
Number, date and time format are automatically adjusted to the new country's
default values that are shown in the display eld at the bottom of the Locale tab.
If you need to make further adjustments for those, click the respective tabs and
3
set the options according to your wishes.
52 KDE User Guide

If more than one language is installed on your system (as secondary languages
4
with YaST) and you want to change the graphical interface of KDE to a different
language, click Add Language on the Locale tab. This opens a list of languages
currently installed on your system.
Select the language for the graphical user interface. The new language is now
5
shown at the top position in the Language list.
To conrm the changes, click Apply. All newly started applications or desktop
6
objects now appear in the new language.
To switch to another language, re-sort the languages in the Languages list until
7
the desired language is at the top position and apply your changes.
Procedure 3.12
If you often need to enter texts in various languages, you may want to add different
language layouts for your keyboard. You can then easily switch layouts when needed.
To add additional keyboard layouts, open the Personal Settings and select Regional
1
& Accessibility > Keyboard Layout.
Activate Enable keyboard layouts at the top.
2
In the list of Available layouts, select a layout. Click the right arrow button to
3
transfer it to the list of Active layouts.
Adding Keyboard Layouts
Customizing Your Settings 53

If you added several layouts, you can change the sorting order with the help of
4
the up and down arrow buttons.
Use the Switching Options tab to adjust the options for switching between the
5
keyboard layouts. For example, you can dene keyboard shortcuts for switching.
After having conrmed your changes with Apply, you can change between different keyboard layouts by clicking the country ag in the panel or by using the
respective keyboard shortcut.
KDE runs a session manager that starts after your username and password are authenticated by the login process. It lets you save the status of a certain session and return to
that status the next time you log in. For example, it can automatically start the applications that you were running in the most recent session or when you manually saved a
session. It can save and restore the following settings:
• Appearance and behavior settings, such as fonts, colors, and mouse settings.
• Applications that you were running, such as a le manager or OpenOfce.org.
54 KDE User Guide

NOTE: Saving and Restoring Applications
You cannot save and restore applications that Session Manager does not
manage. For example, if you start the vi editor from the command line in
a terminal window, Session Manager cannot restore your editing session.
Procedure 3.13
To change the session handling options, open the Personal Settings and on the
1
Advanced tab, click Session Manager.
By default, Session Manager restores the applications that were running when
you logged out from the previous session, enabling an automatic start of these
applications.
To be able to save a certain session manually and restore this session each time
2
you log in to KDE, select Restore manually saved sessions. This adds a new
menu item, Save Session, to your main menu. After a session is saved, KDE automatically restores the saved session on each login.
To start with a “fresh” session each time you log in, select Start with an empty
3
session.
To change the default options that appear when logging out, adjust the respective
4
options in the General and Default Shutdown Options group.
Click Apply to conrm your changes.
5
Procedure 3.14
Apart from the applications from the last session that are restored by the Session
Manager, you can congure which applications should be always be started after login.
Adjusting the Session Handling
Starting Programs Automatically
Open the Personal Settings and on the Advanced tab, click Autostart.
1
To add an application, click Add Program and from the menu structure, select
2
the program you want to start automatically.
To add a shell script, click Add Script and click the Open File Dialog icon in the
next window to select the script from the le system. The program or script is
added to the list and you can view and change the Status.
Customizing Your Settings 55

Click Apply to conrm your changes. When logging in the next time, the appli-
3
cations and scripts should start automatically.
56 KDE User Guide

Part II. Managing Files and
Resources


Viewing PDF Files and Other Documents with Okular
Apart from PDF les, Okular allows you to view a great number of le formats, such
as PostScript, several image formats, OpenDocument format (ODF), OpenDocument
text (ODT), some eBook formats (ePub), and even Microsoft* Compiled HTML Help
(CHM). Okular also provides support for bookmarks, annotations, form elds and
multi- media contents, and rotation of pages.
4.1 Viewing PDF Files
Documents that need to be shared or printed across platforms can be saved as PDF
(Portable Document Format) les, for example, in the OpenOfce.org suite. View them
with Okular, the default KDE document viewer.
Start Okular from the main menu or press Alt + F2 and enter okular. To open a document, select File > Open and choose the desired le from the le system. Navigate
through the document by using the navigation icons at the top or bottom of the window.
Depending on which icon you click on the navigation panel on the left, the sidebar either
shows a table of Contents, a Thumbnail view of each page, the Reviews for this le,
or your Bookmarks for this le. To lter for any text listed in the sidebar or the overall
document, enter a string into the input eld at the top of the sidebar. If you want to select
and copy text or images from the le in Okular, click the Selection icon in the toolbar
and select one of the options from the context menu. Click the Browse icon to switch
back to browsing the document. Working with Bookmarks and Annotations With
Okular, you can review a document by highlighting certain text parts or adding annotations or bookmarks that Okular then attaches to the le in form of metadata. Note that
4
Viewing PDF Files and Other Documents with Okular 59

the annotations and markers you add are not stored within the document, so you cannot
print them or pass them on to other users.
Figure 4.1
Okular Viewing a PDF File
4.2 Annotating a PDF File
With Okular, you can review a document by highlighting certain text parts or adding
annotations or bookmarks that Okular then attaches to the le in form of metadata.
Note that the annotations and markers you add are not stored within the document, so
you cannot print them or pass them on to other users.
To create an annotation for a page, press F6 and select one of the annotation tools from
the toolbar that appears. The annotation is added to the list of Reviews and is agged
with the login name of the user who created it. Use the icons at the bottom of the sidebar
to group the annotations by page, by author or to show the annotations for the current
page only.
60 KDE User Guide

Figure 4.2
Annotating a PDF File
4.3 For More Information
See the homepage http://okular.kde.org of Okular for more information. The
supported formats can be viewed at http://okular.kde.org/formats.php.
Viewing PDF Files and Other Documents with Okular 61


Accessing Network Resources
From your desktop, you can access les and directories or certain services on remote
hosts or make your own les and directories available to other users in your network.
SUSE® Linux Enterprise Desktop offers various different ways of accessing and creating
network shared resources:
Network Browsing
Your le managers, Dolphin or Konqueror, let you browse your network for shared
resources and services. Learn more about this in Section 5.2, “Accessing Network
Shares” (page 65).
Sharing Folders in Mixed Environments
Using Dolphin or Konqueror, congure your les and folders to share with other
members of your network. Make your data readable or writable for users from any
Windows or Linux workstation. Learn more about this in Section 5.3, “Sharing
Folders in Mixed Environments” (page 65).
Managing Windows Files
SUSE Linux Enterprise Desktop can be congured to integrate into an existing
Windows network. Your Linux machine then behaves like a Windows client. It
takes all account information from the Active Directory domain controller, just as
the Windows clients do. Learn more about this in Section 5.4, “Managing Windows
Files” (page 68).
5
Accessing Network Resources 63

NOTE: Network Share Support in Dolphin
Dolphin is KDE 4's default le manager and most of the network functions
described in this chapter are already integrated. However not all of them might
work awlessly—if in doubt, try using Konqueror instead.
5.1 General Notes on File Sharing and Network Browsing
Whether and to which extent you can use le sharing and network browsing on your
machine and in your network highly depends on the network structure and on the conguration of your machine. Before setting up either of them, contact your system administrator to make sure that your network structure supports this feature and to check
whether your company's security policies permit it.
Network browsing, be it SMB browsing for Windows shares or SLP browsing for remote
services, relies heavily on the machine's ability to send broadcast messages to all clients
in the network. These messages and the clients' replies to them enable your machine to
detect any available shares or services. For broadcasts to work effectively, your machine
must be part of the same subnet as all other machines it is querying. If network browsing
does not work on your machine or the detected shares and services do not match with
what you expected, contact your system administrator to make sure that you are connected to the appropriate subnet.
To allow network browsing, your machine needs to keep several network ports open
to send and receive network messages that provide details on the network and the
availability of shares and services. The standard SUSE Linux Enterprise Desktop is
congured for tight security and has a rewall up and running that protects your machine
against the Internet. To adjust the rewall conguration, you would either need to ask
your system administrator to open a certain set of ports to the network or to tear down
the rewall entirely according to your company's security policy. If you try to browse
a network with a restrictive rewall running on your machine, Dolphin warns you about
your security restrictions not allowing it to query the network.
64 KDE User Guide

5.2 Accessing Network Shares
Networking workstations can be set up to share folders. Typically, les and folders are
marked to let remote users access them. These are called network shares. If your system
is congured to access network shares, you can use your le manager to access these
shares and browse them just as easily as if they were located on your local machine.
Whether you have only read access or also write access to the shared folders depends
on the permissions granted to you by the owner of the shares.
To access network shares, or open Dolphin and enter remote:/ in the location bar.
Dolphin then opens a virtual folder that displays the network share types that you can
access. Click a network resource type then click the network share to access. You might
be required to authenticate to the resource by providing a username and password.
Figure 5.1
Network Browsing
5.3 Sharing Folders in Mixed Environments
Sharing and exchanging documents is a must-have in corporate environments. Dolphin
offers you le sharing with Samba, which makes your les and folders available to
both Linux and Windows users. For information on how to install and congure Samba,
Accessing Network Resources 65

refer to Chapter 24, Samba (↑Administration Guide). After Samba is installed, congure
Samba le sharing with Dolphin as follows:
Open Dolphin.
1
Select Home Folder, right-click the window background and then select Properties
2
from the context menu.
In the Properties dialog, click the Share tab. When le sharing is not yet gener-
3
ally enabled, you are informed about this on the tab. To enable le sharing or
select the les to share, click Congure File Sharing and enter the root pass-
word.
To enable or disable le sharing, select or deselect Enable Local Network File
4
Sharing.
Figure 5.2
Select the appropriate sharing option: Simple sharing or Advanced sharing.
5
To limit the number of users allowed to share folders to certain groups, click
6
Allowed Users, select Only users of a certain group are allowed to share folders,
Enabling File Sharing
66 KDE User Guide

click Choose Group, and select the appropriate group from the list in the window
that opens. Click OK to close that window.
In the le sharing dialog, add the folder to share to the list of shared items by
7
clicking Add at the bottom of the dialog and specifying the folder's exact path.
Figure 5.3
Activate Share with Samba to enable Samba le sharing. If needed, apply some
8
ne-tuning to the Samba options:
Detailed Sharing Options
Name
Specify a name other than the preset default.
Public/Writable
Determine which kind of access to grant others to your share. You can grant
users full read and write access or limit their access to just reading your
shares.
Apply your settings and leave the le sharing dialog with OK.
9
The folder now appears in Dolphin with a globe icon.
Accessing Network Resources 67

Figure 5.4
To revoke the share, enter the le sharing dialog again and remove the folder
from the list of shared items. The folder then appears without a globe icon.
Other members of your network can reach your share by entering smb:/ in the location
bar of Dolphin and clicking the appropriate workgroup icon and hostname.
IMPORTANT: Samba Domain Browsing
Samba domain browsing only works if your system's rewall is congured accordingly. Either disable the rewall entirely or assign the browsing interface
to the internal rewall zone. Ask your system administrator about how to
proceed. This procedure is described in more detail in Section “Conguring a
Linux Client for Active Directory” (Chapter 5, Active Directory Support, ↑Security
Guide).
Shared Folder
5.4 Managing Windows Files
With your SUSE Linux Enterprise Desktop machine being an Active Directory client
as described in Chapter 5, Active Directory Support (↑Security Guide), you can browse,
view, and manipulate data located on Windows servers. The following examples are
just the most prominent ones:
Browsing Windows Files with Dolphin
Use Dolphin's smb:/ browsing option to browse your Windows data.
68 KDE User Guide

Viewing Windows Data with Dolphin
Use Dolphin to display the contents of your Windows user folder just as you would
for displaying a Linux directory. Create new les and folders on the Windows
server.
Manipulating Windows Data with KDE Applications
KDE applications, such as the Kate text editor, allow you to open les on the
Windows server, manipulate them, and save them to the Windows server.
Single-Sign-On
KDE applications, including Dolphin, support Single-Sign-On, which means that
to access other Windows resources, such as Web servers, proxy servers, or groupware servers like MS Exchange, you do not need to reauthenticate. Authentication
against all these is handled silently in the background once you provided your
username and password on login.
To access your Windows data using Dolphin, proceed as follows:
1
Press Alt + F2 and enter smb:///
This opens a Dolphin window displaying all Samba workgroups and domains
that could be found in your network.
Click the icon of the workgroup or domain of your AD server.
2
Figure 5.5
Browsing Data on the AD Server
Accessing Network Resources 69

Click the Users folder and select your personal user folder icon. The contents of
3
your My Documents folder are displayed.
To create folders in your Windows user folder using Dolphin, proceed as you would
when creating a Linux folder:
Right-click the background of the Dolphin folder view to open the menu.
1
Select Create New > Folder.
2
Enter the new folder's name when prompted to do so.
3
To create a le on the AD server, proceed as described in the following example for
the Kate text editor.
1
Press Alt + F2 and enter kate.
Enter your text.
2
Figure 5.6
To save the newly created text, select Save as.
3
Click the Network Folders icon to the left and select SMB Shares.
4
Editing a Text File with Kate
70 KDE User Guide

Figure 5.7
Navigate to your Windows folder.
5
Enter the lename and click Save.
6
The le is saved on the Windows server.
Make use of Dolphin's Single-Sign-On support, as in the following example—Web
access to your MS Exchange mailbox:
Make sure that you have a valid MS Exchange account under your current Win-
1
dows user identity.
Saving a File to a Remote Windows Folder
Request the Exchange server's address from your system administrator.
2
3
Press Alt + F2 and enter dolphinhttp://address_exchange_server.
You are logged in to your Exchange account without having to reauthenticate.
Accessing Network Resources 71

Figure 5.8
Write or read your e-mails and log out as usual.
4
Accessing MS Exchange through Dolphin
72 KDE User Guide

Searching with Kerry
Kerry is a KDE front-end for the Beagle search tool, which indexes your personal information space to help you nd whatever you need. You can use Kerry to nd documents, e-mails, Web history, IM/ITC conversations, source code, images, music les,
applications, and much more.
Because Kerry is a front-end to Beagle, it needs the beagle daemon to be functional.
Kerry and Beagle can now index many KDE-specic sources of information, such as
Kopete conversations, Konqueror history, or KMail messages. The result is a smooth
integration into the KDE environment through the Kerry interface. Find more about
Beagle in Chapter 6, Searching with Beagle (↑GNOME User Guide).
6.1 Searching Using Kerry
To nd data using the Kerry tool, follow these steps:
1
Press Alt + F2 and enter kerry to start Kerry and to open the Kerry Beagle
Search window. Alternatively, open the search window by left-clicking on the
Kerry applet icon (a dog's head) in the system tray.
Enter the term to nd in Search. To quickly clear the previously entered text,
2
press the black arrow on the left.
6
The search is case insensitive. It does not matter whether you use uppercase or
lowercase characters. To search for optional terms, use the OR keyword (in uppercase). For example, Mars OR Venus nds all data containing any occurrence
Searching with Kerry 73

of Mars, Venus, or both. To exclude search terms, use a minus symbol (–) in
front of them. For example, Mars -Venus nds all data containing any occur-
rence of Mars but without any occurrence of Venus. To search for an exact phrase,
enclose the phrase in quotes. If you want to include only certain le type in results,
specify the lename extension with ext:. For example, Mars ext:xml nds
xml les containing Mars.
Select the scope of the search in the Show section of the right panel. To search
3
all the indexed content, choose Everything. However, you can limit the search
only to indexed Applications, Contacts, Ofce documents, instant messenger
Conversations, Images, Media les, Web pages, or File/Path names by clicking
the appropriate item in the panel. You can change the scope before or after the
search is performed.
Change the sort order of results in the Sort By section of the right panel. To sort
results by type, click Type. Sorting by Date, Name, and Relevance is also possible.
You can change the sort order before or after the search is completed.
You can limit the results by date of last modication. To show all results regardless of the date of the last modication, click Any Date in the right panel. You
can show items modied today, since yesterday, this week, month, or year by
clicking the appropriate item in the right panel. You can change this before or
after the search is performed.
Press Enter or click the icon to the right of the search eld to start the search.
4
Results are displayed in the main area of the window.
Results are displayed in a window, sorted according to your settings. Click any item to
activate it. To open a folder containing a found le instead of the le itself, click the
name of the folder to the right of the lename. To display more information about an
item, click the icon with the i on the left.
You can change the scope of the search, sort order, or limitation by date at any time by
clicking appropriate item in the panel on the right.
Use Previous results and Next results to move between pages of the result list. The
number of items found is shown in the bottom part of the window.
74 KDE User Guide

6.2 Conguring Kerry
You can congure Kerry by right-clicking its icon in the tray and choosing Congure
Kerry or by clicking Congure in Kerry's main window. The conguration dialog has
four tabs.
On the Search tab, you can change the Default result sort order, Maximum number of
results displayed on one page, or shortcuts for activating Kerry Beagle Search.
On the Indexing tab, set whether the Beagle indexing service should be started automatically and whether data should be indexed while the computer is operating on battery
power. You can also determine which folders should be indexed by Kerry Beagle Search
and which folders should not be indexed at all. See Section 6.2.1, “Indexing More Di-
rectories” (page 75) and Section 6.2.2, “Preventing Files and Directories from Being
Indexed” (page 76) for detailed instructions.
On the Backends tab, choose which of the available Beagle back-ends should be enabled.
To disable a back-end, uncheck it. For example, if you do not want your Kopete conversations be indexed by Kerry Beagle, uncheck the Kopete back-end.
On the Daemon Status tab, check the status of Beagle daemon. You can stop or start
the daemon manually here. To use Kerry Beagle Search functionality, the daemon must
be running.
6.2.1 Indexing More Directories
By default, Kerry indexes your home folder only. If you do not want your home folder
to be indexed, uncheck the Index my home folder option on the Indexing tab of the
Kerry conguration. To index more folders, follow these steps:
If the Kerry Beagle conguration dialog is not open yet, right-click the Kerry
1
icon in the tray and choose Congure Kerry.
Click the Indexing tab.
2
Click the Add button in the middle part (Index) of the tab.
3
In the dialog that opens, choose the folder to index and click OK.
4
Searching with Kerry 75

Press OK.
5
6.2.2 Preventing Files and Directories from
Being Indexed
To exclude some folders or les from being indexed by Kerry, follow these steps:
If the Kerry Beagle conguration dialog is not open yet, right-click the Kerry
1
icon in the tray and choose Congure Kerry.
Click the Indexing tab.
2
Click Add in the bottom part (Privacy) of the tab.
3
In the dialog that opens, choose a folder not to index by selecting the Folder
4
option. Specify the path to the folder in the text eld or press the folder button
and choose the folder in a le dialog.
You can also specify les not to index by selecting File name pattern and specifying the le pattern.
Press OK.
5
76 KDE User Guide

Managing Print Jobs
Printers can either be connected to your system locally or accessed over a network.
There are several ways to set up a printer in SUSE Linux Enterprise Desktop: with
YaST, or on the command line. There are also desktop tools in KDE or GNOME for
setting up printers but we recommend to use YaST for this task.
Refer to Section “Setting Up a Printer” (Chapter 5, Setting Up Hardware Components
with YaST, ↑Deployment Guide) for detailed information how to congure printers with
YaST.
NOTE: Troubleshooting
If you have problems conguring your printer, ask your system administrator.
An in-depth coverage of printer conguration for administrators can be found
in Chapter 12, Printer Operation (↑Administration Guide).
This chapter describes how to set up printers with the KDE Printing Manager. After
conguring the printer correctly, you can address it from any application.
7.1 Starting Print Jobs in KDE
7
In KDE, you usually start print jobs with KPrinter. This application is started automatically each time you print from a KDE application. In the KPrinter dialog, choose a
printer and edit the Properties of your print job, such as page orientation, pages per
sheet, and duplex printing.
Managing Print Jobs 77

TIP: Sending Files to a Printer without Opening the Application
You can also start KPrinter manually by pressing Alt + F2 and entering
kprinter. This is useful if you want to print one or several les without
starting the application to view or edit the le. The KPrinter dialog then additionally includes the Files tab, where you can determine the les to print. Either
drag them from the desktop and drop them into the list or use the le dialog
to locate them.
To specify the number of copies and various other options, click Expand at the bottom
left. The window then expands and shows three tabs: Copies, Advanced Options, and
Additional Tags. See Figure 7.1, “Starting a Print Job with KPrinter” (page 78).
Figure 7.1
The Copies tab determines the page selection (all pages of the selected document, the
currently selected one, or a range) and the number of copies. You may also choose to
print only the even or only the odd numbered pages of the selected document. Use Ad-
vanced Options to specify any additional information for the print job. Enter any Billing
information if needed or set a custom page label at the top and bottom of the page. The
Job Priority can also be set here. The last tab, Additional Tags is rarely needed. Once
your print job has been led, you can watch its progress using KJobViewer.
Starting a Print Job with KPrinter
78 KDE User Guide

7.2 Monitoring Print Jobs in KDE
Start KJobViewer from the main menu or with kjobviewer from the command line.
A window like that in Figure 7.2, “Monitoring Print Jobs with KJobViewer” (page 79)
opens, listing all the print jobs queued on your printer. As long as your print job is not
active, you can edit it. Do this using the entries of the Jobs menu.
Figure 7.2
If, for example, you want to check if you sent the correct document to the printer, you
can stop the job and resume it if you decide to print it. Remove your own print jobs
from the queue with Remove. To change the printer, select a different printer with Move
to Printer.
With Restart, reprint a document. To do this, select Filter > Toggle Completed Jobs,
select the desired document, and click Jobs > Restart. Clicking Jobs > Job IPP Report
shows the technical details of a job. Use Jobs > Increase Priority and Jobs > Decrease
Priority to set the priority, depending on how quickly you need the document.
Filter enables you to switch between various printers, toggle completed jobs, and limit
the view to your own print jobs by selecting Show Only User Jobs. The current user is
then displayed in the top right eld.
Monitoring Print Jobs with KJobViewer
Settings > Congure KJobViewer opens a conguration dialog. Here, determine the
maximum number of print jobs to display. Enter a number in the eld or use the slider
to the right to determine a value. Press OK to save the setting or Cancel to exit the dialog
without saving.
Managing Print Jobs 79

The icons in the toolbar correspond to the functions you can access by way of the menu.
Display a help text explaining the function by holding the mouse pointer over one of
the icons.
The job list consists of eight columns. The job ID is automatically assigned by the print
system to identify the various jobs. The next column contains the login of the user who
sent the job followed by the lename of the document. The status column indicates
whether a job is still in the queue, currently being printed, or already completed. Next,
the size of the document is displayed in kilobytes and number of pages. The default
priority of 50 can be increased or reduced if necessary. Billing information can be cost
centers or other company-specic information. If you right-click a job in the list, the
Jobs menu opens under the mouse pointer, allowing you to select an action. Only a few
functions are available for completed jobs. If you activate Keep window permanent,
KJobViewer opens automatically the next time you log in.
80 KDE User Guide

Managing Passwords with KWallet Manager
Remembering all the passwords for protected resources to which you need to log in
can be problematic. KWallet remembers them for you. KWallet is a password management tool that can collect all passwords and stores them in an encrypted le. With a
single master password, open your wallet to view, search, delete, or create entries.
IMPORTANT: Protect Your KWallet Password
If you forget your KWallet password, it cannot be recovered. Furthermore,
anyone who knows your password can obtain all information contained in the
wallet.
8.1 Starting KWallet
When you enter a password in a KDE application for the rst time (in KMail or Konqueror, for example), you are asked if you want to store the password in an encrypted
wallet. If you click Yes, KWallet wizard starts by default. KWallet is a password management tool that can collect all passwords and store them in an encrypted le.
8
Managing Passwords with KWallet Manager 81

To activate KWallet, select Basic Setup and click Next. Select Yes, I wish to use the
KDE wallet to store my personal information and enter a password. This is your master
password to open KWallet. It cannot be recovered if you forget it. Click Finish to close
the wizard. After this initial conguration, you can open your wallet at any time to
view, search, delete, or create entries. Normally you do not need to insert an entry
manually. KDE recognizes if a resource requires authentication and KWallet starts automatically, prompting you for the KWallet password. Of course, you can also use
KWallet to store additional passwords by adding entries, as described in Adding New
Entries to Your Wallet (page 83).
By default, all passwords are stored in one wallet, kdewallet, but you can also add new
wallets. Once congured, KWallet appears in the panel. You can also start KWallet
manually by pressing Alt + F2 and entering kwalletmanager.
8.2 Managing Your Passwords
To store data in your wallet or view its contents, click the KWallet icon in the panel.
A dialog box opens, showing the wallets that are accessible on your system. Click the
wallet to open. A window prompts for your password.
After a successful login, the KWallet Manager window opens. In the tree view on the
left, navigate to the entry for which you want to view or change the password. For
safety reasons, the password value is hidden by default when you click the entry. For
passwords, click Show Contents. For maps, containing key and value pairs (like a
WLAN ESSID and your password), activate Show Values to view the contents.
82 KDE User Guide

Figure 8.1
The KWallet Manager Window
Procedure 8.1
To manually add new passwords (or maps) to KWallet, select the subfolder to
1
which to add an entry in the tree folder at the left.
To add a new password, right-click a Passwords entry and select New from the
2
context menu.
To add a new key pair (map), right-click a Map entry and select New from the
context menu.
Specify a name for the new entry then click OK. Your new entry is sorted under
3
your folder entry.
Click the new entry to display it on the right side (the folder is initially empty).
4
Click Show Contents or Show Values to open an input eld where you can enter
5
your new password or values.
To add a key pair, right-click the empty input eld and select New Entry Type
6
in your password (or you key and respective value for that key) and click Save.
KWallet saves your entry to the subfolder selected.
Procedure 8.2
Adding New Entries to Your Wallet
Changing the Password for a Wallet
If needed, you can change your password for a wallet at any time.
Managing Passwords with KWallet Manager 83

Open KWallet Manager and right-click the wallet for which to change the pass-
1
word.
Select Change Password.
2
Enter your new password twice.
3
8.3 Adjusting KWallet Settings
By default, you dene the settings for KWallet password manager with the help of a
wizard when you use KWallet for the rst time. You can adjust the initial settings at
any time to increase security.
If KWallet is already started, click the KWallet symbol in the panel and select
1
Congure Wallet. Otherwise, in the main menu, select Congure Desktop and
on the Advanced tab, click KDE Wallet.
If KDE wallet subsystem is not yet enabled, activate the respective check box at
2
the top.
By default, a wallet is closed when the last application stops using it. To increase
3
security, you can set a more restrictive policy: to close a wallet automatically
after a period of inactivity or after start-up of the screen saver, activate the respective check boxes.
84 KDE User Guide

4
By default, KWallet stores all passwords in one wallet named kdewallet. To
store local and network-related passwords in different wallets, activate Different
wallet for local passwords. Click New to create an additional wallet, if needed.
To remove the KWallet icon from the panel, deactivate Show manager in system
5
tray. You can then only access KWallet from the main menu.
8.4 Copying Your Wallet to Another Computer
For the most part, KWallet resides silently in the panel and is automatically activated
if needed. However, you can copy your wallet les to another computer (for example,
your laptop). To simplify this task, wallets can be dragged from the manager window
to a le browser window. This let you easily package a new wallet for transfer to another
environment. For example, a new wallet could be created and copied onto a removable
ash memory device. Important passwords could be transferred there, so you have them
available in other locations.
Managing Passwords with KWallet Manager 85


Controlling Your Desktop’s Power Management
In KDE 4, you can control power management functions supported by your system
with just a few clicks on the desktop. You can choose between various power management proles to match the tasks your system is facing. The Personal Settings hold a
Power Management category, allowing you to congure detailed settings as described
in Section 9.3, “Conguring Power Management” (page 90).
Apart from power proles that can be applied while you are interacting with your
computer, there are also power saving functions (suspend modes) you can use instead
of shutting down the computer completely during breaks.
9.1 Using the Battery Monitor Widget
If you are using mobile computers like a laptop, a widget in your panel displays the
battery status and gives you access to power management functions. If the Battery
Monitor widget is not displayed in your panel by default, add it manually. For more
information, refer to Adding Widgets to the Desktop (page 41).
The widget allows you control the screen brightness when your system is running on
battery power, to switch to a different power prole, or to trigger your system to enter
a suspend mode. Click the panel icon to open the widget.
9
Controlling Your Desktop’s Power Management 87

Figure 9.1
Which suspend modes and power proles are available, depends on the power management abilities of your system and the proles dened in the Personal Settings.
Battery Monitor Widget
The following suspend modes are widely available:
Sleep (Suspend to RAM)
Pauses your computer without logging you out. All your data and the session data
is saved to RAM. Bringing the system up again is faster than restoring a session
from disk.
Hibernate (Suspend to Disk)
Pauses your computer without logging you out. All your data and the session data
is saved to disk before the system is laid to rest. It is thus protected against data
loss should you loose power in the meantime. Waking the system up again is much
faster than booting it from scratch.
To manually suspend your computer, use the buttons in the widget or the suspend options
on logging out (see Section 1.3, “Leaving Your System” (page 11)). If supported by
the system and congured accordingly, pressing sleep buttons on your machine or
keyboard will also suspend your machine.
88 KDE User Guide

You can congure your system to automatically switch into a suspend mode after certain
events like closing the lid (if you are using a laptop) or after a period of that time that
the system has been idle. Refer to Section 9.3, “Conguring Power Management”
(page 90) for more information.
9.2 Saving Power by Using Proles
Power management proles let you adjust various power management parameters to
the requirements of certain typical situations you are facing when using your machine.
SUSE® Linux Enterprise Desktop ships with a set of four precongured proles which
you can adjust to your needs. To switch proles click the battery monitor panel icon
and select a different Power Prole. The following proles are available by default:
Performance
Keep your machine running with full power and full speed to achieve maximum
performance.
Presentation
Disable any display power management and screen savers to make sure that your
presentation is not interrupted by a blanked display or such like.
Powersave
Apply power management methods to make sure that your machine runs as long
as possible when put on battery power instead of AC power.
Aggressive Powersave
Use stricter power management methods to be applied when the battery is at low
level. This includes shorter idle intervals before triggering suspend events, reducing
screen brightness, disabling 3D effects and using CPU scaling policies that preserve
resources.
Xtreme Powersave
Apply extreme power saving by reducing screen brightness even more and using
stricter idle time and CPU scaling policies when the battery is already at warning
level.
Controlling Your Desktop’s Power Management 89

9.3 Conguring Power Management
KDE 4 lets you adjust a number of power management settings: for example, when to
trigger notications or warnings, which power prole to use when running on battery,
what to do when closing the laptop lid or pressing the power or sleep button.
Access the conguration options from the main menu by selecting Congure Desktop
> Advanced > Power Management. Alternatively, click the battery monitor icon in the
panel and click select Congure.
Figure 9.2
To get on overview of your system's power management abilities like supported suspend
methods or CPU policies, click Capabilities. Click the other categories to congure
general settings and power management proles.
Power Management Settings
90 KDE User Guide
 Loading...