

Page 1
1.0 QuickBooks Install
NOTE: Before beginning QuickBooks install, verify that the following REQUIRED
components are installed:
● eDirectory
● iManager
● Samba
For further information, see the NOWS SBE Administration and Install Guide at
http://www.novell.com/documentation/nows/
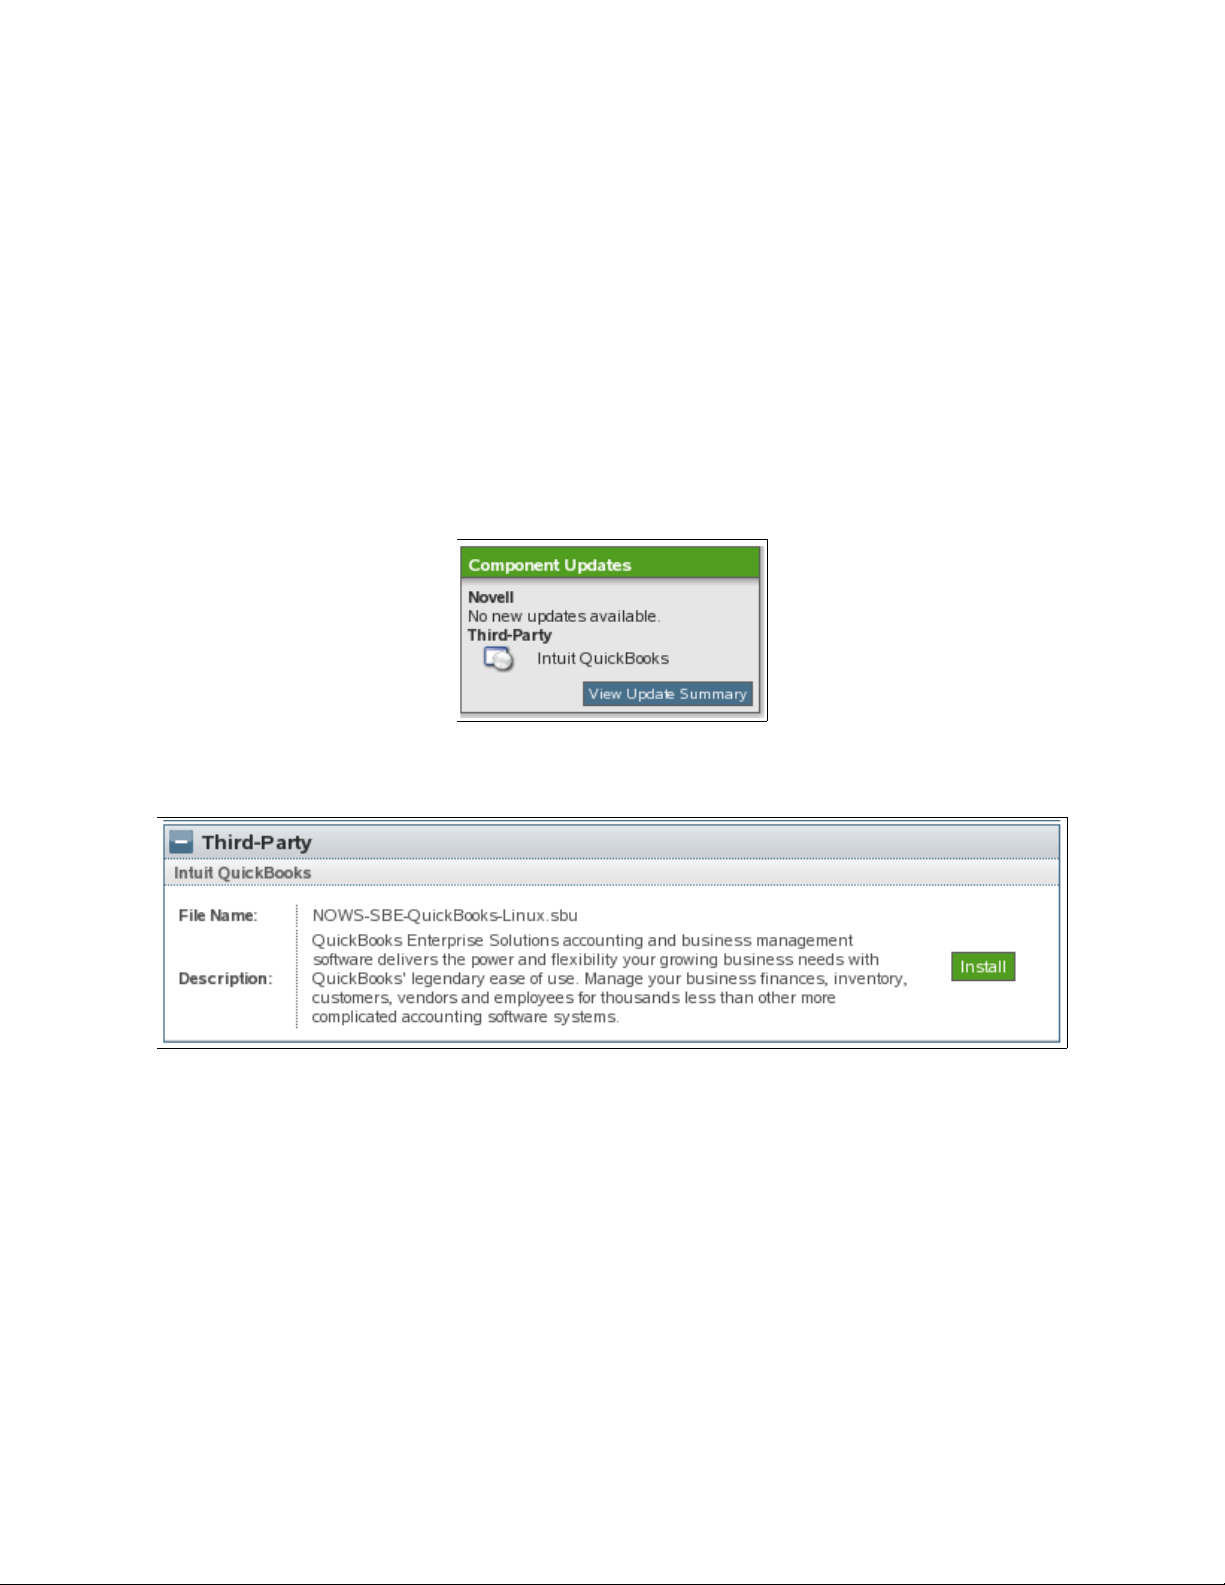
1. To begin the QuickBooks install, log in to the NOWS SBE console.
2. From the Components Updates menu, click View Update Summary.
3. From the Third-Party menu panel, under Intuit QuickBooks, click Install.
Page 2

4. Click Add/Remove under Components menu panel. Verify that iManager, eDirectory, and Samba
are installed. The specified components are required to be installed before QuickBooks.
Page 3
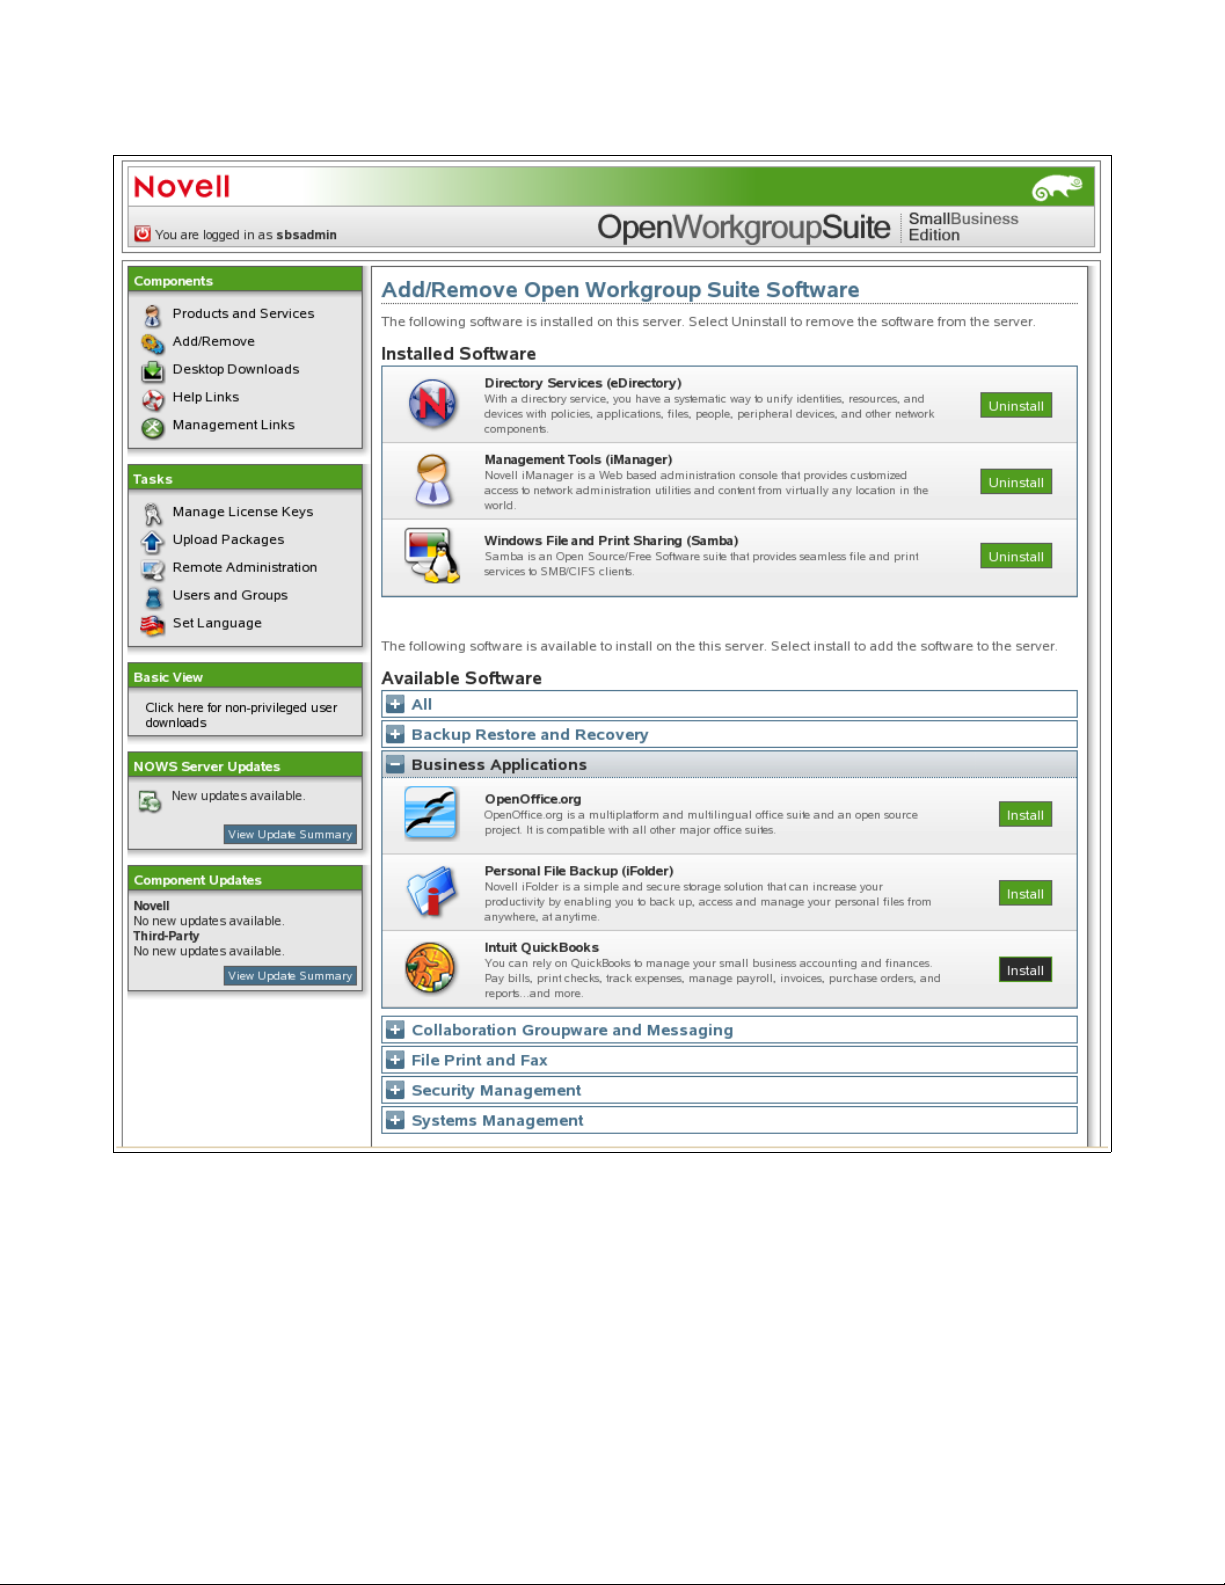
5. Click Business Applications, next to Intuit QuickBooks click Install.
Page 4
1.1 QuickBooks Basic Install
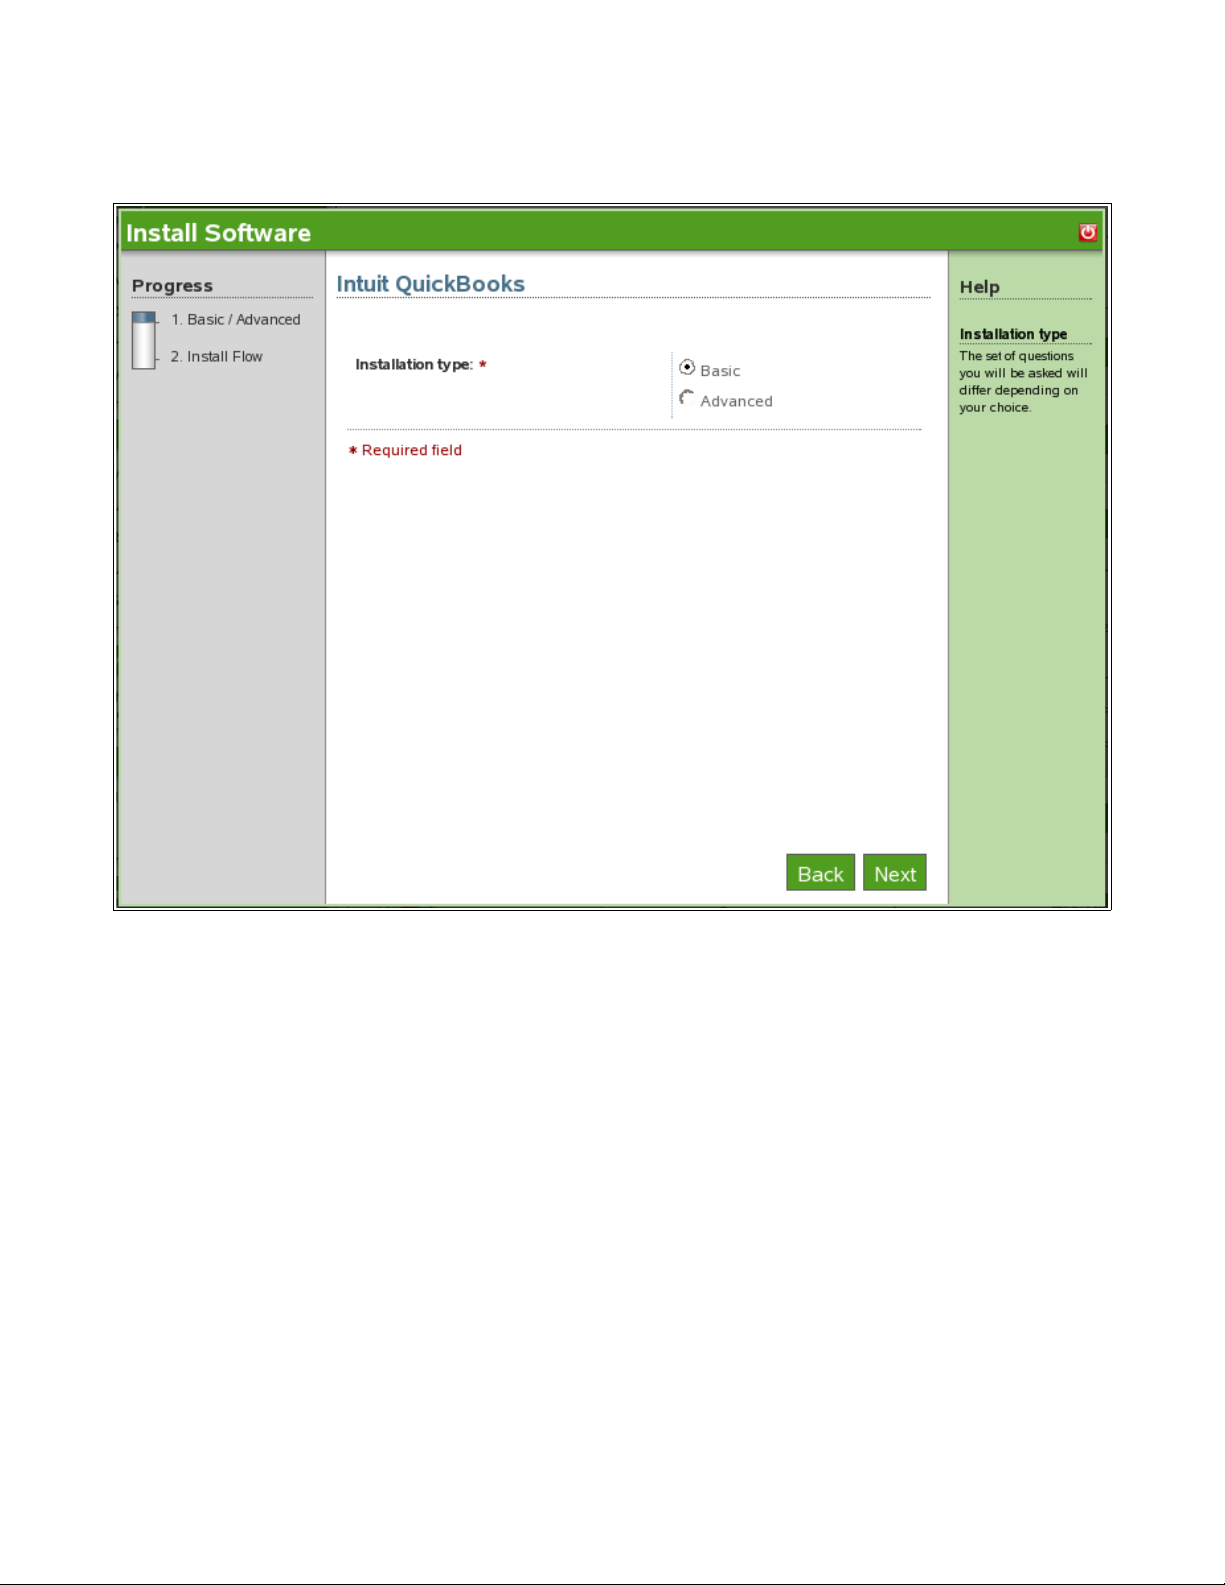
1. Select Basic, and click Next.
2. Click Next to continue with install.
Page 5
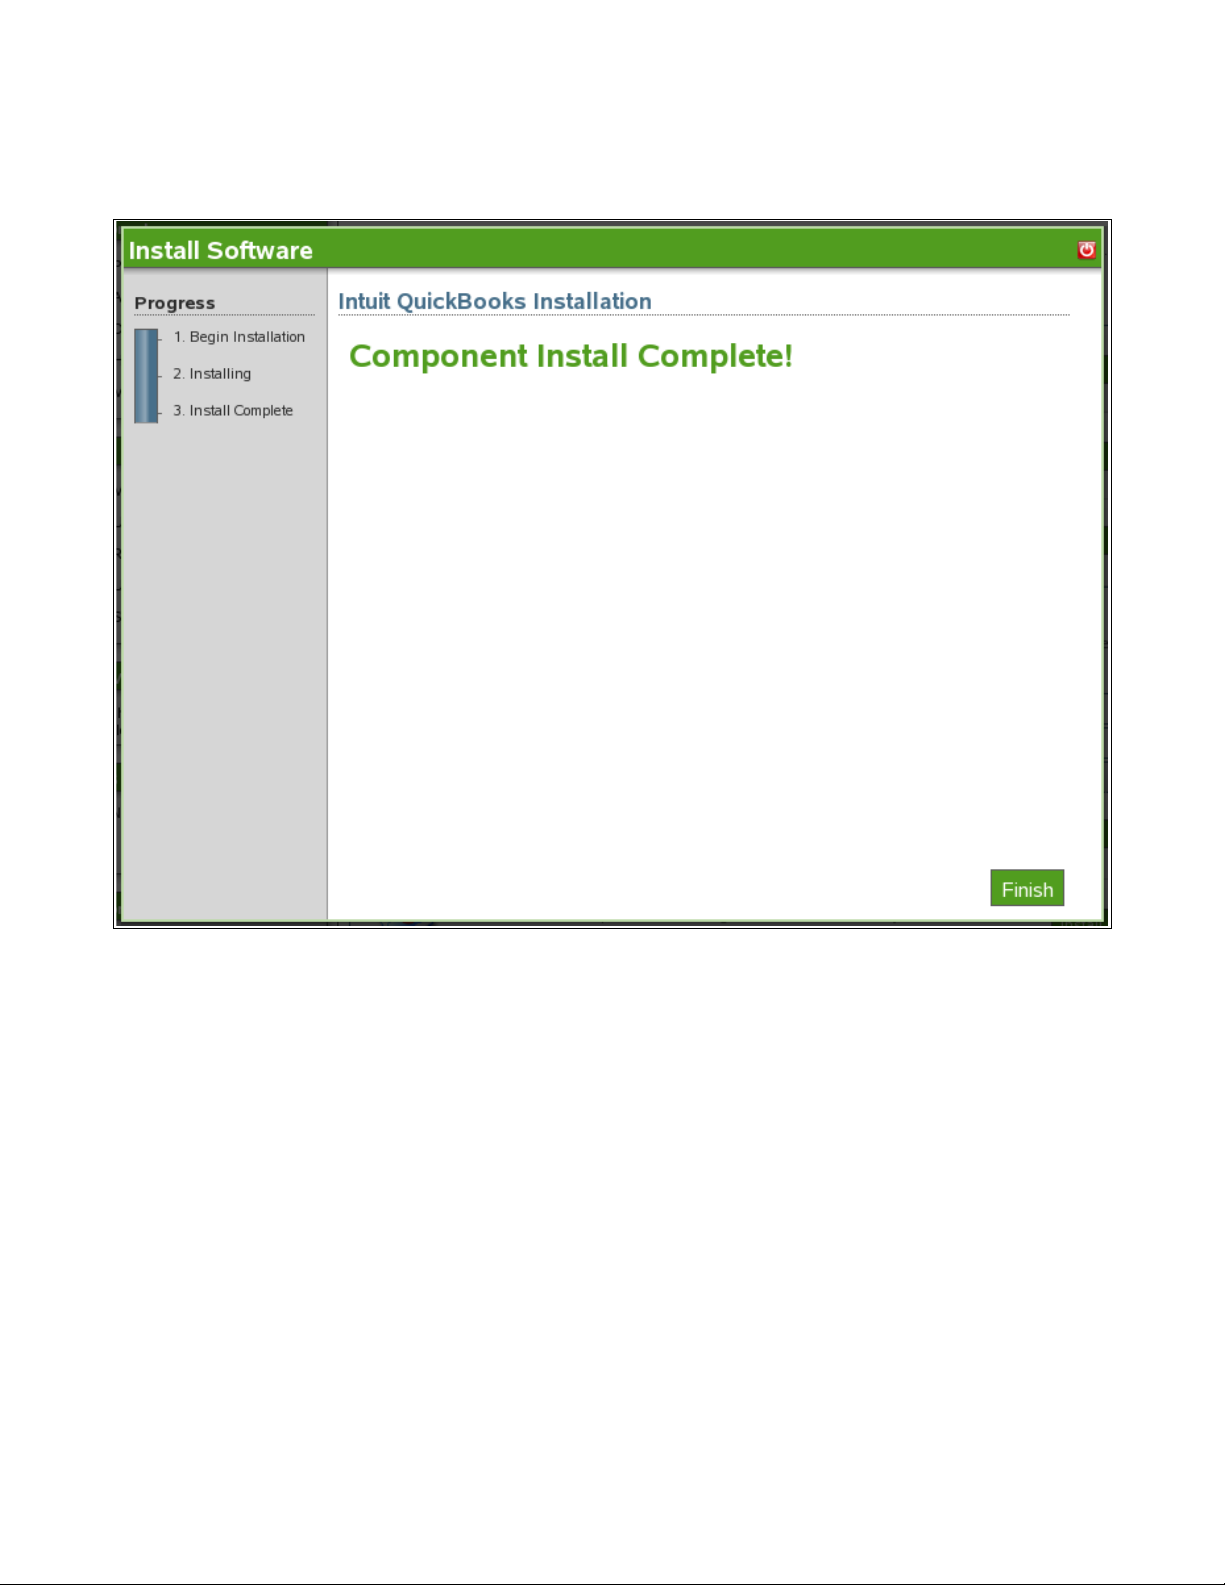
3. QuickBooks basic install is now complete. Click Finish to proceed to Installed Software page.
QuickBooks will now be listed under the installed Software list.
Page 6

2.0 Post-Installation
2.1 Creating a Samba Share for QuickBooks
1. Log in to NOWS SBE console.
2. Click Products and Services.
3. Click Windows File and Print Sharing (Samba).
4. Click Samba Administration.
5. Click Users and click Create User.
6. Specify user information and Set Simple Password, then click OK.
2.2 Creating a Samba Share for QuickBooks
2.2.1 Enabling User for Linux
1. Log on to to NOWS SBE console.
2. Click Products and Services menu panel.
3. Click Windows File and Print Sharing (Samba).
4. Click Samba Administration.
5. Next click Linux User Management.
6. Click Enable Users for Linux.
Page 7
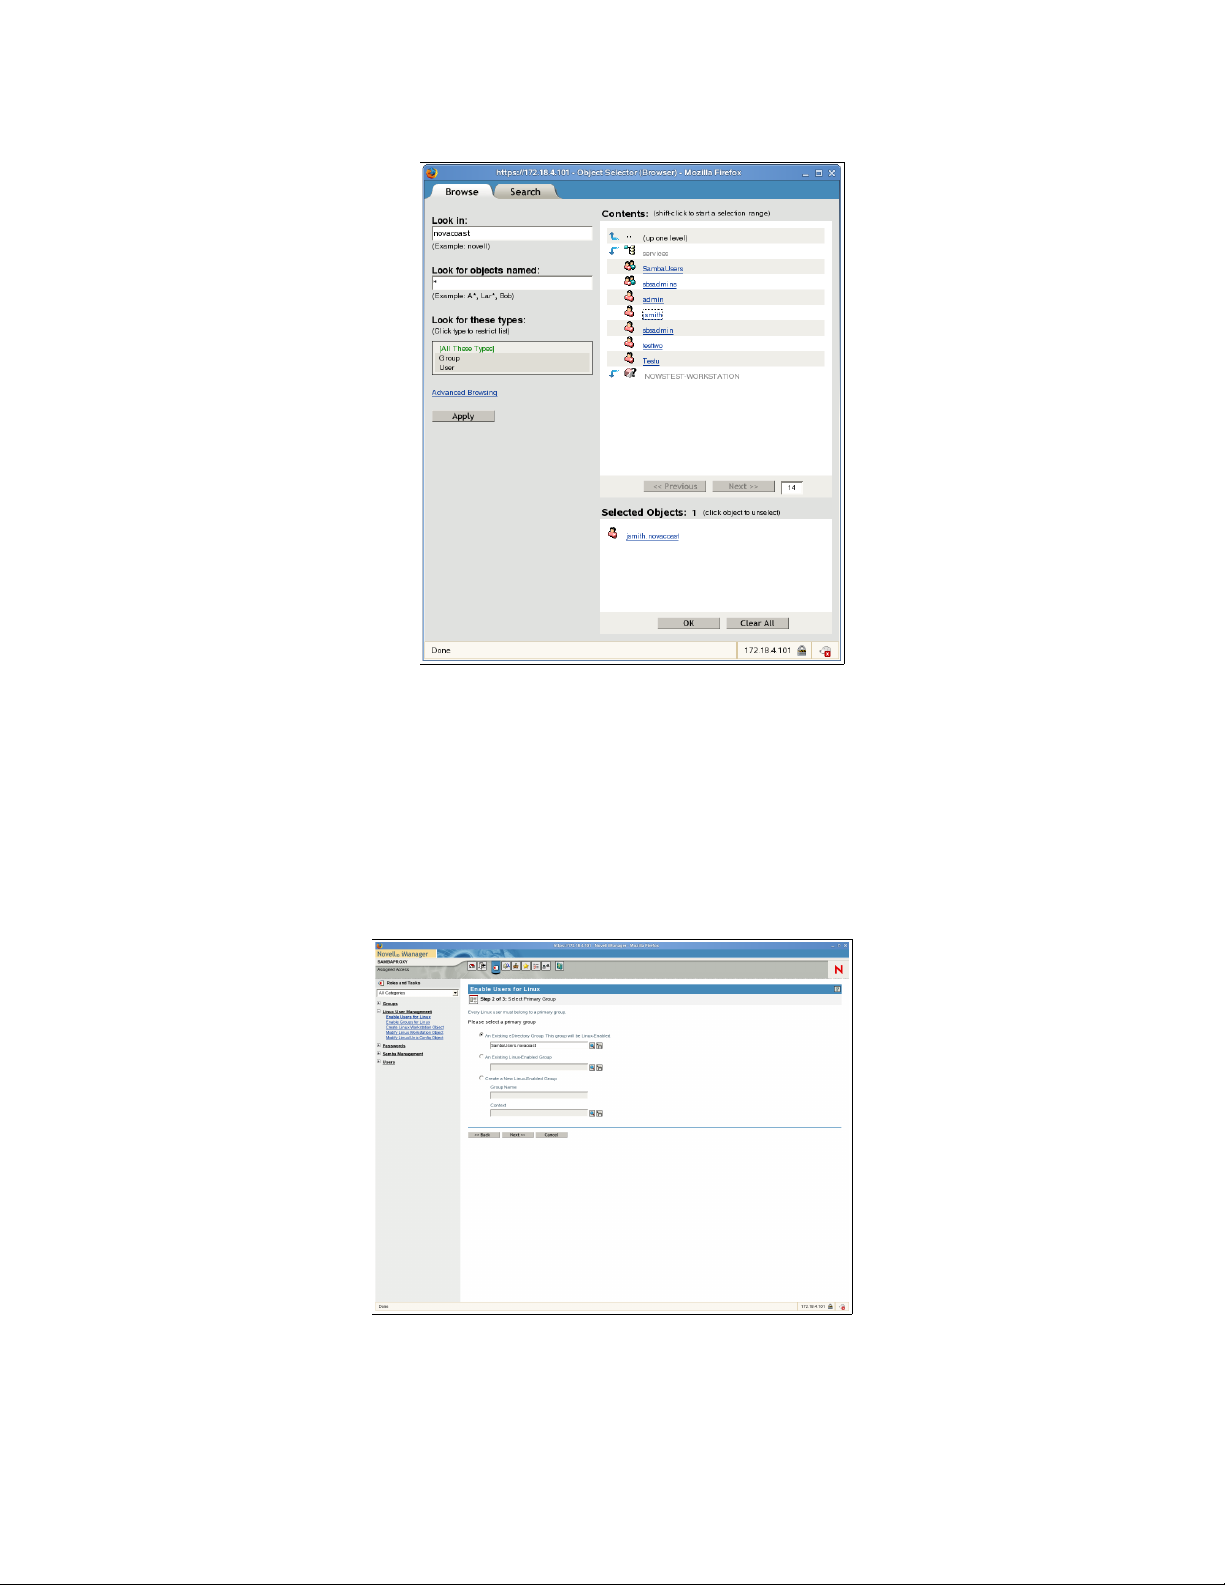
7. Click Object Selector (magnifying glass icon).
Object Selector View
8. Click the user you would like to enable and click OK.
9. Click Next, to confirm your selection.
10. Next you will need to specify a group. Click the Object Selector (magnifying glass icon) and
click SambaUsers.
11. Click Next.
Page 8
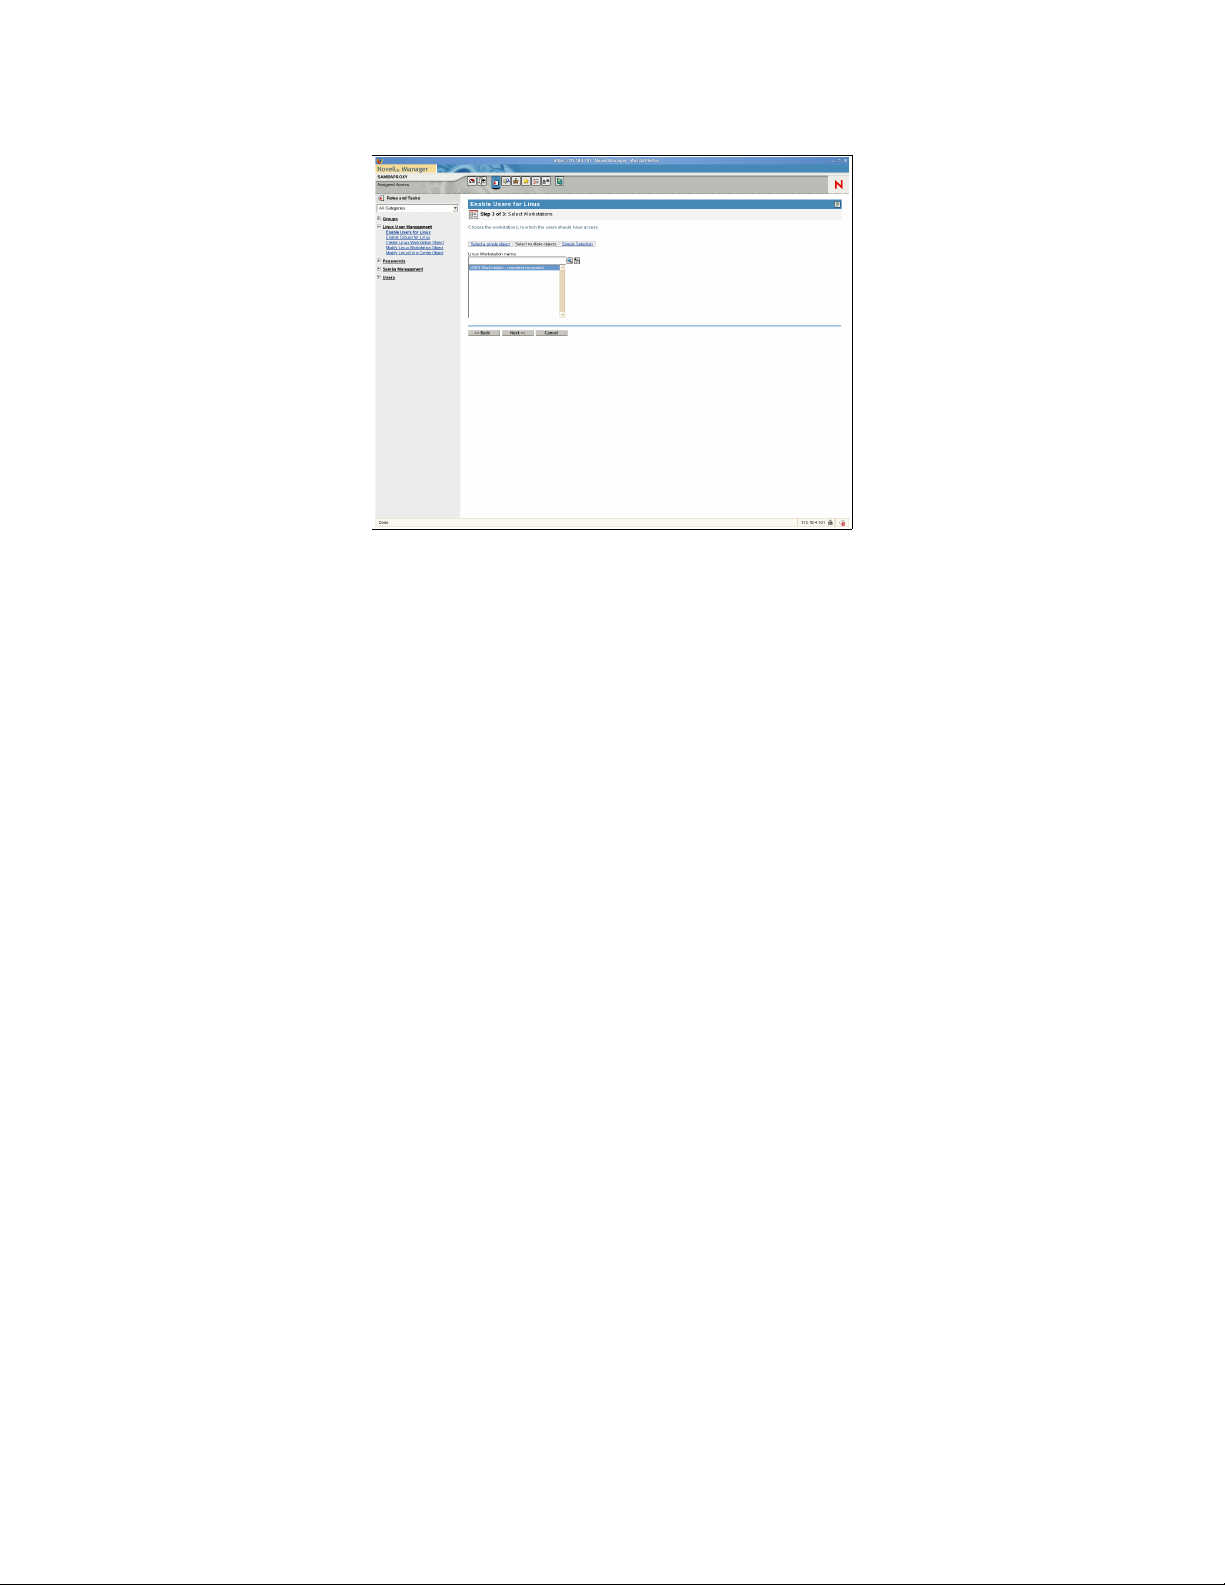
12. Click UNIX Workstation and click Next.
13. Click Finish.
14. Click OK.
2.2.2 Enabling Linux User for Samba
1. Login to NOWS SBE console.
2. Click Products and Services.
3. Click Windows File and Print Sharing (Samba).
4. Click Samba Administration.
5. Click Samba Management, and click Enable Linux User for Samba.
6. Click Object Selector (magnifying glass icon).
Page 9
7. Click desired user.
8. To authenticate through eDirectory, click OK.
9. Specify a universal password. Retype password, and click OK.
10. Click OK to finish.
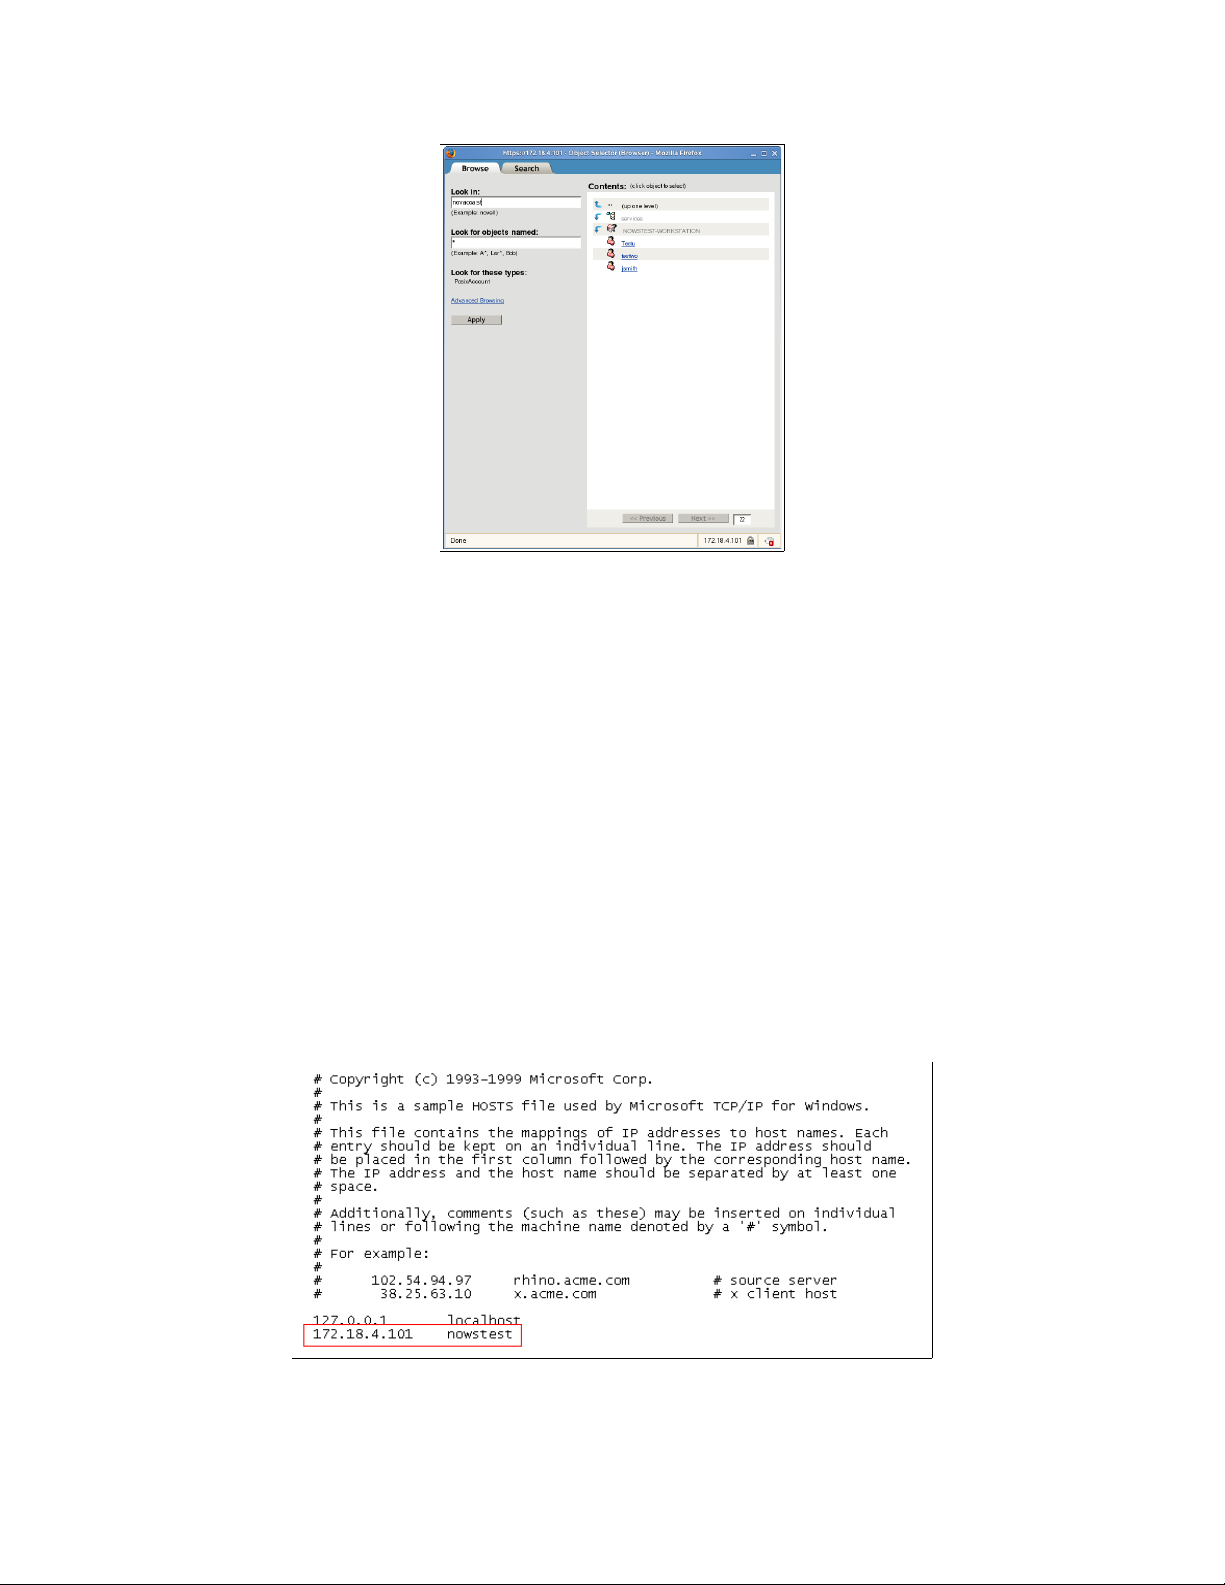
2.2.3 Configuring Windows Hosts File
1. From the Windows client that will run QuickBooks, click Start, then click Run.
2. Type notepad, press Enter.
3. Open c:\<Windows Folder>\system32\drivers\etc\hosts
4. Next add a new line at the end of the hosts file: ip_address NOWSBE_host_name
In the example below, the server is 172.18.4.101 nowstest
5. Test by pinging nowstest from a command prompt.
6. Click File and Save, then exit Notepad.
Page 10

2.2.4 Connecting Windows to Samba
1. Click Start, then click My Computer.
2. Click Tools -> Map Network Drive.
3. Type your NOWS SBE server IP address into the folder field. You will need to type \\(your
NOWS SBE server name) \QBData
4. Click Finish.
Page 11
2.2.5 Configuring QuickBooks to Save to Samba
1. Launch QuickBooks from desktop.
2. Click Create Your New Company Profile.
3. Click Start Interview.
4. Specify your company information and click Next.
5. Choose the appropriate check box and click Next.
6. Specify the month of your company's fiscal year and click Next.
7. Specify the industry of your company and click Next.
8. Specify administrator's user information.
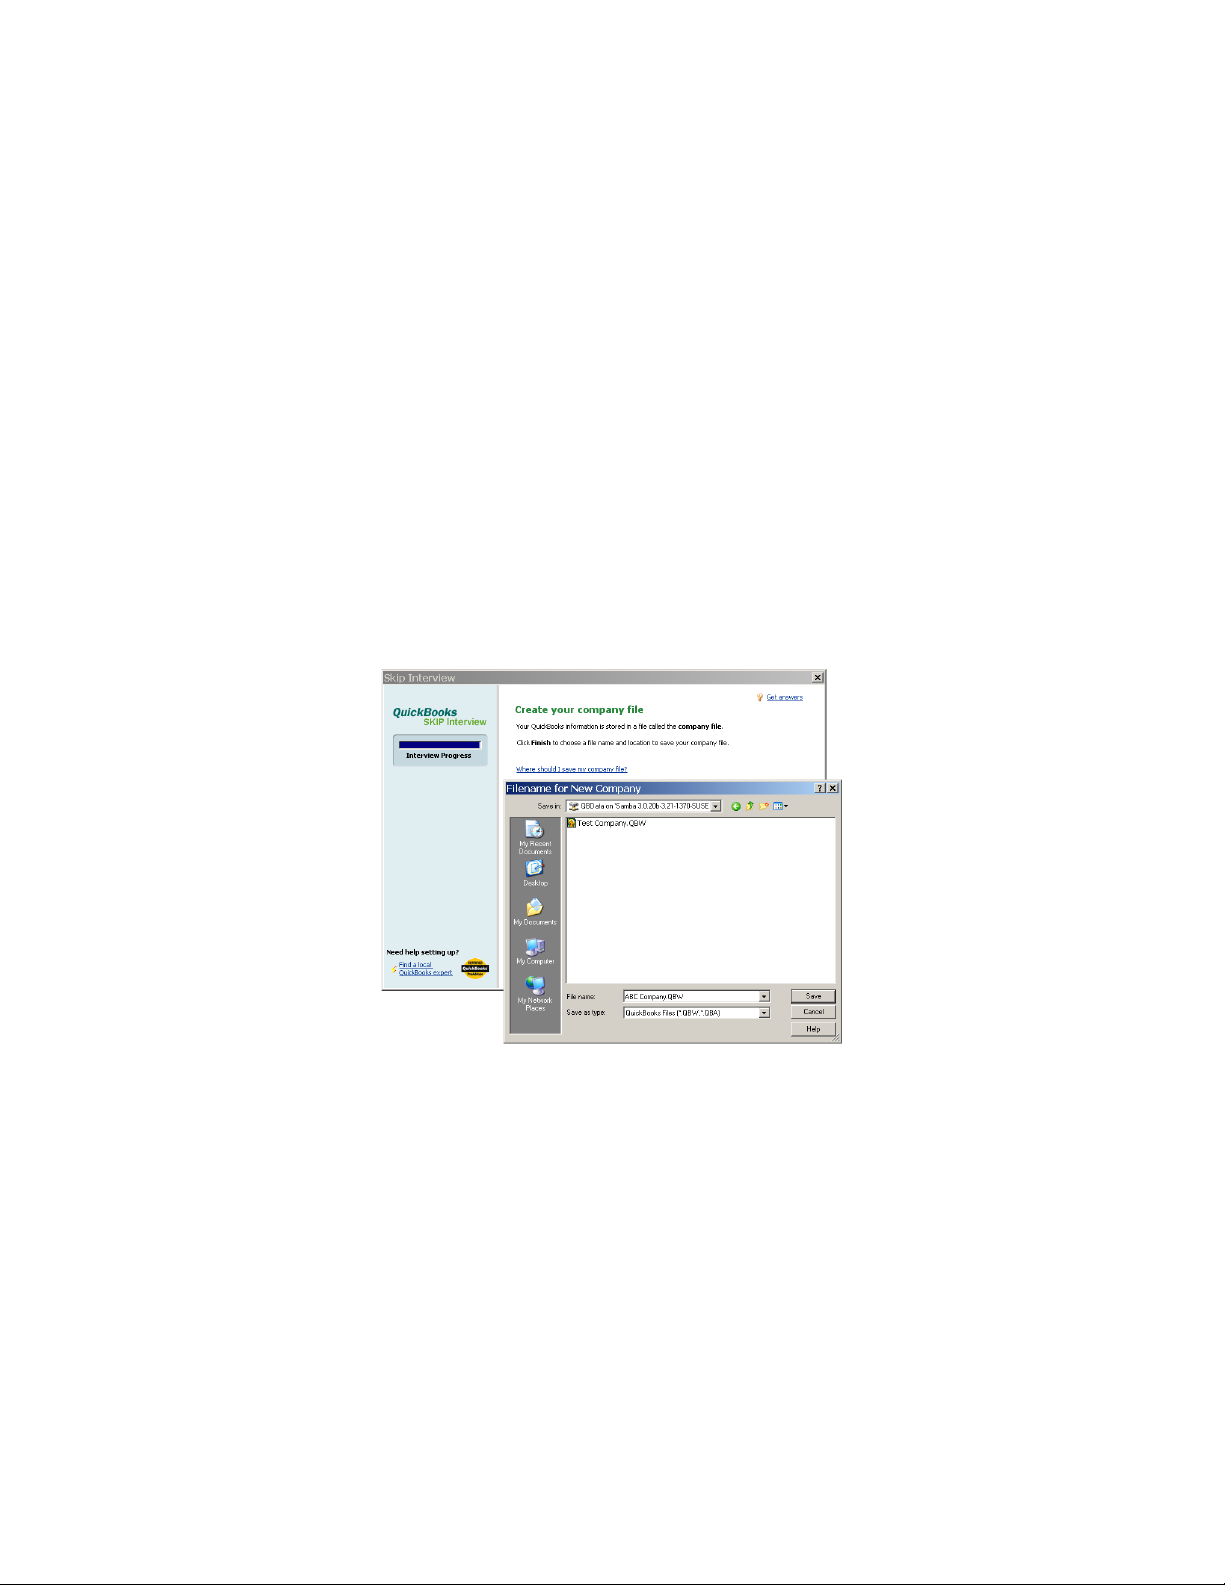
9. Click Next to save your company file. Be sure to save it to the your Samba share location.
9a. Click My Computer.
9b. Click mapped QBData folder.
9d. Click Save.
10. Specify your company's products, click Next.
11. Specify if your company charges tax, click Next.
12. Specify if you want to use sales receipts, click Next.
13. Specify if you want to use billing statements, click Next.
14. Specify if your company uses invoices, click Next.
15. Specify if you want to keep track of bills you owe, click Next.
16. Specify if you print checks, click Next.
17. Specify if your company accepts credit cards, click Next.
18. Specify if you want to track time, click Next.
Page 12

19. Specify if your company has employees, click Next.
20. Specify it you would like to setup accounts in QuickBooks, click Next.
21. Select a start date to begin tracking your finances, click Next.
22. Specify if you would like to add a bank account, click Next.
23. Specify bank information, click Next.
24. Specify bank statement information, click Next.
25. Review bank account information, click Next.
26. Review income and expense accounts, click Next.
27. You have now completed your QuickBooks setup, click Finish.
2.2.6 Switching to Multi-User Mode
To begin using QuickBooks in multi-user mode, launch QuickBooks on the server computer and open
the company file.
1. From the file menu, click File.
2. Click Switch to Multi-User Mode.
Now that you have specified multi-user mode, up to 5 users can simultaneously log into the company
file.
Page 13

2.2.7 Adding Users to the Company File
1. Click Company menu panel.
2. Click Users, and click Setup Users and Roles.
3. Click New.
4. Specify user information and user role, click OK.
5. The new user will now in the users and roles window, click Close.
2.3 Known Issues
1. Portable Backups Restore - In order to restore QuickBooks Portable Backups the files need to
be restored on the local desktop that is the client for QuickBooks. Then the files may be moved
to the NOWS SBE Samba share.
 Loading...