

Novell LINUX ENTERPRISE DESKTOP 11 - OPENOFFICE, SUSE LINUX ENTERPRISE DESKTOP 11 OPENOFFICE.org Quick Start Manual
Page 1

OpenOfce.org is a powerful open-source ofce suite that provides tools for all types of ofce tasks such as
writing texts, working with spreadsheets, creating graphics and presentations, or designing scientic formulas.
With OpenOfce.org, you can use the same data across different computing platforms. You can also open and
edit les in other formats, including Microsoft Ofce, then save them back to this format. The OpenOfce.org
Novell Edition contains improved functionality and additional features not available with the standard version.
OpenOfce.org Novell Edition
SUSE® Linux Enterprise Desktop includes the OpenOfce.org Novell Edition. This version includes several special
features that are not yet included in the standard edition:
Excel VBA Macro Interoperability:
The OpenOfce.org Novell Edition makes the migration
of many macros from Microsoft Excel easier.
Data Pilots
Data Pilots are interoperable with Microsoft Ofce PivotTables*. The OpenOfce.org Novell Edition substantially
improves the Data Pilot feature, making it possible to
edit pilots after creation.
Special Fonts:
Licensed fonts from Agfa* Monotype*, which are metrically identical and visually compatible with some of the
key Microsoft fonts.
EMF+ Support:
The ability to render EMF+ formatted graphics.
SVG Support:
The ability to import scalable vector graphics.
GroupWise® Integration:
The OpenOfce.org Novell Edition includes improved
integration with ODMA (Open Document Management
Architecture) services, for example for GroupWise.
You can also use the OpenOfce.org standard version, rather
than the The Novell Edition. If you install the latest version
of OpenOfce.org, all of your Novell Edition les remain
compatible. However, the standard edition does not contain
the enhancements made in the Novell Edition.
Compatibility
OpenOfce.org can work with documents, spreadsheets,
presentations, and databases in many other formats, including Microsoft Ofce. They can be seamlessly opened like
other les and saved back to the original format. Though
some work has already been invested in interoperability,
occasionally there are still formatting issues. If you have
problems with your documents, consider opening them in
the original application and resaving them in an open format
such as RTF for text documents. In case of migration problems with spreadsheets however, it is advisable to resave
them as Excel les and use this as intermediate format (with
CSV format you would lose all cell formatting and CVS
sometimes leads to incorrect cell type detection for
spreadsheets).
OpenOfce.org Modules
OpenOfce.org consists of several application modules
(subprograms), which are designed to interact with each
other. All modules feature the same graphical user interface
and similar functionality.
OpenOfce.org Quick Start
SUSE Linux Enterprise Desktop 11
NOVELL® QUICK START CARD
1
Page 2
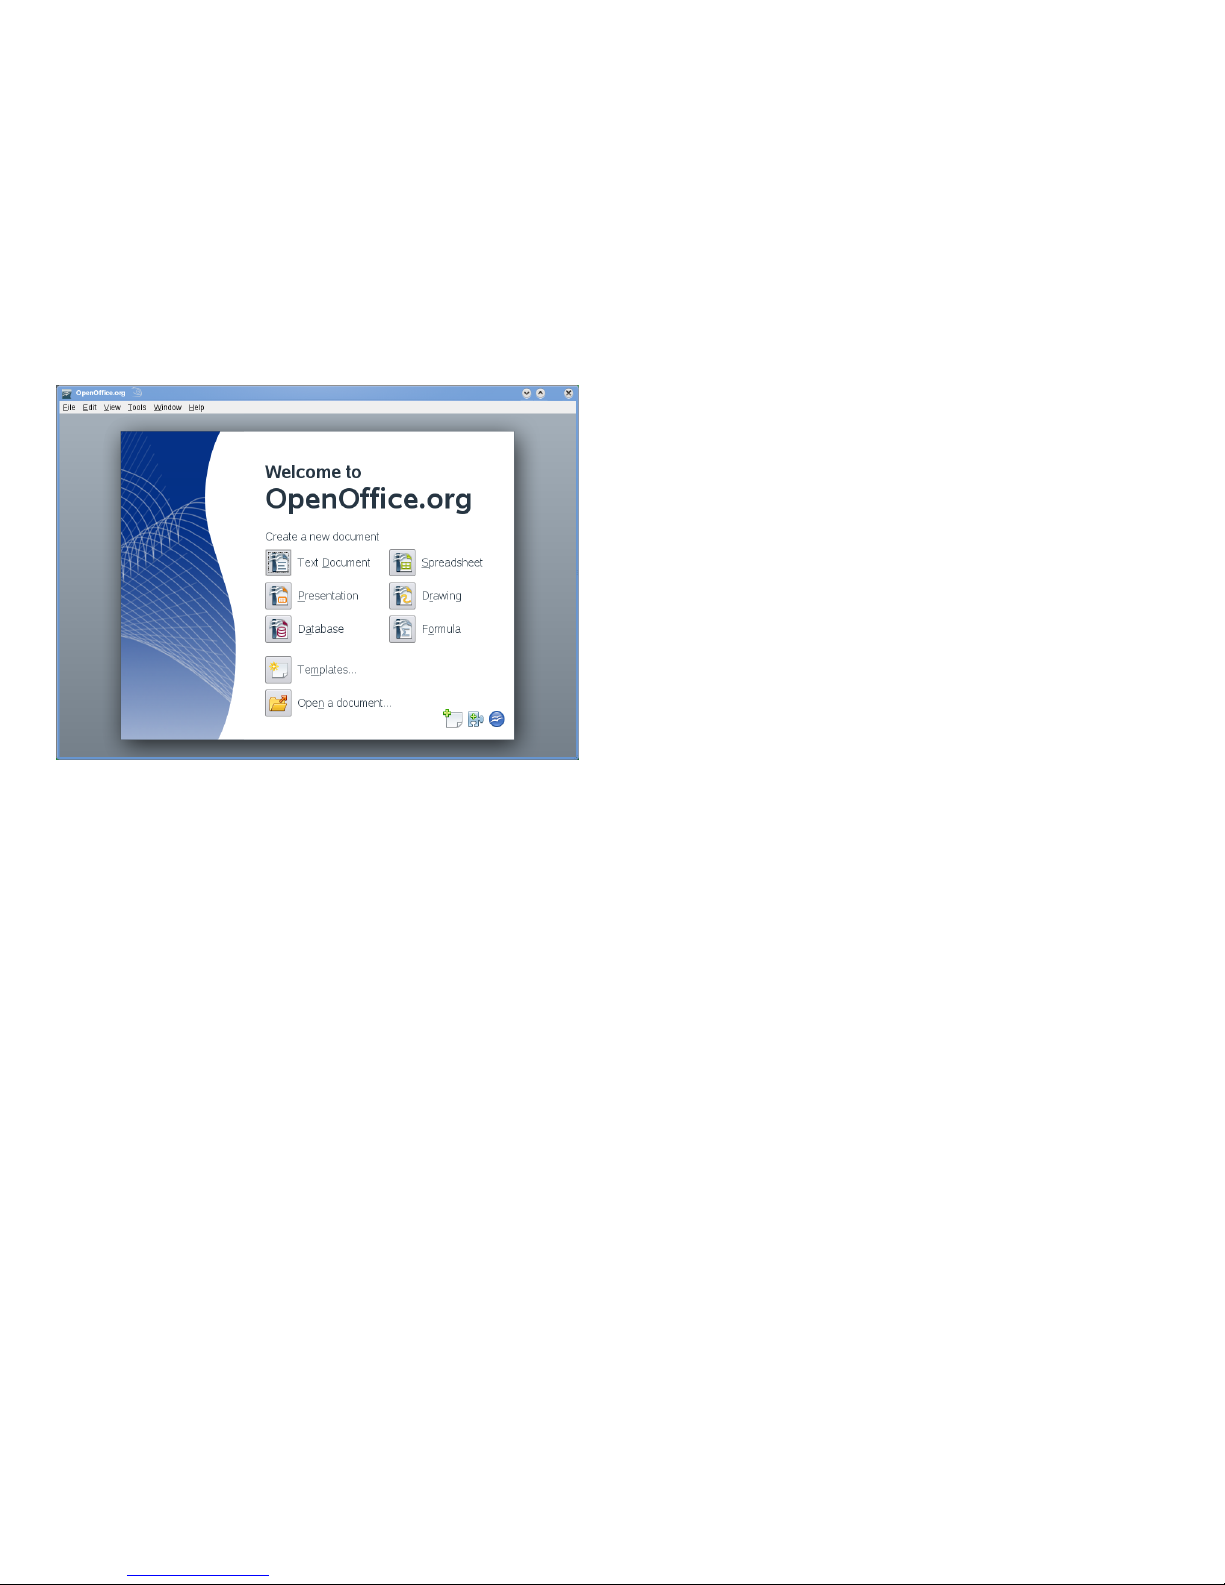
Table 1. The OpenOfce.org Modules
UsageModule
Text document moduleWriter
Spreadsheet moduleCalc
Presentation moduleImpress
Database moduleBase
Vector graphics moduleDraw
Mathematical equation moduleMath
Starting OpenOfce.org
To start the OpenOfce.org suite, press Alt + F2, type
ooffice and press Enter. In the Welcome dialog, select
the module you want to open. If an OpenOfce.org application is open, you can start any of the other applications
by clicking File → New → Name of Application.
Saving OpenOfce.org Files
1. To save a new le, select File → Save or Save as from
the Menu Bar or use the shortcut Ctrl + Shift + S.
2. Select the directory where you want to save the le.
3. Enter the lename in the Location box.
4. From the Filter box, select the le type in which you
want to save the le.
In all modules you can save your documents as native
OpenOfce.org les, OpenOfce.org templates, Microsoft
les and StarOfce les.
Navigator and Navigation Shortcuts
The Navigator tool displays information about the contents
of a document. It also lets you quickly jump to different
elements. For example, you can use the Navigator to get a
quick overview of all images included in the document. To
open the Navigator, click Edit → Navigator or with F5. The
elements listed in the Navigator vary according to the
document loaded in Writer.
You can also navigate your les with the following shortcuts:
Table 2. Navigation Shortcuts
ShortcutAction
Ctrl + Del or Ctrl + <—Delete Word
Ctrl + EndEnd of Document
EndEnd of Line
Ctrl + ASelect All
HomeStart of Line
Ctrl + HomeTop of Document
Ctrl + ←Word Left
Ctrl + →Word Right
Using and Creating Templates
OpenOfce.org comes with a set of predened templates,
and you can nd additional templates on the Internet. If
you want to create your own templates, you need to determine what you want the document to look like and create
the styles you need in that template.
For text document, spreadsheets, presentations, and drawings, you can easily create a template from an existing
document as follows:
1. Start OpenOfce.org and open or create a document
that contains the styles that you want to use as a template.
2. Click File → Templates → Save.
3. Specify a name for the template.
4. In the Categories box, click the category where you
want to place the template.
5. Click OK.
OpenOfce.org Writer
OpenOfce.org Writer is a full-featured word processor
with page and text-formatting capabilities. Its interface is
similar to interfaces for other major word processors, and
it includes some features that are usually found only in expensive desktop publishing applications. Many of the
OpenOfce.org Writer features apply also to other
OpenOfce.org modules.
What is New in Writer
Below is a list of new features:
Displaying Multiple Pages in Editing Mode
OpenOfce.org now includes a set of icons at the right
corner of the status bar which allow you to display multiple pages in the editing mode. With the slide bar, zoom
seamlessly in and out of the document. When zooming
out, OpenOfce.org displays more pages of your document.
2
Page 3
Display and Usability of Notes
When editing or reviewing a document, users can add
notes to the text. In contrast to earlier versions of
OpenOfce.org where notes were only shown as small
rectangles within the text, the notes are now displayed
on the side of the document. Notes from different users
are displayed in different colors and also show editing
date and time.
The OpenOfce.org Novell Edition includes additional features available also in Writer, like enhanced fonts, support
of certain le formats and GroupWise integration.
Creating a New Document
There are two ways to create a new document:
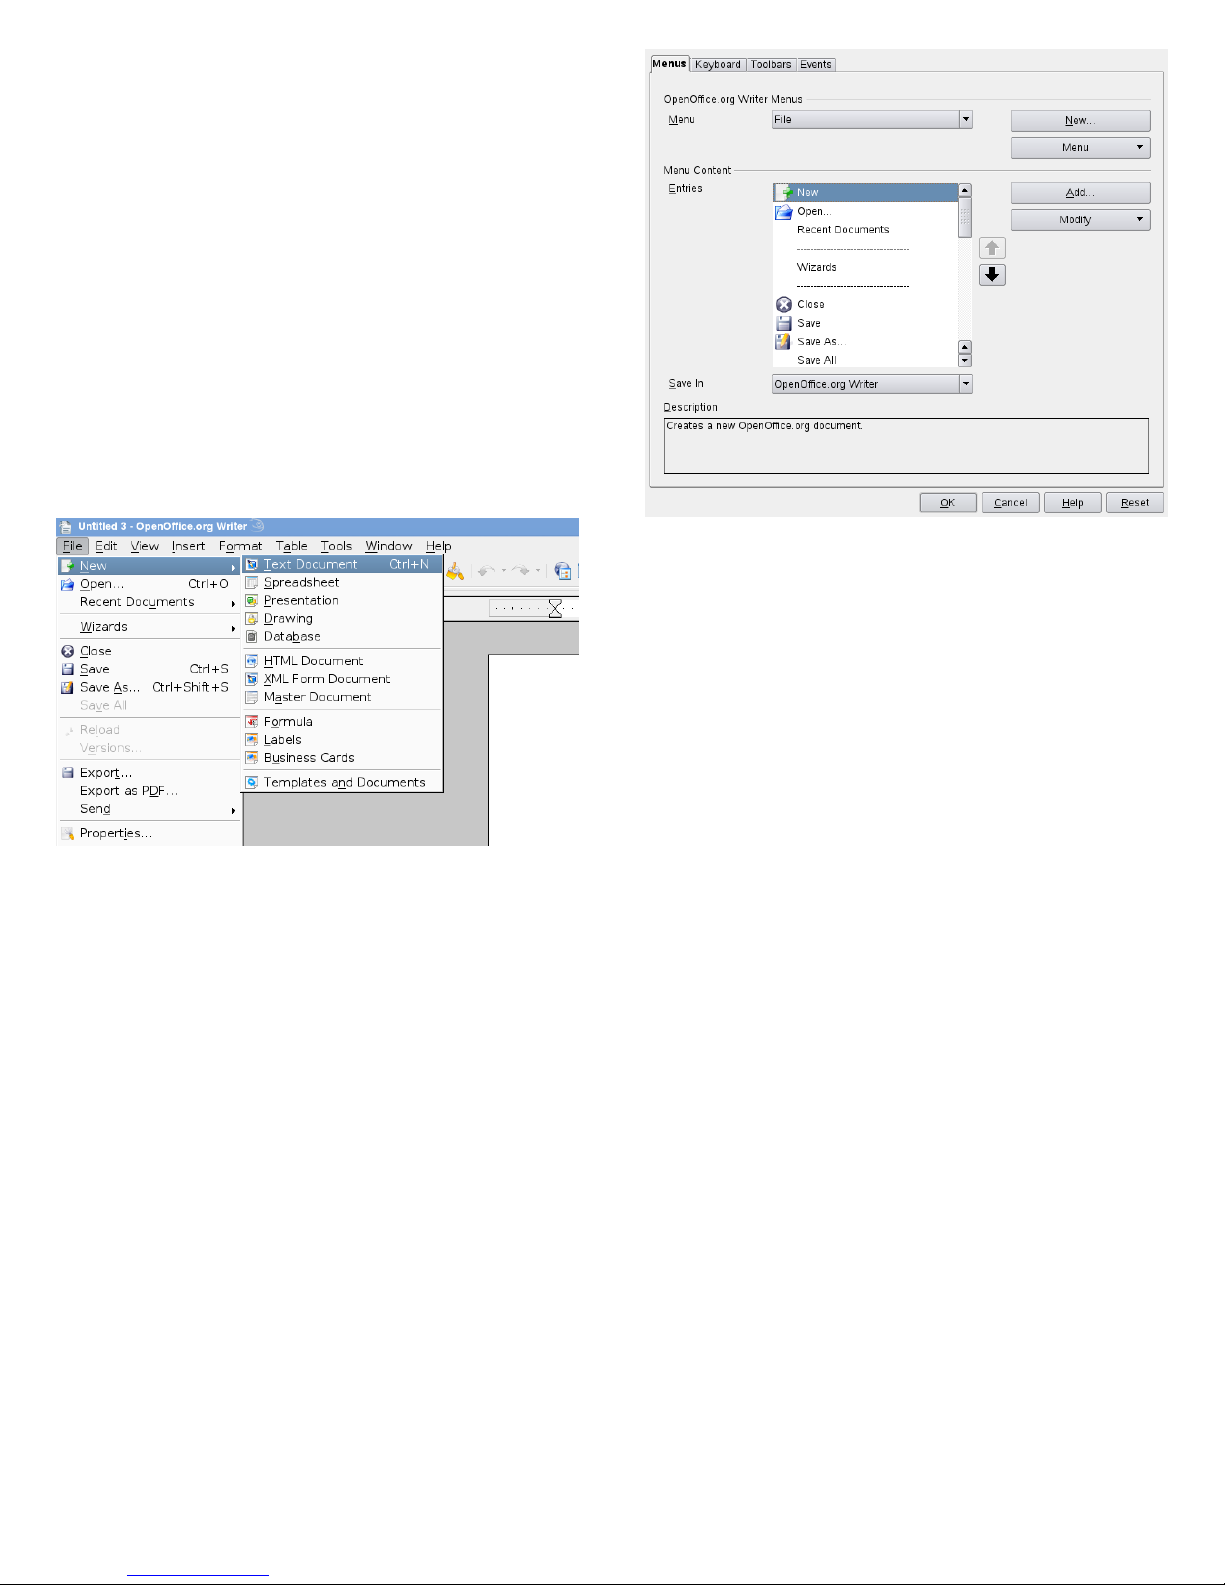
To create a completely new document, click File → New →
Text Document.
To use a standard format and predened elements for your
own documents, try a wizard (a small utility that lets you
make some basic initial decisions and then produces a
ready-made document from a template). For example, to
create a business letter, click File → Wizards → Letter. With
the wizard's dialogs, you can create a basic document that
uses a standard format.
Enter text in the document window as desired. Use the
Formatting toolbar or the Format menu to adjust the appearance of the document. Use the File menu or the relevant buttons in the toolbar to print and save your document. With the options under Insert, add extra items to
your document, such as a table, picture, or chart.
Customizing OpenOfce.org
With OpenOfce.org you can customize the default settings
with the Format menu.
Below is a list of the most popular options available in most
modules:
Customizing Character Settings
To set all character elements at the same time, select
Format → Character.
Customizing Paragraph Settings
To format paragraphs, select Format → Paragraph and
select the appropriate tabs for making changes.
Customizing Alignment
To modify the alignment, select Format → Paragraph
and choose the alignment you want.
Inserting Headers and Footers
If you want to add headers and footers, click Insert and
select either Header or Footer.
Inserting Special Characters
If you want to insert special characters, select Insert →
Special Character.
Inserting Footnotes
If you want to insert footnotes, click Insert and select
Footnote.
Inserting Columns
If you want to insert columns, click Insert and select
Columns.
Inserting Indexes and Table of Contents
If you want to insert indexes or a table of contents, click
Insert and select Indexes and Tables.
The Object Toolbar offers additional text formatting options.
3
Page 4
Using Master Documents
If you are working with a very large document (such as a
book), you might nd it easier to manage the book with a
master document, rather than keeping the book in a single
le. A master document enables you to quickly apply formatting changes to a large document or to jump to each
subdocument for editing.
A master document is a Writer document that serves as a
container for multiple Writer les. You can maintain chapters or other subdocuments as individual les collected in
the master document. Master documents are also useful if
multiple people are working on a document. You can separate each person’s relevant part of the document into subdocuments, allowing multiple writers to work on their subdocuments at the same time without fear of overwriting
each other’s work.
1. Click New → Master Document.
or
Open an existing document and click File → Send →
Create Master Document.
2. Insert subdocuments.
3. Click File Save.
The OpenOfce.org help les contain more complete information about working with master documents. Look for
the topic entitled Using Master Documents and Subdocu-
ments.
Using Writer as HTML Editor
In addition to being a full-featured word processor, Writer
also functions as an HTML editor. Writer includes HTML
tags that can be applied as you would any other style in a
Writer document. You can view the document as it will appear online, or you can directly edit the HTML code.
1. Click File → New → HTML Document.
2. Press F11 to open the Styles and Formatting window.
3. Click the arrow at the bottom of the Styles and Format-
ting window.
4. Select HTML Styles.
5. Create your HTML document, using the styles to tag
your text.
6. Click File → Save As.
7. Select the location where you want to save your le,
name the le, and select HTML Document (.html) from
the Filter list.
8. Click OK.
If you prefer to edit HTML code directly, or if you want to
see the HTML code created when you edited the HTML le
as a Writer document, click View → HTML Source. In HTML
Source mode, the Formatting and Styles list is not available.
The rst time you switch to HTML Source mode, you are
prompted to save the le as HTML, if you have not already
done so.
Tables
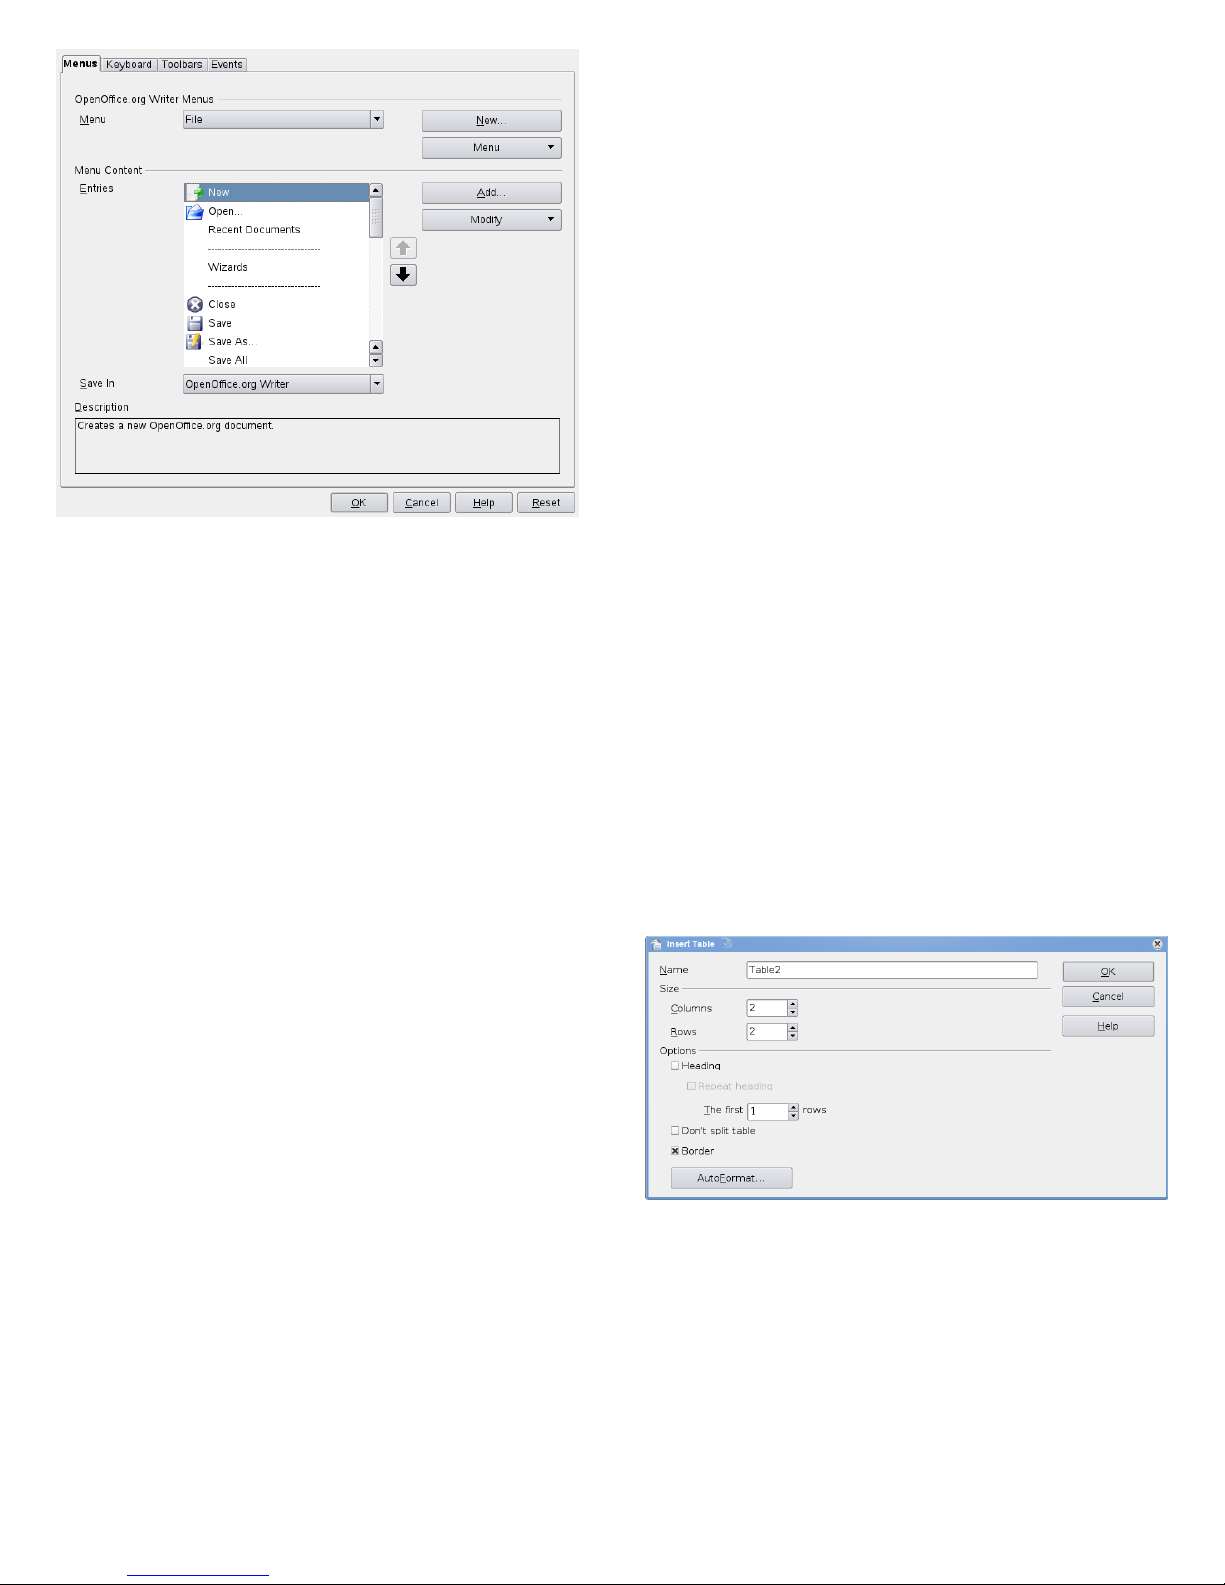
You can include tabular data in the Writer, Impress and
Draw module. Insert basic tables directly into your document either with the following menus items or by using the
toolbar:
• Insert → Table,
• Table → Insert → Table,
• or use the Table icon.
To enter data, select a cell with your mouse pointer and
begin typing. To move around cells, use the arrow keys. →|
moves to the next cell, skipping over the contents of the
cell and Shift + →| moves backwards.
You can use Table menu or the Table toolbar to modify the
table.
4
Page 5
OpenOfce.org Calc
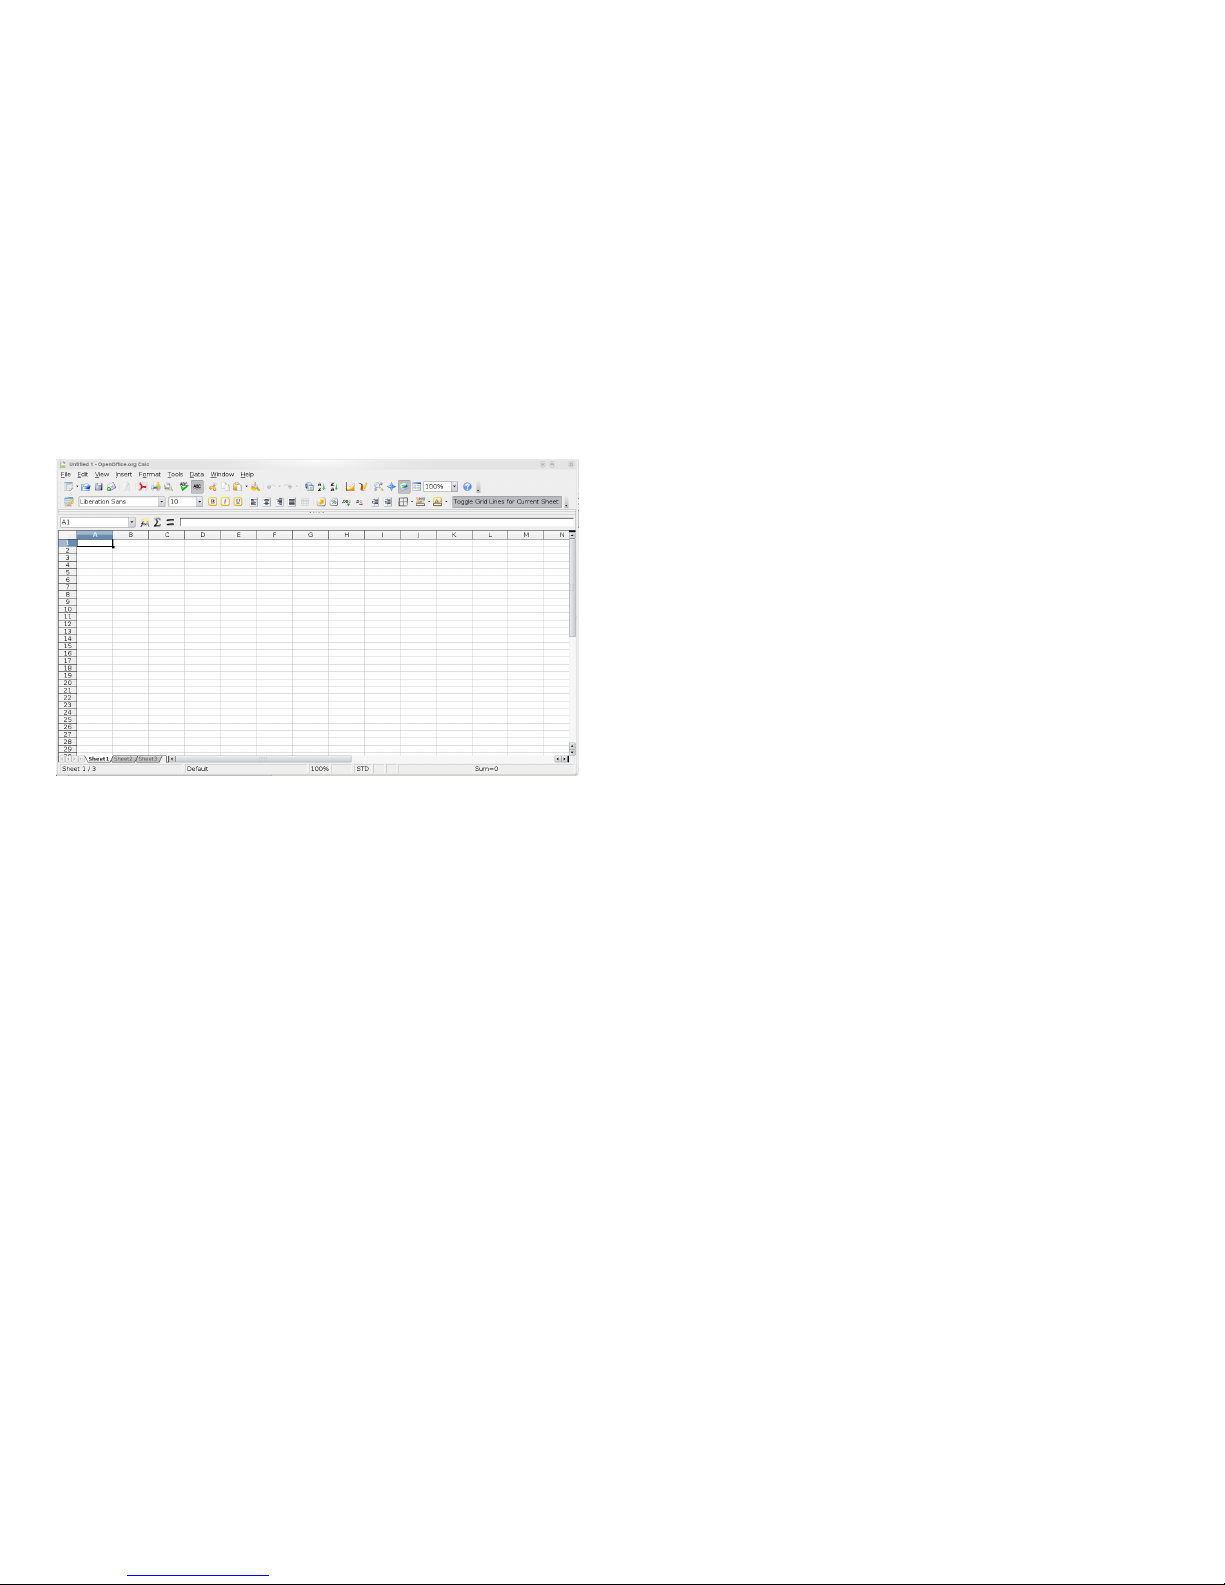
Calc is the OpenOfce.org spreadsheet and data-plotting
module. Spreadsheets consist of a number of sheets, containing cells which can be lled with elements like text,
numbers, or formulas. A formula can manipulate data from
other cells to generate a value for the cell into which it is
inserted. Calc also allows you to dene ranges, lter and
sort the data, or create charts from the data to present it
graphically. By using DataPilots, you can combine, analyze
or compare larger amounts of data.
As with the entire OpenOfce.org suite, Calc can be used
across a variety of platforms. It provides a number of exchange formats (including export to PDF documents), and
can also read and save les in Microsoft Excel's format.
What is New in Calc
Below is a list of new features for Calc:
Spreadsheet Collaboration
It is now possible to share a spreadsheet with other users.
To do so, click Tools → Share Document. In the dialog
that appears, activate the sharing mode and save the
document. This creates a lock le .~sharing
.filename.ods# in the same directory to store the
list of users who are currently accessing the document.
When a different user, tux, opens the le, he or she is
informed of the sharing mode and can make the changes
to the le. User may now save changes. If the document
has been modied by another user in the meantime, an
alert appears. Upon saving the document, the changes
of both users will be merged.
NOTE: Access Permissions
Note that all writers working on the shared
document need writing permission for both the
shared le and the lock le.
Higher Number of Columns Per Calc Sheet
Instead of only 256 columns per spreadsheet, OpenOfce.org can now handle 1024 columns per spreadsheet.
The OpenOfce.org Novell Edition includes the following
additional features available in Calc:
Variable Formula Syntax Support (Calc A1, Excel A1, and
Excel R1C1)
Accessible from the Options dialog: Click Tools → Op-
tions → OpenOfce.org Calc → Calculate and select the
respective Formula Syntax.
Support of External Range Names
Allows users to access named ranges in external documents, as in Microsoft Excel. For example,
SUM('file:///external.ods'#NamedRange)
Support for Encrypted Excel Export
Allows you to save to an *.xls le with password and
encrypt its content. Click File → Save As ... and select the
Microsoft Excel 97/2000/XP (.xls) format. Set the checkbox Save with password, save and type your password.
Protecting Sheets
Allows you to protect sheets and the contents of locked
cells with a password. Click Tools → Protect Document
→ > Sheet to access the available options.
Changing Source Data Ranges of DataPilots
Allows you to change the source data range of a DataPilot after the table has been created.
Toggling Grid Lines Per Sheet
Allows you to hide or show the grid lines individually for
each sheet. The grid line settings are saved with the
document. Access the function from the right end of the
toolbar.
Argument Separators in Formula Expressions
The argument separators in formula expression are dependent on locales. You can use a comma instead of a
semicolon as a separator for expressions. For example,
you can write =SUM(A1,A2,A3) instead =SUM(A1;
A2;A3).
Creating a New Document
Start OpenOfce.org and select File → New → Spreadsheet
to create a new spreadsheet. Access the individual sheets
by clicking the respective tabs at the bottom of the window.
Enter data in the cells as desired. To adjust appearance, either use the Formatting toolbar or the Format menu—or
dene styles. Use the File menu or the relevant buttons in
the toolbar to print and save your document.
Customizing OpenOfce.org Calc
Calc comes with a few built-in cell and page styles to improve the appearance of your spreadsheets and reports.
Although these built-in styles are adequate for many uses,
you will probably nd it useful to create styles for your own
frequently-used formatting preferences.
Creating a Style
1. Click Format → Styles and Formatting.
5
Page 6
2. In the Styles and Formatting window, click either the
Cell Styles or the Page Styles icon.
3. Right-click in the Styles and Formatting window, then
click New.
4. Specify a name for your style and use the various tabs
to set the desired formatting options.
5. Click OK.
Modifying a Style
1. Click Format → Styles and Formatting.
2. In the Formatting and Styles window, click either the
Cell Styles or the Page Styles icon.
3. Right-click the name of the style you want to change,
then click Modify.
4. Change the desired formatting options.
5. Click OK.
Other OpenOfce.org Modules
Besides OpenOfce.org Writer and OpenOfce.org Calc,
OpenOfce.org also includes the modules Impress, Base,
Draw, and Math. With these you can create presentations,
design databases, draw up graphics and diagrams and create
mathematical formulas.
Using Presentations with Impress
Use OpenOfce.org Impress to create presentations for
screen display or printing, such as slide shows or transparencies. If you have used other presentation software, you can
move comfortably to Impress, which works very similarly
to other presentation software.
Impress can open and save Microsoft Powerpoint presentations, which means you can exchange presentations with
Powerpoint users, as long as you save your presentations
in Powerpoint format.
The OpenOfce.org Novell Edition allows you to use 3D
transitions for your slides. Access the available transitions
by selecting Slide Show → Transitions.
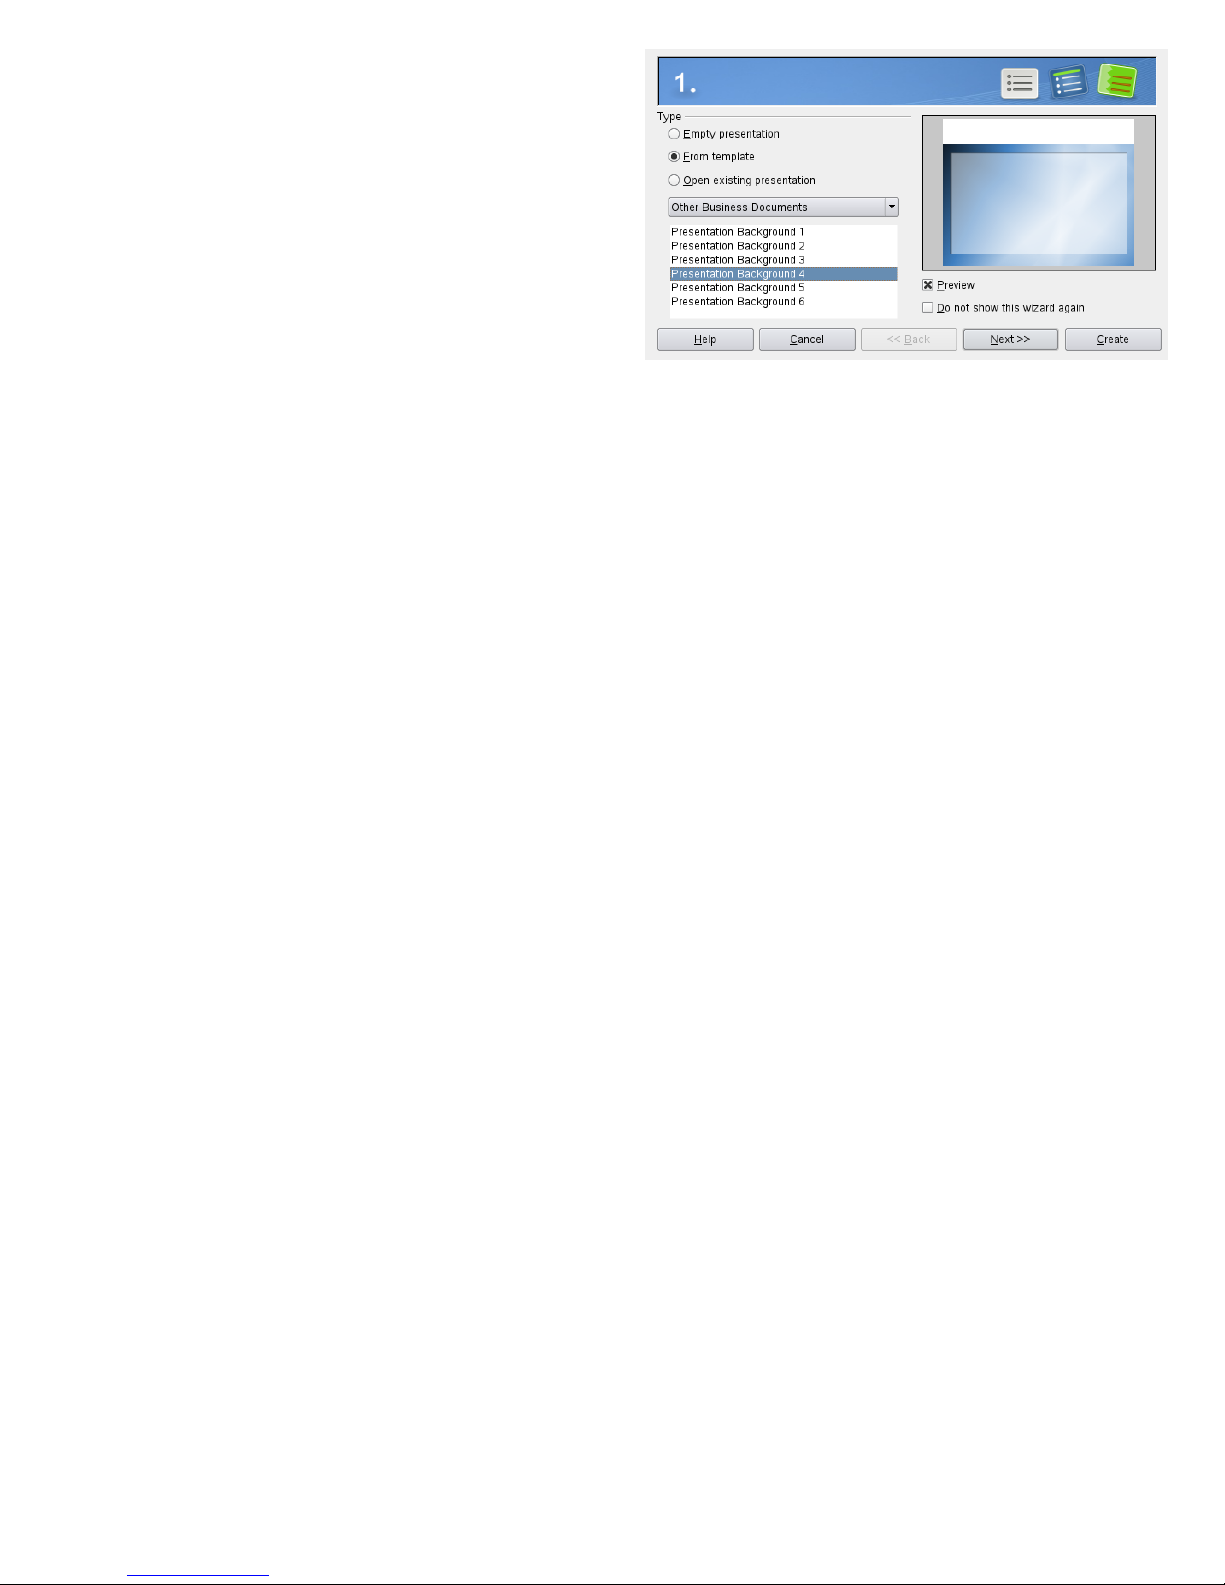
You can either create a brand new presentation (without
any preformatted slides) or use an existing template or
presentation for your new document. Impress uses styles
and templates the same way other OpenOfce.org modules
do. A wizard leads you through the options available for
creating new presentations.
Using Databases with Base
OpenOfce.org includes a database module (Base). Use
Base to design a database to store many different kinds of
information, from a simple address book or recipe le to
a sophisticated document management system.
Tables, forms, queries, and reports can be created manually
or using convenient wizards. For example, the Table Wizard
contains a number of common elds for business and personal use. A wizard guides you through the steps to create
a new database.
OpenOfce.org Base comes with several predened
database elds to help you create a database. A wizard
guides you through the steps to create a new database. The
following steps are specic to creating an address book
using predened elds, but it should be easy to use the
predened elds for any of the built-in database options.
The process for creating a database can be broken into
several subprocesses:
Creating a Database
1. Click File → New → Database.
2. Select Create a new database Next.
3. Click Yes, register the database for me to make your
database information available to other OpenOfce.org
modules, select both check boxes in the bottom half
of the dialog, then click Finish.
4. Browse to the directory where you want to save the
database, specify a name for the database, then click
OK.
Setting Up the Database Table
1. In the Table Wizard, click Personal.
2. The Sample tables list changes to show the predened
tables for personal use. If you had clicked Business, the
list would contain predened business tables.
In the Sample tables list, click Addresses. The available
elds for the predened address book appear in the
Available elds menu.
3. In the Available elds menu, click the elds you want
to use in your address book.
6
Page 7
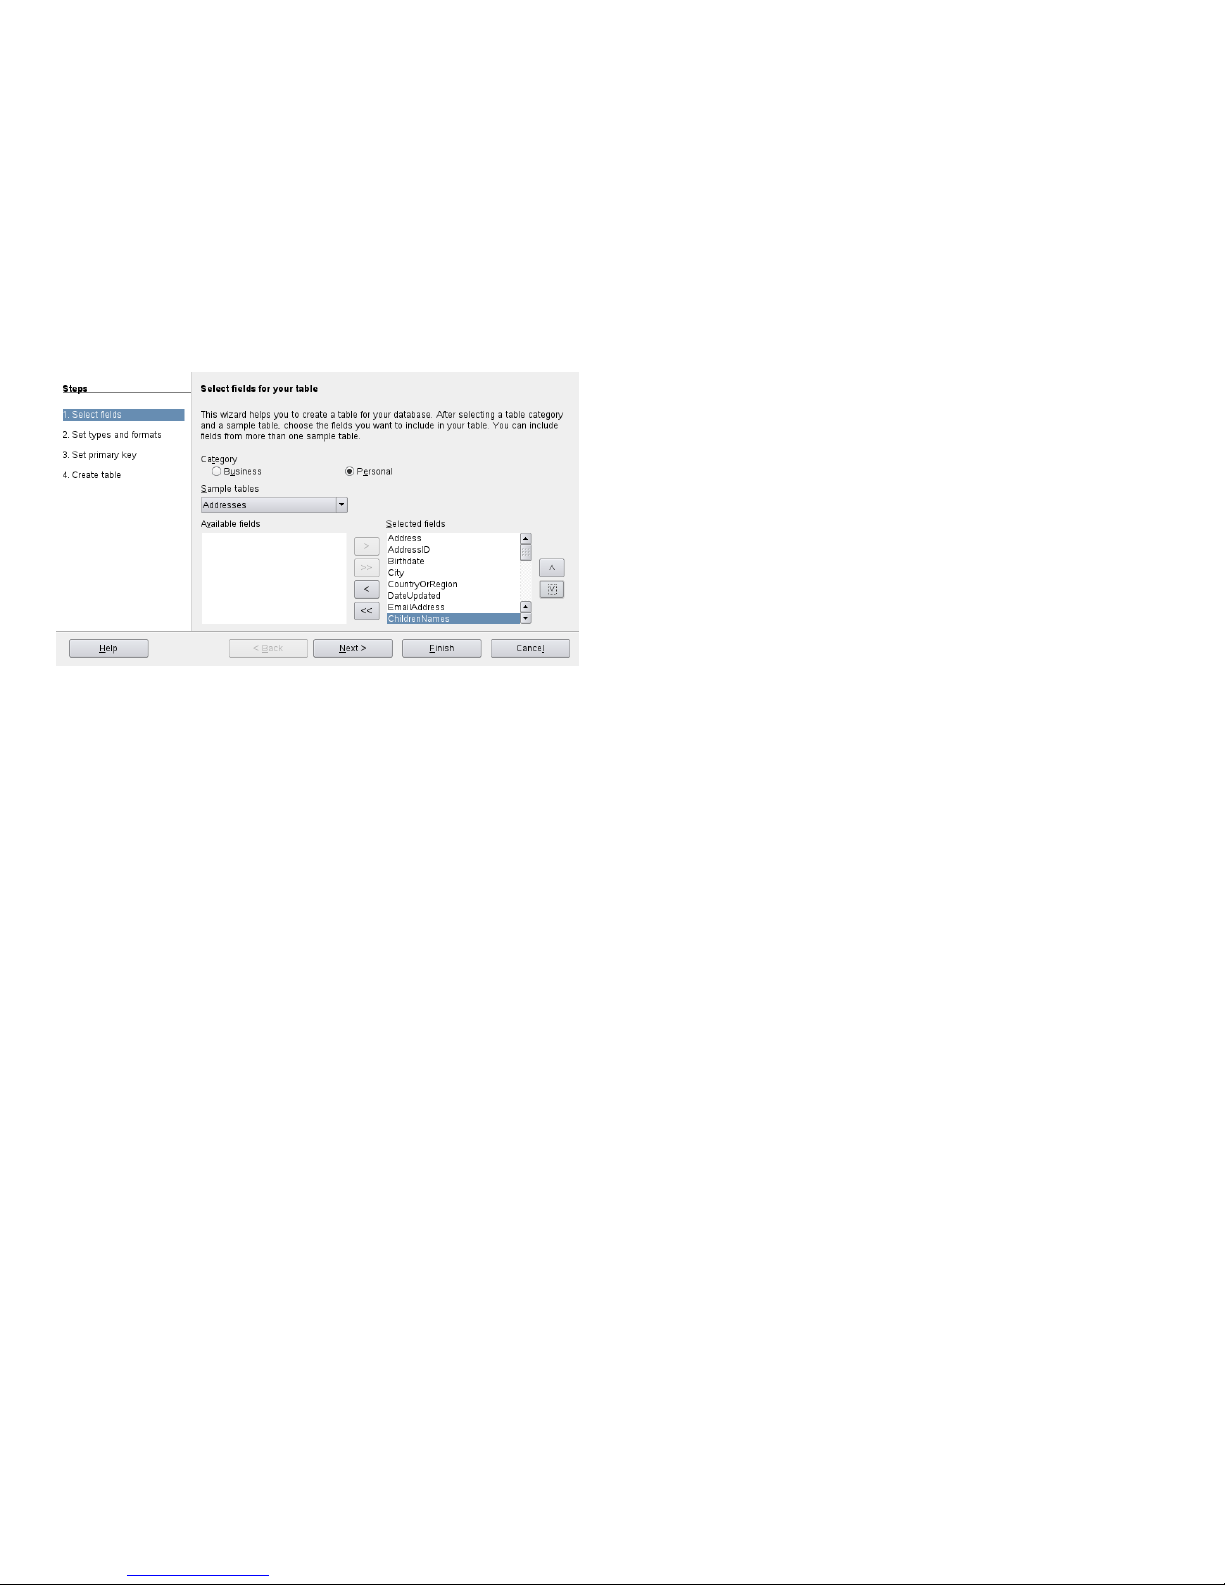
You can select one item at a time, or you can shift-click
multiple items to select them.
4. Click the single arrow icon to move the selected items
to the Selected elds menu.
To move all available elds to the Selected elds menu,
click the double right- arrow.
5. Use the arrow keys to adjust the order of the selected
elds.
The elds appear in the table and forms in the order
in which they are listed.
Creating Graphics with Draw
Use OpenOfce.org Draw to create graphics and diagrams.
You can save your drawings in today’s most common formats and import them into any application that lets you
import graphics, including the other OpenOfce.org modules. You can also create Flash versions of your drawings.
The OpenOfce.org Novell Edition allows you to import
Scalable Vector Graphics (*.svg) and WordPerfect Graphics
(*.wpg). Select File → Open and use the Filter drop-down
list to view which le formats can be opened.
Creating a Graphic
1.
Click Alt + F2 and enter oodraw to open OpenOfce.org Draw.
2. Use the toolbar at the bottom of the window to create
a graphic.
3. Save the graphic.
To embed an existing Draw graphic into an OpenOfce.org
document, select Insert → Object → OLE Object. Select
Create from le and click Search to navigate to the Draw
le to insert. If you insert a le as OLE object, you can easily
edit the object later by double-clicking it.
Opening Draw From Other OpenOfce.org Modules
One particularly useful feature of Draw is the ability to open
it from other OpenOfce.org modules so you can create a
drawing that is automatically imported into your document.
1. From an OpenOfce.org module (for example, from
Writer), click Insert → Object → OLE Object →
OpenOfce.org 3.x Drawing → OK. This opens Draw.
2. Create your drawing.
3. Click in your document, outside the Draw frame.
The drawing is automatically inserted into your document.
Creating Mathematical Formulas with Math
It is usually difcult to include complex mathematical formulas in your documents. The OpenOfce.org Math equation editor lets you create formulas using operators, functions, and formatting assistants. You can then save those
formulas as objects that can be imported into other documents. Math functions can be inserted into other OpenOfce.org documents like any other graphic object.
Using Math, you can enter your equation in three different
ways:
• Type markup in the equation editor,
• Right-click on the equation editor and select the symbol
from the context menu,
or
• Select a symbol from the Selection toolbox.
NOTE
Math is not a calculator. The functions it creates
are graphical objects. Even if they are imported into
Calc, these functions cannot be evaluated.
For More Information
OpenOfce.org contains extensive online help. In addition,
a large community of users and developers support it. For
more details, see the following links:
http://openoffice.org/dev_docs/features/3
.0
A list of all new features available with OpenOfce.org.
http://support.openoffice.org/index.html
Ofcial OpenOfce.org support page, provides manuals
and other documentation
http://www.taming-openoffice-org.com/
Taming OpenOfce.org: Books, news, tips and tricks.
http://documentation.OpenOffice.org/HOW_TO/
index.html
Detailed HowTo's for various OpenOfce.org tasks, including how to create and use templates.
Legal Notice
All content is copyright © 2006- 2009 Novell, Inc.
7
Page 8

This manual is protected under Novell intellectual property
rights. By reproducing, duplicating or distributing this
manual you explicitly agree to conform to the terms and
conditions of this license agreement.
This manual may be freely reproduced, duplicated and distributed either as such or as part of a bundled package in
electronic and/or printed format, provided however that
the following conditions are fullled:
That this copyright notice and the names of authors and
contributors appear clearly and distinctively on all reproduced, duplicated and distributed copies. That this manual,
specically for the printed format, is reproduced and/or
distributed for noncommercial use only. The express autho-
rization of Novell, Inc must be obtained prior to any other
use of any manual or part thereof.
For Novell trademarks, see the Novell Trademark and Service Mark list http://www.novell.com/company/
legal/trademarks/tmlist.html. Linux* is a registered trademark of Linus Torvalds. All other third party
trademarks are the property of their respective owners. A
trademark symbol (®, ™ etc.) denotes a Novell trademark;
an asterisk (*) denotes a third party trademark.
All information found in this book has been compiled with
utmost attention to detail. However, this does not guarantee
complete accuracy. Neither Novell, Inc., SUSE LINUX Products GmbH, the authors, nor the translators shall be held
liable for possible errors or the consequences thereof.
8
Page 9

Created by SUSE® with XSL-FO
9
 Loading...