


XIII
Calendar Publishing Host
Chapter 58, “Configuring the Calendar Publishing Host,” on page 985
Chapter 59, “Monitoring Calendar Publishing,” on page 993
Chapter 60, “Creating a Corporate Calendar Browse List,” on page 995
Chapter 61, “Managing Your Calendar Publishing Host,” on page 997
novdocx (en) 22 June 2009
XIII
Calendar Publishing Host
983

novdocx (en) 22 June 2009
984 GroupWise 8 Administration Guide
58
Configuring the Calendar
novdocx (en) 22 June 2009
Publishing Host
For detailed instructions about installing and setting up the GroupWise® Calendar Publishing Host
for the first time, see “Installing the GroupWise Calendar Publishing Host” in the GroupWise 8
Installation Guide. The default configuration of the Calendar Publishing Host is adequate to begin
publishing calendars. As your GroupWise system grows and evolves, you might need to modify its
configuration to meet the changing needs of the users it services.
Section 58.1, “Logging In to the Administration Web Console,” on page 985
Section 58.2, “Changing Post Office Settings,” on page 985
Section 58.3, “Adjusting Log Settings,” on page 986
Section 58.4, “Configuring LDAP Authentication,” on page 988
Section 58.5, “Customizing the Calendar Publishing Host Logo,” on page 989
Section 58.6, “Logging Out of the Administration Web Console,” on page 990
Section 58.7, “Changing the SSL Trusted Root Certificate,” on page 990
58.1 Logging In to the Administration Web Console
58
The Calendar Publishing Host Administration Web console is a browser-based administration tool
that enables you to easily change the configuration of the Calendar Publishing Host.
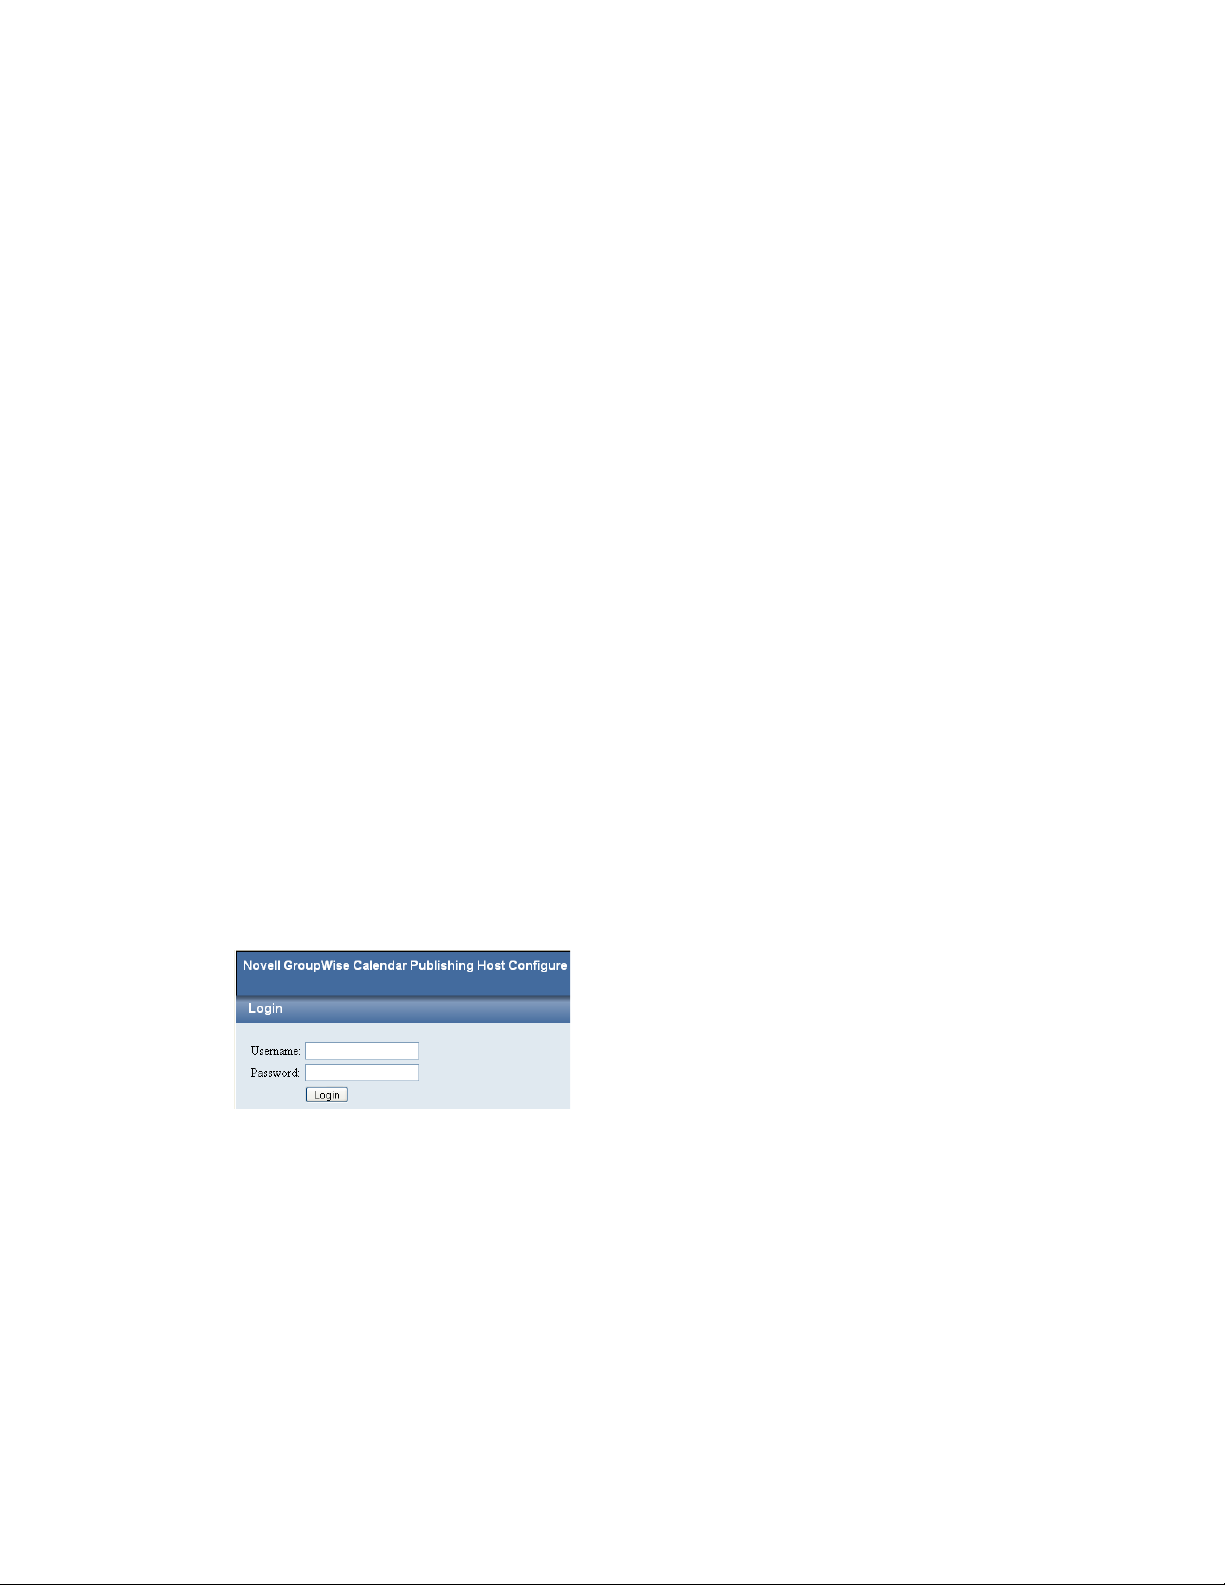
1 Display the Calendar Publishing Host Administration Web console login page:
http://network_address/gwcal/admin
2 Provide the administrative user and password you set up in “Setting Up a Calendar Publishing
Host” in the GroupWise 8 Installation Guide, then click Login.
58.2 Changing Post Office Settings
1 Log in to the Calendar Publishing Host Administration Web console.
Configuring the Calendar Publishing Host
985
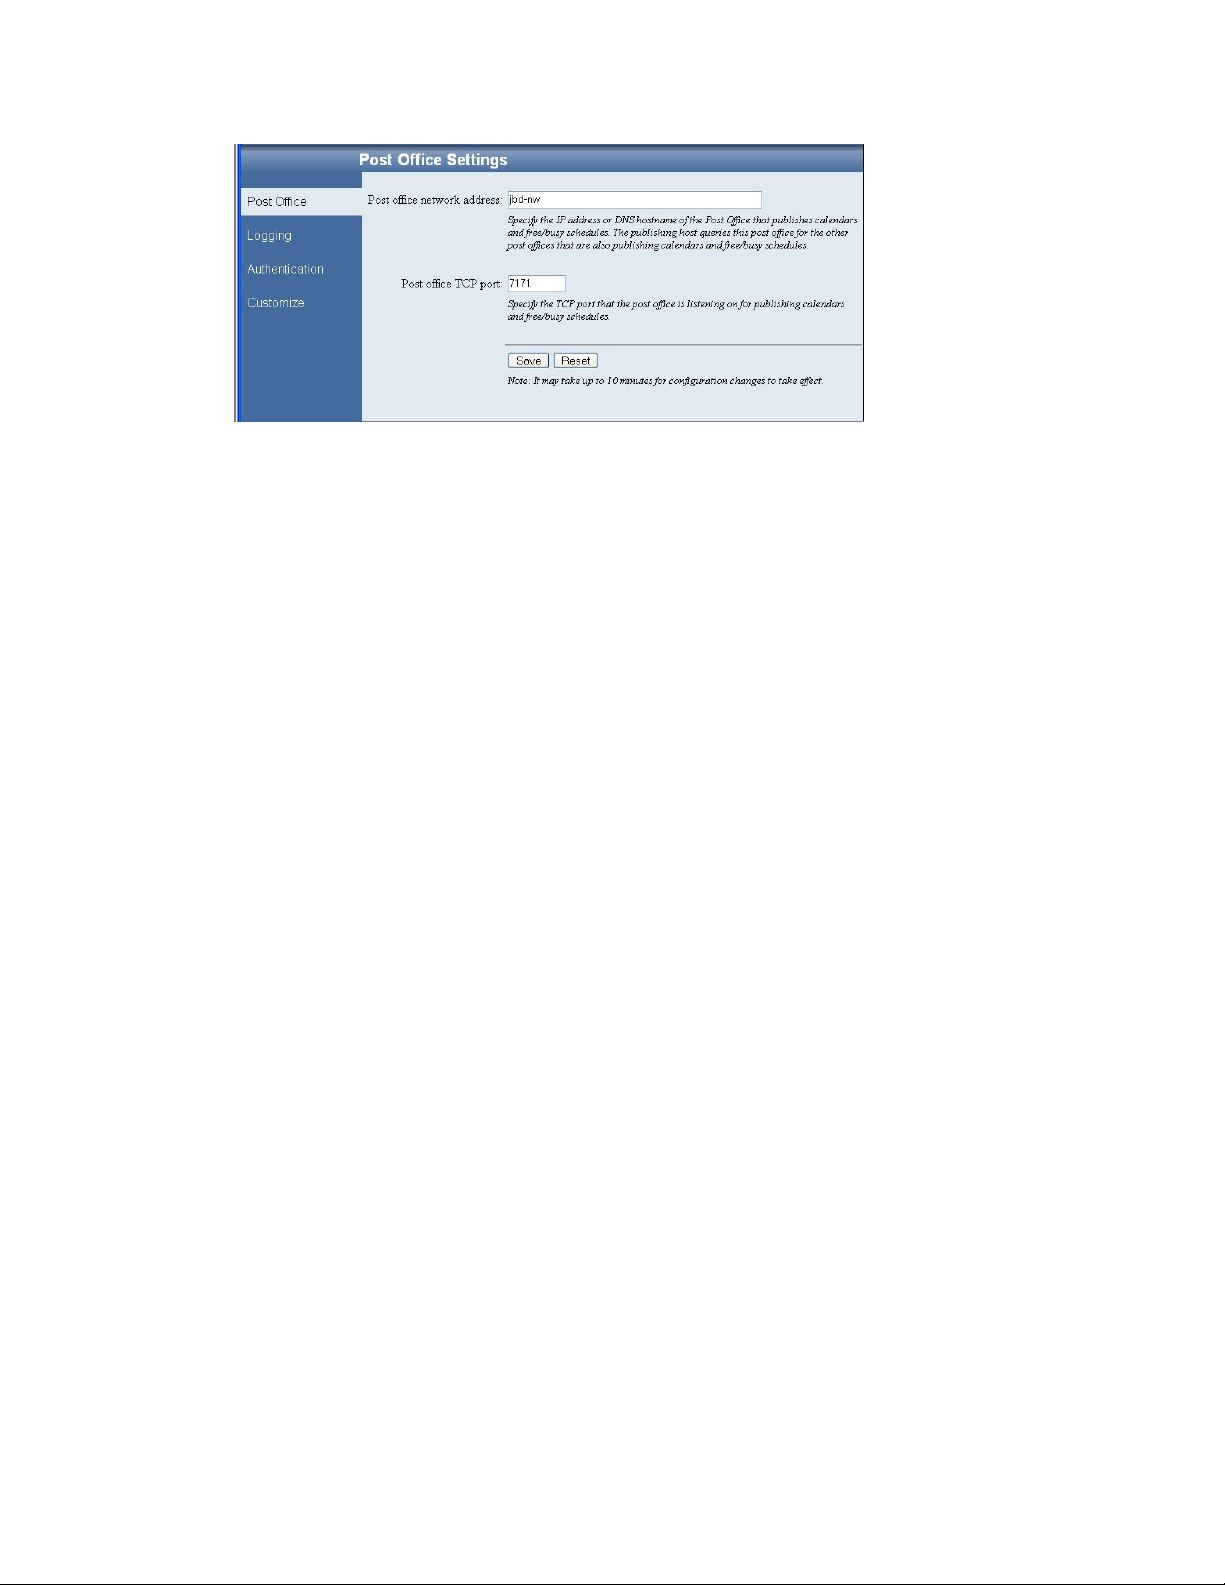
The Post Office page provides the information that the Calendar Publishing Host needs in order
to communicate with a POA to obtain calendar and free/busy information. The initial
information was provided during installation, as described in “Configuring a POA for Calendar
Publishing” in “Installing the GroupWise Calendar Publishing Host” in the GroupWise 8
Installation Guide.
2 Change the post office settings as needed.
novdocx (en) 22 June 2009
Post office network address: Specify the IP address or DNS hostname of the POA that is
configured for calendar publishing.
Post office TCP port: Specify the calendar publishing port that the POA uses to communicate
with the Calendar Publishing Host.
3 If you make changes, click Save.
58.3 Adjusting Log Settings
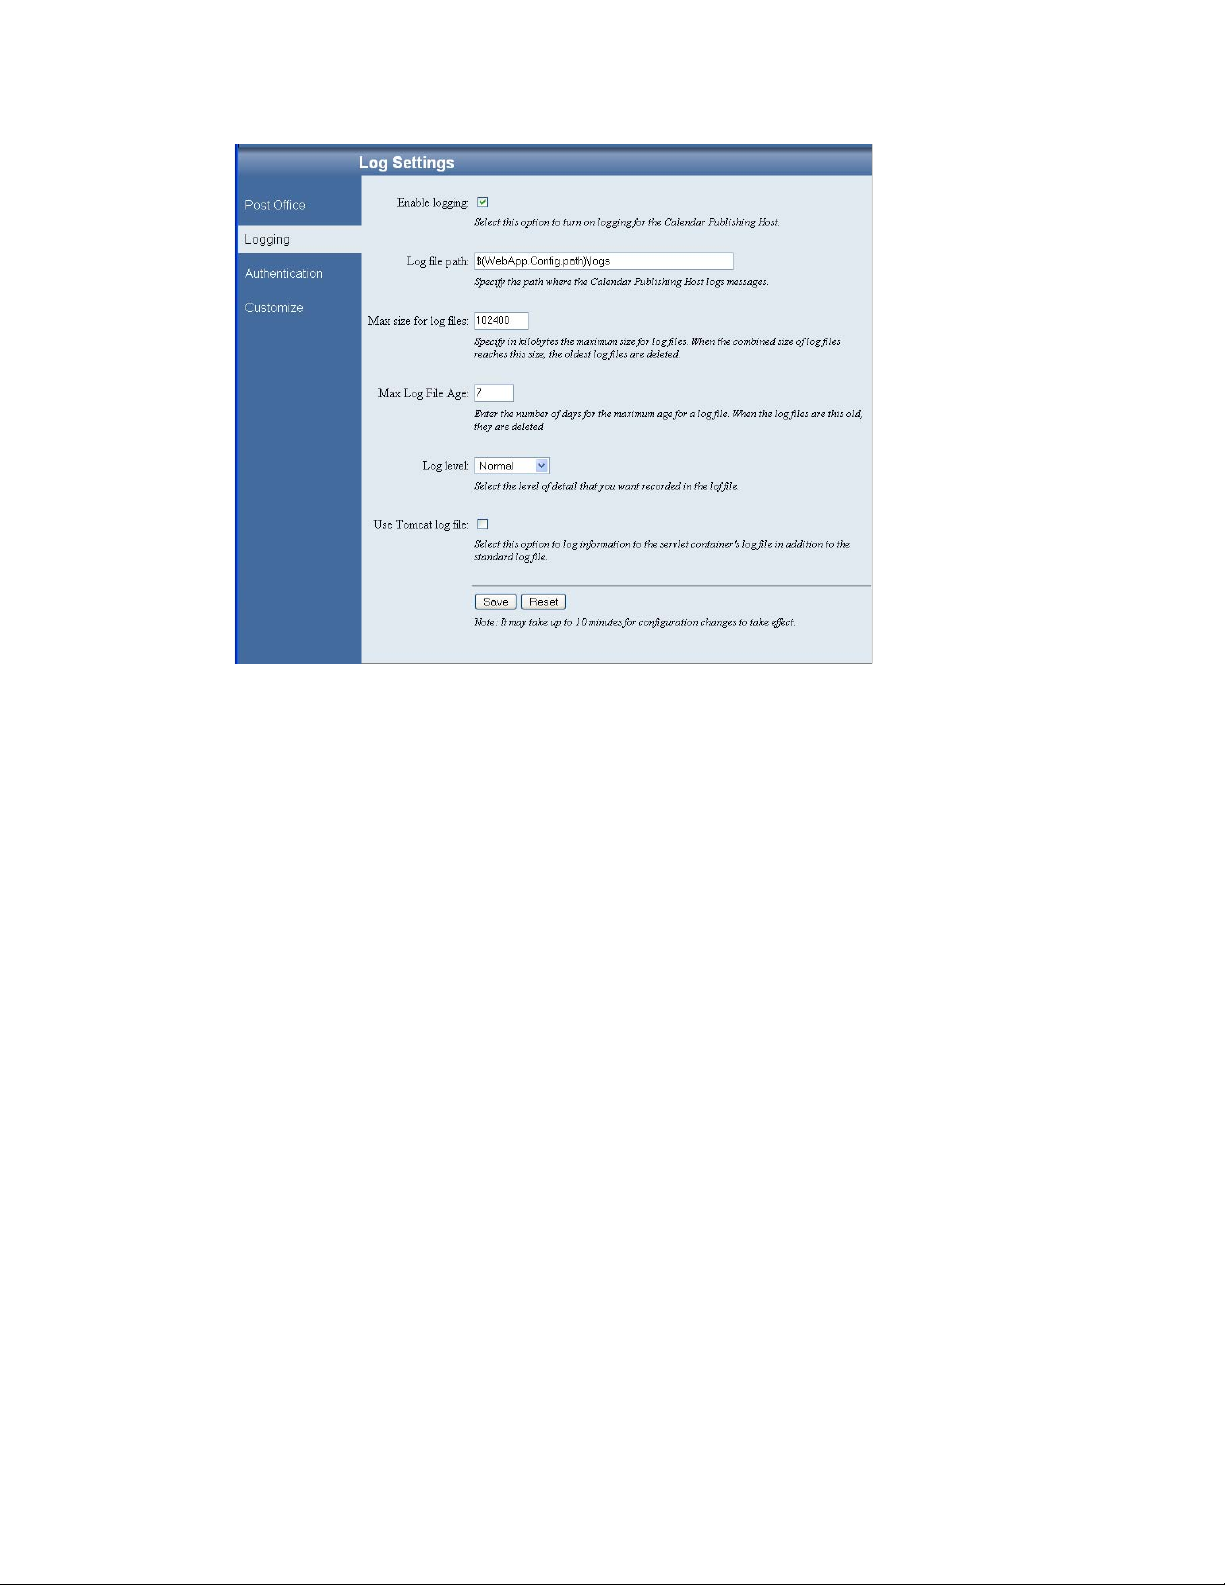
1 Log in to the Calendar Publishing Host Administration Web console, then click Logging to
define log settings for the Calendar Publishing Host:
986 GroupWise 8 Administration Guide
novdocx (en) 22 June 2009
Logging is enabled by default. Default settings are provided for the rest of the fields.
2 Change the Calendar Publishing Host log settings as needed:
Enable Logging: Deselect this option to turn off Calendar Publishing Host logging.
Log File Path: The default log file location varies by Web server platform:
NetWare:
OES Linux:
SLES:
Windows:
sys:\Novell\GroupWise\calhost\logs
/var/opt/novell/groupwise/calhost/logs
/var/opt/novell/groupwise/calhost/logs
c:\Novell\GroupWise\calhost\logs
Change the log file settings as needed:
Max Size for Log Files: Specify in kilobytes the maximum size for log files. When the
combined size of log files reaches this size the oldest log files are deleted.
Max Log File Age: Specify the number of days for the maximum age for a log file. When a log
file reaches this age, it is deleted.
Log Level: Select the level of detail that you want recorded in the log file.
Use Tomcat Log File: Select this option if you want the same information logged to the
Tomcat log file as is logged to the Calendar Publish Host log file.
Configuring the Calendar Publishing Host 987
novdocx (en) 22 June 2009
NetWare:
OES Linux:
SLES:
Windows:
sys:\tomcat\4\logs
/var/opt/novell/tomcat5/logs
/srv/www/tomcat5/base/logs
c:\Novell\GroupWise\tomcat5.5\logs
3 If you make changes, click Save.
58.4 Configuring LDAP Authentication
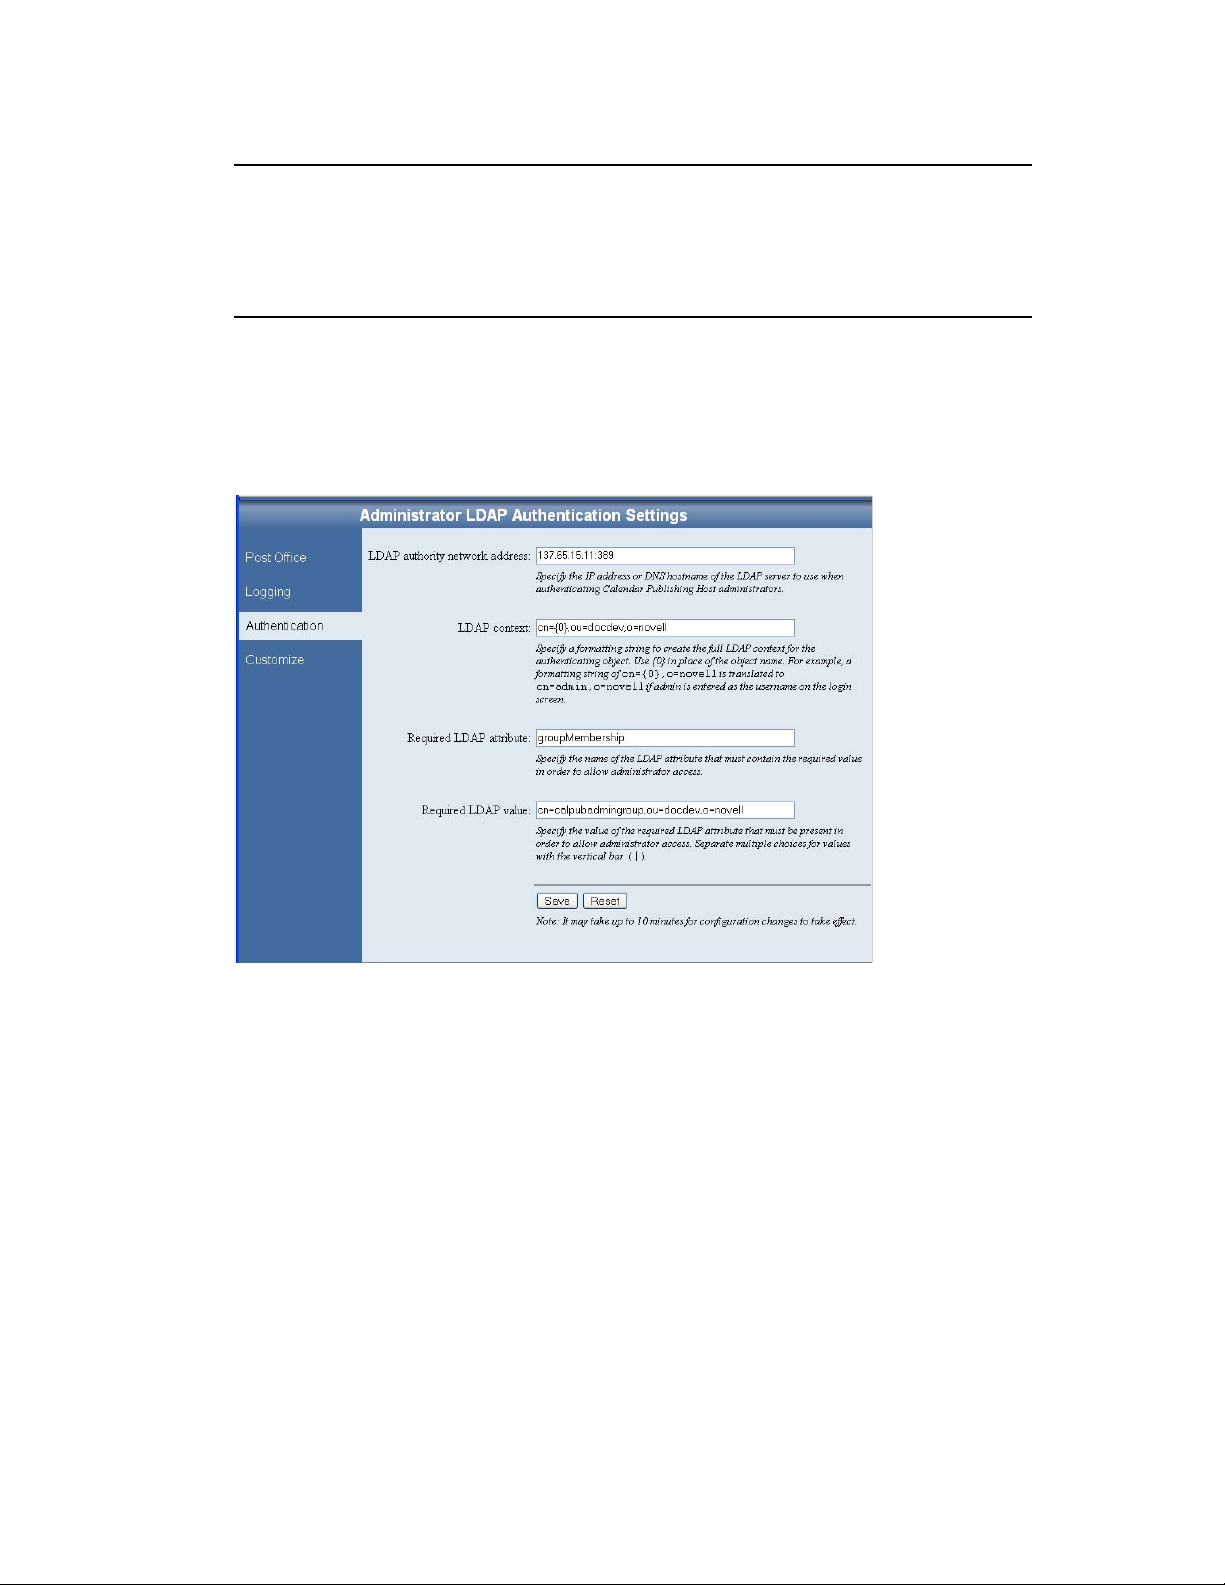
1 Log in to the Calendar Publishing Host Administration Web console, then click Authentication.
The Authentication page provides the information that the Calendar Publishing Host needs in
order to log into eDirectory. The Calendar Publishing Host uses LDAP authentication to log in.
The initial information was provided during installation, as described in “Setting Up Calendar
Publishing Administration” in “Installing the GroupWise Calendar Publishing Host” in the
GroupWise 8 Installation Guide.
2 Change the authentication information as needed:
LDAP Authority Network Address: Specify the IP address or DNS hostname of an LDAP
server where users of the Calendar Publishing Host Administration Web console have
accounts. Include the port number (typically 389 for non-secure connections and 636 for secure
SSL connections).
LDAP Context. Specify the context in which the User objects for Calendar Publishing Host
administrators are located. The variable {0} represents whatever username is provided on the
Administration Web console login page. The User object for the administrator must be located
in the specified context. By providing the context here, administrators do not need to provide
the context when they log in to the Administration Web console.
988 GroupWise 8 Administration Guide

Required LDAP Attribute: By default, the Calendar Publishing Host checks users for
membership in a specific group before it grants access to the Calendar Publishing Host
Administration Web console. This default is typically appropriate.
Required LDAP Value: If you retain the default LDAP attribute of groupMembership, specify
the full context of the group to which Calendar Publishing Host administrator users must
belong in order to log in to the Administration Web console. If you change the default LDAP
attribute, specify the required value for that attribute.
3 If you make changes, click Save.
The SSL trusted root certificate that you supplied when you installed the Calendar Publishing Host
cannot be changed from the Administration Web console. If you need to change the certificate
information, see Section 58.7, “Changing the SSL Trusted Root Certificate,” on page 990.
58.5 Customizing the Calendar Publishing Host Logo
1 Log in to the Calendar Publishing Host Administration Web console, then click Customize to
modify the appearance of the main browser page displayed by the Calendar Publishing Host.
novdocx (en) 22 June 2009
The Customize page enables you to use a different logo, perhaps your company logo, on the
main Calendar Publishing Web page.
2 Provided the information for your company logo:
Logo Image: Specify the full path and filename of the customized image file.
Logo Text: Specify the text to accompany the customized image.
Logo Text Position: Select Top , Middle, or Bottom, based on the example displayed in the box
below the field.
3 Click Save.
Configuring the Calendar Publishing Host 989

58.6 Logging Out of the Administration Web Console
When you close the browser page, you are automatically logged out of the Calendar Publishing Host
Web console.
novdocx (en) 22 June 2009
The Calendar Publishing Host checks its configuration file (
calhost.cfg
) every 10 minutes.
Therefore, it can take up to 10 minutes for the changes you made in the Administration Web console
to take effect in the functionality of the Calendar Publishing Host.
58.6.1 Restarting Tomcat
If you want your changes to take effect immediately, restart Tomcat:
NetWare:
Linux: Novell Open Enterprise Server 2 Linux installation of Apache:
Windows 1. At the Windows server, click Start > Administrative Tools > Services.
unload java
load tomcat4
/etc/init.d/novell-tomcat5 stop
/etc/init.d/novell-tomcat5 start
SUSE Linux Enterprise Server 10 installation of Apache:
/etc/init.d/tomcat5 stop
/etc/init.d/tomcat5 start
2. Right-click Tomcat 5.5, then click Restart.
58.7 Changing the SSL Trusted Root Certificate
LDAP authentication using SSL was originally set up during installation, as described in
“Configuring Authentication to the Administration Web Console” in “Installing the GroupWise
Calendar Publishing Host” in the GroupWise 8 Installation Guide. If you need to change the SSL
trusted root certificate information, you can rerun the Calendar Publishing Host Installation program
and specify new information, as described in “Installing the Calendar Publishing Host”, or you can
edit the
1 Edit the
calhost.cfg
calhost.cfg
file, as described below.
file in a text editor.
The default file location varies by Web server platform:
NetWare:
OES Linux:
SLES:
Windows:
sys:\Novell\GroupWise\calhost
/var/opt/novell/groupwise/calhost
/var/opt/novell/groupwise/calhost
c:\Novell\GroupWise\calhost
2 Find the line that starts with:
Admin.Ldap.trustedRoot=
3 Specify the full path to the trusted root certificate file.
990 GroupWise 8 Administration Guide

novdocx (en) 22 June 2009
4 Save the
calhost.cfg
file, then exit the text editor.
5 Restart the Web server:
NetWare:
Linux: Novell Open Enterprise Server 2 Linux installation of Apache:
Windows 1. At the Windows server, click Start > Administrative Tools > Services.
unload apache2
unload java
tomcat4
apache2
/etc/init.d/apache2 stop
/etc/init.d/novell-tomcat5 stop
/etc/init.d/novell-tomcat5 start
/etc/init.d/apache2 start
SUSE Linux Enterprise Server 10 installation of Apache:
/etc/init.d/apache2 stop
/etc/init.d/tomcat5 stop
/etc/init.d/tomcat5 start
/etc/init.d/apache2 start
2. Right-click Tomcat 5.5, then click Restart.
3. Right-click World Wide Web Publishing Service, then click Restart.
Configuring the Calendar Publishing Host 991

novdocx (en) 22 June 2009
992 GroupWise 8 Administration Guide

59
Monitoring Calendar Publishing
By monitoring the Calendar Publishing Host and the POAs it communicates with, you can
determine whether or not its current configuration is meeting the needs of your GroupWise users.
Section 59.1, “Viewing Calendar Publishing Status at the POA Web Console,” on page 993
Section 59.2, “Using Calendar Publishing Host Log Files,” on page 994
Section 59.3, “Using POA Log Files,” on page 994
59.1 Viewing Calendar Publishing Status at the POA Web Console
1 Display the POA Web console at the following URL:
http://network_address:port
where network_address is the IP address or DNS hostname of a POA that is configured for
calendar publishing and port is the POA HTTP port. The default HTTP port is 7181.
2 Click Configuration.
novdocx (en) 22 June 2009
59
3 Under the Internet Protocol Agent Settings heading, view the configuration information about
the POA’s connection to the Calendar Publishing Host.
4 Click Calendar Publishing Post Office List to view all POAs in your GroupWise system that
have been configured for calendar publishing.
5 Click Calendar Free/Busy Publishing User List to view all users who have published free/busy
information or personal calendars.
A list of all Calendar Publishing Hosts in your GroupWise system is also provided.
Monitoring Calendar Publishing
993

59.2 Using Calendar Publishing Host Log Files
The default log file location varies by Web server platform:
novdocx (en) 22 June 2009
NetWare:
OES Linux:
SLES:
Windows:
Logging is enabled by default. You can increase the amount of information that is logged, as
described in Section 58.3, “Adjusting Log Settings,” on page 986.
sys:\Novell\GroupWise\calhost\logs
/var/opt/novell/groupwise/calhost/logs
/var/opt/novell/groupwise/calhost/logs
c:\Novell\GroupWise\calhost\logs
59.3 Using POA Log Files
To find status information about how the Calendar Publishing Host is communicating with the POA,
you can check the POA log files. For more information, see Section 37.3.2, “Viewing POA Log
Files,” on page 554.
994 GroupWise 8 Administration Guide

60
Creating a Corporate Calendar
novdocx (en) 22 June 2009
Browse List
The Calendar Publishing Host creates a browse list of published calendars. However, by default, no
calendars are displayed in the calendar browse list. To create a corporate calendar browse list, you
need to grant rights to specific users, or at the post office or domain level, to publish to the corporate
calendar browse list.
In ConsoleOne:
1 Browse to and right-click an individual user, or right-click a post office or domain where you
want all users to have rights to publish to the browse list, then click Properties.
2 Click GroupWise > Calendar Publishing.
60
3 Select Override, then select Enable Publishing of Calendars to the Browse List.
This grants the right to publish calendars to the calendar browse list.
4 Click OK.
5 Repeat Step 1 through Step 4 as needed to grant rights to publish to the corporate calendar
browse list.
Creating a Corporate Calendar Browse List
995

novdocx (en) 22 June 2009
996 GroupWise 8 Administration Guide

61
Managing Your Calendar
novdocx (en) 22 June 2009
Publishing Host
As circumstances change over time, you might need to change the configuration of your Calendar
Publishing Host to better meeting the needs of your GroupWise users.
Section 61.1, “Adding Multiple Calendar Publishing Hosts,” on page 997
Section 61.2, “Assigning a Different Calendar Publishing Host to Users,” on page 997
Section 61.3, “Editing Calendar Publishing Host Configuration,” on page 998
Section 61.4, “Deleting a Calendar Publishing Host,” on page 999
61.1 Adding Multiple Calendar Publishing Hosts
Many times, one Calendar Publishing Host is sufficient to service all Internet users who want to
access your GroupWise users’ calendar and free/busy information. However, you might want to add
an additional Calendar Publishing Host for load balancing or to improve response time for Internet
users in different geographical locations.
However, if you have users in remote locations, and response time is slow for these users, you can
add a Calendar Publishing Host to a POA that is closer to these remote users.
NOTE: Sections referenced in the following steps are found in the GroupWise 8 Installation Guide.
61
1 Install the Calendar Publish Host software to a remote Web server, as described in “Installing
the Calendar Publishing Host”.
2 Add and configure the new Calendar Publishing Host, as described in “Configuring the
Calendar Publishing Host in ConsoleOne”. Make sure you restart the POAs for post offices that
support calendar publishing so that the POAs pick up the configuration information for the new
Calendar Publishing Host.
3 Restart the Web Server and Tomcat on the server where you installed the new Calendar
Publishing Host to establish it as part of your GroupWise system, as described in “Restarting
the Web Server and Tomcat”.
4 Make sure that the new Calendar Publishing Host is accessible by following the procedures
provided in “Testing Calendar Publishing” in the GroupWise 8 Installation Guide.
5 Continue with “Assigning a Different Calendar Publishing Host to Users” on page 997
61.2 Assigning a Different Calendar Publishing Host to Users
1 In ConsoleOne, browse to and select a user or a post office with users to whom the new
Calendar Publishing Host will be assigned.
2 Click Tools > GroupWise Utilities.
3 Click Client Options > Environment > Calendar.
Managing Your Calendar Publishing Host
997

novdocx (en) 22 June 2009
4 In the Web Calendar Publishing Host field, select the new Calendar Publishing Host, then click
the Lock button to ensure that the new Calendar Publishing Host setting overrides the previous
setting.
5 Click OK, then click Close.
6 Repeat Step 1 through Step 5 until you are finished moving users.
7 Notify the GroupWise users to whom the new Calendar Publishing Host as been assigned that
they need to notify their Internet colleagues of the new URL for their published calendars and
free/busy information.
61.3 Editing Calendar Publishing Host Configuration
Over time, you might need to set up the Calendar Publishing Host on a different Web server with a
different IP address or port number.
NOTE: Sections referenced in the following steps are found in the GroupWise 8 Installation Guide.
1 If necessary, install the Calendar Publishing Host to a new Web server, as described in
“Installing the Calendar Publishing Host”.
2 In ConsoleOne, select the GroupWise System object, then click Tools > GroupWise System
Operations > Web Calendar Publishing Hosts.
998 GroupWise 8 Administration Guide

3 Select the Calendar Publishing Host whose configuration you need to change, then click Edit.
novdocx (en) 22 June 2009
Do not change the URL unless absolutely necessary. Changing the URL would obsolete the
URL that GroupWise users have sent to Internet colleagues to access published calendars and
free/busy information.
4 Modify the IP address or port number as needed, then click OK twice.
5 Restart Tomcat where the modified Calendar Publishing Host is installed, as described in
Section 58.6.1, “Restarting Tomcat,” on page 990.
6 Restart the POA so that it picks up the updated configuration information for the modified
Calendar Publishing Host.
7 Make sure that users can still access the Calendar Publishing Host by following the procedures
provided in “Testing Calendar Publishing”.
61.4 Deleting a Calendar Publishing Host
1 If necessary, move users,Section 61.2, “Assigning a Different Calendar Publishing Host to
Users,” on page 997
2 In ConsoleOne, select the GroupWise System object, then click Tools > GroupWise System
Operations > Web Calendar Publishing Hosts.
Managing Your Calendar Publishing Host 999

3 Select the Calendar Publishing Host to delete, then click Delete.
4 Click OK.
5 Restart Tomcat where the Calendar Publishing Host has been deleted, as described in
Section 58.6.1, “Restarting Tomcat,” on page 990.
6 Restart the POA that used to communicate with the deleted Calendar Publishing Host, so that
the POA does not try to reestablish the connection.
novdocx (en) 22 June 2009
1000 GroupWise 8 Administration Guide
 Loading...