

Page 1

VI
Distribution Lists, Groups, and
novdocx (en) 11 December 2007
Organizational Roles
Chapter 17, “Understanding Distribution Lists, Groups, and Organizational Roles,” on
page 263
Chapter 18, “Creating and Managing Distribution Lists,” on page 265
Chapter 19, “Using eDirectory Groups as GroupWise Distribution Lists,” on page 279
Chapter 20, “Using eDirectory Organizational Roles as GroupWise Distribution Lists,” on
page 285
VI
Distribution Lists, Groups, and Organizational Roles
261
Page 2

novdocx (en) 11 December 2007
262 GroupWise 7 Administration Guide
Page 3

17
Understanding Distribution Lists,
novdocx (en) 11 December 2007
Groups, and Organizational Roles
Distribution lists are specific to GroupWise. Groups and organizational roles are eDirectoryTM
objects that can be configured to work with GroupWise.
Distribution lists, groups, and organizational roles are all sets of users and (optionally) resources that
can be addressed as a single entity. When a GroupWise user addresses an item (message,
appointment, task, or note) to a distribution list, group, or organizational role, each user or resource
that is a member receives the item if he or she has a GroupWise account.
The following sections provide information to help you learn about distribution lists, groups, and
organizational roles:
Section 17.1, “Public vs. Personal Address Lists,” on page 263
Section 17.2, “Distribution Lists,” on page 263
Section 17.3, “eDirectory Groups and Organizational Roles,” on page 264
17.1 Public vs. Personal Address Lists
Distribution lists and groups are public address lists, meaning that they are administrator-defined
lists available to all users in your GroupWise system.
17
If users want to create personal address lists, they can create personal groups in the GroupWise
client. When a user creates personal groups, the groups are saved in his or her mailbox and are
available for use only by that user. They cannot be shared by, or transferred to, other users.
If a user wants to send to all users in a particular post office or domain, he or she can use wildcard
addressing, if it has been enabled. See Section 6.6, “Enabling Wildcard Addressing,” on page 92.
17.2 Distribution Lists
A distribution list is specific to GroupWise. It is a public address list that you, as the GroupWise
administrator, can create to facilitate easier addressing within your GroupWise system. Distribution
lists can only contain users that have GroupWise accounts.
Each distribution list you want to create must be added as a Distribution List object in eDirectory.
The name that you give the Distribution List object becomes the name by which the distribution list
is displayed in the GroupWise Address Book.
Distribution List objects can be located in any eDirectory container that is in the same tree as the
distribution list’s domain.
Because a distribution list is an addressable entity, you must assign it to a post office when you
create it. This ensures that the distribution list has a standard GroupWise address
(distribution_list_name.post_office.domain).
Regardless of the distribution list’s post office, all GroupWise users can use the distribution list
when addressing a message.
Understanding Distribution Lists, Groups, and Organizational Roles
263
Page 4

You can determine which users see the distribution list in the Address Book. System visibility
enables all users in your GroupWise system to see the distribution list. Domain visibility enables all
users in the distribution list’s domain to see the distribution list. Post Office visibility enables all
users in the distribution list’s post office to see the distribution list. Setting the visibility level to
None means that no users see the distribution list in the Address Book.
Users who cannot see the distribution list in the Address Book can still use the distribution list by
typing the distribution list name in the To field of the message.
A distribution list can contain users and resources as well as other distribution lists, groups, and
organizational roles. Members do not need to be on the same post office as the distribution list’s post
office.
For details about distribution lists, see Chapter 18, “Creating and Managing Distribution Lists,” on
page 265.
17.3 eDirectory Groups and Organizational Roles
novdocx (en) 11 December 2007
eDirectory groups and organizational roles are general eDirectory objects that can be created to
facilitate easier administration of eDirectory users who have common needs or who share a common
role or responsibility.
If you have eDirectory groups or organizational roles that you want GroupWise users to be able to
address messages to, you need to make them available in your GroupWise system. When doing so,
you can choose the groups and roles that you want available, and choose which users they are
available to.
If a group or role contains both eDirectory users with GroupWise accounts and eDirectory users
without GroupWise accounts, only those users with GroupWise accounts receive messages
addressed to the group or role.
As mentioned previously, Group and Organizational Role objects are not specific to GroupWise. For
information about creating these objects, see your eDirectory documentation.
The name given to the Group object or Organizational Role object becomes the name by which it is
displayed in the GroupWise Address Book when you make it available. You make a group or role
available in your GroupWise system by assigning it to a post office. This ensures that the group or
role has a standard GroupWise address (name.post_office.domain). Regardless of the post office
where the group or role is assigned, all GroupWise users can use it when addressing a message.
You can determine which users see the group or role in the Address Book. System visibility enables
all users in your GroupWise system to see the group or role. Domain visibility enables all users in
the distribution list’s domain to see the group or role. Post Office visibility enables all users in the
distribution list’s post office to see the group or role. Setting the visibility level to None means that
no users can see the group or role in the Address Book.
Users who cannot see the group or role in the Address Book can still use it by typing the name in the
To field of the message.
For details about eDirectory groups and organizational roles, see Chapter 19, “Using eDirectory
Groups as GroupWise Distribution Lists,” on page 279 and Chapter 20, “Using eDirectory
Organizational Roles as GroupWise Distribution Lists,” on page 285.
264 GroupWise 7 Administration Guide
Page 5
18
Creating and Managing
novdocx (en) 11 December 2007
Distribution Lists
A GroupWise® distribution list can contain GroupWise users, resources, and other distribution lists.
When creating the distribution list, you can determine each entry’s participation in the list (primary
recipient, carbon copy recipient, or blind copy recipient).
Section 18.1, “Creating a New Distribution List,” on page 265
Section 18.2, “Adding Members to a Distribution List,” on page 268
Section 18.3, “Removing Members from a Distribution List,” on page 269
Section 18.4, “Moving a Distribution List,” on page 269
Section 18.5, “Renaming a Distribution List,” on page 270
Section 18.6, “Enabling Users to Modify a Distribution List,” on page 270
Section 18.7, “Deleting a Distribution List,” on page 272
Section 18.8, “Managing E-Mail Addresses,” on page 272
Section 18.9, “Adding External Users to a Distribution List,” on page 276
18.1 Creating a New Distribution List
1 In ConsoleOne®, right-click the eDirectory container where you want to create the Distribution
List object, then click New > Distribution List.
18
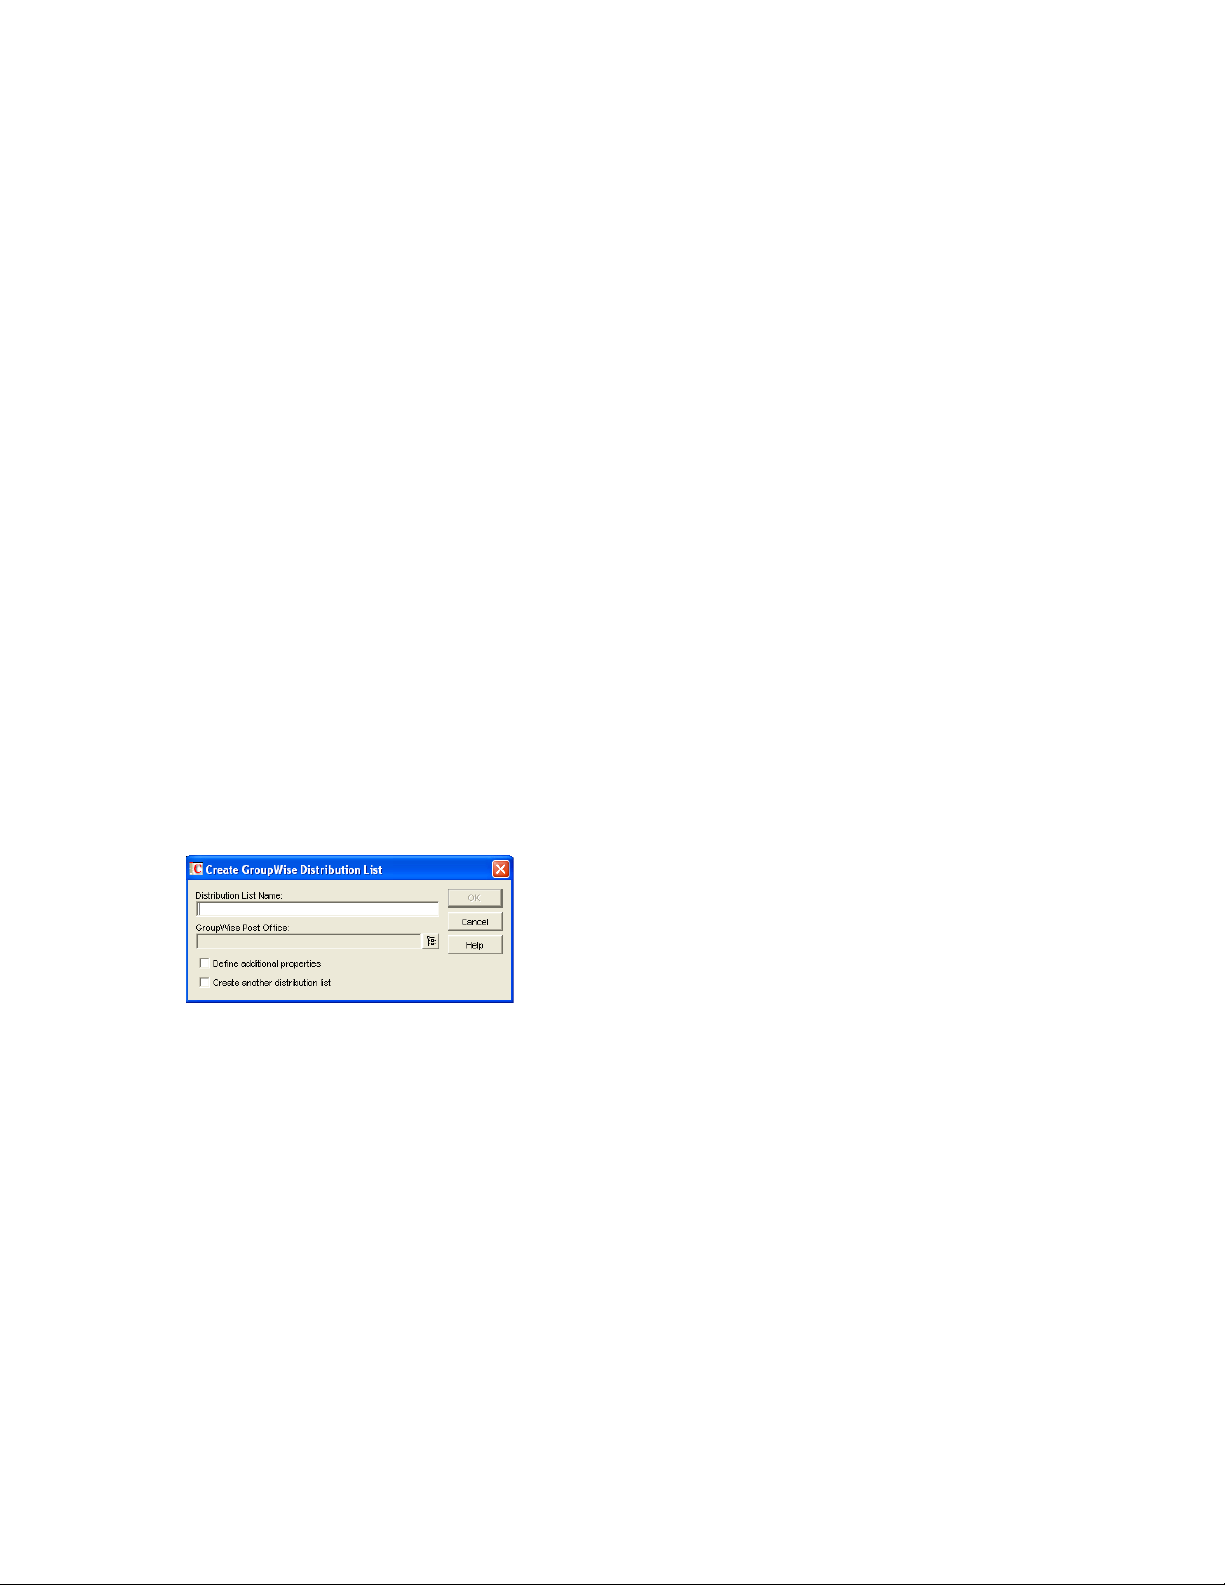
2 Fill in the following fields:
Distribution List Name: Specify a descriptive name. Because the name is used as part of the
distribution list’s GroupWise address, do not use any of the following invalid characters in the
distribution list name:
ASCII characters 0-13 Comma ,
Asterisk * Double quote "
At sign @ Extended ASCII characters that are graphical or typographical
symbols; accented characters in the extended range can be used
Braces { } Parentheses ( )
Colon : Period .
Creating and Managing Distribution Lists
265
Page 6
GroupWise Post Office: Select the post office the distribution list will be assigned to. The
distribution list can contain members of other post offices.
3 Select Define Additional Properties, then click OK.
novdocx (en) 11 December 2007
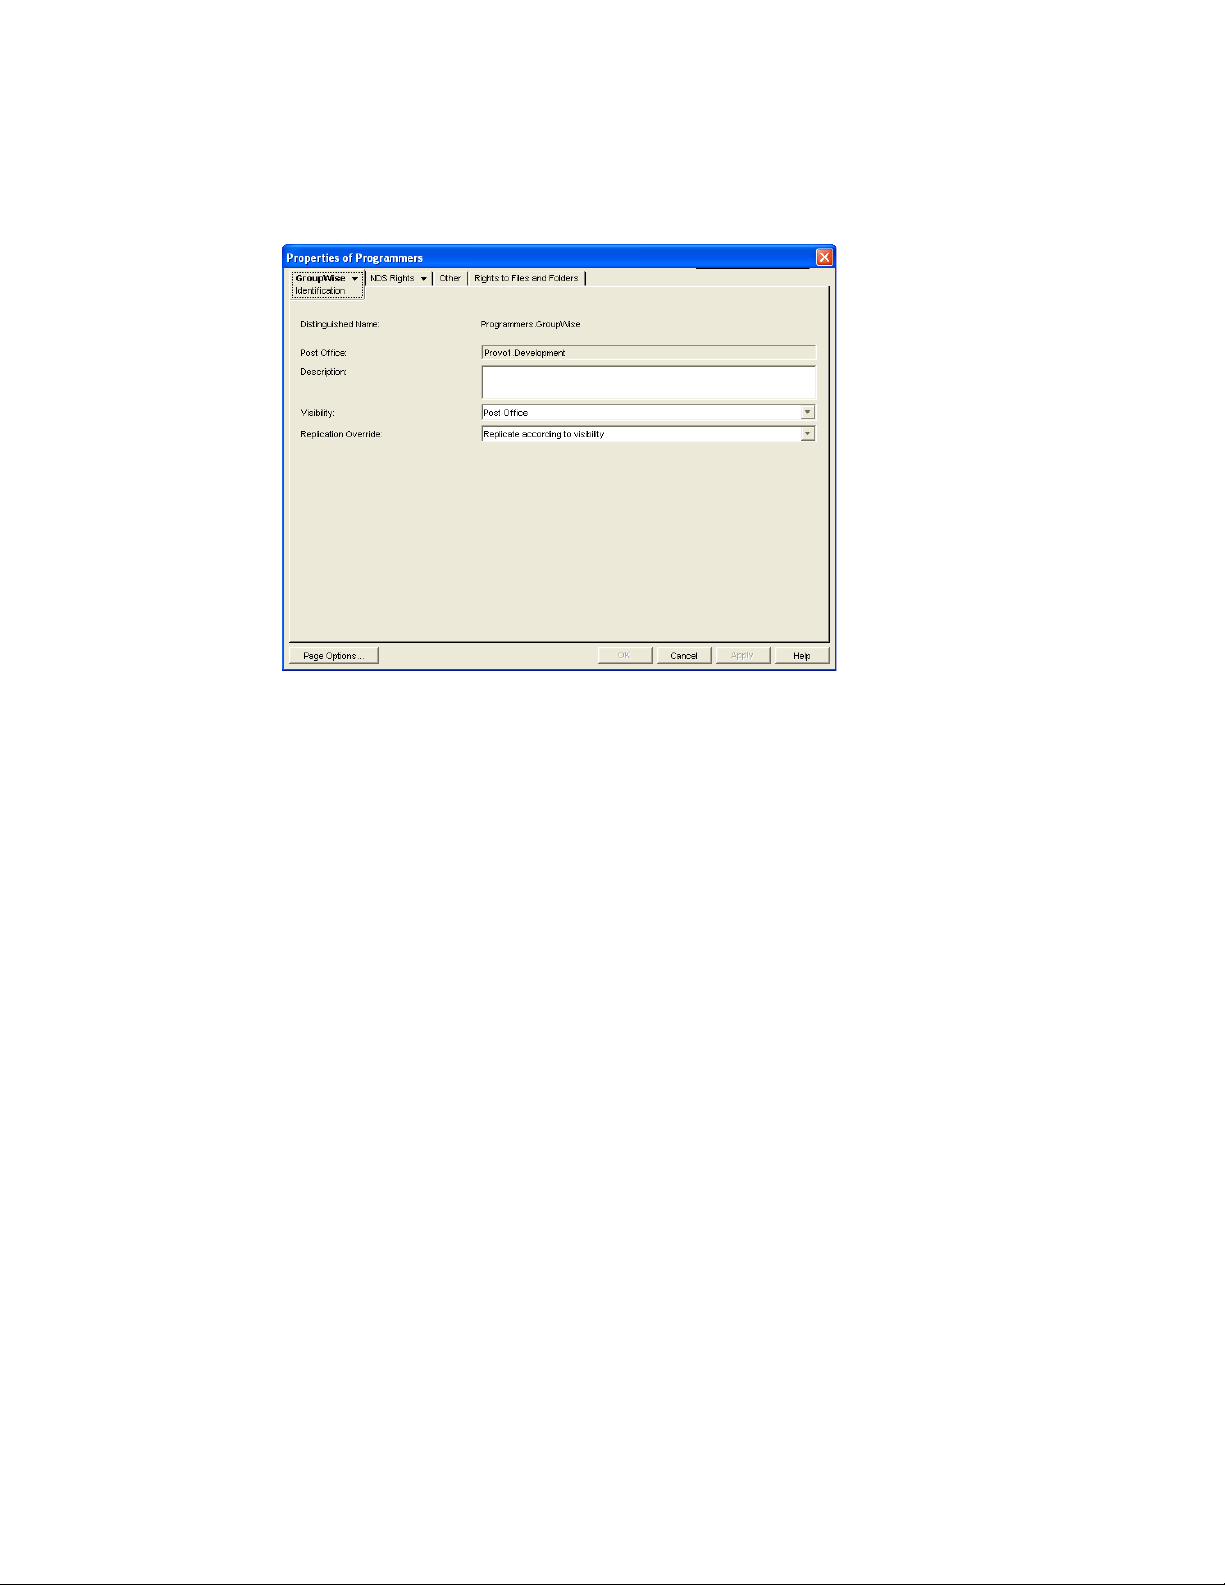
4 On the Identification page, fill in the following fields:
Description: Specify a description to help you identify the purpose or members of the
distribution list.
Visibility: Select the level at which the distribution list will be visible in the Address Book.
System enables the distribution list to be visible to all users in your GroupWise system. Domain
enables the distribution list to be visible to all users in the same domain as the distribution list.
Post Office enables the distribution list to be visible to all users on the same post office as the
distribution list. Setting the visibility level to None means that no users can see the distribution
list in the Address Book.
Replication Override: By default, distribution lists are replicated throughout your GroupWise
system based on the selected visibility level. With the default visibility level, distribution lists
are visible in the GroupWise Address Book for local post office users only and are not
replicated to other post offices.
If you set Visibility to Domain, the distribution list is replicated to all post offices in the
domain, but not to post offices belonging to other domains. If you set Visibility to System, the
distribution list is replicated to all post offices in your GroupWise system. This default behavior
corresponds to the Replicate According to Visibility setting.
Select Replicate Everywhere Regardless of Visibility if you want the distribution list replicated
throughout your GroupWise system regardless of the selected visibility level. With this setting,
the distribution list is made available in all post offices, although it is still only visible in the
GroupWise Address Book according to the selected visibility level. The availability of the
distribution list in all post offices means that it can be nested into other distribution lists that are
visible in any post office, and that users in any post office can manually specify the distribution
list name in the To field of an item.
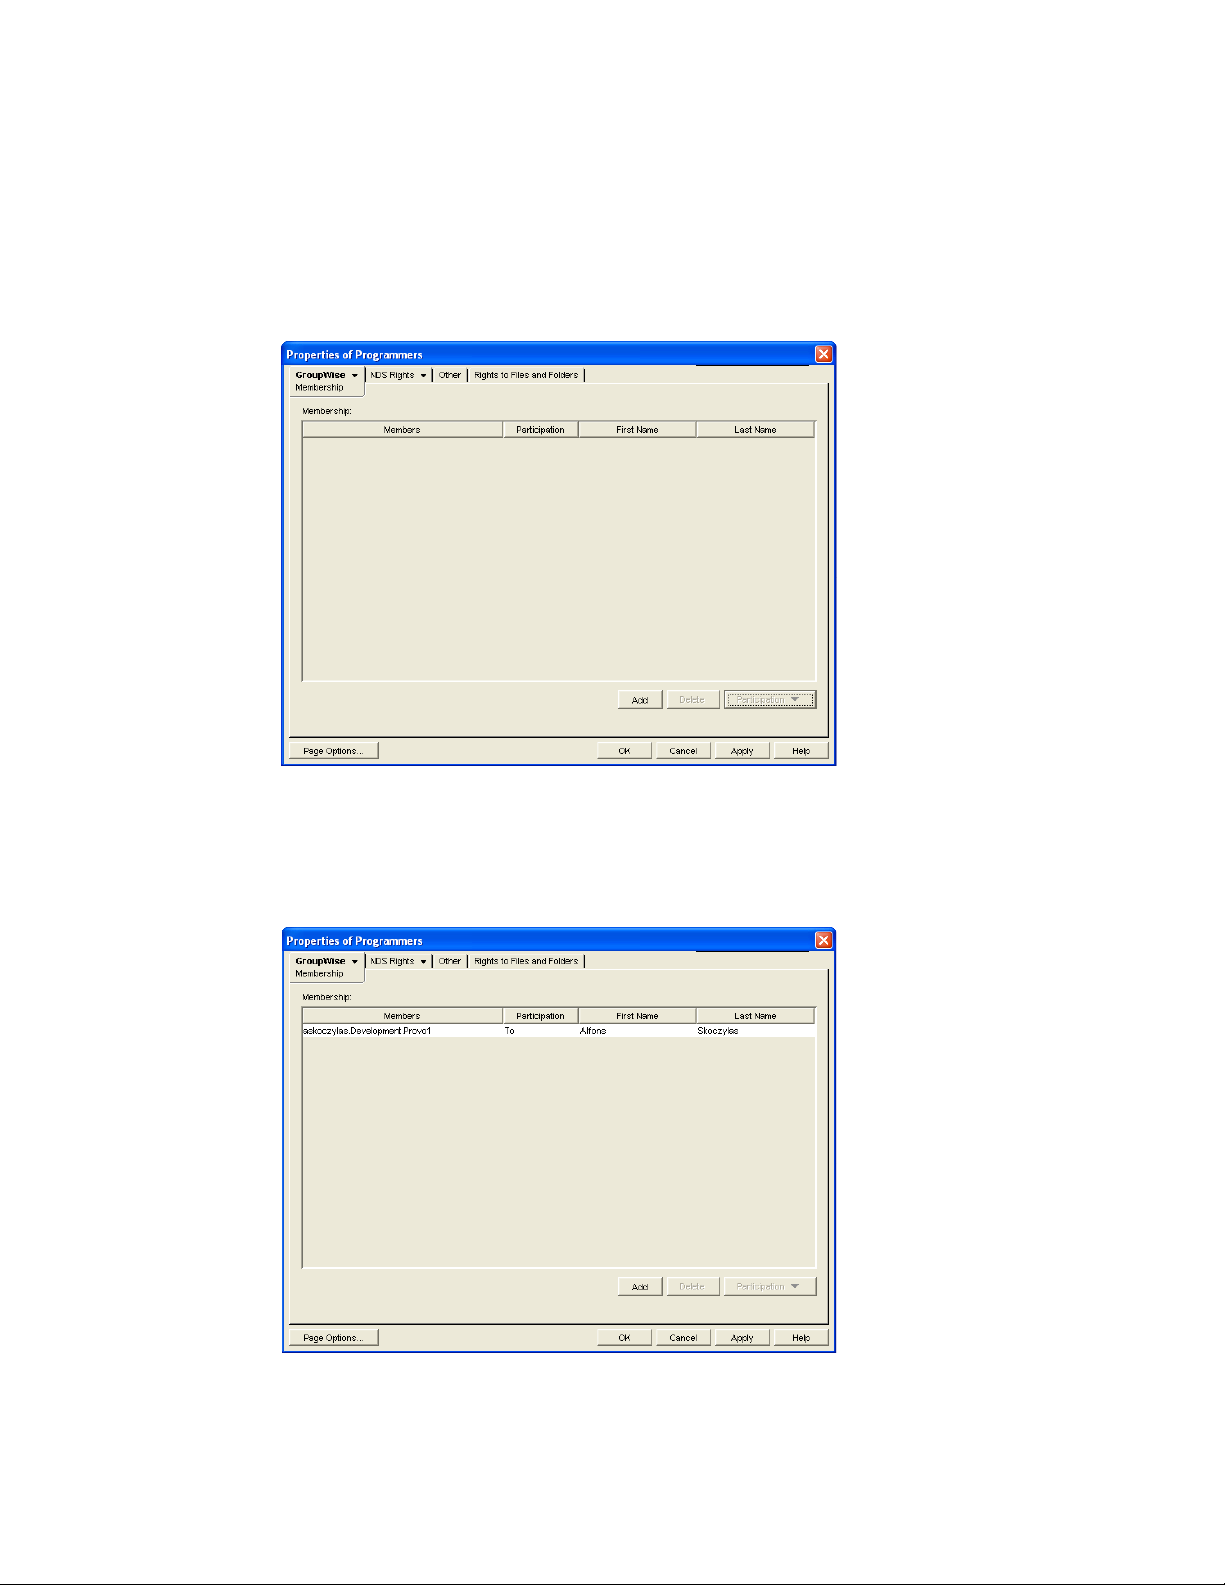
5 Click GroupWise > Membership to display the Membership page.
266 GroupWise 7 Administration Guide
Page 7

6 Click Add, select the user, resource, distribution list, eDirectory group, or organizational role
you want to add as a member, then click OK to add the member to the list.
novdocx (en) 11 December 2007
By default, the member is added as a primary recipient (To: recipient).
7 If you want to change the member’s recipient type, select the member, click Participation, then
click To, CC, or BC.
8 Repeat Step 6 and Step 7 to add additional members.
9 Click OK to save your changes.
Creating and Managing Distribution Lists 267
Page 8
18.2 Adding Members to a Distribution List
Distribution lists can contain users, resources, groups, organizational roles, and other distribution
lists.
®
1 In ConsoleOne
2 Click GroupWise > Membership to display the Membership page.
, right-click the Distribution List object, then click Properties.
novdocx (en) 11 December 2007
3 Click Add, select the user, resource, distribution list, group, or organizational role you want to
add as a member, then click OK to add the member to the list.
If you want to add an external user that is not listed for selection, see Section 18.9, “Adding
External Users to a Distribution List,” on page 276.
By default, the selected member is added as a primary recipient (To: recipient).
268 GroupWise 7 Administration Guide
Page 9
4 If you want to change the member’s recipient type, select the member, click Participation, then
click To, CC, or BC.
5 Repeat Step 3 and Step 4 to add additional members.
6 Click OK to save your changes.
Distribution lists are typically managed by an administrator in ConsoleOne. Starting in GroupWise
7, users can be granted rights to modify distribution lists, as described in Section 18.6, “Enabling
Users to Modify a Distribution List,” on page 270.
In addition, GroupWise client users can create shared address books and then create groups within
those shared address books so that the groups are available to all users with whom the address book
is been shared. The creator of the shared address book can give other users read only rights, or can
choose to grant them additional rights for adding, editing, and deleting information. For more
information about shared address books, see “Sharing an Address Book with Another User” in
“Using the Address Book” in the GroupWise 7 Windows Client User Guide.
18.3 Removing Members from a Distribution List
When you remove users’ or resources’ GroupWise accounts, delete groups, delete organizational
roles, or delete distribution lists, they are automatically removed from any distribution lists in which
they have membership.
novdocx (en) 11 December 2007
To manually remove members from a distribution list:
1 In ConsoleOne, right-click the Distribution List object, then click Properties.
2 Click GroupWise > Membership to display the Membership page.
3 Select the member you want to remove from the list, then click Delete.
18.4 Moving a Distribution List
If necessary, you can move a distribution list from one post office to another. For example, you
might need to move a distribution list from a post office you are removing.
The distribution list retains the same name on the new post office as it has on the current post office.
If another user, resource, or distribution list assigned to the new post office has the same name, you
must rename one of them before you move the distribution list. For details, see Section 18.5,
“Renaming a Distribution List,” on page 270.
To move a distribution list:
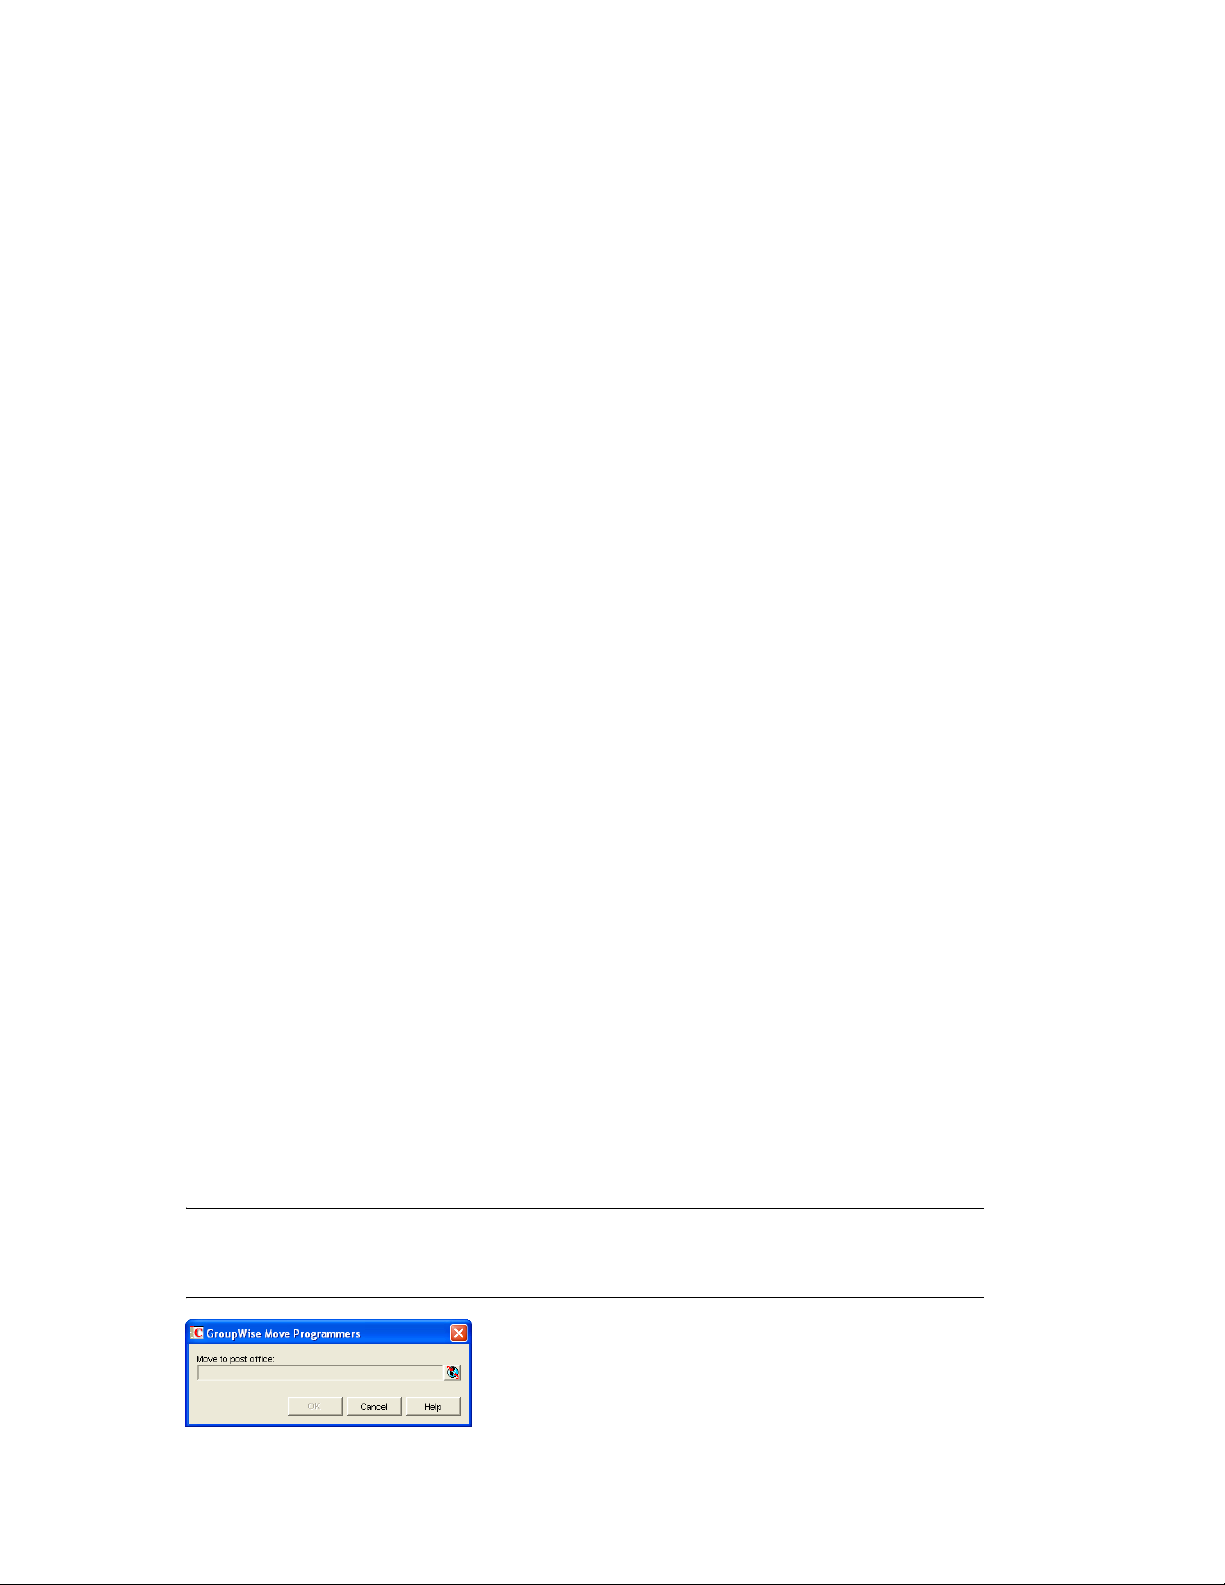
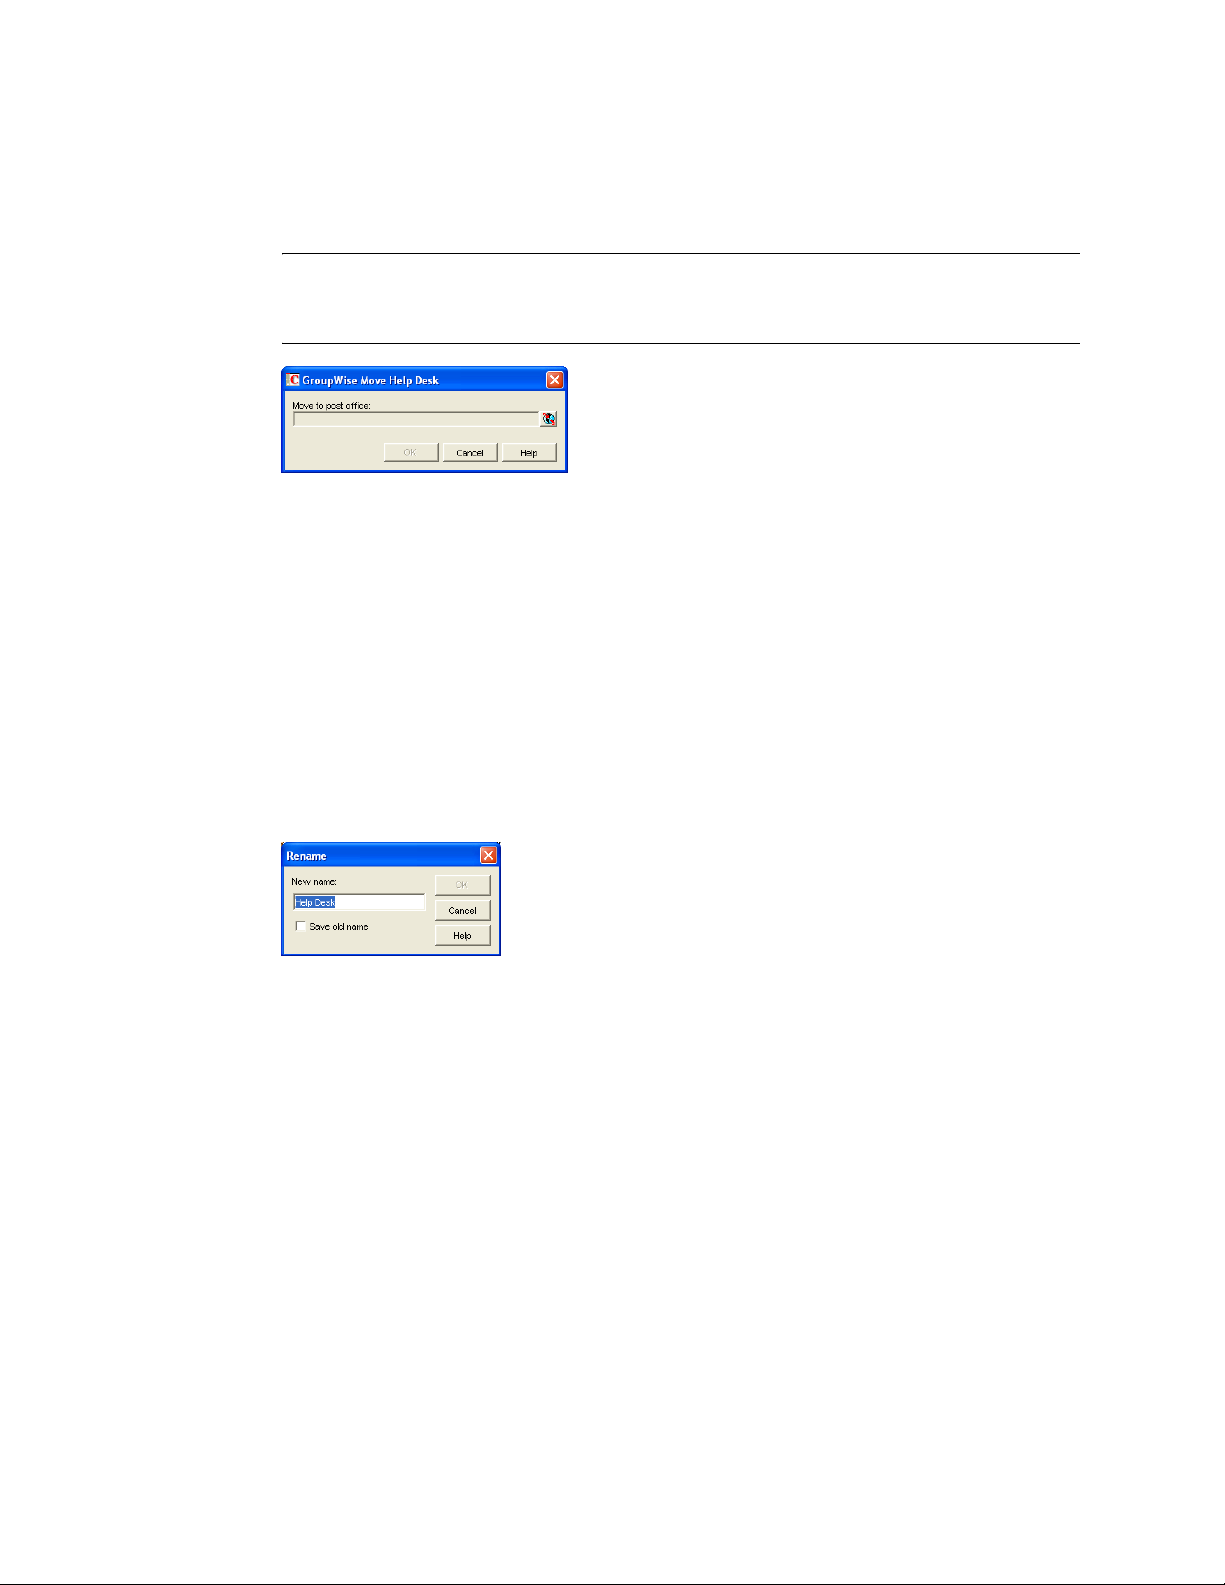
1 In ConsoleOne, right-click the Distribution List object in the GroupWise View, then click Move
to display the GroupWise Move dialog box.
IMPORTANT: You must select the Distribution List object in the GroupWise View. If you
select the object in the standard Console View, you will move the Distribution List object from
one container to another, not the distribution list from one post office to another.
Creating and Managing Distribution Lists 269
Page 10

2 Select the post office to which you want to move the distribution list, then click OK to move the
distribution list.
18.5 Renaming a Distribution List
Situations might arise where you need to give a distribution list a new name. For example, you
might need to move the distribution list to another post office that already has a user, resource, or
distribution list with the same name.
To rename a distribution list:
1 In ConsoleOne, right-click the Distribution List object in the GroupWise View, then click
Rename to display the Rename dialog box.
novdocx (en) 11 December 2007
2 In the New Name field, specify the new name for the distribution list.
3 Make sure the Save Old Name box is not selected. Saving the old name causes duplicate
distribution lists to appear in the Address Book.
4 Click OK to rename the distribution list.
18.6 Enabling Users to Modify a Distribution List
In ConsoleOne, you can grant rights to users to modify distribution lists from the GroupWise
Windows client. However, users cannot create or delete distribution lists; that can be done only in
ConsoleOne by an administrator.
To grant edit rights to a specific distribution list to one or more users:
1 Browse to and right-click a Distribution List object, then click Properties.
2 Click GroupWise > Administration.
270 GroupWise 7 Administration Guide
Page 11

3 Click Add, then select one or more users who can edit the distribution list.
4 Click OK to grant the rights.
5 Notify the users that they have rights to modify the distribution list.
novdocx (en) 11 December 2007
To give a specific user rights to edit one or more distribution lists:
1 Browse to and right-click a User object, then click Properties.
2 Click GroupWise > Distribution List Administration.
3 Click Add, then select one or more distribution lists for the user to edit.
4 Click OK to grant the rights.
5 Notify the user that he or she has rights to modify the distribution lists.
Creating and Managing Distribution Lists 271
Page 12

In the GroupWise client, the editable distribution list does not appear any different to the user
who has rights to edit it, except that Add and Remove are active for that user.
18.7 Deleting a Distribution List
To delete a single distribution list:
1 In ConsoleOne, right-click the Distribution List object, then click Delete.
2 Click Ye s to confirm the deletion.
To delete multiple distribution lists that belong to the same post office:
1 In ConsoleOne, right-click the Post Office object, then click Properties.
2 Click GroupWise > Distribution Lists.
3 Select one or more distribution lists, then click Delete.
4 Click OK to complete the deletion.
18.8 Managing E-Mail Addresses
novdocx (en) 11 December 2007
To ensure that distribution list addresses meet your needs, GroupWise enables you to determine the
format and visibility of addresses, as well as create additional names for distribution lists. The
following sections provide details:
Section 18.8.1, “Changing a Distribution List’s Internet Addressing Settings,” on page 272
Section 18.8.2, “Changing a Distribution List’s Visibility in the Address Book,” on page 274
Section 18.8.3, “Creating a Nickname for a Distribution List,” on page 275
18.8.1 Changing a Distribution List’s Internet Addressing Settings
By default, a distribution list inherits its Internet address settings (preferred Internet address format,
allowed address formats, and Internet domain name) from its post office, domain, or GroupWise
system. If necessary, you can override these settings for a distribution list.
1 In ConsoleOne, right-click the Distribution List object, then click Properties.
2 Click GroupWise, then click Internet Addressing to display the Internet Addressing page.
272 GroupWise 7 Administration Guide
Page 13

3 To override one of the settings, select the Override box, then change the setting.
Preferred Address Format: The preferred address format determines how the distribution
list’s address is displayed in the GroupWise Address Book and in sent messages.
novdocx (en) 11 December 2007
At the distribution list level, only three preferred address formats are available. The address
formats that include first name, last name, and first initial do not apply to distribution lists, so
they are not available.
You can completely override the address format by explicitly defining the user portion of the
address (user@Internet domain name). The user portion can include any RFC-compliant
characters (no spaces, commas, and so forth). The distribution list name portion must be unique
within its Internet domain. This means that a distribution list name can be used multiple times
in your GroupWise system, provided it is used only once in each Internet domain.
Allowed Address Formats: The allowed address formats determine which address formats
can be used to send messages to the distribution list.
Only the UserID.Post Office@Internet domain name and UserID@Internet domain name
formats are valid for distribution lists. The formats that include first name, last name, and first
initial are not valid.
For example, using DL1 as the distribution list ID, Research as the post office, and novell.com
as the Internet domain, if you select the two valid formats, members of the distribution list
receive messages sent using either of the following addresses:
dl1.research@novell.com
dl1@novell.com
Internet Domain Name: The Internet domain name, along with the preferred address format,
is used when constructing the e-mail address that is displayed in the GroupWise Address Book
and in the To field of sent messages.
Only the Internet domain names that have been defined are displayed in the list. Internet
domain names must be defined at the system level (Too ls > GroupWise System Operations >
Internet Addressing). For more information, see Section 45, “Configuring Internet
Addressing,” on page 703.
Creating and Managing Distribution Lists 273
Page 14

If you override the Internet domain name, the For Incoming Mail, Recipients are Known
Exclusively by This Internet Domain Name option becomes available. Enable this option if you
only want the distribution list to be able to receive messages addressed with this Internet
domain name. If you don’t enable this option, the distribution list receive messages addressed
using any of the Internet domain names assigned to your GroupWise system.
4 Click OK to save your changes.
18.8.2 Changing a Distribution List’s Visibility in the Address Book
A distribution list’s visibility level determines which users see the distribution list in the Address
Books. You can control the availability of a distribution list by displaying it in the Address Book for
all users in your GroupWise system, in the Address Book for those users in the distribution list’s
domain only, in the Address Book for those users on the distribution list’s post office only, or not
displaying it at all.
1 In ConsoleOne, right-click the Distribution List object, then click Properties.
novdocx (en) 11 December 2007
2 In the Visibility field, select the desired visibility level.
System: The distribution list is displayed in the Address Book for all users in your GroupWise
system.
Domain: The distribution list is displayed in the Address Book for all users in the distribution
list’s domain.
Post Office: The distribution list is displayed in the Address Book for all users on the
distribution list’s post office.
None: The distribution list not displayed in the Address Book.
3 Click OK to save your changes.
274 GroupWise 7 Administration Guide
Page 15
18.8.3 Creating a Nickname for a Distribution List
Each distribution list has a specific GroupWise address consisting of the distribution list’s name,
post office, and domain (distribution_list_name.post_office.domain). You can assign one or more
nicknames to a distribution list to give it an alternate address. Each part of the address
(distribution_list_name, post_office, and domain) can be different than the distribution list’s actual
address.
For example, you might want to create a nickname for a distribution list you have just moved (see
Section 18.8.3, “Creating a Nickname for a Distribution List,” on page 275) or renamed (see
Section 18.5, “Renaming a Distribution List,” on page 270). The nickname, which would be the
distribution list’s old address, would ensure that any use of the old address would result in the new
address being used instead.
Nicknames are not displayed in the Address Book, which means users need to know the nickname to
use it.
To create a nickname for a distribution list:
1 In ConsoleOne, right-click the Distribution List object, then click Properties.
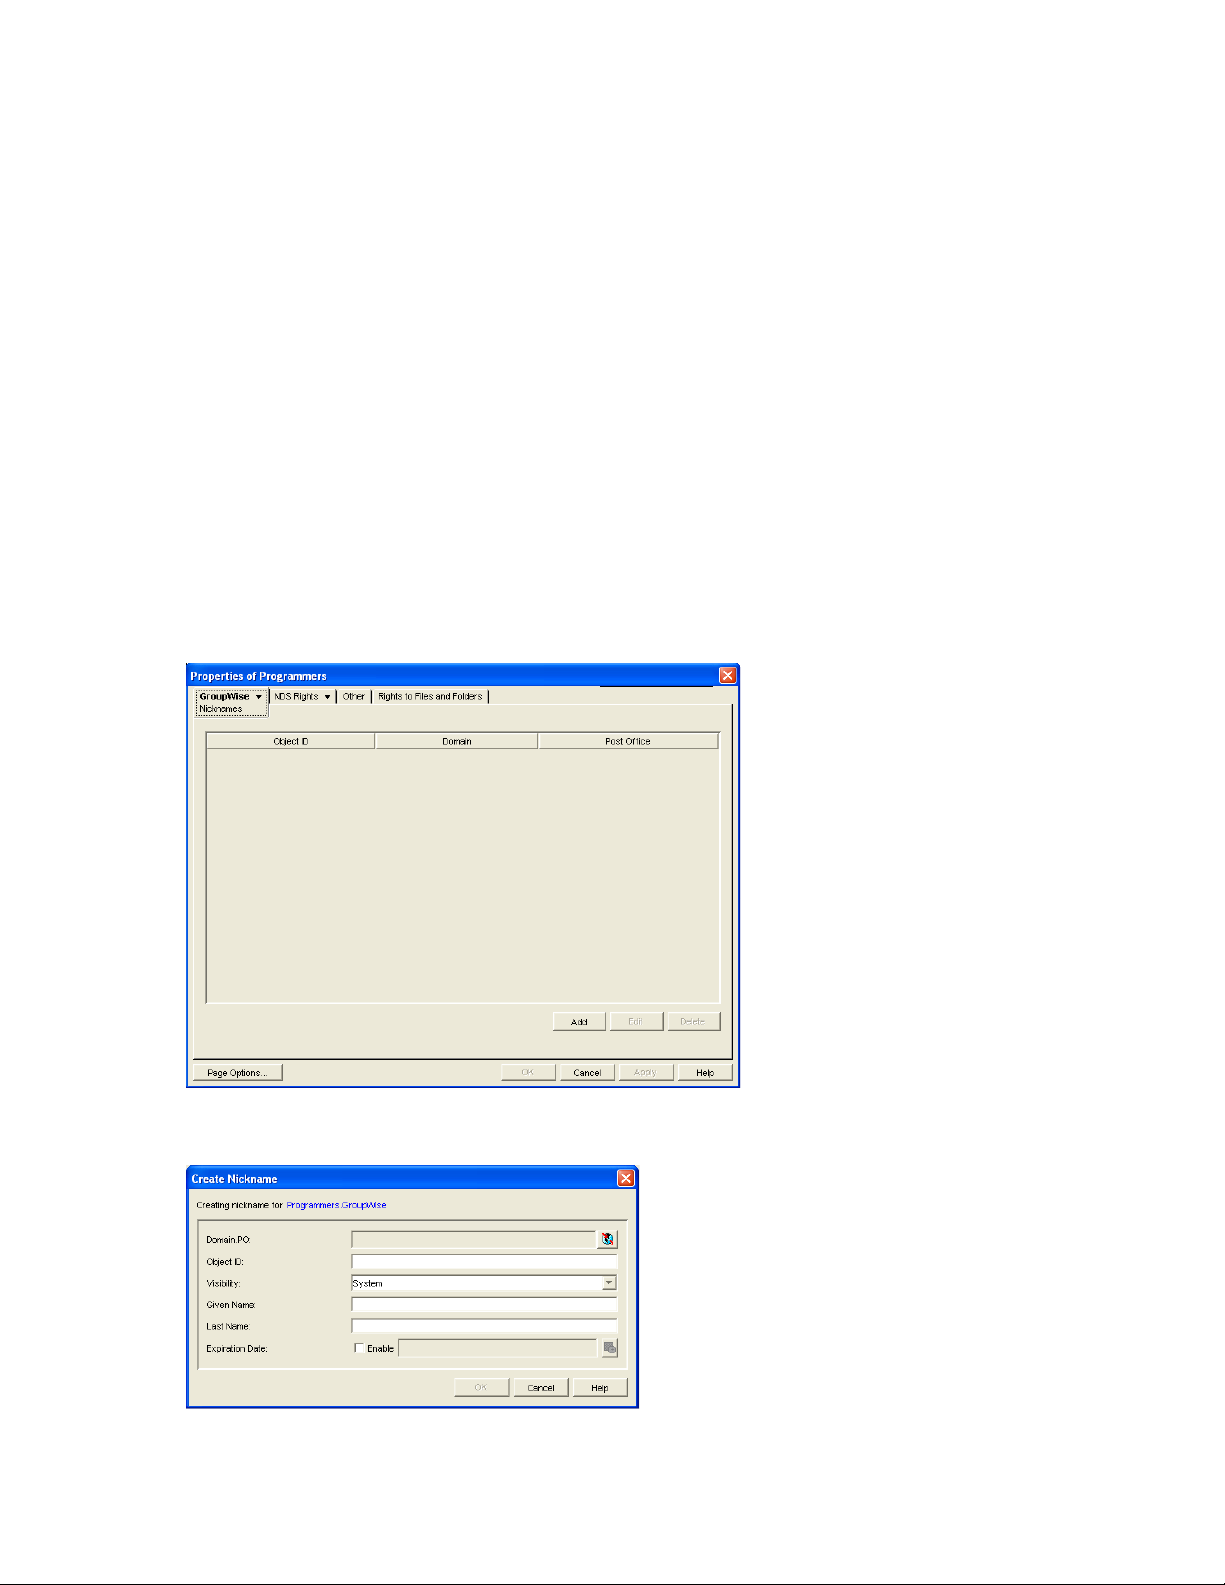
2 Click GroupWise > Nicknames to display the Nicknames page.
novdocx (en) 11 December 2007
3 Click Add to display the Create Nickname dialog box.
Creating and Managing Distribution Lists 275
Page 16

4 Fill in the following fields:
Domain.PO: Select the post office where you want to assign the nickname. This can be any
post office in your GroupWise system; it does not have to be the distribution list’s post office.
Object ID: Specify the name to use as the distribution_list_name portion of the nickname.
Visibility: Ignore this field. Nicknames are not displayed in the Address Book.
Given Name: Ignore this field. It is not used for distribution list nicknames.
Last Name: Ignore this field. It is not used for distribution list nicknames.
Expiration Date: If you want the nickname to no longer work after a certain date, click Enable
and then select the desired date.
5 Click OK to add the nickname to the list.
6 Click OK to save the changes to the Distribution List object.
18.9 Adding External Users to a Distribution List
Members of distribution lists must have corresponding eDirectoryTM objects. If you want to add
users to a distribution list, and the users do not belong to your GroupWise system, you must create
objects to represent these external users within your GroupWise system.
novdocx (en) 11 December 2007
Section 18.9.1, “Creating an External Domain,” on page 276
Section 18.9.2, “Creating an External Post Office,” on page 276
Section 18.9.3, “Creating an External User,” on page 276
For more information, see Section 6.7, “Adding External Users to the GroupWise Address Book,”
on page 95.
18.9.1 Creating an External Domain
You create an external domain to represent the world outside your GroupWise system.
1 In ConsoleOne, right-click GroupWise System, then click New > External Domain.
2 Provide a unique name for the domain, then click OK.
18.9.2 Creating an External Post Office
You create an external post office in the external domain to hold External User objects.
1 In ConsoleOne, right-click the External Domain object, then click New > External Post Office.
2 Provide a unique name for the post office, then click OK.
18.9.3 Creating an External User
You create an external user so that it can be selected when adding members to a distribution list.
1 In ConsoleOne, right-click the External Post Office object, then click New > External User.
2 Provide a unique name for the user, then click OK.
3 Right-click the new External User object, then click Properties.
276 GroupWise 7 Administration Guide
Page 17

4 On the Identification page, fill in at least the first and last names.
5 Click GroupWise > Internet Addressing.
6 Select Override.
7 Select the preferred addressing format depending on how you want e-mail to this user to be
addressed.
or
Provide a preferred e-mail ID.
8 Click OK to save the user information.
9 Follow the instructions in Section 18.2, “Adding Members to a Distribution List,” on page 268
to add the external user to a distribution list.
novdocx (en) 11 December 2007
Creating and Managing Distribution Lists 277
Page 18

novdocx (en) 11 December 2007
278 GroupWise 7 Administration Guide
Page 19
19
Using eDirectory Groups as
novdocx (en) 11 December 2007
GroupWise Distribution Lists
Novell® eDirectoryTM groups can be configured to function as GroupWise® distribution lists.
Section 19.1, “Setting Up an eDirectory Group for Use in GroupWise,” on page 279
Section 19.2, “Seeing Which Members of an eDirectory Group Have GroupWise Accounts,”
on page 280
Section 19.3, “Changing a Group’s Visibility in the Address Book,” on page 281
Section 19.4, “Moving a Group,” on page 281
Section 19.5, “Renaming a Group,” on page 282
Section 19.6, “Removing a Group from GroupWise,” on page 282
19.1 Setting Up an eDirectory Group for Use in GroupWise
By default, eDirectory groups are not automatically available for use as distribution lists in
GroupWise. To make an eDirectory group available, you need to assign it to a GroupWise post
office.
®
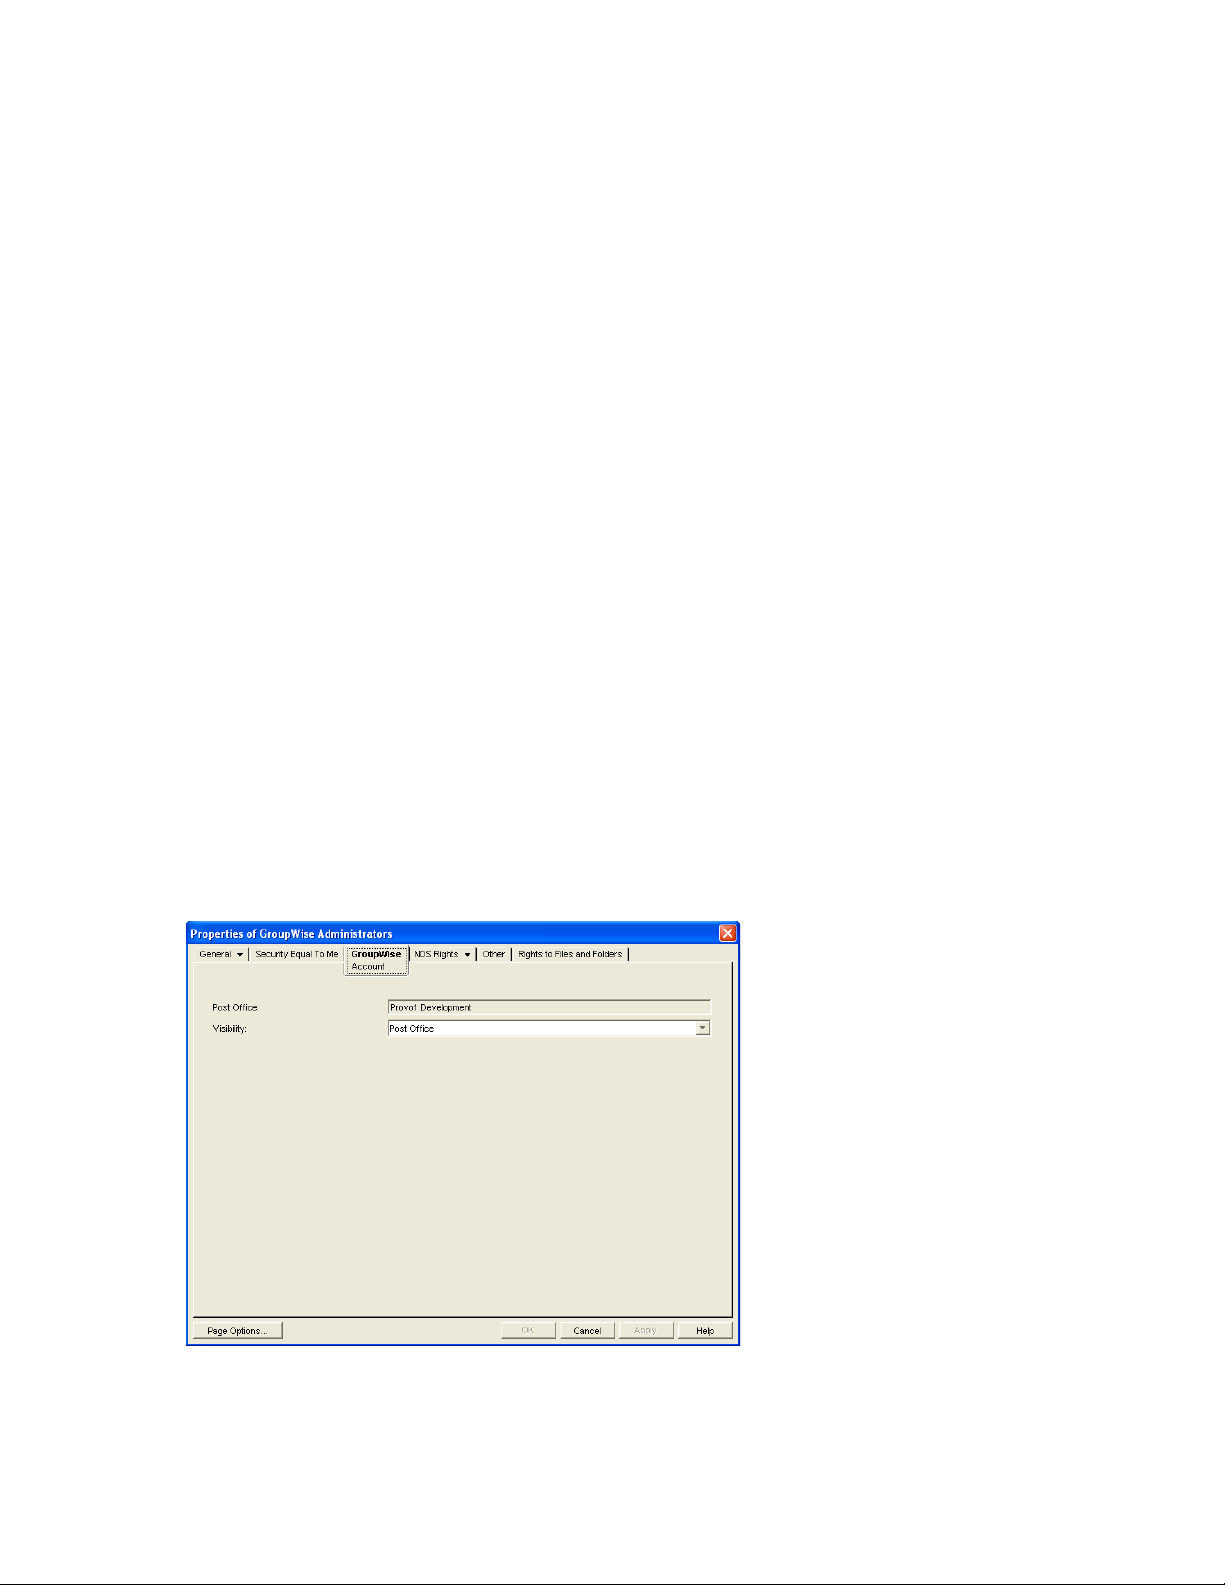
1 In ConsoleOne
2 Click GroupWise > Account to display the Account page.
, right-click the Group object, then click Properties.
19
3 Fill in the following fields:
Post Office: Select the post office where you want to assign the group. You can choose any
post office you want. If you plan to limit visibility of the group to users on a specific post office
or in a specific domain, you should select that post office or a post office in the desired domain.
Using eDirectory Groups as GroupWise Distribution Lists
279
Page 20
Visibility: Select the level at which the group is visible in the Address Book. System enables
the group to be visible to all users in your GroupWise system. Domain enables the group to be
visible to all users in the same domain as the group. Post Office enables the group to be visible
to all users on the same post office as the group. Setting the visibility to None means that the
group is not visible at any level. However, even if the group is not displayed in a user’s Address
Book, he or she can use the group by typing the group’s name in a message’s To field.
4 Click OK to save the changes.
The group is now treated like a GroupWise distribution list and is visible in the GroupWise View
when you filter on distribution lists.
When GroupWise users send messages to the group, only those group members who have
GroupWise accounts receive messages.
For information about using dynamic groups with GroupWise, see TID 3074853 in the Novell
Support Knowledgebase (http://www.novell.com/support/supportcentral).
19.2 Seeing Which Members of an eDirectory Group Have GroupWise Accounts
novdocx (en) 11 December 2007
eDirectory groups can include members who have GroupWise accounts and members who do not
have GroupWise accounts. When the group is used to address a message, only those members who
have GroupWise accounts receive the message.
To see which members have GroupWise accounts and which ones do not:
1 In ConsoleOne, select the Group object, then click To ol s > GroupWise Diagnostics > Display
Object.
The top window displays the members who have GroupWise accounts. The bottom window
displays all members.
280 GroupWise 7 Administration Guide
Page 21
2 When you’ve finished viewing the information, click OK.
19.3 Changing a Group’s Visibility in the Address Book
An eDirectory group’s visibility level determines which users see the group in the Address Books.
You can control the availability of a group by displaying it in the Address Book for all users in your
GroupWise system, in the Address Book for those users in the group’s domain only, in the Address
Book for those users on the group’s post office only, or not displaying it at all.
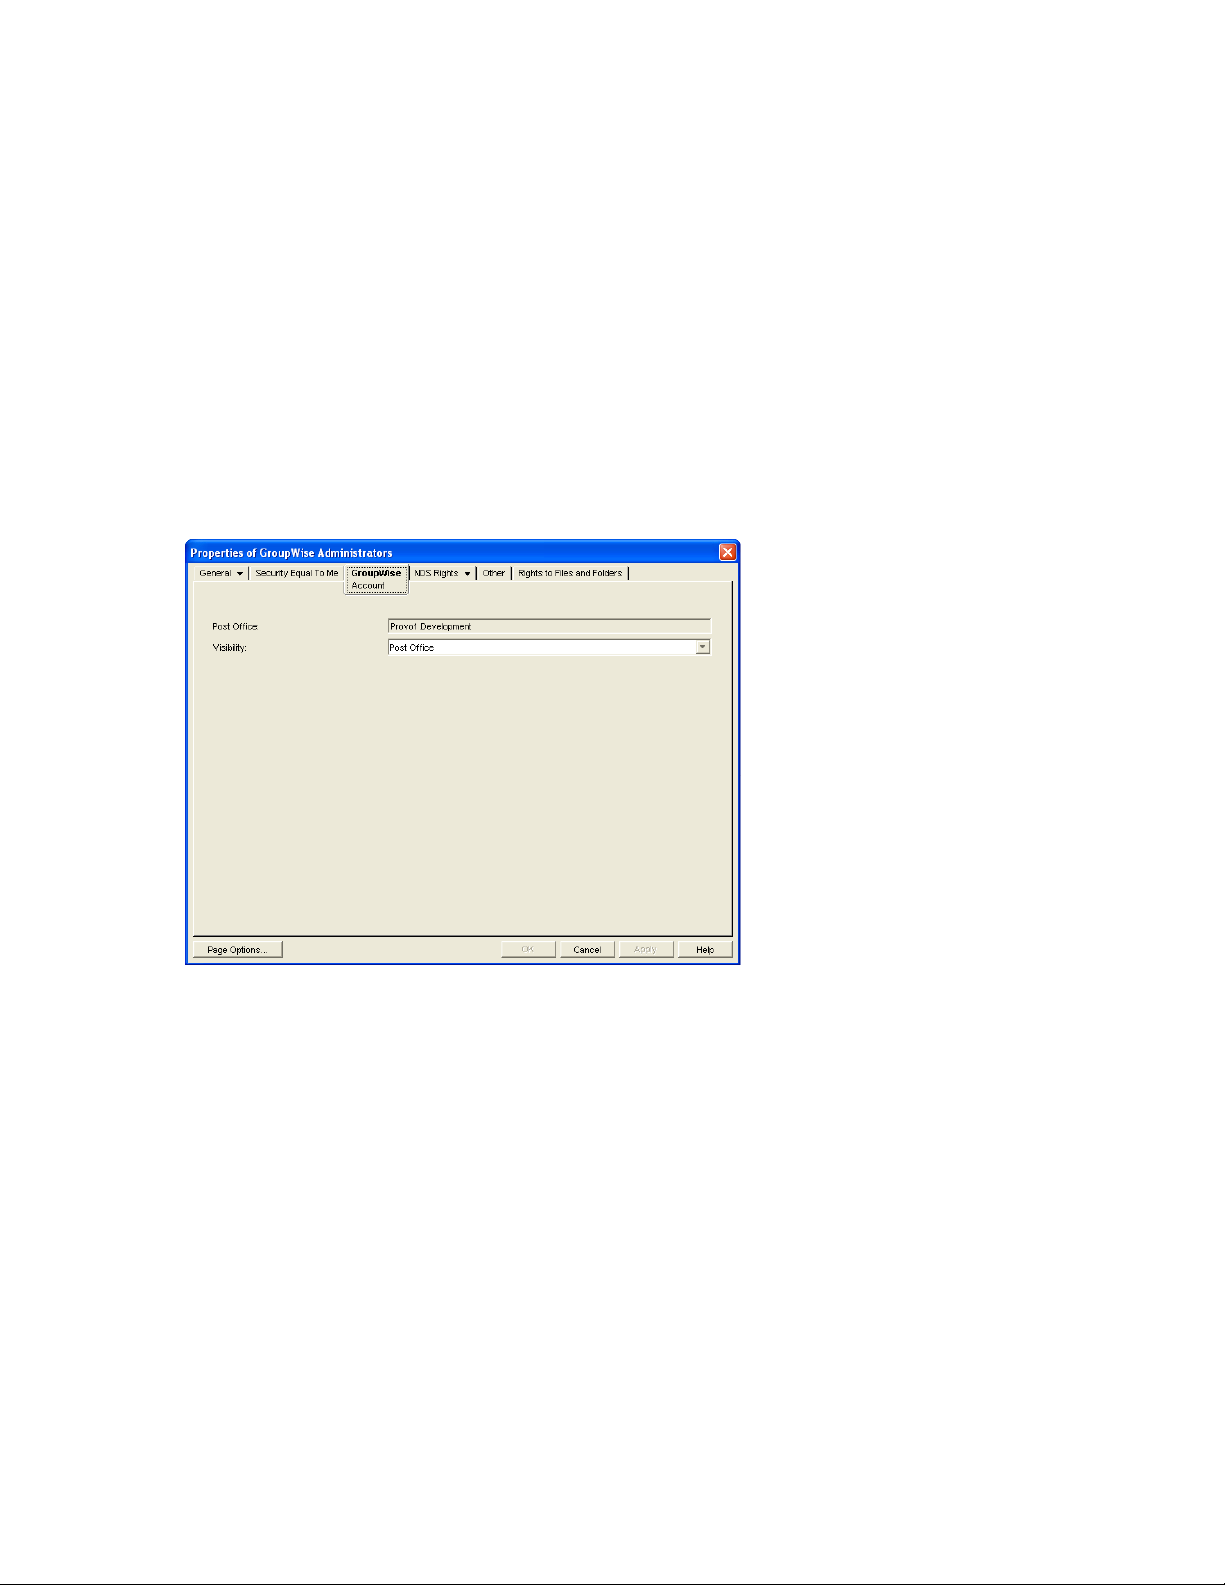
1 In ConsoleOne, right-click the Group object, then click Properties.
2 Click GroupWise > Account to display the Account page:
novdocx (en) 11 December 2007
3 In the Visibility field, select the desired visibility level.
System: The group is displayed in the Address Book for all users in your GroupWise system.
Domain: The group is displayed in the Address Book for all users in the group’s domain.
Post Office: The group is displayed in the Address Book for all users on the group’s post
office.
None: The group is not displayed in the Address Book.
4 Click OK to save your changes.
19.4 Moving a Group
If necessary, you can move an eDirectory group from one post office to another. For example, you
might need to move a group from a post office you are removing.
The group retains the same name on the new post office as it has on the current post office. If
another object (user, resource, distribution list, group, or organizational role) assigned to the new
post office has the same name, you must rename one of them before you move the group. For
details, see Section 18.5, “Renaming a Distribution List,” on page 270.
Using eDirectory Groups as GroupWise Distribution Lists 281
Page 22
To move an eDirectory group from one post office to another:
1 In ConsoleOne, right-click the Group object in the GroupWise View, then click Move to display
the GroupWise Move dialog box.
IMPORTANT: You must select the Group object in the GroupWise View. If you select the
object in the standard Console View, you will move the Group object from one eDirectory
container to another, not the group from one post office to another.
2 Select the post office to which you want to move the group, then click OK to move the group.
19.5 Renaming a Group
novdocx (en) 11 December 2007
Situations might arise where you need to give an eDirectory group a new name. For example, you
might need to move the group to another post office that already has an object (user, resource,
distribution list, group, or organizational unit) with the same name.
When you rename an eDirectory group, you rename the Group object. This means that not only are
you changing the name in GroupWise, but also in eDirectory.
1 In ConsoleOne, right-click the Group object, then click Rename to display the Rename dialog
box.
2 In the New Name field, specify the new name for the group.
3 Make sure the Save Old Name box is not selected. Saving the old name causes duplicate groups
to appear in the Address Book.
4 Click OK to rename the group.
19.6 Removing a Group from GroupWise
If you decide that you no longer want an eDirectory group to be a distribution list in GroupWise, you
can remove its association with a GroupWise post office, so that it returns to being just an
eDirectory group.
1 In ConsoleOne, right-click the Group object, click Delete, then click Yes to confirm that you
want to delete the object.
2 In the eDirectory Account box, deselect Delete to retain the Group object in eDirectory.
The Delete option in the GroupWise Account box is selected by default and cannot be
deselected.
282 GroupWise 7 Administration Guide
Page 23

3 Click OK twice to complete the deletion.
novdocx (en) 11 December 2007
Using eDirectory Groups as GroupWise Distribution Lists 283
Page 24

novdocx (en) 11 December 2007
284 GroupWise 7 Administration Guide
Page 25
20
Using eDirectory Organizational
novdocx (en) 11 December 2007
Roles as GroupWise Distribution
Lists
Organizational roles can be configured to function as GroupWise® distribution lists.
Section 20.1, “Setting Up an Organizational Role for Use in GroupWise,” on page 285
Section 20.2, “Seeing Which Members of an Organizational Role Have GroupWise Accounts,”
on page 286
Section 20.3, “Changing an Organizational Role’s Visibility in the Address Book,” on page 287
Section 20.4, “Moving an Organizational Role,” on page 287
Section 20.5, “Renaming an Organizational Role,” on page 288
Section 20.6, “Removing an Organizational Role from GroupWise,” on page 289
20.1 Setting Up an Organizational Role for Use in GroupWise
By default, Novell® eDirectoryTM organizational roles are not automatically available for use as
distribution lists in GroupWise. To make an organizational role available, you need to assign it to a
GroupWise post office.
®
1 In ConsoleOne
, right-click the Organizational Role object, then click Properties.
20
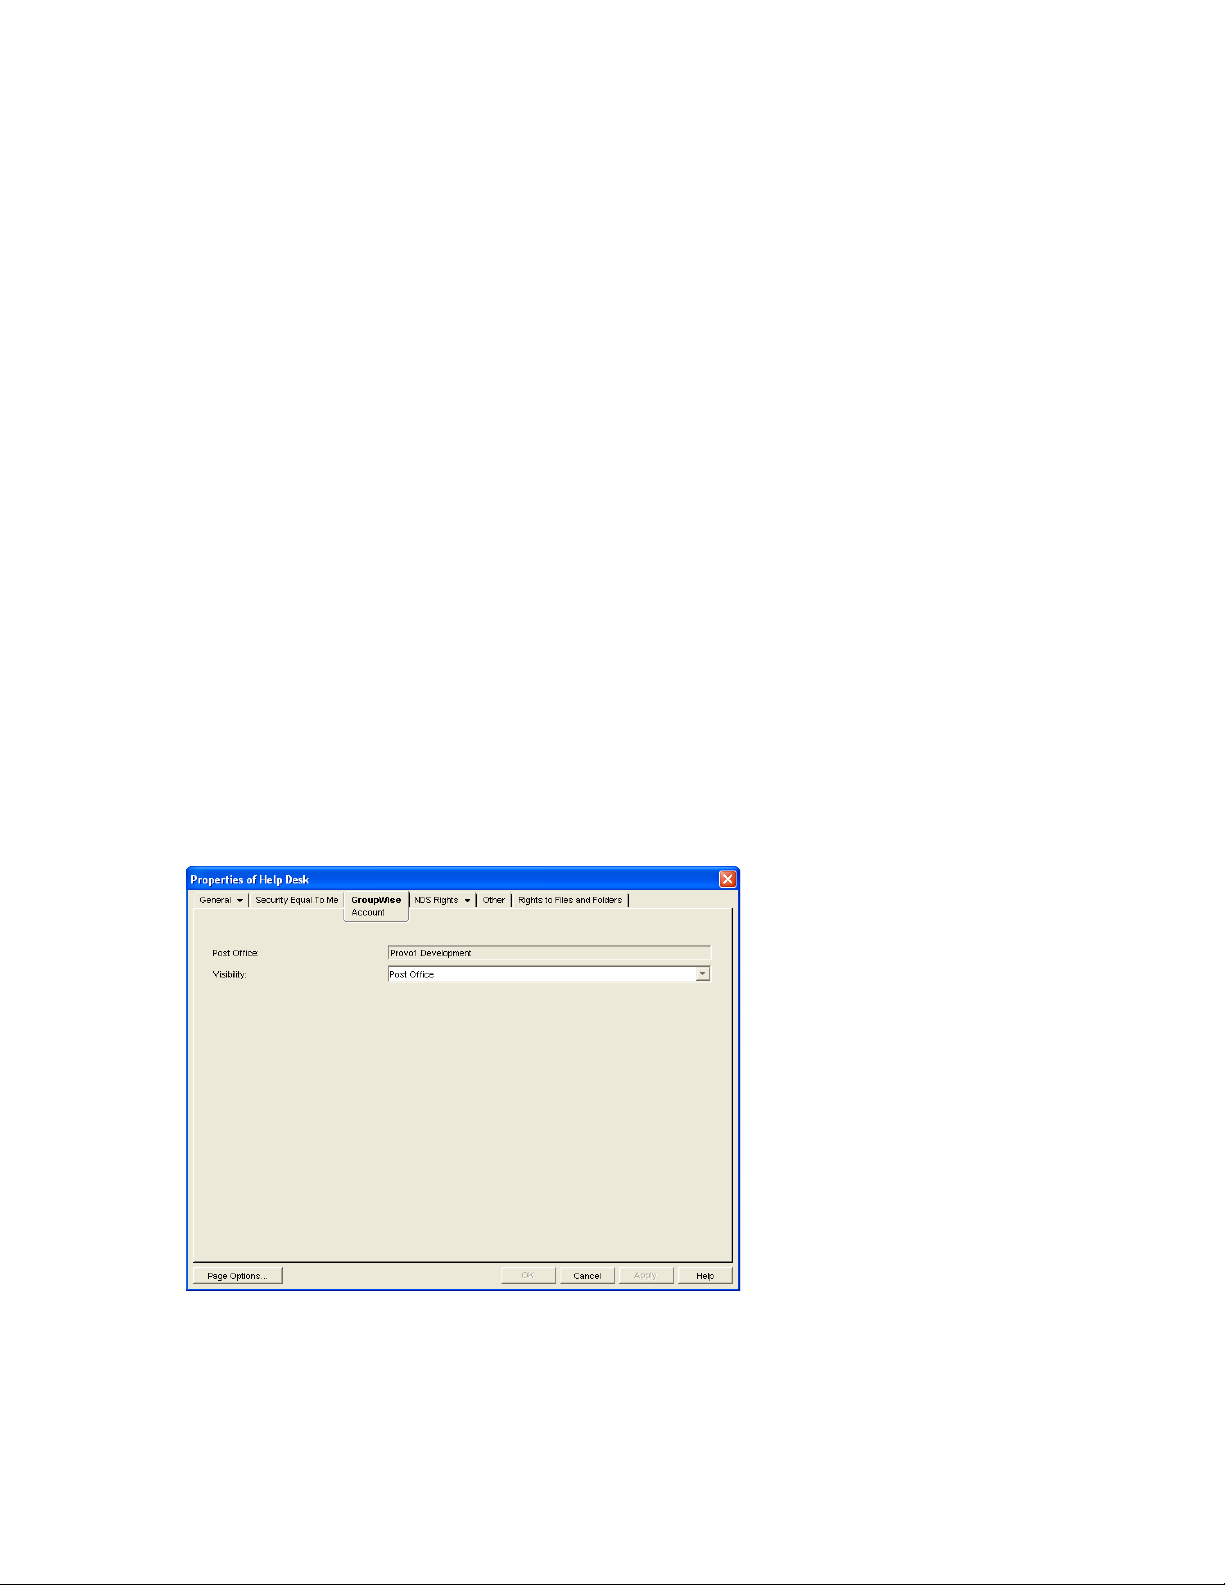
2 Click the GroupWise tab to display the Account page.
3 Fill in the following fields:
Using eDirectory Organizational Roles as GroupWise Distribution Lists
285
Page 26

Post Office: Select the post office where you want to assign the organizational role. You can
choose any post office you want. If you plan to limit visibility of the organizational role to users
on a specific post office or in a specific domain, you should select that post office or a post
office in the desired domain.
Visibility: Select the level at which the role is visible in the Address Book. System enables the
role to be visible to all users in your GroupWise system. Domain enables the role to be visible
to all users in the same domain as the role. Post Office enables the role to be visible to all users
on the same post office as the role. Setting the visibility to None means that the role is not
visible at any level. However, even if the role is not displayed in a user’s Address Book, he or
she can use the role by typing the role’s name in a message’s To field.
4 Click OK to save the changes.
The organizational role is now treated like a GroupWise distribution list and is visible in the
GroupWise View when you filter on distribution lists.
When GroupWise users send messages to the organization role, only those role members who have
GroupWise accounts receive messages.
20.2 Seeing Which Members of an
novdocx (en) 11 December 2007
Organizational Role Have GroupWise Accounts
eDirectory organizational roles can include members who have GroupWise accounts and members
who do not have GroupWise accounts. When the organizational role is used to address a message,
only those members who have GroupWise accounts receive the message.
To see which members have GroupWise accounts and which ones do not:
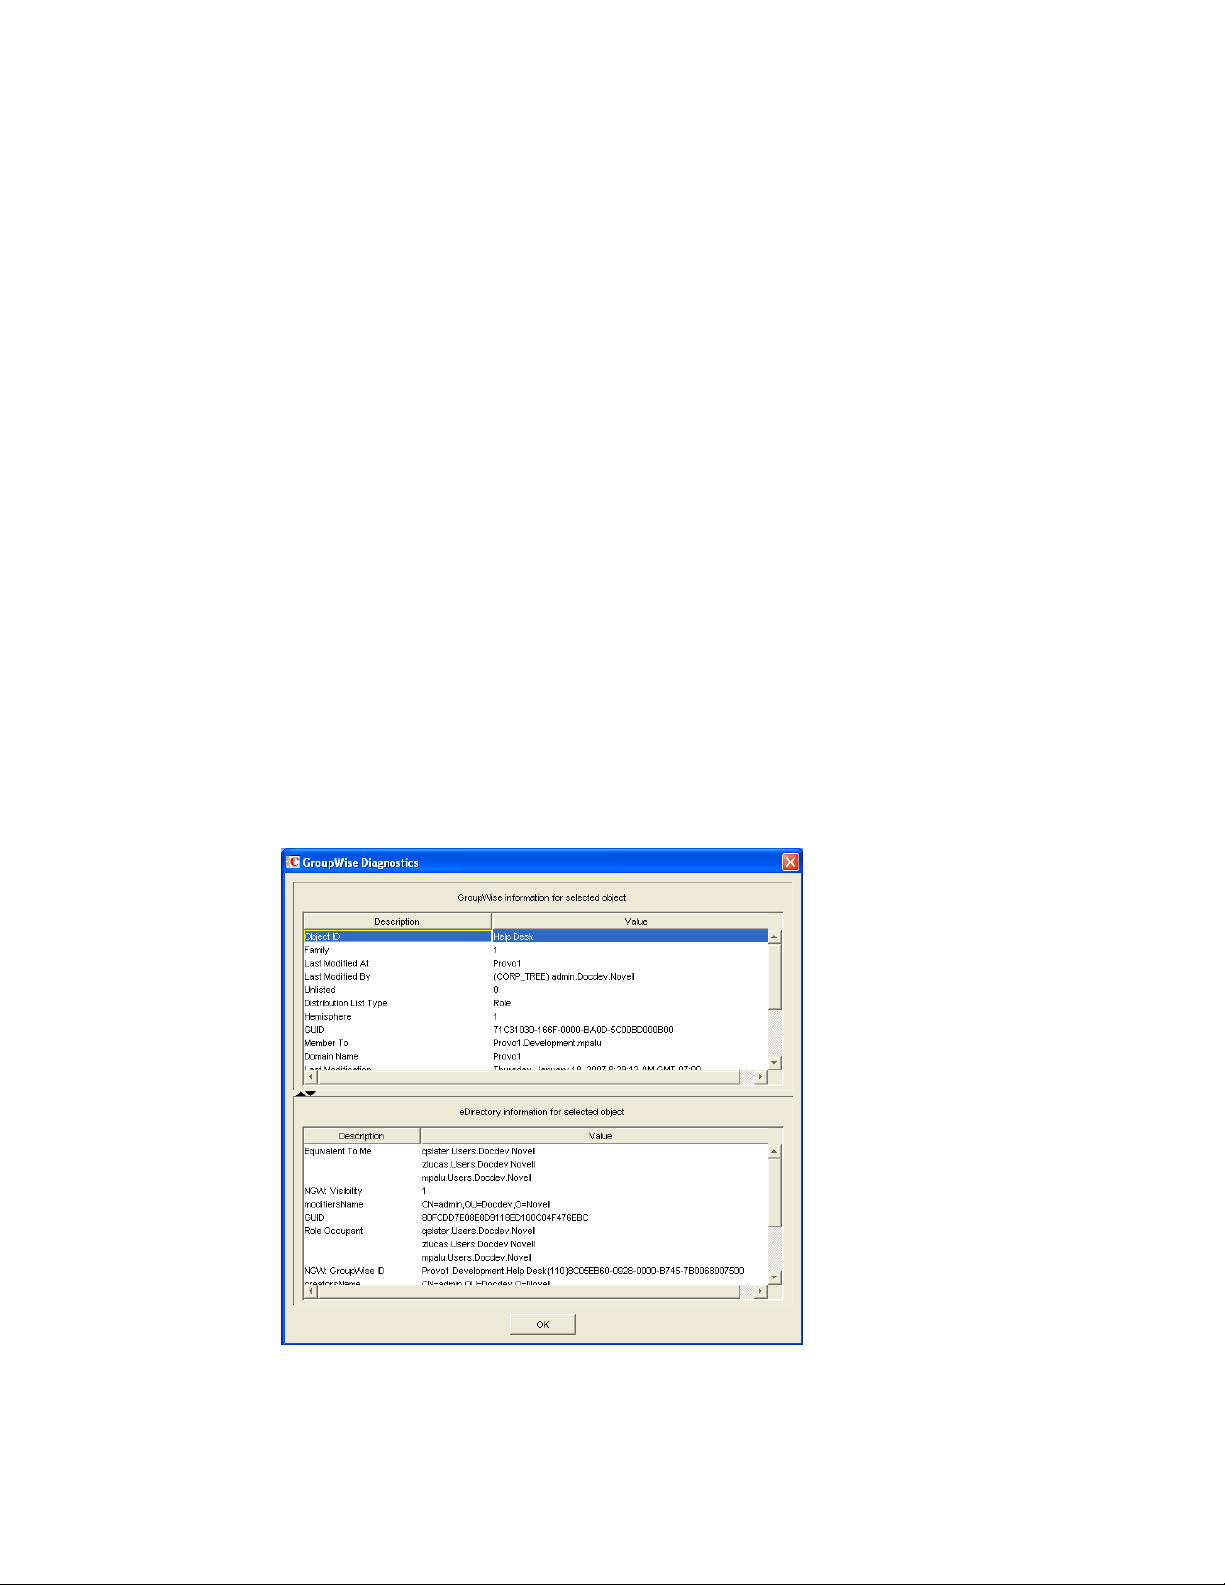
1 In ConsoleOne, select the Organizational Role object, then click Too ls > GroupWise
Diagnostics > Display Object.
286 GroupWise 7 Administration Guide
Page 27
The top window displays the members who have GroupWise accounts. The bottom window
displays all members.
2 When you’ve finished viewing the information, click OK.
20.3 Changing an Organizational Role’s Visibility in the Address Book
An organizational role’s visibility level determines which users see the role in the Address Books.
You can control the availability of a role by displaying it in the Address Book for all users in your
GroupWise system, in the Address Book for those users in the role’s domain only, in the Address
Book for those users on the role’s post office only, or not displaying it at all.
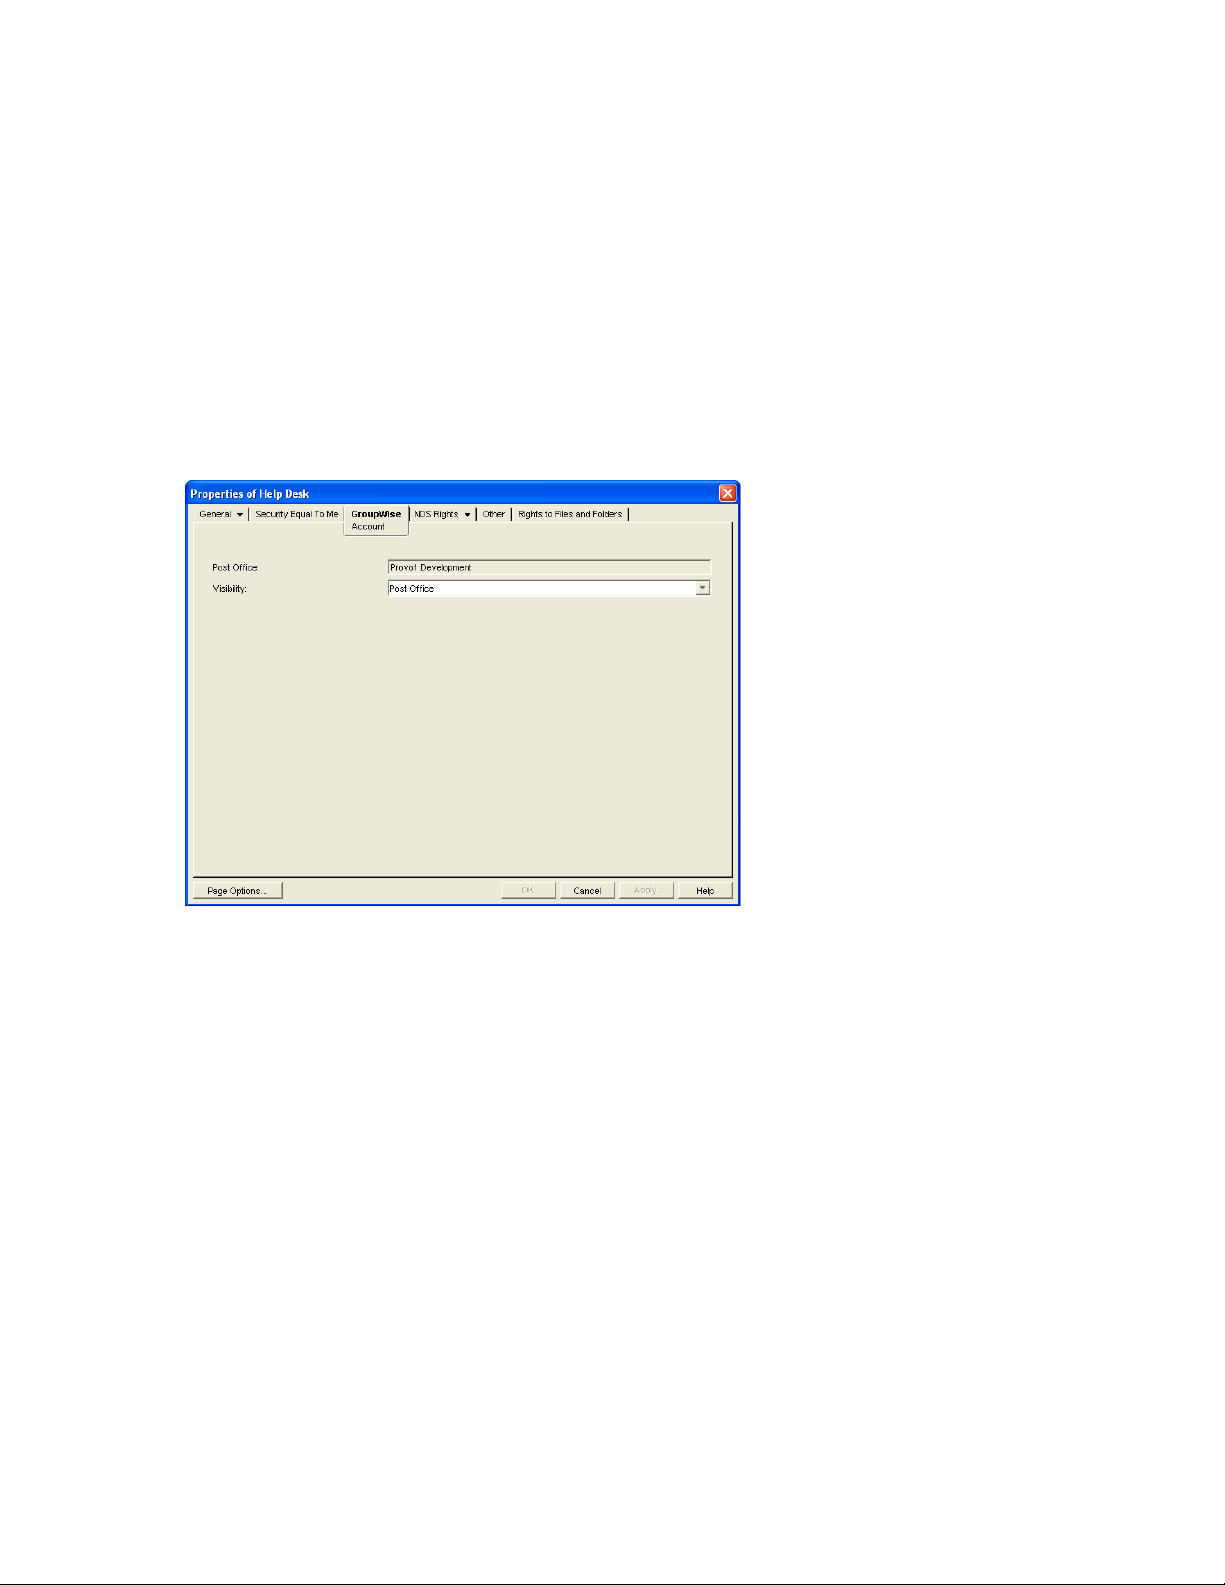
1 In ConsoleOne, right-click the Organizational Role object, then click Properties.
2 Click GroupWise > Account to display the Account page:
novdocx (en) 11 December 2007
3 In the Visibility field, select the desired visibility level.
System: The organizational role is displayed in the Address Book for all users in your
GroupWise system.
Domain: The organizational role is displayed in the Address Book for all users in the role’s
domain.
Post Office: The organizational role is displayed in the Address Book for all users on the role’s
post office.
None: The organizational role is not displayed in the Address Book.
4 Click OK to save your changes.
20.4 Moving an Organizational Role
If necessary, you can move an organizational role from one post office to another. For example, you
might need to move an organizational role from a post office you are removing.
Using eDirectory Organizational Roles as GroupWise Distribution Lists 287
Page 28

The organizational role retains the same name on the new post office as it has on the current post
office. If another object (user, resource, distribution list, group, or organizational role) assigned to
the new post office has the same name, you will need to rename one of them before you move the
organizational role. For details, see Section 18.5, “Renaming a Distribution List,” on page 270.
To move an organizational role from one post office to another:
1 In ConsoleOne, right-click the Organizational Role object in the GroupWise View, then click
Move to display the GroupWise Move dialog box.
IMPORTANT: You must select the Organizational Role object in the GroupWise View. If you
select the object in the standard Console View, you will move the Organizational Role object
from one eDirectory container to another, not the group from one post office to another.
novdocx (en) 11 December 2007
2 Select the post office to which you want to move the organizational role, then click OK to move
the organizational role.
20.5 Renaming an Organizational Role
Situations might arise where you need to give an organizational role a new name. For example, you
might need to move the organizational role to another post office that already has an object (user,
resource, distribution list, group, or organizational unit) with the same name.
When you rename an organizational role, you rename the Organizational Role object. This means
that you are not only changing the name in GroupWise, but also in eDirectory.
To rename an organizational role:
1 In ConsoleOne, right-click the Organizational Role object, then click Rename to display the
GroupWise Rename dialog box.
2 In the New Name field, specify the new name for the organizational role.
3 Click OK to rename the organizational role.
288 GroupWise 7 Administration Guide
Page 29

20.6 Removing an Organizational Role from GroupWise
If you decide that you no longer want an organizational role to be a public address list in
GroupWise, you can remove its association with a GroupWise post office, so that it returns to being
just an eDirectory organizational role.
1 In ConsoleOne, right-click the Organizational Role object, click Delete, then click Ye s to
confirm that you want to delete the object.
2 In the eDirectory Account box, deselect Delete to retain the Organizational Role object in
eDirectory.
The Delete option in the GroupWise Account box is selected by default and cannot be
deselected.
3 Click OK twice to complete the deletion.
novdocx (en) 11 December 2007
Using eDirectory Organizational Roles as GroupWise Distribution Lists 289
 Loading...