

Page 1

Novell
Liberty Identity Provider
TM
for Novell
ADMINISTRATION GUIDE
eDirectory
®
www.novell.com
Page 2

Legal Notices
Novell, Inc. makes no representations or warranties with respect to the contents or use of this documentation, and specifically disclaims any express
or implied warranties of merchantability or fitness for any particular purpose. Further, Novell, Inc. reserves the right to revise this publication and to
make changes to its content, at any time, without obligation to notify any person or entity of such revisions or changes.
Further, Novell, Inc. makes no representations or warranties with respect to any software, and specifically disclaims any express or implied warranties
of merchantability or fitness for any particular purpose. Further, Novell, Inc. reserves the right to make changes to any and all parts of Novell software,
at any time, without any obligation to notify any person or entity of such changes.
You may not export or re-export this product in violation of any applicable laws or regulations including, without limitation, U.S. export regulations
or the laws of the country in which you reside. This product may require export authorization from the U.S. Department of Commerce prior to
exporting from the U.S. or Canada.
Copyright © 2003 Novell, Inc. All rights reserved. No part of this publication may be reproduced, photocopied, stored on a retrieval system, or
transmitted without the express written consent of the publisher.
Patents Pending.
Novell, Inc.
1800 South Novell Place
Provo, UT 84606
U.S.A.
www.novell.com
Liberty Identity Provider for Novell eDirectory
April 2003
Online Documentation: To access the online documentation for this and other Novell products, and to get updates, see
www.novell.com/documentation.
Page 3

Novell Trademarks
eDirectory is a trademark of Novell, Inc.
Novell is a registered trademark of Novell, Inc. in the United States and other countries.
Third-Party Trademarks
All third-party trademarks are the property of their respective owners.
Page 4

Page 5

Contents
About This Guide 3
Introduction . . . . . . . . . . . . . . . . . . . . . . . . . . . . . . . . . . . . . . . . . . . . . . . . . . . . . . . . . 3
Documentation Conventions . . . . . . . . . . . . . . . . . . . . . . . . . . . . . . . . . . . . . . . . . . . . . . . . 3
Documentation Updates . . . . . . . . . . . . . . . . . . . . . . . . . . . . . . . . . . . . . . . . . . . . . . . . . . 3
1 Overview 5
Understanding the Liberty Alliance . . . . . . . . . . . . . . . . . . . . . . . . . . . . . . . . . . . . . . . . . . . . . 5
Liberty Alliance Architecture . . . . . . . . . . . . . . . . . . . . . . . . . . . . . . . . . . . . . . . . . . . . . . . . 5
Understanding the Value of the Novell Liberty Identity Provider . . . . . . . . . . . . . . . . . . . . . . . . . . . . . . 5
Benefits of the Liberty Identity Provider for Novell eDirectory . . . . . . . . . . . . . . . . . . . . . . . . . . . . . . . 6
Define a Liberty Alliance Identity Provider . . . . . . . . . . . . . . . . . . . . . . . . . . . . . . . . . . . . . . . 6
Easily Create and Maintain User Identities . . . . . . . . . . . . . . . . . . . . . . . . . . . . . . . . . . . . . . . 6
Define Liberty Identity and Service Provider Relationships . . . . . . . . . . . . . . . . . . . . . . . . . . . . . . . 6
Securely Authenticate Users . . . . . . . . . . . . . . . . . . . . . . . . . . . . . . . . . . . . . . . . . . . . . . 6
Give Users Control to Federate and Defederate Their Identity Information. . . . . . . . . . . . . . . . . . . . . . . 7
Service Provider Sample Code . . . . . . . . . . . . . . . . . . . . . . . . . . . . . . . . . . . . . . . . . . . . . . . 7
2 Installing the Liberty Identity Provider 9
Product Components . . . . . . . . . . . . . . . . . . . . . . . . . . . . . . . . . . . . . . . . . . . . . . . . . . . . 9
System Requirements . . . . . . . . . . . . . . . . . . . . . . . . . . . . . . . . . . . . . . . . . . . . . . . . . . . 9
Liberty Identity Provider Requirements . . . . . . . . . . . . . . . . . . . . . . . . . . . . . . . . . . . . . . . . . 9
Liberty Server Requirements . . . . . . . . . . . . . . . . . . . . . . . . . . . . . . . . . . . . . . . . . . . . . . 9
Installing Liberty Identity Provider Software . . . . . . . . . . . . . . . . . . . . . . . . . . . . . . . . . . . . . . . 10
Installing Liberty Identity Provider Software. . . . . . . . . . . . . . . . . . . . . . . . . . . . . . . . . . . . . . 10
Installing the Liberty Administration Plug-ins When iManager is Already Installed on Your eDirectory Server . . . . 19
Uninstalling the Liberty Identity Provider Software . . . . . . . . . . . . . . . . . . . . . . . . . . . . . . . . . . . . 19
3 Creating a Liberty IDP Site 21
Creating a Liberty IDP Site . . . . . . . . . . . . . . . . . . . . . . . . . . . . . . . . . . . . . . . . . . . . . . . . 21
1. Set Up a Liberty IDP Site. . . . . . . . . . . . . . . . . . . . . . . . . . . . . . . . . . . . . . . . . . . . . . 21
2. Define Site Properties . . . . . . . . . . . . . . . . . . . . . . . . . . . . . . . . . . . . . . . . . . . . . . . 24
3. Define Service Providers . . . . . . . . . . . . . . . . . . . . . . . . . . . . . . . . . . . . . . . . . . . . . . 25
4. Set Up Your Liberty Identity Server . . . . . . . . . . . . . . . . . . . . . . . . . . . . . . . . . . . . . . . . 27
5. Manage Your Federations . . . . . . . . . . . . . . . . . . . . . . . . . . . . . . . . . . . . . . . . . . . . . 27
4 Configuring Your Liberty Identity Provider to Run in SSL Mode 29
Converting to Secure Mode . . . . . . . . . . . . . . . . . . . . . . . . . . . . . . . . . . . . . . . . . . . . . . . 29
Creating Certificates for Apache . . . . . . . . . . . . . . . . . . . . . . . . . . . . . . . . . . . . . . . . . . . . . 30
Customizing Your Liberty IDP User Interface. . . . . . . . . . . . . . . . . . . . . . . . . . . . . . . . . . . . . . . 30
A Installing and Configuring a Sample Service Provider 33
Installing the Sample Service Provider Software . . . . . . . . . . . . . . . . . . . . . . . . . . . . . . . . . . . . . 33
Configuring Your Service Provider . . . . . . . . . . . . . . . . . . . . . . . . . . . . . . . . . . . . . . . . . . . . 37
Adding Additional Users . . . . . . . . . . . . . . . . . . . . . . . . . . . . . . . . . . . . . . . . . . . . . . . 38
Customizing Your Liberty SP User Interface . . . . . . . . . . . . . . . . . . . . . . . . . . . . . . . . . . . . . . . 38
Contents 1
Page 6

B Modifying Apache 39
Modifying the Apache Configuration Files . . . . . . . . . . . . . . . . . . . . . . . . . . . . . . . . . . . . . . . . . 39
Importing Trusted Roots. . . . . . . . . . . . . . . . . . . . . . . . . . . . . . . . . . . . . . . . . . . . . . . . . . 42
C Troubleshooting Your Liberty IDP Installation and Configuration 43
Troubleshooting Installation Issues . . . . . . . . . . . . . . . . . . . . . . . . . . . . . . . . . . . . . . . . . . . . 43
Reviewing Log Files Created During Installation . . . . . . . . . . . . . . . . . . . . . . . . . . . . . . . . . . . 43
Troubleshooting Post-Installation Issues . . . . . . . . . . . . . . . . . . . . . . . . . . . . . . . . . . . . . . . . . 44
Reviewing Log Files Created After Installation . . . . . . . . . . . . . . . . . . . . . . . . . . . . . . . . . . . . 44
Enabling Advanced Logging . . . . . . . . . . . . . . . . . . . . . . . . . . . . . . . . . . . . . . . . . . . . . . 46
Basic Troubleshooting Tips . . . . . . . . . . . . . . . . . . . . . . . . . . . . . . . . . . . . . . . . . . . . . . . . 47
Troubleshooting Apache . . . . . . . . . . . . . . . . . . . . . . . . . . . . . . . . . . . . . . . . . . . . . . . . 47
Troubleshooting Tomcat . . . . . . . . . . . . . . . . . . . . . . . . . . . . . . . . . . . . . . . . . . . . . . . . 48
Troubleshooting iManager . . . . . . . . . . . . . . . . . . . . . . . . . . . . . . . . . . . . . . . . . . . . . . . 48
2 Liberty Identity Provider for Novell eDirectory
Page 7

About This Guide
Introduction
The purpose of this documentation is to help you install, configure, and administer the Liberty
identity provider for Novell
The audience for this documentation is network administrators.
This guide is divided into the following sections.
Chapter 1, “Overview,” on page 5 — An explanation of the benefits of the Liberty identity
provider and an overview of the components that make up the Liberty product.
Chapter 2, “Installing the Liberty Identity Provider,” on page 9 — Instructions for how to
install Liberty, including system requirements and software installation instructions.
Chapter 3, “Creating a Liberty IDP Site,” on page 21 — An explanation of the tasks you need
to complete in order to set up a basic Liberty infrastructure.
Chapter 4, “Configuring Your Liberty Identity Provider to Run in SSL Mode,” on page 29 —
Instructions for how to convert your Liberty identity provider to secure mode (SSL).
Appendix A, “Installing and Configuring a Sample Service Provider,” on page 33 — A guide
for how to set up your service provider, including instructions for installing a sample service
provider.
Appendix B, “Modifying Apache,” on page 39 — Information on how to modify your Apache
configuration, including configuration examples and information on how to import trusted
roots.
Appendix C, “Troubleshooting Your Liberty IDP Installation and Configuration,” on page 43
— Tips and tricks for troubleshooting your IDP installation and configuration issues.
®
eDirectoryTM infrastructure.
Documentation Conventions
In Novell documentation, a greater-than symbol (>) is used to separate actions within a step and
items in a cross-reference path.
®
A trademark symbol (
trademark.
, TM, etc.) denotes a Novell trademark. An asterisk (*) denotes a third-party
Documentation Updates
For the latest Liberty identity provider for Novell eDirectory documentation, including updates to
this administration guide, see the online documentation at the Novell documentation Web site
(http://www.novell.com/documentation).
About This Guide 3
Page 8

4 Liberty Identity Provider for Novell eDirectory
Page 9

1 Overview
This section covers the following topics:
Understanding the Liberty Alliance
Liberty Alliance Architecture
Understanding the Value of the Novell Liberty Identity Provider
Benefits of the Liberty Identity Provider for Novell eDirectory
Service Provider Sample Code
Understanding the Liberty Alliance
The Liberty Alliance is a consortium of business leaders with a vision to enable a networked world
in which individuals and businesses can more easily conduct transactions while protecting the
privacy and security of vital identity information.
To accomplish its vision, the Liberty Alliance established an open standard for federated network
identity through open technical specifications.
In essence, this open standard is a structured version of the Security Assertions Markup Language,
commonly referred to as SAML, with the goal of accelerating the deployment of standard-based
single sign-on technology.
Liberty Alliance Architecture
The Liberty Alliance 1.1 specification has two main components: the Liberty identity provider
(Liberty IDP) and the identity consumer, referred to as a Liberty service provider (SP).
A Liberty IDP is the central credential store for a user's identity information, and it is the heart of
the user’s identity federations, or account linkage information. The Liberty IDP also serves as the
authentication authority, which is viewed as a trusted identity store by the Liberty SPs.
Liberty SPs are the Web sites that the user wants to connect to.
A "circle of trust" is formed between Liberty IDPs and SPs to provide the user a secure
infrastructure for controlling his or her identity information, and to facilitate Web single sign-on.
Understanding the Value of the Novell Liberty Identity Provider
When a user authenticates to a Liberty SP, he or she is given the option to federate his or her
identity with his or her preferred Liberty IDP. This process creates a unique link between the
Liberty IDP and SP identities.
Overview 5
Page 10

The result of this link is realized on the user's next authentication to the Liberty SP. If he or she is
connected to his Liberty IDP, he or she will be authenticated to the Liberty SP with no user
interaction.
It is important to realize that it is the user who controls his or her identity federation. Thus, the user
is responsible for federation (linking) and defederation of his or her identity information.
Benefits of the Liberty Identity Provider for Novell eDirectory
Novell® eDirectoryTM is the most secure, high-performing, scalable Directory Service on the
market today, which are key requirements of a Liberty IDP identity store.
Using Liberty identity provider for Novell eDirectory software, you can accomplish the following:
Define a Liberty Alliance Identity Provider
Easily Create and Maintain User Identities
Define Liberty Identity and Service Provider Relationships
Securely Authenticate Users
Give Users Control to Federate and Defederate Their Identity Information
Define a Liberty Alliance Identity Provider
The Liberty identity provider for Novell eDirectory software delivers the technology to deploy a
Liberty Alliance 1.1 Identity Provider.
The “Liberty Server Requirements” on page 9 details the supported server platforms for the Novell
Liberty IDP. Once you have a supported server, and you have installed Novell eDirectory 8.7, you
are ready to install and configure the Liberty IDP technology.
Easily Create and Maintain User Identities
Novell's Web-based configuration tools allows the administrator to quickly define and maintain
user identities.
eDirectory 8.7 also provides the administrator with the option to import users using standard
LDAP format, or synchronize with an external user database by adding Novell DirXML
technology.
Define Liberty Identity and Service Provider Relationships
Novell has designed the Liberty IDP and SP configuration screens to allow the administrator to
quickly define the necessary information to define Liberty identity and service providers.
Liberty SPs are also able to provide configuration information that can be imported directly into
the Liberty IDP service.
®
Securely Authenticate Users
Having a secure identity store is worthless if you allow users to authenticate in an insecure manner.
The Liberty Identity Provider for Novell eDirectory software provides administrators with the
ability to encrypt the user's credentials during the authentication process.
6 Liberty Identity Provider for Novell eDirectory
Page 11

Authentication is performed using a login form, which the user completes and submits to the
Liberty IDP. If the user’s credentials (username and password) are verified, the user is
authenticated and is able to federate his or her identities with chosen service providers.
Give Users Control to Federate and Defederate Their Identity Information
A user has the option to federate his or her identity whenever he or she connects to a Liberty SP
that is within the circle of trust with that user’s Liberty IDP.
The user is also able to view all of his or her federations, and can remove or defederate his or her
identity with any Liberty SP at any time.
Service Provider Sample Code
Although the Liberty identity provider for Novell eDirectory software does not provide an actual
Liberty SP, Novell provides sample code to accelerate the deployment of a Liberty SP. This code
is in the form of sample Web pages, JSPs and other Java code that allows users to federate and
display their federation information.
Overview 7
Page 12

8 Liberty Identity Provider for Novell eDirectory
Page 13

2 Installing the Liberty Identity Provider
This chapter provides instructions for installing Liberty identity provider for Novell® eDirectoryTM
software and contains the following topics:
Product Components
System Requirements
Installing Liberty Identity Provider Software
Uninstalling the Liberty Identity Provider Software
Product Components
Your Liberty identity provider (Liberty IDP) installation includes the following components and
specific version numbers:
Novell iManager 1.5.1
JVM* 1.4
Apache* 2
Tomcat* 4.1.18
WARNING: You must not have any of these components already installed on the machine where you will be
installing your Liberty identity provider. If any of these components are already installed, your Liberty identity
provider will not install successfully.
System Requirements
Review the following system requirements to ensure that your server and client environments meet
installation prerequisites:
“Liberty Identity Provider Requirements” on page 9
“Liberty Server Requirements” on page 9
Liberty Identity Provider Requirements
The Liberty IDP is a self-contained installation and does not require licensed hardware to run.
Liberty Server Requirements
You must have Novell eDirectory version 8.7 installed in your Liberty environment prior to
installing the Liberty identity provider. We recommend that you do not have eDirectory installed
on the same machine where you will be installing the Liberty IDP. Ideally, you should run your
Liberty IDP, service provider, and LDAP server on separate machines.
Installing the Liberty Identity Provider 9
Page 14

The Novell-supported platform for installing the Liberty IDP is a Windows* 2000 server or
workstation.
To run the Liberty IDP, you must have:
a static IP address
an iManager-compatible browser: Internet Explorer 5.5 or above, or Netscape* 6.2 or above
For additional information and full system requirements for Novell eDirectory 8.7, refer to the
Novell eDirectory 8.7 Quick Start, available at the Novell Documentation site (http://
www.novell.com/documentation/lg/edir87/index.html).
You can download Novell eDirectory at Novell Software Downloads (http://
download.novell.com).
Installing Liberty Identity Provider Software
To install a basic Liberty IDP infrastructure, complete the following procedures:
“Installing Liberty Identity Provider Software” on page 10
“Installing the Liberty Administration Plug-ins When iManager is Already Installed on Your
eDirectory Server” on page 19
Installing Liberty Identity Provider Software
The Liberty IDP software should only be installed on compatible hardware (see “Liberty Identity
Provider Requirements” on page 9). The installation is divided into four sections: an installation
introduction, a pre-installation summary, the Liberty IDP installation, and a completion record. At
any given point of the installation process, you can follow the progress of your installation by
referring to the left-hand side of the install dialog. (See Figure 1.)
To install the Liberty IDP:
1 At the Web download site, click the Web download link to automatically download the Liberty
IDP executable.
2 Run the executable.
InstallAnywhere* will guide you through the installation process.
3 After you have read the introductory screen, click Next.
10 Liberty Identity Provider for Novell eDirectory
Page 15
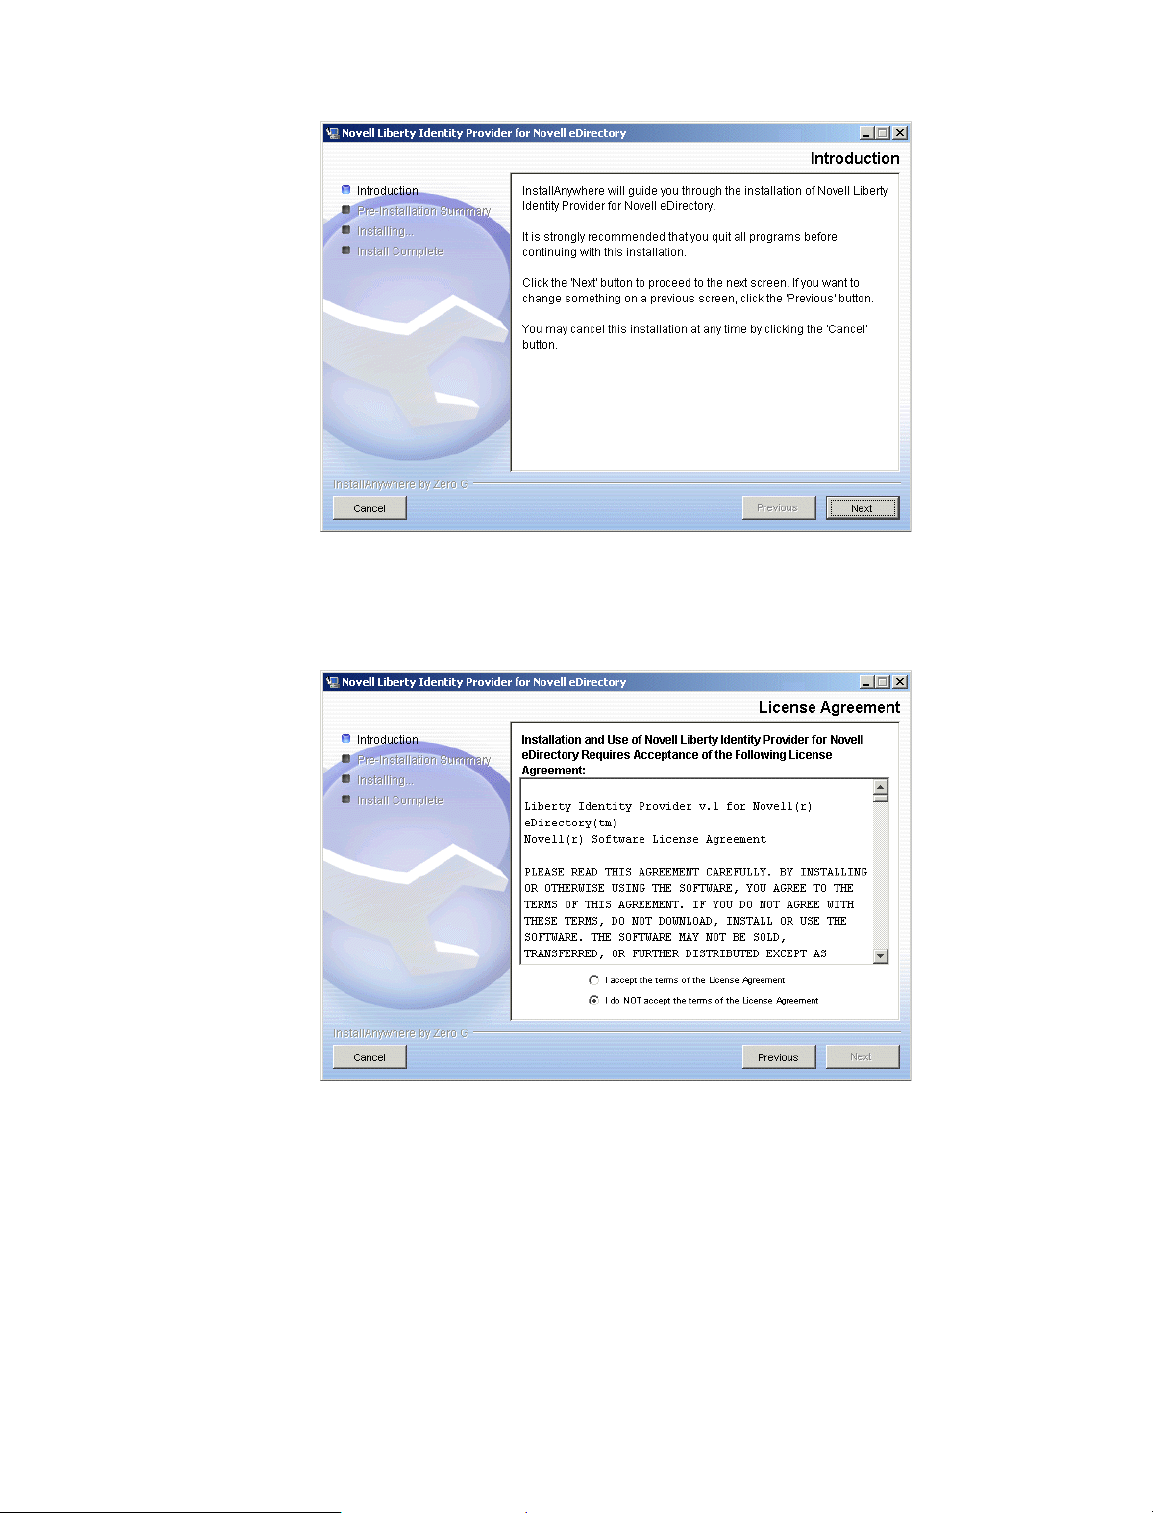
Figure 1 Liberty Identity Provider Introduction
4 If you accept the License Agreement, select the accept button, then click Next.
Figure 2 License Agreement
5 The Liberty IDP created by the installation is configured to run in a non-SSL mode by default.
This mode is sufficient for testing purposes only. You cannot use the non-SSL mode in a
production environment. For information on how to convert to SSL mode, see Chapter 4,
“Configuring Your Liberty Identity Provider to Run in SSL Mode,” on page 29.
Click Next if you accept the SSL warning.
Installing the Liberty Identity Provider 11
Page 16
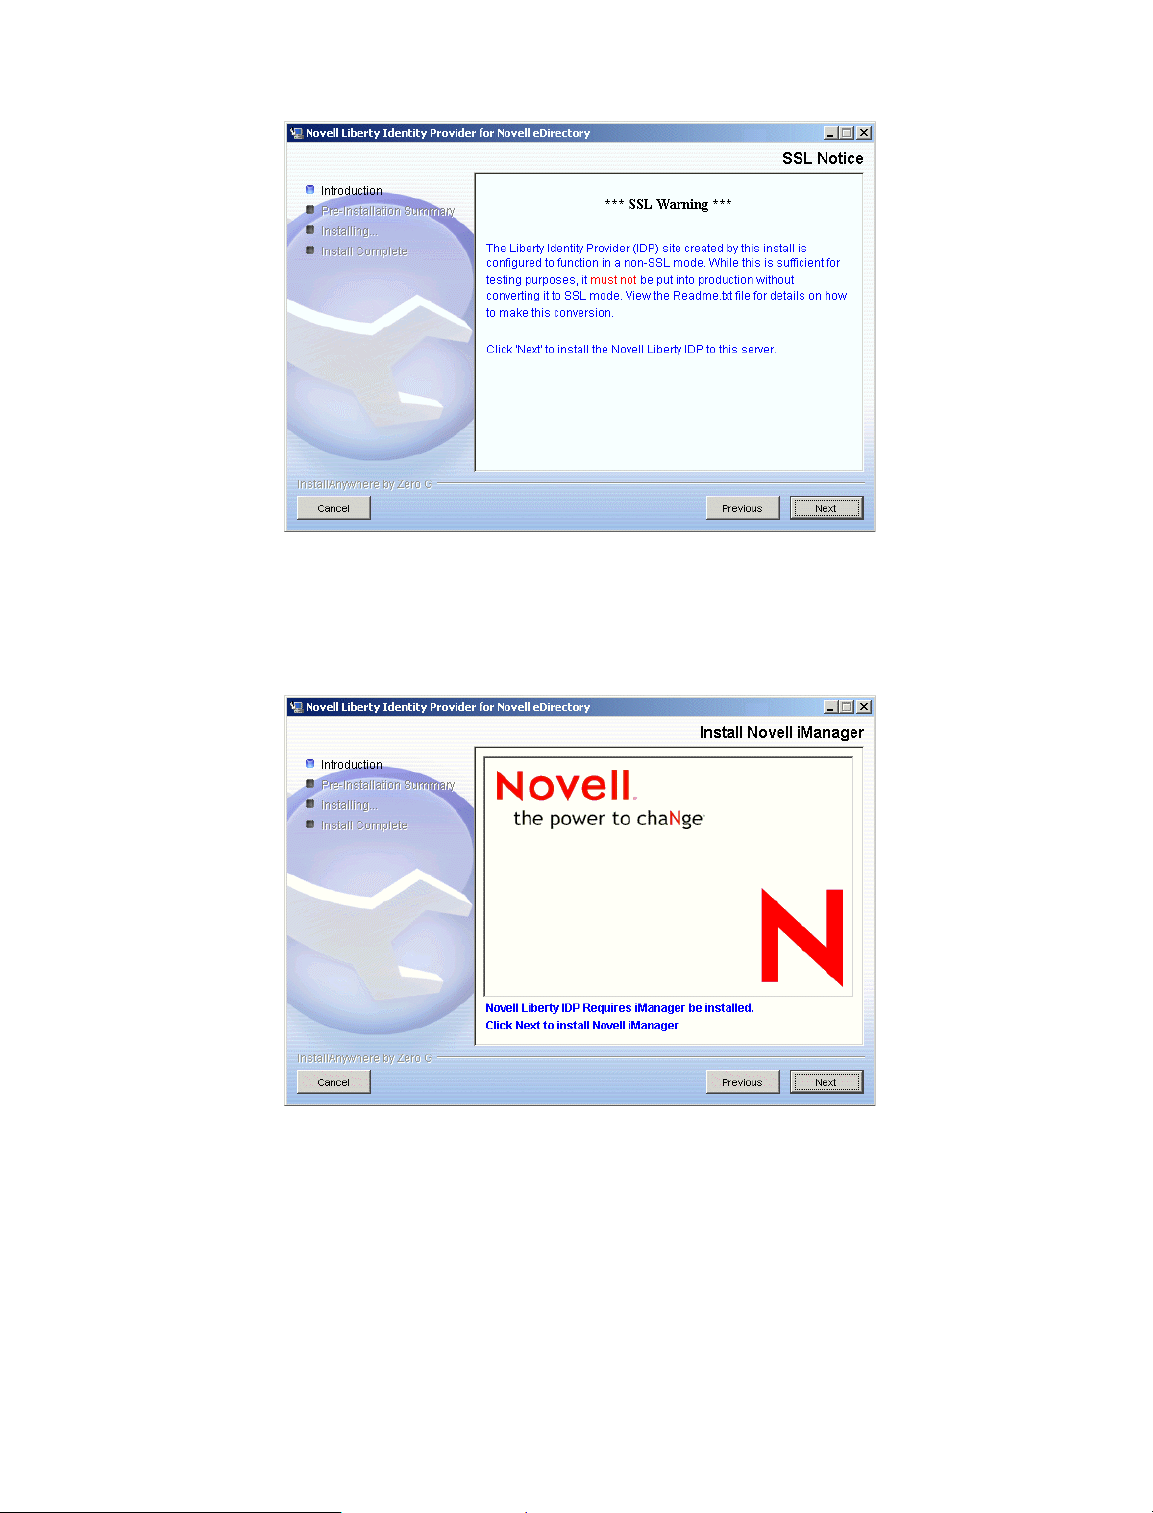
Figure 3 SSL Warning
6 The Liberty IDP requires Novell iManager to be installed. Even if you already have iManager
installed on your machine, click Next to proceed with the installation.
Figure 4 Install iManager
The iManager installation is a wizard that consists of several screens that run on top of your
Liberty IDP installation wizard. InstallAnywhere will guide you through the iManager
installation.
6a Select the language you want (English is the default), then click OK.
12 Liberty Identity Provider for Novell eDirectory
Page 17

Figure 5 iManager Installation
6b Read the Introduction screen, then click Next.
Figure 6 iManager Introduction
6c Read the Detection Summary screen, which indicates the components that will be
installed with iManager, then click Next.
WARNING: If the Web server, servlet container, and/or JVM show as already installed, you must
quit the installation, remove the component(s), then begin the installation again. To be sure you have
deleted all the files before reinstalling the Liberty IDP, see “Uninstalling the Liberty Identity Provider
Software” on page 19.
Installing the Liberty Identity Provider 13
Page 18

Figure 7 Detection Summary
6d Select the directory where iManager should be installed. The default is C:\Program
Files\Novell.
Figure 8 Choose Install Folder
6e Click Next.
6f Review the Pre-Installation Summary. If you need to make changes, click Previous to
return to the previous screens. Otherwise, click Install.
14 Liberty Identity Provider for Novell eDirectory
Page 19

Figure 9 Pre-Installation Summary
iManager is installed on your machine. (This installation might take a few minutes.)
6g If the iManager installation is successful, you will get an Install Complete screen. Review
this screen, then click Done.
Figure 10 Install Complete
You are returned to the Liberty IDP installation.
If iManager does not install successfully, see Appendix C, “Troubleshooting Your
Liberty IDP Installation and Configuration,” on page 43 for tips on how to troubleshoot
the installation.
7 At the LDAP Configuration screen, enter the Admin Distinguished Name, Admin Password,
LDAP Server Domain/IP Address, LDAP Port, and select whether to Use Secure LDAP,
meaning if the connection should be over SSL (the default is No).
You must enter the Admin Distinguished Name in eDirectory context. For example,
cn=admin,ou=users,o=mycompany.
NOTE: If you are using Secure LDAP, you need to import the trusted root of your eDirectory tree into your
certificate authority’s keystore. You can do this by locating your key material object. By default, this would
Installing the Liberty Identity Provider 15
Page 20

be located in the same container where your server object is located. Export the trusted root from the key
material object. For more information, see “Importing Trusted Roots” on page 42.
Figure 11 LDAP Configuration Page
8 Click Next.
9 All Liberty single sign-on communication must be digitally signed. To support the digitally
signing, the installer program will create a digital signing certificate. In order to create the
certificate, you must first enter information. You set up this information on two screens by first
entering site information, then setting up a keystore. At the Signing Certificate Information
screen, enter the Liberty IDP Site Name, Organization Unit, Organization, City/Locality,
State, and Country. You must fill in all of the fields in order to continue with the installation.
For the Liberty IDP Site Name, you normally specify the DNS Host Name of your IDP server.
For example, idp.novell.com.
IMPORTANT: Do not use commas on any of the fields for this screen.
16 Liberty Identity Provider for Novell eDirectory
Page 21

Figure 12 Signing Certificate Information: Site Information Page
10 Click Next.
11 Set up your keystore information by entering a Keystore File Name, Keypair Alias, Keypair
Password, and Keystore Password.
These files are used in the signing process and are referenced by the Liberty application’s
web.xml file. (By default, this file is located at C:\Program
Files\Novell\Tomcat\webapps\nidp\WEB-INF\web.xml.)
For more information about digital signing and keys, see the Key and Certificate Management
Tool documentation (http://java.sun.com/j2se/1.4.1/docs/tooldocs/windows/keytool.html).
Figure 13 Signing Certificate Information: Keystore Page
12 Click Next.
Installing the Liberty Identity Provider 17
Page 22

13 Enter an application name. This name will be part of the URL that will be used by service
providers to request authentication services from you.
For example, if you use nidp, an nidp folder will be created in your Tomcat webapps folder
(<Tomcat_home>\webapps) with the identity provider Web application.
Figure 14 Application Name Page
14 Click Next.
15 Review the Pre-Installation Summary. If you need to make changes to your configuration,
click Previous to go back to previous screens. If you accept the configuration, click Install.
Figure 15 Pre-Installation Summary
The installation will extend the schema using eDirectory. (This process could take several
minutes.)
16 When the installation is complete, click Done.
18 Liberty Identity Provider for Novell eDirectory
Page 23

You will need to install the Liberty administration plug-ins in iManager. An installation help
screen for iManager launches. To set up the Liberty Roles and Tasks, follow the instructions
in the help screen to launch iManager and run the Configuration Wizard.
Continue with the steps in Chapter 3, “Creating a Liberty IDP Site,” on page 21 to set up your
Liberty IDP site.
Installing the Liberty Administration Plug-ins When iManager is Already Installed
on Your eDirectory Server
After you have successfully completed the initial Liberty installation, you must install the Liberty
administration plug-ins for iManager in order to configure the information entered for your Liberty
IDP server. By default, you will install these plug-ins as part of your IDP installation, however, if
you need to install these plug-ins separately from your Liberty IDP installation, follow the
instructions in this section.
To install the Liberty plug-ins:
1 Launch iManager, log in to your tree using the IP address, then click the Configure icon (on
the toolbar at the top of the page).
You launch iManager by opening a Web browser and going to https://<ipaddress>/eMFrame/
iManager.html (case-sensitive), where <ipaddress> is the address of your server. For detailed
instructions on how to launch iManager, see the "Novell Web Applications," html document
that was placed on your desktop as part of the iManager installation.
For iManager documentation, see the iManager 1.5.1 Administration Guide (http://
www.novell.com/documentation/lg/imanager151/index.html).
2 Expand the Plug-in Setup and Install menu on the left-hand side.
3 Click Install Plug-in.
4 Select the Liberty Identity Management plug-in from the list, enter the collection name (by
default, this name is Role Based Service) or search for it, then click OK.
5 Click the Roles and Tasks icon on the toolbar.
6 Expand the Liberty Management menu on the left-hand side.
7 Click Manage Sites and follow the instructions to set up your site. See Chapter 3, “Creating a
Liberty IDP Site,” on page 21 for details.
8 Reboot your machine for the settings to take effect.
IMPORTANT: Your machine will still be running in test mode. Before you can run in a production
environment, you will need to switch to SSL mode. To make the switch, you need to create a key signing
pair, get it signed by a certificate authority, then configure Apache to use it as the SSL certificate. See
Chapter 4, “Configuring Your Liberty Identity Provider to Run in SSL Mode,” on page 29 for information
on how to make this conversion. You can also refer to the Tomcat and Apache Web sites for more
information.
Uninstalling the Liberty Identity Provider Software
If you need to uninstall your Liberty identity provider, you must make sure you delete all the
associated files with it. This is especially important if you plan to reinstall the IDP once it has been
uninstalled.
To uninstall the Liberty IDP:
Installing the Liberty Identity Provider 19
Page 24

1 Go to your Windows Start menu, then click Settings > Control Panel > Add/Remove
Programs.
2 From the list, remove all Apache, iManager, and Tomcat components using the Remove
button.
3 Remove the Novell Liberty Identity Provider for Novell eDirectory program.
3a Launch the Uninstall wizard by clicking the Remove button.
3b Click Uninstall.
3c If there are components that cannot be removed, the wizard will provide a list of these
components. Take note of their locations, then click Done.
3d Delete the remaining components that were listed in the wizard.
3e Click Close to exit the Add/Remove Programs dialog.
4 Delete the Tomcat, Apache, and other Liberty components located in the folder you created
during the installation. By default, this folder is located at C:\Program Files\Novell.
5 Delete all of the files in your Temp folder, located at C:\Documents and Settings\<user>\local
settings\temp directory.
The <user> variable will change depending on your Windows version. Also, the local settings
directory is hidden by default. To display hidden files, go to MS Explorer > Tools > Folder
Options, then click the View tab. Under the Hidden files and folders option, select Show All
Files, then click Apply.
IMPORTANT: If you are doing repeated Liberty IDP installations, you should delete all of the files in your
Temp directory to save disk space.
20 Liberty Identity Provider for Novell eDirectory
Page 25

3 Creating a Liberty IDP Site
After you have installed the Liberty identity provider for Novell® eDirectoryTM software, your next
step is to set up a Liberty identity provider (Liberty IDP) site. You cannot run Liberty unless you
set up an identity provider site.
IMPORTANT: As part of the Liberty IDP configuration, the IDP references information about the service
provider (SP). Therefore, you should install and configure an SP in your Liberty environment you complete
your Liberty IDP configuration. For information about SPs, see Appendix A, “Installing and Configuring a
Sample Service Provider,” on page 33.
This chapter explains the tasks you need to complete to set up a basic Liberty identity provider site.
Creating a Liberty IDP Site
Complete the following tasks to configure your Liberty IDP:
1. Set Up a Liberty IDP Site
2. Define Site Properties
3. Define Service Providers
4. Set Up Your Liberty Identity Server
5. Manage Your Federations
1. Set Up a Liberty IDP Site
Complete the following steps to set up a Liberty IDP site:
1 Launch iManager and log in to your server.
You launch iManager by opening a Web browser and going to https://<ipaddress>/eMFrame/
iManager.html (case-sensitive), where <ipaddress> is the address of your server. For detailed
instructions on how to launch iManager, see the "Novell Web Applications," html document
that was placed on your desktop as part of the iManager installation.
For iManager documentation, see the iManager 1.5.1 Administration Guide (http://
www.novell.com/documentation/lg/imanager151/index.html).
2 Under Roles and Tasks, expand the Liberty Management menu, then click the Manage Sites
task.
This takes you to the Manage Liberty Identity Sites page.
Creating a Liberty IDP Site 21
Page 26

Figure 16 Manage Liberty Identity Sites Page
3 Click the New Site link.
The New Liberty Identity Site page appears on the right-hand side.
22 Liberty Identity Provider for Novell eDirectory
Page 27

Figure 17 New Liberty Identity Site Page
4 Enter a Descriptive Name for your site. (The name you choose is primarily for your own
reference.)
5 Enter the context for this site.
The context identifies where you want to store this site object in the directory. (The default is
located at the root, but you can choose the location you want.)
6 Enter the Protocol and Base URL information.
There are defaults you can use on the application, but if you defined this information during
the product installation, you should verify that the information you used during the installation
matches the information entered at this screen.
To enter the Protocol and Base URL information:
6a Change the Protocol to HTTP.
You should only use HTTP when Liberty is in test mode. (By default, that is how it is
installed.)
IMPORTANT: Before you put your Liberty identity provider into a production environment, you need
to change to HTTPS, however, we recommend that you get your IDP working with HTTP before
switching to HTTPS. Once you are successfully running in HTTP mode, see Chapter 4, “Configuring
Your Liberty Identity Provider to Run in SSL Mode,” on page 29 for information on how to convert to
HTTPS.
6b Enter the Domain and Port.
The Domain should be a name, but it can be the IP address of the Web server where you
installed the IDP.
Creating a Liberty IDP Site 23
Page 28

If you are running on port 80 (HTTP) or port 443 (HTTPS), you do not need to specify
the port value.
7 Click OK.
2. Define Site Properties
Continuing from Step 7 in the previous section, you are now at the Site Properties page.
Figure 18 Site Properties Page
The Descriptive Name you entered in Step 3 carries forward.
The Provider ID is a required field for the Liberty specification. A value for this field is provided
by default, which is the base URL Domain Name with your Descriptive Name added at the end.
This name must be unique.
The Base URL information also carries forward.
1 Specify whether introductions should be used.
Introductions is a feature that allows a service provider to identify which providers (within a
common domain) a user is logged into. The Allow Introductions check box is unchecked by
default. In order for single sign-on to work seamlessly, you must check this box and enter
values for the Application Domain and Common Domain.
NOTE: In order for introductions to work, the identity provider and the service providers must agree on a
common domain.
The Common Domain is a DNS name that IDPs and SPs within a circle of trust have agreed
upon and/or obtained for use between each other.
24 Liberty Identity Provider for Novell eDirectory
Page 29

The Application Domain is an application/company extension to the Common Domain name
that the IDP will use for introductions.
The Application Domain and the Common Domain combine together to form a DNS name
that resolves to the same IP address as the Base URL Domain. If a port value other than the
Base URL port needs to be specified, it can be appended to the Common Domain.
2 At the Session Timeout drop-down menu, select how long you want your Liberty IDP to run
without timing out the session.
For IDP usage, we recommend that the minimum be at least two hours.
3 Select the Single Logout Method that you want to use from the drop-down menu. The default
is Silent.
There are two ways that the identity provider uses to log out service providers using a single
logout. One method is Silent, which is a behind-the-scenes method. The other way uses a
confirmation screen. If you use HTTP, you need to choose one of the methods: either silent,
or showing a notification screen.
If you choose Show Notification Screen, the identity provider will return a page that shows
all of the service providers that use this particular method to log out. These references generate
a request to the servers to log out. When they do, they return a checkmark graphic (the visual
notification) that shows they have logged out.
4 The Authentication Statement URI is optional. It references a statement about the
authentication policy for this identity provider. Enter your information in the empty field if
you want to include it in the information that is transferred to and from providers.
For example, if you are using Novell’s installed sample service provider code, you would
enter the following URL: http://<ip address of SP server>/nwt/metadata.
5 Click OK.
You are brought back to the Identity Sites page.
6 Click the name of your identity site.
3. Define Service Providers
Once you have set up your Liberty identity provider site, you need to identify the service providers
(SPs) your Liberty IDP will affiliate with.
IMPORTANT: You must already have an SP installed and configured before proceeding with the steps in this
section. For more information, see Appendix A, “Installing and Configuring a Sample Service Provider,” on
page 33.
1 Continuing from where you left off in Step 6 in the previous section, click the Affiliate Service
Providers link at the top of the screen.
The Affiliate Service Provider page appears.
Creating a Liberty IDP Site 25
Page 30

Figure 19 Affiliate Service Providers Page
2 The Affiliate Service Providers table lists the SPs you have defined and whether they are
enabled, and whether the information you have provided for them is complete. (Complete in
this case means all the required fields were filled in, not that the information is necessarily
correct.)
If you want to delete, enable, or disable an SP in the list, select the check box next to that SP,
then click Delete, Enable, or Disable according to your preference.
3 You can choose to enter new SP information manually by clicking the New Affiliate Service
Provider link, or you can import an SP definition by clicking the Import Affiliate Service
Provider Definition link. We recommend that you import definitions from another service
provider. Click Import Affiliate Server Provider Definition.
Figure 20 Import Affiliate Service Provider Definition
26 Liberty Identity Provider for Novell eDirectory
Page 31

4
Enter the Descriptive Name and URL for the service provider’s definition you want to import.
For example, if your IP address is 1.1.1.1, you would specify the URL as http://1.1.1.1/nwc/
metadata.
5 Click OK.
4. Set Up Your Liberty Identity Server
Continuing where you left off in Step 5, click the Liberty Identity Servers tab. This page shows a
list of your identity servers.
To add a new Liberty identity server:
1 Click New Liberty Identity Server.
2 At the Modify Object page, enter the Descriptive Name and IP Address of the identity server.
The IP Address should be the server that is going to run the IDP.
Figure 21 Modify Object Page
3 Click OK.
You are returned to the servers list, where your new server should now be listed.
You can select and delete servers as needed.
5. Manage Your Federations
If you have federated users, you can manage your federations by doing the following:
1 In iManager, click the Liberty Management role, then select the Manage Federations task.
2 Select the Site and enter the user context.
To browse for the User Context, select the icon to the right of the field.
Creating a Liberty IDP Site 27
Page 32

Figure 22 Manage Federations
3 Click OK.
4 View the User Federation you created. If you need to delete it, select Delete.
5 Click Done.
If you deleted any federations, those deletions will occur when the user completely logs out
of all sessions and then logs back in.
28 Liberty Identity Provider for Novell eDirectory
Page 33

4 Configuring Your Liberty Identity Provider to
Run in SSL Mode
This chapter contains information on the following topics:
Converting to Secure Mode
Customizing Your Liberty IDP User Interface
In order to become compliant with Liberty specifications, after you have successfully installed
your Liberty identity provider for Novell
a production environment. By default, your Liberty identity provider runs in test mode (HTTP).
You must change this protocol to HTTPS in order to run securely (in SSL mode). You do this by
configuring certificates. See the following links for more information:
Apache SSL/TLS Encryption (http://httpd.apache.org/docs-2.0/ssl)
Apache-SSL: Encryption, Certificates, and More (http://ist.uwaterloo.ca/security/lib-proxy/
howto/ssleay/apache.html)
Setting Up a Secure Server (http://apacheworld.org/ty24/site.chapter17.html)
Tomcat: SSL Configuration How-To (http://jakarta.apache.org/tomcat/tomcat-4.0-doc/ssl-
howto.html)
Converting to Secure Mode
Complete the following tasks to convert your Liberty IDP to SSL (secure) mode:
1 Create a signing request (based on the domain name of the server you will be running on). For
information on how to do this, see “Creating Certificates for Apache” on page 30.
We recommend that you have a trusted third party in place to sign the certificates. Having a
well-known trusted authority will make this process easier.
During the installation, a signing certificate was created. In addition to the signing certificate,
for each provider you use, you will need a certificate for communication and a certificate for
introductions. If you are not using introductions, then you only need one certificate.
®
eDirectoryTM software, you must configure it to run in
2 Configure the Web server to use the certificates.
2a Modify your Apache configuration. For examples of how to do this, see “Modifying the
Apache Configuration Files” on page 39.
NOTE: If you are not signing certificates by a trusted root that is in the certificate authority’s file, you will
need to exchange trusted roots for the IDP and SP, then import them into their respective certificate files.
(See “Importing Trusted Roots” on page 42 for details.)
3 Change iManager from http to https:
3a In iManager, click the Liberty Management role.
Configuring Your Liberty Identity Provider to Run in SSL Mode 29
Page 34

3b Select the Manage Sites task, then select your site’s link.
3c Change the Base URL Protocol from http to https.
4 Restart Tomcat and Apache for the changes to take effect.
Creating Certificates for Apache
The following steps are provided as an example for how to create two certificates for Apache:
1 Using a DOS prompt, go to your Apache bin directory. (The default location is C:\Program
Files\Novell\Apache\bin.)
This is where the openssl.exe file is located.
2 Create a key file using the following command:
openssl genrsa -out myssl.key 1024
3 Create a signing request file using the following command:
openssl req -new -config openssl.cnf -key myssl.key -out
myssl.csr
4 Send the .csr file to a well-known certificate authority for signing, or self-sign the certificate
using the following command:
openssl x509 -req -days 30 -in myssl.csr -signkey myssl.key out myssl.crt
You should now have two (if you are creating a self-signed certificate) or three (if creating a
certificate which is signed by a well-known certificate authority) files: myssl.key, myssl.crt,
and possibly trustedroot.crt.
5 Copy the two or three files to your Apache\conf\ssl directory. (The default location is:
C:\Program Files\Novell\Apache\conf\ssl.)
6 Repeat steps 1-5 to create the same two or three files for the common domain
(mycommonssl.key, mycommonssl.crt, and trustedroot.crt). If they are signed by the same
certificate authority, the trusted root certificate is the same as the one you created for myssl.crt.
7 Modify your Apache configuration files. For examples of how to do this, see “Modifying the
Apache Configuration Files” on page 39.
Customizing Your Liberty IDP User Interface
Before putting your Liberty IDP into a production mode, you should modify the look and feel of
your IDP to your own standard, including your company logo, etc. You do this by modifying the
.jsp files that are located in a subdirectory of the application directory you set up during the IDP
installation. For example, if you accepted the installation default directory, the .jsp files would be
located at C:\Program Files\Novell\Tomcat\webapps\nidp\jsp.
The following table is a list of the JSP files that are available for the IDP:
Table 1 JSP Files for the IDP
File Name Definition
login.jsp Prompts the user to log in.
30 Liberty Identity Provider for Novell eDirectory
Page 35

File Name Definition
main.jsp Displays the main page.
err.jsp Reports an error.
postit.jsp Sends an automatic POST to another provider. This feature
is invisible to the user.
defedask.jsp Shows the list of service providers. Allows the user to
defederate.
loget.jsp Shows the list of service providers that the user logged out of.
logframe.jsp Shows the log. For debugging only.
logheader.jsp Shows the log. For debugging only.
For a list of the .jsp files for the service provider, see “Customizing Your Liberty SP User
Interface” on page 38.
Configuring Your Liberty Identity Provider to Run in SSL Mode 31
Page 36

32 Liberty Identity Provider for Novell eDirectory
Page 37

A Installing and Configuring a Sample Service
Provider
Novell provides sample code for you to use as part of the Liberty identity provider for Novell®
eDirectory
Novell.
This appendix provides information about how to install and configure a sample service provider
(SP). You create the circle of trust between your identity provider (IDP) and SPs by configuring
the SP code with the IDP’s metadata, and vice versa.
As part of your installation, one user is created. To add additional users, see “Adding Additional
Users” on page 38.
This appendix provides information on the following topics:
Installing the Sample Service Provider Software
Configuring Your Service Provider
Customizing Your Liberty SP User Interface
TM
download. This sample service provider is provided "as-is" and is not supported by
Installing the Sample Service Provider Software
The Liberty SP software should only be installed on compatible hardware (see “Liberty Identity
Provider Requirements” on page 9). If you are installing your SP on a different machine from your
Liberty IDP, you must have JVM 1.4 or later and a servlet engine (for example, Tomcat 4.1.18)
already installed on the machine where you are installing the SP.
Before you install and configure an SP, you should verify that your installation of the Liberty IDP
was successful. (For Liberty IDP installation information, see Chapter 2, “Installing the Liberty
Identity Provider,” on page 9.) You can make this verification by viewing your IDP's URL, which
is located at your domain name/nidp. Viewing this URL will take you to the login page, which
should show you a "Welcome to…" home page. If you do not see this page, your install did not
complete, and you will need to completely remove the Liberty IDP software from your machine
and then re-install.
Like the IDP installation, the SP installation is divided into four sections: an installation
introduction, a pre-installation summary, the Liberty SP installation, and a completion record. At
any given point of the installation process, you can follow the progress of your installation by
referring to the left-hand side of the install dialog. (See Figure 23).
To install the sample Liberty SP:
1 At the Web download site, click the Web download link to automatically download the Liberty
SP executable.
2 Run the executable.
Installing and Configuring a Sample Service Provider 33
Page 38

InstallAnywhere will guide you through the installation process.
3 After you have read the introductory screen, click Next.
Figure 23 Liberty Service Provider Introduction
4 If you accept the License Agreement, select the accept button, then click Next.
Figure 24 License Agreement
5 The Liberty SP is provided as example code. You must accept this stipulation in order to
proceed with the installation. If you accept the stipulation, select the accept button, then click
Next.
34 Liberty Identity Provider for Novell eDirectory
Page 39

Figure 25 Example Code Stipulation
6 The Liberty SP installation creates a fictitious SP called World Financial. Read the
information about the SP, note the URL, and then click Next.
Figure 26 World Financial Information
7 In order for single sign-on to work seamlessly between the IDP and the SP when more than
one IDP exists, you must enable Introductions on your IDP. Enter the Common Domain that
Introductions will use.
NOTE: You should make sure the Common Domain you enter at this page matches the Common Domain
you entered for your IDP.
Installing and Configuring a Sample Service Provider 35
Page 40

Figure 27 Common Domain
8 Click Next.
9 Enter a user name and password for your test user, then click Next.
Figure 28 Service Provider Test User
10 Set up your keystore information by entering a Keystore File Name, Keypair Alias, Keypair
Password, and Keystore Password. (This information does not have to match the keystore
information you entered for the IDP.)
For more information about digital signing and keys, see the Key and Certificate Management
Tool documentation (http://java.sun.com/j2se/1.4.1/docs/tooldocs/windows/keytool.html).
36 Liberty Identity Provider for Novell eDirectory
Page 41

Figure 29 Signing Certificate Information: Keystore
11 Click Next.
12 Review the Pre-Installation Summary. If you need to make changes to your configuration,
click Previous to go back to previous screens. If you accept the configuration, click Install.
13 Restart Tomcat and Apache.
When the installation has completed, configure your SP by following the instructions in
Configuring Your Service Provider.
Configuring Your Service Provider
Complete the following steps to configure your SP:
1 Retrieve the Novell Liberty IDP for eDirectory metadata.
1a In your Web browser, enter your IDP's URL (for example, if you didn't change the
application name when you installed, your URL would be http://yourIDP'sDNSorIP/
nidp/metadata, assuming the defaults).
1b Copy the metadata in this page: From the menu, select View Source > Select All.
1c Copy the metadata to your clipboard.
2 Open the libertyconfig.xml file located at <Tomcat_home>\webapps\nwt\WEB-INF.
3 Paste the metadata after the line that says, "Paste IDP metadata after this line".
4 Save the file and close it.
5 Stop and restart the servlet container. (Anytime you make changes to this file, you need to stop
and restart the container.)
For instructions on how to import the SP's metadata to the IDP, see “3. Define Service Providers”
on page 25.
Installing and Configuring a Sample Service Provider 37
Page 42

Adding Additional Users
As part of your installation, one user is created. Adding additional users to your configuration is
optional. If you want to add more users, before federating your first user, locate the Liberty
Principal tag section of your XML file (including the opening and closing portions of the tag), then
copy and paste that section to create the additional users.
You should note that as the system runs and identities are created, new tags are placed inside the
Liberty Principal section of your XML file. You should only copy the following portions of the tag:
<LibertyPrincipal>
<dn><value>spuser</value></dn>
<password><value>spuser</value></password>
<fullname><value>Jonathan</value></fullname>
</LibertyPrincipal>
Customizing Your Liberty SP User Interface
If you use the sample service provider code to create your own SP, you will want to change the
World Financial look of the SP to your own company logo, etc., before putting your SP into
production mode. You do this by modifying the .jsp files that are located in a subdirectory of the
application directory you set up during the SP installation. For example, if you accepted the
installation default directory, the .jsp files would be located at C:\Program
Files\Novell\Tomcat\webapps\nwt\jsp.
The following table is a list of the .jsp files that are available for the SP:
Table 2 JSP Files for the IDP
File Name Definition
login.jsp Prompts the user to log in.
main.jsp Displays the main page.
err.jsp Reports an error.
postit.jsp Sends an automatic POST to another provider. This feature
fedtermok.jsp Reports that federation termination was successful.
manage.jsp Shows the list of identity providers. Allows the user to
logframe.jsp Shows the log. For debugging only.
logheader.jsp Shows the log. For debugging only.
For a list of the .jsp files for the identity provider, see “Customizing Your Liberty IDP User
Interface” on page 30.
is invisible to the user.
federate and defederate.
38 Liberty Identity Provider for Novell eDirectory
Page 43

B Modifying Apache
This appendix provides information on the following topics:
Modifying the Apache Configuration Files
Importing Trusted Roots
Modifying the Apache Configuration Files
1 Go to your Apache httpd.conf file, located in your Apache directory. (The default location is
C:\Program Files\Apache\conf\httpd.conf.)
2 Comment out the line that says, "include "C:/Program Files/Novell/Tomcat/conf/liberty/
liberty_jk.conf" at the end of the file by putting a number sign (#) in front of it.
3 Go to your Tomcat liberty_jk.conf file (the default location is C:\Program
Files\Novell\Tomcat\conf\liberty\liberty_jk.conf.) and copy the following:
################## <idpIPaddress>:/nidp #################
# Static files
Alias /nidp "C:/Program Files/Novell/Tomcat/webapps/nidp"
<Directory "C:/Program Files/Novell/Tomcat/webapps/nidp">
Options Indexes FollowSymLinks
</Directory>
# Deny direct access to WEB-INF and META-INF
#
<Location "/nidp/WEB-INF/*">
AllowOverride None
deny from all
</Location>
<Location "/nidp/META-INF/*">
AllowOverride None
deny from all
</Location>
#
# Use Directory too. On Windows, Location doesn't work unless case
matches
#
<Directory "C:/Program Files/Novell/Tomcat/webapps/nidp/WEB-INF/">
AllowOverride None
deny from all
</Directory>
<Directory "C:/Program Files/Novell/Tomcat/webapps/nidp/META-INF/">
AllowOverride None
deny from all
</Directory>
Modifying Apache 39
Page 44

JkMount /nidp/slo ajp13
JkMount /nidp/*.css ajp13
JkMount /nidp/slo_return ajp13
JkMount /nidp/term ajp13
JkMount /nidp/soap ajp13
JkMount /nidp/setintro ajp13
JkMount /nidp/rni ajp13
JkMount /nidp/sso ajp13
JkMount /nidp/*.jsp ajp13
JkMount /nidp/logview ajp13
JkMount /nidp/*.gif ajp13
JkMount /nidp/metadata ajp13
JkMount /nidp/rni_return ajp13
JkMount /nidp/term_return ajp13
JkMount /nidp/*.js ajp13
JkMount /nidp/* ajp13
JkMount /nidp ajp13
4 Paste the data in your Apache ssl.conf file (the default location is C:\Program
Files\Novell\Apache\conf\ssl.conf) before the line </VirtualHost> at the end of the file.
5 Copy the entire virtual host section (from <VirtualHost_default_:443> to </VirtualHost>) of
your Apache ssl.conf file (the default location is C:\Program
Files\Novell\Apache\conf\ssl.conf).
6 Paste the virtual host data at the end of the Apache ssl.conf file (the default location is
C:\Program Files\Novell\Apache\conf\ssl.conf) after the </VirtualHost> line to create a
second virtual host section for the common domain.
7 In the second virtual host section you just created, remove the eMFrame section, as shown:
################### localhost:/eMFrame ##################
# Static files
Alias /eMFrame "C:/PROGRA~1/Novell/Tomcat/webapps/eMFrame"
<Directory "C:/PROGRA~1/Novell/Tomcat/webapps/eMFrame">
Options Indexes FollowSymLinks
DirectoryIndex index.html index.htm index.jsp
</Directory>
# Deny direct access to WEB-INF and META-INF
#
<Location "/eMFrame/WEB-INF/*">
AllowOverride None
deny from all
</Location>
<Location "/eMFrame/META-INF/*">
AllowOverride None
deny from all
</Location>
#
# Use Directory too. On Windows, Location doesn't work unless case
matches
#
<Directory "C:/PROGRA~1/Novell/Tomcat/webapps/eMFrame/WEB-INF/">
AllowOverride None
deny from all
</Directory>
40 Liberty Identity Provider for Novell eDirectory
Page 45

<Directory "C:/PROGRA~1/Novell/Tomcat/webapps/eMFrame/META-INF/">
AllowOverride None
deny from all
</Directory>
JkMount /eMFrame/webacc ajp13
JkMount /eMFrame/webacc/* ajp13
JkMount /eMFrame/*.jsp ajp13
8 In this same Apache ssl.conf file, add a line for a second SSL listening port for the common
domain. (You could add a second IP address instead of a second port. See the Apache Web
site (http://httpd.apache.org/docs-2.0/vhosts/ip-based.html)for details.
Change the following:
#
# When we also provide SSL we have to listen to the
# standard HTTP port (see above) and to the HTTPS port
#
Listen 443
to the following:
#
# When we also provide SSL we have to listen to the
# standard HTTP port (see above) and to the HTTPS port
#
Listen 443
Listen 444
9 In the same Apache ssl.conf file, modify the following lines that are bolded as shown in the
first virtual host section:
# Server Certificate:
# Point SSLCertificateFile at a PEM encoded certificate. If
# the certificate is encrypted, then you will be prompted for a
# pass phrase. Note that a kill -HUP will prompt again. Keep
# in mind that if you have both an RSA and a DSA certificate you
# can configure both in parallel (to also allow the use of DSA
# ciphers, etc.)
SSLCertificateFile conf/ssl/myssl.crt
#SSLCertificateFile conf/ssl.crt/server-dsa.crt
# Server Private Key:
# If the key is not combined with the certificate, use this
# directive to point at the key file. Keep in mind that if
# you've both a RSA and a DSA private key you can configure
# both in parallel (to also allow the use of DSA ciphers, etc.)
SSLCertificateKeyFile conf/ssl/myssl.key
#SSLCertificateKeyFile conf/ssl.key/server-dsa.key
# Server Certificate Chain:
# Point SSLCertificateChainFile at a file containing the
# concatenation of PEM encoded CA certificates which form the
# certificate chain for the server certificate. Alternatively
# the referenced file can be the same as SSLCertificateFile
# when the CA certificates are directly appended to the server
# certificate for convinience.
SSLCertificateChainFile conf/ssl/trustedroot.crt
#SSLCertificateChainFile conf/ssl.crt/ca.crt
10 If you are using self-signed certificates, the last bolded line above is not needed.
Modifying Apache 41
Page 46

11 In this same file, make the following changes (bolded as shown) to the second virtual host
section for the common domain virtual host:
<VirtualHost nidp.commondomain.com:444>
# General setup for the virtual host
DocumentRoot C:/PROGRA~1/Novell/Apache/htdocs
ServerName nidp.commondomain.com:444
# Server Certificate:
# Point SSLCertificateFile at a PEM encoded certificate. If
# the certificate is encrypted, then you will be prompted for a
# pass phrase. Note that a kill -HUP will prompt again. Keep
# in mind that if you have both an RSA and a DSA certificate you
# can configure both in parallel (to also allow the use of DSA
# ciphers, etc.)
SSLCertificateFile conf/ssl/mycommonssl.crt
#SSLCertificateFile conf/ssl.crt/server-dsa.crt
# Server Private Key:
# If the key is not combined with the certificate, use this
# directive to point at the key file. Keep in mind that if
# you've both a RSA and a DSA private key you can configure
# both in parallel (to also allow the use of DSA ciphers, etc.)
SSLCertificateKeyFile conf/ssl/mycommonssl.key
#SSLCertificateKeyFile conf/ssl.key/server-dsa.key
# Server Certificate Chain:
# Point SSLCertificateChainFile at a file containing the
# concatenation of PEM encoded CA certificates which form the
# certificate chain for the server certificate. Alternatively
# the referenced file can be the same as SSLCertificateFile
# when the CA certificates are directly appended to the server
# certificate for convinience.
SSLCertificateChainFile conf/ssl/trustedroot.crt
#SSLCertificateChainFile conf/ssl.crt/ca.crt
12 If you are using self-signed certificates, the last bolded line above is not needed.
NOTE: If you are using a different port rather than a different IP address for the common domain, you need to
add the port to the Allow Introductions Common Domain in the site configuration using iManager.
Importing Trusted Roots
Your well-known trusted roots file is located at C:\Program Files\Novell\jre\lib\security\cacerts. If
any service provider uses SSL and the service provider's certificates are signed by a certificate
authority that is not in this keystore, you will need to import the trusted root from the service
provider's certificate to this keystore. Use the following command to import the service provider’s
trusted root from the keystore:
C:Program Files\Novell\jre\bin\keytool -import -v -file
<trustedroot.crt> -alias serviceprovidertrustedroot -keystore
C:\Program Files\Novell\jre\lib\security\cacerts -storepass
changeit
where <trustedroot.crt> is replaced with the path and file name of your service provider’s trusted
root file.
42 Liberty Identity Provider for Novell eDirectory
Page 47

C Troubleshooting Your Liberty IDP Installation
and Configuration
This section provides information on the following topics:
Troubleshooting Installation Issues
Troubleshooting Post-Installation Issues
Basic Troubleshooting Tips
Troubleshooting Installation Issues
Most of the issues that occur during installation are likely to be logged in one of the log files
described in this section. You should review each log file to identify the source of the problem. The
Apache or Tomcat errors are open source projects, so the errors logged in these types of log files
should be documented. Use a Web search engine to search for the information specific to the error.
Reviewing Log Files Created During Installation
The following four log files are created during the Liberty IDP installation:
1. apache_install.log: This log file, located by default at C:\Program
Files\Novell\apache_install.log, documents the various steps of the Apache installation. The key
portion of this file is the "Installation operation completed successfully" message shown in the
example below. any error messages in this file should be noted. Since Apache is an open source
project, Web sites such as Google* are likely to reference many of the errors reported.
1: SelfStartService 2: 0
1: StartApacheMonitor 2: 0
Action ended 10:35:15: InstallFinalize. Return value 1.
Action start 10:35:15: RemoveExistingProducts.
Action ended 10:35:15: RemoveExistingProducts. Return value 1.
Action ended 10:35:15: INSTALL. Return value 1.
=== Logging stopped: 4/2/2003 10:35:15 ===
MSI (s) (14:3C): Product: Apache HTTP Server 2.0.44 -- Installation operation
completed successfully.
2. Apache_Tomcat_Installlog.txt:This log file, located by default at C:\Program
Files\Novell\Tomcat\Apache_Tomcat_Installlog.txt, documents every instruction performed by
the Tomcat installation, including the interface with Apache through mod_jk, the various Windows
registry changes, and the setting up of the Tomcat webapps environment. The start of the file
includes a counter of errors and warnings. Ideally, you should see all successes, as shown below.
If you see any errors, you should scan the file for the specific errors reported. As with Apache,
Tomcat is open source and many of the errors or warnings encountered are likely to be documented
and referenced through Internet search engines.
Troubleshooting Your Liberty IDP Installation and Configuration 43
Page 48

Summary
-------
Installation: Successful.
1408 SUCCESSES
0 WARNINGS
0 NONFATAL ERRORS
0 FATAL ERRORS
3. Novell_iManager_1.5.1_InstallLog: This log file, located by default at C:\Program
Files\Novell\Tomcat\webapps\eMFrame\WEB-INF\install\Novell_iManager_1.5.1_InstallLog,
documents every instruction performed by the iManager installation, the various Windows registry
changes, and the setting up of the Tomcat webapps environment for iManager. The start of the file
includes a counter of errors and warnings. Ideally, you should see all successes, as shown in the
previous log file above. If there are any errors, you should scan the file for the specific errors
reported and take appropriate action (for example, if you did not have enough disk space to copy
over class files, you would need to free the required space and try installing again).
4. Novell_Liberty_Identity_Provider_for_Novell_eDirectory_InstallLog.txt: This file,
located by default at C:\Program
Files\Novell\Tomcat\webapps\nidp\Novell_Liberty_Identity_Provider_for_Novell_eDirectory_I
nstallLog.txt, documents every instruction performed by the Liberty installation, including the
various Windows registry changes, and the files and directories installed. As with the other log
files described, the start of the file includes a counter of errors and warnings. Ideally, you want to
see all successes. If there are any errors, you should scan the file for the specific errors reported
and take appropriate action (for example, if you did not have enough disk space to copy over class
files, you would need to free the required space and try installing again).
Troubleshooting Post-Installation Issues
Liberty also includes a number of other log files created during Web application initialization.
These files can also be used to figure out whether your issue is an Apache, Tomcat, iManager or
Liberty problem, which can help you to pinpoint the source of your problem.
You can also enable Advanced Logging as part of your troubleshooting process. For details on how
to do this, see “Enabling Advanced Logging” on page 46.
Reviewing Log Files Created After Installation
The following three files are created after the Liberty IDP installation has completed:
1. logs: These files are located by default at C:\Program Files\Novell\Tomcat\logs\*. as you run
the Web applications, you might trigger errors that throw exceptions in Tomcat. Typically,
information about these types of errors is displayed in your Web browser window as you view your
Web applications. For example, you might view an error similar to the following:
Error: 500
Location:/nidp/soap
Internal Servlet Error:
org.apache.jasper.compiler.CompileExceptions: <and so on>
at org.apache.jasper.compiler.JspParseEventListener.handleDirective <and so
44 Liberty Identity Provider for Novell eDirectory
Page 49

on>
at org.apache.jasper.compiler.DelegatingListener.handleDirective <and so on>
.
.
.
Tomcat's error logs are excellent resources for troubleshooting these types of errors. The logs
provide additional information from Tomcat and the JavaSDK that is not provided in the results
that are returned to the Web browser window. If you explore the \Tomcat\logs\ directory on your
system, you see four files by default (after adding the Liberty applications, you will see more,
which are referenced separately below):
catalina_log.<date>.txt
localhost_admin_log.<date>.txt
stderr.log
stdout.log
You should start troubleshooting these files by reviewing the stderr.txt and stdout.txt files, where
errors from the Java Virtual Machine are logged.
NOTE: You must stop Tomcat before you can open the log files with WordPad. If Tomcat is running, it is
possible to open the log files with NotePad, since NotePad does not check to see if the opened file is in use.
However, do not save the file to itself, as this will overwrite any new information added to the log file since you
opened it.
If you do not locate an error listed in these files, proceed to the other logs. All the logs are text files,
so you can view them with Notepad or Wordpad.
IMPORTANT: The log files will be rotated daily as you use Tomcat. You might want to occasionally delete the
old logs to free up space on your system. You might also want to delete the logs as you try to troubleshoot
errors in the Liberty applications, since new errors are easier to find in a fresh log file.
If Tomcat successfully loads, you should see no errors, as shown in the following messages:
Bootstrap: Create Catalina server
Bootstrap: Starting service
Starting service Tomcat-Standalone
Apache Tomcat/4.1.18
Novell JClient 1.1.1114-1.1.1114. Copyright 1999 Novell Inc. All Rights
Reserved.
Bootstrap: Service started
2. iManager_eMFrame_log.<date>: This log file, located by default at C:\Program
Files\Novell\Tomcat\logs\iManager_eMFrame_log.<date>, generates a list of events that occur
when the iManager application is being initialized. There should be no exceptions reported in this
file. A successful initialization would normally result in the following entry at the end of the file:
2003-04-03 14:31:40 StandardManager[/eMFrame]: Seeding random number
generator class java.security.SecureRandom
2003-04-03 14:31:42 StandardManager[/eMFrame]: Seeding of random number
generator has been completed
2003-04-03 14:31:42 StandardWrapper[/eMFrame:default]: Loading container
servlet default
2003-04-03 14:31:42 StandardWrapper[/eMFrame:invoker]: Loading container
servlet invoker
3. iManager_log.<date>: This log file, located by default at C:\Program
Files\Novell\Tomcat\logs\iManager_log.<date>, describes the state of all Web-based applications
during the Tomcat initialization. You will see eMFrame and NIDP contexts being referenced here.
Troubleshooting Your Liberty IDP Installation and Configuration 45
Page 50

You should check to make sure that no errors are reported. The Liberty NIDP and NWT Web-based
applications should load without errors or exceptions.
Enabling Advanced Logging
You can enable Advanced Logging on the IDP to log all requests in and out of the IDP server.
This logging feature is not enabled by default, since it can quickly fill up your hard disk with
information. You should only use it to troubleshoot problems that are specific to the IDP, and you
should disable this feature when you have completed your troubleshooting.
To enable the IDP logging, go to the web.xml file (found in your C:\Program
Files\Tomcat\nidp\WEB-INF) and uncomment out the following entries, as shown below:
<!-========================================================================
Uncomment this entry and the entry below (LogLevel) for debugging
========================================================================-->
<context-param>
<param-name>LogFile</param-name>
<param-value>LibertyLog.xml</param-value>
</context-param>
<!-========================================================================
Uncomment this entry and the entry above (LogFile) for debugging
The supported LogLevels are:
severe, warning, info, fine, finer, finest
========================================================================-->
<context-param>
<param-name>LogLevel</param-name>
<param-value>finest</param-value>
</context-param>
This will create the libertlog.xml file in the same directory. We recommend that you use a browser
to view and filter content from this file. If you point your browser to the IDP server (/nidp/
viewlog), you will get the following screen, which displays filter options and log file entries.
46 Liberty Identity Provider for Novell eDirectory
Page 51

Figure 30 Filter Options and Log File Entries
Basic Troubleshooting Tips
This section includes troubleshooting information for Apache, Tomcat, and iManager.
Troubleshooting Apache
The following are simple tests you can conduct, either in standard or secure mode, to verify that
Apache is up and running:
Standard Mode: From a browser, go to http://<x.x.x.x> where <x.x.x.x> is the IP address of your
Apache Web server.
If the browser displays a "Page cannot be displayed" error, then it is likely that Apache has not
been set up correctly. If this is the case, check the following:
1 Using the Windows Services application (available from the Apache Monitor option on the
task bar), make sure that the Apache2 service status is "started".
2 Go to the Apache/logs directory and check the error.txt file for any errors. Ideally, you want
to see that the service started 250 worker threads, as shown in the example log entries below:
Troubleshooting Your Liberty IDP Installation and Configuration 47
Page 52

[Wed Apr 02 14:26:58 2003] [notice] Parent: Created child process 3740
[Wed Apr 02 14:27:01 2003] [notice] Child 3740: Child process is running
[Wed Apr 02 14:27:01 2003] [notice] Child 3740: Acquired the start mutex.
[Wed Apr 02 14:27:01 2003] [notice] Child 3740: Starting 250 worker
threads.
You might get a warning like the one below because the IP address of the server being
accessed did not correspond to the servername entry in the httpd.conf. These types of
warnings are unlikely to cause major problems and can be ignored.
[Wed Apr 02 14:26:57 2003] [warn] RSA server certificate CommonName (CN)
`147.2.32.97' does NOT match server name!?
Secure Mode: From a browser, go to https://<x.x.x.x> where <x.x.x.x> is the IP address of your
Apache Web server.
If the browser displays a 'Page cannot be displayed' error, then the chances are that Apache's server
certificated have not initialized correctly, or have not been configured. Check the following:
1 Make sure that httpd.conf has the LoadModule ssl_module modules/mod_ssl.so statement in
its Dynamic Shared object section, and that the following include statement for ssl.conf exists:
<IfModule mod_ssl.c>
Include conf/ssl.conf
</IfModule>
2 Make sure that the ssl.conf SSLCertificateFile entries are uncommented and point to the
following:
SSLCertificateFile conf/ssl/server.cert
SSLCertificateKeyFile conf/ssl/server.key
3 Make sure that the CRT and KEY files referenced in the ssl.conf file exist under conf/ssl.
You must manually use OpenSSL to create the certificates. OpenSSL is shipped with the Apache
server and instructions to create a test certificate are available at the Sunsite Web site (http://
sunsite.bilkent.edu.tr/pub/infosystems/modssl/ftp/contrib/apache-ssl-win32-howto-V1.2.html).
Troubleshooting Tomcat
If you get an internal server error when you try to access iManager or the IDP server, verify that
Tomcat has successfully intialized by checking the content of the stdout file in the
<Tomcat_home>\logs directory. Tomcat has successfully initialized if the "service started"
message is displayed in this file.
Troubleshooting iManager
To troubleshoot iManager, using a browser, go to https://<ip_addr_of_IDP_Server>/eMFrame/
iManager.html. If you cannot get to this location, go to <Tomcat_home>\logs and check the
iManager_log.<date>.txt. and iManager_eMFrame_log.<date>.txt files for errors.
If you make changes to your Liberty configuration in iManager, you must restart Tomcat in order
for the changes to take effect. Additionally, if you use iManager to defederate a user, you must
restart Tomcat.
48 Liberty Identity Provider for Novell eDirectory
 Loading...