

Novatel SA2100X-UG001 User Manual
SA2100X-UG001
SA 2100
Version
2.0 August 7, 2015
User Guide

NOVATEL WIRELESS COPYRIGHT STATEMENT
©2015 Novatel Wireless, Inc. All rights reserved. The information contained in this document is subject
to change without notice and should not be construed as a commitment by Novatel Wireless, Inc.
NOVATEL WIRELESS TRADEMARKS AND SERVICE MARKS
Novatel Wireless is a trademark of Novatel Wireless, Inc., and the other trademarks, logos, and service
marks (collectively the “Trademarks”) used in this user manual are the property of Novatel Wireless or
their respective owners. Nothing contained in this user manual should be construed as granting by
implication, estoppel, or otherwise, a license or right of use of Novatel Wireless or any other Trademark
displayed in this user manual without the written permission of Novatel Wireless or its respective
owners.
Novatel Wireless, and the Novatel Wireless logo are all trademarks of Novatel Wireless, Inc.
MiFi® and the MiFi logo are registered trademarks of Novatel Wireless, Inc.

Contents
Introduction 1
Device Description and Label 2
Technical Specifications 4
Features and Functions 7
LEDs 8
Connectors 10
Reset Button 11
Installation 12
SIM Installation 13
Battery 14
Precautions and Guidelines 16
Mounting Methods 17
Driver Installation 18
Using the Device 23
Powering the Device 24
Positioning Your Router 25
Connecting to the SA 2100 Router 26
Using the Web User Interface 27
Logging In 28
Home 30
Connected Devices 32
Data Usage 35
Settings 36
Device Settings 36
Hotspot Settings 50
Mobile NetworkSettings 53
Advanced Settings 57
Messages 70
GPS 71
Customer Support 73
About 74
Current Status 75
Device Info 78
Diagnostics 80
Logs 84
iii

Software Update 86
Accessories 88
Accessories List 89
Antenna 90
Backup Battery 92
Power Cable 93
USB Cable Part 95
Compliance and Regulatory 96
General Disclaimer 97
Warranty Information 98
Regulatory Compliance 101
iv

1
Introduction
Device Description and Label
Technical Specifications
1
Device Description and Label
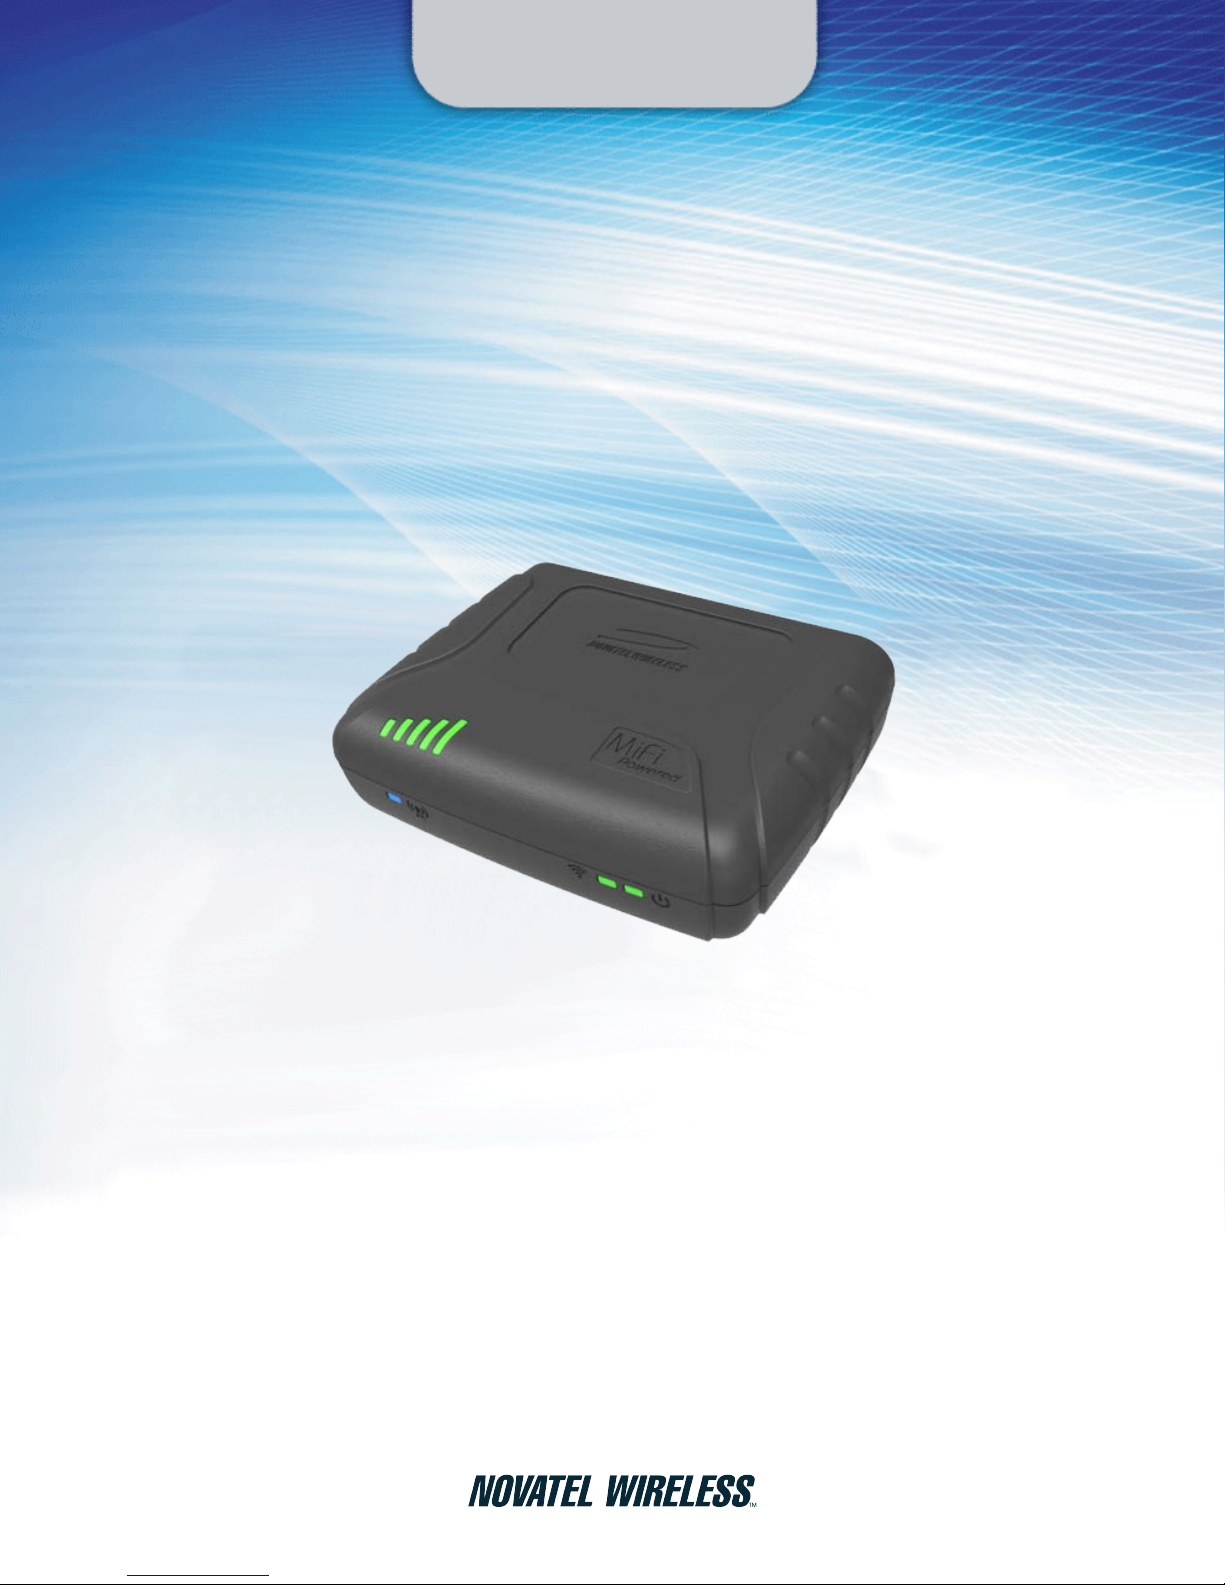
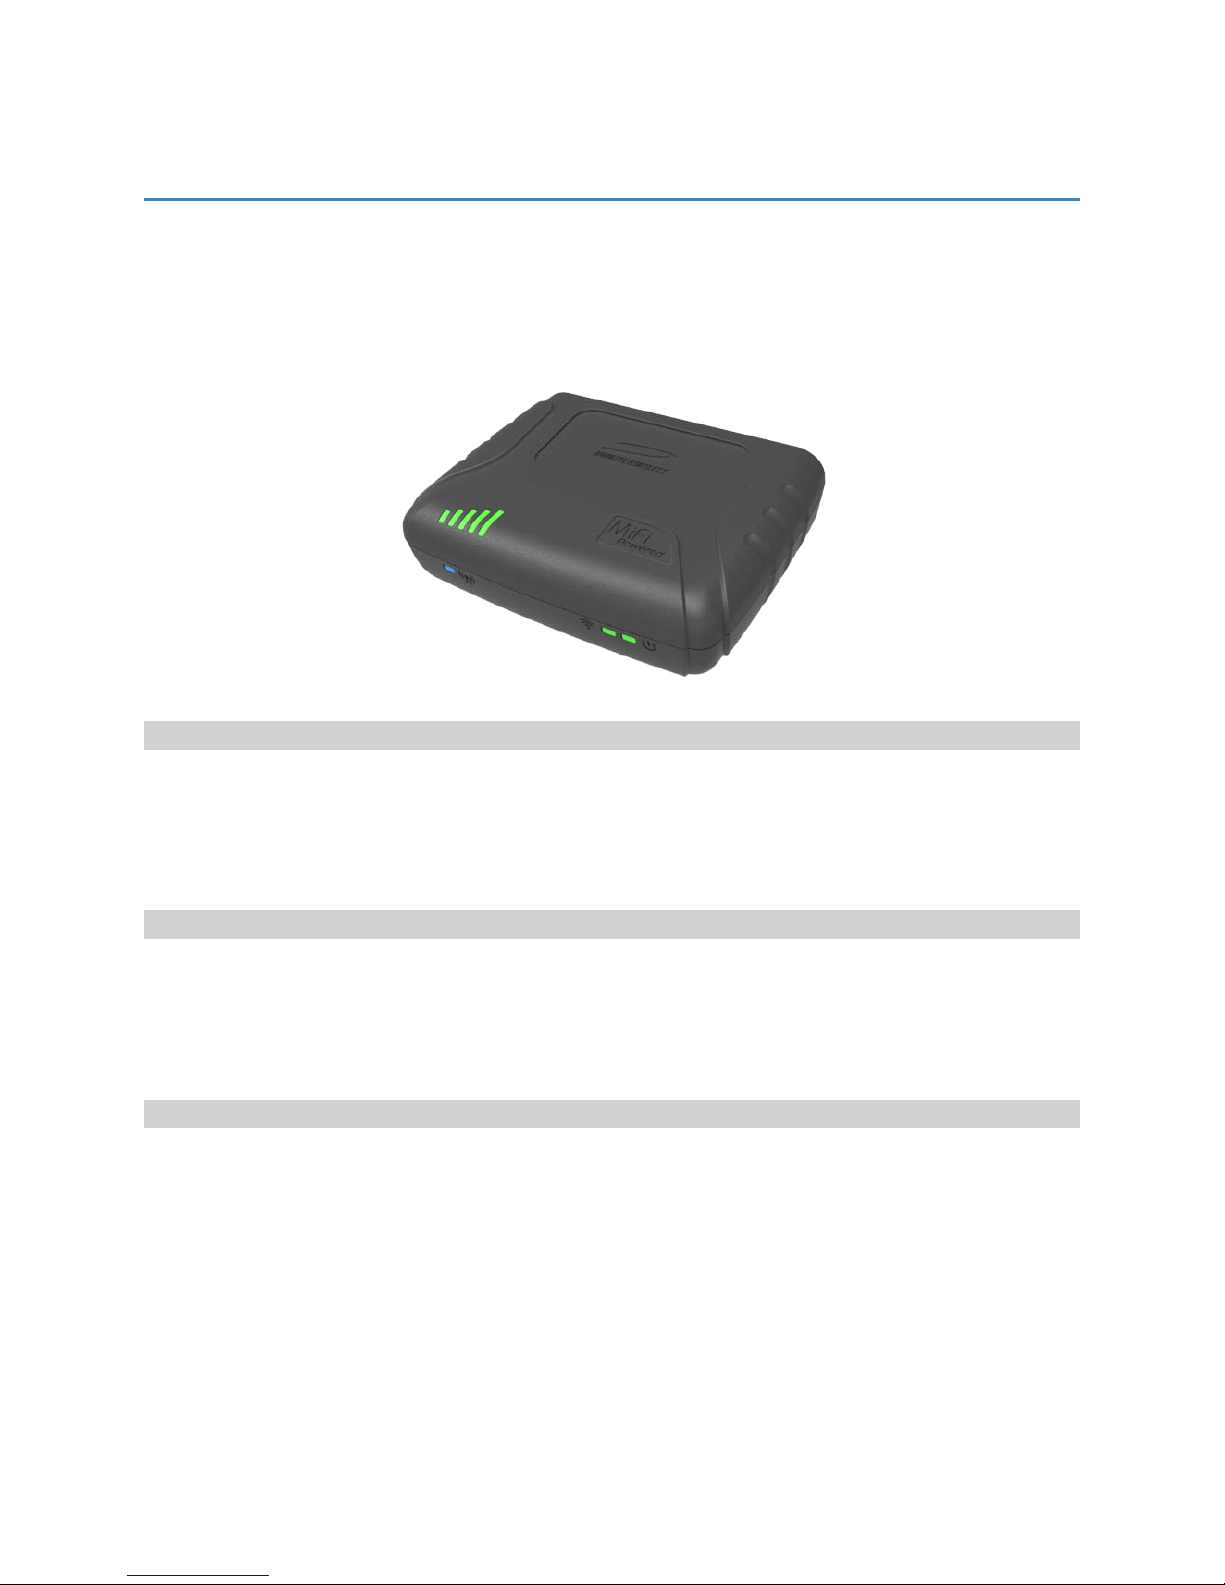
The compact SA 2100 is cellular router designed with multiple mounting options and connectivity
interfaces for M2M applications including Fixed Telemetry, Fleet Management and Asset Tracking, and
Connected Car, right out of the box. Internal antennas minimize installation time and cost, while autoswitching between internal and external antennas provides options to ensure the best RF performance
in any situation. The SA2100 is shown in the following image.
Fast and Future-Proof
With connectivity to 4G LTE and 3G networks, the SA 2100 provides the highest wireless data rates and
the longest device service life. Now managers can upgrade firmware remotely, manage devices centrally
and reduce the number of costly site visits, all while being assured that their solution will support carrier
network updates for years to come.
Reliability
The rugged SA 2100 is designed to get connected easily and stay connected. The MiFi® Powered™
platform offers unique features to ensure business continuity. Battery backup delivers instant failover
during power outages. Advanced security of encryption and authentication protocols offers peace of
mind. The extended operating temperature range makes the SA 2100 the reliable choice.
Easy Deployment, Easy Integration, Easy Usage
Securely connect, collect and transmit valuable field data quickly and easily, just install and deploy – no
complicated configurations or programming necessary. Designed with multiple interfaces, internal
antennas, intuitive web UI, preconfigured default settings, and self-registration to the central
management already enabled, the SA 2100 is built with “Power it up, ready to connect” in mind.
SA 2100 User Guide 2
Cloud Management
With cloud-enabled N4A™ Device Manager software, any number of devices can be easily managed and
monitored around the globe in a cost-efficient and scalable manner. The N4A™ Device Manager features
remote management and monitoring from a central location to configure, monitor, manage, and even
update devices and assets all over the air minimizing costly on-site visits.
System Requirements
The SA 2100 Cellular Router allows you to set up a network and provides both wired and wireless
connectivity.
NOTE: This device is intended for professional installation and not for consumer use.
Requirements include:
l
A computer or computing device supporting Wi-Fi 802.11 b/g/n
l
Internet browser software, such as Microsoft Internet Explorer 8.0 or higher, Firefox, Safari,
Opera, or Chrome
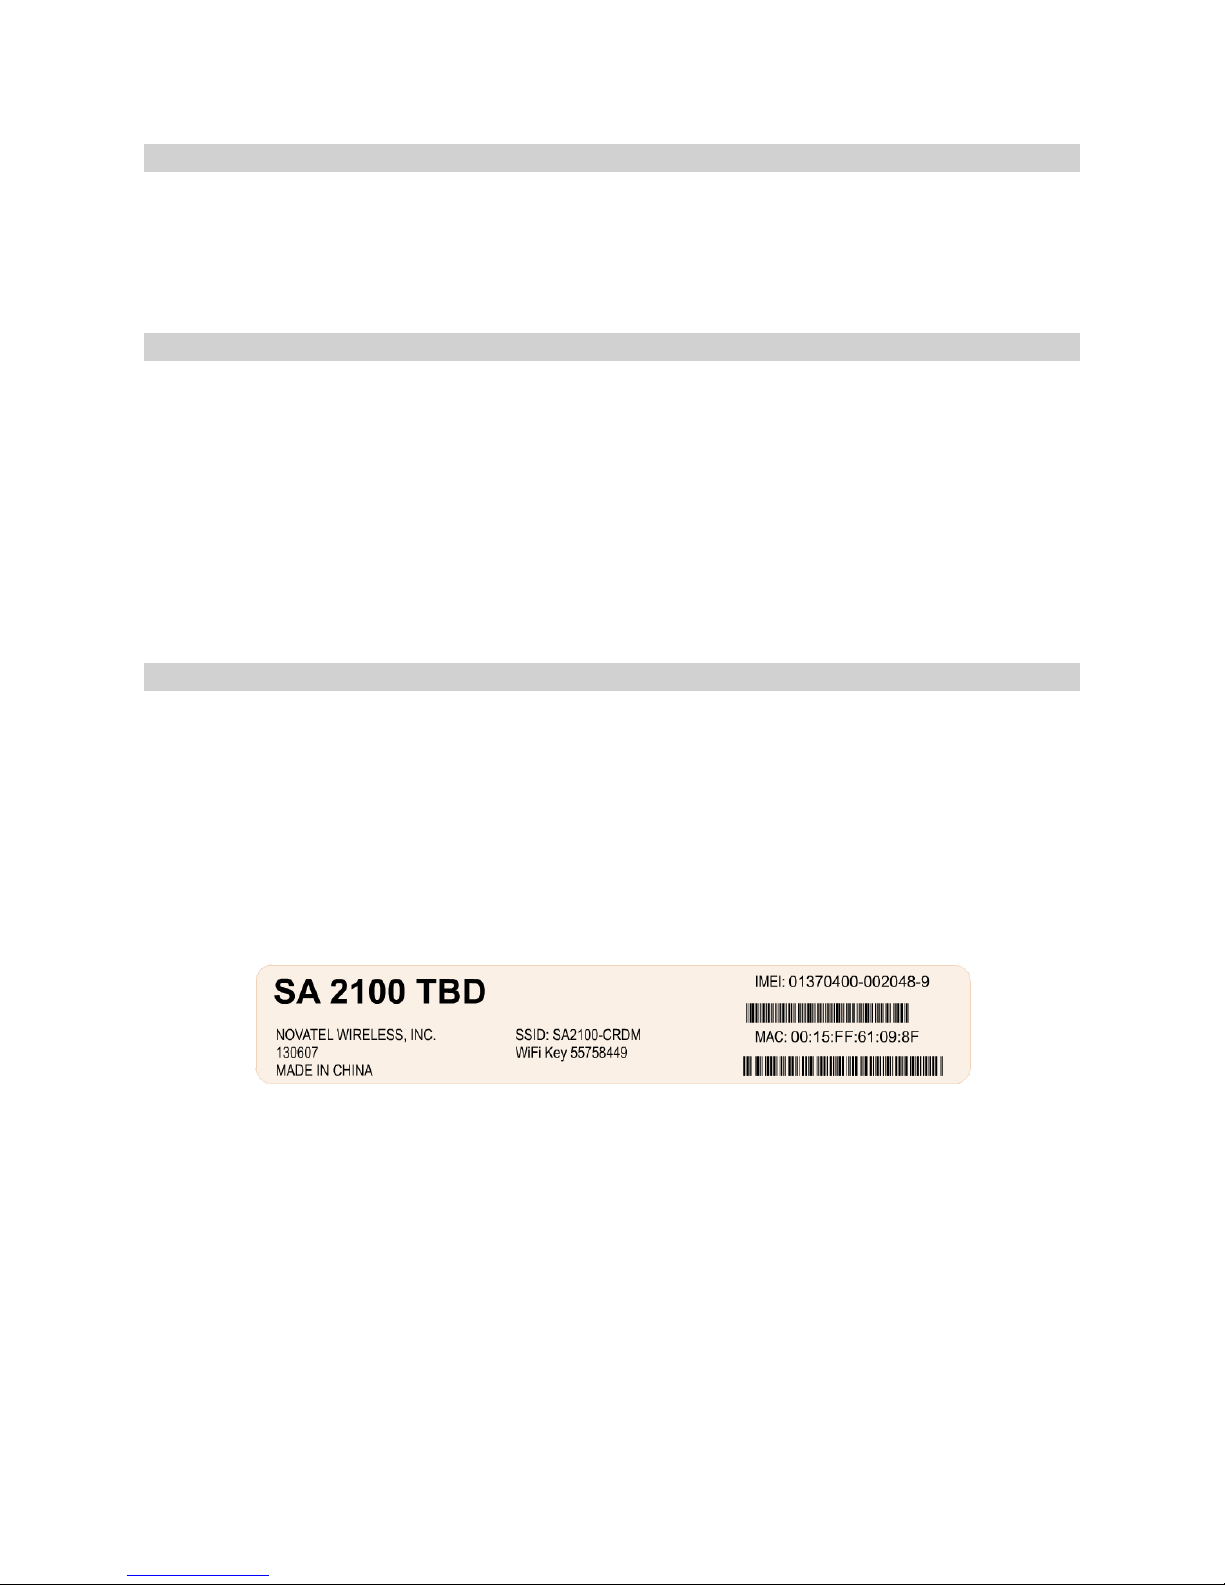
Label
The label is located on the back panel of the router displays the following information:
l
MAC Address
l
IMEI or ESN Number
l
SSID (Factory preset, unique to each device)
l
Wi-Fi Key (Factory preset, unique to each device)
Here is a sample label that shows placement of the various fields:
SA 2100 User Guide 3
Technical Specifications
Case
Dimensions: (L x W x H)107 x 81 x 30 mm
Weight: 220 g
Mounting Options: Mounting bracket, Velcro tape, tie-wrap, bolts, adhesive
Cellular Technology
Frequency 4G LTE:
Bands LTE: B2, B4, B5, B17
Data Speed LTE:100 Mbps
Routing DHCP server, DNS, static or dynamic IP address, port filtering, port forwarding
SA2100-xx-AT SA2100-xx-VZ
4G LTE:
750/850/AWS/1900 MHz
3G UMTS/HSPA/HSPA+:
850/900/AWS/1900/2100 MHz
2G GPRS/EDGE:
850/900/1800/1900 MHz
GSM/GPRSRadio 850/900/1800/1900
MHz
WCDMA: B1, B2, B4, B5, B8
GSM:B8, B9, B13, B14
DC-DSPA+: 42 Mbps
HSPA+:21 Mbps
700/1700 MHz
3G CDMA 2000:
850/1900 MHz
LTE:B4, B13
CDMA: BC0, BC1
LTE:100 Mbps
CDMA: 3.1 Mbps
Security NAT, SPI Firewall, VPN pass-through, IPSec VPN, MAC access control
Wireless Network Wi-Fi 802.11 b/g/n, 10 clients, pre-configurable security: WPA/WPA2
Certifications FCC, CE, IC, PTCRB, GCF, Wi-Fi Alliance,
eMark, Safety, AT&T
SA 2100 User Guide 4
FCC, Wi-Fi Alliance, Safety, Verizon
Power
Input Power Range: 9 - 32 VDC (Molex Connector); 12V or 24V vehicle ready
Current Consumption: 800 mA @ 12VDC (max power, normal operation)
147 mA @12 VDC (min power, normal operation)
57 mA avg (suspend mode)
8 mAavg (deep sleep mode)
Lithium Battery (Optional): Rechargeable 3.7 V 2900 mAh 1073 Wh Li-ion battery
Environment
Operating Temperature: -30º C to 70º C (external power)
-20º C to 60º C (battery)
Storage Temperature: -40° C to 85° C (external power)
-40º C to 60º C (battery)
Relative Humidity: Up to 95% non-condensing
Antenna
Internal Cellular Antenna: (primary + diversity)
External Cellular Antenna: (primary + diversity)
Automatically switches between internal and external;
SMAConnector
Internal Wi-Fi Antenna: 2.4 GHz
Internal GPS Antenna: 1575 MHz
Interfaces, I/O, and LED
1 Ethernet Port (RJ45 Connector)
1 Micro-SIM Card Slot (Inside Battery Compartment)
2 Digital Inputs, 1 Digital Output
1-Wire® Interface
1 Micro USB On-The-Go (latched)
USBto Serial Supported
2 User-Controlled I/O
LED Indicators: Power, Wi-Fi, Network, Signal Strength
SA 2100 User Guide 5
Device Management
Production Environment: Cloud-based (Optional)
Testing Environment: Cloud-based; 90-day free access with engineering support
Bulk Provisioning: Over-the-air or local
Firmware Upgrade: FOTA (Firmware-over-the-air) or local
Additional Features
FOTA
On-Board, Configurable Smart Agent: GPS, Accelerometer, GPIO, 1-Wire, Exception-Based Reporting
3-Axis Digital Accelerometer
I/O Control
Models
SA2100-xx-AT (AT&Tvariations)
SA2100-xx-VZ (Verizon Wireless variations)
SA2100-10-R (ROWTelematics)
SA2100-20-R (ROWTelemetry)
Document References
Guide Number Guide Title
SA2100X-AT002 SA 2100 Telemetry AT Command Reference Guide
SA2100X-AT003 SA 2100 Telematics ATCommand Reference Guide
ENF0000AN002 FOTA Application Note
ENF0000CB001 API Reference
ENF0000AN014 Access the Novatel Wireless M2M Test Server
SA 2100 User Guide 6

2
Features and Functions
Reset Button
LEDs
Connectors
7
LEDs
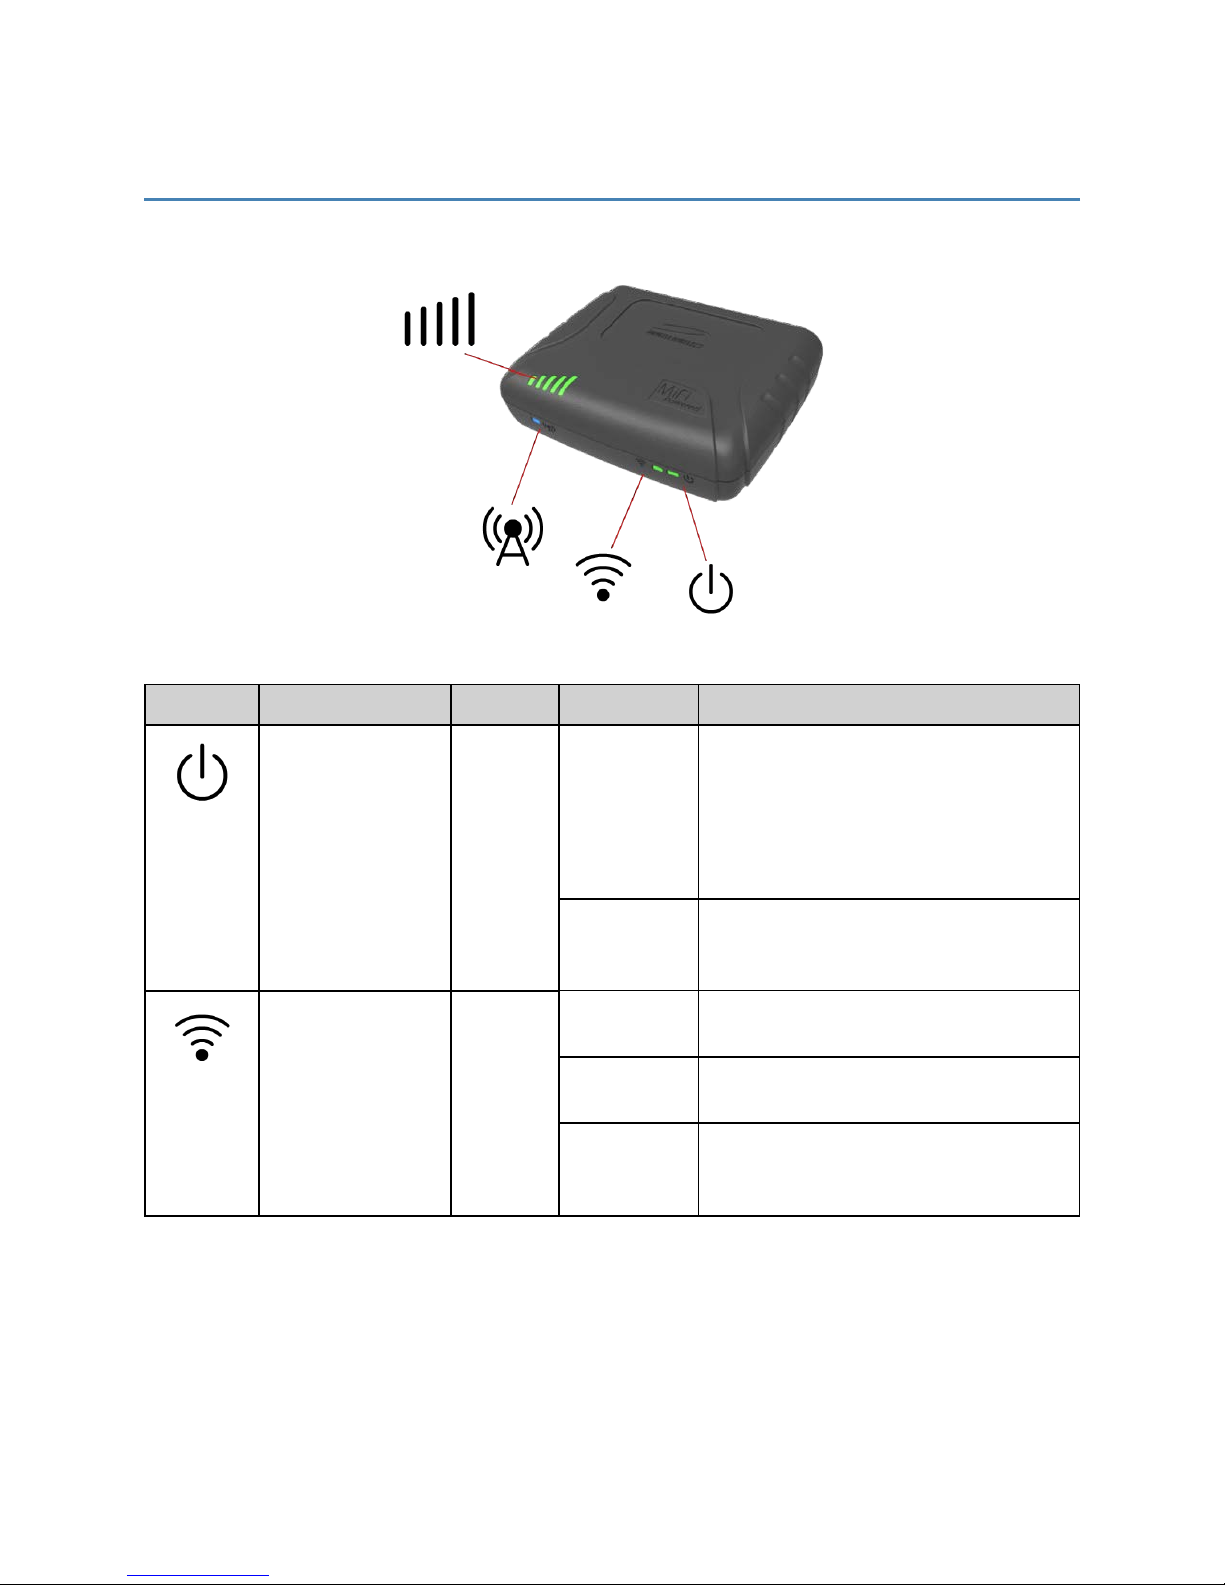
The SA 2100 router has LEDs that verify status, signal, and connectivity.
The following table describes each LED:
Symbol
LED Color
Power Green On Normal operation (External or Battery
WiFi Green Off Wi-Fi not enabled or No Wi-Fi connected
State Description
Power)
NOTE: When operating on Battery power,
all other LEDs are OFF.
The LED blinks slowly, once every 5
seconds, when running on the battery.
Blinking
1 sec On
2 sec Off
On External Power - Wi-Fi devices attached
Blinking
1 sec On
1 sec Off
During device Reset or Power-up
sequence
devices or device is powered from Battery
but no Wi-Fi traffic
Wi-Fi traffic
SA 2100 User Guide 8
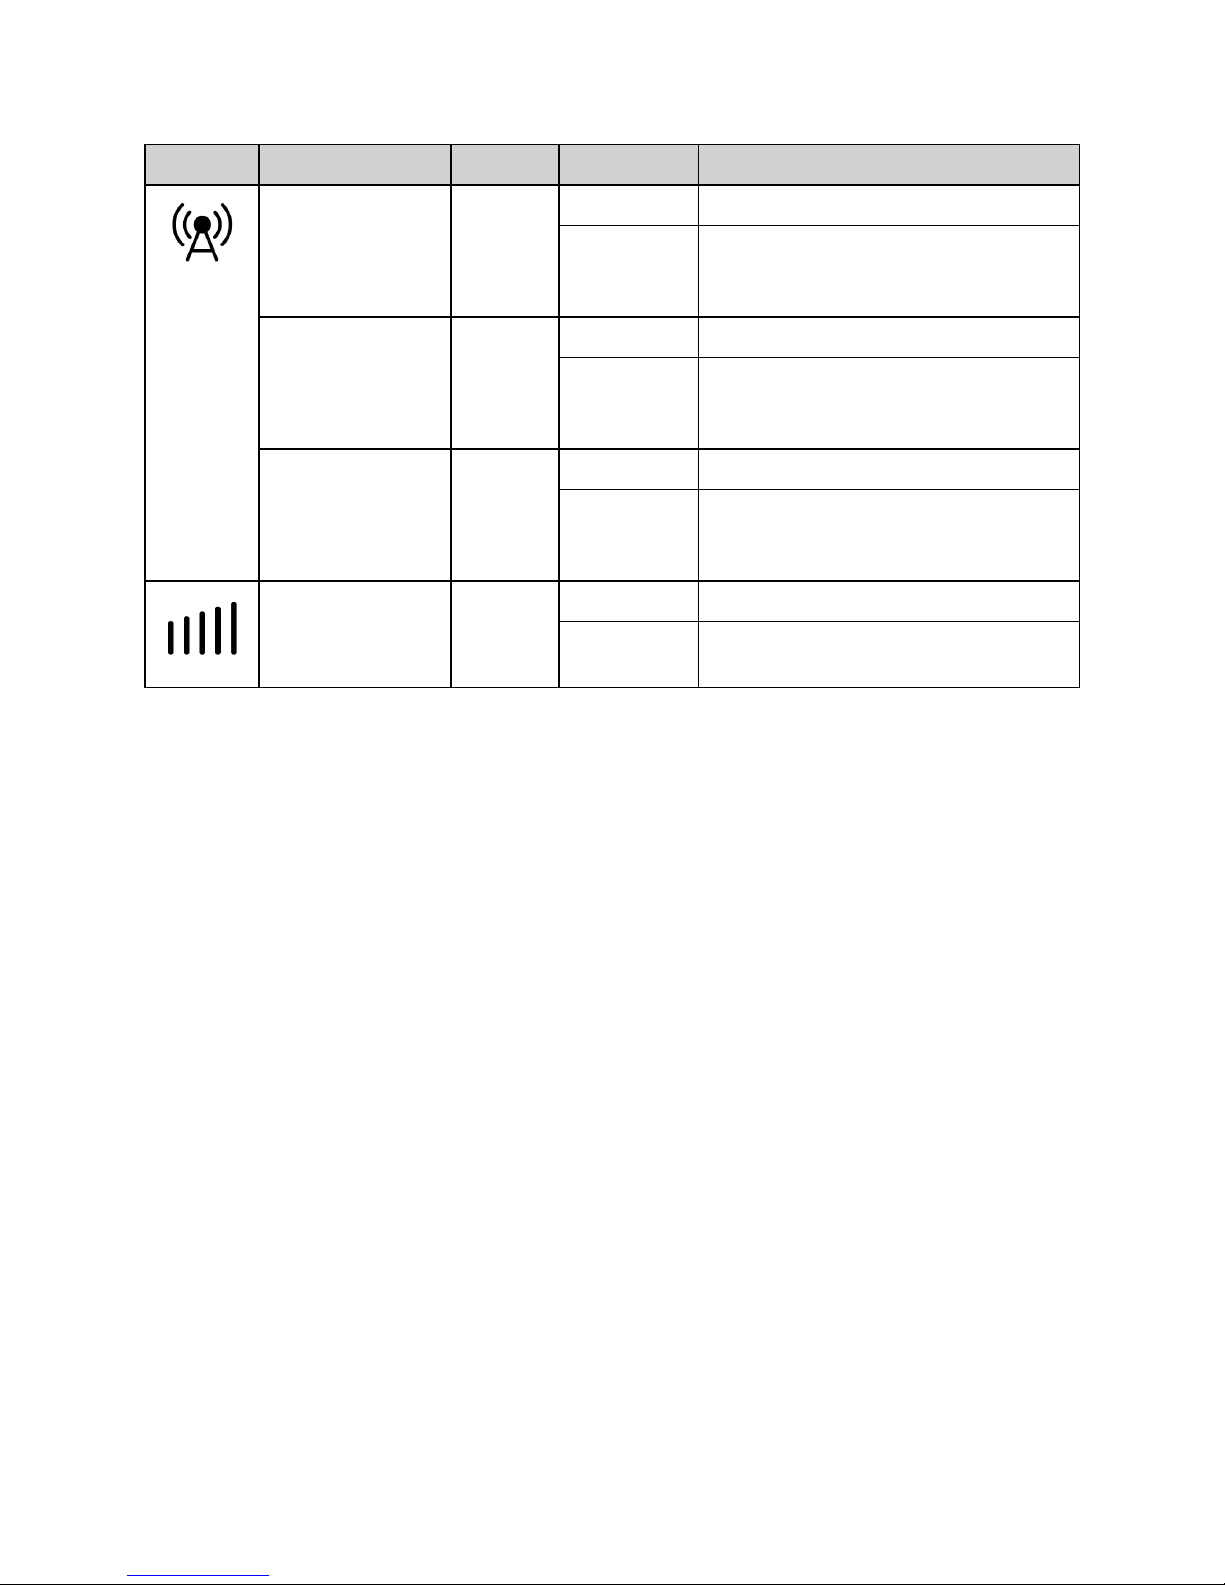
Symbol
LED Color
State Description
WAN – LTE Green On Attached (LTE) – no traffic
Blinking
1 sec On
1 sec Off
PDP Activity
WAN – 4G/3G Blue On Attached (4G/3G) – no traffic
Blinking
1 sec On
1 sec Off
PDP Activity
WAN – 2G Orange On Attached (2G) – no traffic
Cellular 5-bar signal
strength
Blinking
1 sec On
1 sec Off
Green Off No SIM/No Signal/Operating from battery
On Active only when external power is
PDP Activity
present.
NOTE: While the SA 2100 is operating on battery power, the Power LED is the only LED that operates.
SA 2100 User Guide 9
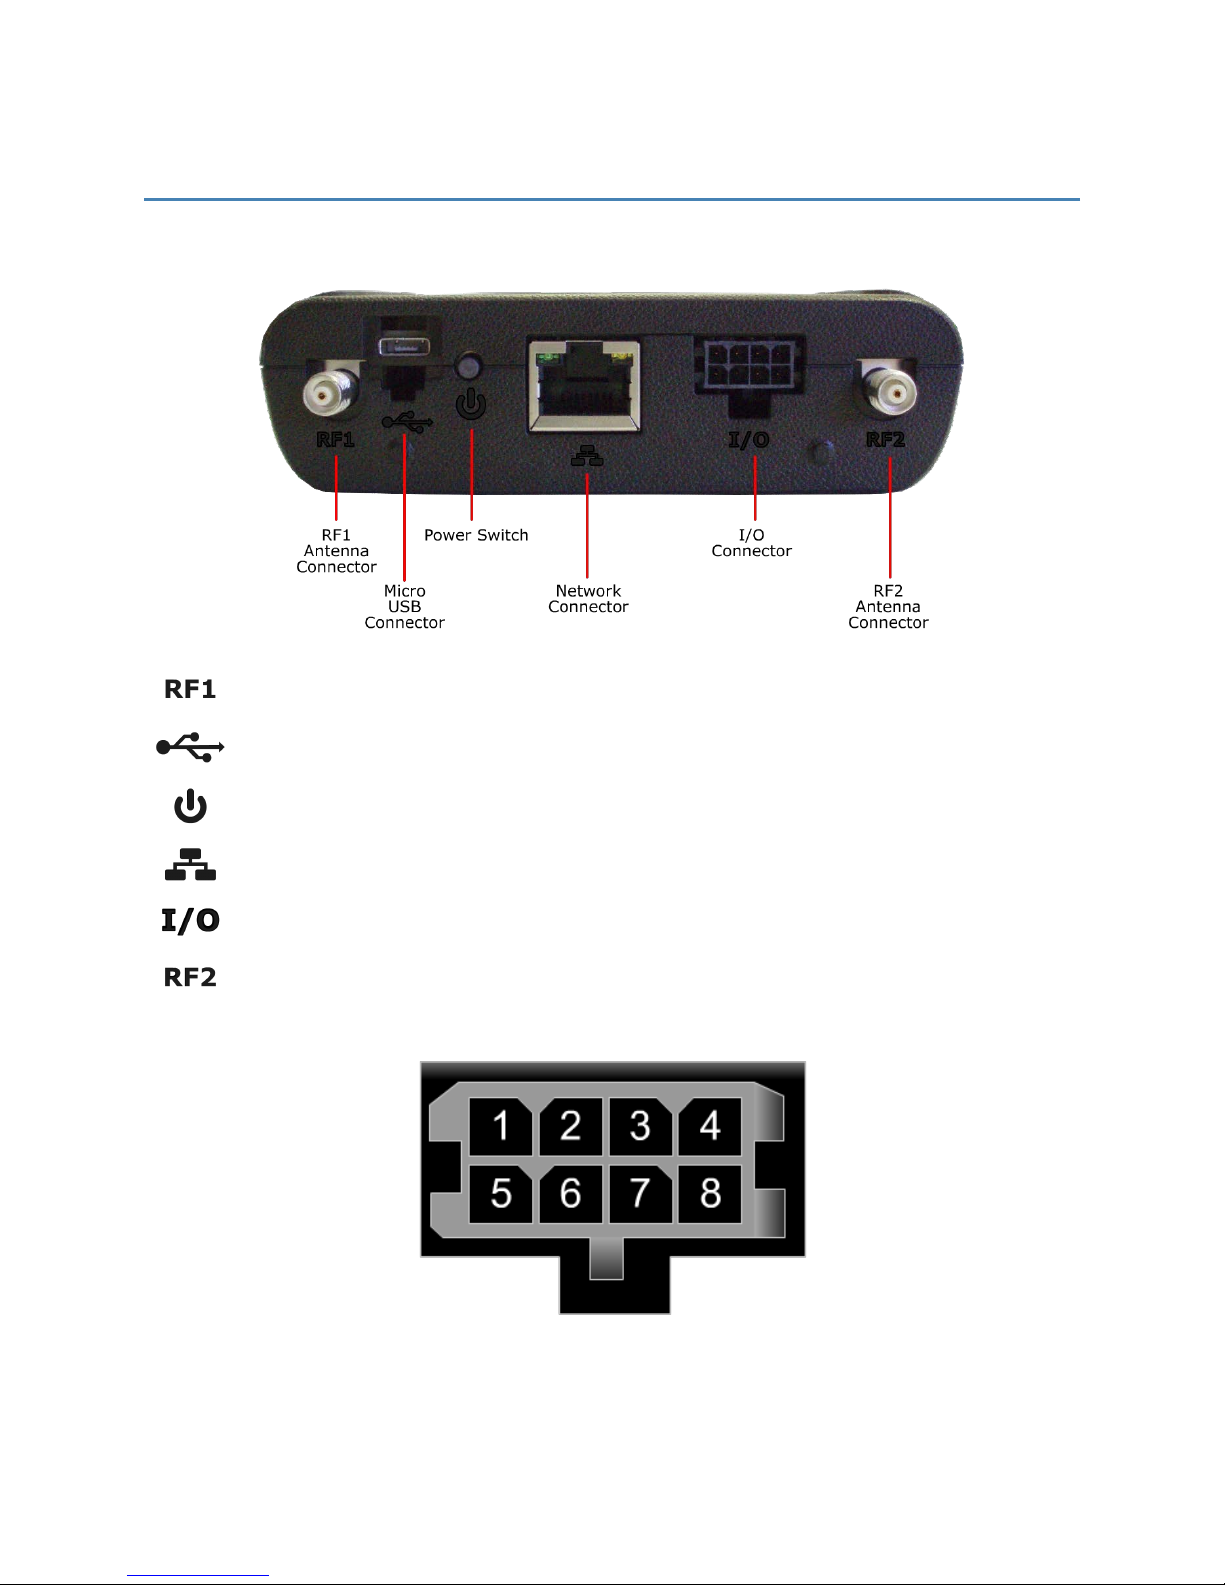
Connectors
The SA 2100 router has the following connectors:
Cellular Antenna Connector RF1 (Primary)
Micro USB Connector
Graceful Shutdown Button
Network Connector (Ethernet)
8-Pin I/O Connector (Includes Power)
Cellular Antenna Connector RF2 (Diversity)
For Pin Out descriptions, see the Power Cable section.
SA 2100 User Guide 10
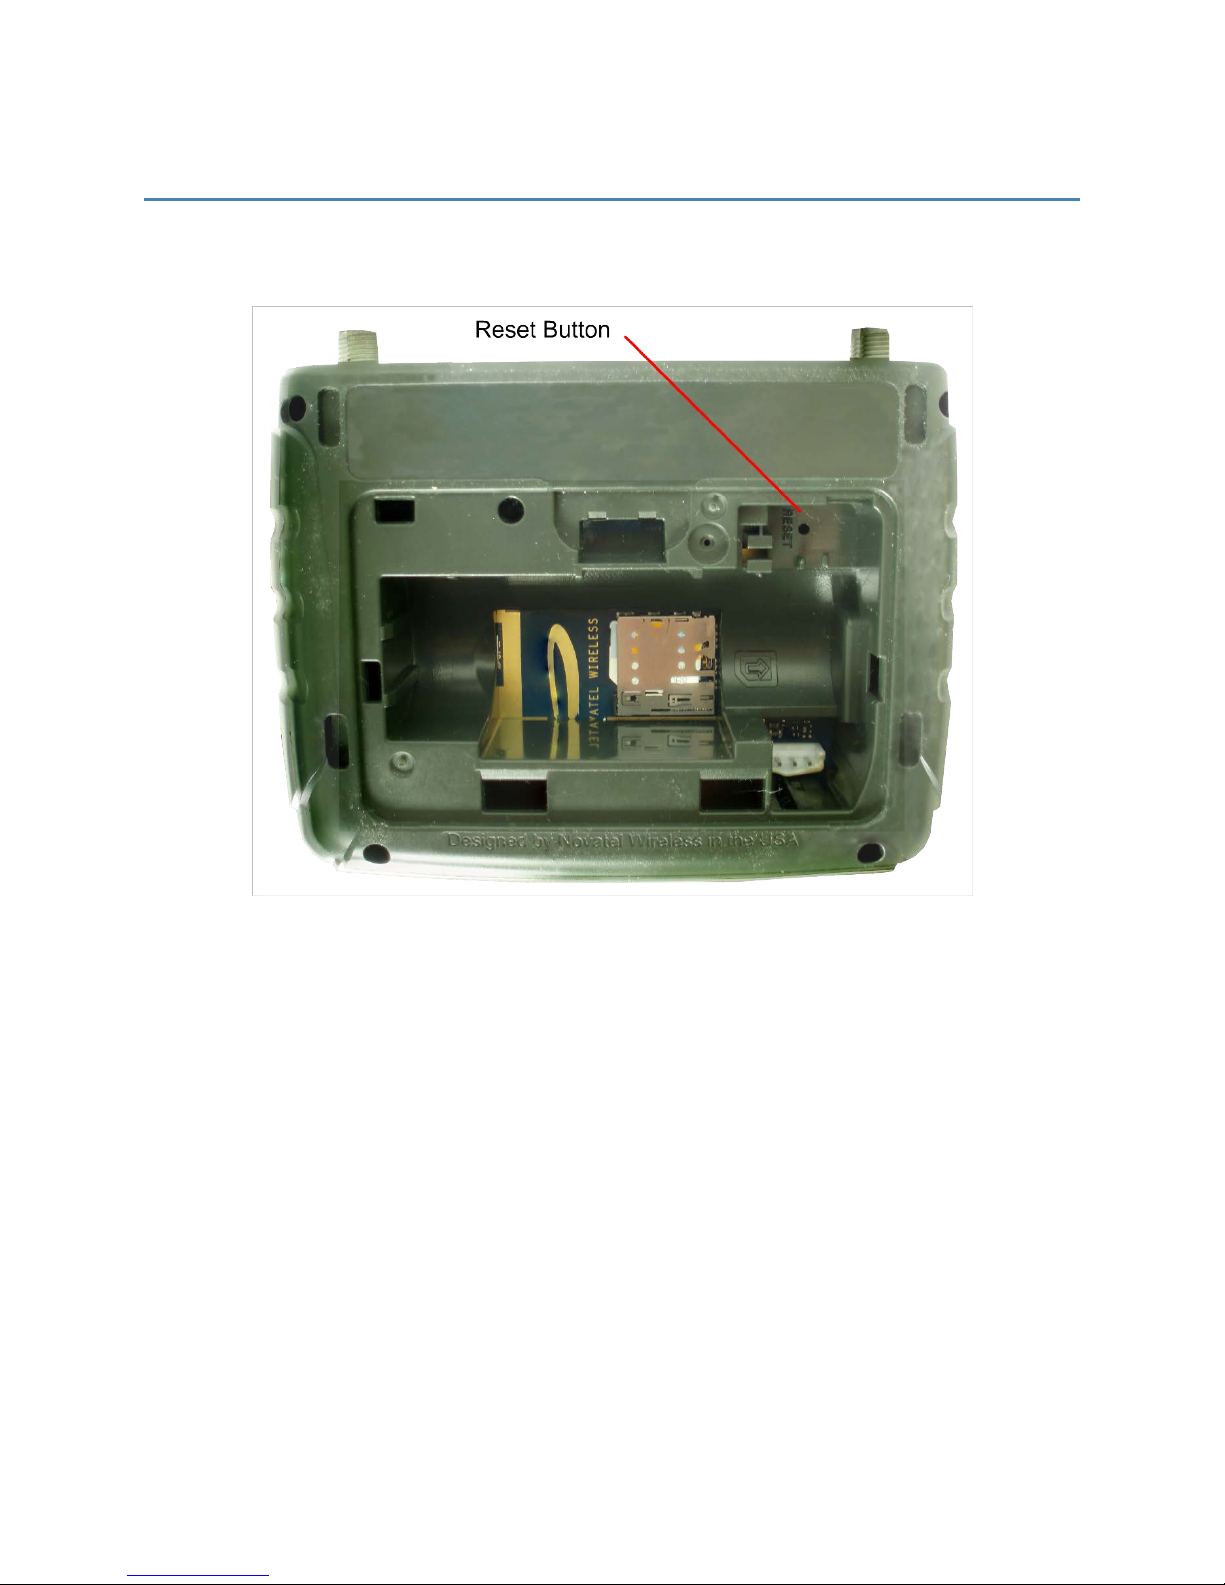
Reset Button
The Reset Button is located inside a corner of the battery compartment. The button is a small hole about
1.5mm in diameter, with the word “RESET” below it. The location is shown in the following image.
NOTE: If a reset is required, use a small pointed object, such as a paperclip, to push the Reset button.
SA 2100 User Guide 11

3
Installation
Precautions and Guidelines
SIM Installation
Battery
Mounting Methods
Driver Installation
12
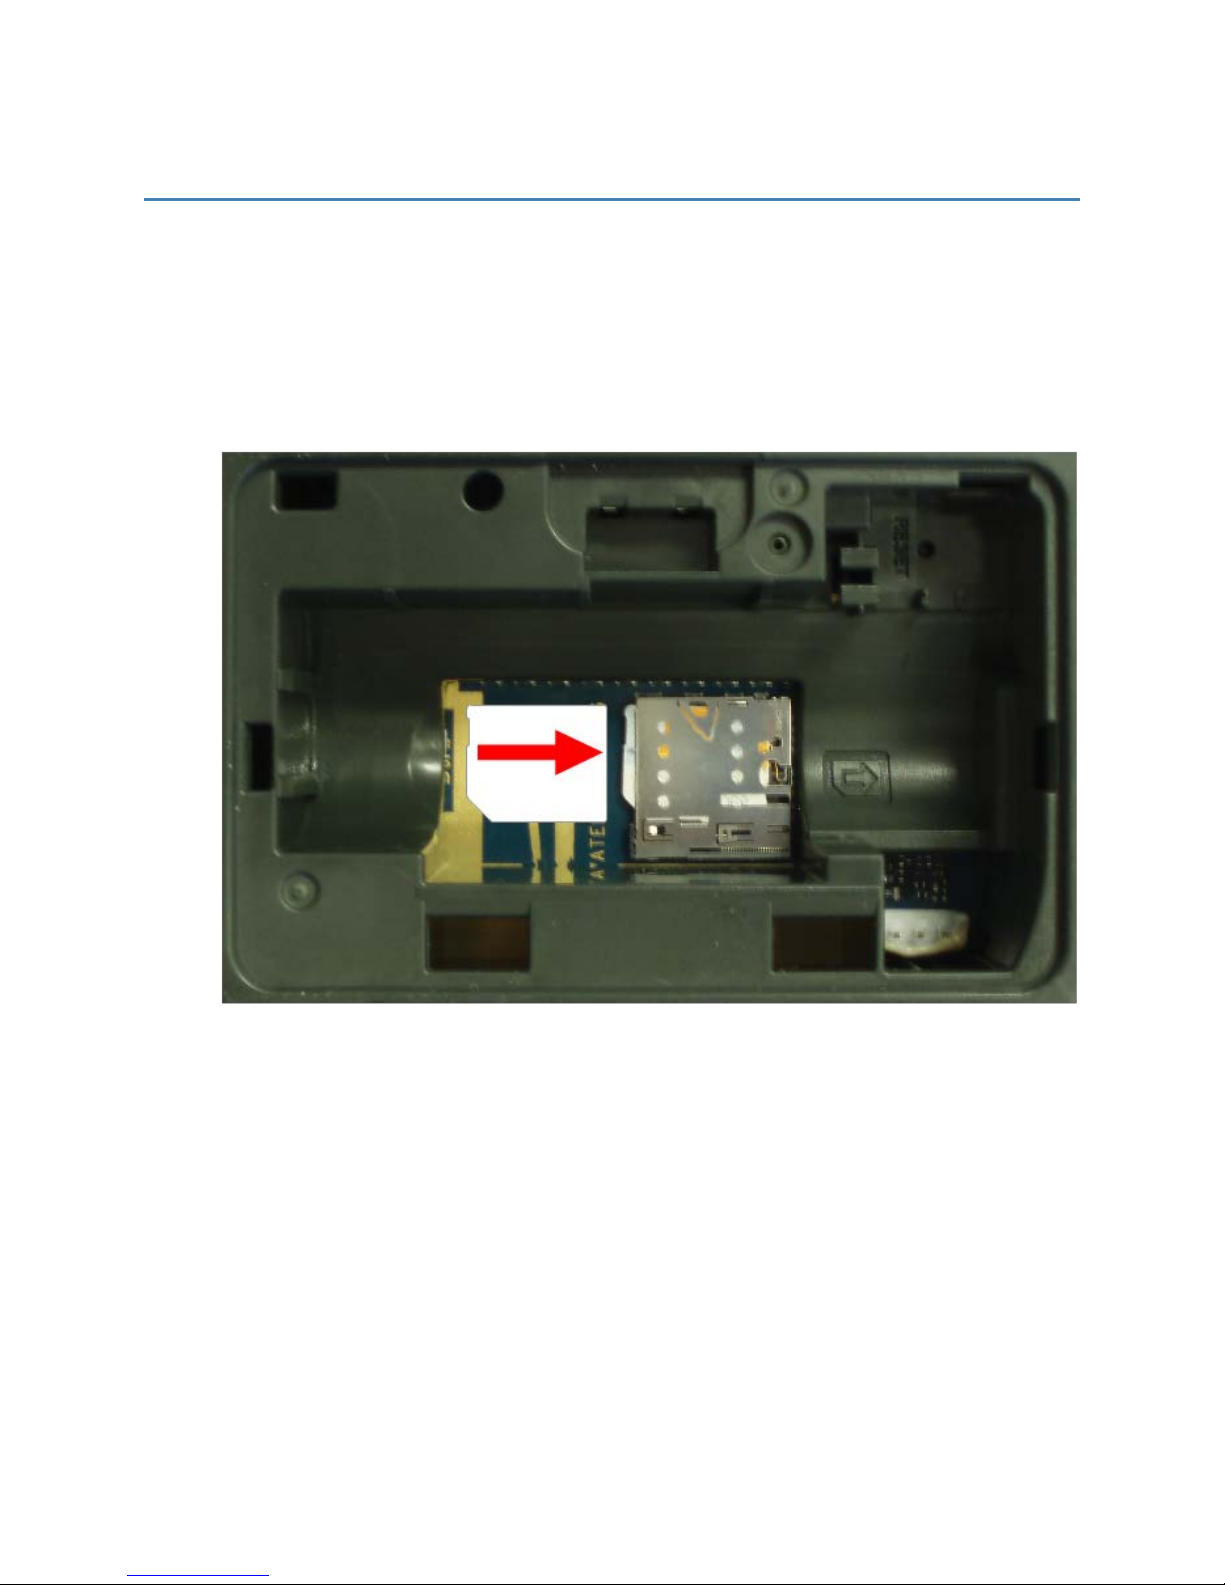
SIM Installation
To insert the SIM card:
1. Open the device by removing the lid for the battery compartment.
2. Remove the battery to uncover the SIMcard holder.
3. Insert the SIM card into the SIM holder.
You should hear a "click" when the SIM card is in place.
4. Insert the device “door”plate into the opening and snap into place.
The SIM Installation is complete.
SA 2100 User Guide 13
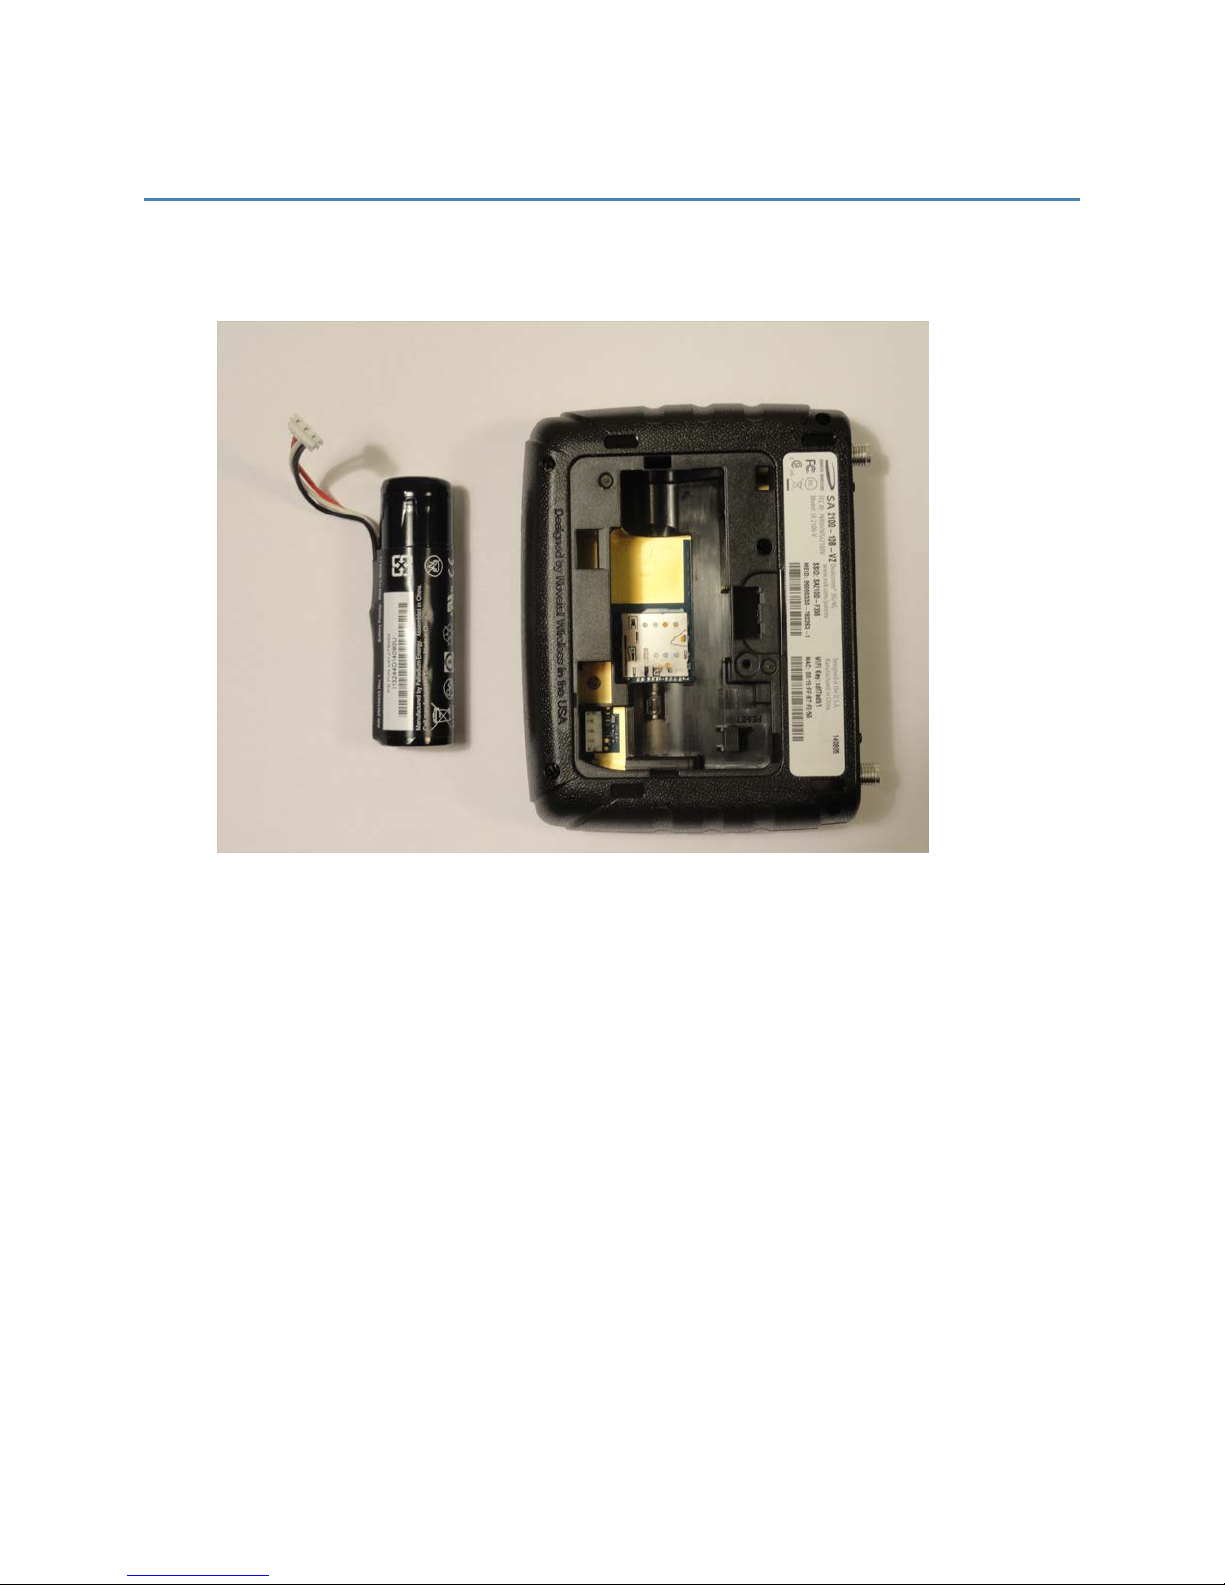
Battery
To insert the battery:
1. Open the device by removing the lid for the battery compartment.
2. Connect the battery plug to the battery jack in the device as shown in the following photo.
SA 2100 User Guide 14
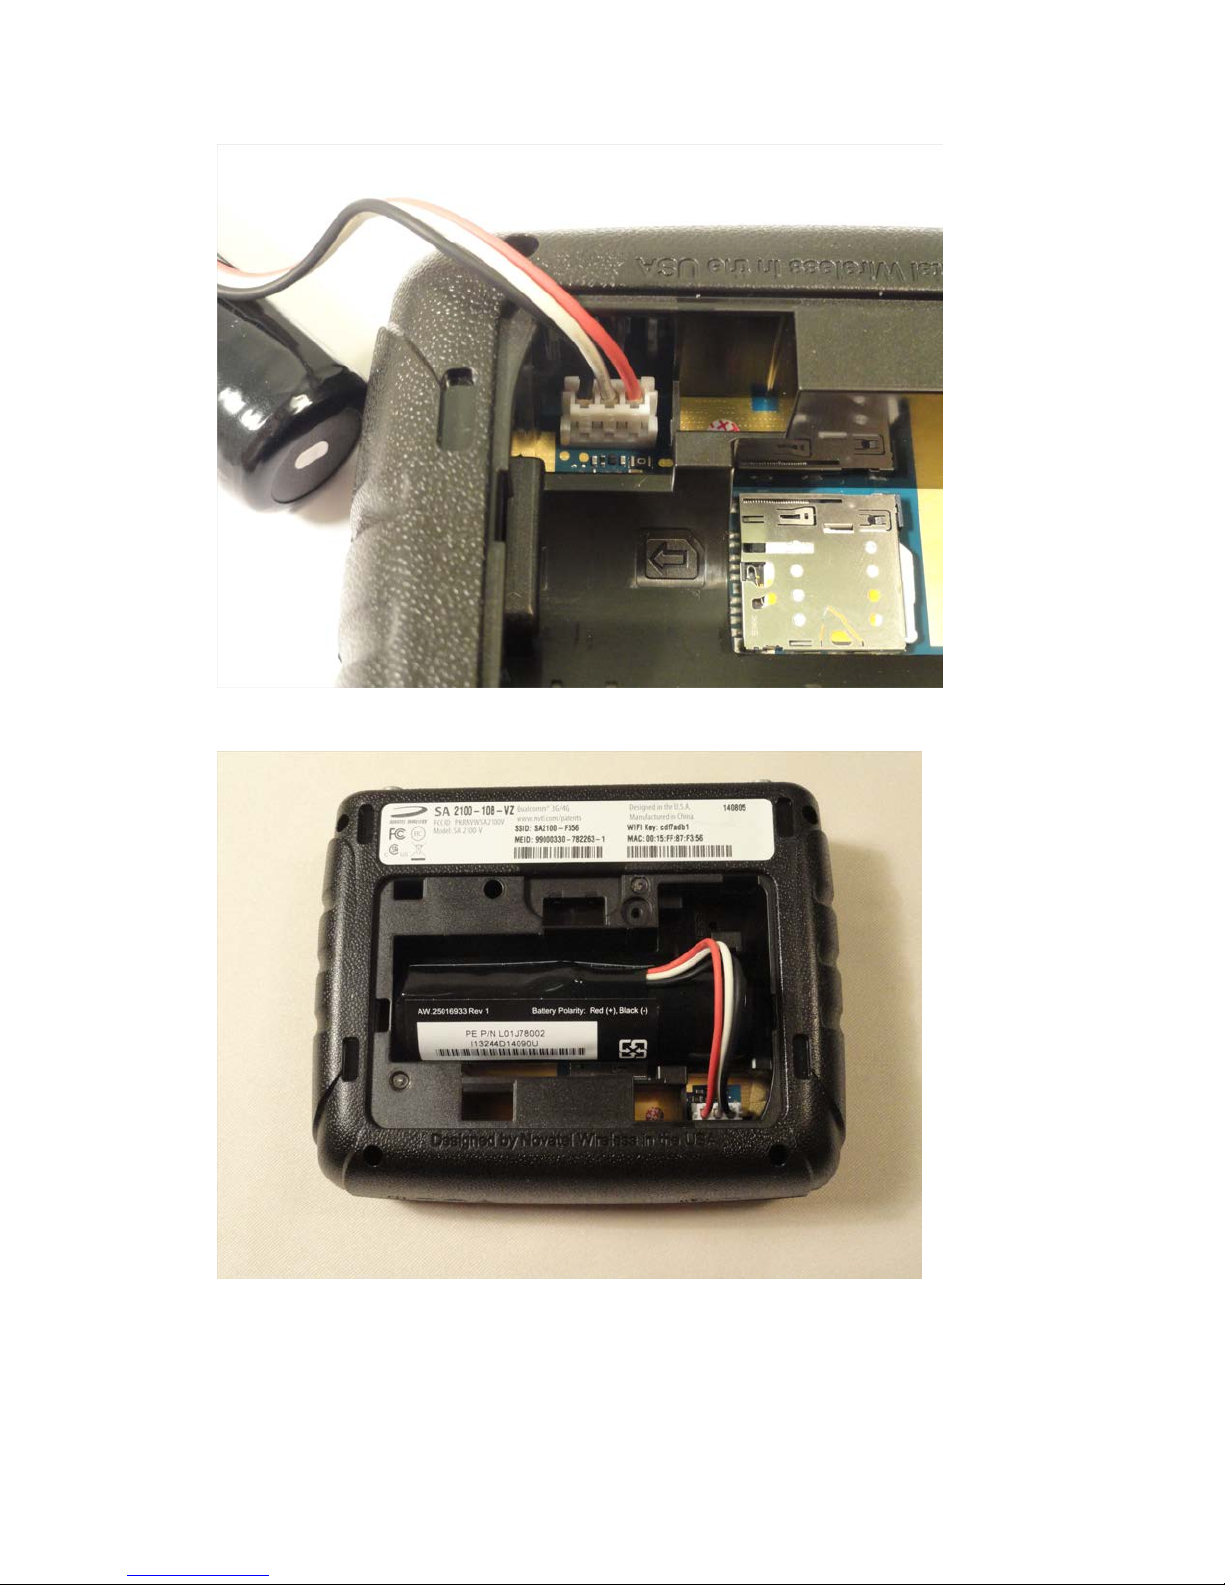
3. Place the battery into the recessed compartment as shown in the following photo.
4. Finally, replace the battery compartment cover.
SA 2100 User Guide 15

Precautions and Guidelines
As you determine the mounting location and prepare to install the device, be sure to heed the following
precautions and guidelines:
l
Place the router in an area free from liquids, dust, and extreme temperatures.
l
Store the router back in its box when not in use.
l
Do not block any ventilation openings by applying adhesives or labels to the router as this
might cause the device to overheat or it might interfere with the antenna.
l
Clean only with a clean, dry cloth.
l
Protect the cord from being crushed or pinched.
l
Route the cord so that it is not easily damaged by someone walking on it, or by items sitting on
or against it.
l
Avoid dropping or shaking the router.
l
Avoid moving the router when it is powered on.
SA 2100 User Guide 16

Mounting Methods
To mount the device using the Mounting Bracket, use the accessory SKU # 21915042.
WARNING! While performing these steps, do not apply excessive force to the retention legs or snap
feature prior to inserting the device as this may deform the mounting bracket.
Mounting Bracket
Secure the mounting bracket to the desired mounting surface using one of the following methods:
l
Two (2) # 6 screws
l
Double-sided tape
Insert the device into the mounting bracket as shown in the figure above. The device should be inserted
with the battery compartment down. Take care to position the device so that the top of the device has
the best unobstructed path to the sky.
Double-Sided Tape
CAUTION! If securing the device using double-sided tape or a method not described in this manual,
note the following precautions:
l
Excessive force in the middle of the device may cause damage to the device.
l
If using rigid mounting hardware, apply pressure only to the ends of the device. Limit the
mounting pressure only to the amount needed to secure the device.
SA 2100 User Guide 17
Driver Installation
Use the following steps to correctly install the drivers in Windows 7 using the Novatel Wireless Driver
Setup Utility.
To install the drivers:
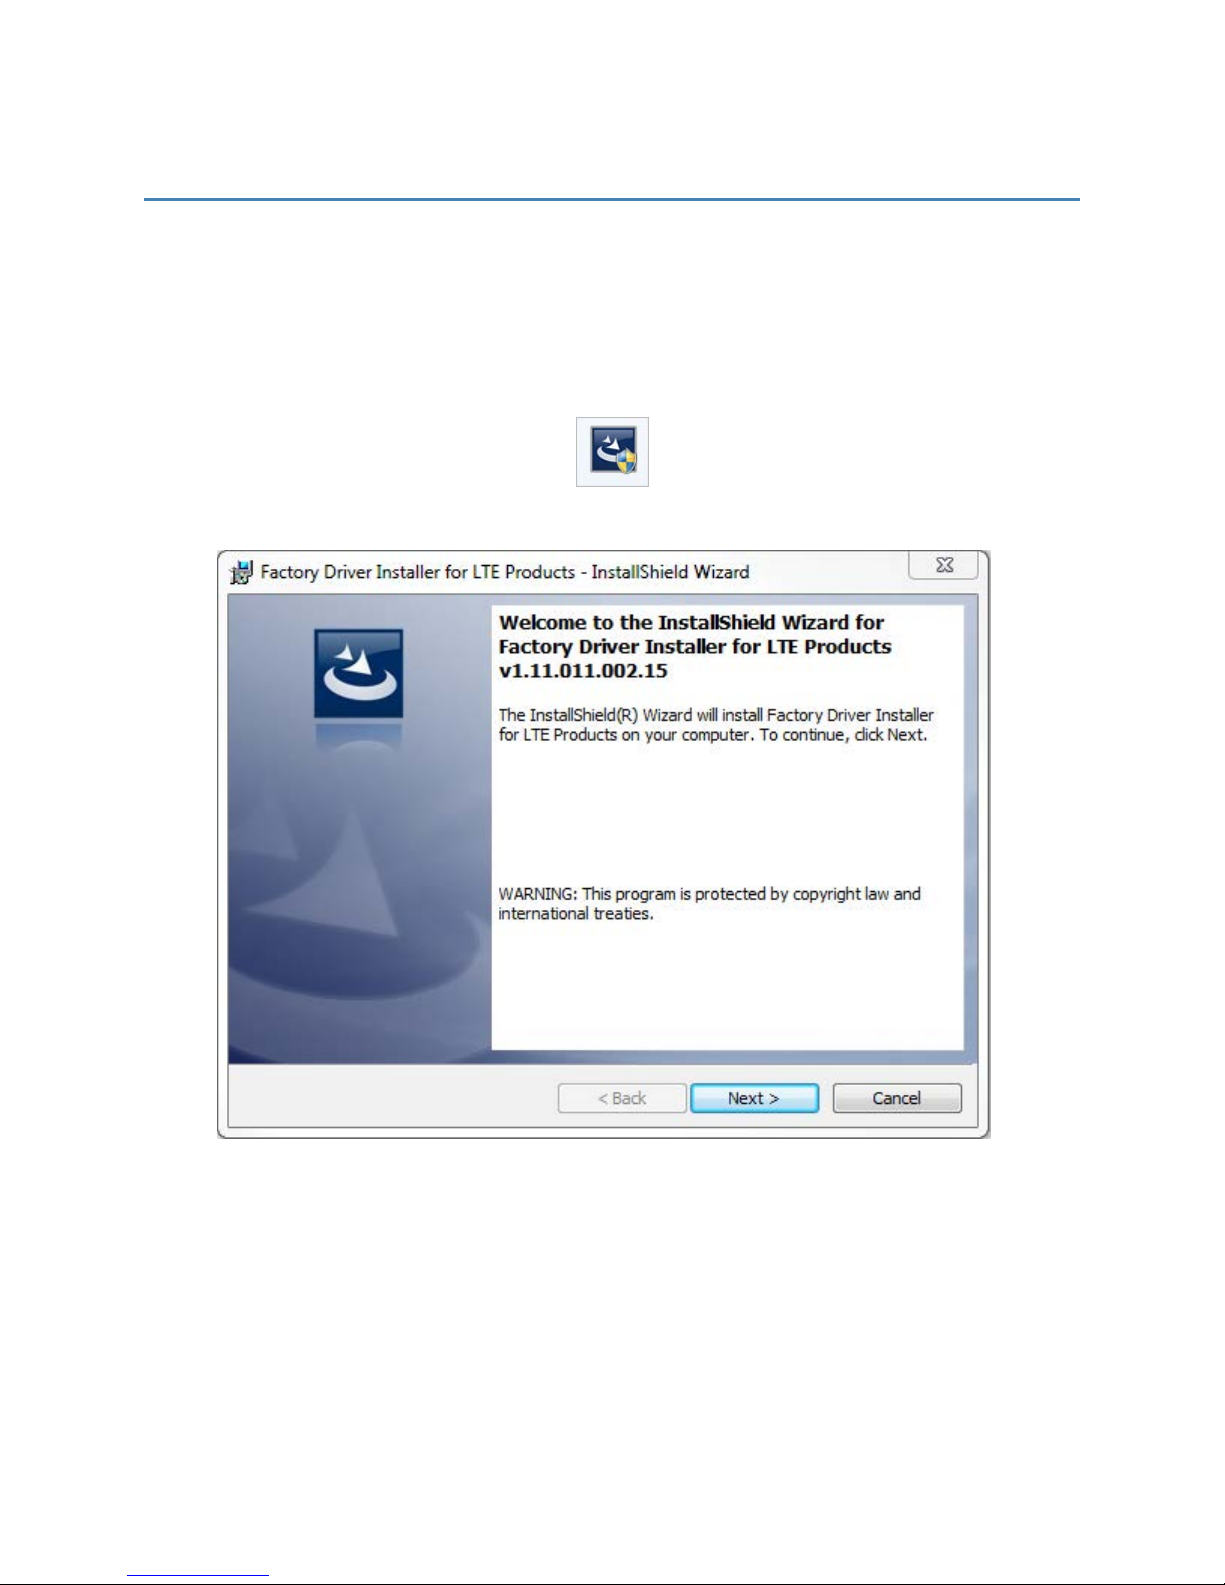
1. Double-click the Novatel Wireless Factory Driver Installer executable file to run the Novatel
Wireless Driver Setup Utility.
The Novatel Wireless Factory Driver Installer Welcome window opens.
2. Click Next.
SA 2100 User Guide 18
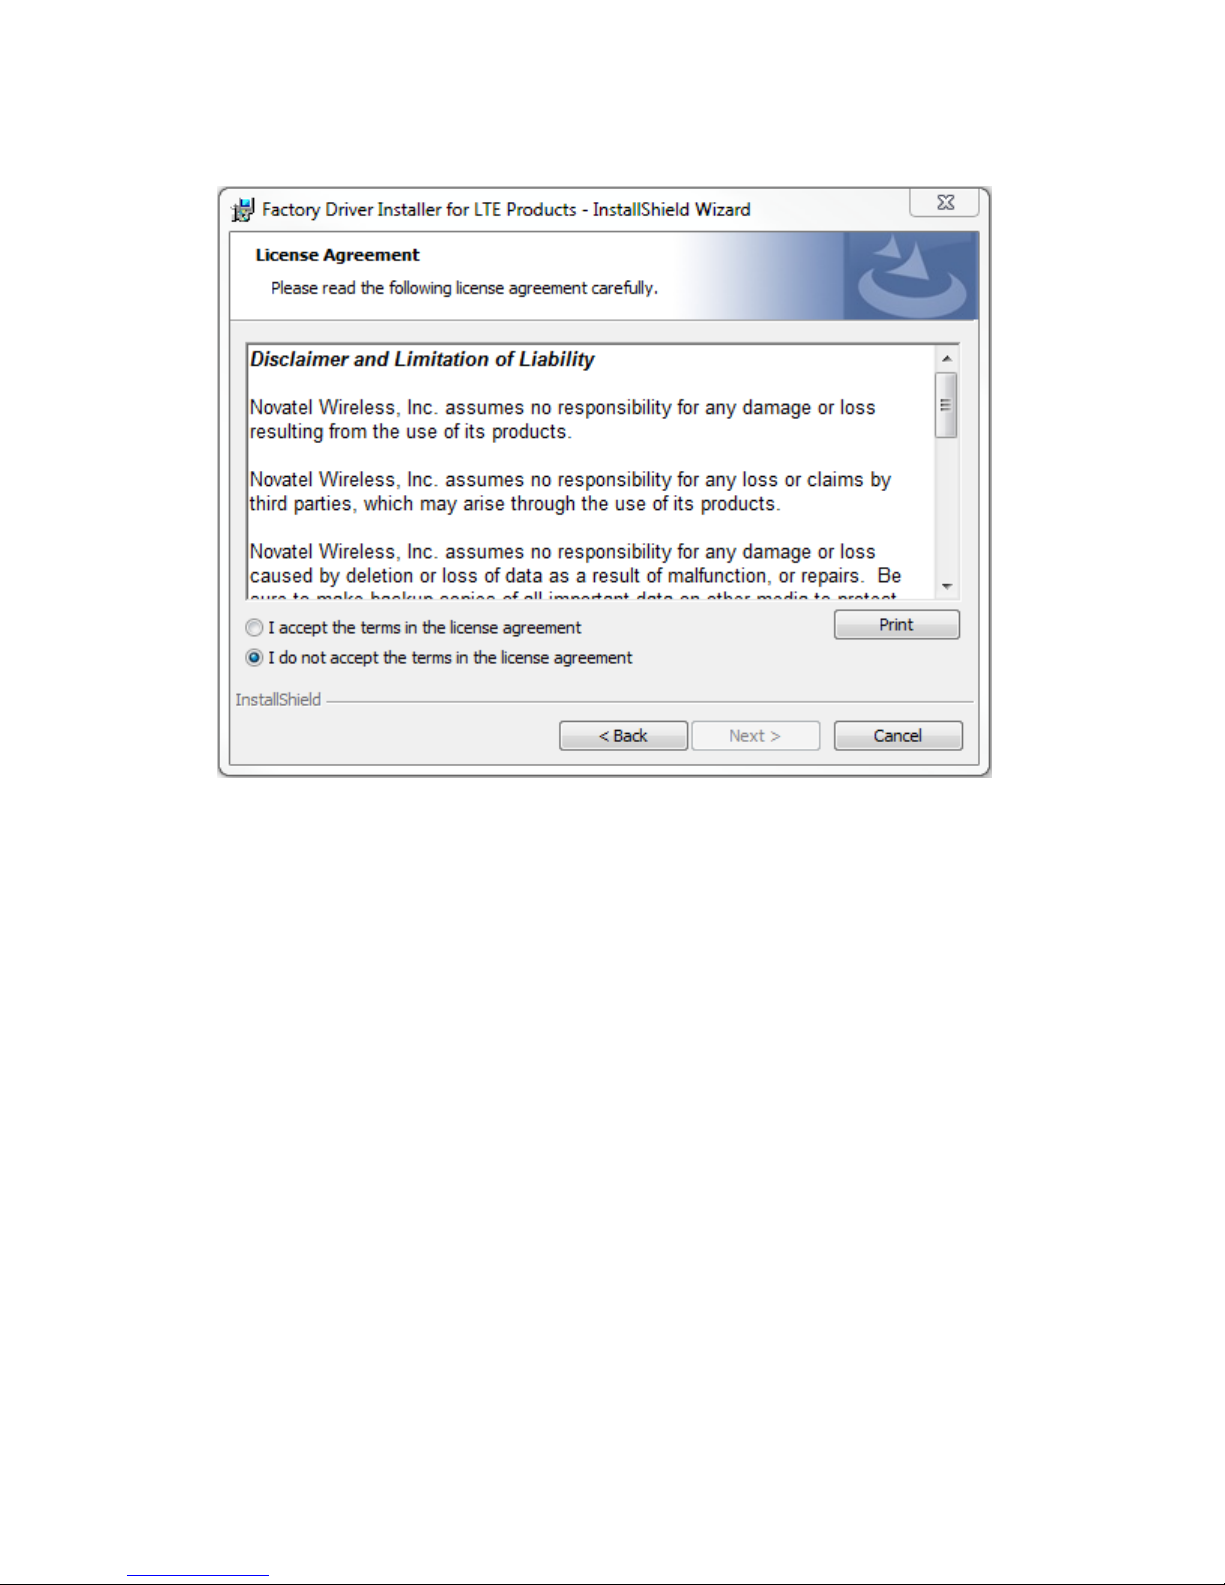
The Novatel Wireless Factory Driver Installer License Agreement Window opens.
3. Read the terms, and if you agree, select I accept the terms in the license agreement and
click Next.
SA 2100 User Guide 19
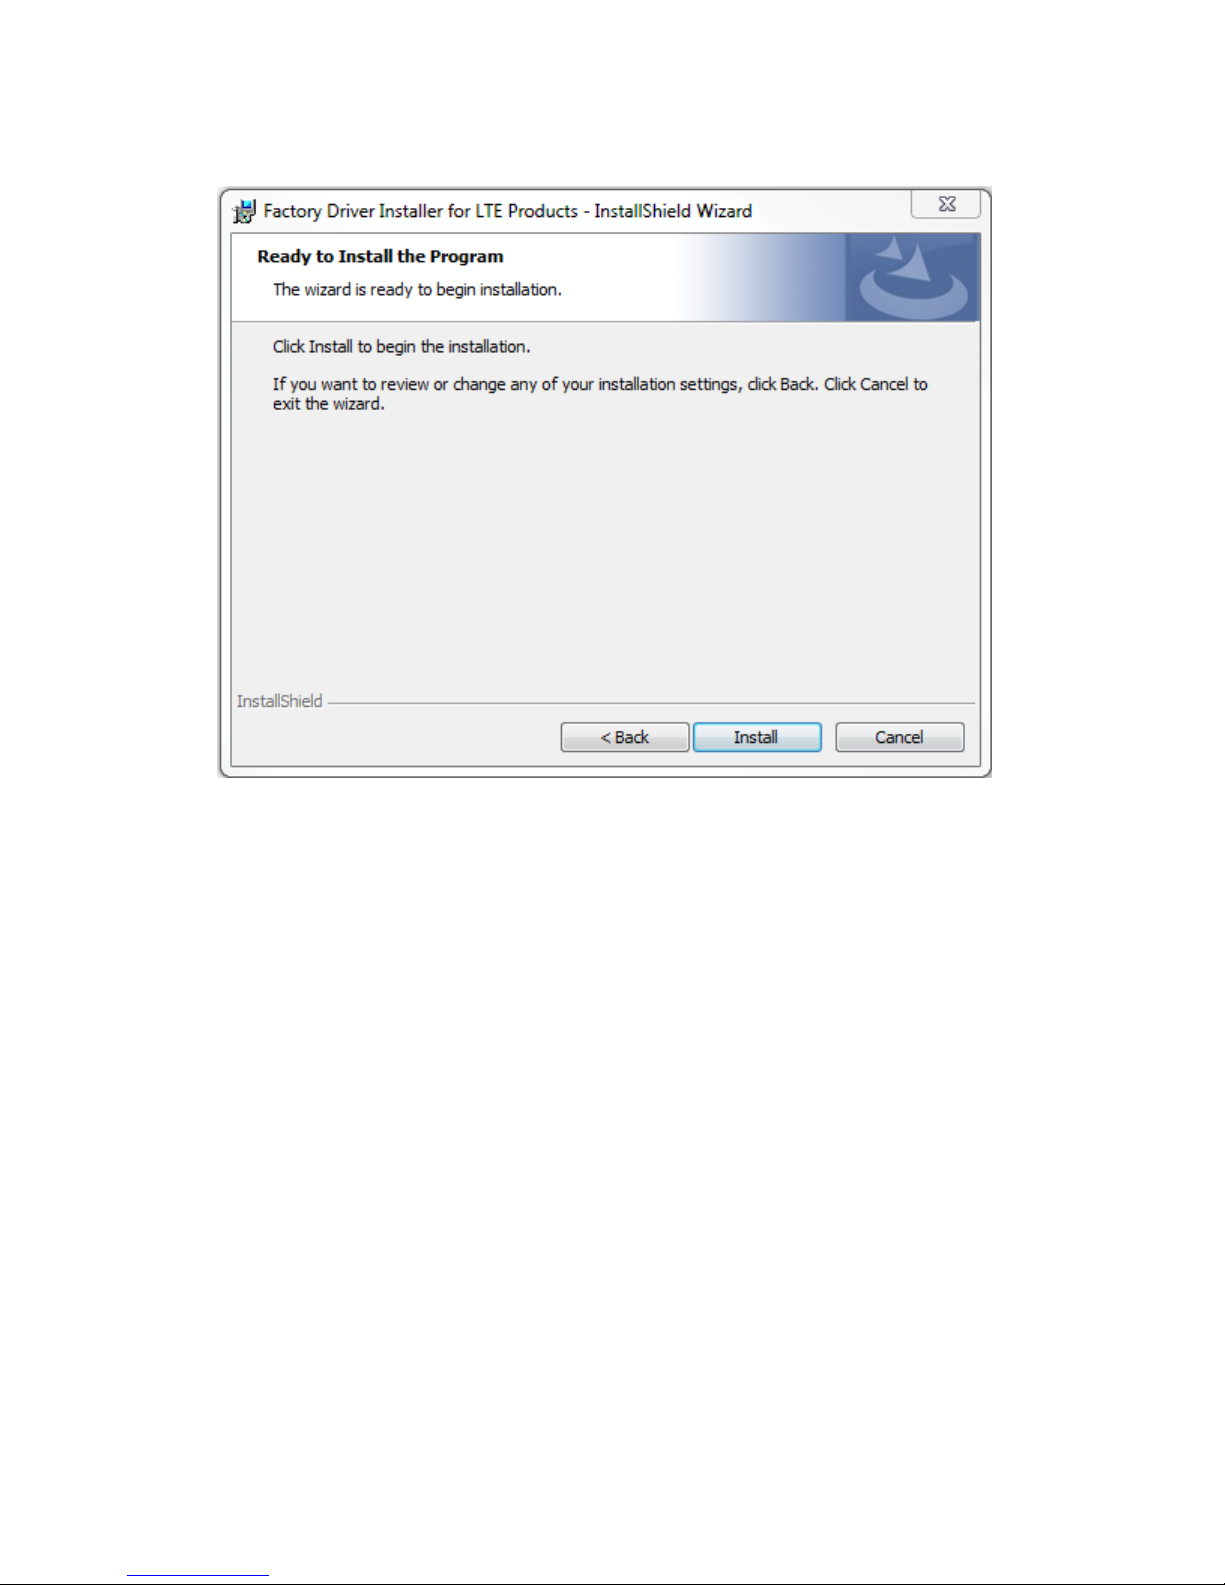
The Ready to Install the Program window opens.
4. Click Install.
SA 2100 User Guide 20
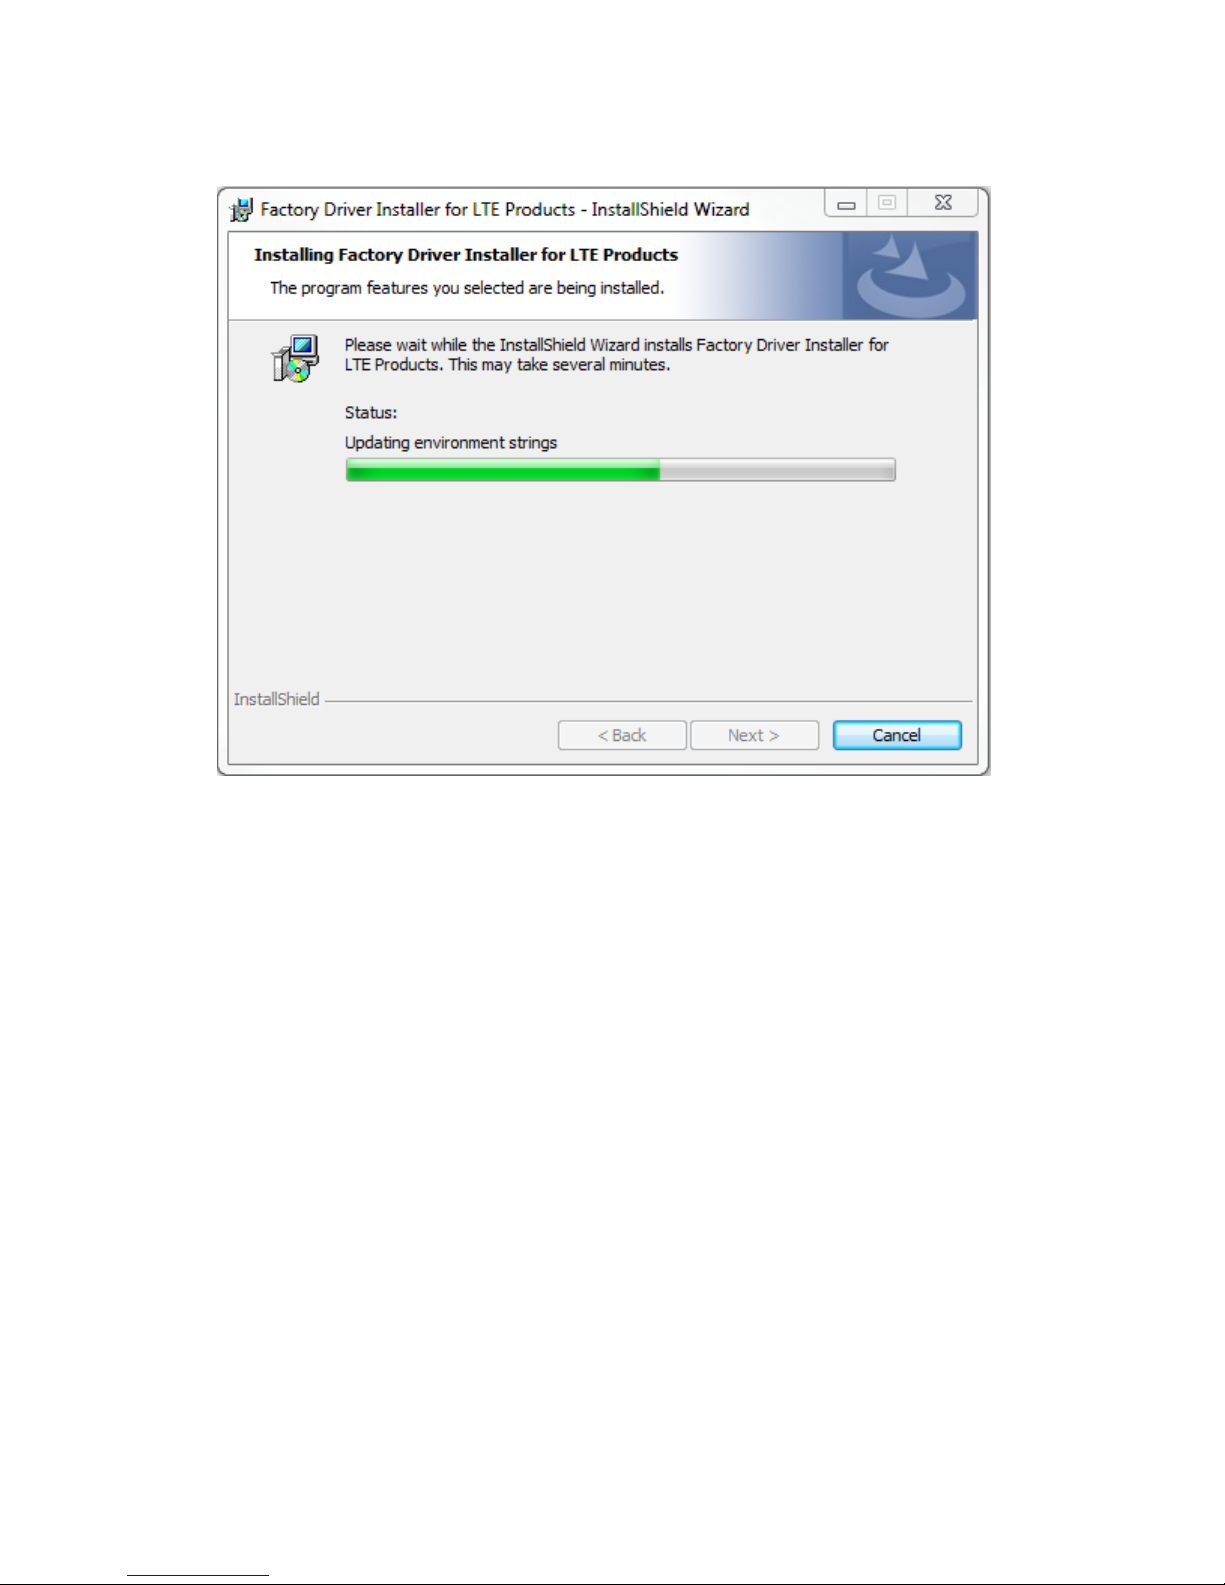
The Installation Progress window opens.
SA 2100 User Guide 21
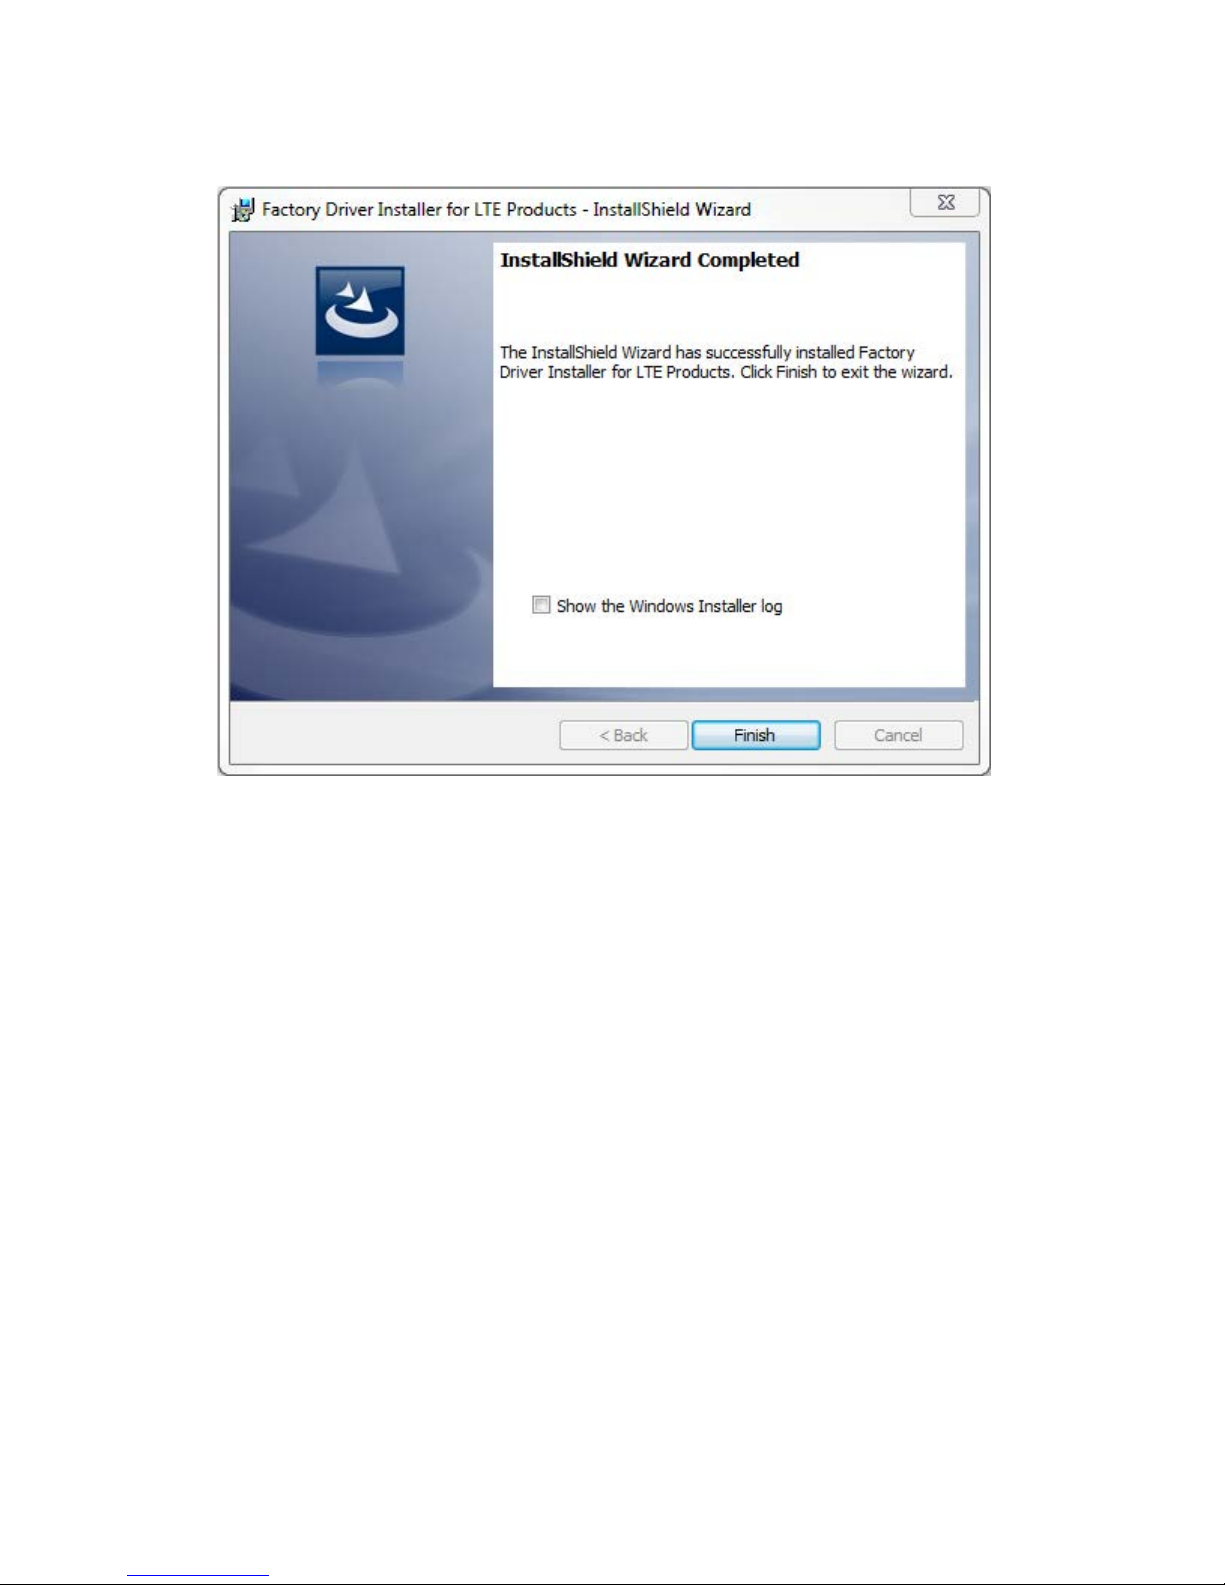
Once the installer has successfully installed the driver, the Installation Complete window opens.
5. Click Finish.
SA 2100 User Guide 22

4
Using the Device
Connecting to the SA 2100 Router
Powering the Device
Positioning Your Router
23

Powering the Device
When the power adapter is connected, the SA 2100 powers up automatically. It takes approximately
two minutes for the device to power up and register on the cellular network.
To power the device:
1. Connect the device to a power source.
2. Push the Power switch that is located in the back of the device.
To view the Power switch location, see the Connectors section.
3. The device power LED lights up to indicate that it is powered on.
It may take approximately two minutes for the device to power up.
Using the Battery
To power the device using the battery:
1. See the Inserting a Battery section for instructions.
2. Push the Power switch that is located in the back of the device.
To view the Power switch location, see the Connectors section.
3. The device power LED should lights up to indicate that it is powered on.
It may take approximately two minutes for the device to power up.
SA 2100 User Guide 24

Positioning Your Router
The router allows you to access your network almost anywhere within a given operating range.
However, this range depends on where you place your router. The placement of furniture, the thickness
of walls, and the number of walls a signal must travel through can limit this range.
For best results, place your router:
l
Away from interference such as microwaves, ceiling fans, security systems, or cordless phones
l
Away from large containers of glass or concrete (fish tanks, mirrors, brick or concrete walls)
l
Away from large metal surfaces (cook tops, metal doors, aluminum studs, appliances)
l
Close to a window but out of the way of direct sunlight (great for 4G reception)
l
Close to an AC outlet and near Ethernet computer cables
l
In an elevated location
l
In line-of-sight to wireless devices
l
Near the computers or other devices that communicate with the router
l
On an upper floor (if applicable)
When using multiple points of access, use different radio frequency channels for adjacent access points.
We recommend leaving 5 spaces between channels (1 and 6, or 3 and 8).
SA 2100 User Guide 25

Connecting to the SA 2100 Router
Users can connect to the SA 2100 router using either USB cable or Wi-Fi connection.
Connecting using USB
To connect using USB:
1. Install the USB and network adapter drivers using the driver installation executable file provided
by Novatel Wireless. (Detailed instructions for installing these drivers are provided in the Driver
Installation section of this document.)
2. Ensure the SA 2100 router is powered on.
3. Connect the router to a USB port on the computer using a micro-USB cable.
Connecting using Wi-Fi
To connect using Wi-Fi:
1. Ensure the SA 2100 router is powered on.
2. Connect to the router using the SSID and WPA key information provided on the label.
SA 2100 User Guide 26
 Loading...