

Novatel U547 Turbo Stick, Bell Turbo Stick U457 Getting Started Manual
Getting started guide
Turbo Stick
Novatel Wireless U547

Thank you for purchasing a Turbo Stick from Bell. This Turbo Stick will
enable you to connect to the Internet. This guide provides an overview of
your new Turbo Stick and details on how to configure your computer for
use with this Turbo Stick.
Getting started . . . . . . . . . . . . . . . . . . . . . . . . . . . . . . . . . . . . . . . . . . . . . . . . . . . . . . 2
System requirements . . . . . . . . . . . . . . . . . . . . . . . . . . . . . . . . . . . . . . . . . . . . . . . . . 3
Inserting your Bell SIM card . . . . . . . . . . . . . . . . . . . . . . . . . . . . . . . . . . . . . . . . . . . 5
Inserting a microSD card (sold separately) . . . . . . . . . . . . . . . . . . . . . . . . . . . . . 7
Preparing your computer for installation . . . . . . . . . . . . . . . . . . . . . . . . . . . . . . . 8
Installing Mobile Connect for Windows . . . . . . . . . . . . . . . . . . . . . . . . . . . . . . . . . 9
Start-up . . . . . . . . . . . . . . . . . . . . . . . . . . . . . . . . . . . . . . . . . . . . . . . . . . . . . . . . . . . . . 11
Using your Turbo Stick . . . . . . . . . . . . . . . . . . . . . . . . . . . . . . . . . . . . . . . . . . . . . . .12
Installing Mobile Connect for Macintosh . . . . . . . . . . . . . . . . . . . . . . . . . . . . . . . 13
How much data do I need? . . . . . . . . . . . . . . . . . . . . . . . . . . . . . . . . . . . . . . . . . . . 15
Hardware overview . . . . . . . . . . . . . . . . . . . . . . . . . . . . . . . . . . . . . . . . . . . . . . . . . 16
Inserting and removing your Turbo Stick from your computer . . . . . . . . . . . 18
Unblocking a SIM card . . . . . . . . . . . . . . . . . . . . . . . . . . . . . . . . . . . . . . . . . . . . . . . 20
Troubleshooting . . . . . . . . . . . . . . . . . . . . . . . . . . . . . . . . . . . . . . . . . . . . . . . . . . . . . .21
Welcome

Before installing your Turbo Stick, please ensure you have the following:
• A Bell wireless account with a Mobile Internet plan. (If you don’t
have an account or a Mobile Internet plan, speak with a Bell account
representative to get set up.)
• An active Bell SIM card.
• Your Mobile Directory Number (MDN),
or phone number
__________________________________ .
Getting started
2

3
WINDOWS
Operating system
Microsoft
®
Windows XP (SP 2 – 3, 32-bit only),
Windows Vista™ (SP 1 – 2, 32/64-bit) and Windows 7
(32/64-bit) with 500MHz CPU
Card slot 1 USB port, version 2.0 (recommended) or 1.1
COM ports 4 free COM ports
I/O Resources 1 IRQ, 4096 bytes of I/O space
RAM Memory 256MB (XP), 1GB (Vista), or 1GB (7)
Disk space 100MB
To install and operate your Turbo Stick, ensure your computer has
the following system resources:
System Requirements

4
MACINTOSH
Operating system Macintosh OS 10.4 (Tiger), 10.5 (Leopard), and
10.6 (Snow Leopard) with 300 MHz Intel CPU
Card slot 1 USB port, version 2.0 (recommended) or 1.1
RAM Memory 256MB
Disk space 100MB
System Requirements
(continued)
Your Turbo Stick requires an activated Bell SIM card to function. If the SIM
card was not inserted at the time of purchase, please insert it now, as
described below.
1. Remove the cover from the front of the device by inserting a
fingernail under the top narrow end of the cover and pulling
toward you.
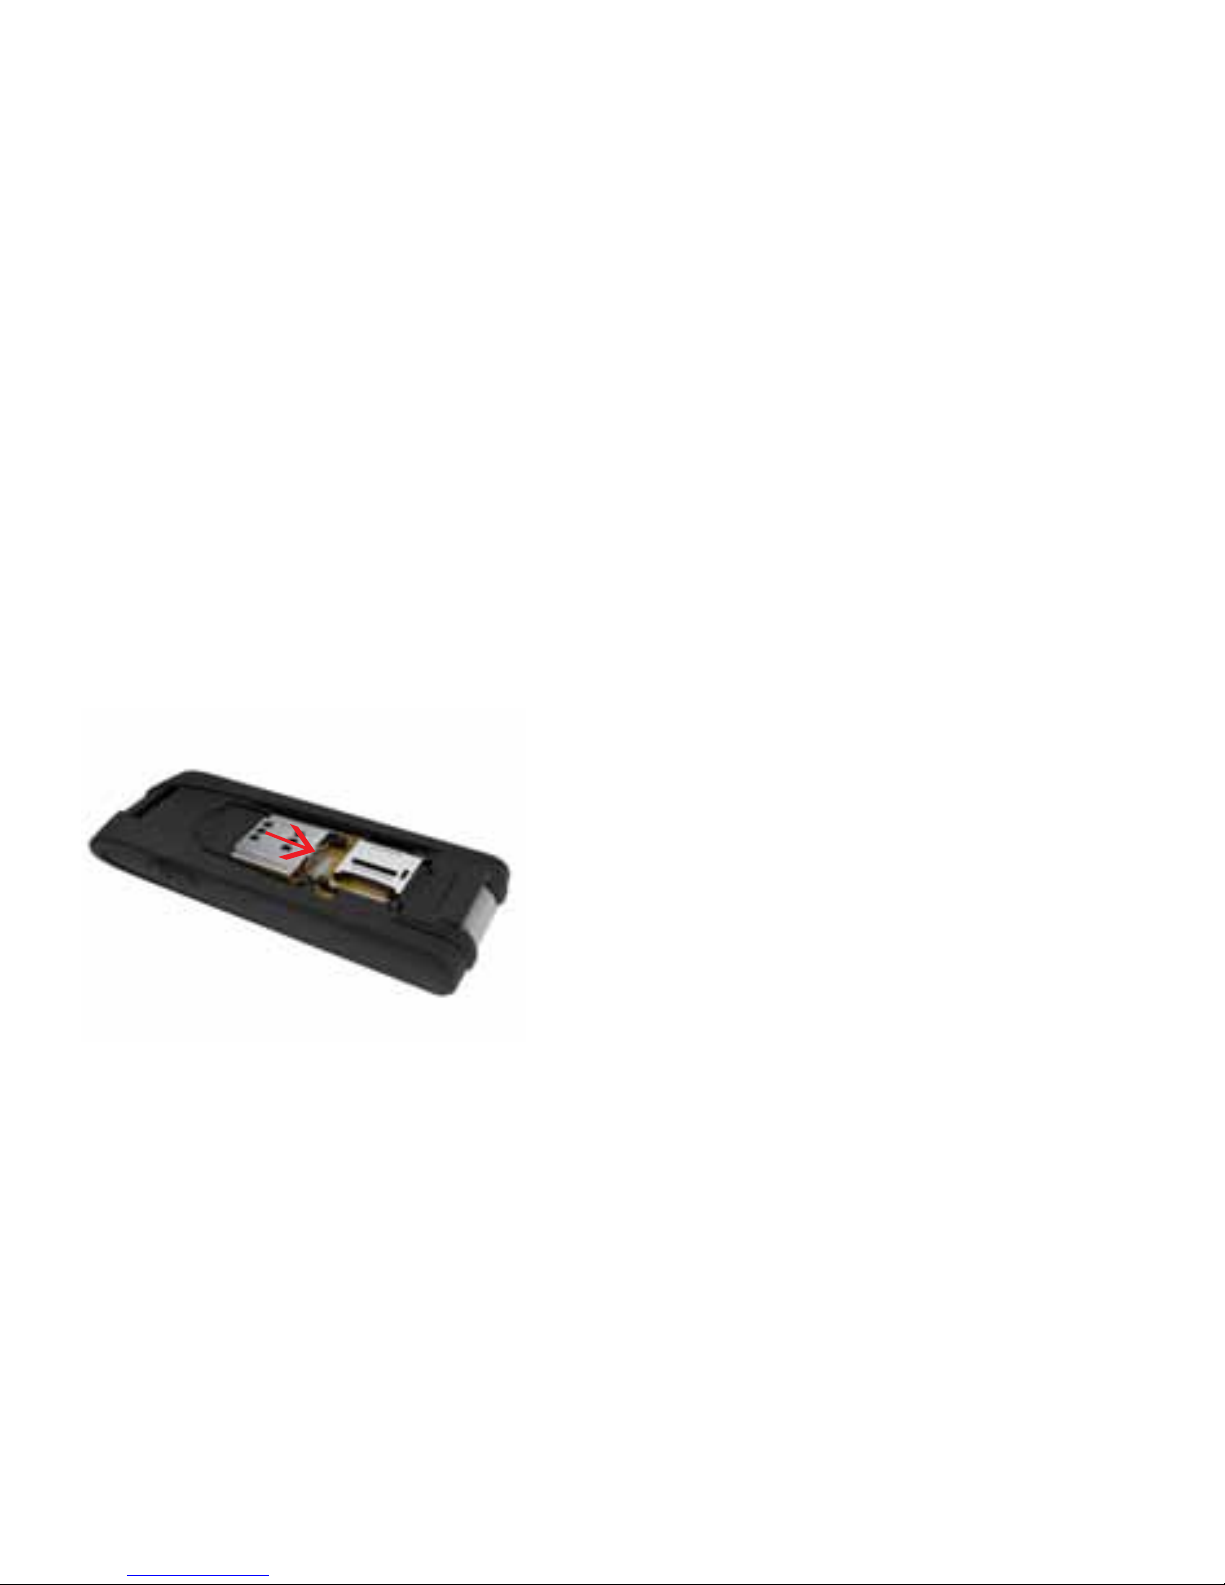
2. Slide the SIM card holder toward the USB connector to
release the catch.
Inserting your Bell SIM card
5
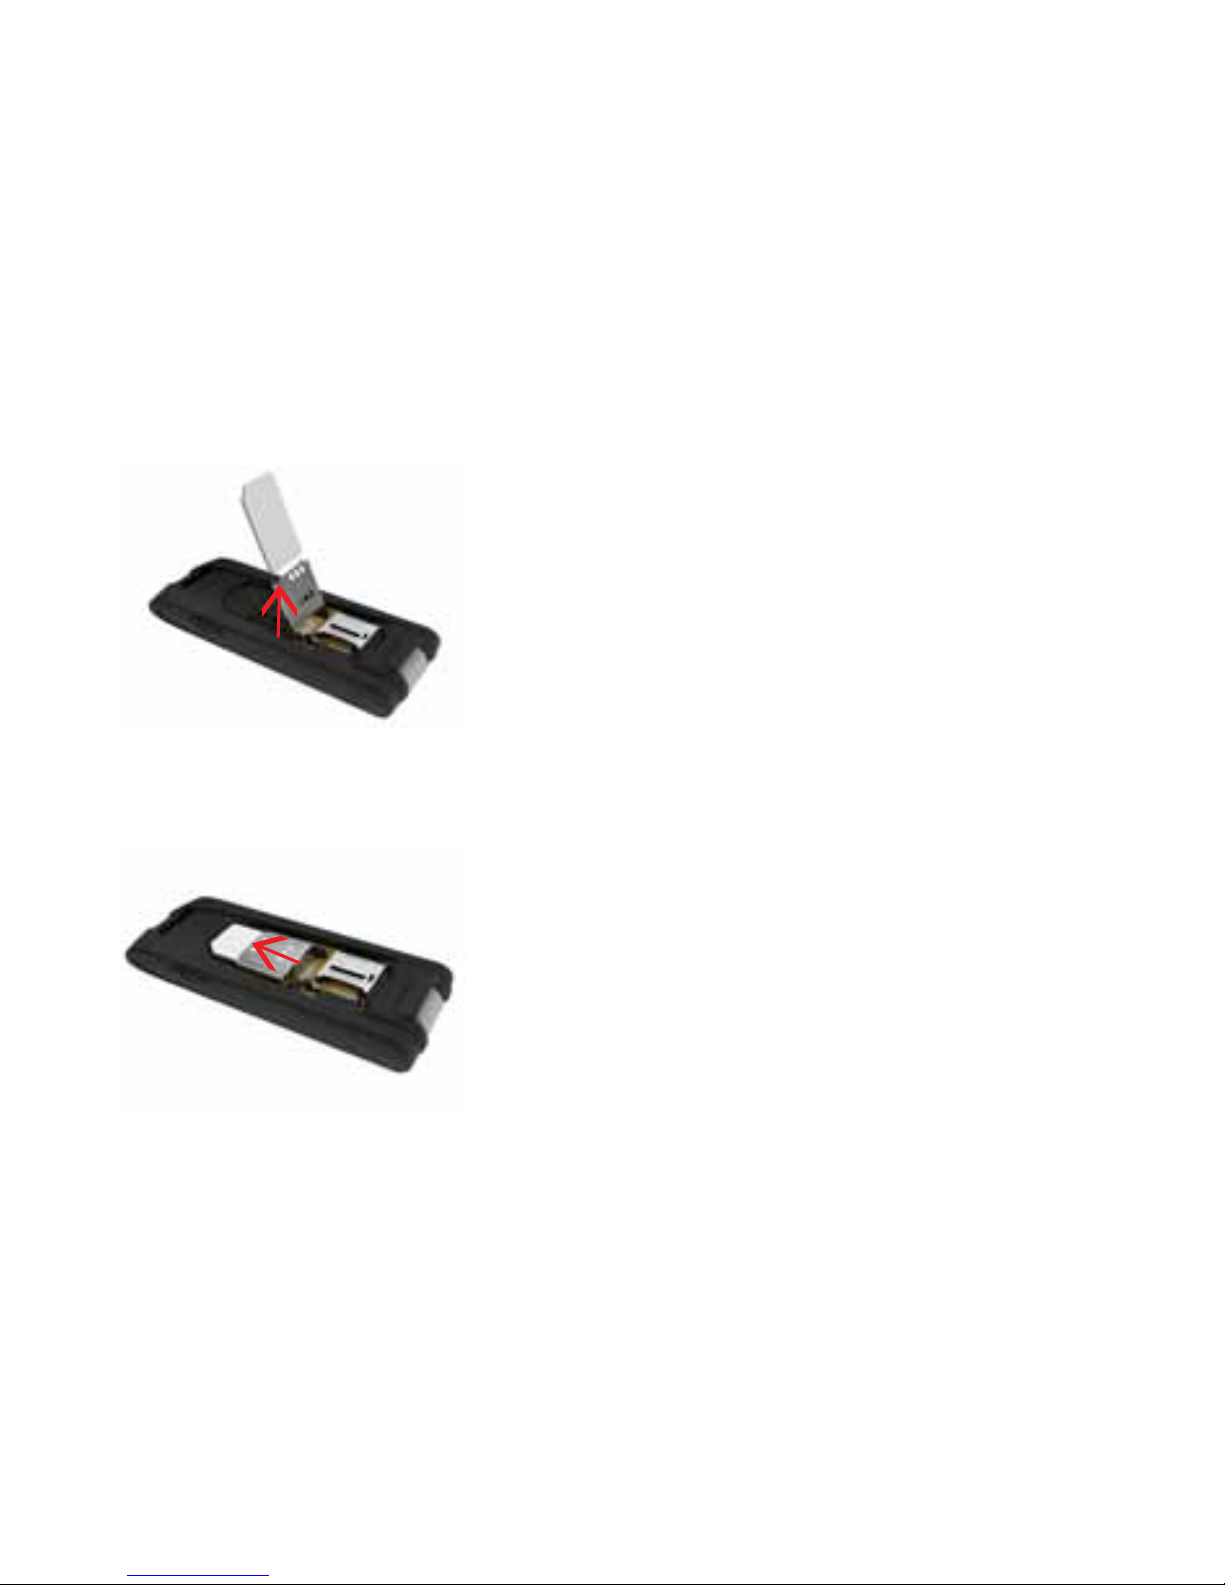
3. Lift the SIM card holder up with a fingernail. Insert the SIM card so
the metal contacts on the the card face the metal contacts inside the
device. The cut corner on the card goes in last.
4. Push the inserted SIM card in the SIM card holder down and then
slide it forward until the SIM card holder catches. Be sure the card
is locked in place.
5. Replace the cover
Inserting your Bell SIM card (continued)
6
1. Remove the cover from the front of the device by inserting a fingernail
under the top narrow end of the cover and pulling toward you.
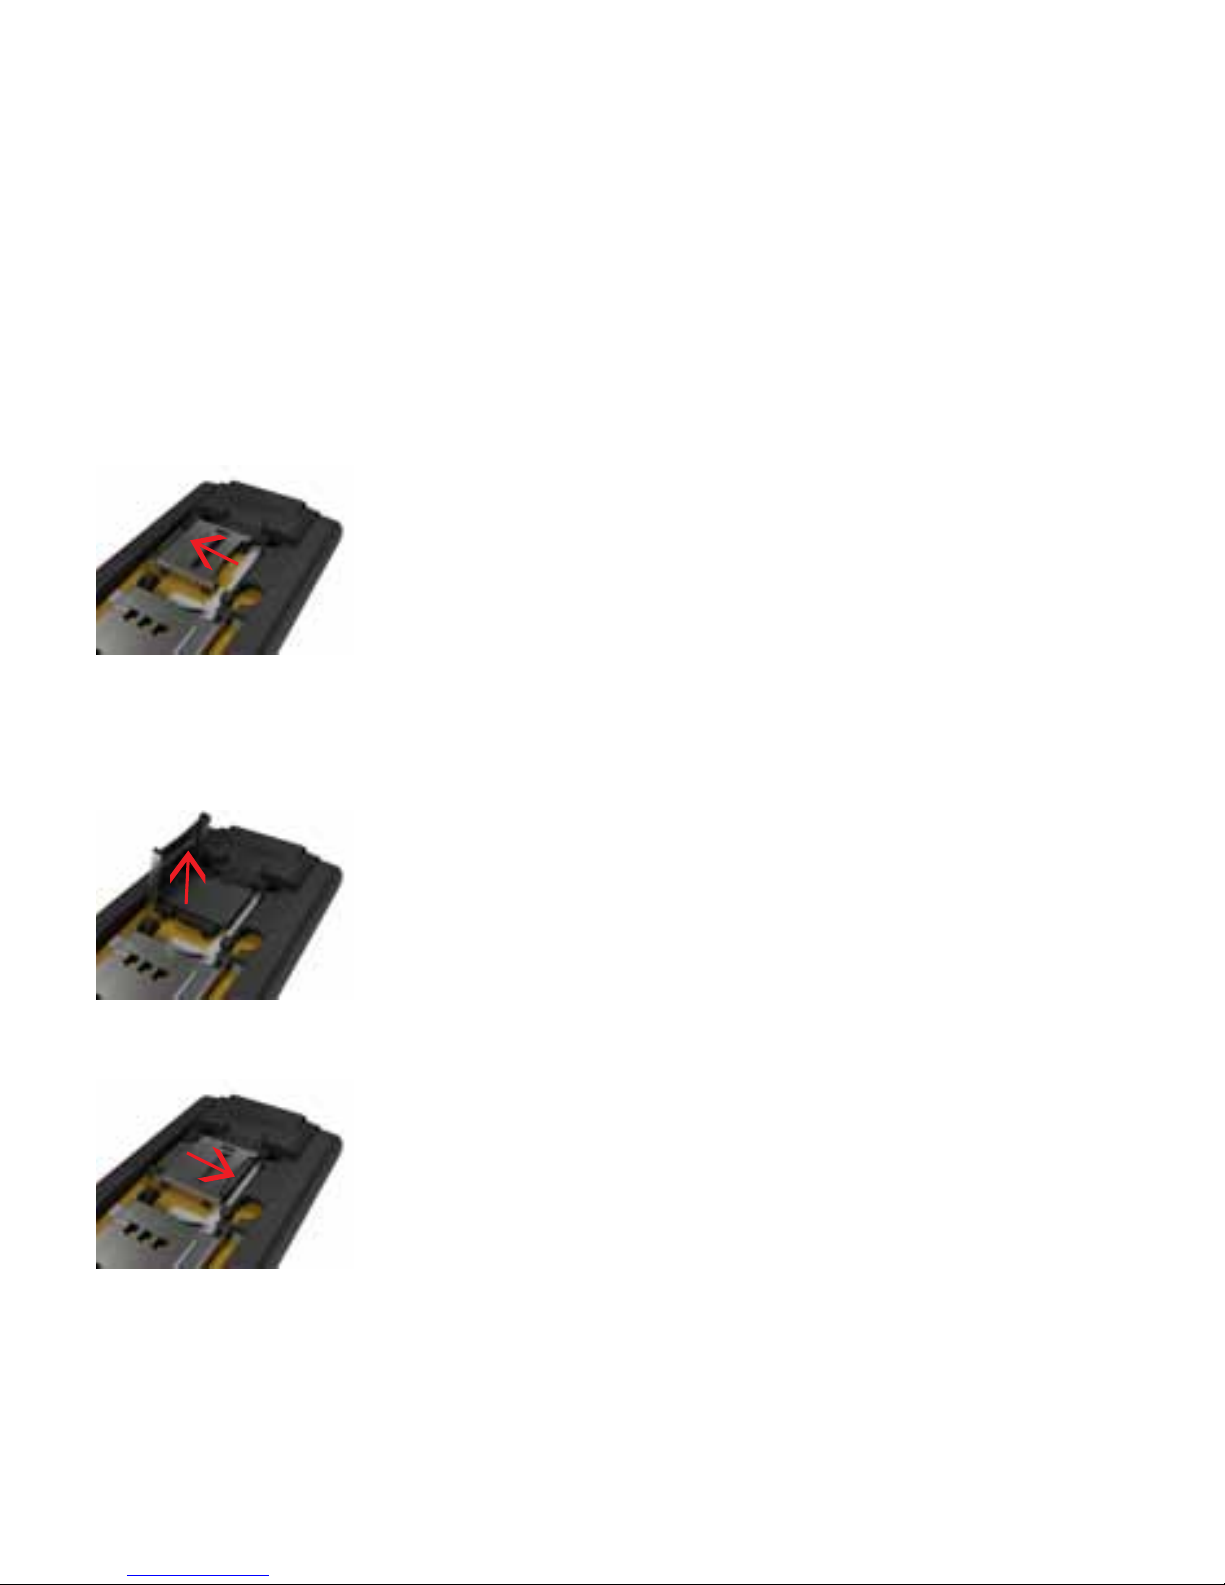
2. Slide the microSD card holder to the side to release the catch.
3. Lift the microSD card holder up with a fingernail and place the microSD
card in the holder. Be sure the metal contacts on the card face the
metal contacts inside the device. Also, be sure the shape of the card
matches the holder exactly.
4. Push the microSD card holder down and then slide it forward until the
holder catches. Be sure the card is locked in place.
5. Replace the cover.
Inserting a microSD card (sold separately)
7

Mobile Connect from Bell is a software application that allows you to
set up and manage your wireless connections over the Bell network.
Mobile Connect for Windows and Macintosh is pre-loaded onto your
Turbo Stick and can be installed directly from it to your computer
– no CD required.
Before inserting your Turbo Stick into the computer:
1. If you are already using Mobile Connect or have it installed on the
computer, you should uninstall the current version and restart before
inserting your new Turbo Stick.
2. Ensure that computer security software (antivirus and firewall programs)
are set to allow software installation.
3. Ensure that you have Administrator Rights and the login user name and
password before attempting to install – check your computer’s Help files
for details on this feature.
Preparing Your Computer for Installation
8
 Loading...