

Page 1
“There are fighters and there are
targets. There is nothing else.”
- John A. Fergione, Experimental Test Pilot
Lockheed Martin Tactical Aircraft Systems
Internet Address: www.LMTAS.com
Page 2
F-16
Multirole Fighter
User Manual
™
02
Page 3

Contents
Table of Contents
Credits 03
Introduction 06
Chapter 1 Installing F-16 07
Game Installation
Calibrating the Joystick
Starting the Game
Chapter 2 Quick Start 10
10 easy steps to getting up in the air
10 easy steps to getting back on the ground
Chapter 3 Menus 13
Quick Mission
Campaign
Multiplayer (Refer to Chapter 9)
Options
Overview
Credits
Exit
07
09
09
10
11
13
18
21
21
25
25
25
01
Chapter 4 Controls 26
The Joystick
Rudder Controls
Throttle Controls
Keyboard Controls
Mouse Controls
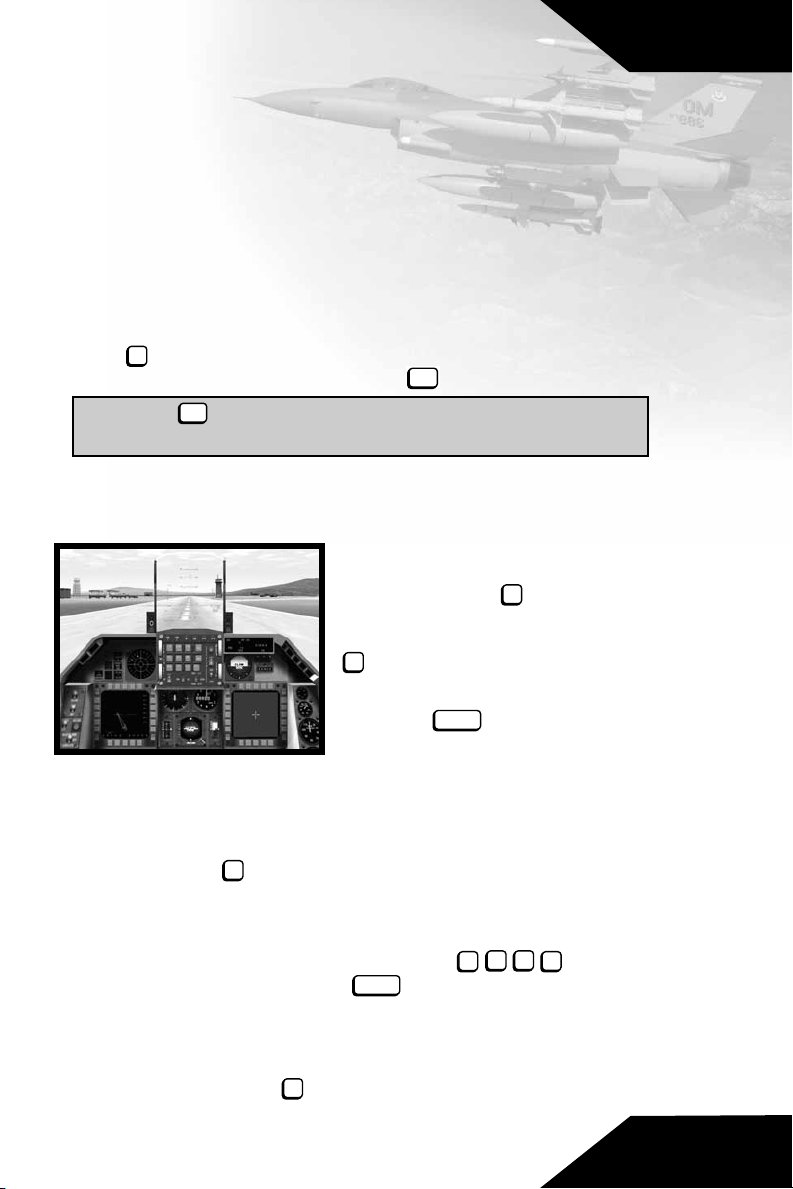
Chapter 5 Displays 37
Cockpit
Threat Warning Display
Multifunction Displays
Head-Up Display
Chapter 6 Flying F-16 48
Tutorials
Basic Flight Maneuvers
Landing the Aircraft
26
27
28
28
36
37
39
42
48
50
58
Page 4

Chapter 7 Air Combat 62
Radar
Air-to-Air Weapons
Air-to-Surface Weapons
62
63
65
Chapter 8 Strategies and Tactics 68
Altitude
Speed
Emissions Control
Wingman Tactics
Missile Avoidance
68
69
70
70
71
Chapter 9 Multiplayer 73
Connection Types
Multiplayer Game Types
Hosting a game
Integrated Battle Space
™
73
75
76
78
Glossary 79
Contents
Legals 90
Tech Support 91
Index 92
F16 Multirole Fighter now features the holographic Wide
Angle HUD specially designed to support the LANTIRN
pod. Although the screenshots in this manual show the
former Head-Up Display, all text annotations and delineating symbology remain true.
02
Page 5

Introduction
Thank you for purchasing F-16 Multirole Fighter, the latest fixed
wing simulation from NovaLogic. To make the best possible game,
our design team went straight to the experts at Lockheed Martin
Tactical Aircraft Systems. With the invaluable aid of their professional consultation, we are able to bring you the most exciting and
easy to use F-16 PC flight simulation without sacrificing authentic
characteristics such as the unique flight model.
The F-16 Multirole Fighter is the best the world has to offer when
it comes to true multi-mission fighter planes. Capable of housing
a larger variety of ordnance and fuel pods than any other fighter
aircraft, the F-16 adeptly handles a wide range of tasks. Air-to-Air
missiles such as the AMRAAM and the AIM-9M Sidewinder along
with a unique, high maneuverability body blend make the F-16 a
formidable opponent in air combat and interception. Laser and
Infrared guided bombs and missiles such as the GBU-10 and the
AGM-84 Harpoon allow the F-16 to be used in precision ground
strikes and maritime interdiction. Advanced detection instruments
such as the LANTIRN and FLIR permit the aircraft to operate fully
at night in all weather conditions. The current F-16 can do it all.
Intro
Originally intended to be a lightweight air-to-air fighter, the F-16
first flew in January of 1974. Over its long lifetime, it would see
continual upgrades and refits to its body/tail design, engines and
detection systems. This helped transcend the F-16 into a superbly
effective multi-mission aircraft.
The current service record speaks for itself. With an impressive
69-0 kill ratio and an average peacetime mission success rate
of 88%, the F-16 is a proven asset. Due to the nine highly
configurable hard points, the USAF continues to use the F-16 to
test new forms of advanced weaponry. To this day, F-16s have
been successfully utilized in enforcing U.N. no-fly zones over Iraq.
With a price tag of under $20 million (and considerably less for
NovaLogic’s version of the F-16), it is no wonder why 20 air forces
around the world choose the F-16.
We hope that you enjoy the thrill of piloting the versatile and
powerful F-16 Multirole Fighter as much as we enjoyed creating
the game.
06
Page 6

Installing
Chapter 1
Installing F-16
Multirole Fighter
Welcome to F-16 Multirole Fighter. This chapter of the manual
will help you get the program installed on your computer, and will
walk you through the configuration of your system. The next
chapter is a Quick Start section, for those of you with significant
flight sim experience, or for those who want to jump right in and
learn by doing.
In order to play F-16 Multirole Fighter, you must first install the
game files onto your computer’s hard drive. You should also calibrate your joystick before beginning play.
Game Installation
Your gateway to installing and running F-16 Multirole Fighter is
the AutoRun program. AutoRun will automatically load itself and
run each time you insert the F-16 Multirole Fighter CD into your
CD-ROM drive. F-16 Multirole Fighter uses the Install Wizard to
place the necessary files on your hard drive.
07
The AutoRun Program
Before you begin installing the game, close all programs that your
computer may be currently running. The installation program
requires all of your computer’s resources. Then:
1) Place the game CD into your CD-ROM drive and close the
drive door. The AutoRun program will now take over. If you
have turned off the AutoRun feature or if the Autorun fails to
launch automatically, double-click on the “My Computer“
icon on your desktop and then double-click on your
computer’s CD-ROM drive letter. This should launch the
F-16 Multirole Fighter AutoRun.
2) Click the mouse on one of the menu choices, or type the
letter corresponding to the underlined hot key. The AutoRun
menu gives you the following choices:
Start F-16 Multirole Fighter—Select this option to play the simulation. You will first have to install the program on your hard drive.
Page 7

Install F-16 Multirole Fighter—Select this option to install the
simulation onto your hard drive. You must install the game before
you can play. This will also automatically install the Mission Editor
at the same time.
View Readme—The Readme file contains the latest technical and
game-related information about the program.
Start Mission Editor—Select this option to create new missions
for your F-16. To learn how to use the Mission Editor, please refer
to the Adobe Acrobat file included on the CD.
Explore CD—This CD also contains informational files and demos
of other NovaLogic games. Use this option to see the contents of
the CD.
Install DirectX—Make this selection to install DirectX
hard drive. You must have DirectX 5.0 or greater installed on your
machine to play F-16 Multirole Fighter. Multiplayer games
require DirectX 5.0 or greater. Windows NT requires Service Pack
3 (obtained at the Microsoft Website) to play single player and
Internet multiplayer.
Exit—Exits the AutoRun program.
When you are ready, select Install F-16 Multirole Fighter.
™
onto your
Installing F-16 Game Files
Use your mouse to make the appropriate selection, or press the
letter of the underlined hot key.
Installing
1) At the beginning of the installation program you are given
the opportunity to select a destination folder for the game. A
default is typed in the window for you. Press the key to
select the default destination. Otherwise, select your own
folder name. If the folder you specify does not already exist on
your hard drive, the Install program will create it for you.
Further installation instructions will appear onscreen.
2) If there is enough free hard drive space at the destination
site, the program will copy the files from your F-16 Multirole
Fighter CD-ROM. An on-screen progress meter displays the
completion percentage as the program transfers the files.
3) The install procedure automatically adds a NovaLogic
folder to your Windows® 95/98 Start Menu under the
Programs heading. The F-16 sub-folder within the NovaLogic
folder contains an application short-cut icon for the game. The
install also places an F-16 shortcut icon on your desktop.
enter
08
Page 8
Installing
4) If your system does not already have DirectX installed, you
will need to install it now. Select Install DirectX from the
AutoRun program, then follow the on-screen instructions. You
will need to restart your computer to activate DirectX before
you can play F-16 Multirole Fighter.
3Dfx™Users
If the game appears too bright or washed out in 3Dfx
we recommend that you check the Gamma control of your 3D
fx™card. You can do this by going to the Displays in your
computer’s Control Panel Settings under the Start Menu.
™
mode,
Calibrating the Joystick
If you haven’t done so already, you will need to calibrate your
joystick in Windows 95/98 for it to work properly in F-16
Multirole Fighter. Follow these steps:
1. Click on the Start button at the far left of the Taskbar at the
bottom of the screen.
2. Highlight Settings, then select Control Panel from
the menu.
3. Double-click on the Game Controllers icon.
4. Select your joystick from the list of game controllers you
have installed, then follow the on-screen instructions to
calibrate your joystick.
Starting the Game
If your computer is already turned on and the F-16 Multirole
Fighter CD is in the CD-ROM drive, double-click on the F-16
Multirole Fighter shortcut, or go to the directory containing the
simulation or Start Menu and double-click on the F-16 Multirole
Fighter program icon.
09
If your computer is on, but the program CD is not in the drive,
insert the F-16 Multirole Fighter CD into the drive and select
Start from the AutoRun screen. If no screen appears when you
insert the CD, double-click on the “My Computer“ icon on your
desktop, then double-click on the icon for your computer’s
CD-ROM drive. You can then choose Start from the AutoRun
screen. You may also use your computer’s Find feature to locate
and launch the program.
Enjoy!
Page 9
Quick Start
Chapter 2
Quick Start
For those of you who want to jump right into the simulation, select
Quick Mission from the Main Menu. Click Accept to get to the
Mission Briefing and Accept again to start the mission. Your F-16
will have an appropriate weapons load. To abort the mission, press
esc
the key. In order to utilize the number pad on your keyboard,
you will want to make certain that the is on.
Press the key if you need to pause the simulation between
pause
the steps listed below or at anytime.
10 Easy Steps to
Getting Up In The Air
1) The mission will begin with the
camera positioned on the exterior
of your F-16. Press to enter the
virtual cockpit. Press it again for an
alternate view of the cockpit. Press
F2
xxx if you prefer to use the F-16’s
HUD (Head-Up Display) view.
2) Hit the to engage your
afterburner. You will begin to
accelerate down the runway. At
around 160 knots (located in the box at the left side of the HUD),
pull up into the air. This could take longer depending on your
aircraft’s total weight.
3) Press the key to raise your landing gear only if you have
changed your Landing Gear to Manual in the Options screen.
Climb to a comfortable altitude (generally around 20,000 ft).
The Altitude Above Sea Level (ASL) is in the right hand box of
your HUD. Adjust the engine power with keys or
pour on the speed with the xxxx x key (afterburners). Cut your
afterburner to conserve fuel.
G
backspace
num
lock
backspace
7
F1
98
0
4) Now is the time to practice flying. Try making turns and
rolls with your arrow key or joystick. If you are having trouble
stabilizing, use the to auto level the plane. With all aircraft
L
maneuvers, you should try to be deliberate and precise.
10
Page 10
Quick Start
5) Level out and take the time to look around your aircraft. This
would be a good time to hit . The entire number pad (and
pause
hatswitch on some joysticks) allows you look about the cockpit.
“Check your Six“ (look behind you) by pressing the CC on the
number pad. Press to see the exterior of your aircraft. While
holding the | Ct key down, you can move the camera angle
with your arrow keys. Pressing the and keys will zoom
F3
ctrl
S
X
+
the view in and out respectively.
6) Hit to check your HUD for your next Steerpoint (a
F2
preprogrammed navigational reference point), then proceed
there. The tadpole in the middle of your HUD points to your
next navigational Steerpoint. If you desire, you may press the
A
key and the autopilot will direct the F-16 there for you.
7) Hitting the key will toggle your radar on and off. Radar is
R
used to select a target.
8) Cycle through your weapons with the key (or joystick
~
button 3).
9) When you have your target acquired and are in range, press
spacebar
the (or joystick button 2) to launch or fire your weapon.
At any time you can fire your 20 mm cannon by pressing the
Z
button (or joystick trigger).
10) Press the key to view your mission objectives. After
O
completing all of them, you will be prompted to end your
mission. Do so by pressing the key. You are not required to
E
land your airplane to complete most missions, but will get a
higher score if you do.
11
10 Easy Steps to Getting
Back on the Ground
1) Press the key to have
the navigational computer
guide you directly toward the
Initial Approach Steerpoint
(about 15 miles from the
runway).
2) When you are facing the
correct direction toward this
Steerpoint, reduce the throttle to 60% by pressing . Get
to an altitude of 5000 feet AGL, with a speed of 400 knots. Use
your air brakes ( ), if you are going too fast.
H
8
B
Page 11
Quick Start
3) When you get to the Initial Approach Steerpoint, begin
reducing speed and altitude. When you hit the Final Approach
Steerpoint (about 5 miles from the runway), you should be
around 1500 feet AGL and flying no more than 250 knots.
4) Press to lower your landing gear.
G
5) Align yourself with the center of the runway. Avoid sharp
banks and sudden turns. Level your wings, use the key as
L
needed.
6) You should be flying at about 160 knots. Use your air brakes
B
( ), if you are going more than 175 knots.
7) Check the HUD Pitch Scale. Adjust your pitch to be about 10
degrees.
8) Keep your aircraft aligned with the runway centerline. Use
the Instrument Landing System, located on the center of the
Head-Up Display. Align the vertical and horizontal lines.
9) Just before touchdown, “flare“ (pitch) your aircraft’s nose up.
10) Press the key to apply brakes until the plane stops.
B
Congratulations, you may now end the mission.
12
Page 12
Menus
Chapter 3
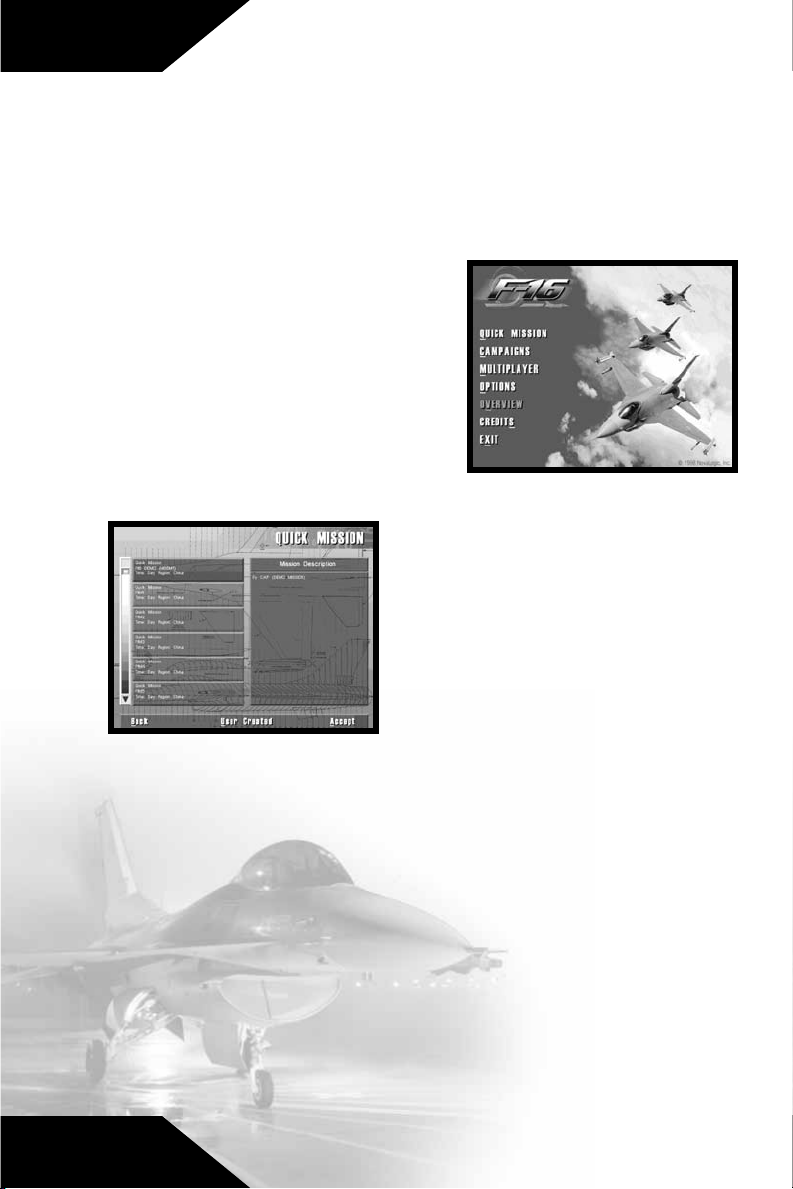
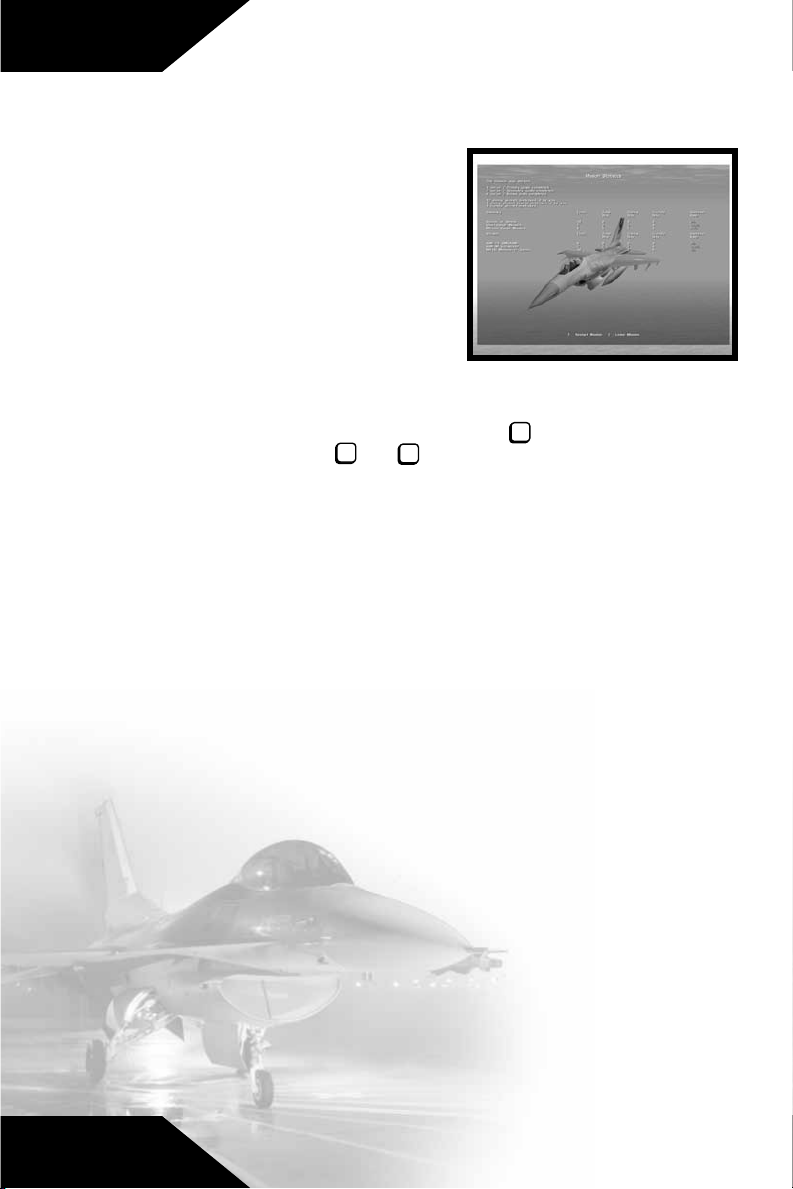
The Menus
The F-16 Menu System gives
you access to all game features,
including campaigns, missions,
multiplayer options, and information about the simulation itself.
Each session of F-16 Multirole
Fighter begins at the Main Menu,
from which you can make the
following selections by pressing
the underlined key or using
your mouse:
Quick Mission
Select Quick Mission when you
simply want to fly, without the long
term considerations of a campaign.
F-16 Multirole Fighter provides you
with a set of missions designed
especially for this feature. In addition,
whenever you complete a mission in
a campaign, that mission is added to
the Quick Mission list, so you will be able to select it for replay
whenever you want.
13
To select a Training Mission or a Quick Mission, click on the Quick
Mission option on the Main Menu then examine the list of
missions provided. You can scroll through all the available missions
with the scroll bars to the left of the mission title. Highlight a
mission to get a description of the situation and goals. Click on the
Accept box when you have highlighted the mission you wish to fly,
or click on Back to return to the Main Menu. Press User Created
to load in a custom mission created by the Mission Editor.
Mission Briefing
When you are given a mission, either because you selected it from
the Quick Mission list or because you have been assigned a task
Page 13

as part of a continuing Campaign,
the first element is always a
Mission Briefing. The briefing
details the tasks you must
complete before the mission can
be considered over. You are
required to achieve all the mission’s
primary objectives before you are
allowed to end the mission.
The Mission Briefing screen lets
you determine some of the conditions under which you will fly the
mission, including the ammunition loadout you will take into the
air, the amount of fuel you will carry, and the Map route you will
follow to accomplish your goals. Click on Loadout to view or
change the mission default munitions and fuel aboard, and click
on Map to check out the battle zone and set your flight route for
this mission. Click on the Accept box to begin the simulation, or
click on Back to return to the Quick
Mission screen.
Loadout
Click on Loadout to select what
armaments your F-16 will carry for this
mission. This brings up the Loadout
Options screen. Here you will see
your plane sitting in the hangar
awaiting ordnance. As you load the
F-16, the armament will be placed on the appropriate stations. You
can use the center buttons or keyboard arrow keys to walk around
or zoom toward the aircraft.
Menus
You select your ordnance on the lower left side of the screen. Each
station is marked by a number that corresponds with the diagram
of the plane. Use the arrow buttons to scroll through the possible
armament for each station. The text box on the lower right will display important information about the ordnance selected.
The lower center column contains two options. The first one allows
you to choose between Normal Mode and Double Mode.
Normal Mode will limit your aircraft to an authentic Loadout
maximum. The Double Mode will double your existing weaponry
without adding the extra weight. Pressing the Default Load
button will automatically load your F-16 with a balanced inventory
recommended for this specific mission by the mission designers. If
you are undertaking a Campaign mission, the number of weapons
14
Page 14
Menus
available is the total number you can have for the entire campaign,
unless friendly transport aircraft or convoys bring in more. If the
transports in a particular campaign get shot down, you may face
ammunition shortages in that Campaign.
The lower right side displays important Loadout information,
including the weight of your fuel and ordnance. In Normal Mode,
you will not be able to exceed the maximum weight allowance of
the F-16 (37,203 pounds).
The heavier your aircraft is, the longer it will take to achieve
liftoff. Also with increased drag, your in-air maneuverability
will be diminished. However, remember that as you expend
fuel by flying, your aircraft will start to become lighter.
When you have finished, click on Accept to give yourself the
weapons load you have selected and return to the Mission
Briefing. Click on Back to return to the Mission Briefing screen
without choosing a Loadout.
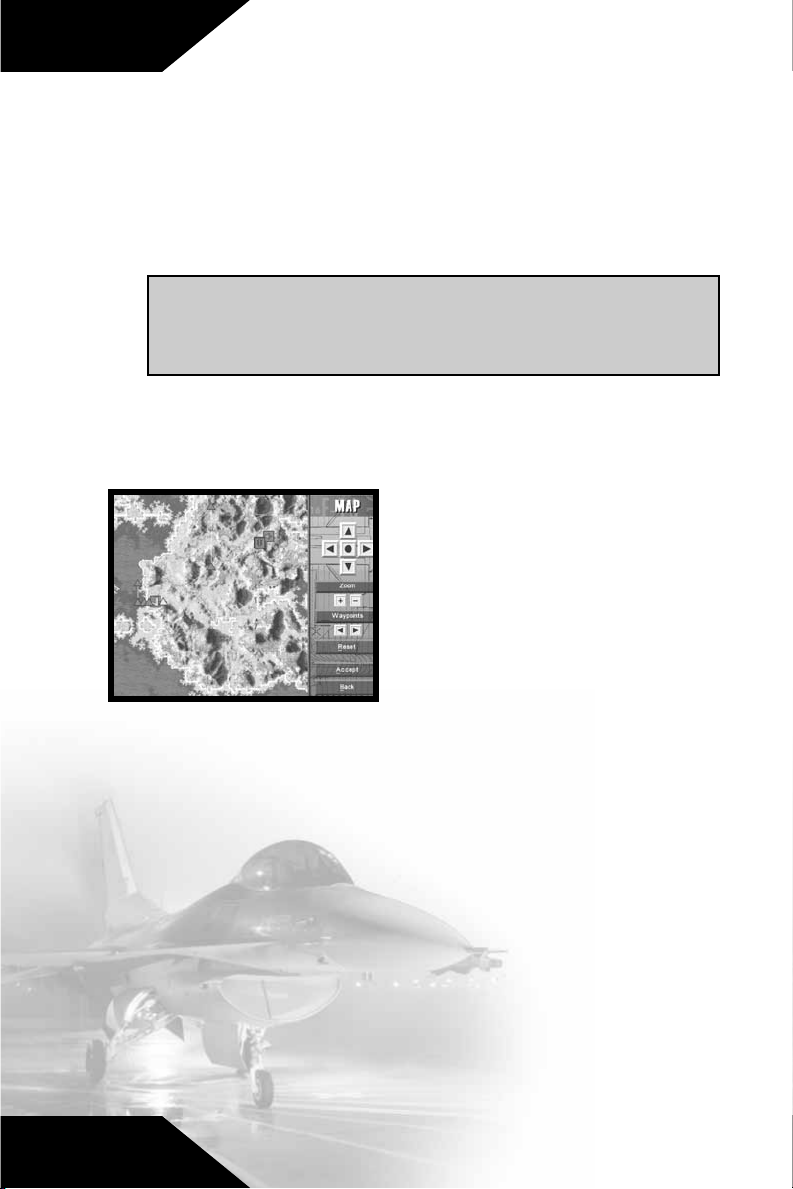
Map
Every mission begins with a series
of Steerpoints already entered on
the map. Steerpoints are locations
that your on-board navigational
computer can use to give directions
to your Autopilot. They are also
handy for manual navigation. Your
HUD (Head-Up Display) in the front
of the cockpit will direct you toward any selected Steerpoint. This
simplifies navigation enormously, particularly under conditions
where you find it difficult to locate landmarks below, such as
at night.
15
You can move most of the Steerpoints on the map, changing the
designated mission route. Simply click on a Steerpoint and hold
the mouse button down while you drag the icon to a new location.
Release the mouse button to place the Steerpoint in its new
location. You will not be able to move the last two Steerpoints.
These are your Initial and Final Approach Steerpoints, which help
you land your airplane. Click on the Steerpoint buttons to select
the next or previous Steerpoint. Use the arrow buttons at the right
to scroll the map, and click on the Zoom buttons to zoom the map
in and out. You can instantly return to the mission default
Steerpoints settings by pressing the Default button.
Page 15
When you have thoroughly examined the terrain over which you
will be flying, and have arranged the mission Steerpoints to your
satisfaction, click on Accept to save your choices and return to the
Mission Briefing screen. Clicking on Back will return to the
Mission Briefing screen without saving your changes.
Ending a Mission
If you run low of ammunition or fuel on a mission, you may return
to your base to pick up more. You will have to land at your base
and bring the aircraft to a complete stop before you can be
rearmed and refueled. Damage to the aircraft, however, will not be
repaired while you are still on this mission.
You must complete all your assigned primary mission objectives
before your mission can be considered a success. If, for example,
your Mission Briefing orders you to shoot down a transport,
eliminate its escorting fighters, and bomb its base, and you shoot
down the transport and a few fighters, you will still have to
accomplish the rest of your mission goals to have a successful
mission. During a mission, press the key to view the list of
mission objectives. To get credit for a completed mission you will
have to achieve all your primary mission goals. Secondary and
bonus goals are only recommended, not required to succeed.
M
Menus
When you complete all the assigned primary goals in a mission,
you will receive a text message across the top of your screen,
giving you clearance to end the mission by pressing the key.
E
This will bring up the Mission Statistics Screen, which analyzes
your mission performance. In all missions you will receive a score,
so you will know how well you did on the flight. To get the most
points possible for a mission, do not press the key as soon as
E
you have accomplished the mission goals. Wait until you have
taken your aircraft back to base and landed it before pressing
E
. That way you will receive the Landing Bonus, a large addition
to your score, awarded once each mission for successfully landing
the aircraft back at base.
You may abort any mission at any time by pressing the key.
esc
When you abort a mission you will be taken directly to the
Mission Statistics
screen.
16
Page 16
Menus
The Mission
Statistics Screen
At the conclusion of each mission
you get a summary of your
performance, including how many
enemy aircraft and ground targets
you destroyed and how many missiles, bombs, or cannon rounds it
took you to do so. You will be rated
for accuracy as well. There will also
be a Mission Score assigned. If you
are playing a Quick Mission this
score is for your own information, but in Campaign missions this
score constitutes your Promotion Points for the mission, which
are essential to achieve higher rank. Press xxx if you wish to replay
the scenario. Press or to exit to the Mission Briefing
screen for your next assignment.
esc
2
1
Scoring
You receive points during a mission based on whether or not you
accomplish certain tasks. Here are the tasks for which you can
receive points:
17
• Complete a Mission—1,000 points, once per mission
• Bonus for Wingman Surviving—1000, once per mission
• Achieve Mission Bonus Goal—500 points per goal
• Successful Landing—500 points, once per mission
• Cannon Success Rate—10 points per 1% efficiency
• Short Range Missile Success Rate—5 points per 1% efficiency
• Medium Range Missile Success Rate—5 points per 1%
efficiency
• Bomb Success Rate—8 points per 1 % efficiency
• Airframe Integrity—5 points per 1% undamaged structure at
missions end
• Killed Enemy Skill Level Bonus—0-250 points depending on
enemy pilot’s skill level
Page 17
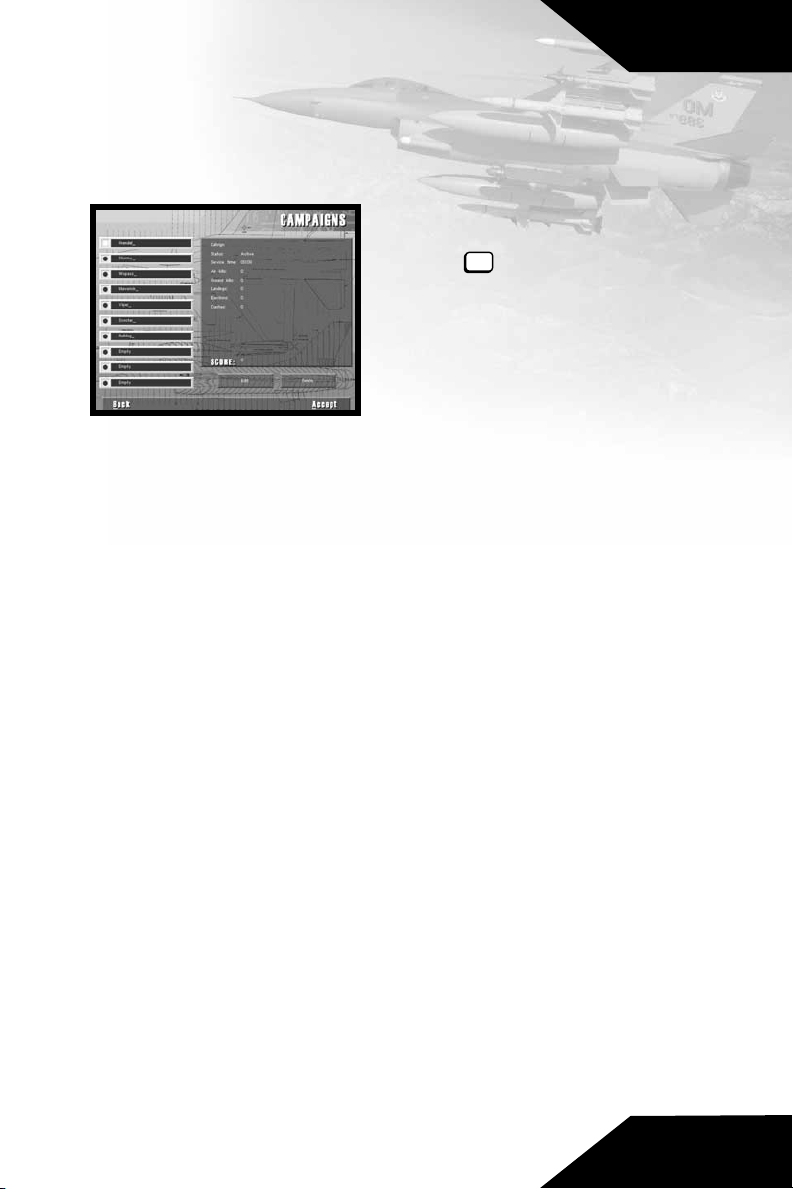
Campaigns
Choose Campaigns to start a new campaign game with a new
pilot or continue a campaign in progress with an established pilot.
You can have up to ten pilots/campaigns at one time. Use the
mouse to select the slot with
the callsign of the pilot who
will be flying your campaign
and press .
If you wish to edit a pilot’s callsign, highlight it, then click on
Edit Name. You will be able to
enter a new callsign for your
pilot. To remove a pilot from
the list and free up a campaign
slot, highlight your pilot’s call-
sign and then click on Delete Slot. This will permanently remove
that pilot’s career from your system. A warning screen will appear
to ensure that you wish to complete this action.
On the right side of the screen is the Pilot Stats, where you can
view your overall performance ratings and score. Press the arrows
to see the Pilot Awards you have accumulated. The game rewards
successful completion of all the missions in a single
campaign with a Medal. The Air Force recognizes your hard work
and accomplishments; wear your medals with pride. Pressing the
arrows again will bring you to the Campaign Stats, where you can
select which campaign to play. Feel free to switch to a new
campaign at any time.
enter
Menus
When you have selected a pilot for your campaign, click on the
Accept box to continue, or click on Back to return to the Main
Menu. When you accept a campaign you will go directly to the
Mission Briefing screen for the first mission in your campaign. See
the Mission Briefing section under Quick Mission at the beginning of this chapter for a complete description.
The Campaigns
F-16 Multirole Fighter consists of five separate Campaigns which
you can play in any order. Campaigns are made up of a series of
missions linked to a common story line. Actions taken in one mission affect some of the conditions for the next. The goals for subsequent missions can be changed by your success (or lack thereof) in an earlier one. If, for example, you bomb a factory in one
mission, it will still be destroyed when you fly over it on your next
18
Page 18
Menus
mission. Similarly, if you allow enemy fighters to destroy your
AWACS plane, it will not be available for the remainder of that
campaign unless another one is sent in. When you are conducting
a campaign, you do not select your own missions. F-16 will assign
missions based on what you have achieved so far in the campaign,
and on what the overall campaign requires.
You may also have restricted Loadout choices. Each campaign
allows your unit only a certain number of bombs and guided missiles, though supplies may be replenished by friendly transports.
You must therefore pay attention to some of the logistical factors
in a campaign. If you shoot a lot of AMRAAM radar-guided missiles, for example, you may run out of them, leaving you only
Sidewinders and your 20mm cannon to combat enemy aircraft
until new missiles can be flown in.
Serbia
An extremist Serb faction within the Yugoslav military has seized
control of the Yugoslavian government. Blaming the continued
economic hardships of the country on international interference
and loss of territories that are rightfully Serbian, this faction
has begun making territorial and economic demands on its neighbors. Concerned that this will upset the fragile balance of the
region, the United Nations and NATO have authorized a limited
operation to defeat the extremists and restore the legitimate
Yugoslavian government.
19
Liberia / Sierra Leone
After the death of their president, the military government of
Nigeria appointed a hard-line general to lead the country. Once in
power this general initiated a large scale modernization of his
armed forces, including procurement of new weapon systems
from China. Unable to raise money because of an international
embargo on Nigerian oil, the general ordered his forces to seize
control of the extensive diamond fields in Sierra Leone. Buoyed by
their quick success in Sierra Leone, Nigerian forces have been
ordered to continue their blitzkrieg and attack Liberia. Alarmed at
the quick capitulation of the government in neighboring Sierra
Leone, Liberia has appealed to their long time friend the United
States for assistance. The UN Security Council has authorized a US
led mission to protect Liberia from this aggression and to restore
the rightful government of Sierra Leone.
Democratic Republic of the Congo
After months of fighting in the Democratic Republic of the Congo
(DRC), government forces were on the brink of defeating rebel
forces. The DRC had long claimed that Rwandan military units
Page 19

were fighting alongside the rebels, but could not obtain proof that
the war was being orchestrated by its neighbor. As DRC government forces closed in on the last positions of the rebels, the
Rwandan military poured across the border. The surprise attack
stunned the DRC military and forced them to retreat significantly.
With Rwandan forces openly attacking DRC positions, the
President of the DRC has requested assistance in ending the long
conflict and driving back the invaders within its territory. With the
leadership of the United States, the UN Security Council has
authorized the creation of a force sufficient to push back the
Rwandans and secure the territorial integrity of the DRC.
Burma (Myanmar)
The most powerful drug lord of the Golden Triangle has been
steadily increasing the strength of his personal army. Through
careful diplomacy and big promises he managed to unite most of
the armies opposing the national government. In a series of wellexecuted battles, the unified armies defeated the State Law and
Order Restoration Council (SLORC) and gained control of the
entire country. By holding the majority of his own troops in reserve,
the drug lord maintained his own strength while weakening the
strength of his “allies“. Once in power, he commanded his army to
destroy all of his former allies and grabbed control over all of
Burma. His goal is to use this vast military to take over all Opium
production in the region. This includes seizing areas of Thailand,
Laos, and even China.
Menus
Fearful of the instability being wrought by these actions, the
Association of South-East Asian Nations (ASEAN) and the UN
have sanctioned a multi-lateral force to defeat this threat. US
forces and leadership will be the key to coordinating this force and
defeating this large and highly motivated drug lord’s army.
Somalia/Ethiopia
After years of internecine fighting between the various warlords
and their clans in Somalia, the Somaliland National Front (SNF)
managed to defeat its rivals and unify the country. While the international community was happy to see the long years of bloody
struggle end, many voiced suspicions about the number and types
of weapons used by the SNF. Upon the full pacification of northern Somalia, the SNF began exploitation of the natural gas and oil
deposits discovered by the UN during operations there in the
early 1990s. When the deposits were discovered to be very limited, the SNF started to make claims on the known oil reserves in
Ethiopia.
Following a swift build-up in its military capability, the SNF has
20
Page 20
Menus
crossed into Ethiopian territory. The international community was
quick to condemn this brutal invasion. In cooperation with the
member states of the Organization of African Unity, the United
States has dispatched its forces to roll back this invasion.
Multiplayer
F-16 Multirole Fighter allows for the exciting possibility of fighting against up to 128 opponents on NovaWorld and the challenge
of facing the MiG-29 Fulcrum™and F-22 Raptor™in Integrated
Battle Space. See Chapter 9: Multiplayer for more details.
Options
The Options selection lets you to choose a variety of
game-related parameters, allowing you to set up the game for
best performance on your system. It also gives you options
concerning some of the features you can include in an F-16 game.
Access the configuration features via the Options choice on the
Main Menu. Press Accept to accept changes and return to the
Main Menu screen.
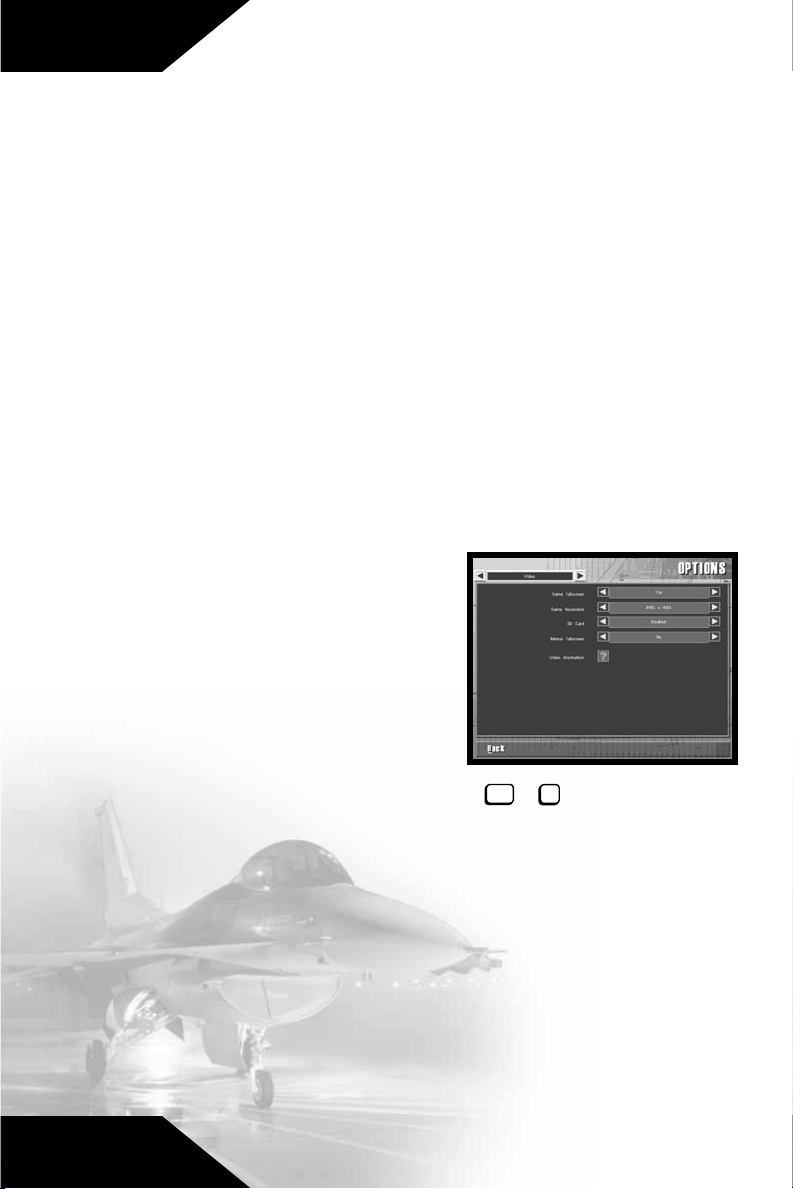
Video Options
Game Fullscreen
Select No from the Game
Fullscreen option to run the game
inside a Windows window.
Selecting Yes gives you a
full-screen view of the simulation.
When you are playing the
simulation you may also toggle
ctrl
between the choices by pressing both + .
V
21
Game Resolution
Choose the screen resolution that is most suitable for your
computer. The options are 640 x 480, 800 x 600, and
1024 x 768. The higher the resolution, the finer the graphical
detail will be, however the game will play slower.
3D Card
Select Enabled if you wish to use your 3D card to enhance the
graphical representation of the simulator. If your system does
not have a suitable 3D card or lacks the appropriate drivers,
then only the Disabled option will be available. Select the
Video Information button below to see the specific set up of
your system.
Page 21

Menus Fullscreen
Select No to display the pre-game menus inside a Windows
window. Selecting Yes gives you a full-screen view of the menus.
Depending on your system, you may need to have this option
enabled to connect to NovaWorld.
Video Information
Pressing the question mark will have F-16 Multirole Fighter
auto-detect your systems configuration.
Audio Options
Sound FX Volume
Use the mouse to slide the bar to
an appropriate volume level for
game sounds.
Music Volume
Use the mouse to slide the bar to
an appropriate volume level for the
menu music.
Menu Music
Disabling this option will override the Music Volume control and
turn the menu music off.
Menus
Avionic Sound Cues
Select Enable to hear indicator tones and beeps given off by
your F-16’s computer.
Voice Dialog Volume
Use the mouse to slide the bar to an appropriate volume level
for game dialog.
Control/
Performance
Options
Joystick
When you select Enabled, your joystick will be the primary flight control device for the simulation. If you
select Disabled, the keyboard’s
arrow keys are the only way to fly the F-16.
22
Page 22
Menus
Joystick Type
This option provides you with a list of joystick types to choose
from. Select the one that matches your joystick. If your joystick
brand is not listed, use the Standard option.
Throttle Controller
Allows you to select an external throttle device. Your choices are
Yes, No, and Reverse. Selecting Reverse means that your
external throttle will accelerate the airplane when you pull back on
the throttle yoke rather than when you push it forward. Note that
you cannot use an external throttle to start the engines. You will
have to press one of the Engine Control keys to start them.
Rudder Pedals
Your choices are Yes and No. Select Yes if you have a set of
external Rudder Pedals or twisting joystick connected.
Ground Steering
This selection lets you determine what method of steering control
you use when on the ground. Your selections are Stick or Rudder
Pedals. Selecting Stick means that the joystick (or the arrow keys
if you have no joystick installed) steers the aircraft while it is on the
runway. Select Rudder Pedals if you want to steer the aircraft with
rudder pedals or the rudder keys and . In this mode, the
arrow keys will not affect ground steering.
delete
page
down
23
Texture Distance
This slide controller allows you to set the distance at which the
F-16 simulation will apply textures to the terrain. Players with
slower machines should move the slider to the left to speed up the
graphical presentation.
Memory Usage
Your choices are High, Medium, and Low. Select High if your system is well equipped with RAM. Select Low if you have a small
amount of RAM.
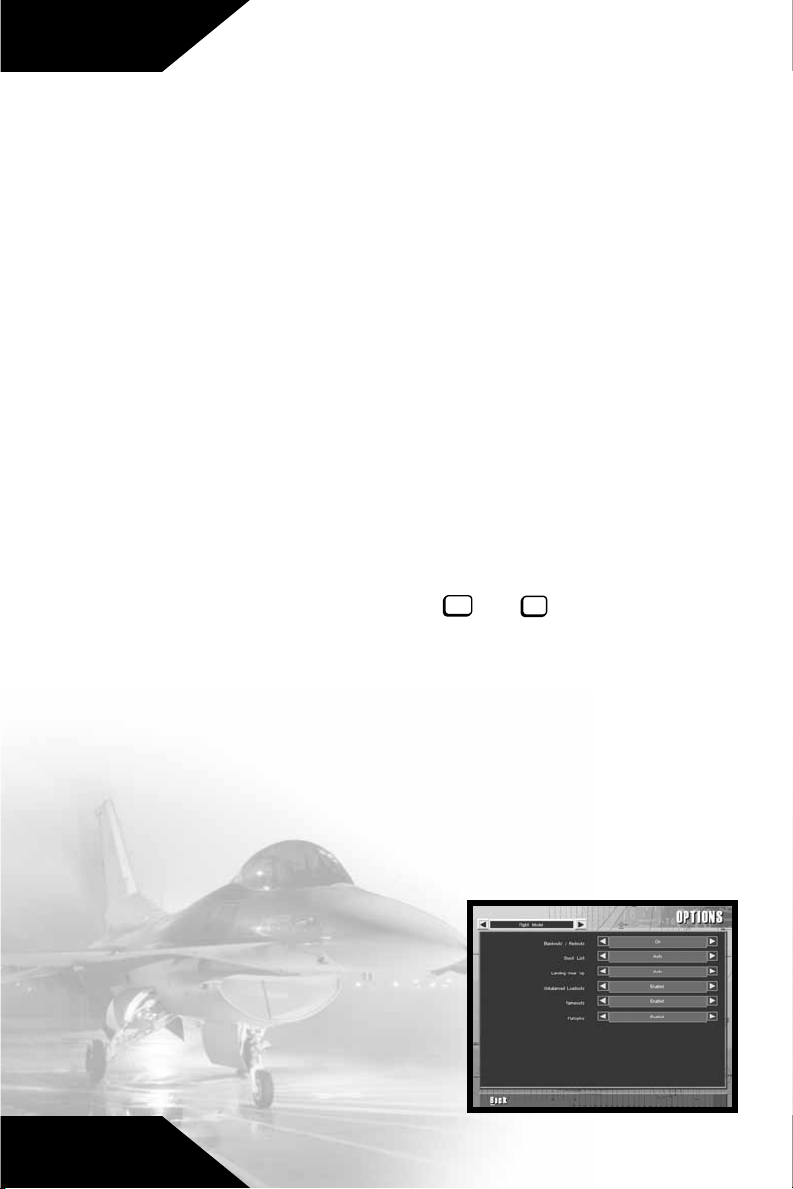
Flight Model
Options
Blackouts /
Redouts
Sharp turns and rapid acceleration
can cause severe G-force consequences to an aircraft’s pilot.
High-G turns, for example, cause
Page 23
blood to drain from the pilot’s head, leading to blackouts.
Similarly, maneuvers that bring about negative-G situations can
cause the body’s blood supply to rush to the head, filling the eyes
with blood and causing a redout. If you do not want this degree of
realism in an F-16 mission, turn this selection to Off before you fly.
Shoot List
Auto creates a shootlist whenever you have targets available. If
you select Manual, you will have to press the key to have your
aircraft create a shootlist.
enter
Joystick Mapping
Your joystick’s Cannon Priority configuration is described in
Chapter 4:Joystick Buttons. Select Weapons Priority to shift all
of the buttons down one so that the Trigger will now fire yor currently selected weapon. In this configuration, hold down button 4
to move the camera angle around. The Weapon Priority
configuration is generally preferred for 2-button joysticks.
Landing Gear Up
Select Auto to have your F-16 automatically raise its landing gear
after takeoff and lower them when you slow to fewer than 250
knots while landing. Manual means you perform this task yourself.
Unbalanced Loadouts
If you select Enabled, your plane will list/roll when your loadouts
are unbalanced by firing ordnance from only one wing. With this
feature set to Disabled, your plane’s balance is not affected by
unbalanced loadouts.
Menus
Flameouts
In certain circumstances, the engine of the F-16 can lose all power
in a flameout. The engine will try to re-ignite itself, but may
not be successful. Select Enabled if you want this level of
authenticity. Choosing Disabled will not allow the F-16 to
experience flameouts.
Flatspins
In rare cases, a wrong maneuver can throw the aircraft into the
dangerous flatspin. Recovering from this predicament is nearly
impossible. Select Enabled if you want this level of authenticity.
Choosing Disabled will not allow the F-16 to
experience flatspins.
24
Page 24
Menus
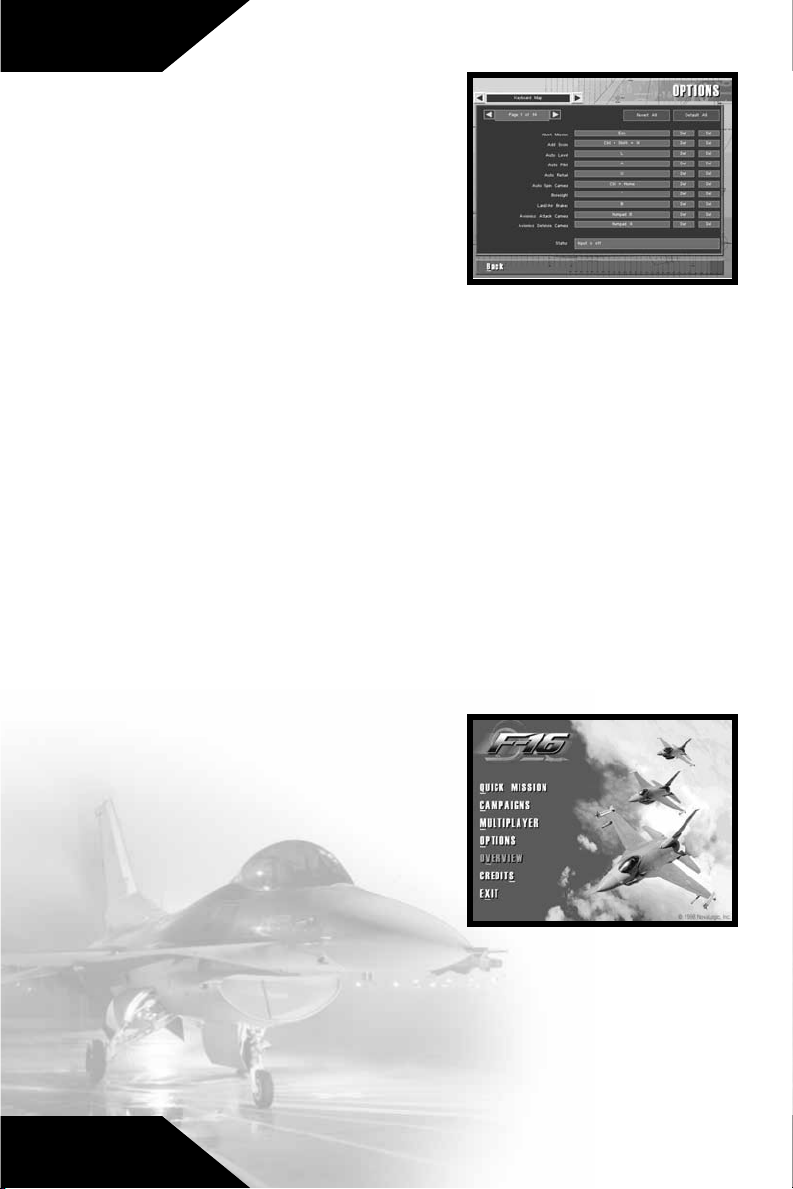
Map Keyboard
and Joystick
You have the ability to alter any of
the Keyboard commands and
Joystick buttons to suit your tastes.
Using the mouse, click on the command that you would like to
change. Type the key or push the
button that you would like to be
used for that command, when the Status bar indicates that input
is on for that command. If the message in the Status bar indicates
that “Input is off“, then nothing will be changed if you hit a key or
button. The Status bar will also indicate if there is a conflict with
another command sharing the same key.
Use the left-hand scroll bar to see all possible Keyboard and
Joystick commands. Select the Revert All button to change all
keys or buttons back to your last saved configuration. Pressing the
Default All button will change all of the keys or buttons back to
the original configuration set by NovaLogic. Under this is a
Default button to reset only the selected command back to the
original configuration and a Delete button to remove all keys or
buttons associated with the corresponding command. This is
useful in avoiding conflicts.
25
Overview
This section highlights key points of the F-16 Multirole Fighter.
Credits
Make this selection to learn more
about the people who created the
F-16 Multirole Fighter simulation.
Exit
Choosing Exit takes you directly
back to the Windows operating
system desktop.
Page 25

Chapter 4
Controls
The Joystick
All game controls can be found on the keyboard, however the
preferred flight control device for the F-16 Multirole Fighter
simulator is the joystick. With a little practice, using the joystick will
help immerse you into the aircraft’s cockpit. When flying, try to
make your stick movements definite and purposeful. A good pilot
is always in positive control of the aircraft.
The Stick
The stick controls the elevators, at the rear of the aircraft, and the
flaperons, on the trailing edges of the wings. The elevators pitch
the nose of the aircraft up or down, while the flaperons roll the airplane around its longitudinal axis. Combining these two elements
allows you to turn.
When you move the joystick to the left or right, it causes the wings
of your aircraft to bank in the direction of the stick movement. If
you move the stick to the right, for example, the flaperons cause
the right wing of the aircraft to drop and the left wing to rise. The
airplane is now “banked“ to the right. Now when you pull back on
the joystick the elevators will pitch the nose of the plane up perpendicular to the wings, and cause the aircraft to turn in the direction of the bank. The further you push the stick to the right or left,
and the harder you pull it back, the faster your turn will be.
Controls
Sharp turns increase the G forces exerted on the aircraft, which
may cause it to lose both airspeed and altitude or begin to shake
as its airframe becomes compromised. High G stresses can also
cause the pilot to become unconscious. Save your extreme
maneuvers for times you really need them, like when you are
trying to dodge a missile or get behind an enemy aircraft.
Joystick Buttons
F-16 supports joysticks with up to sixteen buttons, and includes a
number of custom joystick configuration files. You can reconfigure
the joystick buttons in the Options screen.
26
Page 26
Controls
The Cannon Priority Default
configuration for the joystick
buttons is as follows:
• Button 1—The Trigger
button fires several rounds
from your 20mm cannon.
• Button 2— Fires or launches
your selected weapon.
• Button 3— Cycles through all
the targets on your Shootlist.
• Button 4— Cycles through your
available weapons.
• Hat Switch—The four hat switch positions
perform the following functions:
Up—The Up position toggles between the Virtual
Cockpit view and the HUD.
Down—Push the hat switch button to the Down position
to look to your rear (“check your six“).
Left—Look out the cockpit to the left.
Right—Look out the cockpit to the right.
1
4
2
3
27
Use the Options screen to select your specific joystick type or
reconfigure the joystick buttons.
Rudder Controls
The rudders cause the airplane’s nose to swing to the left or right
(this motion is called “yaw“). Modern aircraft integrate the rudder
into the operation of the joystick, automatically applying
the proper amount of rudder to enhance the operations of
the flaperons.
You can use rudder inputs to make your flight maneuvers more
extreme, which can be useful in combat. Use the rudder to exaggerate your other control motions. Step on the right rudder, for
example, when you are making a right-hand turn with the joystick.
The actions of the rudders will bring the nose of the aircraft around
more quickly than the effect of the flaperons and elevators alone.
You can also use the rudders to make flight inputs in the opposite
direction from your other controls. If you can control the
instability of the flight path, it will make it difficult for an enemy to
stay with you.
Page 27
Throttle Controls
To better simulate the F-16, you have the option of attaching an
external throttle controller. Pushing the throttle forward will
increase the engine's thrust. Moving the throttle all the way
forward equates to using full afterburners. In the Options screen,
you can reverse the direction of the throttle device.
Keyboard Controls
F-16 Multirole Fighter uses the keyboard to control many of the
on-board systems in the airplane, and to control a wide variety of
camera views. The keyboard also gives you alternate methods of
exercising flight control, and provides a means of communicating
with your wingman. In addition, you use the keyboard for game
functions not specifically related to flying the F-16.
General Game Controls
These keys control aspects of the game not directly concerned
with the flight of the aircraft or the operation of its weapons and
other on-board systems.
esc
Exit Mission—Press the Escape key to abort your current
mission. You will have the option to change your mind before
the mission aborts.
pause
Pause—Use this key as a toggle to halt/resume the current
mission. This key does not function in multiplayer games.
ctrl
Reverse Cycle—Used in combination with some other keys,
Control will reverse the direction of a cycling list. For example,
if you press Control with Tab, you will cycle through your
targets in the reverse order.
?
Keyboard Help—Use the Question Mark key to bring up an
on-screen key control summary. Press ? again to remove the
list from the screen.
O
Mission Objectives—Press O to toggle a list of your mission
goals and their status.
Y
Recent Messages—Keeps a list of the most recent dialog
from the computer and other players.
V
ctrl
E
Window/Full Screen—Use this key combination to
toggle your screen mode from Full Screen to Windowed
and back.
End Mission—Press the E key to end the current mission and
receive an evaluation of the mission’s success or failure. You
can only use this key when you have completed all the primary objectives in your current mission or when you have failed
a mission.
Controls
28
Page 28

Controls
Keypad Views
F-16 provides an extensive series of perspectives from which to
operate or view the simulation. Use the various points of view
offered to increase your situational awareness. If there is one
single rule for success in fighter aircraft, it is, “keep your head
moving.“ You must always be looking around for threats
and opportunities.
With the exception of keypad 8, the below views are static. You
cannot pan, tilt, or zoom the image. When in one of the above
perspectives, pressing the key a second time will return you to the
screen from which you entered the view. You must have
Number Lock on in order to utilize the keypad on the side of
your keyboard.
Keypad Left Auxiliary Console—Press this key to look down
Keypad Look Down—Press this key to look down at the lower
Keypad Right Auxiliary Console—Press this key to look
Keypad Left MFD—Press this key to quickly zoom into the
Keypad Center Console—Press this key to view the center
Keypad Right MFD—Press this key to quickly zoom into the
Keypad Threat Warning Indicator—Press this key to look at
Keypad Virtual Cockpit—Press this key to view the entire
Keypad Attitude Indicator—Press this key to look at the
Keypad Look Left—Press the slash key to look out the left
Keypad Look Right—Press the asterisk key to look out the
Keypad Look Forward—Press the minus key on the keypad
1
at your left auxiliary console.
2
center gauges.
3
down at your right auxiliary console.
4
left hand MFD.
5
controls such as your Airspeed Indicator and Altimeter.
6
right hand MFD.
7
the upper left side of the cockpit.
8
virtual cockpit. Using Control and arrow keys will shift the
perspective from here.
9
upper right side of the cockpit.
/
side of your aircraft’s cockpit.
*
right side of the cockpit.
–
to look straight ahead out of the cockpit.
29
Page 29
Controls
Keypad Check Six—Press the keypad plus key to quickly look
+
behind you. Use this key often.
Camera Controls
You can control the position of the camera while in the virtual
cockpit view and external camera view.
S
Zoom In Slow—Press this key to magnify your camera view or
display range and zoom in on the object you are viewing.
S
ctrl
Zoom In Fast—As above, but faster.
X
Zoom Out Slow—Press this key to expand your camera view
or display range and zoom your perspective out.
X
ctrl
ctrl
Zoom Out Fast—As above, rapidly.
Tilt Up—Pressing the up arrow while holding down on the
control key will move the perspective up.
ctrl
Tilt Down— Moves the camera perspective down.
ctrl
Pan Right—Moves the camera perspective to the right.
ctrl
Pan Left— Moves the camera perspective to the left.
Perspectives Controls
The Function Keys will control the various camera views in F-16
Multirole Fighter.
F1
Virtual Cockpit View—Press the F1 key to place yourself in
the cockpit, looking forward through the Head-Up Display.
Press again to zoom closer to the HUD. This is the most
common perspective from which to operate the F-16.
F2
HUD View—Pressing the F2 key puts you in a perspective
similar to that available via the F1, but removes the cockpit
frame from the screen, giving you a little better view of the
terrain outside your aircraft.
F3
External View—Press the F3 key to show an external view of
your aircraft. You can move or zoom the camera perspective.
Press again to see alternate external views. See the Camera
Controls section for how to change the camera point of view.
F4
Fly-By View—Pressing the F4 key puts you at a fixed point
outside your aircraft, watching it fly past your location.
F5
Target Padlock View—If you have a target designated, press-
ing the F5 key will keep the target centered in your field of
vision, regardless of where it moves.
30
Page 30

Controls
F6
Wingman External View—Brings up an external view of your
wingman’s plane. This view is movable.
F7
Missile Toggle—Press this key to watch your missile fly past a
fixed location. Press the F7 key again to get a movable external camera view of your missile. The F7 key now toggles you
between these two perspectives.
F8
Target View—Press this key to access a movable external
camera view of your current target.
F9
LANTIRN On/Off—Toggle your LANTIRN system on and off
with this key.
F10
HUD On/Off—Toggle your Head-Up Display on and off with
this key.
F11
Attack Display—Toggle an overlay view of your Situational
Awareness Mode on and off with this key.
F12
Time Compression— The F-16 simulation allows you to
“speed up“ the passage of time by using the F12 key. Moving
the aircraft or pressing this key again will return back to normal
speed. This key does not function during multiplayer games.
Engine Power Settings
The throttle controls regulate the amount of thrust being produced by your engine. Higher power settings increase your thrust,
but they also increase fuel consumption alarmingly. Keep your eye
on the amount of fuel you have remaining. Use the number keys
at the top of the keyboard to control the engine.
6
0% Power; Engine Off—Press this key to shut down
your engine.
7
35% Power; Taxi—Press the 7 key to turn your engine on and
idle. If on the ground, you will begin taxiing.
8
60% Power; Landing—Press this key to bring your engine to
the suggested amount of thrust for landing.
9
70% Power; Cruise—Press this key to set your engine output
to 70% for normal flying.
0
100% Power; Full Military Power—The zero key on the
keyboard puts your engine power to 100%, useful for most
combat engagements.
–
Decrease Thrust—Pressing the minus key decreases your
engine power in small increments.
31
Page 31

=
Increase Thrust—Pressing the equals key increases engine
power slightly each time you press it.
backspace
Afterburner—Press the keyboard’s Back Space key
to engage your afterburner. Using the afterburner gives
you a large boost in engine power, but uses fuel at an
astonishing rate.
General Flight Controls
The following keys control flight operations and some of the
airframe systems aboard the F-16. Some of these keys duplicate
the functions of other flight control devices, such as a joystick or
rudder pedals.
Pitch Down—Press this key to pitch the nose of your aircraft
downwards.
Pitch Up—Press the Down Arrow key to pitch the nose of
your aircraft upwards.
Roll Left—Press this key to bank your wings and roll the
aircraft to the left.
Roll Right—Use the Right Arrow key to bank to the right.
page
Right Rudder—Press this key to yaw the nose of your aircraft
down
to the right.
delete
Left Rudder—Yaws the nose of your aircraft to the left.
G
Gear Up/Down—The G key raises and lowers your landing
gear. A small “G“ appears at the lower right of the screen
when the gear is down. The landing gear will automatically
raise when your airspeed goes over 250 knots and lowers when
you approach the landing field below 250 knots.
B
Air and Ground Brakes—Press the B key when in flight to
extend the F-16’s air brakes. On the ground, pressing B
engages the craft’s wheel brakes, allowing you to come to a
stop. A small “B“ appears at the lower right of the screen when
you apply air or wheel brakes. The brakes will disengage when
you release the key.
ctrl
B
Brakes Toggle—Press B and the Control key at the same
time to toggle brakes on and off. The brakes will remain
engaged until you press these keys again.
F
Flaps Up/Down—To slowly bleed off speed and increase lift,
use the F key to move your aircraft’s flaps. A small “F“ appears
at the lower right of the screen when you have your
flaps extended.
Controls
32
Page 32

Controls
ctrl
E
Eject—Use this key combination to exit a stricken air-
plane. Ejection from an aircraft in the inverted flight position at
very low altitudes may be fatal.
<
HUD Dim— This key decreases the contrast/brightness of
your HUD display.
>
HUD Bright— This key increases the contrast/brightness of
the HUD display.
Navigation Controls
These keys control some of the navigational capabilities of the
F-16, mainly to allow hands-off flight control and allow you to get
back to base quickly and easily.
A
Autopilot—Use this key to engage your Autopilot. When
engaged, the autopilot will take your aircraft automatically
to the next selected Steerpoint. Exercising any of the manual
flight controls, or pressing the A key again, will disengage
the autopilot.
N
Cycle Steerpoint—Press the N key to cycle through your
mission’s Steerpoints. When you engage the Autopilot, it will
automatically head for the next selected Steerpoint.
L
Auto-Level—Pressing the L key will immediately put your
F-16 in straight and level flight.
H
Home—Pressing the H key engages the Autopilot to take you
to the initial approach point of your home runway.
33
Weapon Controls
The following keys allow you to select weapons and countermeasures aboard your F-16. You will quickly become very familiar
with these controls, or you will be dead. Use the keyboard (not the
keypad) number keys to control the appropriate functions.
~
Cycle Weapons—Press the Tilde key to cycle through your
available ordnance.
1
Nav—Press this key to deselect all weapons.
2
Cannon—Press this key to ready the M61A1 20mm cannon.
This mode toggles between the EEGS and Strafing HUD mode
3
Air to Air Missiles—This key cycles through all of your
available Sidewinders and AMRAAMs.
4
Air to Ground Missiles—Press this key to cycle through all of
your available Air to Surface Missiles.
5
Bombs—Press this key to cycle through all of your bombs.
Page 33

spacebar
Fire Selected Weapon—Press the Space Bar to fire or
drop the selected weapon or fuel pod.
Z
Fire Cannon—Press the Z key to fire your 20 mm cannon.
Note this will not bring up the Enhanced Envelope Gun Sight
(EEGS) on your HUD.
C
Chaff—Press this key to release a bundle of chaff to throw off
an enemy missile’s radar lock.
D
Flares—Press the D key to deploy a series of flares to
confuse an enemy heat-seeking missile.
ctrl
J
Jettison Stores—Press these keys to immediately drop
all ordnance and fuel pods with the exception of Air to Air
Missiles. This emergency only technique will drastically lessen
your aircraft’s weight in just a few seconds to give you
additional speed and maneuverability. All weapons will
jettison unarmed.
K
ctrl
Jettison Current—This key combination will jettison only
the currently selected ordnance.
Radar Controls
Your radar is instrumental in tracking targets for many of your
weapon systems.
R
Radar On/Off—Use this key to toggle your APG-68 radar
from Standby to On and back. A small “R“ will appear at the
lower right of the screen when you have the radar turned on.
R
ctrl
enter
tab
[
]
’
Cycle Radar—This key combination will cycle through
your various radar modes.
Build Shootlist—If you have disabled the Auto Shootlist in
the Options, you will need to press this key to create a list of
available targets.
Cycle Targets—Press this key to cycle through all detected
objects that are in the forward arc of your aircraft and less than
40 nautical miles away.
Select Previous Target—Use the Left Bracket key to cycle
backwards through the targets currently on your shootlist.
Select Next Target—Press the Right Bracket key to cycle
forward through the targets currently on your shootlist.
Joystick button # 3 will do the same thing.
Boresight—Press the Single Quote key to target the nearest
object directly ahead of your aircraft.
Controls
34
Page 34

Controls
insert
Cycle Left MFD—This key is used to cycle your left
Multifunction Display through all of its possible modes.
page
up
Cycle Right MFD—Press this key to cycle your right MFD
through all of its possible modes.
scroll
Laser Designator On/Off—Use this key to toggle your laser
lock
guided bombs targeting designator on and off. A small “L“ will
appear in the lower right of the screen when you have the
Laser Designator active.
home
Park LANTIRN Targeting—Use this key combination to reori-
ent your LANTIRN's laser designator to the center of the HUD.
homectrl
LANTIRN Field of View—Press this key to toggle the
size of the LANTIRN cone.
end
LANTIRN Lock—Press this key when you want to lock the LANTIRN view on an arbitrary spot on the ground. As you fly away,
the LANTIRN will attempt to continue to target this area.
ctrl
end
LANTIRN Slave—Use the End key when you have a radar
fix on a preprogrammed ground target. As you fly away, the
LANTIRN will try to maintain that lock.
M
Tactical Map—This full screen grid map is highly useful in
Multiplayer games. Use the grid coordinates to communicate
your location to teammates.
35
Wingman Controls
These keys allow you some control over the actions of your
Wingman. Your flight companion has a large degree of freedom
when it comes to carrying out these directives.
W
Wingman Command Menu—Brings up a list of commands
you can give your Wingman.
0
ctrl
Wingman Cover—Pressing the Ctrl zero key combination
directs your wingman to form up on your right wing. Your wingman will maintain this formation until ordered otherwise.
ctrl
1
Evasive Maneuvers—Directs your wingman to maneuver
to avoid incoming missiles.
2
ctrl
ctrl
ctrl
Wingman Engage—Press these keys to order your
wingman to engage targets at will.
3
Wingman Attack My Target—Your wingman will imme-
diately engage the target you have locked on radar.
4
Break Right and Engage—Orders your wingman to
make a sharp turn to the right and engage at will.
Page 35

5
ctrl
Break Left and Engage—As above, but to the left.
6
ctrl
Engage My Target’s Attacker—If you have a friendly
aircraft locked into your targeting system you can use this
command to order your wingman to engage any enemy
aircraft that attempts to attack the friendly.
7
ctrl
Escort My Target—Again, if you have a friendly aircraft
in your targeting system, you can order your wingman to
accompany that friendly aircraft and guard it from attack.
ctrl
8
Cover Me—Directs your wingman to engage any hostile
aircraft with a radar lock on your aircraft.
ctrl
9
Wingman Patrol Home Base—Press these keys to order
your wingman to return to your home base. Once there, your
wingman will begin a Combat Air Patrol, keeping enemy aircraft away from your base.
Multiplayer Keys
The following keys only have value in Multiplayer games.
T
Chat Mode—Press the T key to send a text message to
everybody in the game.
T
shift
Squadron Chat—Press the Shift and T keys together to
send a private message to your squadron only.
P
Player List—Lists all players currently in the game.
Q
Show Squadron—Lists all members of your squadron who
are currently playing in your game.
;
Top 8 Players—Use this key to see which players are leading
the game.
Controls
Mouse Controls
The Virtual Cockpit of the F-16 contains many buttons on the
Multifunction Displays that can be activated by the mouse.
Additionally, there are several areas where clicking the mouse will
zoom the camera in closer to sections of the cockpit. The mouse
icon will change shape when it encounters any of these hot spots.
36
Page 36

Displays
Chapter 5
Displays
The Cockpit Instruments
Your cockpit contains a wealth of information to help you fly the
F-16. You should familiarize yourself with the various functions
and their use
4
11
19
3
21
2
5
1
1) Wheels down lights–When your landing gear is down and
locked these lights will be green.
2) Launch Warning–This will light up when an incoming missile is
detected.
3) AOA Indexer–Primarily used for landing, the down arrow will
light when you are going too slow with a high angle of attack.
The up arrow indicates that you are going too fast with a low
angle of attack.
20
7
8
10
20
6
9
18
12
13
14
15
16
17
37
4) NWS Status–The center light is active during taxiing, when
your nose wheel controls steering instead of your flaperons
and rudders.
Page 37

5) Airspeed/Mach Indicator–The outer ring measures your air-
speed in nautical miles per hour. The inset needle shows
your Mach.
6) Barometric Altimeter –measured in feet ASL (Above Sea
Level). The lower right-hand box denotes barometric pressure
in inches of mercury.
7) AOA Indicator–measured in degrees.
8) Attitude Director Indicator–displays the pitch and roll of
the aircraft.
9) VVI–Vertical Velocity measured in thousands of feet per
minute.
10) Horizontal Situation Indicator–displays horizontal view of
the aircraft and direction to next Steerpoint. The upper left box
show the distance to the next Steerpoint, where the upper
right box displays the heading to the next Steerpoint.
11) Standby Attitude Indicator – Backup Attitude indicator.
12) Fuel Flow Indicator–listed in pounds per hour.
13) NOZ POS Indicator–Position of turbofan’s nozzle opening.
14) RPM Indicator–Turbofan’s revolutions per minute.
Displays
15) FTIT Indicator–Fan Turbine Intake Temperature measured in
degrees Celsius.
16) Magnetic Compass–shows heading of aircraft with respect to
magnetic north.
17) Fuel Quantity Indicator–displays total pounds of fuel
remaining.
18) Caution Light Panel–Yellow or Red lights will indicate which
systems are failing.
19) TWI–The Threat Warning Indicator is detailed later in this
chapter.
20) MFD–The Multifunction Display is detailed later in this chapter.
21) HUD–The Head-Up Display is detailed later in this chapter.
Warnings
Your onboard computer will attempt to warn you of hazardous
conditions. Receiving the WARNING or CAUTION as an audible
cue and on the HUD, indicates that you should check your
instrument panel for possible system failures. The word TERRAIN
38
Page 38

Displays
will appear if a ground collision is imminent and an arrow will point
in the direction of the threat. Immediately pull your craft away in
the opposite direction. Unless you are in the process of landing,
you will hear an ALTITUDE warning when your F-16 dips below 400
ft. Keep an ear out for the ominous BINGO warning, which alerts
you to the fact that you are nearly out of fuel.
Threat Warning Indicator
The Threat Warning Azimuth
Indicator shows you the direction
and type but not proximity of radar
threats. This is a God’s eye view
looking down on your aircraft,
where the top of the indicator
represents what is in front of you.
The outer circle will display ground
radar sites and aircraft, while the
inner circle will only show incoming
radar guided missiles. Here are the
symbols you will see:
AWACS
Aircraft
Ground Radar
39
Incoming Radar Missile
Multifunction Displays
The F-16 features a number of
displays designed to present data
in graphical form for quick analysis.
You can change the MFD modes
insert
with and or by pressing
the appropriate MFD button with
the mouse. The DCLT button will
declutter the screen by removing
the mode button labels. The other
buttons are labeled as follows:
page
up
WEP
You can select your air-to-air missiles (AA), air-to-ground ordnance
(AG), or prepare to eject your fuel pods (PODS) with this screen.
Page 39

STAT
If your F-16 suffers system failures
due to aircraft damage, you will be
notified in this MFD mode. Use this
regularly to check on the status of
your vital systems.
STORE
The Stores Display indicates the type
and number of armament or fuel pods
currently on the nine stations. It also
indicates remaining Flares, Chaff bundles
and 20mm rounds.
RAD
The pilot has many options to consider when using the Radar
MFD. There are six separate modes to choose from, two Air to Air
modes and four Ground or “Look Down“ Radar modes. Enemy
targets will appear as triangles, Friendlies will appear as circles
and unidentified targets show up as squares. A small line attached
to the symbol will indicate which direction they are heading. Your
selected target will be encased in a circle. The centerline indicates
the roll of your aircraft. The ticks at the end of these lines will point
toward the horizon to indicate whether you are diving or
climbing. Information regarding your Steerpoint can be found in
the bottom corner. The radar’s cone size can be adjusted with the
S
(zoom in) and (zoom out) keys.
X
Displays
SAM – Air Situational
Awareness Mode
With a radar range of about 80 nautical
miles, this mode displays a wealth of
information. Your Steerpoints and
predetermined bombing targets, along
with information on AWACS and air
targets can help you get a better
understanding of your entire situation.
40
Page 40

Displays
ACM - Air Combat
Maneuver Mode
Focusing on air combat, this mode
shows only air targets within your
combat radar range (40 nautical
miles).
SAM - Ground
Situational
Awareness Mode
Similar to the Air Situational
Awareness Mode, this display
shows all relevant information,
except air targets.
FTT - Fixed Target
Track Mode
This mode further simplifies
things by only showing preprogrammed static bombing targets
such as buildings.
41
GMT - Ground
Moving Target
Mode
This mode will only display preprogrammed moving ground targets
such as tanks and trucks.
Page 41

MAP - Ground
Mapping Mode
This MFD mode shows a lookdown view on the terrain
below you.
LANT Mode
The LANTIRN pod is used to assist
Electro-Optical targeting (TGT) of
television guided missiles such as the
AGM-65G Maverick.
Head-Up Display
(HUD)
By far the most important cockpit
display in the F-16 is the Head-Up
Display, or HUD. The HUD displays
information from many sources,
including the avionics systems,
radars, and weapons systems aboard your aircraft, all in a
convenient and compact format. The HUD projects its data onto a
transparent plexiglass screen directly in front of the pilot’s field
of vision. With a little practice you will be able to read the HUD
quickly and easily.
Displays
There are many different modes for the Head-Up Display. Each
assists you in specific tasks such as weapon firing or landing the
F-16. They are as follows:
NAV
This is your default mode. It contains all the basic information you
need to fly the aircraft.
1. Gun Boresight – These fixed cross hairs indicate where bullets
from your 20 mm Cannon should arrive once they achieve their
maximum range.
2. Pitch Scale - The horizontal lines bisecting the center of the
HUD are part of the Pitch Scale (sometimes referred to as the
Pitch Ladder). The lines themselves are always parallel to the
42
Page 42

Displays
horizon, and the tick marks on the tips of the Pitch Scale rungs
always point to the horizon, so you can quickly determine your
relationship to the horizon, no matter how extreme your
maneuvers have been, or how bad the visibility is. The numbers
at the end of the pitch scale lines show the pitch angle of the
nose of your aircraft. Positive numbers represent angles above
the horizon, while negative numbers indicate that your nose is
pointing below the horizon.
3. Gravity Force Indicator – This number represents the amount
of g affecting the plane and pilot.
4. Calibrated Airspeed Indicator - On the left side of the HUD is
the box containing the current airspeed for your F-16, in knots
(nautical miles per hour).
5. Mach Indicator - Just below the Airspeed Indicator box the
HUD shows the current Mach number, a multiple of the speed
of sound. A reading of 1.09, for example, means that the aircraft
is travelling at 1.09 times the speed of sound. Mach is derived
from the air speed of the F-16 relative to the air pressure (generally determined by the altitude.)
6. Current HUD Mode Indicator – There are several different
modes in which a HUD can be in. If this line says “NAV“, then
you are currently viewing the Navigation Mode.
43
7. Compass Heading Indicator - At the bottom center of the HUD
screen is a box with the current compass heading of the aircraft.
8. Selected Weapon Indicator - At the bottom left of the HUD
your F-16 displays the currently selected weapon and the
number of weapons or rounds available.
9. Steerpoint Comments - Any special preprogrammed instruc-
tions associated with the selected Steerpoint will appear here.
10. Roll Scale – This marking shows the aircraft’s relative bank to
the horizon. This is useful for determining your aircraft’s position
in situations where your visibility is compromised, such as flying
through the clouds. F-16’s that are not equipped with the
LANTIRN pod have much larger Roll Scales.
11. Flight Path Marker - The small circle with the vanes extending
from its top, bottom, and sides is the Flight Path Marker. At any
given moment the Flight Path Marker points directly to where
your aircraft would wind up if all flight parameters remained the
same. An “X“ will appear through the Flight Path Marker if it is
actually beyond the limits of the HUD. This can happen during
bad spins or extreme maneuvers.
Page 43

12. Barometric Altimeter - At the right of the HUD is a box
containing the aircraft’s current altitude, in feet Above Sea
Level (ASL).
13. Radar Altimeter - At the right of the HUD is a box marked
“AR“ containing the aircraft’s current altitude, in feet Above
Ground Level (AGL).
14. Altitude Low Setting – If your radar altitude gets below this
number, you will be given a warning. The ground crew preset
the “AL“ at 400 ft.
15. Time to Next Steerpoint – Measured in minutes and seconds.
16. Selected Steerpoint - Gives the distance in nautical miles
to the next selected Steerpoint followed by that Steerpoint’s ID
number. Cycle through the Steerpoints for the mission with the
N
key.
17. Command Steering Cue - The “tadpole“ marker indicates the
direction to steer to reach the next Steerpoint. When you are
heading directly towards the Steerpoint, the Command
Steering Cue will line up inside the Flight Path Marker.
EEGS
Although you can fire your cannon
at any time with the button, the
Enhanced Envelope Gun Sight will
greatly aid you while the M61A1 is
selected (press ).
Z
2
Displays
1) Bullet Flight Path – The EEGS
mode automatically compensates
for relative velocity and position of
your target. Line up your target so
that its wingtips touch the funnel lines for optimal accuracy.
2) Range Scale – This indicates the range of the designated
target. The dial moves counterclockwise as you get closer to
your target.
3) Maximum Gunnery Range – The dot at 3 o’clock represents
3,000 ft, which is the maximum effective range of your M61A1
20mm Cannon.
Strafing Mode
When you wish to attack ground targets with your M61A1 cannon,
use the Ground Strafing Mode.
44
Page 44

Displays
1) Gun Aiming Piper – maneuver
the aircraft to position this dot
over your target.
SRM
The Short Ranged Missile mode
is displayed when AIM-9M
Sidewinders are selected.
1) Boresight Circle – In order to
establish a radar lock, the
Boresight Circle must contain the
Target Box. Note that the heat
seeking tracking head can slew,
attempting to gain a lock independently of your heading.
2) Missile Range Scale – This scale
shows the effective range of the
missile. The arrow indicates the
current range to the target. The top portion of the scale represents your radar’s combat range. The middle portion is called
the “Kill Zone“; this is the effective range of the missile. The bottom portion represents the range at which it is too close to effectively fire the missile.
45
3) Target Range – This circular scale indicates the distance to your
target. As you get closer, the scale will shift counterclockwise.
4) Target Box – When you have your radar turned on, all aircraft
within your radar range will appear on your HUD as a dashed
box. When you select a target, it will become a solid line box.
5) Missile Lock Diamond – When the target is within range and
the missile has achieved a positive lock, a diamond box appears
in the Target Box.
MRM
When the AIM-120 AMRAAM is armed, the Medium Ranged
Missile mode will appear on the HUD.
1) ASE Circle – The Azimuth
Steering Error Circle represents
the radar view of the selected
missile (not your aircraft’s radar).
The ability of the seeker head to
slew around enables it to sometimes lock on targets that you can
not see.
Page 45

2) Boresight Circle – In order to establish a radar lock, this circle
must be within the ASE and your target must be within range.
Note, because the seeker head’s radar can slew, you do not have
to have the Target Box within the ASE, only the Boresight Circle.
3) Missile Range Scale – This scale shows the effective range of
the missile. The arrow indicates the current range to the target.
The top portion of the scale represents your radar’s combat
range. The middle portion is called the “Kill Zone“; this is the
effective range of the missile. The bottom portion represents the
range at which it is too close to effectively fire the missile.
4) Target Range – This circular scale indicates the distance to your
target. As you get closer, the scale will shift counterclockwise.
5) Target Box – When you have your radar turned on, all aircraft
within your radar range will appear on your HUD as a dashed
box. When you select a target, it will become a solid line box.
6) Missile Lock Diamond-When the target is within range and the
missile has achieved a positive lock, a diamond box appears in
the Target Box.
ASM
When the AGM-84A Harpoon is armed, the Anti Ship Missile
mode will appear on the HUD. Unlike the MRM mode, the ASM is
used to target ships that have been preprogrammed as legitimate
targets, otherwise refer to the MRM mode for details.
Displays
ARM
The Anti Radiation Missile mode
appears when the HARM is
selected.
1) Target Box – This box indicates
a potential ground target for you to
lock onto.
2) Missile Lock Diamond – When
the target is within range and the
missile has a achieved a positive lock, a diamond box appears in
the Target Box.
EO
The Electro-Optical mode shows you a television view from such
missiles as the AGM-65B when they are selected.
1) Target Box – This box indicates a potential ground target for
you to lock onto.
46
Page 46
Displays
2) Weapon Seeker Cross Hair –
When the ground target is in
range and acquired, the cross
hairs will line up over the Target
Box to indicate that the weapon
may be fired at will.
CCIP
The Continuously Computed
Impact Point mode appears when
you have bombs armed.
1) CCIP – The Continuously
Computed Impact Point or “Death
Dot“ shows where the bomb will
detonate. Aim this small circle onto your ground target.
2) Bomb Fall Line – This line will indicate the path the bomb will
take from your F-16 to its target.
ILS
The Instrument Landing System mode assists you in landing the
F-16. When you are facing a runway from the proper side, the ILS
will appear to give you guidelines to help line up the runway with
your plane. See Chapter 6, Landing for HUD details.
47
Tactical Map
M
Press to bring up the Tactical
Map. This God’s Eye view is
extremely useful for coordinating
attacks in Multiplayer games. Refer
to the grids to effectively communicate your location to teammates.
LANTIRN
The Low Altitude Navigation and Targeting InfraRed for Night
system allows F-16 pilots to operate in total darkness as well as all
weather. The LANTIRN consists of a navigation pod and a targeting pod integrated and mounted beneath the F-16. Enhanced
with terrain-following radar and a fixed infrared sensor, the aircraft
is capable of precision strikes in all conditions.
To activate the LANTIRN pod, press the key. The pod’s sensor
will illuminate your HUD green with an infrared image of the
forward terrain.
F9
Page 47
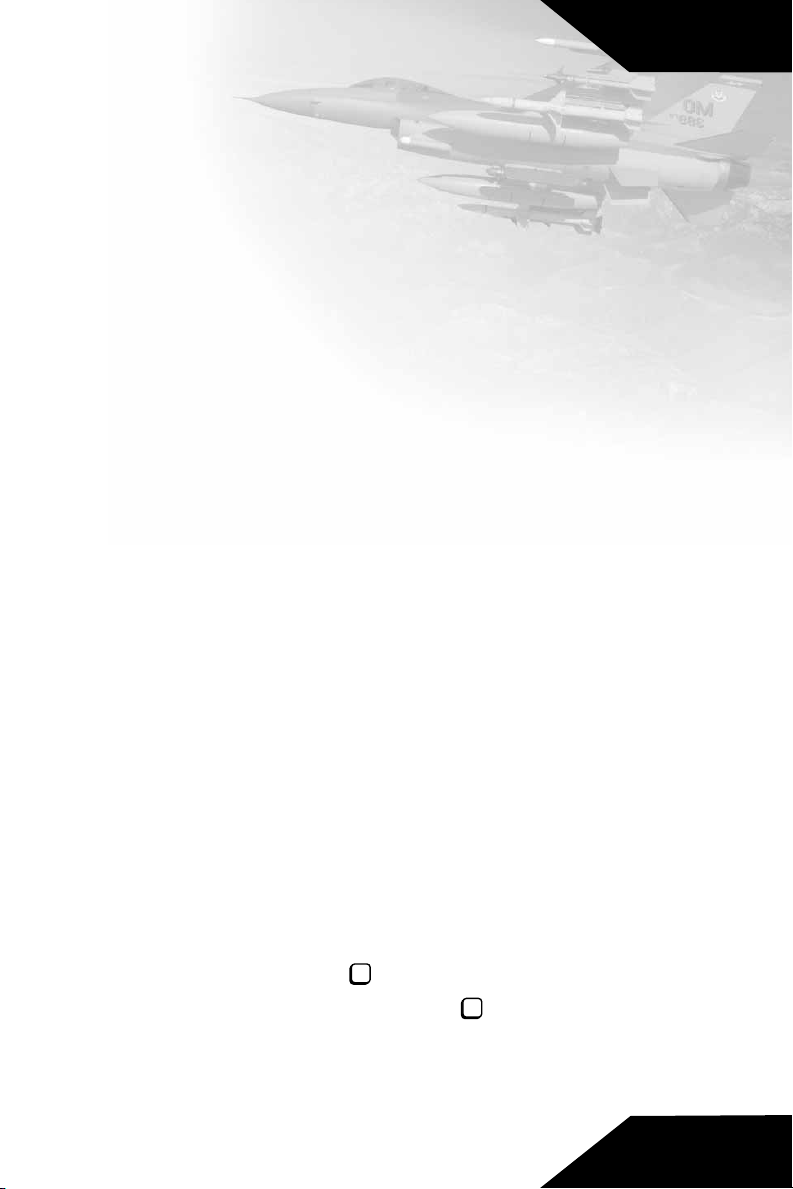
Flying F-16
Chapter 6
Flying F-16
Tutorials
You can fly any available F-16 mission whenever you wish, but we
recommend that you begin your experience with this simulation
by undertaking the Tutorial Missions. It won’t take long, and even
if you are an experienced flight sim pilot, you will come out of the
experience better able to control the F-16.
The F-16 Tutorial Missions are part of the Quick Mission set,
available from the Main Menu.
Mission #1—Introduction to the basic workings of the aircraft.
Mission #2—Practice Landing
Mission #3—Introduction to Air Combat Maneuvers
Mission #4—Basics of Air to Ground Guided munitions
Mission #5—Practice at Air to Ground Unguided bombing
Mission #6—This mission has no enemies or other distractions,
and is designed to give you a place to practice flying the F-16.
Prepare for Takeoff
Take a moment to review the mission in your mind, concentrating
on the tasks you must perform, then get ready for takeoff:
• Check your HUD. Note the altitude of the runway and the direc-
tion you are pointing. When you return to base you will want to
know this information. In the lower left of the HUD you should
see the letters G, F, B, and R. They indicate that your brakes are
applied, your landing gear is down, your flaps are extended, and
your radar is on. In the upper right corner of the screen is a
miniature version of the Situational Awareness Mode MFD.
Toggle it on and off with the key.
• Turn on the engines. Press the keyboard key to turn your
engines on and set them to idle.
F11
7
48
Page 48

Flying F-16
Takeoff
Once you are cleared for takeoff, you will need to quickly bring the
aircraft up to speed before you can achieve liftoff. Takeoff velocity
in the F-16 is approximately 160 knots, depending mainly on the
loadout weight of your aircraft.
• Set your engines to Full Military Power (100%). Press the
(zero) key to bring up maximum normal thrust. Your F-16 will
start to accelerate down the runway, rapidly picking up speed.
Keep your eye on the Airspeed Indicator at the left of the HUD.
It should reach 160 knots about one-third of the way down
the runway unless you have an exceptionally low or high
loadout weight.
0
• If you need to get in the air quicker, use your afterburners by
pressing .
backspace
• When the Airspeed Indicator reaches 160 knots, you are ready to
“rotate,“ or liftoff from the runway. Pull back gently on the stick,
and keep a little back pressure on. Pitch the nose of your aircraft
up about 20 degrees (use the HUD Pitch Scale to determine your
pitch.) Gain some altitude as soon as possible, just in case the
engine should fail or some other in-flight emergency occurs. You
do not want to be too close to the ground if that happens.
Climb Out to Mission Altitude
Now that you are in the air and headed for mission altitude, it’s
time to clean up the airplane and prepare for the mission.
• As soon as you are airborne, it’s safe to raise your landing gear.
If you selected Manual Landing Gear in the Options, press
G
the key. The small “G“ at the lower left of your HUD should
disappear, indicating that the gear is up. Your landing gear can
not handle the pressures of high speed and become in
danger of tearing off at airspeeds greater than 250 knots.
• At this point, you should reduce thrust to save on fuel. Press the
keyboard key to put your engines on Cruise setting. You will
hear a distinct difference in the sound of the engines.
• Maintain a steady climb, keeping your pitch angle at about 20
degrees. Your Barometric Altimeter, in the box on the right side
of the HUD, gives you the altitude of your aircraft, in feet Above
Sea Level (ASL). Your distance above the actual ground (Above
Ground Level—AGL) is measured by the Radar Altimeter
located in the box below the Barometric Altimeter.
9
49
Page 49

Flying F-16
• When you reach an altitude of about 25,000 feet, level off. You
can do this manually by using the joystick, or you can just press
L
the key. This automatically puts the F-16 in straight and level
flight. You are ready to continue with your mission.
Basic Flight Maneuvers
Your piloting skills will improve with understanding and practice
only. You should take ample time to master each of the Basic
Flight Maneuvers (BFM) listed below. This fundamental
understanding is key to your survival.
Always know where you want to put the plane. You should
make deliberate and controlled movements to get it there.
Turns
The first of the Basic Flight Maneuvers to master is the simple turn.
Smooth, well controlled turns are the hallmark of the expert pilot.
Practice turning until you can do so with precision, and without
wasting time, altitude, or airspeed.
• Start this series of turns from level flight. You will not, of course,
always be in level flight when you initiate a turn, but for this practice session start from straight and level. Use the key to level
your aircraft if you have trouble keeping it stable.
• Note the direction you are flying. Check the compass indicator
in the box at the bottom of your HUD to determine your
compass heading.
• Note your speed and altitude. The boxes at the side of the HUD
will tell you your airspeed and altitude above sea level.
• Now make a 120 degree turn to the left. Push the handle of your
joystick part way to the left, and at the same time pull back on it
slightly. Hold your aircraft in this flight attitude until your compass heading is 120 degrees left of your original direction, then
use the joystick to bring the aircraft back to straight and level on
the new course. Use the key if you have to.
L
L
50
Page 50

Flying F-16
• Check to see if you have lost any speed or altitude in the turn.
Anytime you maneuver in the air you potentially lose energy, so
always keep an eye on your speed and altitude. Lose too much
of either of these and you’ll wind up dead.
• Practice turning. The farther you push the stick to the right or left
during a turn, and the farther back you pull on it, the faster the
turn will be. Practice both sharp and gentle turns. Strive to make
your turns crisp and precise, so that you come out of the turn
facing the direction you want to be going. Make each turn a definite movement, with a clear objective.
• When you have spent some time practicing turns, and you are
ready to go on, check your fuel supply to be certain you have
enough jet fuel to continue. Make sure you have plenty of altitude. You’ll need it for this next session.
The Break Turn
The Break Turn is an emergency combat maneuver. It is very
expensive in terms of energy (you risk losing lots of speed and
altitude). A break turn can let you cut inside the turning radius of
an oncoming missile, or throw off an opponent who is moving in
for a gun kill. Break turns are most effective when performed
suddenly and unexpectedly.
51
• To start practice, get straight and level, then note your speed,
heading, and altitude.
• Break right! Quickly push the stick all the way to the right, and
pull it back all the way. This is actually two movements, but they
should be performed very quickly and precisely. The first
movement, to the right, rolls your aircraft until its wings are
perpendicular to the ground, or even a little farther. Pulling back
on the stick sharply then causes a very rapid turn. Watch the
Pitch Scale on your HUD to determine when you have rolled the
aircraft sufficiently far to the right to make the turn crisp.
• Try to maintain the turn through at least 90 degrees of heading.
Note how much speed and altitude you are losing in this
turn. Never hold a break turn for so long that you are unable
to maneuver (have little speed or altitude) when you come
out of it.
Page 51

• Break turns place extreme G-forces on the plane and pilot, and
can lead to Blackouts from sustained high G force. The F-16’s
flight control computers limit the amount of G the aircraft will
pull (-3.0 G to + 9.0 G), but if you hold a break turn too long and
the screen begins to go dark, relax the joystick to reduce the
tightness of the turn, or use the key to activate your Air
Brakes to reduce the aircraft’s speed through the turn. Don’t forget to deactivate the air brakes when you no longer need them.
You can choose whether you wish to have F-16 simulate blackouts from high-G turns and Redouts from negative-G situations.
Go to Options on the Main Menu, and check
Blackouts/Redouts.
• Practice break turns. As with any aircraft control movement,
strive to make your breaks crisp and precise, with a definite
purpose in mind. When you are good at break turns, you will be
able to come out of one heading in precisely the direction you
want to go. Watch your speed and altitude whenever you are
performing break turns.
B
Roll
A Full Roll consists of a complete rotation of the aircraft around its
longitudinal axis, from level flight to inverted, and back to level. As
with all aerial maneuvers, make your rolls precise and efficient.
Ideally, a roll should not include any forward or backward pressure
on the joystick, and you should come out of the roll headed in
exactly the same direction you were headed when you started it.
Flying F-16
• Make sure you have plenty of altitude and airspeed, then get
into level flight and check your airspeed, heading, and altitude
for reference.
• Roll left. Push the stick to the left, without any forward or backward pressure. Hold the stick to the left as you roll through
inverted flight and back to your original orientation, then level
off. You should be headed in the same direction you were when
you started the roll, and you should not have lost very much
speed or altitude. If you did lose a lot of speed or height, that
probably means you were performing the roll too slowly.
52
Page 52

Flying F-16
Chapter 6
• Practice rolls. Always try to make your motions smooth and definite, with a precise objective in mind. Practice rolling until you
can perform the maneuver without causing too much change in
the direction your aircraft is headed.
Half-Roll
The full roll is not really a very useful maneuver. After all, you wind
up right back where you started. The Half-Roll, on the other hand,
is quite handy. It is an important component of several of the more
complex flight maneuvers, like the Immelmann and the Split-S.
• Get yourself plenty of altitude and airspeed, then check your
compass heading for reference.
• Half-roll your airplane. Push the stick right or left, and hold it in
that position until you are flying inverted. Use the HUD Pitch
Scale to determine when you have achieved inverted flight. Stop
the roll when your wings are level and you are flying upside
down. Properly done, a half-roll should be quick and precise,
without overshooting the roll and having to correct. There
should be little change in the compass heading of the aircraft.
53
• Half-roll again to regain normal flight.
• Practice half-rolls. Try to make them definite and rapid, with no
wasted motion. Note the loss of airspeed and altitude associated with this maneuver, so you will know when it is safe to perform.
• Check your fuel supply before continuing.
Page 53

Chapter 6
HALF LOOP
Loop
The Roll was a motion without any forward or backward pressure
on the stick. The Loop is a maneuver that requires no right or left
pressure. Properly done, a loop will deliver your aircraft back to
where it began, with nearly the same heading, altitude, and airspeed that you had when you initiated the loop.
• Check airspeed, altitude, and heading for reference. You won’t
be able to tell if you have performed the loop properly unless
you know where you started the maneuver.
• Get up a little airspeed by going into a shallow dive.
• Loop your aircraft. Pull back on the stick and hold it back while
the airplane goes through a complete circle, then push the airplane back to level when you approach normal flight attitude
again. Stay aware of where your airplane is during the loop, and
keep a close eye on your altitude and airspeed indicators. Try to
keep the Pitch Scale rungs horizontal through the loop. When
you are coming out of the loop, make your control motions definite and precise. You should be headed the same direction you
were when you began the loop, and your altitude and airspeed
should be pretty much the same as when you started.
Flying F-16
• Practice looping. Try to visualize the movement of your aircraft
through the air so you always know where you are in the loop,
and can come out of the movement easily and under control.
Perform loops at various speeds, and note how much altitude or
speed you lose. You should always know the energy price of any
maneuver you undertake.
• When you are satisfied with your loops, regain any altitude you
may have lost then check your fuel supply before going on.
54
Page 54

Flying F-16
Half-Loop
Like the Roll, the Loop is more useful as a part of a more complex
maneuver than it is by itself. A loop merely returns the aircraft to
its start conditions. A Half-Loop, on the other hand, is a maneuver
you will have to get good at, since it is a vital part of some of the
most effective air combat maneuvers. When performing a halfloop, keep your awareness high, and make all your control
motions quick and precise. You should have a little snap in each
movement.
• As usual, check your altitude, airspeed, and heading before
• Perform a half-loop. Pull back on the stick until you are flying
starting.
inverted, on an opposite course from that with which you began
the maneuver. Use the HUD Pitch Scale rungs to keep aware of
where you are in the turn, and to help keep your wings level
through the movement. Hold yourself in inverted flight for a few
moments. Note how much speed or altitude you have lost by
half-looping.
55
• Practice half-loops. Enter the maneuver at various speeds, and
make your half-loops of different sizes by pulling back softer or
harder on the stick when you are initiating the motion. Stay
under control at all times, and stay aware of where you are in the
maneuver. Practice breaking out of the half-loop quickly and
cleanly, ready for the next movement.
• When you can reliably perform a half-loop, check your fuel supply, and then regain mission altitude to continue.
Page 55

The Immelmann
Half Roll
Half Loop
An Immelmann turn is a combination of a Half-Loop and a HalfRoll. It is an excellent way to simultaneously gain altitude and lose
speed, which can be just what you want when you are getting
ready to enter an air combat engagement. An Immelmann is also
a good way to reverse direction to throw off an enemy or to recover after an attack. When you are good at Immelmanns you can
come out of the maneuver headed any direction you like. As
always, make your control movements quick and precise when
performing this maneuver, and watch your heading, airspeed, and
altitude.
• Check initial heading, airspeed, and altitude.
• Perform a half-loop, then a half-roll, so you wind up flying right
side up, in the opposite direction from your previous course and
at a higher altitude. Start the half-loop by picking up a little
speed, then half-loop into inverted flight. When inverted, and
flying on the opposite course, half-roll the aircraft back upright.
Flying F-16
• Practice Immelmann turns. Concentrate on making your control
movements with authority, putting the aircraft exactly where you
want it to go. Also practice coming out of the turn. When you are
half-rolling out of an Immelmann you can break the half-roll at
any point, or hold it longer than normal, so that you come out of
the Immelmann on any course you desire. The main idea of the
Immelmann turn is that you will make a significant course
change, and wind up at a higher altitude.
• When you are good at Immelmanns, check your fuel supply, and
then regain mission altitude to continue.
56
Page 56

Flying F-16
The Split-S
A Split-S is the opposite of an Immelmann. First you half-roll to the
inverted position, then you pull back on the stick and do a
half-loop. You wind up with a lower altitude and greater speed,
headed in the opposite direction to your original line of flight. A
Split-S is a good way to increase your energy state.
Half Loop
• Check your altitude, airspeed, and heading.
• Do a Split-S. Half-roll to the inverted position, then pull back on
the stick and do a half-loop until you are right side up and flying
level again. Keep an eye on the HUD Pitch Scale rungs to stay
informed about your attitude, and stay aware of how much
altitude you are losing. You should wind up on a course close to
the opposite of the one with which you started.
• Practice the split-s. If you find that you are losing a lot of altitude
with this maneuver, try slowing down before you initiate the
movement, or deploy your air brakes (use the key) to reduce
your speed through the half-loop. Don’t forget to retract the air
brakes when you have finished the turn. With practice, you
should be able to come out of a Split-S on any desired course,
so pay attention to your heading as you come out of the
maneuver, and leave the half-loop whenever you need to in
order to assume the course you want.
• Keep an eye on your fuel supply. If you still have plenty after
getting good at the Split-S, continue with flight practice.
Otherwise, turn to the section on landing the F-16 (below) to
return to base for more fuel.
Half Roll
B
57
Page 57

Flying F-16
Landing the Aircraft
When you land your F-16 during missions, the ground crew will
re-arm and refuel you. They will not have time, however, to fix
any damages you may have incurred. In this simulation, simply
bringing your F-16 to a successful stop on the landing strip will
refresh your fuel and ordnance. Although most missions do not
require that you land the aircraft, you will receive a significant
mission score bonus if you do. It is generally a good idea to bring
the aircraft home after finishing your mission.
When you are ready to land, press the key. This will activate the
Autopilot and guide your aircraft directly to the Initial Approach
Steerpoint. At this point the navigation system updates the
autopilot with the next Steerpoint, the Final Approach Steerpoint.
From the Final Approach Steerpoint you proceed directly to the
runway. Going through the Initial and Final Approach Steerpoints
keeps you clear of any other traffic that may be flying near the
runway, and gives you a chance to get your F-16 set for landing.
Be careful about using the autopilot while there are still enemies
active in the area. The autopilot is only capable of directing the
aircraft to preprogrammed Steerpoints; it is not designed to avoid
SAMs and enemy fighters while on route. Take manual control of
the plane if there are still enemies around. Cycle through your
Steerpoints with the key until the Initial Approach Steerpoint
appears, then use the Command Steering Cue in the center of the
HUD to help you steer to the direction you need to go.
N
H
To help keep aircraft from running into one another, the air traffic
controllers at an airbase maintain an air traffic pattern in the sky,
including corridors through which each aircraft is to fly. All aircraft
taking off or landing must travel in the same direction, so before
you leave a base you should note the direction that traffic flows
around it. Then when you are returning home you will know ahead
of time from which direction you will want to approach the runway.
Your Instrument Landing System (ILS) display on your HUD can be
of significant assistance in landing, helping you keep the proper
altitude and aligning you with the runway. The ILS only functions if
you approach the runway from the proper direction. If you attempt
to land against the flow of traffic, the ILS will not show up on your
HUD.
Landing can be the most dangerous part of controlling an aircraft.
You are flying low and slow, with little margin to correct an error
should something go wrong. Pay attention to the landing process,
and keep focused on what you are doing.
58
Page 58

Flying F-16
Instrument Landing System
The F-16 has an Instrument Landing System (ILS), which provides a
means of landing the aircraft even when you can’t see the runway.
The ILS has several components, including a Glideslope Bar, show-
ing you where your glide actually is,
and a Localizer to get you oriented
properly with the runway. The ILS
activates when you are less than six
nautical miles from the runway, and
at an altitude of less than 5,000 feet
AGL (Above Ground Level) with
gear down.
1) Glideslope Bar—The horizontal
red line on the HUD is the
Glideslope Bar. When you are
approaching the runway at the proper altitude this line will be
centered.
2) Localizer—The solid red vertical arrow is the Localizer. Its job is
to keep you oriented along the runway centerline. If you are
pointed to the left of the runway centerline the Localizer will
point to the right side of the HUD, while if you are too far right,
the Localizer line points left. When you are pointed correctly the
Localizer arrow points directly down.
59
3) Angle of Attack Indicator—Displays your current Angle of
Attack.
When in ILS mode the HUD also changes some of the other
parts of its normal display. It now shows the Gear Lowering
Speed next to the Airspeed Indicator box at the left of the HUD,
and the Desired Heading just above the Altimeter box on the
right. Press to lower your landing gear and extend flaps
when your airspeed falls below the Gear Lowering Speed, and
keep pointed to the Desired Heading.
G
Page 59

Flying F-16
At the Initial Approach Steerpoint
Your Initial Approach Steerpoint is usually about 15 miles from the
runway. Its purpose is to get you to the vicinity of the runway, yet
still leave you time to get set for landing. Approach the Steerpoint
at an altitude of about 5000 feet AGL, with a speed of around 400
knots. Well before you reach the Steerpoint you should reduce the
throttle to 60% to slow yourself down gradually. It is better to allow
your airspeed and energy to bleed off slowly rather than have to
use your airbrake to reduce speed.
At the Final Approach Steerpoint
The Final Approach Steerpoint is normally about five or six miles
from the runway. By the time you reach this Steerpoint you should
be at an altitude of around 1500 feet AGL, with an airspeed no
greater than 250 knots. Your main task now is aligning yourself
properly with the runway.
Locate the centerline of the runway and use your stick to bring the
nose of the aircraft into alignment with it. Avoid sharp banks and
sudden turns. Gradually reduce both your altitude and airspeed.
When you are aligned with the runway centerline, check your
airspeed to make sure that you are at about 160 knots. This gives
you a little airspeed to play with if anything goes wrong. Press the
G
key to lower the landing gear. You will notice a distinct drop in
airspeed as the landing gear deploys and locks into place.
Now you are on Final Approach. Perform the following checklist to
make certain that your aircraft is properly configured for landing,
and that the runway is clear for your use:
• Check to see that the traffic pattern is clear.
• Check to see that your wings are level. Use the Artificial Horizon
Indicator if necessary.
• Check to see that your landing gear is extended. The flaps on
the wings of your F-16 will extend with the landing gear, providing you with extra lift. If you try to land without lowering your
landing gear, you will receive an audio warning.
• Check your airspeed. It should be between 150 and 175 knots.
Do not extend your airbrakes if your speed is within this range.
• Check the HUD Pitch Scale. Your pitch angle should be about 10
degrees.
• Check your HUD to confirm that the ILS is engaged. It will be vis-
ible on the HUD when you are approaching the runway from the
proper direction and your gear is down.
60
Page 60

Flying F-16
Touchdown
Keep your aircraft aligned with the runway centerline. Your landing
gear should straddle the centerline on touchdown. Continue to
lose altitude as you near the runway, but keep your pitch angle up.
You do not want to dive into the runway. Time your touchdown so
that it occurs in the first 1/3 of the runway. This will give you plenty of braking distance, or room to take off again if necessary.
Just before touchdown, pitch the nose of your airplane up slightly. This maneuver is known as a “flare.“ Use a flare to make sure
that your rear wheels are always the first to make contact with the
ground. If your nosewheel hits the ground first it can cause the F16 to nose into the ground and crash.
When your wheels touch down you will hear the squeal of the tires.
Apply brakes with the key to bring the aircraft to a gradual
halt. Once the aircraft has completely stopped, wait to be rearmed to takeoff again or press the key to finish the mission
and start the post-mission performance analysis. You are home,
and safe. Congratulations!
B
E
Stalls
A Stall can happen any time a wing surface can no longer provide
enough lift to keep an airplane flying. Low speeds and high Angles
of Attack are the most common causes of stalls. The most dangerous time to experience a stall is when you are flying low and
slow, like when you are landing.
The F-16’s stall speed in any given situation depends on a number
of factors, such as the weight of the aircraft, its speed, the angle of
attack of the wings, and whether or not it has its flaps and gear
extended. In general, you should consider 120 knots too slow a
speed for safe flight at low altitudes. To avoid stalls when landing,
keep your airspeed above 140 knots and your angle of attack low.
If you do manage to stall the F-16, immediately drop your nose to
reduce the angle of attack, raise the landing gear, and hit the afterburner (the key) to maximize engine thrust. Keep your
wings level. As your airspeed increases, you will get more lift from
the wings, which will allow you to fly out of the stall.
backspace
61
Page 61

Air Combat
Chapter 7
Air Combat
As the world’s premier multirole fighter plane, the F-16 has the
capability of taking on a number of different types of missions.
Proven reliable by experience, it is used for air defense, sea
defense, battlefield support, reconnaissance and precision bombings. But despite its highly configurable payload, the F-16 is no
better than the pilot flying it. Relying on advanced radar warning
and quick reflexes, the F-16 pilot must be up to the challenge of
combat.
Radars
The primary means by which modern aircraft detect and track one
another is by radar. Mounted in the nose of the F-16 is the APG-68
Westinghouse multimode radar. The APG-68 can detect any
potential target to the front or sides of the aircraft, to a range of
80 nautical miles in Situational Awareness Mode, or up to 40
nautical miles in combat mode. With the APG-68, the F-16 can
create a “shootlist“ of the multiple targets, allowing the pilot to
target and engage all of them simultaneously. If you turn off your
radar, you will lose your shootlist, unless there is an AWACS on station to support you.
Many F-16 missions provide the player with an AWACS (Airborne
Warning and Control System) aircraft, usually a modified Boeing
E-767 with a Westinghouse AN/APY-2 radar mounted on top of
the fuselage. The AWACS automatically downloads radar data to
your airplane’s computer system, giving you excellent radar
coverage without having to turn on the F-16’s internal radar set.
The AWACS provides 360 degree coverage around your F-16, and
can reach more than 40 miles from your aircraft. If your mission
provides you with an AWACS, guard it well. It is a very useful tool,
and if you let it get shot down you will be unable to take
advantage of its radar coverage.
Unfortunately, the radar signal that lets you detect enemy objects
in the air also announces your presence to everyone in the area.
You can see some of the effects of turning on the radar by
watching the radar coverage on your Situational Awareness Mode
MFD. When you turn your APG-68 radar on, the diameter of the
62
Page 62

Air Combat
radar coverage circles increases dramatically, reflecting the
greater ease with which the enemy can now detect your aircraft.
Fortunately, the radar signal from an AWACS does not give away
the location of the F-16.
Radar is not the only method of detecting and tracking targets.
Your AIM-9M Sidewinder heat-seeking missile, for example, relies
on infrared radiation to track and kill its targets, so it doesn’t need
any kind of radar signal to be effective. Similarly, when you are in
close combat, at gun ranges, your eyes will often be a better target tracking device than radar. You should also be aware that
some of the enemy fighters you will encounter are equipped with
infrared target tracking systems. These systems rely on infrared
radiation to detect and track your F-16, and do not require the aircraft to broadcast a signal. You will therefore be unable to tell
when an enemy fighter is tracking you with this device. Your enemies also have heat-seeking missiles, similar to the Sidewinder.
Air-to-Air Weapons
The F-16 has three different air-to-air weapons systems, each with
unique characteristics, designed to engage targets under different
conditions. You can fire at targets up to 25 nautical miles away with
your AMRAAM radar-guided missile, engage enemies at up to 5
nautical miles with the Sidewinder heat-seeking missile, or close to
under 2 miles and blast away with the M61A1 six-barreled 20mm
cannon.
63
AIM-120 AMRAAM
Type: Air to Air Missile
HUD Mode: MRM
Guidance: Radar
Range: 25 nautical miles
Weight: 332 pounds
The AIM-120 AMRAAM (Advanced Medium Range Air to Air
Missile) is a high-supersonic, day/night/all weather Beyond Visual
Range (BVR), fire-and-forget air-to-air missile. Although it relies on
the F-16’s internal APG-68 radar to acquire targets, it can track
them all on its own. Shortly after launch, an independent radar system in the missile’s nose takes over the tracking task and guides
the missile to its target, leaving the pilot free to concentrate on
other tasks, and other targets. Housed in a light-weight structure
of steel and titanium, the AMRAAM contains a 40-pound highexplosive warhead. The missile has an effective range of over 25
nautical miles and can achieve a speed of Mach 4.
Page 63
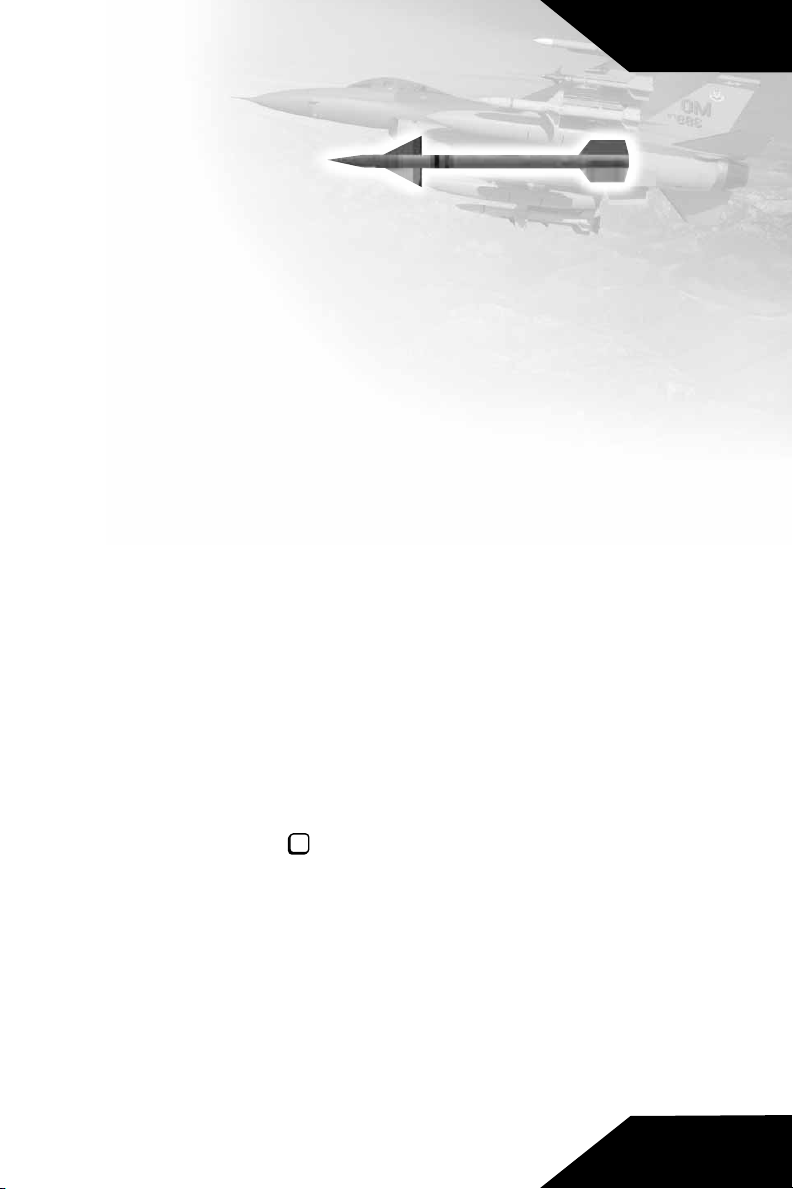
Air Combat
AIM-9M Sidewinder
Type: Air to Air Missile
HUD Mode: SRM
Guidance: Heat
Range: 5 nautical miles
Weight: 188 pounds
The Aerial Intercept Missile Nine, AIM-9M, is nicknamed the
Sidewinder due to the peculiar back-and-forth motion it makes
when tracking a target. The infrared guidance head enables the
missile to hone on the target aircraft’s engine exhaust. Pilots
frequently comment that the missile will “growl“ while it is seeking
to find a target, then emit a steady tone once one is acquired. The
AIM-9M is an “all-aspect“ missile, meaning that it can track a
target from any angle. Because the missile does not rely on the
F-16 radar, the pilot is free to leave the area or take evasive action
while the missile guides itself to the target. Less expensive than
other types of guidance systems, the infrared seeker can be used
in day or night.
M61A1 20mm Cannon
Type: 6 barreled Gatling Cannon
Range: under 2 nautical miles
The Lockheed-Martin GE M61A1 20mm Cannon provides an average of 6,000 rounds per minute with six rotating barrels. The rate
of fire is so fast that it sounds like a raspy hum. The M61A1 is located at the portside of the fuselage and fed by the ammo drum
located just behind the cockpit. Ammunition is loaded through an
access door on the bottom of the starboard wing, next to the air
intake. This weapon is extremely valuable in close range dogfighting, where it is too close to properly engage missiles.
To engage in gun combat you must first select the M61A1 20mm
cannon by pressing the key. The M61A1 has a maximum range
of approximately 2 nautical miles, but for effective shooting you
should close to under 1 nautical mile. The ammo drum has a 511round capacity.
2
64
Page 64

Air Combat
Air-to-Surface Weapons
The F-16 has a variety of Air-to-Surface missiles and bombs to
choose from, in fact more so than any other type of jet fighter.
AGM-65B Maverick
Type: Air to Ground Missile
HUD Mode: EO
Guidance: Television
Range: 5 nautical miles
Weight: 597 pounds
The AGM-65 Maverick is an electro-optically guided 130lb
warhead missile. The pilot may launch the missile and search for a
target beyond visual range with a television guidance system. The
Mavericks are primarily used in the Close Air Support
missions against hardened targets such as tanks.
AGM-65G Maverick
Type: Air to Ground Missile
HUD Mode: EO
Guidance: Thermal Imaging
Range: 12 nautical miles
Weight: 664 pounds
Unlike the AGM-65B, this missile employs an inertial infrared
guidance system to grant it a considerable range advantage. In
addition, it is capped with a powerful 300lb warhead, a digital
autopilot and the TX-633 reduced smoke rocket motor.
65
AGM-84A Harpoon
Type: Anti-Ship Missile
HUD Mode: ASM
Guidance: Radar
Range: 29 nautical miles
Weight: 1135 pounds
Widely used by NATO, the AGM-84A Harpoon is an
all-weather, over-the-horizon, anti-ship missile. The radar guided,
sea-skimming cruise trajectory can effectively deliver the 488 lb.
proximity warhead to its target. Although the turbojet engine
is not capable of the supersonic speeds common in rocket
propulsion, what it lacks in speed it more than makes up for
in range. When directed at a sea target the range will
significantly increase.
Page 65

Air Combat
AGM-88 HARM
Type: Anti-radar Missile
HUD Mode: ARM
Guidance: Passive Radar
Range: 24 nautical miles
Weight: 793 pounds
The AGM-88 HARM (High Speed Anti-Radiation Missile) is an
improvement on the radar honing AGM-45 Shrike, especially in
attacking Surface to Air Missile (SAM) Sites. To strike without
warning, the propulsion system of the HARM is capable of Mach 3
with a far range of 25 nautical miles. Unlike the Shrike, the HARM
will resort to a backup navigation system in the event of the target
disengaging its radar. The F-16C is currently the only aircraft
capable of housing the HARM.
Mk 20 Rockeye Cluster Bomb
Type: Anti-Tank Cluster Bomb
HUD Mode: CCIP
Guidance: None
Range: 7 nautical miles
Weight: 908 pounds
Highly potent against tank formations, ground troops and small
buildings, the MK 20 Rockeye is a superb unguided, free-fall
bomb. When it is deployed, it drops some distance, then bursts
open to dispense 247 dual-purpose armor-piercing shapedcharge bomblets, each of which produces its own small explosion.
The Mk 20 is most effective when released from an altitude of a
few hundred feet: this gives the bomblets time to spread over a
specific area.
66
Page 66

Air Combat
GBU LGB
Type: Laser Guided Bomb
HUD Mode: EO
Guidance: Semi-Active Laser
Range: 7 nautical miles
Weight: 500-2004 pounds
Considered both inexpensive and competent, the GBU series consists of laser guidance heads attached to low drag, general-purpose Mk bombs. The one-inch thick steel case fragments when
the nose to tail fuze ignites the explosive Tritonal 80/20 upon
impact. At 500 lb., the GBU-12 Mk82 is primarily used against
tanks and ground force targets. The GBU-16 1000 lb. Mk83 bomb
can be utilized against small to medium sized buildings and storage tanks. As the F-16’s largest bomb, the GBU-10 2000 lb. Mk84
destroys large targets such as factories, bridges, power plants, and
hardened bunkers.
JDAM Bombs
Type: Joint Direct Attack Munition
HUD Mode: CCIP
Guidance: GPS
Range: 7 nautical miles
Weight: 500-2004 pounds
The Joint Direct Attack Munition (JDAM) is a superior guidance
system attached to the Mk 82 500-pound bomb, Mk 83 1000pound bomb or the Mk 84 2000-pound bomb. The all-weather
guidance system for the JDAM unit relies on internal sensors and
gyroscopes and Global Positioning System (GPS) data, transmitted from a satellite. The JDAM flight system uses this data to move
control surfaces on the bomb, allowing it to glide to its target without input from the F-16. The JDAM can achieve impressive accuracy with this system, usually planting the bomb within three
meters of the computed impact point.
67
Page 67

Chapter 8
Strategy
and Tactics
To survive the perils of air combat, a good pilot must rely on
various strategies and tactics. This section will go over some of the
fundamental issues regarding flight altitude, speed, avoiding
detection and incoming missiles as well as working with
teammates. However, textbooks can’t teach you everything. Ace
fighter pilots learn from experience which tactics work best
for them.
Altitude
The F-16 is well suited for high altitude flying.
A good deal of altitude gives you the ability to maneuver at will,
comfortable in the knowledge that there is a large reserve of
empty air below. Without having to worry about close terrain and
sudden hills, you will have more time to process information
displayed on your multifunction displays and cockpit instruments.
An aircraft at high altitude can see farther and detect targets at
greater ranges. A normal F-16 mission altitude should be between
20,000-30,000 feet.
Strategy
Flying at a high altitude gives an aircraft a defensive advantage. It
can see enemy missiles coming from far away, and can maneuver
to avoid them. Missiles climbing to high altitude will take longer to
arrive than those fired at targets closer to their own level, and will
be moving more slowly, making them even easier to detect and
avoid. Many surface-to-air missiles (SAMs) cannot reach aircraft
flying at great heights (over 35,000 feet). You will be able to cruise
over certain SAM sites with impunity, so long as you stay high in
the air. However, that invulnerability can quickly disappear in a
dogfight. A few break turns and a Split-S or two can seriously
compromise this high altitude leverage.
High altitude flight provides offensive advantages as well. Altitude
provides a convenient reserve of energy, which you can convert to
speed at any time. Like missiles, enemy aircraft must approach
“uphill,“ slowing their speed. This means enemy targets will spend
68
Page 68

Strategy
longer time inside the F-16’s missile radius. A place where the
F-16 can strike them, and they cannot hit back.
High altitude is the preferred place from which to drop a JDAM
bomb. The JDAM does not require any emissions from its carrying
aircraft to locate a target and therefore is less likely to compromise
the F-16’s position. Dropping a JDAM from high altitude also gives
the weapon more range and striking power, since it relies on its
gliding ability to reach the target location. The higher the bomb is
at launch, the farther it will be able to glide before impact, and the
faster it will be traveling when it hits.
Speed
Your best speed is around 400 knots. Flying slow makes it
harder to avoid enemies and their missiles. Flying faster uses
more fuel but can grant additional range to bombs.
One of the most important factors to consider when entering
an engagement is the airspeed of your F-16. The velocity at
which you are flying has tremendous effect on many of the basic
maneuvers necessary during combat. The speed at which your
F-16 can instantaneously achieve a 9g turn is called its “corner
velocity“. For most flight configurations that speed will probably
be somewhere near 400 knots, or a little more.
Low speed maneuvers quickly compromise both velocity and
altitude. In a normal aircraft, impending loss of control would
signal a dangerous flight condition. In the F-16 you will not lose
control, and so may fail to notice that, for example, your airspeed
is down to around 100 knots, and that your aircraft is actually
falling through the air rather than flying. This is an especially
dangerous situation when you are in the middle of air combat, and
might not have time to make regular speed and altitude checks.
Since combat maneuvers usually cause loss of speed and altitude,
you can suddenly find yourself in the undesirable position of going
very slow at a low altitude. Flying too slowly can interfere with your
ability to dodge missiles, because you cannot physically move the
airplane fast enough to avoid the missile.
69
In general, the faster you fly, the better, or as some fighter pilots
say, “Speed is life.“ There are a few disadvantages of flying too
fast. For one, you go through fuel more rapidly. At higher
velocities your turns will be much larger and your breaks less crisp.
But the biggest danger is exceeding safe speeds. As you
approach your Vmax (Velocity maximum), you will begin to
experience turbulence. Your F-16 will explode if subjected to
speeds over 800 knots.
Page 69

One tactical situation that calls for high speeds is bomb delivery.
The faster you are flying when you release your bombs the further
they can travel, and the more kinetic energy they will have when
they strike. If possible, always drop your JDAMs while at high
speeds. You will be able to do so farther from the target’s defenses, and your egress will be quicker.
To get the most out of your airplane, practice maneuvering it at
various speeds, until you know what kind of response you
can expect.
Emission Control (EMCON)
Radar helps you locate enemies, but also compromises your
position. Don’t always leave it on, use it when needed.
When your radar is turned on you increase the chances that an
enemy will be able to spot your aircraft. When your radar is turned
off you cannot acquire targets for your best missiles, and, if there
is no AWACS available, you may not even be able to spot other
aircraft until they get too close. Herein lies the dilemma of when
to use your radar and when to leave it off.
The solution lies in common sense. Use your radar when you need
to, and turn it off when you don’t. You will need your radar to
acquire targets for your AMRAAM, so don’t be afraid to crank it up
when you have enemy aircraft inside the AMRAAM range envelope. After you have fired your missiles and are certain the
AMRAAMs are active, turn the radar off. If you are flying with
AWACS support, this may be the only time you need to use
your radar.
Strategy
If you do not have the support of an AWACS aircraft, your internal
radar is your only early warning and target detection system, so
you will have to use it less sparingly than you would if the AWACS
were present. Just don’t get carried away. Use the radar
deliberately to perform the tasks for which it was designed,
then turn it off until you need it again. When flying a combat
mission, turn on the radar every once in a while and make a 360
degree turn, keeping the nose of the aircraft pitched downward
a bit while you turn. When you have scanned all around your
location, turn off the radar and resume course, or take steps to
deal with whatever your radar has turned up.
Wingman Tactics
Remember to use your Wingman during missions. He’s there
to help you.
You’re not alone up there. Your wingman is perhaps your most
70
Page 70

Strategy
valuable asset in combat situations; he can double your firepower
and watch your back. Don’t let him go soft by just tagging along
behind you, put him to the test. Your wingman should always have
something important to do.
One of the most useful things you can instruct your wingman to do
is cover your six. Your wingman will engage any object that targets
you. When you are in the thick of things, it is often reassuring to
know someone is looking out for potential threats you may have
missed. Your Wingman will vigilantly look for enemies attempting
to sneak up on you. As soon as the enemy turns on targeting radar,
your wingman will attack, hopefully forcing the enemy to deal with
the new threat rather than maintain the attack on you.
You can also use your wingman as a handy source of ordnance. By
ordering your wingman to engage your target, you can keep target lock on an enemy and have your wingman launch the missiles,
saving your own ammo for later in the mission. This can be especially useful on penetration missions, where you have to fight your
way to an objective. Use your wingman to help punch you through
the danger zones.
Don’t forget that you can order your wingman to head back to
base and perform a Combat Air Patrol over it. This is especially
useful for intercept missions, where you are trying to stop an
enemy force from penetrating and attacking your base. While you
fly out and try to engage the enemy before they get too close,
your wingman can stay home and deal with any enemy aircraft that
manage to get by you. Having a wingman covering the base is
extremely beneficial when you are trying to land an empty or
injured aircraft.
71
Missile Avoidance
The best way to avoid a missile is to stay out of your enemy’s
firing envelope. Your best strategy is to get behind your
target as much as possible.
The bulk of the air-to-air combat in which you will engage will be
missile combat. Avoiding enemy missiles is therefore an
important combat tactic. The better you are at avoiding incoming
missiles, the longer you will stay in the air.
The first step in avoiding a missile is detecting it. Your Threat
Warning Indicator will track incoming missiles for you, giving you
the opportunity to set yourself up to avoid them. Check this
display often. The Situational Awareness Mode MFD also shows
the tracks of missiles fired at you.
Page 71

Your threat warning system will audibly warn you with a series of
beeps when your aircraft has been illuminated by someone else’s
radar systems. As soon as you are warned of an incoming missile,
execute a break turn, release chaff and flares and try to find your
attacker. Chaff tries to confuse radar locks, while Flares seek to
decoy heat seeking missiles. Even if you don’t know exactly where
the missile is, it’s a good bet that it knows where you are, so
change things as rapidly as you can by maneuvering.
If you have a missile incoming from fairly long range (more than
five or six miles), you can be sure that it is radar guided. Unlike the
AMRAAMs you carry, most radar missiles require that the launching aircraft maintain a radar lock on the target until impact. It may
therefore be possible to move your aircraft out of the radar coverage of the firing aircraft, which will break target lock and force the
missile to go ballistic (unguided). Try to gain a position behind the
aircraft that fired at you. This should force the enemy radar to
lose contact.
If you cannot break the target lock of the enemy missile with chaff,
with flares, or by maneuvering your aircraft out of the radar envelope of your attacker, you will have to try to turn inside it. To do
this, use the missile’s speed against it. First, maneuver to put the
missile on your beam, approaching from the side. This will force
the missile to keep maneuvering to track you, wasting its fuel, and
making it overcome losses in speed and altitude due to the
maneuvers. Get yourself as close to your corner velocity as you
can, so you can make a very sharp turn when the time comes.
Finally, when the missile is very close, perform a break turn into the
missile. You are trying to turn inside the missile’s turn radius, so it
will not be able to follow you through the maneuver. Do not break
away from the missile. That just gives it additional time to find you,
and keeps you inside its maneuver envelope. Make the break
three-dimensional (change altitude as well as direction) to force
the missile into an even more extreme situation. With any luck the
missile will miss, and you will still be flying.
Strategy
72
Page 72
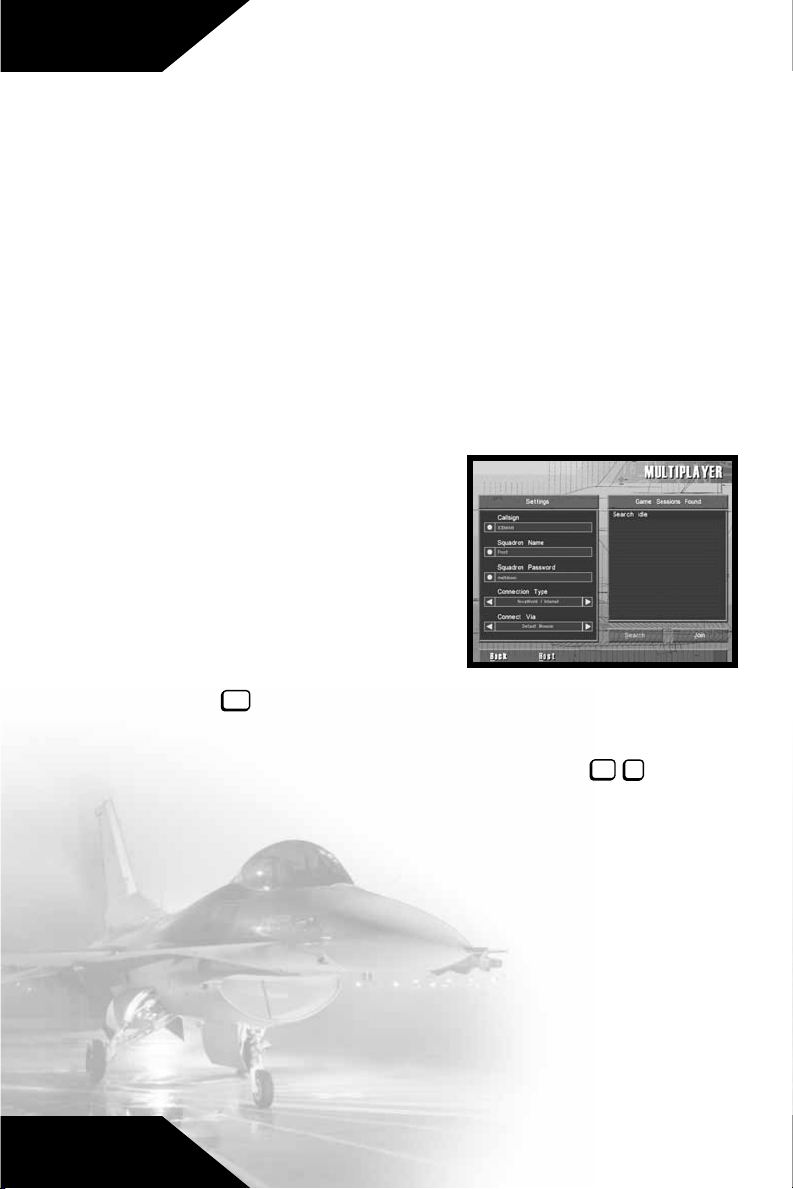
Multiplayer
Chapter 9
Multiplayer
There are many options to consider when selecting to play a
Multiplayer game. You will need to decide whether you will Host
the game or whether you will Join someone else’s game. You can
join a multiplayer game at any time, and leave whenever you wish.
That means unless you are the Host, you do not have to be
present at the initiation of an F-16 game to join in, and if you leave
in the middle of a mission, the other players can continue to play
without you.
To begin a multiplayer game session, first select Multiplayer from
the Main Menu. Select Host to go
to the Host Game screen
(described later in this chapter).
Choose Back to return to the
Main Menu.
73
Click on the Callsign box at the top
of the settings box to type in the
callsign/handle of your pilot and
enter
press . From the Multiplayer page, you may type in the
Squadron name to be part of a team during a deathmatch. A
squadron is a group of players who fly together, cooperating to
shift
reach common goals. They can also chat privately ( ) while
in the game. If your squadron has a Password, click on the
Squadron Password box button and enter the password. Under
this, you can choose a Connection Type. Click on the arrows in
the Connection Type box to cycle through the five possible
connection types:
T
Connection Types
NovaWorld
Compete with up to 128 opponents per game in Integrated Battle
Space on NovaWorld. The NovaLogic servers automatically host
the games located on its servers. NovaWorld can be accessed
through your Internet browser by selecting Default Browser.
Select Mini Browser in the Connect Via box if your web browser
Page 73

Multiplayer
cannot open NovaWorld (for example certain versions of AOL do
not support NovaWorld). The mini-browser has less functionality
than most browsers (lacking the ability to use our JAVA based chat
room for example). However, its small size and single purpose
dedication allows it to load quicker than more powerful browsers.
You should use the Mini Browser if you have set your browser so
that it won’t accept “cookies“. Select Join to enter NovaWorld.
NovaLogic is dedicated to periodically updating NovaWorld with
new features and enhancements. Every time you log onto
NovaWorld, it will automatically check to see if you have the latest
software and prepare an update, if needed.
LAN/IPX
Up to 16 players can simultaneously play over a LAN/IPX network.
Select Host to start a game from
your computer or Search to find
a game. Once you have located
a game to play, press Join. You
will need to type in the correct
password if the Host has opted to
password protect the game.
Internet
Up to 16 players can simultaneously play over an Internet connection
without being part of NovaWorld.
Select Host to start a game from
your computer. If you wish to find a
game, you must first type in the IP
Address of the host’s computer in
the Internet Address box, then hit
Search to find the game. Once you
have located a game to play, press Join. You will need to type in
the correct password if the Host has opted to password protect
the game.
74
Page 74

Multiplayer
Serial Cable
You can play F-16 Multirole Fighter
against a single human opponent
by using a Serial Cable (common-
ly referred to as a “null-modem
cable“) to direct connect your two
computers. You will need to tell
the program which Com Port you
will be using. Select Host to start a
game from your
computer or Search to find a
game. Once you have located a game to play, press Join.
number of the host in the Phone # box, then press Join.
Modem
Two players can play F-16
Multirole Fighter over a Modem
connection. If you wish to host the
game, simply press the Host
button to go to the next screen.
Your computer will then wait for
the other player to call in. If you
intend to join a game on someone
else’s computer, type in the phone
75
Multiplayer Game Types
There are two types of multiplayer games in which you may participate. Deathmatch games are you and your F-16 against the
world, where the only object is to down as many of your fellow
players as possible. RAW games require the participants to work
together to accomplish common mission goals. The Host of a
given game selects which type it will be.
Deathmatch Games
A Deathmatch game is just that, a fight to the finish, with every
pilot seeking only to kill or be killed. A Deathmatch game differs
from a normal F-16 mission in several respects:
• All players start on different airfields, typically inside an
imaginary circle about 80 miles across.
• All players are invulnerable for 45 seconds after take-off.
• There are no Ground Targets in Deathmatch play.
Page 75

Multiplayer
• You can rearm and refuel your F-16 by landing it at any runway.
Unlike the single player version, ground crews will repair all
damage. You must bring the aircraft to a complete stop to
have this take effect.
• You cannot Pause the game.
• You cannot Eject from a crippled airplane. Hit to restart at
base.
• If you are killed in any way, the game removes one kill from
your total.
• You will not have a Wingman.
enter
RAW
The object of a RAW game is to bomb the opposing team’s base
completely. When you start the game, it will ask you to select
which side to join and whether you would like your loadout to be
that of a bomber or a fighter. Most of the rules are the same as
with Deathmatch, except:
• Each team is given an AWACS to provide radar coverage.
Destroying the other teams AWACS is a valuable tactic.
• The players are responsible for flying CAP around their base,
protecting their AWACS, escorting bombers, and intercepting
enemy forces.
Hosting a Game
To host a multiplayer F-16
Multirole Fighter game, press the
Host button at the bottom of the
Multiplayer screen. This brings up
the Host Options. If you are the
host, other players will have to Join
your game. You have a number of
choices to make:
• Game Name—Enter a unique
name to identify your game.
When other player’s search for your game, they will see this
name in the Sessions on their Multiplayer screen.
• Session Password—If you wish to restrict access to your game,
enter a Session Password here. Only players who know the
password will be able to Join a password-protected game. You
do not have to require a password. Leave this box empty if you
do not want players to have to enter a password to join your
game.
76
Page 76

Multiplayer
• Server Type—Choose Serve Only or Serve and Play. If you
• Game Type—Select a Deathmatch or RAW game type for this
• Status—This box tells you if your
• Max. Players—Use the arrow
• Blackouts—Choose the Blackouts/Redouts option to be either
will be playing in games you host on your computer, choose
Serve and Play. The host should always be the person with the
fastest computer setup. If you will have a dedicated server for
hosting the game, choose Serve Only. The game will play
faster with a separate unused computer acting as the server.
Once you hit Accept, you will see a server only screen with
various relevant information. Hit to exit this screen.
game. See Multiplayer Game Types earlier in this chapter for
a description of these choices.
other players are logged in.
buttons to increase or decrease
the Maximum Number of
Players allowed to Join this
game. This varies depending on
the type of connection
you establish.
Enabled or Disabled for all players, regardless of their
personal option selection.
esc
77
• Spin Only Deaths—For Deathmatch games only. Choose Yes
or No. Normally, pilots shot down in a Deathmatch game find
themselves back on a random runway, ready to get back into
the fray. If you select Yes, aircraft hit in the air will go into a
spin for a few seconds, then revert to player control, all
damage repaired. However these aircraft will still be spinning,
so you’ll have to pull out of the spin manually. Choosing No
here puts pilots back on the ground when they are shot down,
with a brand new airplane.
• GPS Guidance—For RAW games only. Select disable if you
want to turn off the targeting box on the CCIP HUD mode.
• Time of Day—Pick the Time of Day at which you want this
mission to be flown.
• Region—Cycle through the list of Regions to play in, such as
desert and glacial.
• Terrain Sequence—Select Cycle Regions to have the comput-
er switch to the next region on the region list when the Terrain
Changes. Cycle Times will change only the Time of Day. With
Page 77

Random selected either the Region or the Time of Day will
shift randomly during Terrain Changes.
• Rounds Until Terrain Change—After the goal of the current
round is met, the host will automatically start a new round.
Select how many rounds will be played before the terrain
changes. When it changes, it will do so according to the order
you have selected in Terrain Sequence.
• Kills per Round—For Deathmatch games only. Choose how
many kills a player has to achieve to end the current round.
When any player reaches this total, the round will end.
• Bombers get SRM—For RAW games only. Allows planes con-
figured to be bombers to also carry a light load of air-to-air
missiles for self-protection.
• SRMs—If you have selected a Deathmatch game, choose the
number of short ranged missiles each aircraft in the game will
carry. This choice is not available in RAW games.
• MRMs—In Deathmatch games, you must choose how many
medium ranged missiles each plane will carry. This choice is
not available in RAW games.
• Side Selection—For RAW games only. Enabled allows players
to choose which side of the battle they fight for. Disabled
means that the computer will assign teams.
Multiplayer
Click on Accept to start the game with your computer as the
Host. You will find yourself on the end of a runway, ready to get
into the air. Other players will Join your game whenever they
wish. They do not have to sign up at the beginning of the game.
They can also leave your game at any time, without affecting the
other players.
Integrated Battle Space
Integrated Battle Space is a revolutionary multiplayer gaming
environment where you play F-16 games with people who own
compatible products by NovaLogic, such as MiG-29 Fulcrum
and F-22™Raptor™(with purchased update). This not only adds
an exciting challenge to your gaming experience, but also allows
you to experience the strategic advantages each aircraft has over
the others in a true combat situation. Additional products will be
announced on NovaWorld and the NovaLogic Website
(www.novalogic.com).
™
78
Page 78

Glossary
Glossary
Glossary
A
AAA- Anti-Aircraft Artillery. Pronounced “triple-A,“ this term
refers to antiaircraft guns.
AAM- Air-to-Air Missile. A missile designed to be fired from an
airplane, with the intention of hitting another airplane.
AB- Non-US Air Base.
ACM- Air Combat Maneuvers. The basic movement techniques
of air fighting, including the Immelmann and the Split-S.
ADA- Air Defense Artillery. Ground units that operate AAA.
AFB- Air Force Base. A base inside the United States. An air
base in a foreign country is termed an AB-Air Base.
Afterburner- A device for pumping raw fuel directly into the
engine exhaust, dramatically increasing both engine power and
fuel consumption.
AGL- Above Ground Level. One way to measure altitude, in units
from the surface of the earth directly below.
AGM- Air-to-Ground Missile. A missile fired from an aircraft at a
target on the ground.
AIM- Air Intercept Missile. The type prefix for U.S. air-to-air
missiles, such as AIM-9 and AIM-120.
79
Airspeed- The velocity of the plane in relation to the surrounding air.
Altimeter- An instrument that measures altitude by monitoring
differences in air pressure.
AMRAAM- Advanced Medium Range Air-to-Air Missile. The
AIM-120 AMRAAM uses Active Radar Homing (ARH), so it is a
“fire and forget“ missile.
Angels- Thousands of feet. “Angels 10“ equals 10,000 feet.
Anti-radiation missile- A missile that locks onto radio frequency
radiation, such as the HARM.
AoA- Angle of Attack. The angle between the aircraft’s wings’
mean chord line and the relative wind.
APG-68- Multimode radar system on the F-16.
Page 79

Armstrong- Weapons are armed.
ASL- Above Sea Level. Another way to measure altitude, in units
above sea level. Sometimes referred to as MSL (Measured from
Sea Level).
Aspect angle- The angle between the flight path of an attacking
aircraft and that of its target.
ATO- Air Tasking Order. A schedule of what targets are to be hit,
who is to hit them, and with what.
Autopilot- Flight control system feature, allowing the computer
to fly the plane toward the next programmed Steerpoint.
Avionics- Electronic gear aboard an aircraft. Specifically refers to
devices that help fly or navigate the aircraft.
AWACS- Airborne Warning and Control System. A powerful and
sophisticated suite of radars and communications gear carried
aboard an aircraft. An AWACS aircraft controls air combat opera-
tions over a wide area.
B
Bandit- An aircraft positively identified as an enemy.
Bank- Rolling your aircraft to the left or right such that your lift
vector is not vertical.
Glossary
BARCAP- Barrier Combat Air Patrol. Combat aircraft positioned
to act as a barrier against enemy aircraft passing through or past
a given area.
BDA- Bomb Damage Assessment. A post-strike report on the
damage caused to a particular target.
Beaming- An aircraft approaching from the side is said
to be beaming.
Bear- NATO code name for the Russian Tu-95 turboprop
bomber.
Bearing- Relative direction, in degrees. The front of the aircraft is
always 0 degrees, so a target bearing 270 degrees is directly to
the left.
BFM- Basic Flight Maneuvers. The standard air maneuvers that
every pilot should know. They include the turn, break, loop, and
roll.
Bingo- An aircraft with only enough fuel to return to base is at
bingo fuel.
80
Page 80

Glossary
Bitchin’ Betty- Pilot slang for the female voice of the onboard
computer.
Glossary
Blackjack- NATO code name for the Russian Tu-160 high speed
low altitude bomber.
Blackout- Loss of vision due to high positive-G forces. Blood
draining from the eyeballs causes this condition.
Blip- An image on the radar screen annotating a detected
object.
Bogey- An aircraft whose identity has not yet been positively
established.
Bull’s eye- A bull’s eye is an arbitrary predetermined map
coordinate used as a navigational point of reference by
friendly forces.
Buster- Slang term for the afterburner, or for using it.
BVR- Beyond Visual Range. A target that is too far away to be
seen with the naked eye. Also refers to missiles designed to
engage such targets.
C
Callsign- A code name given to a particular fighter pilot for
reasons of identification.
Cans- Another slang term for the afterburners.
CAP- Combat Air Patrol. A defensive flight over a particular
location.
81
CAS- Close Air Support. The practice of using aircraft to attack
enemy ground forces in conjunction with friendly troops.
C3I- Command, Control, Communications, and Intelligence. The
basic functions of battlefield management.
Chaff- Metallic strips dropped from a fighter that can interfere
with missile radar signals.
Check fire- Cease firing, or don’t fire.
Closure- Rate at which two objects are approaching one another.
Coaler- NATO code name for the An-72P maritime patrol
aircraft.
Cold- Retreating. A bandit is cold if it is leaving the
combat zone.
Page 81

COMMS- Communications.
Contrails- Vapor trails generated from an aircraft during high G
maneuvers.
Corner velocity- Minimum speed necessary to pull the maximum
rated Gs of an aircraft.
Cossack- NATO code name for the mammoth An-225 cargo
plane, the world’s largest aircraft.
CSAR- Combat Search and Rescue. The process of locating and
recovering downed pilots in a combat zone.
D
Dead-reckoning- To navigate without the assistance
of instruments.
Death dot- The small aiming mark in the center of a
target reticule. Also referred to as the “pipper“.
Ditch- To put an airplane down in the water. Alternately, to eject,
especially over water.
Dry thrust- The power of an aircraft’s engines, without
afterburner. Measured in units of weight, as in “15,000
pounds of thrust.“
Glossary
E
ECM- Electronic Counter Measures. Electronic means of
interfering with an enemy radar or radio transmission.
Jamming is a form of ECM.
Egress- To exit. The route an aircraft takes out of the area after
striking a target.
Engage- Begin Air Combat Maneuvers against the enemy.
Envelope- Effective range and positioning of aircraft or missiles.
F
Falcon- Designation for the F-16. Sometimes referred to as the
Fighting Falcon or the Viper.
Fantan- NATO code name for a Chinese-built fighter-bomber.
FEBA- Forward Edge of the Battle Area. Modern term for “the
front lines”.
Fire and forget- Indicates a self-guided weapon that does not
require the pilots attention after being launched.
82
Page 82

Glossary
Flak- Nickname for antiaircraft gunfire. Derived from
Fliegabwerkanon, a German WW II antiaircraft gun.
Flanker- NATO code name for the Russian Su-27 air
superiority fighter.
Flaperons- Control surfaces on the F-16’s wings that allow it to
roll about its longitudinal axis.
Flare- A pyrotechnic released from an airplane to fool the
infrared sensors on heat-seeking missiles.
Flaps- Hinged surfaces on the wings of an aircraft used to
generate extra lift.
Flogger- NATO code name for the MiG-27 fighter-bomber.
FLOT- Forward Line of Own Troops. A line behind which friendly
forces are operating, and beyond which only enemies roam.
Fly-by-wire- Computer system that controls the plane based on
input from the pilot’s flight stick.
FOB- Forward Operating Base. A temporary base close to the
combat zone set up to support flight operations.
FOX 1- Pilot warning of the launch of an AIM-7 Sparrow radar-
guided missile.
83
FOX 2- Pilot warning of the launch of an AIM-9 Sidewinder
heat-seeking missile.
FOX 3- Pilot warning of the launch of an AIM-120 AMRAAM
radar-guided missile.
Foxbat- NATO code name for the MiG-25 fighter.
Foxhound- NATO code name for the MiG-31 interceptor.
Fulcrum- NATO code name for the MiG-29 air superiority fighter.
Full grunt- Full Military Power; throttle setting of 100% thrust.
Full Military Power- 100% thrust.
Fur ball- A frantic multiple-aircraft engagement at close ranges.
G
G- Pressure exerted by gravitational force. Standing on the
ground equals 1 G.
G suit- A suit designed to help the pilots counter blackouts
during high G maneuvers.
Page 83

GPS- Global Positioning System. Satellite-based navigation system that allows a receiver to locate itself within a few meters.
Guard- Listen to the common radio frequency. You will often be
asked to “monitor guard“ to pick up vital information.
H
HARM- High Speed Anti-Radiation Missile. A missile that
tracks a radar emission, and attacks the transmitter.
Havoc- NATO code name for the Russian Mi-28 ground-attack
helicopter.
Heat signature- The image of an aircraft as seen on
infrared systems.
Heater- Pilot slang for an infrared homing (heat-seeking) missile.
Heading- Direction of flight, in compass degrees. Due east is a
heading of 90 degrees.
Helix- NATO code name for the Russian Ka-29 light attack
helicopter.
Hot- Bandit is approaching, or entering the combat zone.
HOTAS- Hands On Throttle and Stick. A modern method of
cockpit design, where one does not have to remove one’s hands
from the flight controls to operate other aircraft systems,
especially weapons.
Glossary
HUD- Head-Up Display. A flight information technique that
places most flight and combat information on a transparent
panel directly in front of the pilot.
I
ILS- Instrument Landing System. A device that allows aircraft to
land safely at night and in low visibility conditions.
Ingress- To enter. The route followed to approach a strike target.
IP- Initial Point (or Ingress Point)-The map location where a strike
package begins its approach to a target.
IR- Infrared. A band of radiation just below visible light in fre-
quency. Infrared radiation is associated with heat sources, and so
can be used to track objects with heat signatures.
84
Page 84

Glossary
J
JDAM- Joint Direct Attack Munition. The JDAM mates a normal
Mk. 83 1000-pound bomb, a set of control surfaces, and a GPS
receiver to make a weapon capable of striking within a few
meters of any selected ground location.
Jinking- A series of erratic maneuvers designed to throw off an
enemy gun attack.
K
KIAS- Knots Indicated Air Speed. The aircraft’s velocity, in nautical miles per hour.
Kts.- Knots or nautical miles per hour.
L
LGB- Laser Glide Bomb. An LGB glides to its target, like the
JDAM, but uses reflected laser energy for guidance instead of
the GPS.
LO- Low Observable. An aircraft designed not to reflect radar
energy or visible light. Stealthy.
Lock on- To acquire a target with radar with the intent to fire a
weapon.
85
LZ- Landing Zone. A temporary landing place, usually for helicopters or short-field aircraft, directly in a combat area.
M
Mach- The speed of sound at sea level. Approximately 760
ft/sec. This value changes with relative air pressure.
Mainstay- NATO code name for the Russian A-50u airborne
warning aircraft.
Maverick- Nickname for the AGM-65 air-to-surface missile.
Mayday- An emergency call, from the French m’aidez-
“help me.“
Military power- 100% thrust.
MFD- Multi-Function Display. Cockpit monitors which the pilot
can configure to display a variety of flight, combat, and navigation information.
MSA- Minimum Safe Altitude. Altitude below which you are
asking for trouble.
Page 85

MSL- Measured From Sea Level. Also referred to as ASL (Above
Sea Level)
Muzzle flashes- AAA fire.
N
NATO- North Atlantic Treaty Organization formed in 1949 for
purpose of collective defense against aggression.
Nautical mile- One-sixtieth of a degree of latitude, measured at
the equator, which is one-sixtieth of a degree of longitude, or
2026 yards, or 1.15 miles.
Negative- A non-affirmative response; no. The opposite of “roger.“
No joy- No visual or radar contact with enemy aircraft. The
opposite of “tally-ho!“.
NOE- Nap-of the-Earth flying- Flying as low as possible to avoid
radar detection.
O
OTH- Over the Horizon. Usually refers to targets masked by the
curve of the earth, or to missiles that can strike such targets.
Glossary
P
Padlocked- Being unable to take one’s eyes off a target for fear
one will be not be able to find it again.
Pickle- To release ordnance, as in pickle a bomb.
Pipper- The small aiming mark in the center of a target reticule.
Also referred to as the “death dot“.
Pitch- Measure of aircraft motion around its lateral axis. The ele-
vators control pitch.
Pop-up- A sudden climb from low altitude, usually as part of the
bomb delivery process. Also called popping.
Punch out- Pilot slang for eject.
R
Radar- Radio Detection and Ranging. A device which detects
objects by bouncing a beam of microwave energy off them, then
timing the return.
RAM- Radar Absorbing Material. Materials that reduce the
amount of energy reflected from their surface.
86
Page 86

Glossary
Rammer- Slang term for the AMRAAM radar-guided missile.
Raptor- Code name for the F-22 air superiority fighter.
Red-out- A temporary blindness caused by blood forced into the
eyeball by negative-G conditions.
ROE- Rules of Engagement. A set of instruction detailing the condi-
tions under which a pilot may engage in combat.
Roger- Affirmative; yes. A positive comment. The opposite of “neg-
ative“.
Roll- Measure of aircraft motion around its longitudinal axis. Roll is
controlled by the aircraft’s flaperons.
Rookie- A pilot with very little actual flying experience.
RTB- Return to Base. Radio call indicating that the current mission
has been aborted, and that all pilots should come home.
RWR- Radar Warning Receiver. A device which detects hostile radars.
S
Saddled- In a stable flight relationship alongside another aircraft.
SAM- Surface-to-Air Missile. A missile fired from the ground against
an air target.
87
SAR- Search and Rescue. The process of finding and recovering
downed flyers.
Scramble- A rapid takeoff, usually as the result of an alert or other
emergency situation.
Scud- A medium-range ballistic missile of Russian design. Not very
accurate, but cheap.
SEAD- Suppression of Enemy Air Defenses. The process of destroying or otherwise degrading an enemy air defense system by means
of strikes directed against radars, SAM sites, and AAA defenses.
Sidewinder- Nickname for the AIM-9 missile due to the peculiar
back-and-forth motion it makes when tracking a target.
Signature- The electronic parameters of a radio or radar or heat
from an engine.
Silk approach- The act of bailing out of an airplane.
Six- Directly to the rear. Check your six to keep from being
surprised by enemy fighters sneaking up behind you.
Page 87

Shack- Pilot slang for a bomb that impacts directly on its
intended target.
Slammer- Pilot slang for the AIM-120 AMRAAM.
Slick- Clean or smooth. Refers to an aircraft with no external
ordnance or equipment that could create drag or increase its
radar cross-section.
Smoke in the air- Incoming missiles.
Sortie- A combat mission.
Splash- Indicates an air-to-air kill or weapons impact on a ground
target, as in, “splash one MiG“.
Stall- The separation of airflow from the upper surface of a wing,
resulting in full or partial loss of lift. Aircraft that stall are no
longer flying, they are falling.
Steerpoint- The F-16 pilot’s preferred term for a fixed reference
point entered into the aircraft’s autopilot and navigational
computers. Also referred to as Waypoint.
Strike package- A group of different aircraft assigned a particular mission.
Strip- Peel off; break from the formation.
Glossary
Su-34- Russian fighter-bomber.
Su-35- Russian air-superiority fighter. Most deadly aircraft in the
Russian inventory.
T
Tally- To get a visual sighting of something.
Tally-ho!- Confirmed target sighted. Opposite of “no joy“.
Taxi- To steer an aircraft while it is on the runway.
Tracers- Cannon or machine gun projectiles with a phosphor
coating that ignites on firing, allowing the shooter to follow the
path of the bullets.
Triple-A- Antiaircraft Artillery; AAA.
Turbulence- Violent shaking that occurs when your aircraft
approaches its Vmax or encounters conflicting winds.
88
Page 88

Glossary
U
USAF- United States Air Force.
V
Vc- Velocity (closure). Speed at which two objects are
approaching one another.
Vne- Velocity (never exceed). Speed at which you begin to risk
structural damage to the aircraft.
Vmax- Velocity (maximum). The maximum safe speed for a
particular altitude. An aircraft will experience turbulence as it
approaches its Vmax.
Vector- A direction, expressed in compass degrees; to send
someone in a particular direction.
Vertical velocity- Rate of change in the altitude of an aircraft.
Viper- Nickname given by pilots to the F-16.
W
Waterline- The artificial horizon line.
Waypoint- Another word for Steerpoint. A fixed reference point
entered into the aircraft’s autopilot and navigational computers.
89
Weapons free- Freedom to fire weapons within a given airspace.
Weapons hold- The opposite of weapons free. Cease firing or
withhold fire.
Winchester- An aircraft with no ordnance left; an
unarmed fighter.
Winder- Slang term for the AIM-9 Sidewinder heat-seeking
missile.
Wingman- Companion plane. Combat fighters usually fly in
pairs.
WVR- Within Visual Range.
Y
Yaw- The motion of an aircraft around its vertical axis, controlled
by the rudders. A yaw is an inherently unstable flight attitude.
Page 89

Index
A
Abort 16
ACM Mode MFD 41
AGM-65B 65
AGM-65G 65
AGM-84A 65
AGM-88 66
AIM-9M 64
AIM-120 63
Air Brakes 32
Air Combat Maneuver Mode 41
Air Situational Awareness Mode 40
Air-to-Air Missiles 63
Air-to-Surface Missiles 65
Airspeed Indicator 38
Altimeter 38
Altitude Tactics 68
AMRAAM 63
Angle of Attack 37
AOA 37
APG-68 Radar 62
ARM HUD 46
ASM HUD 46
Audio Options 22
Autopilot 33
Autorun Program 7
Avionics Sound Cues 22
B
Blackouts 23,24
Basic Flight Maneuvers 50
Bombs 66
Brakes 32
Break Turn 51
C
Calibrating the Joystick 9
Callsign 73
Camera Views 30
Campaigns 18
Campaign Stats 18
Caution 38
CCIP HUD 47
Cockpit Instruments 37
Control Options 22
Controls 26
Custom Mission Editor 8
D
Damage 38
Deathmatch 75
Default Browser 73
DirectX 8
Displays 37
Double Loadout 14
E
Editor 8
EEGS HUD 44
Eject 33
EMCON 70
Emission Control 70
End Mission 16
Engine Power 31
EO HUD 46
Exit 25
F
Final Approach Steer Point 60
Fixed Target Tracking Mode 41
Flameouts 24
Flatspins 24
Flight Controls 32
Flight Model Options 23
Flight Path Indicator 43
Flight Characteristics 23
FTT Mode MFD 41
Fuel Expenature 15
G
Game Fullscreen 21
Game Installation 7
Game Resolution 21
GBU Bombs 67
General Flight Controls 32
General Game Controls 28
Glideslope Indicator 59
Glossary 79
GMT Mode MFD 41
Ground Mapping Mode 42
Ground Moving Target Mode 41
Ground Steering 23
H
Half-Loop 55
Half-Roll 53
HARM 66
Harpoon 65
Head-Up Display 42
Hosting a Multiplayer Game 76
HUD 42
I
ILS HUD 47
Immelmann 56
Initial Approach Steerpoint 60
Installing F-16 8
Instrument Landing System 59
Integrated Battle Space 78
Internet (TCP/IP) Connection 74
Instruments 38
J
JDAM 67
Jettison 34
Joining a Multiplayer Game 73
Joystick 22, 26
Joystick Buttons 26
Joystick Calibration 9
Joystick Type 23
K
Keyboard Controls 28
Keypad Views 29
L
Landing 58
Page 90

Landing Bonus 17
Landing Gear 24
LAN/IPX Connection 74
LANT Mode MFD 42
LANTIRN 47
Loadouts 14
Loop 54
M
M61A1 20mm Cannon 64
Map 15
Map Keyboard 25
Map Joystick Buttons 24
MAP Mode MFD 42
Map Screen 15
Medals 18
Memory Usage 23
Menus 13
Menus Fullscreen 21
MFD 39
Mini Browser 73
Missile Avoidance 71
Missiles 63
Mission Briefing 13
Mission Editor 8
Mission Statistics 16
Mk 20 Rockeye Bomb 66
Modem Connections 75
Mouse Controls 36
MRM HUD 45
Multifunction Display 39
Multiplayer Games 73, 39
Multiplayer Keys 36
Music Volume 22
N
NAV HUD 42
Navigational Controls 33
New Campaign 18
Normal Loadout 14
NovaWorld 73
Null-Modem Cable 75
O
Options 21
Overview 25
P
Pause 28
Performance Options 22
Perspective Controls 30
Pilot Awards 18
Pilot Stats 18
Pitch Scale 42
Promotion Points 17
Q
Quick Mission 13
Quick Start 10
R
RAD Mode MFD 40
Radar (2) 34, 62
RAW 76
Redouts 23
Rockeye Bomb 66
Roll 52
Rudder Controls 27
Rudder Pedals 23, 27
S
SAM Mode MFD 40
Scoring 17
Screen size 21
Serial Cable Connection 75
Shoot List 24
Sidewinders 64
Situational Awareness Mode 40
Sound FX Volume 22
Speed 69
Split-S 57
Squadron 73
SRM HUD 45
Stalls 61
STAT Mode MFD 40
Statistics Screen 17
Steerpoints 15
STORE Mode MFD 40
Strafing HUD 44
Strategy 68
T
Tactical Map 47
Tactics 68
Takeoff 48
Technical Support 91
Texture Distance 23
3D Card 21
Threat Warning Indicator 39
Throttle Controller 23
Time Compression 31
Turns 50
Tutorials 48
U
Unbalanced Loadouts 24
V
Video Information 21
Video Options 21
Voice Dialog Volume 22
Volume Controls 22
W
Warnings 38
Weapons Controls 33
WEP Mode MFD 39
Wingman Controls 35
Wingman Tactics 70
Z
Zoom Controls 30
 Loading...