

Page 1
™
®
™
Page 2
INTRODUCTION
In response to terrorist attacks on the United States of America, the world banded
together in 2002 to fight the threat of terrorists and their state sponsors.
Under a UN Security Council resolution, eighteen countries joined the International
Security Assistance Force, or ISAF, to fight this latest threat to world peace. Not since
World War II had so many countries pledged themselves multilaterally to a cause. The
focal point for the ISAF’s attention was Afghanistan, a safe haven for terrorists.
The front line action would not be waged with huge battalions of soldiers and tanks. It
would be fought by small, mobile, Special Forces units who could move silently through
the countryside. By employing guerrilla tactics against the terrorists, casualties to ISAF
forces were kept to a minimum, while nearly every major objective was accomplished.
In Delta Force: Task Force Dagger, you have the chance to play as one of the ten
Special Forces units that fought in Afghanistan.
From the United State’s Delta Force and Navy SEALs to Australian SASR, you’ll take on
various missions inspired by the actions of the many men and women risking their lives
in Afghanistan.
Page 3

TABLE OF CONTENTS
Installation . . . . . . . . . . . . . . . 2
Quick Start . . . . . . . . . . . . . . . 3
Main Menu . . . . . . . . . . . . . . . 4
Video/Audio Settings . . . . . . . . . . . . . . . 5
The Teams . . . . . . . . . . . . . . . 8
Gear . . . . . . . . . . . . . . . 12
UAV (Unmanned Aerial Vehicle) . . . . . . . . . . . . . . . 15
Keyboard Chart . . . . . . . . . . . . . . . 16
Game Controls . . . . . . . . . . . . . . . 18
Game Screen . . . . . . . . . . . . . . . 20
Commander’s Screen . . . . . . . . . . . . . . . 22
NovaWorld/Multiplayer . . . . . . . . . . . . . . . 24
Multiplayer Game Types . . . . . . . . . . . . . . . 25
Voice-Over-Net . . . . . . . . . . . . . . . 28
Credits . . . . . . . . . . . . . . . 31
Tech Support . . . . . . . . . . . . . . . 33
Legal . . . . . . . . . . . . . . . 34
Page 4
INSTALLATION
In order to play Delta Force: Task Force Dagger you must first install the game files onto
your computer’s hard drive. You must also have the game disk inserted into your
computer’s CD-ROM drive in order to play.
To install the game, insert the game CD into the CD-ROM drive. If you have AutoRun
enabled, you will see the game menu appear. Click on INSTALL DELTA FORCE: TASK
FORCE DAGGER. The automatic installation will walk you through the rest of the set-up.
If you insert the game disk and nothing happens, double-click on the “MY COMPUTER”
icon on your Windows desktop. Then double-click the DFTFD icon. When the menu
appears, click the INSTALL DELTA FORCE: TASK FORCE DAGGER button.
You will need to refer to the CD Key printed inside the game’s jewel case in order to
install the game or access NovaWorld. When prompted, type the CD Key into the space
provided. It is recommended that you keep this number safe for future use. You will not
be able to reinstall Delta Force: Task Force Dagger without it.
After the game installs, it will automatically return to the auto-run menu. Press the START
TASK FORCE DAGGER button to begin the game. You may also start the game from
your Start Menu. The start-up icon will be located in a “NovaLogic” folder in your
program files. The default directory will be C:\program files\NovaLogic\Delta Force
Task Force Dagger.
2
Page 5
QUICK START
After installing Delta Force: Task Force Dagger, you may want to get right into the
action. If you are already familiar with Delta Force: Land Warrior, you’ll find that the
majority of the commands and functions are the same (though you may have to
reconfigure your keyboard mapping).
To get right into the action, follow these steps:
1. From the Main Menu click the Single Player button.
2. You can enter a new name on this screen, change your character’s appearance
and change your keyboard settings. Once you have made your changes (if any)
click on the Quick Missions selection at the bottom of the next screen.
3. On the Quick Missions screen you will see a mission called “Boot Camp”.
Select it to play a tutorial that will explain the various weapons and
functions in the game. Once you’ve selected the mission, choose Accept to
go to the gear selection screen.
4. On the gear selection screen, the most appropriate equipment will already be
chosen for you, so simply click Start Mission to begin.
3
Page 6
MAIN MENU
The Main Menu will automatically appear when Delta Force: Task Force Dagger starts
up. From here you can access the following sections of the game:
Single Player – Accesses the Single Player, missions and any player-created maps
you may have downloaded.
Play on NovaWorld – If you want to play multiplayer games over the Internet, click
on this selection. On the following screen you will be able to change character and
game settings.
Multiplayer Options – If you plan on hosting a game over a LAN or the Internet, or
plan to play via LAN or Internet, click on this option. The following screen will have a
number of options to customize your character or host settings.
Video/Audio Options – Clicking this option will bring you to the screen where you
will be able to set many different video and audio options to enhance the game’s
performance on your machine.
Update Game – If you are currently connected to the Internet, click on this option to
launch an Update Wizard. This will automatically download and install any new files or
patches that may be available from NovaLogic.
4
Page 7

VIDEO/AUDIO SETTINGS
VIDEO
Delta Force: Task Force Dagger is designed to run on a wide range of computers.
Reducing one or more of the following settings may help increase performance on
slower computers or those with older 3D cards.
When you are finished making changes, be sure to click on Accept to save your settings
and return to the Main Menu.
Change Driver – Clicking this option will run a diagnostic tool that will find any
3D video cards installed on your machine. Select the one you wish to run and press
the OK button. Your screen will flicker as the tool determines what resolutions your
card can handle.
Resolution – Choose your level of resolution here. The higher the numbers, the
higher the quality of the image, but slower computers may not play as smoothly at
higher resolutions.
Terrain Detail – Sets the level of complexity for features on the terrain such as roads,
helicopter landing pads and explosives scarring.
Object Detail – Determines the highest graphical setting for other people and objects
in the game. At its top setting, objects will use the highest “Level of Detail” (LOD) when
you are close enough. Reducing this will restrict objects to the selected LOD regardless
of your view.
Color Depth – Sets how many colors your machine will display. 16 bit will show
thousands of colors while 32 bit will display millions.
Terrain Geometry – Setting this to “High” will allow you to view the highest level of
terrain detail from a further distance.
Shadows, Blood, Smoke and Shell FX – Simply turn these features on to
increase the graphical quality of the game or turn them off to increase performance.
5
Page 8
AUDIO
SFX Volume – Sets the level of audio for special effects sounds such as explosions,
vehicle sounds, and gunfire.
Music Volume – Sets the levels of any menu music that may play.
Dialogue Volume – Sets the levels for any lines spoken over the radio or
near your location.
PLAYER SETTINGS
This page is accessible from the Single Player, Play on NovaWorld or Multiplayer Start
pages by selecting Player Settings. Any selections you make are stored for the character
that is highlighted on the Choose Character screen only. This means that you can set
different options for different characters.
Remember to click on Accept when finished to save your settings for this character.
Keyboard – This screen allows you to reconfigure which keyboard keys are assigned
to which functions. Click once on the key you wish to change. Now press the key you
want to replace it.
Pressing Revert will set the keyboard to its default settings.
MOUSE CONTROL
Mouse Sensitivity – Adjusts how responsive your mouse is.
Flip Mouse – Select “Yes” to reverse the Look Up/Down movement of the
mouse controls.
Scope Sensitivity – Adjusts how sensitive your mouse is when using the scope
on a weapon.
GAMEPLAY
Enemy AI – Select “Hard” to make the enemy use more complex tactics and increase
their accuracy. “Easy” will allow you to take more damage before dying. The game
defaults to “Normal”.
6
Page 9

Tracers – Select “Off” if you don’t want to see the bullet trails from weapons that use
tracers. Note that not all weapons use tracers.
Friendly Fire Warning – Select “Off” to remove the red safety X that appears when
you target a team member.
GPS Icon – Select “Show Everything” to see icons on your GPS (Global Positioning
System) and Commander’s Screen for all enemy and friendly units. “Show Friendly”
will display only friendly units. The “Default” setting will show selected enemy and
friendly units.
Wind – Wind can affect the accuracy of your weapons. You can set this to “Random”
for random wind speeds and direction, “None” for no wind, or “Default” for the preset
wind conditions.
Character Abilities – If you don’t want to use the special abilities that each character
has, turn this to “Off”.
Scope Drift – If you do not want your stance to affect the stability of your scope view,
turn this to “Off”.
Crosshair Spread – If you do not want your accuracy to diminish as you run, turn
this to “Off”.
Weapon Recoil – As you fire a weapon, the muzzle will rise. Set this to “Off” to
keep your muzzle steady.
Drop Weapons – If you do not want the option of dropping a weapon to replace it
with another, turn this to “Off”.
VON (VOICE OVER NET)
This set of options is explained in its own section of the manual on page 28.
Message Macros
When playing in Multiplayer, you can send preset messages to the other people on your
team. To change the default messages, simply click on the message, use BACKSPACE to
delete the previous entry and write your new message.
The function key listed before each message is the key you will press while playing to
send it to your team members.
7
Page 10
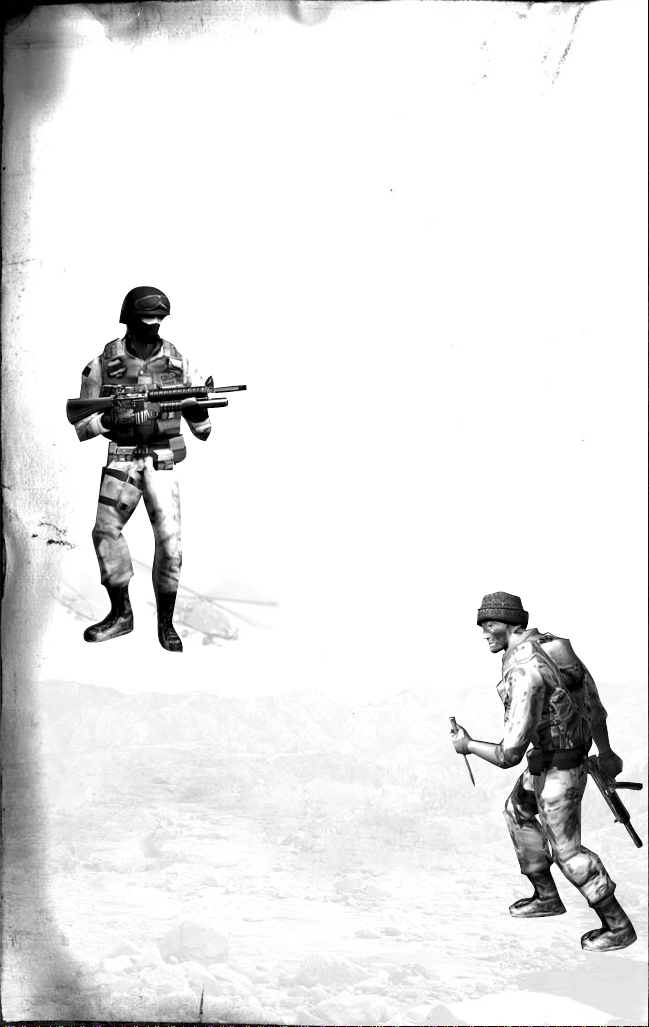
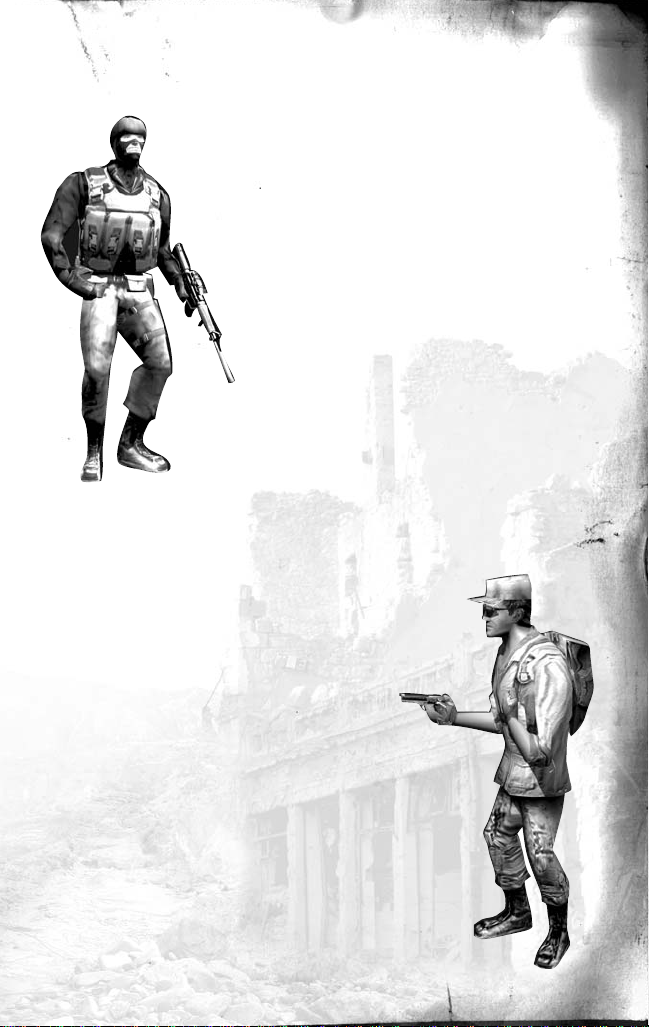
THE TEAMS
Delta Force: Task Force Dagger allows you to portray a soldier from any one of the
following ten Special Forces Units. Each has unique skills and abilities, so choosing the
right soldier to fit the mission profile is imperative.
Detailed background information on each unit can be found in the Character Select
section of the game.
SFOD – Delta
United States Army Special Forces
Operational Detachment - Delta
Role: CQB (Close Quarters Battle)
Special Abilities: Fast movement, Extended knife range
Preferred Weapons: SA-80, M4 SOPMOD,
HK MP5SD6 (suppressed), HK MP5N,
F89 Austeyr, F88 Austeyr
Green Berets
United States Army
Special Forces “Green Berets”
Role: Heavy Gunner
Special Abilities: Minimal recoil,
withstands more damage
Preferred Weapons: M249 “Minimi” SAW (Squad
Automatic Weapon), FN MAG machine gun,
M60E3 machine gun
8
Page 11
SEAL Team 6
United States Navy “Sea Air Land” Team 6
Role: Medic
Special Abilities: Team Medic (multiplayer only),
best swimmer (speed, maneuverability, holding breath)
Preferred Weapons: HK MP5SD6 (suppressed),
HK MP5N, PSG-1 suppressed sniper rifle
™
CIA SOG
Central Intelligence Agency
Special Operations Group
Role: Sniper
Special Abilities: Steady with scope, fast crawling
Preferred Weapons: M82A1 Barrett
.50 cal sniper rifle, PSG-1 suppressed sniper rifle,
M40A3 sniper rifle, M24 sniper rifle, AW sniper rifle
9
Page 12

SAS
British Special Air Service
Role: Sniper
Special Abilities: Steady with scope, fast crawling
Preferred Weapons: M82A1 Barrett .50 cal sniper
rifle, PSG-1 suppressed sniper rifle, M40A3 sniper rifle,
M24 sniper rifle, AW sniper rifle
SASR
Australian Special Air Service Regiment
Role: Grenadier
Special Abilities: Accurate with indirect weapons
Preferred Weapon: M4 w/M203, OICW,
M16A2 w/M203
JTF-2
Canadian Joint Task Force 2
Role: CQB (Close Quarters Battle)
Special Abilities: Fast movement, Extended knife range
Preferred Weapons: SA-80, M4 SOPMOD,
HK MP5SD6 (suppressed), HK MP5N,
F89 Austeyr, F88 Austeyr
10
Page 13

Ranger
United States Army 75th Ranger Regiment
Role: Grenadier
Special Abilities: Accurate with indirect weapons
Preferred Weapons: M4 w/M203, OICW,
M16A2 w/M203
Marine Force Recon
United States Marine Corp
Reconnaissance Force
Role: Heavy Gunner
Special Abilities: Minimal recoil,
withstands more damage
Preferred Weapons: M249 “Minimi” SAW (Squad
Automatic Weapon), FN MAG machine gun,
M60E3 machine gun
CSAR
United States Air Force
Combat Search and Rescue
Role: Medic
Special Abilities: Team Medic
(multiplayer only), best swimmer (speed,
maneuverability, holding breath)
Preferred Weapons: HK MP5SD6
(suppressed), HK MP5N (not suppressed),
PSG-1 suppressed sniper rifle
11
Page 14
GEAR
Before starting a mission you will be able to select your gear to best suit the mission and
your own playing style. After viewing the mission briefing, simply click on the Change
Gear button. On this screen is a box for each of the gear categories. By clicking through
the selections you can see information on each weapon and choose to take it on the
mission. You are allowed only one item in each of the following categories:
Primary Weapons – These are heavy weapons such as machine guns or
sniper rifles.
Secondary Weapons – These are smaller shoulder weapons used for
close-quarters-combat or as a back-up to your primary.
Sidearms – Handguns of various calibers.
Grenades – Small, thrown explosives.
Explosives – Heavy ordnance including rockets, demolition charges and mines.
Auxiliary Equipment – Consists of extra armor or extra ammunition.
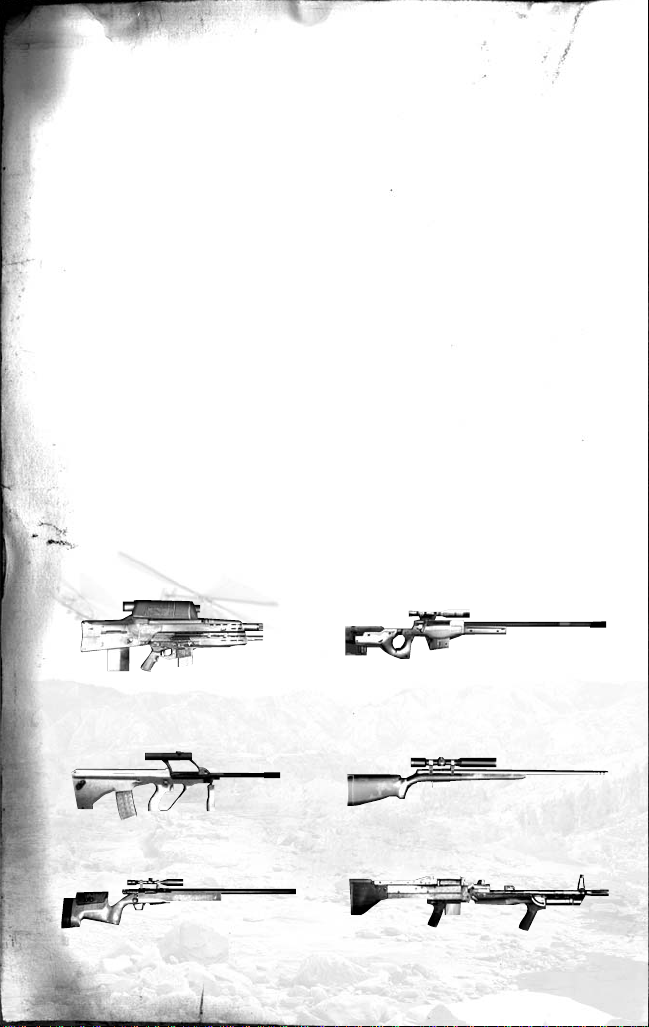
PRIMARY WEAPONS
OICW Assault Rifle
with 20mm grenade launcher
F88 Austeyr Assault Rifle
M40A3 Sniper Rifle
12
AW Sniper Rifle
M24 Sniper Rifle
M60E3 Machine Gun
Page 15

PSG-1 Suppressed Sniper Rifle
M4 Assault Rifle with
M203 40mm grenade launcher
M16A2 Assault Rifle with
M203 40mm grenade launcher
FN MAG Machine Gun
SECONDARY WEAPONS
M82A1 Barrett Sniper Rifle
M4 SOPMOD
(w/ACOG scope) Assault Rifle
M249 “Minimi” SAW (Squad
Automatic Weapon) Machine Gun
SA-80
HK MP5SD6 (suppressed)
F89 Austeyr
HK MP5N (not suppressed)
13
Page 16

SIDEARMS
SOCOM Pistol
M9 Beretta (92FS)
Sig P226 F97 (Glock 19)
Browning HP
EXPLOSIVES
M18 Claymore At-4 LAW Alliant SLAM
ARMORIES
Most single and multiplayer maps have armories in them where you can change your
current gear selections. An armory may be a small, stand alone bunker or a rack of
weapons inside a larger structure.
To access the armory, enter the Commander’s Screen by pressing the C key. Select the
“Weapons” tab and click the arrows to choose new gear. Be sure to click “Accept” to
finalize your choices and press C again to exit.
AERIAL STRIKES
One of the primary roles of a Special Forces unit is to call in aerial strikes. To call
in a strike you will use the laser designator (8 Key) to direct nearby bombers to a
specific area. Activate the scope view to engage the designator’s range finder and
target acquisition systems.
Now aim the cursor at the target and press “Fire” on your mouse. There may be a
small delay while the planes move into position, but the destruction they provide is
worth the wait.
Remember that aerial strikes are not always approved for a mission. If you call in a
strike and one is not available, you will be informed by radio.
14
Page 17

keyboard chart
`
'
HELP
1st/3rd
PERSON
POV
SAVE
MISSION
LOAD
MISSION
CROSS
HAIRS
ON/OFF
1st
PERSON
GUN
ON/OFF
SCOPE
TOGGLE
MOVE
FWD
SCOPE
MAGNIFY
RADIO
DETONATOR
GRENADES
LASER
RANGE
FINDER
TALK
(TEXT)
RECENT
MESSAGES
TEAM
TALK
STRAFE
LEFT
BACKUPSTRAFE
RIGHT
FRIENDLY
TAGS
MISSION
GOALS
KILLS/PLYRS
LIST
PRIMARY
WEAPON
SECONDARY
WEAPON
SIDEARM
MEDIC
PACK
DROP
WEAPON
MAP
ZOOM IN
MAP
ZOOM OUT
CYCLE
WEAPONS
STAND CROUCH
MOVE
FWD
WALKWALK
COMMANDER'S
MAP
BINOCUL ARS
JUMP
CHANGE
MAGAZINE
BACKUPSTRAFE
RIGHT
STRAFE
LEFT
SHOOTSHOOT
PRONE
LOOK
UP
LOOK
DOWN
TURN
LEFT
TURN
RIGHT
MPG HOST
SCREEN
DROP
ITEM
AUDIO
COMMANDS
CYCLE
WAYPOINTS
CYCLE
FLAGS
PRINT
SCREEN
PAUSE
Esc
F1 F2 F3 F4
123 Insert Home
Page Up
Delete End
Page Down
Print Scrn
Pause
4567890–+
QTab
Caps Lock
WE R T Y UI O
ASDF GHJ
ZShift Shift
Ctrl
Alt Space Alt Ctrl
XCV BNM
,./
P[ ]
KL
;
'
Enter
\
F5 F6 F7 F8 F9 F10 F11 F12
Scroll Lock
PUSH TO TALK
(VON)
TALK TO
SELECTED
PLAYER
ADJUST SCOPE
ZERO UP
ADJUST SCOPE
ZERO DOWN
NIGHT
VISION
KNIFE
EXPLOSIVES
AUTO RUN
TOGGLE
CYCLE
MODES
CYCLE
MODES
CYCLE
MODES
UAV
16 17
Page 18

UAV’S - UNMANNED AERIAL VEHICLES
UAV
TILT
DOWN
Num Lock
/
*
–
789
456
+
123
0
Del Enter
RECORD
VOLUME
UP
MUTE CURRENT
TALKER
BREAK
TALKER
PUSH
TO
TALK
UNMUTE
SELECTED
PLAYER
SELECT
LAST
TALKER
DISPLAY
LAST
TALKER
VON
DISPLAY
UAV
PAN
LEFT
UAV
LOCK ON
TARGET
UAV
PAN
RIGHT
UAV
ZOOM
IN
UAV
TILT
UP
UAV
ZOOM
OUT
RECORD
VOLUME
DOWN
One of the advanced tools available to Special Forces units is the UAV. This unmanned
plane will fly a preset path over the area of operations and allow a soldier on the
ground to control the camera mounted to its underbelly. This can give a soldier important
knowledge of enemy positions.
To access the UAV’s camera, first press the U key. Once the camera view is up use the
keypad to pan, tilt, rotate, zoom, and lock the camera onto a target.
If you lock the camera onto a moving vehicle, the camera will track along with the
target. If the UAV is locked and the target moves beyond the view of the camera, the
lock will break and you will have to reacquire the target.
15
Page 19

Game Controls
MOUSE CONTROLS IN GAME IN COMMANDER’S MAP
Move Mouse Look Up/Down, Turn Left/Right Moves Mouse Pointer
- Left Mouse Button Shoot Selects Item
- Right Mouse Button Toggle Scope Moves Map
- Middle Mouse Prone/Stand Toggle (No function)
Button (if available)
KEYBOARD CONTROLS
F1 Help
F2 1st / 3rd Person POV Toggle
F3 1st Person Crosshair on/off
F4 1st Person Gun on/off
F5 Cycle Waypoints
F6 Cycle Flags (Capture The Flag games only)
F7 Audio Commands (brings up list of macros)
F8 Drop Item (such as a Flag)
F9 Print Screen (saves to game directory)
F11 Save Mission *
F12 Load Mission *
-Map Zoom In
= Map Zoom Out
MOVEMENT CONTROLS
Arrow Keys Move Forward, Back Up, Strafe Left, Strafe Right
WMove Forward
S Back Up
AStrafe Left
DStrafe Right
P Look Up
LTurn Left
;Turn Right
. Look Down
SHIFT Walk (used with arrow or W,A,S,D keys)
SPACEBAR Jump
DELETE Stand
END Crouch
PAG EDOWN Prone
SCROLL LOCK Auto Run Toggle (character runs without holding the W key)
Reversing Cycles
You can make any key cycle in the reverse order by holding down the SHIFT key while pressing the button. For
example, SHIFT+F5 will cycle backwards through your waypoints.
*SAVING A MISSION
At any point during a mission, you can press the F11 key to save the game. Each mission has 3 save slots
available. You can overwrite any of the save slots with a new save.
18
Page 20

WEAPONS/GEAR CONTROLS
1 Knife
2 Sidearm *
3 Primary Weapon *
4 Secondary Weapon *
5 Explosives
6 Radio Detonator (for SLAM charges only)
7Grenades
8 Laser Range Finder (for calling in aerial strikes)
9 Medic Packs (only available for medics)
0 Drop Primary Weapon
BKSP Cycle Weapons
CTRL Shoot
B Binoculars
N Night Vision
M Change Magazine
/Toggle Scope On/Off
[ Adjust Scope Zero Up
] Adjust Scope Zero Down
‘ Cycle Scope Magnification
* Press again to cycle firing modes if the weapon has multiple modes
FIXED WEAPON EMPLACEMENTS
You can use fixed weapon emplacements simply by walking up to them. Your field of view will then become
limited to that of the weapon. To break away from the weapon, simply back up.
MISSION CONTROLS
PAUSE Pause Game
HOME Multiplayer Host Screen
CView Commander's Map
F Display Friendly Tags
G Display Mission Goals
K Display Kills / Players List
R Display Recent Messages
TTalk (text)
HTalk to Selected Player (text)
YTeam Talk (text)
UAV
U Activate UAV Mode
Keypad 2 Tilt Down
Keypad 4 Pan Left
Keypad 5 Lock On Target
Keypad 6 Pan Right
Keypad 7 Zoom In
Keypad 8 Tilt Up
Keypad 9 Zoom Out
VOICE-OVER-NET
Keypad + Unmute Selected Player
Keypad 0 Mute Current Talker
Keypad - VON Display On/Off
Keypad DEL Break Talker
Keypad 1 Adjust Record Volume Down
Keypad 3 Adjust Record Volume Up
Keypad * Display Last Talker
Keypad / Select Last Talker
ENTER Push to Talk
Please refer to page 28 for more details on VON controls.
NOTE: You can drop your primary weapon (zero key) and pick up enemy primary weapons during the mission.
19
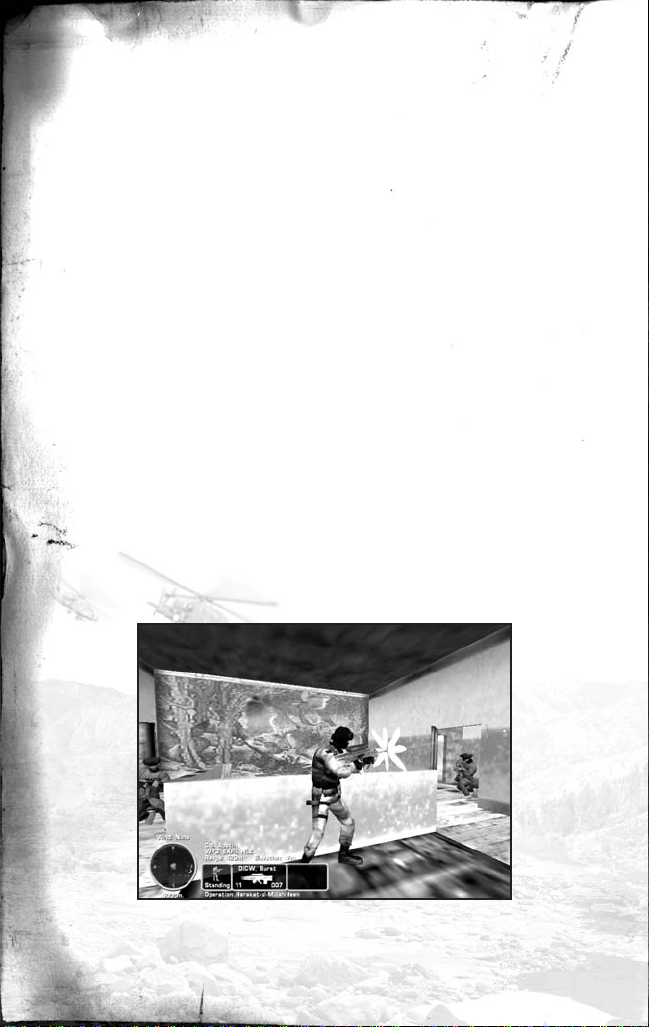
Page 21

Game Screen
7
6
1
2
3
4
5
8
ONSCREEN INFORMATION SYSTEM
1. Wind Indicator
This tells you which direction the wind is coming from and its speed. Helpful for
adjusting your aim to compensate for wind speed.
2. GPS Map
This is your Global Positioning Satellite overhead map. The center dial indicates the
cardinal direction you are currently facing. The color of the center dot represents your
team side. Enemies that have been seen by satellite reconnaissance or that are alert to
your presence and in visual range will appear on this map. The direction to your next
waypoint objective is denoted by a blinking dot. In a Capture The Flag game, the
direction to your flag bay appears as a team colored dot. All other symbols and colors
are described below. The number below the map indicates the zoom level of the GPS.
Use the - and + keys to adjust the range of your GPS.
3. Situational Icon
This profile of your soldier shows your body position.
20
Stand Crouch Lie Prone
Page 22

4. Current Weapon Selected
This section displays the weapon you are holding, the firing mode that it is in, the
number of magazines and number of rounds you have remaining in the current
magazine. The weapon name will appear green when it is ready (i.e. the round is
in the chamber).
5. Items
If you pick up an item during a mission, such as a briefcase or flag, it will be displayed
here. Certain items can be dropped by pressing the F8 key.
6. Waypoint Information
This area displays the code name and distance in meters to your next waypoint. Cycle
through all of your waypoints with the F5 key.
7. Information Link
Important information, such as current mission orders and status of your squad, will be
transmitted here via your radio. Text sent from other players in a multiplayer game will
appear here as well.
8. Scope
With certain weapons, you can use a scope by pressing the / key or Right Mouse
button. The number on the right shows the distance of the target you are aimed at. The
number on the left side shows what range the scope is zeroed at. Use the [ and ] keys to
move the scope zero up and down in 100 meter increments to compensate for bullet
drop over distance. Use the ‘ key to change the magnification of the scope.
GLOBAL POSITIONING SATELLITE MAP (GPS)
Initial/Final Waypoint (orange)
Waypoints (next waypoint blinks) (green)
•
Teammates (blue) with facing indicator
Known Enemies (red) with facing indicator
Wounded Teammate (blue)
Dead Teammate (blue)
Claymore
•
Building (green)
Vehicles (green)
Red Team Flag (Capture The Flag)
Blue Team Flag (Capture The Flag)
Medic (blue)
Dead Enemy (red)
21
Page 23

Commander’s Screen
The most useful tool you will have in the field is the commander's screen. By pressing the
C key, you will have access to a wealth of mission information such as waypoints,
identified enemy positions, objectives and squad statistics.
The top portion of the screen displays in-game text messages, similar to the Information
Link on the main game screen. Use the menu below it to view the different information
screens. The large left-hand window is the Primary Display Screen, which shows the
essential data. The right-hand side shows specific information on items selected in the
Primary Display Screen. Information that appears here will remain until you select
something new, even if you change to a different menu choice.
MAP
This is a larger, more sophisticated form of your GPS map. With the buttons below the
map, you control what information is displayed or hidden from view. In addition you
can zoom the map in and out (plus and minus keys), toggle between your color and
contour map, and automatically re-center the map on yourself. If you hold the right
mouse button down, you can scroll the map around.
When you click the mouse on an object or person, the icon will flash and information
will appear in the right-hand display. Here you will find out things such as the object's
name and side. When selecting other players, a new set of commands will appear in
this window, such as the ability to send a message directly to them or stop all
communication coming from them.
Your mission waypoints are invaluable for finding your way to your mission objectives.
However, during a mission you can grab any one of your assigned waypoints and
drag it to a new location. You can also select any object and temporarily set it as your
next waypoint. This can be very useful in finding your way directly to someone or
something on the main game screen. As soon as you select a new waypoint or cycle
back to your mission waypoints, this temporary one will disappear. Finally, you can set
custom mission markers in the game with the waypoint button. You can name these
markers whatever you like and even send them (one at a time) to other players in a
multiplayer game.
22
Page 24

VON
This screen is used to control the Voice-Over-Net feature. By clicking on the appropriate
icon, you can select the recipient of your voice messages and mute/unmute players. The
last column will tell you if the selected player is receiving your message. At the bottom of
the screen you can mute or unmute all players by pressing one of the buttons. All players
begin the game muted.
PLAYERS
This screen lists all of the players in the game. By clicking on the appropriate icon, you
can allow/disallow certain players from sending you custom waypoints and text
messages. You can easily locate teammates on the map by selecting their name on this
screen; when you return to the map display they will be highlighted.
TEAM
This screen lists all of your teammates, the weapons that they currently have in hand
and their general plan of action. This gives you a quick overview of your teammates'
intentions. Keep your teammates informed of your plan of attack by setting it here.
You can set a descriptor from either or both lines of plan actions. For example, to
indicate that you will be attacking the right side of the enemy’s base, click on “Assault”
and “Right”.
WEAPONS
To view information on the weapons and equipment that you currently carry, check out
this screen. If you are in an Armory Building when you access this screen, you will have
the ability to change out weapons and items. Be warned, in a multiplayer game
checking out new arms may cost you a few seconds of game time depending on your
Internet connection.
MISSION SETTINGS
Access your initial mission briefing information from this window. Game settings relevant
to this mission will appear in the right-hand window. This screen is particularly relevant
for seeing the specific rules of a multiplayer game that you joined. Refer to the Game
Settings and NovaWorld section for more details on the settings.
23
Page 25

NOVAWORLD/MULTIPLAYER
Once you have tested your skills against the single player missions, you can see how
you fare against human opponents. Delta Force: Task Force Dagger is fully supported by
our online battleground called NovaWorld and can also be played by up to 16 players
over a LAN/IPX.
When playing via NovaWorld, you can join a multiplayer game at any time, and leave
whenever you wish. This means that unless you are the Host, you do not have to be
present at the initiation of a game to join in. If you leave in the middle of a mission, the
other players can continue to play without you.
You can host a NovaWorld game with up to 16 players depending on your Internet
connection, or a LAN/IPX game. The faster your connection, the more players you
will be able to adequately have in your game. If the host leaves at any point, the game
will end. Since your connection to the Internet will directly affect your performance on
NovaWorld, you will want to make sure that you have as fast a connection as possible
when hosting or playing a game.
JOINING NOVAWORLD
In order to play on NovaWorld, you must have a NovaWorld account. If you do not
already have one, you can create a new account in seconds. If this is your first time
playing Delta Force: Task Force Dagger, you will be asked to enter the CD KEY that is
printed in your Delta Force: Task Force Dagger CD case (you must include the dashes).
Once you are logged into NovaWorld, you can join NovaWorld Stat-Hosted games
(explained below), public games, or password protected games.
NOVAWORLD RANKS AND STAT-HOSTED GAMES
NovaWorld features a world ranking system where all of your game statistics from
official NovaWorld hosted games will be stored and be available for other players to
view. Players will rise through actual Army ranks as they play in official games.
The speed at which you gain new ranks will depend on how well you play. Similar to
the real military, higher ranks will not come easily. Only dedicated players will make it
to officer level. Players will also be given Awards if their statistics meet certain criteria.
You will have a separate level for each different multiplayer game category. Please log
onto NovaWorld for more information on Ranks and Awards.
24
Page 26

MULTIPLAYER GAME TYPES
DEATHMATCH
AND TEAM DEATHMATCH
For Deathmatch, all players are competing against
each other to gain the high score by eliminating the
most opponents. In Team Deathmatch, players work
in teams to get the high score.
Deathmatch Score:
Kill Friendly (Team only) -4
Kill Yourself -1
Killed by opponent 0
Kill opponent +1
Kill opponent with head shot +2
Kill opponent with a knife +3
KING OF THE HILL AND TEAM KING OF THE HILL
In this scenario, players win by occupying a certain area for a specific duration of time
(set by the game host). The hot zone shows up as a red circle on your GPS and
Commander’s map. Although your time in the zone is cumulative, leaving the hot zone
will cause your timer to start to count backwards. The size and number of hot zones will
vary depending on which map the host chooses.
In Team King of the Hill, up to four teams can play against each other. You need
only one teammate in the zone for the timer to start. Unlike regular King of the Hill,
as soon as you have no more teammates in the hot zone, your timer will immediately
drop to zero.
CAPTURE THE FLAG
Flags are represented by a triangle symbol on the GPS and Commander’s Map. You are
part of the red team or the blue team and your objective is to grab the other team’s flag
by running over it and returning it to your team’s Flag Bay (represented by a colored
circle). At the same time, you need to defend your own flags from your opponents.
Some variations have multiple flags that must be retrieved. The waypoint indicator will
help guide you to the flags and back to your flag bay.
SEARCH AND DESTROY
Each team must enter into the other’s territory and destroy specific targets to
win the game.
ATTACK AND DEFEND
Similar to Search and Destroy, one team wins if they destroy all of their targets within
their opponent’s territory. The defenders win if time expires before the other team can
accomplish all of their goals.
FLAGBALL
In Flagball, there is one flag in the middle of the playing field. Up to four teams compete
to grab the flag and return to their base to score 1 point. After a point is scored the flag
is reset to the center of the playing field.
25
Page 27

MULTIPLAYER HOSTING GAME OPTIONS
The host of a multiplayer game will be able to set several different options to determine
how the game functions.
Game Name: Type the name you want your game to appear as to other players.
Game Password: If you want to limit who can join your game, type the password
they must know to join your game here.
Country: Type the three letter abbreviation of your country here if you want other
players to know where the game is being hosted from.
Connection Type: Select either NovaWorld or LAN/IPX.
Server Type: If you will be playing the game you host on your computer, choose
“Serve and Play”. The host should always be the person with the fastest Internet
connection and/or computer setup. If you will have a dedicated server for hosting the
game, choose “Serve Only”.
Number of Teams: Select how many teams there will be in team oriented games.
TEAM OPTIONS
Team Selection: “Server Chooses” will override the individual player’s choice of sides
and make teams even.
Allow Friendly Fire: You have the option of making your teammates invulnerable to
your weapons by turning Allow Friendly Fire “Off.”
Friendly Fire Warning: Select “Off” to remove the safety X that appears when
targeting allies for all players.
Friendly Tags: Having this option “Off” will not allow players to use Friendly Tags.
See Team On GPS: Select “Yes” if you want members of the same team to be able to
see icons representing the location of their teammates on the GPS map.
Team Lives: For a more realistic game, you can set this value to zero, which means
when you are killed, you're out of the game. Increasing this value creates a pool of lives
that your team can draw from. When they are used up, your teammates will be dropped
from the game when killed. This setting is defaulted to “Infinite”, where you will always
respawn after being killed.
26
Page 28

Squad Password: Use these boxes to set individual passwords for teams. Remember
to inform your players of their proper password.
WIN CONDITIONS
Time Limit: Determines how long a game will last.
Score Limit: Determines what score must be attained before the game ends
and a winner is declared.
King of the Hill Time: Determines the total cumulative amount of time, in minutes, a
player must occupy the hot zone in order to win a King of the Hill game.
BASIC AND ADVANCED SETUP
Maximum Players: Determines the maximum number of players allowed to join the
multiplayer game.
Start Delay: The number of minutes before play can begin. This allows time for new
players to join in.
Replay: If this is set to “Selected Mission”, the game will automatically restart in the
same map after the previous round is finished. Select “Cycle” to have the game go
through each map for that game type. Select “No” to have the game end after the
round is finished.
Timeout Box: Determines the amount of time to elapse before a killed player is
allowed to re-enter the game.
Destroyable Buildings: By setting this to “Yes”, players can destroy certain buildings.
Death Messages: Turning this option “Off” will eliminate the text messages that
appear when someone is killed. This way you won't know if you've killed someone
unless you see them die.
Character Abilities: If you don’t want to use character special abilities such as
variable run speed, hit points, or preferred weapons, select “Off”.
Wind: Use this setting to turn off the default wind settings or enable random settings
GPS Icons: Selects whether players can see only friendly units on the GPS, all units,
or none.
Tracers: Select “Off” if you don’t want any player to see the bullet trail from weapons
that fire tracer ammunition.
27
Page 29

Scope Drift: If you do not want your stance to affect your scope’s stability, turn this
option “Off”.
Crosshair Spread: If you do not want your crosshair to widen while you run,
select “Off”.
Weapon Recoil: If you do not want your weapons to have recoil, select “Off”.
Drop Weapons: If you do not want the option of dropping weapons to pick up new
ones, select “Off”.
Respawn with Primary: Set to “No” to have players respawn without a
primary weapon.
WEAPON RESTRICT
You can limit which weapons are allowed into your game here. Simply turn the
weapons you don’t want “No”. Players who choose a restricted weapon will be
given a default weapon.
Voice-Over-Net
Voice-Over-Net is a built in voice communication system for use on NovaWorld. The set
up is simple and can be done entirely while in Delta Force Task Force Dagger. All you
will need is a Full-Duplex sound card and a microphone plugged into the Mic In jack of
your sound card. Note that a Half-Duplex sound card will allow you to hear other
players, but not to talk.
After plugging in your Microphone (make sure it is in the Mic In and not the Line In
input), start Delta Force Task Force Dagger and click on Player Settings. Upon starting or
joining a game, all players will be defaulted to “muted” to eliminate unwanted
conversation. Unmute those players that you want to talk to.
On the Commander’s Voice-Over-Net screen, use the Tab key to cycle through the list of
players. The “muted” icon will appear after the player’s name if you have muted them.
Use the Keypad + key to unmute the currently selected player or the Keypad 0 key to
mute the current talker. If their name appears in red that means that they have muted
you. In team games, you can only select players on your own side to talk with.
VOICE-OVER-NET KEYPAD COMMANDS
+ Unmute Selected Player: Press this key to be able to listen to a player
28
who was previously muted. Note that all players begin the game muted.
Page 30

0 Mute Current Talker: When you no longer want to hear voice messages
UAV
TILT
DOWN
Num Lock
/
*
–
789
456
+
123
0
Del Enter
RECORD
VOLUME
UP
MUTE CURRENT
TALKER
BREAK
TALKER
PUSH
TO
TALK
UNMUTE
SELECTED
PLAYER
SELECT
LAST
TALKER
DISPLAY
LAST
TALKER
VON
DISPLAY
UAV
PAN
LEFT
UAV
LOCK ON
TARGET
UAV
PAN
RIGHT
UAV
ZOOM
IN
UAV
TILT
UP
UAV
ZOOM
OUT
RECORD
VOLUME
DOWN
from a certain player, you can press this key to break communication and put
them on mute mode.
- VON Display On/Off: The Voice-Over-Net status display turns on/off.
DEL Break Talker: To break communication with a player who is talking to you in
order to free up your line for another talker, press this key. Unlike Mute, the
player can try to contact you again by pressing the Push to Talk button on
their end.
ENTER Push to Talk: Hold this button down to transmit a voice message to the currently
selected player.
1 Adjust Record Volume Down: If your outgoing messages are distorted, you may
wish to decrease the mic’s sensitivity by using this key.
3 Adjust Record Volume Up: If people are having a hard time hearing you, try
adjusting your Microphone’s record level up with this key.
* Display Last Talker: By pressing this key, the name of the last person to send
you a voice message will appear.
/ Select Last Talker: By pressing this key, the last player to send you a message
will be selected to receive your outgoing voice messages.
29
Page 31

Internet Etiquette
NovaLogic does not monitor Voice-Over-Net communication. If you are having a
problem with any other player, we strongly suggest that you mute them.
When using any form of communication, please be considerate of other people. Using
hateful, discriminatory or obscene language will probably get you muted. You can try
using text chat (the T key) to ask them politely to unmute you. If they choose to keep you
muted, it probably wouldn’t have been an interesting conversation anyway.
VOICE-OVER-NET
Voice-Over-Net: Set to “Enable” if you want to use the Voice-Over-Net feature.
Disabling this feature will not allow you to transmit or receive voice messages or
access the Voice-Over-Net interface. A Full-Duplex sound card is required to transmit
voice messages.
Duplex Mode: In “Full” mode, you will be able to transmit and receive voice
messages (if you have a Full-Duplex soundcard). If you do not have a Full-Duplex
soundcard or if you do not wish to send voice messages but you would still like to
receive them, select “Half”.
Record Volume: This slider bar is used to set the sensitivity level of your microphone.
If people are having a hard time hearing you, try increasing this level. If your messages
are distorted, you may want to adjust this bar down.
Check Recording Level: When you press “Check Recording Level” begin talking
normally for five seconds. The computer will automatically playback the audio you just
recorded. If you are not satisfied with the levels, adjust the Record Volume option.
Activation Mode: “Voice Activation” automatically starts transmitting when
you speak. With “Push To Talk” mode, you must hold down the Enter key to send
a voice message.
Activation Threshold: This determines how loud you must be for “Voice Activation”
to start sending a message. Adjust it down if Voice-Over-Net activates when you
are not speaking.
30
Page 32

credits
Zombie
Producer
Mark Long
Associate Producer
Joanna Alexander
Production Assistant
Janice Butler
Art
Lloyd Bailey
Eric Eye
Mark Long
Shane Moura
Daniel Sipes
David Tyson
John Williamson
Kentarou Taya
Nicholas Kondo
Shawn Mulanix
Mission
Design Manager
Eric Eye
Mission Design Lead
Daniel Sipes
Mission Design
Eric Eye
Shane Moura
Daniel Sipes
John Williamson
Additional
Mission Design
Joanna Alexander
Lloyd Bailey
Ron Haskins
Nicholas Kondo
Mark Long
Kentarou Taya
David Tyson
Mission Briefings
Mark Long
Audio Director
Joe Zajonc
Sound Effects
Joe Zajonc
Music
Mark Long
Joe Zajonc
Dialog Editing
Ron Haskins
Mark Long
Marcin Wieczorek
Joe Zajonc
Voices
Mustasha Aljayashi
Mustafa Alkhedairy
Eric Eye
Nate Hall
Ron Haskins
Jimbo Harris
Shawn Mulanix
Ali Ghambari
Mark Long
Joe Zajonc
Special Thanks
Victoria Gentry
Charlie Parker
Joe Who
Loa and Legba
Melissa Williamson
Ivy and Michi
Chris Eckhart
Bruce Haskins
Aramis Van Sandt
Mike Kieltsch
Monolith
WXP
RED
DigiPen
Cheery Street Coffee
NovaLogic
Lead Programming
Pat Griffith
Programming
Mark Davis
Kyle Freeman
Additional
Programming
David King
Kent Simon
Trevor Walker
NovaWorld Team
Michael Drannikov
Lukas McGregor
Eric Milota
Jim Ratcliff
Chris Tearpak
31
Page 33

Executive Producer
John Garcia
Producer
Wes Eckhart
Associate Producer
Barry Feather
Production Assistant
Anthony Jimenez
Additional
Management
John Butrovich
David Seeholzer
—
Art Department
Manager
Chris Tamburrino
Art
John Brophy
Chris Demers
Rod Parong
Jon Tando
Video Editing
Paul Fox
Marketing
Management
Georgina Petrie
Marketing
Paul Olshan
Lucinda Searle
PR
Marcus Beer
Chris Clarke
Sales Management
Dave Pollack
Sue Wosczyna
Sales
Rose Buahin
Scott Ellyn
Web Design
Alan Bollinger
Creative
Service Director
Keith Rust
Packaging
Layout & Design
Hamagami/Carroll
Ulises Gerardo
Production
Management
Lance Pifer
Silvana Luciano
QA Manager
Tim Knight
Quality Assurance
Todd Dang
Boris Faynberg
Henry Gukasyan
Chris Hansen
Mike Harling
David Holder
Alan Maddox
Sean Manzano
Steve Merkel
Joel Taubel
Special Thanks
Jeff Brunner
Natalia Fernandez
Ed Gwynn
Kathy Hatton
Neva Lawson
Lee Milligan
Jason Monroe
Paul Rebhan
Saras Seth
Gregg Southard
Video Footage
Defense Visual
Information Center,
March ARB, CA.
Audio Support
Russell Brower
Paul Fox
32
Manual
Layout & Design
Deanna Dolph
Manual Written by
Jason Ryan
Uses Bink
Video Technology.
Copyright © 1997-2002
by RAD Game Tools, Inc.
Page 34

tech support
The entire staff at NovaLogic Inc. thanks you for purchasing Delta Force: Task Force
Dagger. NovaLogic is committed to creating quality entertainment software that pushes
the technological envelope. However, this commitment doesn’t end when you purchase
our games – it’s only just begun. Our technical support staff is ready to assist you.
INTERNET WEBSITES: HTTP://WWW.NOVALOGIC.COM
Visit the NovaLogic website for up-to-the-minute information, frequently asked questions,
game updates, and previews of upcoming products and screen shots.
HTTP://WWW.NOVAWORLD.COM
Visit this website for the latest information on NovaWorld.net, our large-scale multiplayer
gaming service.
EMAIL SUPPORT ADDRESS: SUPPORT@NOVALOGIC.COM
You may also email your questions and comments to a member of technical support at
any time. Remember to provide a detailed description of the problems you are
encountering and your system specifications.
TECHNICAL SUPPORT LINE: (818) 878-0325
If you need to speak to someone directly, our technical support staff can be reached
during normal business hours (Monday through Friday 9AM to 5PM Pacific Time,
excluding holidays). To better assist you, please have your hardware set-up information
on hand. Also be prepared to explain the exact nature of any problems you are
experiencing. For example, write down the exact wording of any on-screen error
messages you may be receiving.
FAX LINE: (818} 880-3448
You may be asked to provide proof of purchase or CD-Keys. If you cannot e-mail them to
us, you can fax a photocopy to the number listed above.
33
Page 35

legal
NOVALOGIC’S LIMITED NINETY-DAY WARRANTY AND LICENSE PROVISIONS
IMPORTANT: By breaking the seal on the software, you agree to be irrevocably bound to the following terms and conditions. If you
do not wish to be bound, promptly return this product in its entirety with the software seal intact and proof of purchase to NovaLogic,
Inc., 26010 Mureau Road, Suite 200, Calabasas, California 91302, and a full refund will be made.
LIMITED WARRANTY ON MEDIA
NovaLogic, Inc. (“NovaLogic”) warrants the compact disc on which this product is recorded to be free from reasonable defects in
materials and workmanship under normal use for a period of ninety (90) days from the date of purchase as evidenced by a copy of
your proof of purchase. NovaLogic’s entire liability and your exclusive remedy in the event of such defect will be replacement of the
compact disc not meeting NovaLogic’s limited warranty and which is returned to NovaLogic with a copy of your proof of purchase.
NovaLogic will have no responsibility to replace any such compact disc damaged by accident, abuse or misapplication. This policy
applies to the initial purchase only.
ANY IMPLIED WARRANTIES ON THE COMPACT DISC, INCLUDING THE IMPLIED WARRANTIES OF MERCHANTABILITY AND
FITNESS FOR A PARTICULAR PURPOSE, ARE LIMITED IN DURATION TO NINETY (90) DAYS FROM THE DATE OF DELIVERY. THIS
WARRANTY GIVES YOU SPECIFIC LEGAL RIGHTS, AND YOU MAY ALSO HAVE OTHER RIGHTS WHICH VARY BY JURISDICTION.
If you and the NovaLogic Tech Support Staff believe you have found any such error or defect during the warranty period please
return the defective compact disc together with a dated proof of purchase to NovaLogic, Inc., 26010 Mureau Road, Suite 200,
Calabasas, California 91302, for a free replacement.
DISCLAIMER OF WARRANTY ON PRODUCT
YOU EXPRESSLY ACKNOWLEDGE AND AGREE THAT USE OF THIS PRODUCT IS AT YOUR SOLE RISK. THIS PRODUCT AND
RELATED DOCUMENTATION ARE PROVIDED “AS IS” AND WITHOUT WARRANTY OF ANY KIND AND NOVALOGIC EXPRESSLY
DISCLAIMS ALL WARRANTIES, EXPRESS OR IMPLIED, INCLUDING, BUT NOT LIMITED TO, THE IMPLIED WARRANTIES OF
MERCHANTABILITY AND FITNESS FOR A PARTICULAR PURPOSE. UNAUTHORIZED REPRESENTATIONS: NOVALOGIC
WARRANTS ONLY THAT THE PROGRAM WILL PERFORM AS DESCRIBED IN THE USER DOCUMENTATION. NO ADVERTISING,
DESCRIPTION OR REPRESENTATION, WHETHER MADE BY A NOVALOGIC DEALER, DISTRIBUTOR, AGENT OR EMPLOYEE, SHALL
BE BINDING UPON NOVALOGIC OR SHALL CHANGE THE TERMS OF THIS DISCLAIMER OR THE LIMITED WARRANTY ON
MEDIA SET FORTH ABOVE. NOVALOGIC DOES NOT WARRANT THAT THE FUNCTIONS CONTAINED IN THE NOVALOGIC
PRODUCT WILL MEET YOUR REQUIREMENTS, OR THAT THE OPERATION OF THE NOVALOGIC PRODUCT WILL BE
UNINTERRUPTED OR ERROR-FREE, OR THAT DEFECTS IN THE PRODUCT WILL BE CORRECTED. FURTHERMORE NOVALOGIC
DOES NOT WARRANT OR MAKE ANY REPRESENTATIONS REGARDING THE USE OR THE RESULTS OF THE USE OF THE
PRODUCT OR RELATED DOCUMENTATION IN TERMS OF THEIR CORRECTNESS, ACCURACY, RELIABILITY, OR OTHERWISE. NO
ORAL OR WRITTEN INFORMATION OR ADVICE GIVEN BY NOVALOGIC OR NOVALOGIC’S AUTHORIZED REPRESENTATIVE
SHALL CREATE A WARRANTY OR IN ANY WAY INCREASE THE SCOPE OF THIS WARRANTY. SHOULD THE PRODUCT PROVE
DEFECTIVE, YOU (AND NOT NOVALOGIC) ASSUME THE ENTIRE COST OF ALL NECESSARY SERVICING, REPAIR OR
CORRECTION. SOME JURISDICTIONS DO NOT ALLOW THE EXCLUSION OF IMPLIED WARRANTIES, SO THE ABOVE
EXCLUSION MAY NOT APPLY TO YOU.
NO CONSEQUENTIAL DAMAGES: NOVALOGIC SHALL NOT BE LIABLE FOR SPECIAL, INCIDENTAL,CONSEQUENTIAL OR
OTHER DAMAGES, EVEN IF NOVALOGIC IS ADVISED OF OR AWARE OF THE POSSIBILITY OF SUCH DAMAGES. THIS MEANS
THAT NOVALOGIC SHALL NOT BE RESPONSIBLE OR LIABLE FOR LOST PROFITS OR REVENUES, OR FOR DAMAGES OR COSTS
INCURRED AS A RESULT OF LOSS OF TIME, DATA OR USE OF THE SOFTWARE, OR FROM ANY OTHER CAUSE EXCEPT THE
ACTUAL COST OF THE PRODUCT. IN NO EVENT SHALL NOVALOGIC’S LIABILITY EXCEED THE PURCHASE PRICE OF THIS
PRODUCT. SOME STATES DO NOT ALLOW THE EXCLUSION OR LIMITATION OF INCIDENTAL OR CONSEQUENTIAL DAMAGES,
SO THE ABOVE LIMITATION OR EXCLUSION MAY NOT APPLY TO YOU.
LICENSE
NovaLogic grants you a nonexclusive, nontransferable license as follows. You are entitled to use this product for your own use, but
may not make, sell or transfer reproductions of the software or manual to other parties in any way, nor rent, lease, or preview the
product to others without the prior written permission of NovaLogic. You may use one copy of the product on a single terminal
connected to one particular computer. You may not reverse engineer, disassemble, or translate the product. Additionally, you are
expressly prohibited from redistributing the BinkPlay.exe. If you would like to redistribute the BinkPlay.exe program, please contact
RAD at www.radgametools.com about acquiring a redistribution license.
© 1998-2002 NovaLogic, Inc. NovaLogic, the NovaLogic logo, NovaWorld and Delta Force are registered trademarks of
NovaLogic, Inc. The Delta Force logo, the NovaWorld logo, Task Force Dager, NovaLogic – The Art of War are trademarks of
NovaLogic, Inc. Windows is a registered trademark and Direct 3D, Direct X are trademarks of Microsoft Corporation.
SurroundSound decoding hardware required for Dolby SurroundSound. Dolby and the Double-D symbol are trademarks of Dolby
Laboratories Licensing Corporation. NVIDIA and the NVIDIA logo are trademarks of NVIDIA Corporation. Intel and Pentium are
registered trademarks of Intel Corporation. All other trademarks are property of their respective owners.
U.S. Patent #s 5,625,759, 5,550,959 and 6,020,893.
European Union Patent # 0824830
9816-1303
 Loading...