

Page 1
Copyright © 2002, Nova Development Corporation and its licensors.
All rights reserved. Product of the USA.
®
Page 2

License Agreement
PLEASE READ CAREFULLY!
1. Grant of License. Nova Development Corporation ("Nova Development") hereby grants you a non-exclusive license to
use the Photo Explosion® software and related documentation (collectively, the "Software") solely in accordance with the
terms and conditions of this license agreement ("License"). This License sets forth your rights and responsibilities and other
terms and conditions that relate to your use of the Software. Before you use the Software, please read this License as
carefully as you would read any other legal document. If you do not agree with all of the terms and conditions of this
License, do not use the Software and return it within 90 days of purchase in accordance with the procedure set forth in the
Money Back Guarantee section below for a full refund. Your installation or use of the Software means that you have read
and agree to all of the terms and conditions of this License.
2. Reservation of Rights. Nova Development hereby reserves all rights not expressly granted by this License. Nothing in
this License constitutes a sale or grant of any ownership rights in or to the Software.
3. Permitted Use. You may use the Software on only one computer at a time. The use of one disc on one computer and
another disc on a different computer at the same time is a breach of this License. You may make one copy of the Software
for archival or "back up" purposes. You should contact Nova Development to obtain a site license if you need to use the
Software simultaneously on multiple computers or a network.
4. Prohibited Use.You may not use the Software except as expressly permitted by this License. For example, you may not:
(i) copy or reproduce any part of the Software, except as permitted by law or Section 3 of this License; (ii) sublicense, copy,
lend, lease, rent, transfer or otherwise make any part of the Software available to any third party, except in accordance with
Section 11; (iii) decompile, reverse-engineer or disassemble the Software or otherwise attempt to obtain the source code of
the Software; (iv) alter, translate, adapt or modify the Software in any way; or (v) remove or alter the copyright notices on
the Software.
5. Use of Content. You may use the content (the "Content") included in the Software only for your personal,
noncommercial use, as may be further described in the documentation for the Software. You may not use the Content for
any other purpose whatsoever. For example and without limitation, you may not: (i) permit any third party to use or access
the Content, to make products or otherwise; (ii) sell or otherwise commercially distribute products created using the
Content; (iii) sell or distribute (commercially or otherwise) the Content as stand-alone images or clip art, or in graphics
catalogs, design books, compilations, collections, templates, designs, stock engravings or the like; or (iv) distribute or make
available electronic copies of the Content to third parties in any manner, including without limitation, via the Internet, on
any tangible media or by broadcast.
6. Responsibility For Use Of Content.You are completely responsible for your use of the Content. You may only use the
Content responsibly, in a manner consistent with the exercise of good judgment. For example, and without limitation, you
may not use the Content in any manner that: (i) infringes the copyright, trademark, patent, trade secret, right of publicity or
any other right of a third party; (ii) is or may be libelous, defamatory or slanderous; (iii) denigrates or offends any ethnic,
racial, sexual or religious group, or persons who are physically or mentally challenged; (iv) is designed to or will harass,
threaten, defame or abuse others; (v) exploits images or the likeness of individuals under 18 years of age; or (vi)
characterizes any other unlawful activity as acceptable, glamorous or desirable.
7. Third-Party Intellectual Property. Certain portions of the Content may consist of the copyrights, trademarks, service
marks, trade names or other intellectual property of third parties. These portions of the Content are provided for the
convenience of certain users of the Software who are expressly authorized to use them by their owners. You may not use
any third-party intellectual property without their express authorization.
8. LZW Restrictions. The Software uses LZW compression/decompression technology licensed under U.S. Patent No.
4,558,302 and foreign counterparts. You may not use the technology covered by this Patent, except in your use of the
Software, unless you are separately licensed in writing by Unisys to do so.
9. U.S. Government Restricted Rights. The Software is licensed to the U.S. Government with RESTRICTED RIGHTS.
Use, duplication or disclosure by the U.S. Government is subject to restrictions as set forth in the Rights in Technical Data
and Computer Software clause at DFARS 252.227-7013 and the Commercial Computer Software clause at 48 CFR 52.22719, as applicable. Contractor/manufacturer is Nova Development Corp., 23801 Calabasas Road, Suite 2005, Calabasas,
California 91302.
Page 3

10. Export Restrictions. You are responsible for complying with all foreign and domestic laws and trade regulations. The
Software and its underlying information and technology may be not downloaded or otherwise exported or re-exported: (i)
into Cuba, Iraq, Libya, Sudan, North Korea, Iran, Syria, or any other country subject to a U.S. embargo, or to any national
or resident of any of these countries or (ii) to any person or entity on the U.S. Treasury Department's list of Specially
Designated Nationals or the U.S. Commerce Department's Denied Persons List or Entities List. By using the Software you
agree to the foregoing and represent and warrant that: (i) no U.S. federal agency has suspended, revoked or denied your
export privileges; (ii) you are not located in any such country or under the control of a national or resident of any such
country or on any such list; and (iii) you will not export or re-export the Software to any prohibited county or to any
prohibited person, entity or end-user as specified by U.S. export controls.
11. Assignment. You may only assign the Software to another party if that party takes the Software subject to all of the
terms and conditions of this License. If you assign the Software, you may not use the Software or retain any copies of it in
any format whatsoever and all of your rights under this License will immediately terminate.
12. Term. The term of this License with you will continue until you assign the Software in accordance with Section 11 or
you breach any term of this License.
13. Money-Back Guarantee. Without limiting any of the provisions of Sections 14 through 17, if for any reason you are
not satisfied with the Software you may return it in its original condition within 90 days of purchase for a full refund. If the
store where you purchased the Software does not support this money-back guarantee, you may return the Software directly
to Nova Development. Call Nova Development at the phone number listed on the back cover of your User Manual to obtain
a return authorization number. Then send the Software, along with the original store receipt, to the address you are given
when you call Nova Development. Nova Development cannot accept returns without prior authorization.
14. LIMITED WARRANTY. NOVA DEVELOPMENT ONLY WARRANTS THAT THE SOFTWARE WILL BE
FREE FROM MATERIAL DEFECTS FOR A PERIOD OF 90 DAYS FOLLOWING ITS PURCHASE. IF A MATERIAL
DEFECT OCCURS WITHIN 90 DAYS, YOU MAY RETURN THE SOFTWARE TO NOVA DEVELOPMENT FOR A
FREE REPLACEMENT. EXCEPT FOR ANY ADDITIONAL RIGHTS THAT MAY EXIST IN YOUR JURISDICTION,
THE FOREGOING REMEDY IS YOUR SOLE REMEDY FOR NOVA DEVELOPMENT'S BREACH OF THIS
WARRANTY.
15. DISCLAIMER. WITH THE EXCEPTION OF THE FOREGOING EXPRESS WARRANTY, THE SOFTWARE IS
LICENSED TO YOU "AS IS." NOVA DEVELOPMENT DOES NOT REPRESENT OR WARRANT THAT THE
SOFTWARE, ITS USE OR THE WORK PRODUCT PRODUCED USING THE SOFTWARE: (i) WILL BE
UNINTERRUPTED OR FREE OF INACCURACIES OR ERRORS; (ii) WILL MEET YOUR REQUIREMENTS; OR
(iii) WILL OPERATE IN THE CONFIGURATION OR WITH THE HARDWARE OR OTHER SOFTWARE YOU MAY
SELECT. NOVA DEVELOPMENT HEREBY DISCLAIMS ANY AND ALL IMPLIED WARRANTIES, INCLUDING
WITHOUT LIMITATION, WARRANTIES OF FITNESS FOR A PARTICULAR PURPOSE, MERCHANTABILITY
AND NON-INFRINGEMENT.
16. EXCLUSION. NOVA DEVELOPMENT WILL NOT BE LIABLE TO YOU OR ANYONE ELSE FOR
CONSEQUENTIAL, INCIDENTAL, INDIRECT, PUNITIVE OR SPECIAL DAMAGES (INCLUDING DAMAGES
RELATING TO LOST PROFITS, LOST DATA OR LOSS OF GOODWILL) ARISING OUT OF, RELATING TO OR
CONNECTED WITH THE USE OF THE SOFTWARE, REGARDLESS OF THE NATURE OF THE CLAIM, AND
EVEN IF ADVISED OF THE POSSIBILITY OF SUCH DAMAGES.
17. LIMITATION. IN NO EVENT WILL NOVA DEVELOPMENT'S TOTAL LIABILITY FOR DAMAGES ARISING
FROM, RELATING TO OR CONNECTED WITH THIS LICENSE OR THE SOFTWARE EVER EXCEED THE
PRICE YOU HAVE PAID FOR THE SOFTWARE, REGARDLESS OF THE NATURE OF THE CLAIM.
18. APPLICABILITY OF EXCLUSIONS AND LIMITATIONS. SOME JURISDICTIONS MAY NOT PERMIT
CERTAIN OF THE EXCLUSIONS AND LIMITATIONS SET FORTH IN THIS LICENSE, IN WHICH CASE THEY
MAY NOT APPLY TO YOU.
19. Miscellaneous. This License is governed by the law of California applicable to contracts entered into and performed
entirely within California irrespective of its conflict of laws principles. Any action arising under, relating to or connected
with this License or the use of the Software will be filed only in an appropriate court located in Los Angeles County,
California, and the parties irrevocably consent and submit to the personal jurisdiction of such courts for such purposes. The
Section titles in this License are for convenience only and will not be deemed to affect the provisions of the Sections. No
waiver, amendment, supplementation or modification of any provision of this License will be effective, except pursuant to
a written instrument signed by both parties. In the event that any portion of this License is held invalid or unenforceable,
such portion will be deemed modified so as to make it valid and enforceable, consistent with the parties' intentions or if it
cannot be so modified, will be deemed stricken, with the remaining portions of this License to remain in full force and
effect. This License constitutes the entire understanding and agreement, and supersedes any and all prior or
contemporaneous representations, understandings and agreements, between the parties with respect to the subject matter of
this License. Nothing contained in this License will be deemed to create a joint venture or partnership between you and
Nova Development, or to create any third party rights. The prevailing party in any action or proceeding arising under,
relating to or connected with this License shall be entitled to recover from the other party the reasonable attorneys fees and
costs incurred in such action or proceeding.
Page 4

Acknowledgements
Nova Development wishes to thank the many people who contributed to Photo Explosion
including:
Douglas Gintz, Eric Kaufman, Roger Bloxberg, Karen Brower,Tracy Chandler, Kristyl Cornell,
Ryan Crippen, Gary Gonzalez, Lisa Helfstein, Todd Helfstein, Derek Jacobsen, and Shan
Ogdemli.
In addition, we are also grateful for the work and support of Christina Canale, Jorge Dagang,
Troy Doss, Marisa Eland, Dan Feldman, Kim Huang, Louis Jordan, Alex Khoras, Nick Kim,
Juliet Kuo, James Lagasse, Rhea Lu, Alia Michaels, Susan Ragsdale, Russell St. Charles, Levi
Salvador, Michael Schultz, Maya Sidharta, John Tsai, David Tseng, Dennis Yang, William
Wood and Alex Wu.
©2002 Nova Development Corp. and its licensors. All Rights Reserved. Explosion is a registered trademark
and Photo Explosion and the Nova logo are trademarks of Nova Development Corporation. Software
developed by Ulead Systems, Inc. ©1992-2002 Ulead Systems, Inc. All Rights Reserved. JPEG Plug-In
Module ©1992-2001 Ulead Systems, Inc. All Rights Reserved. Portions of this software are based in part on
the work of the Independent JPEG Group. Portions under license from Applian Technologies Inc. Portions
under license from SplashData Inc.
Images ©1998-1999, 2002 Nova Development Corporation; ©1995 Expressions Computer Software; ©
Management Graphics, Ltd.; ©1995 Tanner Dokuments GmbH; ©1996-98 Focus Designs; ©1996 Cliptoart;
©1996-99 Hemera Technologies, Inc.; ©1995 Silicon 4 Multimedia; ©1997-98 Seattle Support Group;
Contains type software from Bitstream, copyright ©1981-2000 Bitstream Inc. Font names may be registered
trademarks or trademarks of Bitsream Inc. or their respective owners. Rights of all parties reserved.
KODAK and the KODAK Picture Friendly logo are trademarks of Eastman Kodak Company. Avery and all
Avery codes are trademarks of Avery Dennison Corporation. Microsoft, Windows, and the Windows logo are
trademarks, or registered trademarks of Microsoft Corporation in the United States and/or other countries.
Other product names are trademarks of their respective owners.
The templates in this product use the names of people and organizations as placeholders for your custom text.
Any similarity to actual names is entirely coincidental.
Page 5

Table of Contents
Chapter 1. Introducing Photo Explosion
Welcome! . . . . . . . . . . . . . . . . . . . . . . . . . . . . . . . . . . . . . . . . . . . . . . . . . . .1
Registering Photo Explosion . . . . . . . . . . . . . . . . . . . . . . . . . . . . . . . . . . . .2
Getting Help . . . . . . . . . . . . . . . . . . . . . . . . . . . . . . . . . . . . . . . . . . . . . . . . .2
Conventions Used in This Guide . . . . . . . . . . . . . . . . . . . . . . . . . . . . . . . . .3
Chapter 2. Installing Photo Explosion
System Requirements . . . . . . . . . . . . . . . . . . . . . . . . . . . . . . . . . . . . . . . . . .4
Installing Photo Explosion . . . . . . . . . . . . . . . . . . . . . . . . . . . . . . . . . . . . . .4
Using Files from the Content and Bonus CDs . . . . . . . . . . . . . . . . . . . . . .4
Uninstalling . . . . . . . . . . . . . . . . . . . . . . . . . . . . . . . . . . . . . . . . . . . . . . . . .5
Chapter 3. Getting Started
Starting Photo Explosion . . . . . . . . . . . . . . . . . . . . . . . . . . . . . . . . . . . . . . .6
The Different Modes . . . . . . . . . . . . . . . . . . . . . . . . . . . . . . . . . . . . . . . . . .6
Browse Mode Overview . . . . . . . . . . . . . . . . . . . . . . . . . . . . . . . . . . . . . . .7
Photo Mode Overview . . . . . . . . . . . . . . . . . . . . . . . . . . . . . . . . . . . . . . . . .9
Project Mode Overview . . . . . . . . . . . . . . . . . . . . . . . . . . . . . . . . . . . . . . .12
Printing Overview . . . . . . . . . . . . . . . . . . . . . . . . . . . . . . . . . . . . . . . . . . .14
Using Photo Explosion Help . . . . . . . . . . . . . . . . . . . . . . . . . . . . . . . . . . .15
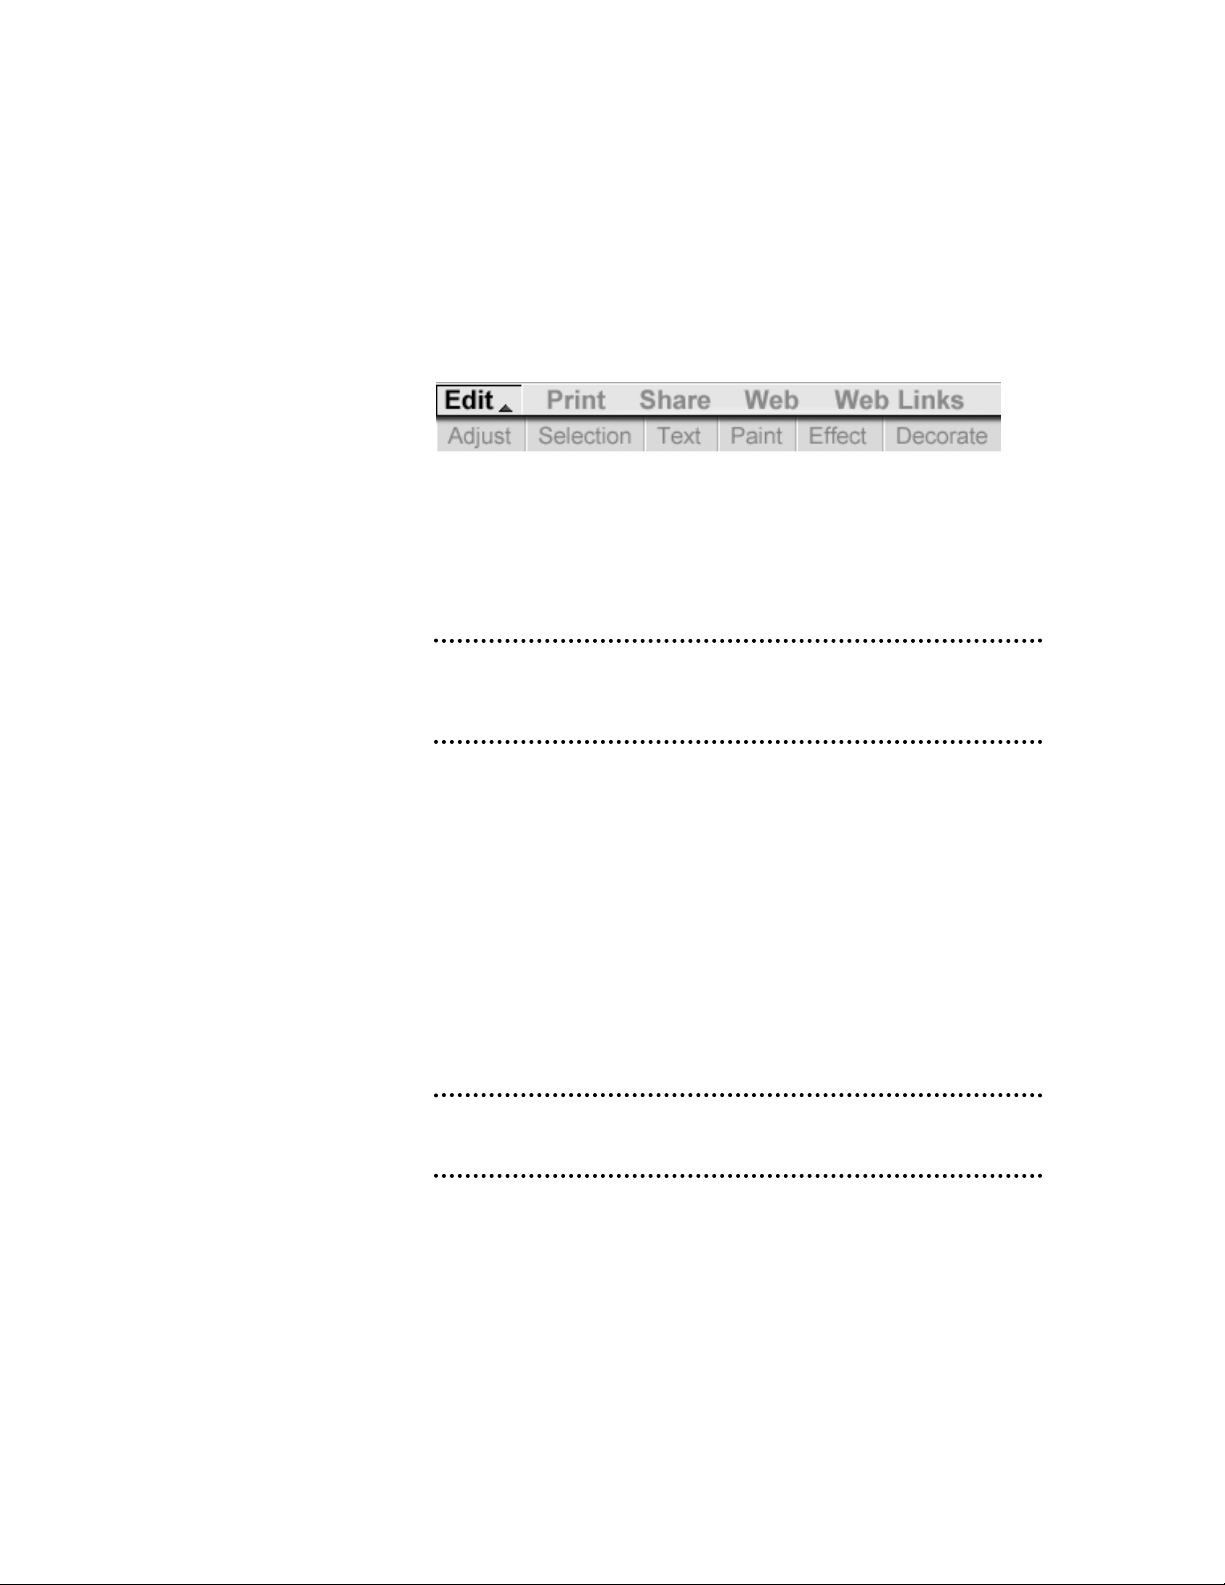
Chapter 4. Using Photo Explosion
Workspace Overview . . . . . . . . . . . . . . . . . . . . . . . . . . . . . . . . . . . . . . . . .16
Working with Objects . . . . . . . . . . . . . . . . . . . . . . . . . . . . . . . . . . . . . . . .19
Saving Photos and Projects . . . . . . . . . . . . . . . . . . . . . . . . . . . . . . . . . . . .21
Opening Existing Photos and Projects . . . . . . . . . . . . . . . . . . . . . . . . . . . .22
Chapter 5. Getting Photos and Other Images
Importing Clip Art or Other Graphics Images . . . . . . . . . . . . . . . . . . . . . .24
Understanding Resolution . . . . . . . . . . . . . . . . . . . . . . . . . . . . . . . . . . . . .25
Scanning . . . . . . . . . . . . . . . . . . . . . . . . . . . . . . . . . . . . . . . . . . . . . . . . . . .25
Downloading from a Camera . . . . . . . . . . . . . . . . . . . . . . . . . . . . . . . . . . .27
Capturing Video . . . . . . . . . . . . . . . . . . . . . . . . . . . . . . . . . . . . . . . . . . . . .27
Page 6

Chapter 6. Organizing and Adjusting Your Photos
Browse Mode Toolbars . . . . . . . . . . . . . . . . . . . . . . . . . . . . . . . . . . . . . . .29
Organizing Your Photos . . . . . . . . . . . . . . . . . . . . . . . . . . . . . . . . . . . . . . .30
Adjusting Your Photos in Batches . . . . . . . . . . . . . . . . . . . . . . . . . . . . . . .33
Chapter 7. Enhancing Your Photos
Photo Mode Toolbars . . . . . . . . . . . . . . . . . . . . . . . . . . . . . . . . . . . . . . . . .37
Selecting Parts of Photos . . . . . . . . . . . . . . . . . . . . . . . . . . . . . . . . . . . . . .38
Editing Images . . . . . . . . . . . . . . . . . . . . . . . . . . . . . . . . . . . . . . . . . . . . . .44
Fixing Your Photos . . . . . . . . . . . . . . . . . . . . . . . . . . . . . . . . . . . . . . . . . . .47
Adding Text . . . . . . . . . . . . . . . . . . . . . . . . . . . . . . . . . . . . . . . . . . . . . . . .52
Working with Painting Tools . . . . . . . . . . . . . . . . . . . . . . . . . . . . . . . . . . .55
Adding Graphic Elements and ‘Dressing up’Your Photos . . . . . . . . . . . .57
Chapter 8. Creating Projects
Project Mode Toolbars . . . . . . . . . . . . . . . . . . . . . . . . . . . . . . . . . . . . . . . .63
Working with Templates . . . . . . . . . . . . . . . . . . . . . . . . . . . . . . . . . . . . . .64
Customizing a Project . . . . . . . . . . . . . . . . . . . . . . . . . . . . . . . . . . . . . . . .66
Enhancing Your Project . . . . . . . . . . . . . . . . . . . . . . . . . . . . . . . . . . . . . . .68
Saving Your Project . . . . . . . . . . . . . . . . . . . . . . . . . . . . . . . . . . . . . . . . . .69
Chapter 9. Sharing Your Photos and Projects
Printing . . . . . . . . . . . . . . . . . . . . . . . . . . . . . . . . . . . . . . . . . . . . . . . . . . . .70
Sending by E-mail . . . . . . . . . . . . . . . . . . . . . . . . . . . . . . . . . . . . . . . . . . .76
Creating Web Projects . . . . . . . . . . . . . . . . . . . . . . . . . . . . . . . . . . . . . . . .77
Using Your Images on Your Computer . . . . . . . . . . . . . . . . . . . . . . . . . . .83
Making Images and Animations for Mobile Devices . . . . . . . . . . . . . . . .87
Creating Photo Gifts . . . . . . . . . . . . . . . . . . . . . . . . . . . . . . . . . . . . . . . . .90
Chapter 10. Advanced Special Effects
Advanced Special Effects for Images . . . . . . . . . . . . . . . . . . . . . . . . . . . .91
Adding Animation (Deluxe Version) . . . . . . . . . . . . . . . . . . . . . . . . . . . . .96
Advanced Special Effects for Text . . . . . . . . . . . . . . . . . . . . . . . . . . . . . . .99
Chapter 11. Using Images and Installing Fonts
Vector vs. Raster . . . . . . . . . . . . . . . . . . . . . . . . . . . . . . . . . . . . . . . . . . .100
Finding and Using the Image You Want . . . . . . . . . . . . . . . . . . . . . . . . .101
Installing Fonts . . . . . . . . . . . . . . . . . . . . . . . . . . . . . . . . . . . . . . . . . . . . .102
Chapter 12.Troubleshooting . . . . . . . . . . . . . . . . . . . . . . . . . . . . . . . . .104
Page 7

Appendix A. Supported File Types . . . . . . . . . . . . . . . . . . . . . . . . . . . .107
Appendix B. DVD PhotoPlay . . . . . . . . . . . . . . . . . . . . . . . . . . . . . . . . .109
Index . . . . . . . . . . . . . . . . . . . . . . . . . . . . . . . . . . . . . . . . . . . . . . . . . . . . . .123
Page 8

Chapter 1. Introducing Photo
Explosion
WELCOME!
Welcome to Photo Explosion, the complete digital photo studio.
For as long as there have been digital cameras, there have been digital photo
editing programs. Photo Explosion is the first product of its kind to deliver
powerful photo editing features, spectacular special effects and professionalquality photo projects all together in one program.
Photo Explosion is an indispensable tool for organizing and enhancing your
photographs. Photo Explosion allows you to acquire images from a wide
variety of TWAIN-compatible devices (digital cameras, scanners and video
cameras) and easily edit and apply cutting-edge effects to the images.
Additionally, you can create photo-based projects to share with family and
friends by transforming your pictures into artistic greeting cards, calendars,
banners and even animated Web Cards.
With Photo Explosion’s many tools you don’t have to be a graphic artist to
enhance and transform your photos. You can enhance your photos
individually or make changes to groups of photos. You can also import and
convert your photos into many different file formats.
Photo Explosion includes a wide range of project templates with millions of
creative combinations.
Photo Management: With Photo Explosion’s unique user interface, it is
now easy to keep track of your files. In Browse mode, you can use a
Windows Explorer–like view to browse image, audio and video files visually
and move the files into different folders, as needed.
Editing: Photo Explosion has a wide range of image editing tools from
simple color correction to high-end photographic effects. You can also dress
up your photos with fun props and decorative elements such as edges and
frames. Photo Explosion’s Single-Click SmartEnhance™ Technology makes
image editing easy for beginners. Or you may use advanced settings to
create unlimited variations.
Projects: Photo Explosion has ready-made templates that you can combine
with your own photos and text. These photo projects include: Photo Frames,
3D Crafts, Photo Calendars, Cards, Albums, Scrapbook Pages, Web Cards,
1
Page 9

Web Pages, Web Shows and many other personal and business-related
projects.
More ways to share: Instantly share your photos by e-mail, create an onscreen slide show or even make a web page with many output options to
share your memorable photos over the Internet. You can also enhance your
desktop with a practical calendar and wallpaper.
REGISTERING
PHOTO
EXPLOSION
Before you start enhancing your first photo or creating your first project,
please take a moment to register. Once you do, you’ll be entitled to:
• Free Technical Support: We’re committed to making Photo
Explosion work for you. If you have any questions, please contact our
support staff.
• Immediate Notification of Upgrades: You’ll hear about new versions
of Photo Explosion as soon as they’re available.
• Registered User Discounts: As a registered user, you’re eligible for
special prices on many new products and bonus offers on our other
best-selling software products.
Note: There is a registration button on the screen that appears when you
insert the Photo Explosion Installer disc.You can register Photo Explosion
before you install it.
GETTING HELP
Don’t panic! Our friendly technical support staff is ready to help:
• Send an e-mail message clearly describing your problem to
support@novadevelopment.com. We will reply within one business
day.
• Visit our web site at www.novadevelopment.com/main/support.html
for frequently asked questions and troubleshooting tips.
• Call us at 818-591-9600. Technicians are available from 8:30 AM to
5:30 PM Pacific Standard Time, Monday through Friday.
• Send a fax to 818-591-8885. We will reply within one business day.
• In Europe please contact Nova Development (UK) Limited:
Phone: +44 (0)1752 202507
2
Page 10

Fax: +44 (0)1752 894833
E-mail: support@novadevelopment.co.uk
CONVENTIONS
USED IN THIS
GUIDE
• Bold text is used for keys, buttons, check boxes, radio buttons, menus
or menu items, and text that you are directed to type.
• Italicized text refers to names for folders, files, disks or discs,
windows, and dialog boxes. It’s also used for new terms, chapter or
section references, and important ideas.
• Hierarchical submenus are noted as Submenu
➧
Submenu Item. For
example, the Custom item of the Rotate submenu would be described
as “Choose Rotate
➧
Custom from the Arrange menu.”
• Ctrl, Shift or Alt followed by a letter means hold down that key while
pressing the letter. For example, Ctrl+S means hold down the Ctrl
key while pressing the ‘S’ key.
• Click means click the left mouse button. Double-click means click the
left mouse button twice in quick succession. Right-click means to
click the right mouse button. Shift-click means hold down the Shift
key while clicking the left mouse button.
• A shortcut menu is the menu that appears when you click the right
mouse button over an object.
• Warnings, notes and tips look like this:
Note: Please don’t run with scissors.
3
Page 11

Chapter 2. Installing Photo
Explosion
SYSTEM
REQUIREMENTS
To run Photo Explosion you'll need a computer with a Pentium®166 or
faster microprocessor; Windows 95, 98, NT, 2000, Me or XP; 32 MB RAM;
and a CD-ROM drive; and Microsoft®Internet Explorer 5.0 or above.
INSTALLING
PHOTO
EXPLOSION
1. Insert the Photo Explosion CD labeled Installer into your CD-ROM
drive. In a few moments the Photo Explosion Installer startup screen
should appear automatically. If it doesn’t, go to My Computer, open
your CD-ROM drive and open the setup.exe program.
2. Click the Install Photo Explosion button.
3. Follow the instructions on screen to complete the installation.
Selecting the Typical Install option installs the software and supporting
files needed to run Photo Explosion. This is the recommended installation
and requires that you have the Photo Explosion Content CD in the CD-ROM
drive when you want to work with the ready-made designs. Selecting the
Full Install option installs the software, supporting files and the ready-made
designs.
If you don’t have Internet Explorer installed or a version prior to 5.0, the
Installer will prompt you to install Internet Explorer 5.5.
USING FILES
FROM THE
CONTENT AND
BONUS CDS
Your Photo Explosion program includes content CDs that contain the readymade project templates, photographs and fonts.
The Content CD
Project templates are on this disc. If you selected the Typical Install option,
you need to have the Content CD in the CD-ROM drive when you select and
open a project. If you selected the Full Install option, the Installer copies the
project templates on this disc to your hard drive.
Additional CDs
Additional items (such as photographs, fonts, software and ready-made
designs) may be included with your version of Photo Explosion. The disc
4
Page 12

label indicates the type of bonus content. You can view the photographs and
additional templates using the multimedia browsing features of Photo
Explosion. See Chapter 11: Using Images and Installing Fonts for details
about installing fonts.
Bonus Software (Deluxe
Version)
The Deluxe version of Photo Explosion includes bonus software that
provides even more ways to enhance and share your photos.
• Create CD Slide Shows you can watch on TV.
Share your photos with family and friends – even those that don’t have
a computer. Burn photo slide shows onto CDs that play on most DVD
players. You can even add background music.
• Transform photos into a 360° panorama.
Easily transform a series of photos into a 360° or wide-angle
panorama. Automatic photo stitching, alignment and color blending
make it easy for anyone to create professional results in minutes. Post
your panoramas online or send them by e-mail and allow viewers to
“walk-through” the scene.
• Slide Shows for Palm® and Pocket PC PDAs.
View photos full screen or as thumbnails on your Palm or Pocket PC
handheld. You can enhance pictures and create stunning slide shows.
To install bonus software:
1. Insert the Bonus Software CD in the CD-ROM drive, double-click My
Computer and open the CD.
2. Double-click Setup.exe to launch the Bonus Software Installation
screen.
3. Click the Button associated with the software you want to install.
UNINSTALLING
If you want to uninstall Photo Explosion, you should use its uninstall
program. The Uninstaller will properly remove all Photo Explosion files,
settings and fonts.
1. Choose Settings ➧Control Panel from the Start menu.
2. Open the Add/Remove Programs control panel. The
Install/Uninstall tab has a list of programs that you can remove.
3. Select Photo Explosion and click Add/Remove (or Change/Remove
depending on your version of Windows).
4. Follow the instructions on screen to remove Photo Explosion from
your hard drive.
5
Page 13

Chapter 3. Getting Started
You have now installed Photo Explosion. If you haven’t registered yet,
please take a moment to register online. If Photo Explosion is open, choose
Online Registration from the Help menu or go to the Nova Development
web site (http://www.novareg.com). Becoming a registered user entitles you
to product updates, free downloads, and technical support should you have
any problems with the Photo Explosion program.
STARTING
PHOTO
EXPLOSION
When you work with Photo Explosion, make sure your display is set to a
resolution of at least 800x600 and either HiColor (16 bit) or True Color (24
bit) mode.
To start Photo Explosion:
• Choose Programs
➧
Nova Development ➧Photo Explosion from
the Start menu.
THE DIFFERENT
MODES
Photo Explosion is a cutting-edge digital photo studio that is easy to use. You
use Photo Explosion for three main purposes: browsing and organizing
photos, enhancing photos and creating photo-based projects. For each of
these purposes Photo Explosion has a different mode of operation.
Note: You can save and print your work in all modes.
Browse mode: You use this mode to store, organize, browse and otherwise
enjoy your photos, projects, video and audio files. While in this mode, you
can share your photo or project albums (folders) in many different ways. You
can also convert your photos from one file format to another.
6
Page 14
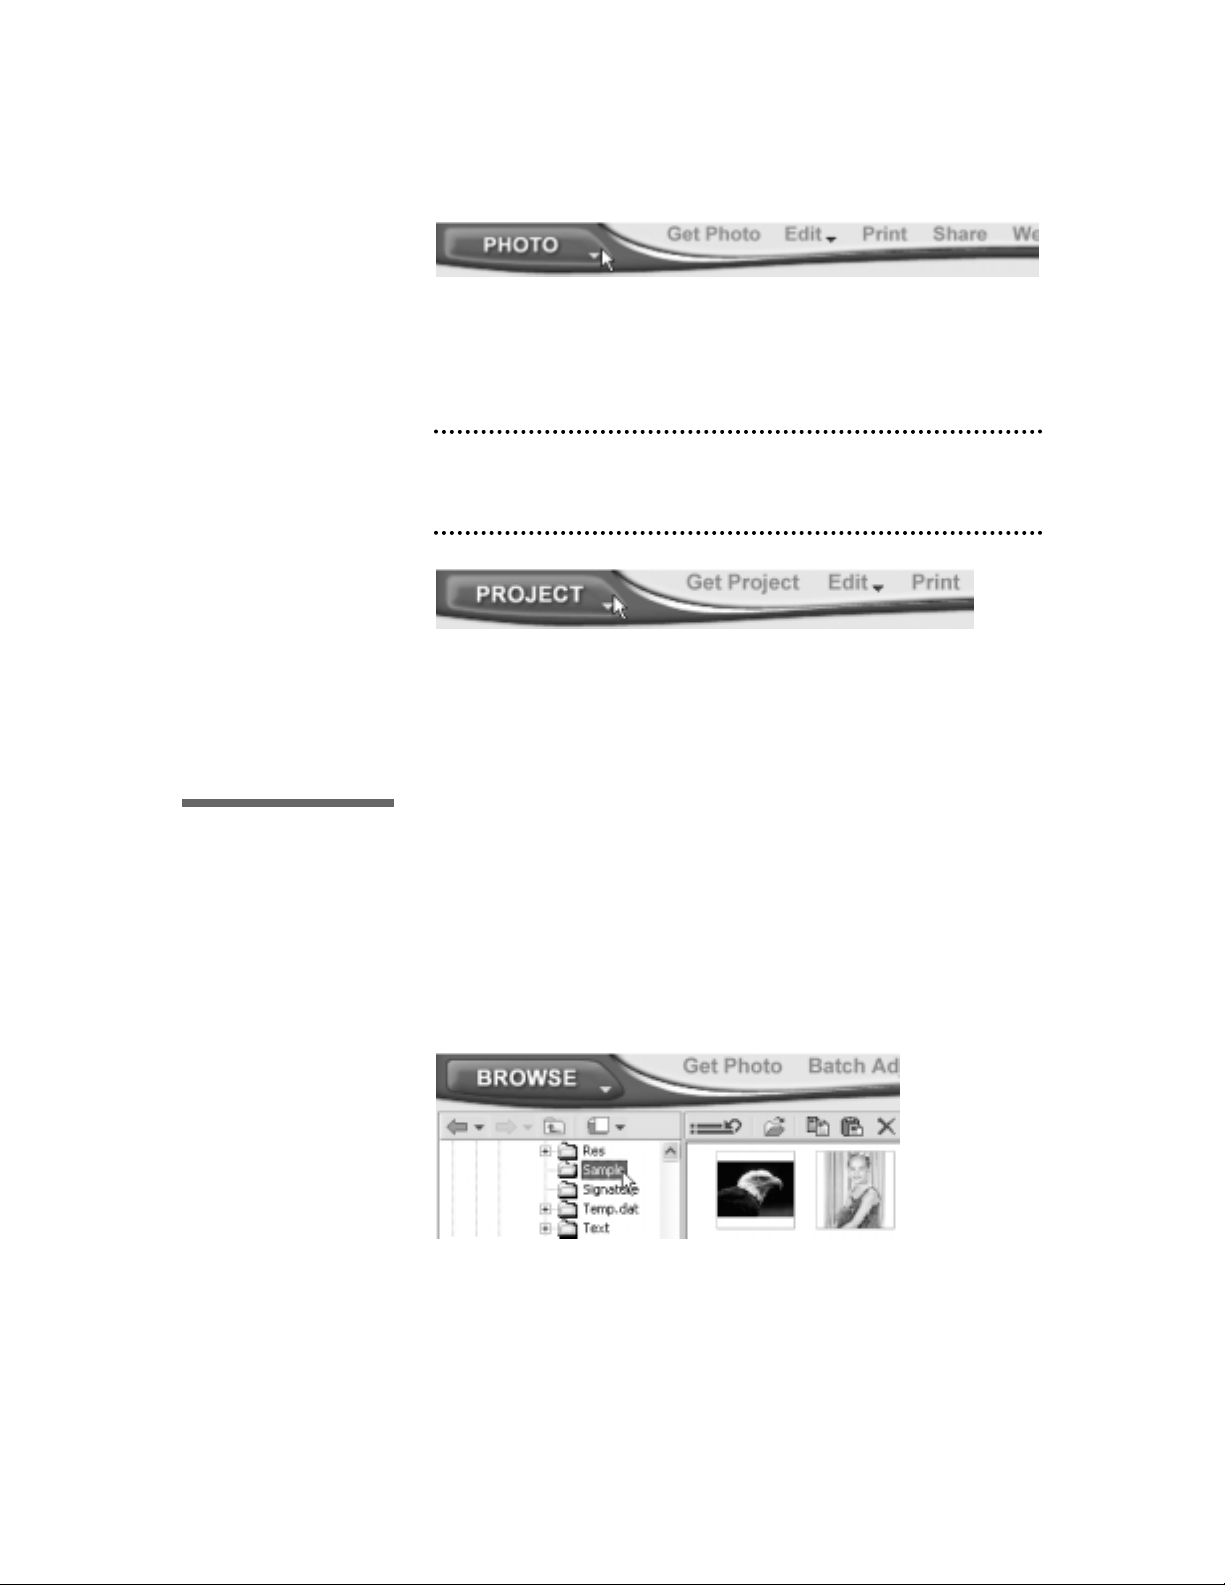
Photo mode: This is where you will do most of your work. You’ll find all
the standard tools found in most image editors here, as well as many
advanced features unique to Photo Explosion. It’s easy to open, adjust, paint,
add text, create special effects, add decorations and dress up your photos.
Note: When you open a photo, you’re working on the original file. It’s
therefore safest to save the file with a new name immediately after opening
it. This will prevent you from accidentally overwriting the original photo.
Project mode: This is where you can produce unique photo-based creations.
Don’t worry if you don’t have your own photos to use. Photo Explosion
provides you with lots of samples that can get you started. You can easily
create projects such as 3D frames and crafts, photo frames, calendars,
business cards and greeting cards.
BROWSE MODE
OVERVIEW
What You Can Do in
Browse Mode
In Photo Explosion you view thumbnails of images in Browse mode. Browse
mode is arranged in a convenient way for locating multimedia files. There is
a folder tree in the Options panel, and the selected folder’s contents are
viewed as thumbnails in the workspace. (Selected images are outlined in
blue.)
In Browse mode you can:
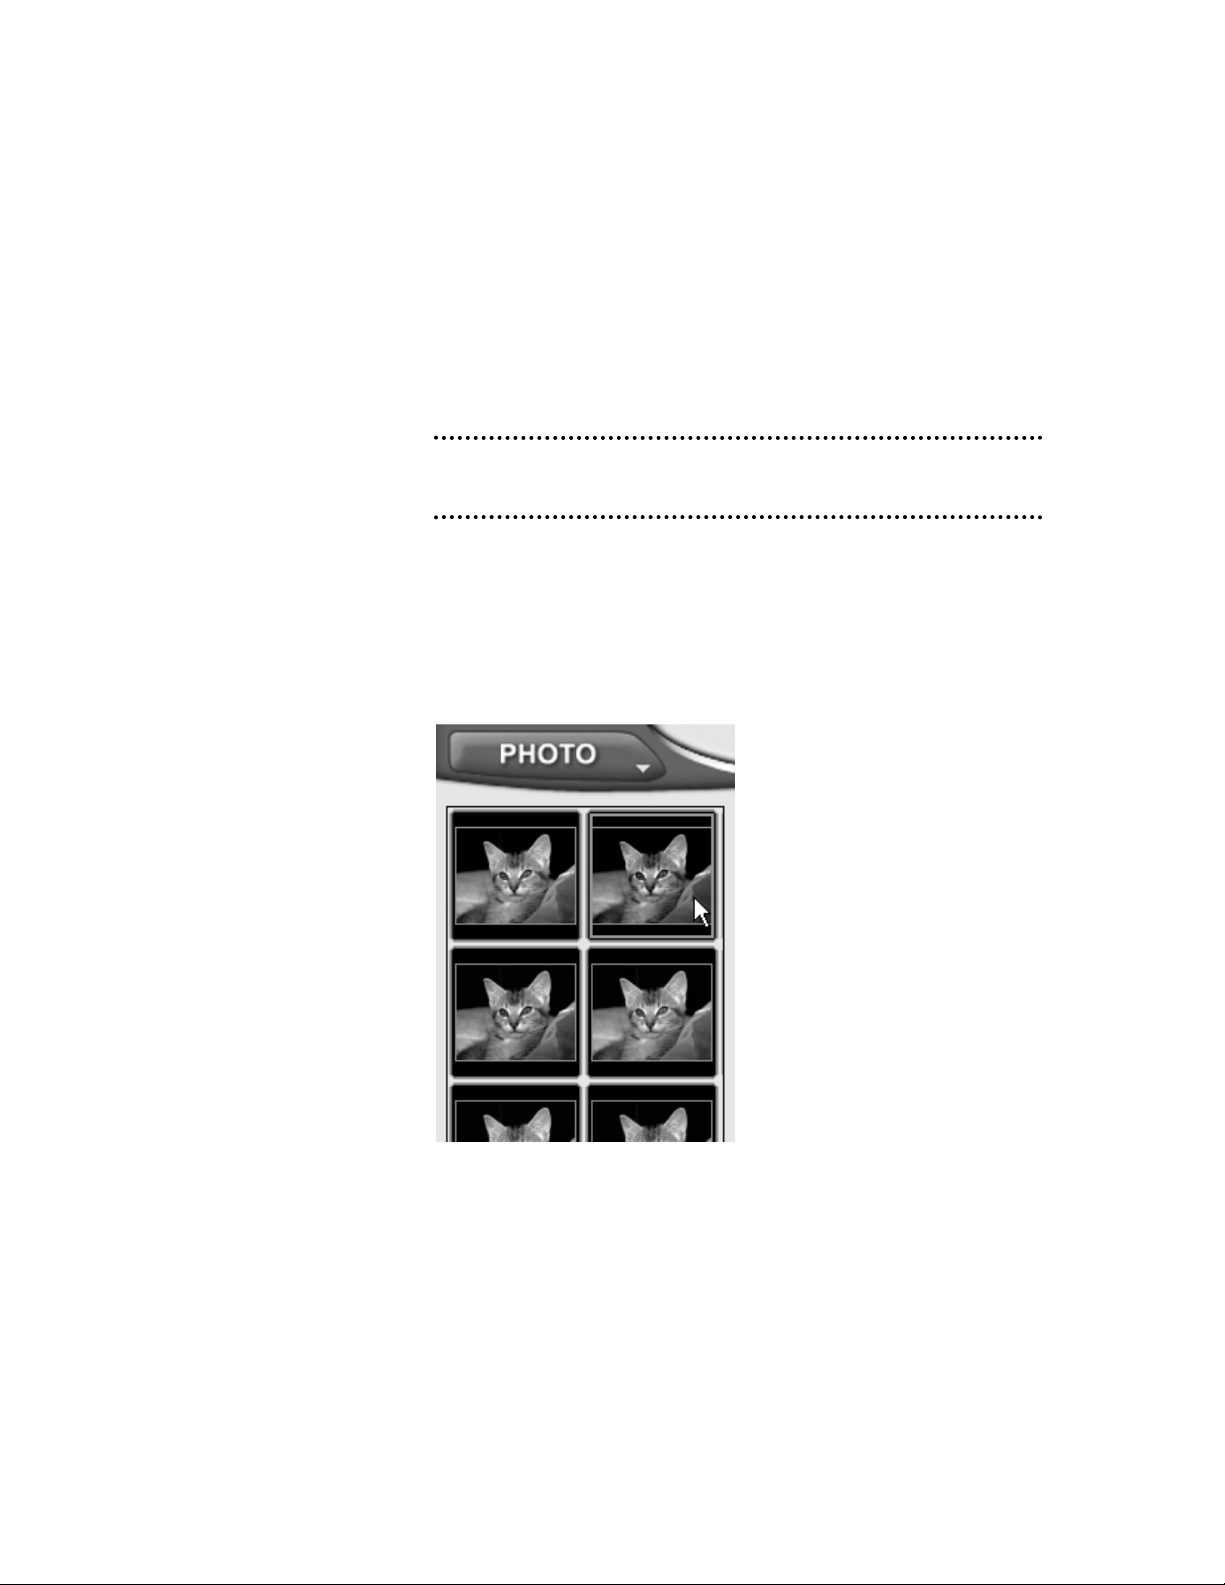
• Select multiple photos.
7
Page 15
• Adjust individual photos or groups in batches. You can use this for
quick enhancements or for converting files.
• Locate and open multimedia files.
• Organize multimedia files. You can easily create new folders and move
files between folders.
• Print thumbnails. You can print all (or just the selected) images in a
folder.
• Obtain detailed information about selected image files.
Using Browse Mode
Locate and select a folder from the folder tree on the left to display the
contents in the workspace.
You can arrange icons, change the thumbnail size, and specify the types of
multimedia files to display using the toolbar buttons or commands on the
View menu. An integrated search tool is also available to help you find files
easily.
You can use the tools on the toolbar above the Options panel to move
quickly among recently browsed folders.
Once you’ve located the images to edit, there are four ways to open them and
switch to Photo mode:
• Double-click a thumbnail.
• With one or more thumbnail selected, click the Open button on the
toolbar.
• Drag selected thumbnails to the Thumbnail Strip.
• Right-click one or more selected thumbnails and click Edit on the
shortcut menu.
Note: You select multiple thumbnails by pressing Shift (for contiguous
selections) or Ctrl (for non-contiguous selections) while clicking the
thumbnails. If you have selected more than one thumbnail, all the photos
open simultaneously and appear on the Thumbnail Strip.
8
Page 16
Creating a Photo Album
Photo albums are folders that contain images. One important feature of
Browse mode is its ability to easily organize your photos and other images
into photo albums.
To create a photo album:
1. In the left panel, locate and open the folder (or disk) to contain the
new album.
2. Click the New Album icon on the toolbar above the left panel.
3. Type a name for the album.
4. Move images into the album:
— Drag thumbnails from the Thumbnail Strip.
— Select and copy images from other folders or albums.
— Use the commands in the Get Photo menu on the Command panel
to acquire new images.
PHOTO MODE
OVERVIEW
Unless you have a darkroom in your basement, traditional print photography
offers little to nothing in the way of flexibility. If a picture is less than perfect
when it comes back from the developer, there’s nothing you can do to fix it.
Modern digital imaging, however, gives you creative freedom and the ability
to fix images that were shot under less than ideal conditions. Photo
Explosion’s Photo mode allows you to fix, enhance, edit and transform your
digital photos.
9
Page 17
What You Can Do in
Photo Mode
When you have an image open in Photo mode, it fills the workspace. You’ll
find a large selection of tools to prepare your images for projects, add special
effects, or just touch up your photos. The editing and enhancing tools (for
example, the Adjust tools) are all available on the menus after you click
Edit on the Command panel.
When you work with a tool, the Options panel on the left has default presets
where you can select a balanced effect. Alternatively, you can click
Advanced mode to view the many options for each tool, giving you fine
control over the tool’s attributes (like width, color and transparency). Every
tool has a different set of options.
Note: When you open your photo in Photo mode, you are working on the
original photo… not an untitled image. Therefore, you may want to save the
photo with a new name to preserve the original file.
In Photo mode, you can select an area of a photo to copy that part of the
image. The selection becomes a separate object. It is then independent of the
rest of the base image. You can move selections and change them. You can
add other objects to photos, including text, props, backgrounds and frames.
After making changes, if you want to keep objects as separate elements, save
your image as a Photo Explosion file (*.UPX) or template (*.TPX) that you
can go back and re-edit. Otherwise, save your photos as graphic files — to
send your images to friends, use them on a Web Page project or open them
in another program. You can select from several different graphic file
formats (like *.BMP, *.GIF or *.JPG). The independent objects are merged
into the photo and can no longer be edited.
Note: To quickly access tools that you’ve just closed, click the List the
recently used tools button on the toolbar.
10
Page 18
Enhancing a Photo
(QuickStart)
Photo Explosion has many different ways for you to enhance your photos.
Here’s one method to give you an idea of what you can do with your photos.
To enhance a photo:
1. Open the File menu and click Open
➧
Open Photo.
2. Locate and select the photo you want to open.
Note: If you don’t have any photos handy at the moment, open the Sample
folder in the Photo Explosion folder on your hard disk.
3. Click Open.
4. Click Edit on the Command panel.
5. Open the Adjust menu and click Balance Color.
6. Select one of the preset color changes on the left.
7. Click Close.
8. Open the File menu and click Save As.
9. Locate and open a folder for the new file.
10. Name the file and click Save.
11
Page 19

PROJECT MODE
OVERVIEW
Project mode gives you a focused environment in which to create custom
photo projects such as photo frames, scrapbook pages, crafts, stationery, and
much more.
What You Can Do in
Project Mode
You open a project template by clicking an item on the Get Project menu
on the Command panel. Photo Explosion has many template categories
including:
• Business & ID Cards
• Certificates
• Crafts — including 3D projects, magazine covers, body switches and
trading cards
• Greeting Cards — including invitations and announcements
• Matching Sets — with invitations, cards, gift tags, labels, and more
that match a given theme
• Photo Frames — both general and holidays/occasions
• Postcards — business and personal
• Scrapbooks — including album covers
• Signs & Posters — banners, flyers and posters
• Stationery — letterhead, envelopes, labels and notes
Additionally, there are blanks for you to create your own projects from
scratch.
12
Page 20
Creating a Project
(QuickStart)
Photo Explosion has many different ready-made designs for various types of
projects. Here’s one method for customizing a ready-made design.
To start a new project:
1. Open the Mode menu and click Project.
2. In the panel on the left, click Photo Frames and double-click General
in the workspace.
or
Choose Photo Frames
➧
General from the Get Project menu.
3. Double-click one of the pre-designed photo frames. (You may be
prompted to load the Content CD.)
4. Click Edit on the Command panel and then choose Add/Edit from the
Te xt menu.
5. On the Options panel on the left, type your name or other text in the
Te xt box at the top and click Apply. Click Close.
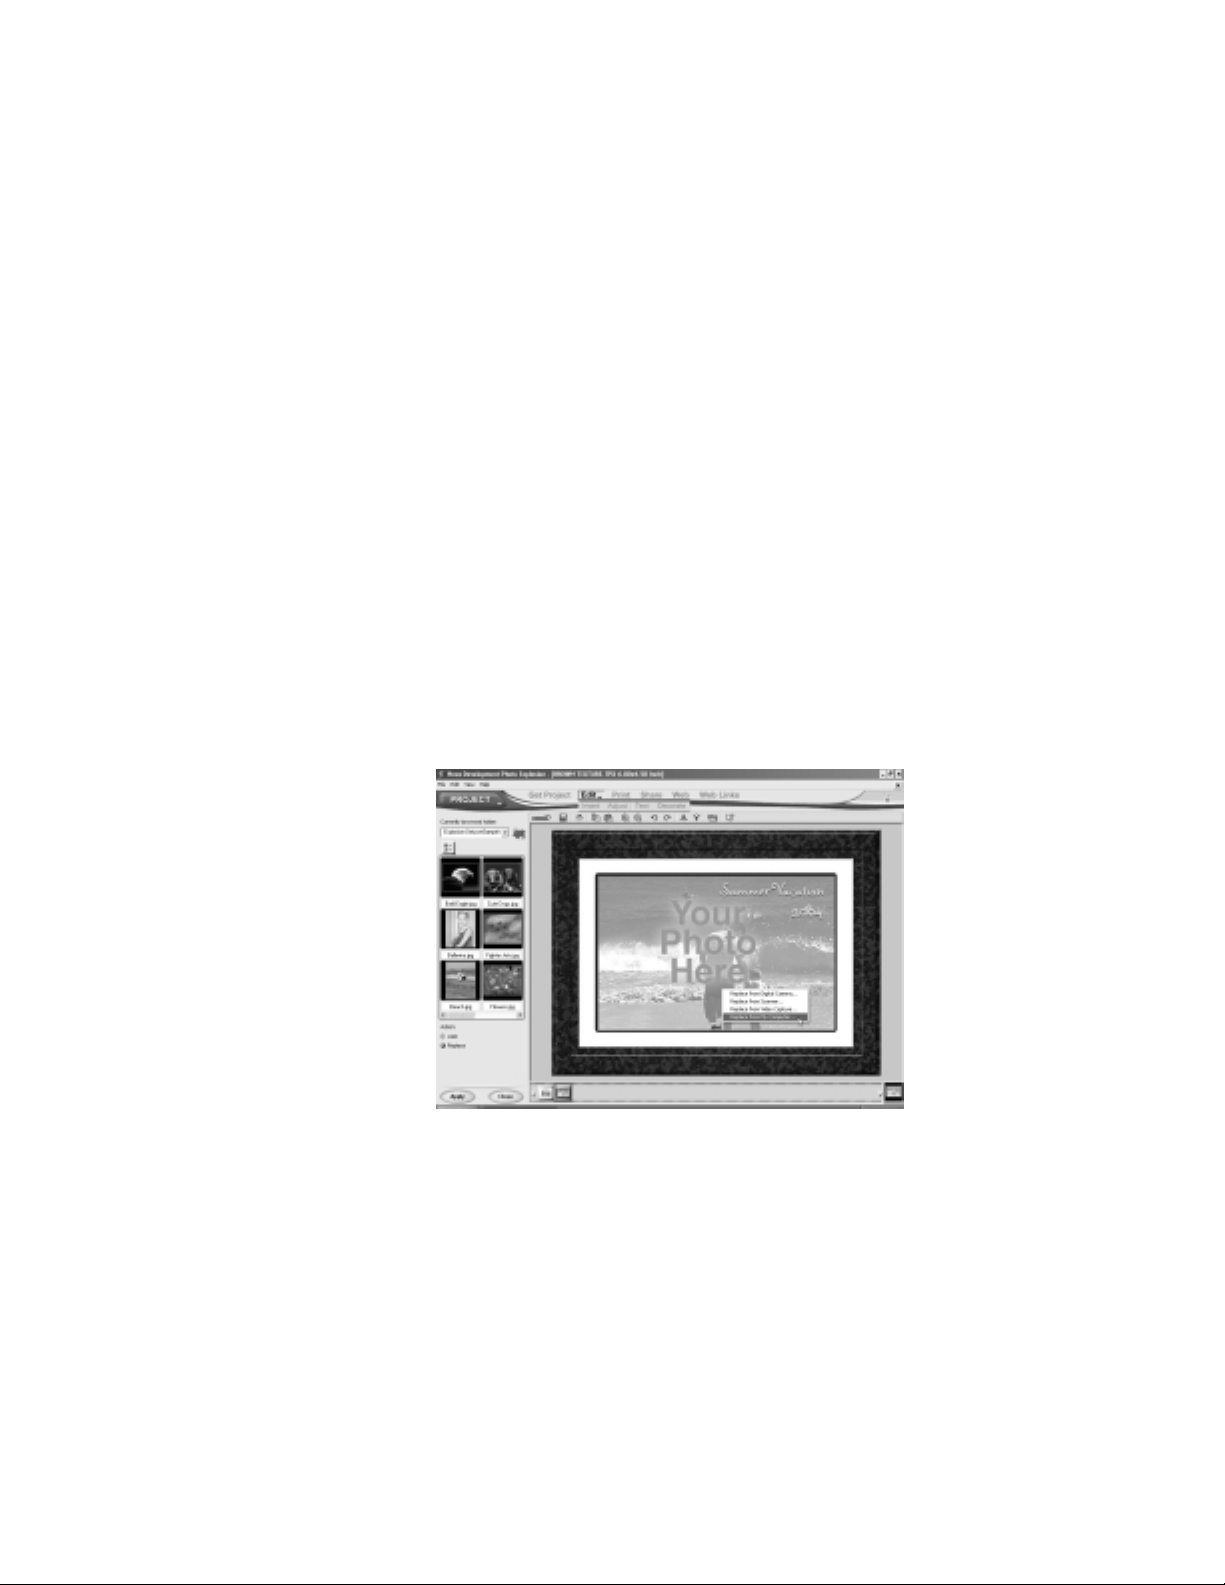
6. Double-click the photo placeholder and click Replace from My
Computer.
7. Double-click one of the images that appears in the Options panel on
the left.
8. Click Close.
9. Choose Save As from the File menu.
10. Locate and open a folder for the new file.
11. Name the project and click Save.
13
Page 21
PRINTING
OVERVIEW
You can use Photo Explosion to print your photos and projects in many
different ways. Printing normally prints one image or project on a sheet of
paper. However, if you are in Browse mode and select multiple photos,
Photo Explosion prints multiple pages equal to the number of photos
selected.
To print one image or project onto a sheet of paper:
1. If you’re in Browse mode, select an image.
or
If you’re in Photo or Project mode, have the image or project active.
2. Open the Print menu on the Command panel and click Normal.
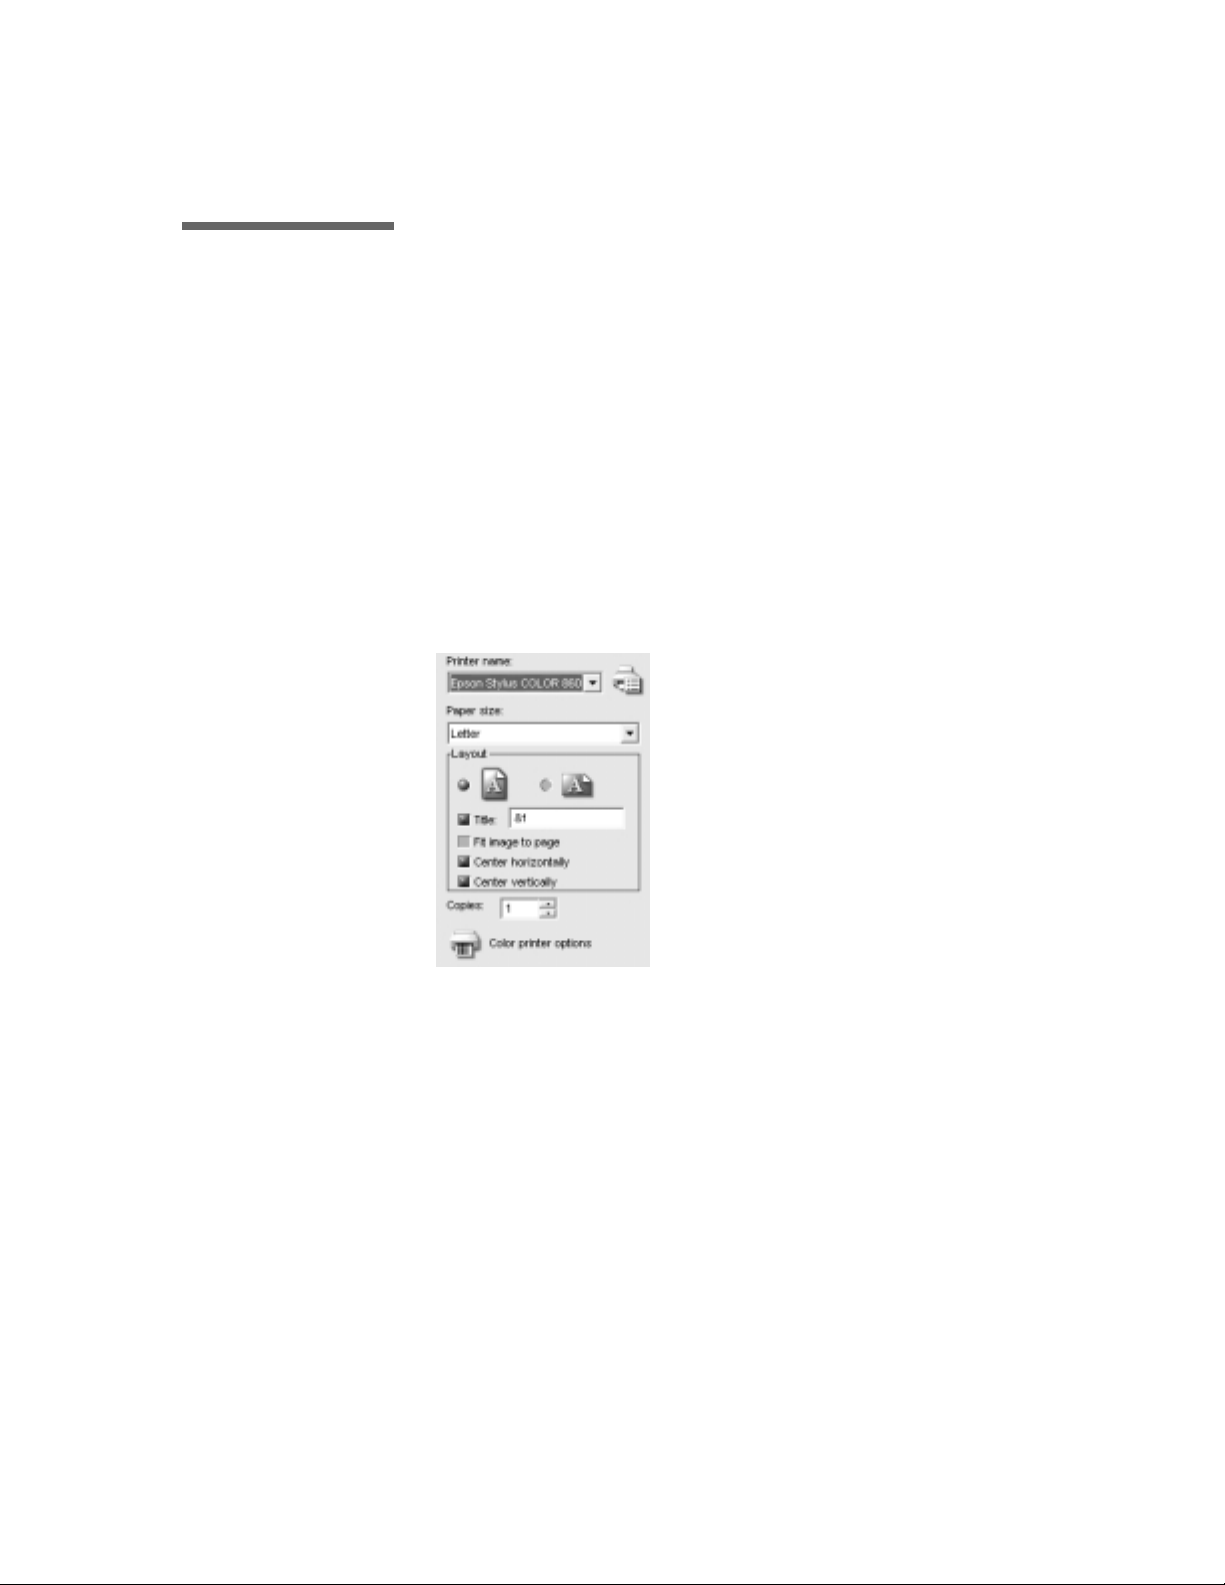
3. In the Options panel, select the printer you want used for this print
job.
4. Select a Paper Size.
5. Adjust the Layout options.
— Select either Portrait or Landscape orientation.
— To add a title to the image or project, click Title and type a title in
the box.
— To maximize the image or project on the paper, click Fit image to
page.
— Set or clear the Center horizontally or Center vertically options.
6. Type the number of Copies or click the arrows.
7. Click Print.
8. Click Close.
14
Page 22

You’ll find more specific information about printing in Chapter 9: Sharing
Your Photos and Projects.
USING PHOTO
EXPLOSION
HELP
Photo Explosion features full online help including Photo Explosion Help,
ToolTips, What’s This Help and context-sensitive help. Also, the Web Links
menu on the Command panel gives you access to other helpful information
— like Frequently Asked Questions (FAQs) and program updates.
The Help Menu
The Help menu contains three items.
• Photo Explosion Help (F1) has general information and step-by-step
instructions for Photo Explosion tasks. It also contains tips and
techniques for scanning images and working with photos from digital
cameras.
• Photo Explosion Web Links give you a quick way to get to various
Nova Development web pages.
• Online Registration allows you to register online at any time.
• About Photo Explosion shows the version and registration
information for your copy of Photo Explosion.
Guide Tips
When a light bulb appears on the toolbar, you can click it to get information
about the current mode you are in. You can turn this feature on or off in the
Preferences dialog box
ToolTips
If you move the cursor over an active toolbar button, you’ll see a message
giving you the button’s functionality or its name.
What’s This Help
If you click the What’s This Help button on the toolbar and then click
an item in the workspace, you’ll get additional information about that
item.
Context-Sensitive Help
When you have a dialog box on the screen and have a question about
proceeding, you can get help directly from there by clicking the Help button.
Web Links
Check out the Nova web site periodically to keep yourself up-to-date with
important program news and promos. The Web Links menu offers quick
access to a number of useful links related to the program, and displays these
web pages in the Photo Explosion workspace.
15
Page 23
Chapter 4. Using Photo
Explosion
In this chapter, you’ll find detailed instructions that explain the basic
features of the Photo Explosion interface. By the end of this chapter you’ll
be familiar with the different elements in the workspace and know how to
work with objects.
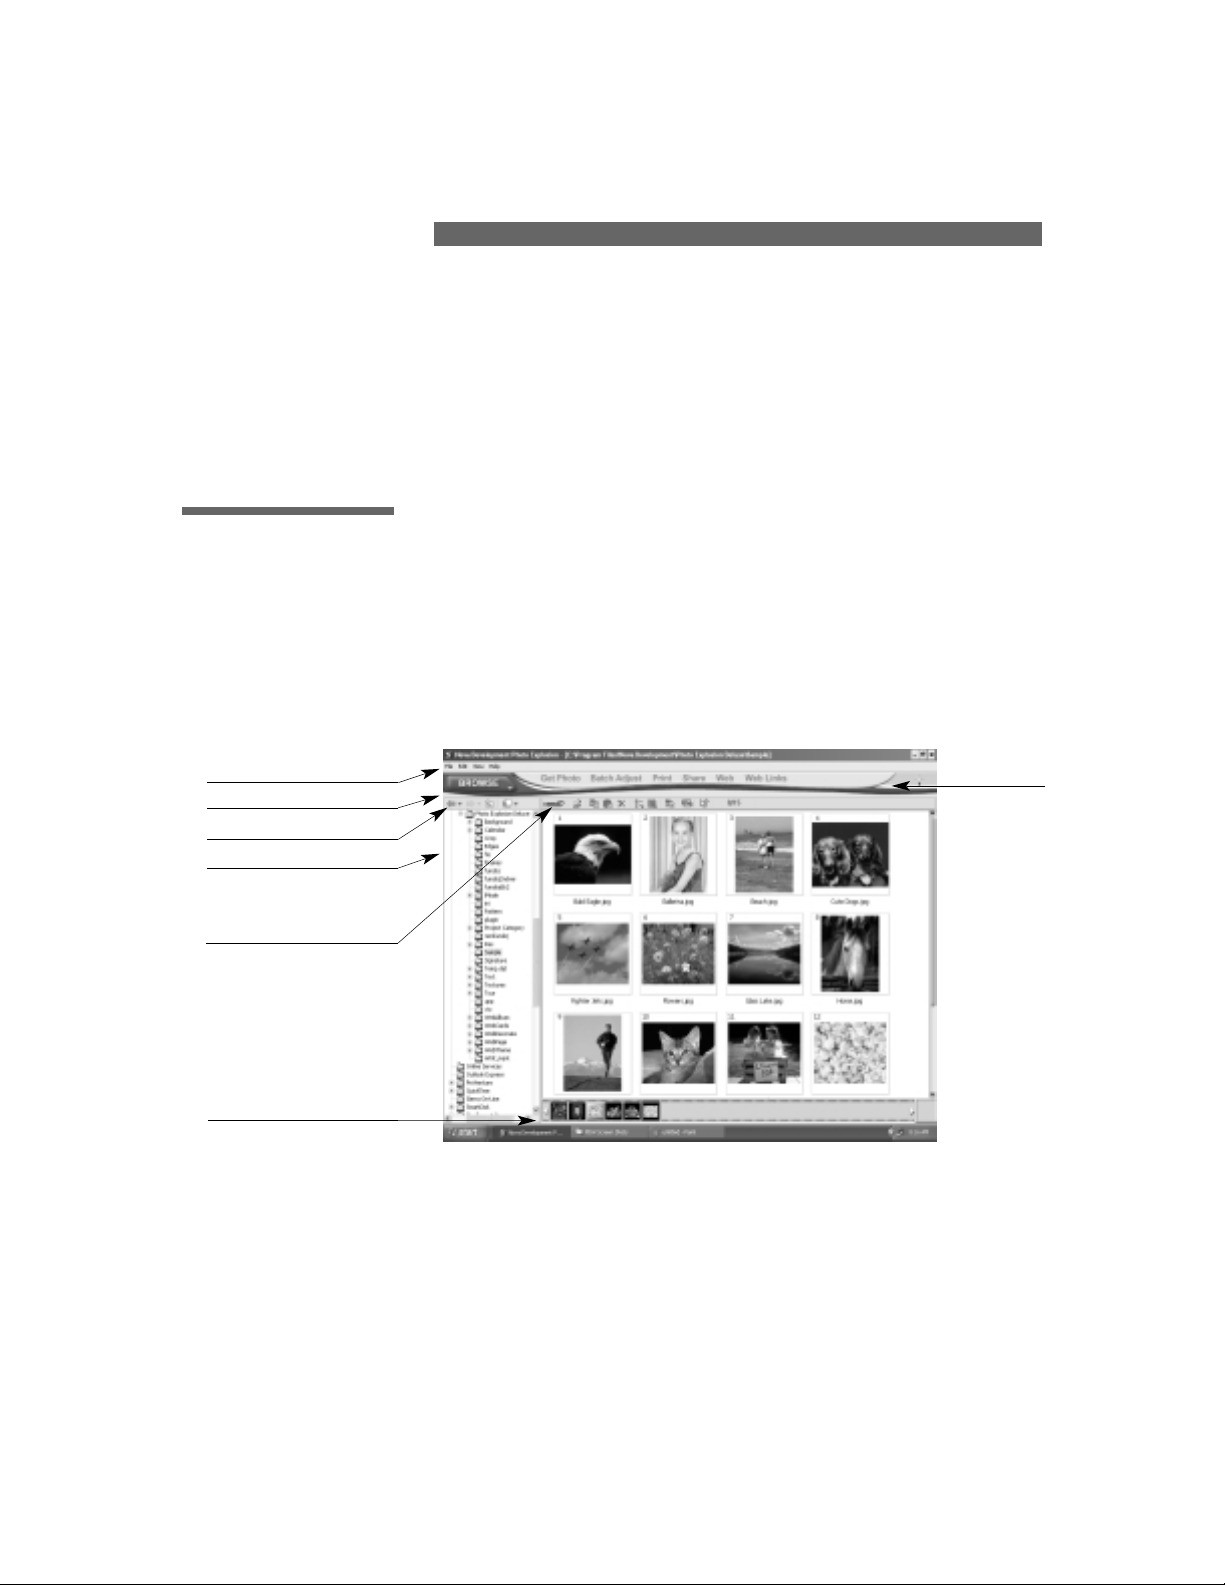
WORKSPACE
OVERVIEW
The project workspace is where you view photos (Browse mode), edit your
photos (Photo mode) and create projects (Project mode) in Photo Explosion.
In addition to the standard Windows menu bar and the workspace viewing
area, the workspace contains a Command panel with most of the Photo
Explosion commands for accessing tools and projects, a Toolbar with icons
depicting the most common commands, the Mode menu, an Options Toolbar
for working with the contents of the Options panel, and a Thumbnail Strip.
Menu bar
A number of commands common to Windows applications are found here
— like Save, Open and Exit.
Mode menu
The Mode menu is where you switch among Browse, Photo and Project
modes. Browse mode is where you locate and organize files. Photo mode is
where the majority of image-editing and enhancing takes place. Project
mode is where you create cards and other items from templates.
16
Menu Bar
Options Panel
Thumbnail Strip
Mode Menu
Workspace Toolbar
Command Panel
Options Toolbar
Page 24

Command panel
This area lists all the menus and tools available for the mode you are
currently using. Clicking Edit on the Command panel shows or hides the
Edit menu bar. The Command panel items are always available (as are the
Edit menu titles after you click Edit). These items and menu titles are gray
until you click them to view the menus.
Options panel
This panel on the left of the workspace area displays all the different
possibilities and settings available for any given function. You select predefined tool attributes or set user-specified tool attributes using this panel. In
Browse mode or Project mode, this area shows the hierarchical folder
structure for the currently opened folder.
Thumbnail Strip
All active photos and projects appear as thumbnails on the Thumbnail Strip
located at the bottom of the workspace. You can drag images from the
Thumbnail Strip to add them to projects. To view an image or project
quickly, double-click its thumbnail.
At the right of the Thumbnail Strip, there is a thumbnail of the active image
or project. Clicking this thumbnail lets you navigate around magnified
images that can no longer be displayed entirely on screen.
Workspace Toolbar
This toolbar, located above the main workspace area, has buttons relevant to
the current mode and the current tool.
Options Toolbar
This toolbar, located above the Options panel, has buttons relevant to the
current mode or the current tool.
Setting Photo Explosion
Options
The Preferences command on the File menu allows you to set global
program options.
In the Photo Explosion tab you can set:
• Generation quality: Determines the quality of images being used.
High quality yields better images but uses more memory and takes
more time. Good is the default.
• Associate picture files with Photo Explosion: Makes Photo
Explosion the default image-editing program for all graphic files on
your computer. If you open a graphic file (such as .BMP, .GIF or .JPG
files), Photo Explosion will open automatically.
• Show Guide Tips: Has Photo Explosion show Guide Tips (Light
Bulb) for the currently selected function.
• Turn on sound effects: Turns on or off sound effects associated with
using the program.
17
Page 25
• Web update checking system: When you select this feature, Photo
Explosion will periodically check Nova Development’s web site for
product updates.
• Enable command reminder: Pops up a reminder at the top of each
Option panel letting you know which command opened this set of
options.
• Monitor gamma: Adjusts the gamma correction of your monitor to
match standards.
In the Plug-Ins tab
• Define additional folders for plug-ins: Select a box at left and then
type the path for (or click the Browse button to locate) the folder that
contains additional PhotoShop
®
-compatible plug-ins such as Kai’s
Power Tools™or Alien Skin™.
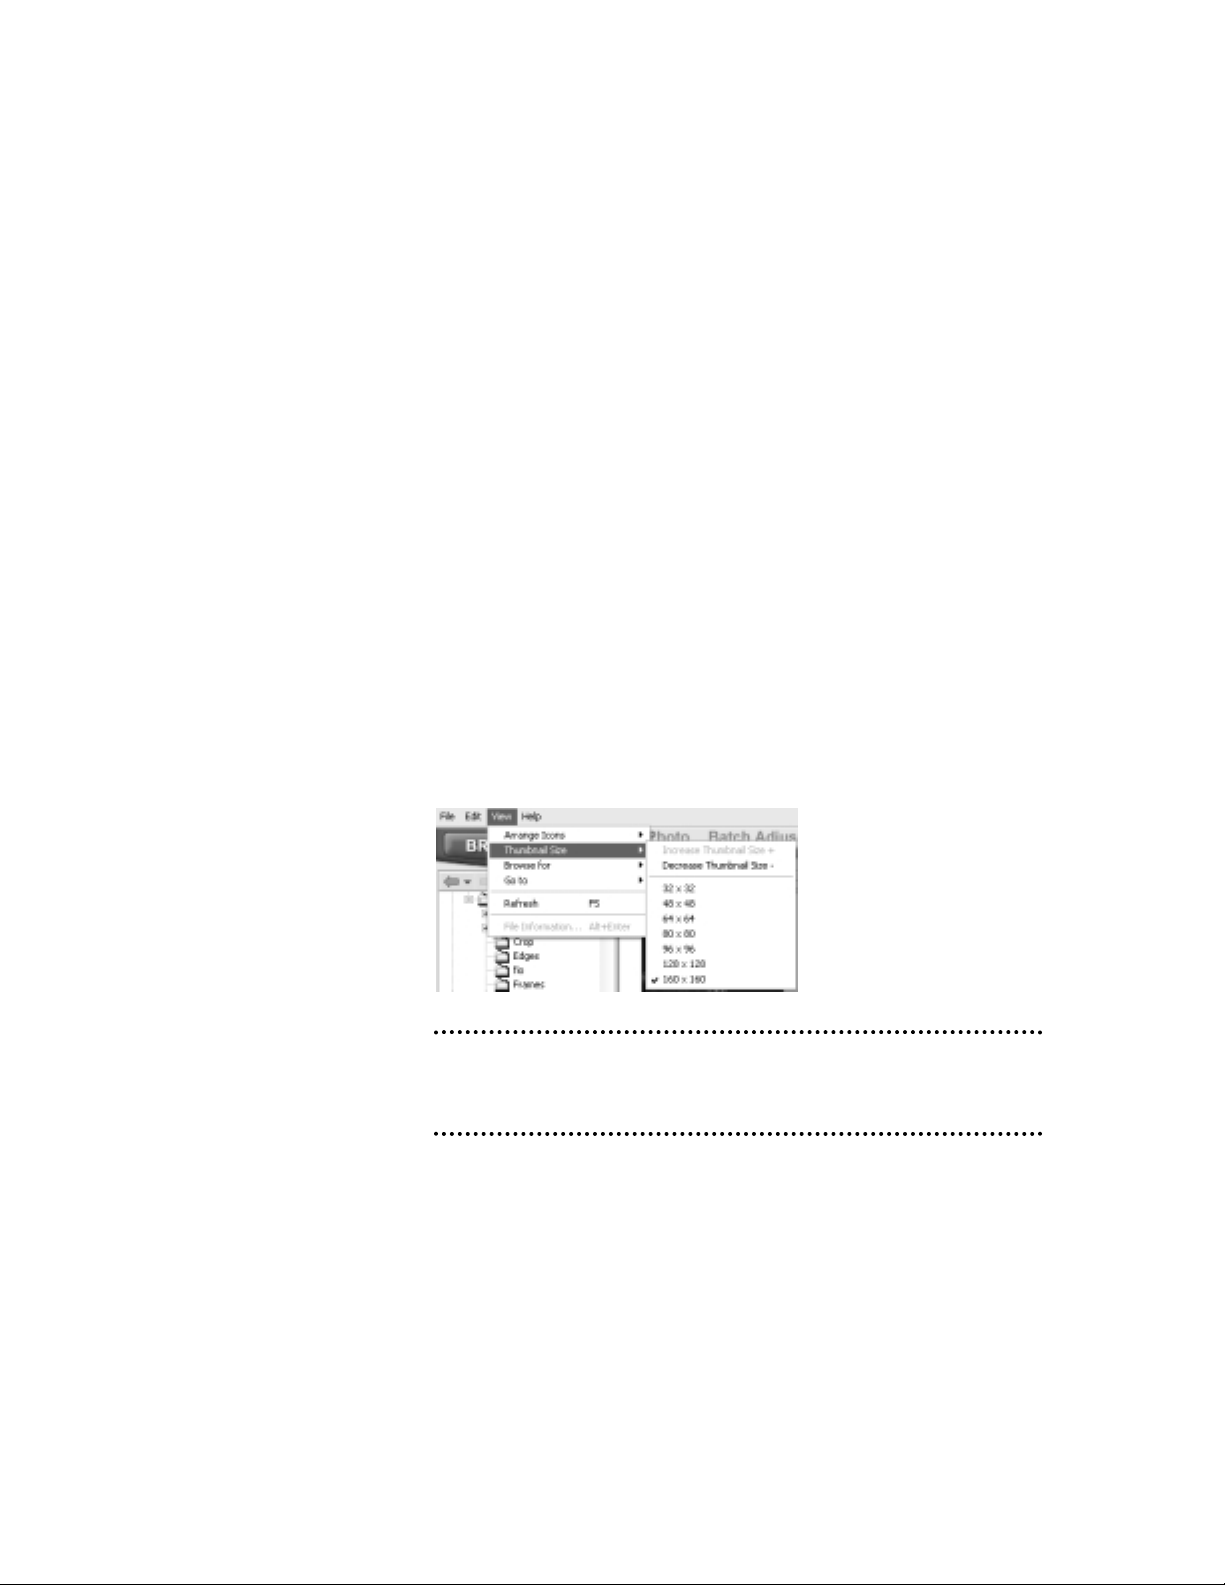
Changing the Views
The View menu has commands that affect how you see the thumbnails in the
workspace. The Thumbnail Size submenu allows to increase or decrease
the size of the thumbnails allowing you to see fewer or more thumbnails at
a time. The Arrange Icons submenu commands affect the order of the
thumbnails. The Browse For submenu filters the type of media file(s) that
are visible while browsing.
Note: The filenames will not be visible for thumbnail sizes below 96 x 96. To
view thumbnails that have long file names, select a larger size such as 128
x 128 or higher.
Customizing the Photo
Explosion Workspace
Tired of looking at the same windows all the time? Photo Explosion makes
it possible to change the workspace background and the skin around the
Command panel.
Selecting a skin and background:
1. On the toolbar, click Change the appearance of Photo Explosion.
18
Page 26

2. In the dialog box that appears, select from among the preset skins and
backgrounds.
3. Click OK.
Note: To check the Nova web site for new skins, click Get Skins on the
Web Links menu.
To use your own image as the workspace background:
1. Select an image in Browse mode.
2. Right-click and click Set As Background on the shortcut menu.
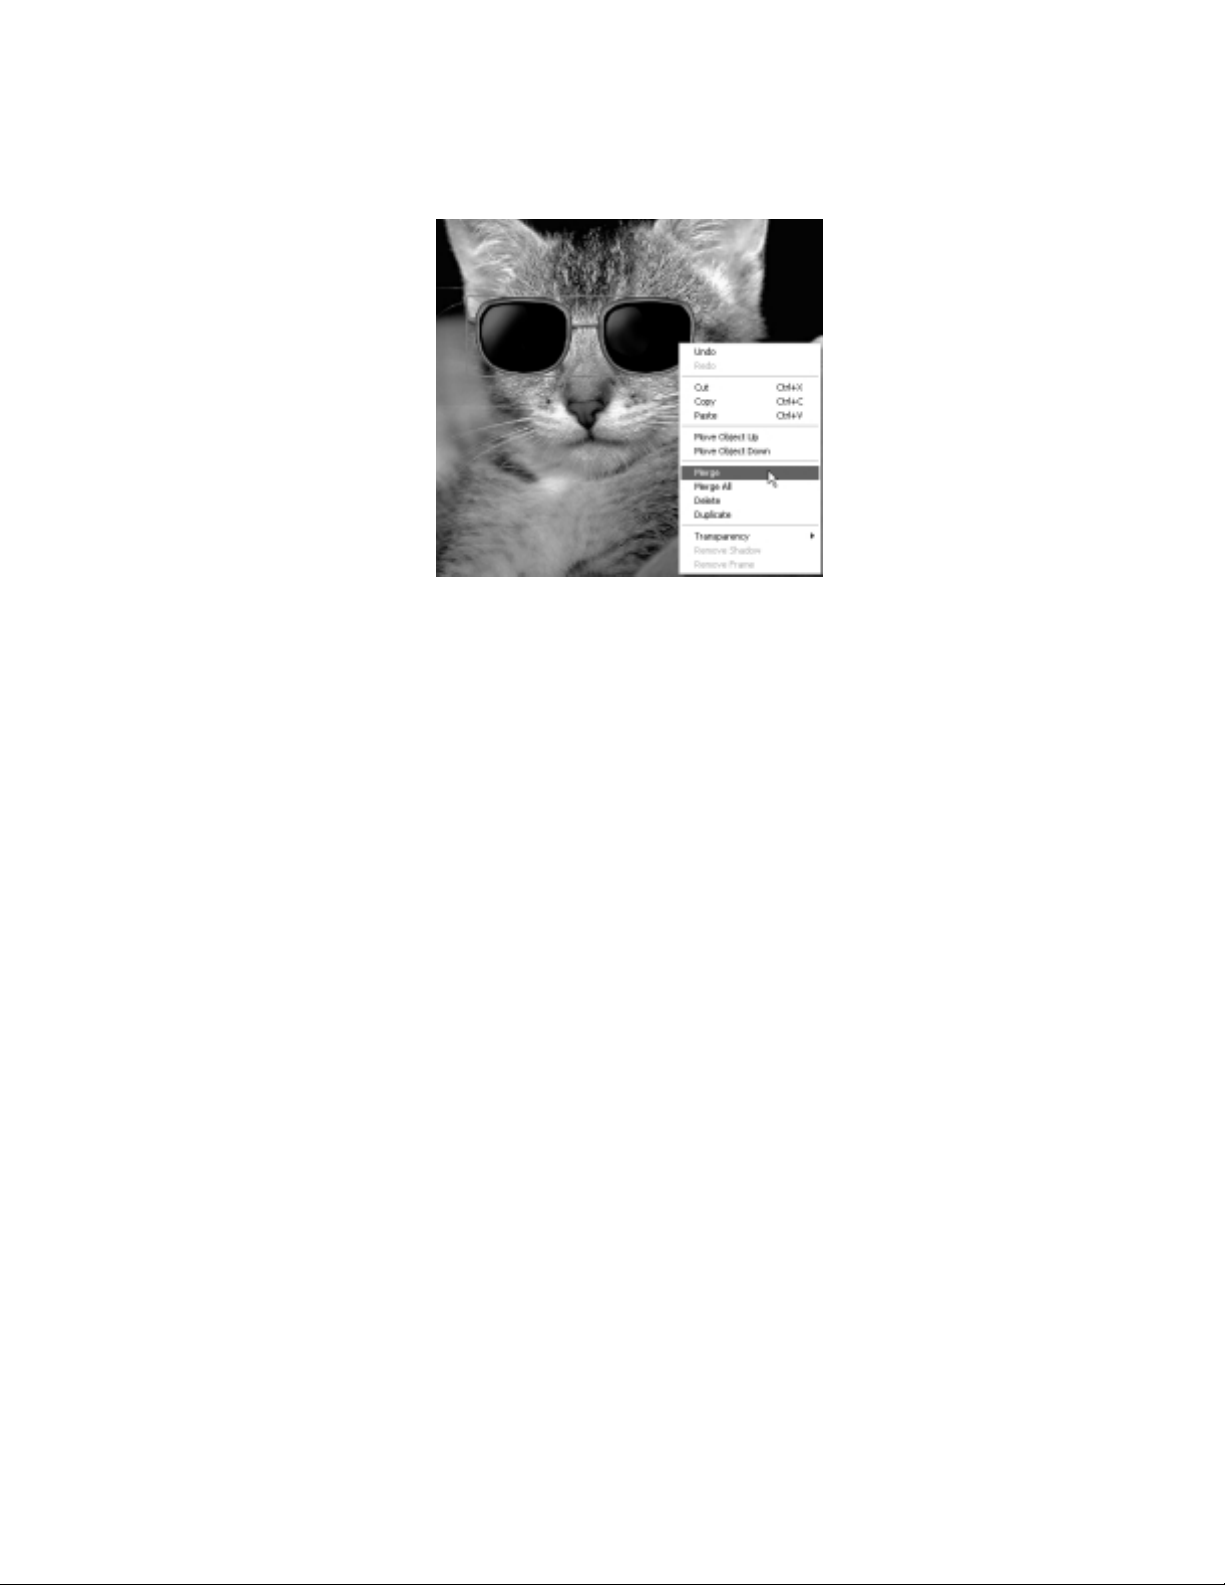
WORKING WITH
OBJECTS
Objects are self-contained components placed on images or projects. These
can be frames, shadows, text, images or the background. Also, when you
select a part of an image and cut it out using one of the selection tools, that
part of the image becomes a separate object. Objects can be changed without
altering other parts of an image. For example, they can be moved in front of
or behind other objects.
Each object has its own properties and attributes. For example, a text object
has size, font style and color attributes; whereas an image object does not
have font style attributes. Often, an object’s properties are accessible by
right-clicking the object.
When you save an image as a *.UPX file or a project as a *.TPX file, each
object’s characteristics and attributes remain editable for future editing.
To integrate an object into an image permanently, right-click the object and
choose Merge on the shortcut menu. Alternatively, if you want to use or
view an image outside of Photo Explosion, you need to save it in a standard
image format like *.JPG or *.BMP. An image’s objects are automatically
merged when you save the image in a standard image format.
19
Page 27
Working with Objects
You can resize, move and apply effects to one or more objects.
To select objects:
• To select a single object, click it. A box appears around the object.
• To select all the objects in an image or a project, choose Select All
(Ctrl+A) from the Edit menu on the Windows menu bar.
• To select a few objects, click the first object and then Shift-click each
additional object.
To copy a selected object or group of objects, do one of the following:
• Choose Copy (Ctrl+C) and then Paste (Ctrl+V) from the Edit menu
on the Windows menu bar.
• Right-click the selected object and click Copy on the shortcut menu.
Right-click the selected object and click Paste on the shortcut menu.
To delete a selected object or group of objects, do one of the following:
• Choose Cut (Ctrl+X) from the Edit menu on the Windows menu bar.
The object goes onto the Clipboard.
• Choose Clear from the Edit menu on the Windows menu bar.
• Press the Delete key.
If you are working in another image-editing application, you can copy all or
part of the image to the Clipboard and paste it into Photo Explosion.
20
Page 28
To paste the contents of the Clipboard onto an image or project:
• Choose Paste (Ctrl+V) from the Edit menu on the Windows menu
bar.
The contents of the Clipboard appear in your image or project as a
separate object.
To move an object:
• Select the object, move the pointer inside the object and drag the
object to a new location.
Working with Layers
When you add an object to a project, Photo Explosion puts the object in its
own layer. As you add objects they get placed into layers on top of each
other. You can change the order in which objects appear; therefore, for
example, you can superimpose a text object on top of a picture.
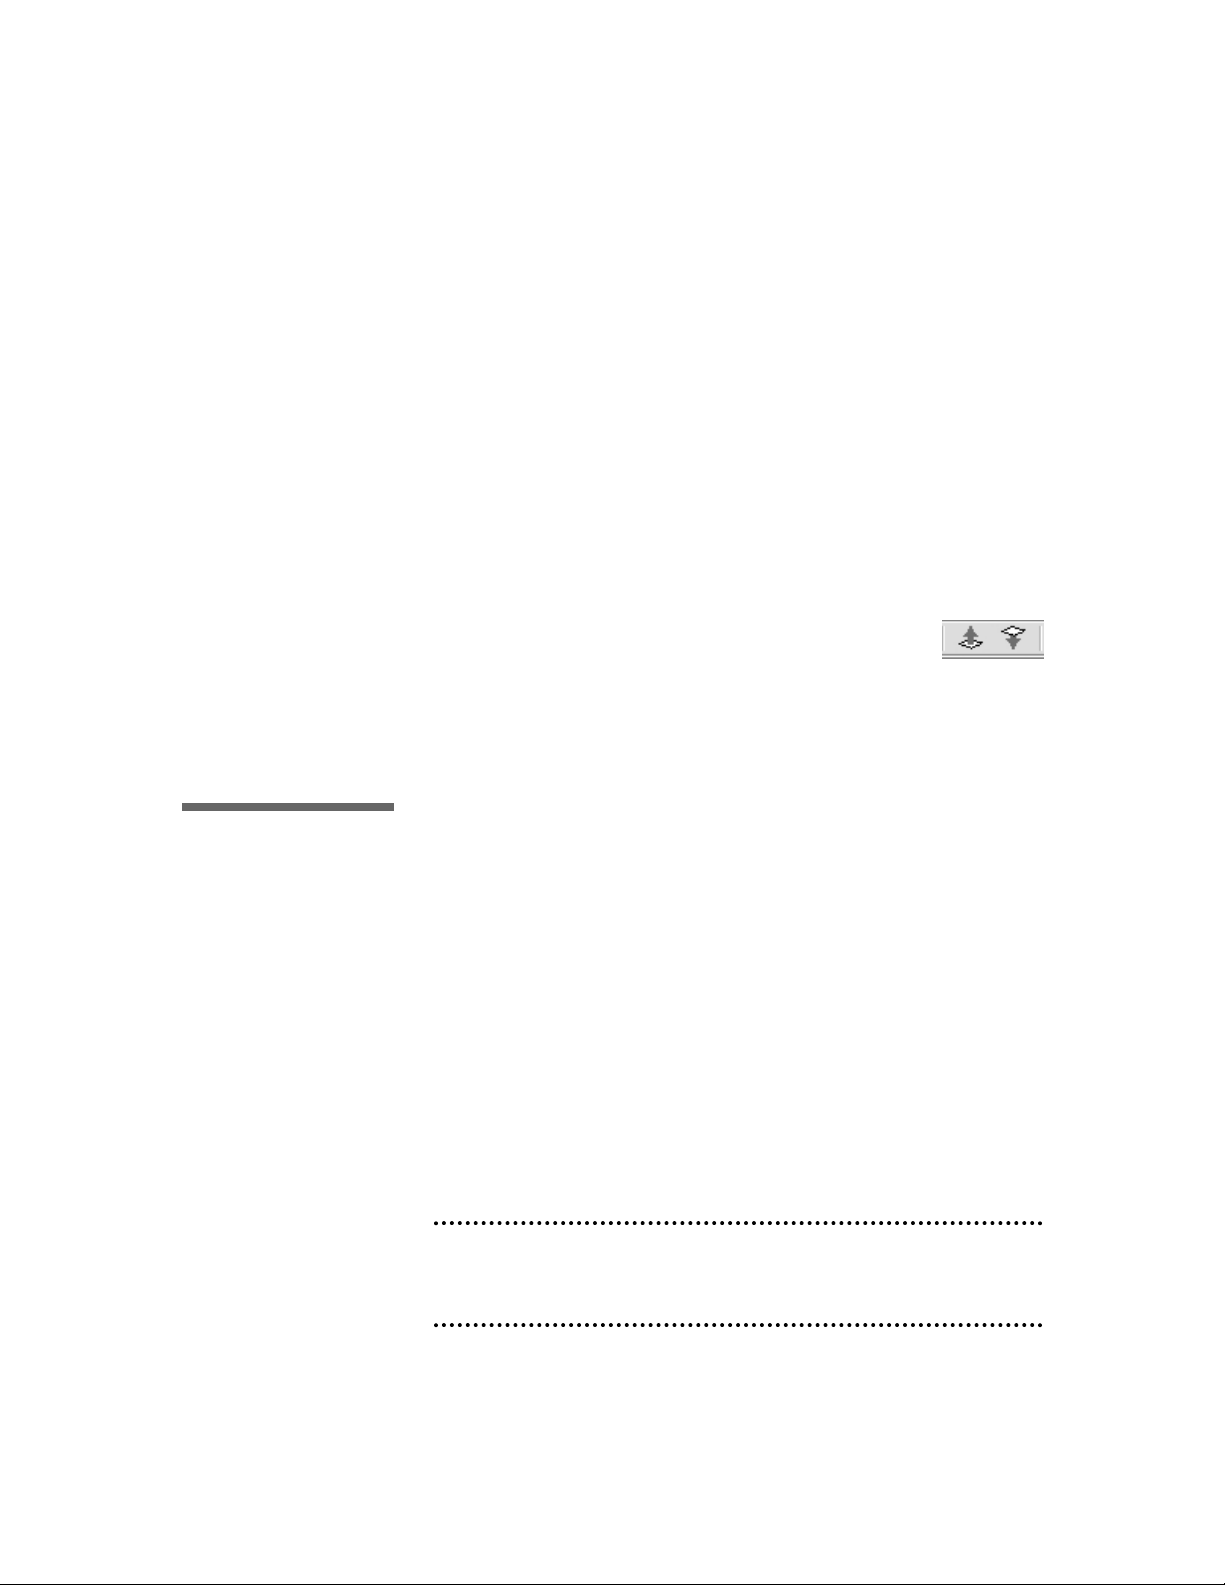
To change an object’s layer:
• To move an object one level forward, select it and click the Bring Up
button on the toolbar.
• To move an object one level back, select it and click the Send Down
button on the toolbar.
SAVING PHOTOS
AND PROJECTS
It is a good habit to save your work periodically to ensure that you don’t
have to redo everything when unexpected events happen. Keep in mind that
saving a project as a *.TPX file or saving an image as a *.UPX file means
that you will be able to edit the individual objects when you reopen the file.
To save a photo or project:
1. Open the Share menu on the Command panel and click Save.
2. On the Options panel, locate the folder where you want to save the
image or project.
3. Type a file name.
4. Select a File type for the image or project.
Note: Use BMP and TIF to keep the highest level of quality; use JPG for
photos to be used on the Web or sent by e-mail; use UPX to save photos or
TPX to save projects with unmerged objects.
21
Page 29

5. Select a Data type for the image or project.
Note: Data type describes how much color information is saved with the
image. The more color information included in the file, the larger the file is.
For the highest quality color, use True Color. Indexed-256 and Grayscale
each contain up to a maximum of 256 distinct colors or shades of gray and
are generally quite small. (With .TIF files 48-bit True Color and 16-bit
Grayscale are also available for good quality images.)
6. Click Save.
Note: Use the Save As command on the File menu to specify advanced
save options — such as file quality, compression or other options that are
specific for each file type.
OPENING
EXISTING
PHOTOS AND
PROJECTS
There are several ways to open photos in Photo Explosion.
To open an existing photo in any mode:
1. Click Open
➧
Open Photo on the File menu.
2. Locate the image in the Open dialog box.
3. Click Open.
The image opens in Photo mode ready to edit.
If you are in Browse mode and you’ve opened the folder containing the
image:
• Double-click the thumbnail.
• Select the thumbnail and click the Open button on the toolbar.
• Drag the thumbnail to the Thumbnail Strip.
• Select the thumbnail, right-click it and click Edit on the shortcut
menu.
22
Page 30

Note: When in Browse mode, you can open more than one image at a
time. Select multiple images by pressing Ctrl (for non-contiguous
selections) or Shift (for contiguous selections) while clicking the thumbnails.
To open an existing project while in any mode:
1. Click Open ➧Open Template File on the File menu.
2. Locate the project in the Open dialog box.
3. Click Open.
The project opens in Project mode ready to edit.
To open a project in Project mode:
1. Open the Get Project menu on the Command panel and click My
Computer.
2. Locate the folder containing the project in the Options panel on the
left.
3. Select the project and click Open.
or
Double-click the project.
The project opens in Project mode ready to edit.
Note: When in Project mode, you can open more than one project at a
time. Select multiple projects by pressing Ctrl (non-contiguous selections)
or Shift (contiguous selections) while clicking the thumbnails.
23
Page 31

Chapter 5. Getting Photos
and Other Images
Photo Explosion is primarily a photo-editing program that allows you to
easily edit and enhance your digital photos or scanned images. You can
import images from other programs, import clip art images, import photos
from photo CDs, download photos from the Web or from digital cameras,
scan images or capture video stills. In this chapter, you learn how to get these
images into the program.
IMPORTING CLIP
ART OR OTHER
GRAPHIC
IMAGES
You can import images from your hard disk, from photo CDs or from clip
art libraries.
To import an image from your hard disk or a CD:
1. In Photo mode, open the Get Photo menu on the Command panel and
click My Computer.
2. In the Options panel, locate the folder containing the image.
3. Select one or more images and click Open.
Note: You can open more than one image at a time.
For more information, see Chapter 11: Using Images and Installing Fonts.
24
Page 32

UNDERSTANDING
RESOLUTION
When scanning images and downloading photographs that you may want to
print, you need to be aware of the images’ resolution. Here are some factors
to consider:
Resolution is the number of pixels per inch (or centimeter) in an image. A
600-pixel wide image at a resolution of 100 pixels/inch will be six inches
wide. If you double the resolution (200 pixels/inch), the image will be half
the size (three inches). Photo Explosion compensates for resolution changes.
If you double the resolution, the size of the image doubles automatically.
(Increasing an image’s resolution will make it smaller, but above certain
resolutions, your printer or even your monitor will be unable to display these
changes.)
When scanning an image or taking a digital picture, consider what you want
to do with the image. The highest resolution may not always be the best
because the higher the resolution, the larger the image file. If an image will
only be seen on screen, you may use a lower resolution without loss of
viewing quality. If it will be printed, the output resolution of your printer is
the determining factor. Usually scanning at 600 dpi is about the highest
resolution that you would need for photographic quality printing.
The main exception to this rule is if you want to enlarge the image that you
are scanning. Enlarging digital images results in a loss of quality. To limit
the loss of image quality, scan the image at a higher resolution than you
would normally.
When taking digital pictures, remember that if you use a higher resolution
setting, your camera stores fewer pictures. If you’re going to be showing the
pictures online, you can easily use a lower resolution and take more pictures.
SCANNING
The image quality of any image is dependent upon the quality of the original
scan or the downloaded image. To get the best overall quality, scan your
images as .TIF files.
With Photo Explosion, if you have a TWAIN-compliant scanner, you can
scan photos directly into the workspace. You can scan photos when in
Browse or Photo mode.
Note: If your scanner isn’t TWAIN-compliant, you’ll have to scan the images
using the scanner’s software and then save them to your hard disk before
using them in Photo Explosion.
25
Page 33

To acquire an image from a scanner:
1. Open the Get Photo menu on the Command panel and click Scanner.
2. In the Options panel, select your device’s driver from the Select data
source list.
3. Type a File name prefix, which will be appended with a sequential
number. (For example, if you use the default Pict prefix, the scanned
images get named Pict001, Pict002 and so on.)
4. Select a File type.
5. Set other options:
• Apply post-processing: Automatically make minor adjustments
to the imported file, such as alignment and lighting.
• Enable slicing: Scan multiple images at once and have them cut
into separate files.
• Show TWAIN data source: Clear this option to scan images
without opening the external program (TWAIN) using the default
settings.
6. Click Acquire.
Photo Explosion opens your scanner’s software.
7. If you have Show TWAIN data source selected, scan the photo.
(Check with the scanner’s software user guide for details.)
8. Click Close.
26
Page 34

DOWNLOADING
FROM A
CAMERA
With Photo Explosion, if you have a TWAIN-compliant digital camera, you
can download photos directly into the workspace similar to the way you scan
images. You can download images when in Browse or Photo mode.
Note: If your digital camera isn’t TWAIN-compliant, you’ll have to download
the images using your camera’s software and then save the images to your
hard disk before using them in Photo Explosion.
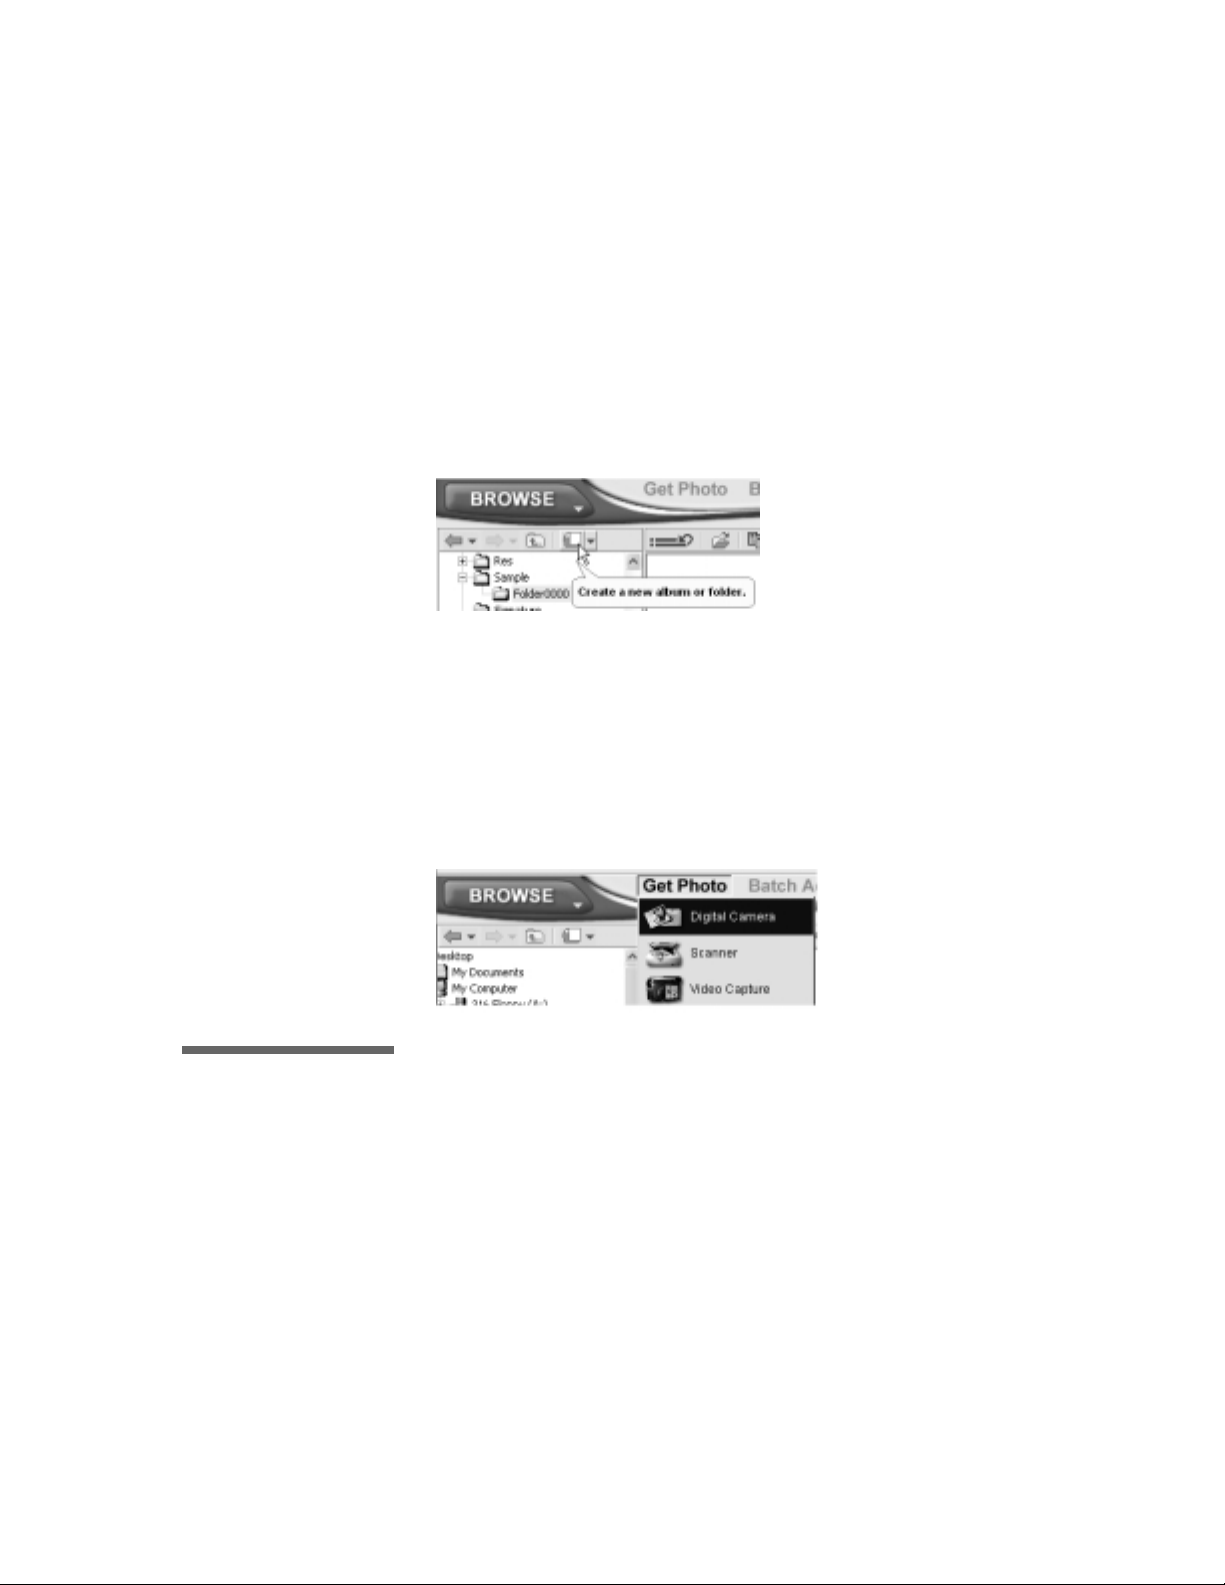
To acquire images from a digital camera:
1. Open the Get Photo menu on the Command panel and click Digital
Camera.
2. In the Options panel, select your camera’s driver from the Select data
source list.
3. Type a File name prefix, which will be appended with a sequential
number (for example, Pict001, Pict002 and so on).
4. Select a File type.
5. Select Apply post-processing to automatically make minor
adjustments to the imported images, such as alignment and lighting.
6. Click Acquire.
7. Download the images. (Check with the camera’s user guide for
details.)
8. Click Close.
CAPTURING
VIDEO
Photo Explosion has an integrated video capture component to capture still
images. You can capture video when in Browse or Photo mode.
To capture a still image from a video camera:
1. Open the Get Photo menu on the Command panel and click Video
Capture.
2. If needed, select the correct driver for your video capture device from
the list at the top of the Options panel.
27
Page 35

3. Adjust the settings as needed in the Options panel.
4. Click Import.
The Video Capture window opens with the video playing.
5. In the Video Capture window, click Capture when you see an image
you want to capture.
The image appears as a thumbnail on the bottom of the Video Capture
window.
6. Select each thumbnail that you want to keep and click Insert.
The images move to the Photo Explosion Thumbnail Strip.
7. Click Exit to close the Video Capture window.
8. Click Close.
28
Page 36

Chapter 6. Organizing and
Adjusting Your Photos
In Browse mode you can organize your photos into on-screen albums and
adjust multiple images without opening a single file. You can open and view
images in Browse mode. This is where you can select images to edit in Photo
mode.
Browse mode is arranged in a convenient way for locating multimedia files.
There is a folder tree in the Options panel, and the selected folder contents
are viewed as thumbnails in the workspace. (Selected images are outlined in
blue.)
BROWSE MODE
TOOLBARS
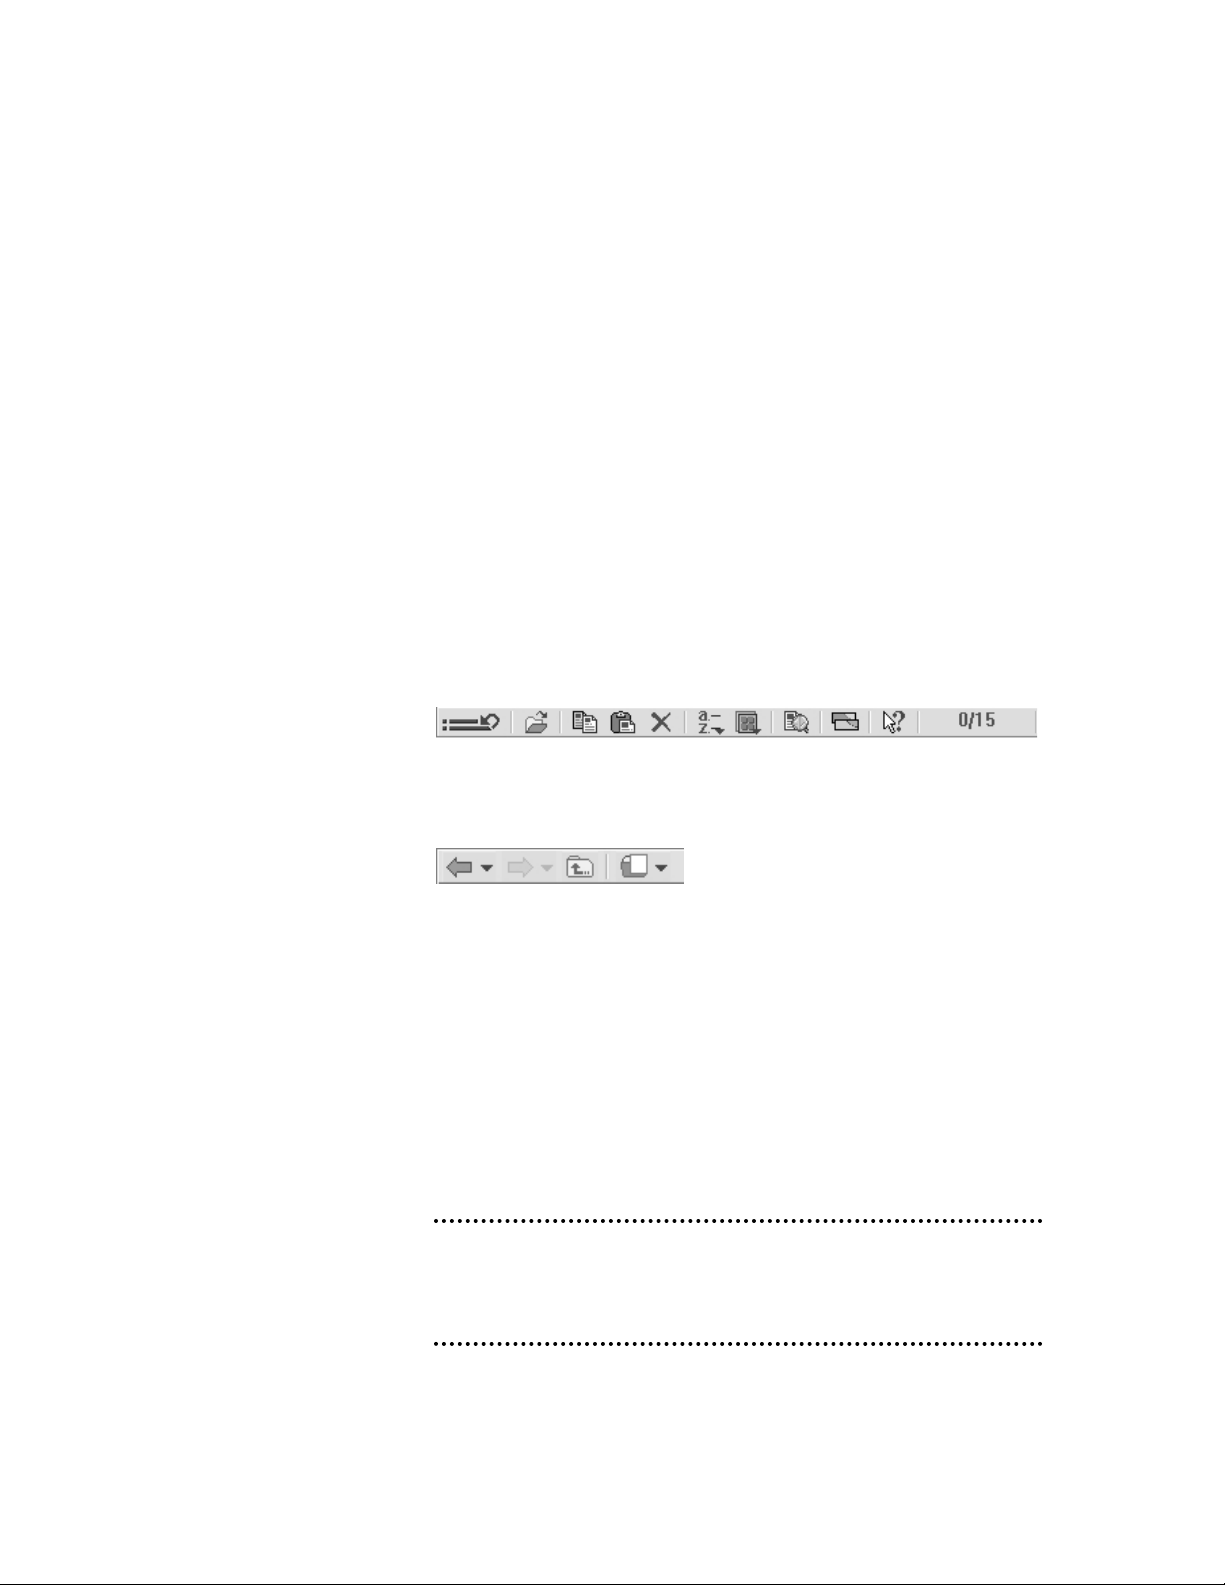
The Browse mode has its own toolbar with shortcuts for many of the
functions available in this mode.
Get Previous Command: Opens a list of your most recently used
commands that can be re-applied to the selected image.
Open: Opens the selected thumbnails for editing.
Copy: Copies the selected thumbnails to the Clipboard. You’ll use
this to paste the thumbnails into another folder.
Paste: Pastes the contents of the Clipboard into the open folder.
Delete: Deletes the selected thumbnails from the open folder.
Sort Thumbnails: Sorts the thumbnails by name, by date, by size
or by extension.
Change Thumbnail Size: Changes the size of the thumbnails.
Also, allows you to switch between the list and thumbnail views.
29
Page 37

Search: Searches for a file based on its name.
Modify Interface: Allows you to change the appearance of the skin
and workspace background.
What’s This Help: Shows information about the next item clicked.
Selected Thumbnails: Shows the number of selected thumbnails
relative to all the thumbnails in the current folder.
Go Back: Returns you to the previously selected folder.
Go Forward: Returns you to the folder that was open before Go
Back was clicked.
Parent Folder: Goes up one level to the folder that contains the
current folder.
Create Folder: Creates a new folder within the current folder.
ORGANIZING
YOUR PHOTOS
Once you open a folder of images, there are variety of display options
available using the toolbar buttons or commands on the View menu. You can
arrange icons, change the thumbnail size, and specify the types of
multimedia files to display. You can use a search tool to help you find files
easily.
30
Page 38

Changing the Thumbnail
Size
To change the size of the thumbnails in the workspace, you use the
Thumbnail Size submenu on the View menu on the Windows menu
bar or click the Change Thumbnail Size button on the toolbar.
• Increase Thumbnail Size (+): Increases the size by one standard
increment.
• Decrease Thumbnail Size (-): Decreases the size by one standard
increment.
• 32x32
• 48x48
• 64x64
• 80x80
• 96x96
• 128x128
• 160x160
The larger the thumbnail, the more detail you will see, but fewer thumbnails
will be visible in the window.
Note: The filenames will not be visible on thumbnail sizes below 96 x 96.To
view thumbnails that have long file names, select a larger size such as 128
x 128 or higher.
Switching to and from
List View
If you don’t want to see thumbnails in the Browse mode workspace, you can
switch to a list view that shows the file name, size, type and date information
for each image.
31
Page 39

To switch to list view:
• Click the Thumbnail Size button on the toolbar and click List Mode.
To switch back to thumbnail view:
• Click the Thumbnail Size button on the toolbar and click one of the
thumbnail sizes.
Rearranging Images
You can sort the images seen in Browse mode in several ways: by
name, by date, by size or by extension. To rearrange the thumbnails in
the workspace, you use the Arrange Icons submenu on the View
menu on the Windows menu bar or click the Sort Thumbnails button
on the toolbar.
You can use these same commands to sort the information when in list mode,
but additionally, you can click the column header to arrange the items.
Clicking the same header again switches the order from ascending or
descending.
Specifying the Files to
Display
By default, Browse mode displays all types of multimedia files that Photo
Explosion recognizes. If you wish, you may limit the displayed items to
image, audio or video files. You do this using the Browse for submenu on
the View menu on the Windows menu bar. To view all media files again,
click All Files.
Moving Images Among
Folders
A digital photo album is a folder or sub-folder containing images. In Browse
mode you can re-organize your image files by moving them from one folder
to another.
To create a new folder or album:
1. In the Options panel, go to the location where you want to have the
folder.
2. Click the Create Folder button on the Options panel toolbar.
3. Name the folder in the Options panel.
To reorganize images:
1. In the Options panel, open the folder that has the images.
2. Select the thumbnails of the images you want to move.
3. Click the Copy button on the toolbar.
32
Page 40

4. To remove the images from this folder, click the Delete button on the
toolbar.
5. Open the folder where you want to place the images.
6. Click the Paste button on the toolbar.
ADJUSTING
YOUR PHOTOS
IN BATCHES
Photo Explosion’s batch adjust feature makes editing multiple images much
less time-consuming. You can enhance, rotate and convert groups of images
without opening a single file.
Enhancing Photos
To enhance multiple images:
1. Go to Browse mode.
2. Select the image files that you want to adjust.
3. Open the Batch Adjust menu and click Enhance.
4. Click one of the available preset enhancements.
These are all automatic enhancements, there are no settings for you to adjust.
You can apply multiple enhancements one at a time.
5. Click Next.
33
Page 41

6. Select one of the saving options available:
Update original file: This will overwrite the
existing files.
Save to another folder: This allows you to save
the enhanced images in another folder using the
same filename.
7. Select one of the options for Already existing file names:
Skip: If there is another file existing in the same folder with the same
filename, then the save action is cancelled.
Replace: Overwrites existing files.
Rename: Allows you to enter a new filename for
the adjusted image and save it as another file.
8. Click Save and then click OK.
9. Click Close.
Rotating Multiple Photos
To rotate multiple images:
1. Go to Browse mode.
2. Select the image files that you want to adjust.
3. Open the Batch Adjust menu and click Rotate.
4. Click one of the available rotate or flip actions.
You can use multiple rotations or flips one at a time.
5. Click Next.
6. Select one of the saving options available.
Update original files: This overwrites the existing files.
Save to another folder: This allows you to save
the enhanced images in another folder but still
using the same filenames.
7. Select one of the options for Already existing file
names:
Skip: If there is another file existing in the same folder with the same
filename, then the save action is cancelled for that image.
34
Page 42

Replace: Overwrites the existing file.
Rename: Allows you to enter a new filename for
the adjusted image and save it as another file.
8. Click Save and then click OK.
9. Click Close.
Converting Multiple
Photos
You can convert selected thumbnails to a different image file format. The
available formats include .BMP, Encapsulated PostScript (.EPS), .GIF, .JPG,
.TIF and others. The default conversion is to convert to .JPG files.
To convert multiple images:
1. Go to Browse mode.
2. Select the image files that you want to adjust.
3. Open the Batch Adjust menu and click Convert.
4. To convert to a format other then .JPG, click More file formats.
5. If you’re converting to .JPG, set the Quality and Data format.
or
If you’re converting to another file format, click the Format option
button. Set the options in the dialog box and click OK.
6. Select an Action for converted files:
Update original files: This will overwrite the existing files.
35
Page 43

Save to another folder: This allows you to save the enhanced images
in another folder but still using the same filenames.
7. Select one of the options for Already existing file names:
Skip: If there is another file existing in the same folder with the same
filename, then the save action is cancelled.
Replace: Overwrites the existing file.
Rename: Allows you to enter a new filename for the adjusted image
and save it as another file.
8. Click Convert and then click OK.
9. Click Close.
36
Page 44

Chapter 7. Enhancing Your
Photos
Photo Explosion can help you create “the perfect photograph” without
having to spend a lot of time or energy trying to understand photographic
techniques. In Photo mode, you can correct common photographic errors
such as overexposed and unfocused shots.
PHOTO MODE
TOOLBARS
The Photo mode has its own toolbar with shortcuts for many functions in this
mode.
Get Previous Command: Opens a list of your most recently used
commands that can be re-applied to the current image.
Save As: Opens the Save As dialog box for you to save the current
image with a new name and location.
Panning: Allows you to view areas of the image that aren’t visible
in the workspace. Used when the image is magnified or is resized.
Copy: Copies the image or the selection to the Clipboard. You’ll
use this to paste the image or selection onto another image.
Paste: Pastes the contents of the Clipboard onto the open image.
Zoom In: Activates the Zoom In tool, which allows you to see more
detail.
Zoom Out: Activates the Zoom Out tool, which allows you to see
less detail.
Undo: Undoes the most recent change to the image. You can undo
the ten most recent changes.
Redo: Reapplies what was just undone. You can reapply up to ten
changes.
Bring Up: Moves the selected object forward (or upward) one level.
37
Page 45

Send Down: Moves the selected object back (or downward) one
level.
Modify Interface: Allows you to change the skin and workspace
background.
What’s This Help: Shows information about the next item clicked.
SELECTING
PARTS OF
PHOTOS
When you open a photo, it becomes the base image in the workspace. You
can apply global adjustments to the base image (like changing the color
balance or adding artistic effects).
You may want to adjust certain areas in an image or, perhaps, remove
specific areas from the image entirely. This is where the selection tools come
in handy. With selections, you can modify parts of an image while leaving
the base image intact.
In Photo mode, the available selection tools are on the Selection menu once
you click Edit on the Command panel. After creating a selection area, you
convert the selection into an object by dragging the selection. This new object
can then be moved, edited and changed without affecting the rest of the
photo. You can also cut an object and paste it onto other images or projects.
Note: You can only select areas on the original base image — not any
objects that are on top of the original image. If you want to select part of an
object you must merge it into the base image first and then select the part
that you want.
Selection Modes
There are three selection modes (or behaviors) available for the selection
tools. You determine the selection modes after activating a selection tool, but
prior to drawing the selection marquee:
• Create a new selection: Using this mode turns the selected area into a
new object on top of the base image. You’ll normally use this selection
mode.
After you draw the selection marquee, you can click Selection tool
options and then click Move Selection Marquee. This allows you to
drag the marquee around the image without making an object so you
can select a different part of the image. To create a new object, then
click Move Selection Marquee to remove the check mark.
38
Page 46

• Add to the selection: This mode allows you to draw multiple
selection marquees on various parts of the image or draw overlapping
and combined marquees.
• Subtract from the selection: If you select this mode, you can make a
cut-out area inside the selected area. First draw or trace your selection
marquee. Then draw or trace a second marquee inside of the first. The
area inside of the second marquee will be cut out from the new object.
Selecting an Area by
Shape
The Selection menu becomes available after clicking Edit on the Command
panel. You can choose among several different selection tools.
To select an area using a simple shape:
1. If necessary, click Edit on the Command panel.
2. Open the Selection menu and click Shape.
3. In the Options panel, select a shape.
4. To adjust the edge of the selection area, select a Soft edge.
Note: The leftmost value gives the most distinct edge; the rightmost gives
the most feathered edge.
5. To use the center point to make the selection, click the Selection tools
options and click Draw from Center.
6. To make an non-anti-aliased selection, click the Selection tools
options and click Anti-Aliasing to remove the check mark.
Note: Anti-aliasing makes diagonal edges appear smoother, but that may
not be the effect you want.
7. In the workspace, make a selection area by dragging the cursor over
the image.
The selection is outlined with a marquee and is now a separate object from
the base image (unless you activated Move Selection Marquee in the
Selection tool options shortcut menu).
8. Drag the selection elsewhere on the base image or drag it to the
Thumbnail Strip to create a new image.
39
Page 47

9. Click the Deselect Button to cancel the selection and remove
the marquee.
or
Click Close to accept the selected area in the marquee or click Next to
apply edging options or to crop the selection into a new image.
To select the entire image:
1. If necessary, click Edit on the Command panel.
2. Open the Selection menu and click Shape.
3. In the Options panel, click the leftmost Quick selection
button.
The whole image becomes outlined with a marquee.
4. Click the Deselect Button to cancel the selection and remove the
marquee.
or
Click Close to accept the selected area as an object.
To make an inverse cutout of the image:
1. If necessary, click Edit on the Command panel.
2. Open the Selection menu and click Shape.
3. In the workspace, make a selection area by dragging the cursor over
the image.
The selection is outlined with a marquee.
40
Page 48

4. In the Options panel, click the rightmost Quick selection button.
The whole image becomes outlined with a second marquee in addition to the
original marquee.
5. Click the Deselect Button to cancel selection and remove the
marquees.
or
Click Close to accept the selected area.
The original selection you made is now “cut-out.”
Tip: You can make a cutout quickly by drawing a marquee and pressing the
Delete key.
Note: You can drag or copy the cut-out object into another photo and
workspace. The base image or object can be placed behind the cutout to
make interesting photo creations.
Selecting an Area Using
the SmartSelect Tool
The SmartSelect tool works by finding the edges of an object based on the
similarity of colors.
To use the SmartSelect tool:
1. If necessary, click Edit on the Command panel.
2. Open the Selection menu and click SmartSelect.
3. On the image, click at the point where you want to begin the selection
area.
You may want to zoom in to view the selection outline in more detail.
4. When the Red button appears, click at points around the image to
create the selection area.
41
Page 49

Note: If the surrounding colors are very similar to the edge colors, adjust
the Tolerance slider in the Options panel. The selection sensitivity
increases as you move the slider to the right.
5. Click the Red button again to close the selection.
The button then becomes Green.
6. To fine-tune the current selection, move the cursor over an area of the
selection frame until the cursor changes to a pointing finger, and then
drag to modify the selection frame.
7. When you’re satisfied with the selection area, click the Green button
to create the actual selection.
The selection outlined in the marquee is now an object.
8. Drag the selection elsewhere on the base image or drag it to the
Thumbnail Strip to create a new image.
9. Click Close to cancel the tool or click Next to apply edging options or
to crop the selection into a new image.
42
Page 50

Selecting an Area by
Tracing
To select an area by tracing:
1. If necessary, click Edit on the Command panel.
2. Open the Selection menu and click Trace.
3. On the image, click at the point where you want to begin the selection
area. Drag to create a selection shape or click to change the direction
of the selection outline
4. Double-click to finish the selection.
The selection outlined by the marquee is now an object.
5. Drag the selection elsewhere on the base image or drag it to the
Thumbnail Strip to create a new image.
6. Click Close to cancel the tool or click Next to apply edging options or
to crop the selection into a new image.
Selecting an Area by
Color
To select an area by color:
1. If necessary, click Edit on the Command panel.
2. Open the Selection menu and click By Color.
3. If you want all areas containing a specific color selected, select
Expand selection in the Options panel.
4. Click a color on the image.
The tool selects the area containing that color. The selection outlined by the
marquee is now an object.
5. Drag the selection elsewhere on the base image or drag it to the
Thumbnail Strip to create a new image .
6. Click Close to cancel the tool or click Next to apply edging options or
to crop the selection into a new image.
Note: If you find that your selection is not clean or does not cover the entire
range of the selected color, adjust the Similarity value in the Options
panel.
43
Page 51

Edging a Selection
You can add an edge effect to the current selection.
To add an edge effect to the selection:
1. Click Next on the Options panel.
2. Select an Edge type from the list.
3. Click Show selected edge type presets.
4. Double-click a preset edge type or drag it to the image.
or
To change the color of the edge type, click the Advanced mode
button, select Edge color and click a single color, add a gradient, or
add a texture. Click Apply.
5. Click Close.
EDITING IMAGES
Images often need some adjustments, especially if you’ve retrieved them
from a digital camera or scanner.
Trimming an Image
You sometimes get excess background in a photo or just more than the main
picture. To get rid of the excess, you can trim it away.
To trim a photo:
1. If necessary, click Edit on the Command panel.
2. Open the Adjust menu and click Trim .
3. Select a Trim shape in the Options panel.
4. Resize the trim shape by dragging the handles.
5. Reposition the trim shape, as needed, on the image.
44
Page 52

6. Select a Soft edge value for the trim shape. (This helps the edges of
the trimmed area blend more with the background.)
7. To crop the image, select the Create a new image box. This creates a
new base image on the Thumbnail Strip using the trim shape.
or
To create an object using the trim shape, clear the Create a new
image box.
8. Click Apply.
9. Click Close.
Note: You can create your own trim shapes by cropping with a selection
tool instead of using the Trim command. Apply one of the selection tools,
click Next and then click the Crop with current selection button.
Resizing the Base Image
With Photo Explosion, you can resize your images. Remember, though, that
making an image larger generally decreases the quality of the image.
Note: If you enlarge the base image, any objects that haven’t been merged
into the base image will remain the same size. These will have to be
resized manually using the Rotate & Resize command.
To resize an image:
1. If necessary, click Edit on the Command panel.
2. Open the Adjust menu and click Resize.
3. In the Options panel, select a Standard size.
or
Type a custom size in the User-defined box.
Note: If you resize the base image using a Standard size, it may result in
stretched or unnatural photos because the aspect ratio of the original image
is not preserved. To maintain an image’s aspect ratio, use User-defined.
4. To prevent the image from stretching unnaturally, Select Keep aspect
ratio.
5. To change the resolution, type a value or click the arrows.
45
Page 53

6. Click Apply.
7. Click Close.
Note: The image resolution determines how the image prints on paper. A
lower resolution uses fewer but larger pixels to generate the image, while
higher resolution uses more but finer pixels.
To do a freehand resize on the base image or to resize objects, click Rotate
& Resize. Then drag the square handles that appear around the image. If you
want to resize the image proportionally, use the two square corner handles.
Rotating the Base Image
or Objects
You may want to rotate an image to adjust the alignment of the main part of
an image (for example, if your digital camera was held at an angle).
Alternatively, you can flip and image to get a mirror image or turn an image
upside-down.
To rotate an image:
1. If necessary, click Edit on the Command panel.
2. Open the Adjust menu and click Rotate & Resize.
3. To rotate in 90˚ increments, click one of the buttons at the top of the
Options panel.
or
To rotate the image by a specific amount, type that amount in the
Rotate by degrees box and click either the Rotate clockwise or
Rotate counter-clockwise button.
or
To do a freehand rotate, drag the circles on the image.
46
Page 54

4. Click Close.
To flip an image:
1. If necessary, click Edit on the Command panel.
2. Open the Adjust menu and click Rotate & Resize.
3. To get a mirrored image, click the Flip horizontally icon.
or
To turn the image upside-down, click the Flip vertically icon.
4. Click Close.
Scaling the Base Image
or Objects
You can adjust the size of both the base image or objects.
To re-size an image or an object:
1. If necessary, click Edit on the Command panel.
2. Open the Adjust menu and click Rotate & Resize.
3. Click the base image or the object you want to resize. (This doesn’t
work with multiple selections.)
A bounding box appears around the image or object.
4. Drag a handle on the bounding box to change its size.
5. Select another object to resize
or
Click Close.
FIXING YOUR
PHOTOS
Photo Explosion has many adjustment and enhancement tools to fix up your
photos or other images. Most of the adjustment tools are specific to photos
— like adjusting the focus and fixing red eye. But you can use them in
creative ways to adjust other images.
The available tools depend on which mode you are in. The Photo mode has
most of the adjustment and enhancement tools and this is where you work
with individual images. The Browse mode has tools to do batch adjustments
on groups of images. The Project mode allows you to perform some
enhancements on a project.
Using SmartEnhance™
Photo Explosion has specific tools to adjust your images, but it also has
some quick and easy enhancements that you can apply with the click of a
button.
47
Page 55

To automatically enhance your photos:
1. If necessary, click Edit on the Command panel.
2. In Photo mode, open the Adjust menu and click SmartEnhance.
or
In Browse mode, open the Adjust menu and click Enhance.
3. In the Options panel, click each tool that you want to use.
Photo Explosion automatically finds the optimal settings for each tool and
immediately changes the images when you click an icon.
4. Click Close.
Note: If you don’t like a change, click the Undo button on the toolbar.
Adjusting the Focus
If you have a photo or a project, that is a little blurry, you can sharpen it up
by adjusting the focus. This tool is only available in Photo and Project
modes.
48
Page 56

To adjust the focus:
1. If necessary, click Edit on the Command panel.
2. Open the Adjust menu and click Focus.
3. To apply a preset focus, double-click a thumbnail in the Options panel
or drag it to the image.
or
Click the Advanced mode button and adjust the Level and Range
sliders.
The preview area at the top of the Options panel shows the effect of the
adjustments as you make them.
4. Click Apply.
5. Click Close.
Adjusting the Lighting
You can adjust the lighting to make an image or project lighter or darker.
This tool is only available in Photo and Project modes.
To adjust the lighting:
1. If necessary, click Edit on the Command panel.
2. Open the Adjust menu and click Lighting.
3. To apply a preset lighting adjustment, double-click a thumbnail in the
Options panel or drag it to the image.
or
Click the Advanced mode button and adjust the Brightness,
Contrast and Gamma sliders.
49
Page 57

The preview area at the top of the Options panel shows the effect of the
adjustments as you make them.
4. Click Apply.
5. Click Close.
Balancing the Colors
You can change the balance of the colors in your image.
To change the color balance:
1. If necessary, click Edit on the Command panel.
2. Open the Adjust menu and click Balance Color.
3. To apply a preset color adjustment, double-click a thumbnail in the
Options panel or drag it to the image.
or
Click the Advanced mode button and adjust the Cyan to Red,
Magenta to Green and Yellow to Blue sliders.
The preview area at the top of the Options panel will show the effect of the
adjustments as you make them.
4. Click Apply.
5. Click Close.
Removing Red Eye from
a Photo
This tool is most commonly used for removing the red eyes caused by a
camera flash. However, you can also use it to change the eye color. This tool
is only available in Photo mode.
Note: It may be easier to work on a magnified image. Press the + key to
zoom in.
50
Page 58

To remove red eyes or change eye color:
1. If necessary, click Edit on the Command panel.
2. Open the Adjust menu and click Remove Red Eye.
3. Click a Brush size. Select one that is closest to the size of the eyes in
the photo.
4. Set the color Similarity.
Use a higher similarity to replace more of the red eye.
5. Set the Strength of the replacement color over the existing color.
6. To replace red eyes with black, select Remove Red Eye.
or
To change eye colors, select Change Eye Color and then click each
color square and select a new color.
51
Page 59

7. Brush over the area in the photo that you want to replace.
8. Click Close.
Note: Click Reset attributes to revert to the default settings.
ADDING TEXT
Adding text is a quick and easy way to liven up any photo. Photo Explosion
provides you with an extensive range of text effects that you can apply to
your text to create even more unique and impressive images. The text tools
are available in Photo or Project mode on the Tex t menu after clicking Edit.
Adding/Editing Text
To add text to your image:
1. If necessary, click Edit on the Command panel.
2. Open the Te xt menu and click Add/Edit.
3. In the Options panel, type new text in the Text box.
4. To change the style, click one of the Style buttons.
5. To change the text alignment, click one of the Alignment buttons.
6. To make the text vertical, click the Display the text vertically button.
7. To change the font, select a new font from the Font list.
8. To change the text color, either select a preset color or click the large
color box for more options.
or
Click Gradient and then click the gradient box to set the gradient.
Click OK.
or
Click Texture and then click the texture box to select a texture. Click
OK.
9. Select Enter new text and click Apply.
10. Click Close.
52
Page 60

To edit the text in your image:
1. Double-click the text object.
2. In the Options panel, change the text in the Text box.
3. To change the style, click one of the Style buttons.
4. To change the text alignment, click one of the Alignment buttons.
5. To make the text vertical, click the Display the text vertically button.
6. To change the font, select a new font from the Font list.
7. To change the text color, either select a preset color or click the large
color box for more options.
or
Click Gradient and then click the gradient box to set the gradient.
Click OK.
or
Click Texture and then click the texture box to select a texture. Click
OK.
8. Select Update the selected text and click Apply.
9. Click Close.
Note: You can resize the text manually by adjusting the text object in the
workspace.
53
Page 61

Transforming Text
Simply adding text to an image is often enough to attract attention, but if you
really want the text to get noticed, try enhancing the text with some of the
incredible effects in Photo Explosion.
Remember, that before you can use any of the Text tools for creating effects,
you must select the text object in the workspace by clicking it.
To transform text objects:
1. Select a text object.
2. If necessary, click Edit on the Command panel.
3. Open the Te xt menu and click Transform.
4. In the Options panel, click a transform tool.
5. If you clicked a transform tool in the lower half of the Options panel,
drag one of the control handles around the text object.
6. Click Close.
Reshaping Text
To reshape a text object:
1. Select a text object.
2. If necessary, click Edit on the Command panel.
3. Open the Te xt menu and click Reshape.
4. In the Options panel, select a reshape type from the list at the top.
5. Double-click a reshape thumbnail in the Options panel or drag it to the
image.
6. Click Close.
Adding Shadows to Text
To add a shadow to text:
1. Select a text object.
2. If necessary, click Edit on the Command panel.
3. Open the Te xt menu and click Shadow.
4. In the Options panel, click the Add Shadow button.
5. To change the color, select one of the preset colors or click the large
color box to view more color options.
54
Page 62

6. Select the type of edge for the shadow in the Soft edge area.
7. Select a Transparency option. (The leftmost option is the most
opaque.)
8. In the workspace, adjust the position of the shadow by dragging the
shadow’s handle on the right.
9. Click Close.
Note: To quickly remove the shadow, select the text object, right-click it and
then click Remove Shadow on the shortcut menu.
For more advanced enhancements, see Advanced Special Effects for Text in
Chapter 10: Advanced Special Effects.
WORKING WITH
PAINTING TOOLS
These tools give you the opportunity to reveal your creative side. You can
‘paint’ on the image or clone parts of the image.
Using the Brush Tool
Use the Brush tool to add personal touches to your images.
To use the Brush tool:
1. If necessary, click Edit on the Command panel.
2. Open the Paint menu and click Brush.
3. In the Options panel, click Shape and select the brush shape. The
default is a circular brush.
4. Click the Options button and click the type of brush stroke. The
default is a freehand brush.
5. Adjust the size of the brush, as necessary.
Note: The small padlock indicates whether to maintain the aspect ratio
when resizing the brush. If you click it to ‘open’ the lock, you can adjust the
height and width separately.
6. Select one of the preset colors or click the large color box to view
more color options.
7. Select the type of edge for the brush stroke in the Soft edge area.
55
Page 63

8. Select a Transparency option. (The leftmost option is the most
opaque.)
9. Move the cursor over the image and drag to create the brush stroke.
10. Click Close.
Note: If you don’t like the brush stroke, press Ctrl+ Z to remove the last
stroke you made.
Tip: To simulate airbrushing, use the Freehand option combined with soft
edges.
Using the Clone Tool
You use the Clone tool to replicate portions of the image.
To use the Clone tool:
1. If necessary, click Edit on the Command panel.
2. Open the Paint menu and click Clone.
3. In the Options panel, click the image to clone in the Select source
photo strip.
4. Click within the Source photo view area and move the crosshairs to
mark a reference point on the source image. (You may want to zoom
in to precisely place the crosshairs.)
5. Click the Adjust brush attributes icon and adjust, as necessary, and
click OK.
(See Using the Brush Tool for details.)
6. Move the cursor over the image in the workspace area and drag to
change the image.
56
Page 64

An outline of the brush shape is visible inside the Source photo view area.
Moving this outline in the source area changes the cloned area that appears
on the workspace image. Use short strokes for the best effect.
7. Click Close.
ADDING
GRAPHIC
ELEMENTS AND
‘DRESSING UP’
YOUR PHOTOS
The Decorate menu gives you access to ornamental effects. These are
special, object-based effects such as Frames, Edges, Props and Shadows that
you can use to enhance images.
Note: You cannot add ornamental effects to text objects.
Using Edge Effects
You can apply an edge effect to the entire image or to an object in an image.
To apply a regular edge effect:
1. To apply the effect to an object, select the object.
2. If necessary, click Edit on the Command panel.
3. Click Edges
➧
2D/Mask or Magic on the Decorate menu.
4. Select a preset edge style.
5. To change the color of the edge effect, click the Advanced mode
button, select Edge color and click a single color, add a gradient, or
add a texture. Click Apply.
57
Page 65

6. Click Apply.
7. Click Close.
To apply a text edge effect:
1. To apply the effect to an object, select the object.
2. If necessary, click Edit on the Command panel.
3. Click Edges
➧
Text on the Decorate menu.
4. Select a preset edge style.
5. To change the color of the edge effect, click a preset color, add a
gradient or add a texture.
Note: You can click the large color box for more color options.
6. To set the text for the edge, click the Advanced mode button
7. Type the text you want to see on each edge.
8. Select the font on the Text font list.
9. To change the style, click a Style button.
10. Click Apply.
11. Click Close.
58
Page 66

Adding a Frame
You can add a frame to the entire image or to an object within an image.
Note: To quickly remove a frame, select the image or object, right-click it
and then click Remove Frame on the shortcut menu.
To frame an object:
1. Select an object in the image.
2. If necessary, click Edit on the Command panel.
3. Open the Decorate menu and click Frame.
4. Double-click a frame in the Options panel; select a frame and click
Apply; or drag the frame onto the object.
5. Click Close.
Note: You may have to scale the object using Rotate & Resize to view the
entire frame around an object.
To frame an image:
1. If necessary, click Edit on the Command panel.
2. Open the Decorate menu and click Frame.
3. Double-click a frame in the Options panel; select a frame and click
Apply; or drag the frame onto the image.
4. Click Close.
Dressing up an Image
Using Props
You can add clip art images using the Props command.
To add a prop to an image.
1. If necessary, click Edit on the Command panel.
2. Open the Decorate menu and click Props.
3. Select a prop category from the Category list in the Options panel.
4. Double-click an image in the Options panel; select the image and click
Apply; or drag the image into the workspace.
5. Click Close.
59
Page 67

Note: You can rotate, resize and otherwise adjust a prop object as you
would any other object in the image. See other procedures in this chapter
and Chapter 4. Using Photo Explosion: Working with Objects. But you
cannot merge a prop to an object, it merges to the base image.
Shapes
To add a shape to an image:
1. If necessary, click Edit on the Command panel.
2. Open the Decorate menu and click Props.
3. Select the Shapes category from the Category list in the Options
panel.
4. Double-click a shape in the Options panel; select a shape and click
Apply; or drag the shape into the workspace.
5. Click Close.
Once you have the shape on the image, you may color it or apply a fill to it
as you would any object.
Shadows
You can add a shadow to an object in your photo.
To apply a shadow:
1. Select an object in your photo.
2. If necessary, click Edit on the Command panel.
3. Open the Decorate menu and click Shadow.
4. Click the Add Shadow button to apply a shadow to the selected image
object.
60
Page 68

5. To change the color, select one of the preset colors or click the large
color box to view more color options.
6. Select the type of edge for the shadow in the Soft edge area.
7. Select a Transparency option. (The leftmost option is the most
opaque.)
8. In the workspace, adjust the position of the shadow by dragging the
shadow’s handle on the right.
9. Click Close.
Note: To quickly remove the shadow, select the image object, right-click it
and then click Remove Shadow on the shortcut menu.
Adding a Signature
A signature is hand-written text or symbols added to an image.
1. If necessary, click Edit on the Command panel.
2. Open the Decorate menu and click Signature.
3. Select the type of signature: Graffiti or Handwriting.
4. Select a preset signature from the preset window.
or
Click Create a new signature to create your own. Use your mouse or
pen tablet to write your signature and then adjust the settings. Click
Save to make the signature available in the Preset window.
5. Click Apply to apply the signature on the image.
6. Click Close.
Note: You can change the color by clicking one of the Fill commands on
the Decorate menu. You can rotate, resize and otherwise adjust a signature
object as you would any other object in the image. See other procedures in
this chapter and Chapter 4. Using Photo Explosion: Working with Objects.
Applying Fills, Colors or
Gradients
You can fill objects with patterns or colors.
61
Page 69

To fill an object with color:
1. Select an object.
2. If necessary, click Edit on the Command panel.
3. Choose Fill
➧
Color Fill from the Decorate menu.
4. To fill with a single color, select Single color and click a preset color
or click the large color box for more color options.
5. To fill with a gradient, select Gradient and click the Gradient box.
Define the gradient direction and colors of the fill. Adjust the Color
Shift to specify the brightness of your color fill. Click OK.
6. To fill with a texture, select Texture and click the Texture box. Select
a texture and click OK.
7. Select a Transparency option. (The leftmost option is the most
opaque.)
8. Click Apply.
9. Click Close.
To fill an object with a nature or pattern fill:
1. Select an object.
2. If necessary, click Edit on the Command Panel.
3. Choose Fill
➧
Nature Fill or Fill ➧Pattern Fill from the Decorate
menu.
4. Select a thumbnail.
5. Adjust the Variation slider to have fewer or more instances of the
pattern.
6. Adjust the Transparency slider to make the fill more or less opaque.
7. To select a new color for the fill, click the Pattern color box.
8. To select a new background color, click the Background color box.
9. Click Apply.
10. Click Close.
Note: Use the Transparency slider to control the subtlety of the effect and
to make the pattern blend more naturally with your image.
62
Page 70

Chapter 8. Creating Projects
In Photo Explosion, the Project mode is where you can create custom
greeting cards, name cards, invitations, and much more. You can work with
provided pre-designed templates or start from scratch using a blank
template. While in Project mode, you can only open template files, but you
may add image files, decorations and text to customize each project.
PROJECT MODE
TOOLBARS
The Project mode has its two different toolbars with shortcuts for many
functions in this mode.
Buttons for Browsing
Project Templates
Get Previous Command: Opens a list of your most recently
used commands that can be re-applied to the current image.
Open: Opens the selected project.
Sort Thumbnails: Sorts the thumbnails by name, by date, by size
or by extension.
Change Thumbnail Size: Changes the size of the thumbnails.
Also, allows you to switch between the list and thumbnail views.
Modify Interface: Allows you to change the skin and workspace
background.
63
Page 71

What’s This Help: Shows information about the next item clicked.
Selected Thumbnails: Shows the number of selected thumbnails
relative to all the thumbnails in the current folder.
Buttons Available when
Working on a Project
Get Previous Command: Opens a list of your most recently
used commands that can be re-applied to the current project.
Save As: Opens the Save As dialog box for you to save the current
project with a new name and location.
Panning: Allows you to view areas of the image that aren’t visible
in the workspace. Used when the image is magnified or is resized.
Copy: Copies the selected object to the Clipboard. You’ll use this to
paste the object elsewhere.
Paste: Pastes the contents of the Clipboard into the project.
Zoom In: Activates the Zoom In tool, which allows you to zoom in
to see more detail.
Zoom Out: Activates the Zoom Out tool, which allows you to zoom
out to see less detail.
Undo: Undoes the most recent change to the image. You may undo
the ten most recent changes.
Redo: Reapplies what was just undone. You may reapply up to ten
changes.
Bring Up: Moves the selected object forward (or up) one level.
Send Down: Moves the selected object back (or down) one level.
Modify Interface: Allows you to change the skin and workspace
background.
What’s This Help: Shows information about the next item clicked.
WORKING WITH
TEMPLATES
Coming up with a good layout for a web page, greeting card or other project
can be a challenge. Fortunately, Photo Explosion includes a wide variety of
ready-to-use templates so you don’t have to spend time worrying about the
layout. The templates come with customizable features so you can
personalize a template to suit your needs.
64
Page 72

Opening a Template
You can open a template while in any mode by using the Open Template
command on the File menu. When the template opens, you’ll be in Project
mode.
To open a template in Project mode:
1. If you’re in Photo mode, click the Mode menu and switch to Project
or Browse mode.
2. In Project mode, open the Get Project menu on the Command panel,
point to a category and click a project type. (You may be prompted to
load the content CD.)
or
In Browse mode, browse the folder where the templates are located
and double-click to select one or make multiple selections. This is the
way to access the additional templates on the Additional Templates
CD, (Deluxe Version.)
The template folder opens in the workspace and displays samples of the
projects.
3. To open a template, double-click it.
or
Right-click a template and click Edit on the shortcut menu.
or
Select a template and click the Open button on the toolbar.
The template opens in the workspace.
Opening an Existing
Project
You can open an existing project while in any mode by using the Open
Template command on the File menu. When the project opens, you’ll be in
Project mode.
To open a project in Project mode:
1. Open the Get Project menu on the Command panel and click My
Computer.
2. Locate the folder containing the project.
3. Select the thumbnail for the project.
4. Click Open.
The project opens in the workspace.
5. Click Close.
65
Page 73

CUSTOMIZING A
PROJECT
After opening a pre-designed template, you are now ready to personalize it
to make it your own. A template consists of several elements that can be
changed. You can also change a project that has been saved as a *.TPX file.
Here are ways to personalize your template to surprise your family and loved
ones.
Working with Text
To edit text on a template:
1. Select a text object.
2. Click the Text Placeholder button.
3. In the Options panel modify the text and adjust any settings.
4. In the workspace, drag the handles to resize the text.
5. Click Apply.
6. Click Close.
7. Drag the text object to reposition it.
To add text to a template:
1. If necessary, click Edit on the Command panel.
2. Open the Te xt menu and click Add/Edit.
3. In the Options panel, type new text in the Text box.
4. To change the style, click one of the Style buttons.
5. To change the text alignment, click one of the Alignment buttons.
6. To make the text vertical, click the Display the text vertically button.
7. To change the font, select a new font from the Font list.
8. To change the text color, either select a preset color or click the large
color box for more options.
or
Click Gradient and then click the gradient box to set the gradient.
Click OK.
or
Click Texture and then click the texture box to select a texture. Click
OK.
66
Page 74

9. Select Enter new text and click Apply.
10. Click Close.
Working with Images
To replace an image with another:
1. Select the image.
2. Click the Image Placeholder button.
3. On the shortcut menu, click Replace from My Computer.
4. In the Options panel, locate the folder containing the image.
5. Select the image.
6. Make sure that Replace is selected in the Action area.
7. Click Apply.
8. Click Close.
To add a new image:
1. If necessary, click Edit on the Command panel.
2. Open the Insert menu and click My Computer.
3. In the Options panel, locate the folder containing the image.
4. Select the image.
5. Select Add in the Action area.
67
Page 75

6. Click Apply.
7. Click Close.
Note: You may also select any active image on the Thumbnail Strip and
drag it onto the project.
Also, see Chapter 7: Enhancing Your Photos for ways to edit and enhance
images in your project.
ENHANCING
YOUR PROJECT
Once you get the images and text into your project, you can really get
creative! Here are other ways to change the objects that make up your
project:
• To move an object, select it and then drag it.
• To move an object to another layer, select the object. Right-click it and
then click Move Object Up or Move Object Down on the shortcut
menu.
• To adjust the transparency of the selected object, right-click and then
click Transparency on the shortcut menu.
• To resize and rotate a text object, select it, double-click and drag the
nodes.
• To reshape, transform, add a shadow or special effects of a selected
text object, open the Text menu and click one of the items.
• To replace the background image with one from a file, digital camera,
scanner or video capture, double-click the background. Click an item
on the shortcut menu.
• To adjust the project’s overall focus, color or lighting, open the Adjust
menu and click one of the items.
• To add a frame, edge or shadow to the project, open the Decorate
menu and click one of the items.
• To remove a shadow, edge or frame of the image object, right-click in
the background and then click the effect on the shortcut menu that you
want to remove.
• To add new objects into the existing project, open the Decorate menu
and click Props.
68
Page 76

SAVING YOUR
PROJECT
It is a good habit to save your work periodically to ensure that you don’t
have to redo everything when unexpected events happen. Keep in mind that
saving a project as a *.TPX file means that you will be able to edit the
individual objects when you reopen the file. If you want to share the project
with others, you’ll need to save it as a standard image file.
To save a project:
1. Open the Share menu on the Command panel and click Save.
2. On the Options panel, locate the folder where you want to save the
project.
3. Type a file name.
4. Select a File type for the project.
Note: Use .BMP and .TIF to keep the highest level of quality. Use .JPG for
photos to be used on the Web or sent by e-mail. Use .TPX to save projects
with unmerged objects.
5. Select a Data type for the project.
Note: Data type describes how much color information is saved with the
project. The more color information included in the file, the larger the file
tends to be. The highest color data type is True Color. Indexed-256 and
Grayscale each contain up to a maximum of 256 distinct colors and are
generally quite small. (48-bit True Color and 16-bit Grayscale are supported
in .TIF format.)
6. Click Save.
7. Click Close.
69
Page 77

Chapter 9. Sharing Your
Photos and Projects
Once you’ve put the finishing touches onto your photos or projects, Photo
Explosion provides just what you need to share them with your friends and
loved ones. There are numerous printing options as well as ways for sharing
your work across the Internet.
PRINTING
Photo Explosion has several ways for you to print your images or projects:
Normal — prints a single image or project onto a sheet of paper.
Tiled— prints several copies of an image or project onto a sheet of
paper.
Poster — prints an enlarged version of the image or project onto
several sheets of paper.
T-Shirt — reverses the image or poster to print onto transfer paper.
Multiple — prints multiple copies of an image or project onto a sheet
of paper using a specific layout (for example, address labels).
Additionally, in Browse mode, you can print thumbnails or create CD covers
from selected thumbnails.
Print Toolbar
Once you choose an item from the Print menu, a specialized Print toolbar
appears.
Get Previous Command: Opens a list of your most recently used
commands that can be re-applied to the current image.
Reset: Resets the options in the Options panel to their default
values.
Printable Area: Opens the Modify Printable Area dialog box. This
allows you to precisely adjust the position of the image within the
page.
Modify Interface: Allows you to change the skin and workspace
background.
70
Page 78

What’s This Help: Shows information about the next item clicked.
General Printing
These general instruction apply to Normal, Tiled, Poster and T-Shirt
printing.
To print:
1. If you’re in Browse mode, select an image or images.
or
If you’re in Photo or Project mode, have the image or project active.
2. Open the Print menu on the Command panel and click the printing
method.
3. In the Options panel, select the printer you want used for this print
job.
4. If you need to change any printer settings, click the Print icon
to open the printer’s Properties dialog box. Make any changes
and click OK.
5. Select a Paper Size.
6. Adjust the Layout options. See the Layout Options section for details.
7. To resize the image or change its location on the printed page, adjust
the image in the workspace. (This does not apply for Tiled or Poster
printing.)
8. Type the number of Copies or click the arrows.
9. To adjust the color profile for the printer, click Color printer options,
click Adjust color printing settings, select a new profile and click
OK.
10. Click Print.
11. Click Close.
Note: When multiple images are selected and they don’t fit in one page,
use the arrow keys on the toolbar to navigate through the images or pages.
Layout Options
The Layout options in the Options panels are print-job specific.
For Normal printing:
— Select either Portrait or Landscape orientation.
71
Page 79

— To add a title to the image or project, click Title and type a title in
the box.
— To maximize the image or project on the paper, click Fit image to
page. (This expands the image until it touches one of the
margins.)
— Set or clear the Center horizontally or Center vertically options.
For Tiled printing:
— Select either Portrait or Landscape orientation.
— Type the number of rows or columns you want to appear on the
printed page.
— To add cutting lines to the page, click Show cutting grid.
— If you want to determine how the image or project gets tiled, click
Customize. In the panel, set the image size, offset and
spacing. Determine if you want to keep the original aspect
ratio or not. Determine if you want to keep the original size
or not. Click OK.
For Poster printing:
— Select either Portrait or Landscape orientation.
— Determine if you want to keep the original aspect ratio or not.
— Select how to resize the poster: Percent, Inch, Cm, Pages and
adjust the values as needed.
For T-Shirt printing:
— Select either Portrait or Landscape orientation.
— To maximize the image or project on the paper, click Fit image to
page.
— Set or clear the Center horizontally or Center vertically options.
Note: The image or project shows reversed in the workspace.
Printing Multiple Items
You use the Multiple command on the Print menu to print onto specialized
layout paper— such as for printing address labels, postcards and disk labels.
Also, this is the method to use if you want to print different photos on a sheet
of paper.
72
Page 80

To print multiple items on a sheet of specialized paper:
1. If you’re in Browse mode, select an image or images.
or
If you’re in Photo or Project mode, have the image or project active.
2. Open the Print menu on the Command panel and click Multiple.
3. In the Options panel, select the printer you want used for this print
job.
4. If you need to change any printer settings, click the Print icon
to open the printer’s Properties dialog box. Make any changes
and click OK.
5. Select a Paper layout from the list.
6. Select either Portrait or Landscape orientation.
7. Select the thumbnail for the actual specialized paper (such as
KODAK Inkjet Media or Ave r y).
8. Click Next.
9. Type the number of Copies or click the arrows.
10. To adjust the color profile for the printer, click Color printer options,
click Adjust color printing settings, select a new profile and click
OK.
11. Click Print.
12. Click Close.
73
Page 81

Note: You can delete individual images from multiple prints and you can
drag new photos from the Thumbnail Strip up into the sections.
Printing a CD Cover
If you are in Browse mode, you can select several thumbnails to create a CD
cover. You may want to do this if you are burning an image CD and want to
see what it contains.
To print a CD cover:
1. If you’re not in Browse mode, open the Mode menu and click
Browse.
2. Select one or more images.
3. Open the Print menu on the Command panel and click CD Cover.
4. In the Options panel, select the printer you want used for this print
job.
5. If you need to change any printer settings, click the Print icon to open
the printer’s Properties dialog box. Make any changes and click OK.
6. Select a Paper Size.
7. Select either Portrait or Landscape orientation.
8. Type a Cover name.
9. To change the date from the current date, type the date or click the
arrow to open the Calendar to select a new date.
10. To specify the type of CD, click CD index and type a category. (For
example, you may want to have a family photo CD or summer
vacation CD.)
11. If you want the images to print faster, clear the Best quality box.
12. Type the number of Copies or click the arrows.
13. To adjust the color profile for the printer, click Color printer options,
click Adjust color printing settings, select a new profile and click
OK.
14. Click Print.
15. Click Close.
74
Page 82

Note: If you select multiple images and they don’t fit in one page, use the
arrow keys on the toolbar to navigate through the images or pages.
Printing Thumbnails
If you are in Browse mode, you can select several thumbnails to print. You
may want to do this to catalog images as printed contact sheets.
To print thumbnails:
1. If you’re not in Browse mode, open the Mode menu and click
Browse.
2. Select one or more image.
3. Open the Print menu on the Command panel and click Thumbnails.
4. In the Options panel, select the printer you want used for this print
job.
5. If you need to change any printer settings, click the Print icon
to open the printer’s Properties dialog box. Make any changes
and click OK.
6. Select a Paper Size.
7. Select either Portrait or Landscape orientation.
8. Type the number of rows or columns you want to appear on the
printed page.
9. If you want each thumbnail named, select either File name or (Index)
File name.
or
If you don’t want names, select None.
10. If you want the images to print faster, clear the Best quality box.
75
Page 83

11. Type the number of Copies or click the arrows.
12. To adjust the color profile for the printer, click Color printer options,
click Adjust color printing settings, select a new profile and click
OK.
13. Click Print.
14. Click Close.
Note: If you select multiple images and they don’t fit in one page, use the
arrow keys on the toolbar to navigate through the images or pages.
SENDING BY
E-MAIL
Rather than printing an image or project, you may want to send it by e-mail
to friends or family.
To send an image or project by e-mail:
1. If you are in Browse mode, select the images to send.
or
If you are in Photo or Project mode, have the image or project active.
2. Open the Share menu and click E-mail.
3. Select whether to send the images as an HTML e-mail or as an
attachment.
4. Set the Image Dimension and Quality.
5. Click Send.
6. Type the address, subject and message, then click Send.
Note: Make sure you have set a default e-mail program before sending an
e-mail using Photo Explosion.
You can also send by using the Send To ➧Mail Recipient command on the
File menu. However, you can only send the images as attachments and you
can not adjust the image dimension and quality.
76
Page 84

CREATING WEB
PROJECTS
In addition to the other project types, you can also create projects for
uploading and viewing on the Web. Photo Explosion gives you the tools to
create great-looking web pages without writing a single line of code. The
Web menu has a large collection of beautiful and ready-made templates for
you to choose from and lets you start creating those web masterpieces.
Web Page — offers various templates that allow you to share a single image
over the Web. This is a very attractive and convenient way of sharing images
with others.
Web Card —can include photos, sounds and more to send to your friends!
Web Album — is an electronic photo album that you can either send by e-
mail or post to a web site for others to see and enjoy. (Only available in
Browse mode.)
Web Show — provides a fast and convenient way to create your own slide
show with your images on web pages. Place your photos in one of the
templates and send them to your friends, save them to a disk or burn it to a
CD. (Only available in Browse mode.)
Note: Most of these web projects consist of several files. If you are sending
the project to someone and you don’t know what type of computer they
have, do not send it as a package (.EXE). The individual files will be
attached and the web project can be viewed on any computer. When a web
project is packaged, all the files are put together in one large file and must
be broken apart on the receiver’s Windows computer before viewing.
Creating a Web Page
A web page places your image or project (as an image) into a defined web
design. You can change some aspects of the web page — like add a signature
or change the music, but unless you know HTML code you can’t change
other aspects of the design.
To create a web page in Photo Explosion:
1. Open the Web menu and click Web Page.
2. Select a Template category from the list.
3. Select a template and click Next.
4. To change the title, type in the Title box.
5. To add a description, select User-defined and type a Description in
the box.
77
Page 85

6. Click Next.
7. To add an e-mail signature, click the Add/Change/Remove signature
button. Type the information you want to include in the Title area,
type your E-mail address, type your URL and click OK.
8. To change or remove the default music, click Add/Change/Remove
background music. Locate the folder containing the audio file and
select the file in the list or click Remove music. Click OK.
9. Set the Image quality. The better the quality, the larger the file size.
10. To view the page, click Preview in Browser.
11. Click Next.
12. Click an output destination.
— If E-mail, determine whether to send it as an HTML message or
as an attachment. If you send it as an attachment, determine if you
want it packaged as an .EXE file for other Windows users only.
Click Send.
— If Disk, select how to save the file. Change the File name if you
want. Locate the disk or folder for the page. Type a name for the
folder that will contain all the HTML elements. Click Save.
— If Post to Web, assign a name for the main page. Select a web
hosting service from the list or select Personal Account. Type
your User name and Password and, if it’s your personal account,
type the FTP server address and your URL. Click Post.
13. Click Close.
Creating a Web Card
A web card places your image or project (as an image) into a defined web
design. You can change some aspects of the web card — like add a signature
or change the music, but unless you know HTML code you can’t change
other aspects of the design.
Note: You cannot create a web card in Project mode.
To create a web card:
1. Open the Web menu and click Web Card.
2. Select a Template category from the list.
3. Select a template and click Next.
78
Page 86

4. To change existing text, double-click the text item. Change the text in
the Text box. Select a font, a style, a size and alignment. Select a new
color from the default colors or click the large color box for more
color options. Click Next.
5. To add text, click Add Text. Type the new text in the Text box. Select
a font, a style, a size and alignment. Select a new color from the
default colors or click the large color box for more color options.
Click Add.
6. To add an image, click Add an image. Locate the folder containing
the image and select the image’s thumbnail. Adjust the size using the
slider. Click Add.
7. To replace the placeholder photo, double-click the photo. Locate the
folder containing the image and select the image’s thumbnail. Adjust
the size using the slider. Adjust the location by dragging the image.
Click Next.
8. To add a prop (a clip art image), click Add decoration. Select a
category and then select the image’s thumbnail. Adjust the size as
needed and click Add.
9. To change or remove the default music, click Add/Change/Remove
background music. Locate the folder containing the audio file and
select the file in the list or click Remove music. Click OK.
10. Click Next.
11. Click an output destination.
— If E-mail, determine whether to send it as an HTML message or
as an attachment. If you send it as an attachment, determine if you
want it packaged as an .EXE file for other Windows users only.
Click Send.
—If Disk, select how to save the file. Change the File name if you
want. Locate the disk or folder for the page. Type a name for the
folder that will contain all the HTML elements. Click Save.
— If Post to Web, assign a name for the main page. Select a web
hosting service from the list or select Personal Account. Type
your User name and Password and, if it’s your personal account,
type the FTP server address and your URL. Click Post.
12. Click Close.
Creating a Web Album
In Browse mode you can select multiple thumbnails and turn them into an
electronic photo album. Photo Explosion places several of the selected
images on each page.
79
Page 87

To create a web album:
1. Open the Web menu and click Web Album.
2. Select a Template category from the list.
3. Select a template and click Next.
4. To change the title, type in the Title box.
5. To add a description, select one from the Description type list.
6. To change the order of the images, click Change photo order. In the
dialog box, drag the thumbnails into a new sequence and click OK.
Note: You can only select as many photos as there are placeholders in the
template. Each template is different.
7. Click Next.
8. To add an e-mail signature, click the Add/Change/Remove signature
button. Type the information you want to include in the Title area,
type your E-mail address, type your URL and click OK.
9. Set the Image quality. (The better the quality, the larger the file size.)
10. To view the album pages, click Preview in Browser.
11. Click Next.
80
Page 88

12. Click an output destination.
— If E-mail, determine whether to send it as an HTML message or
as an attachment. If you send it as an attachment, determine if
you want it packaged as an .EXE file for other Windows users
only. Click Send.
— If Disk, select how to save the file. Change the File name if you
want. Locate the disk or folder for the page. Type a name for the
folder that will contain all the HTML elements. Click Save.
— If CD, change the File name if you want. Locate the disk or folder
for the page. Type a name for the folder that will contain all the
HTML elements. Click Save.
— If Post to Web, assign a name for the main page. Select a web
hosting service from the list or select Personal Account. Type
your User name and Password and, if it’s your personal account,
type the FTP server address and your URL. Click Post.
13. Click Close.
Creating a Web Show
In Browse mode you can select multiple thumbnails and turn them into an
electronic slide show. Photo Explosion places one image on each page.
To create a web show:
1. Open the Web menu and click Web Show.
2. Select a Template category from the list.
3. Select a template and click Next.
4. To change the title, type in the Title box.
5. To add a description, select one from the Description type list.
6. To change the order of the images, click Change photo order. In the
dialog box, drag the thumbnails into a new sequence and click OK.
7. Click Next.
8. To add an e-mail signature, click the Add/Change/Remove signature
button. Type the information you want to include in the Title area,
type your E-mail address, type your URL and click OK.
9. To change or remove the default music, click Add/Change/Remove
background music. Locate the folder containing the audio file and
select the file in the list or click Remove music. Click OK.
81
Page 89

10. Set the Play mode. If you want it to autoplay, type the interval
between images. If you want to control how long the images stay up,
select Manual.
11. Set the Image quality. (The better the quality, the larger the file size.)
12. To view the slide show, click Preview in Browser.
13. Click Next.
14. Click an output destination.
— If E-mail, the web show is sent by default as a single .EXE file
that can be opened only on a Windows computer. If you don't know
what type of computer the recipient has, clear the Package to an EXE
file box so that the recipient receives individual files readable in any
browser. Click Send.
— If Disk, select how to save the file. Change the File name if you
want. Locate the disk or folder for the page. Type a name for the
folder that will contain all the HTML elements. Click Save.
— If CD, change the File name if you want. Locate the disk or folder
for the page. Type a name for the folder that will contain all the
HTML elements. Click Save.
— If Post to Web, assign a name for the main page. Select a web
hosting service from the list or select Personal Account. Type
your User name and Password and, if it’s your personal account,
type the FTP server address and your URL. Click Post.
15. Click Close.
82
Page 90

USING YOUR
IMAGES ON
YOUR
COMPUTER
Creating Desktop
Wallpaper
You can set your favorite images to appear as your desktop wallpaper.
To use an image or project as your desktop wallpaper:
1. In Browse mode, select an image.
or
In Photo or Project mode, have the image or project active.
2. Open the Share menu and click Wallpaper.
3. Select Use image as wallpaper in the Options panel.
4. Select a display option:
Center — places the image in the center of your desktop.
Tile — places multiple copies of the image on your desktop if the
image is smaller than your desktop.
User-defined — places the image in a defined location on your
desktop.
5. If you selected Center and want to stretch or shrink the image to fill
the desktop, click Fit in window.
If you selected Tile and want to stretch or shrink the image to fill the
desktop, click Fit in window. Select one or more Flip options, if
needed.
If you selected User-defined, type X and Y offset values from the top
left corner of the screen.
6. Click Apply.
7. Click Close.
Making a Calendar
You can use the calendar feature, available on the Share menu in all modes,
to keep a personalized desktop calendar handy with important dates notated.
To create a desktop calendar:
83
Page 91

1. In Browse mode, select one or more thumbnails.
or
In Photo or Project mode, have the image or project active.
Note: If you select multiple images in Browse mode, you can apply the
same calendar settings to several images. You create multiple-page
calendars this way having a different image on each page.
2. Open the Share menu and click Calendar.
3. In the Options panel, select a Calendar type and Orientation.
Note: There are different designs for the two different orientations.
4. Click one of the thumbnail designs and click Next.
5. Set the start date by the year, month or week (as applicable).
Note: The available dates depend on the Calendar type selected.
6. Click Next.
7. To add or modify design elements, click the appropriate icons.
If you clicked Add/Edit text, type text into the text box on the lower
left side. Adjust the style and alignment as needed. Click a color box
to change the related text color. Select a different font for the text.
Click OK.
84
Page 92

If you clicked Change background image, locate and select the
image and click OK.
If you clicked Add year string, the current year appears in the design.
(This does not apply for yearly calendars.)
If you clicked Add date table, it adds a week, month or year to the
design.
Note: You can modify elements in the design by selecting and right-clicking
the object. Use the commands on the shortcut menu to modify or delete
design elements.
8. Click Next.
9. Click the icon next the Output destination you want to use.
10. If you clicked Print, select the printer you want to use. Type the
Number of calendars you want on each sheet. Type the Number of
copies (sheets of paper) you want. Select a paper layout and click
Print.
If you clicked Disk, locate the folder or disk where you want the
calendar saved. Type a name, select a File type, select the Data type,
select the Output size and the Output quality. Click Save.
If you clicked Wallpaper, select the time period for this image to
appear on the calendar. Click OK.
Note: For the Wallpaper option, the Calendar Checker, which has an icon
in the status area on the taskbar, will automatically update the calendar for
you. Right-click the icon to turn the Calendar Checker off.
11. Click Close.
You use the Organize templates button to store your current calendar
project as a template for future use.
Using the Planner
There is an additional feature, Planner, that may be accessed on the toolbar
while you are developing a Calendar. The Planner allows you to add notes
and date-related images to your calendar.
To add notes or holidays while developing a calendar:
1. Click the Planner button on the toolbar.
85
Page 93

The Planner dialog box opens.
2. Select the month and year for the Planner event.
3. To add a note on a day, click the day and click Add Notes on the
shortcut menu. Type the text under Input note here.
Note: Use Ctrl+Enter to create a new line; otherwise, the text will not wrap.
Pressing Enter by itself closes the dialog box.
4. To add holiday to a specific date, click the day and click Add Daybased Holiday on the shortcut menu. Type text for the holiday.
5. To add a holiday based on a week, click the day and click Add a
Week-based Holiday on the shortcut menu. Type text for the holiday.
6. Click Set reminder and select a date and time to be reminded. To add
a reminder sound, click Sound and click Browse to locate the sound
file. Click OK.
7. To change the text color for a note or holiday, select Te xt and click the
color box to select a color.
8. To change the background color for a note or holiday, select Block
and click the color box to select a color.
9. To add clip art to a specific date, drag an image to the date.
10. Click OK.
Note: Depending on your calendar type and design, the text and images
may not show up due to limited space.Text and images show up on weekly
and two-week calendars only.
You can also add notes and holidays by clicking the Add button on the
Note or Holiday tab. You can have only one Note or Holiday per day. If you
try to add a second one, it will overwrite the first one.
To delete a note or holiday:
1. Click the Planner button on the toolbar.
The Planner dialog box opens.
2. Click the Note or Holiday tab.
3. Select the note or holiday you want to delete.
86
Page 94

4. Click the Delete button.
5. Click OK.
To edit a note or holiday:
1. Click the Planner button on the toolbar.
The Planner dialog box opens.
2. Click the Note or Holiday tab.
3. Select the note or holiday you want to edit.
4. Click the Edit button.
5. Make any changes in the Set Note or Set Holiday dialog box and click
OK.
6. Click OK.
MAKING IMAGES
AND
ANIMATIONS
FOR MOBILE
DEVICES
Photo Explosion can prepare your images for use on PDAs, handheld
computers and mobile phones that support images
PDAs and Handheld
Computers
Photo Explosion includes several templates that are sized for PDAs and
handheld computers. While you can resize any existing image to fit the
correct dimensions, these blank templates make it easy to quickly format
your photos for these devices.
To open a PDA template:
1. If you’re in Browse or Photo mode, open the Mode menu and click
Project.
2. Open the Get Project menu on the Command panel, point to
Blanks
➧
PDA Formats.
3. Select a blank template that matches the screen size of your PDA or
handheld computer and double-click it.
or
Right-click a template and click Edit on the shortcut menu.
or
Select a template and click the Open button on the toolbar.
87
Page 95

The template opens in the workspace.
4. Click the placeholder button to add an image.
5. Add text and other elements as with any other project.
6. Save the project in a file format that is compatible with your device’s
software for displaying images.
Mobile Images &
Animation (Deluxe
Version)
Photo Explosion’s Mobile Images feature allows you to edit and prepare
images for mobile phones and similar devices that support images. These
features are useful to edit and resize your images in the format required.
Please note that Photo Explosion does not have the capabilities to send the
graphics or animations directly to a mobile phone. The ability for your
mobile device to receive images depends upon whether or not your service
provider offers such features as SMS (Short Messaging Service) or similar
services that can transmit images to mobile phones in the network. You will
need to contact your service provider for details about your service and how
to use this feature if available.
Note: Visit the Photo Explosion Home Page to check for updates about
mobile images.
To create an image for a mobile phone:
1. Select an image file that you want to send to and display on your
mobile phone.
Note: If the target phone supports only black-and-white images and the
dimensions of the selected image are large, crop the source image to a
smaller size before you proceed.This will make the final mobile phone
image clearer and finer in quality.
2. Open the Share menu and click Mobile Image.
3. Select the Brand name and Phone model of the target phone.
4. To select only a part of the image, click Select part of the image and
use the crop selection box to mark the area that you want.
or
To use the whole image, click Select the whole image.
5. Click Next.
88
Page 96

6. As needed, add a frame to your image, and insert text and other
objects to the image.
7. To resize an object you just added, select it and drag the Size slider.
8. Click Next.
A preview of the mobile phone image appears.
9. Click Disk to save the image file or click E-mail to send the image as
a file attachment directly to the target mobile phone.
10. Click Close.
To create an animation for a mobile phone:
1. Select the image you want to send to and display on your mobile
phone.
Note: If the target phone supports only black-and-white images and the
dimensions of the selected image are large, crop the source image to a
smaller size before you proceed.This will make the final mobile phone
animation clearer and finer in quality.
2. Open the Share menu and click Mobile Animation.
3. Select the Brand name and Phone model of the target phone.
4. Click Next.
5. To add one or more animation, double-click each or drag each to the
image.
Each added animation has two frames.
6. Drag the Delay Time slider to set the amount of time that each frame
will be displayed. For instance, if you drag the slider to 5 seconds, a
frame shows for 5 seconds before the next frame appears.
7. After adding an animation, drag the Size slider to adjust its
dimensions.
8. Click Next.
A preview of the mobile phone animation appears.
9. Click Disk to save the animation file or click E-mail to send the
animation as a file attachment directly to the target mobile phone.
10. Click Close.
89
Page 97

CREATING
PHOTO GIFTS
Turn your precious memories into unique photo gifts. In Photo Explosion
you can turn your photos or projects into great personalized photo based
gifts. Use the Photo Gifts command in the Share menu to link to the web
site for instructions and detailed information. You can order such items as
photo mugs, chocolate photo lollipops, cakes with photo frosting, photo
nightlights and dozens of other photo gifts. These make great birthday and
holiday presents.
Note: See the back of this User Manual for special offers on Photo Gifts
and free professional prints of your photographs.
90
Page 98

Chapter 10. Advanced
Special Effects
Photo Explosion has some advanced special effects that you can apply to
images. After clicking Edit you can use items on the Effect menu to apply
static special effects. If you have Photo Explosion Deluxe, you can apply
animations using the Web menu.
ADVANCED
SPECIAL
EFFECTS FOR
IMAGES
Photo Explosion’s Effect menu offers a variety of enhancement tools and
special effects that can enliven your images. You can only apply these
special effects in Photo mode.
Note: If you’ve added props to your image, you need to save the file and
merge the props into the image before you can apply any of these special
effects to the entire photo.
Artistic Transformations
Photo Explosion includes artistic transformation where your image can
mimic such media as a watercolor, an oil painting, a colored pencil drawing
or a charcoal drawing.
To add artistic effects:
1 If necessary, click Edit on the Command panel.
2. Choose Artist
➧
an artistic style from the Effect menu.
3. Double-click a thumbnail in the Options panel or drag it onto the
image.
4. To adjust the special effect, click the Advanced mode button and
adjust the available options.
5. Click Apply.
6. Click Close.
Note: Try mixing the artistic effects on your images.
91
Page 99

Applying a Lens Effect
The Lenses submenu allows you to mimic using special camera lenses and
filters to adjust your image. Also, you can add a spotlight using the Lenses
submenu.
To apply a lens effect:
1. If necessary, click Edit on the Command panel.
2. Choose Lenses
➧
a lens effect from the Effect menu.
3. Double-click a thumbnail in the Options panel or drag it onto the
image.
4. To adjust the special effect, click the Advanced mode button and
adjust the available options — usually by dragging the Level slider.
5. Click Apply.
6. Click Close.
To apply a spotlight:
1. If necessary, click Edit on the Command panel.
2. Choose Lenses ➧Spotlight from the Effect menu.
3. Double-click a thumbnail or drag it onto the image.
4. To adjust the special effect, click the Advanced mode button.
— On the preview image, drag the red ball to change the light source;
drag the green ball to change the direction of the light.
— On the light control display, drag the red ball to change the light
source location; drag the green balls to change the diameter
of the spotlight effect.
— Drag the Exposure slider to change the strength of the light source.
— Click the Ambience color box to change the color; drag the slider
to change the amount of ambient light.
— Click the Brightness color box to change the color; drag the slider
to change the strength of the spotlight.
5. Click Apply.
6. Click Close.
92
Page 100

Sharpening Your Image
The Sharpness submenu allows you to adjust the edges of your photo’s
elements. In addition to sharpening, you can also blur the edges.
To sharpen or blur an image:
1. If necessary, click Edit on the Command panel.
2. Choose Sharpness
➧
a sharpening effect or Sharpness ➧Blur from
the Effect menu.
3. Double-click a thumbnail in the Options panel or drag it onto the
image.
4. Click Apply.
5. Click Close.
Adding Particles to an
Image
The Particles submenu adds decorative particles over your image. These
include natural items like snowflakes, rain, bubbles and stars.
To add particles to your image:
1. If necessary, click Edit on the Command panel.
2. Choose Particles
➧
a particle type from the Effect menu.
3. Double-click a thumbnail in the Options panel or drag it onto the
image.
4. To adjust the special effect, click the Advanced mode button and
adjust the available options — usually the amount, size, color and
style of the particles.
5. Click Apply.
6. Click Close.
93
 Loading...