

Page 1

Toll Free: 1-888-865-6888
Tel: 510-226-8368 Fax: 510-226-8968
Email: sales@RackmountMart.com
Page 2

L CD 1U15-18 / 17-3 3 / 19-24 / 19-26
Single Rail Console with Modular KVM Switch
Quick Installation Guide
Rev 2.0
Page 3
1. Installation
1.1 Install L CD 1U15-18 / 17-3 3 / 19-24 into Cabinet
1.1.1 Notes
1. Please check all peripherals according the list before installation. To make sure
that the whole unit was not damaged and lost during shipping process. If you
encounter any problem, please contact your dealer.
2. Before installation, make sure all peripherals and computer have been turned
off.
3. The cabinet depth range must be in 504 ~ 1000 mm for 15” and 17” console
(554 ~1000 mm for 19” console). Contact your dealer for deeper cabinet
application.
4. The cabinet depth is 614 ~ 800 mm for 15” and 17” (664 ~ 800 mm for 19”),
please refer to “Step A”.
The cabinet depth is 504 ~ 614 mm for 15” and 17” (554 ~ 614 mm for 19”),
please refer to “Step B”.
The cabinet depth is 800 ~ 1000 mm, please refer to “Step C”.
5. Reliable grounding of rack-mounted equipment should be maintained. Particular
attention should be given to supply connections other than direct connections to
the branch circuit.
1.1.2 Hardware kits contents:
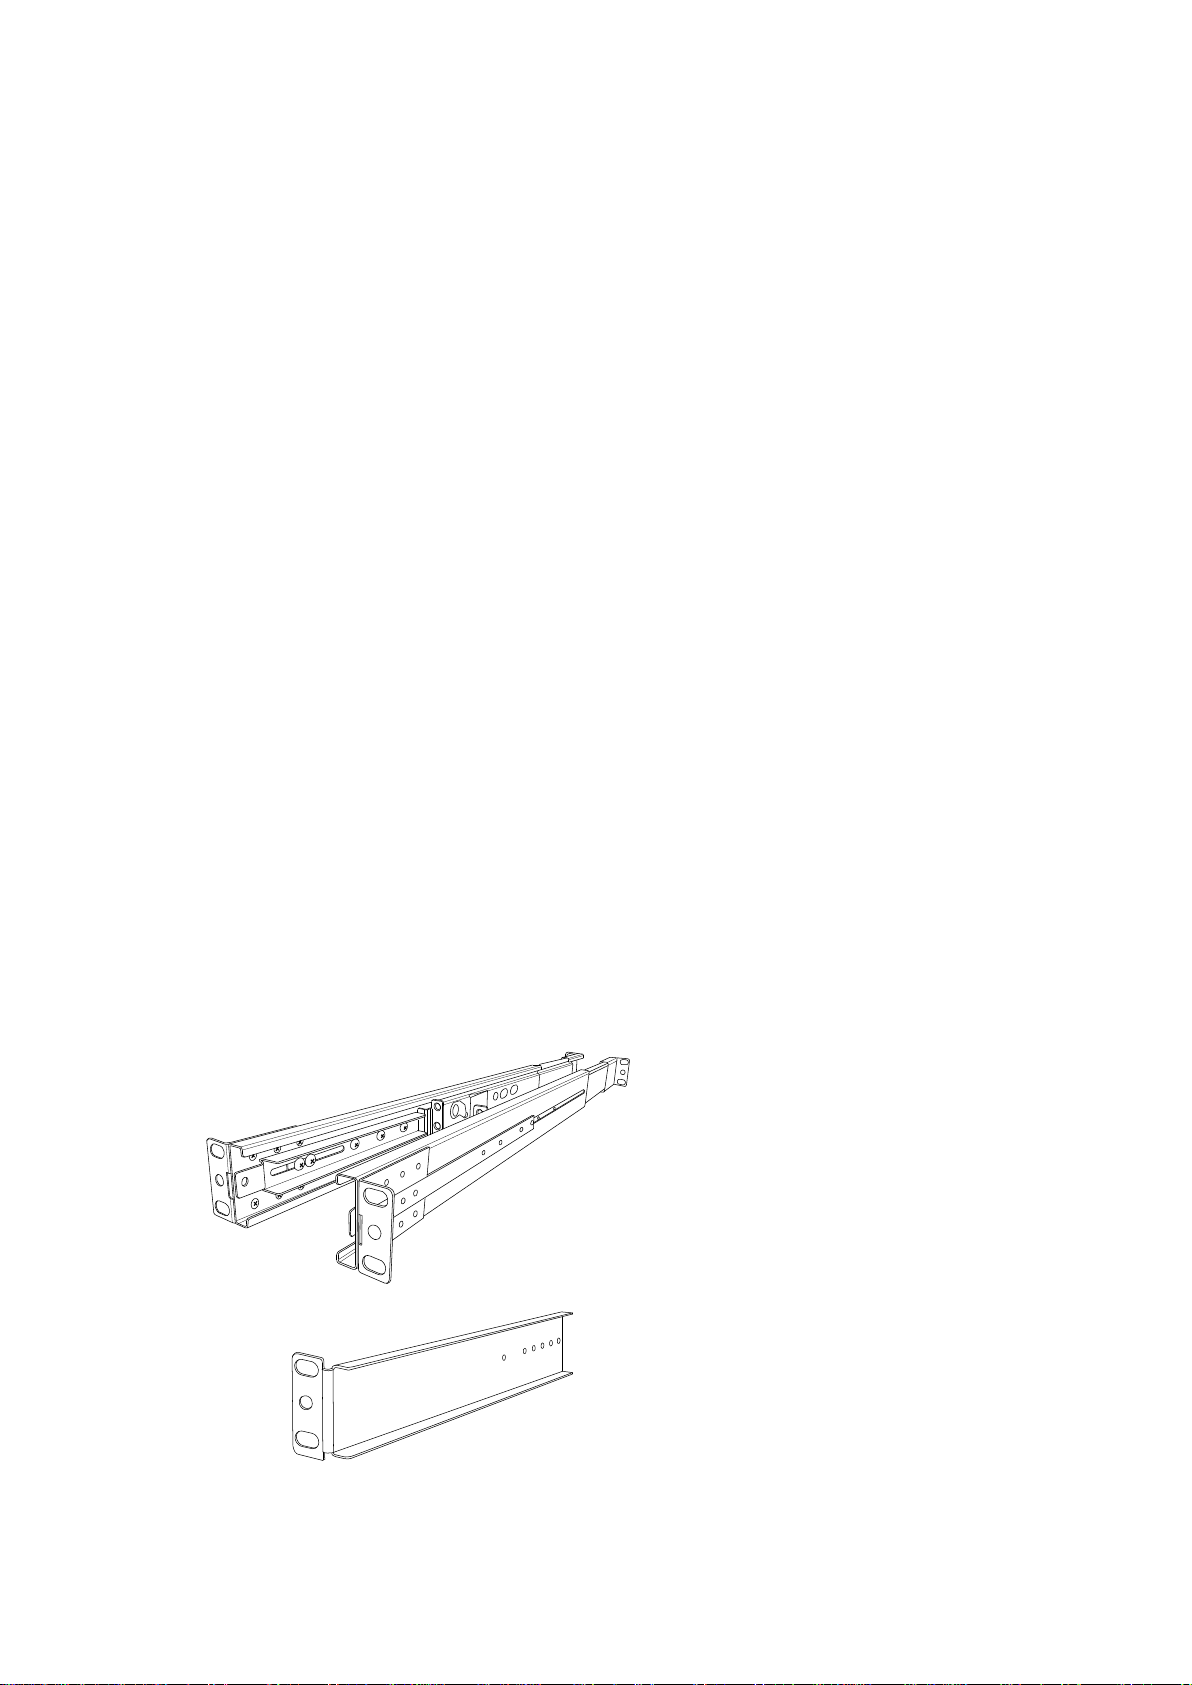
1. Rail with front and rear bracket x 2 (Please identify the brackets. Right and left
sides are different.)
2. Extended bracket x 2
1
www.RackmountMart.com
Page 4

3. Short bracket x 2
4. Bracket attachment x 2
5. Screw (length = 6 mm) x 6
6. Screw x 6
7. Key x 2
L CD 1U15-18 / 17-3 3
bracket attachment
L CD 1U19-24
bracket attachment
Step A:
1. Adjust rail until two screws appear.
2
rail
two screws
www.RackmountMart.com
Page 5

2. Loose (Not remove) seven screws.
3. Adjust rail to fit your cabinet
4. Install front and rear bracket on cabinet.
5. Tight seven screws up.
3
www.RackmountMart.com
Page 6

6. Repeat step 1~5 for the other side.
7. Push console into rails. (Be careful rear box loose when take out console from
carton.)
8. Unlock and pull rail–lock switch (left and right at the same time) then push
console to the end.
lock
unlock
rail-lock switch
9. Install three screws (length = 6 mm) in rear of the console. (Both sides)
10. Finish installation as below.
4
www.RackmountMart.com
Page 7

Step B:
1. Remove seven screws.
2. Take two original brackets out.
3. Put short bracket to rear of the rail.
short bracket
original bracket
original bracket
4. Install four screws (don’t tight-up) to combine rail, short bracket and bracket
attachment.
bracket attachment
short bracket
5. Repeat step 1 ~ 4 for the other side.
6. Repeat step 3 ~ 10 of step A to finish the installation.
5
www.RackmountMart.com
Page 8

Step C:
1. Loose (Not remove) seven screws.
2. Release six screws.
3. Take rear bracket out.
original bracket
4. Adjust rail and input extended bracket to rear of the rail then adjust extended
bracket to fit your cabinet. Install unless 2~3 screws (don’t tight-up) upon the
length you need. One is forbidden.
extended bracket
5. Repeat step 1 ~ 4 for the other side.
6. Repeat step 3 ~ 10 of step A to finish the installation.
6
www.RackmountMart.com
Page 9

1.2 Install L CD 1U19-26 into Cabinet
Notes
1. Please check all peripherals according the list before installation. To make sure
that the whole unit was not damaged and lost during shipping process. If you
encounter any problem, please contact your dealer.
2. Before installation, make sure all peripherals and computer have been turned
off.
3. The cabinet depth range must be in 590 ~ 830 mm. Contact your dealer for
deeper cabinet application.
4. Reliable grounding of rack-mounted equipment should be maintained. Particular
attention should be given to supply connections other than direct connections to
the branch circuit.
Hardware Kits Contents
1. Rail with front and rear bracket x 2
2. Screw (length = 6 mm) x 6
3. Key x 2
7
www.RackmountMart.com
Page 10

Install Console Steps
1. Adjust rail until two screws appear. Loose (Not release) two rear screws then
adjust rear bracket to fit your cabinet.
Rail
2. Install front and rear bracket on cabinet.
3. Tight-up two rear screws.
4. Repeat step 1~3 for the other side.
8
www.RackmountMart.com
Page 11

5. Pull rail until it lock and keep the part A in front of the rail (Both sides).Then
push console into left and right rails. (Be careful rear box loose when takeout
console from carton.)
Part A
6. Pull rail–release switch (left and right at the same time) then push console to
the end.
Rail-release switch
7. Install three screws in rear of the console (Both sides).
8. Finish installation as below.
9
www.RackmountMart.com
 Loading...