

Page 1
9026A
Shower Bench with Arms & Back
Assembly Instructions
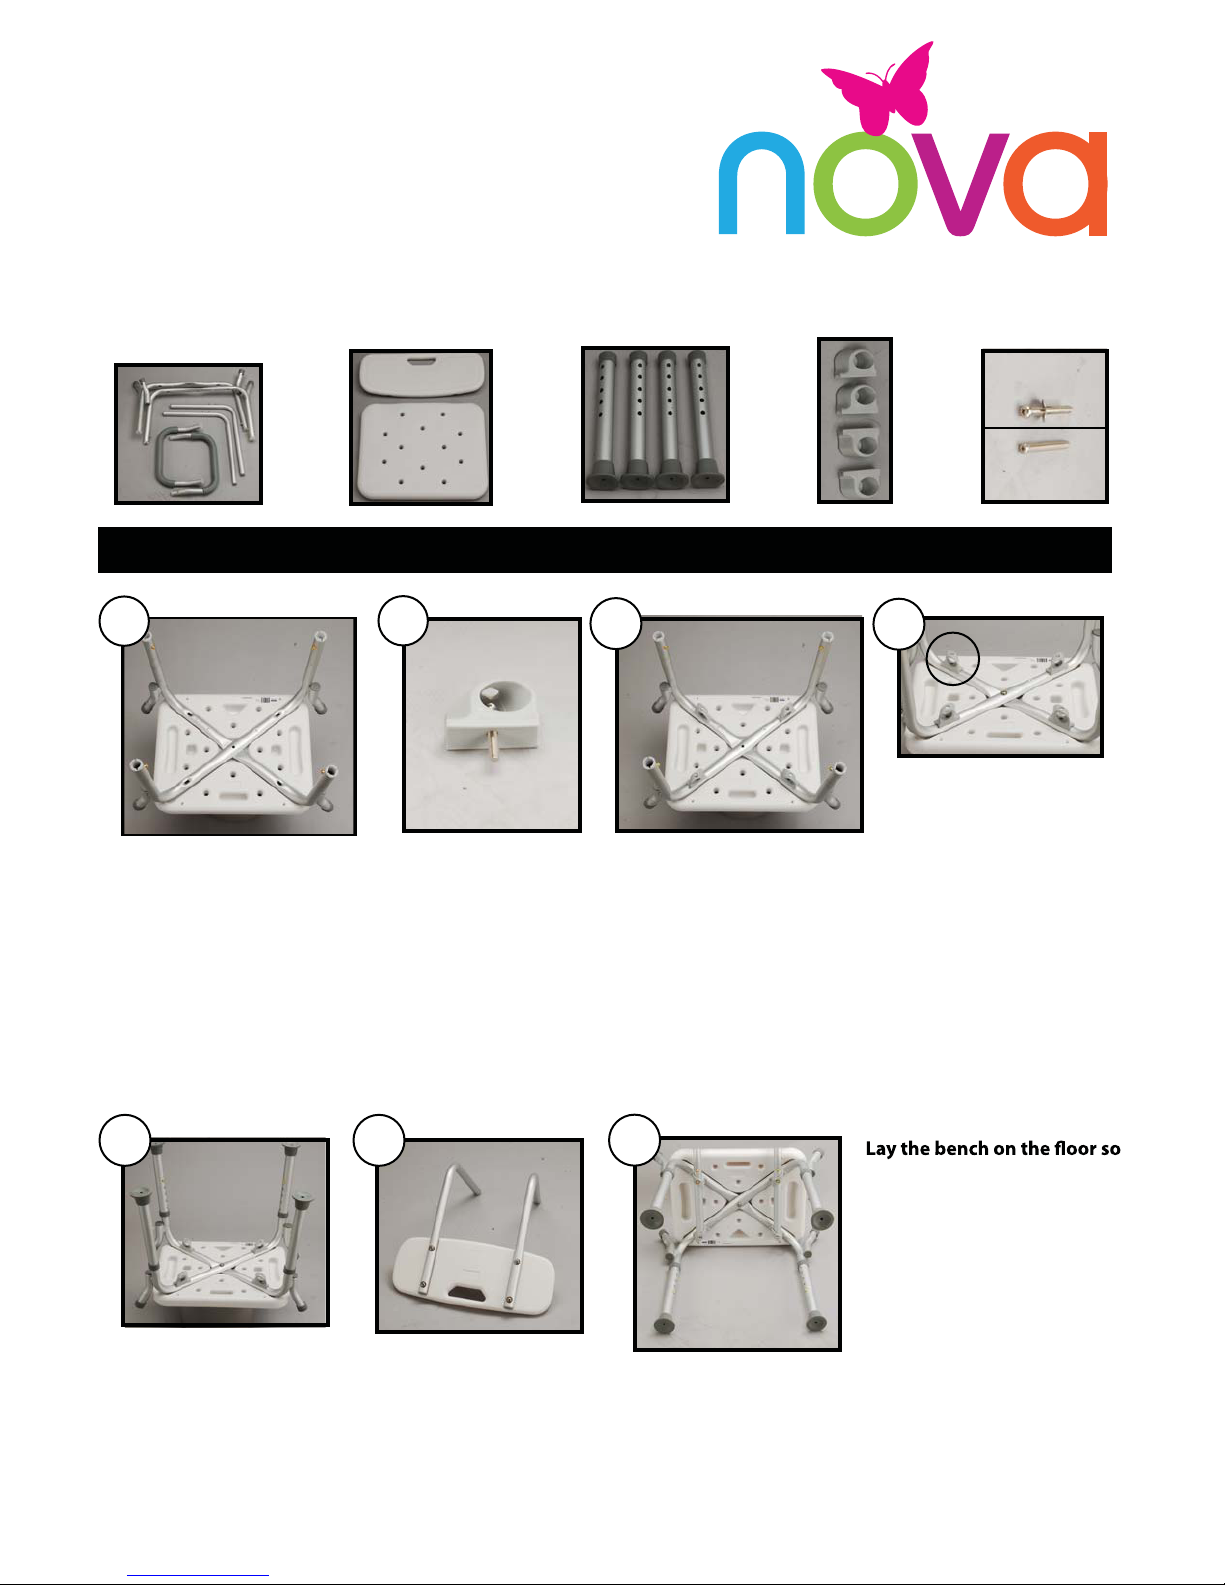
Parts out of the box:
1. Leg posts and
Back Tubes
2. Seat & Back
1a
Set the seat on an elevated
surface face down and place the
leg marked 2 into the diagonal
inset on the bottom of the seat.
(The #2 on the seat should line up
with the #2 label on the tube.
Repeat for tube labeled #1 so that
tube #2 is under tube #1. Insert #1
screw w/ washer into the center
hole and tighten.
2a
Insert four #2 screws
(with smaller head)
into the plastic tube
guides.
Products for an independent life
3. Legs
4. Legs Guides
2b
Place the tube guides onto
the legs so that the screw
goes through the tube and
into the seat bottom.
5. Screws
#1
#2
2c
Be sure the guides are
facing in the correct
position so that the
back tubes can be
inserted through them
in step 5. Tighten all
screws securely once
the guides are determined to be in the
correct position.
3
Attach the legs by
telescoping the adjustment leg over the leg
stem and pushing the
push pin in. Be sure to
adjust all four legs to the
same adjustment holes.
4
Attach the back tubes to
the backrest using four
#1 screws with washers.
5
that the back of it is facing
upward. Place the back
tubes through the rear tube
guides. Depress the brass
push pins and insert the end
of the tubes through the
front tube guides until the
pins engage into the rear
tube guide. (The back can
be adjusted to a deep or
shallow position depending
on user preference.) Be sure
pins are fully engaged by
pulling on the back.
Page 2
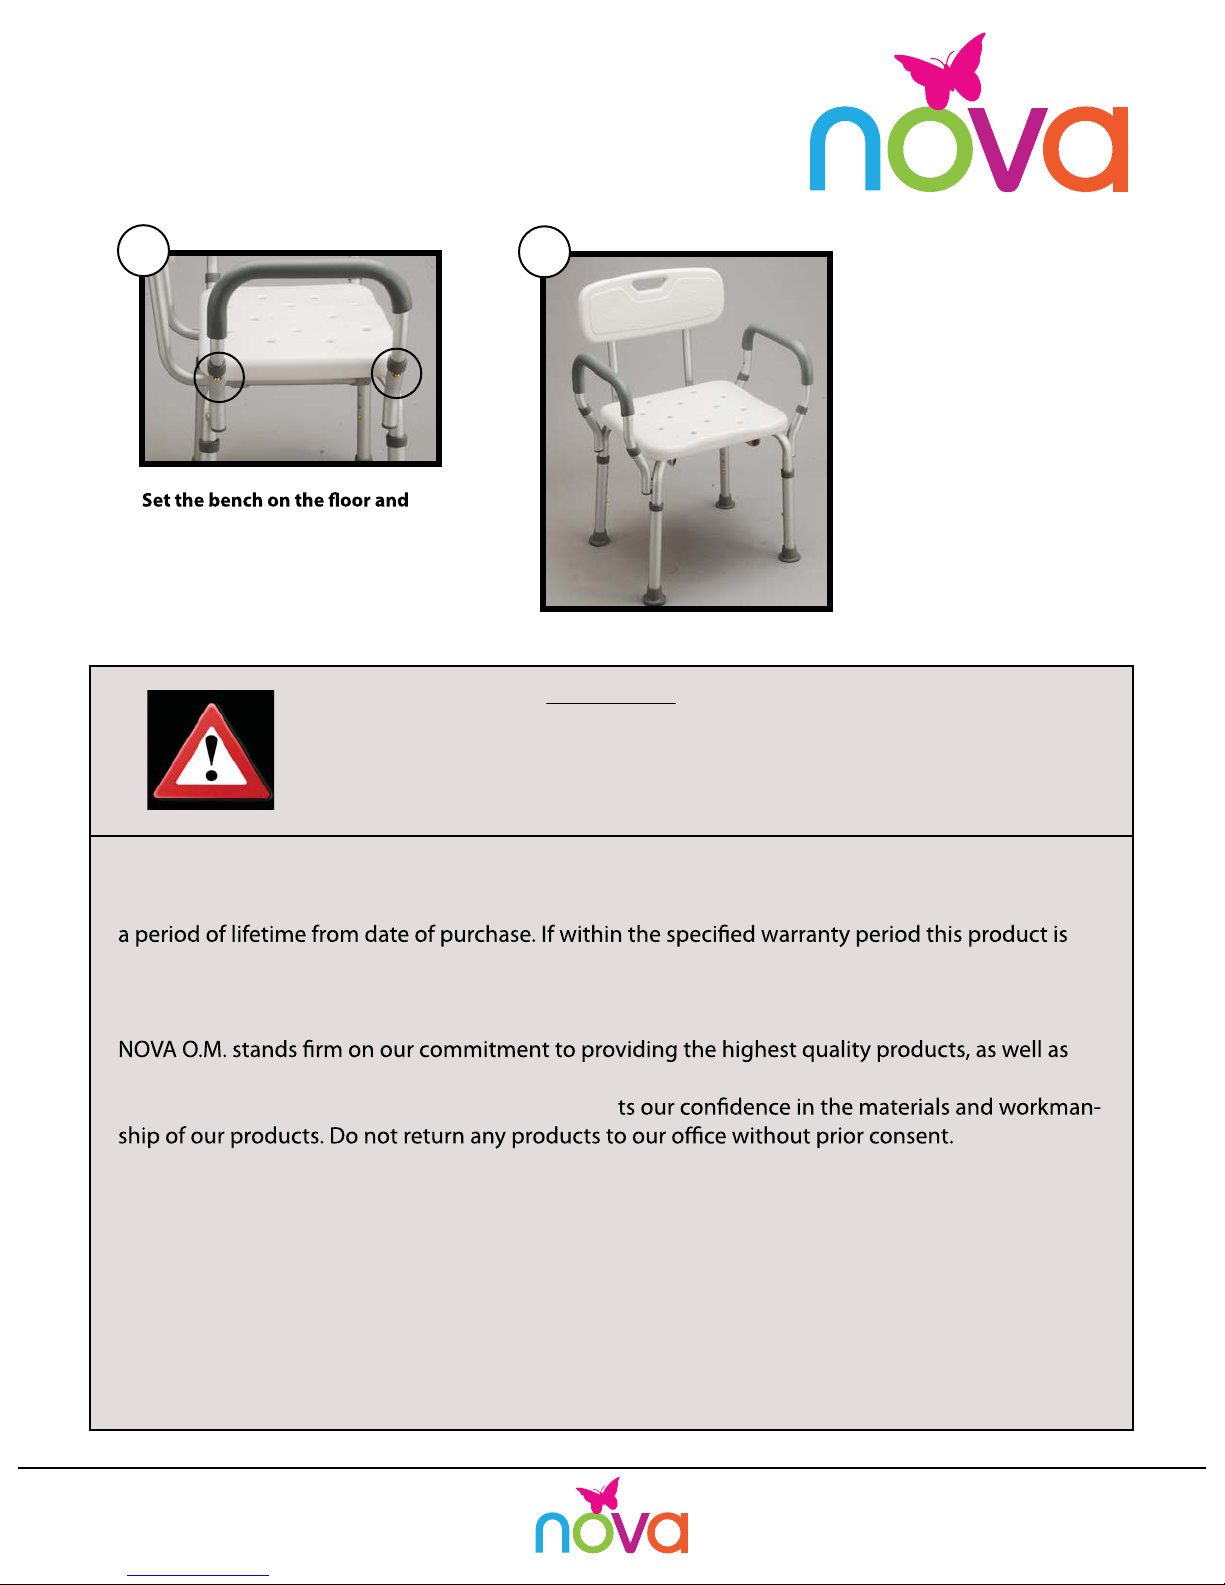
9026A
Shower Bench with Arms & Back
Assembly Instructions
6
insert the arms by depressing the
brass push button and inserting
each side into the arm stems. Be
sure pins are fully engaged by
pulling the arm.
READ THESE DIRECTIONS CAREFULLY BEFORE USE.
FAILURE TO DO SO MAY RESULT IN SERIOUS INJURY.
(cont.)
7
IMPORTANT
Products for an independent life
Use the push buttons on
the legs to adjust the
bench to the desired
seat height.
BE SURE THE BENCH IS
LEVEL AND STABLE
BEFORE USING.
WEIGHT CAPACITY NOT TO EXCEED 275LB.
LIFETIME LIMITED WARRANTY
Nova Ortho-Med, Inc. warrants this product to be free from defects in material or workmanship for
proven to be defective, it will be repaired or replaced at NOVA O.M.’s option. This warranty does not
cover shipping costs incurred in replacement or repair of this product.
exceptional service. This product was built to precise standards and thoroughly inspected prior to
shipment. This Lifetime Limited Warranty represen
This warranty does not cover problems due to user negligence or misuse of the product. This
warranty shall not extend to non-durable components, including but not limited to rubber tips,
hand grips, casters, and other parts subject to normal “wear and tear.”
THIS FOREGOING WARRANTY IS EXCLUSIVE AND IN LIEU OF ALL OTHER EXPRESS WARRANTIES,
IMPLIED WARRANTIES, IF ANY, INCLUDING THE IMPLIED WARRANTIES OF MERCHANTABILITY AND
FITNESS FOR A PARTICULAR PURPOSE. NOVA O.M. SHALL NOT BE LIABLE FOR ANY SEQUENTIAL OR
INCIDENTAL DAMAGES WHATSOEVER.
1470 Beachey Place
Carson, CA 90746
www.NovaMedicalProducts.com
www.novaorthomed.com
For Customer Service, call
Toll Free at (800) 557-6682
Products for an independent life
 Loading...