

Page 1

All products are trademarks of Nostalgia Products Group, LLC.
Worldwide design & utility patented or patents pending.
2014
© 2012 Nostalgia Products Group, LLC.
www.nostalgiaelectrics.com
(rev. 08/27/14)
Page 2
SCM502
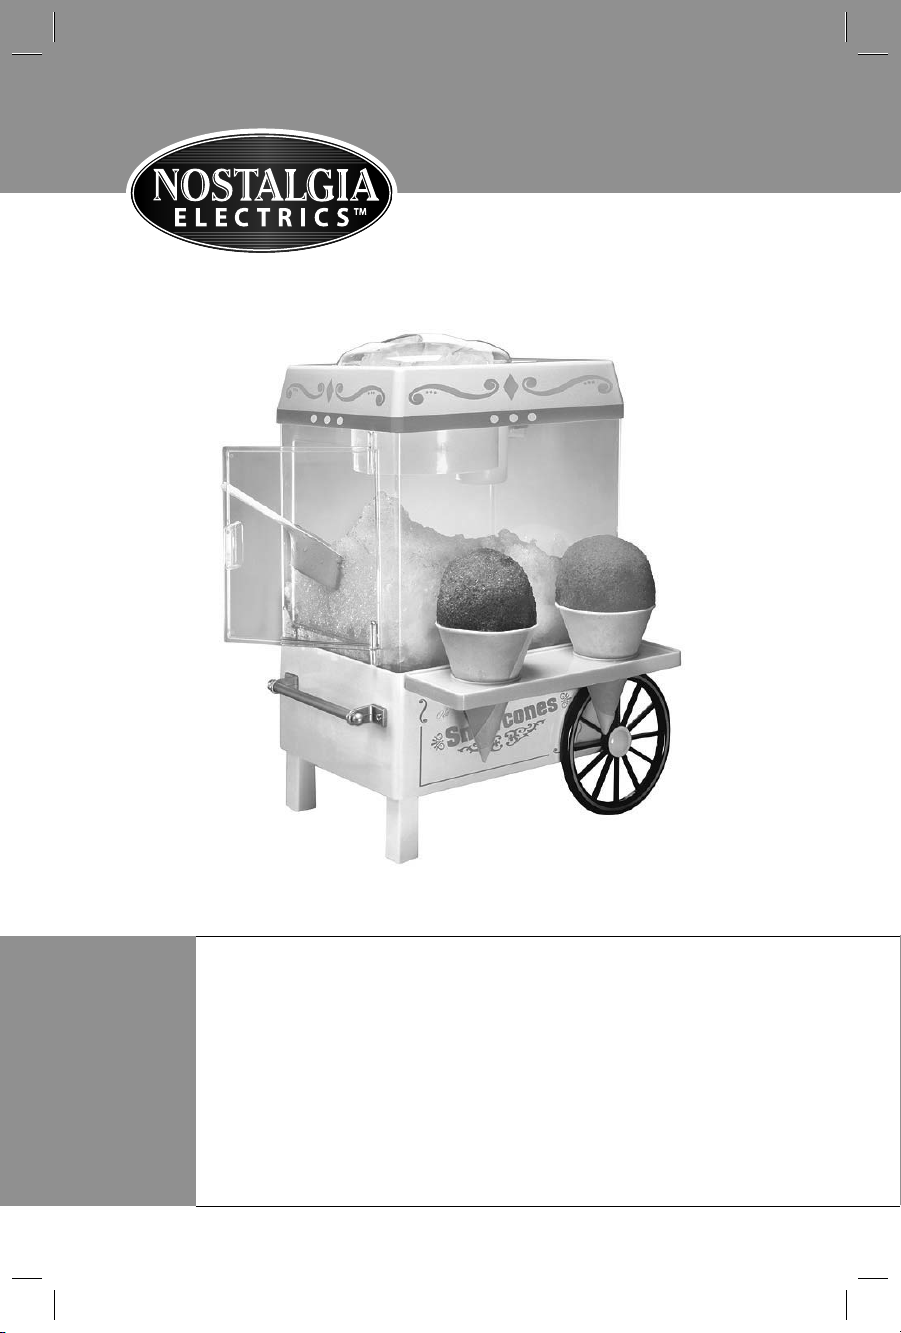
Vintage Collection™ Snow Cone Maker
Fábrica de Conos de Nieve
Générateur Démodé de Cône de Neige
Instructions and Recipes
Instrucciones y recetas
Instructions et recettes
Page 3

Page 4
Make everyday a party!
Visit www.nostalgiaelectrics.com for more fun products.
CONTENTS
IMPORTANT PRECAUTIONS . . . . . . . . . . . . . . . . . . . . . . . . . . . . . 3
IMPORTANT SAFEGUARDS . . . . . . . . . . . . . . . . . . . . . . . . . . . . . 3
INTRODUCTION . . . . . . . . . . . . . . . . . . . . . . . . . . . . . . . . . . . . 4
PARTS & ASSEMBLY . . . . . . . . . . . . . . . . . . . . . . . . . . . . . . . . . . 5
HOW TO OPERATE . . . . . . . . . . . . . . . . . . . . . . . . . . . . . . . . . . 6
HELPFUL TIPS . . . . . . . . . . . . . . . . . . . . . . . . . . . . . . . . . . . . . 7
CLEANING & MAINTENANCE . . . . . . . . . . . . . . . . . . . . . . . . . . . 7
RECIPES . . . . . . . . . . . . . . . . . . . . . . . . . . . . . . . . . . . . . . . . . 8
RETURNS & WARRANTY . . . . . . . . . . . . . . . . . . . . . . . . . . . . . . . 9
SAFETY
ENGLISH
Your safety and the safety of others is very important.
We have provided many important safety messages in this manual and
on your appliance. Always read and obey all safety messages.
This is the safety alert symbol.
This symbol alerts you to potential hazards that
can kill or hurt you and others.
All safety messages will follow the safety alert symbol.
All safety messages will tell you what the potential hazard is, tell you how to reduce the
chance of injury, and tell you what can happen if the instructions are not followed.
Appliance Specications:
120 Volts, 60 Hz
30 Watts, ETL Approved
THIS PRODUCT IS FOR USE IN 120V AC OUTLET ONLY.
2
Page 5
IMPORTANT PRECAUTIONS
1. NEVER immerse Top Housing in water.
2. NEVER use near water.
3. NEVER use an abrasive sponge or cloth on the appliance.
4. NEVER use a scouring pad on the appliance.
ENGLISH
5. NEVER leave appliance unattended while in use.
6. NEVER try to force the cover into locked position.
7. Unplug unit from outlet when not in use and during cleaning.
8. DO NOT operate this appliance with a damaged cord or
plug, nor if the appliance ever malfunctions.
9. This appliance is for use with food and liquids only.
10. DO NOT put in a dishwasher.
11. Keep out of reach of children.
12. This appliance is NOT A TOY.
13. Unsupervised young children and cognitively challenged
individuals should never operate this appliance.
14. This appliance is not intended for use by persons with reduced physical, sensory or mental
capabilities, or lack of experience and knowledge of how to operate this appliance.
15. Young children should be supervised while in proximity of the
appliance to ensure that they do not play with it.
IMPORTANT SAFEGUARDS
Basic safety precautions should always be followed when using
electrical appliances, including the following:
1. Read all instructions before operating this appliance.
2. Keep hands away from blade mechanism. Use handles or knobs.
3. Blades are extremely sharp. Use with EXTREME CAUTION.
4. DO NOT touch moving parts.
5. To protect against electrical shock do not immerse cord, plug or
any part of this appliance in water or other liquids.
6. Close supervision is necessary when any appliance is used near children.
7. Unplug from outlet when not in use, before removing parts and before cleaning.
8. DO NOT operate any appliance with a damaged cord or plug, nor if
the appliance has been damaged in any manner. Return the appliance
to the nearest repair shop for examination or repair.
9. The manufacturer does not recommend the use of accessory
attachments. Use of accessory attachments may cause injuries.
10. DO NOT use outdoors. FOR HOUSEHOLD USE ONLY.
3
Page 6

11. Position the appliance as close to the outlet as possible
to prevent injury due to tripping over cord.
12. DO NOT place on or near a hot gas or electric burner, nor in a heated oven.
13. Check Ice Shaving Canister for presence of foreign objects prior to use.
14. DO NOT use the appliance for other than its intended use.
15. An appliance that is plugged into an outlet should not be left unattended while in operation.
16. A short power supply cord is provided to reduce the risk resulting
from becoming entangled or tripping over a long cord.
17. Longer detachable power supply cords can be used if care is exercised in their use.
18. The marked electrical rating of an extension cord should be at
least as great as the electrical rating of the appliance.
19. This appliance has a polarized plug (one blade is wider than the other). To reduce the
risk of electrical shock, this plug is intended to t into a polarized outlet only one way.
If the plug does not t fully into the outlet, reverse the plug. If it still does not t,
contact a qualied electrician. Do not attempt to modify the plug in any way.
20. Do not attempt to service this appliance yourself, as opening or
removing covers may expose you to dangerous voltage or other
hazards. Refer all servicing to qualied service personnel.
SAVE THESE INSTRUCTIONS!
INTRODUCTION
Thank you for purchasing the VINTAGE COLLECTION™ SNOW CONE MAKER. Now you
can create refreshing snow cones at home anytime! Use ice cubes to make shaved
ice then add your choice of avored syrup and enjoy a cold, tasty treat that's fun
for the whole family and a great relief from the summer sun. You can even make
fruit slush drinks, yogurt snow and smoothies! This product is a great companion
to the other fun appliances in Nostalgia Electrics' VINTAGE COLLECTION™ line.
The VINTAGE COLLECTION™ SNOW CONE MAKER is designed for
kitchen use, but can be used in a number of locations such as:
• FamilyRooms
• DormRooms
• Oces
• ClubHouses
ENGLISH
4
Page 7

PARTS & ASSEMBLY
Your VINTAGE COLLECTION™ SNOW CONE MAKER comes fully assembled.
• Before rst use, lift the Top Housing o of the Main Unit and remove the Ice Shaving Canister.
• The Ice Shaving Canister can be removed by taking o the Ice Shaving
Canister Lid and lifting Ice Shaving Canister from Top Housing.
ENGLISH
• Wipe clean the inside of the Main Unit and Ice Shaving Canister with a non-abrasive moist
sponge, a non-abrasive towel, or a damp cloth followed by a non-abrasive dry towel.
• After cleaning the inside, reassemble the Ice Shaving Canister
and Main Unit, and put the top back on the Main Unit.
• Use EXTREME caution when cleaning and handling the Ice Shaving Canister, as the
• Now you are ready to enjoy cool, refreshing icy snacks from
PARTS
Door
Ice Feed Insert
blades are VERY sharp.
your VINTAGE COLLECTION™ SNOW CONE MAKER!
Ice Shaving Canister
Top Housing
Main Unit
Cone Shelf
2 Plastic Cones
ASSEMBLY
5
Locking Cap
Ice Shaving
Canister Lid
Locking Cap
Ice Feed Insert
Ice Shaving Canister
Ice Scoop
Ice Shaving
Canister Lid
When assembling Ice Shaving
Canister parts, turn Locking
Cap clockwise to lock and turn
counter-clockwise to unlock.
Page 8
HOW TO OPERATE
• Place the VINTAGE COLLECTION™ SNOW CONE MAKER on a stable,
waterproof surface near an electrical outlet before starting.
• Always make sure that the cord is away from any water source.
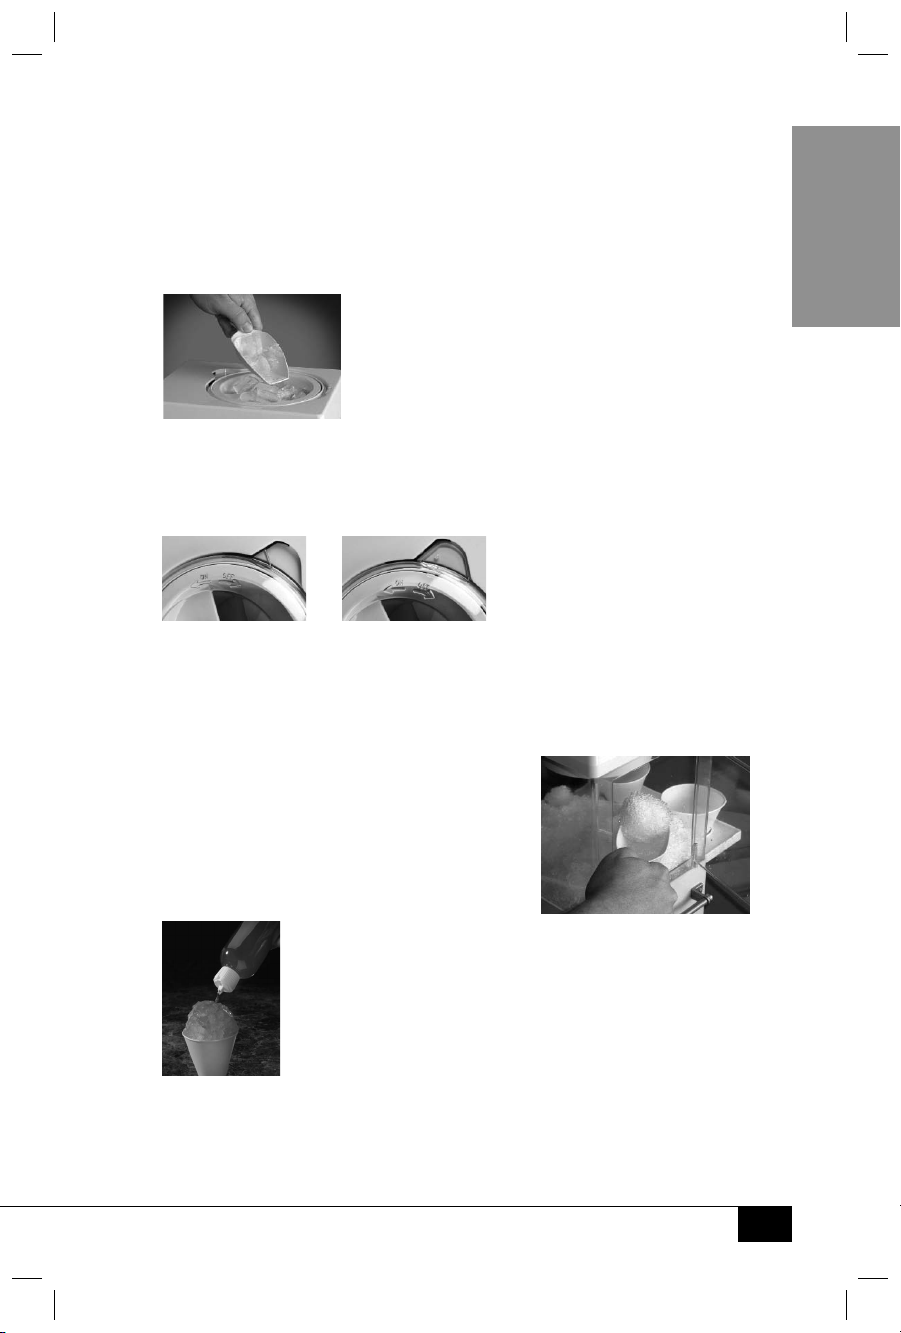
• Before plugging in the unit, add ice cubes to the Ice Shaving Canister by removing the Lid.
• Do not overll the Ice Shaving Canister. Make sure that
there is enough room to put the Lid back on.
• Plug in the unit.
• Turn Lid counter-clockwise to lock and turn on unit.
Unit is ON Unit is OFF
• The unit will immediately begin shaving the ice.
• Repeat the process until you have shaved the amount of ice desired.
• Turn Lid clockwise and unplug unit from outlet when nished.
• Scoop out shaved ice with Ice Scoop from inside
Main Unit by opening the Door. Fill Plastic
Cones with desired amount of shaved ice.
• Squirt avored syrup onto ice in cones and serve.
• This unit comes with two Plastic Cones. It does not
include syrup. It is recommended that you purchase a
snow cone kit with syrup mix and paper cones if you
are planning to make a large batch of snow cones.
ENGLISH
By following these simple instructions, your VINTAGE COLLECTION™ SNOW
CONE MAKER will be fun for friends, family and kids of all ages!
6
Page 9

HELPFUL TIPS
ICE CUBES
Ice cubes should sit outside of the freezer a short while before putting them in the
shaving unit. If ice has a frosty appearance, it is too hard to shave. Let ice sit until it is
translucent and wet to the touch. Then it is ready to put in the Ice Shaving Canister.
SHAVED ICE
ENGLISH
In order to prevent messes:
• Place unit on a waterproof surface while in use.
• After you are nished making snow cones, make sure to empty Ice Shaving
Canister and Main Unit so that ice does not melt onto surface.
CLEANING & MAINTENANCE
• Make sure the unit is unplugged before cleaning.
• Disassemble unit by removing the Ice Shaving Canister Lid and lifting o the Top Housing.
• Remove all parts of the Ice Shaving Canister.
• Unlock the Ice Feed Insert from the Ice Shaving Canister
by turning Locking Cap counter-clockwise.
• Wash all parts of the Ice Shaving Canister, Plastic Cones, Cone Shelf and Ice Scoop by
hand with warm, soapy water. Rinse and dry thoroughly with a non-abrasive cloth.
• Wipe down the inside of the Main Unit with a dry, non-abrasive cloth.
• The blade is very sharp. Use EXTREME CAUTION when handling the appliance
• Keep Top Housing away from water. NEVER wash Top Housing with
• Make sure to clean and dry the unit before and after each use.
• To prolong the life of your VINTAGE COLLECTION™ SNOW CONE MAKER,
during cleaning.
water or damp cloth. Only use a dry cloth on the Top Housing.
hand-washing parts is advised. Dishwasher use is not recommended.
7
Page 10

RECIPES
Your VINTAGE COLLECTION™ SNOW CONE MAKER makes
perfectly shaved ice that can be used to make:
• SNOW CONES
After shaving the ice, add avored syrup. Add more than one avor to create colorful and
varied snow cones. Create stripes of avor in the shaved ice for Rainbow Snow Cones.
• SLUSH DRINKS
Fill a glass with freshly shaved ice. Add your favorite soft
drink, avored tea or fruit juice. Mix well.
• FRESH FRUIT SLUSH
Fill a serving cup with freshly shaved ice. Add avored syrup
and top with fresh chopped fruit of your choice.
• ICE CREAM SLUSH
Fill a serving cup with your choice of ice cream. Top with a
generous serving of shaved ice. Add avored syrup.
• YOGURT SNOW
Freeze avored yogurt in ice cube trays. Use your VINTAGE COLLECTION™
SNOW CONE MAKER to shave the yogurt cubes and make a refreshing,
healthy treat. Add avored syrup for even more avor.
• SNOW SMOOTHIES
Freeze ½ cup of milk in ice cube trays. Use your VINTAGE COLLECTION™
SNOW CONE MAKER to shave the ice cubes. Place the shaved cubes and
fresh strawberries or your choice of fruit in a blender. Add ¼ cup of sugar
for sweetness, then blend until smooth or to desired consistency.
• FROZEN JUICE DRINK
Freeze fruit juice in ice cube trays. Use your VINTAGE COLLECTION™ SNOW
CONE MAKER to shave the cubes to create a healthy, juicy treat.
ENGLISH
8
Page 11

RETURNS & WARRANTY
SHOULD YOUR UNIT NOT WORK OR IF DAMAGED WHEN YOU FIRST TAKE IT OUT
OF THE BOX, PLEASE RETURN IT TO THE PLACE OF PURCHASE IMMEDIATELY.
ENGLISH
VINTAGE COLLECTION™ SNOW CONE MAKER / SCM502
Should you have any questions, please contact us via email or at the
customer service number listed below between the hours of 8:00 AM
and 5:00 PM, Monday through Friday, Central Standard Time.
Distributed by:
Nostalgia Products Group LLC
1471 Partnership Dr.
Green Bay, WI 54304-5685
Customer Service
Phone: (920) 347-9122
Web: www.nostalgiaelectrics.com
Customer Service Inquiry
To submit a Customer Service inquiry, go to www.nostalgiaelectrics.com and
ll out the Customer Service Inquiry form and click the Submit button.
A representative will contact you as soon as possible.
This appliance is designed and built to provide many years of satisfactory performance
under normal household use. The distributor pledges to the original owner that
should there be any defects in material or workmanship during the rst 90 days of
purchase, we will repair or replace the unit at our option. Our pledge does not apply
to damages caused by shipping, mishandling or unit being dropped. A product
deemed defective either from manufacturing or being mishandled is up to the
distributor’s discretion. In order to obtain service under this warranty, please contact
Nostalgia Products Group, LLC at the telephone number listed above or by lling
out the Customer Service Inquiry Form located at www.nostalgiaelectrics.com.
This warranty does not apply to re-manufactured merchandise.
Please read these instructions carefully. Failure to comply with these instructions,
damages caused by improper replacement parts, abuse or misuse will void this
pledge to you and is being made in place of all other expressed warranties.
For more information, visit us online at www.nostalgiaelectrics.com.
Like us on Facebook at www.facebook.com/NostalgiaElectrics.
9
Page 12

¡Convierta todos los días en una etsa!
Visite www.nostalgiaelectrics.com para ver más productos divertidos.
CONTENIDO
PRECAUCIONES IMPORTANTES . . . . . . . . . . . . . . . . . . . . . . . . . . 11
MEDIDAS IMPORTANTES . . . . . . . . . . . . . . . . . . . . . . . . . . . . . . 11
INTRODUCCIÓN . . . . . . . . . . . . . . . . . . . . . . . . . . . . . . . . . . . . 12
PARTES Y ENSAMBLAJE . . . . . . . . . . . . . . . . . . . . . . . . . . . . . . . 13
CÓMO FUNCIONA . . . . . . . . . . . . . . . . . . . . . . . . . . . . . . . . . . 14
CONSEJOS ÚTILES . . . . . . . . . . . . . . . . . . . . . . . . . . . . . . . . . . 15
LIMPIEZA Y MANTENIMIENTO . . . . . . . . . . . . . . . . . . . . . . . . . . . 15
RECETAS . . . . . . . . . . . . . . . . . . . . . . . . . . . . . . . . . . . . . . . . . 16
DEVOLUCIONES Y GARANTÍA . . . . . . . . . . . . . . . . . . . . . . . . . . . 17
SEGURIDAD
Su seguridad y la de otras personas es muy importante.
Hemos proporcionado numerosos mensajes de seguridad importantes en este manual
y en su electrodoméstico. Siempre lea y obedezca todos los mensajes de seguridad.
Este es el símbolo de alerta de seguridad.
Este símbolo le previene de peligros potenciales que pueden
causar la muerte o lesiones a usted y a otras personas.
Todos los mensajes de seguridad estarán antecedidos por el símbolo de alerta.
Todos los mensajes de seguridad le dirán de qué peligro potencial se trata, cómo reducir
la posibilidad de lesiones y qué puede ocurrir si no se obedecen las instrucciones.
Especicaciones del electrodoméstico:
120 Volts, 60 Hz
30 Watts, Aprobado por la ETL
ESTE PRODUCTO ES PARA USAR SOLAMENTE EN TOMAS DE CORRIENTE DE 120 VCA
ESPAÑOL
10
10
Page 13

PRECAUCIONES IMPORTANTES
1. NUNCA sumerja la Estructura Superior en agua.
2. NUNCA lo utilice cerca del agua.
3. NUNCA utilice ninguna esponja ni trapo abrasivo.
4. NUNCA utilice un estropajo en la unidad.
5. NUNCA deje el aparato sin supervisar mientras está en uso.
6. NUNCA trate de forzar la tapa para que quede trabada.
7. Desenchufe la unidad del tomacorriente cuando no esté en uso o mientras se limpia.
8. NO maneje este aparato si tiene un cable o enchufe dañado o
en el caso de un mal funcionamiento del mismo.
9. Este aparato debe ser utilizado con comida y líquidos únicamente.
10. NO lo coloque dentro de un lavavajillas.
11. Mantenga fuera del alcance de los niños.
12. Este equipo NO ES UN JUGUETE.
13. Este aparato no debe ser utilizado por niños ni por individuos
con problemas cognitivos, sin estar supervisados.
14. No está previsto que este aparato sea utilizado por personas con
capacidades físicas, sensoriales o mentales reducidas o sin experiencia
y conocimiento sobre cómo manejar este aparato.
15. Los niños pequeños deberán estar bajo la supervisión de un adulto cuando
se encuentren cerca del aparato para asegurar que no jueguen con él.
ESPAÑOL
MEDIDAS IMPORTANTES
Basic safety precautions should always be followed when using
electrical appliances, including the following:
1. Lea todas las instrucciones antes de manejar este equipo.
2. Mantenga las manos fuera del mecanismo de cuchillas. Siempre
utilice una manopla o agarradera para agarrarlo.
3. Las cuchillas son extremadamente losas. Úselas CON EXTREMA PRECAUCIÓN.
4. NO TOQUE las partes móviles.
5. Para protegerlo de una descarga eléctrica, no sumerja el cable, el enchufe
ni ninguna parte de esta unidad en agua ni en ningún otro líquido.
6. Se requiere de una especial atención cuando el aparato
es utilizado por niños o cerca de ellos.
7. Desenchufe del tomacorriente cuando no se encuentra en
uso, antes de quitar las partes o para su limpieza.
8. NO utilice ningún aparato que tenga el cable o el enchufe dañado, o si el aparato se daña de
alguna manera. Lleve el aparato al servicio técnico más cercano para su control o reparación.
11
11
Page 14

9. El fabricante del aparato no recomienda el uso de accesorios que no sean
los suministrados junto a la unidad ya que podrían ocasionar daños.
10. NO use el aparato en el exterior. SÓLO PARA USO DOMÉSTICO.
11. Coloque el aparato lo más cerca posible del tomacorriente para
evitar lesiones causadas por tropiezos con el cable.
12. NO lo coloque sobre una hornalla a gas o sobre un quemador eléctrico
caliente, ni cerca de ellos y tampoco dentro de un horno caliente.
13. Controle el Depósito para Granizar Hielo para observar la
presencia de objetos extraños antes de usar.
14. NO use este aparato de ninguna otra manera que no sea la prevista.
15. No deje la unidad sin atención mientras esté en uso o enchufada a un tomacorriente.
16. Se proporciona un cable de energía corto, para reducir el riesgo de
estrangulamiento o tropiezos que podrían resultar con un cable largo.
17. Se pueden utilizar cables prolongadores de suministro
de energía si se tiene cuidado en su uso.
18. La clasicación eléctrica indicada en un prolongador debe ser al menos
del mismo valor que la clasicación eléctrica del aparato.
19. Este electrodoméstico tiene un enchufe polarizado (una hoja es más ancha que la
otra). Para reducir el riesgo de una descarga eléctrica, este enchufe está diseñado para
insertarse en un tomacorriente polarizado solamente en una posición. Si el enchufe no
encaja totalmente en el toma corriente, invierta el enchufe. Si aún no encaja, contacte
a un electricista calicado. No intente modicar el enchufe de ninguna forma.
20. No intente realizar tareas de servicio en el aparato, ya que abrir o retirar las
cubiertas puede exponerlo da tensiones peligrosas u otros riesgos. Solicite
al personal de servicio calicado que realice las tareas de servicio.
ESPAÑOL
¡GUARDE ESTAS INSTRUCCIONES!
INTRODUCCIÓN
¡Gracias por comprar la FÁBRICA DE CONOS DE NIEVE! ¡Ahora puede crear refrescantes conos
de nieve en su hogar, en cualquier momento! Utilice cubos de hielo para elaborar hielo
granizado, luego agregue jarabe con el sabor de su elección y disfrute de un fresco y sabroso
aperitivo, divertido para toda la familia y un gran placer para acompañar el sol de verano.
¡Incluso puede elaborar refrescos frutales, nieve de yogurt y batidos! Este producto es el
gran compañero de otros divertidos aparatos de la línea SERIE RETRO de Nostalgia Electrics.
La FÁBRICA DE CONOS DE NIEVE está diseñada para ser usada en la cocina,
pero podrá utilizarse en una variedad de lugares, como por ejemplo:
• Estarfamiliar
• HabitacionesdeResidenciasEstudiantiles
• Ocinas
• Clubes
12
12
Page 15

PIEZAS Y ENSAMBLAJE
Su FÁBRICA DE CONOS DE NIEVE viene completamente armada.
• Antes de usarla por primera vez, levante y retire la Estructura Superior
de la Unidad Principal y retire el Depósito para Granizar Hielo.
• El Depósito para Granizar Hielo puede retirarse extrayendo la Tapa del
Depósito para Granizar Hielo y levantándolo de la Estructura Superior.
• Limpie el interior de la Unidad Principal y del Depósito para Granizar
Hielo con una esponja húmeda no abrasiva, una toalla no abrasiva o
un paño húmedo y luego seque con un paño no abrasivo.
• Luego de limpiar el interior, vuelva a armar el Depósito para Granizar Hielo y
la Unidad Principal y vuelva a colocar la tapa sobre al Unidad Principal.
• Tenga EXTREMA precaución cuando limpie y maneje el Depósito
para Granizar Hielo ya que las cuchillas son MUY losas.
• ¡Ahora está listo para disfrutar de refrescantes aperitivos helados
recién hechos con su FÁBRICA DE CONOS DE NIEVE!
PARTES
Puerta
Depósito para
Granizar Hielo
ESPAÑOL
Recipiente para
introducir el hielo
Estructura
Superior
Unidad Principal
Estante para
los Conos
2 Conos de Plástico
Cuchara
para Hielo
Tapa de Bloqueo
ARMADO
13
13
Tapa del Depósito
para Granizar Hielo
Tapa de Bloqueo
Recipiente para
introducir el hielo
Depósito para
Granizar Hielo
Cuando arme las partes del
Depósito para Granizar Hielo,
gire la Tapa de Bloqueo en el
sentido de las agujas del reloj
para bloquear y gire en el sentido
opuesto para desbloquear.
Tapa del Depósito
para Granizar Hielo
Page 16

CÓMO FUNCIONA
• Coloque la FÁBRICA DE CONOS DE NIEVE sobre una supercie estable e
impermeable cerca de un tomacorriente eléctrico antes de comenzar.
• Siempre asegúrese de que el cable esté alejado de una fuente de agua.
• Antes de enchufar la unidad, agregue los cubos de hielo en el
Depósito para Granizar Hielo, retirando la Tapa.
• No llene el Depósito para Granizar Hielo por demás. Asegúrese de
que haya suciente espacio para volver a colocar la Tapa.
• Enchufe la unidad.
La unidad está ENCENDIDA La unidad está APAGADA
• Gire la Tapa en el sentido opuesto a las agujas del reloj para bloquear y encender la unidad.
• La unidad comenzará a granizar el hielo inmediatamente.
• Repita el proceso hasta tener la cantidad deseada de hielo granizado.
• Gire la Tapa en el sentido de las agujas
del reloj y desenchufe la unidad del
tomacorriente cuando haya terminado.
• Abra la puerta y retire el hielo granizado de la Unidad
Principal con la Cuchara para Hielo. Llene los Conos de
Plástico con la cantidad de hielo granizado deseada.
• Vierta jarabe saborizado sobre el hielo de los conos y sirva.
• Esta unidad viene con dos Conos de Plástico. No incluye el jarabe. Se recomienda
que compre un kit de conos de nieve con mezcla de jarabe y conos de
papel si tiene pensado hacer una gran cantidad de conos de nieve.
¡Siguiendo estas simples instrucciones su FÁBRICA DE CONOS DE NIEVE
será divertida para amigos, familiares y niños de todas las edades!
ESPAÑOL
14
14
Page 17

CONSEJOS ÚTILES
CUBOS DE HIELO
Los cubos de hielo deberán dejarse a temperatura ambiente durante unos minutos antes
de ser colocados en la unidad para granizar. Si el hielo está sumamente congelado y seco,
será difícil de granizar. Deje el hielo a temperatura ambiente hasta que esté translúcido y
húmedo al tacto. Entonces estará listo para ser colocado en el Depósito para Granizar Hielo.
HIELO GRANIZADO
Para evitar problemas:
• Coloque la unidad sobre una supercie resistente al agua mientras se encuentre en uso.
• Cuando haya terminado de elaborar los conos de nieve, asegúrese de vaciar el Depósito
para Granizar Hielo y la Unidad Principal para que no se derrita el hielo sobre la supercie.
LIMPIEZA Y MANTENIMIENTO
• Asegúrese de que la unidad esté desenchufada antes de limpiarla..
• Desarme la unidad retirando la Tapa del Depósito para Granizar
Hielo, levantándola y sacándola de la Estructura Superior.
• Destrabe el Recipiente para Introducir Hielo del Depósito para Granizar Hielo
girando la Tapa de Bloqueo en el sentido opuesto a las agujas del reloj.
• Retire todas las partes del Depósito para Granizar Hielo.
• Lave a mano con agua tibia y jabón todas las partes del Depósito para
Granizar Hielo, los Conos de Plástico, el Estante para los Conos y la Cuchara
para hielo. Enjuague y seque bien con un paño o toalla no abrasivos.
• Limpie el interior de la Unidad Principal con un paño seco, no abrasivo.
ESPAÑOL
• La cuchilla es muy losa. Tenga EXTREMA PRECAUCIÓN
cuando maneje este aparato durante su limpieza.
• Mantenga la Estructura Superior fuera del agua. NUNCA lave la Estructura Superior con
agua ni con un paño húmedo. Sólo use un paño seco sobre la Estructura Superio.
• Asegúrese de limpiar y secar la unidad antes y luego de cada uso.
• Para prolongar la vida de su FÁBRICA DE CONOS DE NIEVE, se recomienda
que las partes se laven a mano. No se recomienda el uso de lavavajillas.
15
15
Page 18

RECETAS
Su FÁBRICA DE CONOS DE NIEVE prepara hielo perfectamente
granizado que puede utilizarse para elaborar:
• CONOS DE NIEVE
Luego de granizar el hielo, agregue esencias saborizadas. Agregue más de un
sabor para crear conos de nieve coloridos y variados. Cree franjas de varios
sabores en el hielo granizado para obtener Conos de Nieve en Arco Iris.
• GRANIZADOS
Llene un vaso con hielo recién granizado. Agregue su bebida
favorita, té saborizado o jugo de fruta. Mezcle bien.
• GRANIZADO DE FRUTA FRESCA
Llene una taza con hielo recién granizado. Agregue esencia saborizada
y cubra con fruta fresca de su elección, cortada en cubos.
• GRANIZADO DE HELADO
Llene una taza con el helado de su elección. Cubra con una porción
abundante de hielo granizado. Agregue esencia saborizada.
• NIEVE DE YOGURT
Congele yogurt saborizado en los Moldes de Hielo. Utilice su FÁBRICA DE
CONOS DE NIEVE para granizar sus cubos de yogurt y elaborar manjares
refrescantes y sanos. Agregue esencias saborizadas para darle más sabor.
• BATIDOS DE NIEVE
Congele ½ taza de leche en los Moldes de Hielo. Use su FÁBRICA DE CONOS DE NIEVE
para granizar los cubos de hielo. Coloque los cubos granizados y frutillas frescas u otra
fruta de su elección en una procesadora. Agregue ¼ de taza de azúcar para endulzar,
luego mezcle hasta obtener una consistencia pareja o la consistencia deseada.
• JUGOS CONGELADOS
Congele jugo de fruta en los Moldes de Hielo. Use su FÁBRICA DE CONOS
DE NIEVE para granizar los cubos y crear placeres sanos y jugosos.
ESPAÑOL
16
16
Page 19

DEVOLUCIONES Y GARANTÍA
SI SU UNIDAD NO TRABAJA O ESTÁ DAÑADA CUANDO LA EXTRAE POR PRIMERA VEZ
DE LA CAJA, DEVUÉLVALA INMEDIATAMENTE AL LUGAR DONDE LA COMPRÓ.
FÁBRICA DE CONOS DE NIEVE / SCM502
Si tiene preguntas, contacte con nosotros por correo electrónico o por el
número telefónico de servicio al cliente que aparece a continuación en el
horario de 8:00 AM a 5:00 PM, de lunes a viernes, Hora Estándar del Este.
Distribuida por:
Nostalgia Products Group LLC
1471 Partnership Dr.
Green Bay, WI 54304-5685
Servicio al cliente
Teléfono: (920) 347-9122
Web: www.nostalgiaelectrics.com
Solicitud de servicio al cliente
Para enviar una solicitud al Servicio al Cliente, vaya a www.nostalgiaelectrics.com,
llene el formulario de Solicitud de Servicio al Cliente y haga clic en el botón Enviar.
Un representante le contactará tan pronto como sea posible.
Este electrodoméstico está diseñado y fabricado para proporcionar muchos años de
trabajo satisfactorio bajo un uso doméstico normal. El distribuidor se compromete
con el propietario original que si hay algún defecto en materiales o mano de obra
ESPAÑOL
durante los primeros 90 días de la compra, repararemos o sustituiremos la unidad,
según nuestra elección. Este compromiso no se aplica a daños causados por el
envío, mala manipulación o caídas de la unidad. La determinación de si los defectos
del producto son debidos a la fabricación o a una mala manipulación, queda a la
decisión del distribuidor. Para obtener servicio bajo esta garantía, contacte con
Nostalgia Products Group, LLC por el número telefónico que aparece anteriormente
o llenando el Formulario de Solicitud de Servicio al Cliente que se encuentra en
www.nostalgiaelectrics.com. Esta garantía no se aplica a mercancía reelaborada.
Lea estas instrucciones cuidadosamente. El no cumplir con estas instrucciones,
los daños causados por piezas de repuesto inapropiadas, abuso o mal uso,
anularán este compromiso con usted y de todas las otras garantías expresas.
Para obtener más información, visítenos en línea en www.nostalgiaelectrics.com.
Síganos en Facebook en www.facebook.com/NostalgiaElectrics.
17
17
Page 20

Faire une fête tous les jours! Visiter le site Web
www.nostalgiaelectrics.com pour d’autres produits agréables.
TABLE DES MATIÈRES
PRÉCAUTIONS IMPORTANTES . . . . . . . . . . . . . . . . . . . . . . . . . . . 19
MISES EN GARDE SÉCURITAIRES IMPORTANTES . . . . . . . . . . . . . . . . 19
INTRODUCTION . . . . . . . . . . . . . . . . . . . . . . . . . . . . . . . . . . . . 20
PIÈCES ET ASSEMBLAGE . . . . . . . . . . . . . . . . . . . . . . . . . . . . . . . 21
COMMENT FAIRE FONCTIONNER . . . . . . . . . . . . . . . . . . . . . . . . . 22
CONSEILS PRATIQUES . . . . . . . . . . . . . . . . . . . . . . . . . . . . . . . . 23
NETTOYAGE ET ENTRETIEN . . . . . . . . . . . . . . . . . . . . . . . . . . . . . 23
RECETTES . . . . . . . . . . . . . . . . . . . . . . . . . . . . . . . . . . . . . . . . 24
RETOURS DE LA MARCHANDISE ET GARANTIES . . . . . . . . . . . . . . . . 25
SÉCURITÉ
Votre sécurité tout comme celle des autres est primordiale.
Ce manuel renferme plusieurs avis importants sur la sécurité lors de l’utilisation
de votre appareil. Lire le manuel et conformez-vous aux avis contre-indiqués.
Ceci représente le symbole d'avertissement pour votre sécurité.
Ce symbole vous alerte des dangers potentiels, pouvant
vous être fatals à vous ou envers d'autres utilisateurs.
Ce symbole d'alerte à la sécurité suivra tous les avis relatifs à la sécurité.
Tous les avis sécuritaires indiqueront le danger potentiel exact, la façon
dont vous pouvez réduire vos chances de blessure et vous indiquerons les
conséquences potentielles si vous ne suivez pas ces instructions à la lettre.
Spécications des Appareils :
120 volts, 60 Hz
30 watts, Approbation ETL
CE PRODUIT DOIT ÊTRE UTILISÉ UNIQUEMENT DANS UNE PRISE DE COURANT DE 120 V CA
18
18
FRANÇAIS
Page 21

PRÉCAUTIONS IMPORTANTES
1. NE JAMAIS immerger le Compartiment supérieur dans l'eau.
2. NE JAMAIS utiliser l'appareil près de l'eau.
3. NE JAMAIS utiliser d'éponge ou de chion abrasi(f)ve.
4. NE JAMAIS utiliser de tampon à récurer sur l'appareil.
5. NE JAMAIS laisser l'appareil sans surveillance lorsqu'il est utilisé.
6. NE JAMAIS essayer de forcer le couvercle en position verrouillée.
7. Débrancher l'appareil de la prise murale lorsqu'il n'est
pas utilisé ou au moment du nettoyage.
8. NE PAS faire fonctionner cet appareil lorsque la prise ou le cordon est
endommagé(e) ou lorsqu'il ne fonctionne pas correctement.
9. Cet appareil est prévu pour une utilisation avec les aliments et les liquides seulement.
10. NE PAS mettre au lave-vaisselle.
11. Garder hors de portée des enfants.
12. Cet appareil NEST PAS UN JOUET.
13. Les enfants laissés sans surveillance et les personnes ayant une
décience cognitive ne devraient pas utiliser cet appareil.
14. L'appareil n'est pas prévu pour un utilisation par des personnes ayant une
capacité physique, sensorielle ou mentale physique réduite ou un manque
d'expérience et de connaissances dans le fonctionnement de cet appareil.
15. Les jeunes enfants qui sont à proximité de l'appareil ne devraient pas être
laissés sans surveillance pour s'assurer qu'ils ne jouent pas avec celui-ci.
MISES EN GARDE SÉCURITAIRES
IMPORTANTES
Les consignes de sécurité élémentaires doivent toujours être suivies au
moment de l'utilisation d'un appareil électrique, y compris ce qui suit :
1. Lisez toutes les instructions avant d’utiliser cet appareil.
2. Tenir les mains éloignées du mécanisme de la lame. Utiliser des poignées ou des boutons.
3. Les lames sont extrêmement tranchantes. Faire preuve d'une EXTRÊME PRUDENCE.
4. NE PAS TOUCHER les pièces mobiles.
5. Pour se protéger de l'électrisation, ne pas immerger le cordon, la prise
ou quelque pièce de cet appareil dans l'eau ou autre liquide.
6. La surveillance étroite des enfants est nécessaire lorsque quelque
appareil électrique est utilisé à proximité d'eux.
7. Débrancher de la prise murale lorsqu'il n'est pas utilisé,
avant de retirer des pièces ou de le nettoyer.
FRANÇAIS
8. NE PAS faire fonctionner l'appareil lorsque le cordon ou la prise est endommagé(e)
19
19
Page 22

ou qu'il a été endommagé de quelque façon. Retourner l'appareil à l'atelier
de réparation le plus proche pour une révision ou une réparation.
9. Le fabricant recommande l'utilisation d'aucun accessoire. L'utilisation
d'un accessoire pourrait provoquer des blessures.
10. NE PAS utiliser à l'extérieur; POUR USAGE DOMESTIQUE SEULEMENT.
11. Placer l'appareil le plus proche possible d'une prise de courant
pour éviter de se blesser en trébuchant sur le cordon.
12. NE PAS placer sur un brûleur à gaz ou électrique ou dans un four chaud.
13. Vérier la présence d'objets étrangers dans le Récipient à piler la glace avant son utilisation.
14. NE PAS utiliser l'appareil à une n autre que celle pour laquelle il est prévu.
15. Un appareil branché dans une prise de courant ne devrait pas être
laissé sans surveillance pendant son fonctionnement.
16. Un cordon d'alimentation court est prévu pour diminuer le risque d'emmêlement
ou de trébuchement que peut présenter un cordon plus long.
17. Un cordon d'alimentation détachable plus long pourra être utilisé, mais avec prudence.
18. La puissance nominale électrique indiquée sur une rallonge
devrait être aussi élevée que celle de l'appareil.
19. Cet appareil est muni d’une che électrique polarisée (une des lames est plus large que
l’autre). An de minimiser les risques de choc électrique, cette che est conçue de façon à
être branchée dans une prise électrique polarisée d’une seule façon. Si la che n'entre pas
complètement dans la prise, inverser celle-ci. Si elle ne convient toujours pas, communiquer
avec un électricien agréé. Ne pas essayer de modier la che de quelque façon.
20. Ne pas tenter de réparer cet appareil soi-même, car l'ouverture ou le retrait
des couvercles pourra provoquer des tensions dangereuses ou autres
dangers. Coner toutes les réparations à un personnel qualié.
CONSERVEZ CES INSTRUCTIONS !
INTRODUCTION
Merci d'avoir acheté la GÉNÉRATEUR DÉMODÉ DE CÔNE DE NEIGE. Imaginer des
cornets glacés désaltérants chez soi en tout temps? Utiliser des cubes de glace
pour faire de la glace pilée, puis ajouter le sirop aromatisé de son choix pour un
délice froid, amusant en famille : une fraîcheur bienvenue sous le soleil d'été.
Faire aussi des barbotines aux fruits, des cornets glacés au yaourt ou des boissons
frappées! Ce produit est le compagnon idéal des autres appareils amusants de
la gamme de produits de la Collection d'époque de Nostalgia ElectricsMC.
La GÉNÉRATEUR DÉMODÉ DE CÔNE DE NEIGE est conçue pour la
cuisine, mais peut être utilisée à plusieurs endroits tels que :
• lessallesfamiliales
• lesdortoirs
• lesbureaux
• lespavillons
20
20
FRANÇAIS
Page 23

PIÈCES ET ASSEMBLAGE
La GÉNÉRATEUR DÉMODÉ DE CÔNE DE NEIGE est livrée déjà assemblée.
• Avant sa première utilisation, soulever le Compartiment supérieur de
l'Appareil principal, puis retirer le Récipient à piler la glace.
• Le Récipient à piler la glace peut être retiré en soulevant le Couvercle du Récipient
à piler la glace et le Récipient à piler la glace du Compartiment supérieur.
• Nettoyer l'intérieur de l'Appareil principale et le Récipient à piler la glace
avec une éponge humide non abrasive, une serviette non abrasive ou
un chion humide, puis d'une serviette sèche, non abrasive.
• Après le nettoyage de l'intérieur, reposer le Récipient à piler la glace et l'Appareil
principal, puis reposer la partie supérieure sur l'Appareil principal.
• Faire preuve d'une extrême prudence au moment du nettoyage et de la
manipulation du Récipient à piler la glace, car les lames sont TRÈS tranchantes.
• Le moment est venu de déguster d'une collation glacée désaltérante
confectionnée avec la GÉNÉRATEUR DÉMODÉ DE CÔNE DE NEIGE !
PIÈCES
Porte
Plateau à cornets
Récipient à
piler la glace
Bol d'alimentation
de la glace
Compartiment
supérieur
Appareil
principal
Cornets en
plastique (2)
Capuchon de
verrouillage
ASSEMBLAGE
Couvercle du récipient
à piler la glace
Capuchon de verrouillage
FRANÇAIS
21
21
Bol d'alimentation
de la glace
Récipient à
piler la glace
Au moment de l'assemblage des
pièces du Récipient à pile la glace,
tourner le Capuchon de verrouillage
dans le sens horaire pour
verrouiller, puis tourner dans le sens
antihoraire pour le déverrouiller.
Couvercle du
récipient à piler la glace
Pelle à glace
Page 24

COMMENT FAIRE FONCTIONNER
• Poser la MACHINE À COTNET GLACÉ DE LA Collection d'époque sur une
surface stable, à proximité d'une prise de courant avant de commencer.
• Toujours s'assurer que le cordon est éloigné de quelque source d'eau.
• Avant de brancher l'appareil, ajouter les cubes de glace au
Récipient à piler la glace en retirant le couvercle.
• Ne pas surcharger le Récipient à piler la glace. S'assurer qu'il y a
susammentdeplaceavantderemettreleCouvercle.
• Brancher l'appareil.
Appareil à la position ON (marche) Appareil à la position OFF (arrêt)
• Tourner le Couvercle dans le sens antihoraire pour le verrouiller et le mettre en marche.
• L'appareil démarrera immédiatement et commencera le pilage de la glace.
• Refaire le processus jusqu'à ce qu'il y ait la quantité de glace désirée.
• Tourner le Couvercle dans le sens antihoraire, puis
débrancher l'appareil de la prise murale une fois terminée.
• Recueillir la glace pilée à l'aide de la Pelle à glace de l'intérieur
de l'Appareil principal en ouvrant la porte. Remplir les
Cornets en plastique d'une quantité désirée de glace pilée.
• Verser un coulis de sirop sur la glace des cornets, puis servir.
• Cet appareil est livré avec deux Cornets en plastique. Il ne comprend pas le
sirop. Acheter un ensemble pour cornet glacé avec mélange de sirop et des
cornets en papier si une grande quantité de cornets de glace est prévue.
En suivant ces simples consignes, la GÉNÉRATEUR DÉMODÉ DE CÔNE DE NEIGE
sera amusante pour les amis, la famille et les petits, quel que soit leur âge !
22
22
FRANÇAIS
Page 25

CONSEILS PRATIQUES
CUBES DE GLACE
Les cubes de glace devraient être sortis du congélateur peu de temps avant de les
mettre dans l'appareil à piler la glace. Si la glace a un aspect givré, le pilage sera
tropdicile.Laisserreposerjusqu'àcequelaglacesoittranslucideethumideau
toucher. Ensuite, elle sera prête à mettre dans le Récipient à piler la glace.
GLACE PILÉE
Pour éviter les dégâts :
• Poser l'appareil sur une surface imperméable à l'eau pendant l'utilisation.
• Une fois les cornets glacés terminés, s'assurer de vider le Récipient à piler la
glace et l'Appareil principal pour ne pas que la glace fonde sur la surface.
NETTOYAGE ET ENTRETIEN
• S'assurer que l'appareil est débranché avant de le nettoyer.
• Déposer l'appareil en retirant le Couvercle du Récipient à piler
glace, puis soulever le Compartiment supérieur.
• Déverrouiller le Bol d'alimentation de la glace du Récipient à piler la glace
en tournant le Capuchon de verrouillage dans le sens antihoraire.
• Retirer toutes les pièces du Récipient à piler la glace.
• Laver toutes les pièces du Récipient à piler la glace, les Cornets en plastique, le
Plateau à cornets et la Pelle à glace la main dans de l'eau chaude savonneuse.
Rincer, puis assécher soigneusement avec un chion non abrasif.
• Essuyer l'intérieur de l'Appareil principal avec un chion sec, non abrasif.
• La lame est tranchante. Faire preuve d'une EXTRÊME PRUDENCE
au cours de la manutention de l'appareil pour le nettoyer.
• Tenir le Compartiment supérieur éloigné de l'eau. NE JAMAIS laver le
Compartiment supérieur avec de l'eau ou un chion humide. Utiliser
uniquement un chion sec sur le Compartiment supérieur.
• S'assurer de nettoyer et d'assécher l'appareil avant et après chaque utilisation.
• Pour prolonger la durée de vie de votre GÉNÉRATEUR DÉMODÉ
DE CÔNE DE NEIGE, les pièces devraient être lavées à la main.
L'utilisation d'un lave-vaisselle n'est pas recommandée.
FRANÇAIS
23
23
Page 26

RECETTES
La GÉNÉRATEUR DÉMODÉ DE CÔNE DE NEIGE pile parfaitement
la glace qui peut être utilisée pour faire des :
• CORNETS GLACÉS
Après le pilage de la glace, ajouter un sirop aromatisé. Ajouter plus
d'une saveur pour créer des cornets glacés variés. Créer des nuances de
saveur dans la glace pilée pour des Cornets glacés arc-en-ciel.
• BARBOTINE
Remplir un verre avec de la glace fraîchement pilée. Ajouter le soda de
son choix, un thé aromatisé ou un jus de fruit. Bien mélanger.
• BARBOTINE AUX FRUITS FRAIS
Remplir une coupe à service avec de la glace fraîchement pilée. Ajouter un sirop
à saveur de fruit, puis garnir avec un morceau de fruit frais de son choix.
• BARBOTINE À LA CRÈME GLACÉE
Remplir une coupe à service avec de la crème glacée de son choix. Garnir
avec une généreuse portion de glace pilée. Ajouter un sirop aromatisé.
• CORNET GLACÉ AU YAOURT
Congeler le yaourt aromatisé dans des bacs à glaçon. Utiliser la GÉNÉRATEUR
DÉMODÉ DE CÔNE DE NEIGE pour piler les cubes de yaourt, puis faire un délice
santé rafraîchissant. Ajouter un sirop aromatisé pour encore plus de saveur.
• BOISSON FRAPPÉE
Faire congeler 120 mL (½ tasse) de lait dans des bacs à glace. Utiliser la
GÉNÉRATEUR DÉMODÉ DE CÔNE DE NEIGE pour piler les cubes de lait. Placer
les cubes de glace pilée et des fraises fraîches ou le fruit de son choix dans
un mélangeur. Ajouter 60 mL (¼ tasse) de sucre pour rendre plus doux,
puis mélanger jusqu'à obtention d'une consistance lisse ou désirée.
• BOISSON AUX FRUITS CONGELÉS
Faire congeler un jus de fruit dans des bacs à glace. Utiliser la
GÉNÉRATEUR DÉMODÉ DE CÔNE DE NEIGE pour piler les cubes de
jus de fruit, puis faire un délice juteux et rafraîchissant.
24
24
FRANÇAIS
Page 27

RETOURS DE LA MARCHANDISE ET GARANTIES
SI VOTRE APPAREIL NE FONCTIONNE PAS OU EST ENDOMMAGÉ
LORSQUE VOUS LE SORTEZ DE LA BOÎTE, VEUILLEZ LE RETOURNER
IMMÉDIATEMENT À L'ENDROIT OÙ VOUS L'AVEZ ACHETÉ.
GÉNÉRATEUR DÉMODÉ DE CÔNE DE NEIGE / SCM502
Pour toutes autres questions pertinentes, veuillez contacter le service à la
clientèle soit par courriel ou au numéro de service tel qu'indiqué ci-bas,
entre 8h00 et 17h00, du lundi au vendredi, heure normale de l'est.
Distribué par:
Nostalgia Products Group LLC
1471 Partnership Dr.
Green Bay, WI 54304-5685
Service à la clientèle
Téléphone: (920) 347-9122
Site Internet: www.nostalgiaelectrics.com
Question pour le service à la clientèle
Pour soumettre une question au service à la clientèle, veuillez visiter
le site www.nostalgiaelectrics.com et remplir un formulaire destiné
au service à la clientèle puis cliquer sur la touche Soumettre.
Un représentant vous contactera sous peu.
Cet appareil est conçu pour orir plusieurs années d'utilisation de performance satisfaisante,
et ce, sous de conditions normales d'utilisation. Le grossiste nantit que le propriétaire
d'origine se doit de faire réparer ou changer l'appareil à notre discrétion, advenant le cas de
défectuosités des matériaux ou des pièces durant les 90 premiers jours en date d’achat de
l’appareil neuf. Notre nantissement ne s'applique aucunement sur les dommages causés
par le transport, une mauvaise utilisation de l'appareil ou le fait d'échapper l'appareil. Un
produit réclamé défectueux, soit suite à sa fabrication ou une mauvaise utilisation sera
évaluée à l’entière discrétion du grossiste. An que la garantie couvre ce produit, veuillez
contacter Nostalgia Products Group, LLC au numéro de téléphone suivant ou en remplissant
un formulaire de question destine au service à la clientèle situé sur le site Internet : www.
nostalgiaelectrics.com. Cette garantie ne s’applique aucunement à la marchandise ré-usinée.
Lire ces instructions attentivement. Le manque de vous conformer à ces
instructions, de tous dommages causés par un remplacement erroné des pièces,
l’abus ou mauvaise utilisation de l’appareil annulera toute promesse faite à
votre égard, et prévaudra sur toute autre garantie, implicite ou expresse.
Pour des renseignements supplémentaires, visiter le site Web www.nostalgiaelectrics.com.
Dites « J'aime » sur Facebook à www.facebook.com/NostalgiaElectrics.
FRANÇAIS
25
25
Page 28

 Loading...