

Page 1

All products are trademarks of Nostalgia Products LLC.
Worldwide design & utility patented or patents pending.
© 2018 Nostalgia Products LLC.
www.nostalgiaproducts.com
(rev. 02/12/18 DL)
Page 2
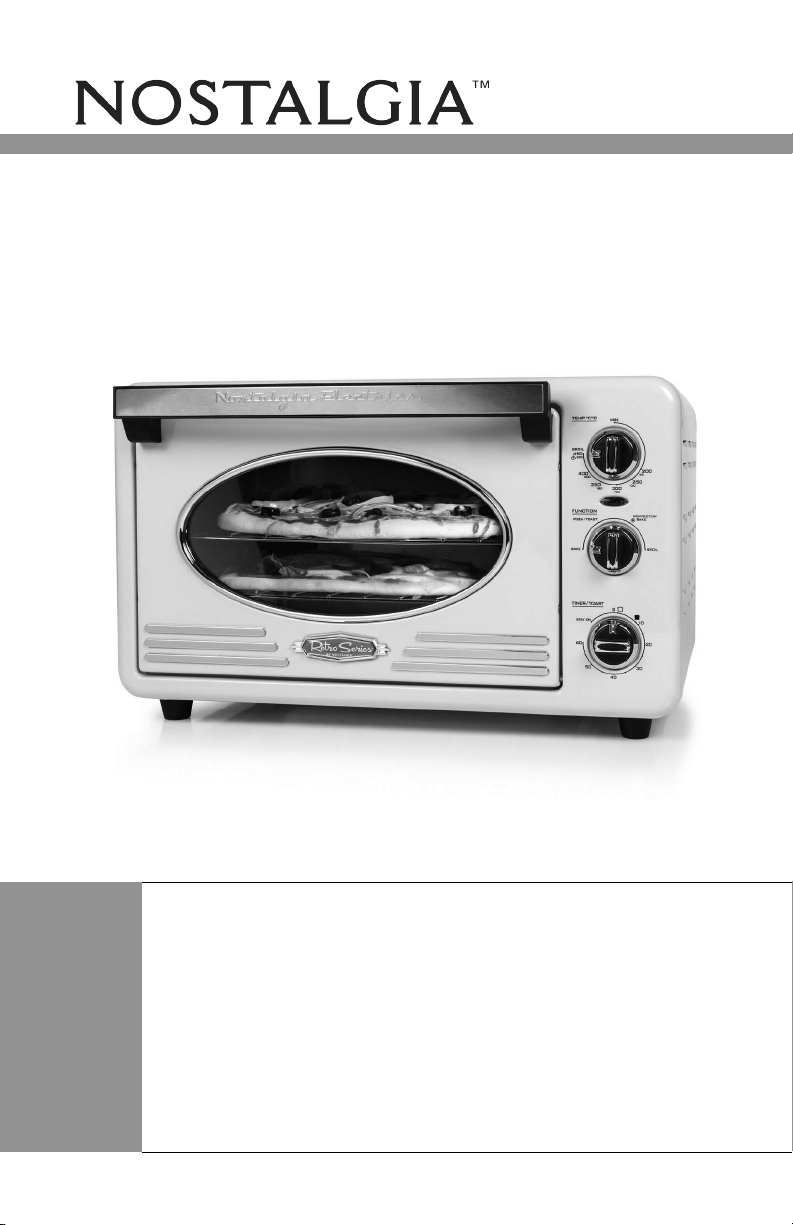
RTOV220AQ
Retro Toaster Oven
Four-Grilloir Retro
Horno tostador de Retro
Instruction Manual
Manuel d'instruction
Manual de instrucciones
Page 3

Page 4
Make every day a party!
Visit www.nostalgiaproducts.com for more fun products.
CONTENTS
SAFETY . . . . . . . . . . . . . . . . . . . . . . . . . . . . . . . . . . . . . . . . . 3
IMPORTANT PRECAUTIONS . . . . . . . . . . . . . . . . . . . . . . . . . . . . . 3
IMPORTANT SAFEGUARDS . . . . . . . . . . . . . . . . . . . . . . . . . . . . . 3
INTRODUCTION . . . . . . . . . . . . . . . . . . . . . . . . . . . . . . . . . . . . 4
PARTS & ASSEMBLY . . . . . . . . . . . . . . . . . . . . . . . . . . . . . . . . . . 5
HOW TO OPERATE . . . . . . . . . . . . . . . . . . . . . . . . . . . . . . . . . . 6
HELPFUL TIPS . . . . . . . . . . . . . . . . . . . . . . . . . . . . . . . . . . . . . 8
CLEANING & MAINTENANCE . . . . . . . . . . . . . . . . . . . . . . . . . . . . 8
RECIPES . . . . . . . . . . . . . . . . . . . . . . . . . . . . . . . . . . . . . . . . . 9
RETURNS & WARRANTY . . . . . . . . . . . . . . . . . . . . . . . . . . . . . . . 13
SAFETY
ENGLISH
Your safety and the safety of others are very important.
We have provided many important safety messages in this manual and
on your appliance. Always read and obey all safety messages.
This is the safety alert symbol.
This symbol alerts you to potential hazards that can
cause serious injury to you and others.
All safety messages will follow the safety alert symbol.
All safety messages will tell you what the potential hazard is, tell you how to reduce the
chance of injury, and tell you what can happen if the instructions are not followed.
Appliance Specications:
120 Volts, 60 Hertz
1500 Watts
THIS PRODUCT IS FOR USE IN 120V AC OUTLET ONLY.
Refer to www.nostalgiaproducts.com/user-manuals/ for the most updated manual.
2
Page 5

IMPORTANT PRECAUTIONS
1. NEVER immerse appliance in water.
2. NEVER use near water.
3. NEVER use an abrasive sponge or cloth on the appliance.
4. NEVER leave appliance unattended while in use.
ENGLISH
5. NEVER place anything other than what is being cooked in or on the appliance.
6. Unplug unit from outlet when not in use and during cleaning.
7. DO NOT operate this appliance with a damaged cord or
plug, nor if the appliance ever malfunctions.
8. DO NOT place appliance in a dishwasher.
9. Keep out of reach of children.
10. This appliance is NOT A TOY.
11. Unsupervised young children and cognitively challenged
individuals should never operate this appliance.
12. Young children should be supervised while in proximity of the
appliance to ensure that they do not play with it.
IMPORTANT SAFEGUARDS
Basic safety precautions should always be followed when using
electrical appliances, including the following:
1. Read all instructions before operating this appliance.
2. To protect against electrical shock do not immerse cord, plug or
any part of this appliance in water or other liquids.
3. Close supervision is necessary when any appliance is used near children.
4. Unplug from outlet when not in use, before removing parts and before cleaning.
5. DO NOT operate any appliance with a damaged cord or plug, nor if
the appliance has been damaged in any manner. Return the appliance
to the nearest repair shop for examination or repair.
6. The manufacturer does not recommend the use of accessory
attachments. Use of accessory attachments may cause injuries.
7. DO NOT use outdoors.
8. DO NOT place on or near a hot gas or electric burner, nor in a heated oven.
9. DO NOT use the appliance for other than its intended use.
10. An appliance that is plugged into an outlet should not be left unattended while in operation.
11. Check appliance for presence of foreign objects prior to use.
12. DO NOT attempt to stick any utensils or other objects into
the toaster while appliance is plugged in.
13. A short power supply cord is provided to reduce the risk resulting
3
Page 6

from becoming entangled or tripping over a long cord.
14. Longer detachable power supply cords can be used if care is exercised in their use.
15. The marked electrical rating of an extension cord should be at
least as great as the electrical rating of the appliance.
16. This appliance has a polarized plug (one blade is wider than the other). To reduce the
risk of electrical shock, this plug is intended to t into a polarized outlet only one way.
SAVE THESE INSTRUCTIONS!
INTRODUCTION
Thank you for purchasing the RETRO TOASTER OVEN from Nostalgia™! Now
you can bake, toast, convection bake or broil a quick and energy ecient
meal. Make everything from quick snacks to pizzas to toast and more. Check
out the RECIPES section for tons of fun breakfast, lunch and dinner recipes!
Features Include:
• 1500 Watts
• 22 L capacity holds two 12" pizzas or 12 slices of toast
• Bake / Toast / Convection Bake / Broil functions
• Four stage heating selector: upper heating / lower
heating / upper & lower heating / OFF
• Adjustable temperature between 200°F - 450°F
• Aluminum baking pan, two nickel-plated racks & crumb tray
• Power light indicator
ENGLISH
4
Page 7
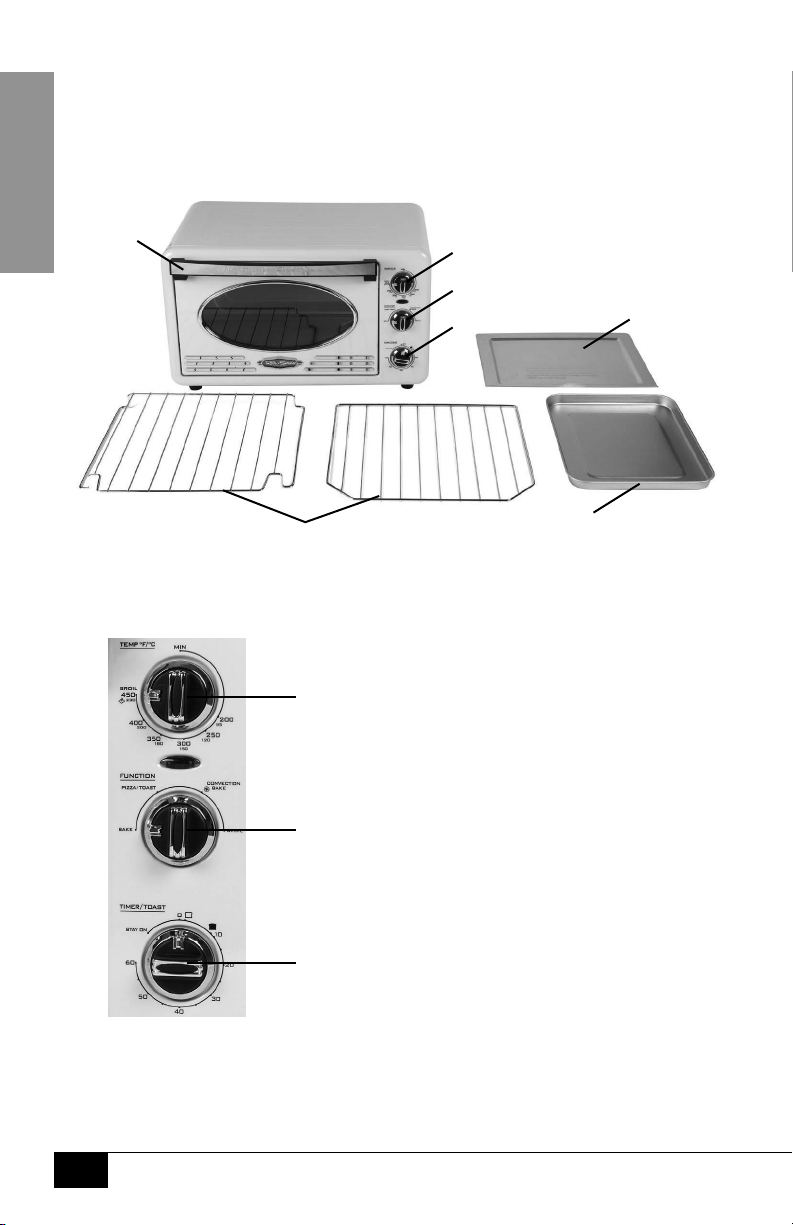
PARTS & ASSEMBLY
PARTS
Your RETRO TOASTER OVEN is fully assembled.
ENGLISH
Handle
Control Panel
Wire Racks
Temperature Gauge
Function Selector
Timer
Baking Pan
Crumb Tray
Temperature Gauge:
Adjustable temperature from
200°F - 450°F (95°C - 230°C)
Function Selector:
Bake - Both the upper and lower heating elements will heat.
5
Pizza/Toast - Both upper and lower heating elements will heat.
Convection Bake - Both upper and lower heating elements
will heat and hot air will circulate throughout the oven.
Broil - Only the upper heating element will heat.
Timer:
Adjustable timer from
0 - 60 minutes
Page 8

HOW TO OPERATE
Before you begin, wipe the outer housing and inner cavity wall with a damp
cloth. Clean the Wire Racks, Crumb Tray and Baking Pan in hot, sudsy water.
Place the RETRO TOASTER OVEN on a stable surface near an electrical
outlet before starting. Make sure that the cord is away from any water
source, then plug the appliance into an electrical outlet.
Bake Function
1. Open the oven door and insert the Grill Rack to the
suitable rack slot, then close the oven door.
2. Turn the Temperature Gauge to the desired temperature, then
turn the Function Selector to the "BAKE" position.
3. Turn the timer to 15 minutes to allow oven to preheat with the door closed.
4. Once oven is preheated, place food on the Baking Pan using a hot pad or oven mitt.
CAUTION: Interior of the toaster oven will be VERY HOT and contact may cause burns.
5. Turn the timer to the desired cooking time. After setting the
time, the power indicator light will illuminate.
6. When the timer has expired, the timer bell will ring and the dial will
be back to the "0"position. To stop the cycle at any time, simply turn
the Timer to the "0" position and the timer bell will ring.
7. Using a hot pad or oven mitt, carefully remove your food from the oven.
Pizza/Toast Function
1. Open the oven door, place the Grill Rack on the suitable rack slot, place up to
six pieces of bread or two pizzas on the Wire Rack, then close the oven door.
Bread should be evenly spaced on the Wire Rack so that it toasts evenly.
2. Rotate the Temperature Gauge clockwise to "450°F/230°C", and
the Function Selector to "PIZZA/TOAST" position.
3. Next, turn the Timer dial to the desired browning setting. A lighter toast corresponds to the
symbol, while darker toast corresponds to the symbol.
NOTE: Allow oven to preheat with the door closed for 15 minutes before putting
pizza in the oven. Rotate pizzas 180° half way through the cycle for even cooking.
4. After setting the timer, the power indicator light will illuminate. When the timer has
expired, the timer bell will ring and the dial will be back to the "0"position. To stop the
cycle at any time, simply turn the Timer to the "0" position and the timer bell will ring.
5. Using a hot pad or oven mitt, carefully remove your food from the oven.
Convection Bake Function
1. Open the oven door and insert the Grill Rack on the
suitable rack slot, then close the oven door.
2. Turn the Temperature Gauge to the desired temperature, then turn
the Function Selector to the "CONVECTION BAKE" position.
3. Turn the timer to 15 minutes to allow oven to preheat with the door closed.
4. Once oven is preheated, place food on the Baking Pan using a hot pad or oven mitt.
CAUTION: Interior of the toaster oven will be VERY HOT and contact may cause burns.
ENGLISH
6
Page 9

5. Turn the timer to the desired cooking time. After setting the
time, the power indicator light will illuminate.
6. When the timer has expired, the timer bell will ring and the dial will
be back to the "0"position. To stop the cycle at any time, simply turn
the Timer to the "0" position and the timer bell will ring.
7. Using a hot pad or oven mitt, carefully remove your food from the oven.
ENGLISH
Broil Function
1. Open the oven door and insert the Grill Rack on the
suitable rack slot, then close the oven door.
2. Turn the Temperature Gauge to the desired temperature, then
turn the Function Selector to the "BROIL" position.
3. Turn the timer to 15 minutes to allow oven to preheat with the door closed.
4. Once oven is preheated, place food on the Baking Pan using a hot pad or oven mitt.
CAUTION: Interior of the toaster oven will be VERY HOT and contact may cause burns.
5. Turn the timer to the desired cooking time. After setting the
time, the power indicator light will illuminate.
6. When the timer has expired, the timer bell will ring and the dial will
be back to the "0"position. To stop the cycle at any time, simply turn
the Timer to the "0" position and the timer bell will ring.
7. Using a hot pad or oven mitt, carefully remove your food from the oven.
By following these simple instructions, your RETRO TOASTER
OVEN will be fun for friends, family and kids of all ages!
7
Page 10

HELPFUL TIPS
OVERCOOKED / UNDERCOOKED FOODS
For overcooked or undercooked food, the temperature setting, time setting or
Wire Rack may need to be adjusted or repositioned. Also, it is best to prevent
heat loss while cooking and avoid opening the oven door frequently.
Keep in mind that the RETRO TOASTER OVEN is smaller than a regular
oven and will heat up faster and generally cook in shorter periods of time.
In addition, frozen foods and thick meat will take longer to cook.
BURNING/SMOKING
A burnt smell coming from your RETRO TOASTER OVEN, may be due to food build-up inside
the oven. Follow the directions under CLEANING & MAINTENANCE to clean the oven.
CLEANING & MAINTENANCE
Make sure the unit is unplugged and allow all parts to cool completely before cleaning.
To prolong the life of your RETRO TOASTER OVEN, please follow these simple
instructions for maintenance. Never place the appliance in a dishwasher.
• Wash the Wire Racks, Baking Pan, and Crumb Tray in warm, soapy water.
• Clean the outer surface with a soft, damp cloth.
• Dry all parts with a soft, non-abrasive towel or cloth.
• DO NOT use abrasive cleaning products as they may damage the unit.
• DO NOT wipe the heating elements.
ENGLISH
8
Page 11

RECIPES
Use your RETRO TOASTER OVEN to prepare quick, easy-to-serve meals!
From breakfast to late night snacks, create your own masterpieces or
follow the recipes below to become a toaster oven connoisseur.
WHOLE WHEAT BLUEBERRY CORNBREAD MUFFINS
ENGLISH
• ½ cup buttermilk
• 1 large egg
• 2 Tbsp. of sugar
• 2 Tbsp. of
unsweetened
applesauce
• / cup cornmeal
• / cup of whole
wheat flour
• 2 tsp. of baking
powder
• ¼ tsp. of salt
• ½ tsp. cinnamon
• ½ cup of fresh
blueberries
Using CONVECTION BAKE, preheat your RETRO TOASTER
OVEN to 350°F as directed under HOW TO OPERATE.
In a medium size bowl, mix together the our, cornmeal,
baking powder, cinnamon, and salt. Set aside.
In a small bowl, whisk together the buttermilk,
egg, applesauce, and sugar. Add the wet
ingredients to the dry ingredients.
Mix until just barely combined, then fold in the blueberries.
Divide mixutre into 6 mun cups
and put in the toaster oven.
Bake for 20 to 25 minutes.
BAKED APPLE BREAKFAST OATS
• 1 large apple
• / cup vanilla
Greek yogurt
• / cup rolled oats
• 1 Tbsp. peanut butter
• Cinnamon
9
Using BAKE, preheat your RETRO TOASTER OVEN
to 400°F as directed under HOW TO OPERATE.
Cup an apple into ½ inch chunks and
sprinkle generously with cinnamon.
Bake in the toaster oven for 12 minutes.
When apples are done baking, combine yogurt,
rolled oats, and baked apples chunks in a bowl.
Top with peanut butter and enjoy!
Page 12

BAKED EGGS
• 4 eggs
• Butter
• 10 grape or cherry
tomatoes
• 2 strips of bacon
• Cheese to grate
• ¼ tsp. Smoked
paprika
• Salt
• Pepper
OPEN FACED TUNA MELT
• 1 can (3 oz.) white
tuna in water, drained
• 2 Tbsp. chopped
cilantro
• 2 Tbsp. salsa
• 1 Tbsp. light
mayonnaise
• 1 English muffin,
split, lightly toasted
• 2 slices colbyjack cheese
ENGLISH
Using BAKE, preheat your RETRO TOASTER OVEN
to 375°F as directed under HOW TO OPERATE.
Cook the strips of bacon on the stove.
Grease two ramekins with butter.
Cut the tomatoes in half and divide among the
dishes. Sprinkle with a little bit of salt.
When bacon is nicely browned, blot o excess
grease with paper towels and chop into small pieces.
Divide the bacon between the two dishes.
Grate the cheese into each dish and then
crack two eggs into each dish.
Sprinkle half of the smoked paprika on each
dish, along with a pinch of salt and pepper.
Place both ramekins on the Baking
Pan and then into the oven.
Cook until the egg whites turn opaque, roughly 15 minutes.
Enjoy!
Using BAKE, preheat your RETRO TOASTER OVEN
to 350°F as directed under HOW TO OPERATE.
Combine tuna, cilantro, salsa and
mayonnaise in a small bowl.
Place English mun halves on the Baking Pan
and top with the tuna mixture and cheese.
Bake until cheese is melted, 2 to 3 minutes.
Enjoy!
10
Page 13

OVEN ROASTED ASPARAGUS
• 1 bunch asparagus
• 4 Tbsp. olive oil
• Kosher salt, to taste
• Freshly ground black
ENGLISH
pepper, to taste
PESTO SALMON
• 1 ¼ lb. salmon filet,
cut into 4 pieces
• 2 Tbsp. white wine
• 2 Tbsp. toasted pine
nuts (optional)
• 1 lemon, halved
Using BAKE, preheat your RETRO TOASTER OVEN
to 425°F as directed under HOW TO OPERATE.
Wash and trim asparagus, then spread out the aspargus
in a single layer on the Baking Pan. Pat aspargus as dry as
you can to avoid "steaming" the asparagus in the oven.
Drizzle olive oil over the asparagus and then
sprinkle with kosher salt and black pepper.
Roast the asparagus for about 10 minutes.
Enjoy!
Using BROIL, preheat your RETRO TOASTER OVEN
to 450°F as directed under HOW TO OPERATE.
Cover the Baking Pan with foil, then
coat with canola cooking spray.
Place salmon lets, skin-side dow, on the foil-lined pan.
Squeeze one of the lemon halves over the
salmon, then drizzle with white wine, and
allow to marinate for 15 minutes.
Spread ½ Tbsp. of the pesto over each serving of salmon.
Broil until sh akes and esh is opaque and light
pink, or about 8 to 10 minutes per inch of thickness.
Cut the remaining lemon in thin slices, and
garnish with toasted pine nuts.
Enjoy!
11
Page 14

QUICK AND EASY BRUSCHETTA
• ½ French baguette
• 1 clove garlic
• 12 cherry
tomatoes, diced
• ¼ cup fresh
mozzarella
cheese, diced
• 4 large basil leaves,
chiffonade
• Extra virgin olive oil
• Salt and pepper,
to taste
FISH AND CHIPS
• 1 ¾ lbs. red or Yukon
gold potatoes, cut
into 1-inch chunks
• 4 Tbsp. olive oil
• 1 ¼ tsp. kosher salt
• 1 ¼ tsp. black pepper
• 8 sprigs fresh thyme
• 4 6-oz. pieces of cod
• 1 lemon, halved
• 1 clove garlic,
thinkly sliced
• 2 Tbsp. capers,
drained
Using PIZZA/TOAST, preheat your RETRO TOASTER
OVEN to 450°F as directed under HOW TO OPERATE.
Slice half of the baguette on the diagonal
into 12 ½-inch thick pieces.
Place the slices on a baking sheet and toast them on
the top rack of the toaster oven for 5 to 6 minutes,
until turning golden brown around the edges.
When the slices are cool enough to handle, rub them with
a clove of garlic, then drizzle with extra virgin olive oil.
Place the diced tomatoes, diced mozzarella and basil
together in a small bowl. Drizzle with olive oil and
season with salt and pepper, to taste. Stir to combine.
Spoon the mixture over the bruschetta
or serve on the side as a dip.
Enjoy!
Using BAKE, preheat your RETRO TOASTER OVEN
to 450°F as directed under HOW TO OPERATE.
Plate the potatoes, 2 Tbsp. of olive oil, 1 tsp. of salt, ¼ tsp. of
pepper, and 4 sprigs of thyme in a bowl and toss to coat.
Spread the potato mixture on the Baking Pan
in a single layer and bake, stirring occasionally,
until golden brown, 25 to 30 minutes.
Transfer to a large piece of aluminum
foil and wrap to keep warm.
Wipe the Baking Pan and place cod in the tray.
Thinly slice half the lemon. Top the cod with lemon
slices, garlic, capers and the remaining salt, pepper
and thyme sprigs. Drizzle with the remaining oil.
Bake cod until cooked through, 8 to 12
minutes, depending on size.
Transfer cod and potatoes to plates, squeeze the
remaining lemon half over the Baking Pan and return
to the oven until the juices are warmed through, about
5 minutes. Pour sauce over the sh and potatoes.
Enjoy!
ENGLISH
12
Page 15

RETURNS & WARRANTY
SHOULD YOUR UNIT NOT WORK OR IF DAMAGED WHEN YOU FIRST TAKE IT OUT OF
THE BOX, PLEASE RETURN IT TO THE PLACE OF PURCHASE IMMEDIATELY.
RETRO TOASTER OVEN / RTOV220AQ
Should you have any questions, please contact us via email or at the customer service number listed
ENGLISH
below between the hours of 8:00 AM and 5:00 PM, Monday through Friday, Central Standard Time.
Distributed by:
Nostalgia Products LLC
1471 Partnership Dr.
Green Bay, WI 54304-5685
Customer Service
Phone: (920) 347-9122
Web: www.nostalgiaproducts.com
Customer Service Inquiry
To submit a Customer Service inquiry, go to www.nostalgiaproducts.com and ll
out the Customer Service Inquiry form and click the Submit button.
A representative will contact you as soon as possible.
Product Warranty Terms
Nostalgia Products LLC (the “Company”) hereby warrants that for a period of one (1) year from the
date of original purchase, this product will be free of defects in material and workmanship under
normal home use, provided that the product is operated and maintained in accordance with the
operating instructions. As the sole and exclusive remedy under this warranty, the Company will
at its discretion either repair or replace the product found to be defective, or issue a refund on the
product during the warranty period. This warranty is only available to the original retail purchaser of
the product from the date of initial retail purchase, and is only valid with the original sales receipt, as
proof of purchase date is required to obtain warranty benets. All warranty claims must be brought
to the attention of the Company within the warranty period and no later than 30 days of the failure
to perform. This warranty does not cover normal wear or damage caused by shipping, mishandling,
misuse, accident, alteration, improper replacement parts, or other than ordinary household use.
You may be required to return the product (with shipping prepaid by you) for inspection and
evaluation. Return shipping costs are not refundable. The Company is not responsible for returns
damaged or lost in transit. Unless otherwise specically permitted by the operating instructions, this
warranty applies to indoor household use only. In order to obtain service under this warranty, please
contact the Company at the telephone number listed above or by lling out the Customer Service
Inquiry Form located at www.nostalgiaproducts.com. Warranty valid only in USA and Canada.
This warranty is in lieu of all other warranties, expressed or implied, including warranties of
merchantability and tness for a particular purpose, which are hereby excluded to the extent
permitted by law. In no event shall the Company be liable for any indirect, incidental, consequential,
or special damages arising out of or in connection with this product or the use thereof. Some
states, provinces or jurisdictions do not permit the exclusion or limitation of incidental or
consequential damages, so the foregoing exclusion or limitation may not apply to you.
This warranty does not apply to re-manufactured merchandise.
Please read the operating instructions carefully. Failure to comply
with the operating instructions will void this warranty.
For more information, visit us online at www.nostalgiaproducts.com.
Like us on Facebook at www.facebook.com/NostalgiaElectrics.
Follow our boards on Pinterest at www.pinterest.com/nostalgiaelctrx.
Tweet along with us on Twitter at www.twitter.com/NostalgiaElctrx.
13
Page 16

Faire une fête tous les jours!
Visiter le site Web www.nostalgiaproducts.com
pour d’autres produits agréables.
TABLE DES MATIÈRES
SÉCURITÉ . . . . . . . . . . . . . . . . . . . . . . . . . . . . . . . . . . . . . . . . 14
IMPORTANTES MESURES DE PRÉCAUTION . . . . . . . . . . . . . . . . . . . 15
IMPORTANTES MISES EN GARDE . . . . . . . . . . . . . . . . . . . . . . . . . 15
INTRODUCTION . . . . . . . . . . . . . . . . . . . . . . . . . . . . . . . . . . . . 16
PIÈCES ET ASSEMBLAGE . . . . . . . . . . . . . . . . . . . . . . . . . . . . . . . 17
MODE DE FONCTIONNEMENT . . . . . . . . . . . . . . . . . . . . . . . . . . . 18
CONSEILS UTILES . . . . . . . . . . . . . . . . . . . . . . . . . . . . . . . . . . . 20
NETTOYAGE ET ENTRETIEN . . . . . . . . . . . . . . . . . . . . . . . . . . . . . 20
RECETTES . . . . . . . . . . . . . . . . . . . . . . . . . . . . . . . . . . . . . . . . 21
RETOURS ET GARANTIE . . . . . . . . . . . . . . . . . . . . . . . . . . . . . . . 25
SÉCURITÉ
FRANÇAIS
Votre sécurité tout comme celle des autres est importante.
De nombreux messages importants de sécurité se trouvent dans le présent manuel
et sur votre appareil. Toujours lire et respecter toutes les consignes de sécurité.
Ceci est le symbole d'avertissement de sécurité.
Ce symbole vous alerte des risques de danger potentiels pouvant
causer de graves blessures à vous et d'autres personnes.
Tous les messages de sécurité suivront le symbole d'avertissement de sécurité.
Tous les messages de sécurité indiqueront le danger potentiel et la façon de réduire
le risque de blessure et ce qui peut arriver si les consignes ne sont pas suivies.
Appliance Specications/Fiche technique de l'appareil :
120 V, 60 Hz
1500 Watts
CE PRODUIT DOIT ÊTRE BRANCHÉ UNIQUEMENT DANS UNE PRISE DE COURANT DE 120 V CA.
Reportez-vous à www.nostalgiaproducts.com/user-manuals/
pour la version la plus récente.
14
14
Page 17

IMPORTANTES MESURES DE PRÉCAUTION
1. NE JAMAIS plonger l'appareil dans l'eau.
2. NE JAMAIS utiliser près d'une source d'eau.
3. NE JAMAIS utiliser une éponge ou un chion abrasif sur l'appareil.
4. NE JAMAIS laisser l'appareil sans surveillance pendant le fonctionnement.
5. NE JAMAIS faire cuire ou mettre autre chose dans l'appareil que ce qui est prévu.
6. Débrancher la prise de l'appareil lorsqu'il n'est pas utilisé et au moment du nettoyage.
7. NE JAMAIS utiliser cet appareil avec un cordon ou une prise
endommagée, ou si l'appareil fonctionne mal.
8. NE JAMAIS le mettre dans le lave-vaisselle.
9. Garder hors de la portée des enfants.
10. Cet appareil n'est PAS UN JOUET.
11. Les enfants laissés sans surveillance et les personnes ayant une
décience cognitive ne devraient jamais utiliser cet appareil.
12. Les jeunes enfants qui sont à proximité de l'appareil ne devraient pas être
laissés sans surveillance pour s'assurer qu'ils ne jouent pas avec celui-ci.
IMPORTANTES MISES EN GARDE
Des mesures de précaution de base devraient toujours être prises
pendant l'utilisation d'appareils électriques, notamment :
1. Lire toutes les consignes avant d'utiliser l'appareil.
FRANÇAIS
2. Pour éviter de s'électrocuter, ne pas immerger le cordon électrique,
la prise ou l'appareil dans l'eau ou tout autre liquide.
3. Une surveillance étroite est nécessaire lorsque tout appareil
électrique est utilisé à proximité des enfants.
4. Avant de retirer les pièces et de les nettoyer, débrancher l'appareil lorsqu'il n'est pas utilisé.
5. NE PAS utiliser l'appareil avec un cordon ou une prise endommagée ni si
l'appareil est endommagé de quelque façon que ce soit. Retourner l'appareil
à l'atelier de réparation le plus près pour qu'il soit révisé ou réparé.
6. Le fabricant ne recommande pas l'utilisation d'accessoires. L'utilisation
de quelque accessoire pourra provoquer des blessures.
7. NE PAS utiliser à l'extérieur.
8. NE PAS placer sur un brûleur à gaz ou électrique ou à sa proximité, ou dans un four chaud.
9. NE JAMAIS utiliser cet appareil pour un usage autre que celui auquel il est destiné.
10. Un appareil qui est branché dans une prise de courant ne devrait pas être
laissé sans surveillance lorsqu'il est en cours de fonctionnement.
11. Vérier qu'il n'y a aucun corps étranger dans l'appareil avant l'utilisation.
12. NE JAMAIS mettre un ustensile ou tout autre objet dans la grille quand l'appareil est branché.
15
15
Page 18

13. Un cordon électrique court est fourni pour réduire le risque de
s'emmêler ou de trébucher sur un long cordon.
14. Une rallonge amovible peut être utilisée avec prudence.
15. La capacité nominale d'une rallonge doit être supérieure ou
égale à la puissance électrique de l'appareil.
16. Cet appareil possède une che polarisée (une lame est plus large que
l'autre). Pour réduire le risque d'électrisation, cette che est conçue
pour s'intégrer dans une prise polarisée que dans un sens.
CONSERVER CES CONSIGNES!
INTRODUCTION
Merci d'avoir acheté le FOUR-GRILLOIR STYLE RETRO de Nostalgia™. Maintenant,
vous pouvez faire cuire au four, faire grillé, cuire par convection ou griller
un repas rapidement et ecace en énergie. Faites des collations rapides,
de pizzas aux toasts et plus. Consultez la section de recettes pour une
multitude de recettes de petit-déjeuner, déjeuner et dîner amusants!
Caractéristiques incluses :
• 1 500 W
• D’une capacité de 22 l pouvant cuire deux pizzas de 12 po ou 12 tranches de pain
• Fonctions Cuire au four/Faire griller/Cuisson par convection/Griller
• Sélecteur de puissance de chauage à quatre niveaux : Élément du
haut/élément du bas/ éléments du haut et du bas/Éteint
• Température réglable de 93°C à 232°C (200°F à 450°F)
• Plaque de cuisson en aluminium, deux grilles nickelées et un ramasse-miettes
• Voyant d’alimentation
FRANÇAIS
16
16
Page 19

PIÈCES ET ASSEMBLAGE
PIÈCES
Votre FOUR-GRILLOIR RETRO est livré complètement assemblé.
Poignée
Panneau de contrôle
FRANÇAIS
Thermostat
Sélecteur de fonctions
Minuterie
Plaque de cuisson
Grille
Thermostat:
Température réglable de
95°C à 230°C (200°F à 450°F)
Sélecteur de fonctions :
Cuire au four - Les éléments du haut et du bas chaueront.
Pizza/Rôtir - Les éléments du haut et du bas chaueront.
Cuisson par convection - Les éléments du haut et du
bas chaueront et de l’air chaud circulera dans le four.
Broil - Seul l’élément du haut chauera.
Ramasse-miettes
17
17
Minuterie :
Minuterie réglable
de 0 à 60 minutes
Page 20

MODE DE FONCTIONNEMENT
Avant de commencer, essuyer l’extérieur du boîtier et les parois
internes avec un linge humide. Nettoyer les Grilles, le Ramasse-miettes
et la Plaque de cuisson dans de l’eau chaude savonneuse.
Placer le FOUR-GRILLOIR RETRO sur une surface stable près d'une
prise de courant. S'assurer que le cordon électrique est éloigné de
toute source d'eau, et brancher l’appareil dans une prise.
Fonction Cuire au four
1. Ouvrir la porte du four et insérer la Grille à la hauteur désirée, puis fermer la porte du four.
2. Régler le Thermostat à la température désirée, puis tourner le Sélecteur
de fonctions à la position « CUIRE AU FOUR » (BAKE).
3. Tournez la minuterie à 15 minutes pour permettre au
four de préchauer avec la porte fermée.
4. Une fois que le four est préchaué, placez les aliments sur la plaque de cuisson à
l'aide d'un dessous-de-plat ou des gants de cuisinier. MISE EN GARDE : L’intérieur
du four-grilloir sera TRÈS CHAUD et un contact peut causer des brûlures.
5. Mettre la minuterie selon le temps de cuisson désiré. Après
avoir réglé la minuterie, le voyant s'allumera.
6. Lorsque le temps de la minuterie est expiré, la sonnerie de la minuterie
s’activera et le cadran sera à nouveau de retour à la position « 0 ». Pour
mettre n au cycle à n'importe quel moment, il sut de ramener le
cadran à la position « 0 », la sonnerie de la minuterie s’activera.
7. À l’aide d’un dessous-de-plat ou des gants de cuisinier,
retirer avec précaution la nourriture du four.
Fonction Pizza/Rôtir
1. Ouvrir la porte du four et insérer la Grille à la hauteur désirée, poser 6 tranches de
pain ou 2 pizzas sur la grille, puis fermer la porte du four. Les tranches de pain doivent
être espacées régulièrement sur la grille de sorte qu'elles grillent uniformément.
2. Tourner le Thermostat dans le sens horaire è 230°C (450°F), et le Sélecteur
de fonctions à la position « PIZZA/RÔTIR » (PIZZA/TOAST).
3. Ensuite, Tourner la molette de Minuterie au niveau de brunissement désiré. Un rôtissage
blanc correspond au symbole
REMARQUE : Laisser le four préchaué pendant 15 minutes la porte fermée avant
de mettre la pizza. Tourner les pizzas de 180° à la moitié du temps de cuisson.
4. Après avoir réglé la Minuterie, le voyant d’alimentation s'allumera. Lorsque le temps
de la minuterie est expiré, la sonnerie de la minuterie s’activera et le cadran sera à
nouveau de retour à la position « 0 ». Pour mettre n au cycle à n'importe quel moment,
il sut de ramener le cadran à la position « 0 », la sonnerie de la minuterie s’activera.
5. À l’aide d’un dessous-de-plat ou des gants de cuisinier,
retirer avec précaution la nourriture du four.
Fonction de cuisson par convection
1. Ouvrir la porte du four et insérer la Grille à la hauteur désirée, puis fermer la porte du four.
2. Régler le Thermostat à la température désiré, puis tourner le Sélecteur
s, alors qu’un rôtissage foncé correspond au symbole .
FRANÇAIS
18
18
Page 21

de fonctions à la position « CUISSON PAR CONVECTION ».
3. Tournez la minuterie à 15 minutes pour permettre au
four de préchauer avec la porte fermée.
4. Une fois que le four est préchaué, placez les aliments sur la plaque de cuisson à
l'aide d'un dessous-de-plat ou des gants de cuisinier. MISE EN GARDE : L’intérieur
du four-grilloir sera TRÈS CHAUD et un contact peut causer des brûlures.
5. Mettre la minuterie selon le temps de cuisson désiré. Après
avoir réglé la minuterie, le voyant s'allumera.
6. Lorsque le temps de la minuterie est expiré, la sonnerie de la minuterie
s’activera et le cadran sera à nouveau de retour à la position « 0 ». Pour
mettre n au cycle à n'importe quel moment, il sut de ramener le
cadran à la position « 0 », la sonnerie de la minuterie s’activera.
7. À l’aide d’un dessous-de-plat ou des gants de cuisinier,
retirer avec précaution la nourriture du four.
Fonctions pour griller
1. Ouvrir la porte du four et insérer la Grille à la hauteur désirée, puis fermer la porte du four.
2. Régler le Thermostat à la température désirée, puis tourner le
Sélecteur de fonctions à la position « GRILLER ».
3. Tournez la minuterie à 15 minutes pour permettre au
four de préchauer avec la porte fermée.
4. Une fois que le four est préchaué, placez les aliments sur la plaque de cuisson à
l'aide d'un dessous-de-plat ou des gants de cuisinier. MISE EN GARDE : L’intérieur
du four-grilloir sera TRÈS CHAUD et un contact peut causer des brûlures.
5. Mettre la minuterie selon le temps de cuisson désiré. Après
avoir réglé la minuterie, le voyant s'allumera.
FRANÇAIS
6. Lorsque le temps de la minuterie est expiré, la sonnerie de la minuterie
s’activera et le cadran sera à nouveau de retour à la position « 0 ». Pour
mettre n au cycle à n'importe quel moment, il sut de ramener le
cadran à la position « 0 », la sonnerie de la minuterie s’activera.
7. À l’aide d’un dessous-de-plat ou des gants de cuisinier,
retirer avec précaution la nourriture du four.
En suivant ces instructions simples, votre FOUR-GRILLOIR RETRO sera
amusant pour les amis, la famille et les enfants de tous âges!
19
19
Page 22

CONSEILS UTILES
ALIMENTS TROP CUITS/PAS ASSEZ CUITS
Pour les aliments trop cuits ou pas assez cuits, il sut de réajuster la température
de cuisson, le temps de cuisson ou repositionner la Grille. Il faut également éviter la
perte de chaleur pendant la cuisson en ouvrant fréquemment la porte du four.
Garder cependant à l'esprit que le FOUR-GRILLOIR RETRO est plus petit qu’un four
normal et qu’il se réchauera plus vite et cuira généralement pour moins longtemps.
En outre, les aliments congelés et la viande épaisse prendront plus de temps à cuire.
BRÛLÉE/FUMÉE
Une odeur de brûler émanant de votre FOUR-GRILLOIR RETRO peut être causée
par l’accumulation de nourriture à l’intérieur du four. Suivez les instructions
sous la rubrique NETTOYAGE ET ENTRETIEN pour nettoyer le four.
NETTOYAGE ET ENTRETIEN
Débrancher l'appareil et laisser toutes les pièces se
refroidir complètement avant de nettoyer.
Pour prolonger la durée de vie de votre FOUR-GRILLOIR RETRO, veuillez suivre
les instructions d'entretien. Ne jamais mettre l'appareil au lave-vaisselle.
• Laver les Grilles, la Plaque de cuisson et le Ramassemiettes dans de l’eau chaude savonneuse.
• Nettoyer les surfaces extérieures avec un linge doux et humide.
• Sécher toutes les pièces avec une serviette ou un chion doux non abrasif.
• NE PAS utiliser des produits de nettoyage abrasifs étant donné
que ceux-ci peuvent endommager l’appareil.
• NE PAS essuyer les éléments chauants.
FRANÇAIS
20
20
Page 23

RECETTES
Utiliser votre FOUR-GRILLOIR RETRO pour un repas facile et vite servi ! Du petit
déjeuner aux collations de n de nuit, créer vos propres chefs-d'œuvre ou suivre les
recettes ci-dessous pour le transformer en un four grille-pain de connaisseur.
MUFFINS DE PAIN DE MAÏS DE BLÉ ENTIER AU BLEUET
• ½ tasse de babeurre
• 1 gros œuf
• 2 c. à soupe de sucre
• 2 c. à soupe de
compote non sucrée
• / de tasse de
semoule de maïs
• / de tasse de farine
de blé entier
• 2 c. à thé de levure
chimique
• ¼ c. à thé de sel
• ½ c. à thé de cannelle
• ½ tasse de
bleuets frais
En utilisant la CUISSON PAR CONVECTION, préchauer
votre FOUR-GRILLOIR RETRO à 177°C (350°F) tel que
spécié à la rubrique MODE DE FONCTIONNEMENT.
Dans un bol moyen, mélanger la farine, la semoule de maïs,
la levure chimique, la cannelle et le sel. Mettre de côté.
Dans un petit bol, mélanger au fouet le babeurre,
les œufs, la compote et le sucre. Ajouter les
ingrédients liquides aux ingrédients secs.
Mélanger juste à peine, puis incorporer les bleuets.
Diviser le mélange dans 6 moules à muns
et mettre dans le four-grilloir.
Cuire au four durant 20 à 25 minutes.
FRANÇAIS
PETIT DÉJEUNER D’AVOINE À LA POMME AU FOUR
• 1 grosse pomme
• / de tasse de
yaourt à la vanille
• / de tasse de
flocons d’avoine
• 1 cuillère à soupe de
beurre d'arachides
• Cannelle
21
21
En utilisant CUIRE AU FOUR, préchauer votre FOURGRILLOIR RETRO à 204°C (400°F) tel que spécié
à la rubrique MODE DE FONCTIONNEMENT.
Couper une pomme en morceaux de 1/2 po et
saupoudrer généreusement de cannelle.
Cuire dans le four-grilloir durant 12 minutes.
Lorsque les pommes sont cuites dans le four,
mélanger le yogourt, les ocons d'avoine et les
morceaux de pommes cuites dans un bol.
Mettre du beurre d’arachide et régalez-vous !
Page 24

ŒUFS CUITS
• 4 œufs
• Beurre
• 10 raisins ou des
tomates cerises
• 2 tranches de bacon
• Fromage à râper
• ¼ c. à thé de
Paprika fumé
• Sel
• Poivre
THON FONDU GRILLÉ
• 1 boîte de 85 g (3
oz) de thon blanc
à l’eau, égoutté
• 2 c. à soupe
de coriandre
fraîche hachée
• 2 c. à soupe de salsa
• 1 c à soupe de
mayonnaise légère
• 1 muffin anglais,
séparé et
légèrement grillé
• 2 tranches de
fromage colby-jack
En utilisant CUIRE AU FOUR, préchauer votre FOURGRILLOIR RETRO à 191°C (375°F) tel que spécié
à la rubrique MODE DE FONCTIONNEMENT.
Cuire les tranches de bacon sur le poêle.
Graisser deux ramequins avec du beurre.
Couper les tomates en deux et repartir dans
les plats. Saupoudrer avec un peu de sel.
Lorsque le bacon est bien doré, absorber l'excès
de graisse avec de l’essuie-tout et couper en petits
morceaux. Diviser le bacon entre les deux plats.
Râper le fromage dans chaque plat et
casser deux œufs dans chaque plat.
Saupoudrer la moitié du paprika fumé sur chaque
plat, avec une pincée de sel et poivre.
Mettre les deux ramequins sur la plaque
de cuisson et ensuite dans le four.
Cuire jusqu’à ce que les blancs d’œufs deviennent
opaques, environ 15 minutes. Régalez-vous !
En utilisant CUIRE AU FOUR, préchauer votre FOURGRILLOIR RETRO à 177°C (350°F) tel que spécié
à la rubrique MODE DE FONCTIONNEMENT.
Mélanger le thon, la coriandre, la salsa et
la mayonnaise dans un petit bol.
Mettre les moitiés de muns anglais sur le plat de cuisson
et les napper du mélange de thon et de fromage.
Cuire jusqu'à ce que le fromage soit fondu, 2 à 3 minutes.
Régalez-vous !
FRANÇAIS
22
22
Page 25

ASPERGES GRILLÉES AU FOUR
• 1 botte d’asperges
• 4 c. soupe
d'huile d'olive
• Sel cachère, au goût
• Poivre noir
fraîchement
moulu, au goût
SAUMON AU PESTO
• 567 g (1 ¼ lb) de
filet de saumon,
coupé en 4 darnes
• 2 c. à soupe de
vin blanc
• 2 c. à soupe de
FRANÇAIS
noix de pin grillées
(facultatif)
• 1 citron, coupé
en deux
En utilisant CUIRE AU FOUR, préchauer votre FOURGRILLOIR RETRO à 218°C (425°F) tel que spécié
à la rubrique MODE DE FONCTIONNEMENT.
Laver et parer les asperges, puis éparpiller les asperges
en une seule couche sur la Plaque de cuisson. Tapoter
les asperges aussi fort que vous pouvez pour éviter
que les asperges émettent de la vapeur dans le four.
Verser l'huile d'olive sur les asperges, puis saupoudrer
d’une pincée de sel cachère et de poivre noir.
Griller les asperges environ 10 minutes.
Régalez-vous !
En utilisant GRILLER, préchauer votre FOURGRILLOIR RETRO à 232°C (450°F) tel que spécié
à la rubrique MODE DE FONCTIONNEMENT.
Couvrir la Plaque de cuisson avec une feuille
d’aluminium, enduire ensuite avec de l’huile
de de cuisson canola en aérosol.
Poser les lets de saumon, la peau vers
le bas, sur la feuille d’aluminium.
Presser l'une des moitiés du citron sur le
saumon, puis arroser avec du vin blanc et
laisser mariner pendant 15 minutes.
Napper 1/2 c. à soupe de pesto sur
chaque darne de saumon.
Griller jusqu'à ce que le poisson se défasse et la
chair devienne opaque et rose clair, soit dans
environ 8 à 10 minutes par pouce d'épaisseur.
Couper le citron restant en nes tranches,
et garnir avec les noix de pin grillées.
Régalez-vous !
23
23
Page 26

BRUSCHETTA FACILE ET RAPIDE
• ½ baguette française
• 1 gousse d'ail
• 12 tomates
cerises, coupées
• ¼ de tasse de
fromage mozzarella
frais, en dé
• 4 chiffonnades
de grande feuille
de basilic
• Huile d’olive
extra-vierge
• Saler et poivrer
à votre goût
En utilisant PIZZA/RÔTIR, préchauer votre FOURGRILLOIR RETRO à 232°C (450°F) tel que spécié
à la rubrique MODE DE FONCTIONNEMENT.
Trancher la moitié d’une baguette en diagonale
en 12 morceaux 0,5 po d’épais.
Placer les tranches sur une plaque à pâtisserie
et les faire griller sur la grille supérieure du fourgrilloir de 5 à 6 minutes, jusqu'à ce qu’elles
deviennent brun doré sur les bords.
Lorsque les tranches ont susamment refroidi pour
être manipulées, frottez-les avec une gousse d'ail,
puis les arroser avec de l’huile d'olive extra-vierge.
Mettre les tomates, le mozzarella et basilic en dés
dans un petit bol. Arroser d’huile d’olive et assaisonner
au goût avec du sel et poivre. Bien mélanger.
Verser le mélange sur la bruschetta ou
servir sur le côté comme trempette.
Régalez-vous !
POISSON-FRITES
• 0,8 kg (1 ¾ lb) de
pommes de terre
rouge ou Yukon
gold, couper en
morceaux de 1 po
• 4 c. soupe
d'huile d'olive
• 1 ¼ c. à thé de
sel cachère
• 1 ¼ c à thé de
poivre noir
• 8 brins de thym frais
• 4 morceaux de morue
de 170 g (6 oz)
• 1 citron, coupé
en deux
• 1 gousse d’ail,
tranché mince
• 2 c. à soupe de
câpres, égouttés
FRANÇAIS
En utilisant CUIRE AU FOUR, préchauer votre FOURGRILLOIR RETRO à 232°C (450°F) tel que spécié
à la rubrique MODE DE FONCTIONNEMENT.
Mettre les pommes de terre dans un plat, 2 c.
à soupe d'huile d'olive, 1 c. à thé de sel, ¼ c.
à thé de poivre, et 4 branches de thym dans
un bol et remuer pour bien les enrober.
Étaler le mélange de pommes de terre sur la Plaque de
cuisson en une seule couche et cuire, en remuant de temps
en temps, jusqu'à la couleur brun-dorée, 25 à 30 minutes.
Transférer dans un grand morceau de papier
d'aluminium et envelopper pour garder au chaud.
Essuyer la Plaque de cuisson et placer
la morue dans le plateau.
Trancher nement la moitié du citron. Poser sur le
dessus de la morue les tranches de citron, l'ail, les
câpres et le reste du sel, le poivre et les branches
de thym. Arroser avec le reste de l'huile.
Cuire la morue de 8 à 12 minutes, selon la taille.
Transférer la morue et les pommes de terre dans
des assiettes, presser le reste de la moitié du citron
restant sur la Plaque de cuisson et remettre au four
pour réchauer le jus pour environ 5 minutes. Verser
la sauce sur le poisson et les pommes de terre.
Régalez-vous !
24
24
Page 27

RETOURS ET GARANTIE
SI VOTRE APPAREIL NE FONCTIONNE PAS OU S'IL EST ENDOMMAGÉ QUAND VOUS LE RETIREZ
DE LA BOÎTE, VEUILLEZ LE RETOURNER IMMÉDIATEMENT À L'ENDROIT OÙ IL A ÉTÉ ACHETÉ.
FOUR-GRILLOIR RETRO / RTOV220AQ
Pour toute question, communiquer par courriel ou au numéro de téléphone du service à
la clientèle, entre 08 h 00 et 17 h 00, du lundi au vendredi, heure normale du Centre.
Distribué par :
Nostalgia Products LLC
1471 Partnership Dr.
Green Bay, WI 54304-5685
Service à la clientèle
Téléphone : (920) 347-9122
Site Web : www.nostalgiaproducts.com
Demande pour le service à la clientèle
Pour soumettre une demande au service à la clientèle, rendez vous au www.nostalgiaproducts.com puis
remplissez le formulaire de demande au service à la clientèle puis cliquez sur le bouton Soumettre.
Un représentant vous contactera dès que possible.
Conditions de garantie du produit
Le groupe Nostalgia Products LLC (référé tel « l’Entreprise ») garantit que pour une période d’un
(1) an en date d’achat, ce produit est sans défaut de matériel et de fabrication selon une utilisation
normale à domicile, seulement si le fonctionnement et l’entretien du produit sont conforment aux
directives fournies. À titre de réparation exclusive et entière sous cette garantie, l’Entreprise pourra
à sa discrétion, réparer ou remplacer le produit défectueux, voire émettre un remboursement du
produit durant la période couverte sous garantie. Cette garantie n’est disponible seulement qu’à
l’acheteur d’origine du produit, en date d’achat au détail dudit produit et sera valide uniquement
avec le reçu de caisse d’origine, à titre de preuve d’achat, lequel est requis pour obtenir les bienfaits
reliés à cette garantie. Toute réclamation doit être rapportée à l’attention de l’Entreprise dans la
FRANÇAIS
fenêtre de la période de la garantie, sans dépasser 30 jours à défaut de performance. Cette garantie
ne couvre pas l’usure normale ou dommage cause par l'expédition, la mauvaise manipulation, la
mauvaise utilisation, les accidents, les modications, les mauvaises pièces de remplacement, voire
toute autre utilisation anormale du produit à domicile. Il est possible que vous ayez à retourner le
produit (avec les frais de retour prépayés par vous) pour une inspection et une évaluation. Les frais
des coûts de retour ne sont pas remboursables. L'Entreprise n’est aucunement responsable pour les
retours endommagés ou perdus en transit. Autrement que spéciquement permit selon les directives
de fonctionnement, cette garantie s’applique à une utilisation à domicile à d'intérieur seulement.
An d'obtenir un service couvert sous cette garantie, veuillez contacter l'Entreprise au numéro de
téléphone inclut ci-haut ou en remplissant le formulaire de demande au service à la clientele, sur le
site www.nostalgiaproducts.com. La garantie est valide seulement aux États-Unis et au Canada.
Cette garantie prévaut toute autre garantie, expresse ou implicite incluant les garanties de qualité
marchande ou ayant une aptitude pour une intention en particulier, lesquelles sont exclues selon la
loi. Sous aucun prétexte l’Entreprise ne pourra être tenue responsable pour tout dommage indirect,
accidentel, conséquentiel ou spécial provenant de ou en relativité avec ce produit ou son utilisation.
Certains états, provinces ou juridictions n'allouent pas l'exclusion ou la limitation de tels dommages
accidentels ou conséquentiels, donc l'exclusion ou limitation suscitée peut ne pas s'appliquer à vous.
Cette garantie ne s’applique pas à la merchandise de renaissance.
Veuillez lire les directives de fonctionnement attentivement. Ne pas se
conformer aux directives de fonctionnement annulera cette garantie.
Pour plus d’informations, visitez notre site Web à www.nostalgiaproducts.com.
Aimez-nous sur Facebook à l’adresse www.facebook.com / NostalgiaElectrics.
Suivez nos conseils sur Pinterest à www.pinterest.com / nostalgiaelctrx.
Tweet avec nous sur Twitter à l’adresse www.twitter.com / NostalgiaElctrx.
25
25
Page 28

¡Haga de cada día una esta!
Visite www.nostalgiaproducts.com para
ver más productos divertidos.
CONTENIDO
SEGURIDAD . . . . . . . . . . . . . . . . . . . . . . . . . . . . . . . . . . . . . . 26
PRECAUCIONES IMPORTANTES . . . . . . . . . . . . . . . . . . . . . . . . . . 27
PROTECCIONES IMPORTANTES . . . . . . . . . . . . . . . . . . . . . . . . . . 27
INTRODUCCIÓN . . . . . . . . . . . . . . . . . . . . . . . . . . . . . . . . . . . . 28
PARTES Y ENSAMBLAJE . . . . . . . . . . . . . . . . . . . . . . . . . . . . . . . 29
CÓMO FUNCIONA . . . . . . . . . . . . . . . . . . . . . . . . . . . . . . . . . . 30
CONSEJOS ÚTILES . . . . . . . . . . . . . . . . . . . . . . . . . . . . . . . . . . 32
LIMPIEZA Y MANTENIMIENTO . . . . . . . . . . . . . . . . . . . . . . . . . . . 32
RECETAS . . . . . . . . . . . . . . . . . . . . . . . . . . . . . . . . . . . . . . . . . 33
DEVOLUCIONES Y GARANTÍA . . . . . . . . . . . . . . . . . . . . . . . . . . . 37
SEGURIDAD
Su seguridad y la de los demás son muy importantes.
Hemos proporcionado numerosos mensajes de seguridad importantes en este manual
y en su electrodoméstico. Siempre lea y obedezca todos los mensajes de seguridad.
Este es el símbolo de alerta de seguridad.
Este símbolo le avisa de los peligros potenciales que
pueden provocar serias lesiones a usted y a otros.
Todos los mensajes de seguridad estarán antecedidos por el símbolo de alerta.
Todos los mensajes de seguridad le dirán de qué peligro potencial se trata, cómo reducir
la posibilidad de lesiones y qué puede ocurrir si no se obedecen las instrucciones.
Especicaciones del electrodoméstico:
120 Voltios, 60 Hertz
1500 Watts
ESTE PRODUCTO ES PARA USAR SOLAMENTE EN TOMAS DE CORRIENTE DE 120 VCA.
Visite www.nostalgiaproducts.com/user-manuals/ para ver el manual más actualizado.
ESPAÑOL
26
26
Page 29

PRECAUCIONES IMPORTANTES
1. No sumerja NUNCA el aparato en agua.
2. No lo utilice NUNCA cerca del agua.
3. No utilice NUNCA una esponja o un paño abrasivo con el aparato.
4. No deje NUNCA el aparato desatendido mientras esté en funcionamiento.
5. No introduzca NUNCA en el aparato ninguna otra cosa que
no sea lo que se está procesando en el aparato.
6. Desconecte el aparato de la toma de corriente cuando no lo esté utilizando y para limpiarlo.
7. NO manipule este aparato con un cable o enchufe dañados, ni si funciona incorrectamente.
8. NO coloque el aparato en un lavavajillas.
9. Manténgalo fuera del alcance de los niños.
10. Este aparato NO ES UN JUGUETE.
11. Este aparato no debe ser operado nunca por niños o personas
con limitaciones cognitivas que no estén supervisados.
12. Se debe supervisar a los niños mientras estén cerca del aparato
para asegurarse de que no jueguen con el mismo.
PROTECCIONES IMPORTANTES
Cuando utilice aparatos eléctricos debe seguir siempre las
precauciones básicas de seguridad, entre las que se incluyen:
1. Lea todas las instrucciones antes de utilizar este aparato.
2. Como medida de protección contra el riesgo de descarga eléctrica, no sumerja el
cable, los enchufes ni ninguna otra parte del aparato en agua ni en otros líquidos.
3. Cuando cualquier aparato se utilice cerca de niños, es necesaria una supervisión estrecha.
4. Desenchufe el aparato de la red cuando no lo esté utilizando,
antes de retirar piezas y antes de su limpieza.
5. NO utilice ningún aparato con el cable o el enchufe dañados, ni si el
aparato se ha dañado de cualquier manera. Devuelva el aparato al
taller de reparación más cercano para su examen o reparación.
6. El fabricante no recomienda el uso de implementos accesorios. El
uso de implementos accesorios puede provocar lesiones.
7. NO lo utilice en exteriores.
8. NO lo coloque sobre ni cerca de una hornilla de gas ni
eléctrica, ni dentro de un horno caliente.
9. NO utilice el aparato para otro uso que no sea el cual para el que está destinado.
10. Un aparato que esté conectado a una toma de corriente no debe
dejarse sin atención mientras esté funcionando.
11. Revise el aparato para ver si tiene objetos extraños antes del uso.
ESPAÑOL
12. NO intente introducir utensilios ni objetos en el horno tostador mientas esté conectado.
27
27
Page 30

13. Un cable de alimentación corto se proporciona para reducir el riesgo
resultante de quedar enredado o tropezarse con el cable largo.
14. Pueden usarse cables de alimentación desmontables
más largos si se tiene cuidado al utilizarlos.
15. Las características nominales del cable de extensión
deben ser al menos iguales a las del aparato.
16. Este aparato tiene un enchufe polarizado (una clavija es más ancha que la otra).
Para reducir el riesgo de descarga eléctrica, este enchufe se ha diseñado para
introducirse en una toma de corriente polarizada solo en una posición.
¡GUARDE ESTAS INSTRUCCIONES!
INTRODUCCIÓN
¡Gracias por comprar el HORNO TOSTADOR DE RETRO de Nostalgia™! Ahora puede
hornear, tostar, hornear por convección o asar una comida rápida y eciente en energía.
Haga de todo, desde rápidos bocadillos hasta pizzas, tostadas y mucho más. ¡Revise la
sección de RECETAS para probar toneladas de recetas para desayuno, almuerzo y cena!
Las características incluyen:
• 1500 Watts
• Con capacidad de 22 L, puede guardar dos pizzas de 12” o 12 rebanadas de tostadas
• Funciones de Hornear / Tostar / Hornear por convección / Asar
• Selector de calentamiento de cuatro etapas: calentamiento superior /
calentamiento inferior / calentamiento superior e inferior / APAGADO
• Temperatura ajustable entre 200°F y 450°F
• Bandeja de hornear de aluminio, dos parrillas niqueladas y bandeja de migas
• Luz indicadora de energía
ESPAÑOL
28
28
Page 31

PARTES Y ENSAMBLAJE
PARTES
El HORNO TOSTADOR DE RETRO viene totalmente ensamblado.
Agarradera
Panel de control
Medidor de temperatura
Selector de función
Temporizador
Bandeja de
Parrillas
Medidor de temperatura:
Temperatura ajustable de
200°F a 450°F (95°C - 230°C)
Selector de función:
Hornear - Los elementos de calentamiento
superior e inferior calentarán.
Pizza/Tostar - Los elementos de calentamiento
superior e inferior calentarán.
Hornear por convección - Los elementos de
calentamiento superior e inferior calentarán y
aire caliente circulará a través del horno.
Asar - Sólo el elemento de calefacción superior calentará.
hornear
Bandeja de migas
ESPAÑOL
29
29
Temporizador:
Temporizador ajustable
de 0 a 60 minutos
Page 32

CÓMO FUNCIONA
Antes de comenzar, limpie la carcasa exterior y la pared de cavidad
interior con un paño húmedo. Limpie las parrillas, bandeja de migas
y la bandeja de hornear pan en agua jabonosa caliente.
Coloque el HORNO TOSTADOR DE RETRO en una supercie estable cerca de una toma
de corriente eléctrica antes de comenzar. Asegúrese de que el cable esté alejado de
cualquier fuente de agua, luego enchufe el aparato en el tomacorriente eléctrico.
Función de Hornear
1. Abra la puerta del horno y coloque las parrillas en las ranuras
adecuadas, luego cierre la puerta del horno.
2. Gire el indicador de temperatura a la temperatura deseada,
luego gire el selector de función a la posición “BAKE”.
3. Gire el temporizador a 15 minutos para permitir que el
horno se precaliente con la puerta cerrada.
4. Una vez que el horno se haya precalentado, coloque la comida en la bandeja de
hornear con un protector de calor o un guante para horno. PRECAUCIÓN: El interior
del horno tostador estará MUY CALIENTE y el contacto puede causar quemaduras.
5. Gire el temporizador al tiempo de cocción deseado. Una vez ajustado
el tiempo, la luz indicadora de encendido se iluminará.
6. Cuando haya expirado el temporizador, el timbre del temporizador sonará y el dial
regresará a la posición “0”. Para detener el ciclo en cualquier momento, sólo tiene
que girar el temporizador a la posición “0” y el timbre del temporizador sonará.
7. Con un protector de calor o un guante para horno, retire con cuidado la comida del horno.
Función de Pizza/Tostar
1. Abra la puerta del horno, coloque las parrillas en las ranuras adecuadas, coloque hasta
seis trozos de pan o dos pizzas en las parrillas, y luego cierre la puerta del horno. El pan
debe espaciarse igualmente sobre las parrillas para que se tueste uniformemente.
2. Gire el medidor de temperatura en sentido horario a “450 °F/230
°C”, y el selector de función a la posición “PIZZA/TOAST”.
3. Luego, gire el dial del temporizador hasta la posición de tostado deseada. Un tostado más
ligero corresponde al símbolo
símbolo
NOTA: Permita que el horno se precaliente con la puerta cerrada
por 15 minutos antes de colocar la pizza en el horno. Gire las pizzas
180º a medio camino del ciclo para una cocción uniforme.
4. Una vez ajustado el temporizador, la luz indicadora de encendido se iluminará.
Cuando haya expirado el temporizador, el timbre del temporizador sonará y el dial
regresará a la posición “0”. Para detener el ciclo en cualquier momento, sólo tiene
que girar el temporizador a la posición “0” y el timbre del temporizador sonará.
5. Con un protector de calor o un guante para horno, retire con cuidado la comida del horno.
Función de hornear por convección
1. Abra la puerta del horno y coloque las parrillas en las ranuras
adecuadas, luego cierre la puerta del horno.
.
, mientras que un tostado más oscuro corresponde al
ESPAÑOL
30
30
Page 33

2. Gire el indicador de temperatura a la temperatura deseada, luego gire
el selector de función a la posición “CONVECTION BAKE”.
3. Gire el temporizador a 15 minutos para permitir que el
horno se precaliente con la puerta cerrada.
4. Una vez que el horno se haya precalentado, coloque la comida en la bandeja de
hornear con un protector de calor o un guante para horno. PRECAUCIÓN: El interior
del horno tostador estará MUY CALIENTE y el contacto puede causar quemaduras.
5. Gire el temporizador al tiempo de cocción deseado. Una vez ajustado
el tiempo, la luz indicadora de encendido se iluminará.
6. Cuando haya expirado el temporizador, el timbre del temporizador sonará y el dial
regresará a la posición “0”. Para detener el ciclo en cualquier momento, sólo tiene
que girar el temporizador a la posición “0” y el timbre del temporizador sonará.
7. Con un protector de calor o un guante para horno, retire con cuidado la comida del horno.
Función de asar
1. Abra la puerta del horno y coloque las parrillas en las ranuras
adecuadas, luego cierre la puerta del horno.
2. Gire el indicador de temperatura a la temperatura deseada,
luego gire el selector de función a la posición “BROIL”.
3. Gire el temporizador a 15 minutos para permitir que el
horno se precaliente con la puerta cerrada.
4. Una vez que el horno se haya precalentado, coloque la comida en la bandeja de
hornear con un protector de calor o un guante para horno. PRECAUCIÓN: El interior
del horno tostador estará MUY CALIENTE y el contacto puede causar quemaduras.
5. Gire el temporizador al tiempo de cocción deseado. Una vez ajustado
el tiempo, la luz indicadora de encendido se iluminará.
6. Cuando haya expirado el temporizador, el timbre del temporizador sonará y el dial
regresará a la posición “0”. Para detener el ciclo en cualquier momento, sólo tiene
que girar el temporizador a la posición “0” y el timbre del temporizador sonará.
7. Con un protector de calor o un guante para horno, retire con cuidado la comida del horno.
¡Siguiendo estas sencillas instrucciones, el HORNO TOSTADOR DE RETRO
será divertido para amigos, familiares y niños de todas las edades!
ESPAÑOL
31
31
Page 34

CONSEJOS ÚTILES
COMIDAS RECOCIDAS / CRUDAS
Para comidas recocidas o crudas, será necesario ajustar o cambiar el ajuste de
temperatura, el ajuste del tiempo o las parrillas. Además, lo mejor es prevenir la
pérdida de calor en la cocción y no abrir la puerta del horno con frecuencia.
Tenga en cuenta que el HORNO TOSTADOR DE RETRO es más pequeño que un horno
regular y se calentará más rápido y por lo general cocinará en períodos más cortos.
Además, los alimentos congelados y la carne gruesa llevarán más tiempo para cocinar.
COMBUSTIÓN/HUMO
Un olor a combustión o humo que viene del HORNO TOSTADOR DE RETRO,
puede deberse a acumulación de comida dentro del horno. Siga las indicaciones
según la sección de LIMPIEZA Y MANTENIMIENTO para limpiar el horno.
LIMPIEZA Y MANTENIMIENTO
Asegúrese de que la unidad esté desenchufada y permita que todas las
partes se enfríen completamente antes de realizar la limpieza.
Para extender la vida del HORNO TOSTADOR DE RETRO, siga estas simples instrucciones
para su mantenimiento. No coloque nunca el aparato en un lavavajillas.
• Lave las parrillas, bandeja de hornear y la bandeja de migas con agua tibia jabonosa.
• Limpie la supercie externa con un paño suave y húmedo.
• Seque todas las partes con una toalla o un paño suave, no abrasivo.
• NO utilice productos de limpieza abrasivos ya que pueden dañar la unidad.
• NO limpie los elementos de calefacción.
ESPAÑOL
32
32
Page 35

RECETAS
¡Utilice el HORNO TOSTADOR DE RETRO para preparar comidas rápidas y fáciles de servir!
Desde desayunos hasta bocadillos tarde en la noche, cree sus propias obras maestras
o siga las recetas siguientes para convertirse en un conocedor de hornos tostadores.
PANECILLOS DE MAÍZ Y TRIGO INTEGRAL CON ARÁNDANO
• ½ taza suero de leche
• 1 huevo grande
• 2 cucharadas
de azúcar
• 2 cucharadas de
compota de manzana
no endulzada
• / taza de harina
de maíz
• / taza de harina
de trigo integral
• 2 cucharaditas de
polvo para hornear
• ¼ de cucharadita
de sal
• ½ de cucharadita
de canela
• ½ taza de arándanos
Con la función de HORNEAR POR CONVECCIÓN,
precaliente el HORNO TOSTADOR DE RETRO a 350°F
como se indica en la sección CÓMO FUNCIONA.
En un recipiente de tamaño mediano,
revuelva la harina, la harina de maíz, el polvo
de hornear, la canela y la sal. Retírelo.
En un recipiente pequeño, bata el suero de leche, los
huevos, la compota de manzana y la azúcar. Añada
los ingredientes húmedos a los ingredientes secos.
Mezclar hasta combinarlos apenas,
luego doble los arándanos.
Divida la mezcla en 6 tazas de panecillos
y colóquela en el horno tostador.
Hornear durante 20 a 25 minutos.
AVENA DE DESAYUNO CON MANZANA HORNEADA
• 1 manzana grande
• / taza de yogurt
griego de vainilla
• / taza de avenas
enrolladas
• 1 cucharada de
mantequilla de maní
• Canela
ESPAÑOL
33
33
Con la función de HORNEAR, precaliente el
HORNO TOSTADOR DE RETRO a 400°C como se
indica en la sección CÓMO FUNCIONA.
Corte una manzana en trozos de 1/2 pulgada y
espolvoréela generosamente con canela.
Hornear en el horno tostador durante 12 minutos.
Cuando las manzanas se hayan cocido, combine
el yogurt, los copos de avena y los trozos de
manzana al horno en un recipiente.
¡Cubrir con mantequilla de maní y a disfrutar!
Page 36

HUEVOS HORNEADOS
• 4 huevos
• Mantequilla
• 10 uvas o tomatillos
• 2 tiras de tocino
• Queso para rallar
• ¼ cucharadita de
pimentón ahumada
• Sal
• Pimienta
MEZCLA DE ATÚN EXPUESTO
• 1 lata (3 onzas) de
atún blanco en
agua, drenado
• 2 cucharadas de
cilantro picado
• 2 cucharadas de salsa
• 1 cucharada de
mayonesa ligera
• 1 panecillo ingles
dividido, ligeramente
tostado
• 2 rebanadas de
queso colby y jack
Con la función de HORNEAR, precaliente el
HORNO TOSTADOR DE RETRO a 375°C como se
indica en la sección CÓMO FUNCIONA.
Cocine las tiras de tocino en el horno.
Engrase dos ramequines con mantequilla.
Corte los tomates por la mitad y divídalo entre
los platos. Espolvoree con un poco de sal.
Cuando el tocino esté bien dorado, elimine el exceso
de grasa con toallas de papel y píquelo en trozos
pequeños. Divida el tocino entre los dos platos.
Ralle el queso en cada plato y luego
quiebre dos huevos en cada plato.
Esparza la mitad del pimentón en cada plato,
junto con una pizca de sal y pimienta.
Coloque los ramequines en la bandeja
para hornear y luego en el horno.
Cocinar hasta que las claras de huevo queden
opacas, más o menos 15 minutos.
¡A disfrutar!
Con la función de HORNEAR, precaliente el
HORNO TOSTADOR DE RETRO a 350°C como se
indica en la sección CÓMO FUNCIONA.
Combine el atún, el cilantro, la salsa y la
mayonesa en un recipiente pequeño.
Coloque las mitades de los panecillos ingleses en la bandeja
para hornear y cúbralas con la mezcla de atún y queso.
Hornear hasta que el queso se derrita, de 2 a 3 minutos.
¡A disfrutar!
ESPAÑOL
34
34
Page 37

ESPÁRRAGOS ASADOS AL HORNO
• 1 racimo de
espárragos
• 4 cucharadas de
aceite de oliva
• Sal de Kosher al gusto
• Pimienta negra
molida al gusto
SALMÓN PESTO
• 1 ¼ libra, filete de
salmón, cortado
en 4 pedazos
• 2 cucharadas de
vino blanco
• 2 cucharadas de
nueces de pino
tostadas (opcional)
• 1 limón, partido
por la mitad
Con la función de HORNEAR, precaliente el
HORNO TOSTADOR DE RETRO a 425°C como se
indica en la sección CÓMO FUNCIONA.
Lave y recorte los espárragos, luego esparza los
espárragos en una sola capa en la bandeja para
hornear. Deje los espárragos tan secos como pueda
para evitar el “vaporizar” los espárragos en el horno.
Riegue aceite de oliva sobre los espárragos y luego
espolvoree con sal kosher y pimienta negra.
Hornee los espárragos por casi 10 minutos.
¡A disfrutar!
Con la función de ASAR, precaliente el HORNO
TOSTADOR DE RETRO a 450°C como se indica
en la sección CÓMO FUNCIONA.
Cubra la bandeja para hornear con papel de aluminio,
luego cobra con aerosol para cocinar de canola.
Coloque los letes de salmón, sobre el lado con
piel en la bandeja cubierta de papel aluminio.
Presione una de las mitades del limón sobre el salmón,
y rocíelo con vino blanco y déjelo reposar 15 minutos.
Riegue 1/2 cucharada del pesto sobre
cada porción de salmón.
Asar hasta que el pescado y la carne se tornen opacos y
rosados, o casi de 8 a 10 minutos por pulgada de espesor.
Corte el limón restante en rodajas delgadas, y
adórnelo con las nueces de pino tostadas.
¡A disfrutar!
ESPAÑOL
35
35
Page 38

BRUSCHETTA RÁPIDA Y FÁCIL
• ½ baguette francés
• 1 diente de ajo
• 12 tomatillos,
rebanados
• ¼ taza de queso
mozzarella fresco,
rebanado
• 4 hojas grandes de
albahaca, chifonada
• Aceite de oliva
extra virgen
• Sal y pimienta,
al gusto
PESCADO CON PAPAS FRITAS
• 1 ¾ libras de papas
doradas rojas o
Yukon, cortadas en
trozos de 1 pulgada
• 4 cucharadas de
aceite de oliva
• 1 ¼ cucharadita
de sal kosher
• 1 ¼ cucharadita de
pimienta negra
• 8 ramitas de
tomillo fresco
• 4 trozos de bacalao
de 6 onzas
• 1 limón, partido
por la mitad
• 1 diente de ajo, en
rodajas delgadas
• 2 cucharadas de
alcaparras, drenadas
Con la función de PIZZA/TOSTAR, precaliente
el HORNO TOSTADOR DE RETRO a 450°C como
se indica en la sección CÓMO FUNCIONA.
Rebane la mitad del baguette en diagonal
en 12 piezas de % pulg. de espesor.
Coloque las rebanadas en una placa para hornear y
tuéstelas en la parrilla superior del horno tostador de
5 a 6 minutos, hasta que se dore por los bordes.
Cuando las rebanadas estén lo bastante frías,
frótelas con un diente de ajo, luego rocíelas
con aceite de oliva extra virgen.
Coloque los tomates en cuadritos, la mozzarella
en cuadritos y la albahaca juntos en un recipiente
pequeño. Rociar con aceite de oliva y sazonar con
sal y pimienta, al gusto. Revolver para mezclar.
Vierta la mezcla sobre la bruschetta o
sírvala a un lado como salsa.
¡A disfrutar!
Con la función de HORNEAR, precaliente el
HORNO TOSTADOR DE RETRO a 450°C como se
indica en la sección CÓMO FUNCIONA.
Coloque las papas, 2 cucharadas de aceite de oliva, 1
cucharadita de sal, 1/4 de cucharadita de pimienta, 4
ramitas de tomillo en un recipiente y mézclelos para cubrir.
Riegue la mezcla de papas en la bandeja para hornear
en una sola capa y hornee, revolviendo de vez en
cuando, hasta que estén doradas, de 25 a 30 minutos.
Transérala a un pedazo grande de papel de
aluminio y envuélvala para mantener el calor.
Limpie la bandeja para hornear y coloque
el bacalao en la bandeja.
Corte en rodajas delgadas la mitad del limón.
Cubra el bacalao con las rodajas de limón, el ajo, las
alcaparras y la sal restante, pimienta y las ramitas
de tomillo. Rociar con el aceite restante.
Hornee el bacalao hasta que estén cocido, de 8
a 12 minutos, dependiendo del tamaño.
Transera el bacalao y las papas a las placas,
exprima el medio limón restante sobre la bandeja
para hornear y regréselos al horno hasta que los
jugos estén calientes, más o menos 5 minutos.
Vierta la salsa sobre el pescado y las papas.
¡A disfrutar!
ESPAÑOL
36
36
Page 39

DEVOLUCIONES Y GARANTÍA
SI LA UNIDAD NO FUNCIONA O ESTÁ DAÑADA AL SACARLA POR PRIMERA VEZ
DE LA CAJA, DEVUÉLVALA AL LUGAR DE COMPRA INMEDIATAMENTE.
HORNO TOSTADOR DE RETRO / RTOV220AQ
Si tiene preguntas, contacte con nosotros por correo electrónico o por el número
telefónico de servicio al cliente que aparece a continuación en el horario de
8:00 AM a 5:00 PM, de lunes a viernes, Hora Estándar del Este.
Distribuida por:
Nostalgia Products LLC
1471 Partnership Dr.
Green Bay, WI 54304-5685
Servicio al cliente
Teléfono: (920) 347-9122
Web: www.nostalgiaproducts.com
Solicitud de servicio al cliente
Para enviar una solicitud al Servicio al Cliente, vaya a www.nostalgiaproducts.com, llene
el formulario de Solicitud de Servicio al Cliente y haga clic en el botón Enviar.
Un representante le contactará tan pronto como sea posible.
Términos de garantía del producto
Po este medio, Nostalgia Products LLC (la “Compañía”) garantiza que por un período de un (1) año a
partir de la fecha de compra original, este producto estará sin defectos en cuanto a materiales y mano
de obra en uso normal en casa, siempre que el producto se maneje y mantenga de acuerdo con las
instrucciones de manejo. Como único y exclusivo remedio en virtud de esta garantía, la Compañía, a
su discreción, podrá optar por reparar o sustituir el producto que se encuentre defectuoso, o emitir un
reembolso por el producto durante el período de garantía. Esta garantía sólo está disponible para el
comprador original minorista del producto a partir de la fecha inicial de compra al por menor, y sólo es
válida con el recibo de compra original, y como prueba de la fecha de compra, es necesario obtener los
benecios de la garantía. Todos los reclamos de garantía deben hacerse a la atención de la Compañía
dentro del período de garantía y no más tarde que 30 días desde la imposibilidad de realizarlo. Esta
garantía no cubre el desgaste normal o daños ocasionados por el embarque, malos manejos, mal uso,
accidentes, alteración, piezas de cambio incorrectas, o algo distinto al uso doméstico normal. Es posible
que deba devolver el producto (con los gastos de envío pagados por usted) para inspección y evaluación.
Los costos de envío no son reembolsables. La empresa no se hace responsable por devoluciones
dañadas o perdidas en tránsito. A menos que se indique lo contrario especícamente permitido por
las instrucciones de manejo, esta garantía sólo se aplica al uso en interiores de las viviendas. Para
realizar una reparación bajo esta garantía, comuníquese con la Compañía mediante el número de
teléfono indicado anteriormente o al llenar el formulario de consulta para el servicio de Atención al
Cliente en www.nostalgiaproduct s.com. El período de garantía sólo es válido en EE.UU. y Canadá.
Esta garantía está en lugar de cualquier otra garantía, expresa o implícita, incluso las garantías de
comerciabilidad y conveniencia para un propósito en particular, que quedan excluidas en la medida
permitida por la ley. En ningún caso la compañía será responsable de cualquier daño indirecto, incidental,
consecuente, especial o daños que surjan o estén relacionados con este producto o la utilización del
mismo. Algunos estados, provincias o corregimientos no permiten la exclusión o la limitación de daños
incidentales o consecuentes, por lo que la exclusión o la limitación anterior quizás no se aplique a usted.
Esta garantía no se aplica a mercancía reelaborada.
Lea las instrucciones de manejo cuidadosamente. El incumplimiento
de las instrucciones de manejo anulará esta garantía.
Para obtener más información, visítenos en línea en www.nostalgiaproducts.com.
Me Gusta en Facebook en www.facebook.com / NostalgiaElectrics.
ESPAÑOL
Siga nuestros consejos sobre Pinterest en www.pinterest.com / nostalgiaelctrx.
Tweet con nosotros en Twitter en www.twitter.com / NostalgiaElctrx.
37
37
Page 40

 Loading...