

Page 1
Page 2
1
Contents
i
Package Contents
4
Features
Diagram / 7
5
Assembly and installation
8
Line and Handset Cord Connections / 8
To connect the handset cord
/
9
To connect the line cord
/
10
Power Transformer Connections
/
10
Tone/pulse selection
/
12
Differentiated Ringing Control / 12
Configuration of Your Two Telephone Lines
/
13
Optional A-Lead Connection / 14
Directory Card Installation
/
16
Wall Mounting / 16
Operational problems
/
17
Basic Operation
Manual Dialing
/
19
On-hook Dialing
/
19
Hanging Up / 19
Using the LINK key
/
20
19
UNITY Two-Line Business Terminal, User Guide - Issue 1
Page 3

2 I Contents
Last Number Redial / 20
Attenuated Ringing
/
21
Visual Indicators
/
21
Feature-in-use
/
21
Message waiting
/
21
Factory Default Settings
/
22
Reverting to factory settings
/
22
l
Programmable Features
Tone/Pulse Selection / 23
Line Hold Selection / 24
To deactivate automatic hold / 24
Remote release of hold / 24
Prime Line Select
/
25
Answering
calls / 26
Storing Commands
/
27
Storing a required pause
/
27
Storing a required link
/
27
Storing Telephone Numbers
/
28
Using the Shift Key
/
29
Automatic Dialing of Stored Numbers
/
29
Two stroke dialing
/
29
One stroke dialing
/
30
23
UNITY Two-Line Business Terminal, User Guide - Issue
1
Page 4

Contents I 3
Call Forwarding / 30
To program call forward / 30
To activate call forward / 31
To cancel call forward / 31
Do-Not-Disturb
/32
Handset Receive Volume Adjustment / 32
Saved Number Redial
/
33
Selectable Headset Operation
/
34
Warranty
Warranty / 35
Regulatory Information
/
38
35
Quick Reference Programming Guide
41
UNITY Two-Line Business Terminal, User Guide - Issue
1
Page 5

5
Features
-
-
-
-
-
-
-
-
-
-
-
-
-
-
-
-
-
-
Two line capability
Prime line selection line 1, line 2, or neither
Eight (8) programmable memory keys for automatic dialing
Shift key that enables each memory ke
to store two (2) tele-
phone numbers, for a total of 16 stor
ec!
numbers or codes
Visual indicators for ringing, off-hook, call forward, message
waiting for each line, feature-in-use, do-not-disturb, hold and
line in use Program Mode Shift
LINK
[L]
key for hookswitch flash
Line release
[RI
key
Line Hold
Automatic hold for switching between lines
Remote release of hold
Last Number Redial
[Redial]
Saved Number Redial
[S]
Do-Not-Disturb with visual indicators
On-hook dialing
Dedicated call forward key
Hearing aid compatibility
Tone/Pulse selection, tone default
Adjustable ringer volume
Page 6
6 / Features
-
-
-
-
-
-
-
-
-
-
-
-
One stroke speed dialing
7
l?oeFditt
volume control,handset
-S
eaker
-
P
a erter
Scratch-resistant matte finish
Wall-mountable with optional wall mount kit
C.O.
/
PBX,
CENTREX
compatible
A-Lead control compatible for operation behind
lA2
Key type systems
Differentiated ringing control
Power failure operation
Adjustable handset and receive volume
Selectable headset option
Memory protection retains programmed phone numbers up
72 hours without AC power
Program key
UNITY Two-Line Business Terminal, User Guide - issue 1
Page 7
Features / 7
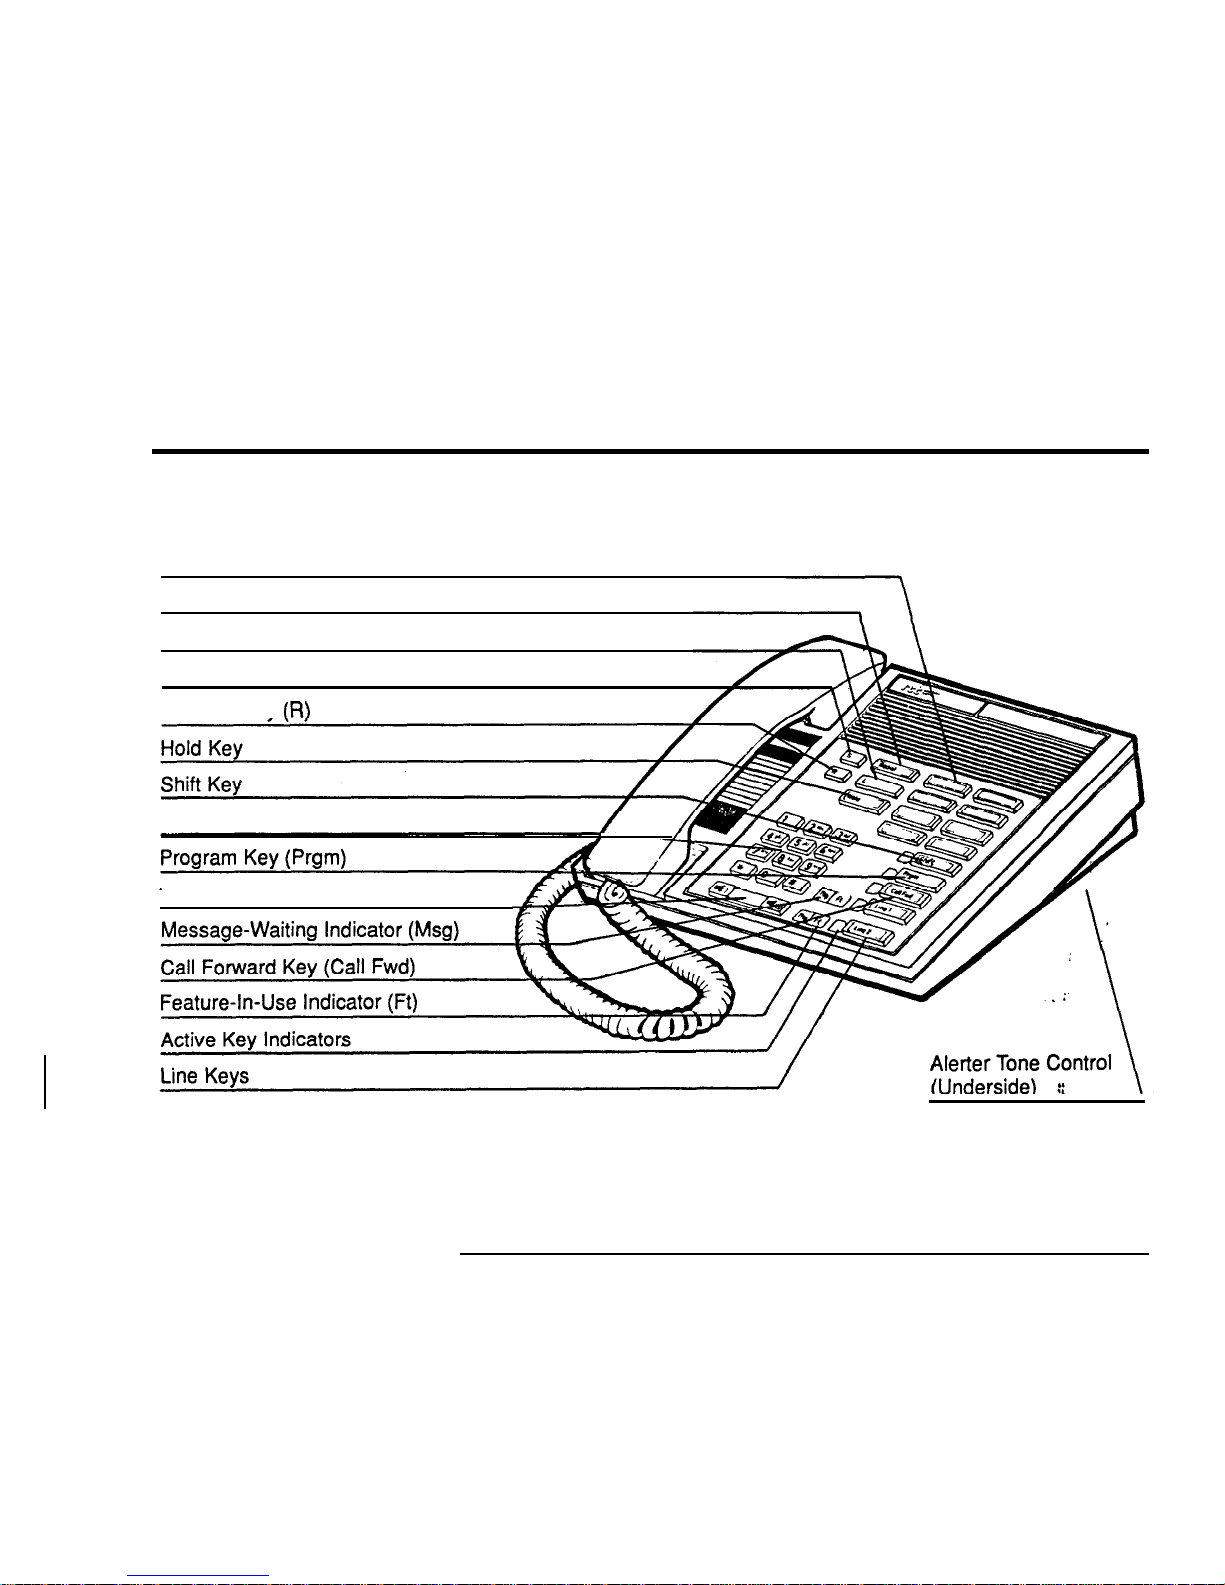
Programmable Memory Keys (8)
Last Number Redial (Redial)
Link Key (L)
Saved Number Redial (S)
Release Kev
Dial Pad
/
/
Volume Control Rocker Switch
Fig. 1
Page 8
8
Assembly and Installation
The Unity Two-Line is a Two line electronic telephone designed
and factory wired for use with PBX,
CENTREX
or CENTRAL
OFFICE (CO) switching system. No wiring changes are required.
Follow these simple installation steps and start using your new
Unity telephone set.
Line and
Handset
Cord
CAUTION
Connections
Before installing the Unity Two-Line, ensure that the
RJ14 (two line) wall jack designated for it is properly
wired for this type of telephone. Plugging the Unity
Two-Line into a jack wired for proprietary-type telephones such as the Meridian
SL-1
or Meridian SL-100
terminals may damage your phone.
UNITY Two-Line Business Terminal, User Guide - Issue 1
Page 9
Assembly and Installation / 9
7’0 Connect the
-
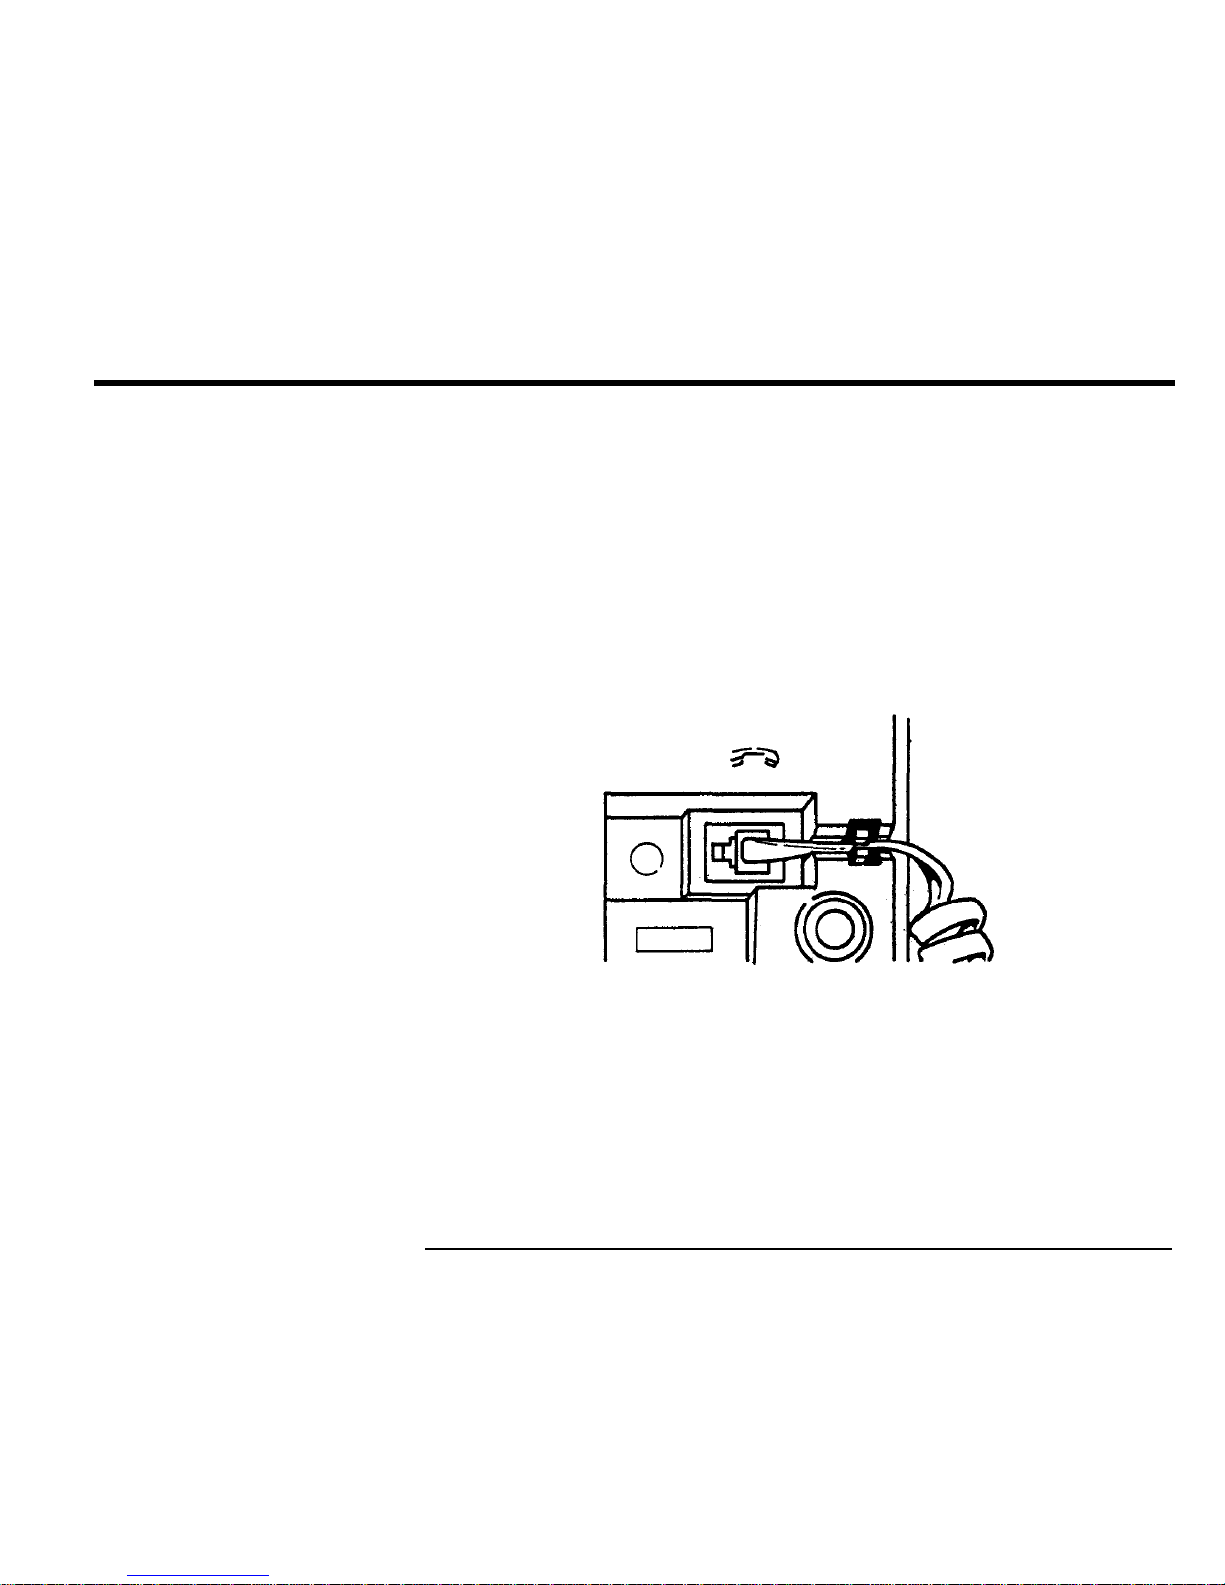
Insert
the plug at one end of the coiled handset cord into the
Handset Cord
handset cord jack on the bottom of your phone. A “click” indicates that it is properly locked in place. See Figure 2.
-
Route the cord through the handset cord channel as shown in
Figure 2. Then connect the plug at the other end of the cord to
the handset. A “click” indicates that it is locked in
place.
Fig. 2
UNITY Two-Line Business Terminal, User Guide - Issue 1
Page 10
10 / Assembly and Installation
To Connect the
Line Cord
Power
Transformer
Connections
-
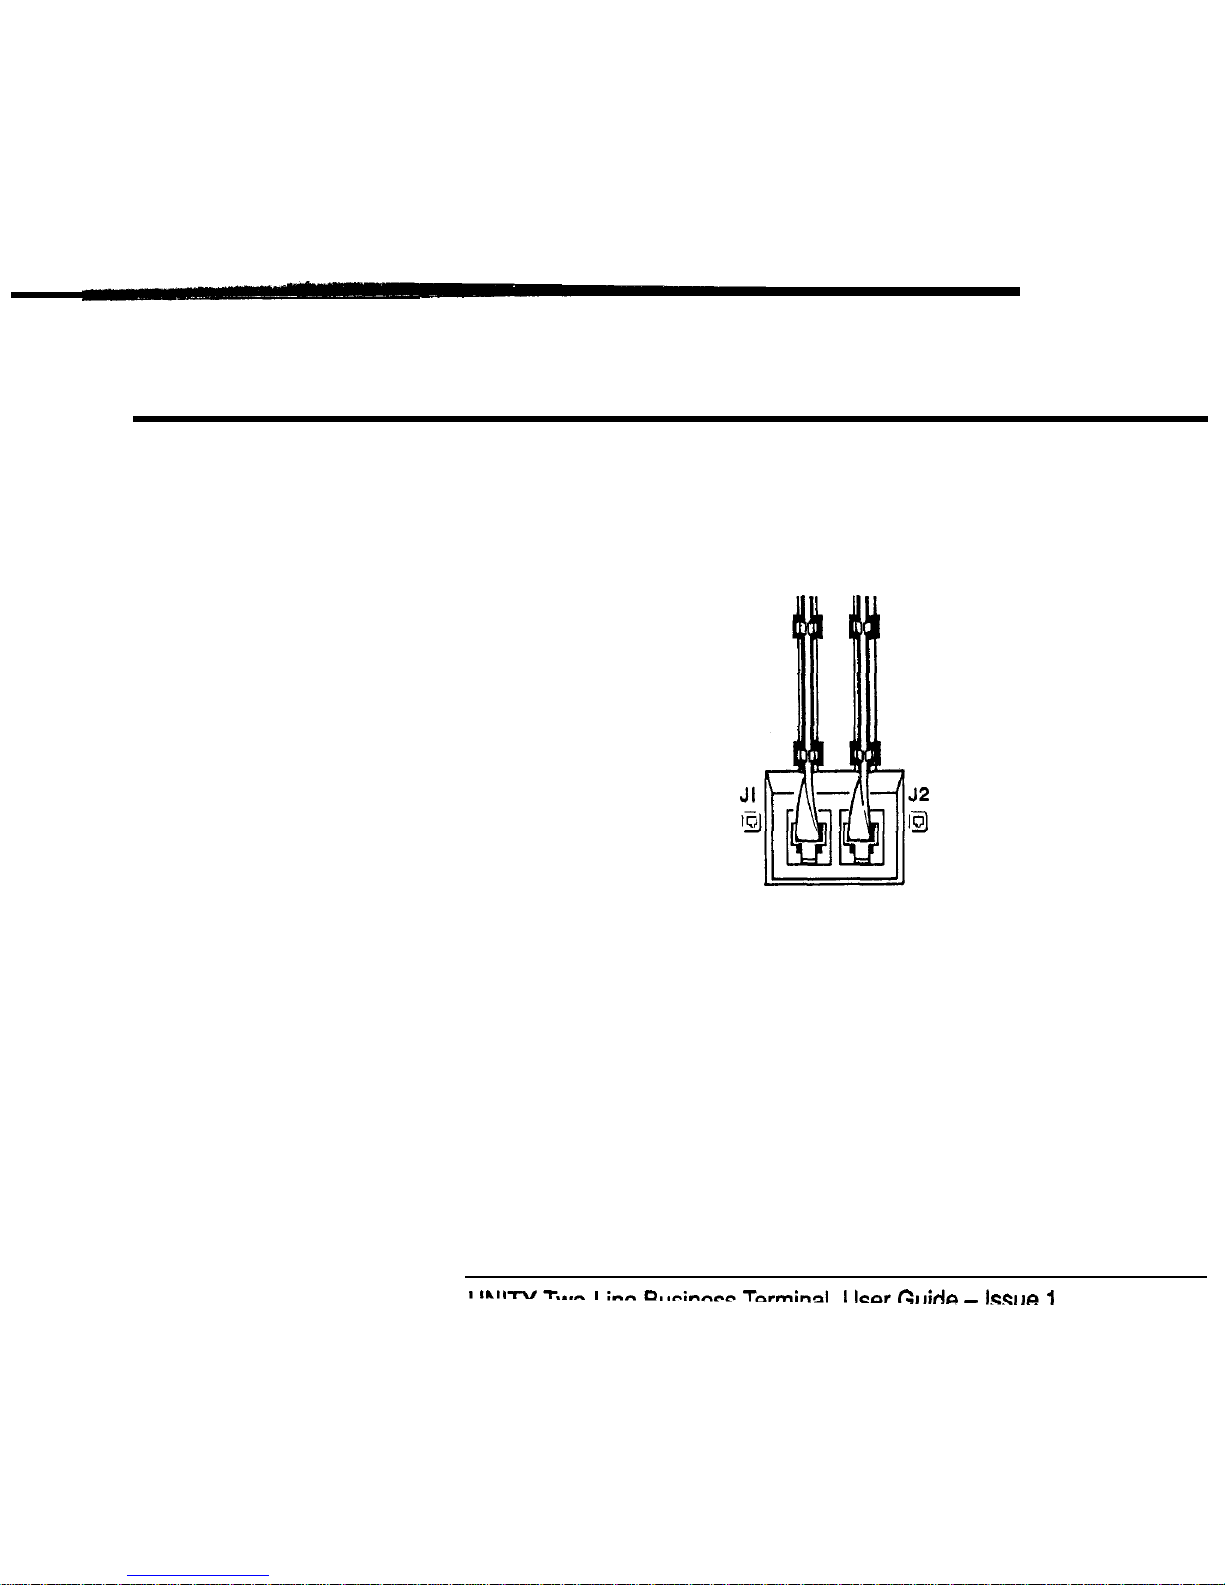
Insert
the
plug at one end of the line cord into the standard
line cord jack (designated
'J2’)
on the bottom of your phone. A
‘click’ indicates that it is locked into place.
-
Route the line cord through the line cord channel. See Figure 3
Fig. 3
The Unity Two-Line is a powerful telephone with many features
such as automatic dialing and a built-in speaker for call monitoring. Therefore, your telephone is equipped with a transformer for
the power needed to enable these additional features.
To
prevent
accidentally turning off power to your phone, we recommend
using an outlet that is not controlled by a light switch.
Note: Make all cord connections before plugging the power trans-
former into an AC outlet.
Page 11
Assembly and Installation /
11
To Connect the
Unity
Two-Line to AC
Power
Fig. 4
-
-
-
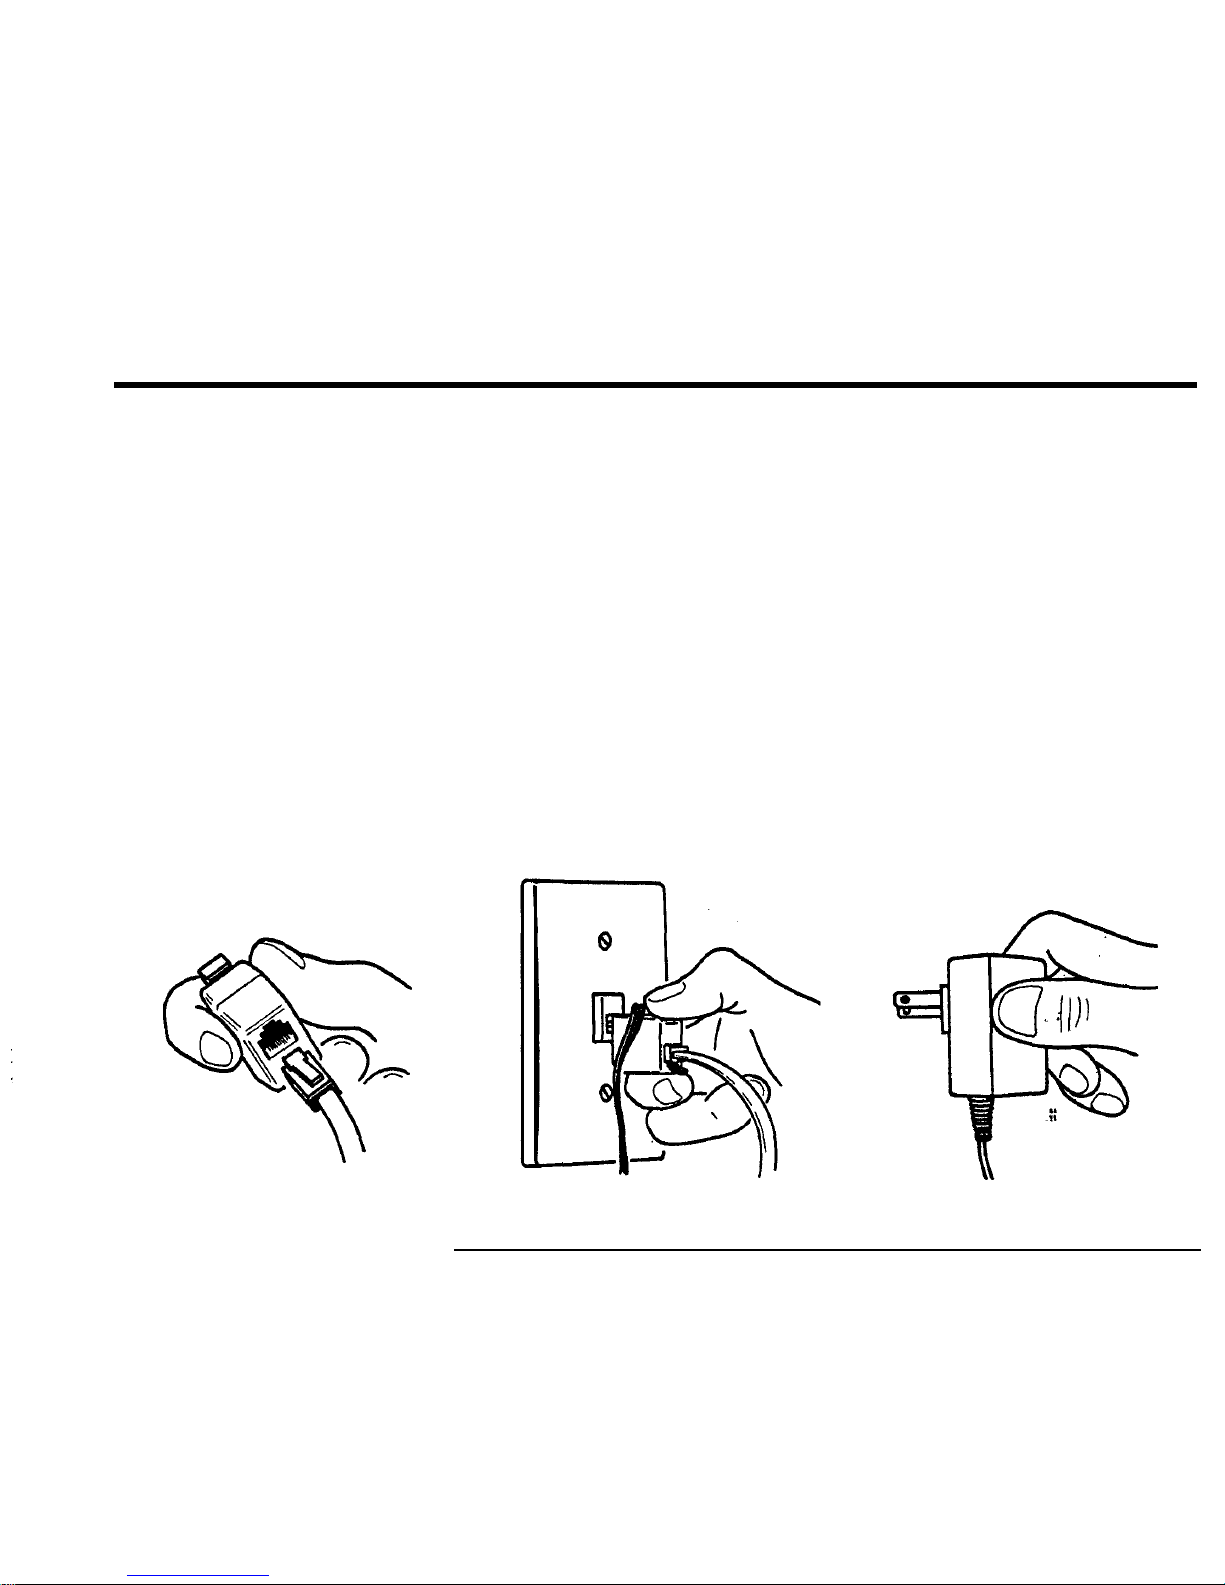
Take the end of the line cord that is not already connected to
the phone and insert it into the jack in the adapter. See
Figure 4. A ‘click’ indicates that it is locked into place.
Insert the adapter into the RJ14 (Two line) wall jack as shown
in Figure 5. Once again, a “click’ indicates that it is properly
locked into position.
Plug your transformer into an AC outlet that is within five feet
of the wall jack. (Figure 6.)
Note: During an AC power failure, you can still use the Unity
Two-Line like a standard telephone, but only on Line 1. You can
dial out manually (in tone mode) and receive incoming calls. Set
reverts to factory default setting.
Fig. 5
Fig.
6
UNITY Two-Line Business Terminal, User Guide - Issue 1
Page 12
12
/
Assembly and Installation
Tone/PuIse
The Unity Two-Line is shipped from the factory already pro-
Selection
g
rammed for tone dialing. You can alter the setting to pulse dialing if you do not have tone service. See ‘Tone/Pulse Selection’ in
the ‘Programmable Features’ section for details on how to program your phone for pulse dialing.
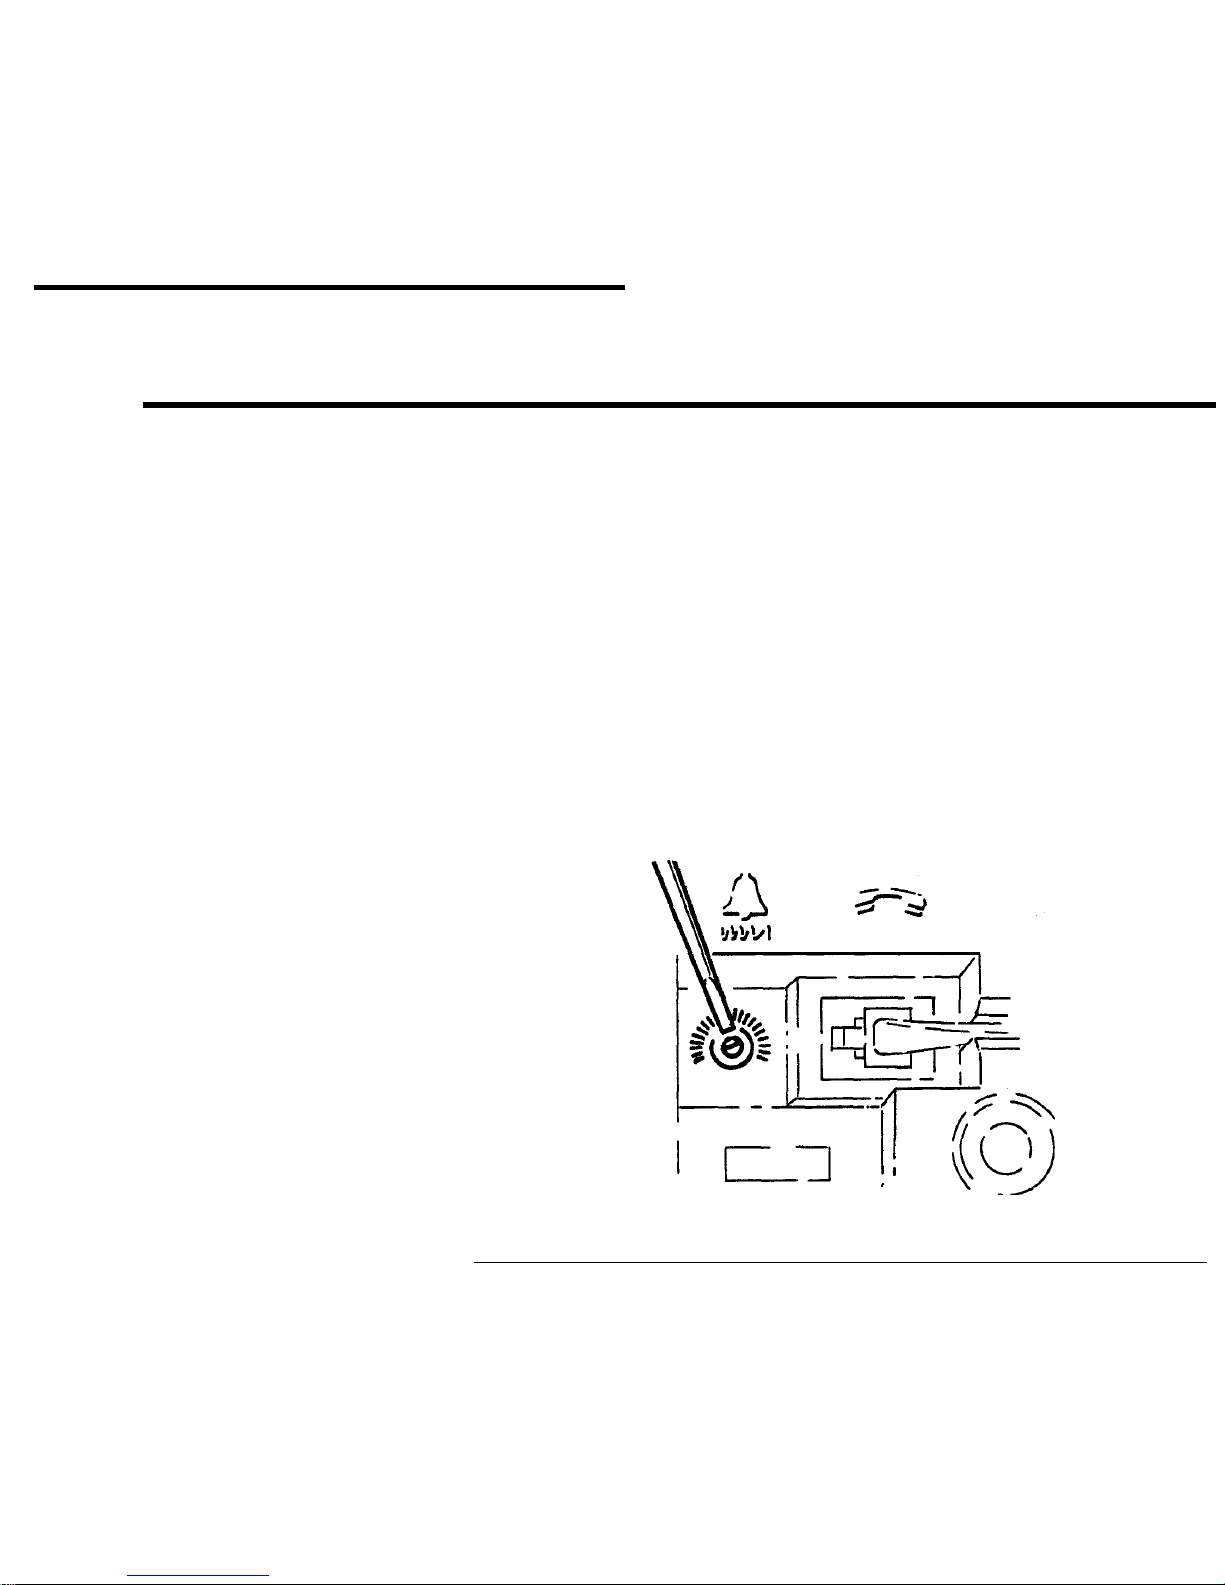
Differentiated
Your Unity Two-Line is equipped with a differentiated ringing
Ringing Control
control. Use a small flat-bladed screwdriver to turn the control
either clockwise or counterclockwise to vary the pitch of the tone
alerter (the ringing sound) of your phone. This can help you distinguish if it is your telephone that is ringing when you are away
from your desk, but still within hearing distance. (Refer to
Figure 7).
Fig. 7
UNITY Two-Line Business Terminal, User Guide - Issue 1
Page 13

Assembly and Installation
/
13
Configuration Of
TheUnityT
wo-Line is shipped from Northern Telecom ready to
Your
Two
use. Your phone is configured for tone dialing; Line 1 is your
Telephone
Prime Line, Automatic Hold, two stroke dialing and volume
con-
tr 1s
Lines
o ls set to nominal. However, you can change all these settings
to suit your particular situation. Refer to the ‘Basic Operation’
section, for factory default setting details, or to modify individual
original factory settings refer to the ‘Programmable Features’
section.
Note: If only one line is connected the LED light beside line 2 will
remain on.
Page 14
14 / Assembly and Installation
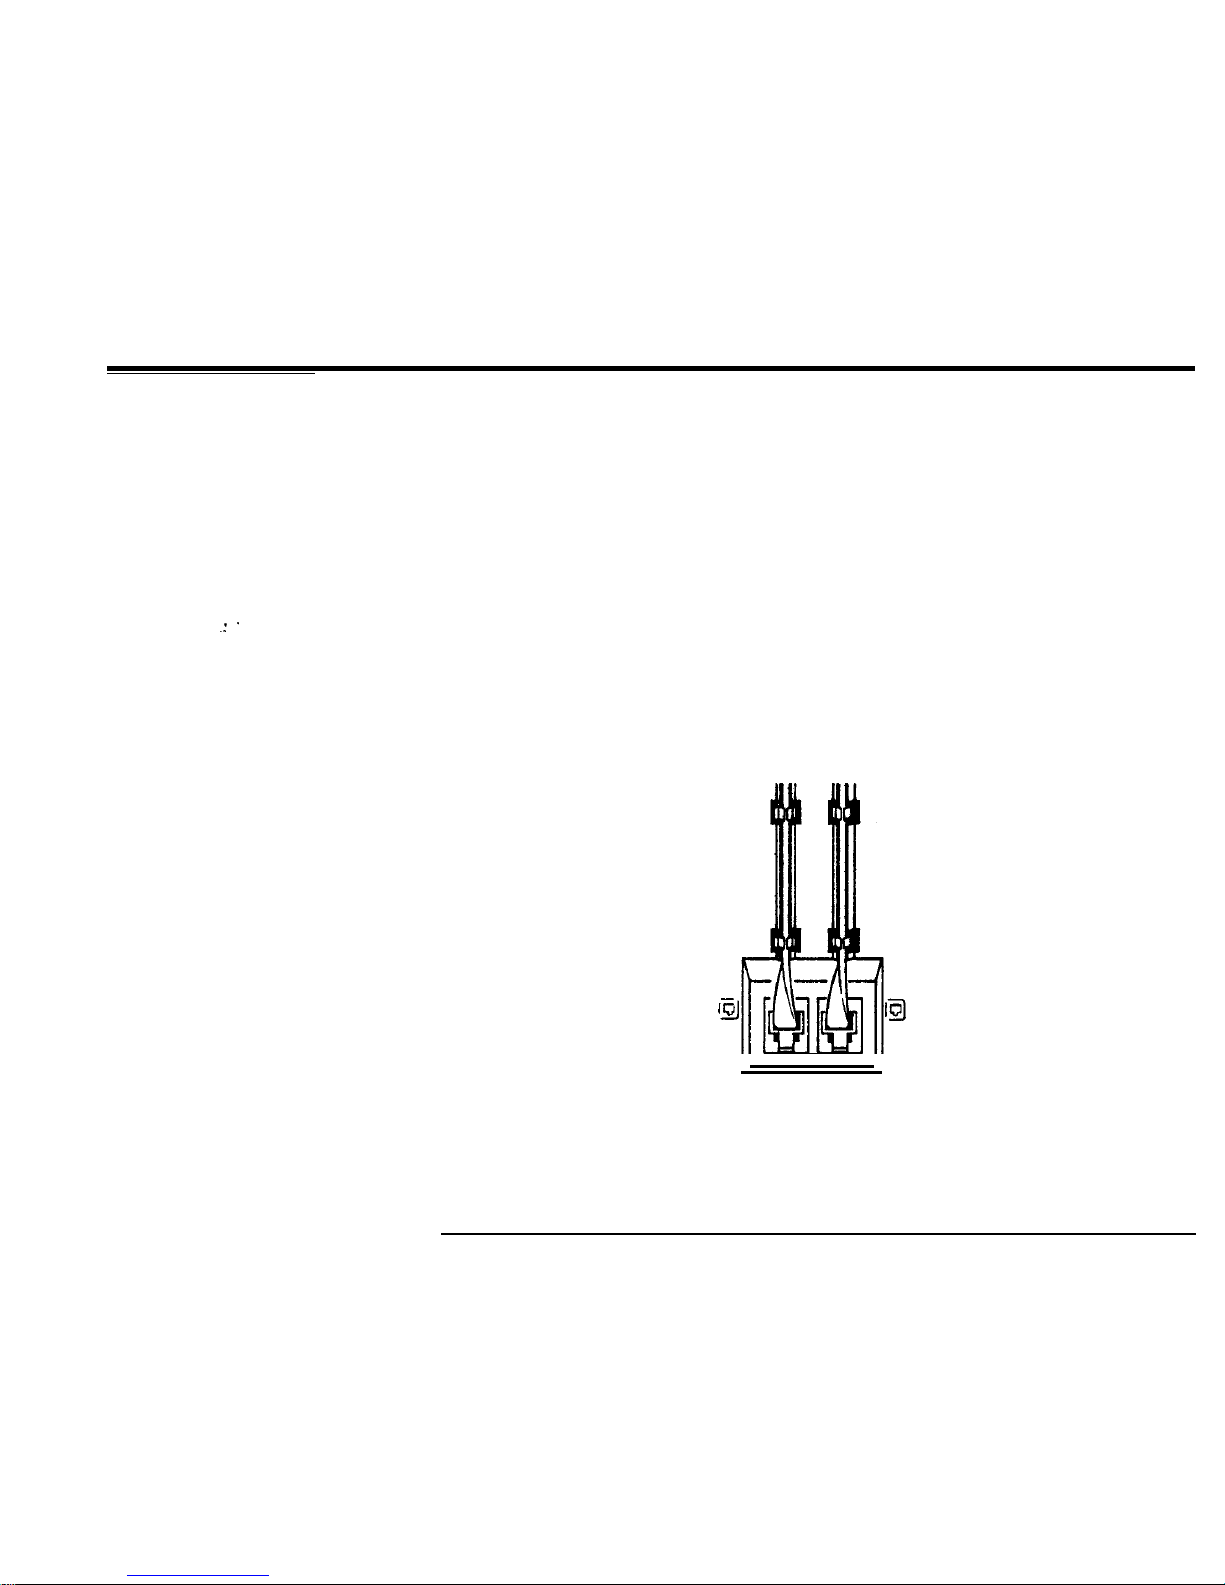
Optional A-Lead
using your Unity Two-Line with certain systems may require A-
Connection
lead control. To enable compatibility with this type of system,
you can order the optional A-lead cord to plug into the second
jack (designated
'J1’)
on the underside of your phone. Refer to
Figure 8 for A-lead cord and jack connections.
Jl
J2
IEJ
IQ
I’
I]
Fig.
a
UNITY Two-Line Business
Terminal,
User Guide - Issue 1
Page 15
Assembly and Installation / 15
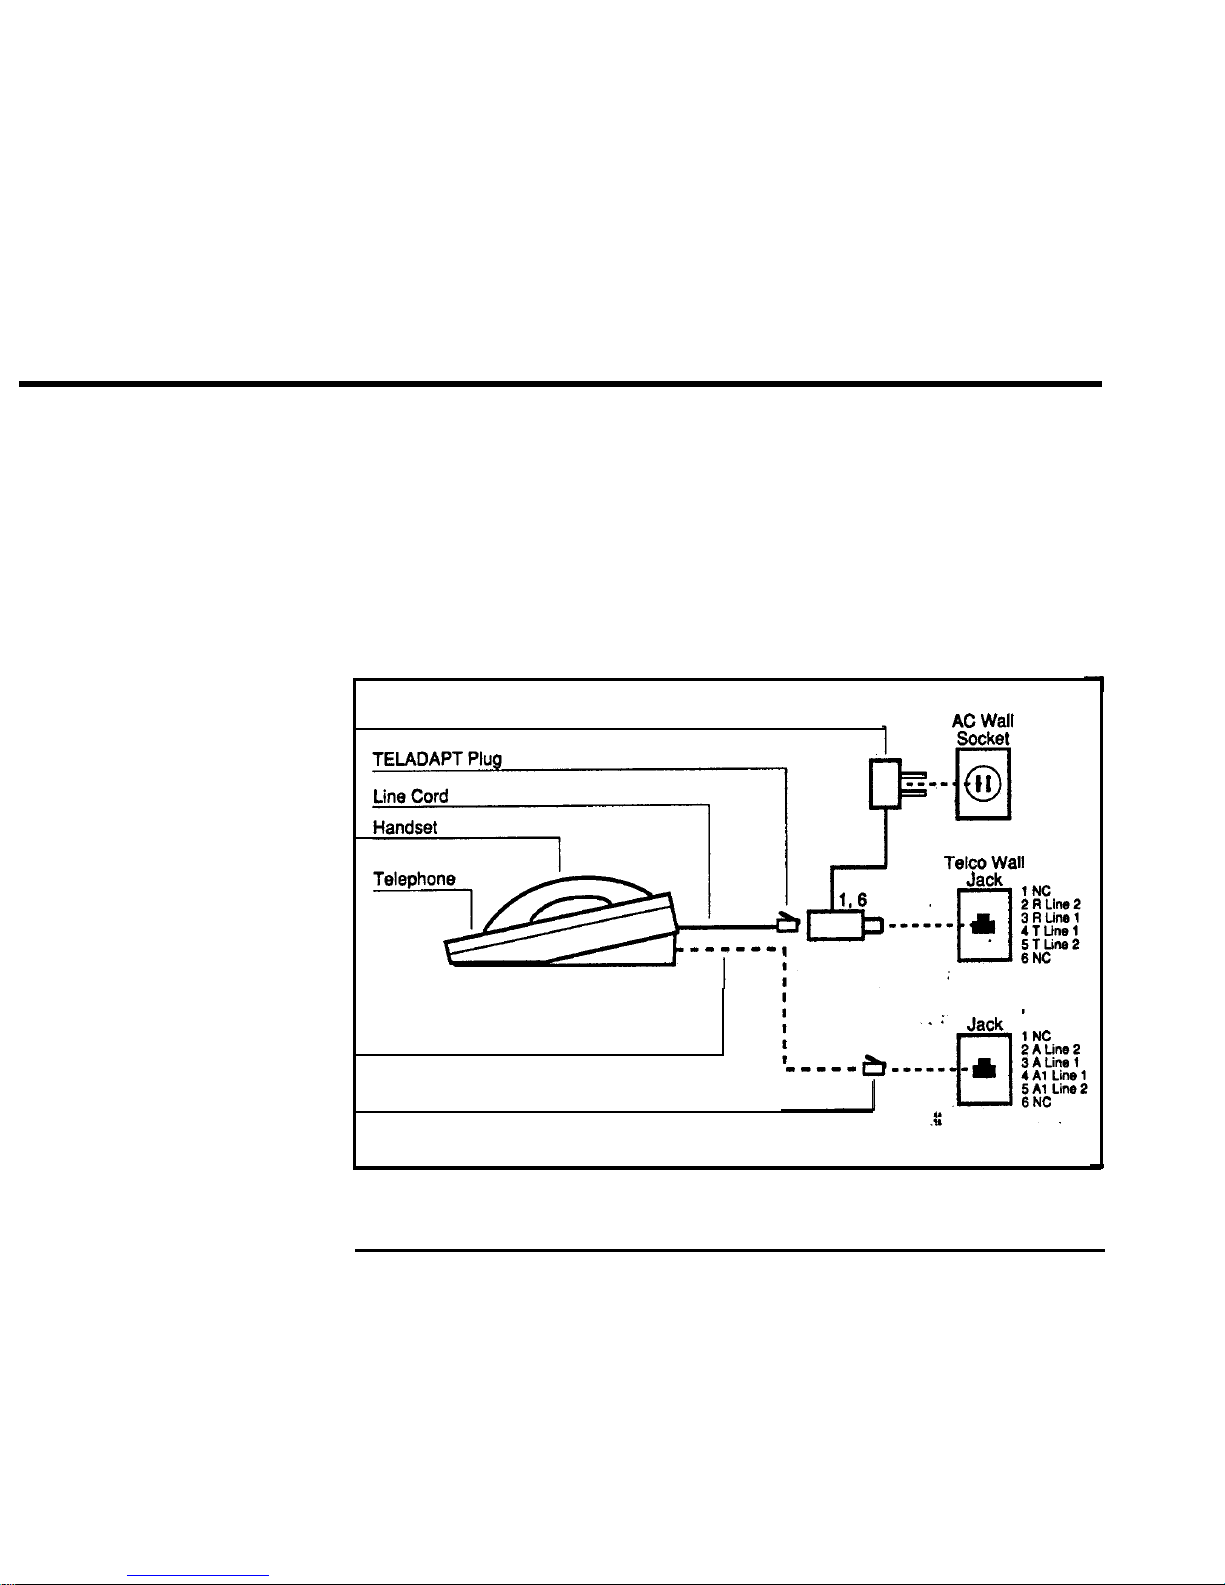
To Connect the
-
Insert the flat P-conductor A-lead line cord into the jack
('J1’)
Optional A-Lead to
located to the left of the two-line jack. A ‘click’ indicates that
Your UNITY
Two-Line
the plug is properly locked into the jack.
-
Route the A-lead line cord through the A-lead line cord chan-
nel.
-
Connect the other end of the A-lead cord to a wall jack that is
specially wired for this type of system.
Fig. 9
Transformer
Optional
‘A’
Lead Cord
TELADAPT Plug
Telco
Wall
UNITY Two-Line Business Terminal, User Guide - Issue 1
Page 16
16
/
Assembly and Installation
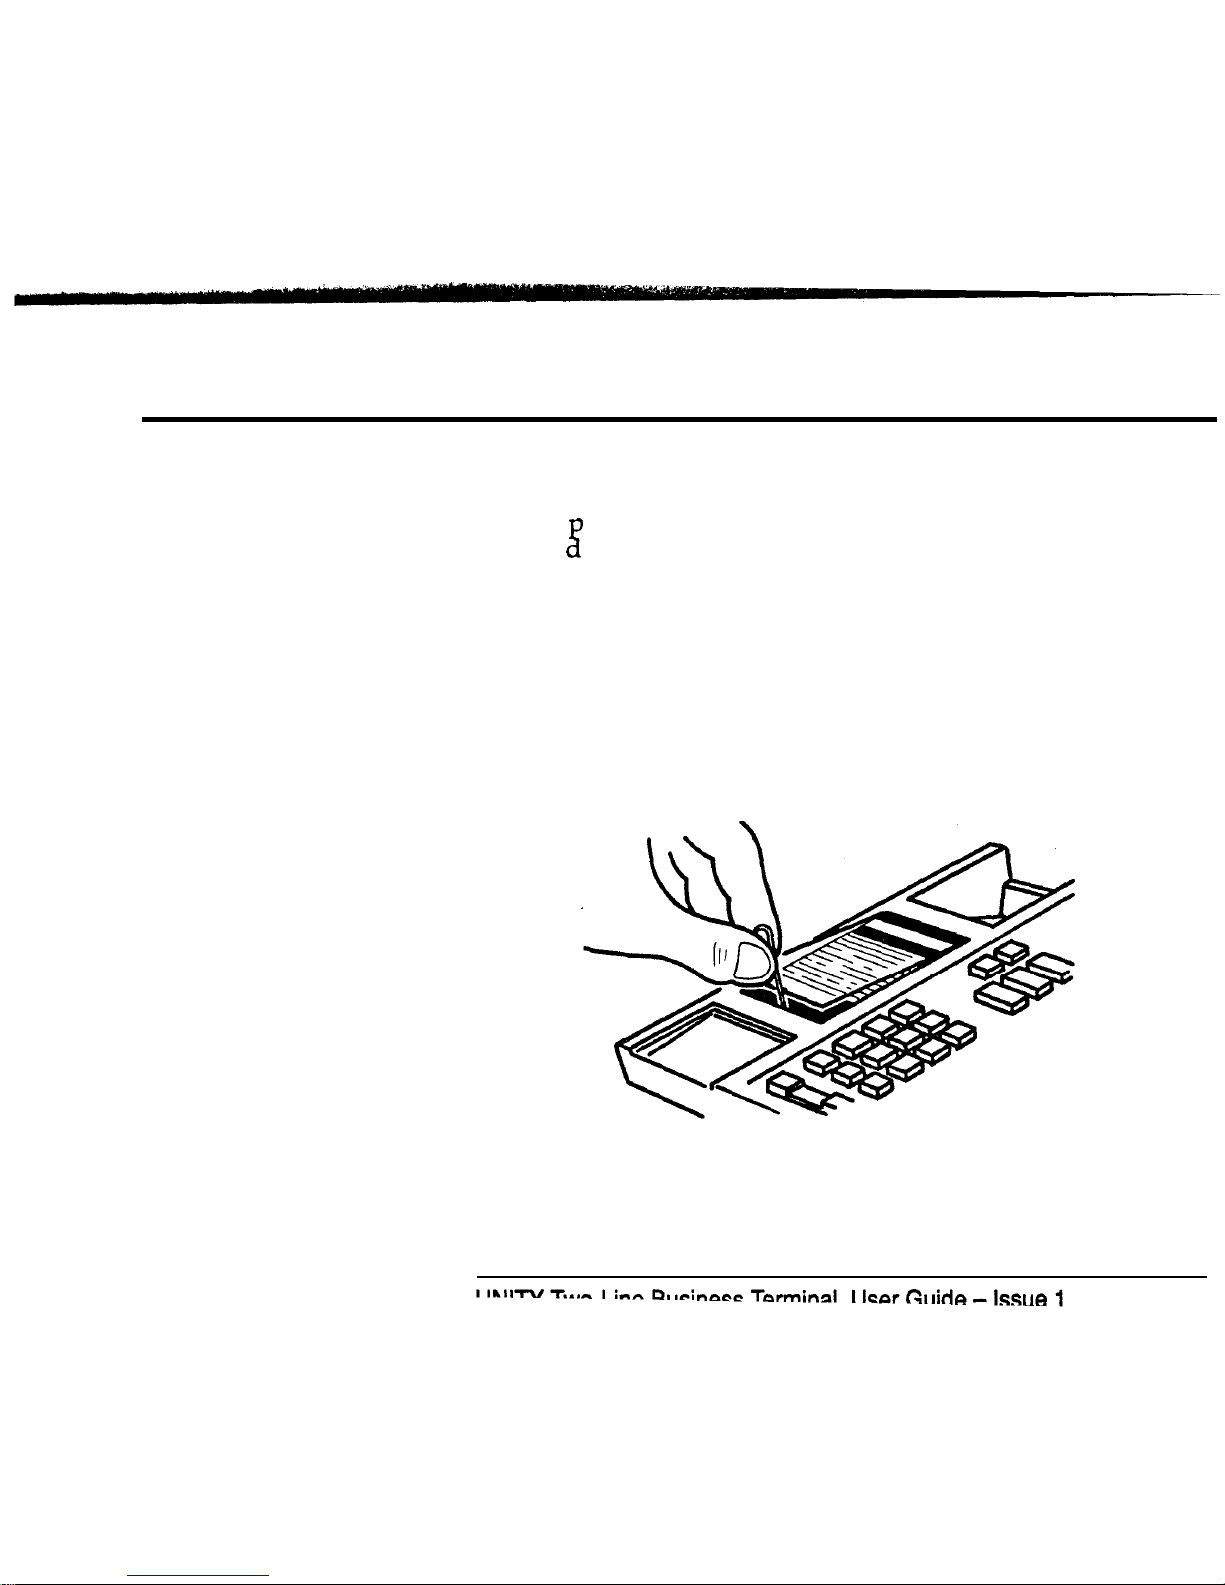
Directory Card
Installation
To remove the
directory card
Wall-Mounting
Your Unity Two-Line comes with a plastic faceplate covering and
a directory card that fits beneath the area where the handset rests.
Type orrint your telephone number and any number or codes
you nee
z
for quick reference on the card.
Position the card in the well area. Insert the plastic faceplate. To
do this insert the tab at the top of the faceplate into the slot at the
top of the retaining area and snap the tabs at the bottom in place.
Insert a straightened paper clip into the indentation below the
Northern Telecom Logo on the faceplate. Gently pull the tabs out
of the retaining slots and lift the faceplate off.
Fig.10
If you intend to wall-mount your Unity Two-Line, order the
optional wall-mounting kit.
Page 17
Assembly and Installation / 17
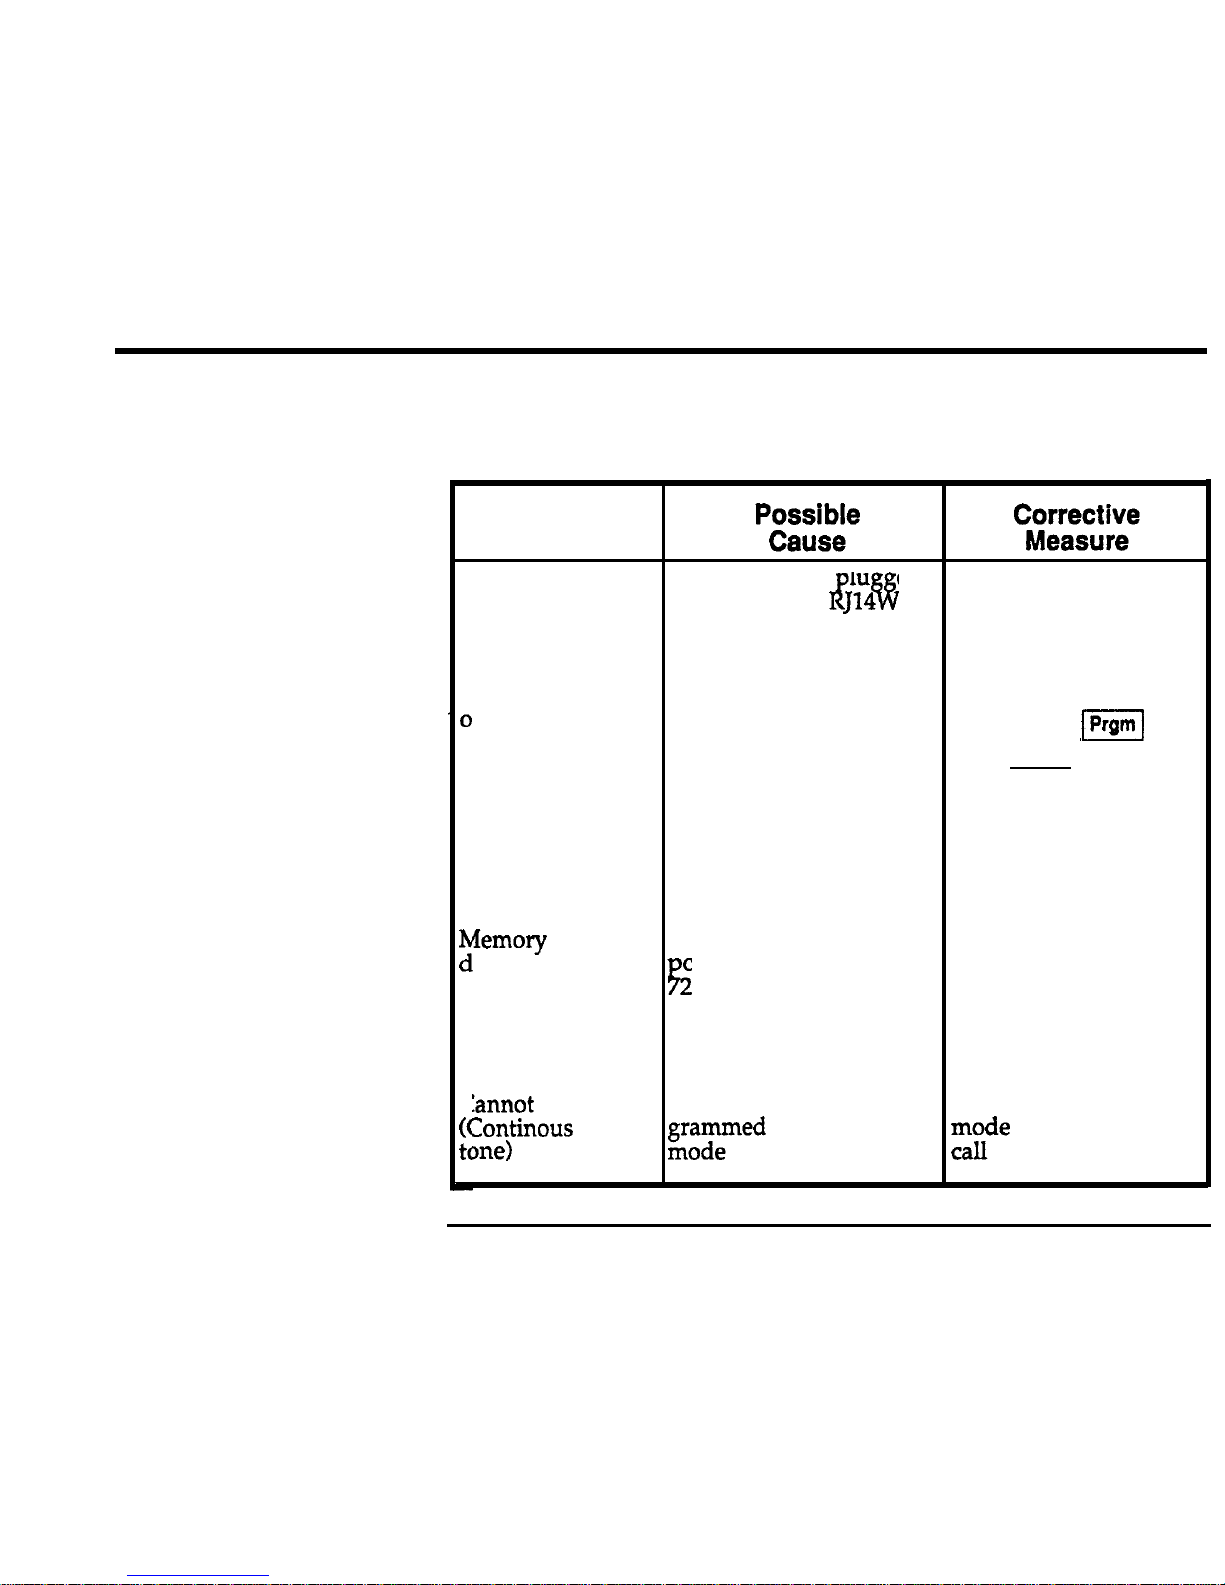
Operational
If
your experience operational problems with this terminal, follow the
Problems
procedures
outlined below:
Determine if the problem is in your terminal.
-
N
N
'0
N
0
5
C
0
tc
I
Problem
o
dial tone
Line cord is notlu ed
into the
RJ14C, J14
I!%
Ensure all plugs are
properly inserted in
wall jack or telephone cor- correct jacks
rectly
Jo dial tone for
Set in headset mode Deactivate
headset
n hook dialing
mode, press
[-I -
q
-F1
Jo incoming calls
r
‘FT’
light on
Do-Not-Disturb is
activat-
Use right side of
vol-
ed Volume control turned
ume control.Tum
vol-
Off
ume
control rocker
switch up until Do-Not-
Disturb is deactivated
lemory dialing Power disconnected or
oes not work ower off for greater than
Make sure power
trans-
%
former is connected to a
hours
live AC outlet
.
Reprogram memory
locations
:annot
dial out
Zontinous
dial
me)
Tone/Pulse may be pro-
gr;remed
for the wrong
Check
Tone/Pulse
rhde
and try
placing
a
UNITY Two-Line Business Terminal, User Guide - Issue
1
Page 18
18 / Assembly and Installation
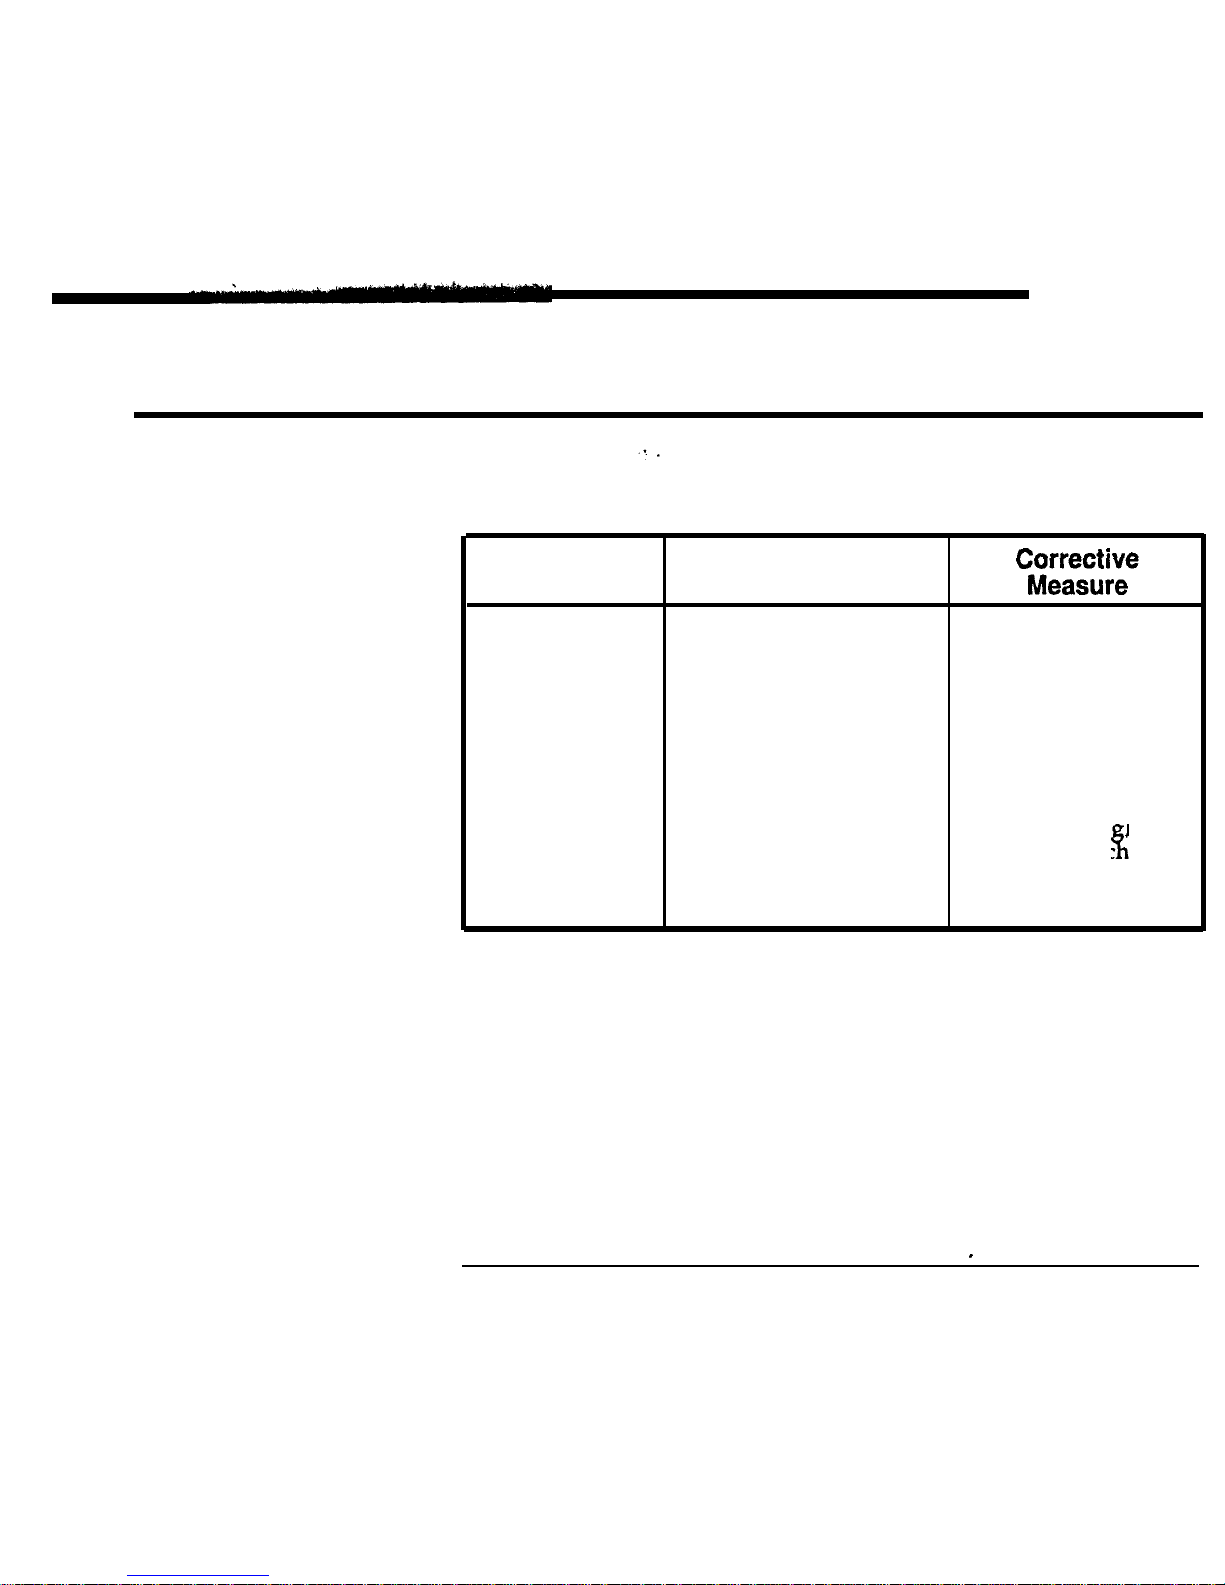
Problem
Possible
Cause
Cannot
hear called Handset volume level low
Use volume control
party
switch to raise receive
level
Calling
party too
Handset volume control
Use volume control
oud
switch turned up too high
switch to lower receive
level
Line
2 LED is
per-
Line 2 is not connected
Check
line cord is
con-
nanently on
nected in the ri
ht
side
line cord jack, caeck
jack wiring for
two-line
operation
I Unity
Terminal.
User Guide -
Issue
1
Page 19
19
Basic Operation
Manual Dialing
To Place a Call
In-hook Dialing
To Monitor an
Outgoing Call
Hanging up
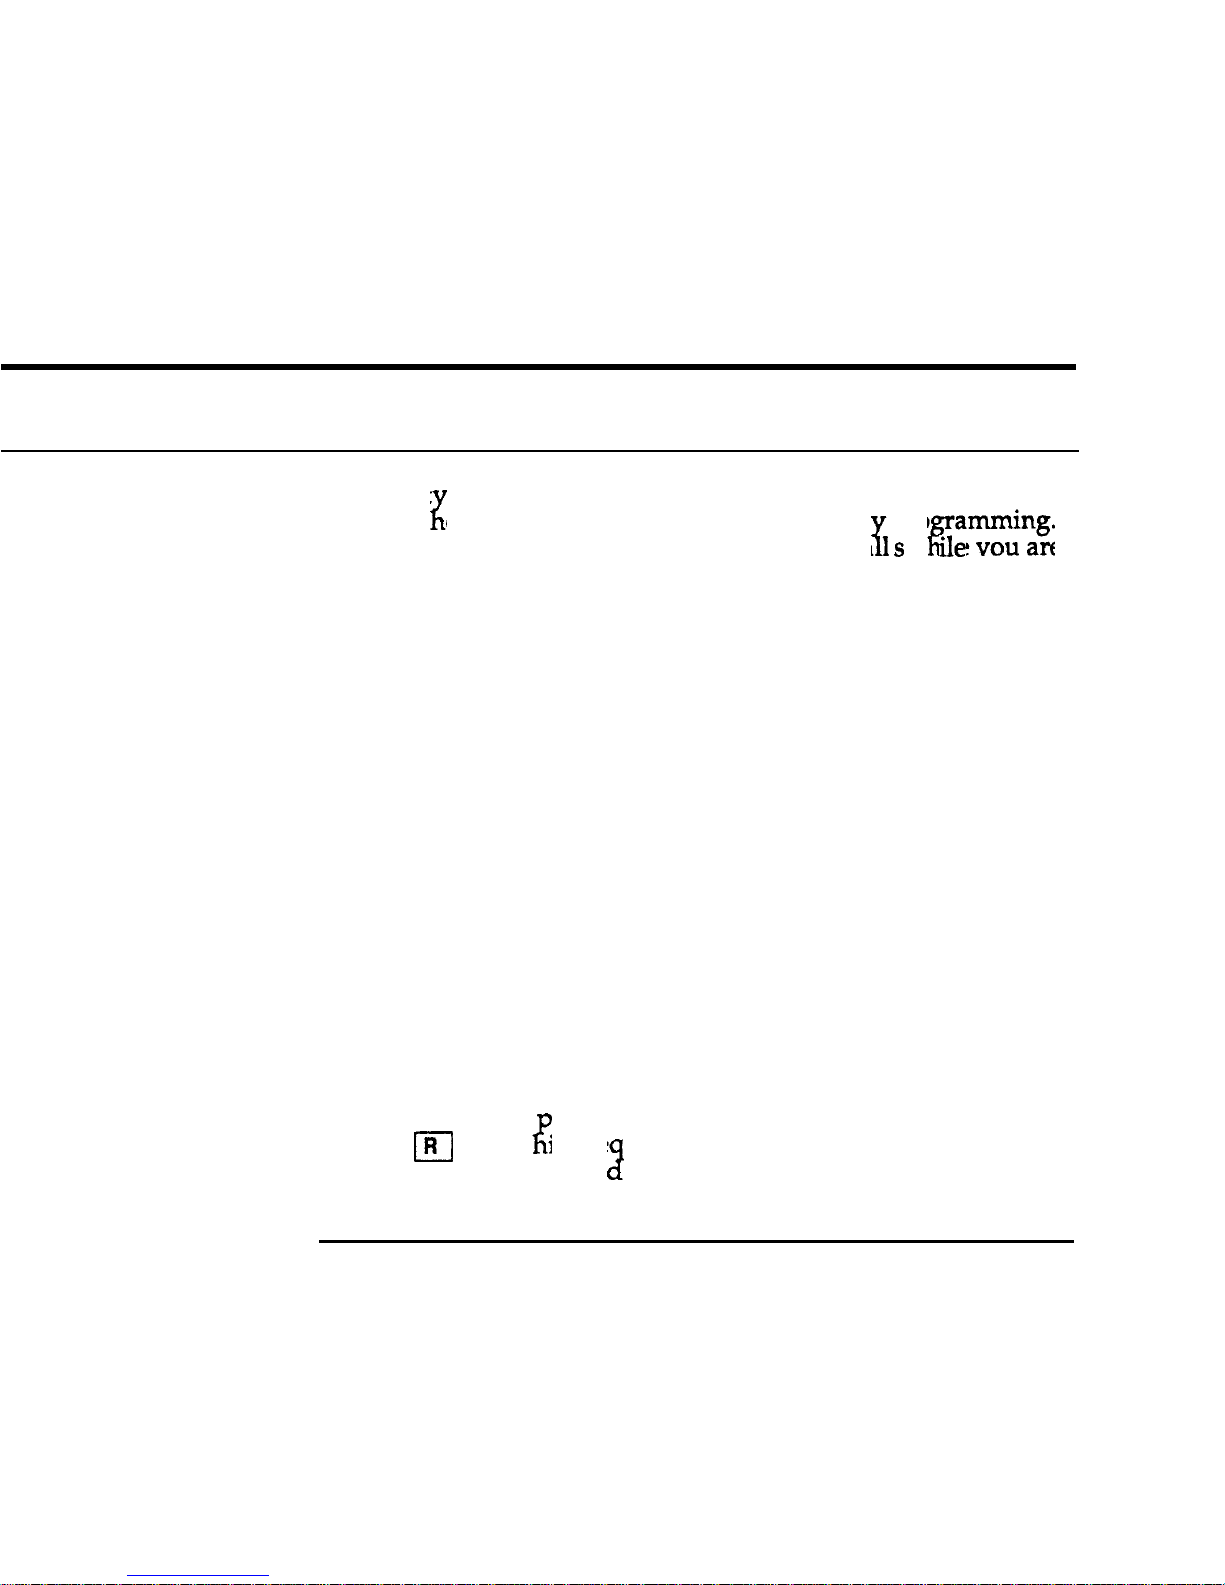
Your Unit
explains t
K
Two-line telephone is ready to use. This section
e basic features that do not require an
E
Famming*
pro
It will get you started and enable you to make ca
s
w
ile
you are
learning how to program your Unity for your particular situation.
-
Lift the handset and listen for dial tone
-
Key in the number on the dial pad
-
Hang up the handset or press the q key to terminate the
Cdl.
-
Press a line key. The LED next to it will light and you will hear
a dial tone.
-
Dial the number. You can monitor the call without picking up
the handset.
-
If someone answers, pick up the handset to talk.
-
If no answer, press the q key to terminate the call.
Simply hang up in the conventional manner. If you want to terminate a call without
Release m key. T
K
utting the handset back on-hook, press the
is is e
down for two seconds an
2
uivalent to pressing the hookswitch
have a dial tone.
allows you to dial again as soon as you
UNITY Two-Line Business Terminal, User Guide - Issue 1
Page 20

20
/
Basic Operation
Using
the
LINK
Your local telephone company or communication system may
(L)
Key
offer additional service including functions that allow you to
interrupt a conversation to answer an incoming call, (Call
.I
Waiting), or transfer a call to a third party (Call Transfer). When
using these services you need to free your line momentarily.
For convenience and reliability, the Unity Two-Line is equipped
with an electronically precision-timed Link
(L)
key. Pressing this
key frees the line for the appropriate length of time regardless of
how long you hold it down.
Last Number
Iff
you manually dial a number and get a busy signal or no answer
Redial
you can dial the same number again by pressing the Last Number
Redial
jl
key.This will automatically redial the last num-
ber which was dialed manually, up to 40 digits long.
Note:
If you manually dial another number, it will replace what-
ever was previously stored in ‘Redial’ memory. However, it will
not store any digits dialed by a memory key.
Page 21

Basic Operation / 21
Attenuated
Ringing
Visual
Indicators
Feature-In-Use
Message Waiting
Calls coming in on the second line will not ring audibly while you
are talking on the other line, or while placing a call. Instead, your
telephone will ring for one short burst and the light beside that
line key will flash for a visual indication of the call on the other
line.
Your Unity Two-Line has LED’s that tell you at a glance what fea-
tures are in use. Call Forward, Program, Line in Use, Hold, Visual
Ring, Shift keys all have these visual indicators.
The Feature-In-Use LED
labelled
‘Ft’ lights when you activate
Call Forward or when you turn the ringer volume all the way
down to activate the ‘Do-Not-Disturb’ function.
Where equipped, in a PBX/CO/Centrex environment, standard
message waiting signals sent to your station activate the Message
Waiting
(Msg)
indicator.
UNITY Two-Line Business Terminal, User Guide - Issue 1
Page 22
22 /
Basic Operation
Factory
Defau
I t
The Unity Two-Line is shipped from the factory preprogrammed
Settings
in what is known as Default Mode. You have the option of altering these features for your particular office environment. Once
you have changed these settings, you can revert to the original
factory default settings at any time.
-
-
-
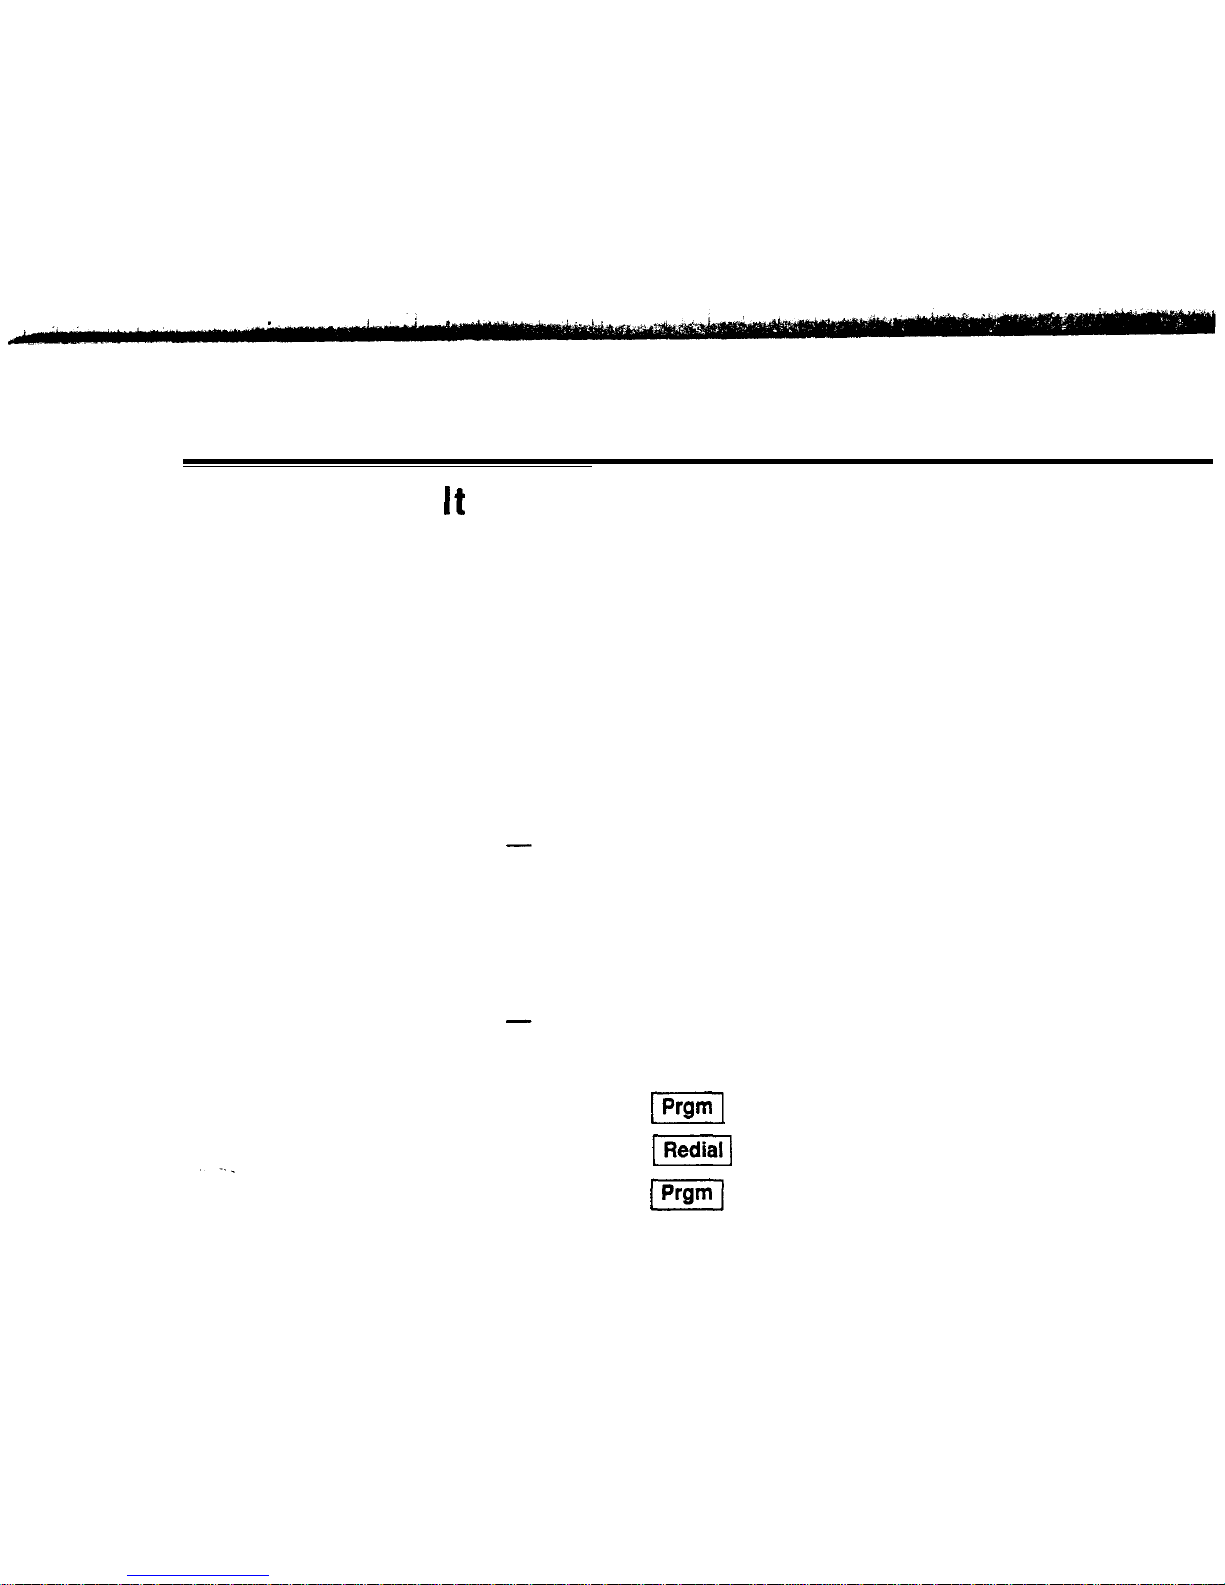
Reverting to Factory
-
Settings
-
Provides for tone dialing.
Line hold operation is set for Automatic Hold. When you are
on one line and you press a line key to dial out or answer an
incoming call, you automatically put the first call on hold.
Prime Line Select is programmed to automatically select Line
when you pick up the handset.
You have Two Stroke Dialing. To place a call, select a line or
pick up the handset before automatically dialing a number
with a memory key.
Audible feedback for ringer volume adjustment is turned off.
Press the
I-1
key
Press the
II
key
Press the
(-1
key again
Page 23
23
Programmable Features
Now that you are comfortable with the operation of your Unity
Two-line telephone set, let’s continue by learning how to program
the memory buttons and other useful features. All programming
of features require the set to be on-hook and idle, except where
noted in the instructions.
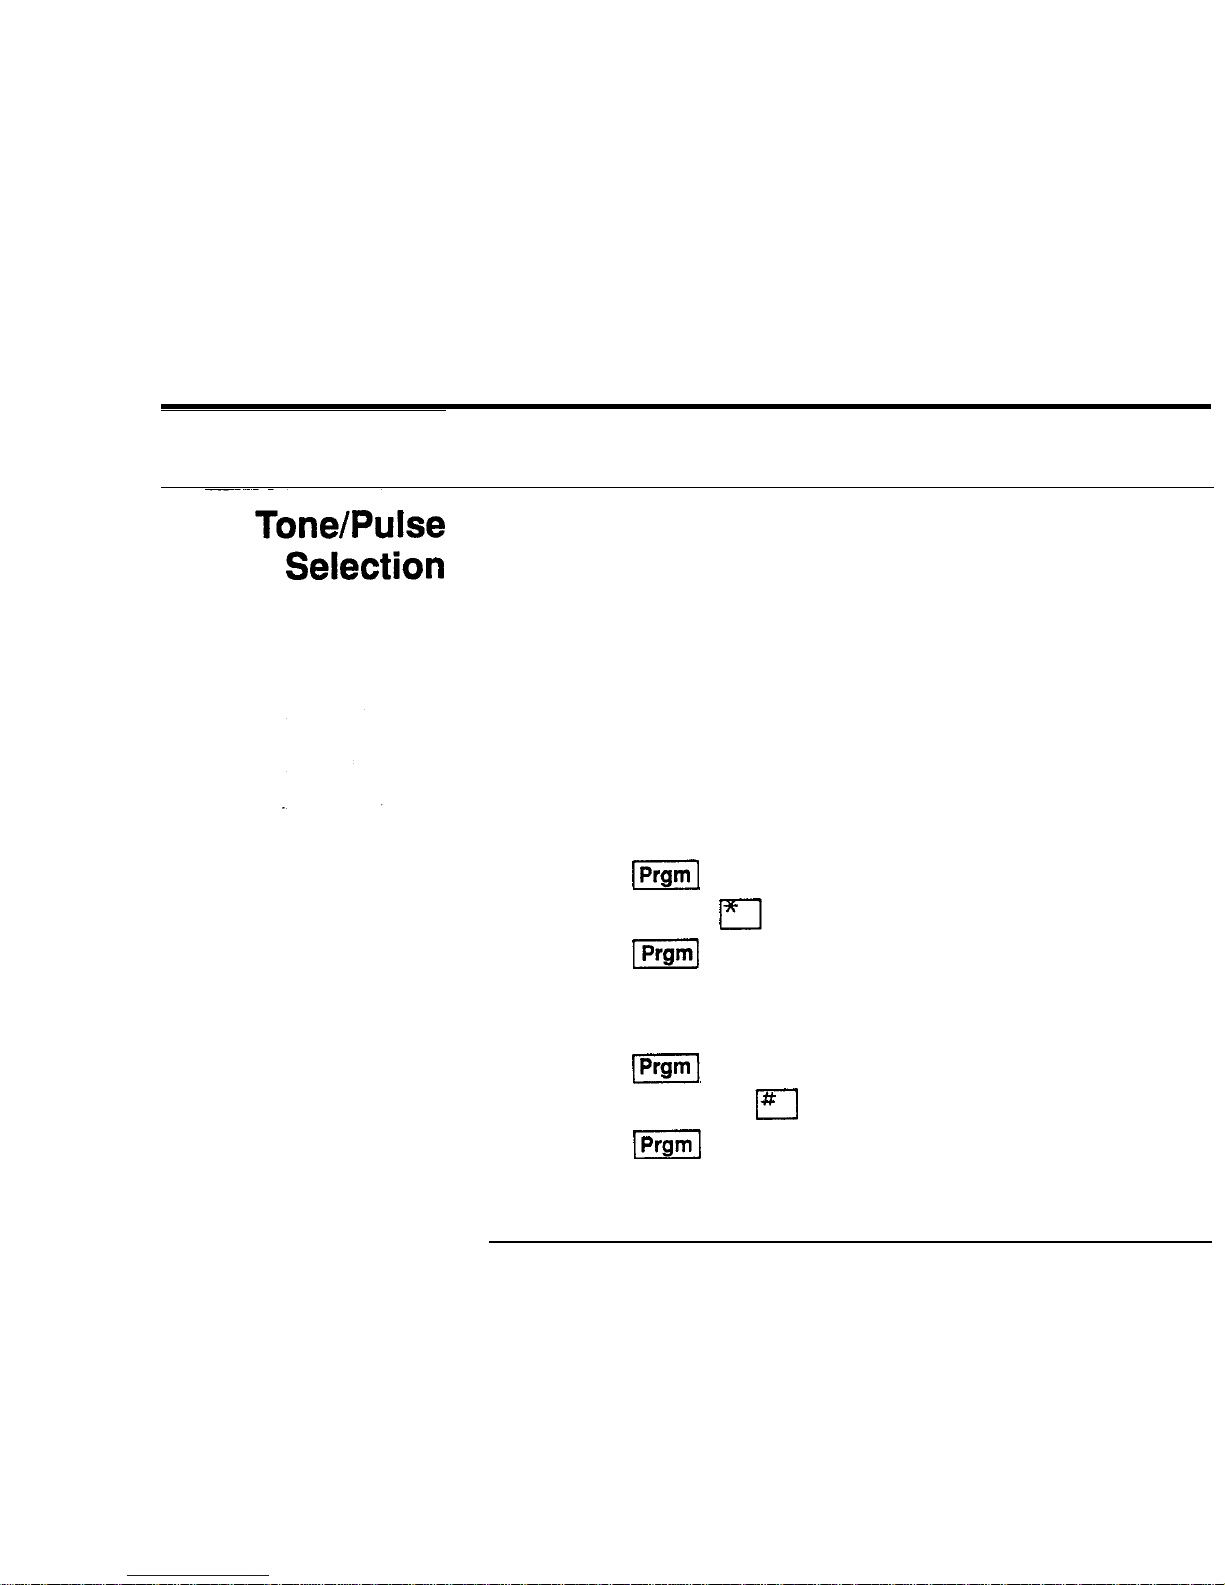
Your Unity Two-Line comes from the factory preprogrammed to
dial in tone mode. However you have the option of selecting
pulse mode.
To
change the original factory setting to enable you to dial in
pulse mode:
-
Press the
[Prgml
key.
-
Press the asterisk
m
key.
-
Press the
I]
key.
If you have altered the original factory setting
and
want to
change it to enable tone dialing again:
-
Press the
w/
key.
-
Press the octothorpe
m
key.
-
Press the
I]
key again.
UNITY Two-Line Business Terminal, User Guide - issue 1
Page 24
24 / Programmable Features
Line Hold
Selection
To Deactivate
Automatic Hold
Remote Release of
Hold
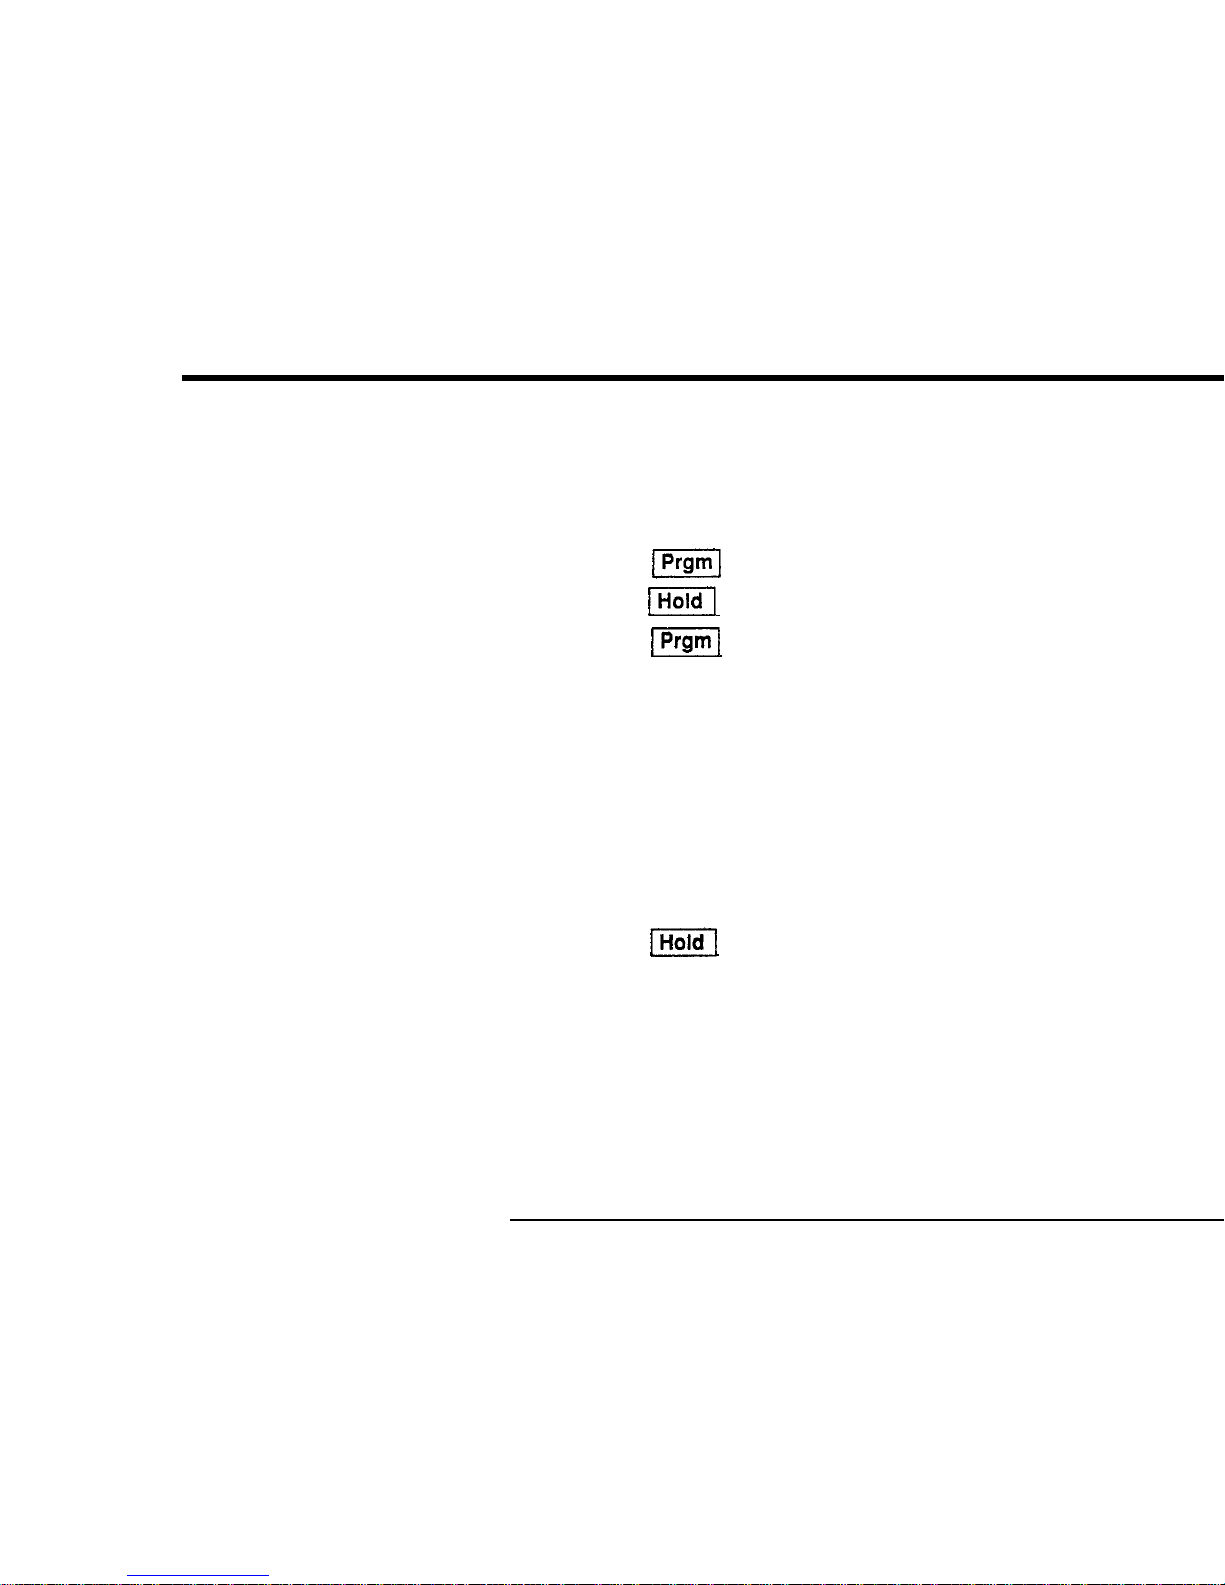
The Unity Two-Line comes from the factory preprogrammed for
Automatic Hold. This means that when you are on one line and
you press the other line key to either dial out or answer an incoming call, you automatically place the first call on hold.
-
Press the
i/
key.
-
Press the
I]
key.
-
Press the
IPrgmJ
key again.
Repeat this procedure to activate Automatic Hold again. It turns
the feature off and on.
To take a call off hold when you have Automatic Hold:
-
Simply lift the handset or press the line key for whichever line
that you want to take off hold.
Placing a call on hold and taking it off when you do Not have
Automatic Hold:
-
Press the
WI
key. The light (LED) next to the key for that
line will flash 60 times per minute.
-
Press the key for that line again to take a call off hold.
If you share your two phone lines with other people in your
office, you may find the ‘Remote Release of Hold’ feature to be
quite useful. Should you have to put a line on hold to leave your
desk for some reason, you can use any phone that shares your
line
to take that line off hold and retrieve the call.
UNITY Two-Line Business Terminal, User Guide - Issue
1
Page 25
Programmable Features
/ 2
Your Unity Two-Line comes from the factory preprogrammed to
automatically select Line 1 when you pick up the handset.
However, you also have the option of selecting Line 2 as your
Prime Line or you can program your phone so that neither is
prime.
Prime Line Select offers you several advantages, especially in an
environment where you share your lines with someone else.
Designating a Prime Line gives you a dial tone for your own line
whenever you pick up the handset to make a call. When both
lines ring at once, your telephone automatically selects your owr
line when you answer.
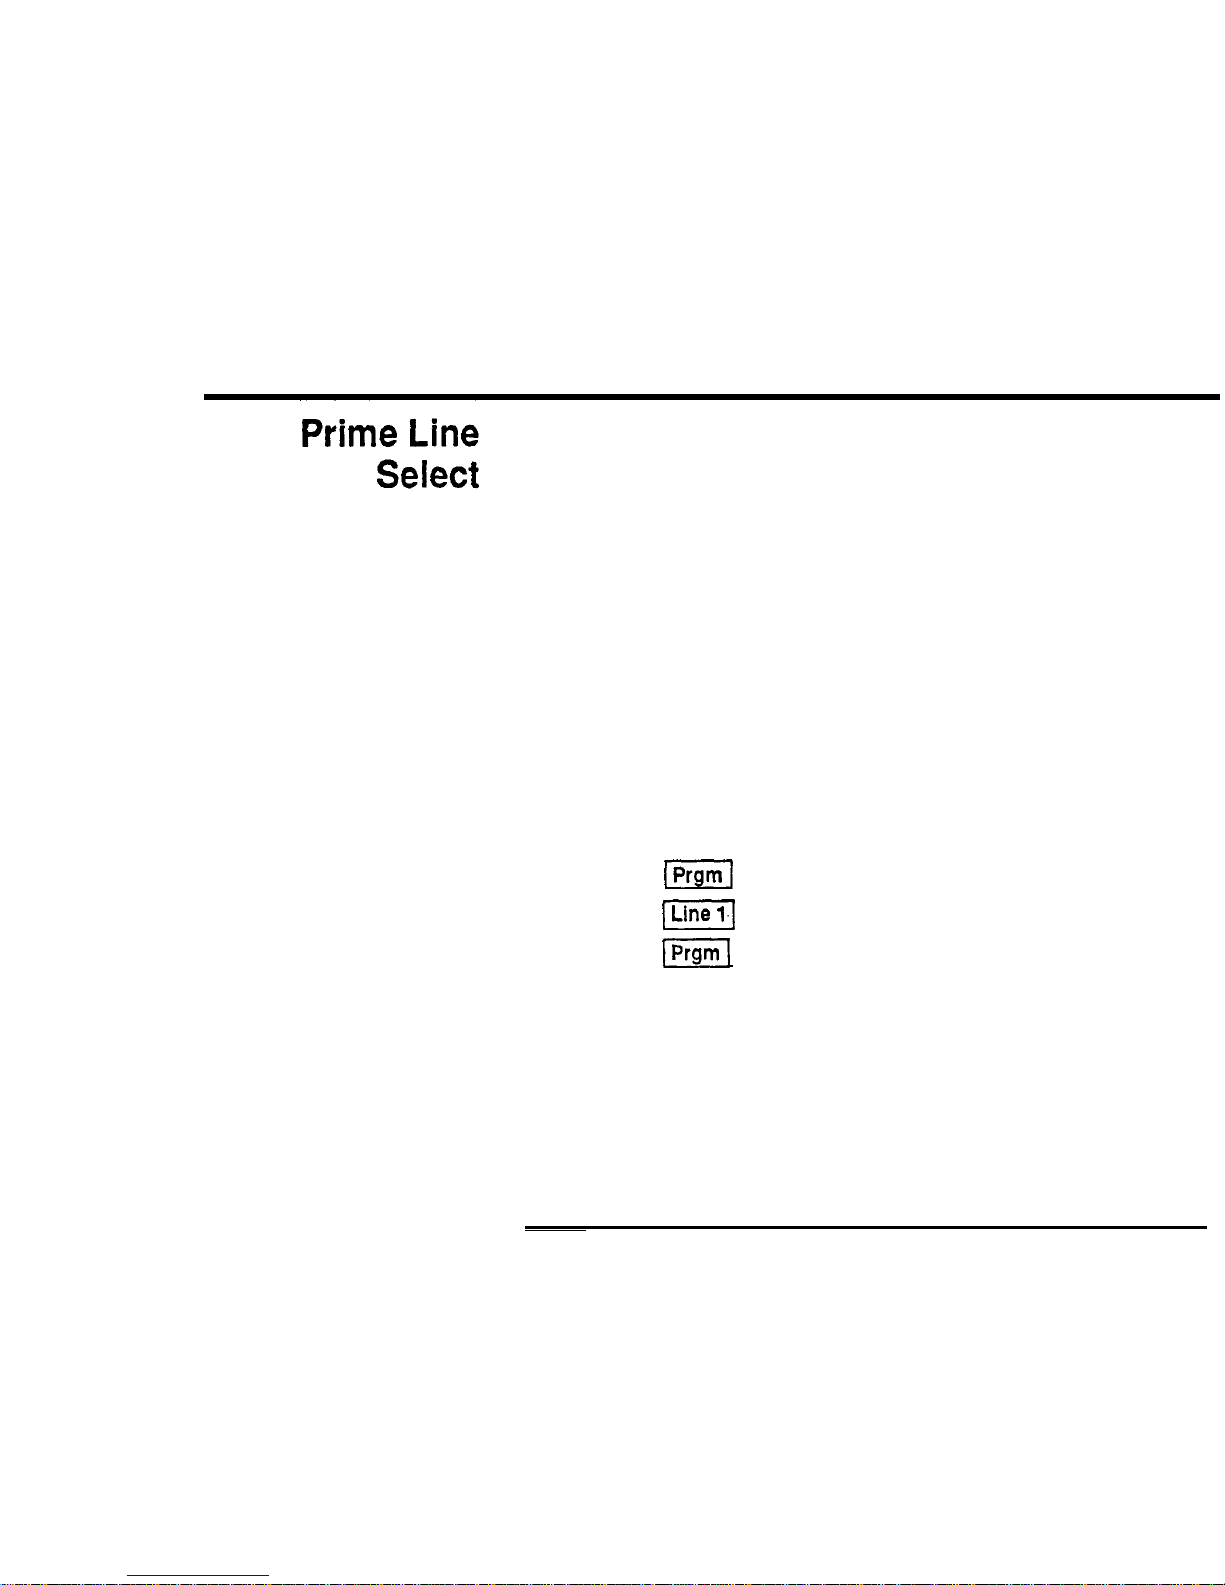
If you have altered the original factory setting and want to repro
gram your Unity Two-Line to designate Line 1 as prime:
-
Press the
(1
key.
-
Press the
[I
key.
-
Press the
I[
key again.
Note: Prime is set to Line 1 when you reprogram for Default
Mode.
To designate Line 2 as your Prime Line, substitute Line 2 for
Line 1 in the procedures above.
UNITY Two-Line Business Terminal, User Guide - Issue 1
Page 26
26 / Programmable Features
Answering Calls
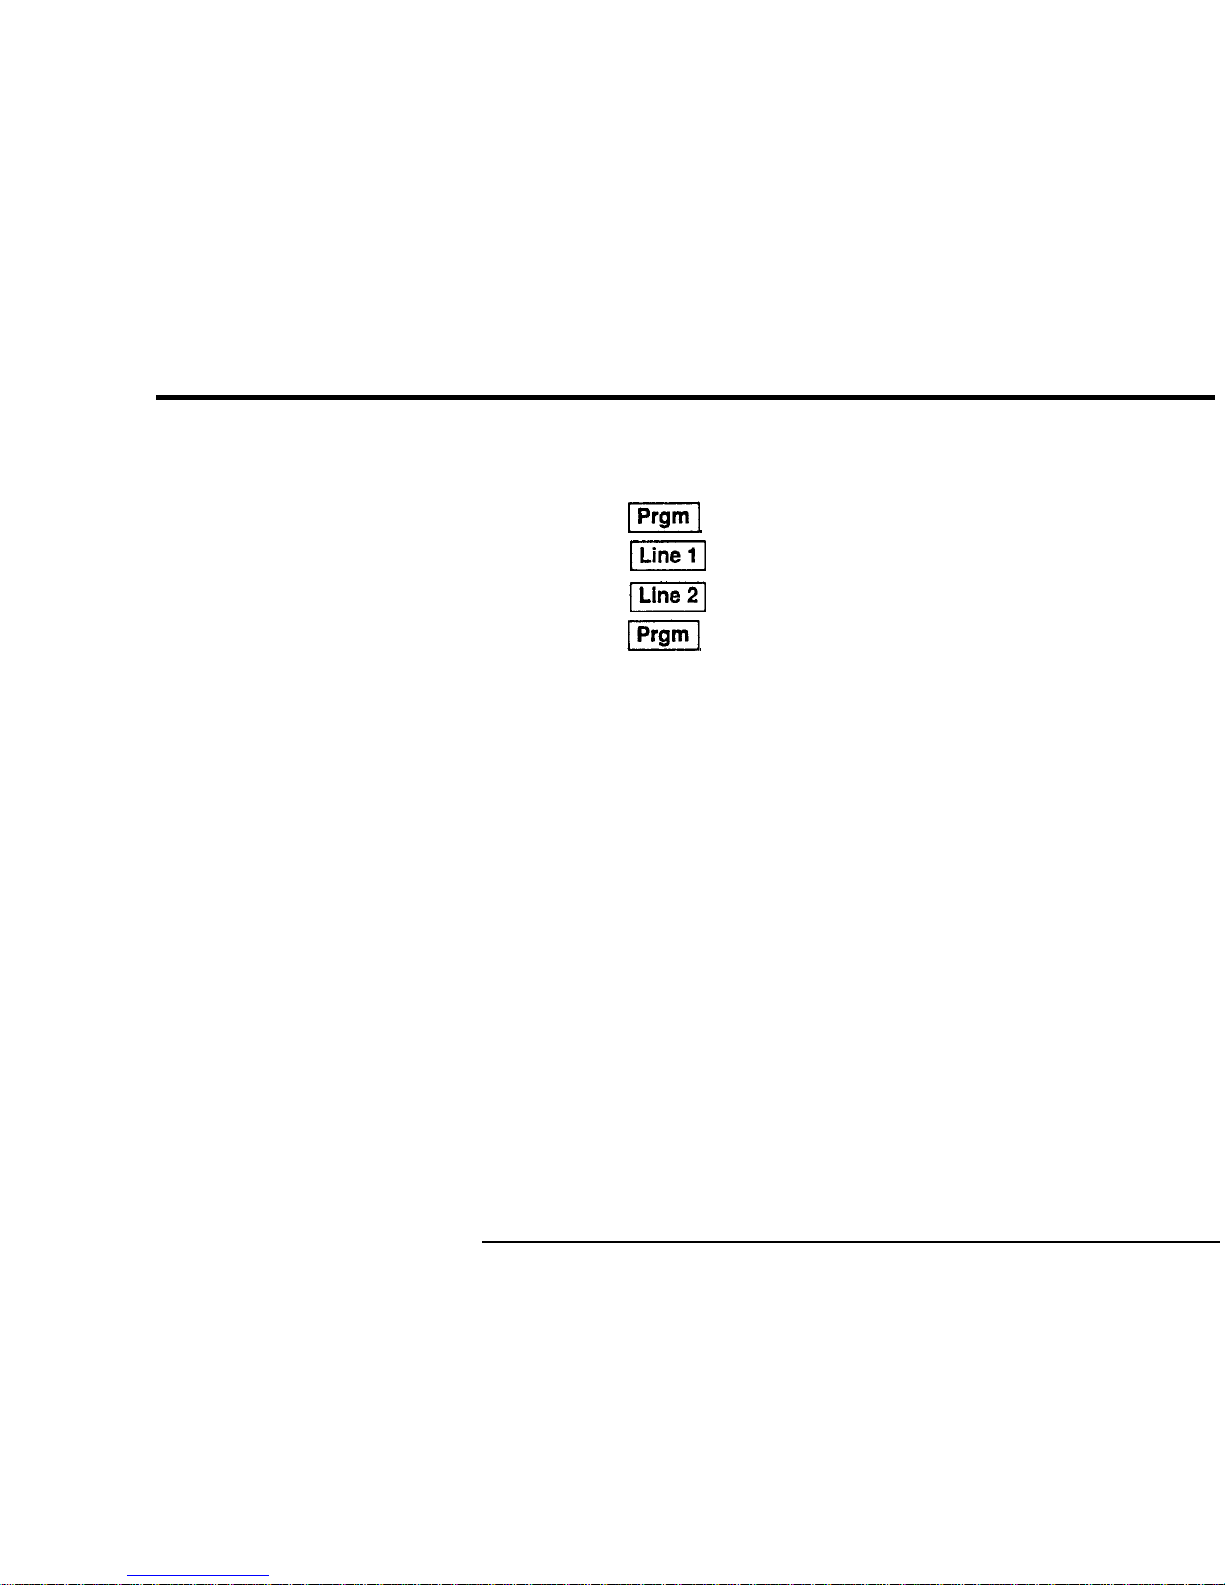
To program your Unity Two-Line so that neither line is designated
as your Prime Line:
-
Press the FPrgm key.
-
Press the
II
key.
-
Press the
I]
key.
-
Press the
1-1
key.
The Unity Two-Line can be programmed to automatically select
the ringing line. This feature, called Ringing Line Select, interacts with Prime Line Select to give you several options for how
your two lines ring.
You automatically answer the Prime Line when you
pick
up the
handset while both lines are ringing.
If you have not designated a Prime Line...
You automatically answer whichever line is ringing, thus the term
Ringing Line Select applies. If both lines ring simultaneously, you
must select one.
UNITY Two-Line Business Terminal, User Guide - Issue 1
Page 27

Programmable Features /
27
Storing
Commands
Storing a Required
Pause
Storing a Required
To
store a telephone number or feature access code with a
LINK
required LINK function:
When programming your Unity Two-Line, you can store telephone numbers as well as Link and Pause commands.
---
The design of the Unity Two-Line enables you to store pauses
between access codes and long distance numbers when you program memory keys. Automatic dialing resumes immediately
after the delay
To
store pauses when in the programming mode:
-
Press the
mj
key.
Note:
Each time you press Hold key while in the Programming
mode, it stores a 1.5 second pause and uses the same memory
capacity required to store one digit of a telephone number.
-
Press the
IPrgml
key
-
Press a memory key
-
Press the IL/ key.
-
Enter the telephone number or feature access code.
-
Press the
(Prgm]
key again.
UNITY Two-Line Business Terminal, User Guide - Issue
1
Page 28
28 / Programmable Features
Storing
Telephone
Numbers
To Program a
Memory Key to Store
a Telephone Number
To Clear a Memory
Key Location
The eight memory keys can be used to store phone numbers up ta
24 digits long. The Shift key allows you to use each memory key
twice for a total of up to sixteen stored numbers which can be
dialed automatically. When programming memory keys, you can
also insert Link and Pause commands.
-
-
-
-
-
-
-
-
-
Ensure the Unity Two-Line is on-hook and idle.
Press the
[I
key. The indicator beside the key will light.
Press one of the memory keys and dial the number to be
stored
in memory.
Following this same procedure, continue programming as
many keys as you wish.
When you have finished with the keys you want programmed
press the
\=I
key to take the Unity Two-Line out of pro-
gramming mode. This will turn off the red light.
Press the
I/
key.
Press the memory key location you wish to clear
Press the
[Hold1
key
Press the
I]
key again
UNITY Two-Line Business Terminal, User Guide - Issue 1
Page 29
Programmable Features / 29
Using the Shift
Key
Automatic
Dialing of
Stored
Numbers
The Shift key is similar in function to a shift key on a typewriter in
that it gives each of your eight memory keys two
levels of
storage
capacity. After you have programmed the eight memory keys,
press the
m
key The LED next to the
Ishift
key will light.
You now have eight more storage locations at your disposal. To
access the second set of stored numbers for automatic dialing, just
press the
Ishift
key prior to pressing the memory key. Pressing
a memory key without pressing the
p]
key will dial the num-
ber that is stored in the first level of memory.
You can dial a stored number with the handset either off-hook or
on-hook.
Two
Stroke Dialing of a Stored Number:
-
-
-
Lift the handset or press a line key
Press the appropriate memory,
/]
or
m key.
If the
number is located in the second level of storage of a memory
key, you will need to press the
II
key before pressing the
memory key
The number you have stored will
automatically be
dialed.
UNITY Two-Line Business Terminal, User Guide - issue
1
Page 30
30 / Programmable Features
One Stroke Dialing
You can
program
the
Unity
Two-Line to dial stored numbers by
pressingAthe”vl,
a
or
programmed memory keys without
even picking up the handset or pressing a line key Your telephone automatically selects the prime line and dials the number.
To program One Stroke Dialing:
-
Press the [Prgm] key.
-
Press the
u
key.
-
Press the 1
Pram)
key again.
This procedure turns the feature off and on. Reverting to factory
default mode disables One Stroke Dialing.
Call Forwarding
If your communication system provides the feature (Call
Forwarding), the design makes it easy to program and use the
Call Fwd key. You can even have your calls on each line forward,
ed to different numbers.
To Program Call
Forward
-
Press the ~~rarn 1 key
-
Press and release the
[Call1
key. The red light beside it
comes on.
UNITY Two-Line Business Terminal, User Guide
-
Issue 1
Page 31
Programmable Features
/
31
-
-
To Activate Call
-
Forward _
To Cancel Call
-
Forward
-
Press either the
I[
or
(=I
key.
Enter the Call Forward activation code.
Dial in the number to which you want to forward your calls.
Press the
(Call Fwd
]
key again.
The red light (LED) next to the Forward key will go off.
Enter the Call Forward cancellation code.
Press the
p]
key again.
You must press the
ml
key
to complete the storage of the feature code.
Press
a line key.
Press the
1-1
key
Press the (RI key. The Feature-In-Use indicator for that line
and the red light beside the
-1
key will light to
remind you that your calls will be forwarded to’another
number.
Press the same line key on which you
activated Call Forward
in the procedures above.
Press the
-1
key.
Press the
q
key.
Now
your calls will come to your phone
again and the light beside the Forward key
will
go out.
Page 32

32 / Programmable Features
Do-Not-Disturb
The
Unity
Two-Line is equipped with a volume control switch
that allows you to turn off the ringer. The red lights
(LEDs)
beside the line keys will flash to visually indicate any incoming
calls.
To activate Do-Not-Disturb and turn off the ringer:
-
Ensure that your telephone is idle and on-hook.
-
Press the left side of the volume control repeatedly until the
two Feature-In-Use visual indicators labelled
‘Ft’
light. These
red lights (LED’s) let you know that you have turned the
ringer volume all the way down.
To cancel Do-Not-Disturb and turn the ringer back
on,
repeatedly press the right side of the volume control until you have
the desired ringer loudness.
Handset
In addition to adjusting the speaker loudness for monitoring calls
Receive Volume
and putting your phone in ‘Do-Not-Disturb’, the volume control
Adjustment
adjusts the handset receive volume. If the person at the other end
of the line speaks too loudly, turn the volume down by repeatedly pressing the left-hand side of the volume control. If you have
trouble hearing them, you can raise the volume by repeatedly
pressing the right-hand side of the volume control.
I
Guide
Issue
1
Page 33
Programmable Features / 33
Saved
Number
The Unity Two-Line has a programmable Saved Number Redial
Redial
q
k yf
e
or storing an important number. It is useful for storing
access codes to long distance carriers and holds up to 40 digits.
You can even program the
]sl
key during a conversation.
To program the Saved Number Redial key:
Press the q key while you are on the telephone to store the last
number dialed manually.
or
-
Lift the handset or press a line key.
-
Press the
p]
key. The light beside the key will come on.
-
Press the
q
key.
-
Enter the number you want to store.
-
Press the
(Prgmj
key.
To change the number in Saved Number Redial you can program
the new number by either of the above methods. You automatically erase the old number.
UNITY Two-Line Business Terminal, User Guide - Issue 1
Page 34
34 / Programmable Features
Selectable
If
.
your job requires a considerable amount of phone time, you
Headset
may consider using a headset with your Unity Two-Line. Most
Operation
electret type headsets will work with the Unity Two-Line.
c
onnecting both a headset and a handset to a Y-adapter that plugs
into the headset box allows parallel use of the headset and hand-
set.
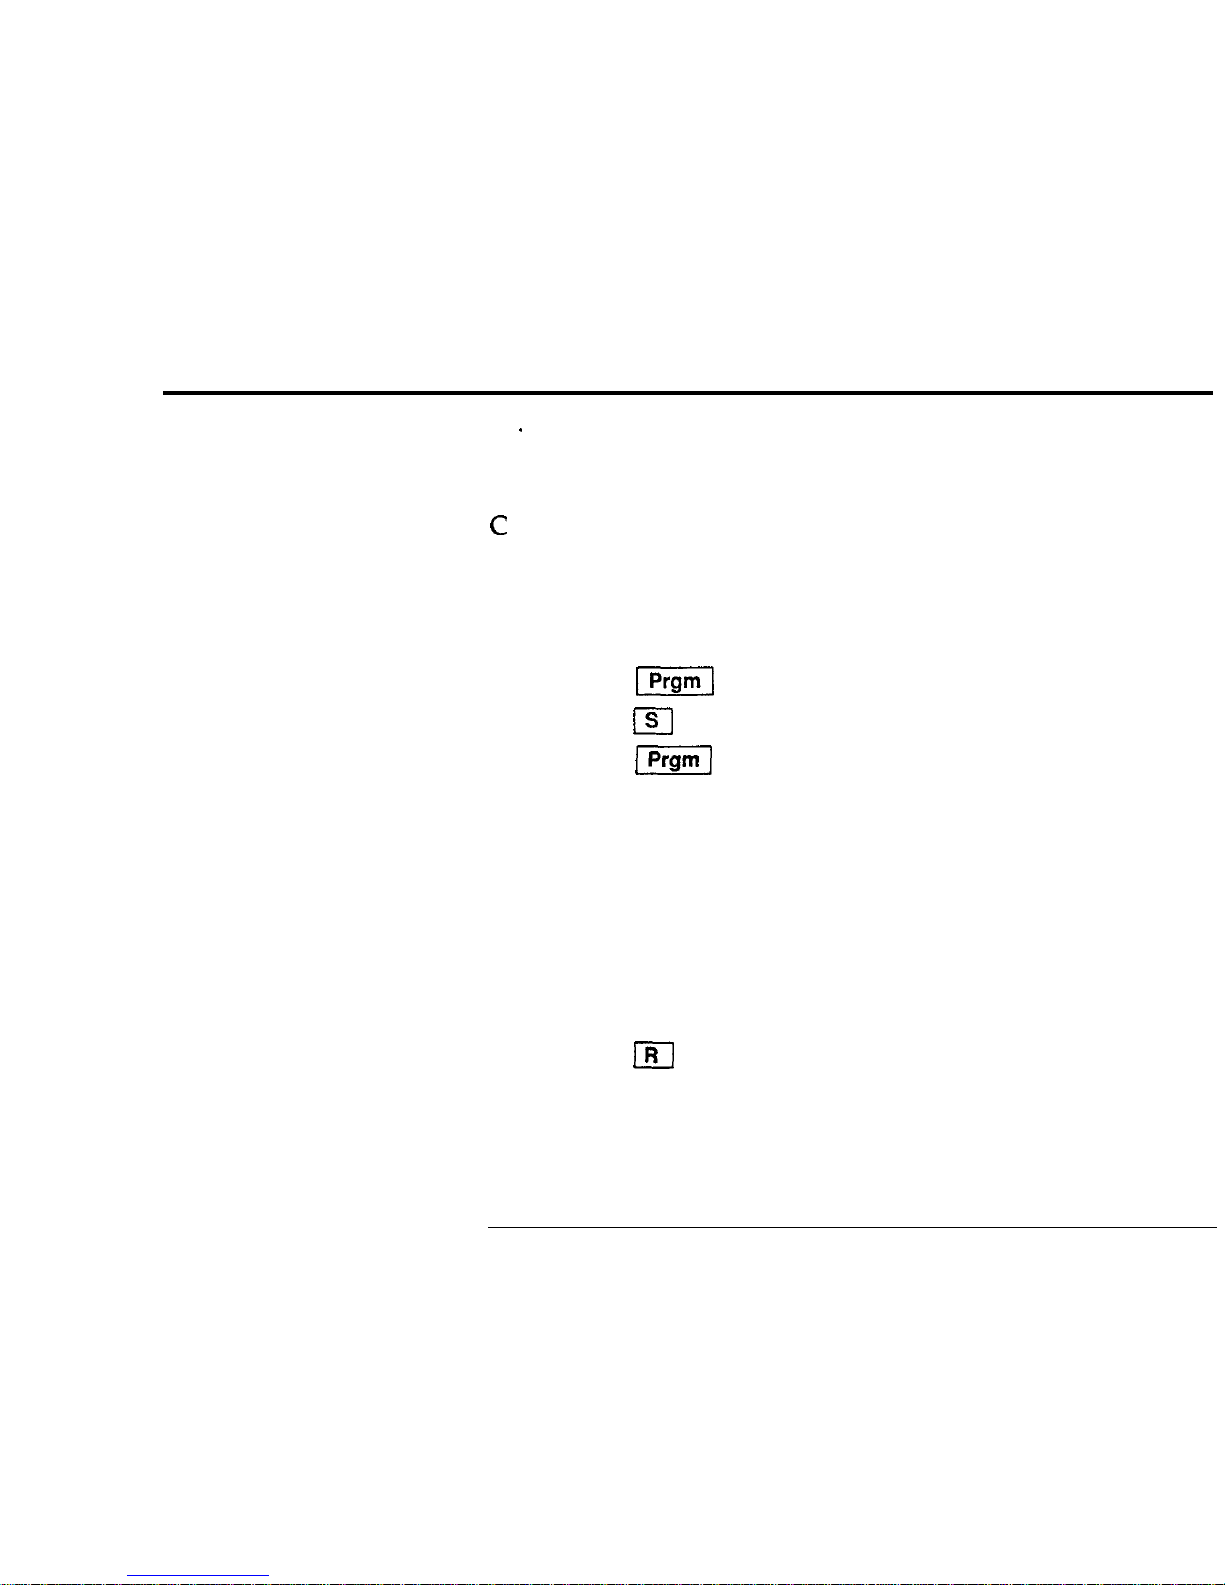
To program for headset operation:
-
Press the
-1
key
-
Press the m key.
-
Press the
1-1
key
This procedure turns headset operation off and on. Reverting to
Factory Default Mode gives you normal on-hook
dialing.
To make
a call in the headset mode:
-
Press line key and dial in the normal manner.
To hang up:
-
Press the
m
key.
To adjust headset
volume:
-
Press the volume control switch.
UNITY Two-Line Business Terminal, User Guide - Issue 1
Page 35

Warranty / 37
Note: If your telephone is
leased
from the telephone company,
the set should be returned to the
Telco,
or their Repair Depot for
repair required after warranty service.
NORTHERN TELECOM SERVICE DEPOTS
Calgary, Alta.
Toronto, Ontario
808-53rd
Avenue N.E. 30 Norelco Drive
Calgary, Alta. Weston, Ontario
T2E 6N9 M9L 2X6
Tel.: 403-275-2772 Tel.: 416-749-0110
Montreal, Quebec
12345 Albert Hudon Blvd.
Montreal North, Quebec
HlG
3Ll
Tel.: 514-324-2020
Saint John, N.B.
HiIlyard
Place
Saint John, N.B.
E2L 4H8
Tel.: 506-642-1000
OR
Call Toll Free
l-800-361-7800
UNITY Two-Line Business Terminal, User Guide - issue 1
Page 36
Warranty
/39
Repairs to certified equipment should be made by an authorized
Canadian maintenance facility designated by the supplier. Any
repairs or alterations made by the user to this equipment, or
equipment malfunctions, may give the telecommunications com-
pany cause to request the user to disconnect the equipment.
Users should ensure for their own protection that the electrical
ground connections of the power utility, telephone lines and internal metallic water pipe system, if present, are connected together.
This precaution may be particularly important in rural areas.
Users should not attempt to make such connection
ti
themselves but should contact the appropnate
electrrc
inspection authority, or electrician, as appropriate.
Load Number
The load number of this telephone is 27A. Load numbers are a
new concept designed to help you determine how many telephones can be connected to any one telephone line.
The total of the load number for all the telephones connected to
any one line should not exceed 100.
UNITY Two-Line Business Terminal. User Guide - Issue 1
Page 37

40 I Warranty
An alphabetic suffix is also specified to indicate the appropriate
ringer type (A or B).
Since load numbers are new, you may not know what the load
numbers are for your previous telephones. It is usually safe to
assume that the load numbers for those telephones will be
about
20.
This means the there should be no problems with up to five
(5)
telephones on one line.
If the maximum total load number of
100 is exceeded, the tele-
phone on that line may not ring or may ring poorly. In addition,
you may not be connected to the calling party when you pick up
the receiver or may have dialing problems.
If you experience the above problems after the addition of a
telephone to your line, you may have exceeded the maximum total
load number of
100. In this case, you will have to disconnect on
of the telephones to reduce your total load number below
100.
UNITY Two-Line Business Terminal, User Guide - Issue 1
Page 38
41
Quick Reference Programming Guide
To Program
Factory Default Mode Features
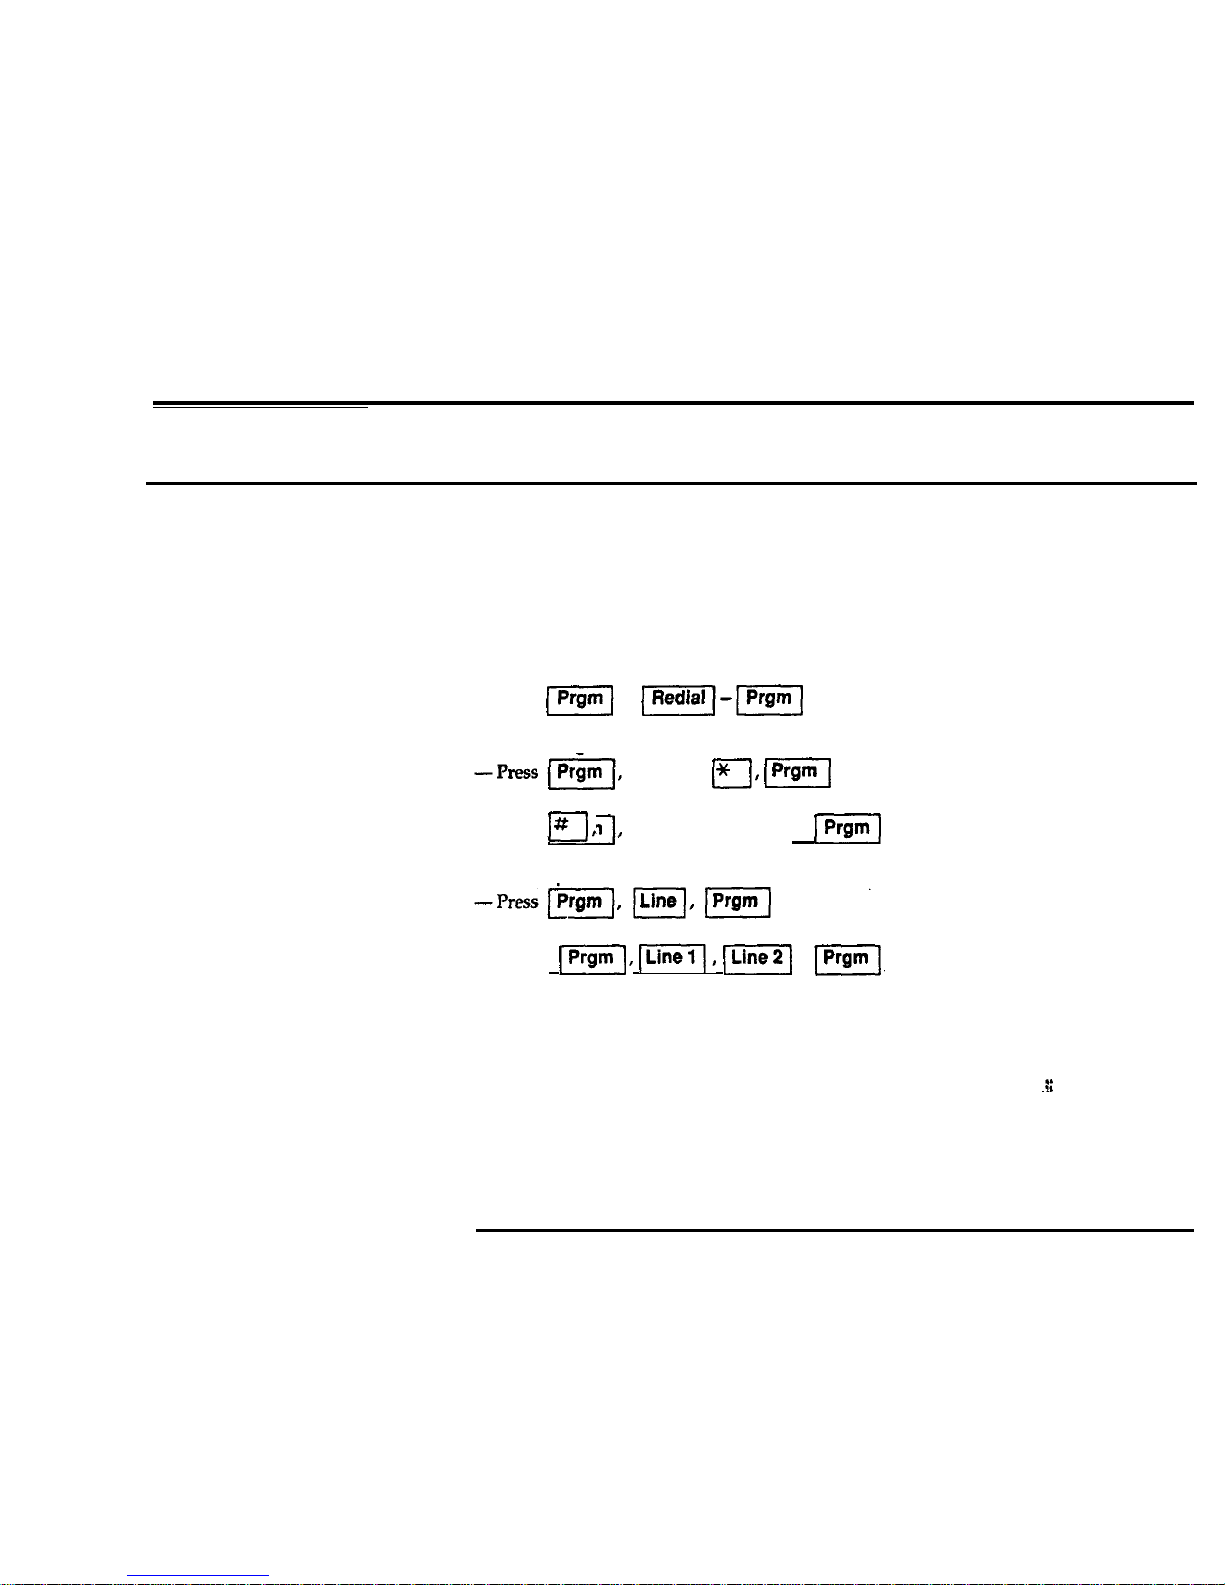
Tone/Pulse Selection
Primeline Selection
Do This
To revert to the factory preprogrammed default settings of:
-Tone dialing
-Automatic hold
- Two
stroke dialing
-
Handset receive, speaker and ringer volumes set at medium
-Press [-&iiq - ~[-~Prgm
Pulse dialing
asterisk
a, (PrgmI
Tone dialing
-Press Prgm
/----I,
lq*
IPrgm]
octothorpe
To select
prime
line:
To Program neither line as prime:
-Press
(Prgml, II, I]
,
LPlgml,
:
Volume,
Ringer,
Handset/Headset
Press the volume control to Increase and decrease
receive
volume
-Press
left side to decrease, right side to increase volume.
UNITY Two-Line Business Terminal, User Guide - fssue
I
Page 39
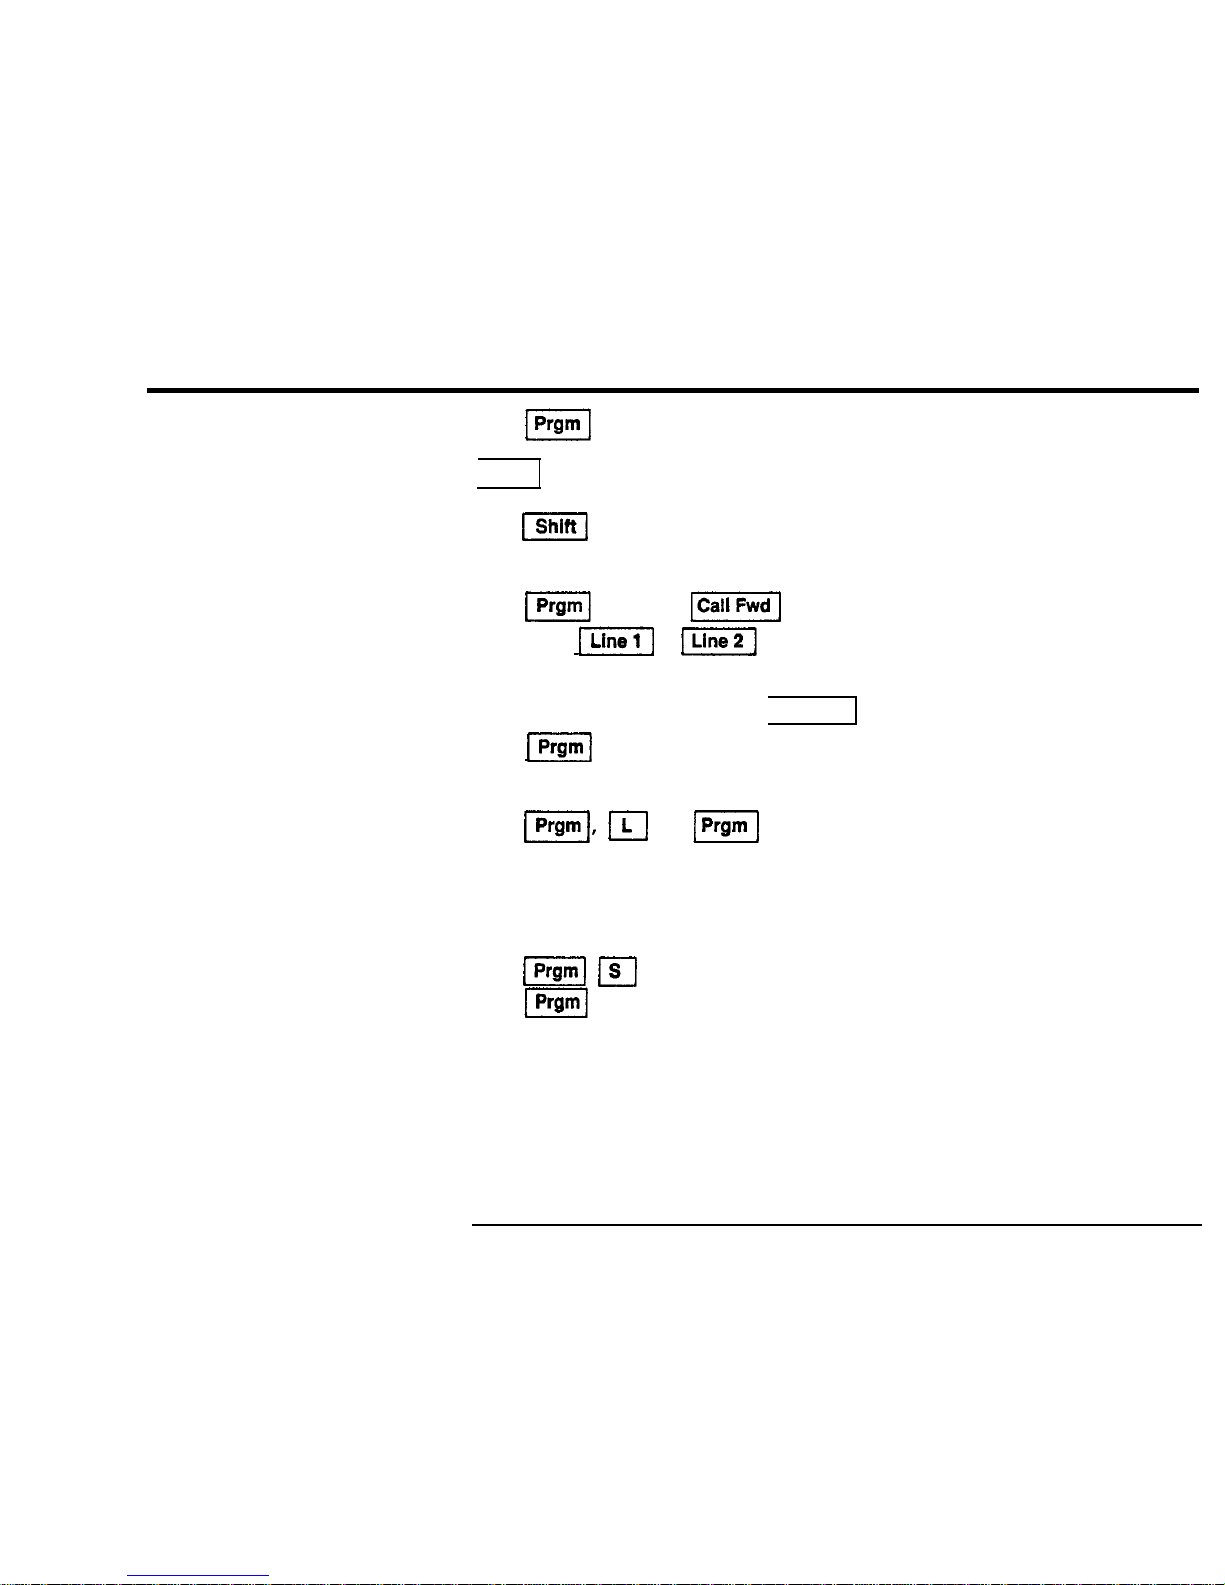
42 / Quick Reference Programming Guide
Memory Keys
(Upper Mem)
Memory Keys
(Lower Mem)
Forward
Key
One Stroke Dialing
Two Stroke
Dialing
Save Number Redial
(while Off-Hook, or in
Conversation)
Last Number Redial
PressIPrgm
key; Press a memory key location and release; Dial desired number; Repeat
above steps until you have completed programming desired numbers; Press
Prgm
key to complete programming function
Press
[shin1
key and follow above procedures
Press
pP19m]
key; Press
1-1
key
Press either
1-1
or
FJ
Enter call forward activation code;
Dial number to forward calls; Press
Call Fwd
key; Enter call forward cancellation code;
Press
I[
key
Press
ml,
m
key;
PI
See
default setting
Press
(Prsm]
, m key,
dial number,
Press
FPrgm
(Stores up to 40 digits)
UNITY Two Line redial feature saves the last number dialed manually on the key pad
(Stores up to 40 digits)
UNITY Two-Line Business Terminal, User Guide - issue
1
Page 40
Quick Reference Programming Guide
/
43
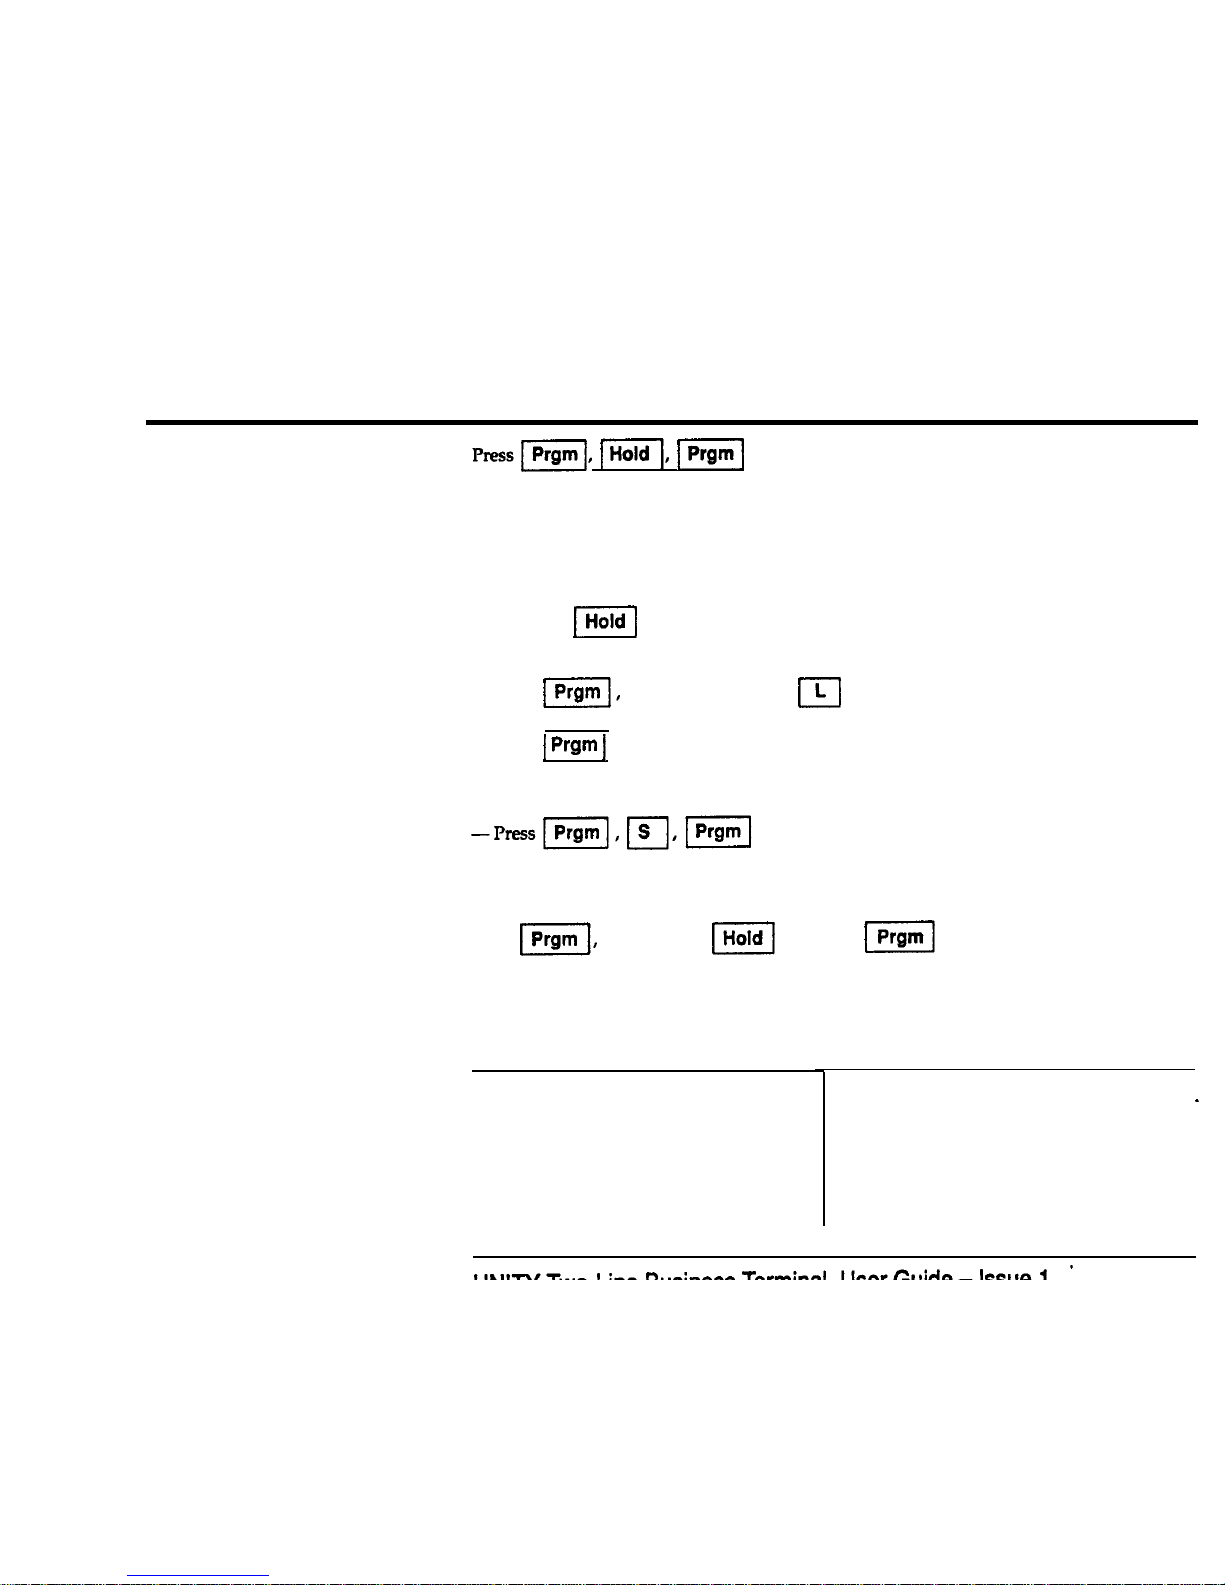
To Deactivate Automatic Hold
Do-Not-Disturb
Required Pause
LINK (L)
On-Hook Dialing for
Handset/Headset Operation
Clear a Single Memory Key
Location
PresslPrgm, pq
j-&q
Set is on-hook press the left side of the volume control until the Feature-In-Use light (LED)
(labelled ‘Ft’) illuminates. To cancel, press the right side until you reach the desired ringer
loudness
To store a pause between access codes and long distance numbers
-
Press the
[Hold1
Key during programming
To store a telephone number or feature access code with a required Link
-
Press
II,
a memory key, press
m
key
-Enter the number or feature code
-Press
1 Prgm
1
again
To activate/deactivate On-Hook Dialing for Handset/Headset operation
To clear only one memory key location
Press Prgm
Elf
memory key, Hold
key, press
Prgm again
I
0
Commonly Used Telephony Terms:
co
CENTREX
Ft
Key System
LED
Prgm
L
Central Office
Central Exchange
Feature
1A2
Light Emitting
Diode
Program
Link
S
Redial
Msg
PBX
2500
Type
Telephone
Saved Number Redial
Last Number Redial
Message
Private Branch
Exchange
Analog Telephone
 Loading...