

Nortel Meridian Meridian 1, 1000, Succession CSE 1000 Installation Manual

Meridian 1 and Succession Communication Server for Enterprise 1000
DECT Messagin g
Installation Guide
Documen t Num ber: P0989045
Document Release: Standard 1.0
Date: May 2002
Copyright © 2002 Nortel Networks,
All Rights Reserved
Printe d in Canada
Information is subject to change without notice. Nortel Networks reserves the right to make changes in design
or component s as progre ss in engineering and manufacturing may wa rrant. H ereby Nortel Networks declares
the Mer idian/Succession Companion DECT is in compliance wit h the essential requirements and other
provisions of Directive 1999/5/EC . This equipment generates, uses, and can radiate radio frequenc y energy,
and if not installed and used in accordance with the instruction manuals, may cause harmful interference to
radi o c omm unica t io ns . Op era ti on o f t his equ ip me nt in a re side nt i al are a i s l ikel y t o c au se h arm fu l i nte r fer en ce in
which case the user will be req uired to correct the interference at their own expense.
Meridian 1, Successi on and Companion are trademarks of Nortel Networks. Windows is a tradema rk of the
Microsoft Corporation. DEC T is a registere d trademark of the Europe an Telecommunications Standards
Institute..
DECT Messaging Installation Guide

P0989045 Standard 1.0 May 2002

Revision history
May 2002
Standard 1.00. This is the first issue of the DECT Messaging I nstallation
Guide.
Page 3 of 60
DECT Messaging Installation Guide

Page 4 of 60
P0989045 Standard 1.0 May 2002

6
About this guide
This document supports Meridian 1 and the Succession Communication
Server for Enterprise (CSE) 1000 systems.
The DECT Messaging Installation Guide provides information for sales
representatives, planners, installers, site maintenance personnel and
administrators.
This document is a global document. Conta ct your system supplier or your
Nortel Networks representative to verify that the hardware and software
described are supported in your area.
Page 5 of 60
Identifying Meridian/Succession systems
The following sy st ems are referred to in this guide as large systems:
• Options 51, 61, 71, 81
• Options 51C, 61C, 81C
The following sy st em s are referred to in this gui de as small systems:
• Option s 11, 11E, 11C, 11C Min i
• Succession CSE 1000
DECT Messaging Installation Guide

Page 6 of 60 About this guide
P0989045 Standard 1.0 May 2002

12
Understanding DECT Messaging
Contents
This section contains information on the following topics:
Introduction. . . . . . . . . . . . . . . . . . . . . . . . . . . . . . . . . . . . . . . . . . . . . . . 7
Architecture. .. . . . . . . . . . . . . . . . . . . . . . . . . . . . . . . . . . . . . . . . . . . . . 8
Messaging Server . . . . . . . . . . . . . . . . . . . . . . . . . . . . . . . . . . . . . . . 8
SNPP interface. . . . . . . . . . . . . . . . . . . . . . . . . . . . . . . . . . . . . . . . . . 9
TAP interface. . . . . . . . . . . . . . . . . . . . . . . . . . . . . . . . . . . . . . . . . . . 10
Web application. . . . . . . . . . . . . . . . . . . . . . . . . . . . . . . . . . . . . . . . . 10
External applications. . . . . . . . . . . . . . . . . . . . . . . . . . . . . . . . . . . . . 10
Page 7 of 60
Introduction
Protocols and external interfaces. . . . . . . . . . . . . . . . . . . . . . . . . . . . . . 10
LAN access protocols. .. . . . . . . . . . . . . . . . . . . . . . . . . . . . . . . . . . . 11
Protocols for external paging systems. . . . . . . . . . . . . . . . . . . . . . . . 11
DECT Messaging web architecture . .. . . . . . . . . . . . . . . . . . . . . . . . 11
DECT Messaging system architecture . . . . . . . . . . . . . . . . . . . . . . . 11
Handsets . . . . . . . . . . . . . . . . . . . . . . . . . . . . . . . . . . . . . . . . . . . . . . 12
DECT Messaging dongle . . . . . . . . . . . . . . . . . . . . . . . . . . . . . . . . . 12
DECT Messaging is a data system. It operate s independent ly from the DECT
voice system .The DECT Messaging sy stem allows users to send and receive
text messa ges on C4040 and C4050 handsets . When there is an incoming
message, the handset alerts the use r in various ways, depending on the
message’s priority. Text messag es can be rec eived even if the handset is in
use. (The only exception is while the handset is ringing.)
DECT Messaging Installation Guide
Page 8 of 60 Understanding DECT Messaging
Architecture
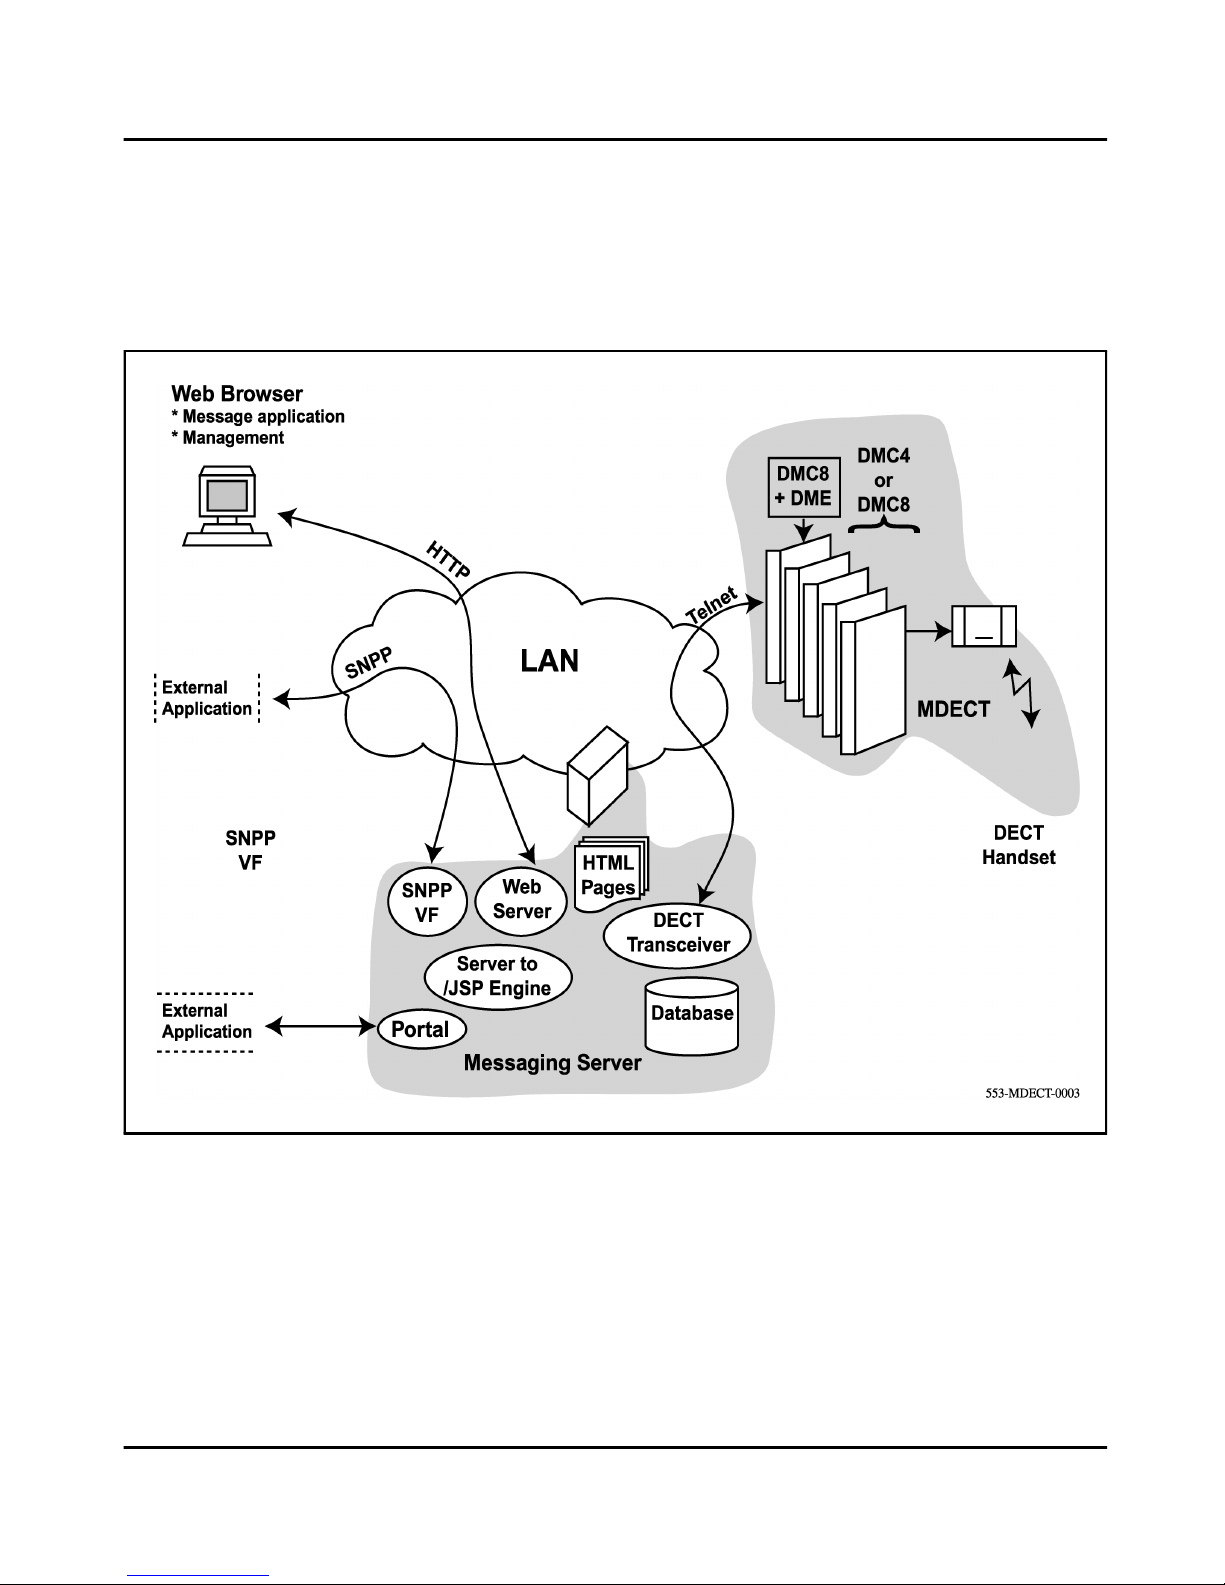
Figure 1 on page 8 shows the architecture for the DECT Messagin g system.
The arrows represent the movement of data through the system.
Figure 1
DECT Messaging System Overview
Messaging Server
The DEC T Tex t M essagi ng sy s te m u ses a Messag i ng Ser v e r (M S ) that
inte rfaces to the DECT system by a DM C 8 car d . The Mes saging Se r v er
software acts as an interface between the DECT System and open standard
inter f aces to external systems and applications.
P0989045 Standard 1.0 May 2002

Understanding DECT Messaging Page9of60
The MS supports two standard i nterfac es for conne cting to externa l syste ms:
Telelocator Alphanumeric Protocol (TAP) over a serial link and Simple
Network Paging Protocol (SNPP) over IP.
The MS contains a user database and a web-based administration tool.
Predefined groups of DECT handsets c an be set up in the serve r database or,
alternatively, the external application ca n control messages to groups of
handsets.
Functionality
The Messaging Server provides the following functionality:
• the abili ty to send messages to a DECT hands et from a standard web
browser
• connection from external paging systems into the DECT syst em using
standard protocols and interfac es. It supports both hard-wi red s erial
connections and dial-up over modems.
• handset-to-handset messaging
• connection over the IP network to the DECT system
• standard interfaces to allow ext ernal applicati ons to be built
• web management of subscriber information and configuration data
• an audi t trail of all m essages a nd response s kept by the syst em. These can
be time-stamped to allow administrators to see what has happened at
particular times, and to allow statis tics to be gener ated.
External systems can be connected using TAP and SNPP protocols.
Note: Since the text mess ages system is independent of the voice
system, this means that voice call re-direction, such as Call Forward,
does not apply t o text message s. If Call Forwar d is implemente d, the text
messages are not forwarded. They are still received at the handset.
SNPP interface
The SNPP int erface al lows the MS to co mmunicate with e xternal s ystems that
use the access protocol over TCP/IP. See “SNPP” on page 11.
DECT Messaging Installation Guide

Page 10 of 60 Understanding DECT Messa ging
TAP interface
The TAP in terface allows legacy paging systems to connect int o the system
through either a serial link or modem. See “TAP” on page 11.
Web application
The standard text messaging appl ication is web based. After the DECT
Messaging System is installed and configured, the web-based application
enables users to send messages from a standard web browser to a hands et.
External applications
External applications, such as radio paging replacement and alarms, are
supporte d by DECT Mes saging.
A simple web based Te xt Messaging application is included with the DECT
Messaging software. This enables a complete messaging system to be
installed without additional software .
Protocols and external interfaces
Using the TAP and SNPP protocols, the DECT Messaging System can be
connected to external systems.
An example of an external system is an alarm system. An external alarm is
triggered from the alarm system. This alarm sends a text message to the
DECT messaging system. The DECT messaging system forwards the text
messag e to the DECT handset.
The supporte d pr otocols are:
• SNPP RFC1861 – Simple Network Paging Protocol, for LAN access
• TAP V1.8 – Telelocator Alphanumeric Protocol, for external paging
systems
P0989045 Standard 1.0 May 2002

Understanding DECT Messaging Page 11 of 60
LAN access protocols
SNPP
SNPP is a simple way to del iver one-way and two-way wirel ess messages t o
receiving devices, such as pagers and cellular telephones. SNPP provides a
way to implement a gate way between the Internet and the DE CT Me ssaging
Server. It allows e nd-to-end acknowl edgments to be sent through the
Messaging Server.
SNPP is t he recommended protocol for new applicat ions because it supports
acknowledgement and allows urgent and non-urgent messages.
Protocols for external paging systems
TAP
TAP is a widely used public paging access p rotocol administered by the
Personal Com munications Indust ry Association (PCI A). TAP allows ext ernal
equipment to connect into a paging network, allowing DECT Messaging to
easily replac e a radio paging system. TAP runs on a serial connection.
DECT Messaging web architecture
Intranet server
The co mpany’s intran et serv er provi des ac ces s to the stat ic HTML page s that
host the web application. The intranet server redirects some requests to the
DECT Messaging web server for it to handle.
DECT Messaging web server
The web server on the DECT Messaging Server handles the following:
• requests for data from the database
• messages sent to the DECT system
DECT Messaging system architecture
The DECT System must ha ve at le ast one DMC8 ca rd or DMC8-E car d with
accompanying DME Ethernet da ughterb oard to prov ide Ethernet a ccess. For
a DECT System wit h multi ple DMC8’s cards, on ly one DME da ughterbo ard
is required.
DECT Messaging Installation Guide

Page 12 of 60 Understanding DECT Messa ging
The DMC4 is the original DMC card with four base stations. For a DECT
system with only DMC4’s, a DMC8 card must be added to provide DECT
Messaging functionality.
Each DMC card must be runn ing the Messaging- specifi c version of firmware
in order to be abl e to interact with the Mess aging server. The valid versions
of Messaging fi rmware are 451 002XX for DMC4 and 470 002XX for DMC8
and DMC8-E.
The Messaging server does not require a separate DMC8 card. It can be
connected to the DMC8 card used by OTM as a relay card. All DMC cards in
the DECT system must be backboned in series
The DECT Messaging Server manages only the messaging aspect of the
DECT Syst em. The D ECT Sy stem is stil l m anag ed by it s O TM .
The Messaging Server works for both concentrated and non-concentrated
DECT systems. Only one DECT system is served by the Messaging Server at
a time .
Handsets
DECT Messaging supports the Norte l Networks C4040 handset with
software Version 11 (and later), and the C4050 handset. Both handsets
support text m essaging for me ssages to a maximum of 4 8 cha racters in le ngth.
The handse ts are su bscribed to the DECT s ystem us ing OTM. See “Subscrib e
the handset s t o the system cards” on page 51.
DECT Messaging dongle
The security dongle supplied with the system is required in order for DECT
Messaging to operate. It must be attached to the parallel port of the Messaging
Server.
P0989045 Standard 1.0 May 2002

22
Page 13 of 60
Installin g the DECT Messag ing softw are
Contents
This section contains information on the following topics:
Introduction. . . . . . . . . . . . . . . . . . . . . . . . . . . . . . . . . . . . . . . . . . . . . . . 13
Installation requirements. .. . . . . . . . . . . . . . . . . . . . . . . . . . . . . . . . . . . 14
Introduction
Installing the DECT Messaging system. . . . . . . . . . . . . . . . . . . . . . . . . 15
Installing the serial port file. . . . . . . . . . . . . . . . . . . . . . . . . . . . . . . . 20
Checking the installation. . . . . . . . . . . . . . . . . . . . . . . . . . . . . . . . . . 20
Uninstalling the DECT Messaging system. .. . . . . . . . . . . . . . . . . . . . . 21
This chapter describes the following:
• System requirements – provides a list of requirements to be met before
installing the DECT Messaging System
• System installation – descr ibes how to install the DECT Mes sa ging
System onto a Windows NT and Windows 2000 platform
• Uninstallation
The DECT Messaging S ystem provides the capability to send me ssages to
one or more handsets from anoth er hands et, the web, or the pagi ng prot ocols
TAP and SNPP.
To inst all the DECT Mess aging System successfully, the instructions in this
chapter must be followed in the order specified.
DECT Messaging Installation Guide

Page 14 of 60 Installing the DECT Mess aging software
Installation requirements
Before proceeding with the installation of a DECT Messaging system, the
following components must be avai lable:
• a PC connected to the company intranet, with the foll owing minimum
requirements:
—CD-ROM drive
— 250MB free hard disk space
— minimum 128 MB RAM, recommended 256 MB RAM
— 600Mhz processor
— network card and assigned IP address
— Internet Explorer v5.5 or Net scape v4.7 installed
— Windows 2000 or Windows NT4 Workstation or Server, with
Service Pack 6 insta lled
— DECT Messaging dongle
• an installat ion CD, which contains the necessary insta llation files and a
copy of this Installation Guide
• an internal/external modem to enable the TAP software
• NT Administrator password for the PC
P0989045 Standard 1.0 May 2002
Installing the DECT Messaging software Page 15 of 60
Installing the DECT Messaging system
CAUTION
If, at any time du r i ng th e insta llation , th e co mp u te r
prompts for the system to be rebooted, do not
reboot. Select the Restart Later option, when
availa ble. Reboo t t h e system only at the end of the
installation process.
To install the DECT Messaging system, follow the steps in Procedure 1.
Procedure 1
Install the DECT Messaging system
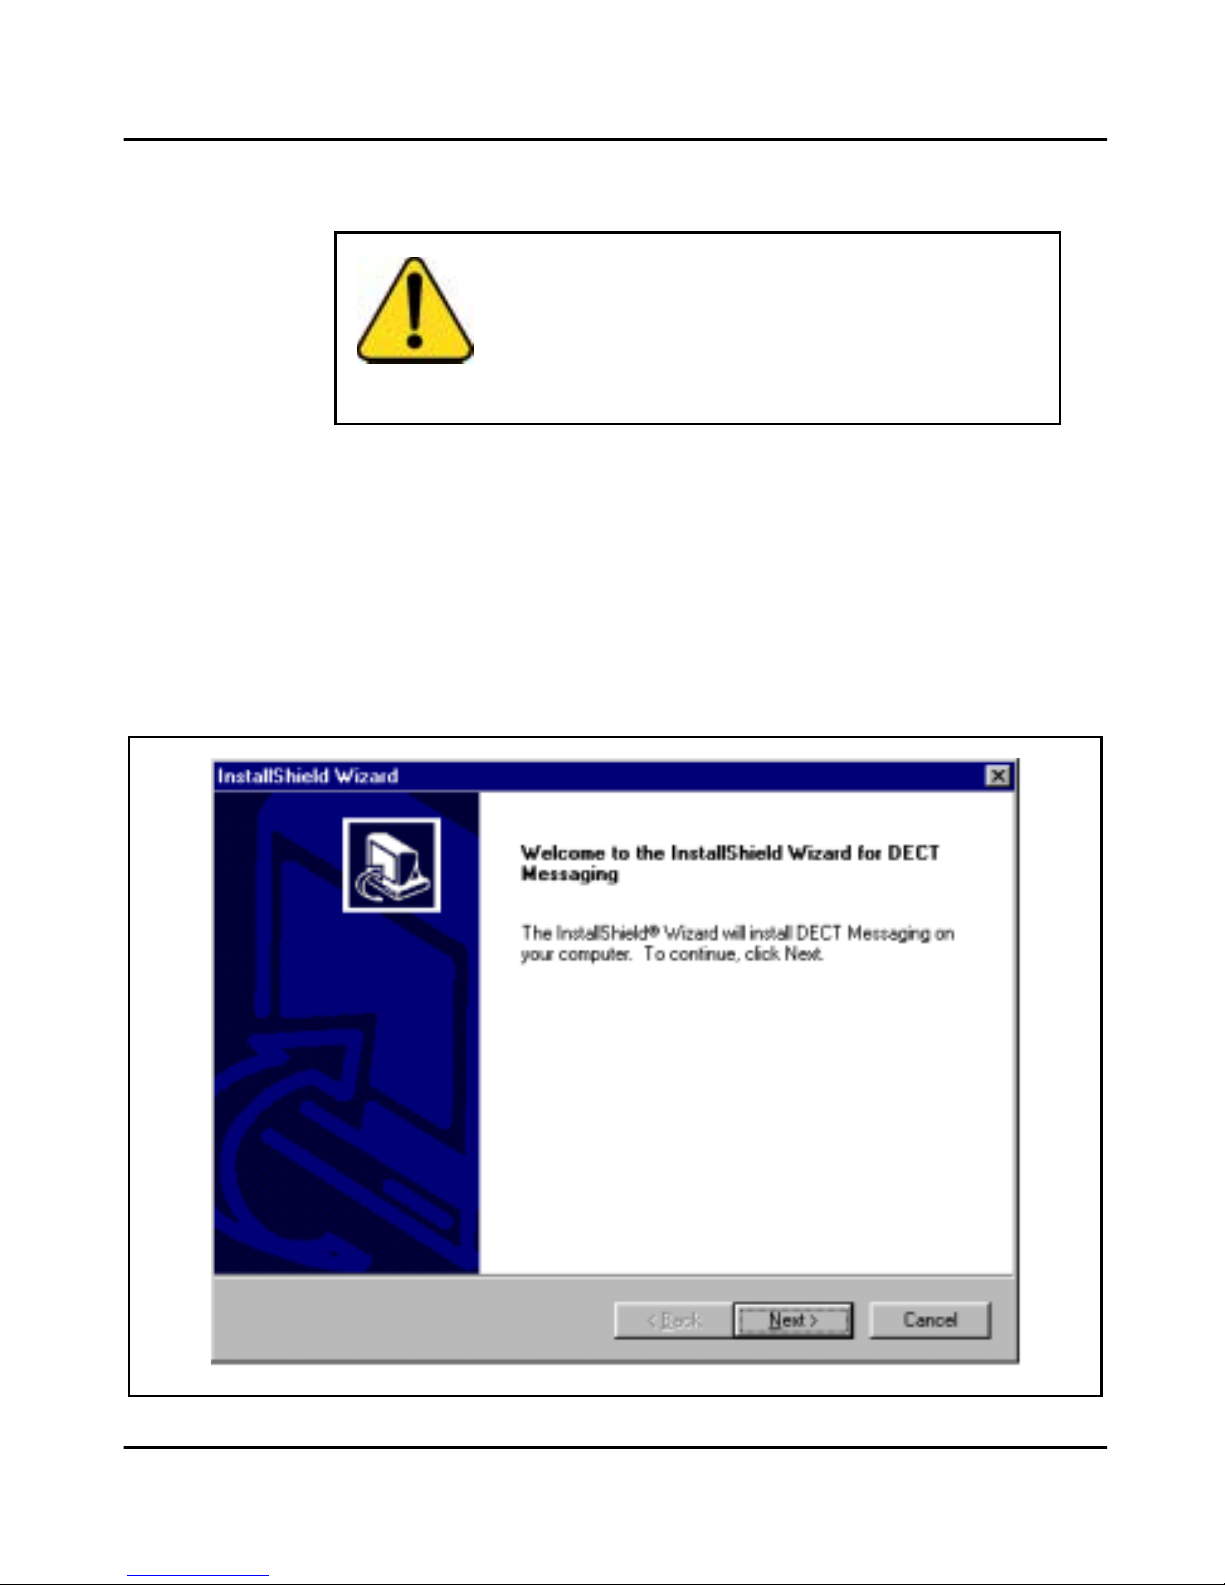
1 Browse the root dir ectory of the installation CD and double click on
Setup.exe . Aft er a few minutes, the welcome screen for the
InstallShield wizard is displayed. See Figure 2 on page 15.
Figure 2
Welcome Screen
DECT Messaging Installation Guide
Page 16 of 60 Installing the DECT Mess aging software
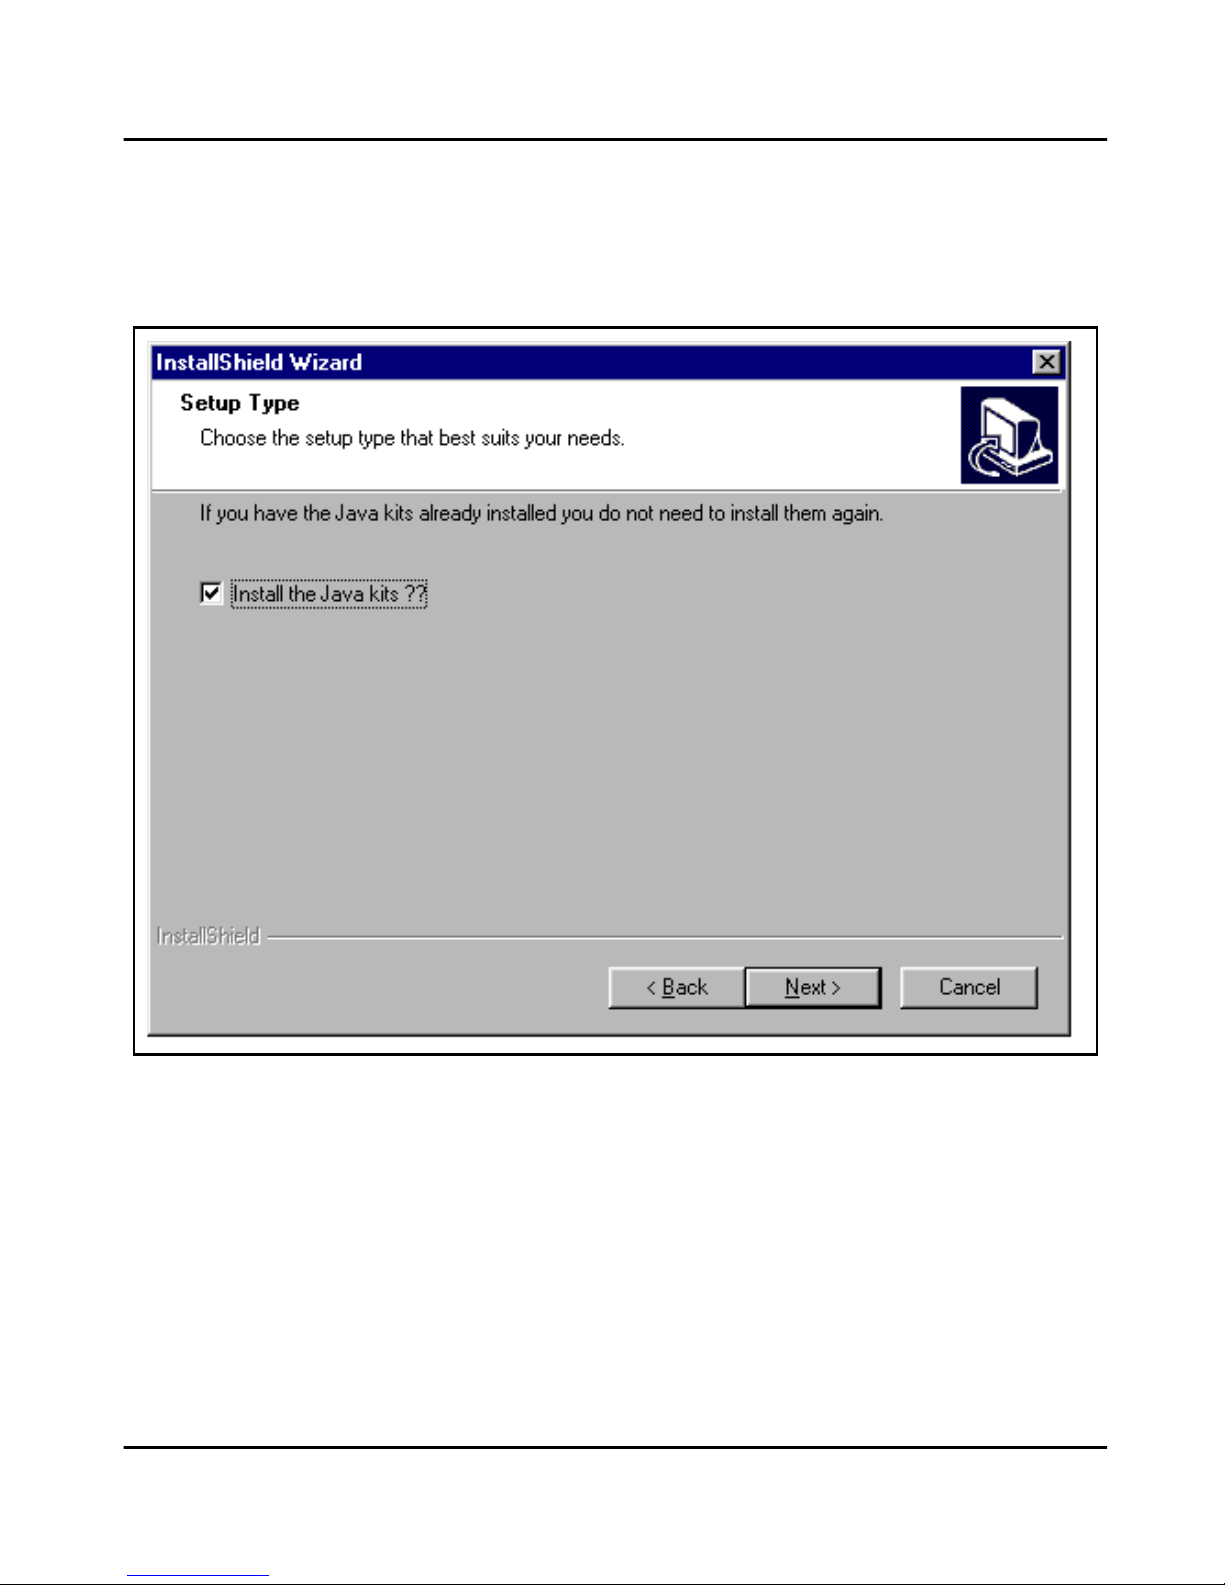
2 Click Next. Continue to follow the prompt s in t he InstallShield wizard
until the Setup Type Screen is displayed. The Setup Type Screen is
shown in Figure 3 on page 16.
Figure 3
Setup Type Screen
3 Before proceeding, it is necessary to determine whether or not the
Java kits have been installed.
a. If the exact Java development kits has already been installed,
P0989045 Standard 1.0 May 2002
de-select the Installthe Javakits option,then godirectly toStep
4.

Installing the DECT Messaging software Page 17 of 60
b. If the Java development kits are not yet installed onto the PC,
leave the Install the Java kits option selected and click Next.
Follow the prompts in the wizard until th e Java development kits are
install ed. If promp ted by th e Java deve lop ment p rograms t o perfo rm a
Restart , select Restart Later to finish inst alling DECT Messaging.
4 Set the JDK v1.3 environment vari ables for the Java Softwa re
Development Kit (JDK) Enterprise Edition for Windows NT or Windows
2000 (dependi ng on which operating system is in use).
Windows NT
a. Right click on the M y Computer icon on desktop and select the
Properties option.
b. Select Environment tab.
c. Enter JAVA_HOME environment variable and set it to where jdk
v1.3.1 is installed; for example, c:\jdk1.3.1. The Java install
directory will be r eferenced as $JAVA_HOME in this document.
d. Click on set.
e. Click on the PATH environment variable. Add a semicolon to the
end of the current value followed by C:\jdk1.3.1\bin.
f. Click Set.
g. Click on Apply and then OK.
Windows 2000
a. Right click on the M y Computer icon on the desktop and select
the Properties option.
b. Select the Advanced tab.
c. Click the Environment Variables button.
d. Under the System variables window, click New.
e. In the Variable Name box, enter JAVA_HOME.
f. In the Variable Value box, enter the path to where the java kits
were installed; for example –
c:\jdk1.3.1\.
g. Click OK.
h. In the System variables window, click to highlight the Path
variable. Click the Edit button under the window.
DECT Messaging Installation Guide

Page 18 of 60 Installing the DECT Mess aging software
i. In the Variable value box, type the path to where the java kits
were installed at the end of the existing text; for example –
;c:\jdk1.3.1\bin\
j. a semicolon (;) must separate the new information being entered
from the existing information).
k. Click OK to set the value.
l. Click OK to finish setting the environment variables.
m. Click OK to close the Advanced system properties dialogue
window.
After the Jav a devel opment kit s are i nstal led, the Des tinat ion L ocat ion
screen is displayed. See Figure 4 on page 19.
5 Follow the prompts and select the defaul t opt ions. The DECT
Messaging System will be installed in the C:\dectms directory if all
default options ar e chosen. The directory in whi ch it is installed will be
referred to as $DECT.
6 . Restart the PC when prompted. Installation is complete
—————————— End of Procedure ——————————
P0989045 Standard 1.0 May 2002
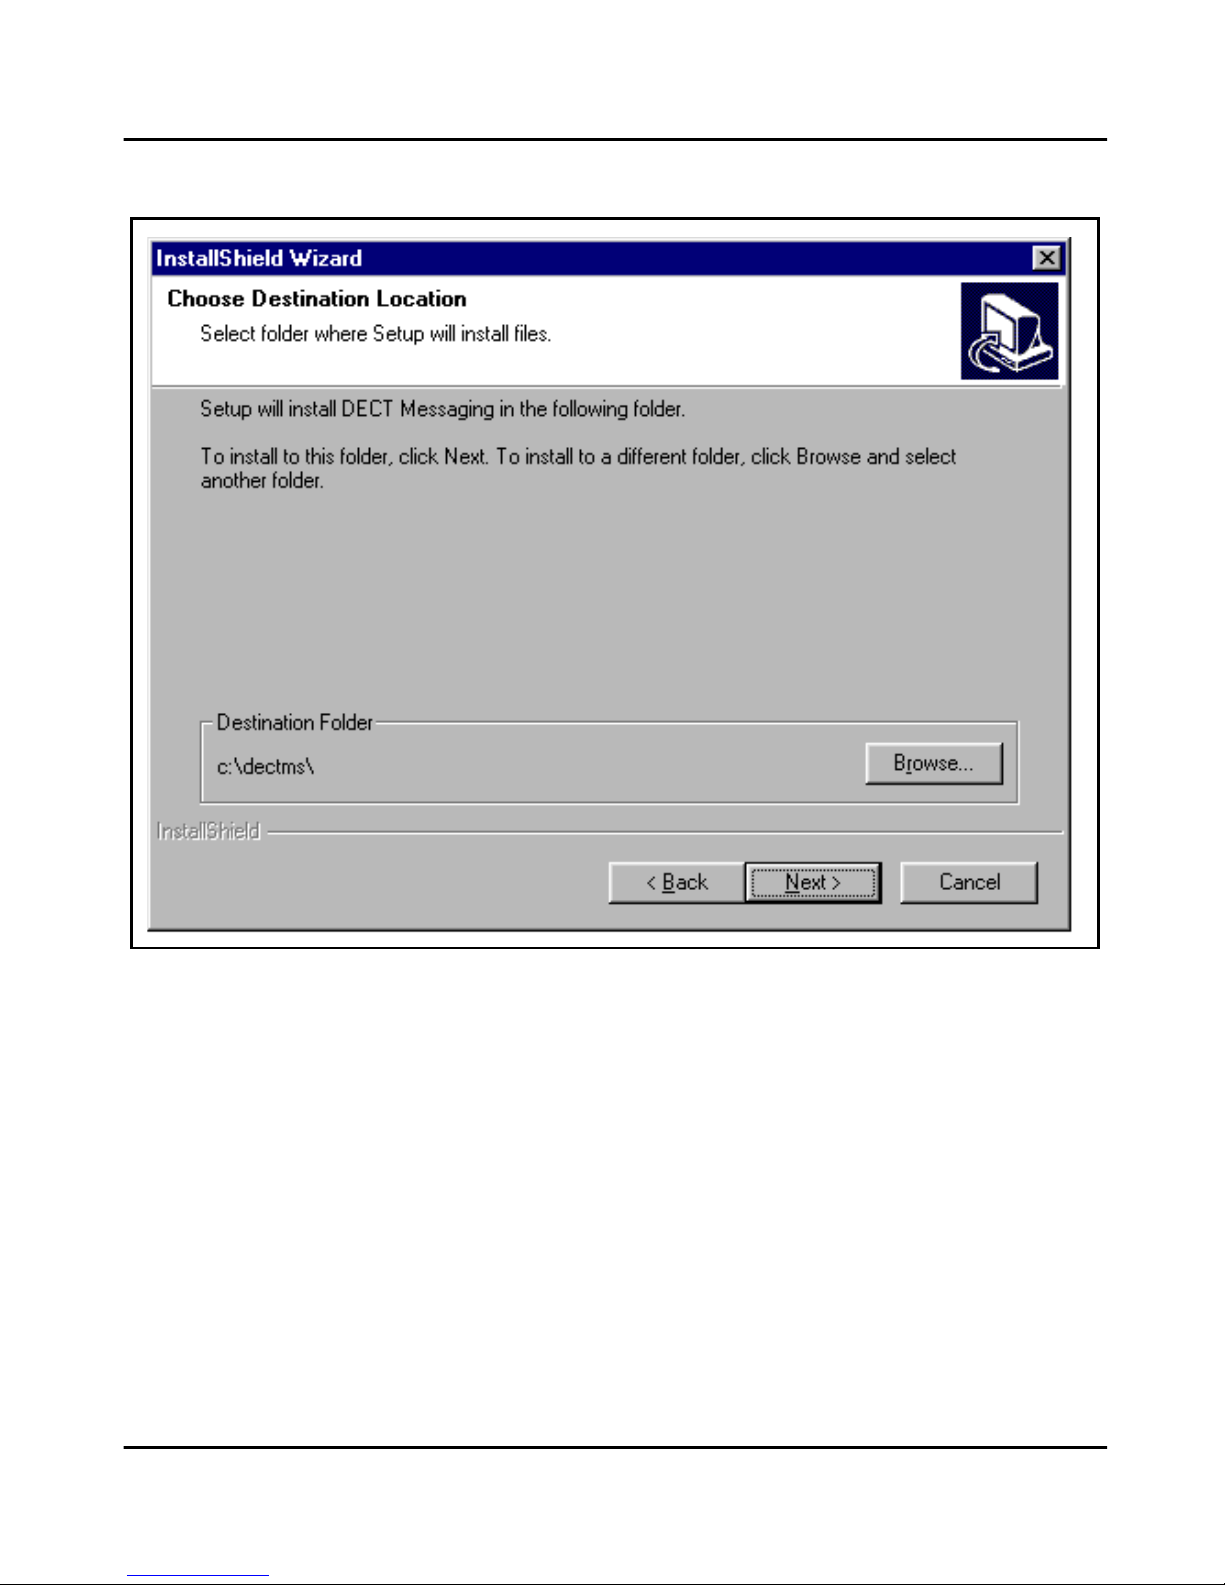
Figure 4
Destination Location
Installing the DECT Messaging software Page 19 of 60
DECT Messaging Installation Guide
 Loading...